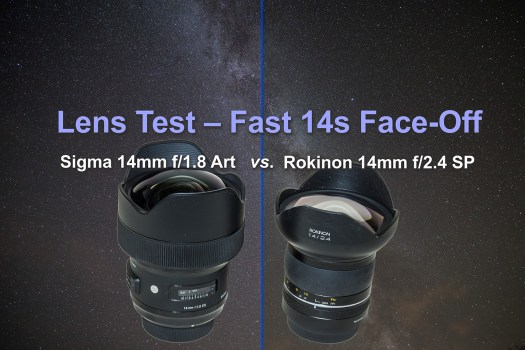
I put two new fast 14mm lenses to the test: the Sigma 14mm f/1.8 Art vs. the Rokinon 14mm f/2.4 SP.
Much to the delight of nightscape and astrophotographers everywhere we have a great selection of new and fast wide-angle lenses to pick from.
Introduced in 2017 are two fast ultra-wide 14mm lenses, from Sigma and from Rokinon/Samyang. Both are rectilinear, not fish-eye, lenses.
I tested the Nikon version of the Sigma 14mm f/1.8 Art lens vs. the Canon version of the Rokinon 14mm f/2.4 SP. I used a Nikon D750 and Canon 6D MkII camera.
I also tested the new faster Rokinon SP against the older and still available Rokinon 14mm f/2.8, long a popular lens among nightscape photographers.
The Sigma 14mm is a fully automatic lens with auto focus. It is the latest in their highly regarded Art series of premium lenses. I have their 20mm and 24mm Art lenses and love them.
The Rokinon 14mm SP (also sold under the Samyang brand) is a manual focus lens, but with an AE chip so that it communicates with the camera. Adjusting the aperture is done on the camera, not by turning a manual aperture ring, as is the case with many of Rokinon’s lower cost series of manual lenses. The lens aperture is then recorded in each image’s EXIF metadata, an aid to later processing. It is part of Rokinon’s premium “Special Performance” SP series which includes an 85mm f/1.2 lens.
All units I tested were items purchased from stock, and were not supplied by manufacturers as samples for testing. I own these!
CONCLUSIONS
For those with no time to read the full review, here are the key points:
• The Sigma f/1.8 Art exhibits slightly more off-axis aberrations than the Rokinon 14mm SP, even at the same aperture. But aberrations are very well controlled.
• As its key selling point, the Sigma offers another full stop of aperture over the Rokinon SP (f/1.8 vs. f/2.4), making many types of images much more feasible, such as high-cadence aurora time-lapses and fixed-camera stills and time-lapses of a deeper, richer Milky Way.
• The Sigma also has lower levels of vignetting (darkening of the frame corners) than the Rokinon 14mm SP, even at the same apertures.
• Both the Sigma Art and Rokinon SP lenses showed very sharp star images at the centre of the frame.
• Comparing the new premium Rokinon 14mm SP against the older Rokinon 14mm f/2.8 revealed that the new SP model has reduced off-axis aberrations and lower levels of vignetting than the lower-cost f/2.8 model. However, so it should for double the price or more of the original f/2.8 lens.
• The Rokinon 14mm SP is a great choice for deep-sky imaging where optical quality is paramount. The Sigma 14mm Art’s extra speed will be superb for time-lapse imaging where the f/1.8 aperture provides more freedom to use shorter shutter speeds or lower ISO settings.
• Though exhibiting the lowest image quality of the three lenses, the original Rokinon 14mm f/2.8 remains a superb value, at its typical price of $350 to $500. For nightscapers on a budget, it’s an excellent choice.
TESTING PROCEDURES
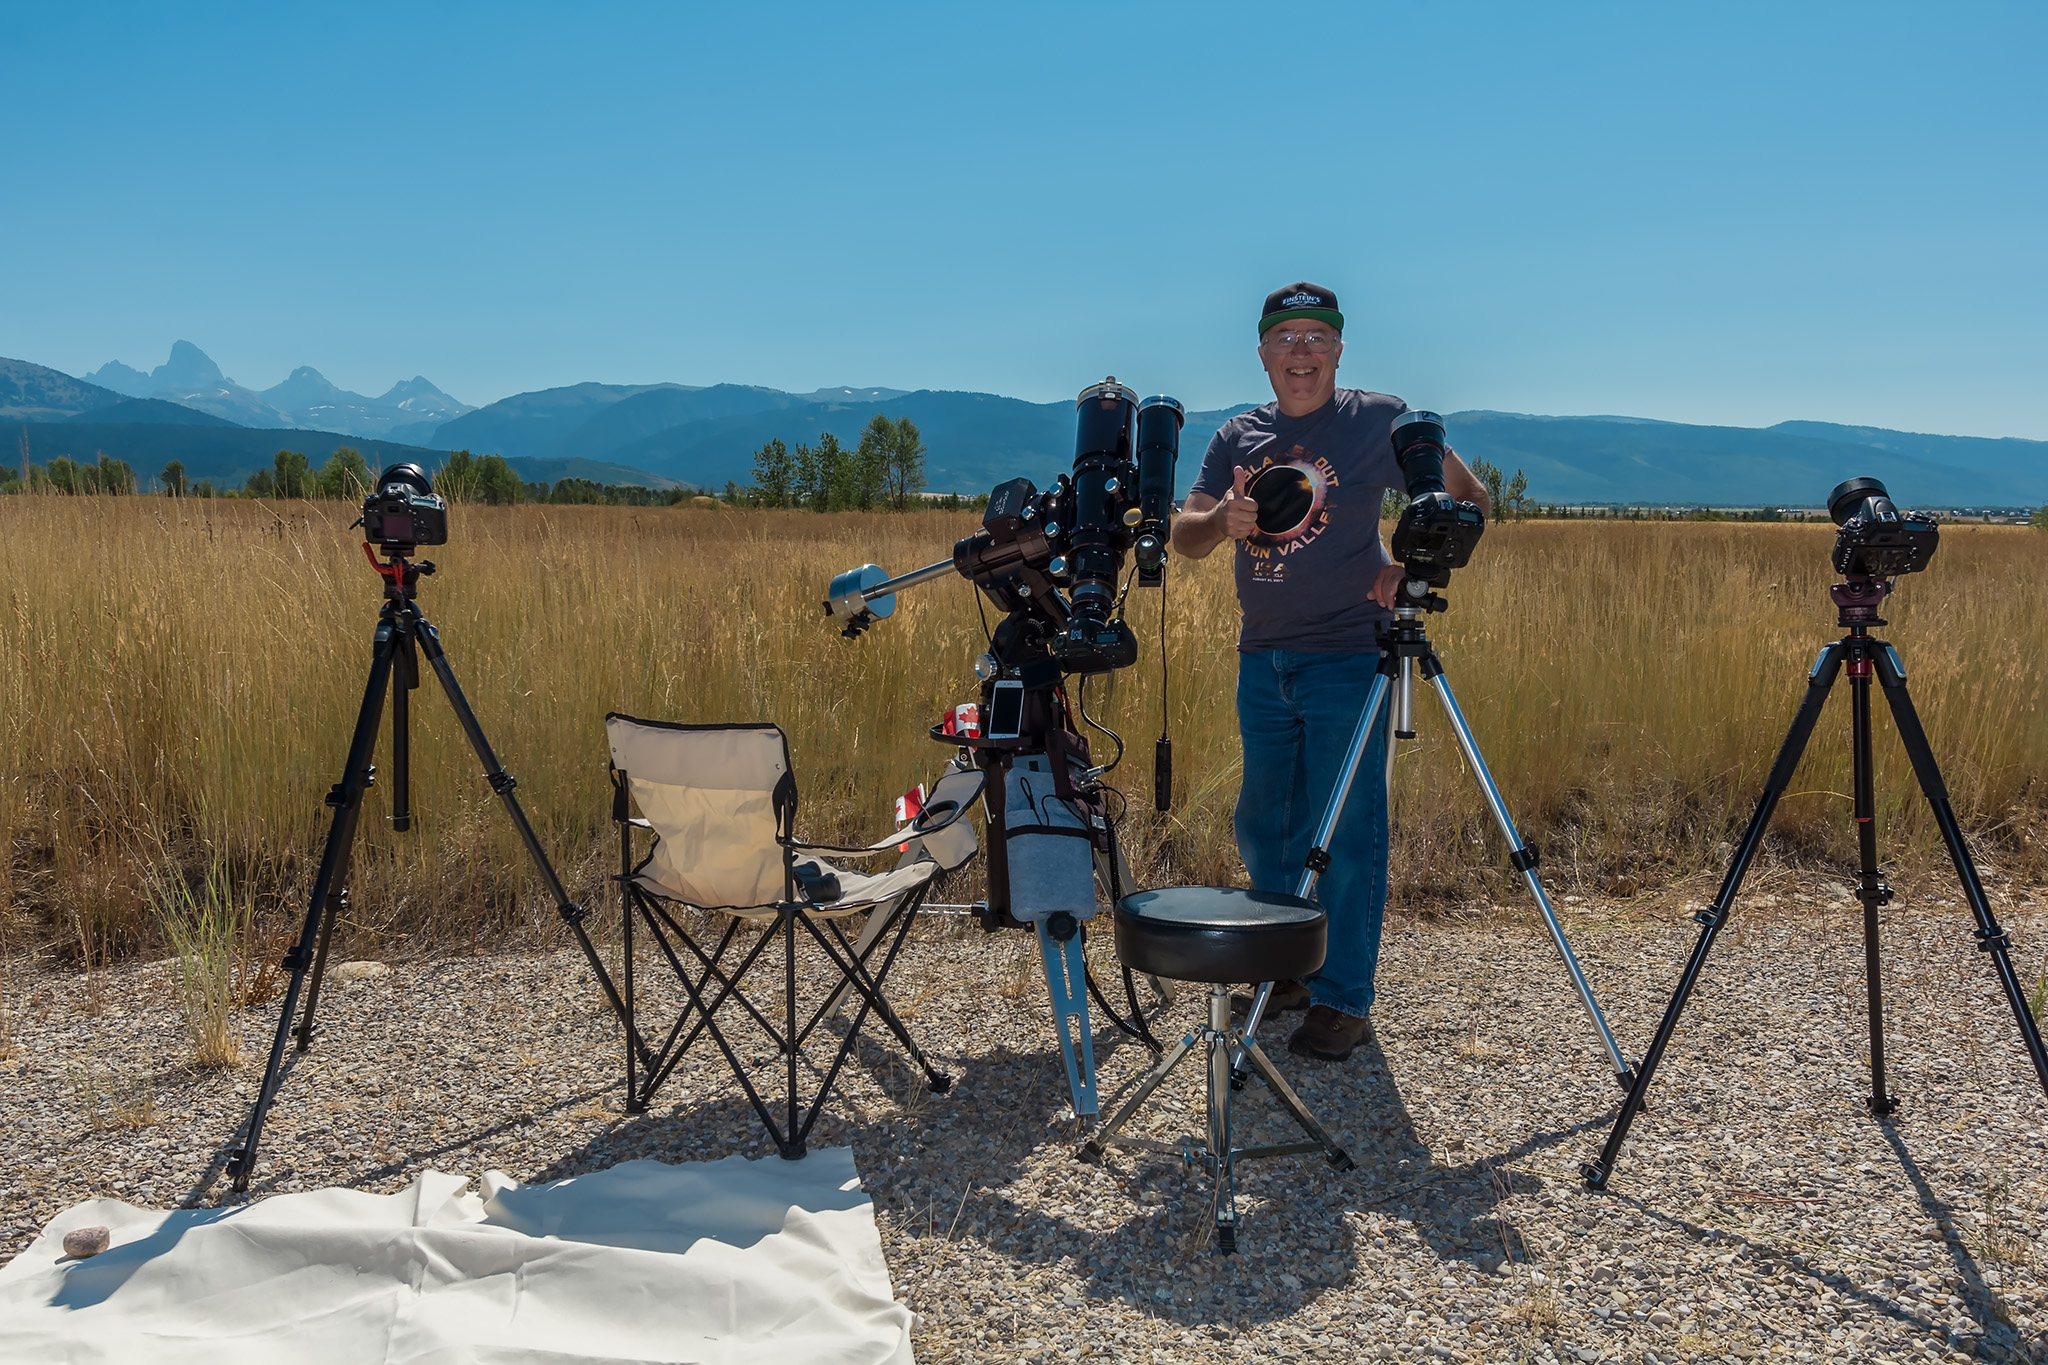
For all these tests I placed the camera and lens on a tracking mount, the Sky-Watcher Star Adventurer Mini shown below. This allowed the camera to follow the sky, preventing any star trailing. Any distortions you see are due to the lens, not sky motion.
As I stopped down the aperture, I lengthened the exposure time to compensate, so all images were equally well exposed.
In developing the Raw files in Adobe Camera Raw, I applied a standard level of Contrast (25) and Clarity (50) boost, and a modest colour correction to neutralize the background sky colour. I also applied a standard level of noise reduction and sharpening.
However, I did not apply any lens corrections that, if applied, would reduce lateral chromatic aberrations and compensate for lens vignetting.
So what you see here is what the lens produced out of the camera, with no corrections. Keep in mind that the vignetting you see can be largely compensated for in Raw development, with the provisos noted below. But I wanted to show how much vignetting each lens exhibited.
OFF-AXIS ABERRATIONS
Stars are the severest test of any lens. Not test charts, not day shots of city skylines. Stars.
The first concern with any fast lens is how sharp the stars are not only in the centre of the frame, but also across the frame to the corners. Every lens design requires manufacturers to make compromises on what lens aberrations they are going to suppress at the expense of other lens characteristics. You can never have it all!
However, for astrophotography we do look for stars to be as pinpoint as possible to the corners, with little coma and astigmatism splaying stars into seagull and comet shapes. Stars should also not become rainbow-coloured blobs from lateral chromatic aberration.
SIGMA 14mm ART


These images show 200% blowups of the two upper corners of the Sigma 14mm Art lens, each at five apertures, from wide open at f/1.8, then stopped down at 1/3rd stop increments to f/2.8. As you would expect, performance improves as you stop down the lens, though some astigmatism and coma are still present at f/2.8.
But even wide open at f/1.8, off-axis aberrations are very well controlled and minimal. You have to zoom up this much to see them.
There was no detectable lateral chromatic aberration.
Aberrations were also equal at each corner, showing good lens centering and tight assembly tolerances.
ROKINON 14mm SP
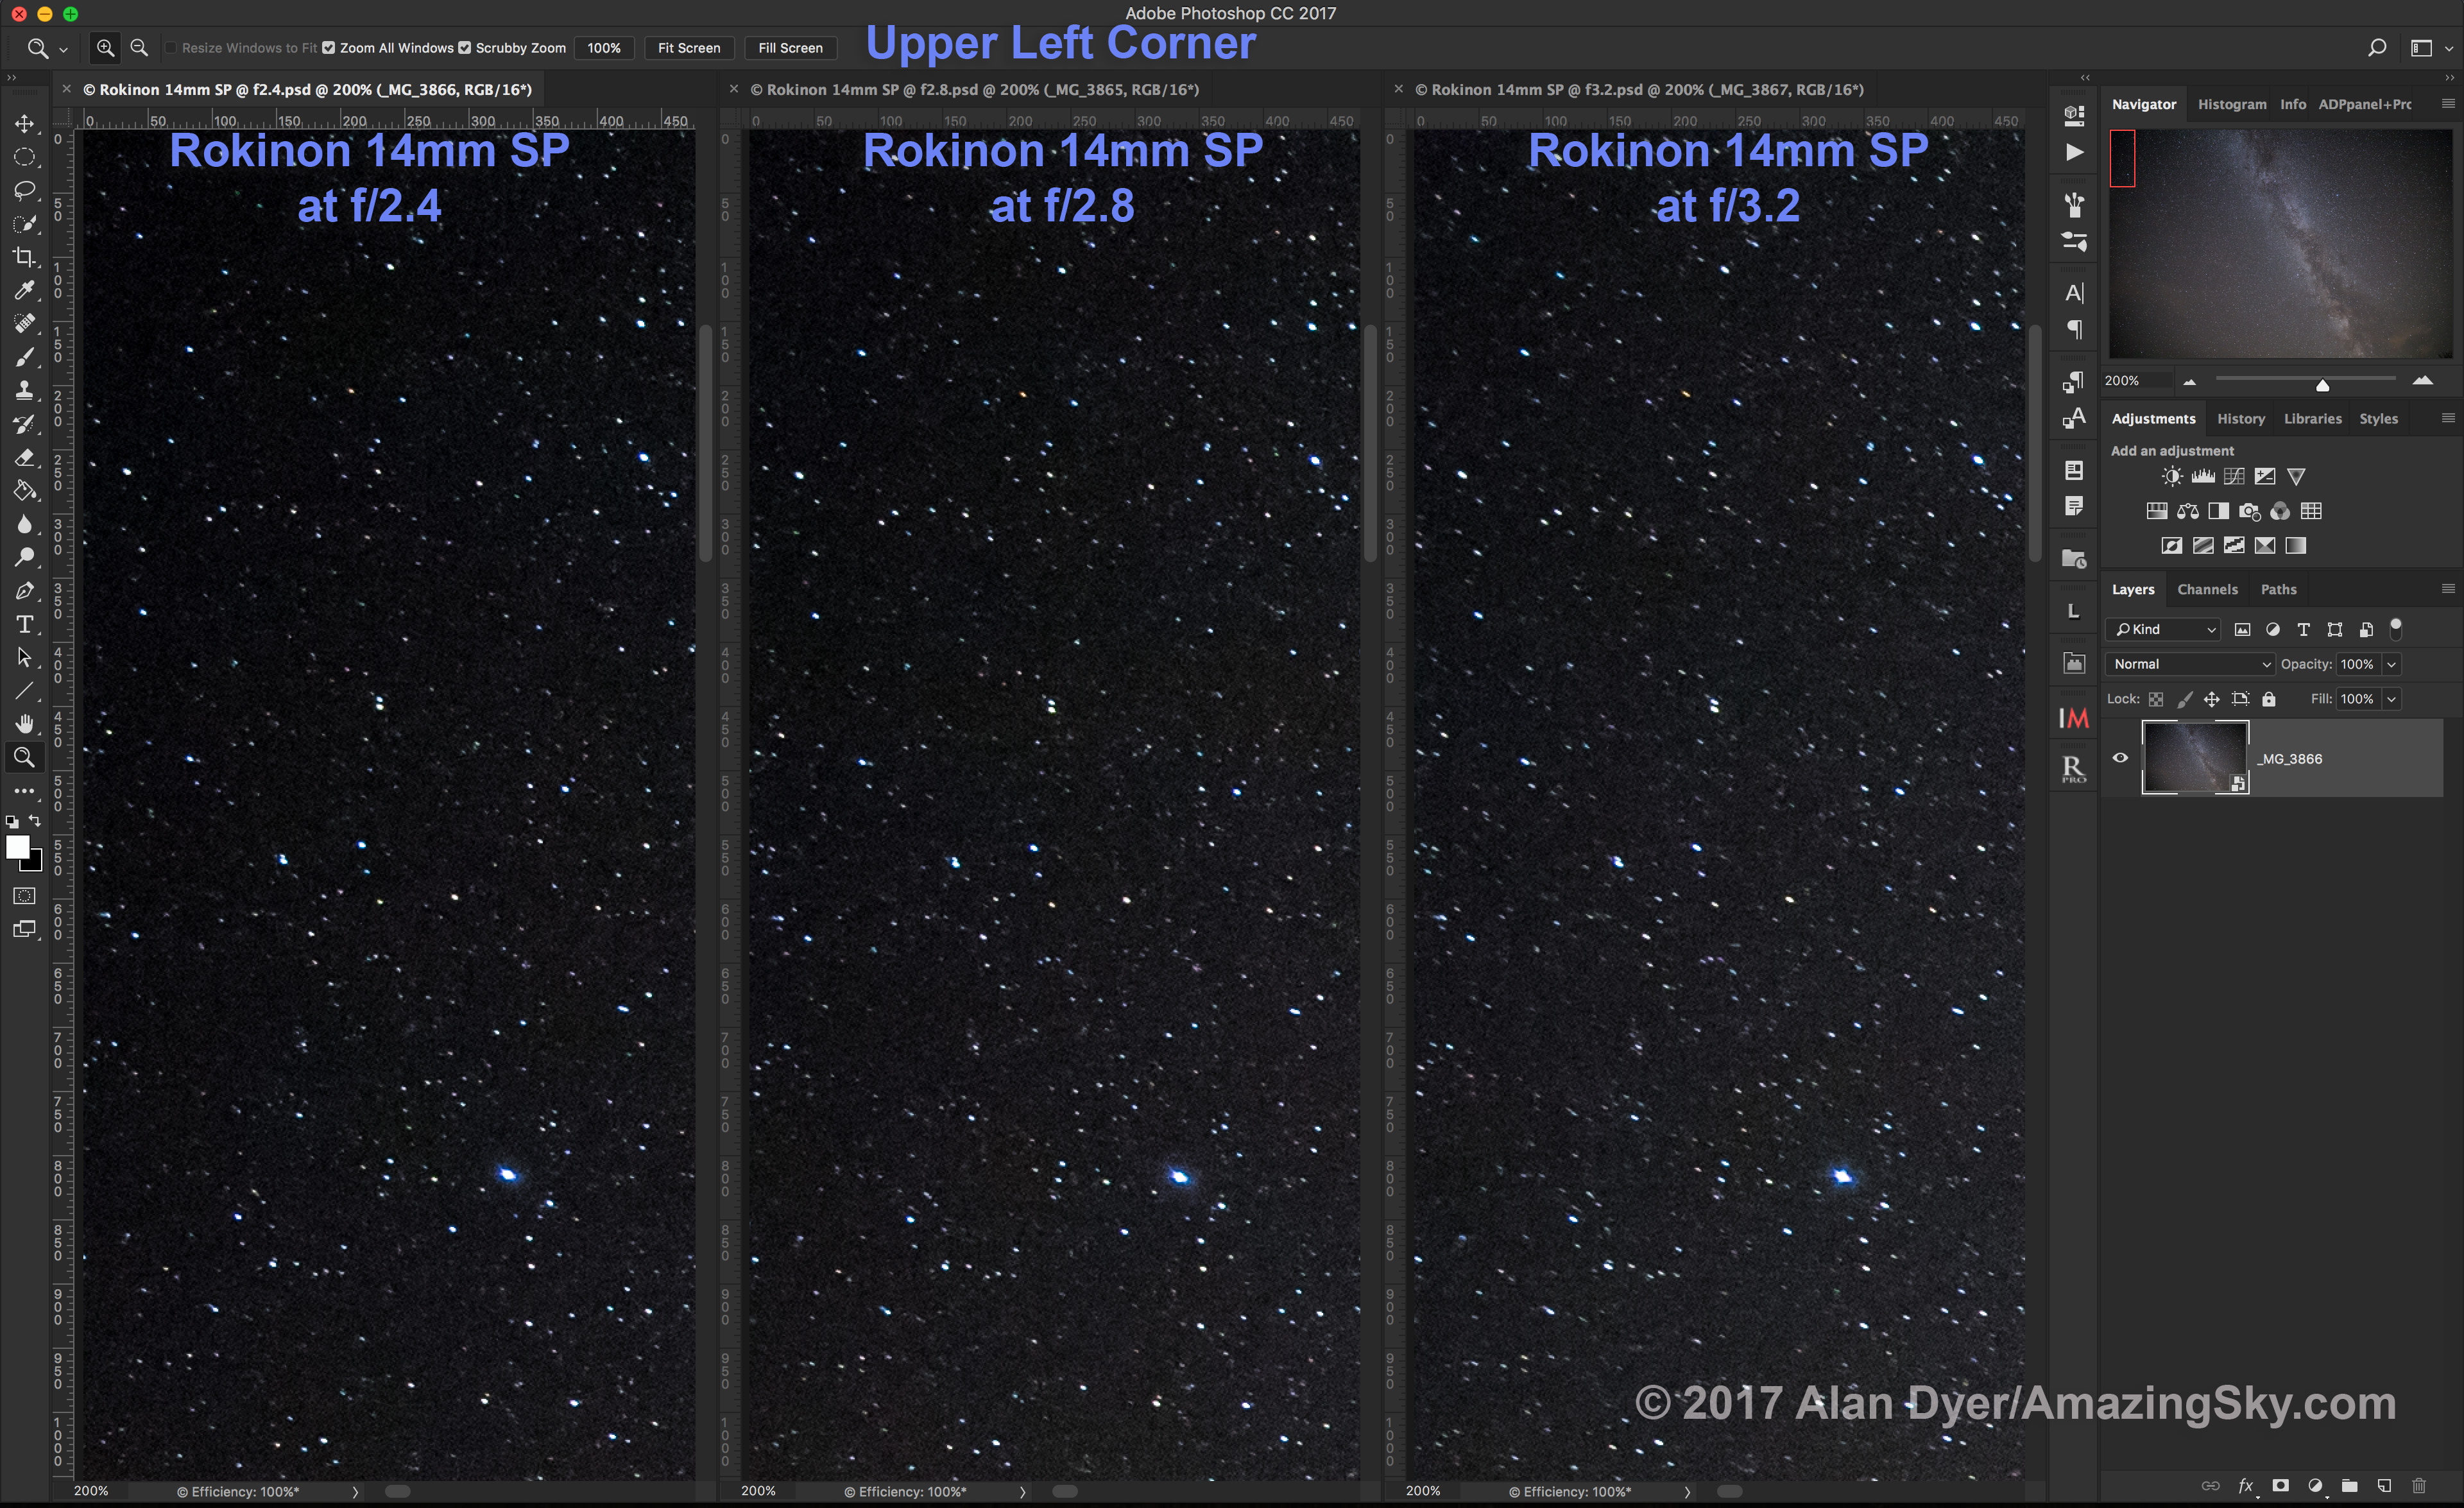
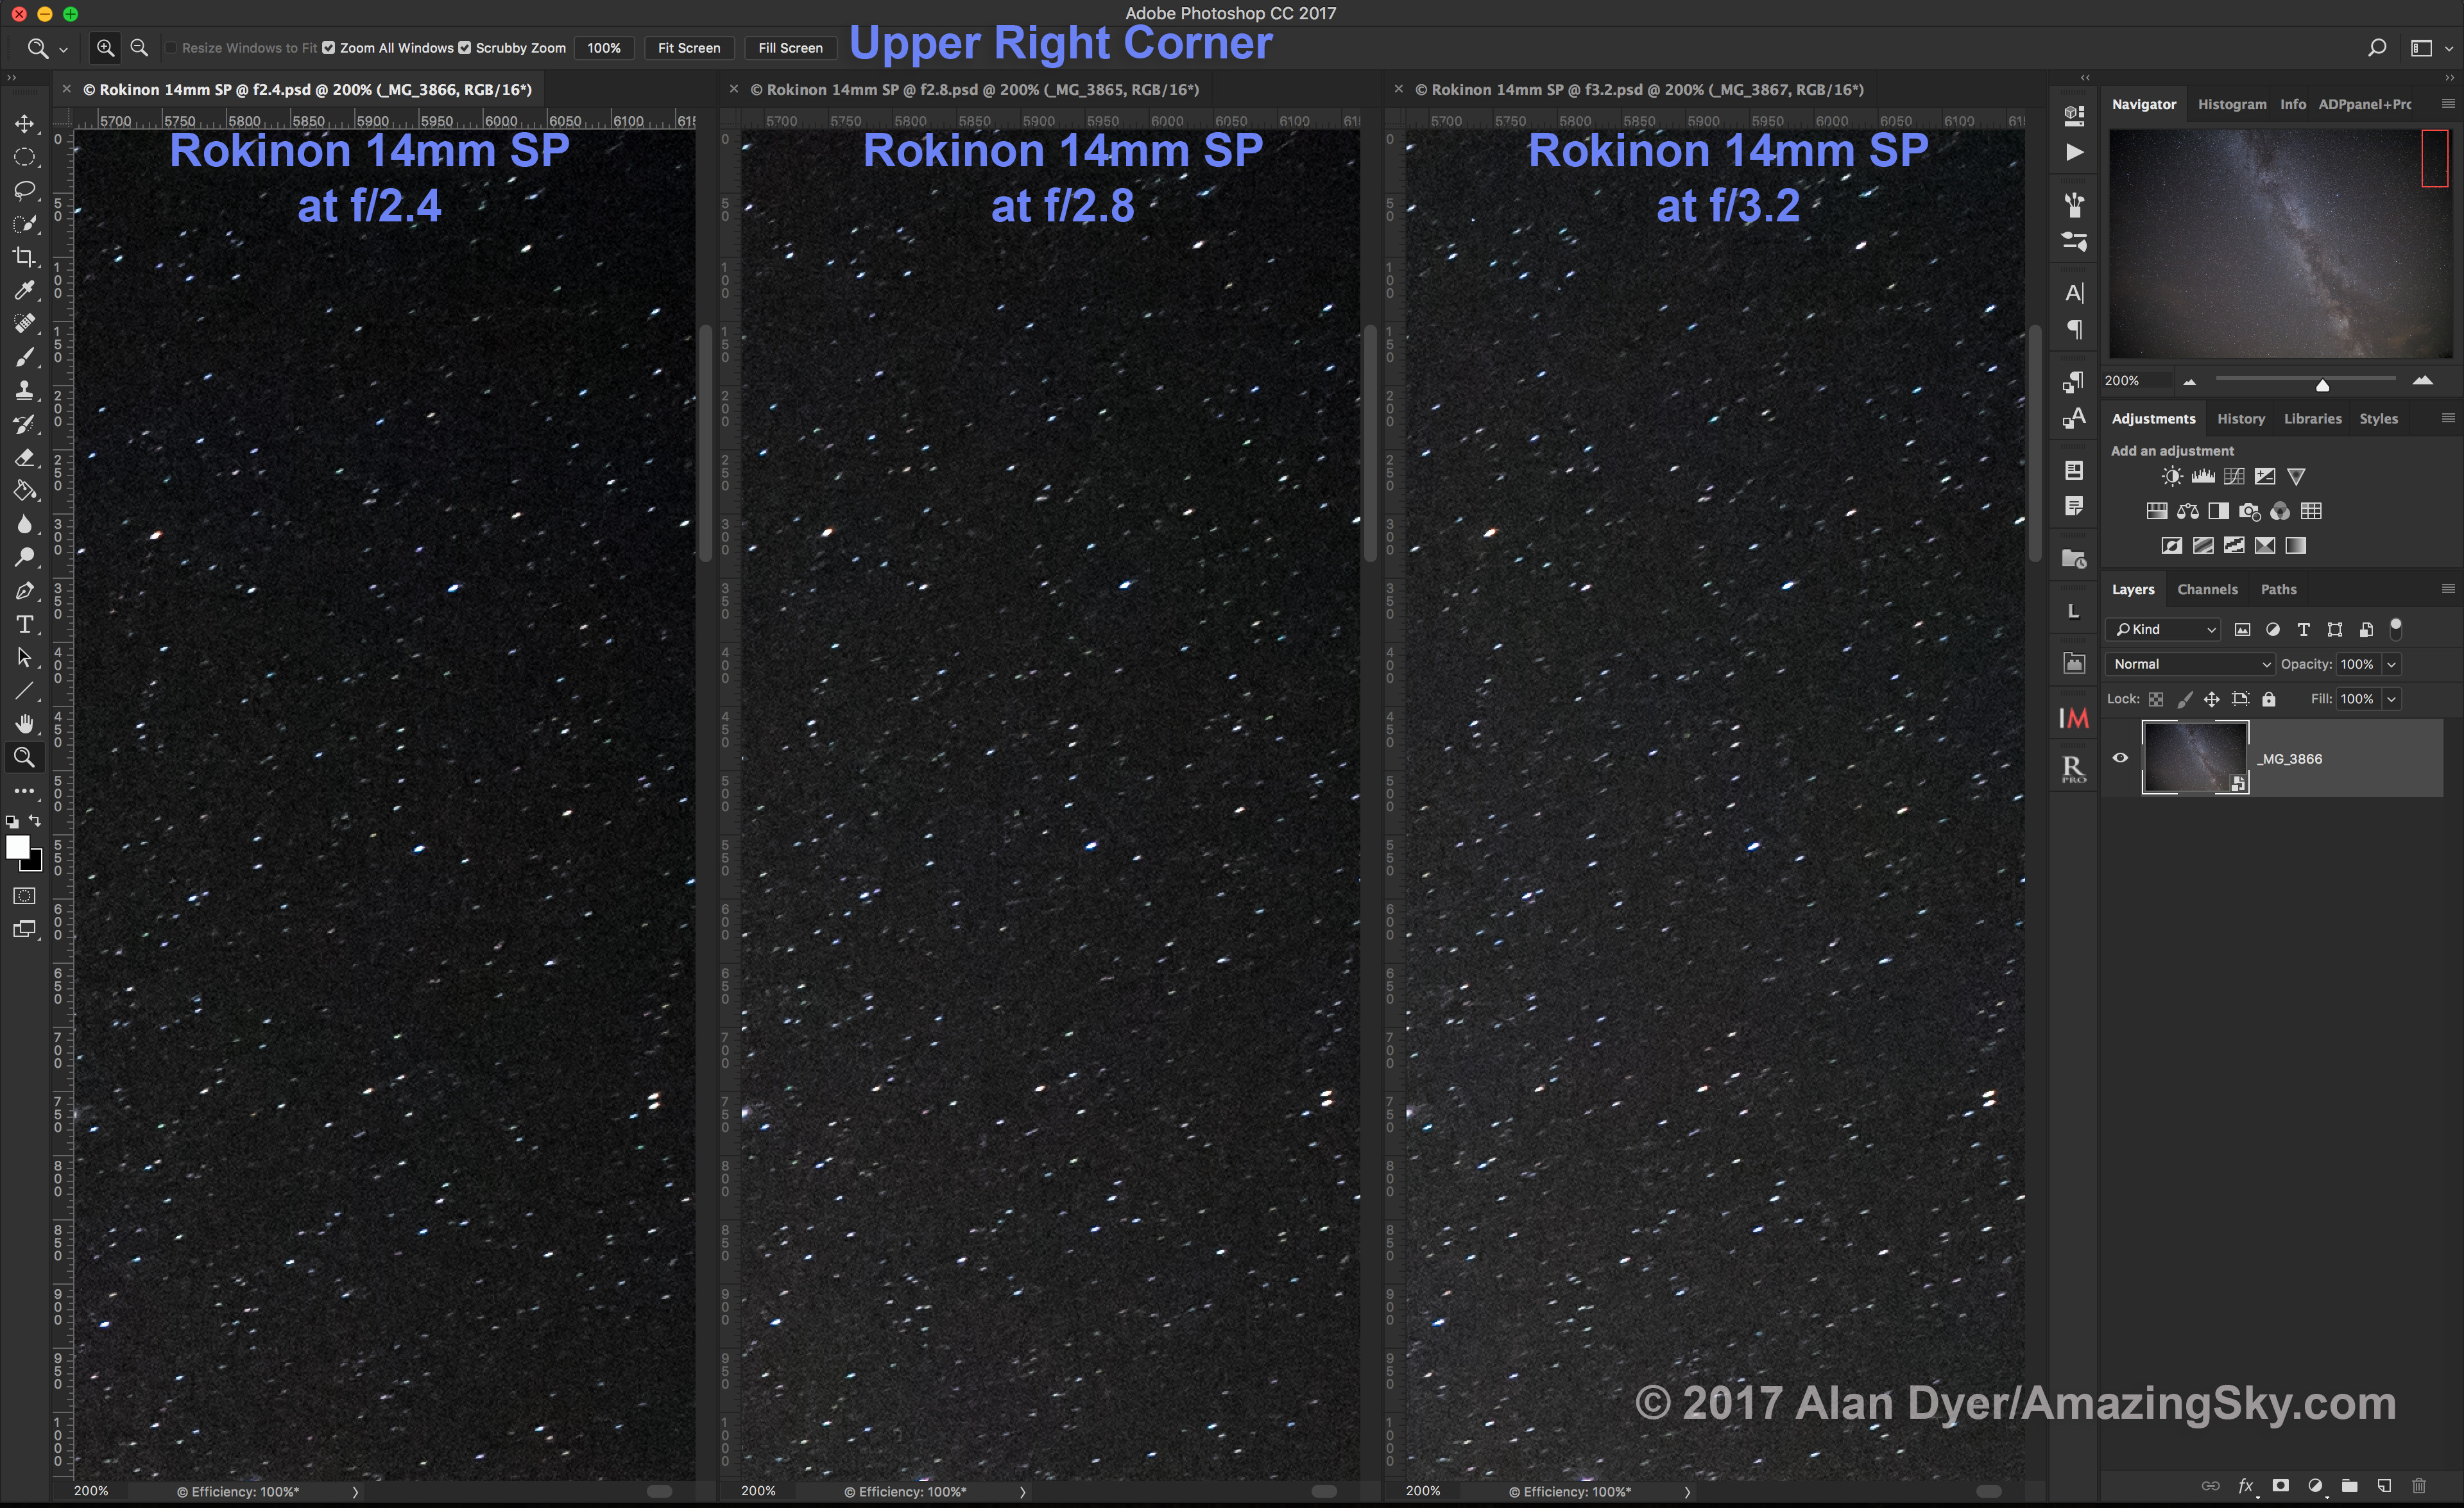
Similarly, these images show 200% blow-ups of the upper corners of the Rokinon SP, at its three widest apertures: f/2.4, f/2.8 and f/3.2.
Star images look tighter and less aberrated in the Rokinon, even when compared at the same apertures.
But images look better on the left side of the frame than on the right, indicating a slight lens de-centering or variation in lens position or figuring, a flaw noted by other users in testing Rokinon lenses. The difference is not great and takes pixel-peeping to see. Nevertheless, it is there, and may vary from unit to unit. This should not be the case with any “premium” lens.
SIGMA vs. ROKINON

This image shows both lenses in one frame, at the same apertures, for a more direct comparison. The Rokinon SP is better, but of course, doesn’t go to f/1.8 as does the Sigma.
ON-AXIS ABERRATIONS
We don’t want good performance at the corners if it means sacrificing sharp images at the centre of the frame, where other aberrations such as spherical aberration can take their toll and blur images.
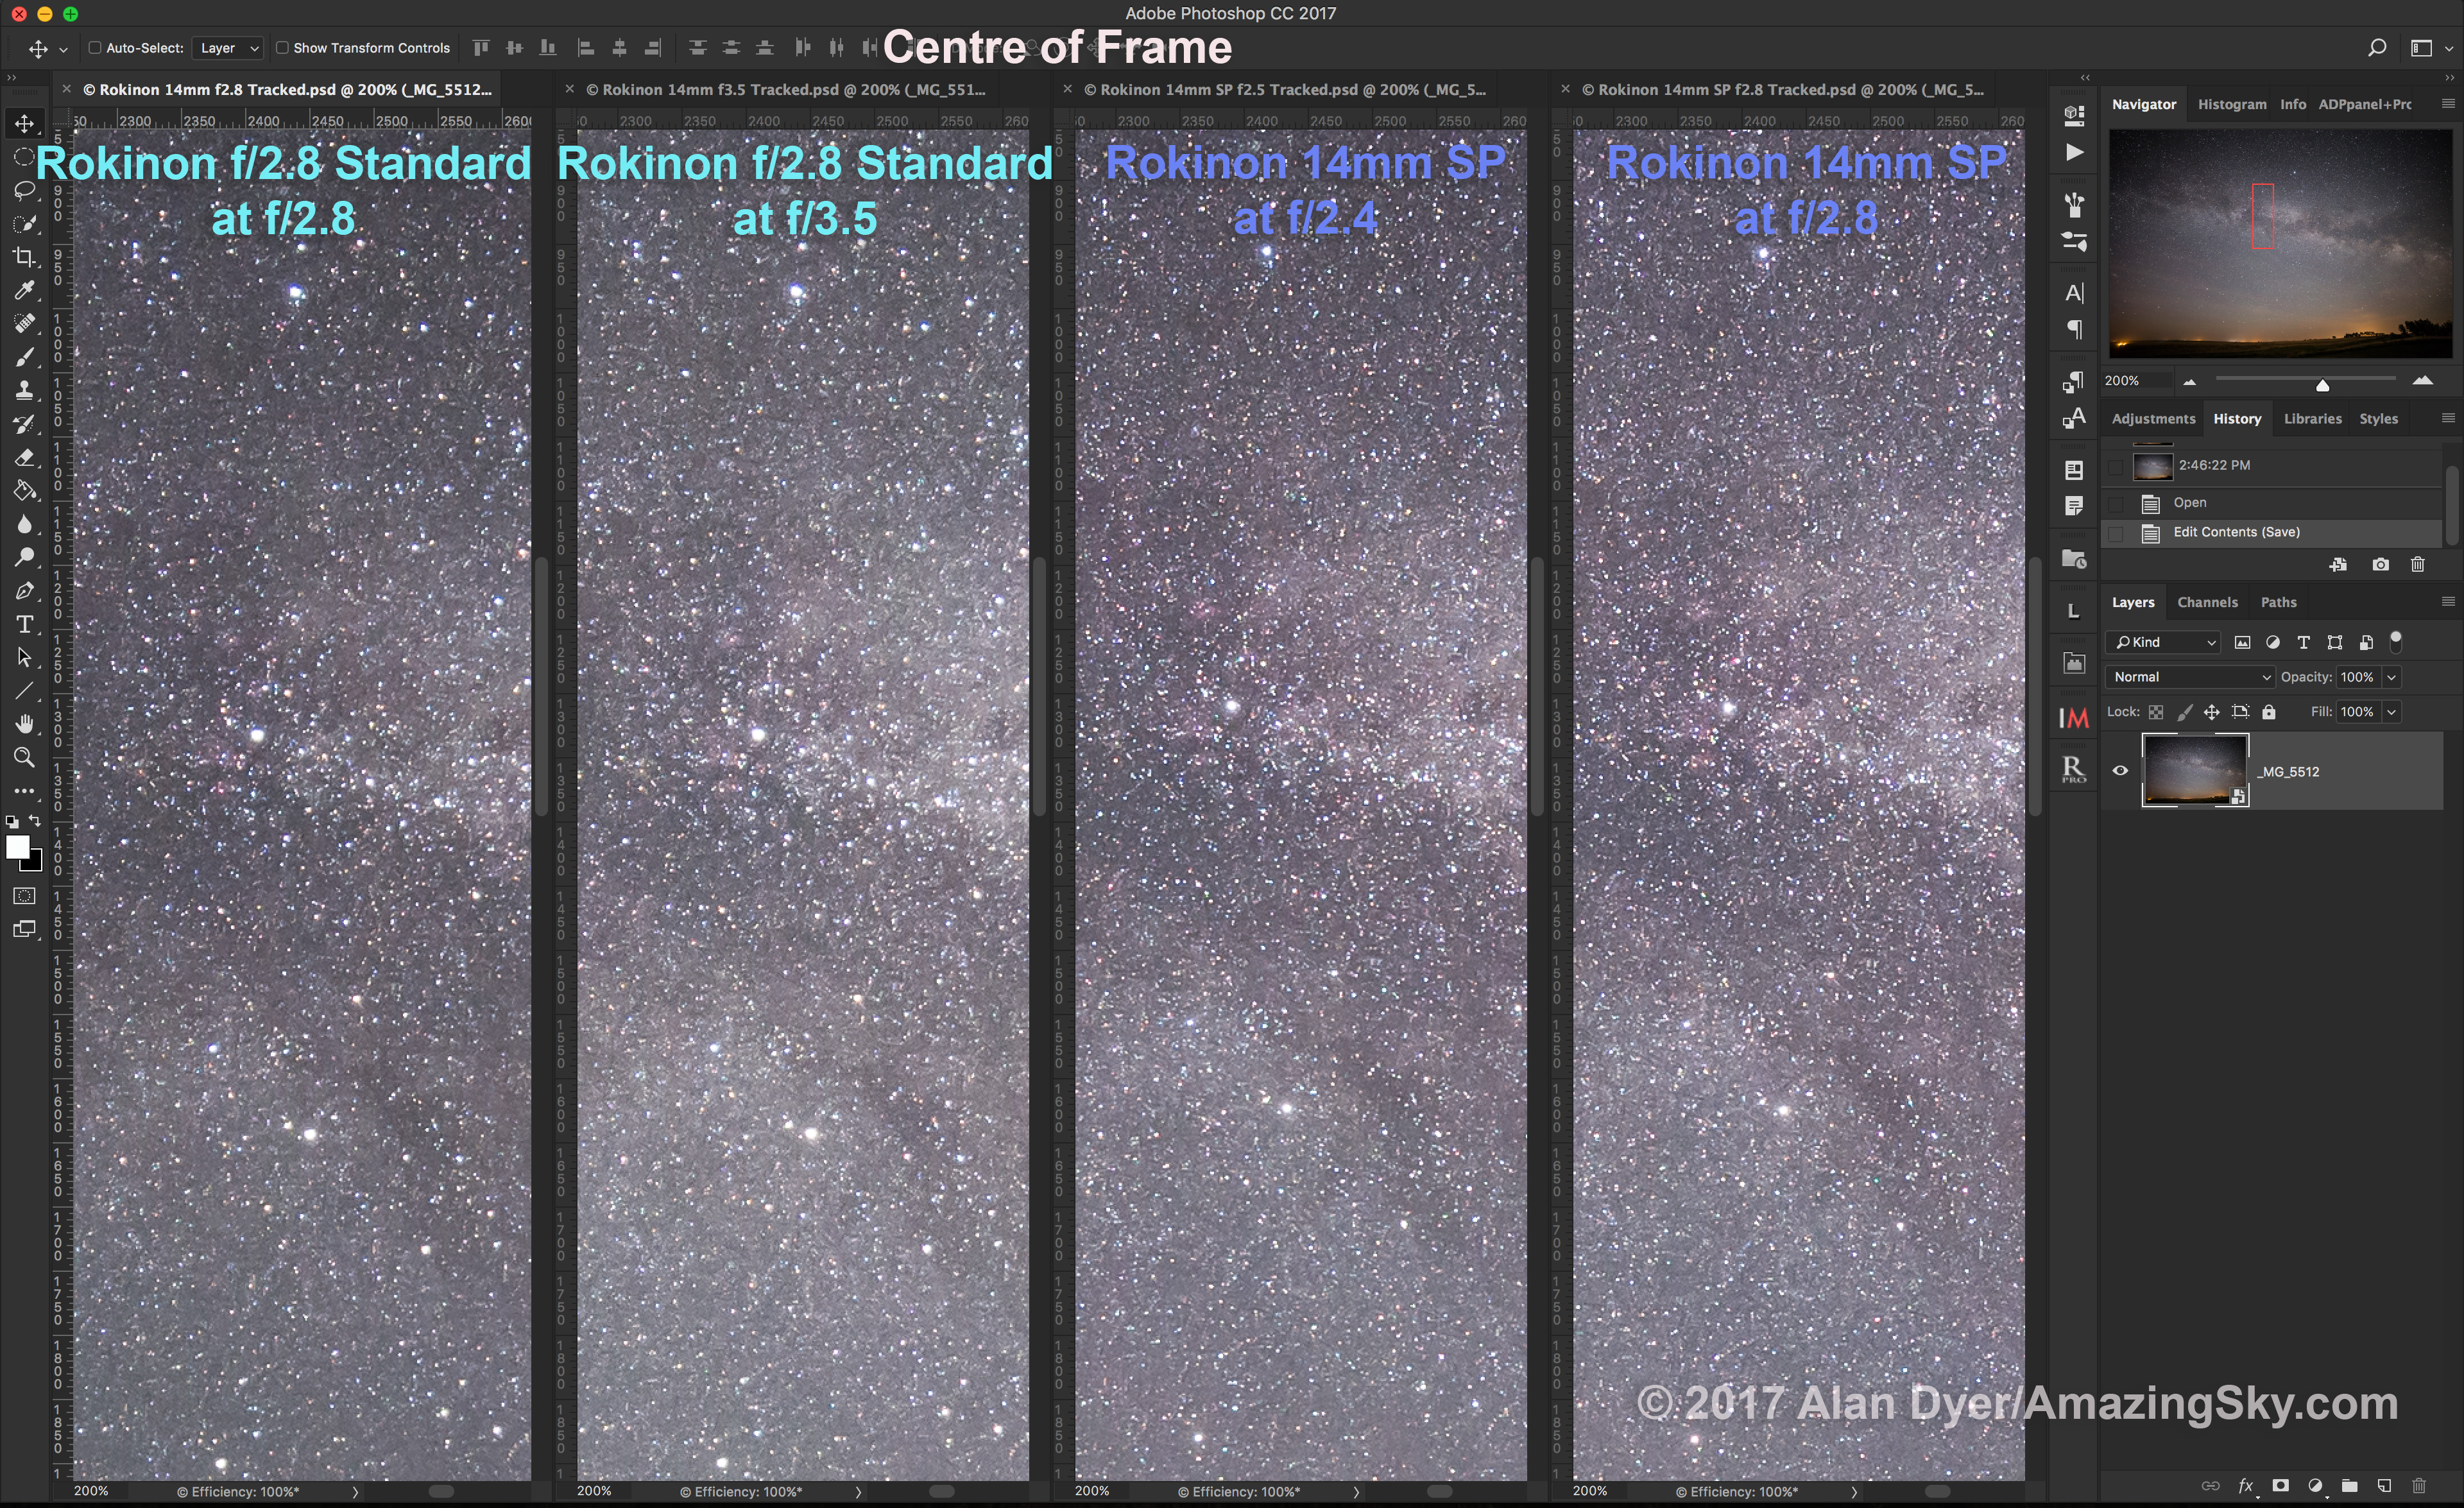
These images compare the two lenses in 200% blow-ups of an area in the Cygnus Milky Way that includes the Coathanger star cluster. Both lenses look equally as sharp.
SIGMA 14mm ART

Even when wide open at f/1.8 the Sigma Art shows very sharp star images, with little improvement when stopped down. Excellent!
ROKINON 14mm SP

The same can be said for the Rokinon SP. It performs very well when wide open at f/2.4, with star images as sharp as when stopped down 2/3rds of an f-stop to f/3.2
SIGMA vs. ROKINON

This image shows both lenses in one frame, but with the Sigma wide open at f/1.8 and stopped down to f/2.8, vs. the Rokinon wide open at f/2.4 and stopped to f/2.8. All look superb.
VIGNETTING
The bane of wide-angle lenses is the light fall-off that is inevitable as lens focal lengths decrease. We’d like this vignetting to be minimal. While it can be corrected for later when developing the Raw files, doing so can raise the visibility of noise and discolouration, such as magenta casts. The less vignetting we have to deal with the better.
As with off-axis aberrations, vignetting decreases as lenses are stopped down. Images become more uniformly illuminated across the frame, with less of a “hot spot” in the centre.
SIGMA 14mm ART
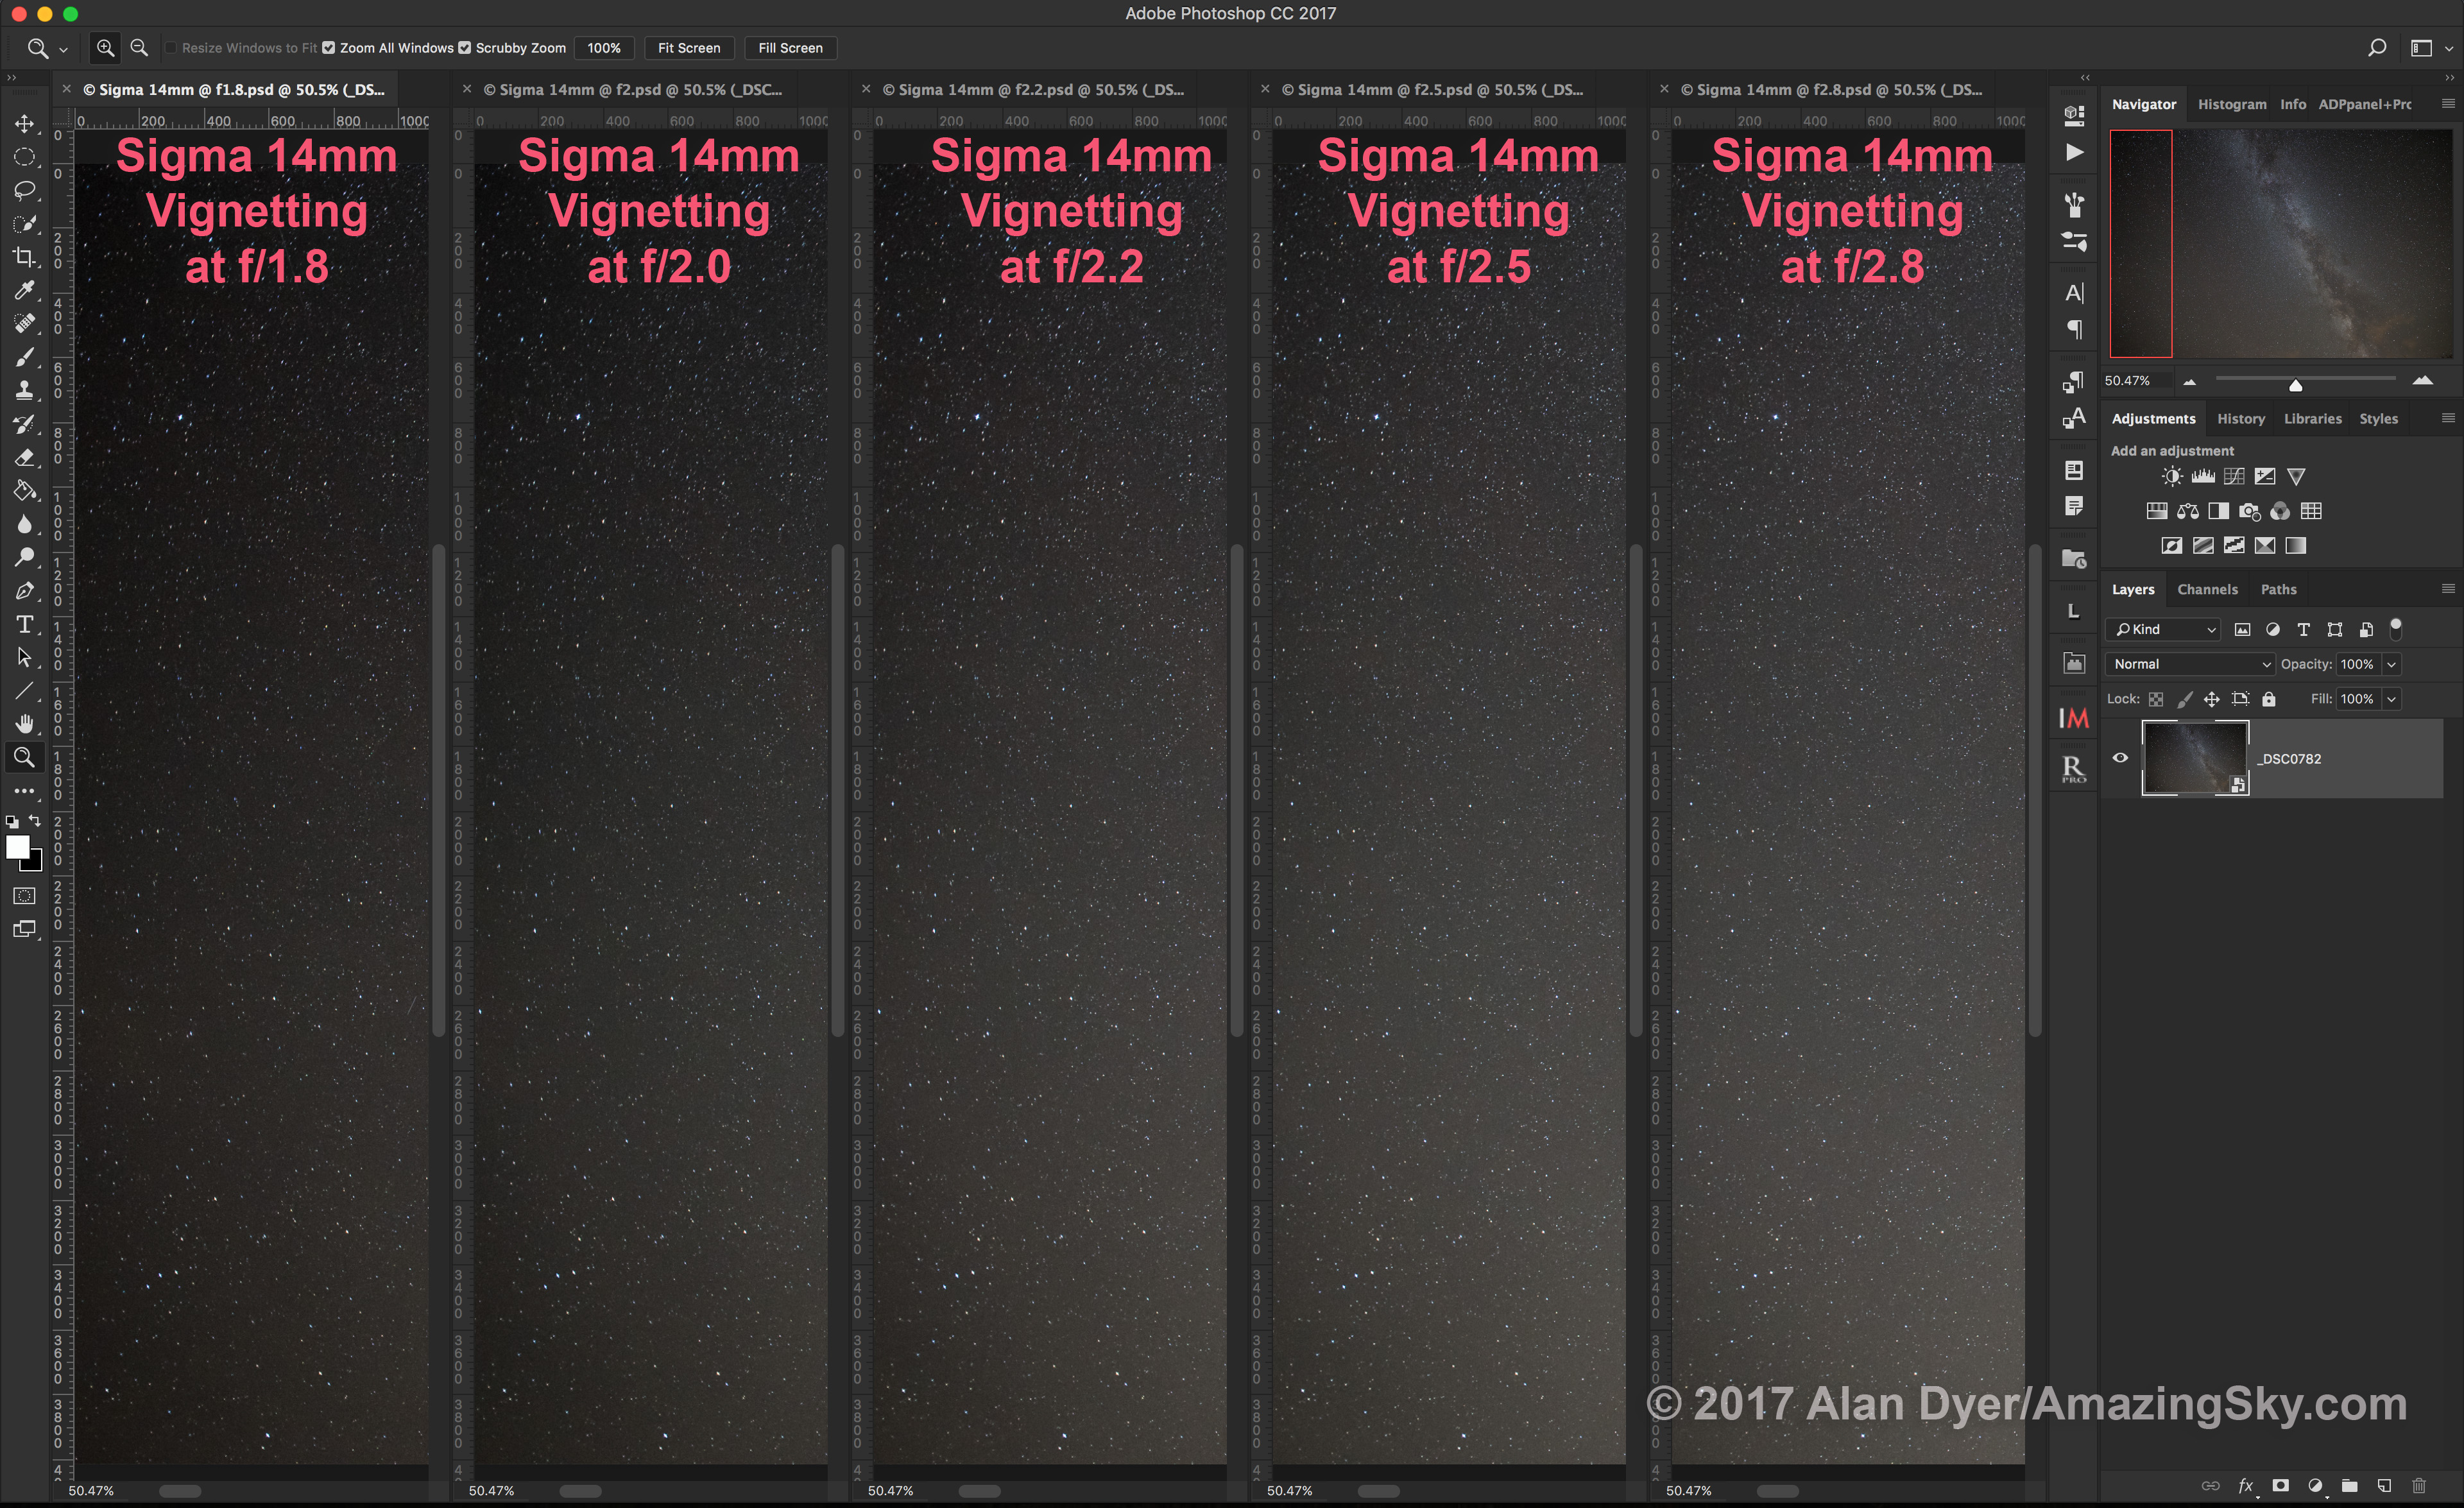
This set compares the left edge of the frame in the Sigma SP at five apertures, from f/1.8 to f/2.8. You can see how the image gets brighter and more uniform as the lens is stopped down. (The inset image at upper right show what part of the frame I am zooming into.)
ROKINON 14mm SP
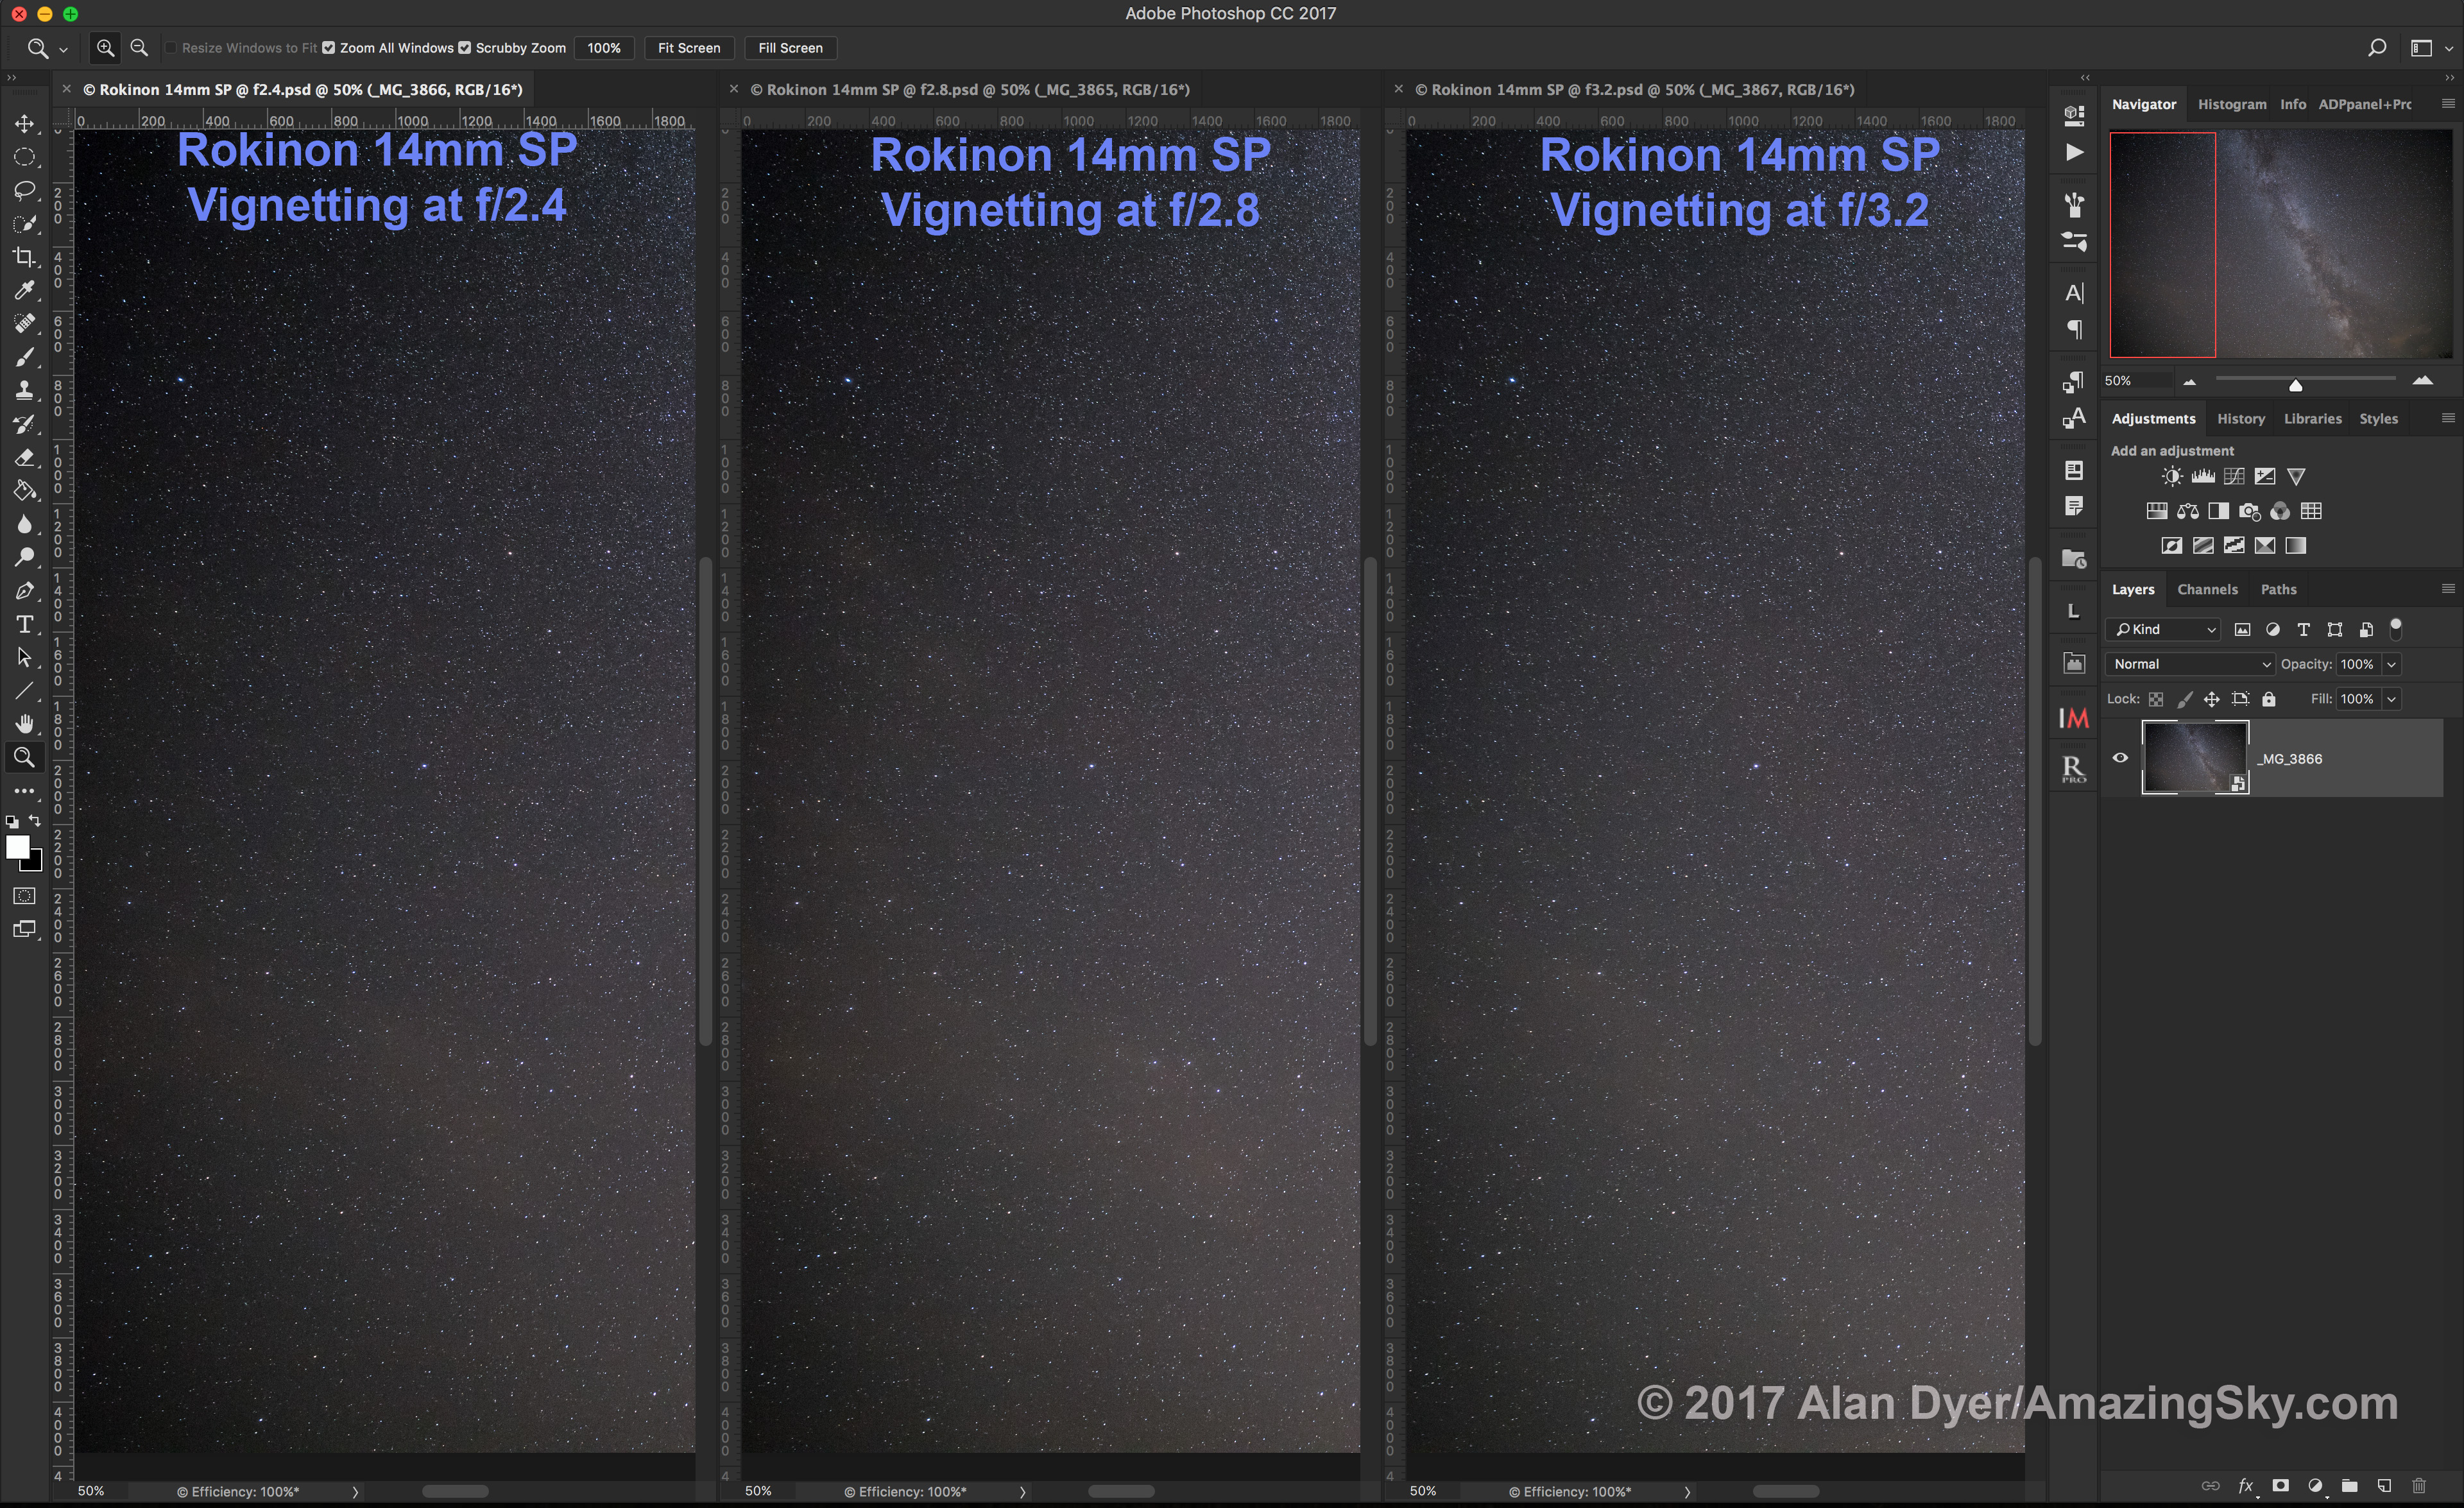
This similar set compares the frame’s left edge in the Rokinon SP at its three widest apertures, from f/2.4 to f/3.2. Again, vignetting improves but is still present at f/3.2.
SIGMA vs. ROKINON
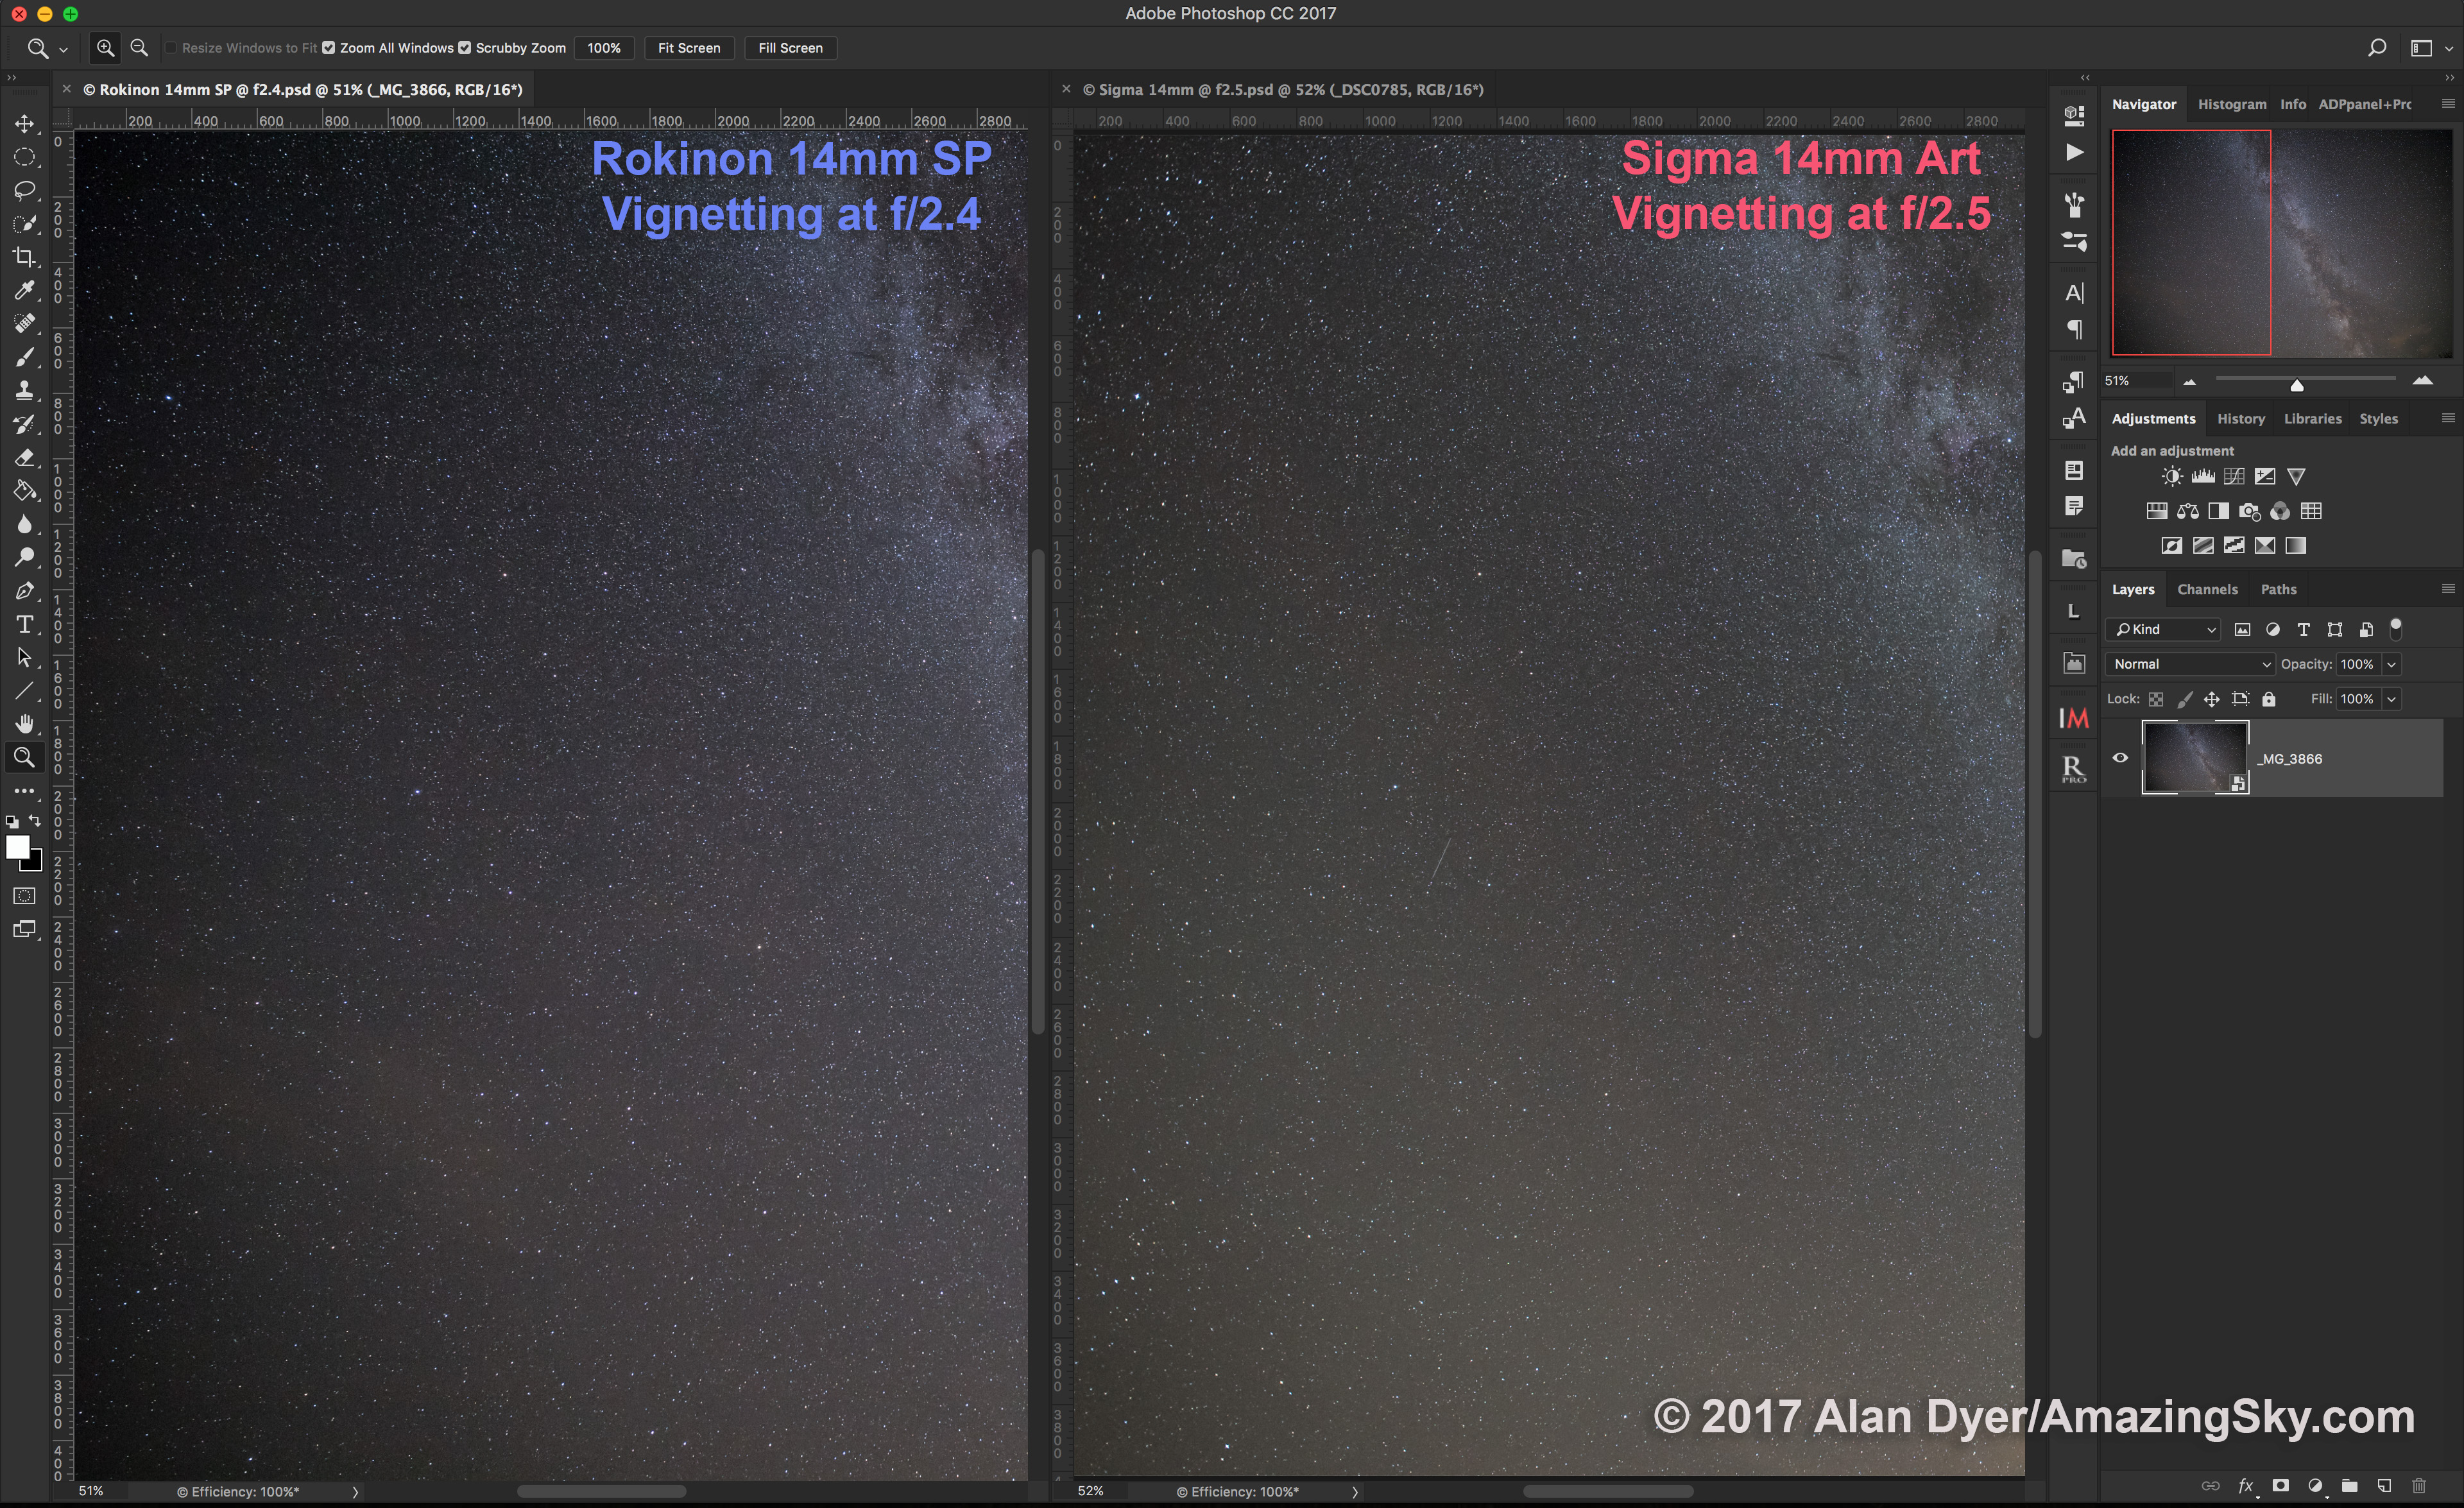
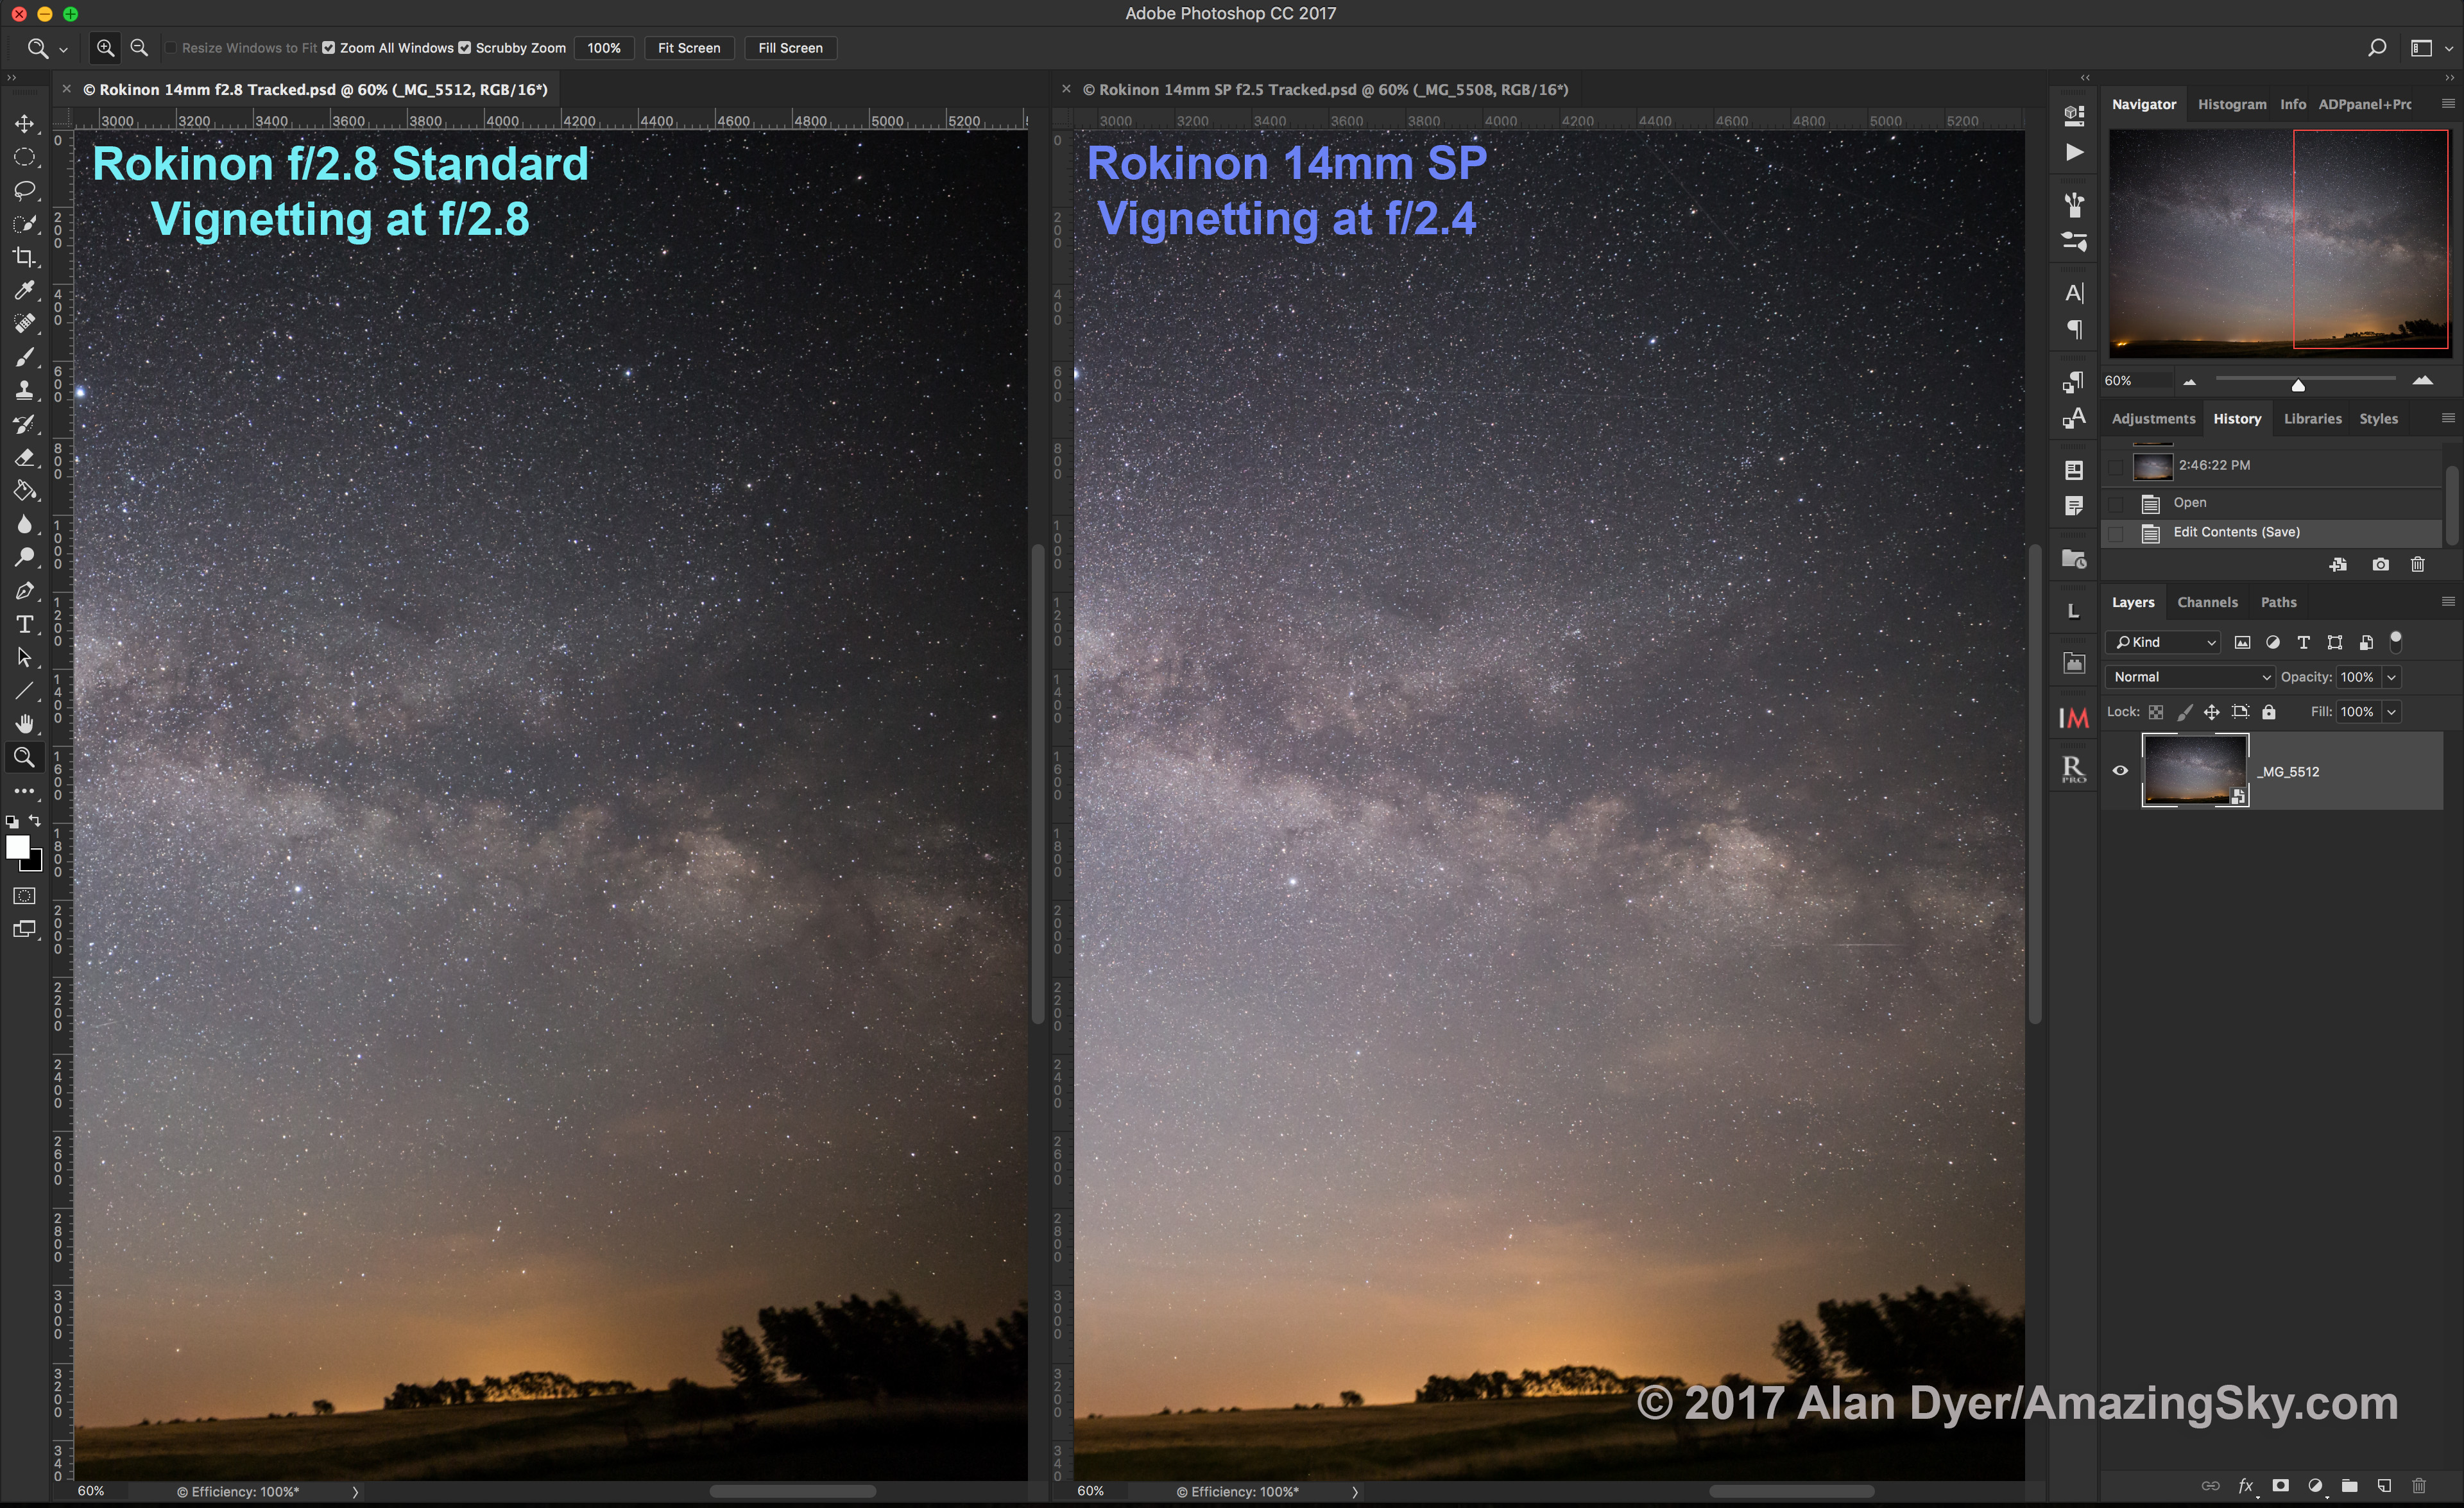
This compares both lenses at similar apertures side by side for a direct comparison. The Sigma is better than the Rokinon with a much more uniform illumination across the frame.


In these two images, above, of the entire frame at their respectively widest apertures, I’d say the Sigma exhibits less vignetting than the Rokinon, even when wide open at f/1.8. The cost for this performance, other than in dollars, is that the Sigma is a large, heavy lens with a massive front lens element.
ROKINON 14mm f/2.4 SP vs. ROKINON 14mm f/2.8 Standard
Even the Rokinon 14mm SP, though a manual lens, carries a premium price, at $800 to $1000 U.S., depending on the lens mount.
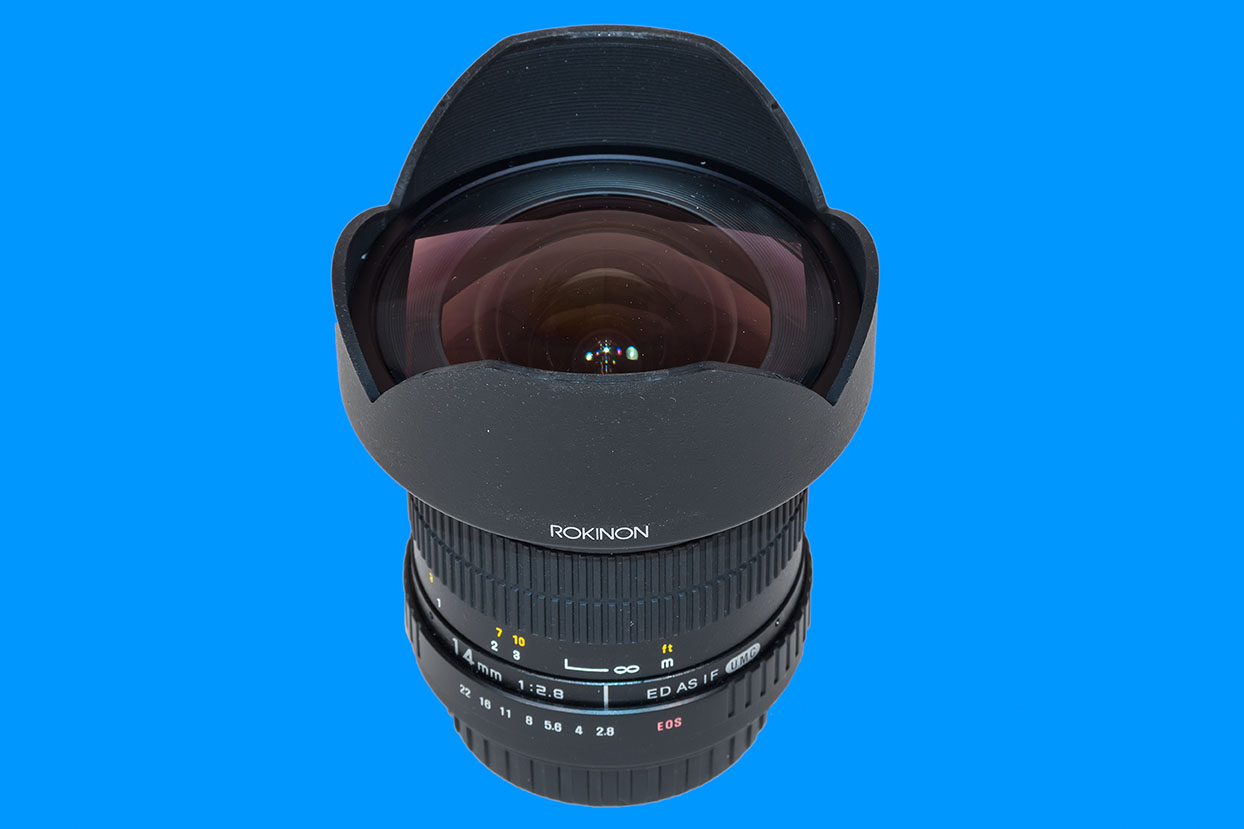
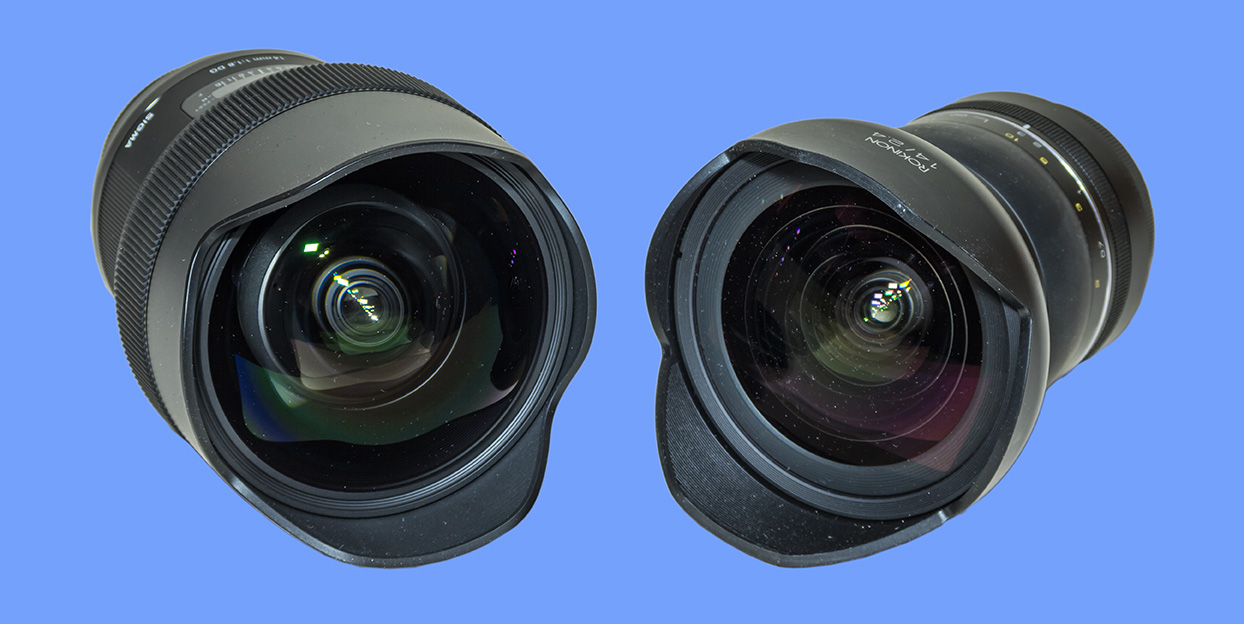
For those looking for a low-cost, ultra-wide lens, the original Rokinon/Samyang 14mm f/2.8 (shown above) is still available and popular. It is a fully manual lens, though versions are available with a AE chip to communicate lens aperture information to the camera.
I happily used this f/2.8 lens for several years. Before I sold it earlier in 2017 (before I acquired the Sigma 14mm), I tested it against Rokinon’s premium SP version.
The older f/2.8 lens exhibited worse off-axis and on-axis aberrations and vignetting than the SP, even with the SP lens set to the same f/2.8 aperture. But image quality of the original lens is still very good, and the price is attractive, at half the price or less, than the 14mm SP Rokinon.
TWO 14mm ROKINONS: OFF-AXIS ABERRATIONS

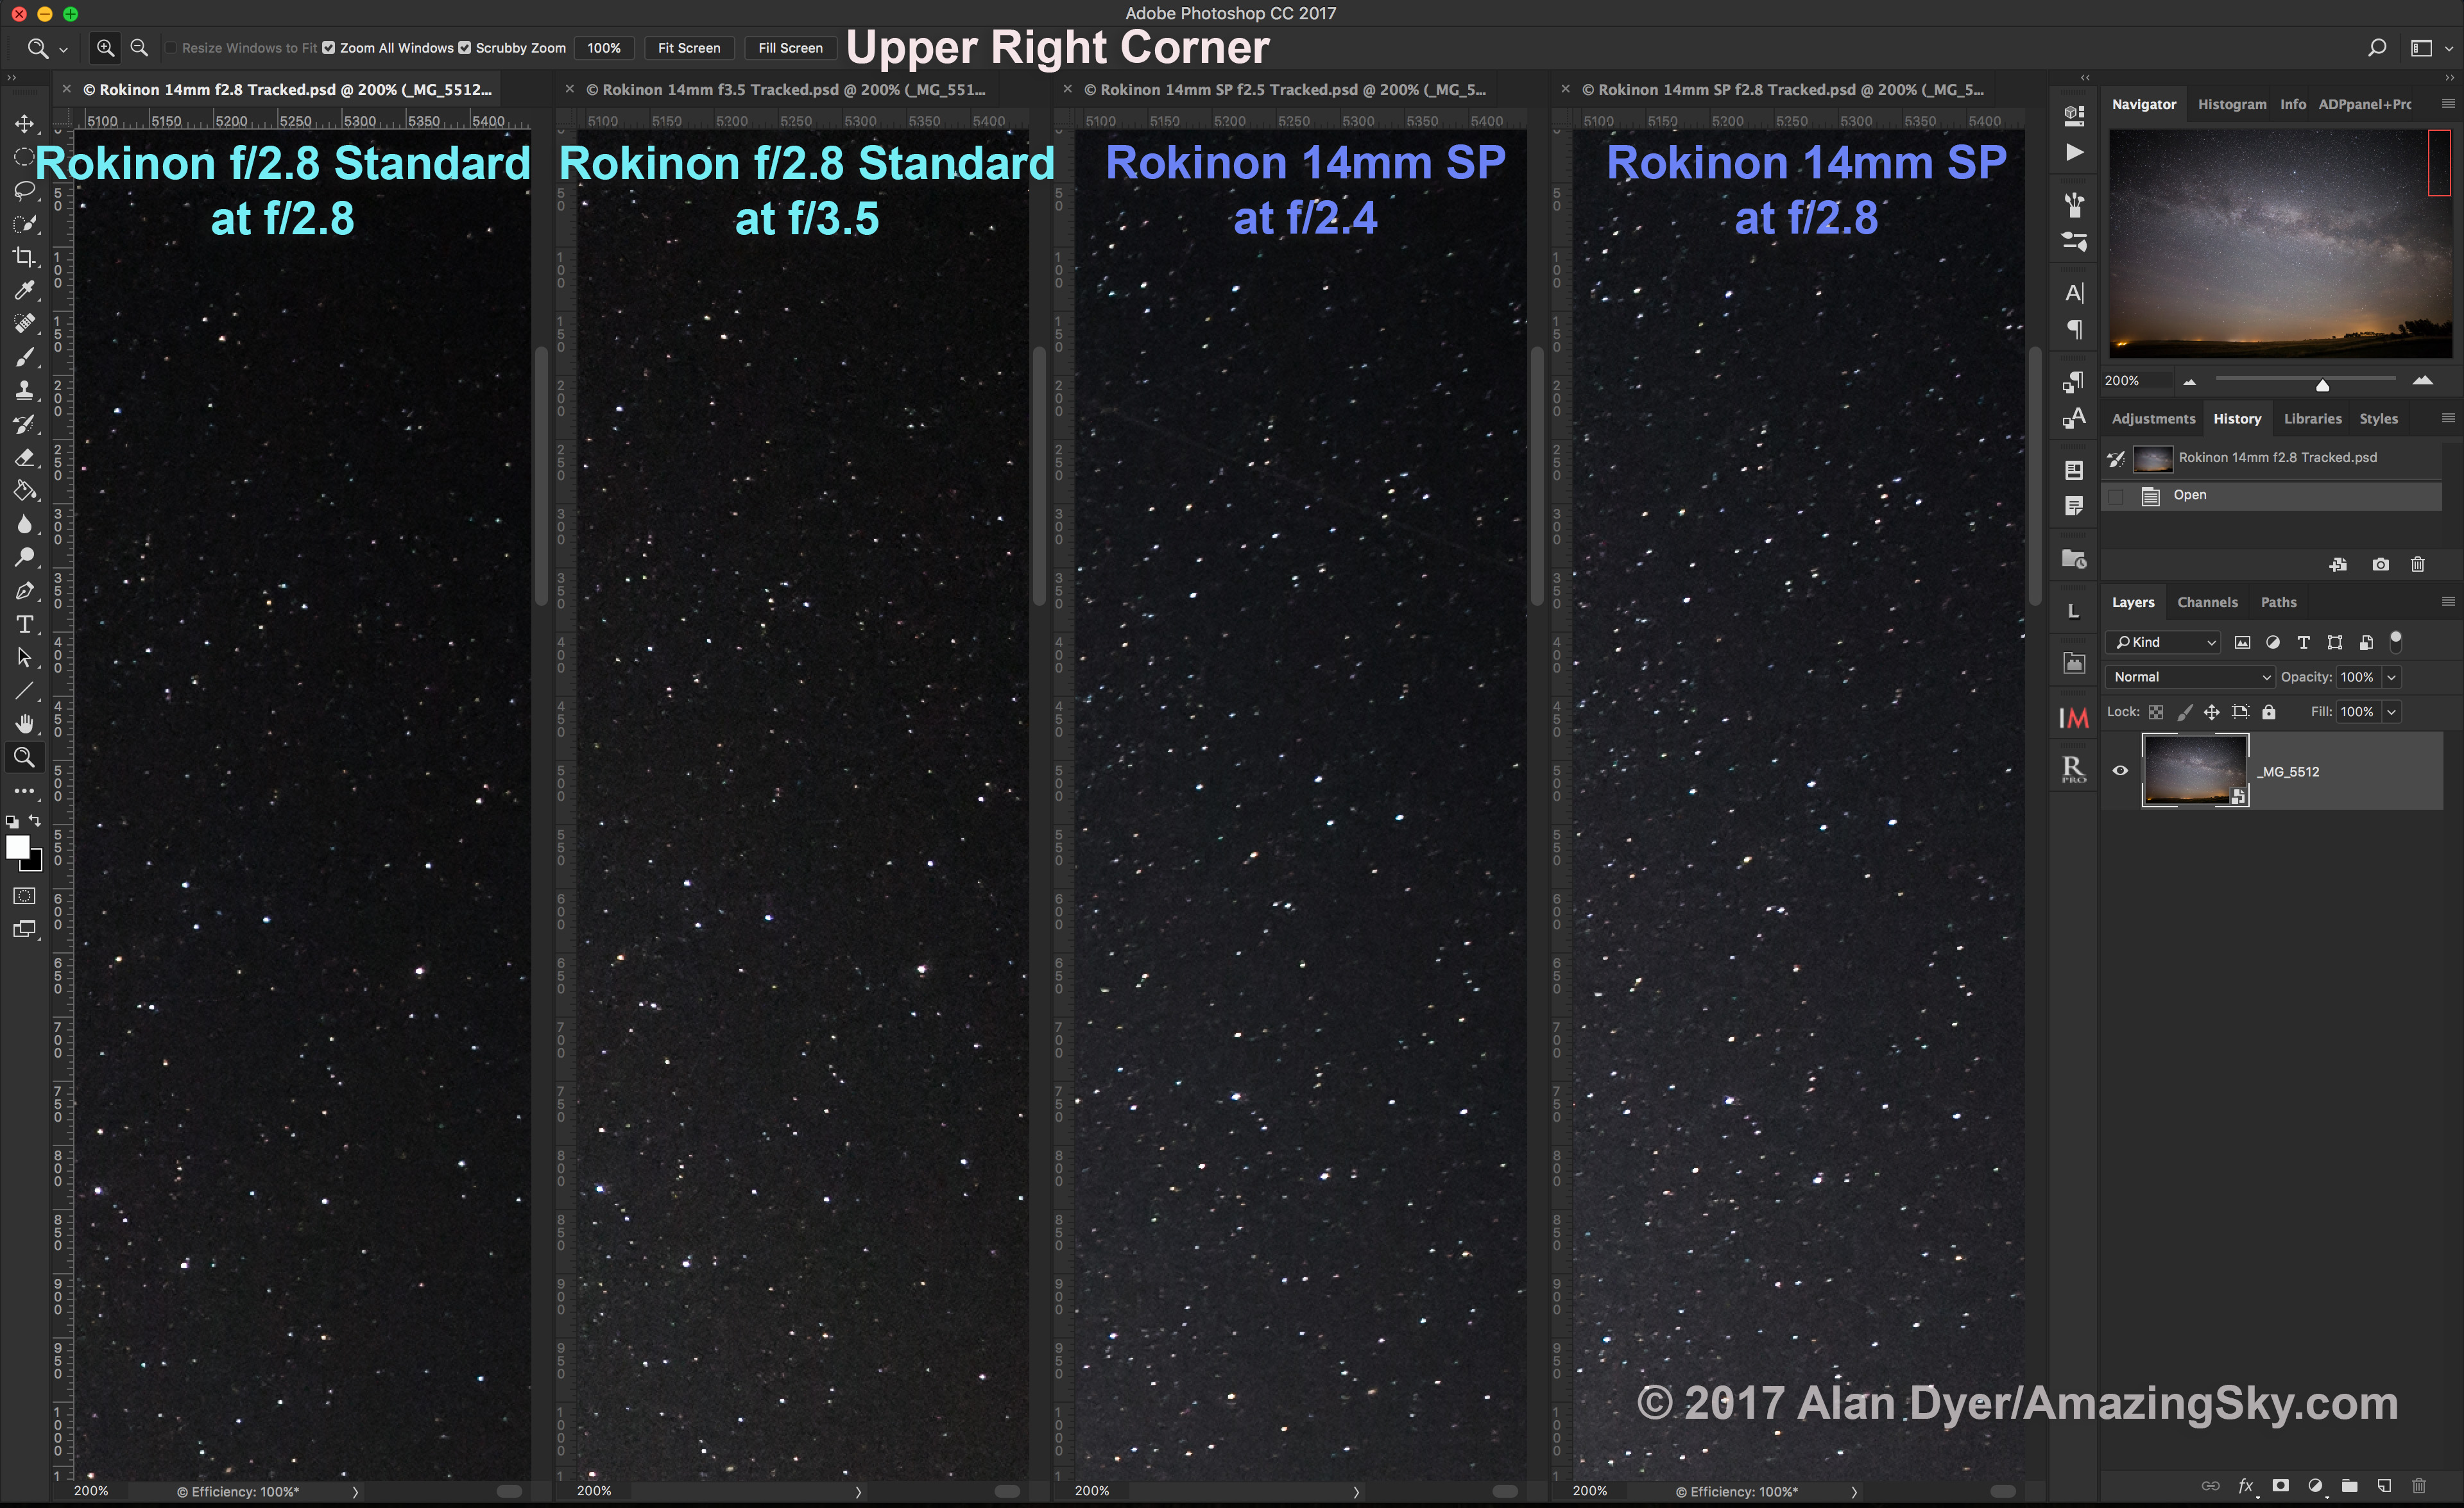
Here, in closeups of the upper corners, I show the difference between the two Rokinons, the older standard lens on the left, and the new SP on the right.
The SP, as it should, shows lower aberrations and tighter star images, though with the improvement most marked on the left corner; not so much on the right corner. The original f/2.8 lens holds its own quite well.
TWO 14mm ROKINONS: ON-AXIS ABERRATIONS
At the centre of the frame, the difference is more apparent, with the SP lens exhibiting sharper star images than the old 14mm with its generally softer, larger star images. The latter likely has more spherical aberration.
TWO 14mm ROKINONS: VIGNETTING
The new SP lens clearly has the advantage here, with less vignetting and brighter corners even when wide open at f/2.4 than the older lens does at its widest aperture of f/2.8. This is another reason to go for the new SP if image quality is paramount
PRICES
The new Sigma 14mm Art lens is costly, at $1600 U.S., though with a price commensurate with its focal length and aperture. Other premium lenses in this focal length range, either prime or zoom, from Nikon and Canon sell for much more, and have only an f/2.8 maximum aperture. So in that sense, the Sigma Art is a bargain.
The new Rokinon 14mm SP sells for $800 to $1000, still a premium price for a manual focus lens. But its optical quality competes with the best.
The older Rokinon 14mm f/2.8 is a fantastic value at $350 to $500, depending on lens mount and AE chip. For anyone getting into nightscape and Milky Way photography, it is a great choice.
RECOMMENDATIONS
With such a huge range in price, what should you buy?
A 14mm is a superb lens for nightscape shooting – for sky-filling auroras, for panoramas along the Milky Way, or of the entire sky. But the lens needs to be fast. All three lenses on offer here satisfy that requirement.
SIGMA 14mm f/1.8 ART
If you want sheer speed, this is the lens. It offers a full stop gain over the already fast Rokinon f/2.5, allowing exposures to be half the length, or shooting at half the ISO speed for less noise.
Its fast speed comes into its own for rapid cadence aurora time-lapses, to freeze auroral motion as much as possible in exposures as short as 1 to 2 seconds at a high ISO. The fast speed might also make real-time movies of the aurora possible on cameras sensitive and noiseless enough to allow video shooting at ISO 25,000 and higher, such as the Sony a7s models.
The Sigma’s fast speed also allows grabbing rich images of the Milky Way in exposures short enough to avoid star trailing, either in still images or in time-lapses of the Milky Way in motion.
While the Sigma does exhibit some edge aberrations, they are very well controlled (much less than I see with some 24mm and 35mm lenses I have) and are a reasonable tradeoff for the speed and low level of vignetting, which results in less noisy corners.
Photographers obsess over corner aberrations when, for fixed-camera nightscape shooting, a low level of vignetting is probably more critical. Correcting excessive vignetting introduces noise, while the corner aberrations may well be masked by star trailing. Only in tracked images do corner aberrations become more visible, as in the test images here.
I’d suggest the Sigma is the best choice for nightscape and time-lapse shooting, with its speed allowing for kinds of shots not possible otherwise.
The Sigma also appears to be the best coated of all the lenses, as you can see in the reflections in the lenses in the opening image, and below. However, I did not test the lenses for flares and ghosting.
As a footnote, none of the lenses allow front-mounted filters, and none have filter drawers.
ROKINON 14mm f/2.4 SP
For less money you get excellent optical quality, though with perhaps some worrisome variation in how well the lens elements are figured or assembled, as evidenced by the inconsistent level of aberration from corner to corner.
Nevertheless, stars are tight on- and off-axis, and vignetting is quite low, for corners that will be less noisy when the shadows are recovered in processing.
I’d suggest the Rokinon SP is a great choice if tracked deep-sky images are your prime interest, where off-axis performance is most visible. However, the SP’s inconsistent aberrations from corner to corner are evidence of lower manufacturing tolerances than Sigma’s, so your unit may not perform like mine.
For nightscape work, the SP’s f/2.4 aperture might seem a minor gain over Rokinon’s lower-cost f/2.8 lens. But it is 1/3 of an f-stop. That means, for example, untracked Milky Way exposures could be 30 seconds instead of 40 seconds, short enough to avoid obvious star trailing. At night, every fraction of an f-stop gain is welcome and significant.
ROKINON 14mm f/2.8 Standard
You might never see the difference in quality between this lens and its premium SP brother in images intended for time-lapse movies, even at 4K resolution.
But those intending to do long-exposure deep-sky imaging, as these test images are, will want the sharpest stars possible across the frame. In which case, consider the 14mm SP.
But if price is a prime consideration, the original f/2.8 Rokinon is a fine choice. You’ll need to apply a fair amount of lens correction in processing, but the lens exists in the Camera Raw/Lightroom database, so correction is just a click away.

That was a lengthy report, I know! But there’s no point in providing recommendations without the evidence to back them up.
All images, other than the opening “beauty shot,” can be clicked/tapped on to download a full-resolution original JPG for closer inspection.
As I’ve just received the Sigma Art lens I’ve not had a chance to shoot any “real” nightscape images with it yet, just these test shots. But for a real life deep-sky image of the Milky Way shot with the Rokinon SP, see this image from Australia. https://flic.kr/p/SSQm7G
I hope you found the test of value in helping you choose a lens.
Clear skies!
— Alan, September 22, 2017 / © 2017 Alan Dyer / amazingsky.com