
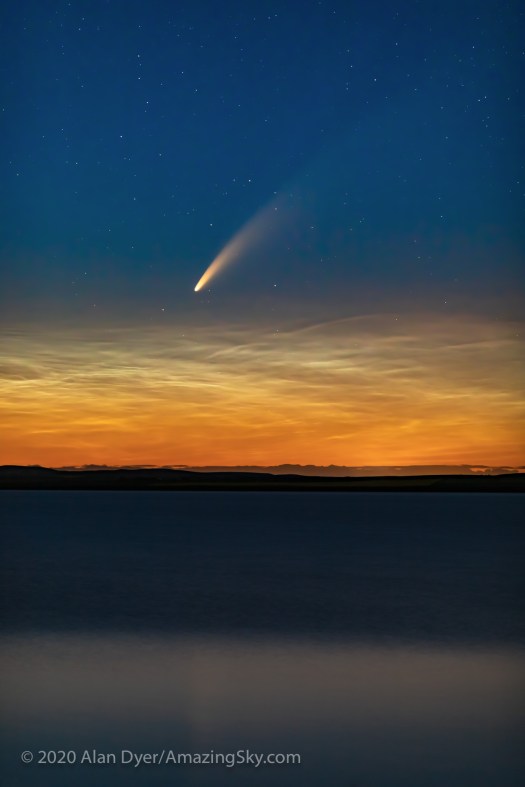
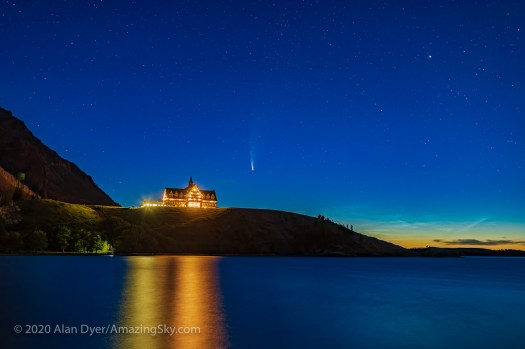
 A bright comet is a once-a-decade opportunity to capture some unique nightscapes. Here are my suggested tips and FAQs for getting your souvenir shot.
My guide to capturing Comet NEOWISE assumes you’ve done little, if any, nightscape photography up to now. Even for those who have some experience shooting landscape scenes by night, the comet does pose new challenges — for one, it moves from night to night and requires good planning to get it over a scenic landmark.
So here are my tips and techniques, in answers to the most frequently asked questions I get and that I see on social media posts.
How Long Will the Comet be Visible?
The comet is not going to suddenly whoosh away or disappear. It is in our northern hemisphere sky and fairly well placed for shooting and watching all summer.
But … it is now getting fainter each night so the best time to shoot it is now! Or as soon as clouds allow on your next clear night.
As of this writing on July 18 it is still bright enough to be easily visible to the unaided eye from a dark site. How long this will be the case is unknown.
But after July 23 and its closest approach to Earth the comet will be receding from us and that alone will cause it to dim. Later this summer it will require binoculars to see, but might still be a good photogenic target, but smaller and dimmer than it was in mid-July.

When is the Best Time to Shoot?
The comet has moved far enough west that it is now primarily an evening object. So look as soon as it gets dark each night.
Until later in July it is still far enough north to be “circumpolar” for northern latitudes (above 50° N) and so visible all night and into the dawn.
But eventually the comet will be setting into the northwest even as seen from northern latitudes and only visible in the evening sky. Indeed, by the end of July the comet will have moved far enough south that observers in the southern hemisphere anxious to see the comet will get their first looks.
Where Do I Look?
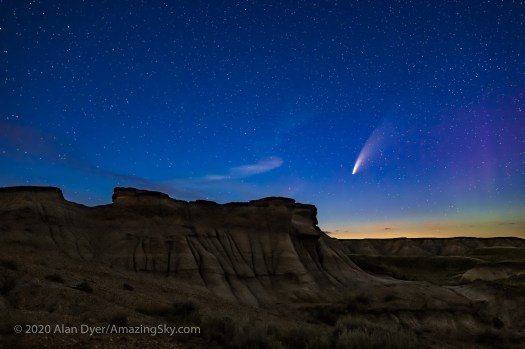
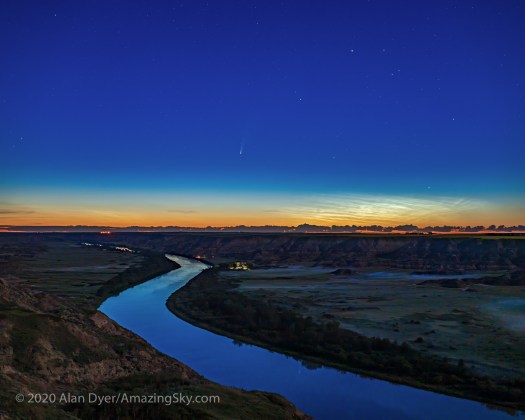
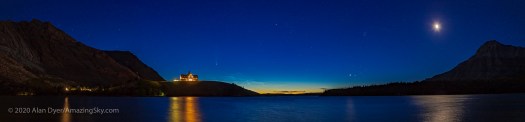
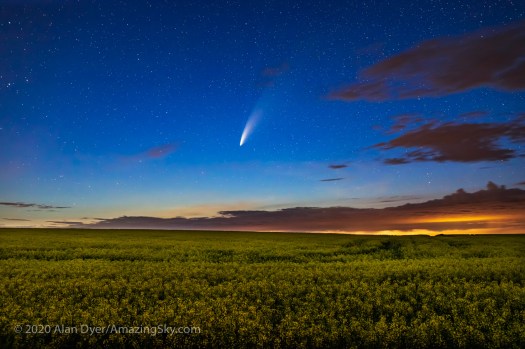
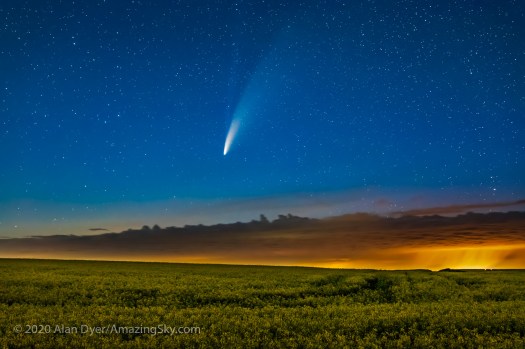
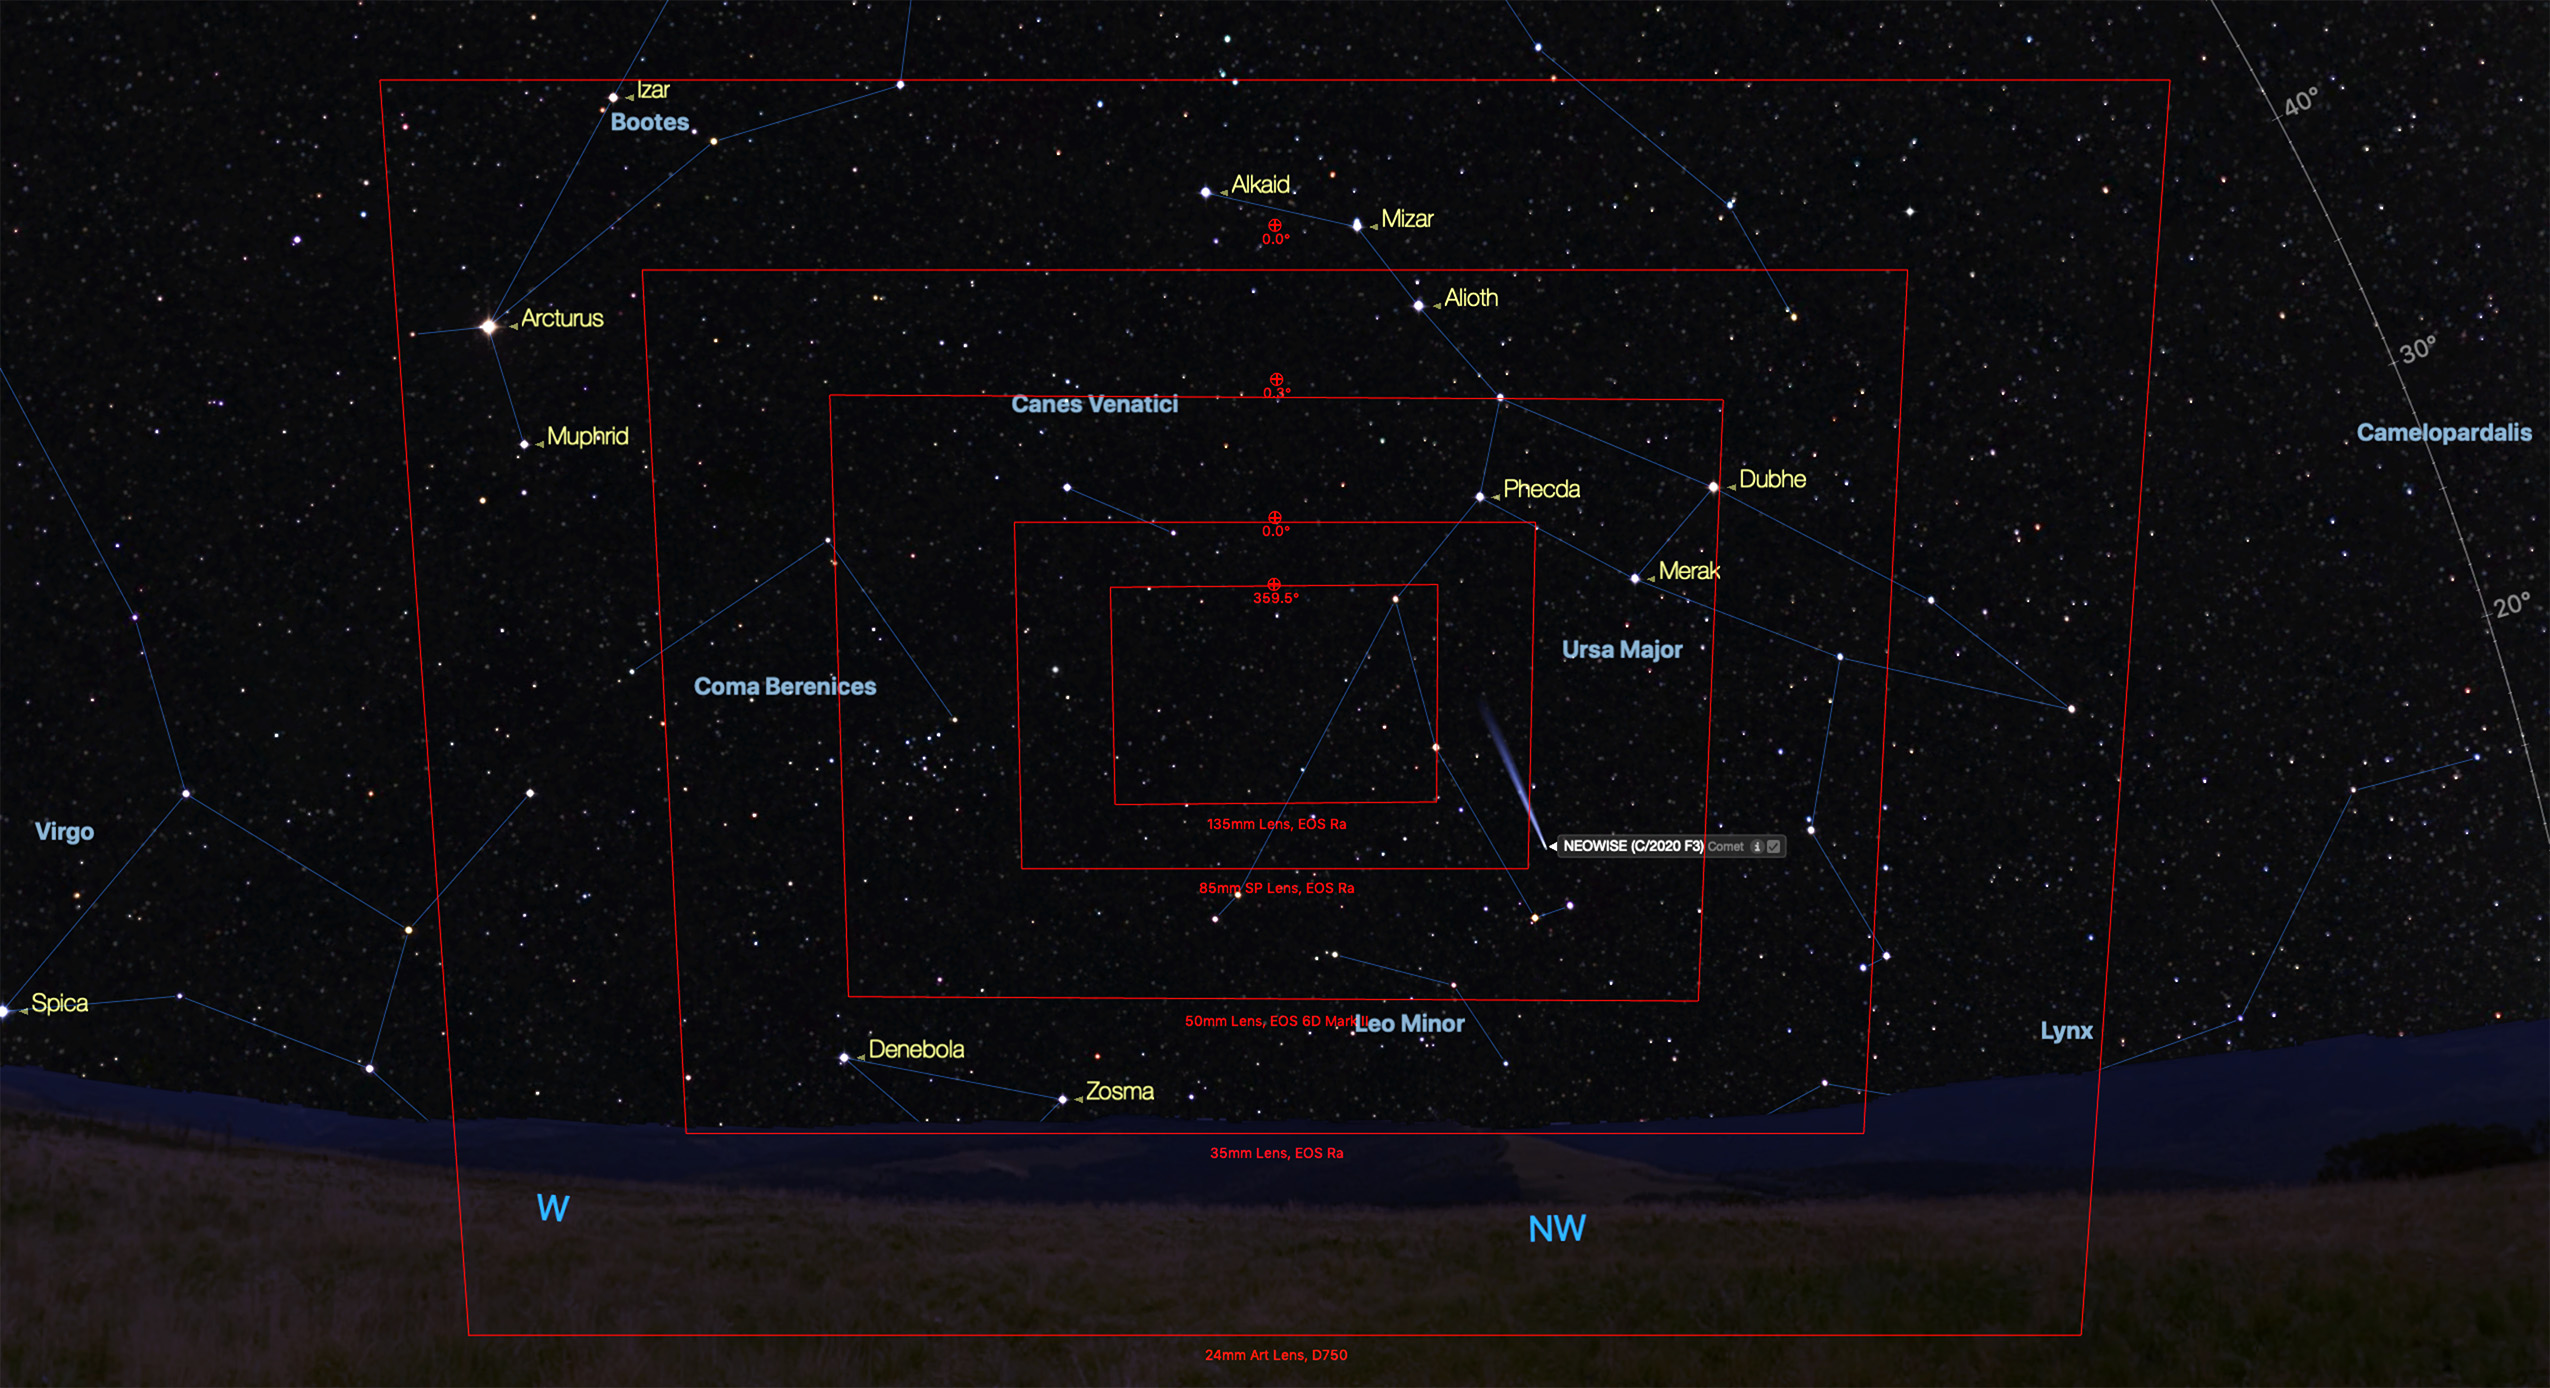
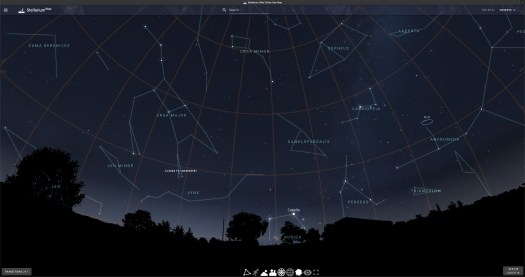
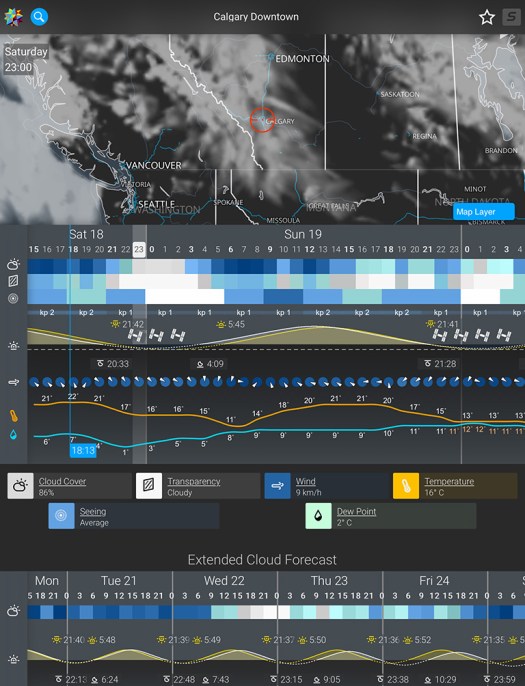
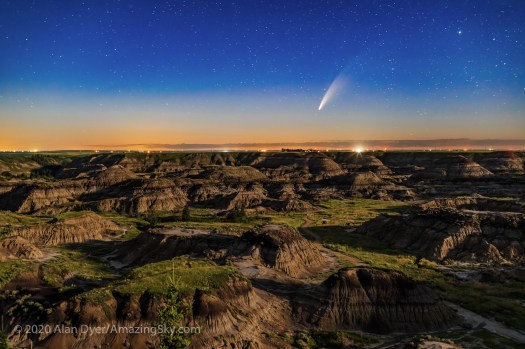
In July look northwest below the Big Dipper. By August the comet is low in the west below the bright star Arcturus. By then it will be moving much less from night to night. The chart above shows the comet at nightly intervals; you can see how its nightly motion slows as it recedes from us and from the Sun.
What Exposures Do I Use?
There is no single best setting. It depends on …
— How bright the sky is from your location (urban vs a rural site).
— Whether the Moon is up — it will be after July 23 or so when the Moon returns to the western sky as a waxing crescent.
— The phase of the Moon — in late July it will be waxing to Full on August 3 when the sky will be very bright and the comet faint enough it might lost in the bright sky.
However, here are guidelines:
— ISO 400 to 1600
— Aperture f/2 to f/4
— Shutter speed of 4 to 30 seconds
Unless you are shooting in a very bright sky, your automatic exposure settings are likely not going to work.
As with almost all nightscape photography you will need to set your camera on Manual (M) and dial in those settings for ISO, Aperture and Shutter Speed manually. Just how is something you need to consult your camera’s instruction manual for, as some point-and-shoot snapshot cameras are simply not designed to be used manually.
Exposure Considerations
As a rule you want to …
— Keep the ISO as low as possible for the lowest noise. The higher the ISO the worse the noise. But … do raise the ISO high enough to get a well-exposed image. Better to shoot at ISO 3200 and expose well, than at ISO 800 and end up with a dark, underexposed image.
— Shoot at a wide aperture, such as f/2 or f/2.8. The wider the aperture (smaller the f-number) the shorter the exposure can be and/or lower the ISO can be. But … lens aberrations might spoil the sharpness of the image.
— Keep exposures short enough that the stars won’t trail too much during the exposure due to Earth’s rotation. The “500 Rule” of thumb says exposures should be no longer than 500 / Focal length of your lens.
So for a 50mm lens exposures should be no longer than 500/50 = 10s seconds. You’ll still see some trailing but not enough to spoil the image. And going a bit longer in exposure time can make it possible to use a slower and less noisy ISO speed or simply having a better exposed shot.
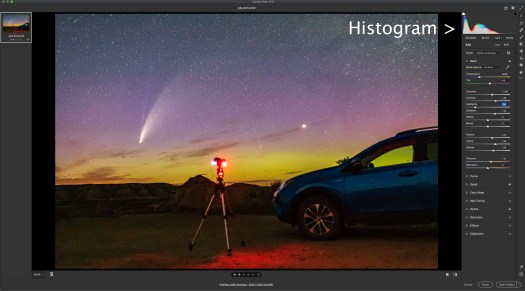
— Avoid underexposing. If you can, call up the “histogram”— the graph of exposure values — on the resulting image in playback on your camera. The histogram should look fairly well distributed from left to right and not all bunched up at the left.
My Nightscapes and Time-Lapses ebook shown above provides extensive instruction on the best camera settings for exposure and noise reduction.
Location Considerations
When and where you are will also affect your exposure combination.
If you are at a site with lots of lights such as overlooking a city skyline, exposures will need to be shorter than at a dark site.
And nights with a bright Moon will require shorter exposures than moonless nights.
Take test shots and see what looks good! Inspect the histogram. This isn’t like shooting with film when we had no idea if we got the shot until it was too late!
What Lens Do I Use?
Any lens can produce a fine shot. Choose the lens to frame the scene well.
Using a longer lens (105mm to 200mm) does make the comet larger, but … might make it more difficult to also frame it above a landscape. A good choice is likely a 24mm to 85mm lens.
A fast lens is best, to keep exposure times below the 500 Rule threshold and ISO speeds lower. Slow f/5.6 kit zooms can be used but do pose challenges for getting well exposed and untrailed shots.
Shooting with shorter focal lengths can help keep the aperture wider and faster. Long focal lengths aren’t needed, especially for images of the comet over a landscape. Avoid the temptation to use that monster 400mm or 600mm telephoto wildlife lens. Unless it is on a tracker (see below) it will produce a trailed mess. It is best to shoot with no more than a 135mm telephoto, the faster the better, IF you want a close-up.
Planetarium programs that I recommend below offer “field of view” indicators so you can preview how much of the horizon and sky your camera and lens combination will show.
Can I Use My [insert camera here] Camera?
Yes. Whatever you have, try it.
However, the best cameras for any nightscape photography are DSLRs and Mirrorless cameras, either full-frame or cropped frame. They have the lowest noise and are easiest to set manually.
In my experience in teaching workshops I find that the insidious menus of automatic “point-and-shoot” pocket cameras make it very difficult to find the manual settings. And some have such noisy sensors they do not allow longer exposures and/or higher ISO speeds. But try their Night or Fireworks scene modes.
It doesn’t hurt to try, but if you don’t get the shot, don’t fuss. Just enjoy the view with your eyes and binoculars.
But … if you have an iPhone11 or recent Android phone (I have neither!) their “Night scene” modes are superb and use clever in-camera image stacking and processing routines to yield surprisingly good images. Give them a try — keep the camera steady and shoot.
What No One Asks: How Do I Focus?
Everyone fusses about “the best” exposure.
What no one thinks of is how they will focus at night. What ruins images is often not bad exposure (a lot of exposure sins can be fixed in processing) but poor focus (which cannot be fixed later).
On bright scenes it is possible your camera’s Autofocus system will “see” enough in the scene to work and focus the lens. Great.
On dark scenes it will not. You must manually focus. Do that using your camera’s “Live View” function (all DSLRs and Mirrorless cameras have it — but check your user manual as on DSLRs it might need to be activated in the menus if you have never used it).
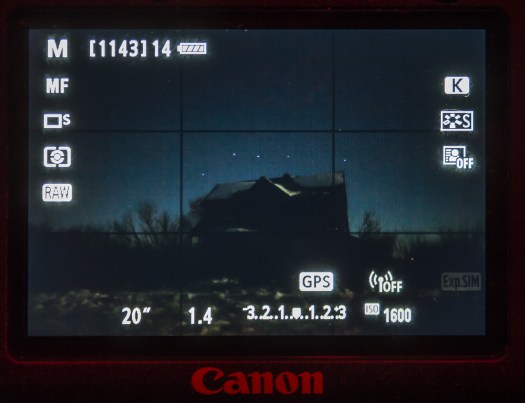
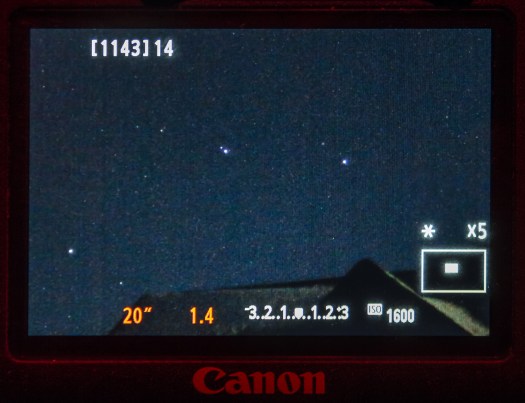
Aim at a bright star or distant light and magnify the image 5x or 10x (with the + button) to inspect the star or light. Put the lens on MF (not AF) and focus the lens manually to make the star as pinpoint as possible. Do not touch the lens afterwards.
Practice on a cloudy night on distant lights.
All shooting must be done with a camera on a good tripod. As such, turn OFF any image stabilization (IS), whether it be on the lens or in the camera. IS can ruin shots taken on a tripod.
What Few Ask: How Do I Plan a Shoot?
Good photos rarely happen by accident. They require planning. That’s part of the challenge and satisfaction of getting the once-in-a-lifetime shot.
To get the shot of the comet over some striking scene below, you have to figure out:
— First, where the comet will be in the sky,
— Then, where you need to be to look toward that location.
— And of course, you need to be where the sky will be clear!
-
Planning Where the Comet Will Be
Popular planning software such as PhotoPills and The Photographer’s Ephemeris can help immensely, but won’t have the comet itself included in their displays, just the position of the Sun, Moon and Milky Way.
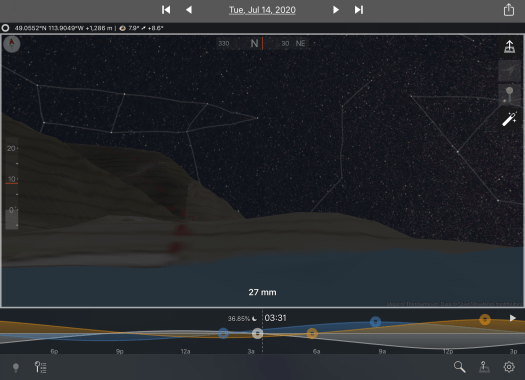
For previewing the comet’s position in the sky, I use the planetarium programs Starry Night (desktop) or SkySafari (mobile app). Both include comet positions.
The program Stellarium (stellarium.org) is free for desktop while the mobile Stellarium Plus apps (iOS and Android) have a small fee. There is also a free web-based version at https://stellarium-web.org Be sure to allow it to access your location.
Set the programs to the night in question to see where the comet will be in relation to the stars and patterns such as the Big Dipper. Note the comet’s altitude in degrees and azimuth (how far along the horizon it will be). For example, an azimuth of 320° puts it in the northwest (270° is due west; 0° or 360° is due north, 315° is directly northwest).
-
Planning Where You Need To Be
I use The Photographer’s Ephemeris mobile app (https://www.photoephemeris.com) — there is a free web version available. Many like PhotoPills (https://www.photopills.com).
With either you can dial in the time and date and see lines pointing toward where the Sun would be, but below the horizon. Scrub through time to move that line to the same azimuth angle as where the comet will be and then see if the comet is sitting in the right direction.
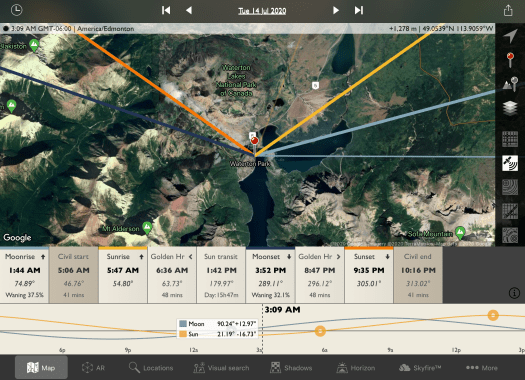
Move your location to place the line toward the comet over what you want to include in the scene.
I like The Photographer’s Ephemeris as it links to the companion app TPE3D that can show the stars over the actual topographic landscape. It won’t show the comet, but if you know where it is in the sky you can see if if will clear mountains, for example.
-
Planning for the Weather
All is for nought if the sky is cloudy.
For planning astro shoots I like the app Astrospheric (https://www.astrospheric.com). It is free for mobile and there is a web-based version. It uses Environment Canada predictions of cloud cover for North America. Use it to plan where to be for clear skies first, then figure out the best scenic site that will be under those clear skies.
For sites outside North America, try ClearOutside (https://clearoutside.com)
Advanced Techniques
Be happy to get a well-composed and exposed single shot.
But … if you wish to try some more advanced techniques for later processing, here are suggestions.

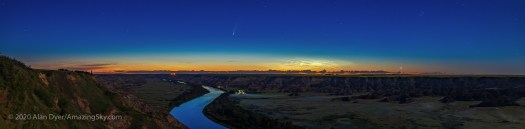
1. Panoramas
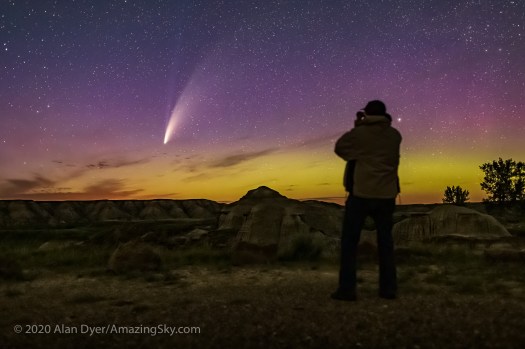
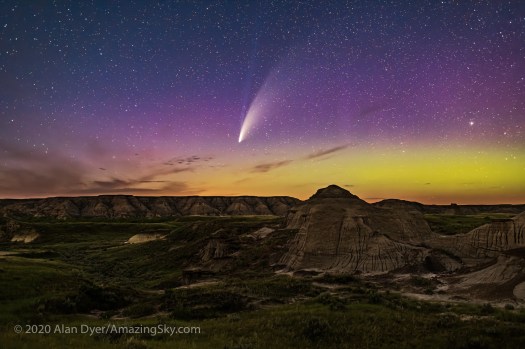
On several nights I’ve found a panorama captures the scene better, including the comet in context with the wide horizon, sweep of the twilight arch or, as we’ve had in western Canada, some Northern Lights.
Take several identical exposures, moving the camera 10 to 15 degrees between images. Editing programs such as Lightroom, Adobe Camera Raw, ON1 Photo RAW and Affinity Photo have panorama stitching routines built in.
My Nightscapes and Time-Lapses ebook shown above provides tutorials for shooting and processing nightscape panoramas.
2. Exposure Blending
If you have a situation where the sky is bright but the ground is dark, or vice versa, and one exposure cannot record both well, then shoot two exposures, each best suited to recording the sky and ground individually.
For example, on moonless nights I’ve been shooting 2- to 5-minute long exposures for the ground and with the lens stopped down to f/5.6 or f/8 for better depth of field to be sure the foreground was in focus.
For a video tutorial on how to do the layering and masking in programs such as Photoshop, see my How to Shoot Moonlit Nightscapes video at https://vimeo.com/theamazingsky/moonlighttutorial.
3. Exposure Stacking
To reduce noise, it is also possible to shoot multiple exposures to stack later in processing to smooth noise. This is most useful in scenes with dark foregrounds where noise is most obvious, and where I will stack 4 to 8 images.
Just how to do this is beyond the scope of this blog. I also give step-by-step tutorials for the process in my Nightscapes and Time-Lapses ebook shown above. It be done in Photoshop, or in specialized programs such as StarryLandscapeStacker (for MacOS) or Sequator (Windows).
But shoot the images now, and learn later how to use them.
4. Tracking the Sky
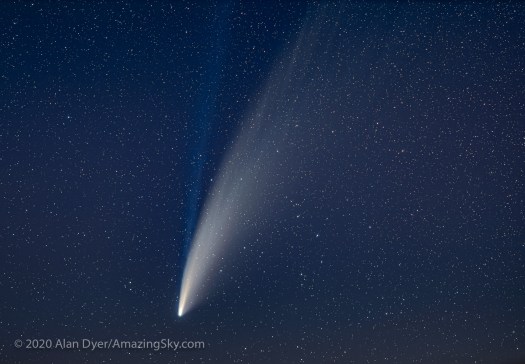
If it is close-ups of the comet you want, then you will need to use a 135mm to 300mm telephoto lens (especially later in the summer when the comet is farther away and smaller).
But with such lenses any exposure over a few seconds will result in lots of trailing.
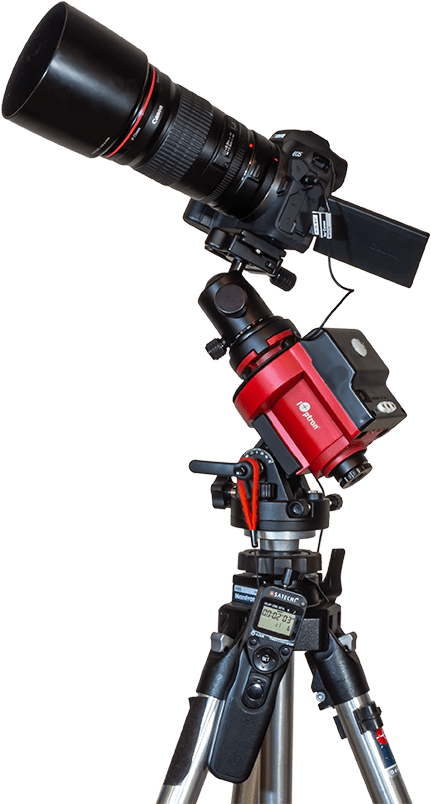
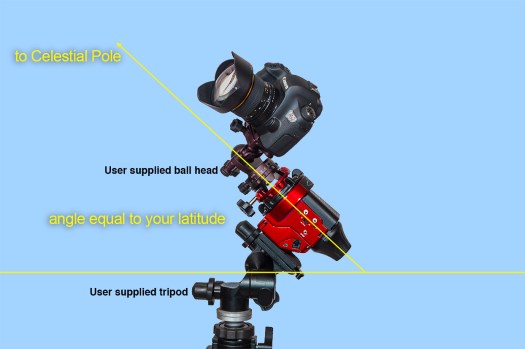
The solution is a tracking device such as the Sky-Watcher Star Adventurer or iOptron SkyGuider. These need to be set up so their rotation axis aims at the North Celestial Pole near Polaris. The camera can then follow the stars for the required exposures of up to a minute or more needed to record the comet and its tails well.
Just how to use a tracker is again beyond the scope of this blog. But if you have one, it will work very well for comet shots with telephoto lenses. However, trackers are not essential for wide-angle shots, especially once the Moon begins to light the sky.
But later in the summer when the comet is fainter and smaller, a tracked and stacked set of telephoto lens images will likely be the best way to capture the comet.
Clear skies and happy comet hunting!
— Alan, July 18, 2020 /Revised July 23 / AmazingSky.com
