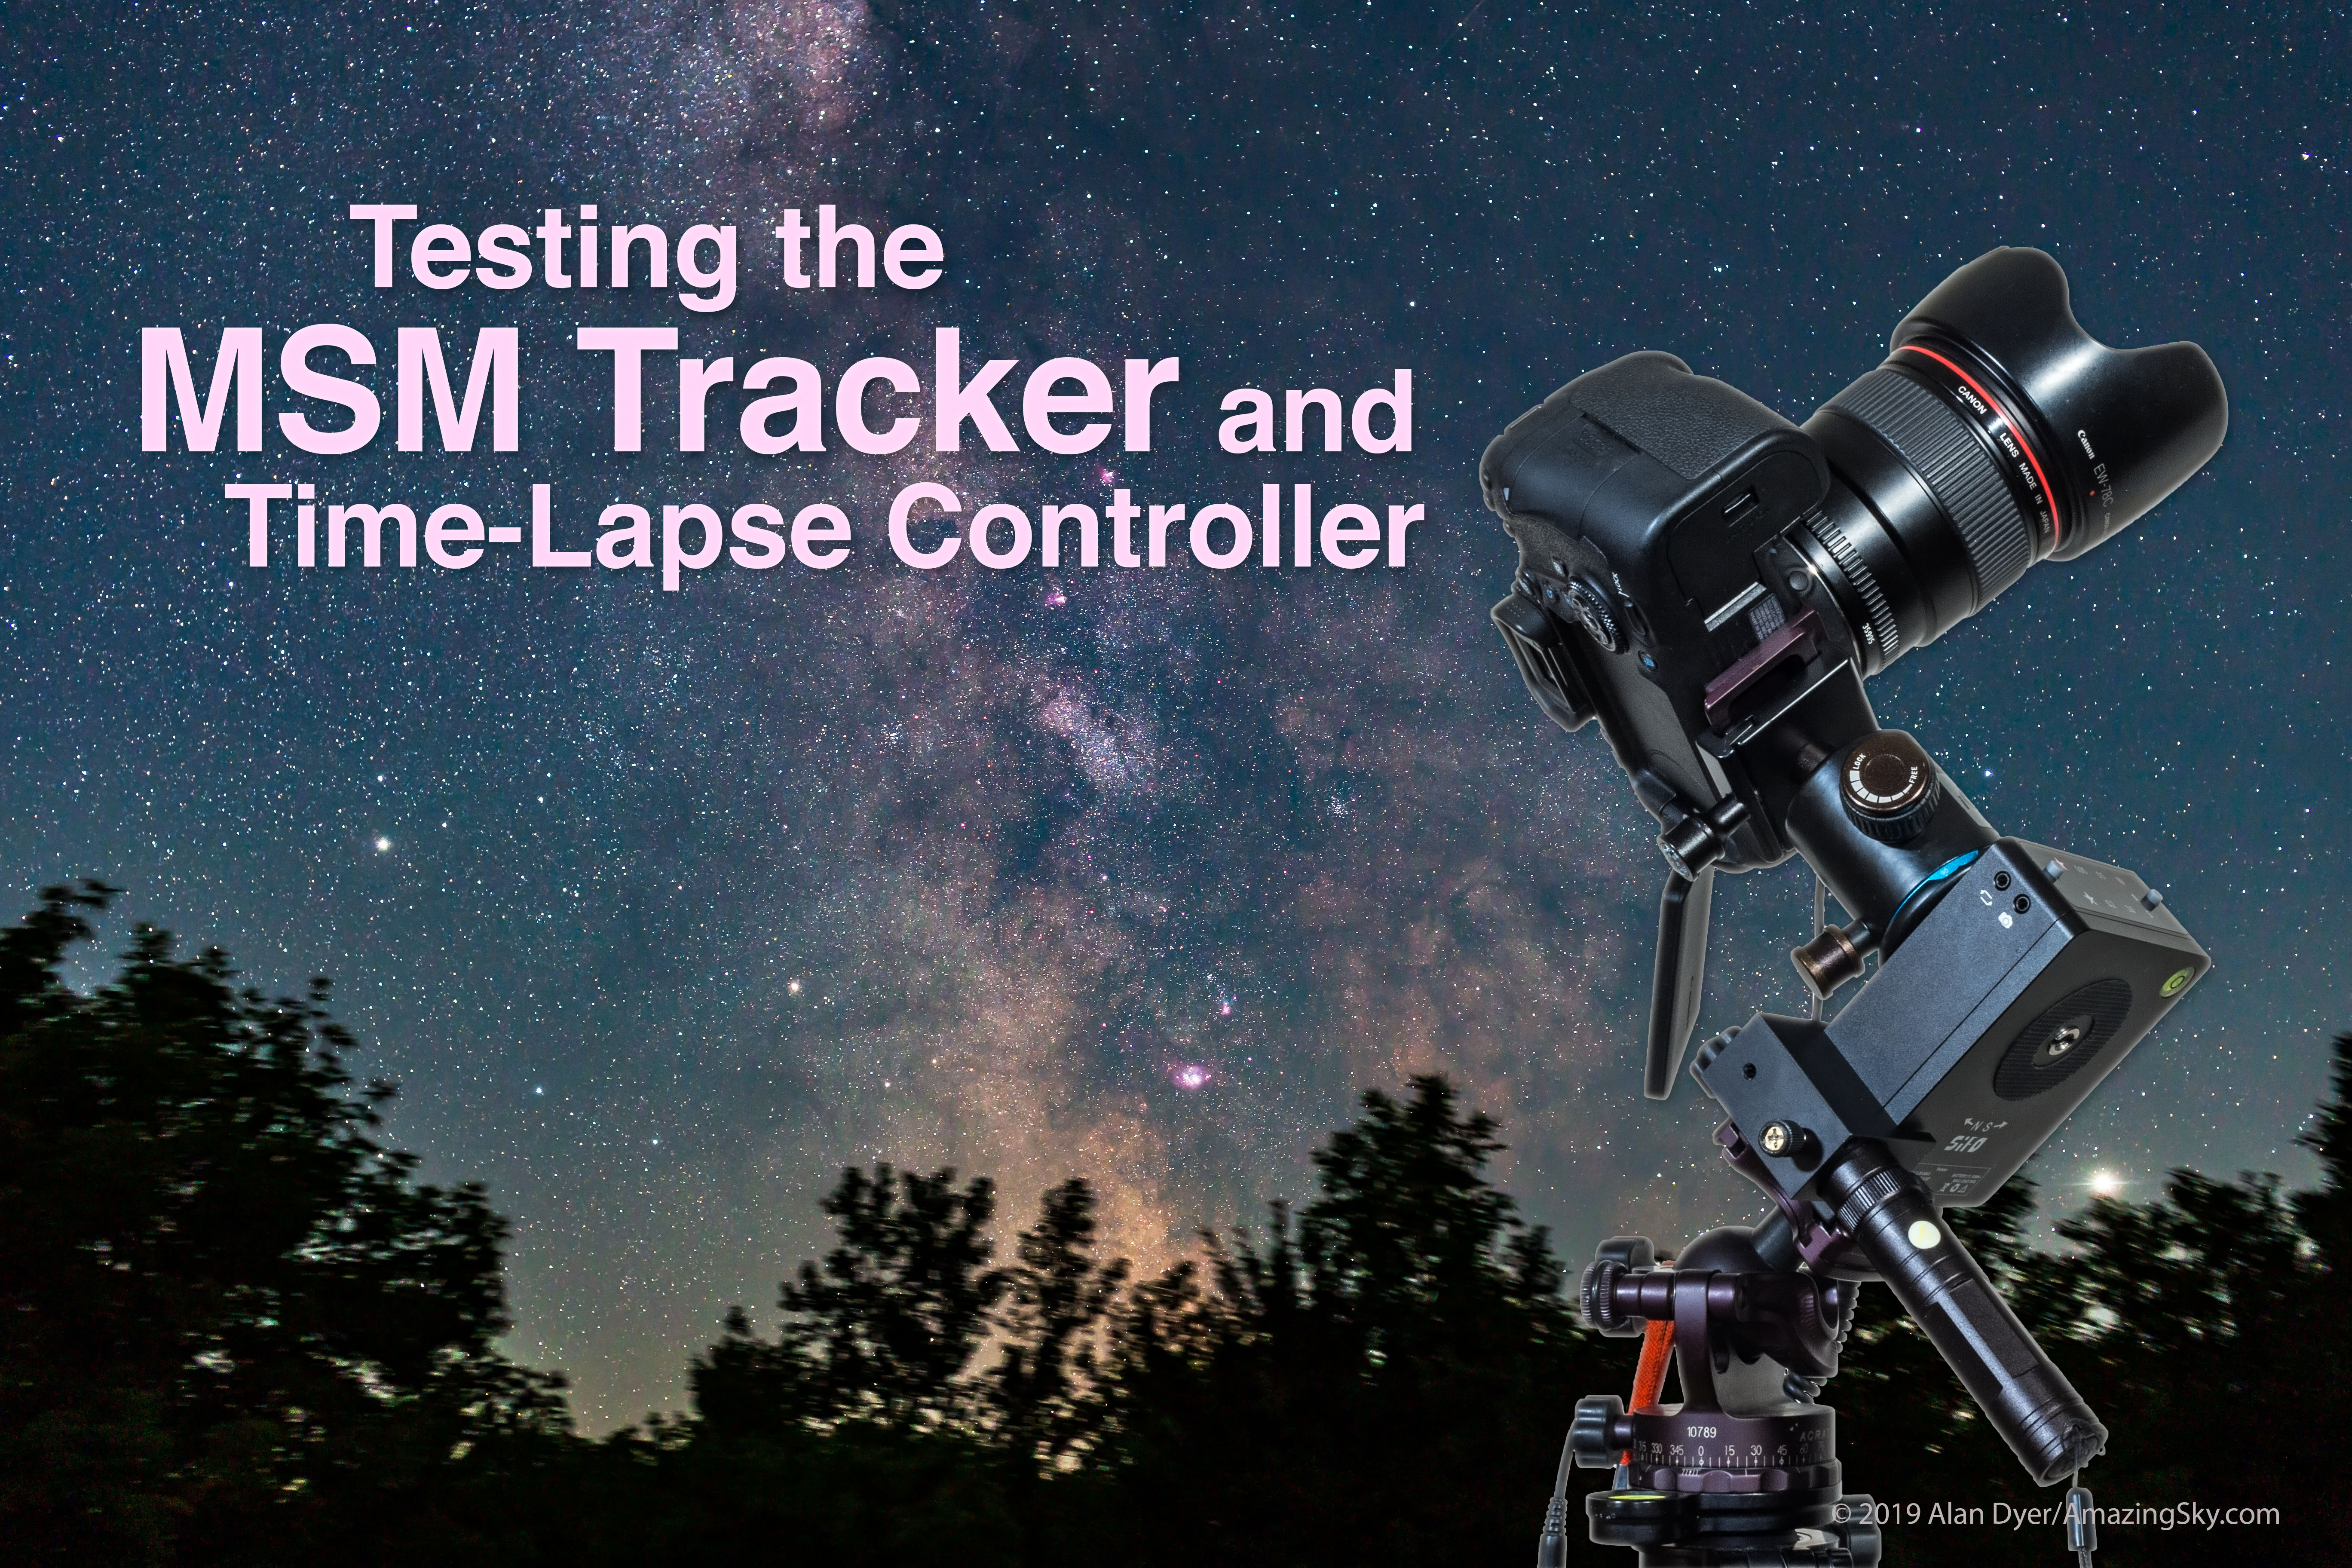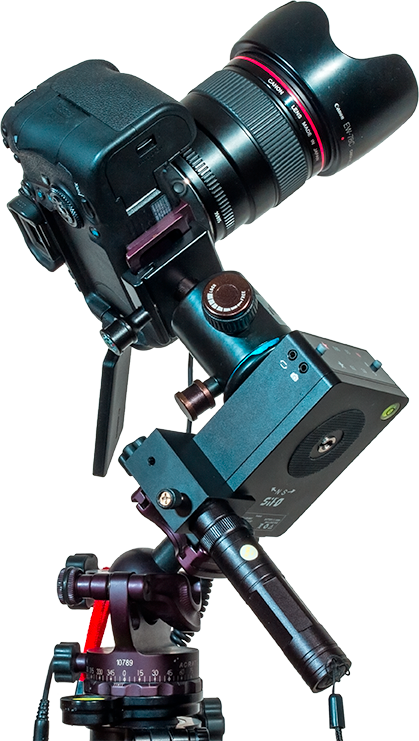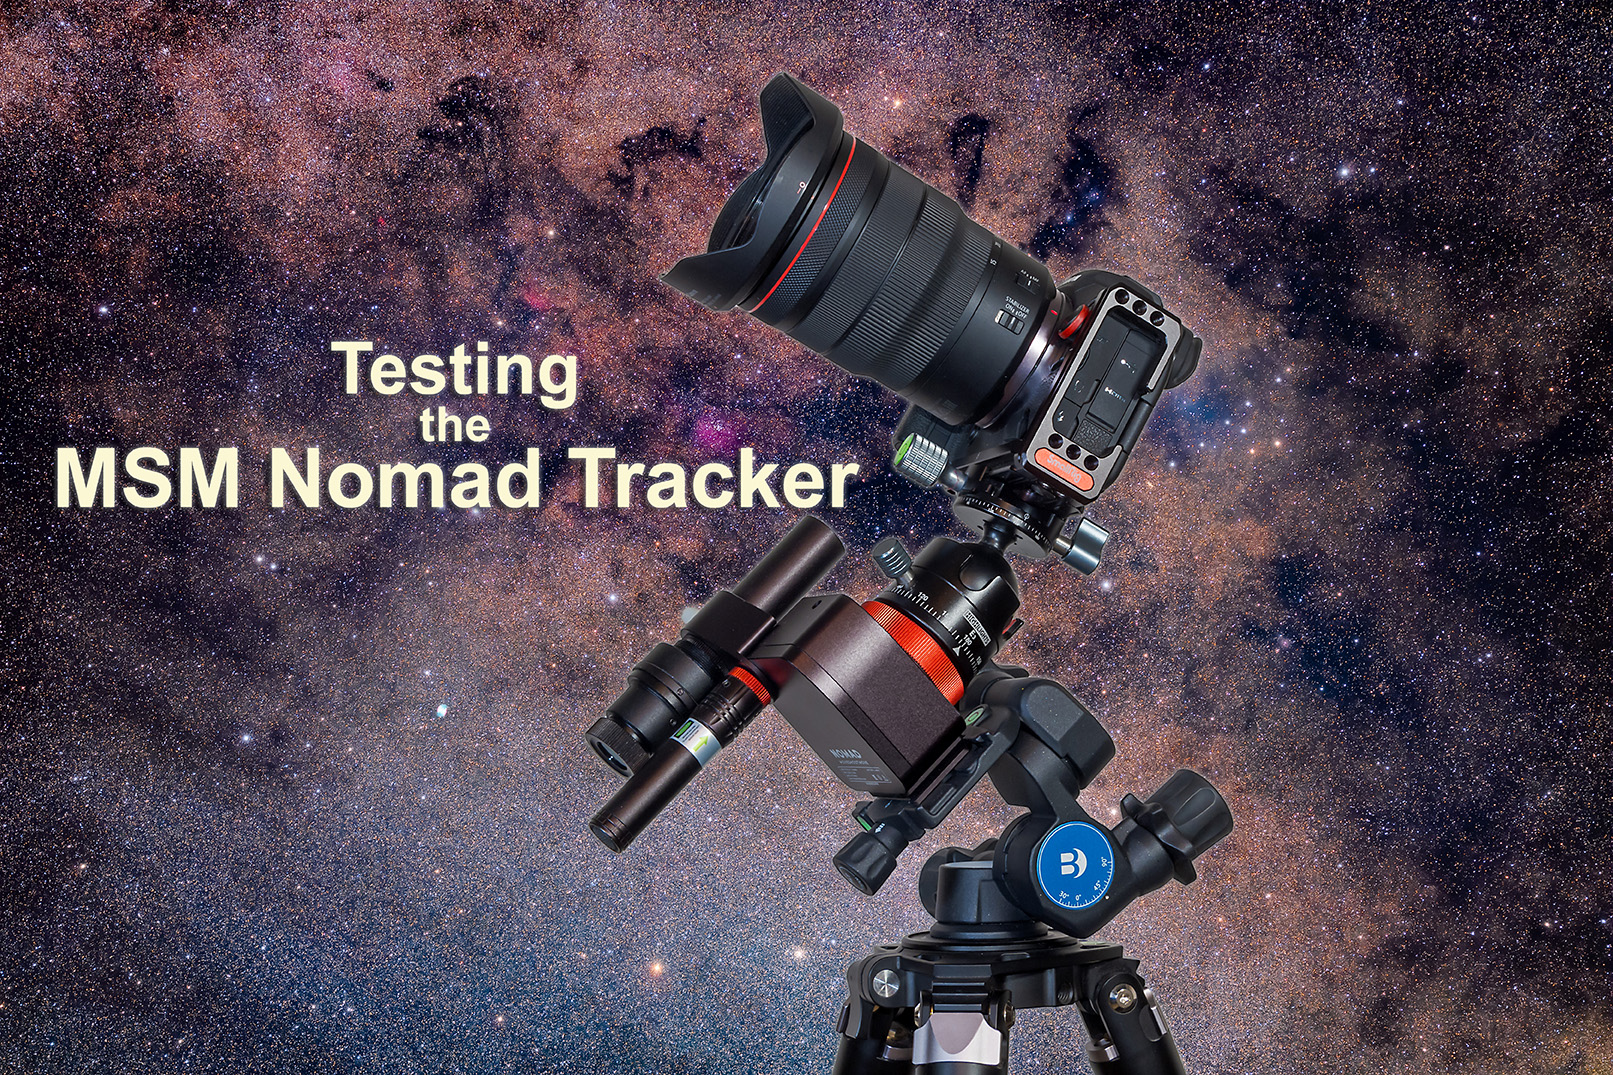
The new star tracker from Move Shoot Move improves upon their original model, eliminating its flaws to provide a reliable and compact tracker.
A few years ago the start-up company Move Shoot Move (MSM) introduced a low-cost (about $250), compact star tracker they called the Rotator. Like all other star trackers, the Rotator allowed a camera to follow the turning sky for untrailed, pinpoint stars in long exposures.
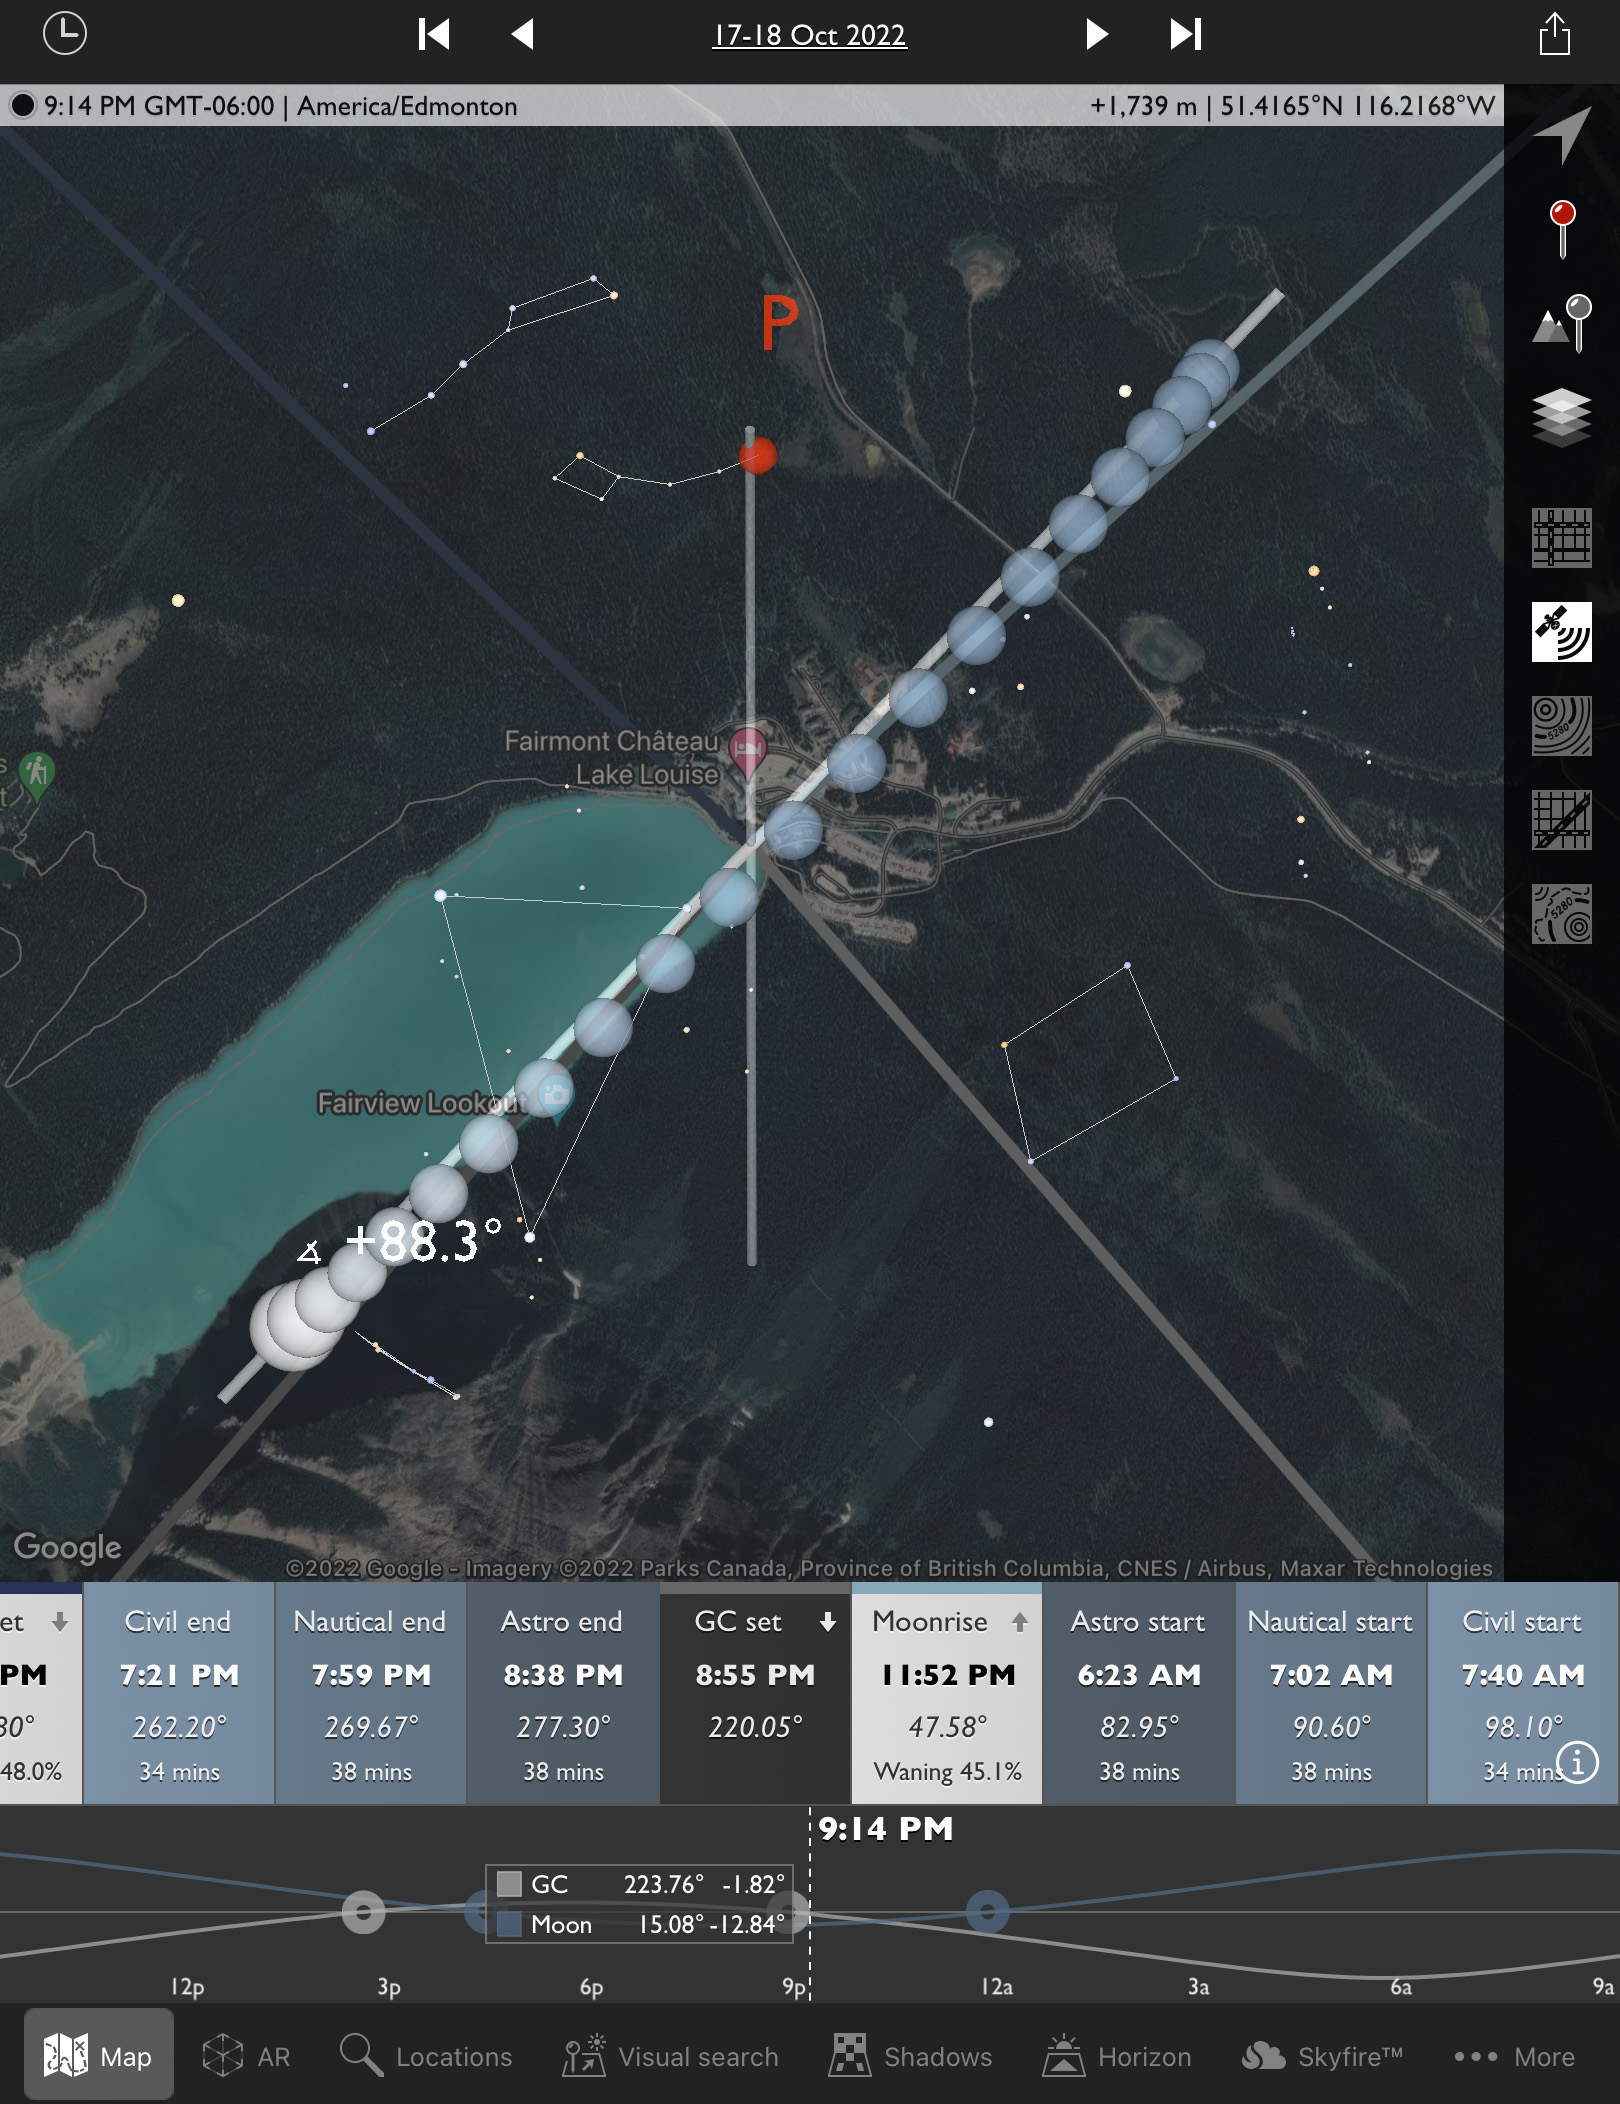
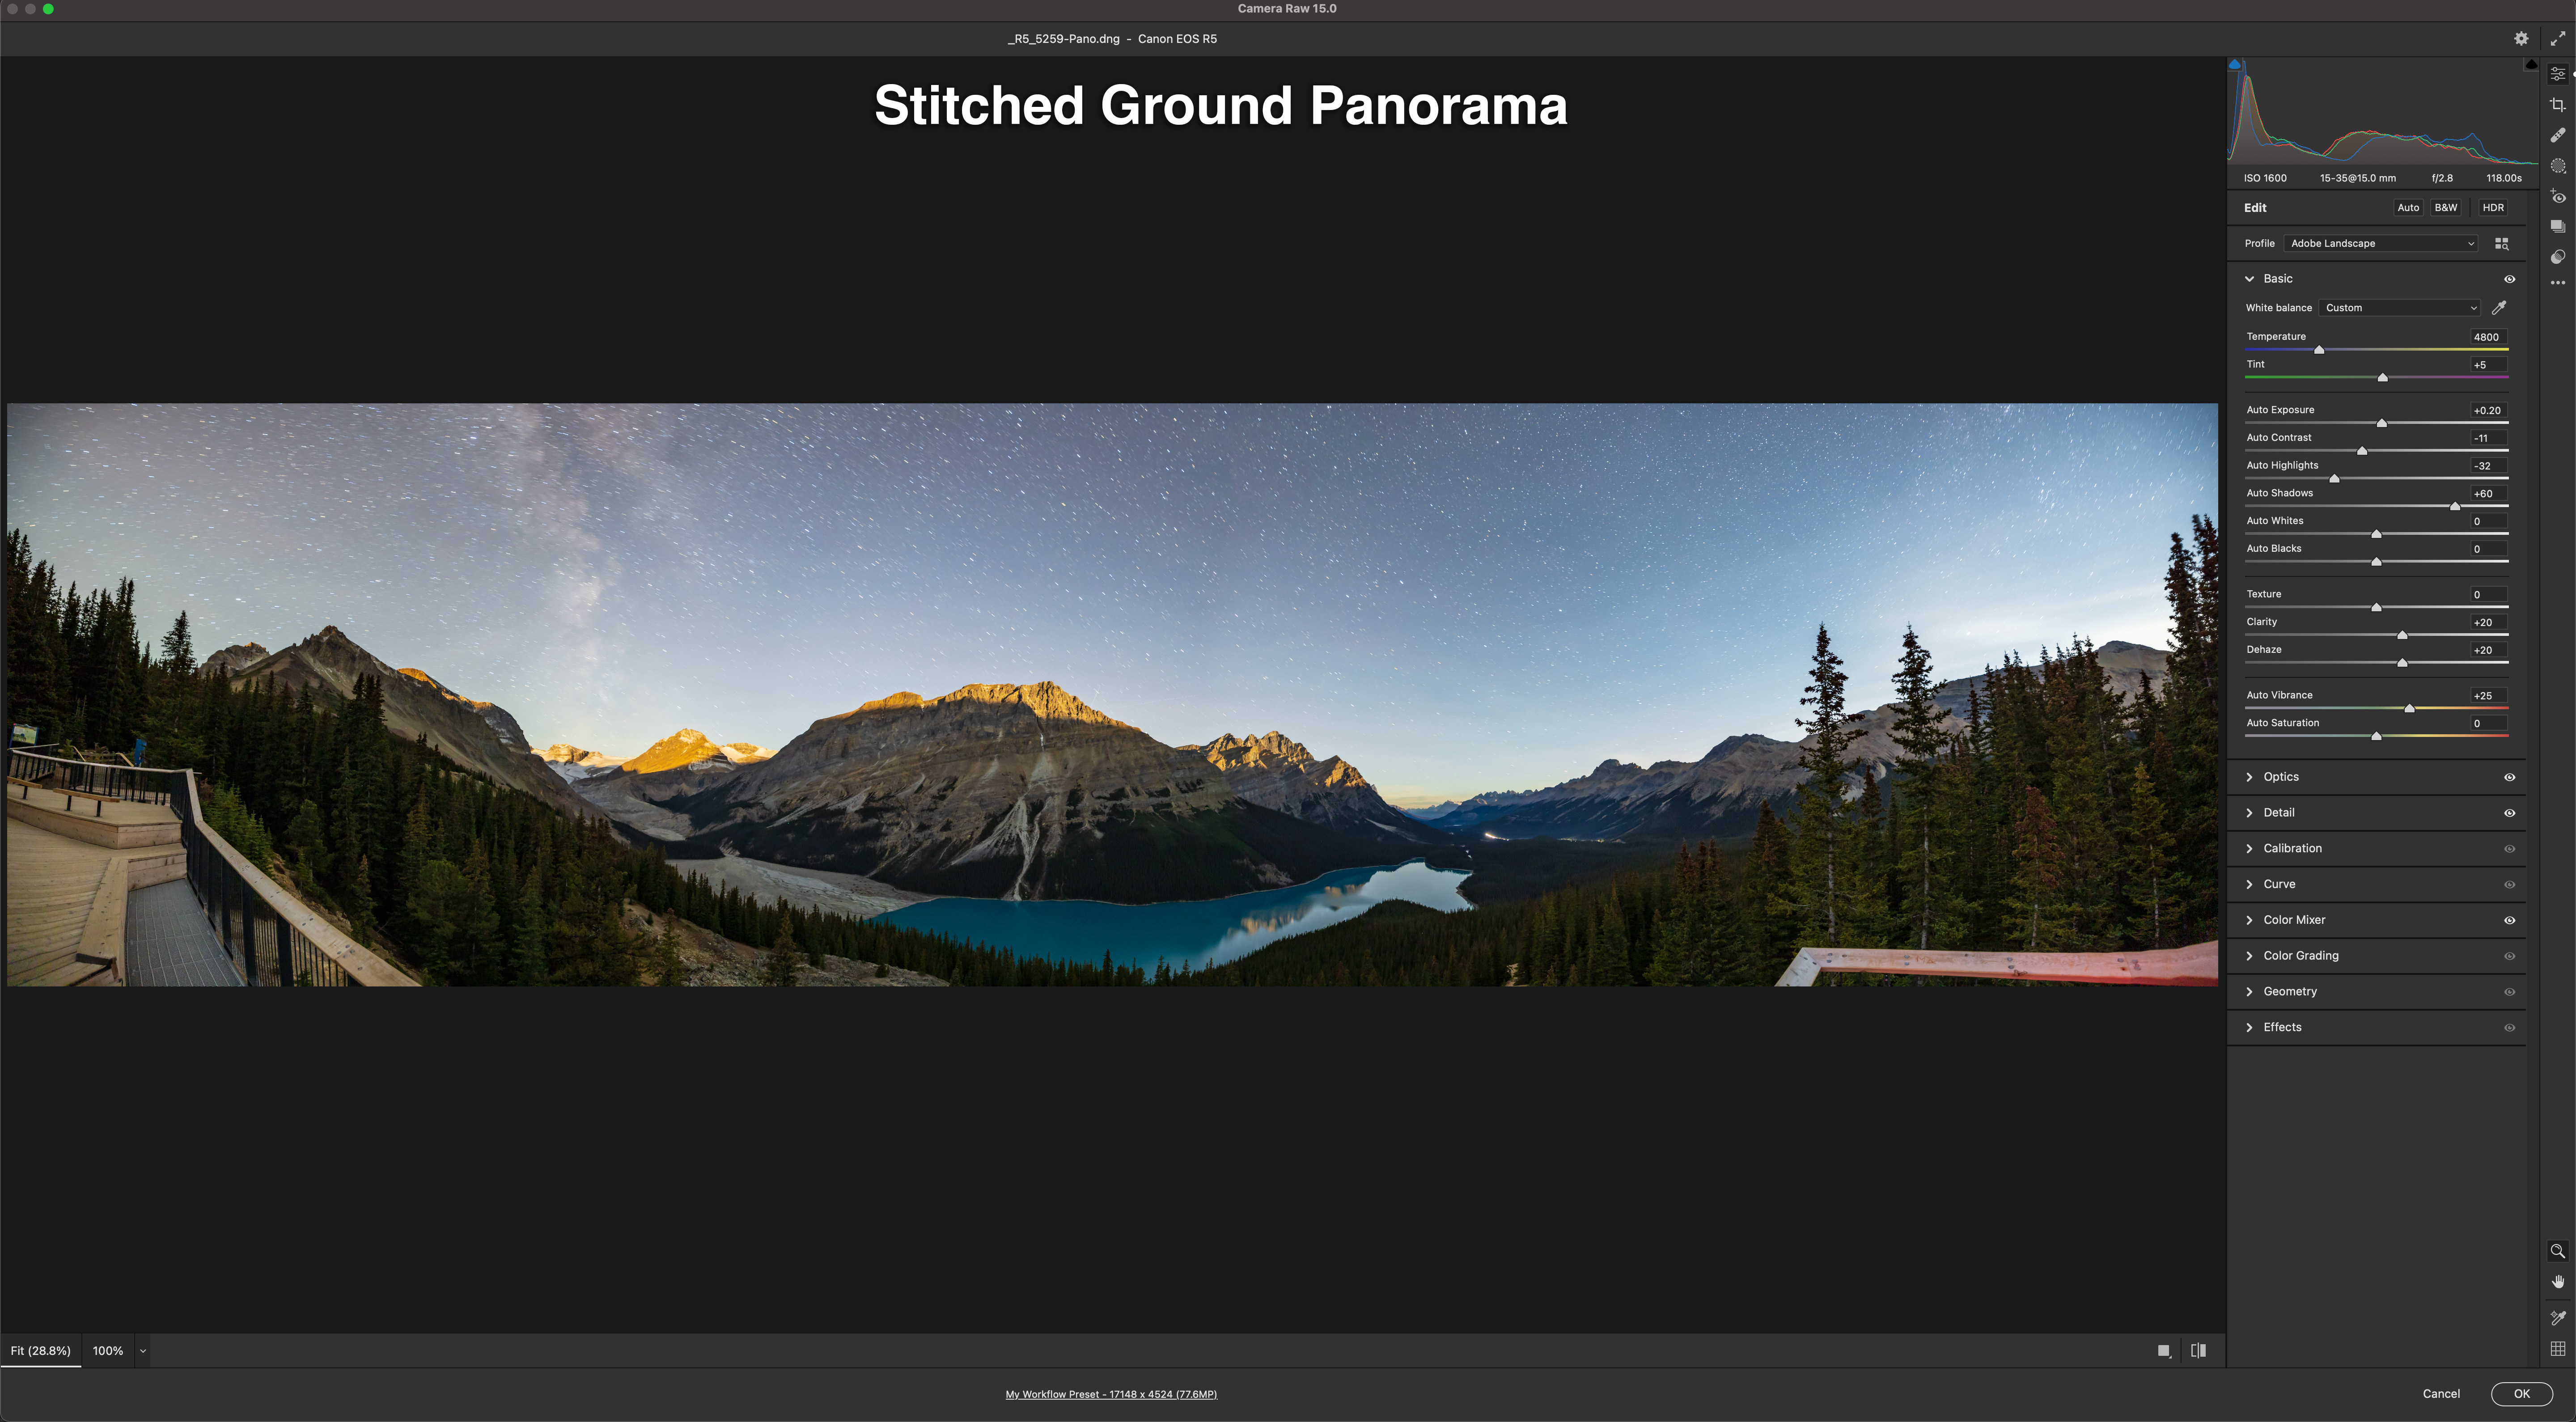
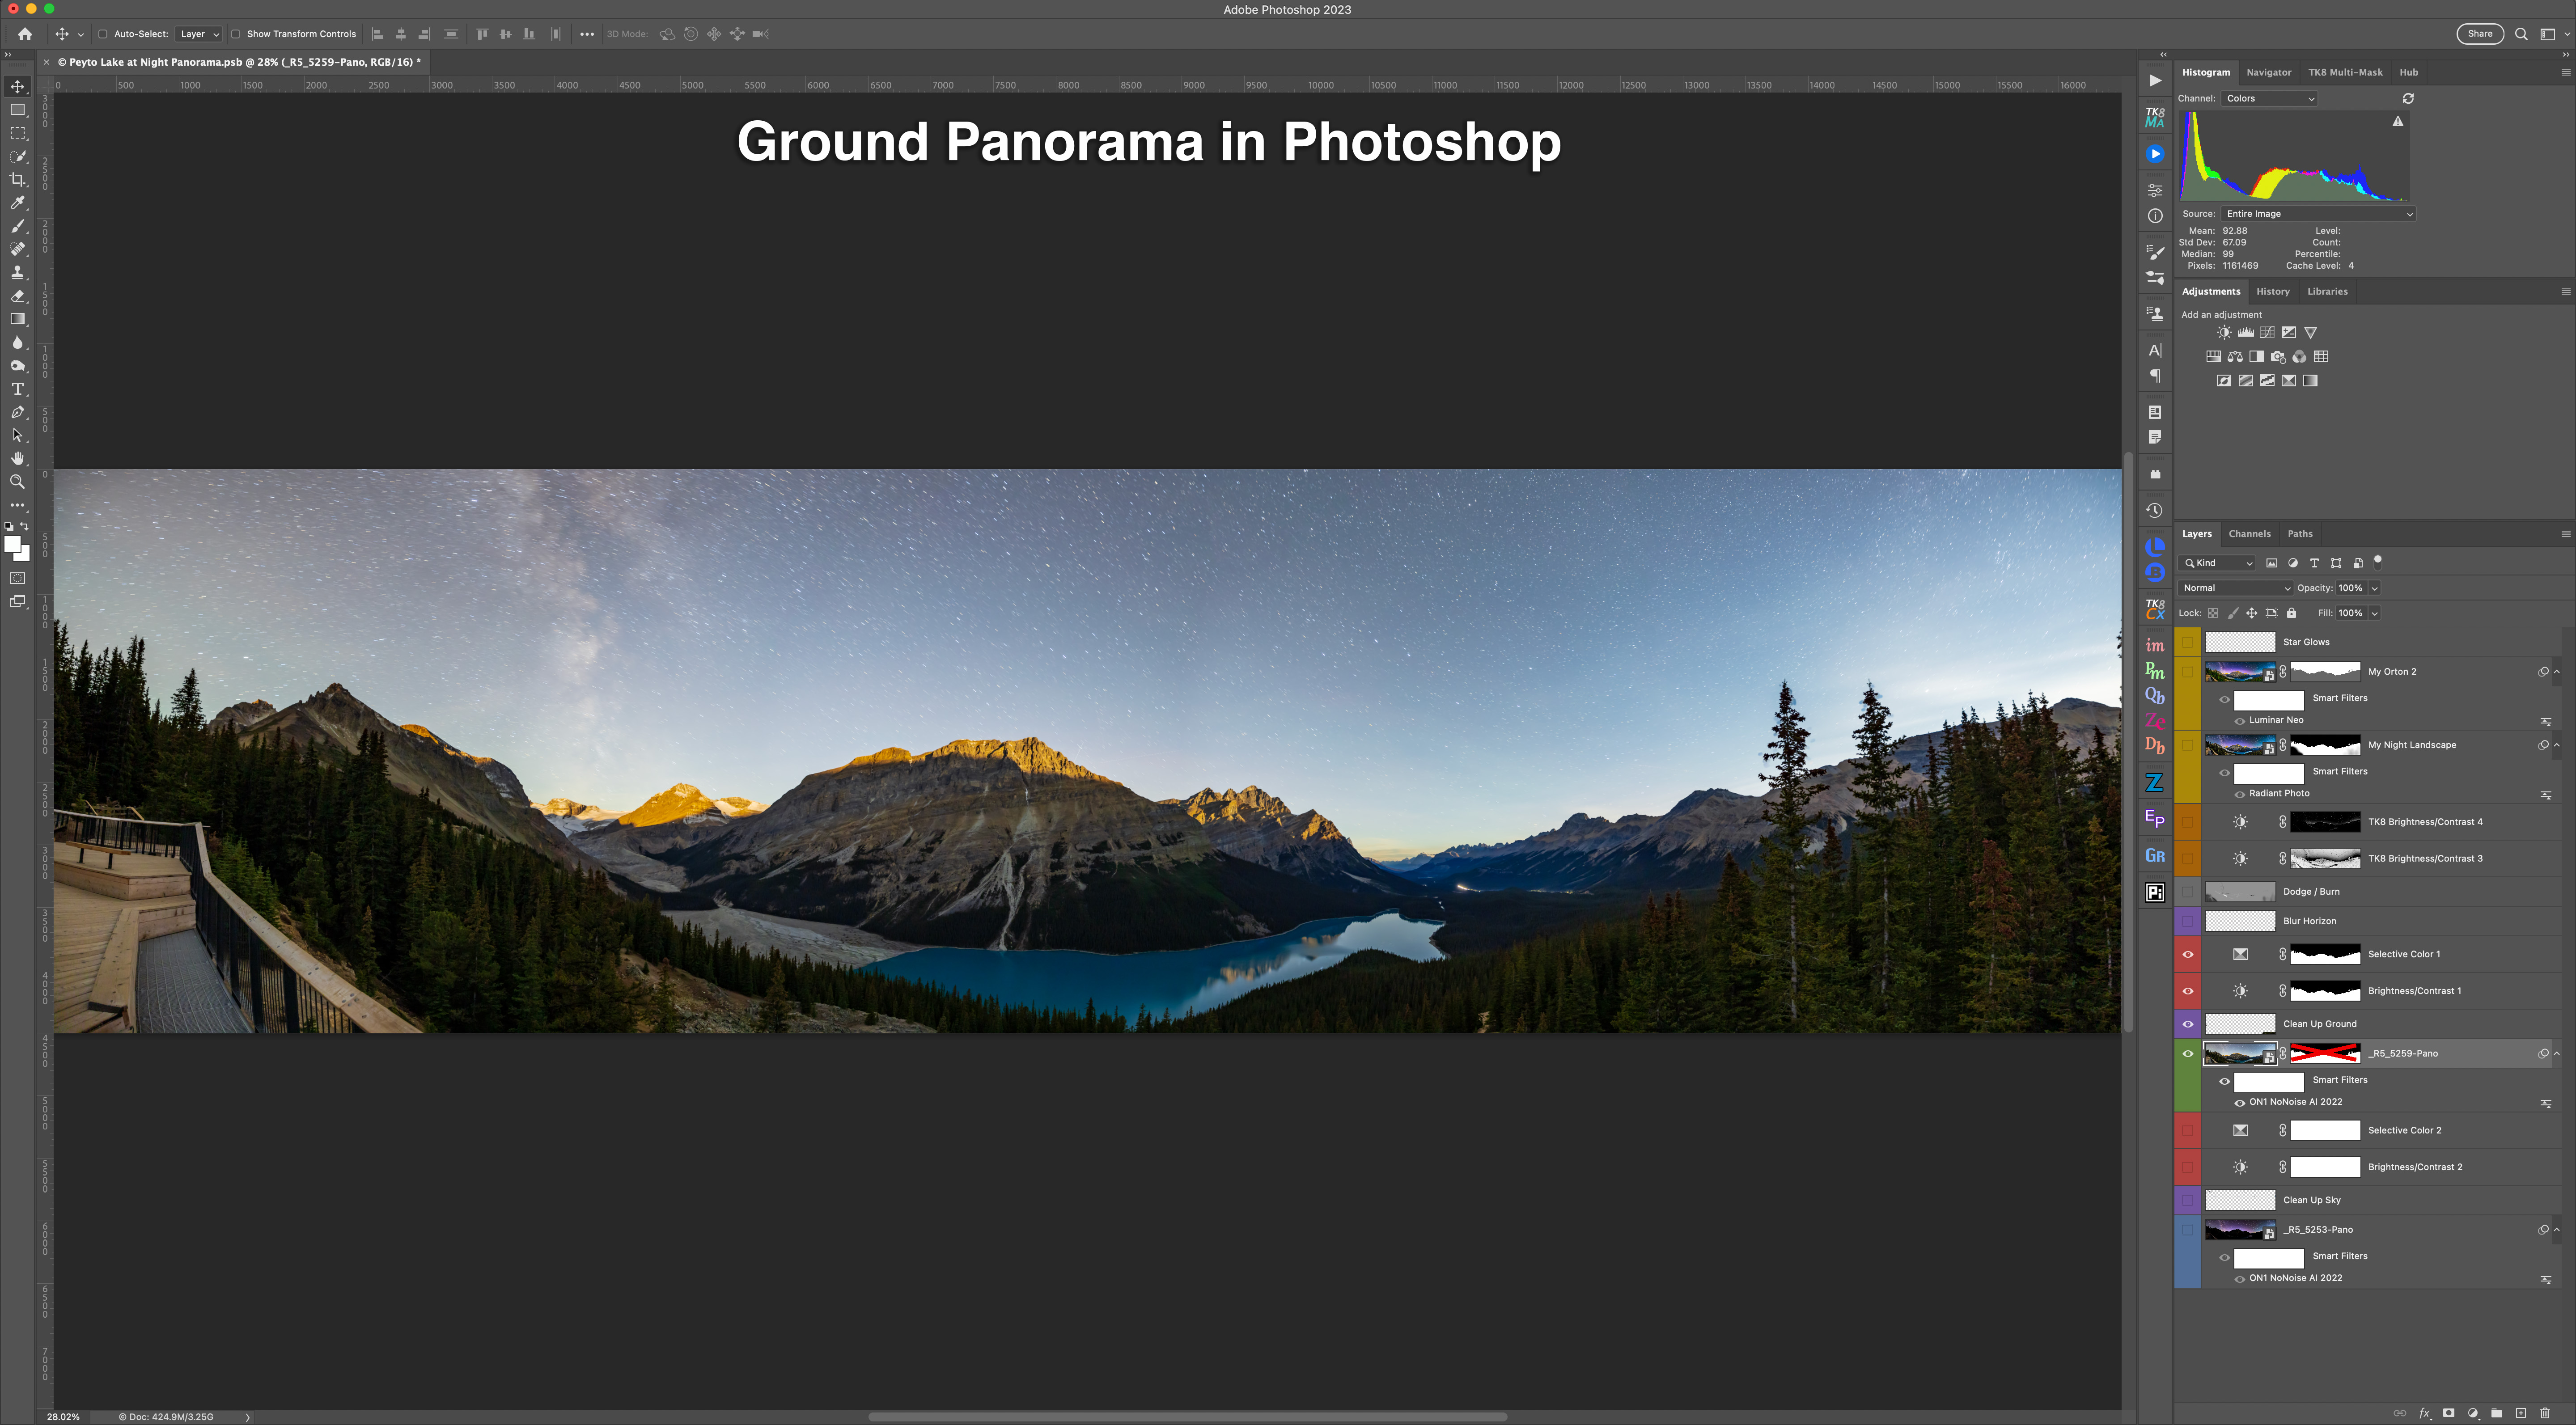
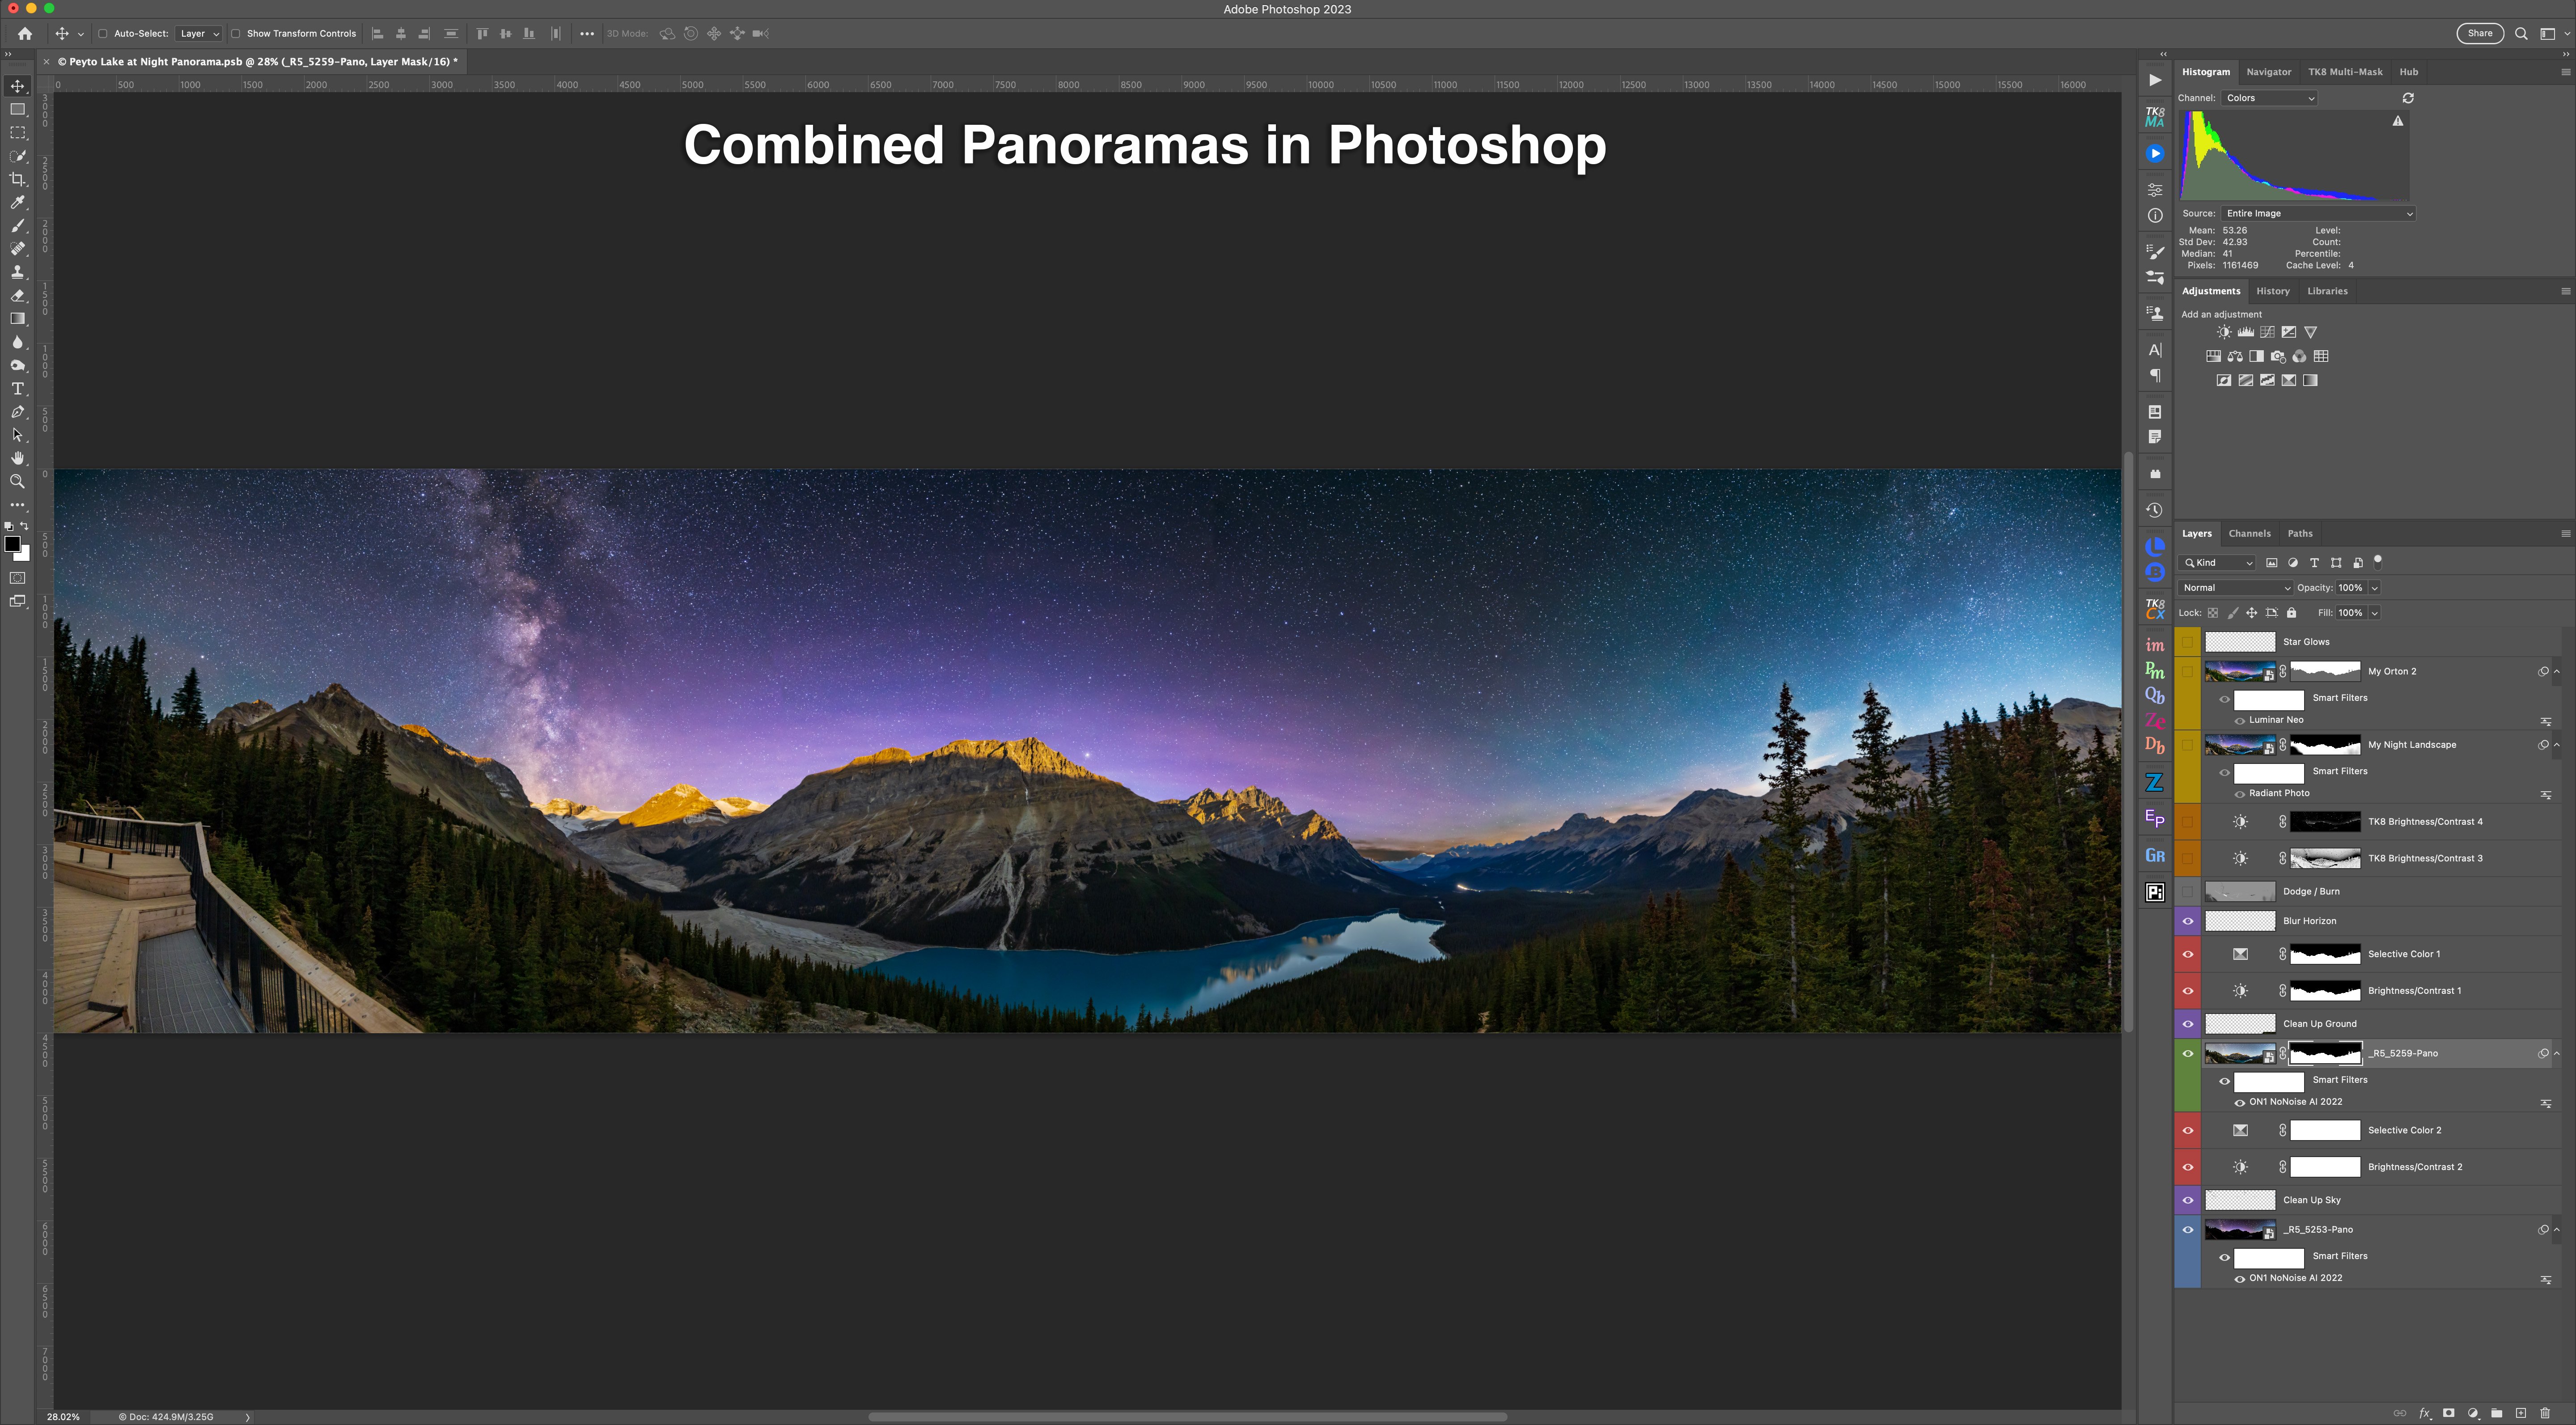
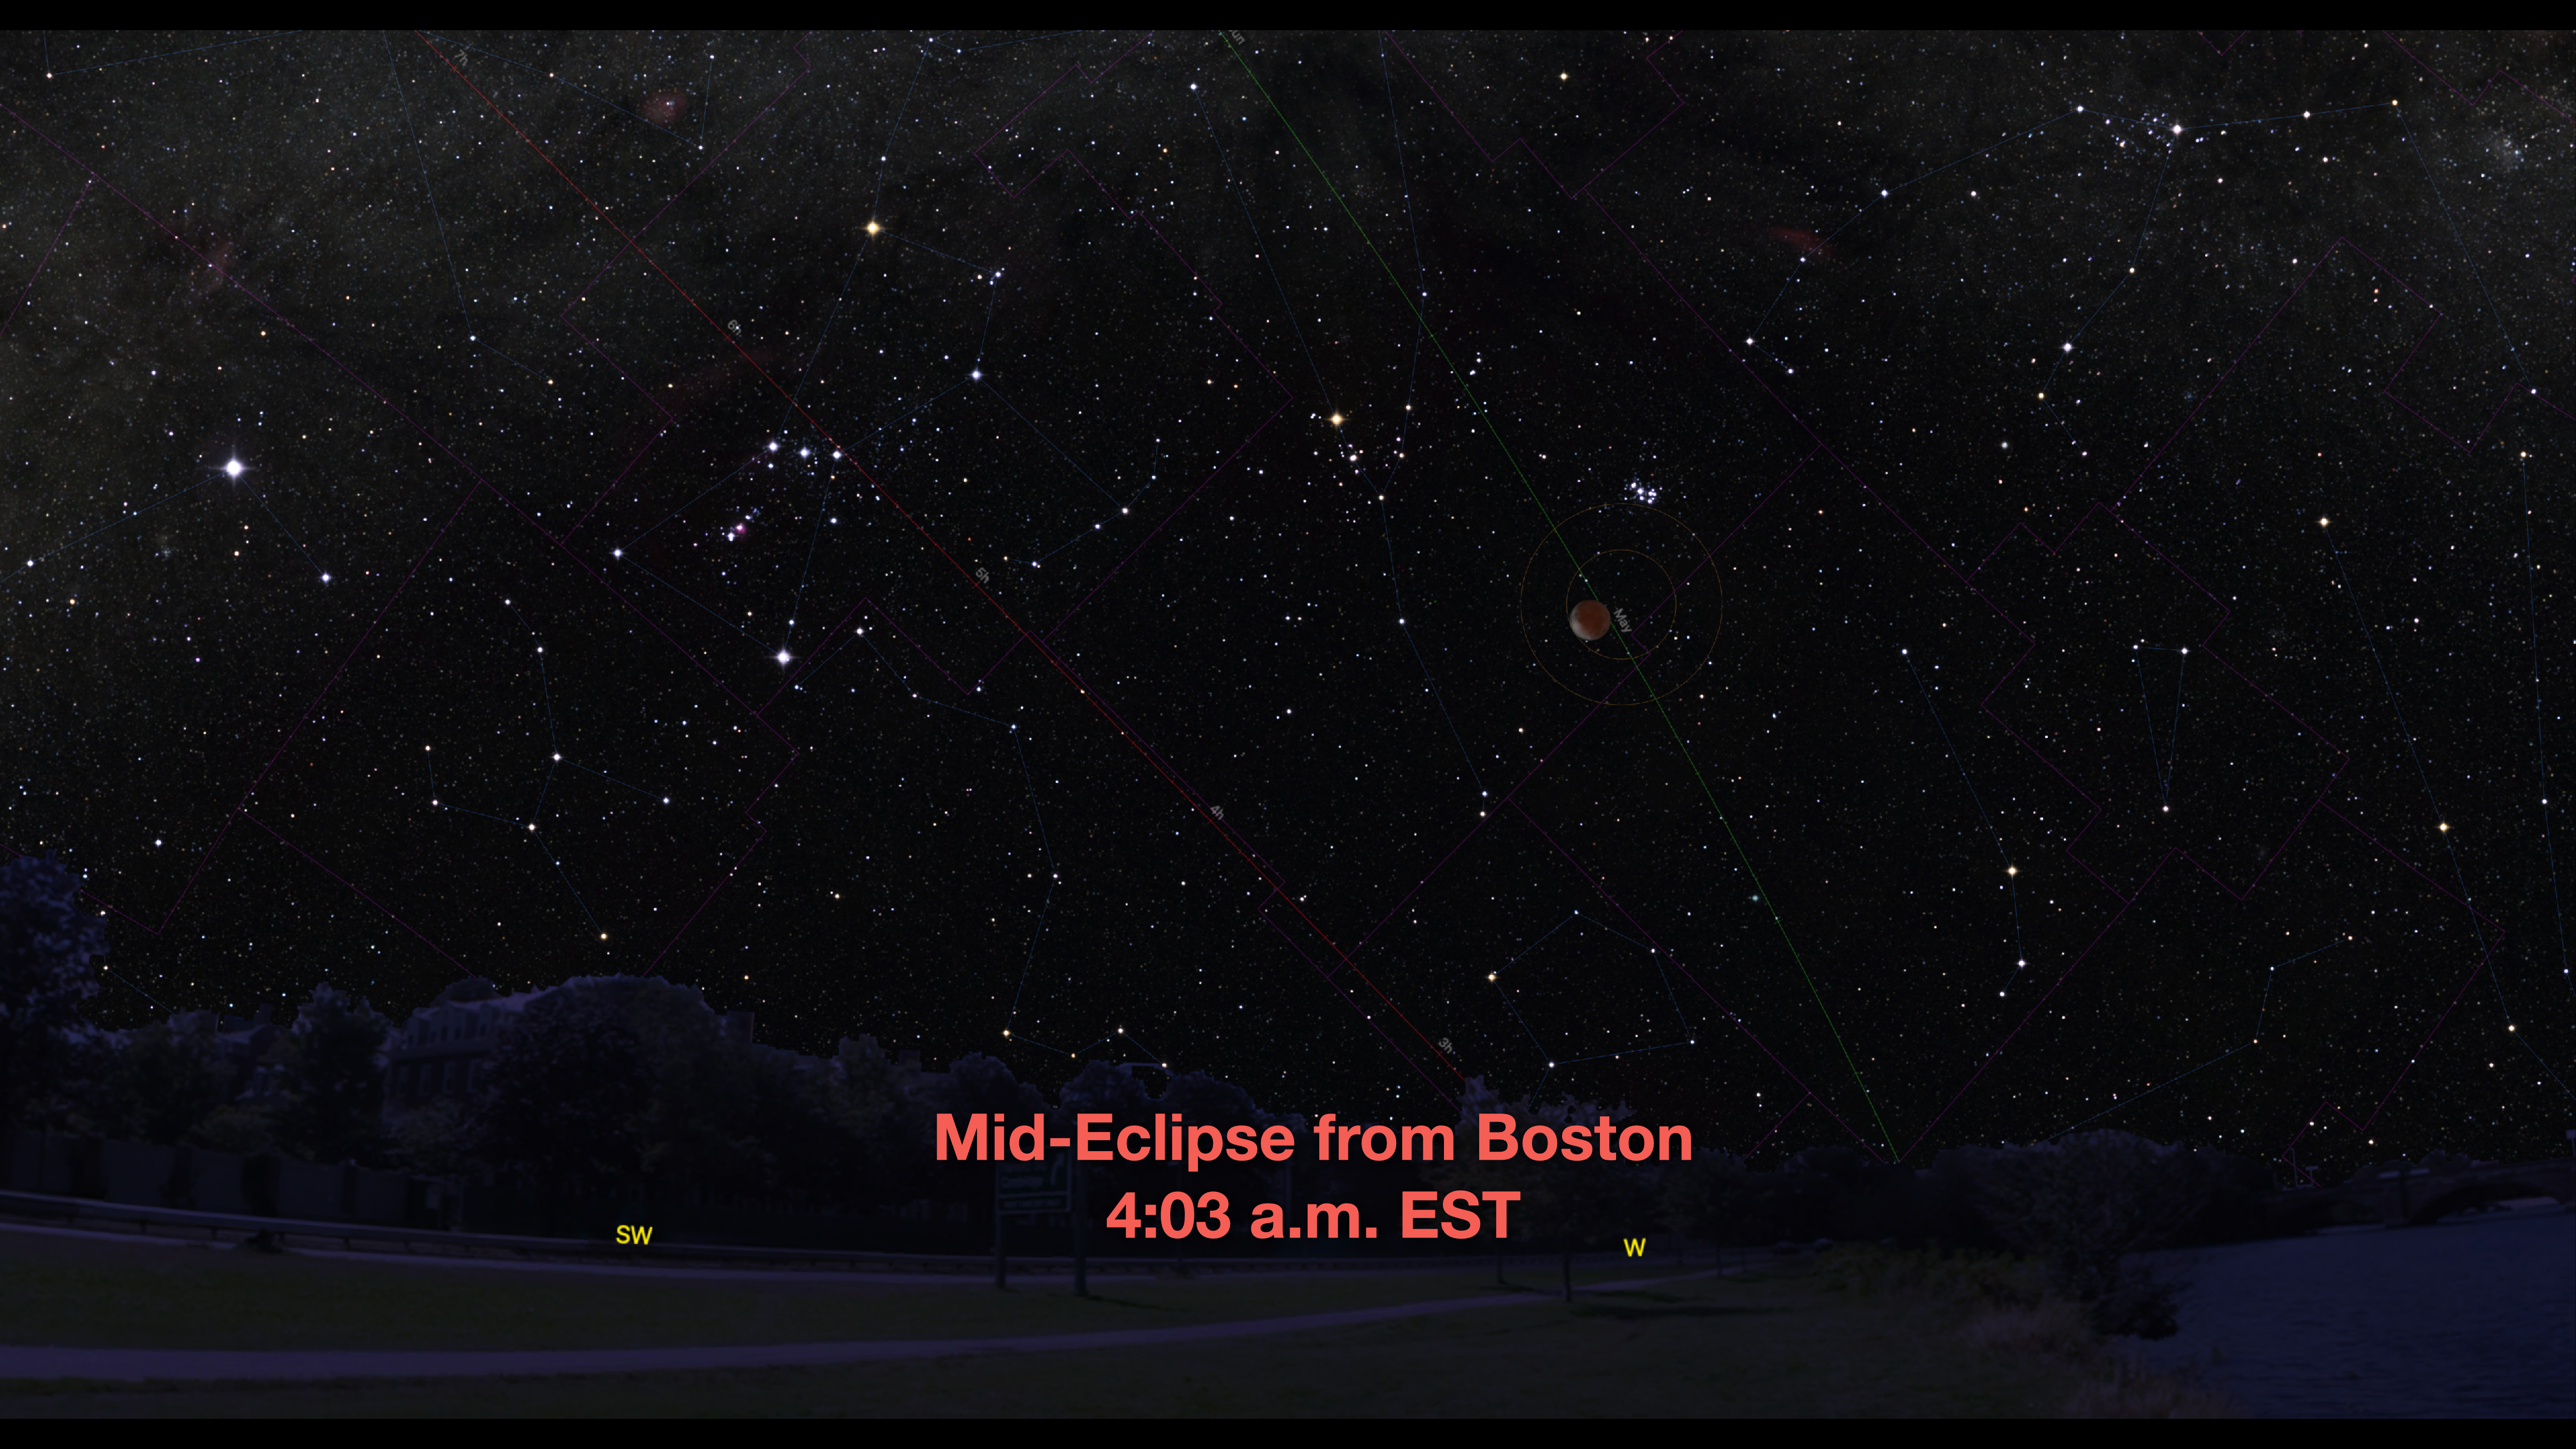
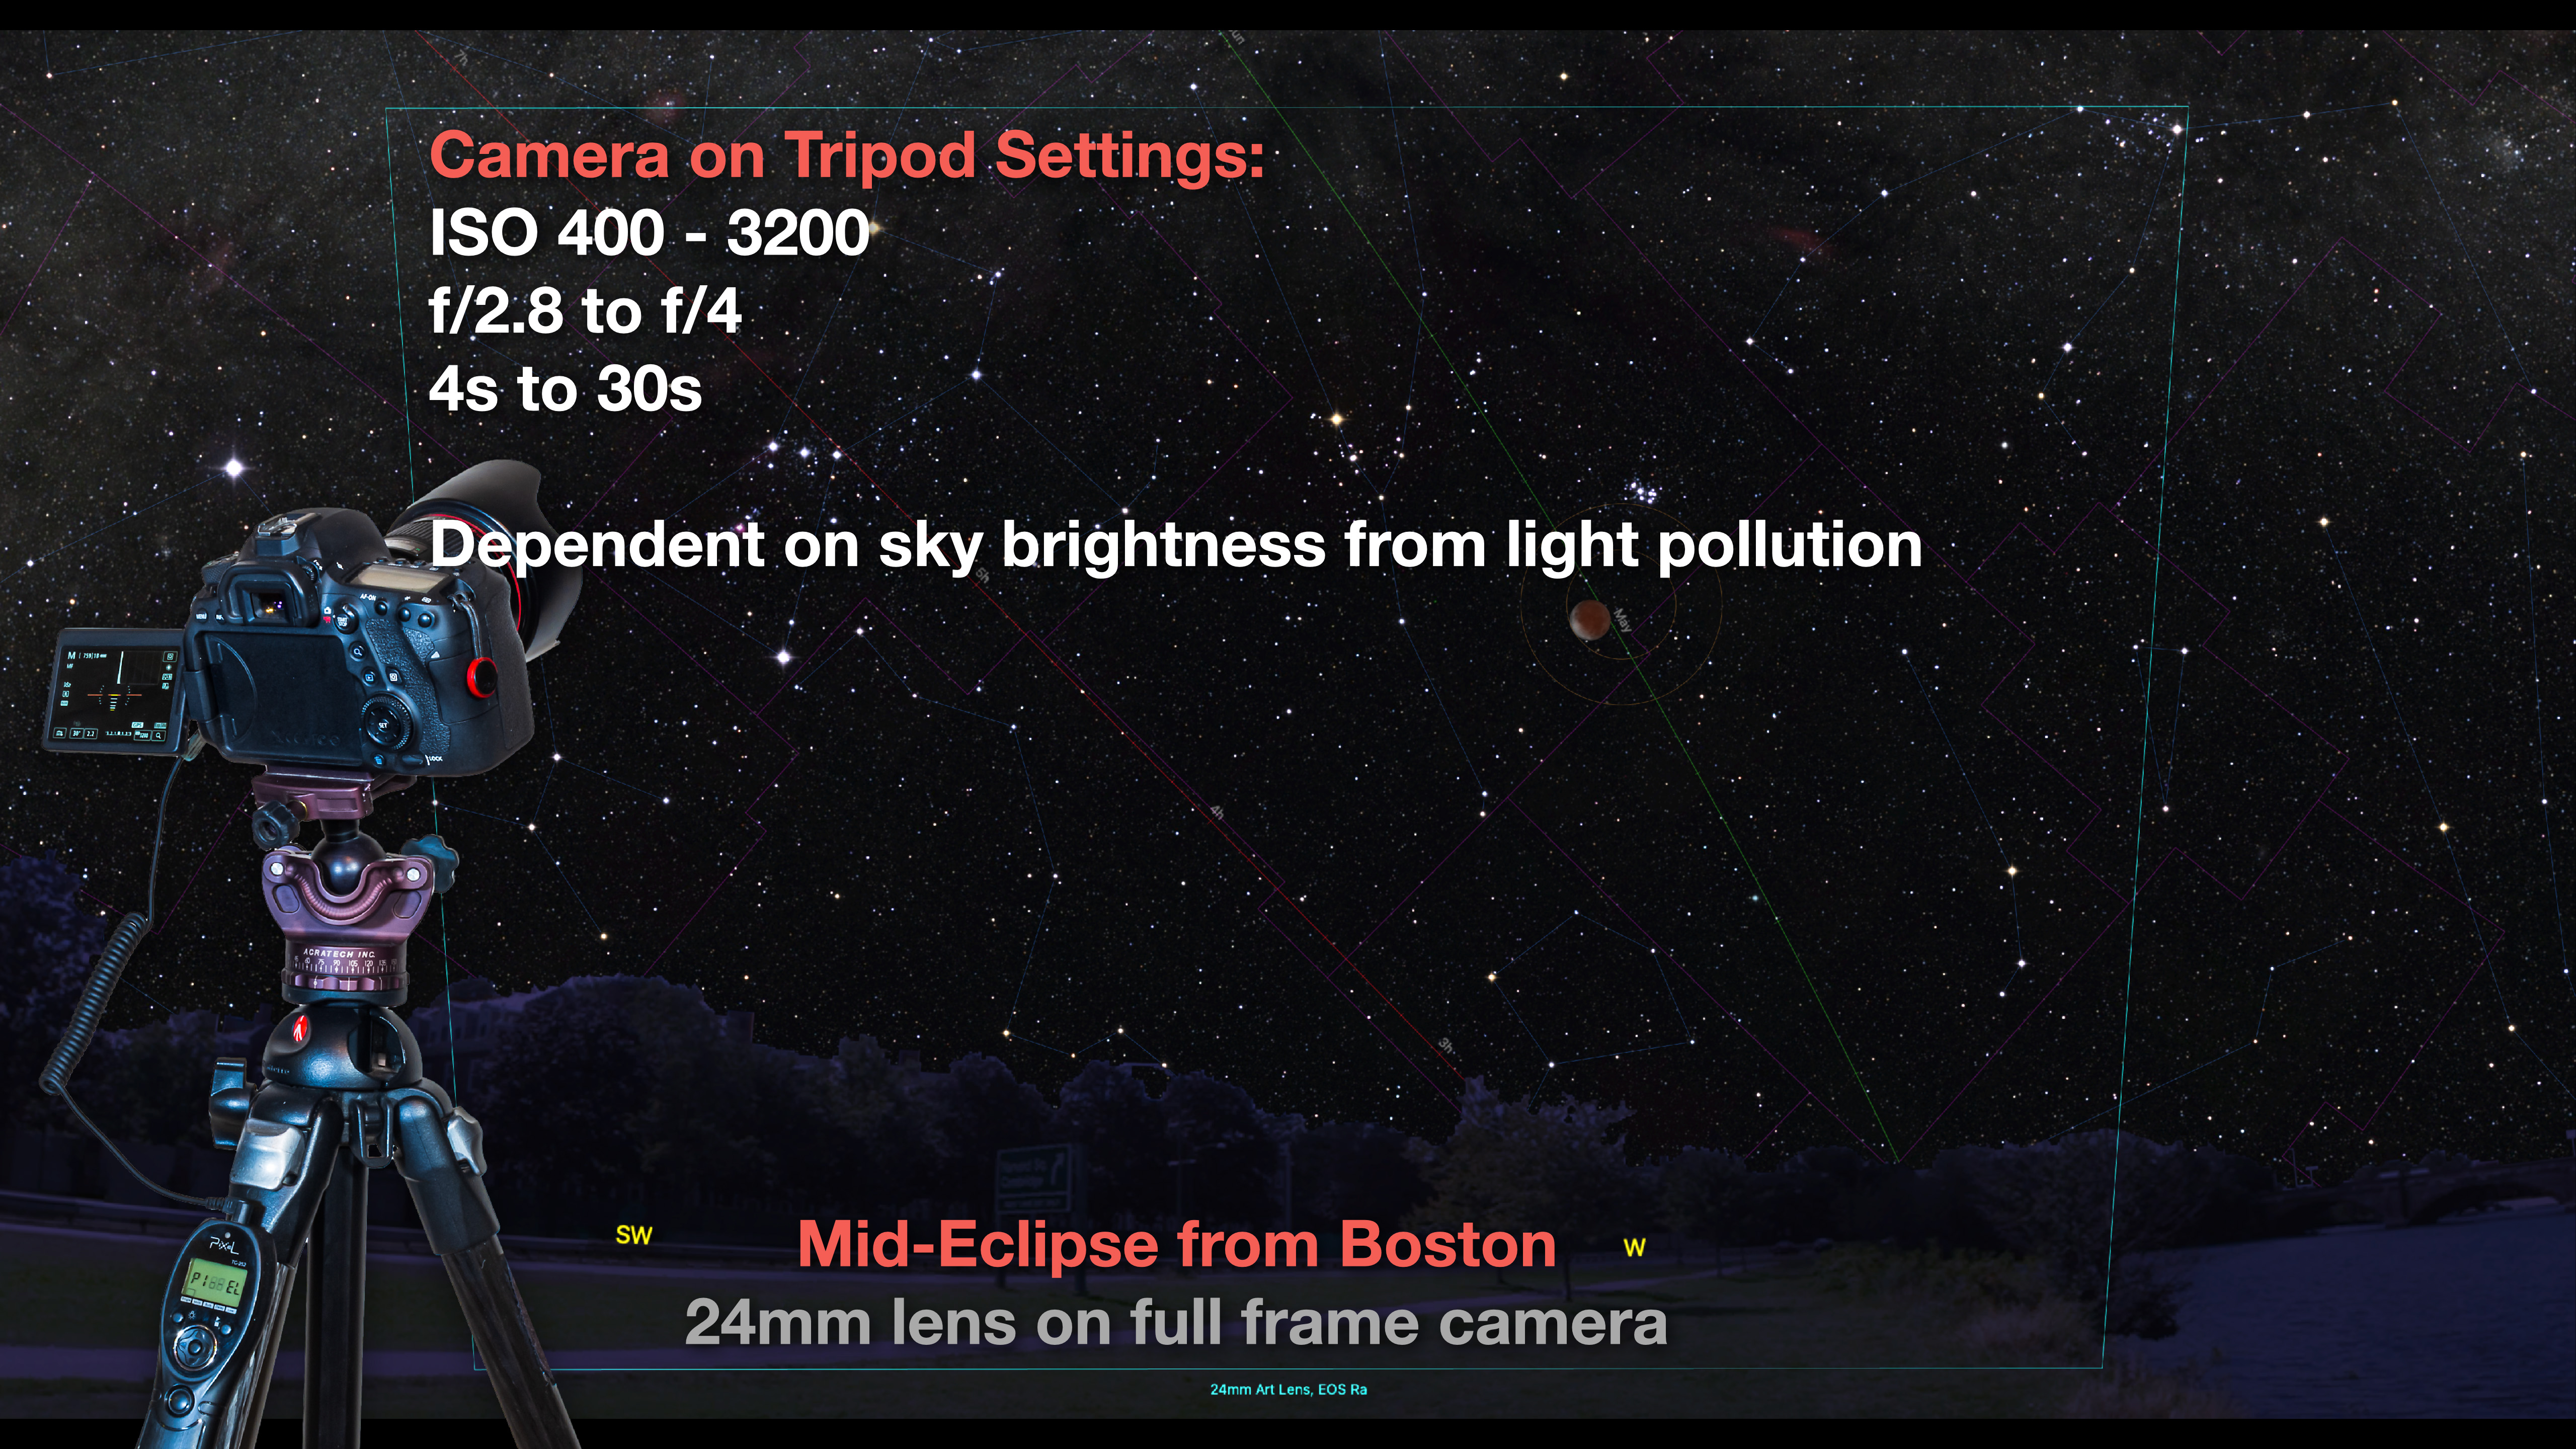
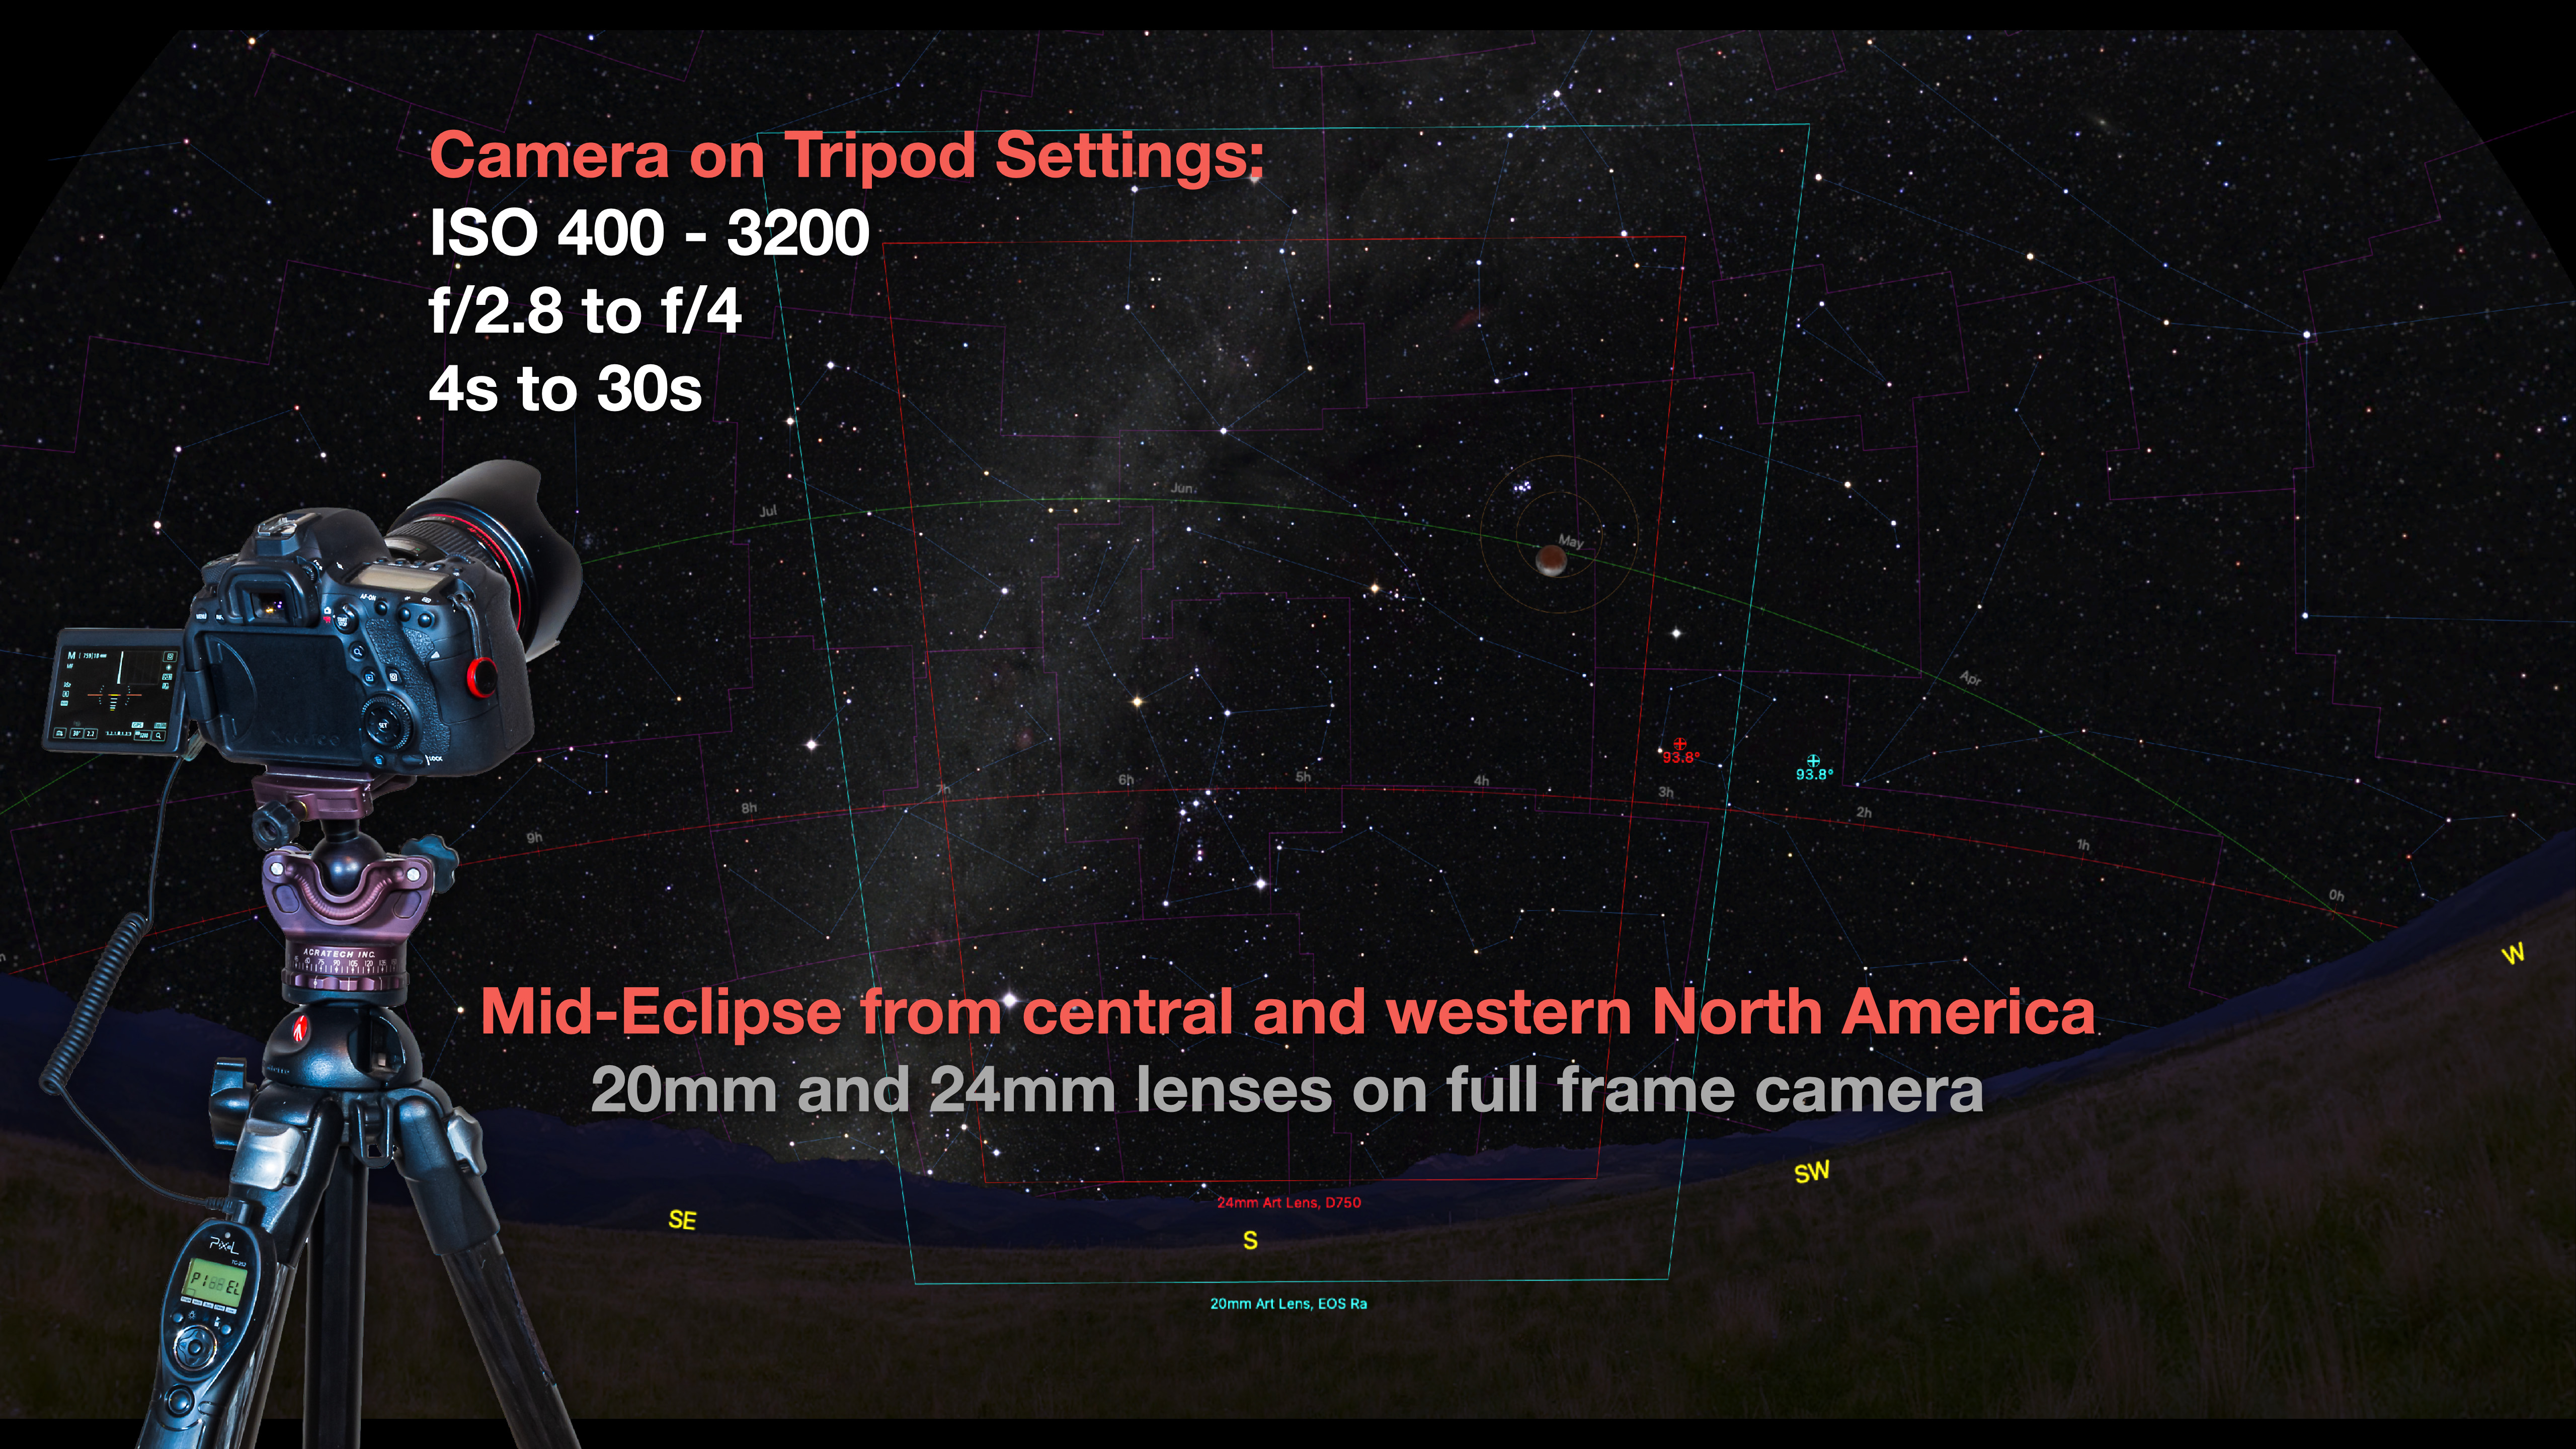
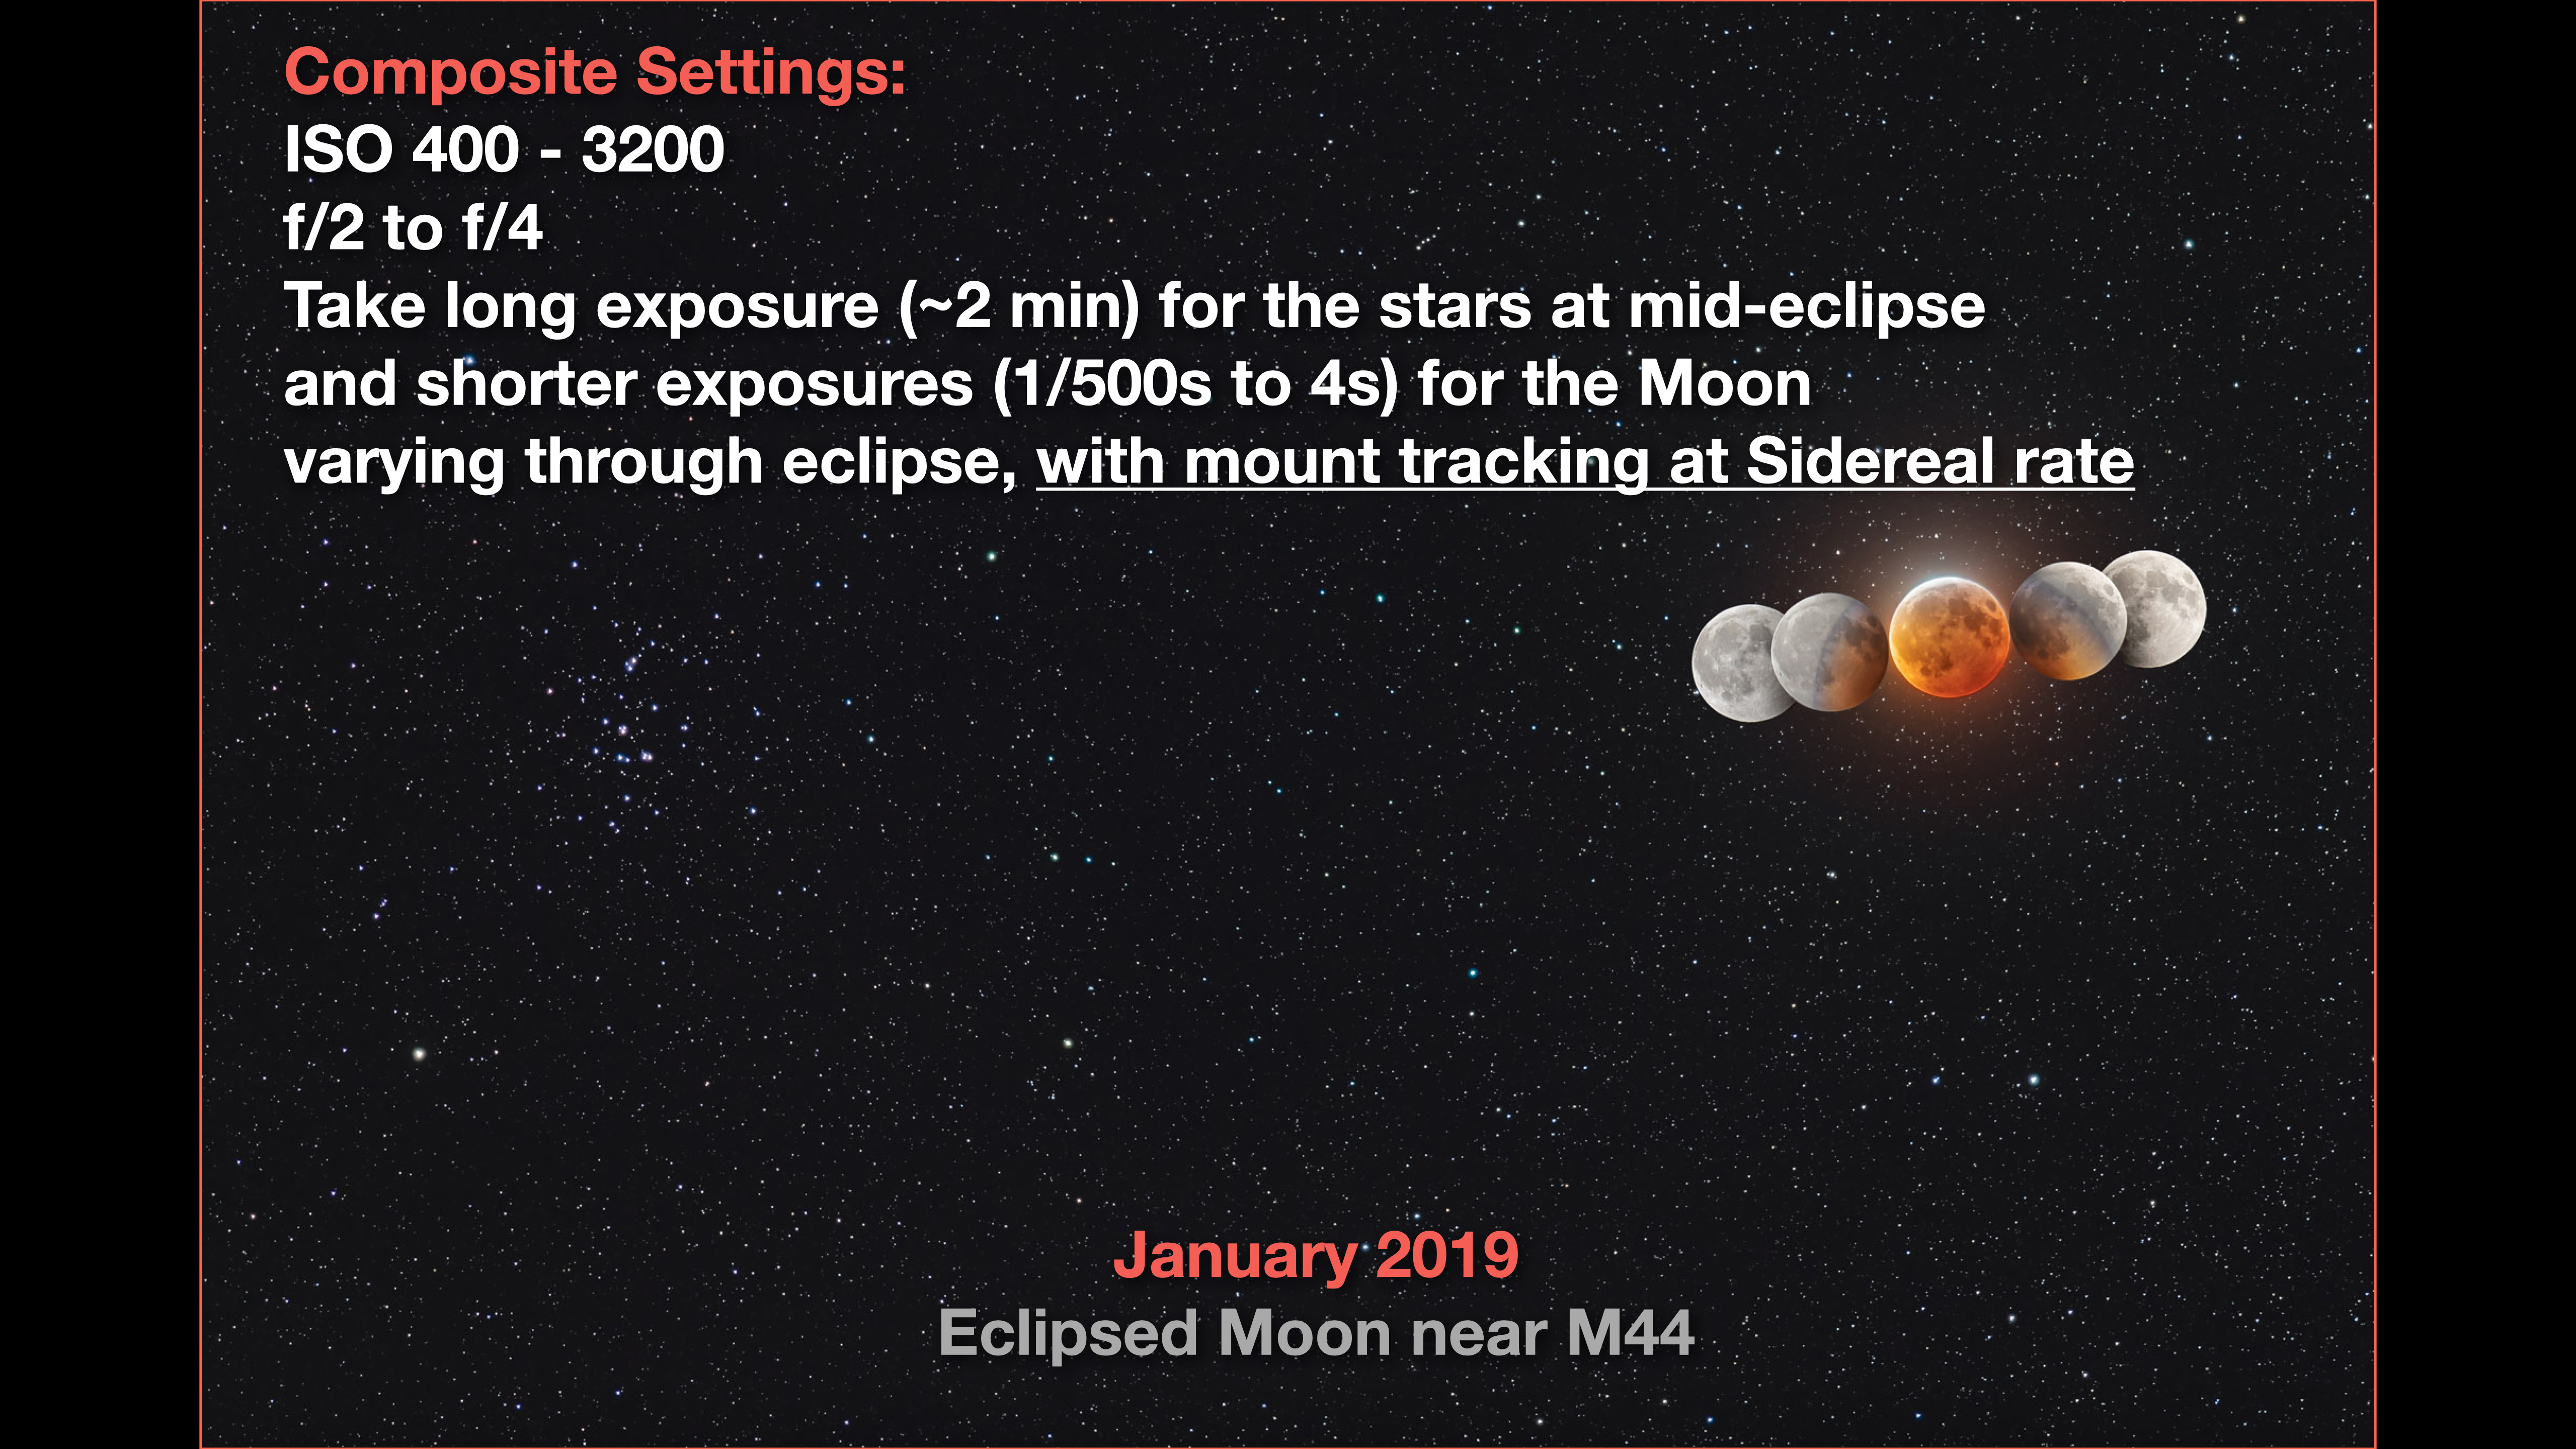
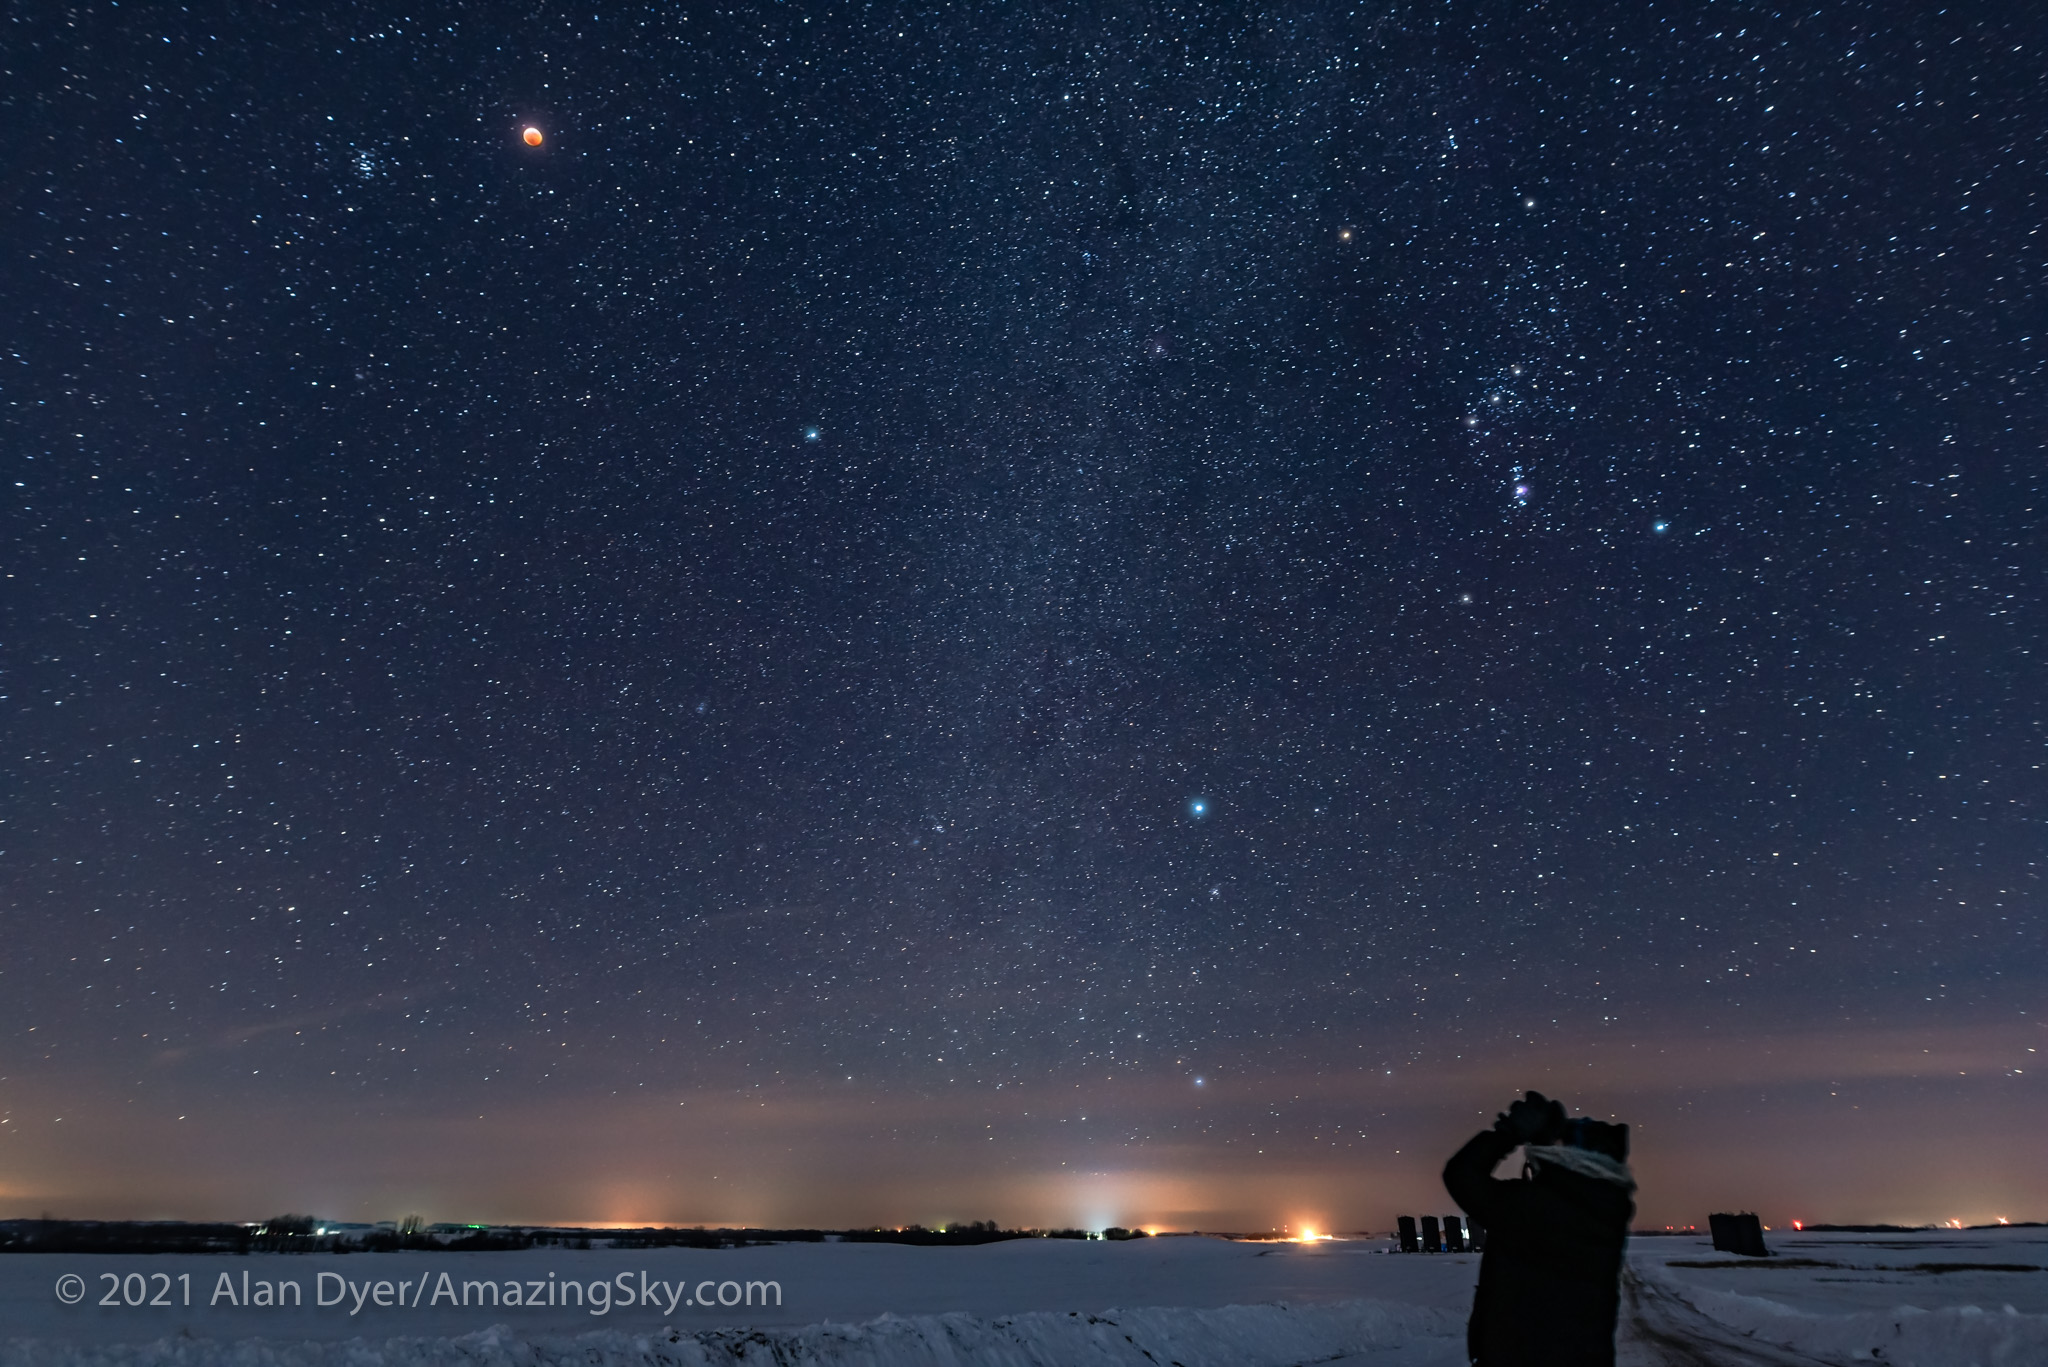
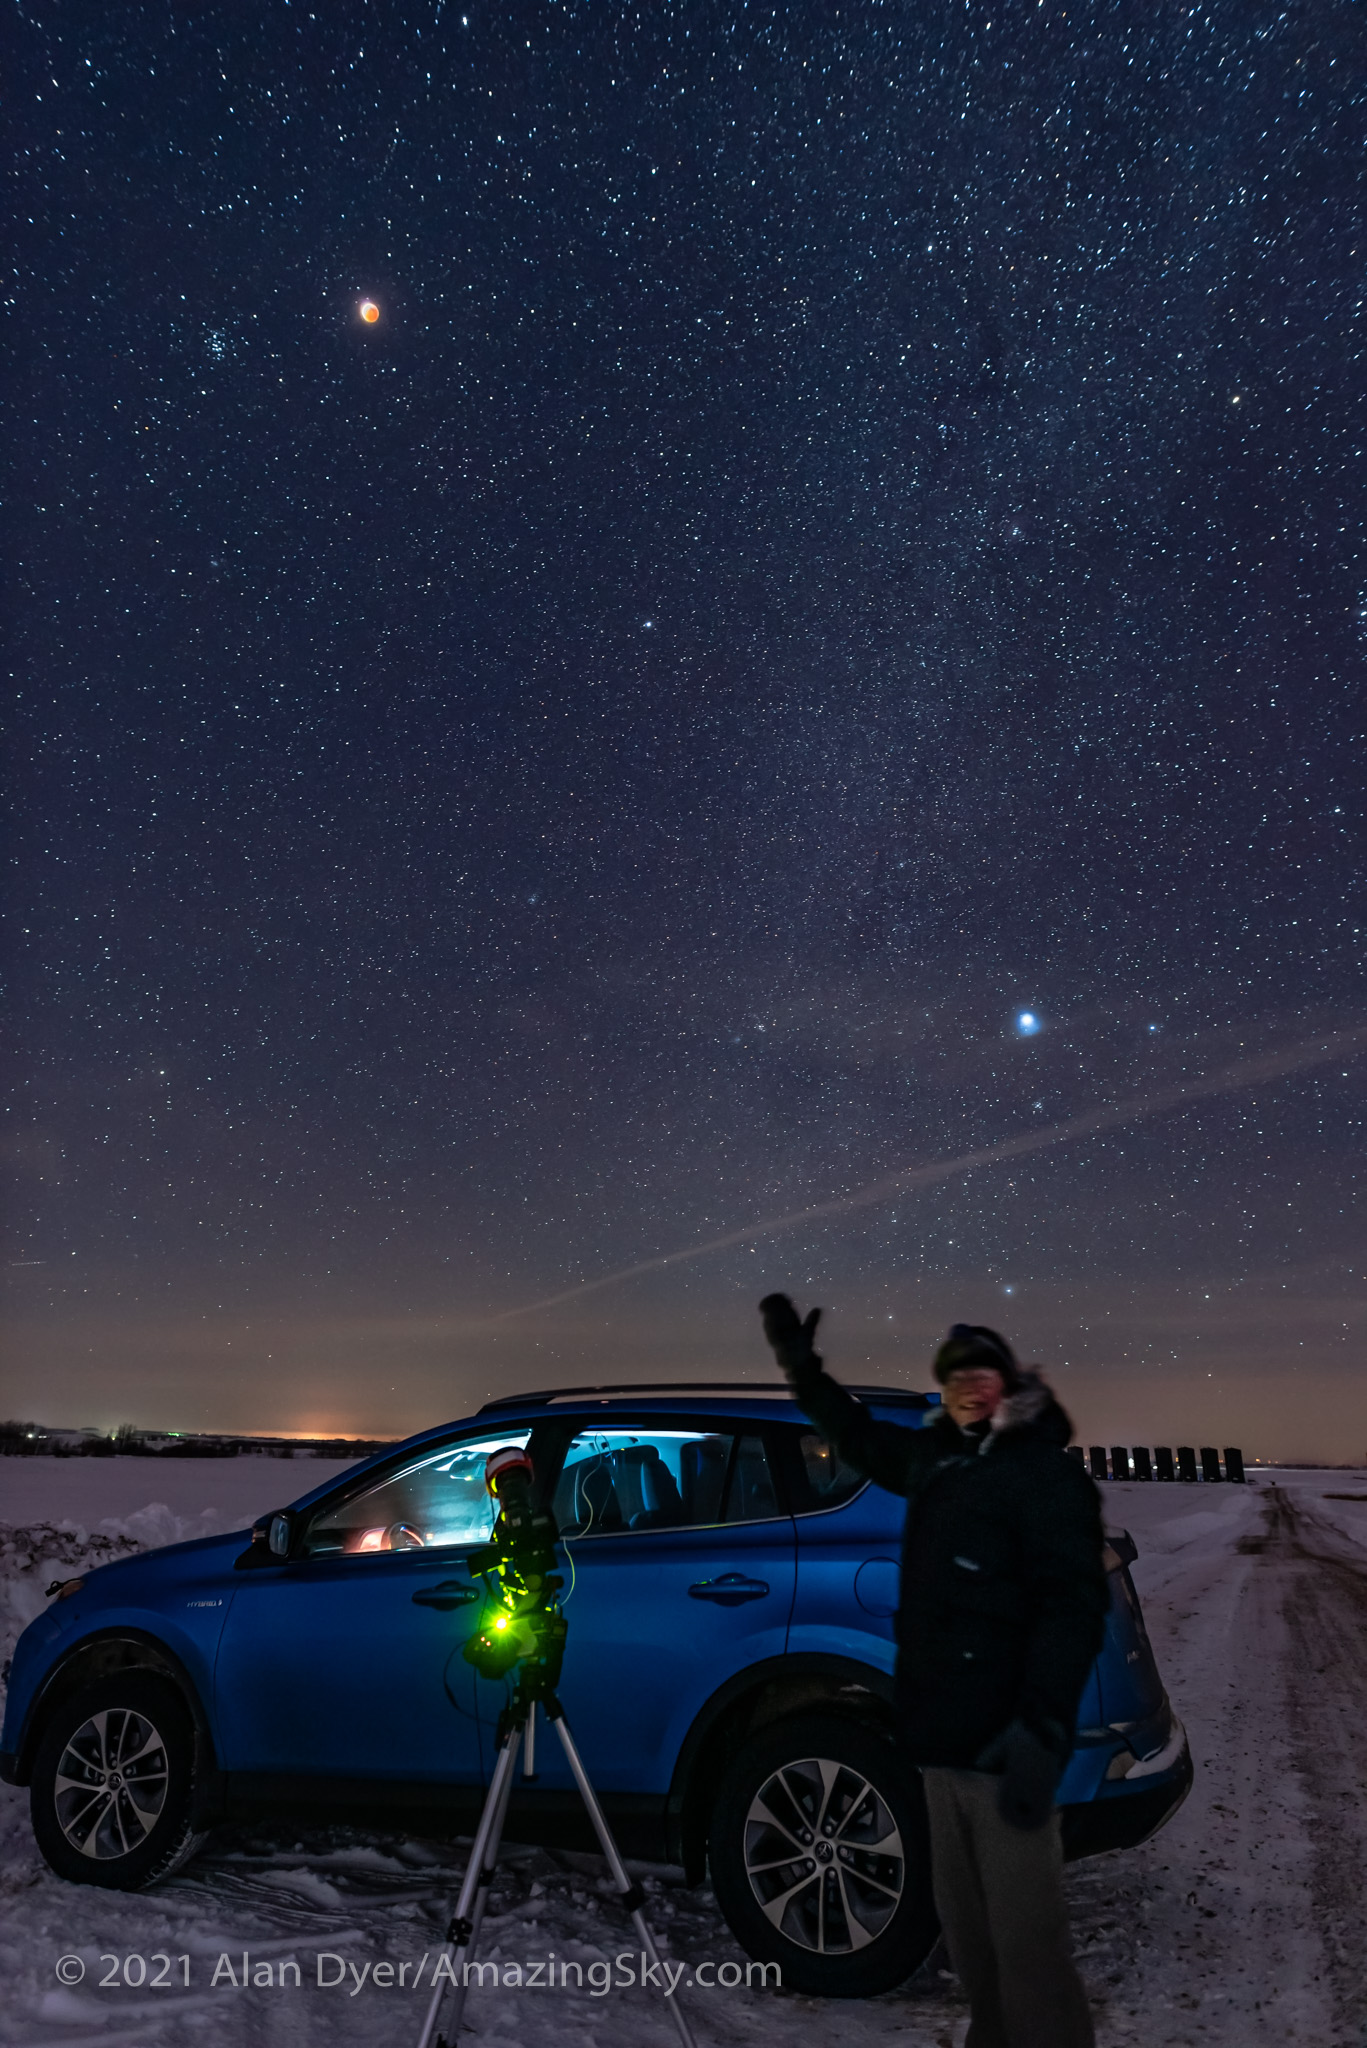
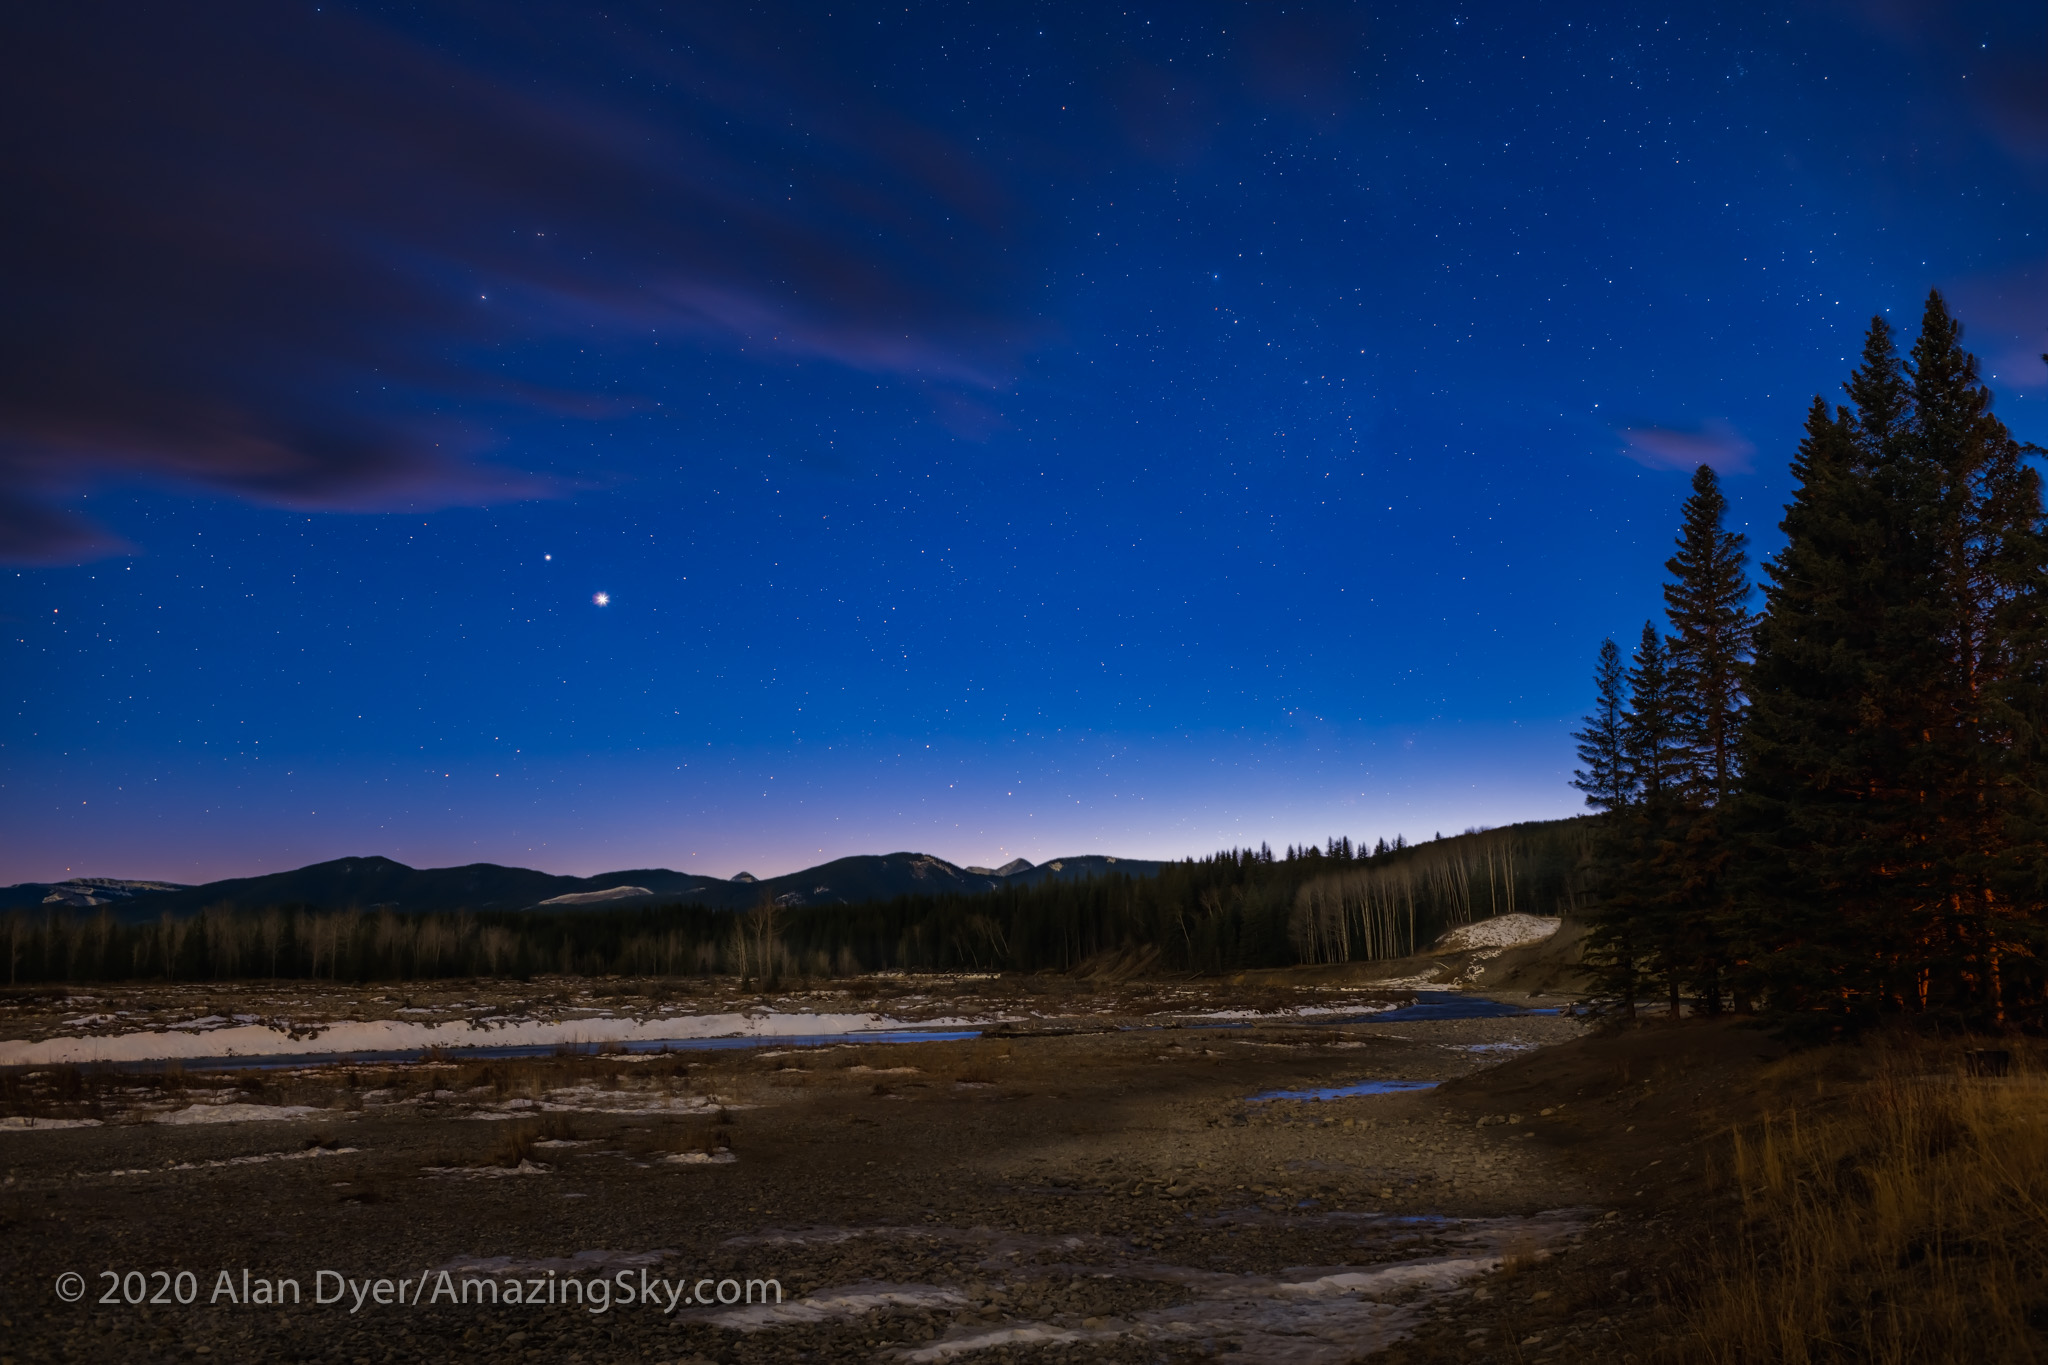
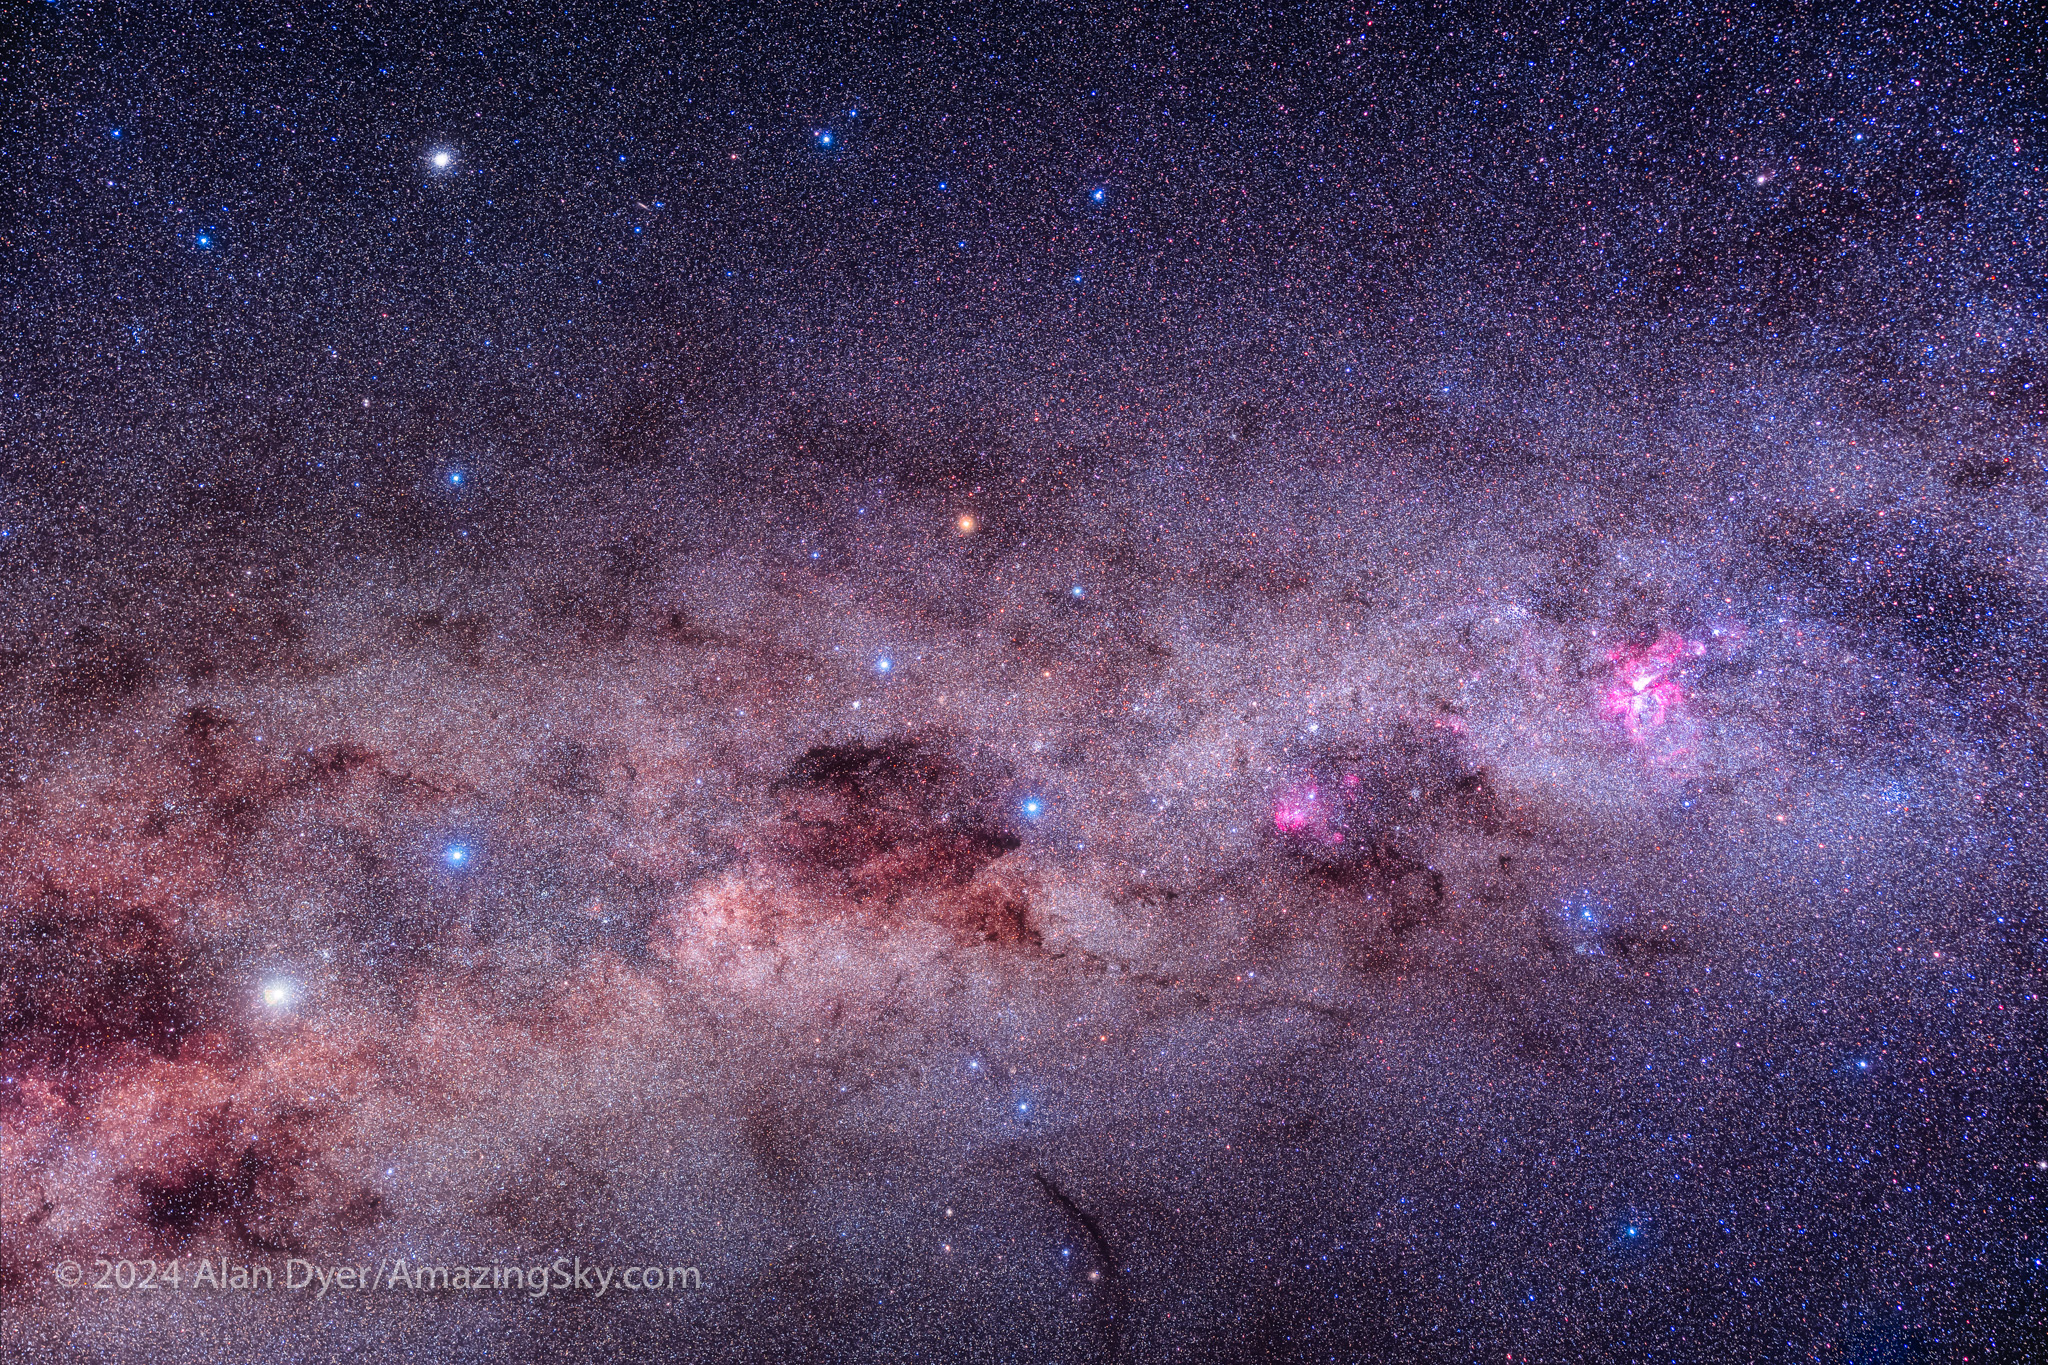
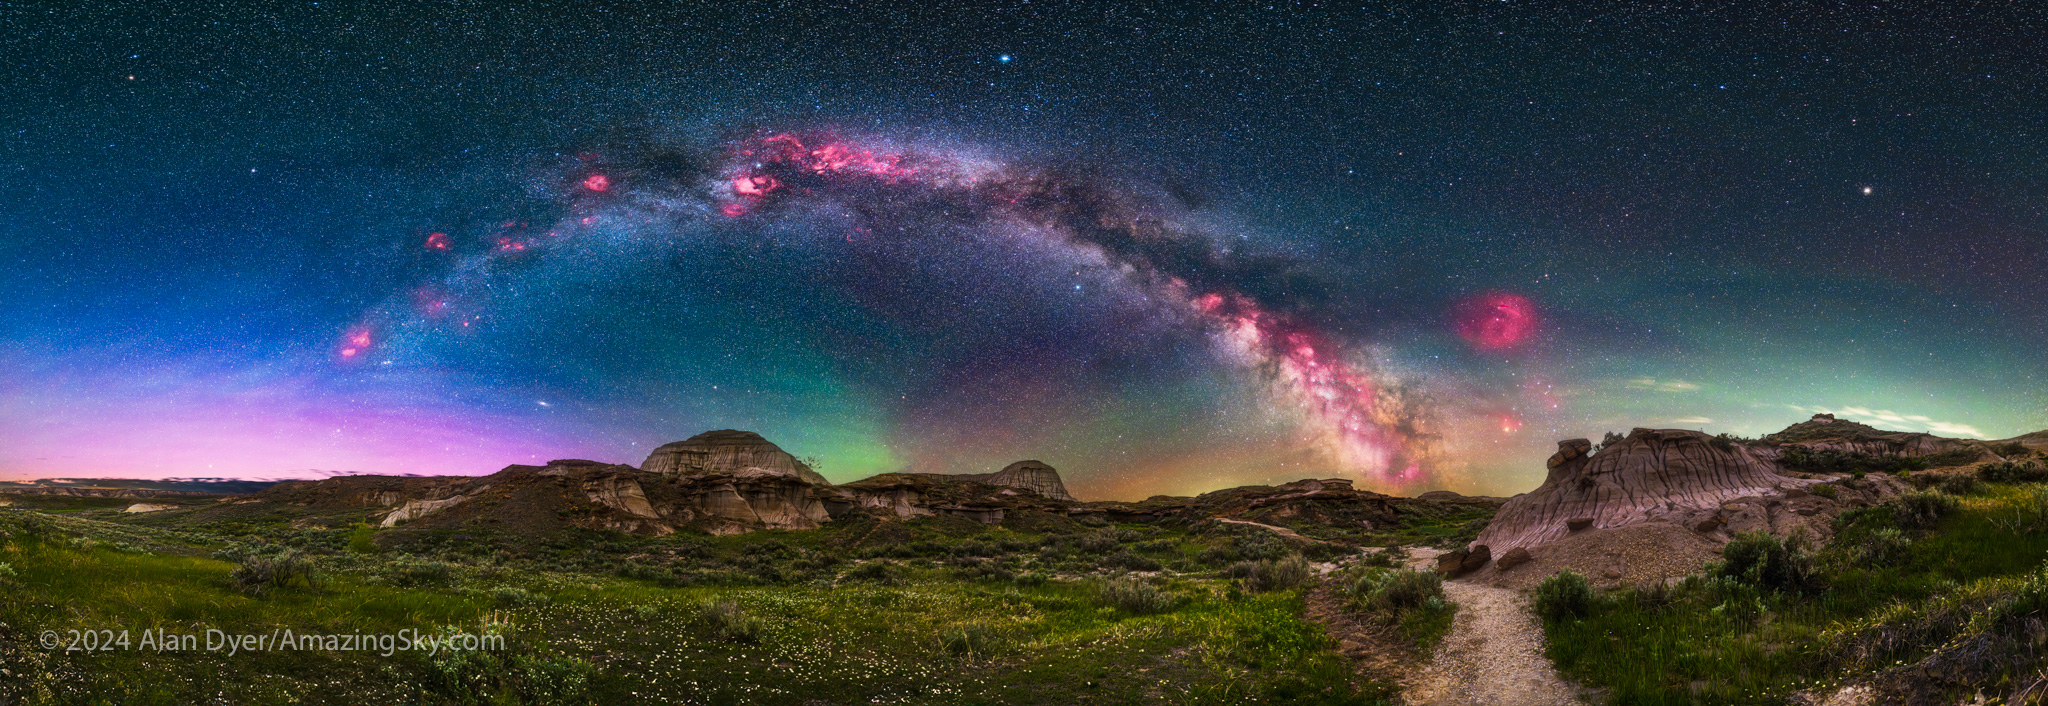
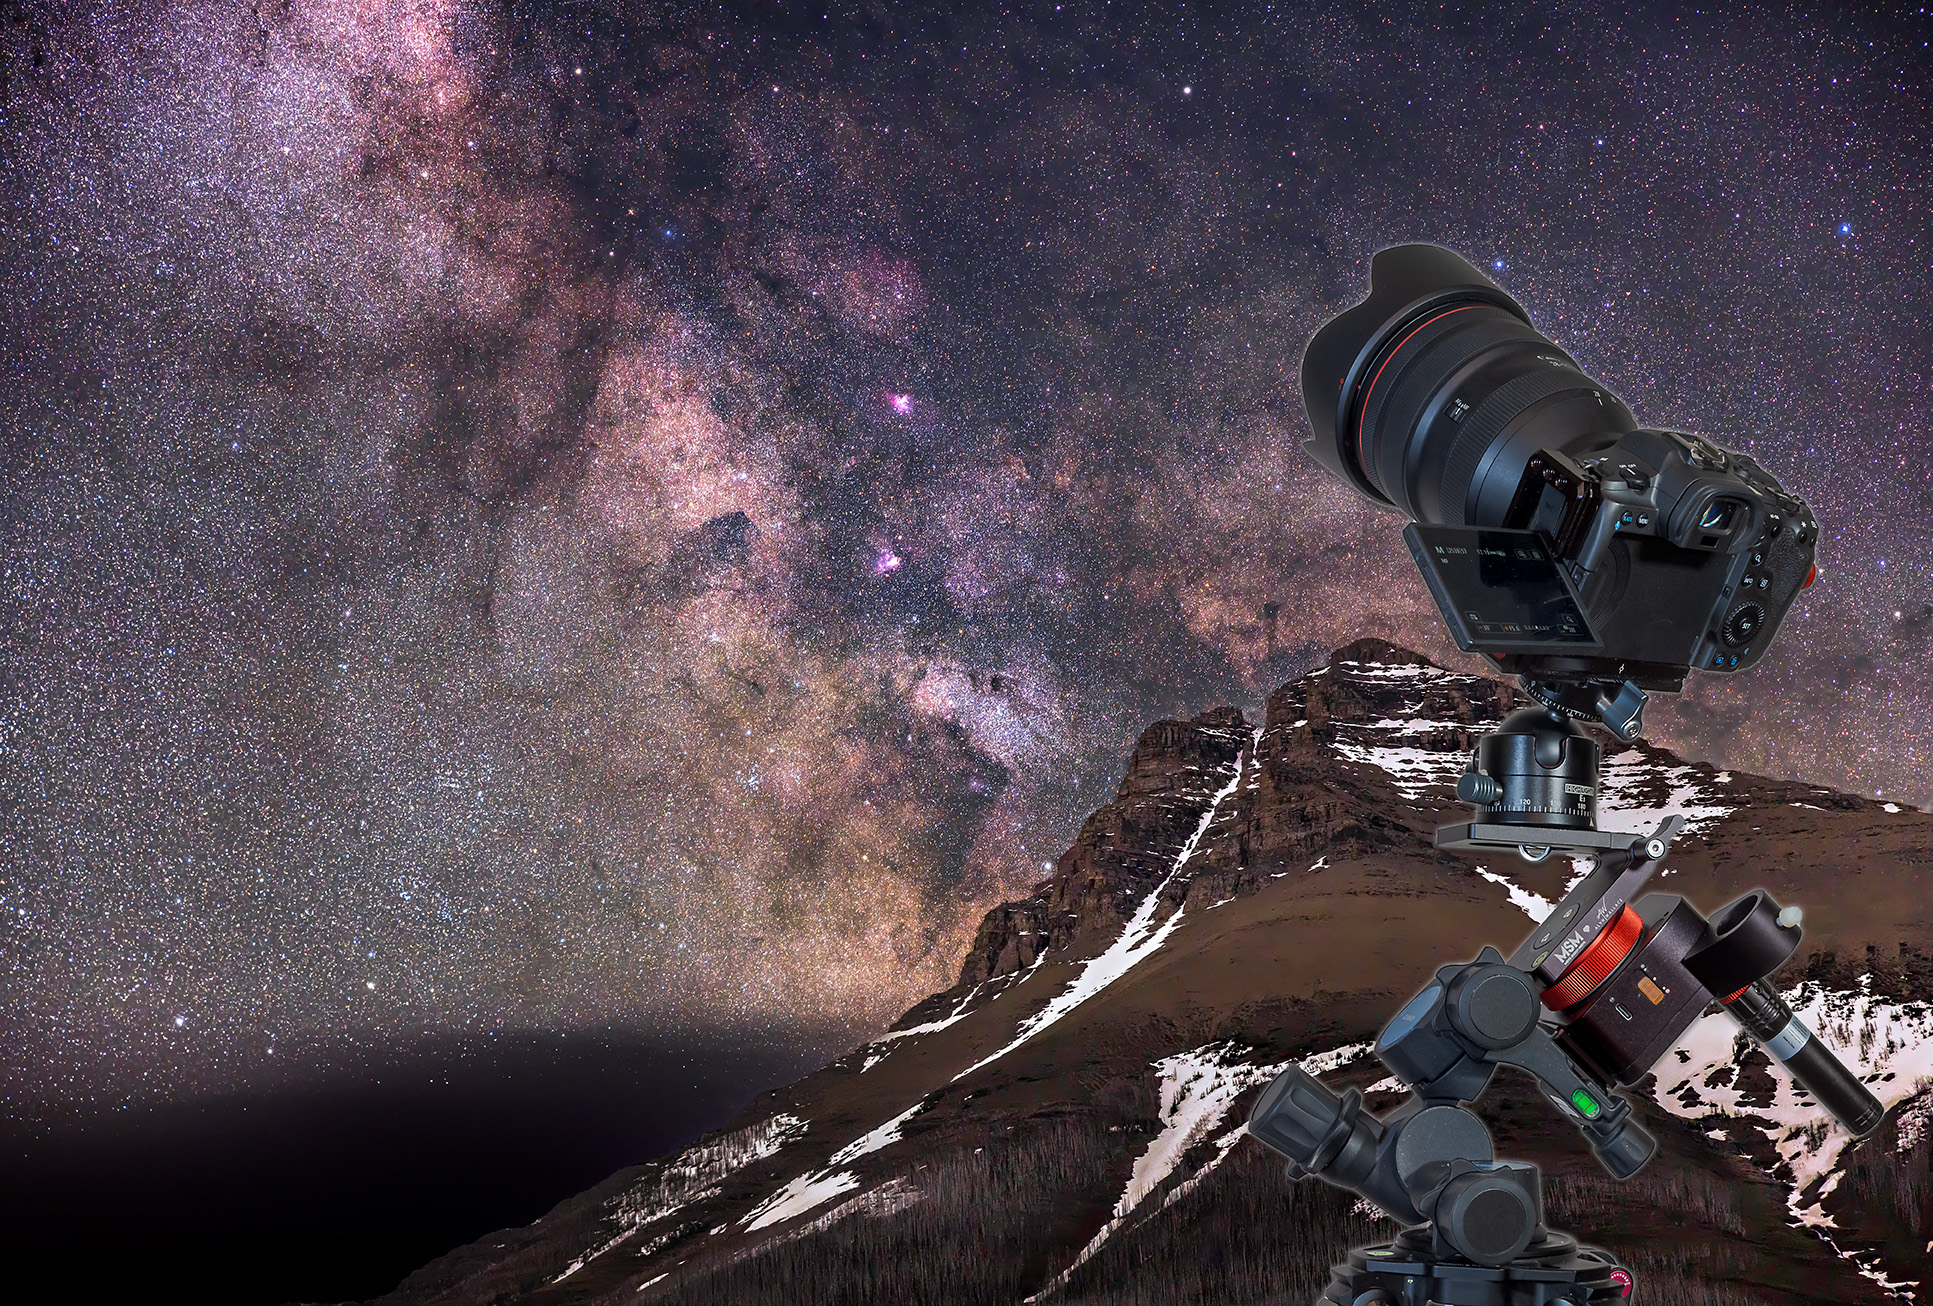
Trackers are essential for rich Milky Way images, and are great for nightscapes, for shooting the sky, blended with untracked shots of the ground, as I show in examples below.
Out with the Old …
The original Rotator went through a couple of design changes during its lifetime. I tested the last versions to be marketed, using three different sample units I either purchased or were sent to me by MSM. (My reviews appeared in 2019 on my blog here, and in the June 2021 issue of Sky & Telescope magazine.)
The bottom line is that I found all the samples of the Rotator I tested to be unreliable for accurate tracking, indeed for tracking period, as units would sometimes not start tracking for a few minutes, or just stop tracking mid-shoot and then restart intermittently. Getting a set of untrailed exposures was a hit or miss affair.
But with a cost lower than most other trackers on the market (ostensibly, as explained below), a pocketable compact size, and with endorsements from notable nightscape photographers, the original Rotator garnered a loyal following of fans. I was not one of them.
MSM obviously recognized the design flaws of the Rotator, because in early 2024 they replaced it with an all-new model, dubbed the Nomad. It works!
I purchased a unit in January 2024 when the Nomad came out, and have used it extensively and successfully over the last few months. I found it has addressed all the serious flaws of the Rotator.
Polar Alignment Accessories
With a weight of about 400 grams, the Nomad is about 70 grams lighter than the old Rotator. It is one of the lightest and smallest trackers on the market, a benefit for those wanting to hike to remote nightscape sites, or pack gear for airline travel. (I took my Nomad to Australia this year; one result is below, shot with the Nomad.)
However, unlike the popular Star Adventurer 2i and Mini trackers from Sky-Watcher, the Nomad, like MSM’s older Rotator, does not have a polar alignment scope built in, just a peep sight hole. That makes it easier for MSM to fit a tracker inside a compact box.
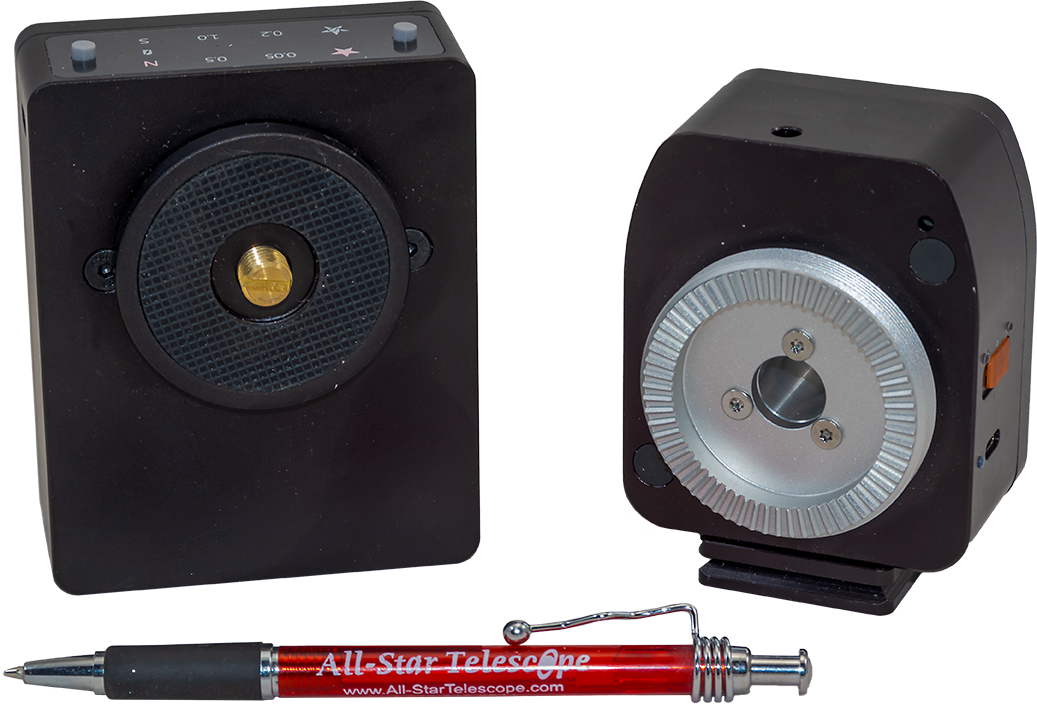
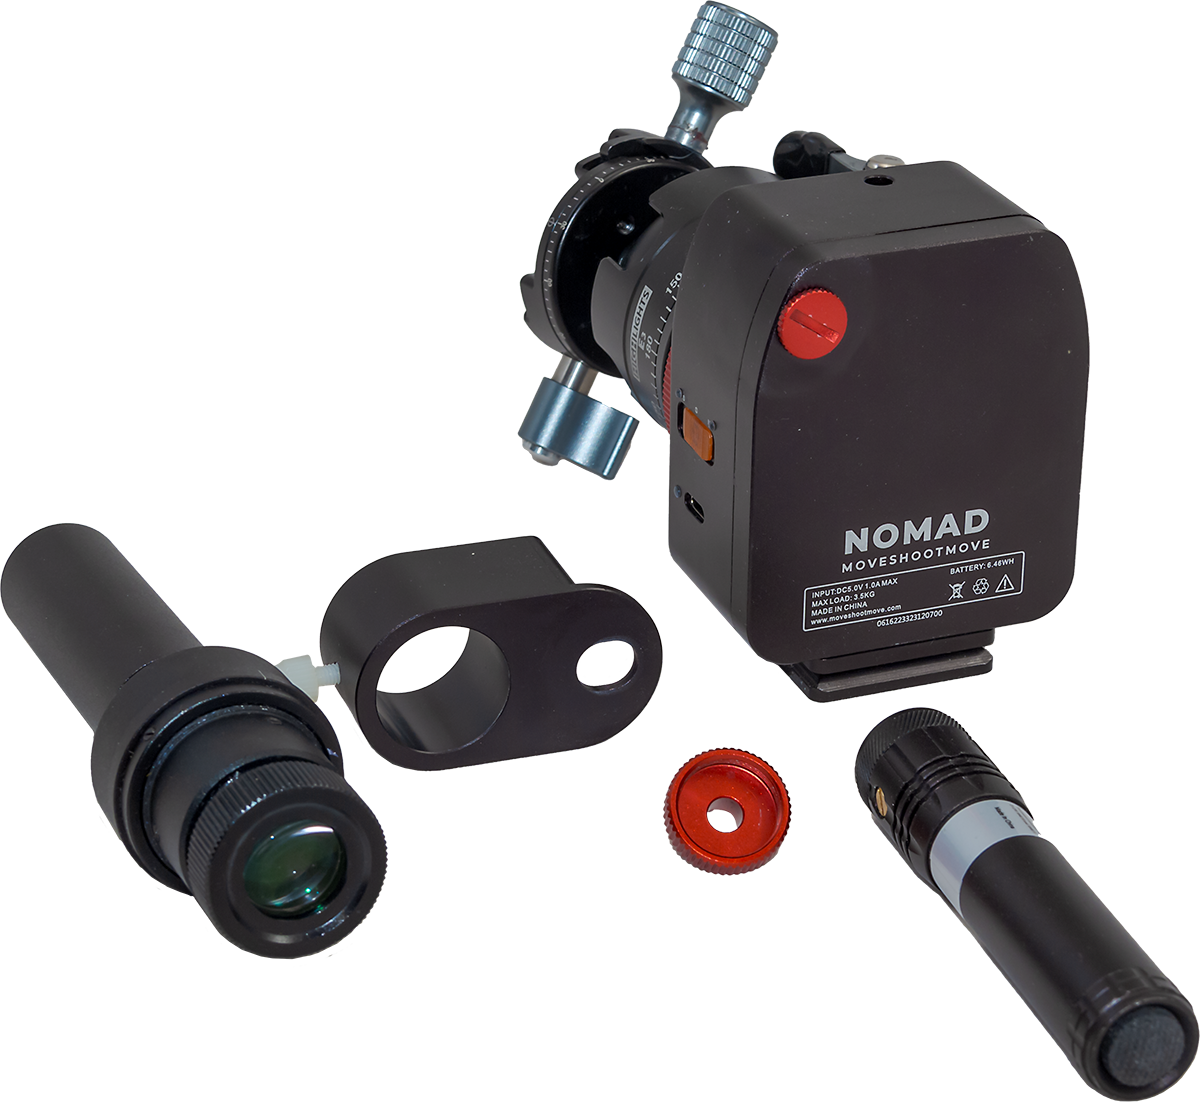
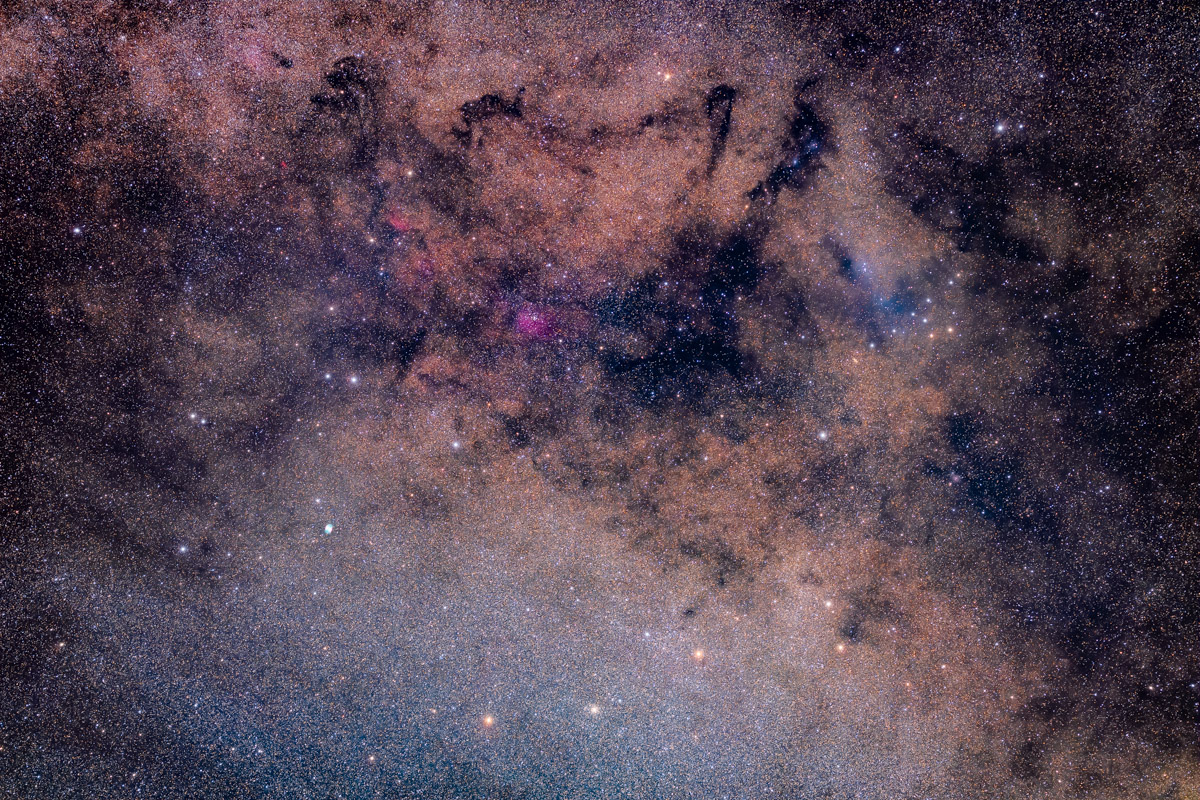
And yet, I feel some form of polar alignment aid (not just a peep sight) is essential if a tracker is to follow the sky accurately. Like the Rotator, the Nomad can be purchased with two add-on choices (shown below):
• a 5 mw green laser pointer,
• and an optical polar scope …
… each of which attaches to the side of the Nomad as outboard accessories. I purchased both, bundled with the Nomad as “Basic Kit C” for $309 U.S., and find both accessories useful.
NOTE: When shopping at the MSM website don’t be fooled by what looks like temporary sale prices. The prices are always marked down, though MSM does offer coupon codes now and then for genuine discounts. I’ve always found MSM’s delivery by parcel post prompt, and in my case, shipments came from a warehouse in Canada, not China.
As with the Rotator, the need to add essential accessories makes the Nomad more expensive and more complex to pack than buyers might think. And it can be more complex to initially set up than imagined, not helped by the lack of any instructions. (I’m told by MSM that a downloadable PDF sheet is being prepared.) In place of factory-supplied instructions, MSM depends on its YouTuber fans to provide tutorials.
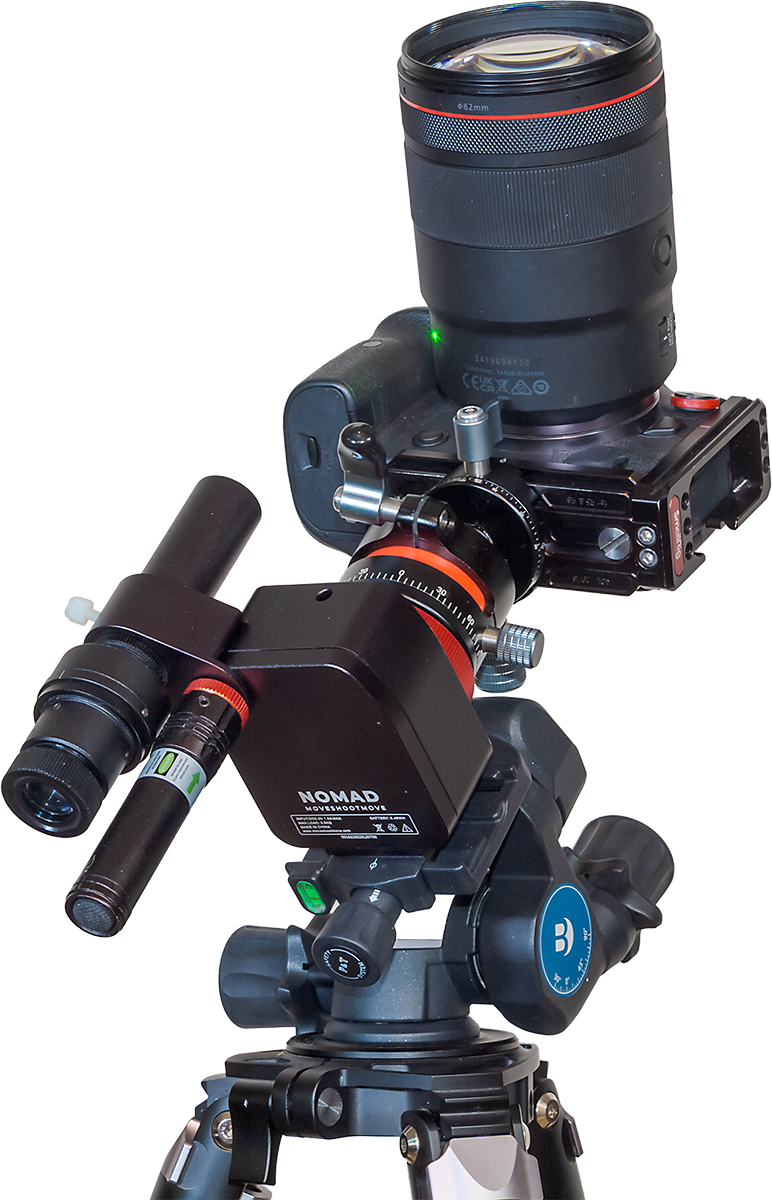
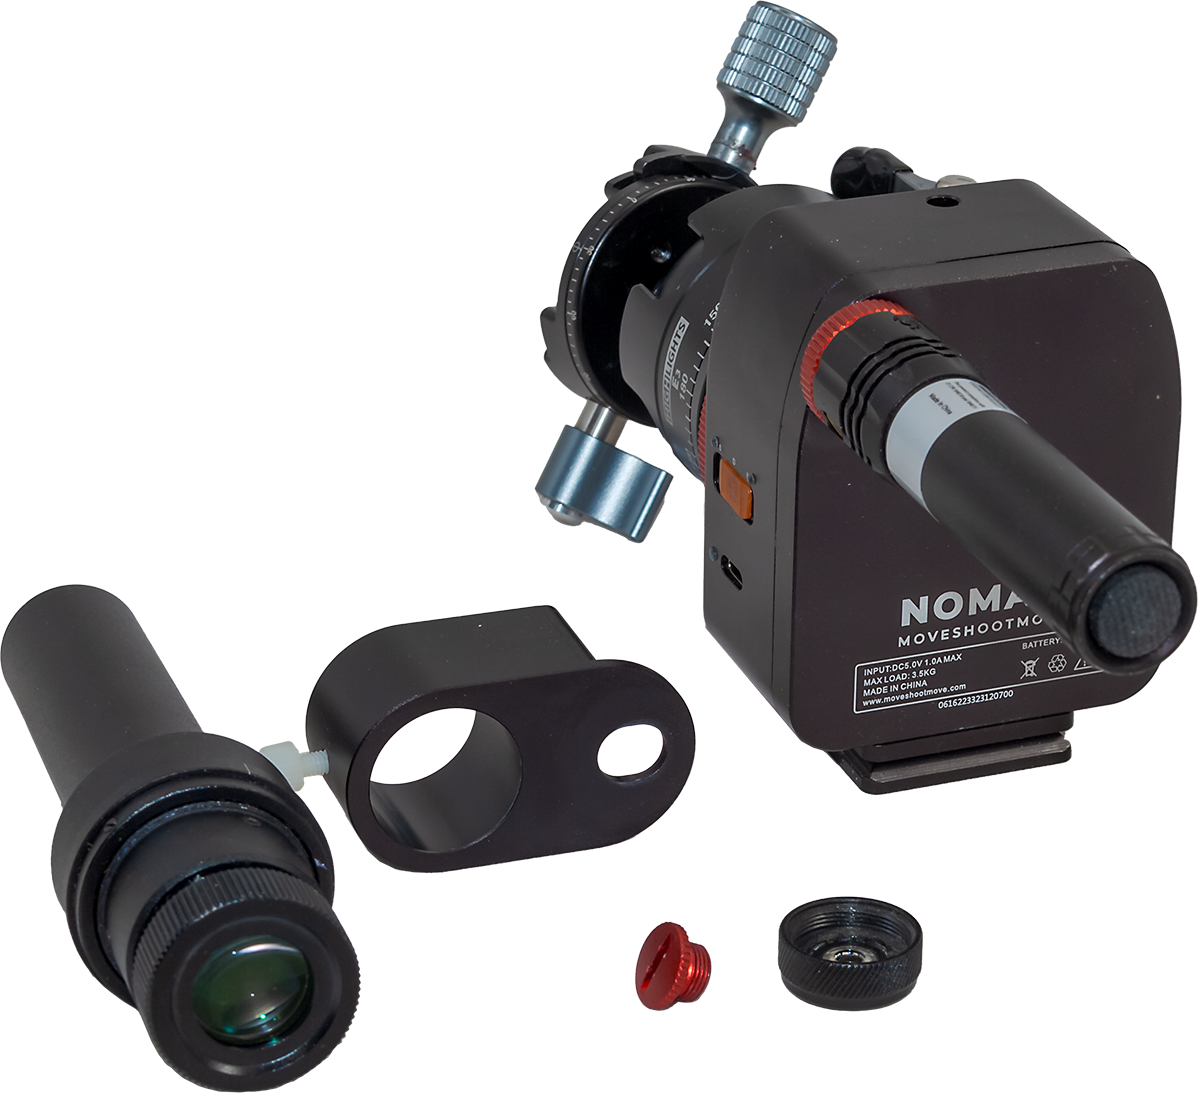
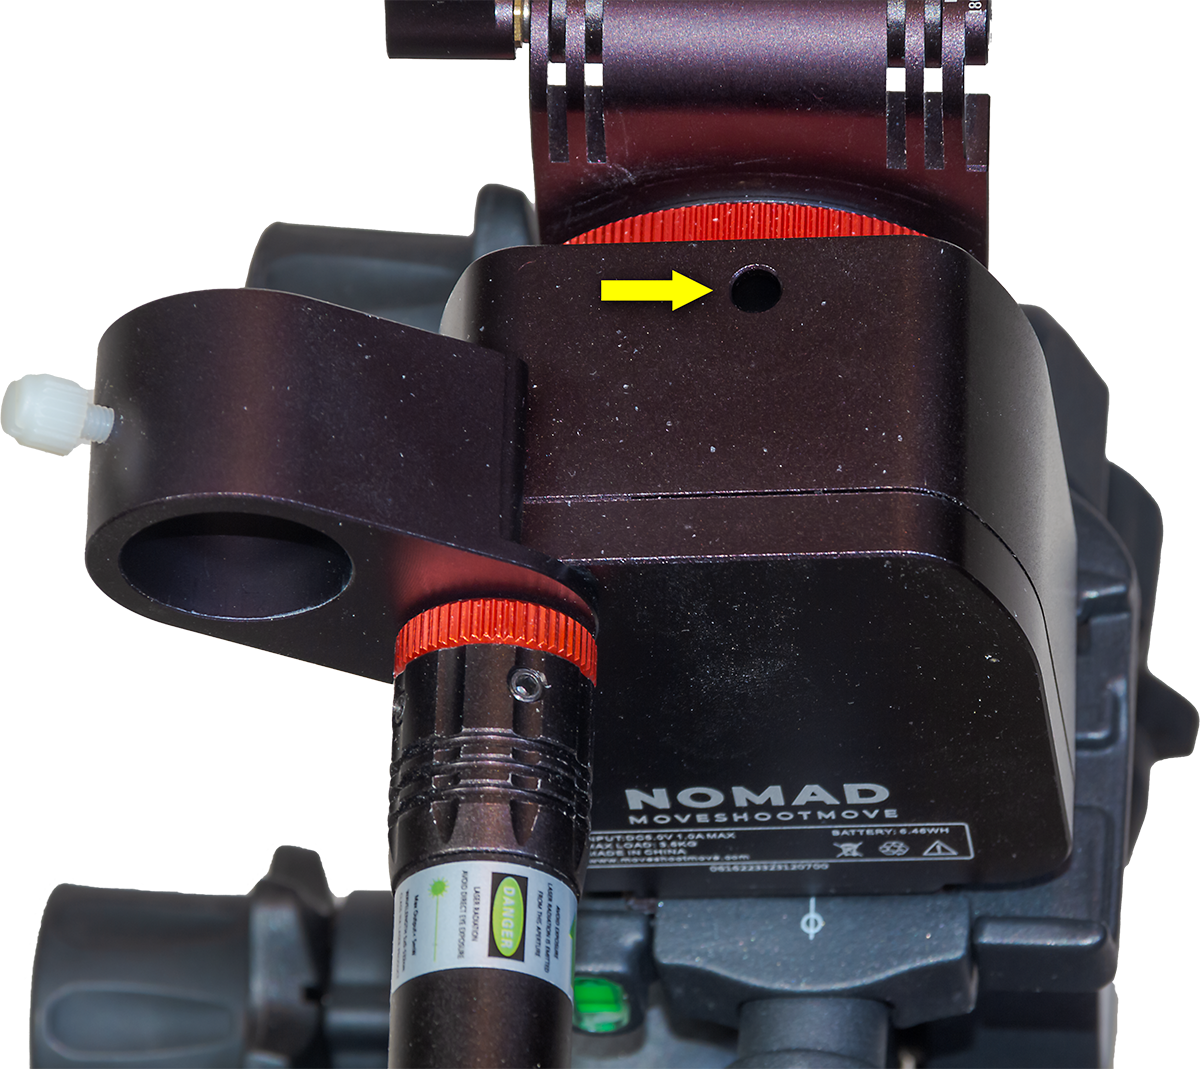
It took me a moment to figure out how the laser attaches to the Nomad — it does so by replacing the black cap that comes on the laser with a supplied threaded red cap, so the laser can screw into the peep hole on the Nomad’s body that is covered by yet another cap you remove — but don’t lose it, as you might need it.
The optical polar scope attaches by way of an included clamp held onto the Nomad by the laser, or by the removable threaded cap (so you will need it if you aren’t using the laser, but it is easily lost).
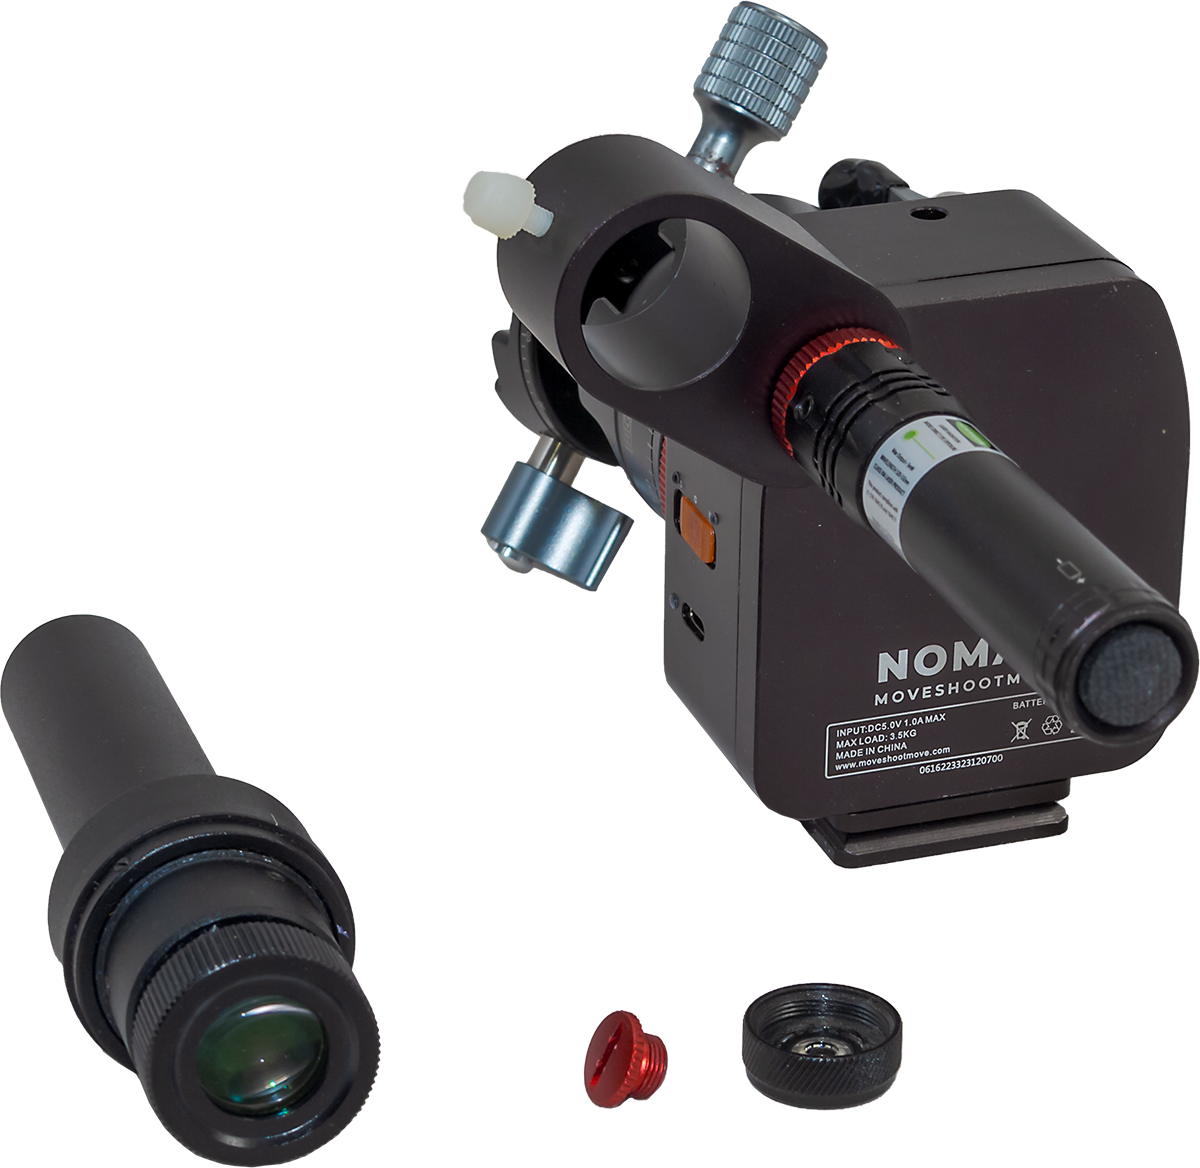
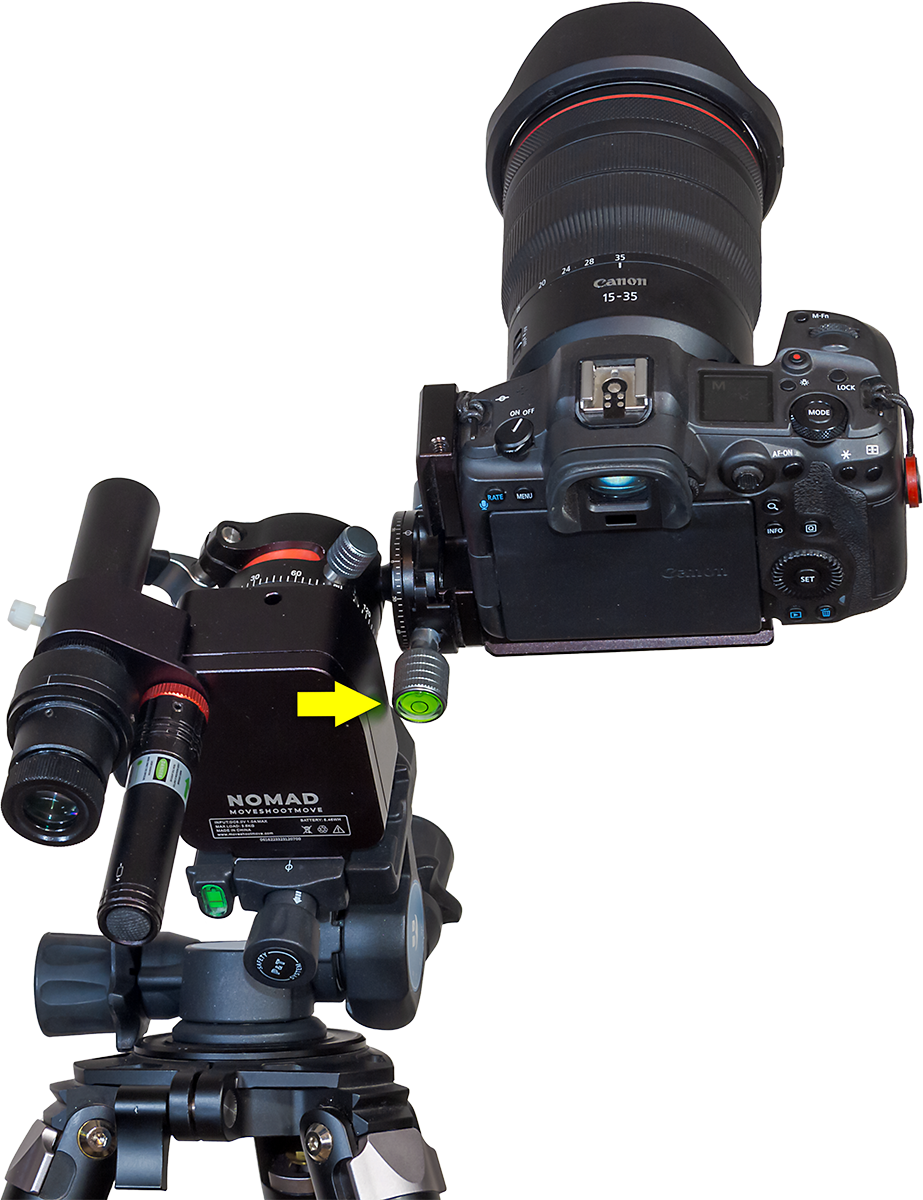
Out of the box I found I had to adjust the beam of the laser (using the two tiny set screws on the laser) so the beam exited straight out the laser and up the peep hole in the Nomad’s case.
Once collimated, the laser pointer has proved to be an accurate and convenient way to polar align, especially for shooting with wide-angle lenses. (Keep in mind, green laser pointers over 1 mw are illegal in some jurisdictions.)
The laser uses a removable and rechargeable 3.7-volt battery, and comes with a little USB-powered charger. The laser’s battery has lasted for months of momentary use. The laser works briefly in winter when it is warm, but as soon as it gets cold, as is true of most laser pointers, it refuses to lase!
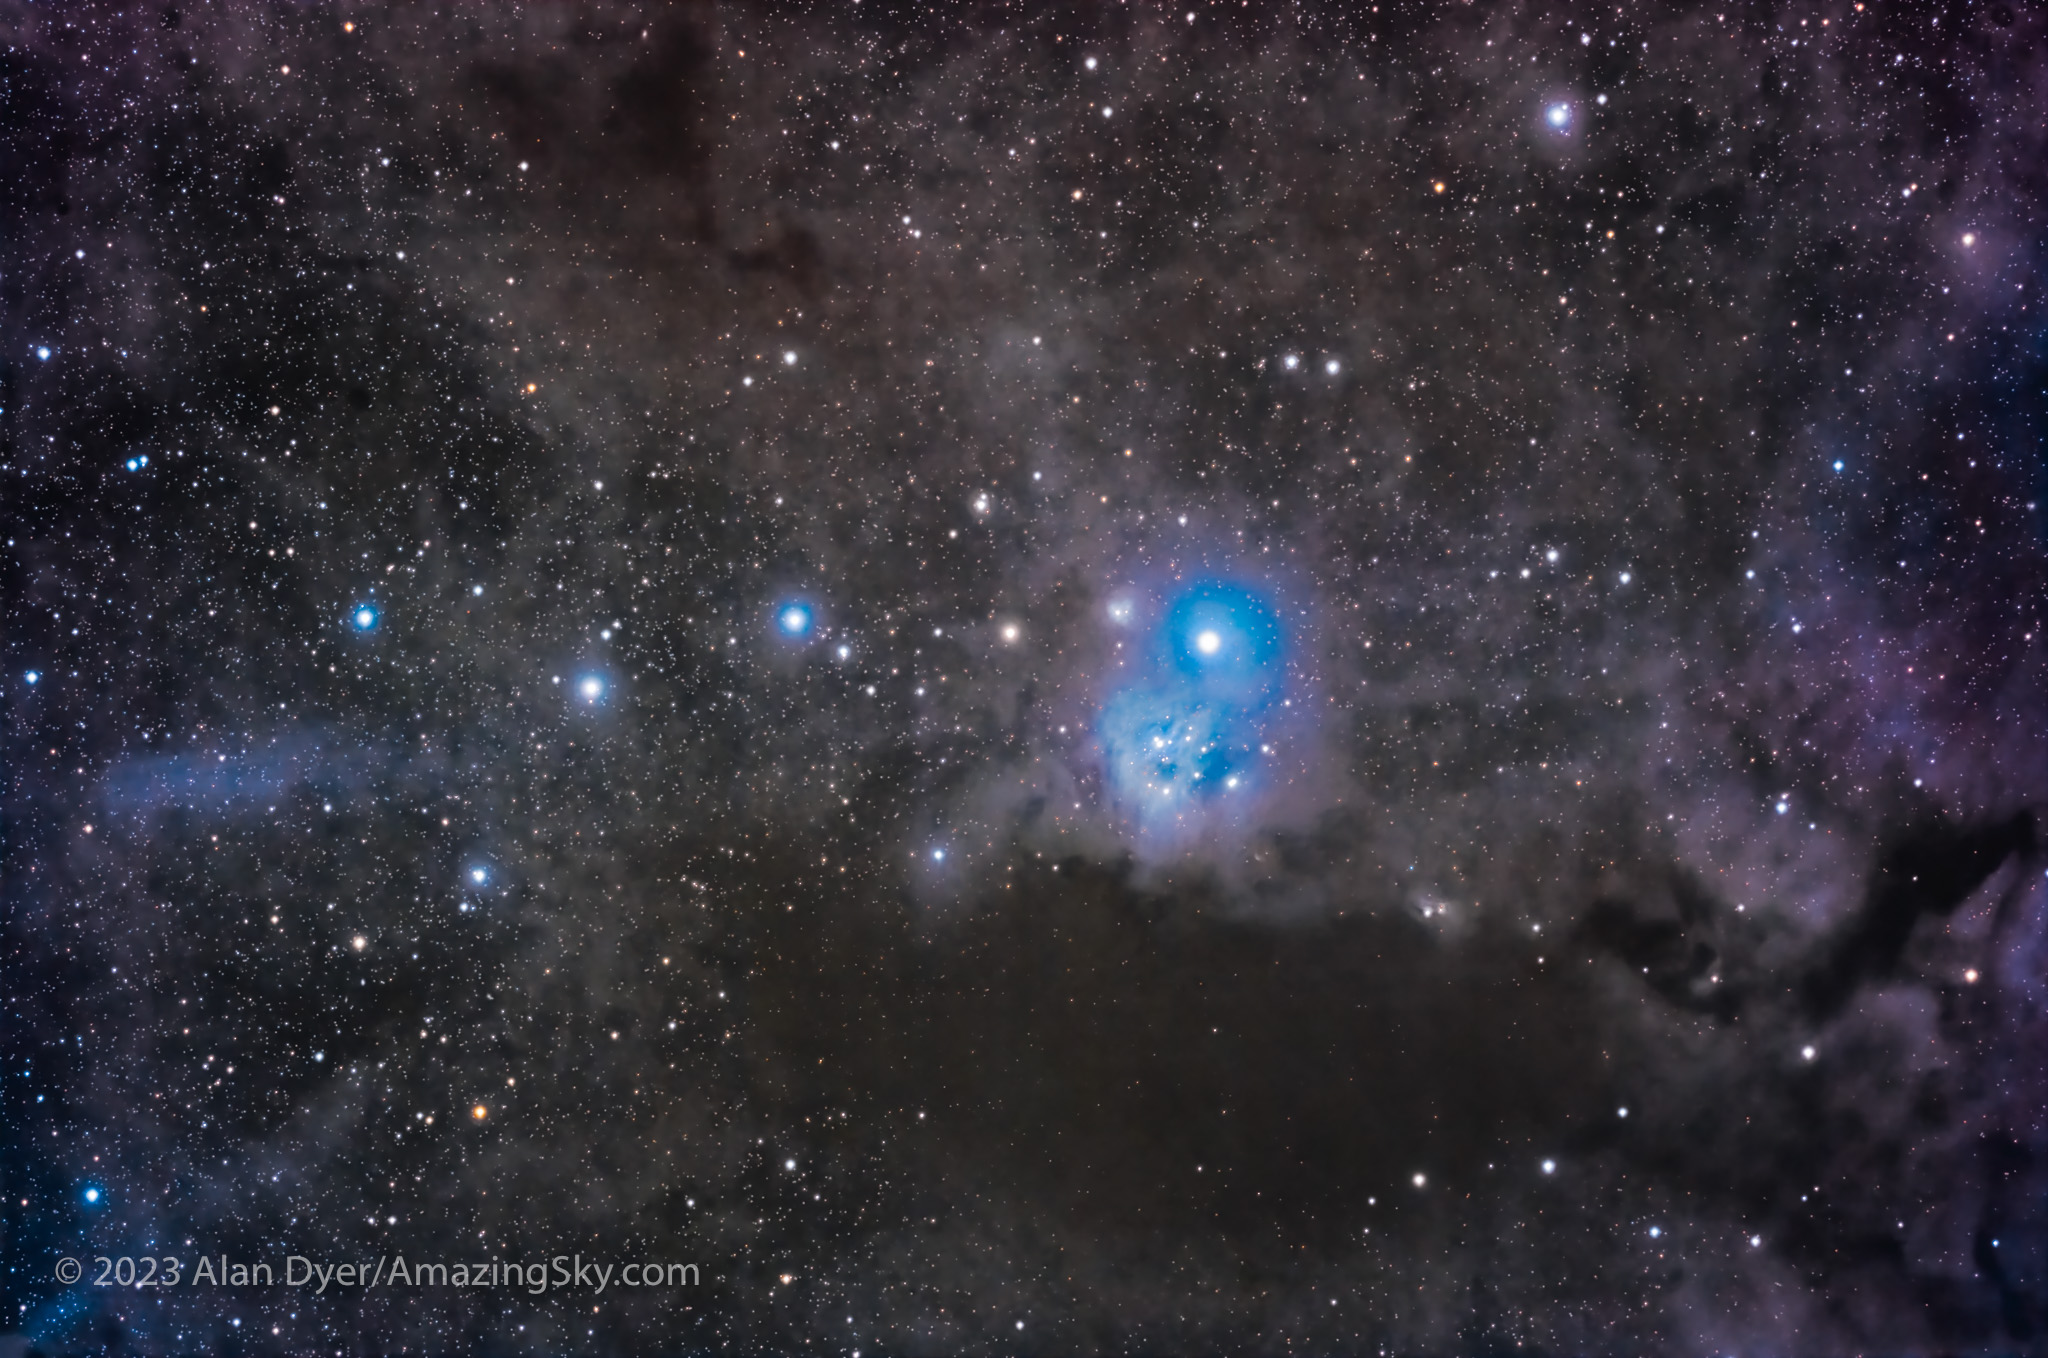
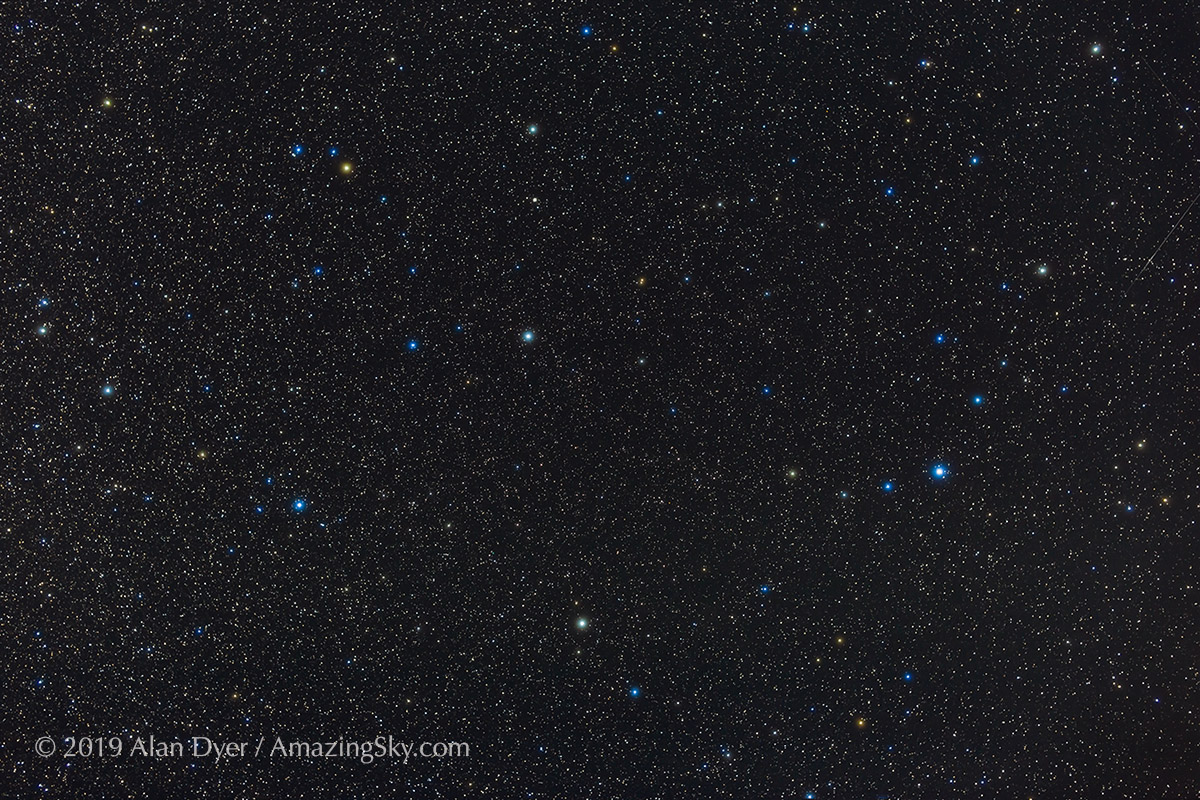
At lower left is the green planetary nebula Messier 27, aka the Dumbbell, shown in the close-up tracking test image below. This is a stack of 14 x 2-minute exposures with the Canon RF135mm lens on the Canon Ra, on the MSM Nomad tracker. The images were the best 14 out of a series shot to test the Nomad’s tracking.
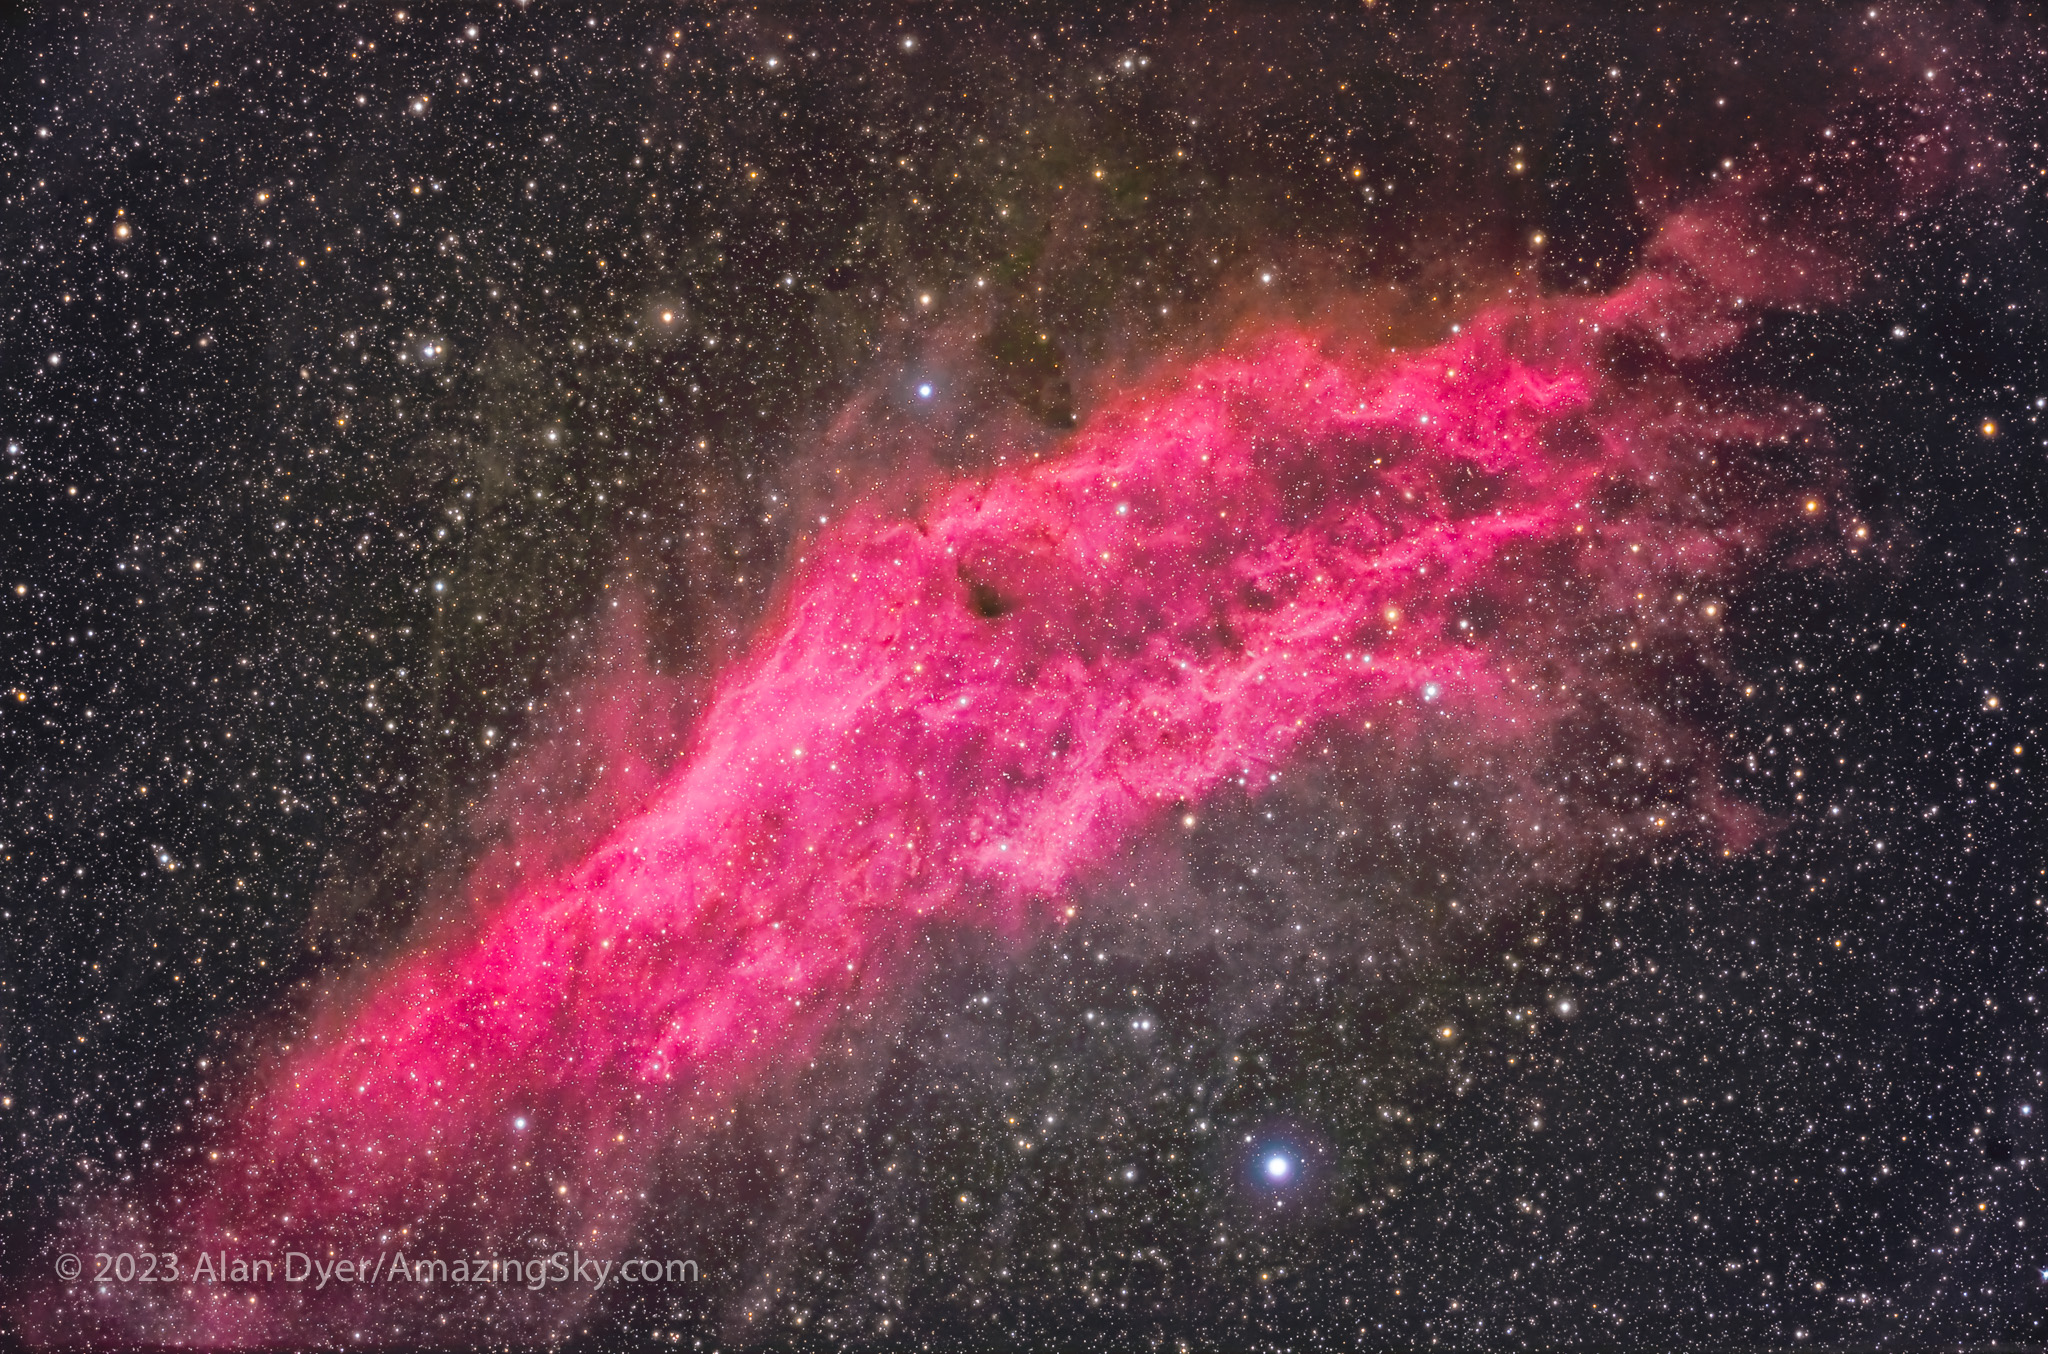
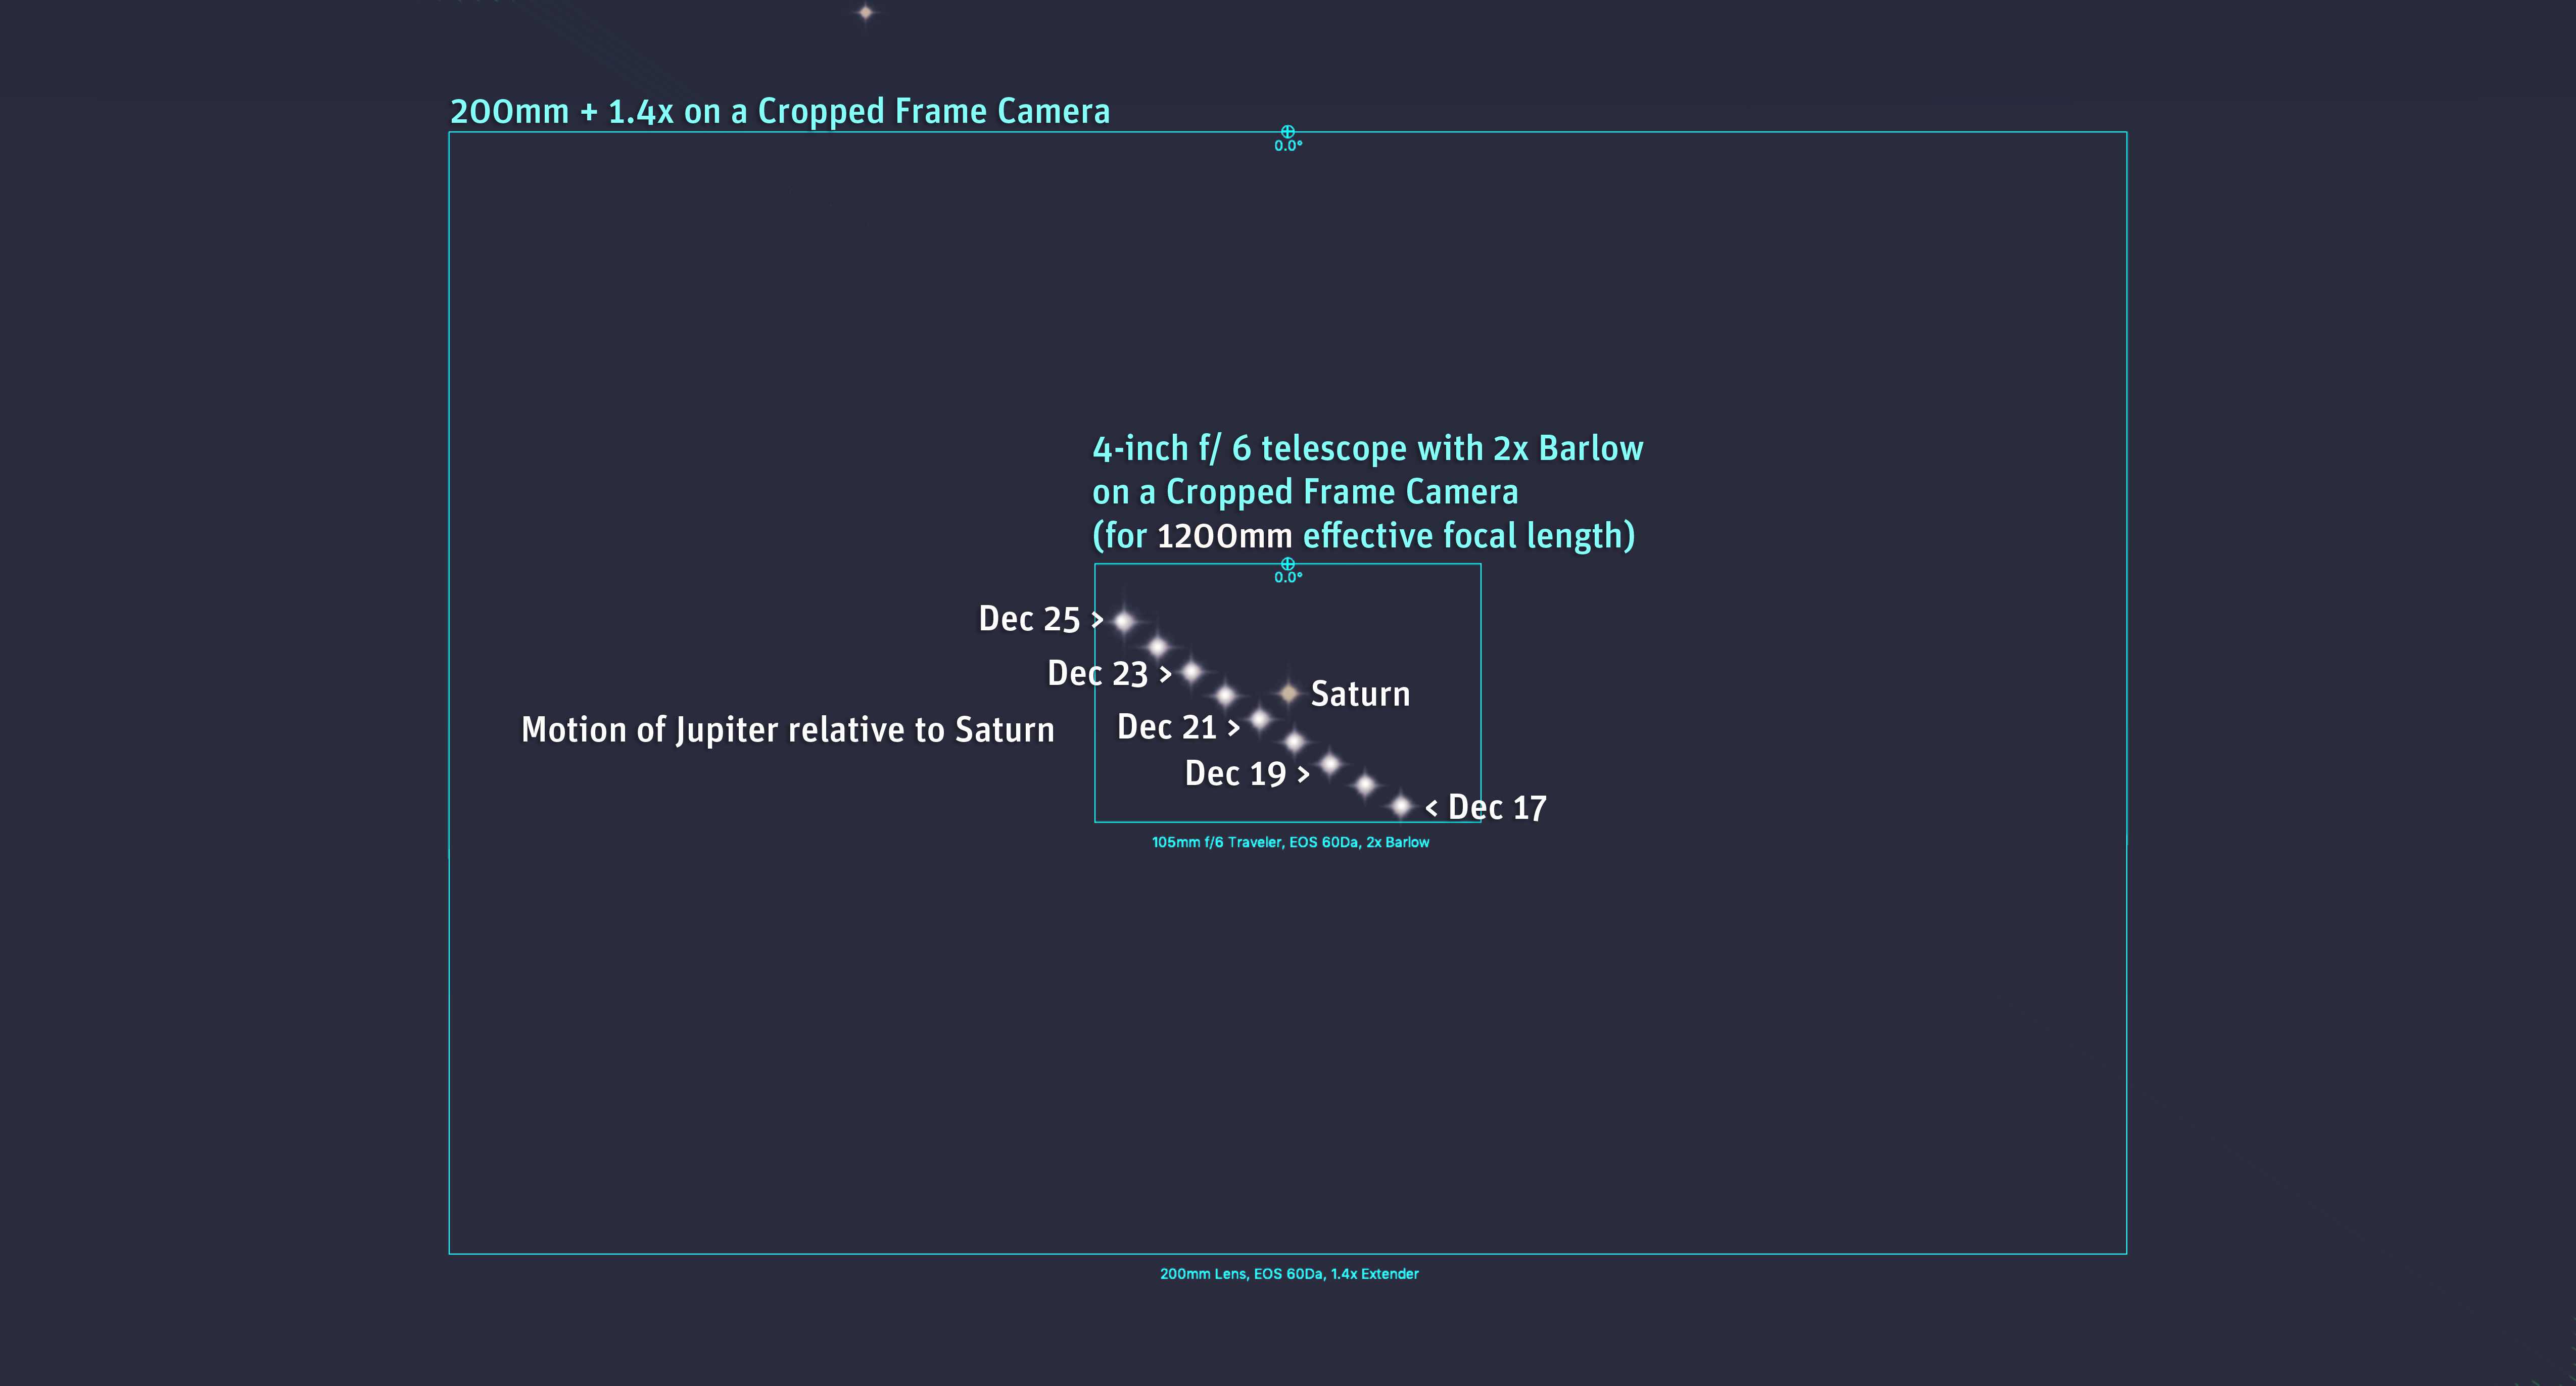
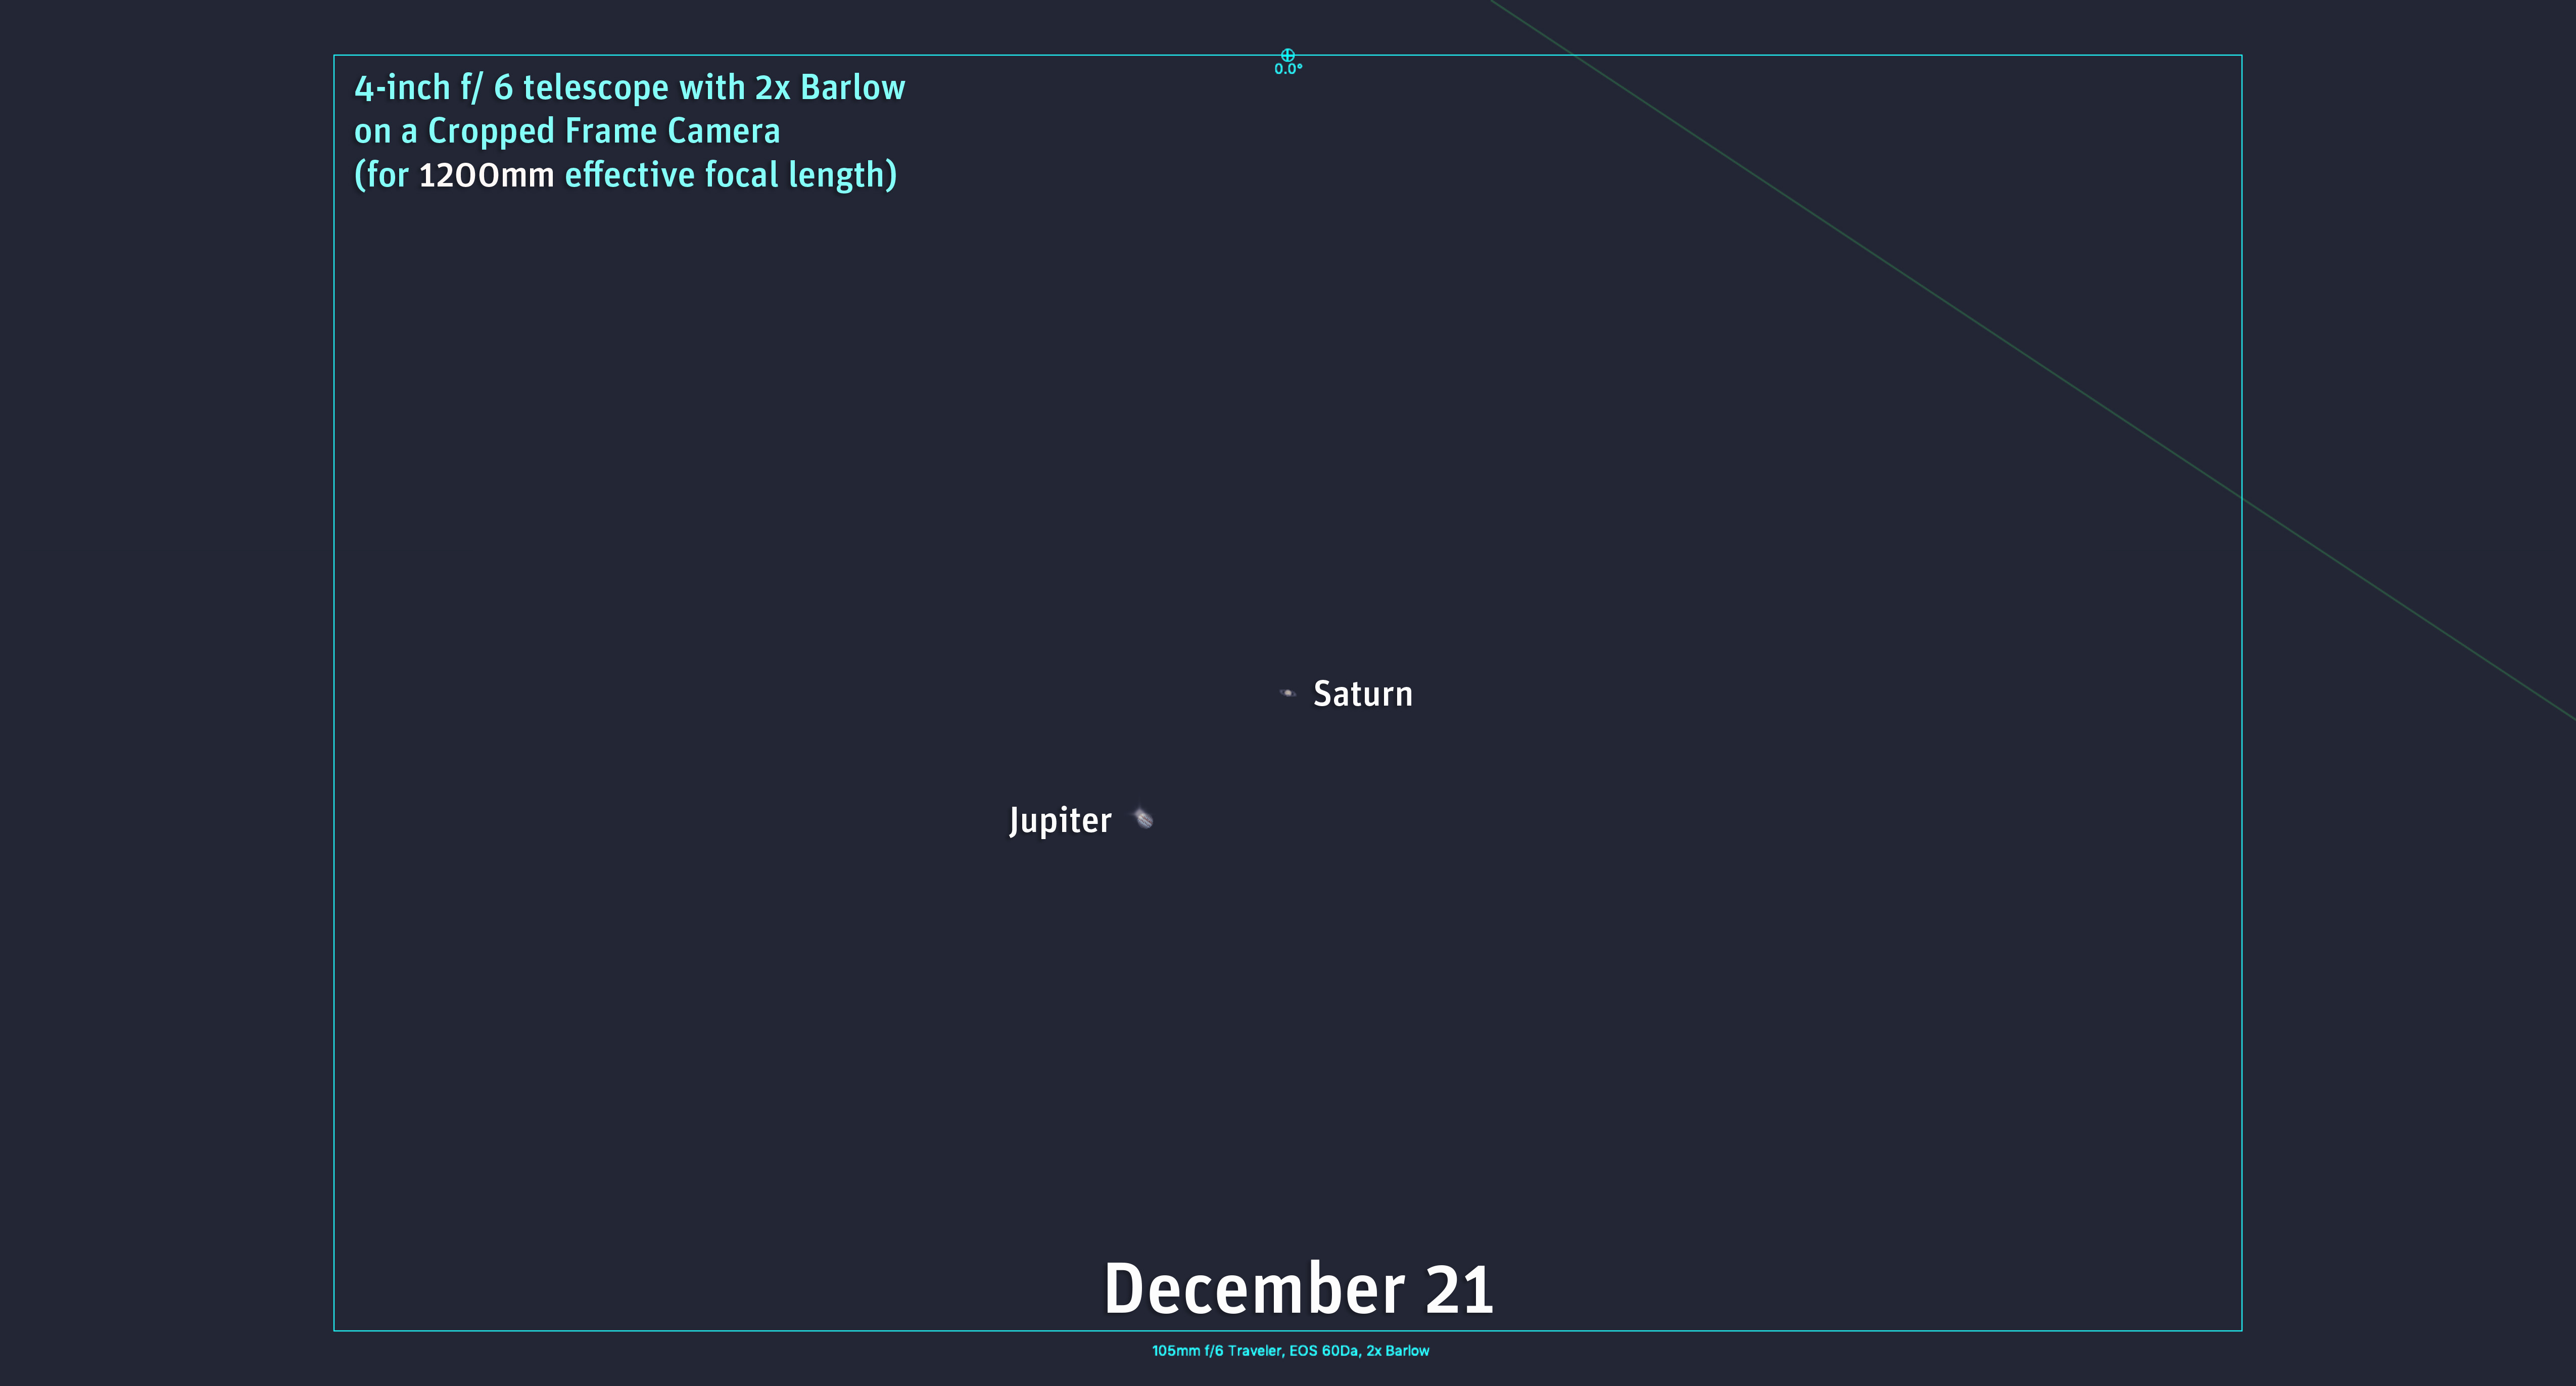
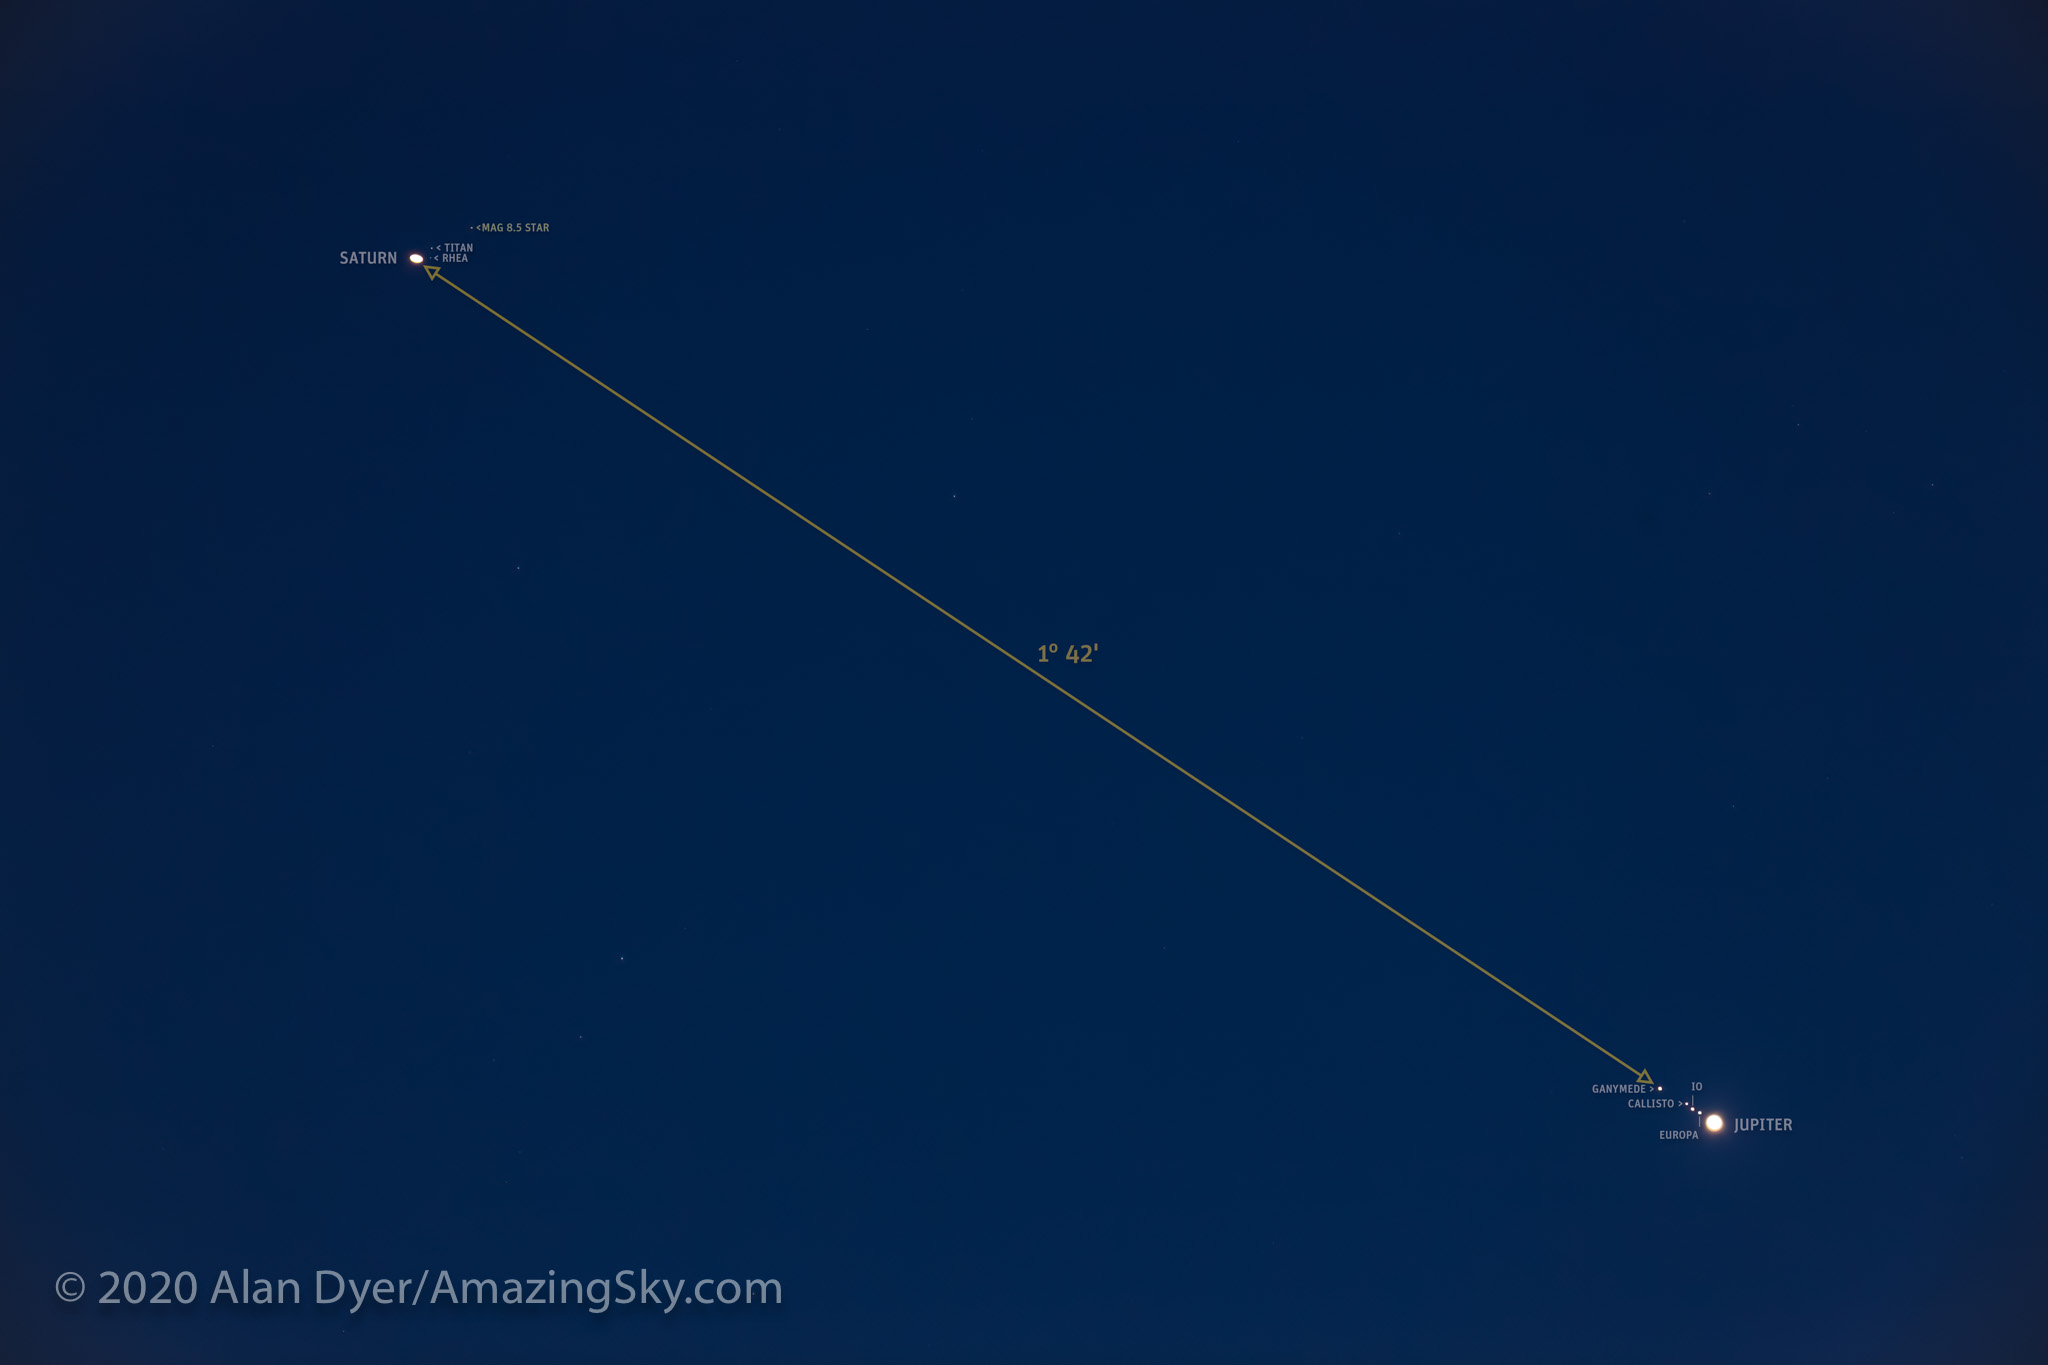
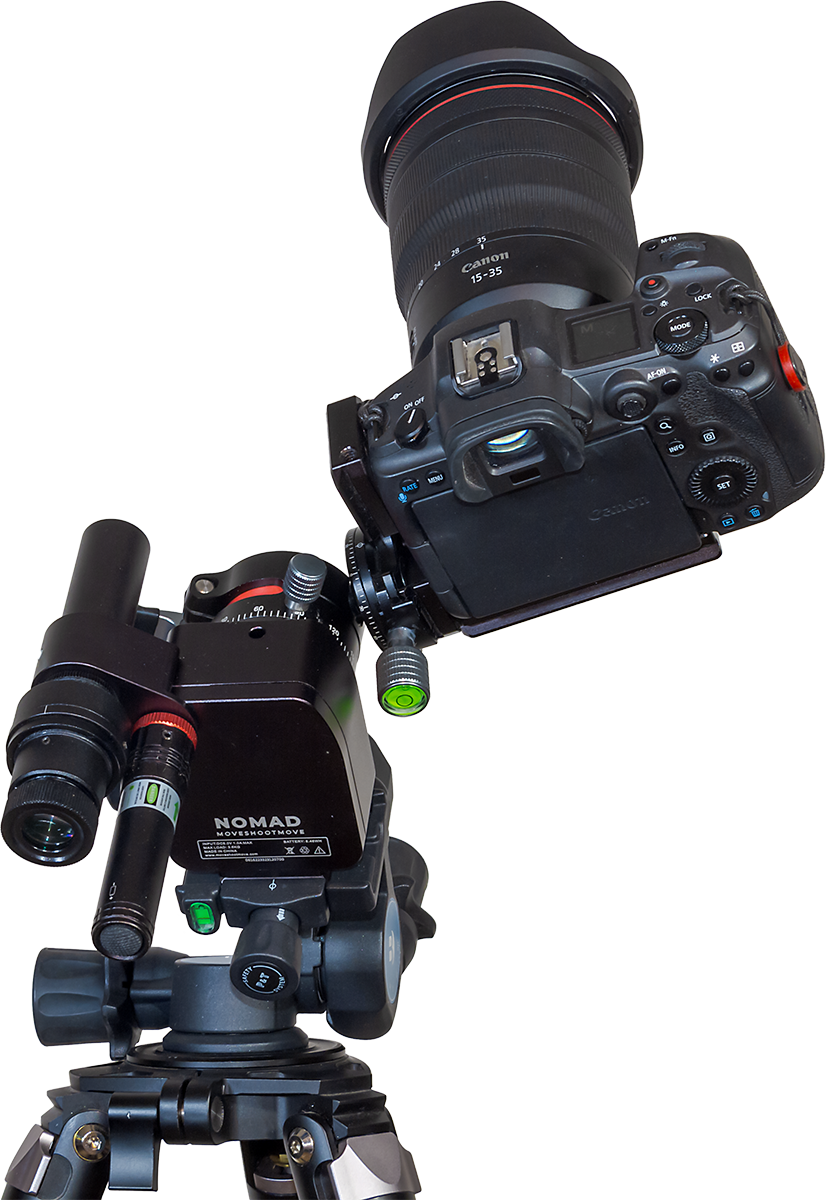
However, for the more accurate polar alignment needed when shooting with telephoto lenses (an example is above), and for winter use, I prefer to use the optical polar scope, with the laser a handy complement just to get close to the pole.
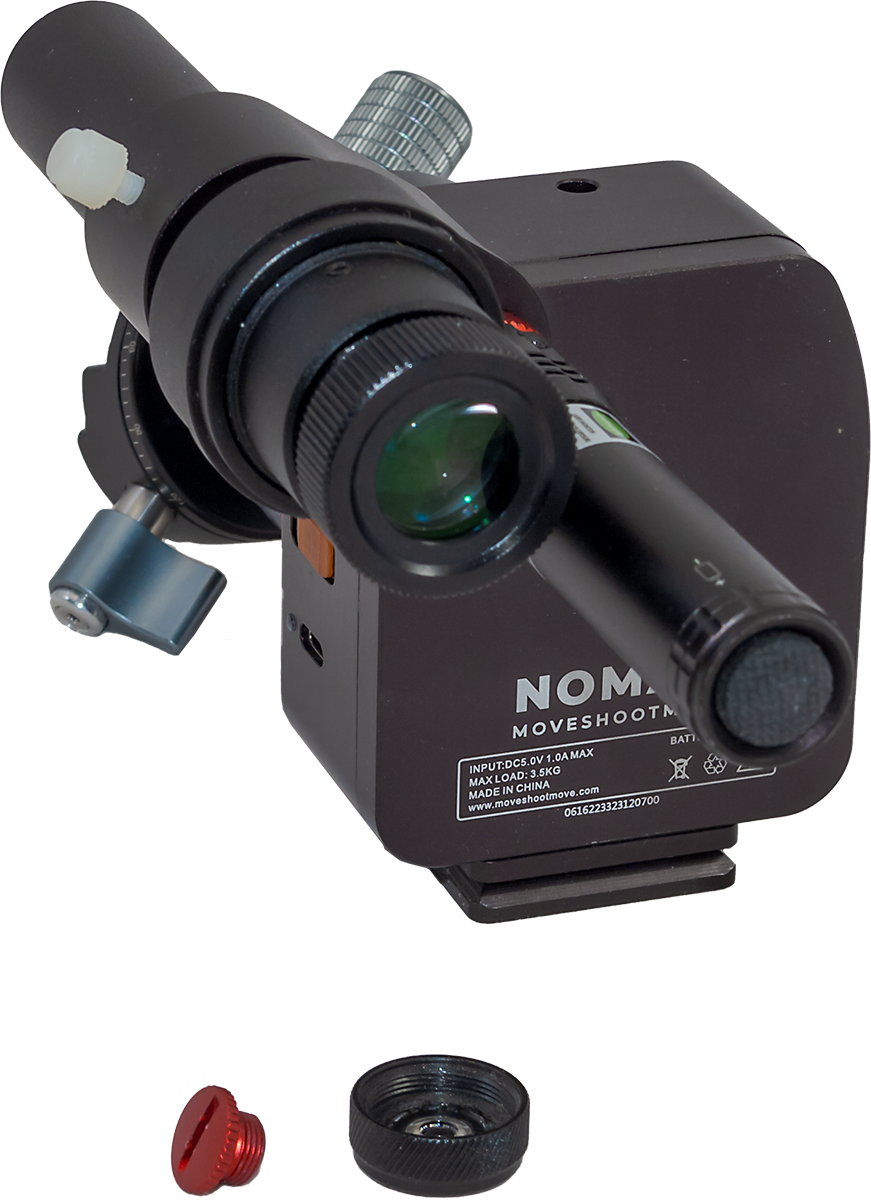
The polar scope has a reticle etched with star patterns for both the North and South Celestial Poles. I found the latter worked well in Australia. The mounting clamp held the polar scope securely and consistently well centered, another welcome improvement over the polar scope clamp supplied with the Rotator, which could wiggle around.
The polar scope does not have an illuminator LED. Instead, it comes with a novel phosphorescent cap which you hit briefly with white light so it glows in the dark.
Placed over the front of the polar scope, it lights up the field allowing the reticle to be seen in silhouette. While it works fine for sighting Polaris, the bright field can make it hard to see the faint stars in Octans around the South Celestial Pole.
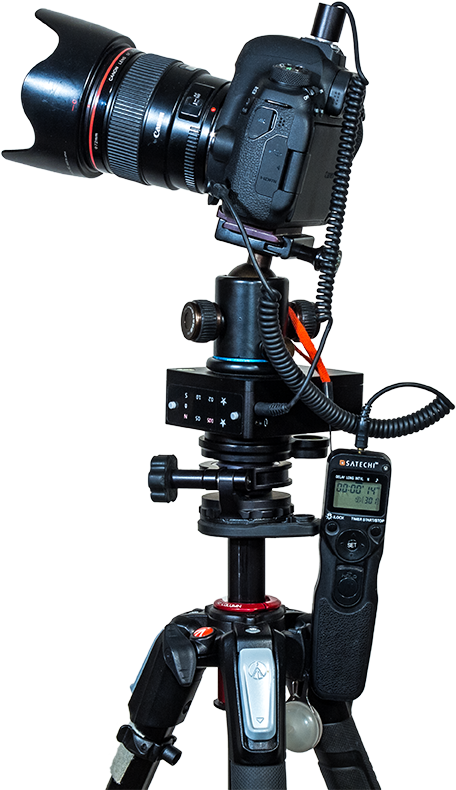
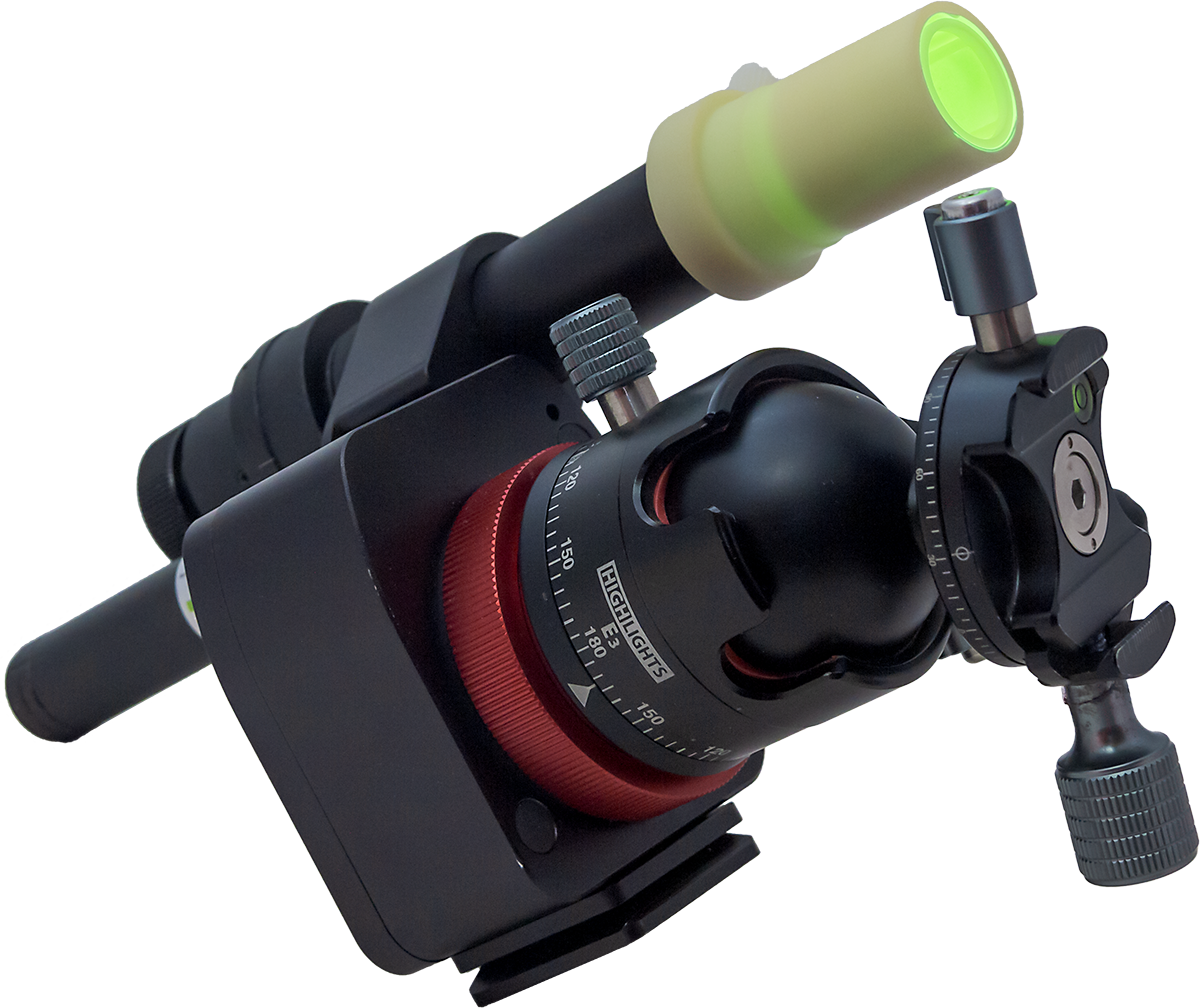
To aid polar alignment I purchased the Benro 3-Way Geared Head, also sold by MSM but available from many sources. Its geared motions make it easy to aim the tracker’s rotation axis precisely at the pole and hold it there solidly.
The Benro accepts standard Arca-Swiss mounting plates, so I’ve found it a useful head to have for other purposes and gear combinations. It has replaced my old Manfrotto 410 3-axis head which uses a proprietary mounting plate.
However, MSM also sells its own latitude adjustment Wedge which, at $90, is a cheaper alternative to the $200 Benro. I’ve not used the MSM Wedge, so I can’t say how solid and precise it is. But the Wedge is lighter than the Benro head, and so may be a better choice when weight is a prime consideration.
I would recommend either the Wedge or Benro for their fine adjustments of azimuth and altitude that are essential for easy, yet precise and stable polar alignment.
Tracking Accuracy
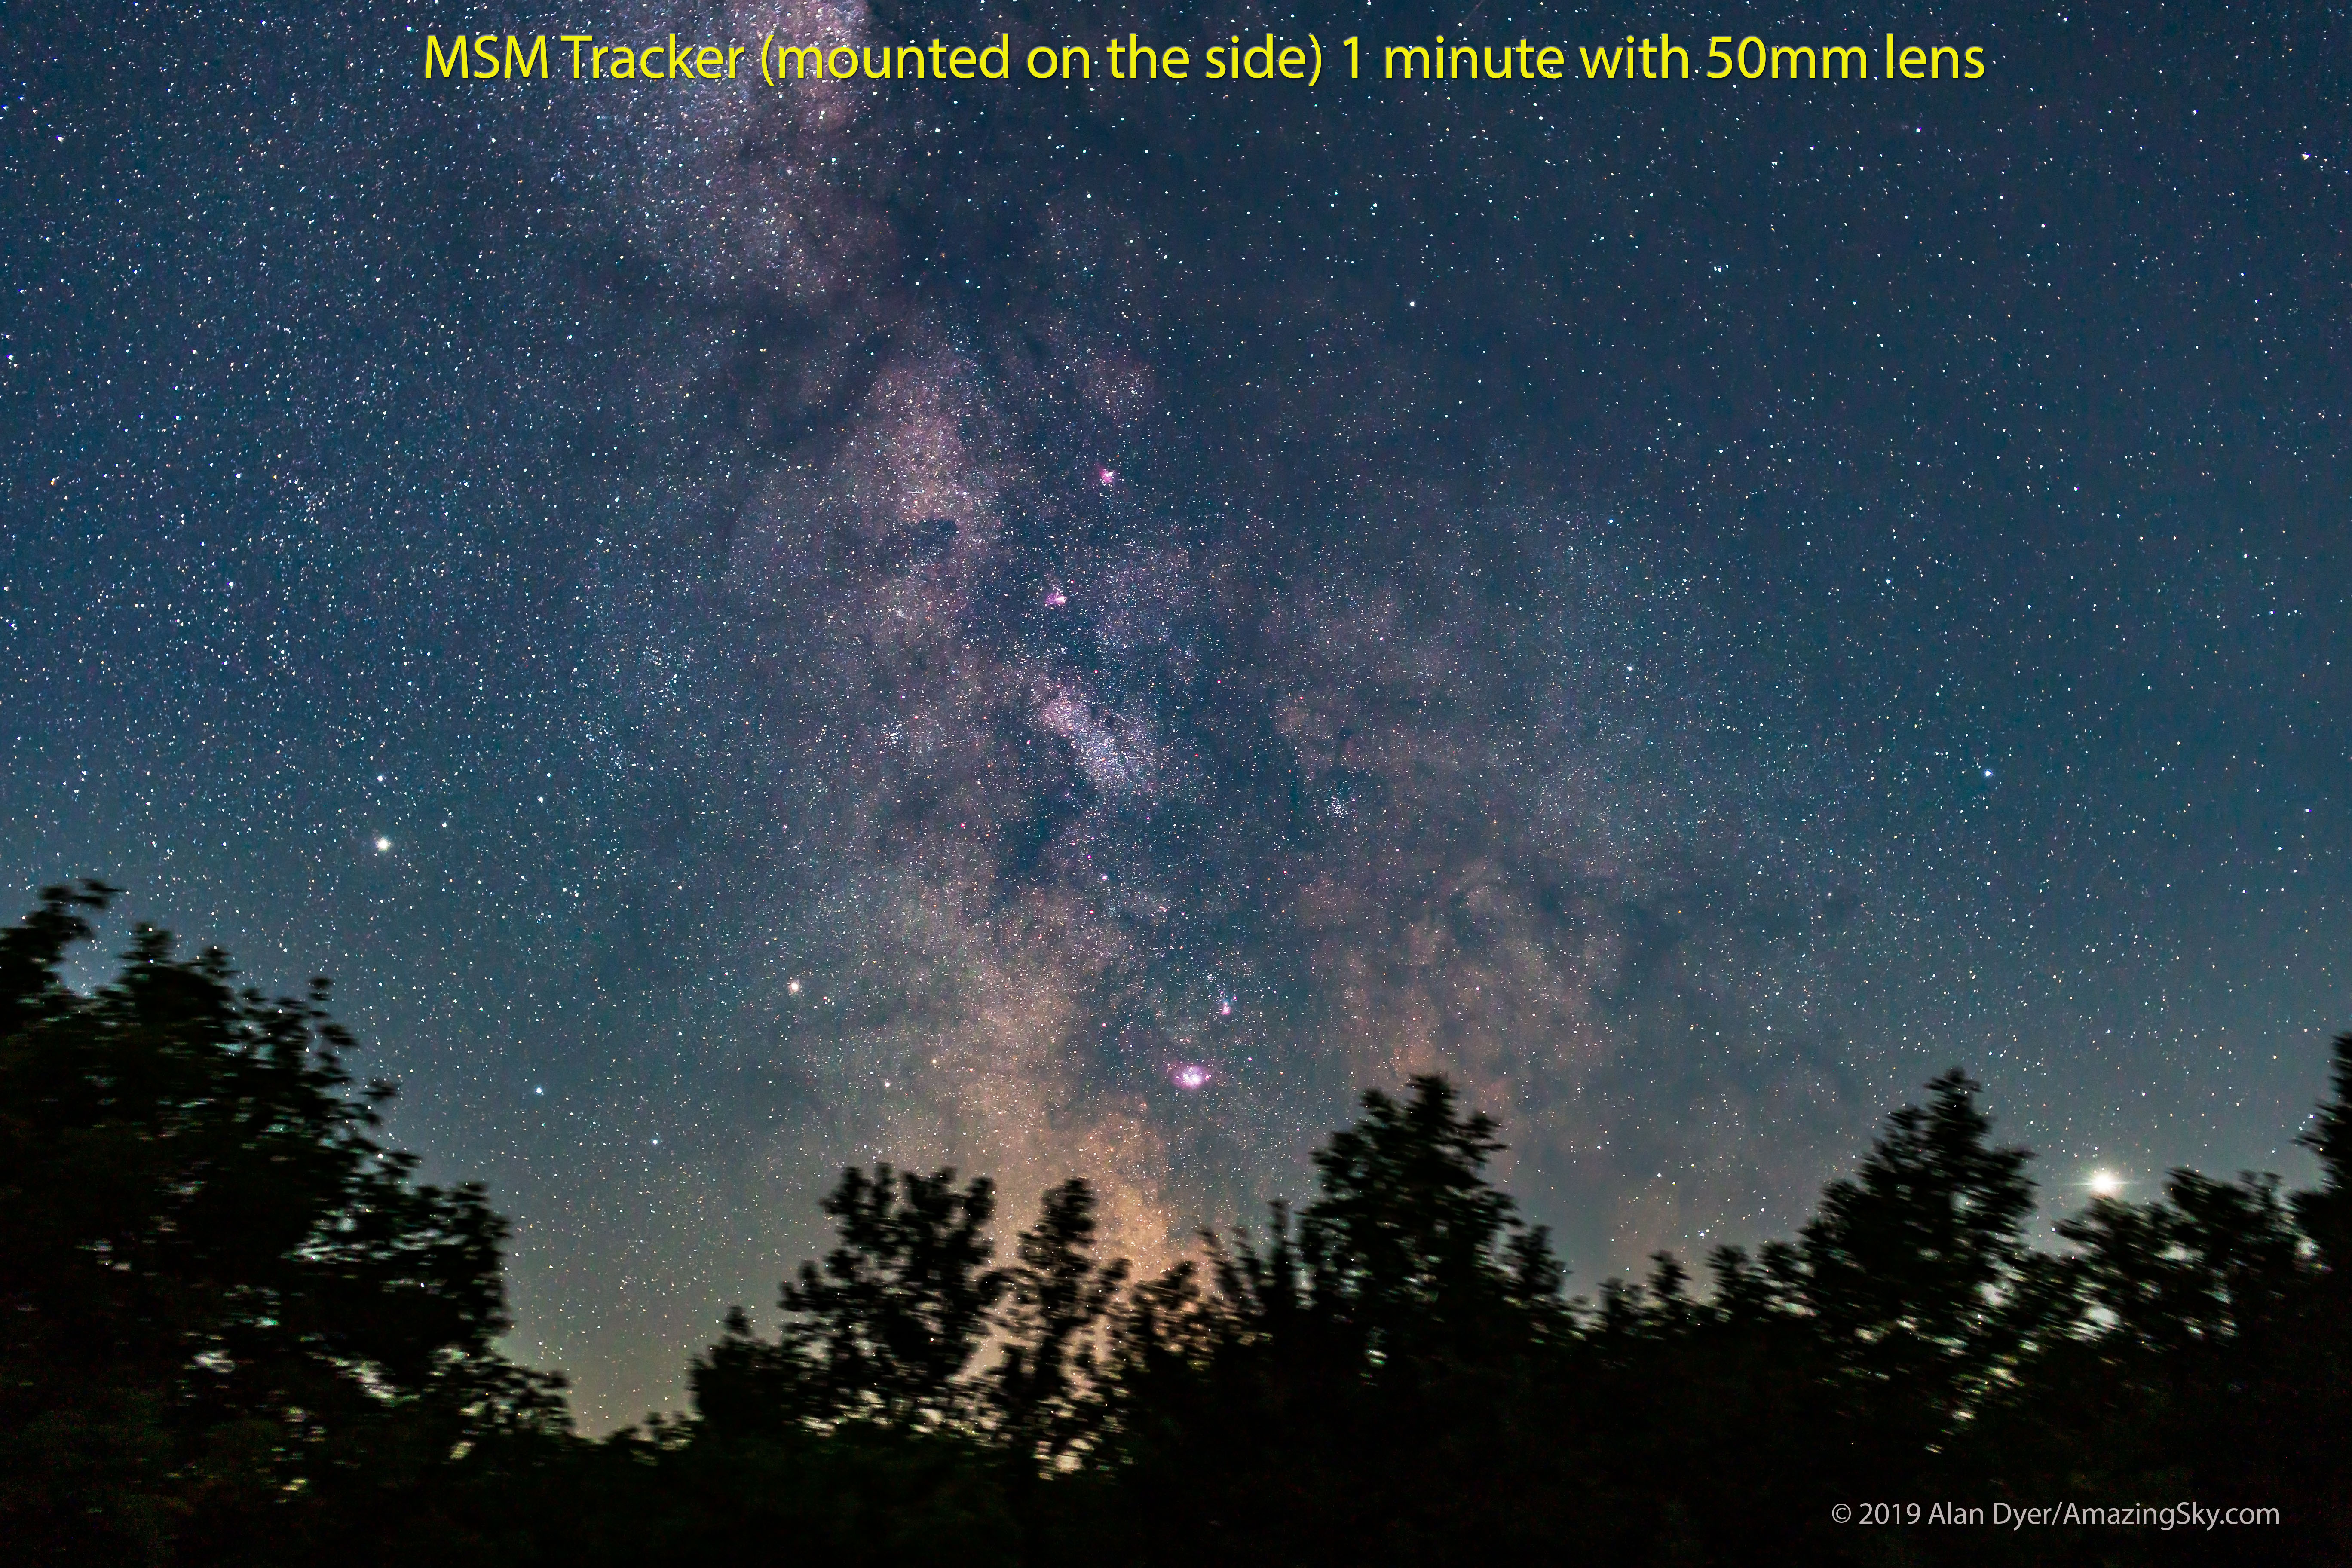
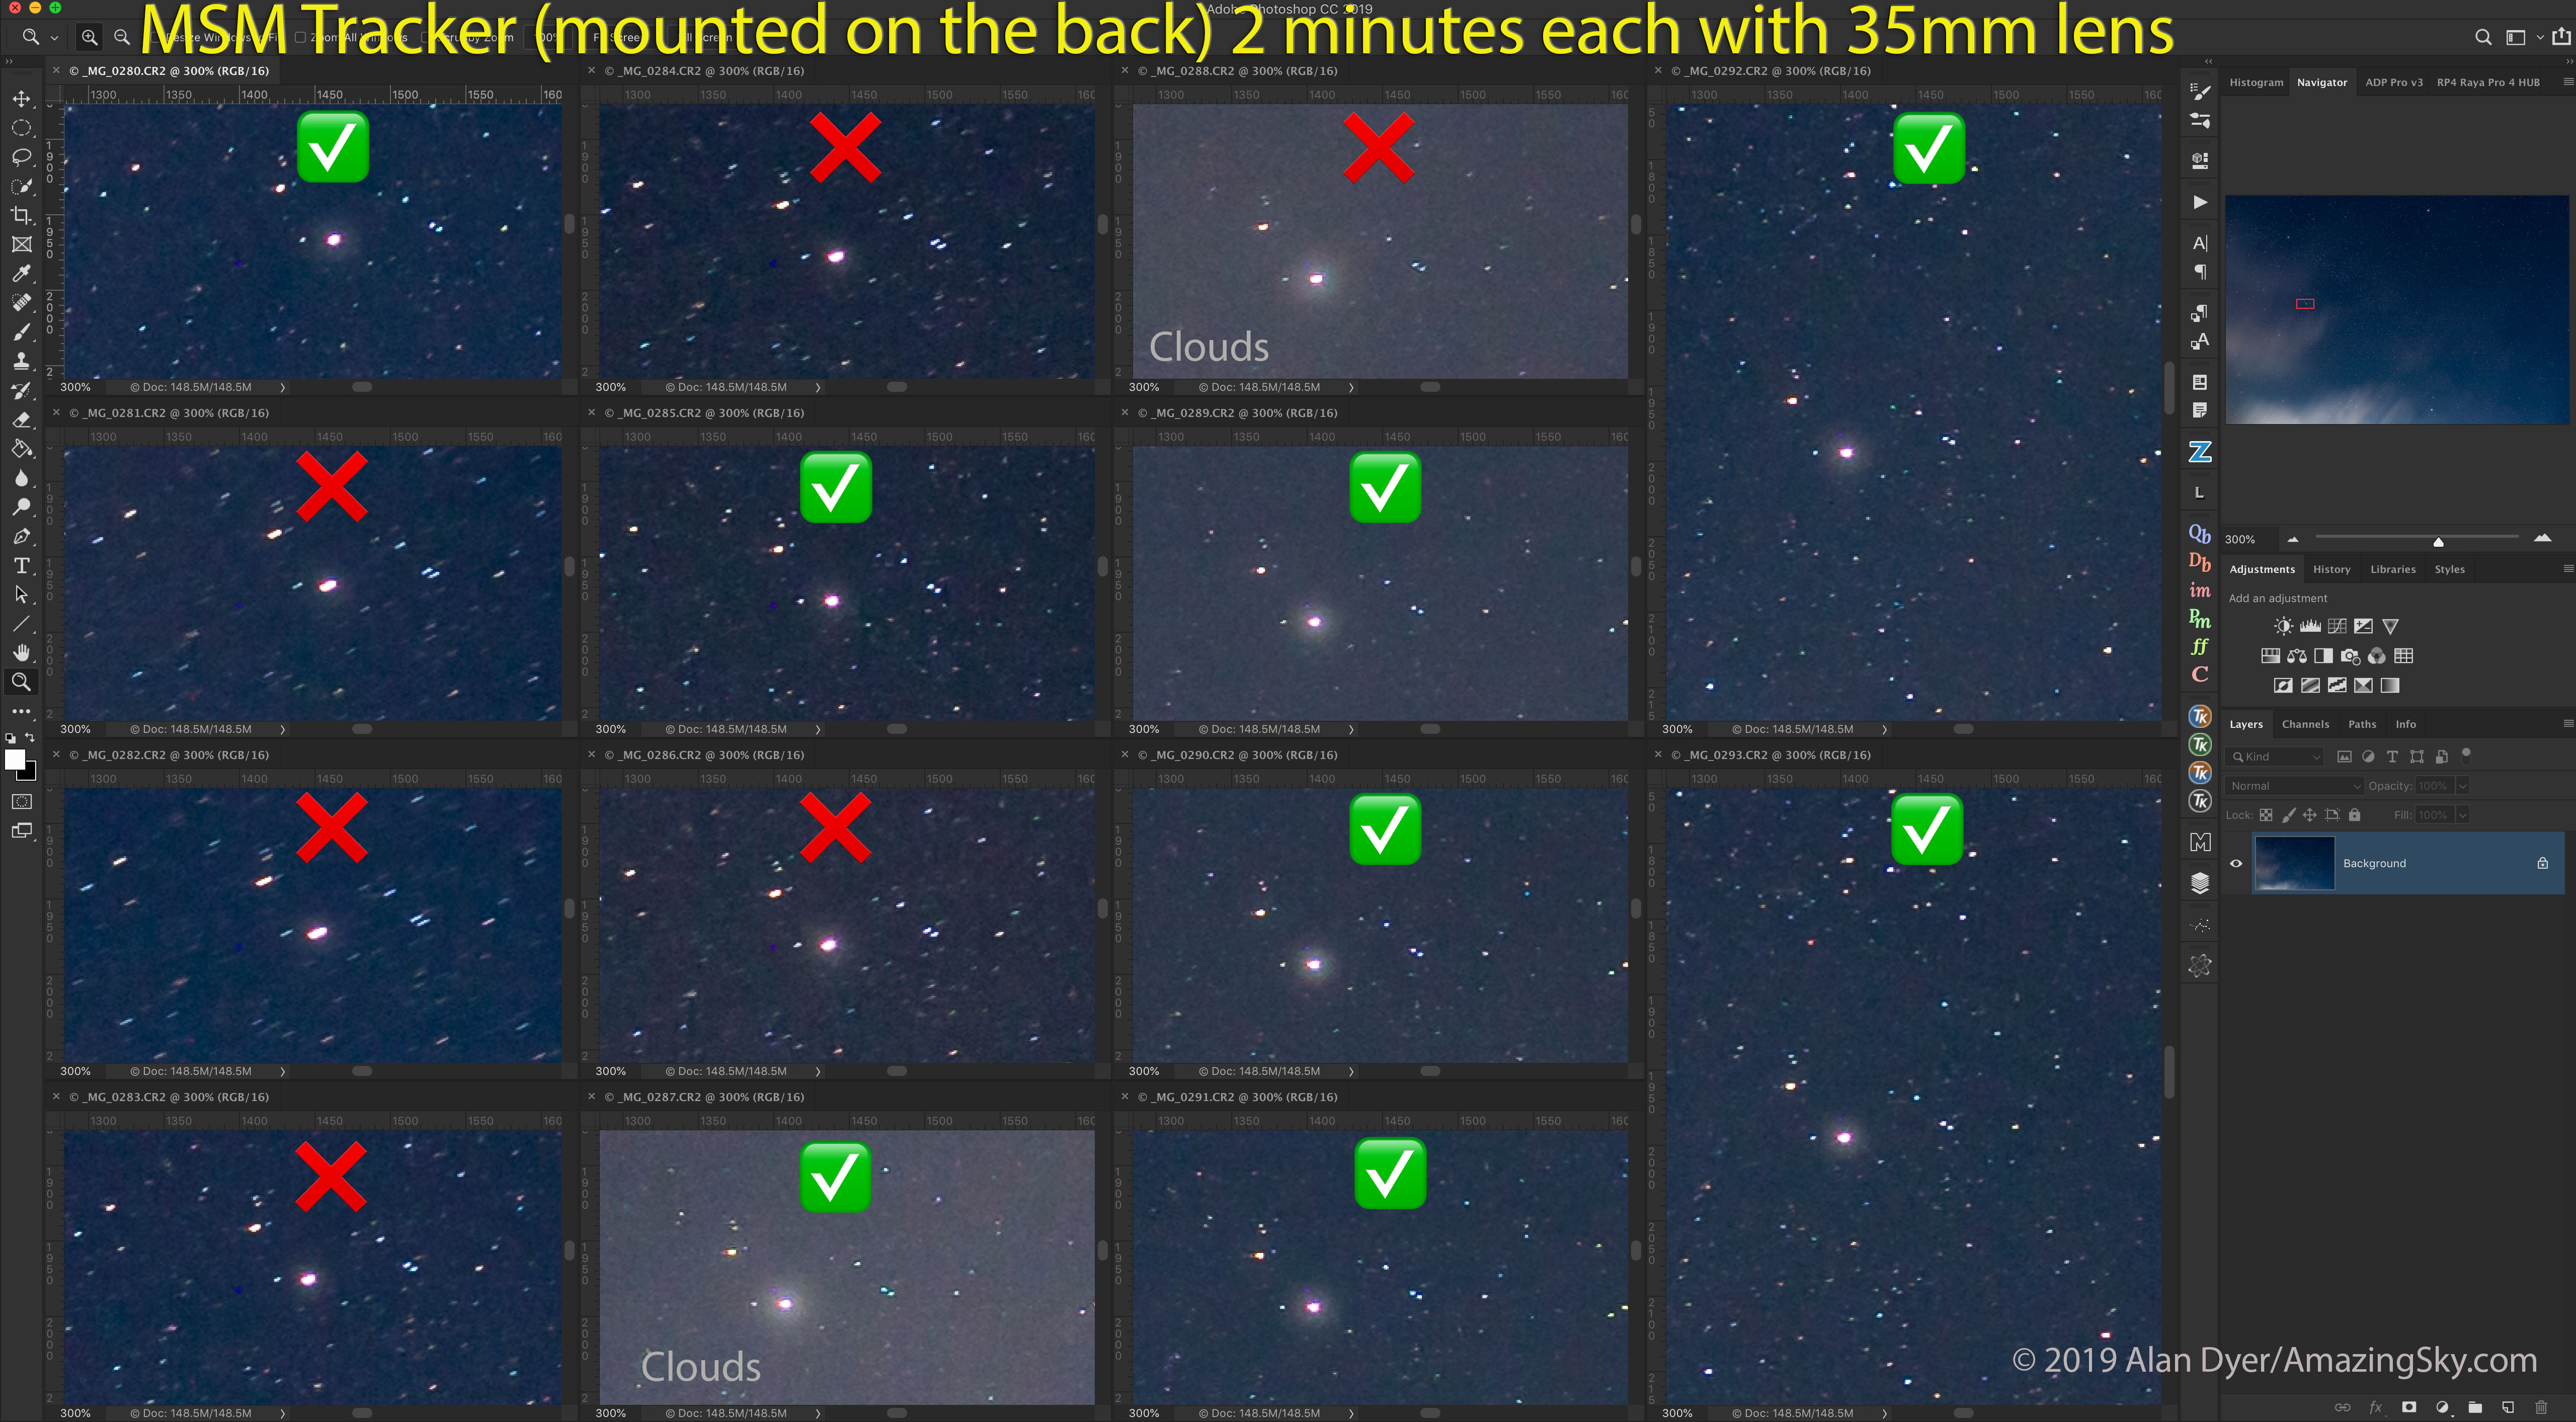
All-important is how well the Nomad tracks. When shooting with wide-angle lenses (14mm to 35mm) for nightscapes and wide Milky Way shots, the majority of images I’ve taken over the last few months, using exposures of 1 to 3 minutes, have been reliably well tracked, with pinpoint stars.
The Nomad begins tracking right away, with no wait for gear backlash to be taken up, or for the drive mechanism to settle in. I also found no tendency for tracking to be better or worse with camera position, unlike the Rotator that seemed to work better with the camera aimed at one area of sky vs another. And the Nomad didn’t suffer from any stalls or moments when it just stopped in its tracks, again unlike the problematic Rotator.
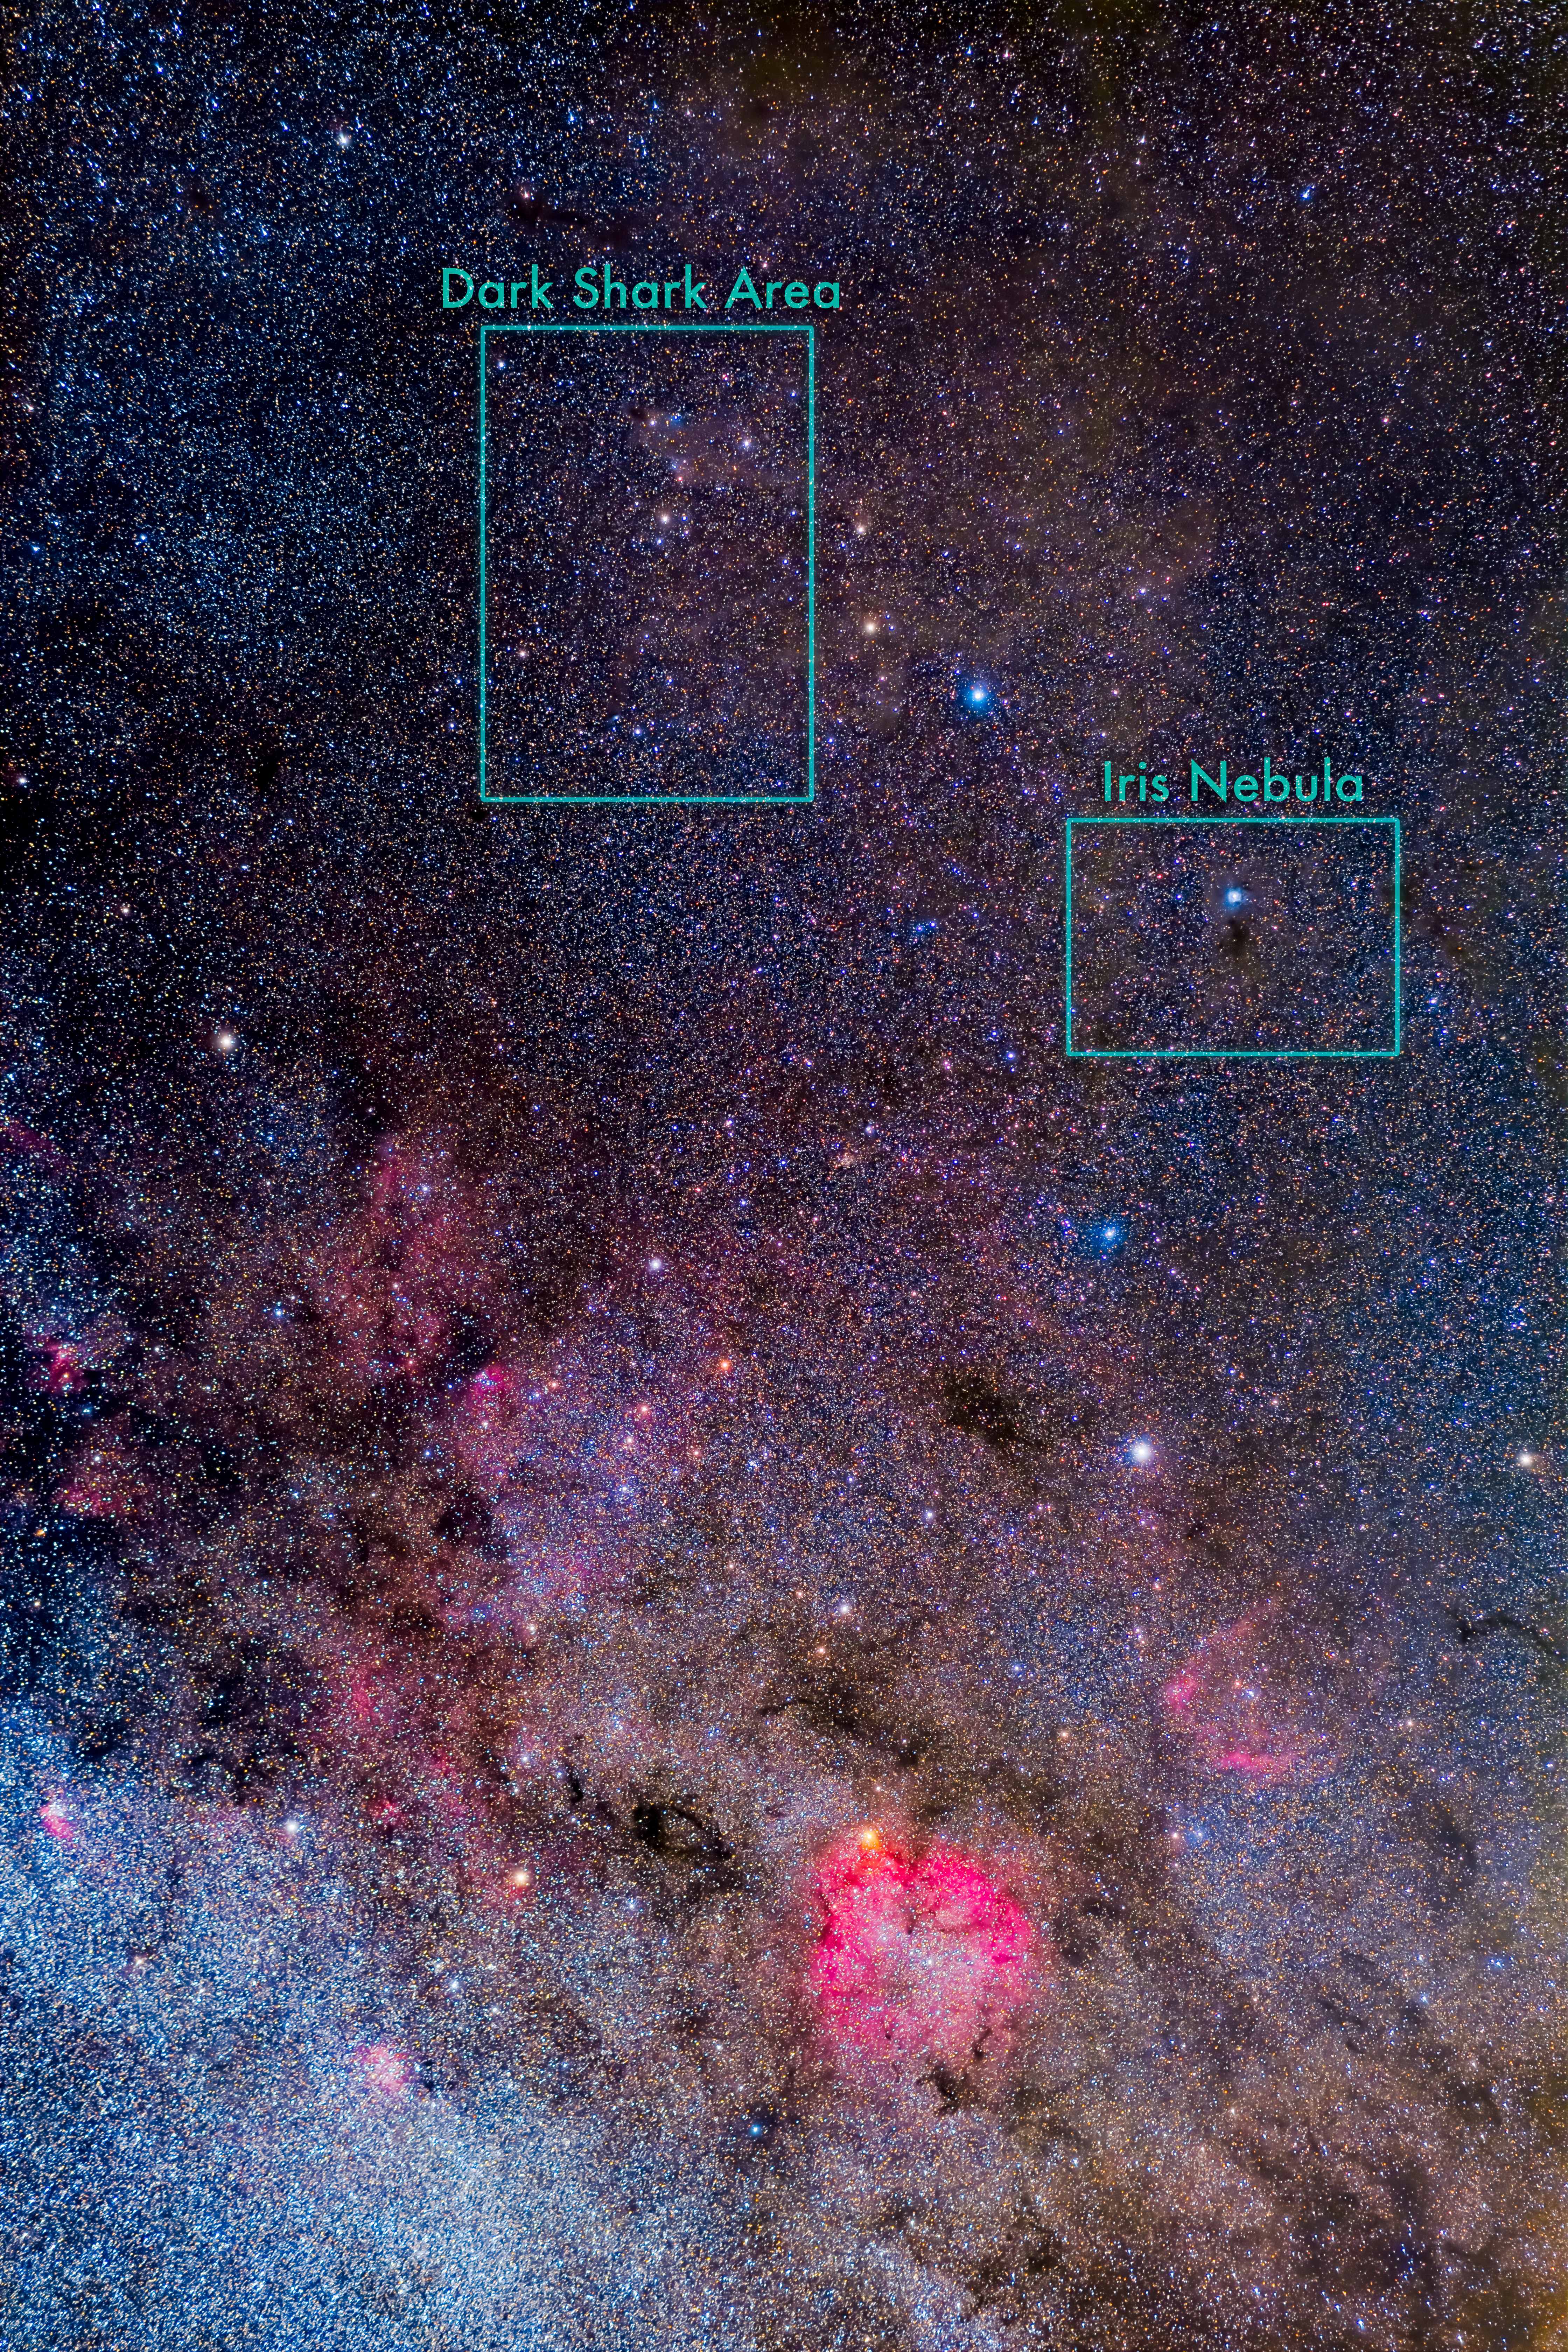
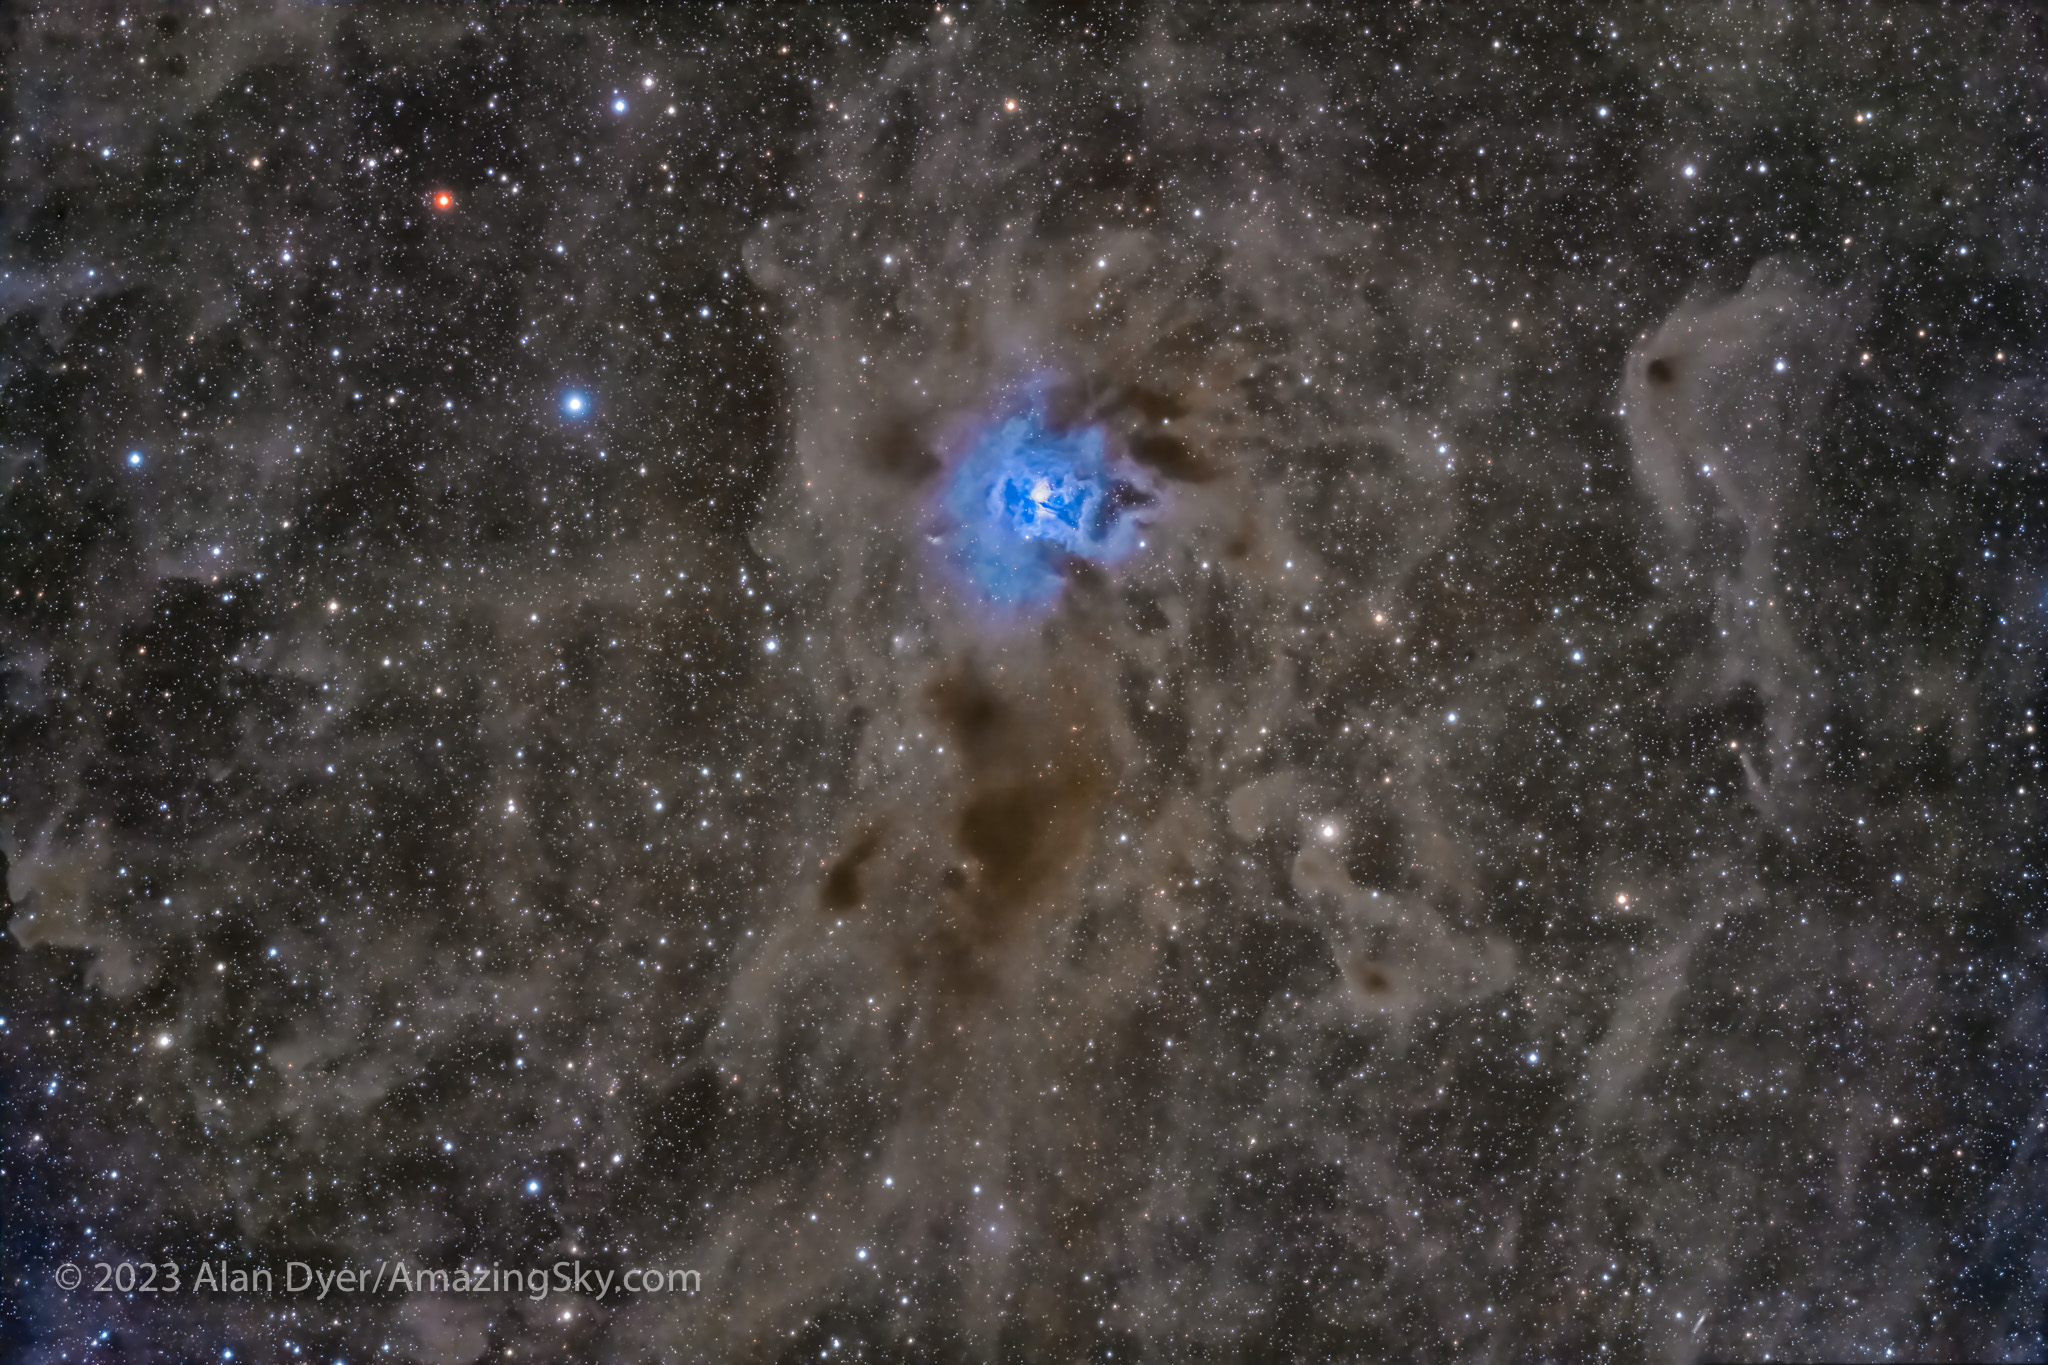
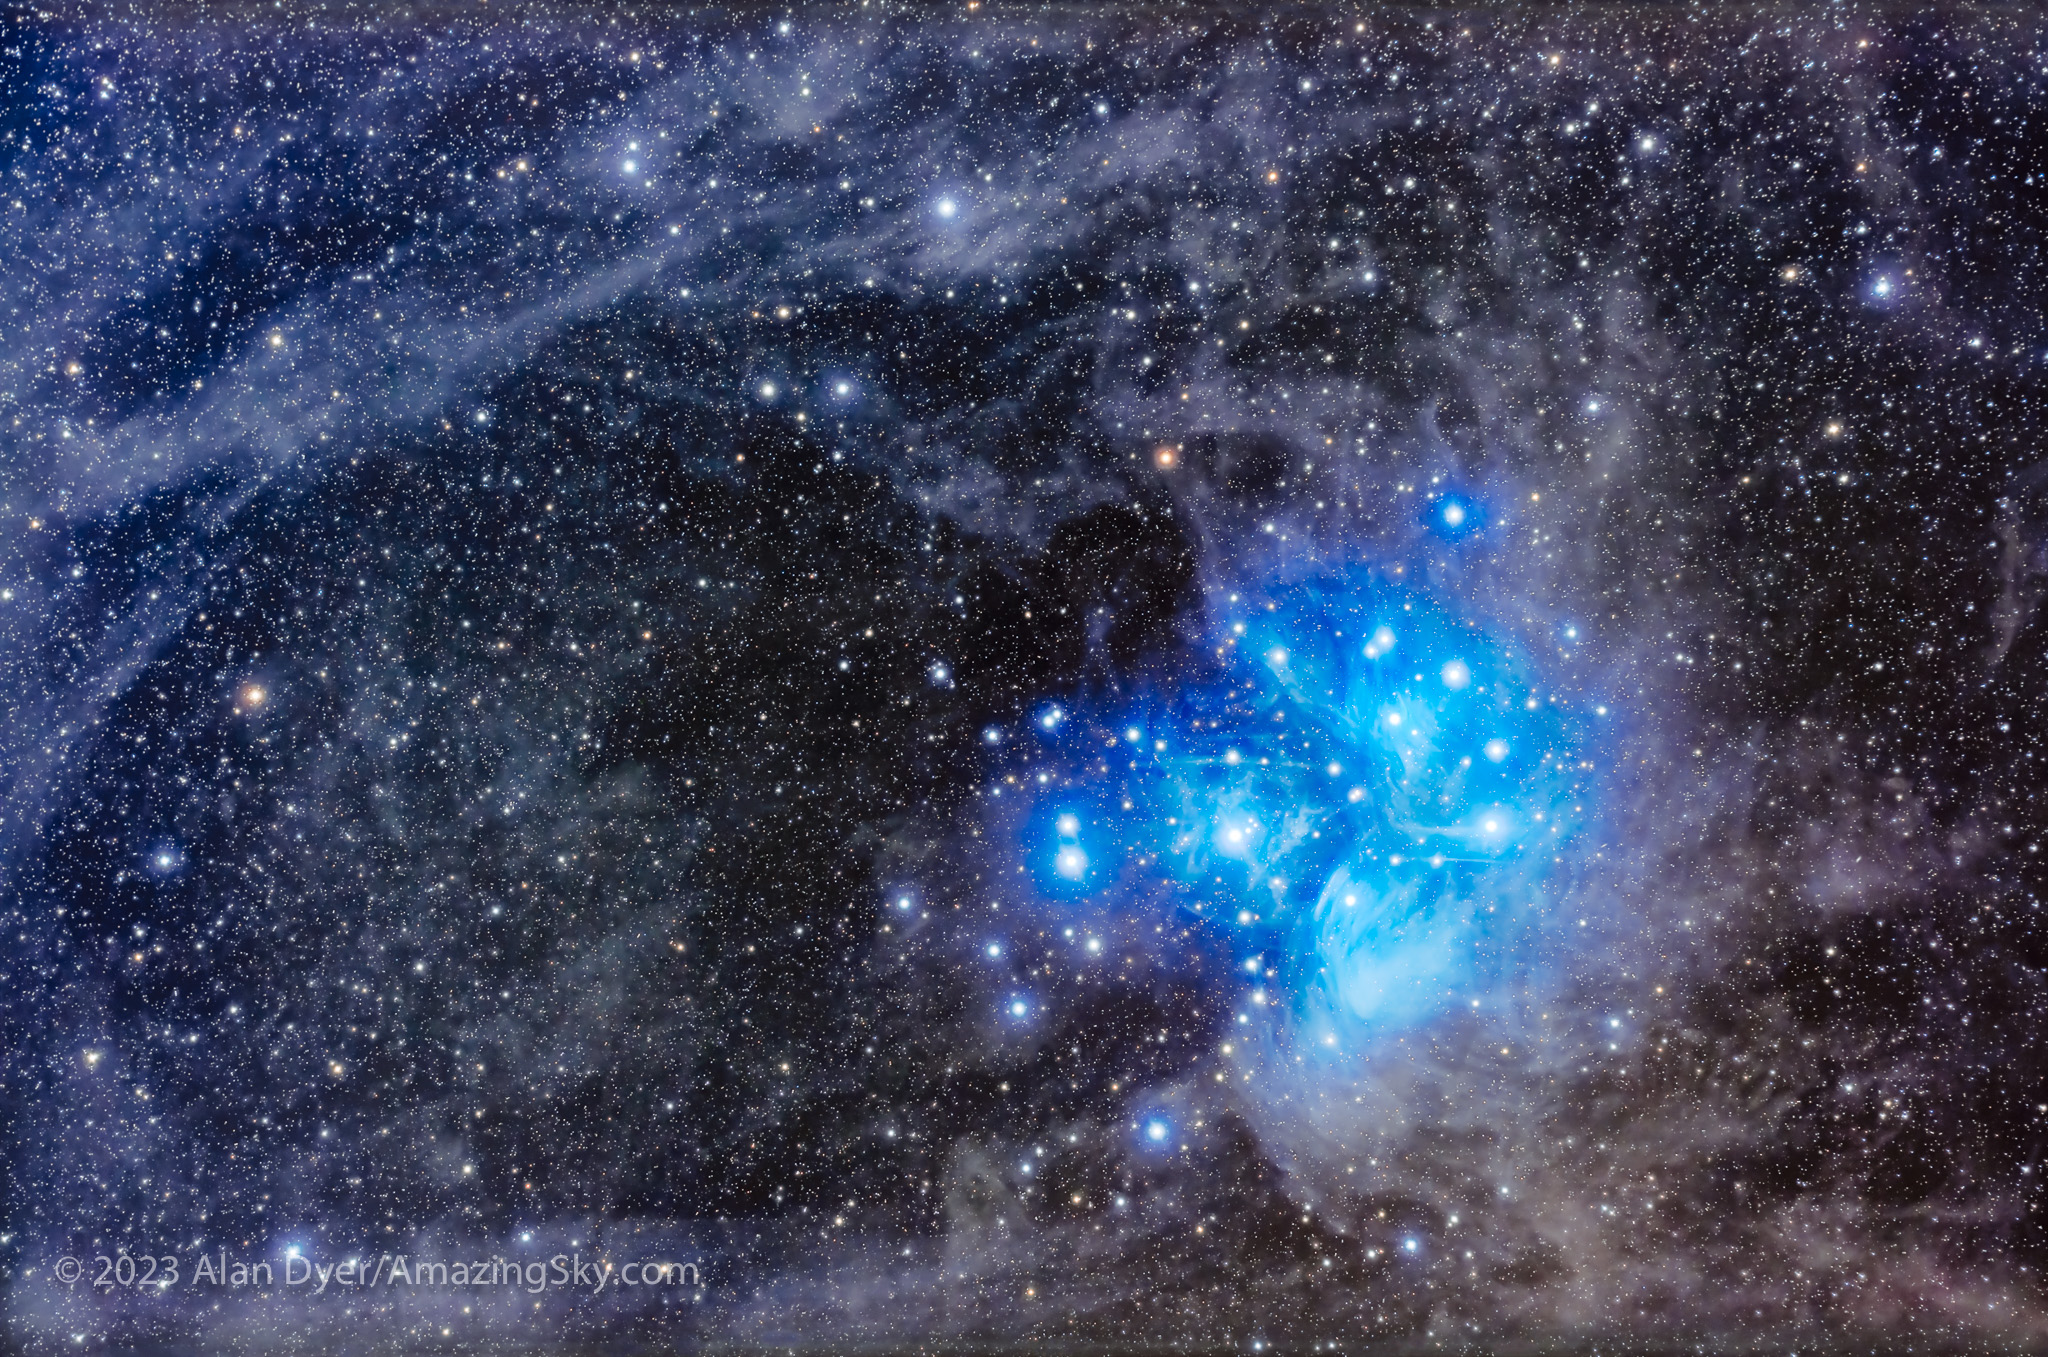
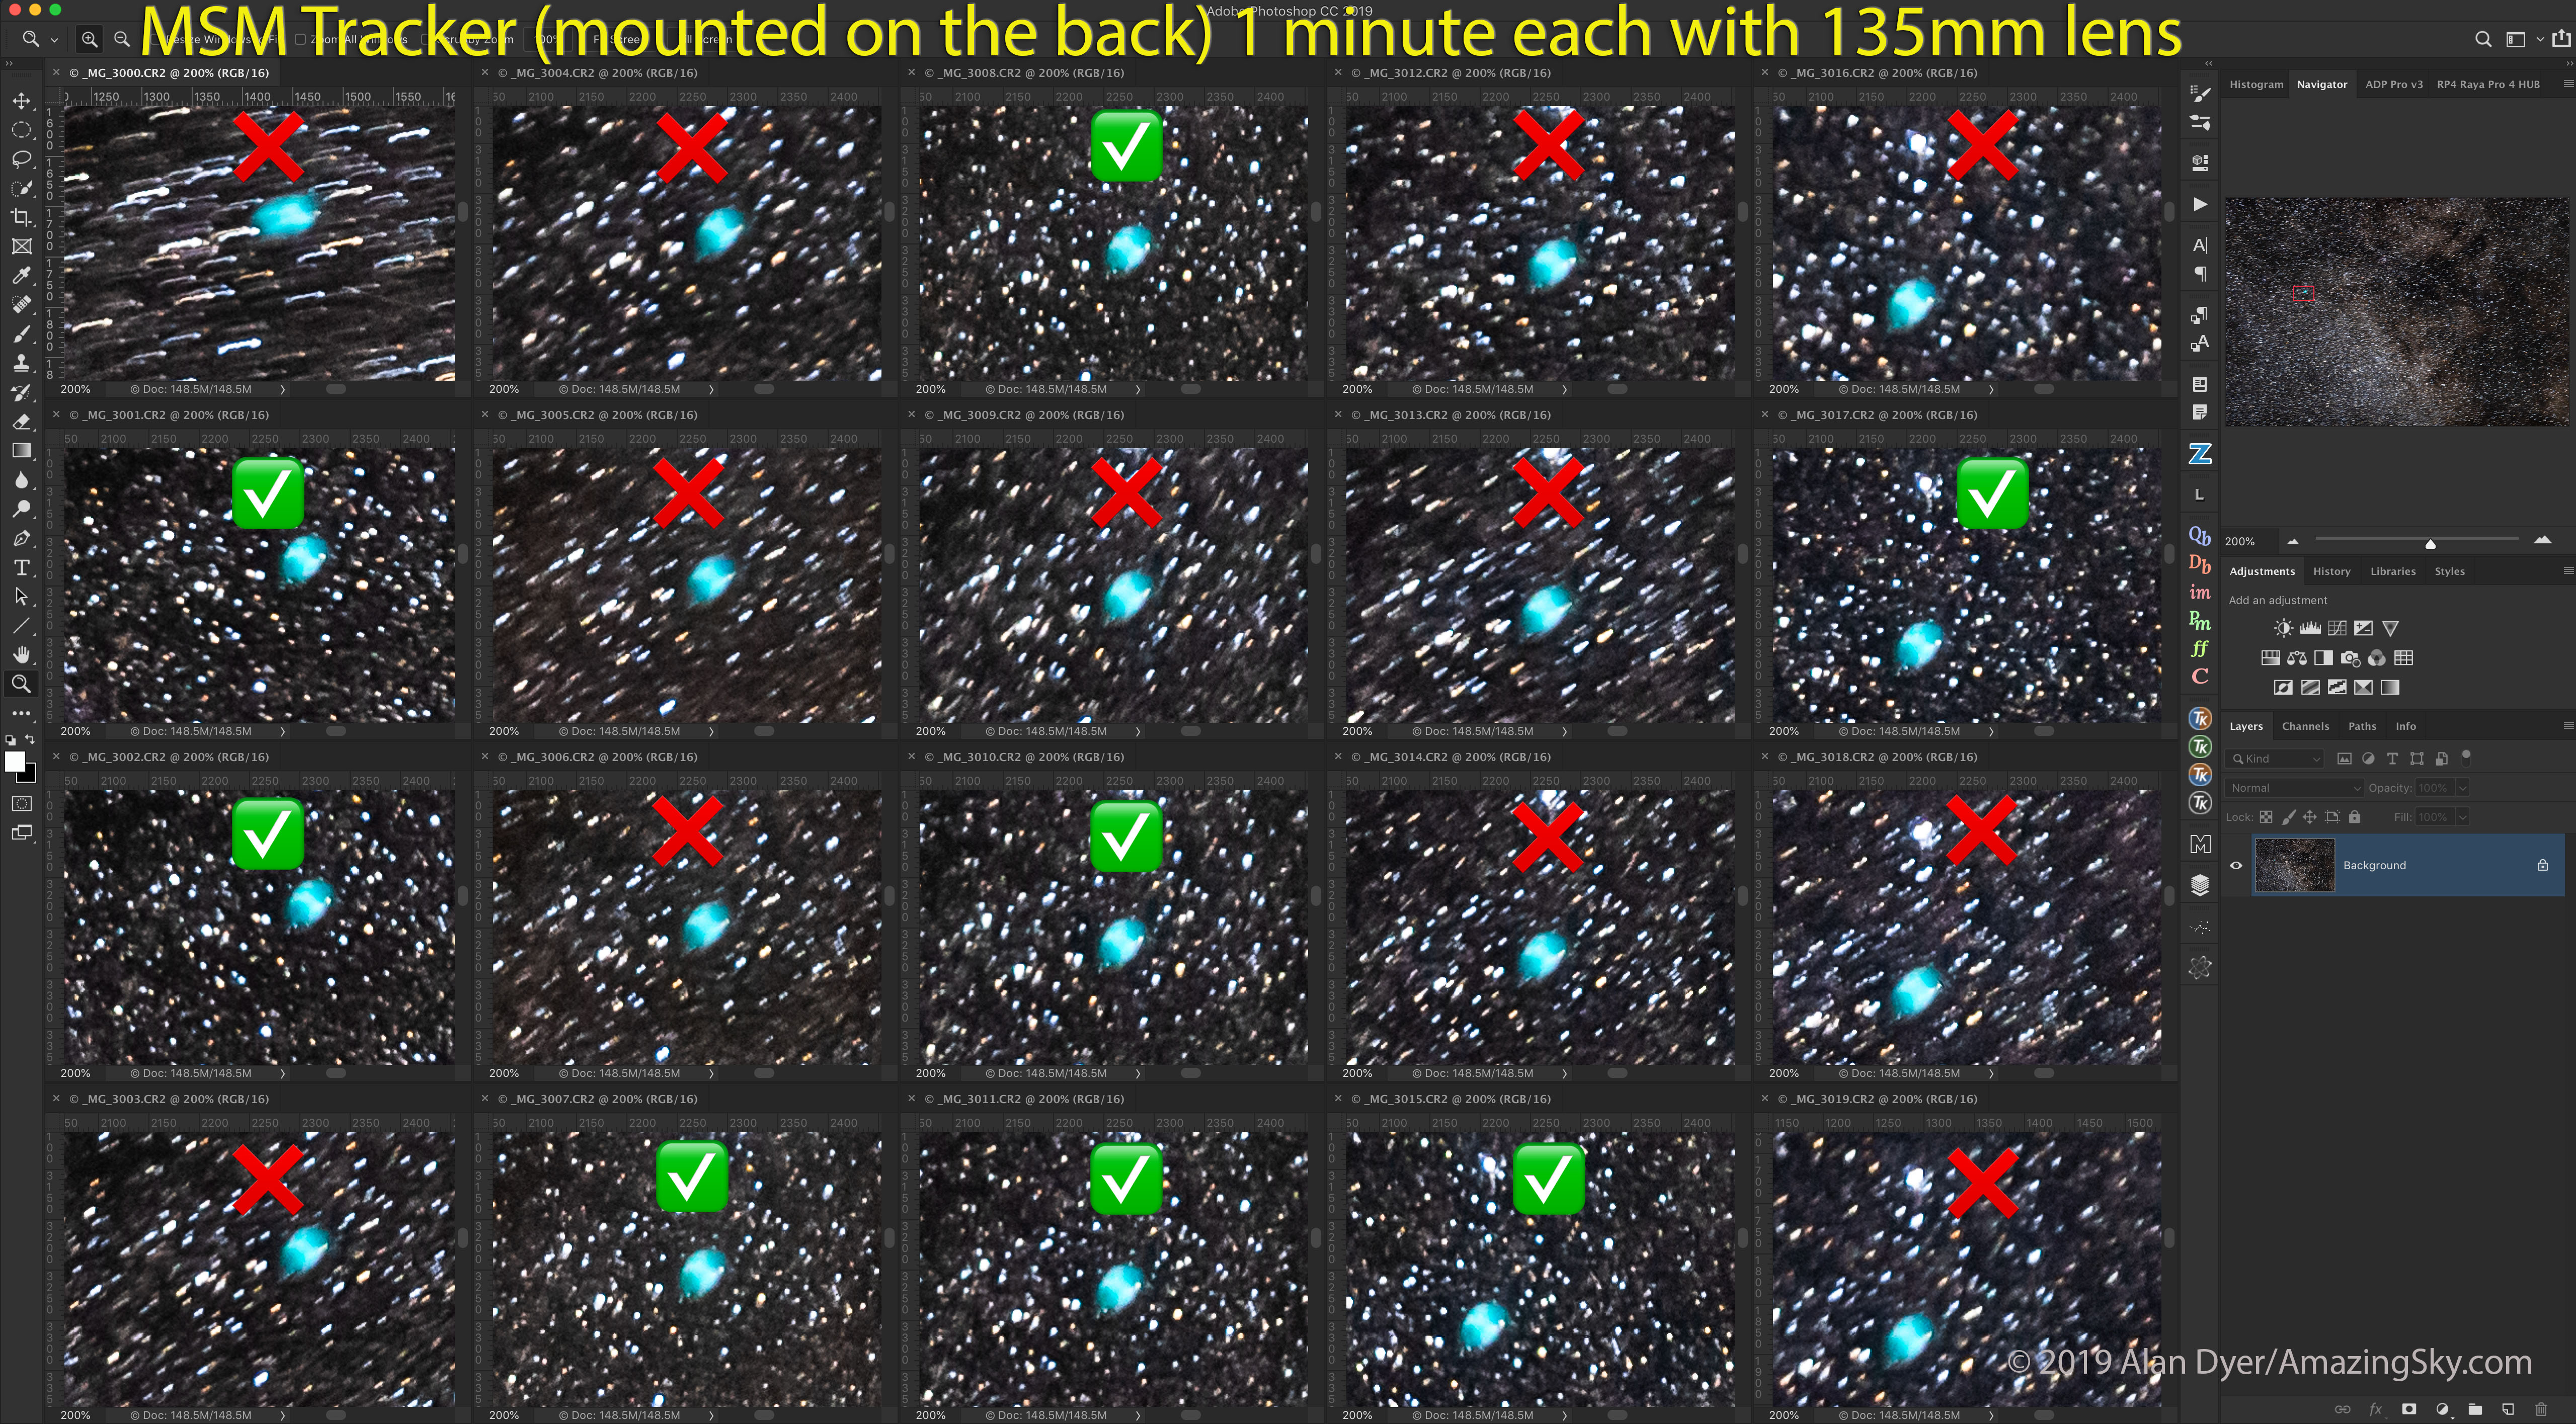
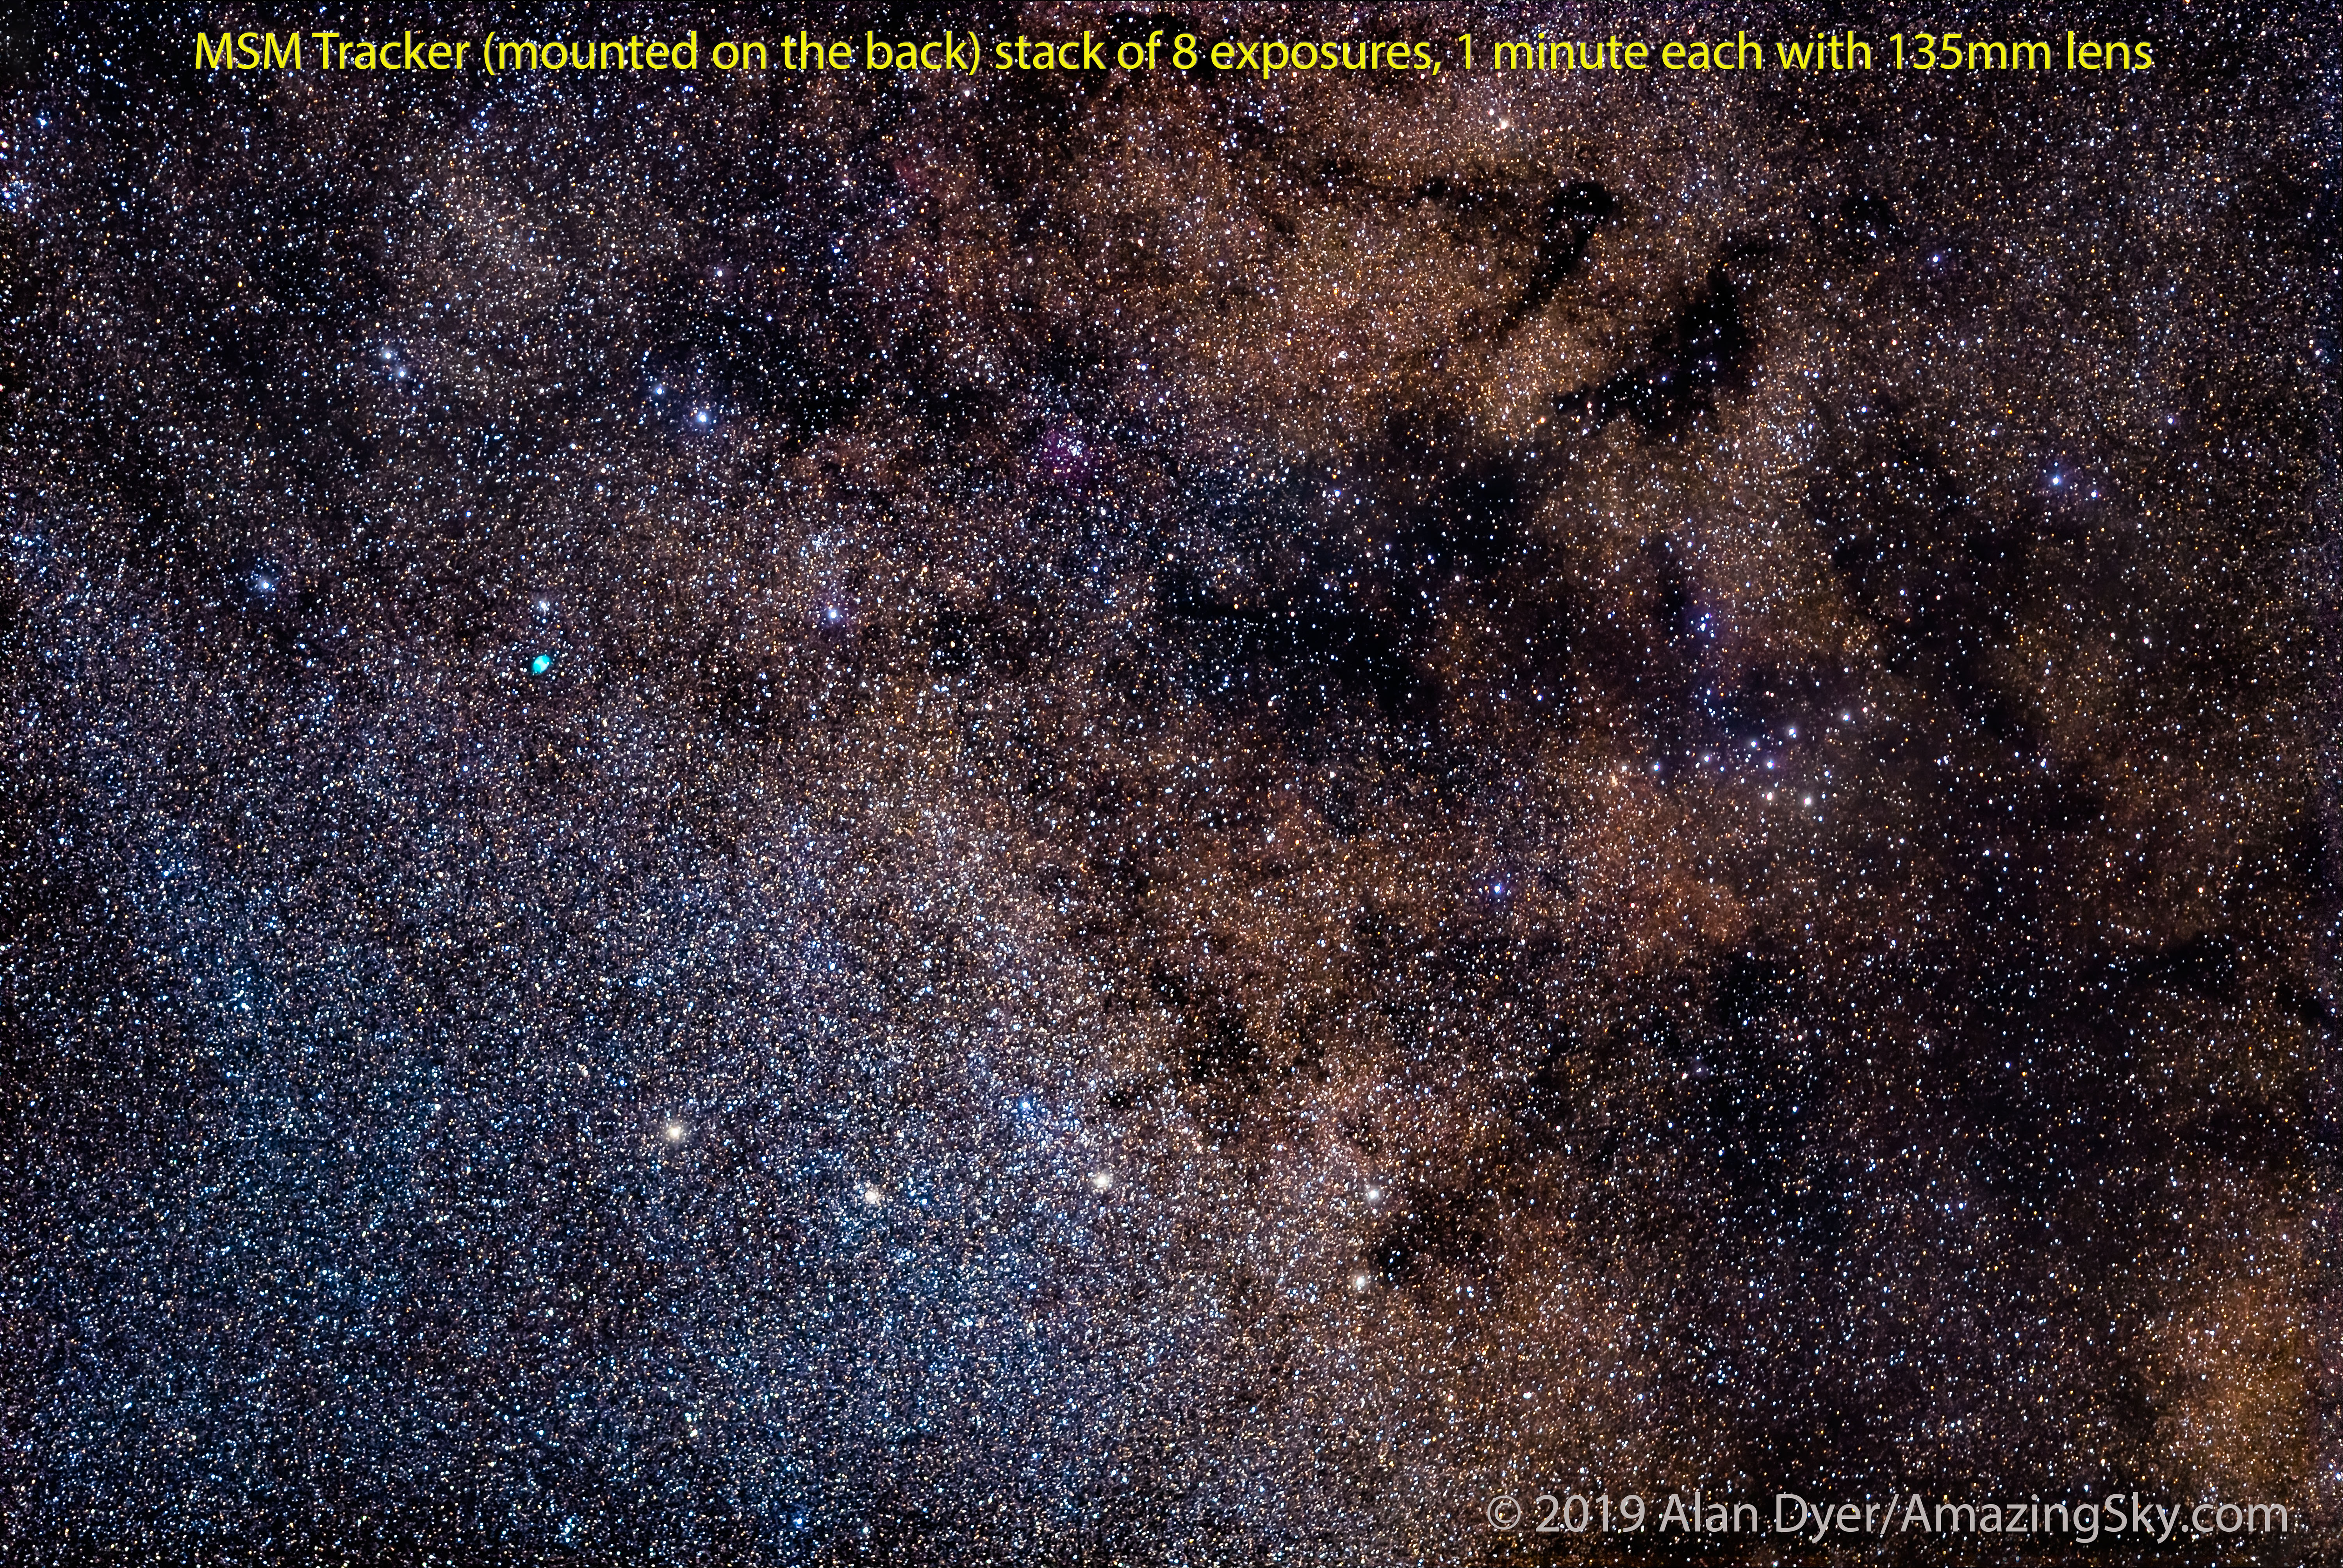
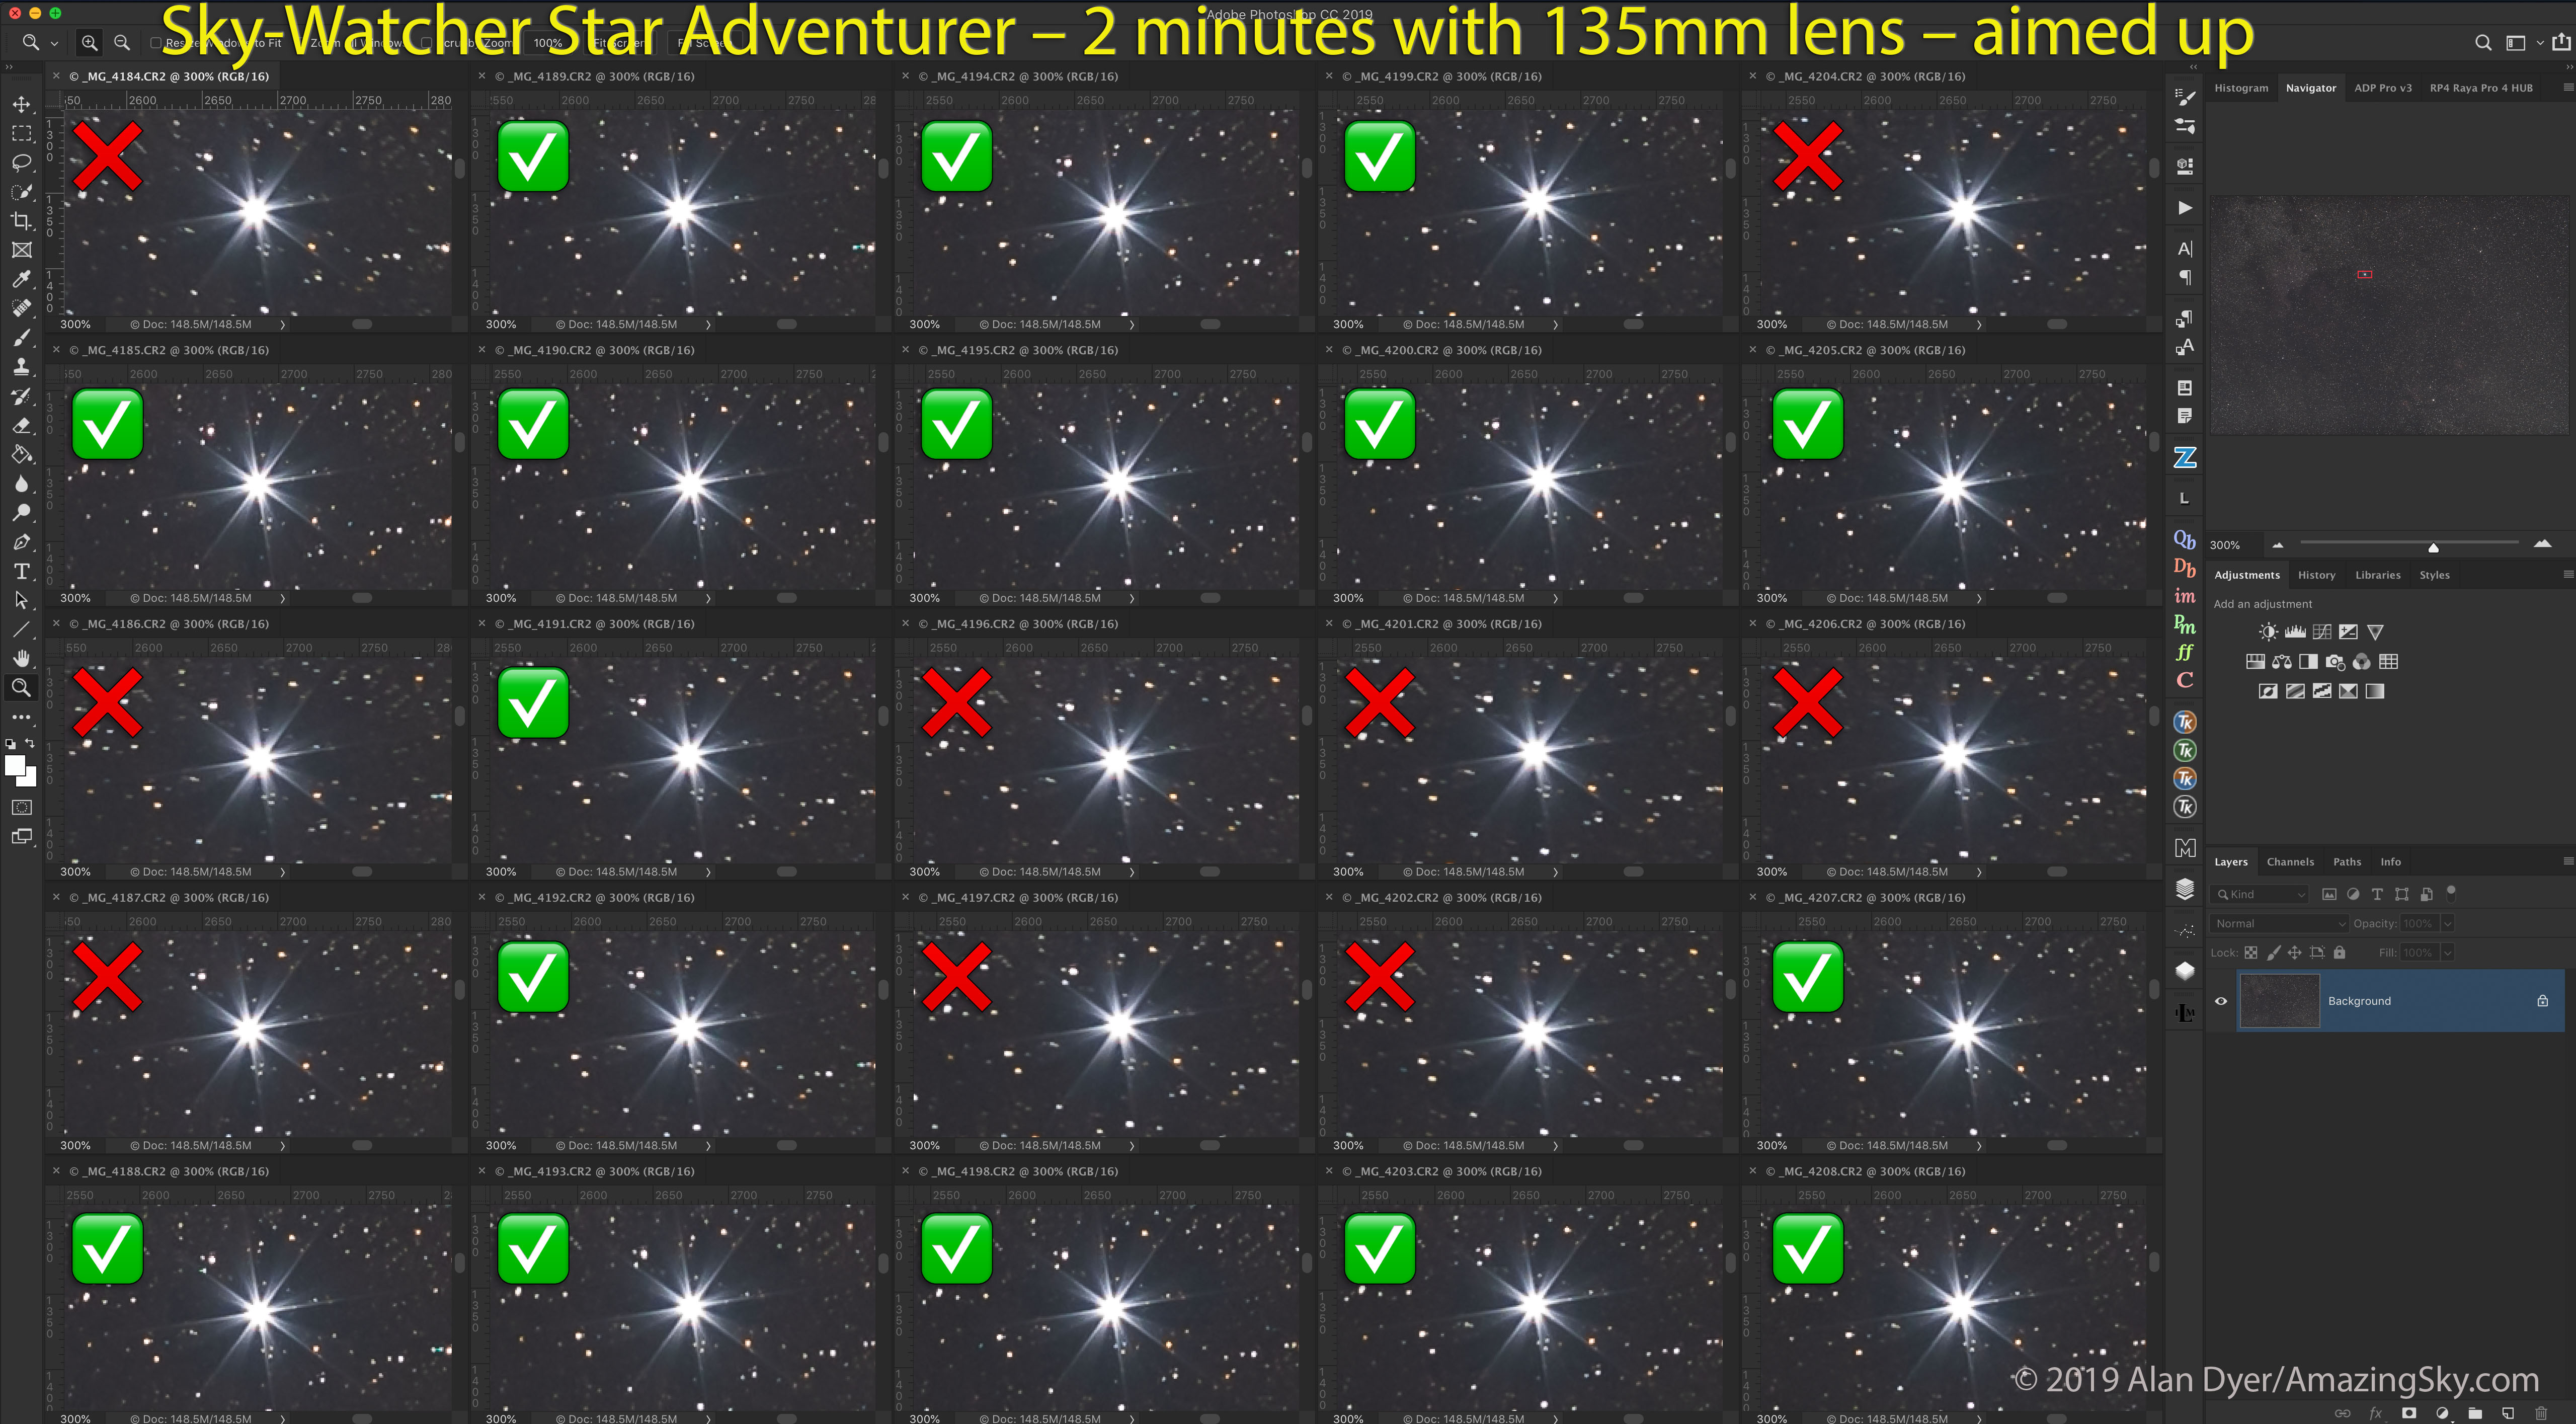
As with any tracker, where you do see mistracking is when using longer lenses. I tested, and indeed have used, the Nomad with 85mm and 135mm telephoto lenses, as many owners will want to do, for close-ups of Milky Way starfields and for so-called “deepscapes.” (An example of the latter is at the end.) The demo image above shows blow-ups of consecutive frames from the 135mm shoot of the Vulpecula/Sagitta starfield shown earlier.
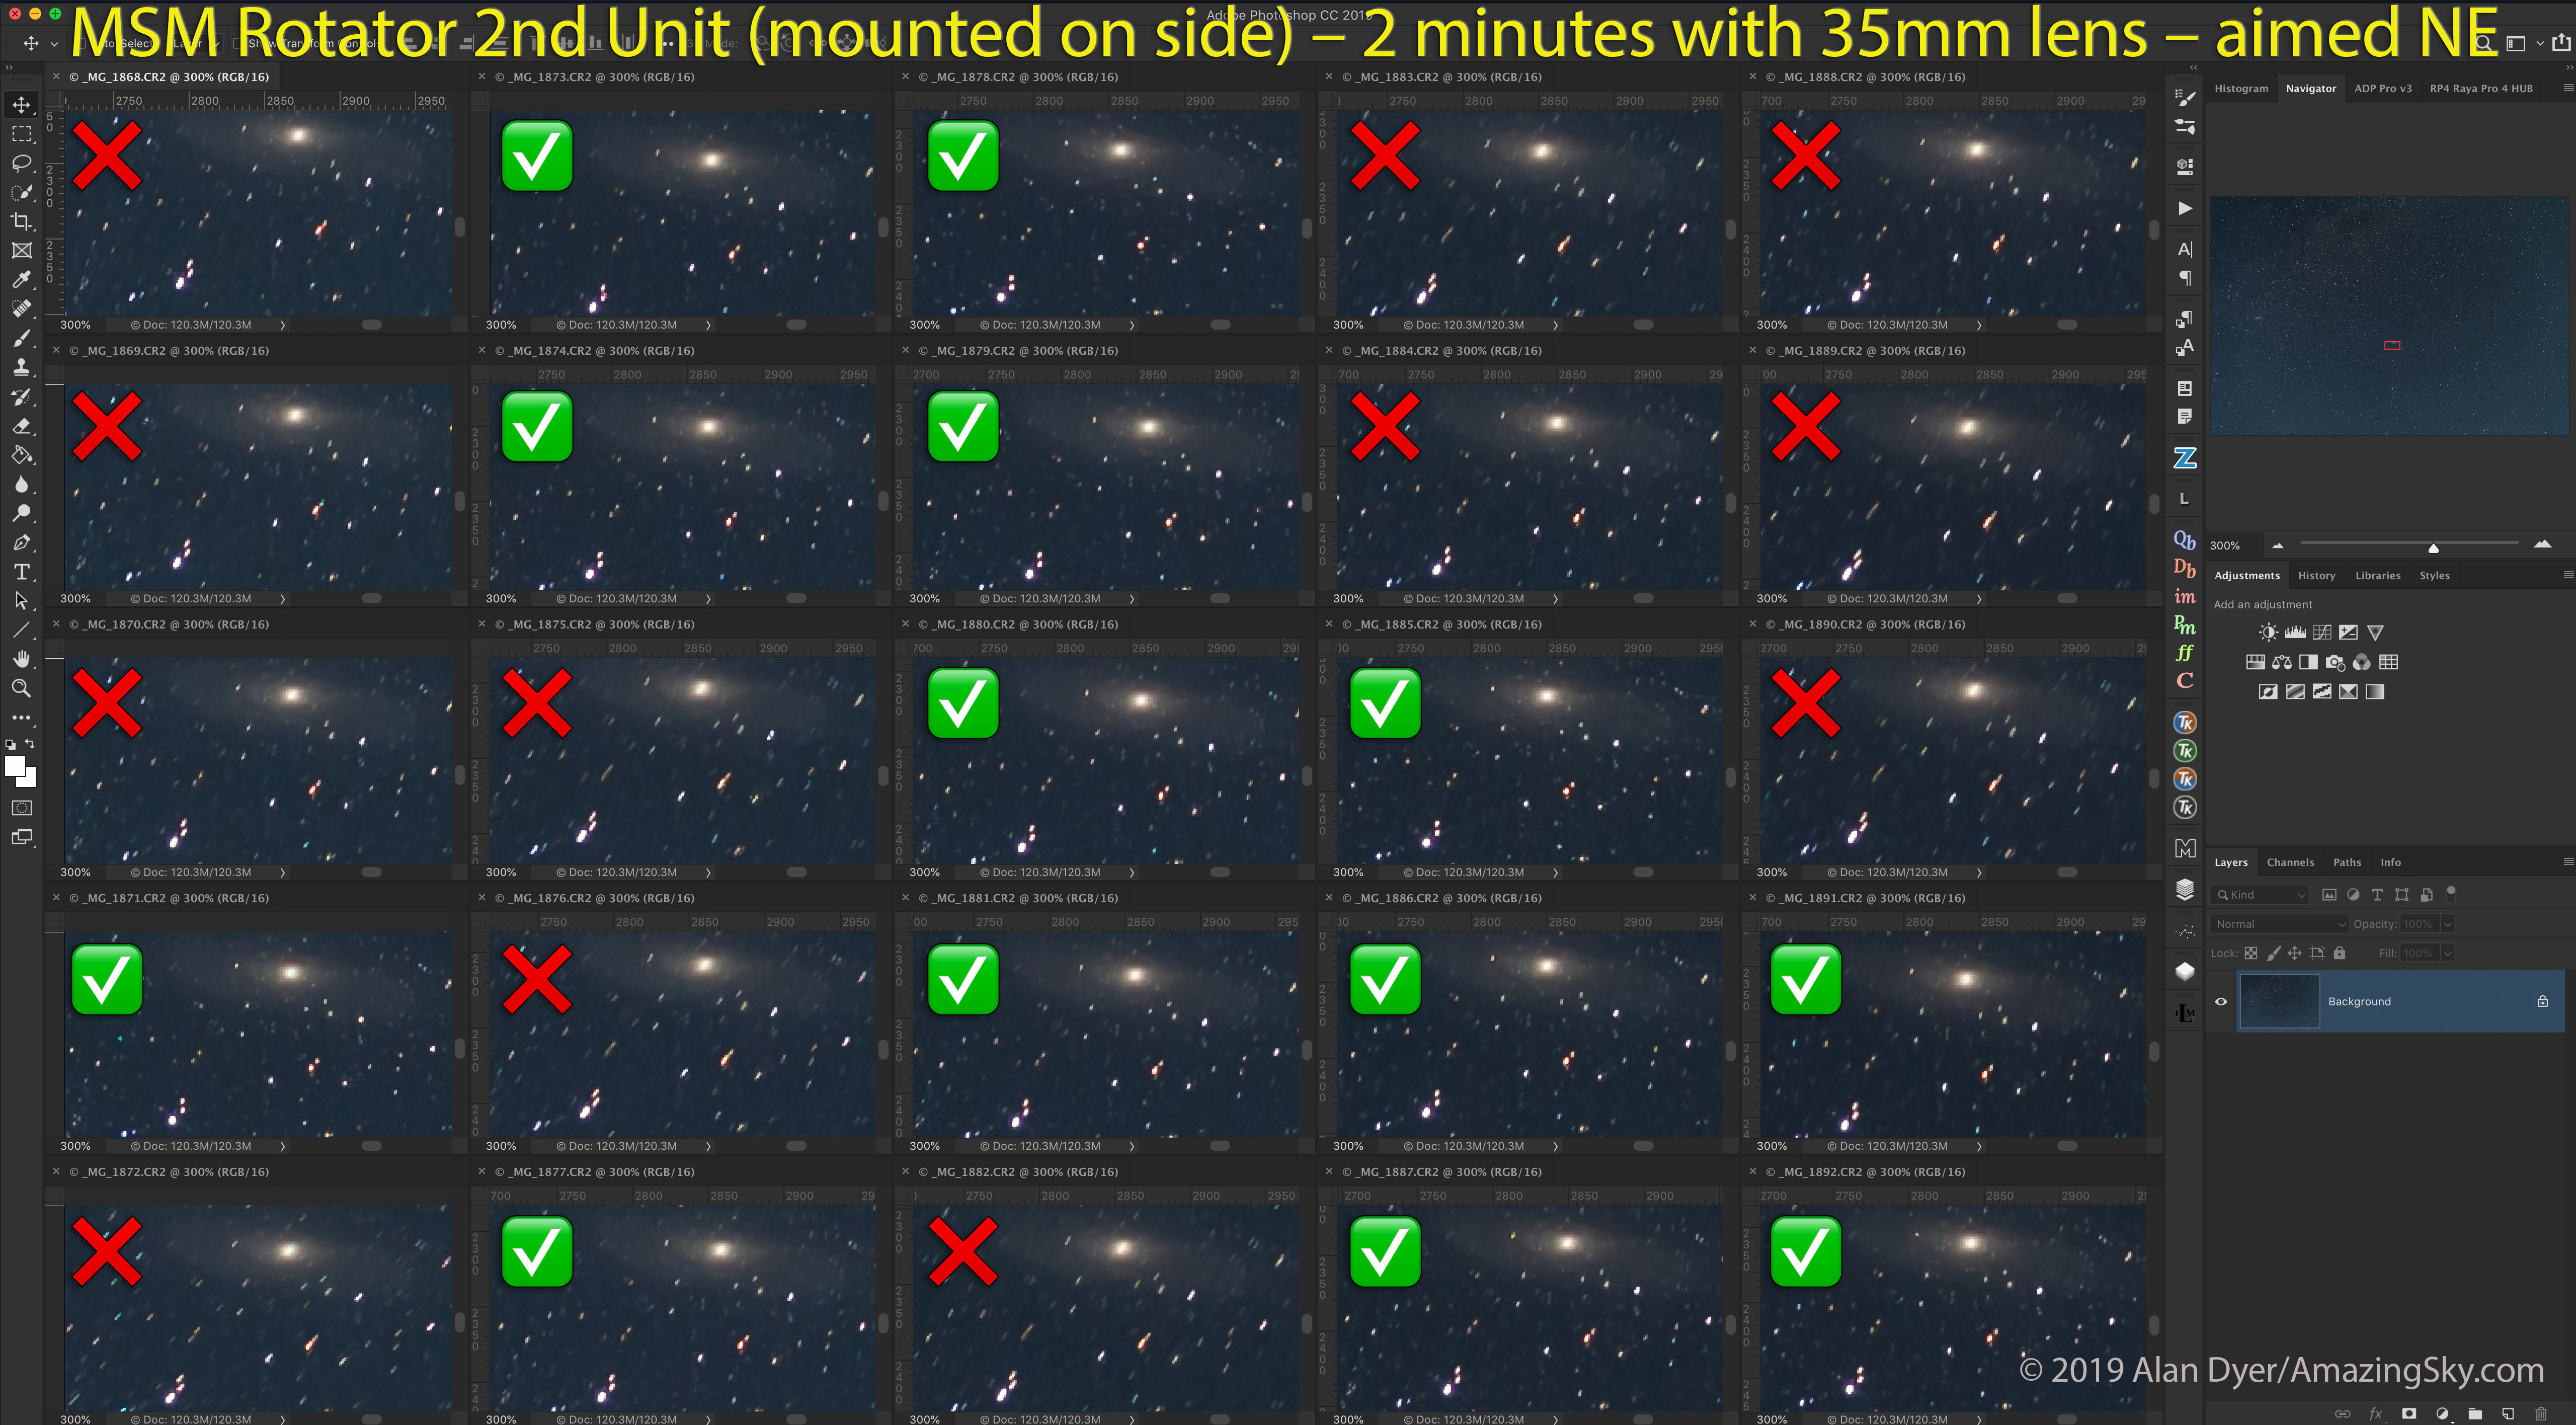
In those more demanding tests, as I demonstrate here, I found that typically about 50% to 60% of images (taken with 1- to 2-minute exposures) were tracked well enough to be usable. The longer the focal length used, or the longer the exposures, the more frames will be trailed enough to be unusable in an image stack. And a well-tracked frame can be followed by a badly tracked one, then the next is fine again. That’s the nature of small drive gears.
As with other trackers, I would suggest that the Nomad is best used with lenses no longer than a fast 135mm. Even then, plan to shoot twice as many frames as you’ll need. Half may need to be discarded. While I know some users will want to push the Nomad beyond its limits, I would not recommend burdening it with monster telephoto lenses or small telescopes. Like all other trackers, that’s not its purpose.
When there was mistracking it was usually in the east-west direction, due to errors in the drive mechanism, and not north-south due to flexure. (If it occurs, north-south drift is likely due to poor polar alignment.)
I found the Nomad did indeed turn at the sidereal rate to follow the stars, something I was never confident the Rotator actually did.
While you might think a 50% success rate with telephotos is not good, in fact the Nomad’s tracking performance is on par with other competing trackers I’ve used, from Sky-Watcher and iOptron. At wide-angle focal lengths the success rate proved closer to 100%.
So for a tracker as compact as the Nomad to perform so well is very welcome indeed. It’s the main area where the Nomad beats the old Rotator by a long shot!
NOTE: While the MSM website mentions an “optional counterweight system,” as of my review’s publication date it is still being developed, MSM tells me. However, I don’t feel it will be necessary for the Nomad’s main purpose of wide-field imaging.
Mechanical Stability
Another flaw of the old Rotator was that it had several single-point attachments that, under the torque of a turning camera, could cause the camera to come loose and suddenly flop down.
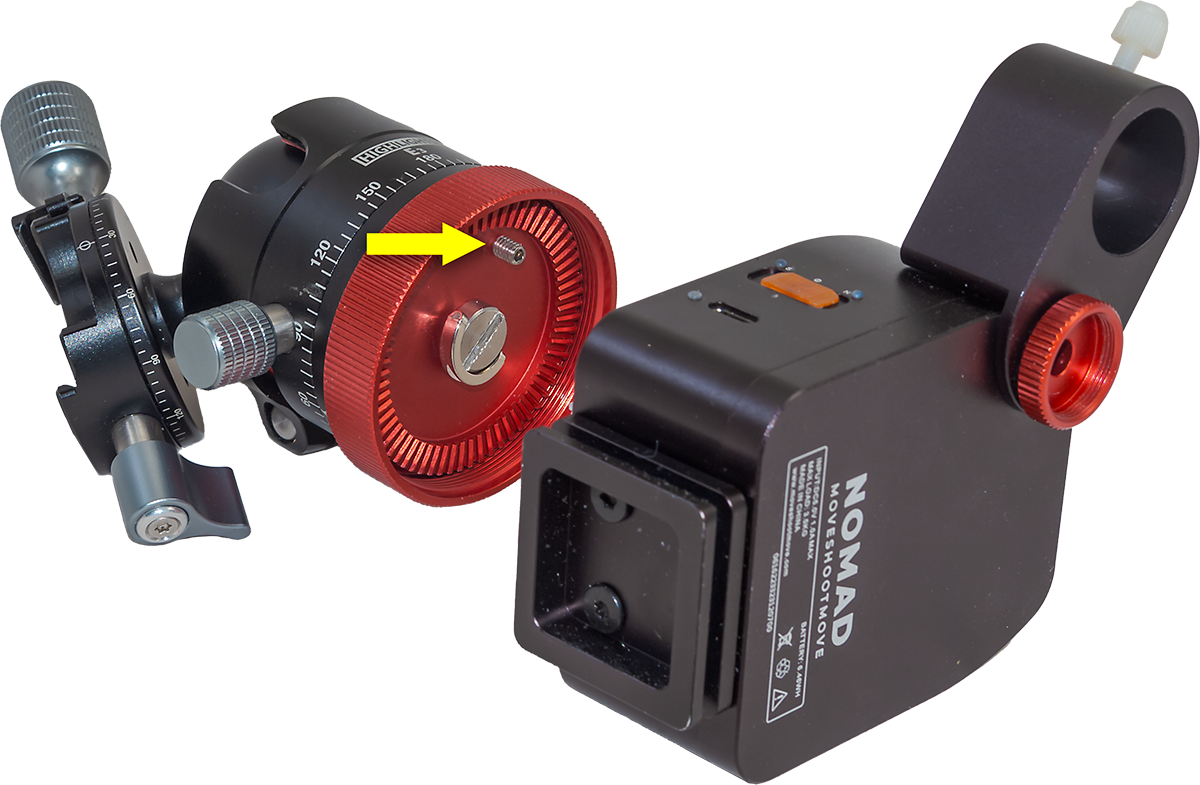
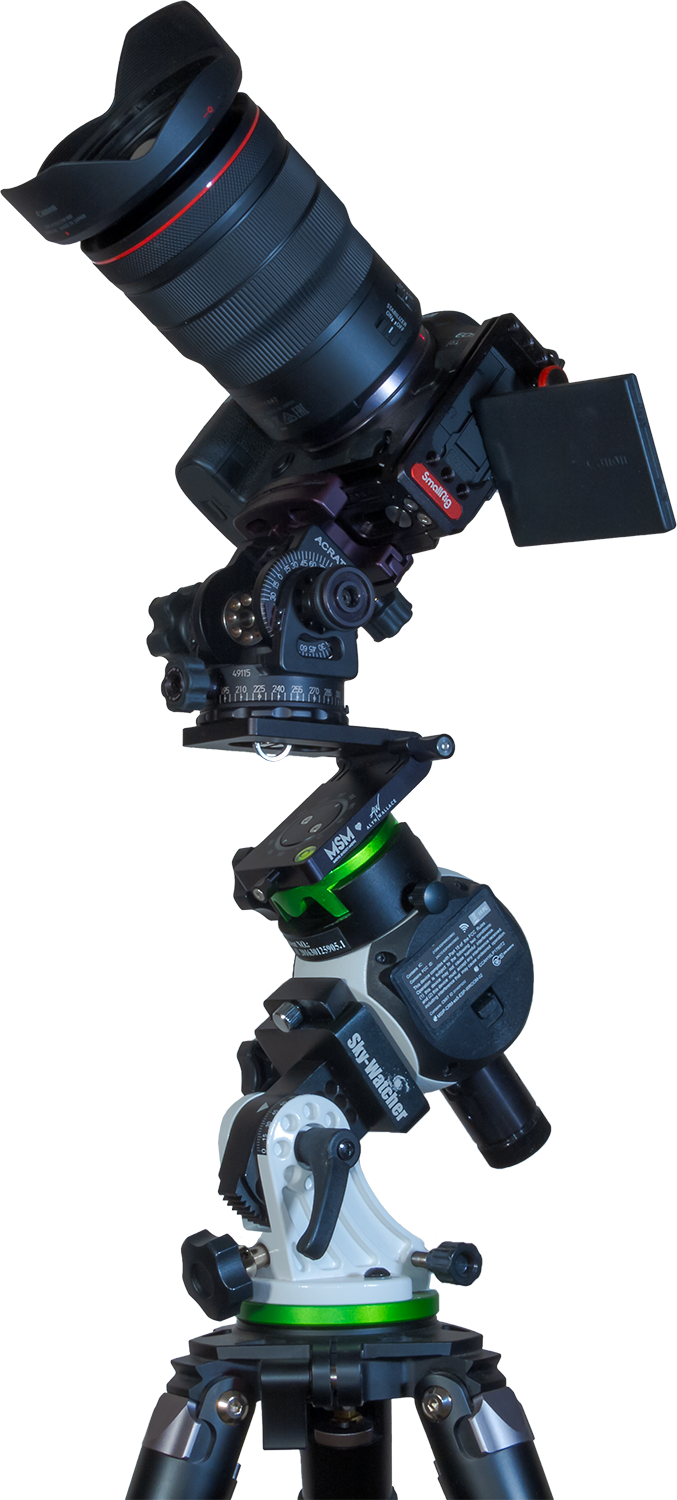
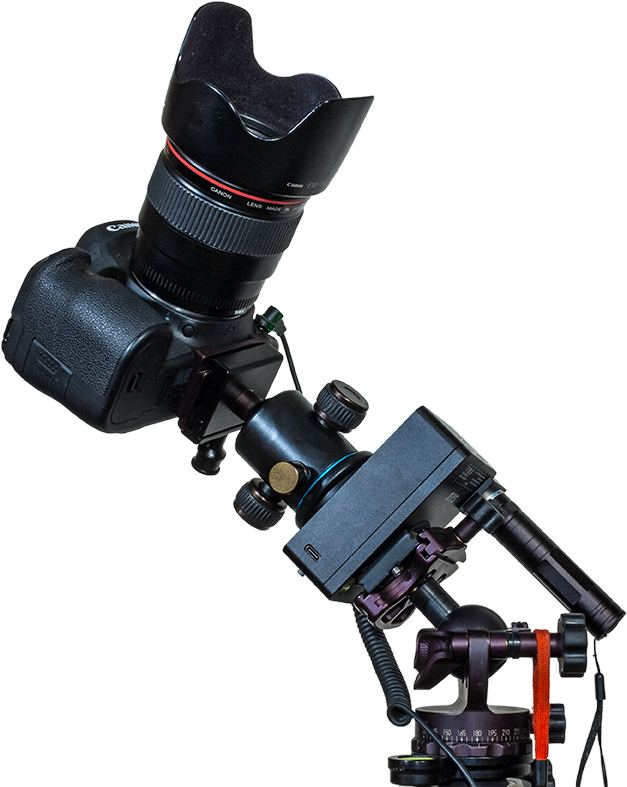
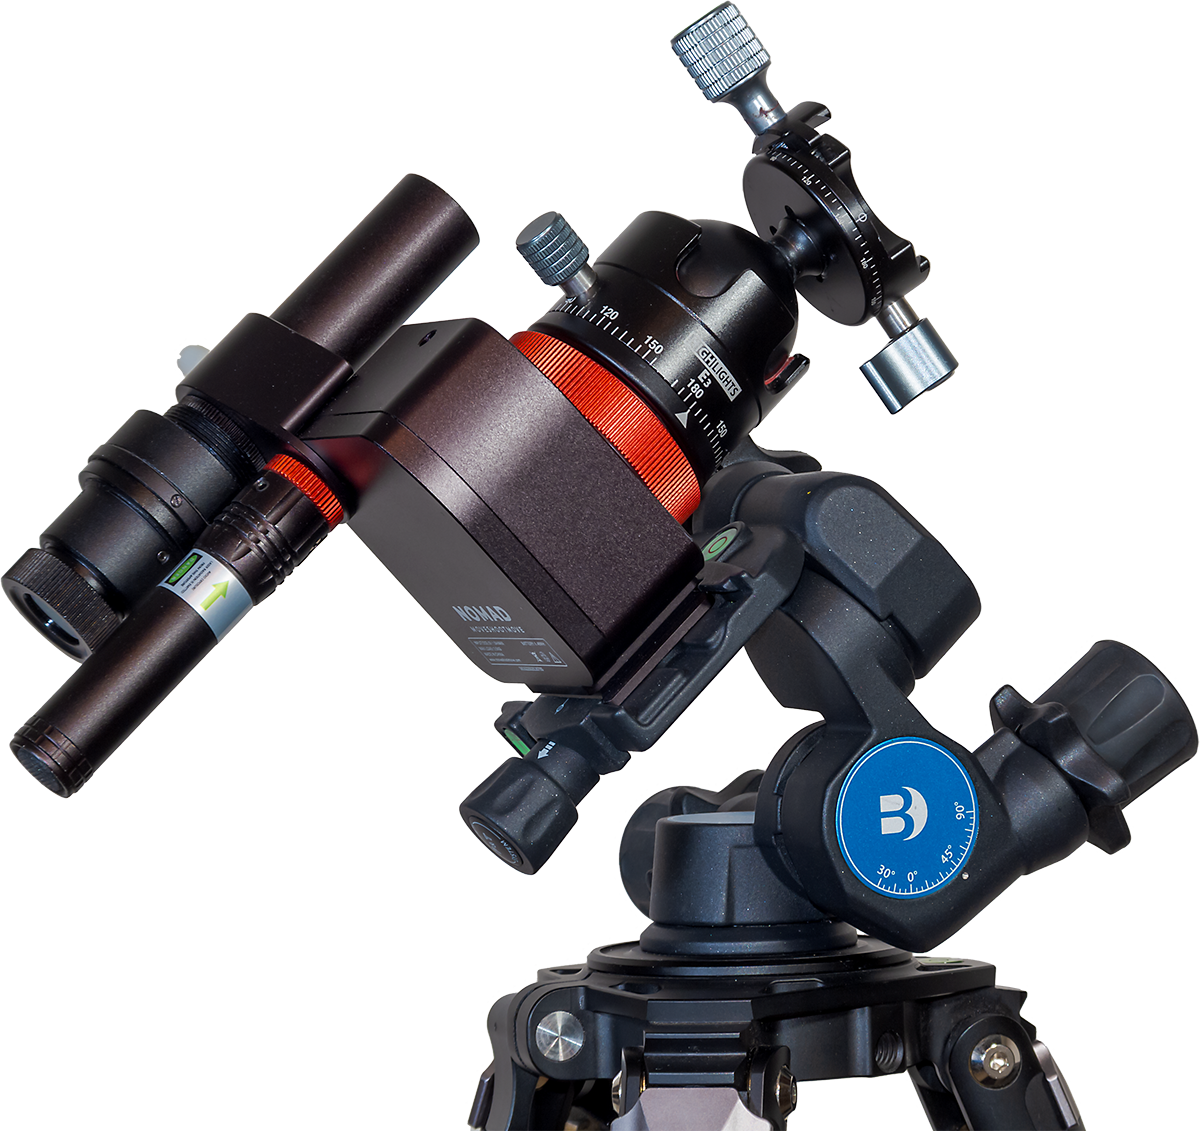
The Nomad uses a ratcheted clamp to attach a user-supplied ball head to the tracker body, and that clamp has an additional safety set screw to help ensure the ball head does not unscrew itself as a camera turns.
I’ve had no issues with cameras coming loose. Of course, the solidness of the ball head used will be critical as well. A large ball head can be better, but introduce some of the issues I report on below.
While MSM offers its own ball head, I have not used it, preferring to use a couple of other ball and pano heads I like, and that I show in the images here.
Simplicity of Operation
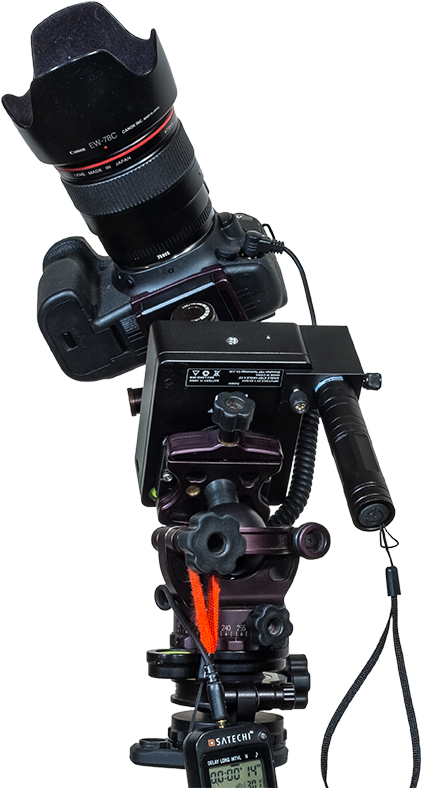
The Nomad improves upon the old Rotator by doing away with all its time-lapse features. You might think that eliminating features can’t be an improvement, but in this case it is.
I suspect few owners used the Rotator’s preset functions for slowly turning a camera along the horizon while firing the camera shutter between each incremental time-lapse move (the very function that gave the company its name!). The Rotator’s options for creating time-lapses were confusing to set up and limited in their choice of speeds. A serious time-lapse photographer would never use it.
(If you do want a tracker with time-lapse motion-control capabilities the Star Adventurer Mini works well. Its WiFi connection and mobile app allows a user to set all the factors needed for a good time-lapse: interval, angle increment, number of frames, and length of shoot.)
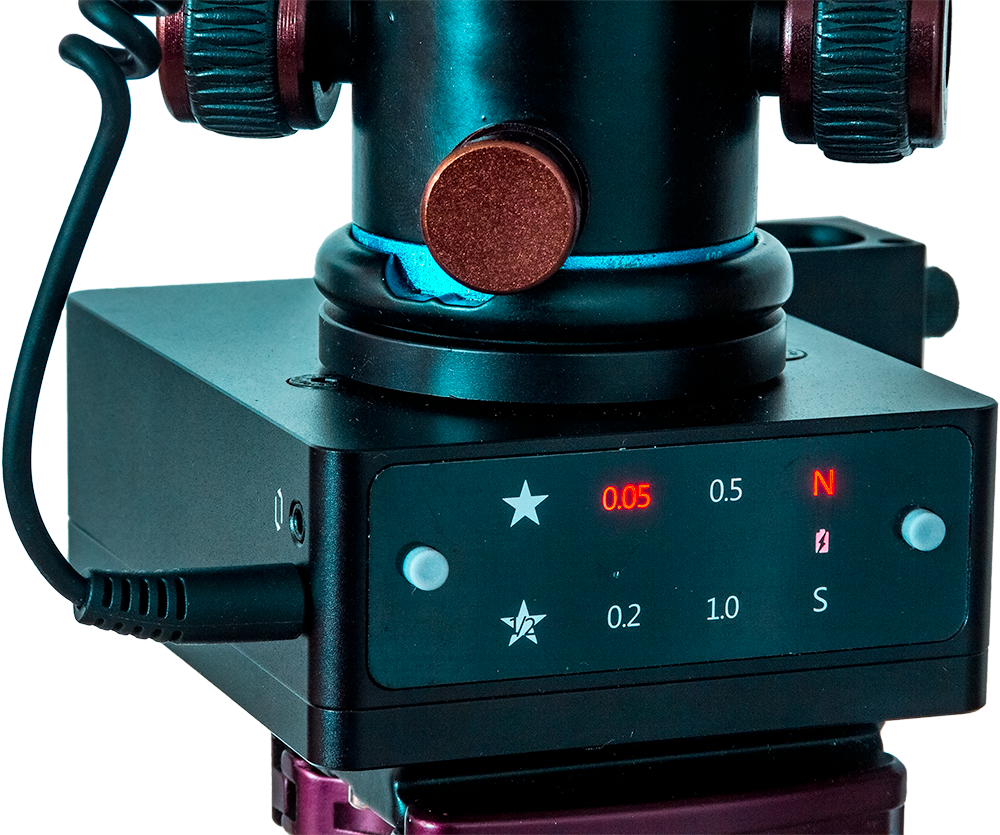
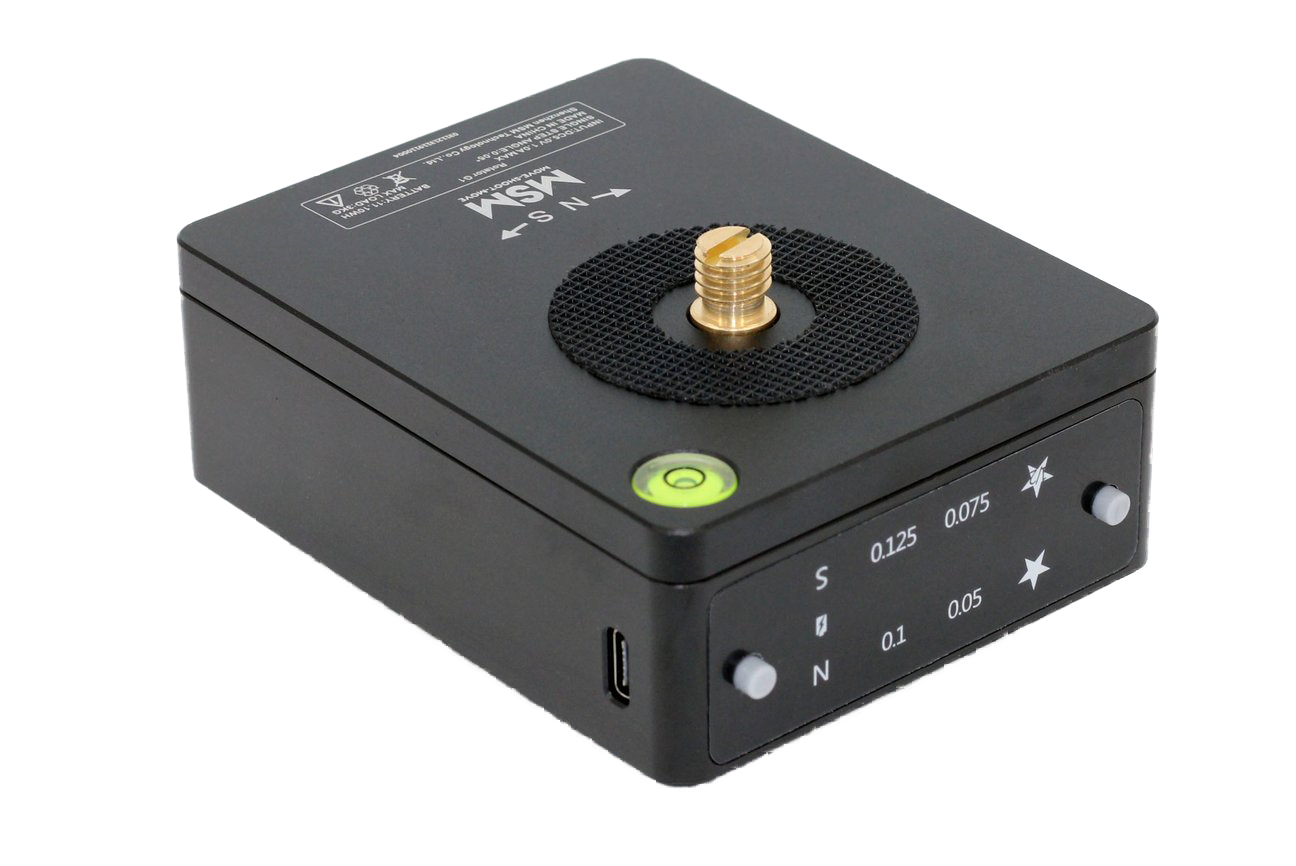
Instead, MSM has focused the Nomad on being just a star tracker, and I think wisely so. Its only controls are a three-position S-OFF-N switch, for using the Nomad in either the southern or northern hemisphere. It worked very well “Down Under,” with the exception noted below.
There is no solar or lunar drive rate, unnecessary in a tracker, and also no half-speed rate for nightscapes, used to lessen star trailing while also minimizing ground blurring. I’ve never liked using trackers at such a compromise half-speed rate, so I don’t miss it.
Using the optional V-Plate described below, I have used the Nomad to take tracked Milky Way panoramas, as shown here. It has worked very well for that purpose, with it easy to switch the tracking on (for the sky) and off (for the ground).
My only criticism is that the power switch is a little mushy and perhaps easy to slide on by mistake when it is packed in a bag.
An LED for each of the N and S directions glows red to indicate the power is on and the direction chosen, handy to help prevent you from choosing the wrong direction by mistake.
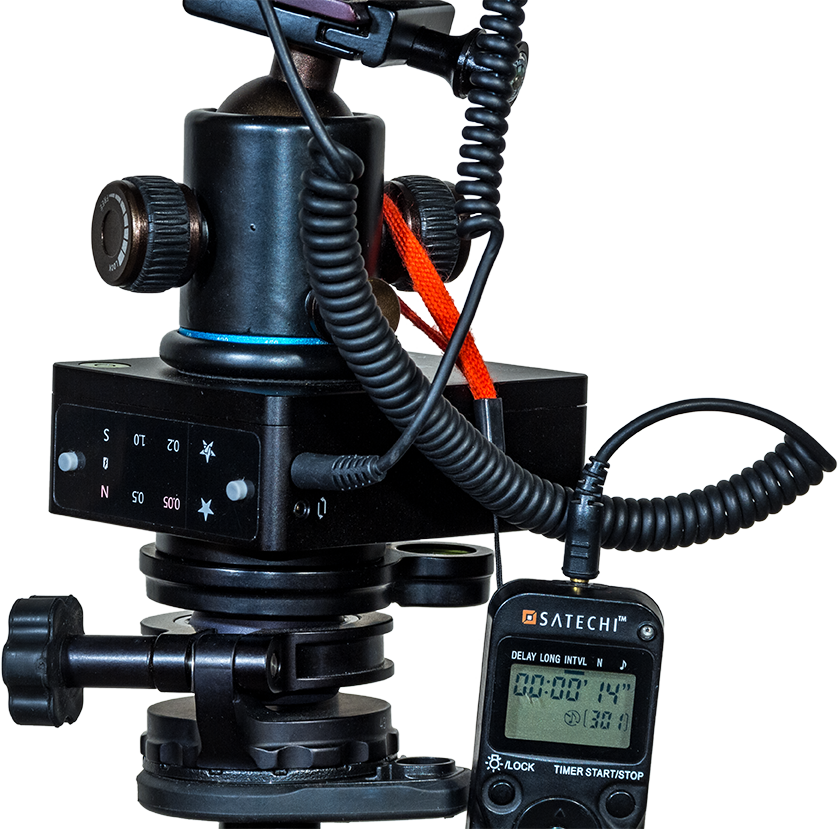
The Nomad is powered by an internal lithium battery that charges from any 5-volt USB charger (the Nomad comes with a USB-C cord, but no charger). The Nomad takes about 2.5 hours to charge to full and runs for 6 to 7 hours of continuous tracking at room temperatures. A second LED by the USB port glows yellow when the Nomad is charging, and green when it has fully charged.
In practice the Nomad has lasted for several nights of shooting on one charge. When the battery level is low, the red LED for the other direction begins blinking. As a backup in the field, the Nomad can be powered via its USB-C port by any external 5-volt power bank.
Collisions
The Nomad hasn’t been without issues, though the main problem I’ve had I can’t, in fairness, blame on the Nomad.
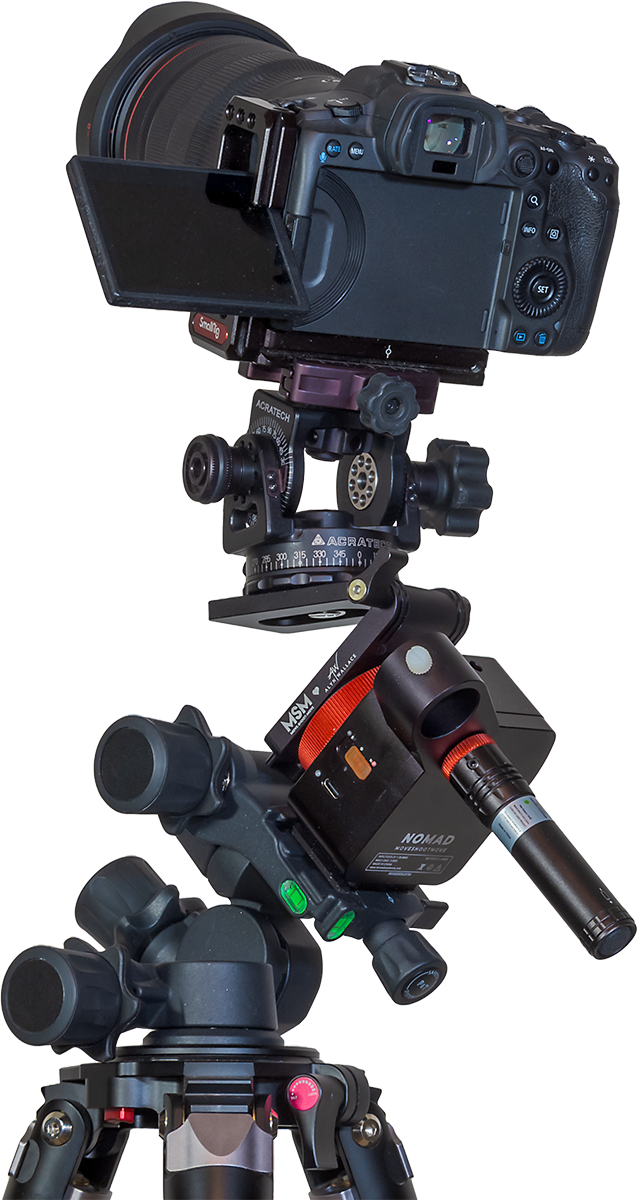
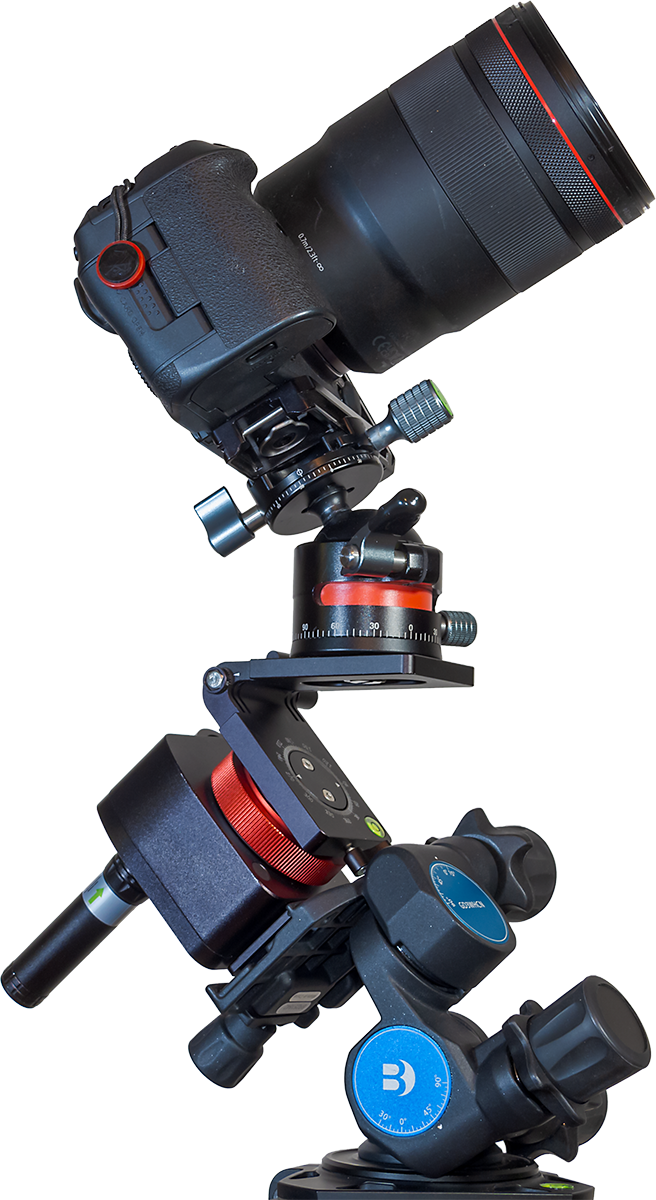
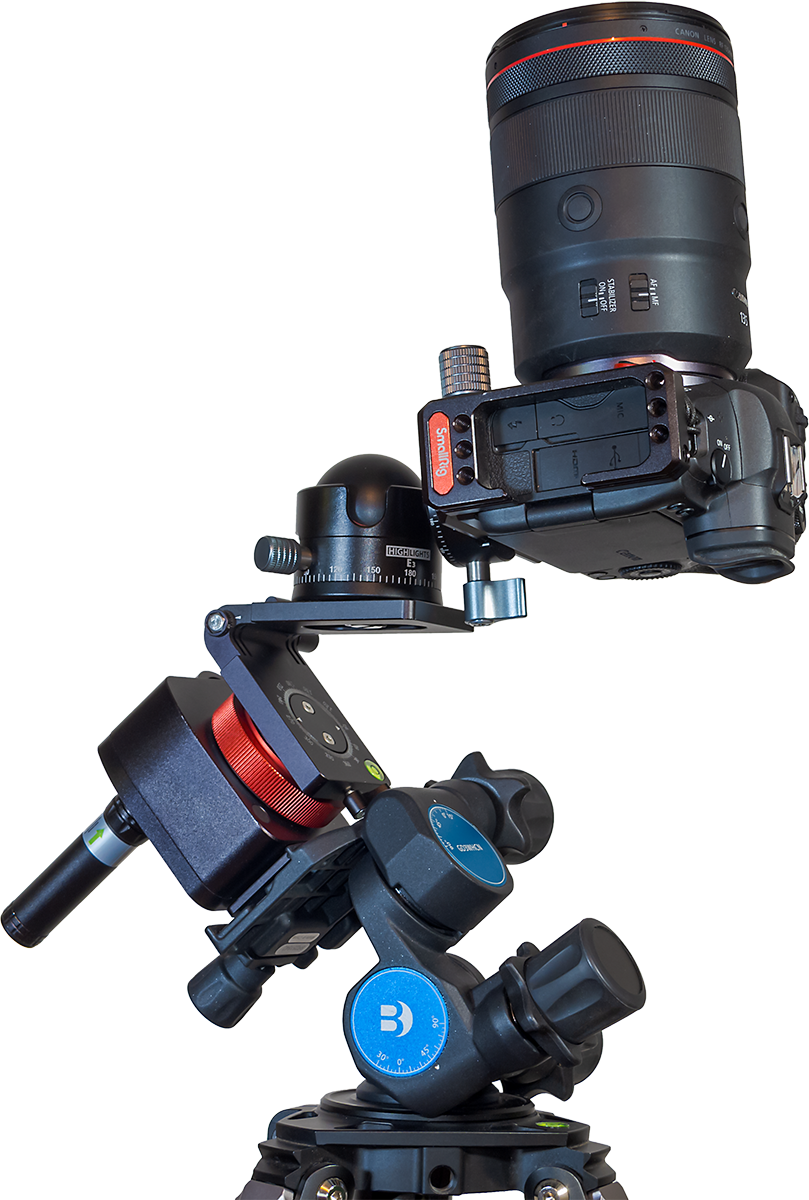
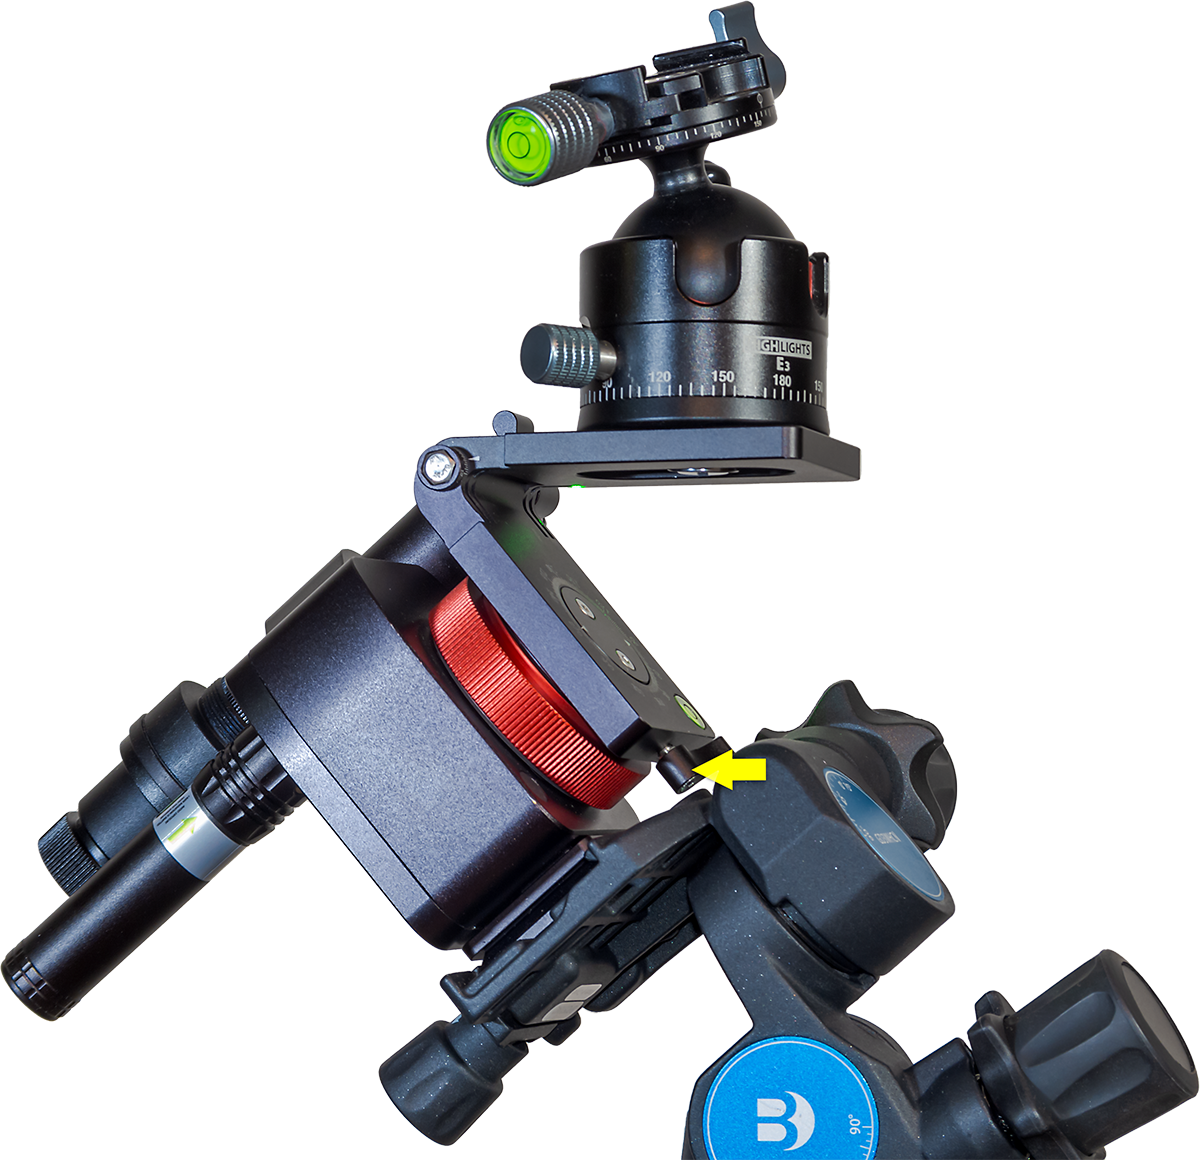
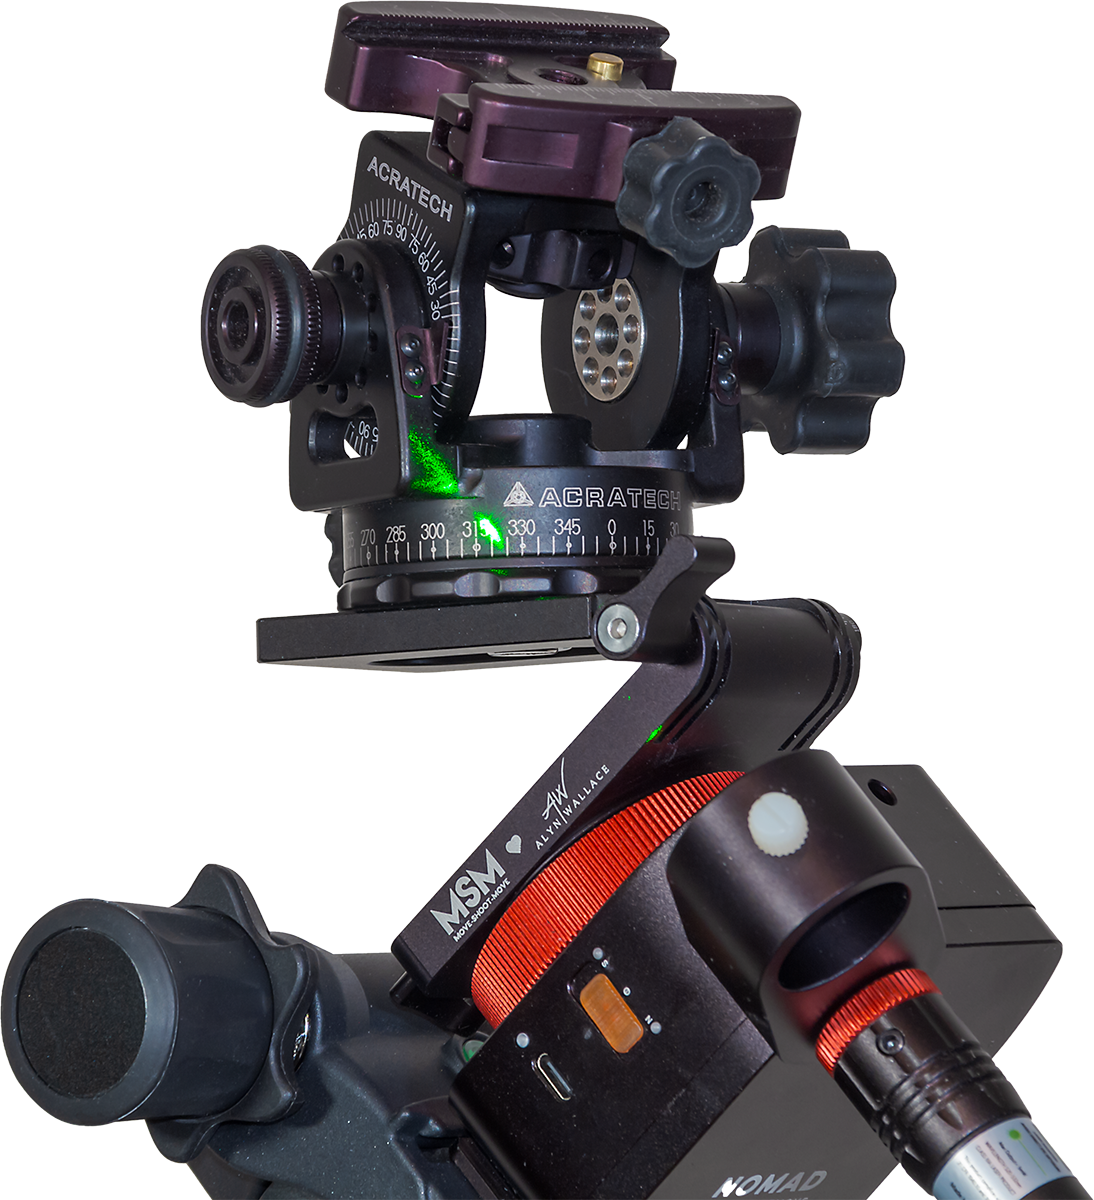
Due to the Nomad’s small size and shape, ball heads sit close to the Nomad body. Locks and clamps sticking out from ball heads can collide with the Nomad, or with the Benro head, as it rotates the ball head. Here I show how a collision can occur when aimed up at the zenith.
But collisions can also occur when aimed at the Celestial Pole. I ran into that issue in Australia, where many of the wide-field targets in the Milky Way (such as the field in Carina and Crux shown earlier) lie close to the South Celestial Pole.
A camera aimed toward the Celestial Pole (either South or North) is more likely to collide with the Nomad than when a camera is aimed toward the sky opposite the Pole.
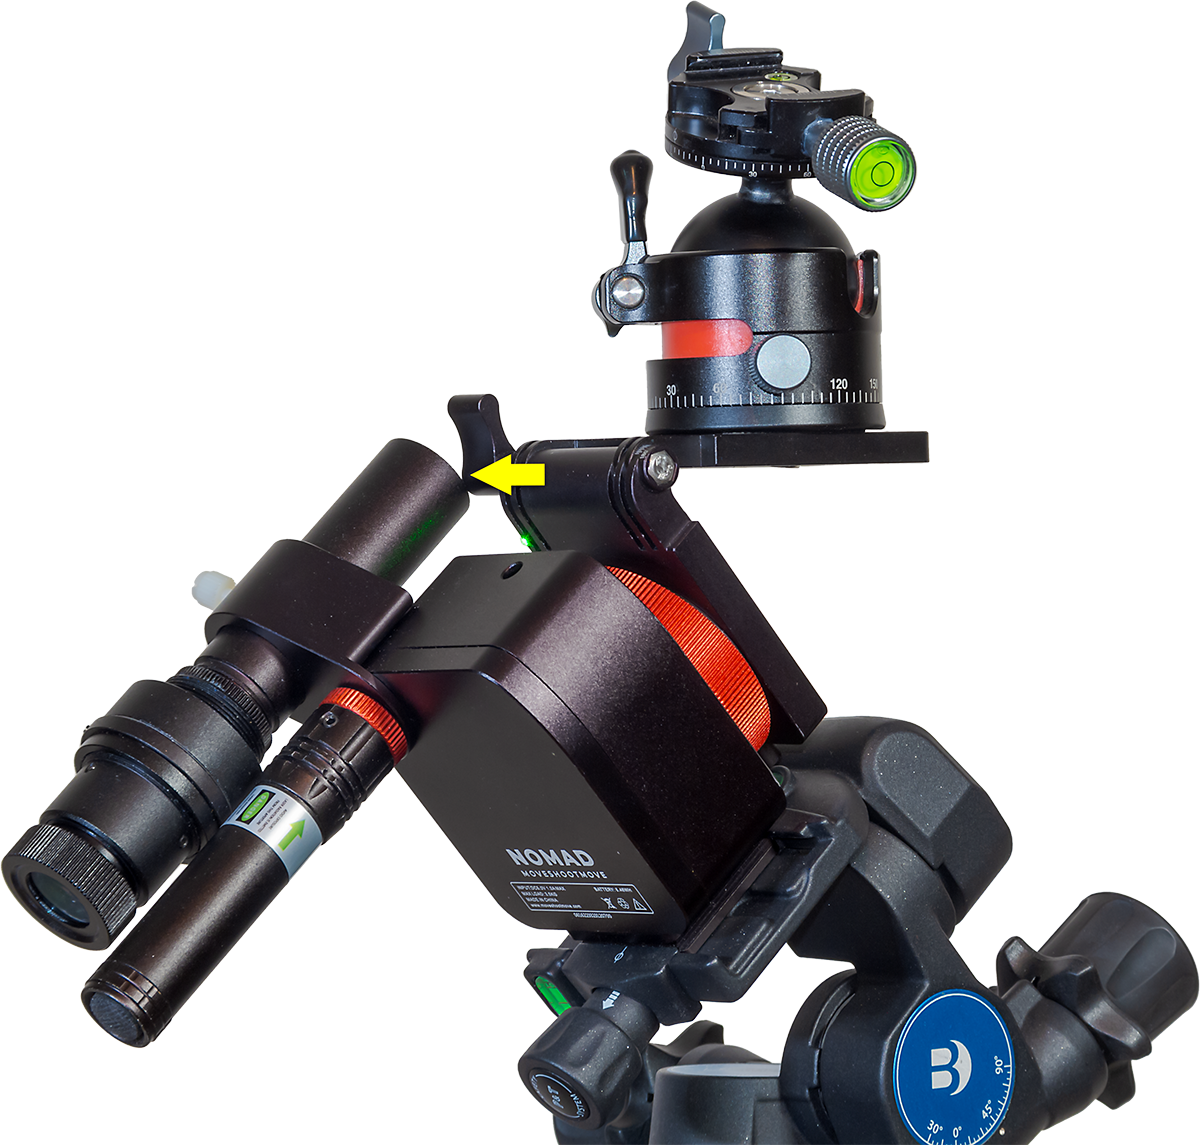
As I show above, one night when tracking targets in Carina I found the ball head had jammed against the Nomad, seizing its motion. As I feared, that caused something inside the Nomad to come loose.
From then on it failed to track well for any shots. The drive was wobbling the stars in random directions. No frame was usable. The Nomad was now out of commission, not a welcome prospect when you have traveled to the other side of the world to shoot the sky.
What was the solution? There was only one point of adjustment accessible to users, a mysterious hole on the side of the tracker with a small hex screw at the bottom. This is normally covered by a rubber plug, though that was either missing on arrival or got lost along the way from my unit. Upon inquiry, MSM told me the screw is for use just at the factory, for a final adjustment of the gear and bearing distance.
But in my case, tightening it slightly seemed to do the trick, restoring normal tracking. However, my unit still tends to make intermittent clicking sounds now and then, though it seems to track well enough again.
The lesson here is don’t let gear collide with the Nomad. It likely has no internal clutch, making it unforgiving of being jammed.
Collision Avoidance
How do you avoid collisions? What I should have used in Australia was MSM’s optional V-Plate designed by the late and sadly missed Alyn Wallace.
I bought one a couple of years ago, but never thought to bring it with me on the Australia trip. As I show above, the V-Plate allows for much more freedom to aim a camera, either toward the Poles or straight up (as I show above), or low in the sky 180° away from the Pole, without fear of the ball head hitting other components.
The V-Plate’s shortcoming is that, despite cranking down the levers that hold it in position, it can still slip under the weight of a heavy camera sitting on the diving-board-like platform supported only on one end. The V-Plate’s locks are not as solid and secure as they should be. But with care it can work well. And you need buy only the V-Plate; not the Z-Plate.
I should note that since I got my V-Plate, it has been upgraded with a larger lever handle to aid tightening the tilt lock. However, it really needs another support point on the tilt adjustment, so it can’t move as readily under load.
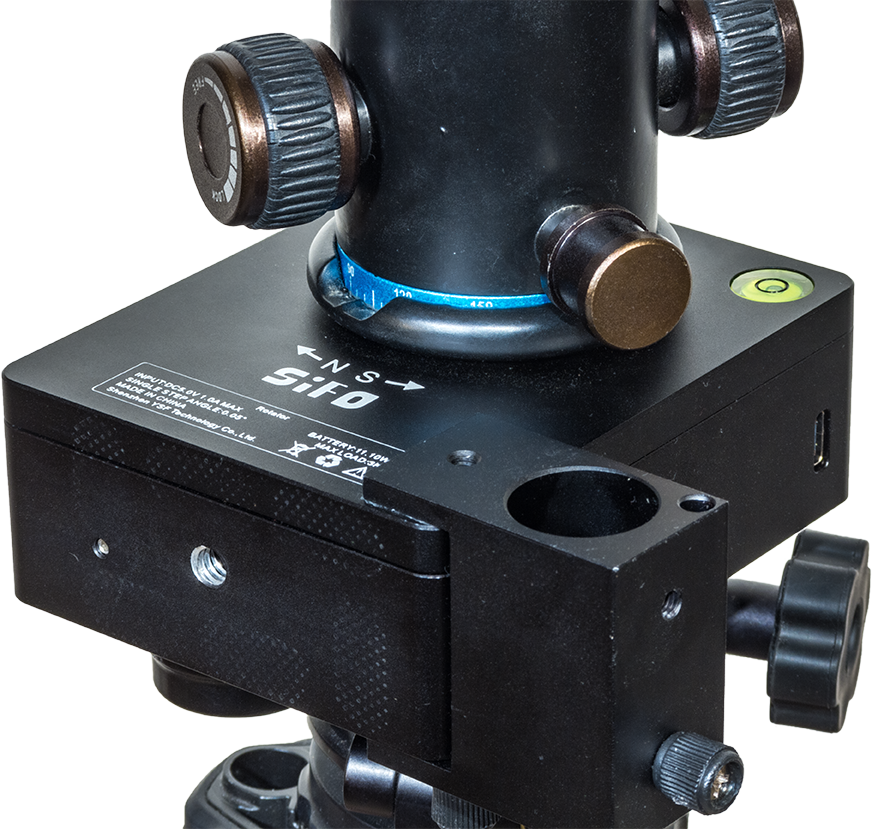
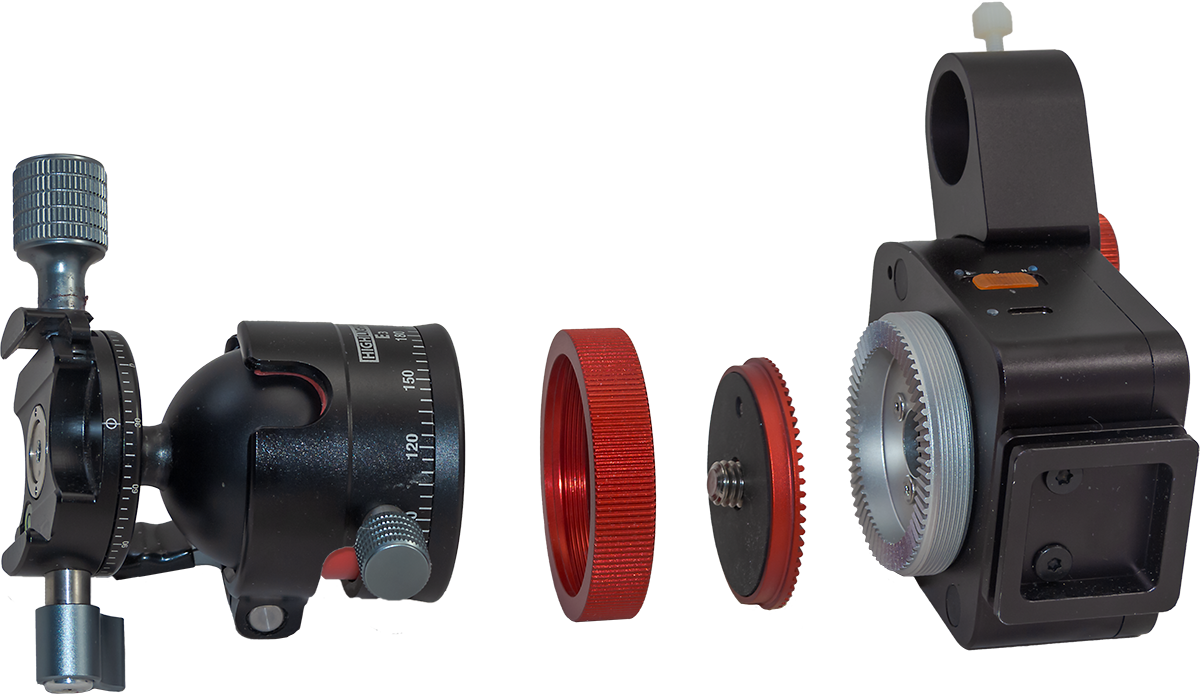
In addition, MSM now offers a taller Arca-Swiss mounting block as an option, to replace the plate that comes bolted onto the Nomad with two Torx screws. That optional riser block moves the Nomad farther from the Wedge or Benro head, helping to prevent some collisions. By putting more space between the Nomad and the Benro head, the riser block makes it easier to get at the small locking clamp on the V-Plate’s rotation axis. But …
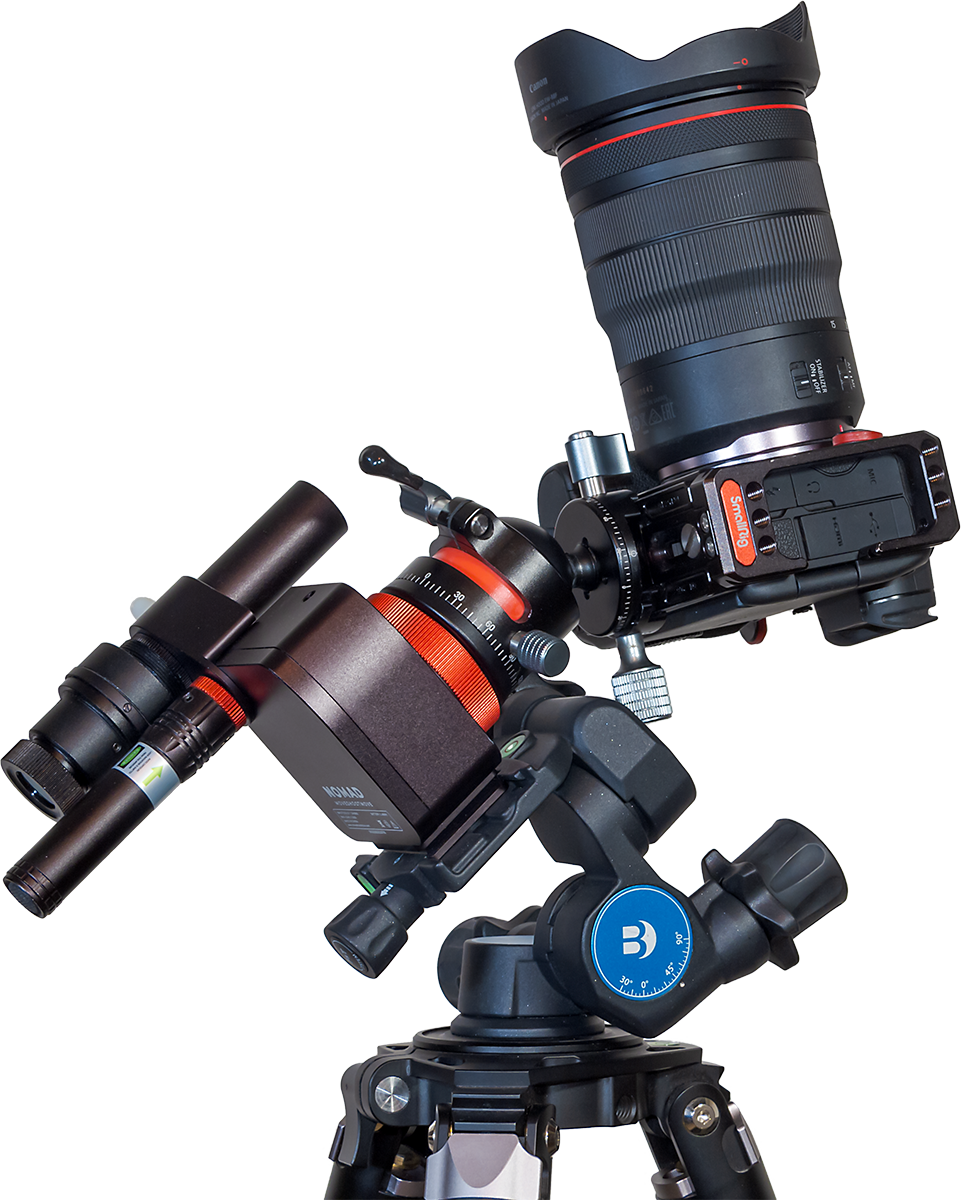
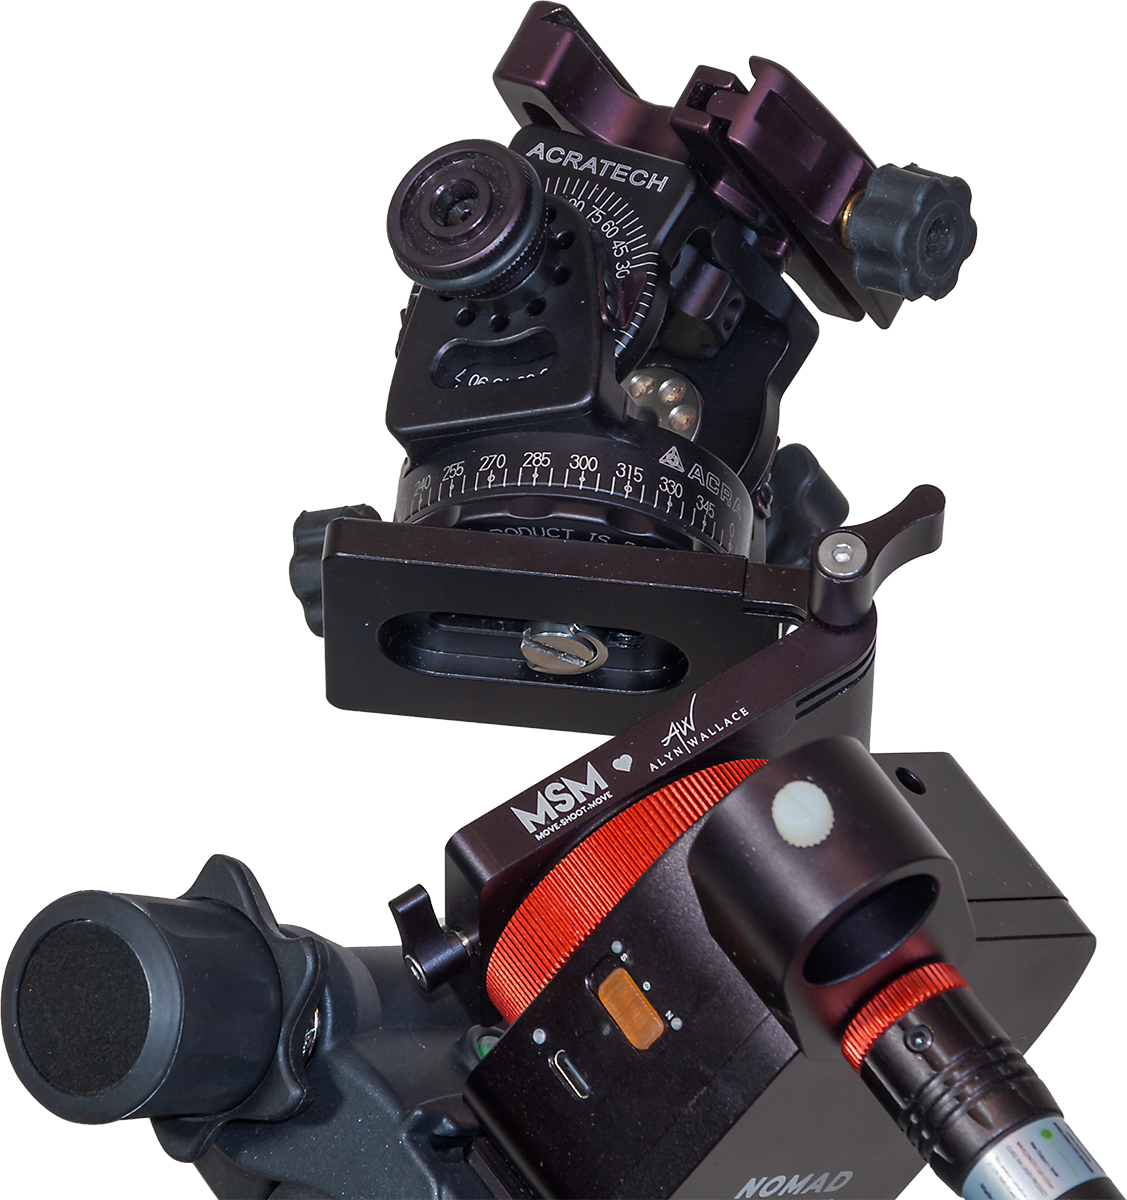
Shortly after I first published this review, a loyal reader (thanks, John!) pointed out his method of placing the Nomad on the Benro, with the Nomad turned 90° to the way I pictured it earlier. As I show below, this places the Benro’s lock knob on the side of the Nomad, not back. The benefit is that the V-Plate’s azimuth lock lever is now more accessible and well-separated from the Benro. That method makes the taller riser block unnecessary.
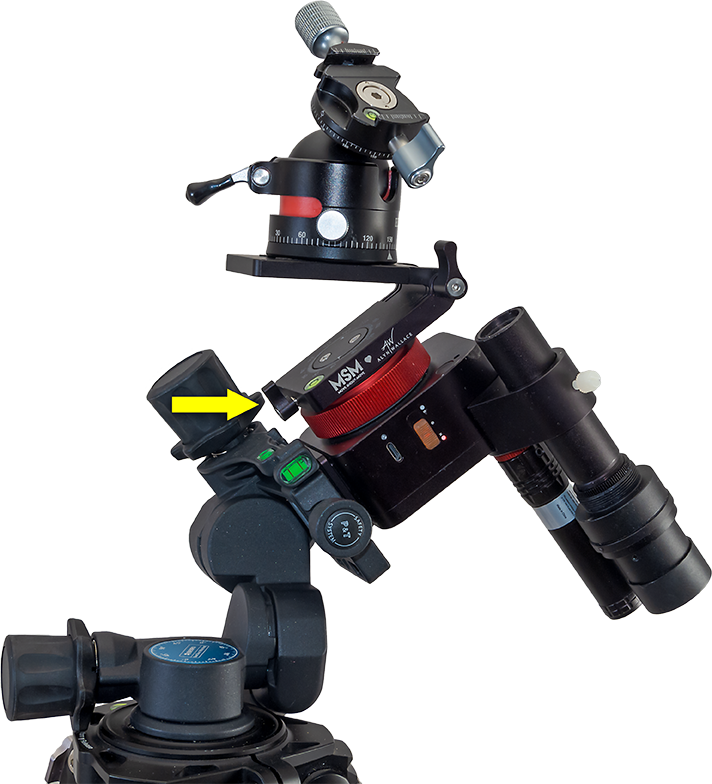
Even with this alternative method, the V-Plate tends to block the laser’s beam, as does a camera once it is mounted. The polar scope can also be blocked. It’s an example of how one MSM accessory can interfere with another accessory, perhaps requiring yet another accessory to solve!
In practice, with the V-Plate installed, polar alignment often has to be done before attaching the camera or setting up the V-Plate to the desired orientation. When adding the camera, care has to be taken to then not bump the Nomad off alignment. That’s why I like the Benro head as a stable platform for the Nomad, despite its extra weight.
As I illustrated earlier, the V-Plate is also an essential accessory for shooting tracked-sky Milky Way panoramas, as it allows a camera to be turned parallel to the horizon from segment to segment while it also tracks the sky.
Recommendations
So, as with the Rotator, when buying a Nomad, plan on adding several “optional” accessories to your cart. They can, in fact, be essential.
However, they can add another $150 (for V-Plate + Wedge + riser block) to $250 (V-Plate + Benro head + riser block) to the total. These are in addition to the cost of the polar alignment aids offered in the various Basic bundles. I like having both the laser and polar scope, but for shooting just wide-angle nightscapes, the laser alone will do.
The cost of accessories makes the Nomad not quite the low-cost tracker you might have been sold on, nor as self-contained and compact as it first appears. Just choosing what combination of gear to buy can be daunting for beginners.

But when well-equipped, the little Nomad can work very well. Despite my run-in with a collision glitch, I can recommend the Nomad as a good choice for anyone looking for a solid, accurate, but portable tracker that can slip into any camera bag.
Just make room in your bag – and budget! – for polar alignment aids, V-Plates, wedges, and ball heads to complete your tracking kit.
And then don’t let anything collide with the Nomad!
— Alan, June 27, 2024 – Revised June 28 / AmazingSky.com