My latest ebook describes in detail the many techniques we can use to capture great still images and movies of the 2023 and 2024 eclipses of the Sun.
In the next few months we have two major eclipses of the Sun visible from North America.
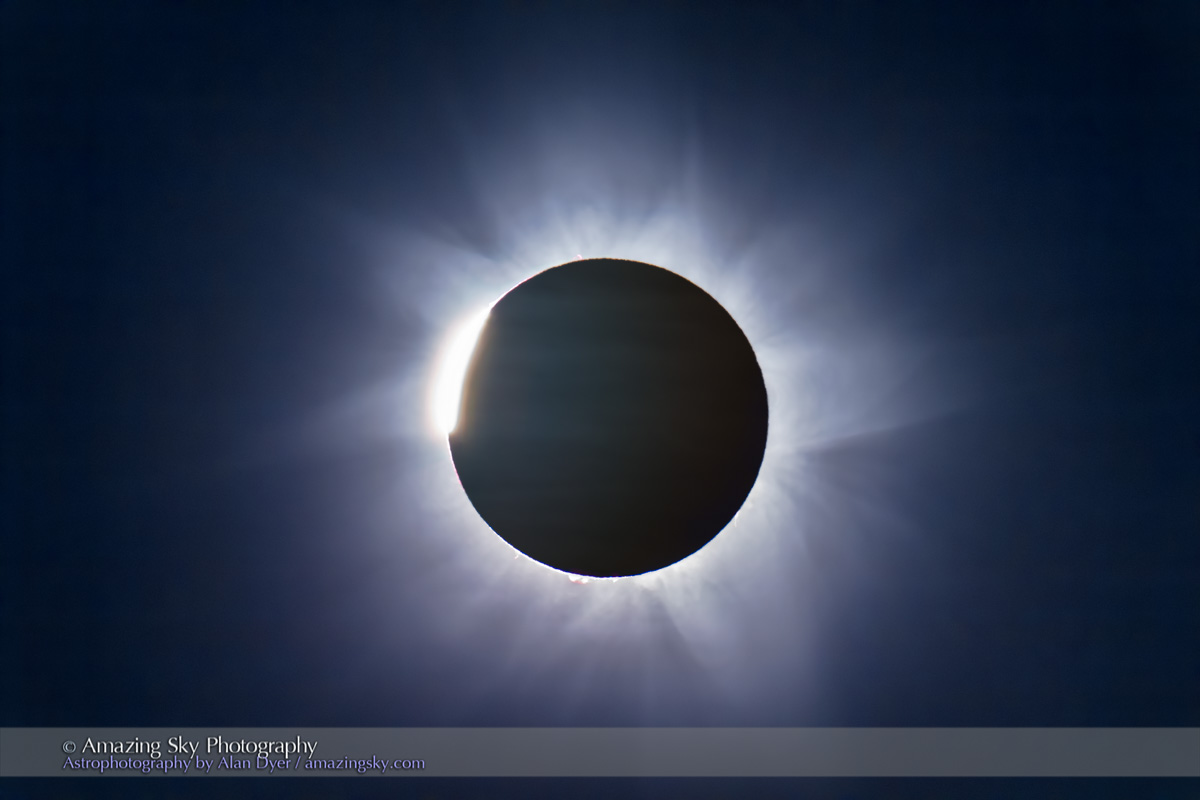
On October 14, 2023 the Moon will cross the disk of the Sun creating a partial eclipse. But from along a narrow path in the western U.S. the Moon’s disk will be centered on the Sun’s disk but not be large enough to completely cover it. For a few minutes, viewers will see an “annular” eclipse, as above, as what remains of the Sun forms a brilliant ring of light around the dark disk of the Moon.
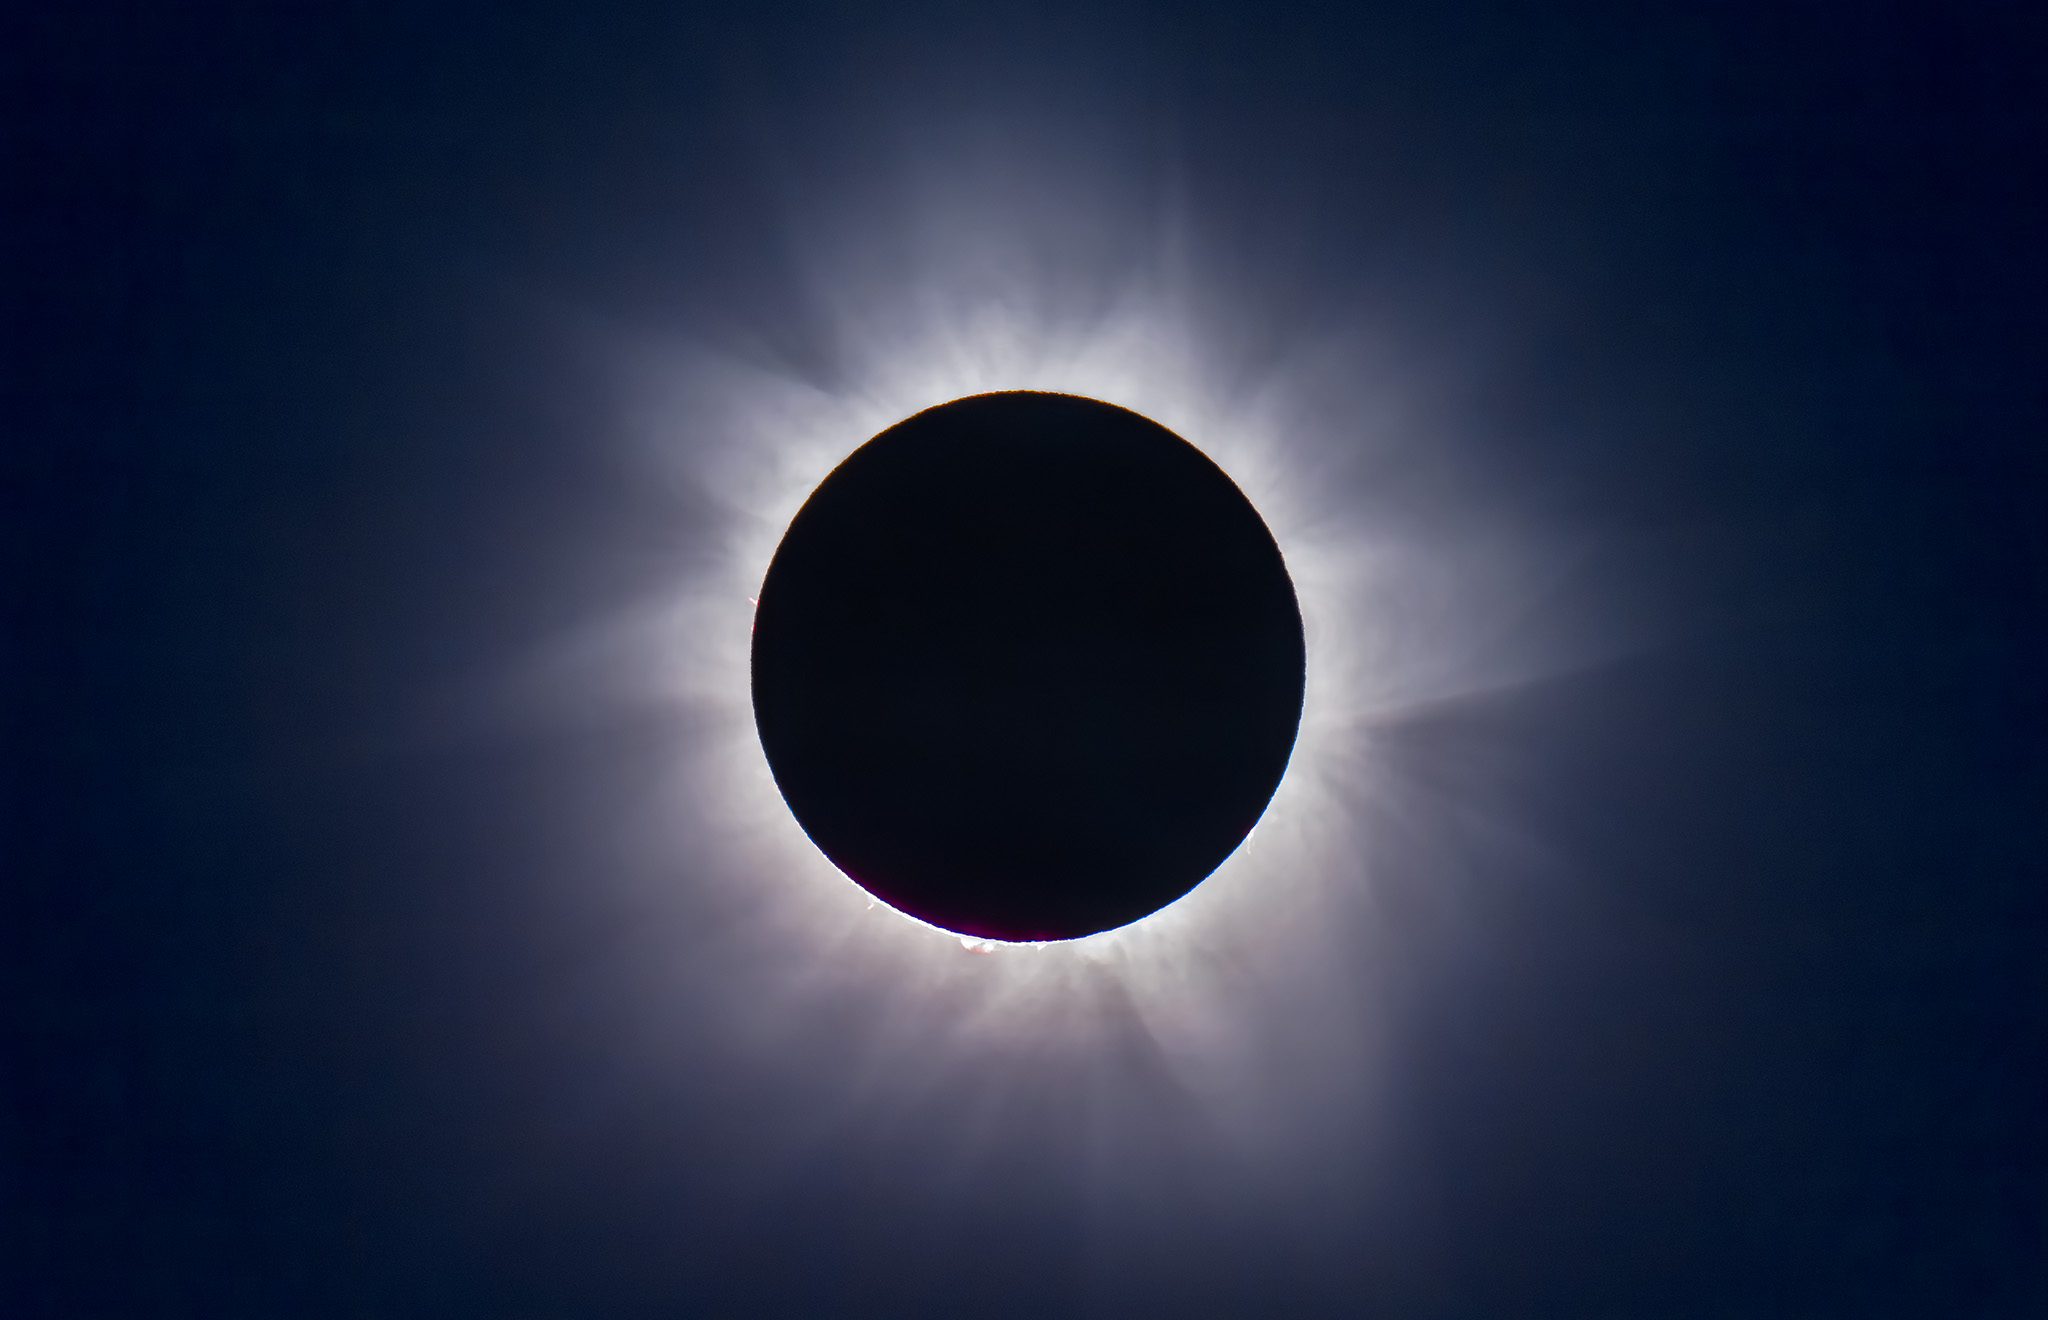
Six lunar months later, the Moon again crosses the Sun but is now large enough to completely cover the Sun’s bright disk. The result is the most spectacular celestial sight, a total eclipse of the Sun, on April 8, 2024. The last such total solar eclipse (TSE) in North America was on August 21, 2017, shown above. After 2024, the next TSE in southern North America will not be until August 23, 2044. (There’s a TSE in northern Alaska on March 30, 2033.)
In 2017 I prepared an ebook about how to shoot that year’s total eclipse. This year I revised and expanded the book extensively to cover both the 2023 annular and 2024 total eclipses. The new 350-page ebook explains how to frame the eclipses depending on where you are along the paths. New information covers the advances in camera gear, with more details added on shooting video. Revised tutorials cover new software and processing techniques.
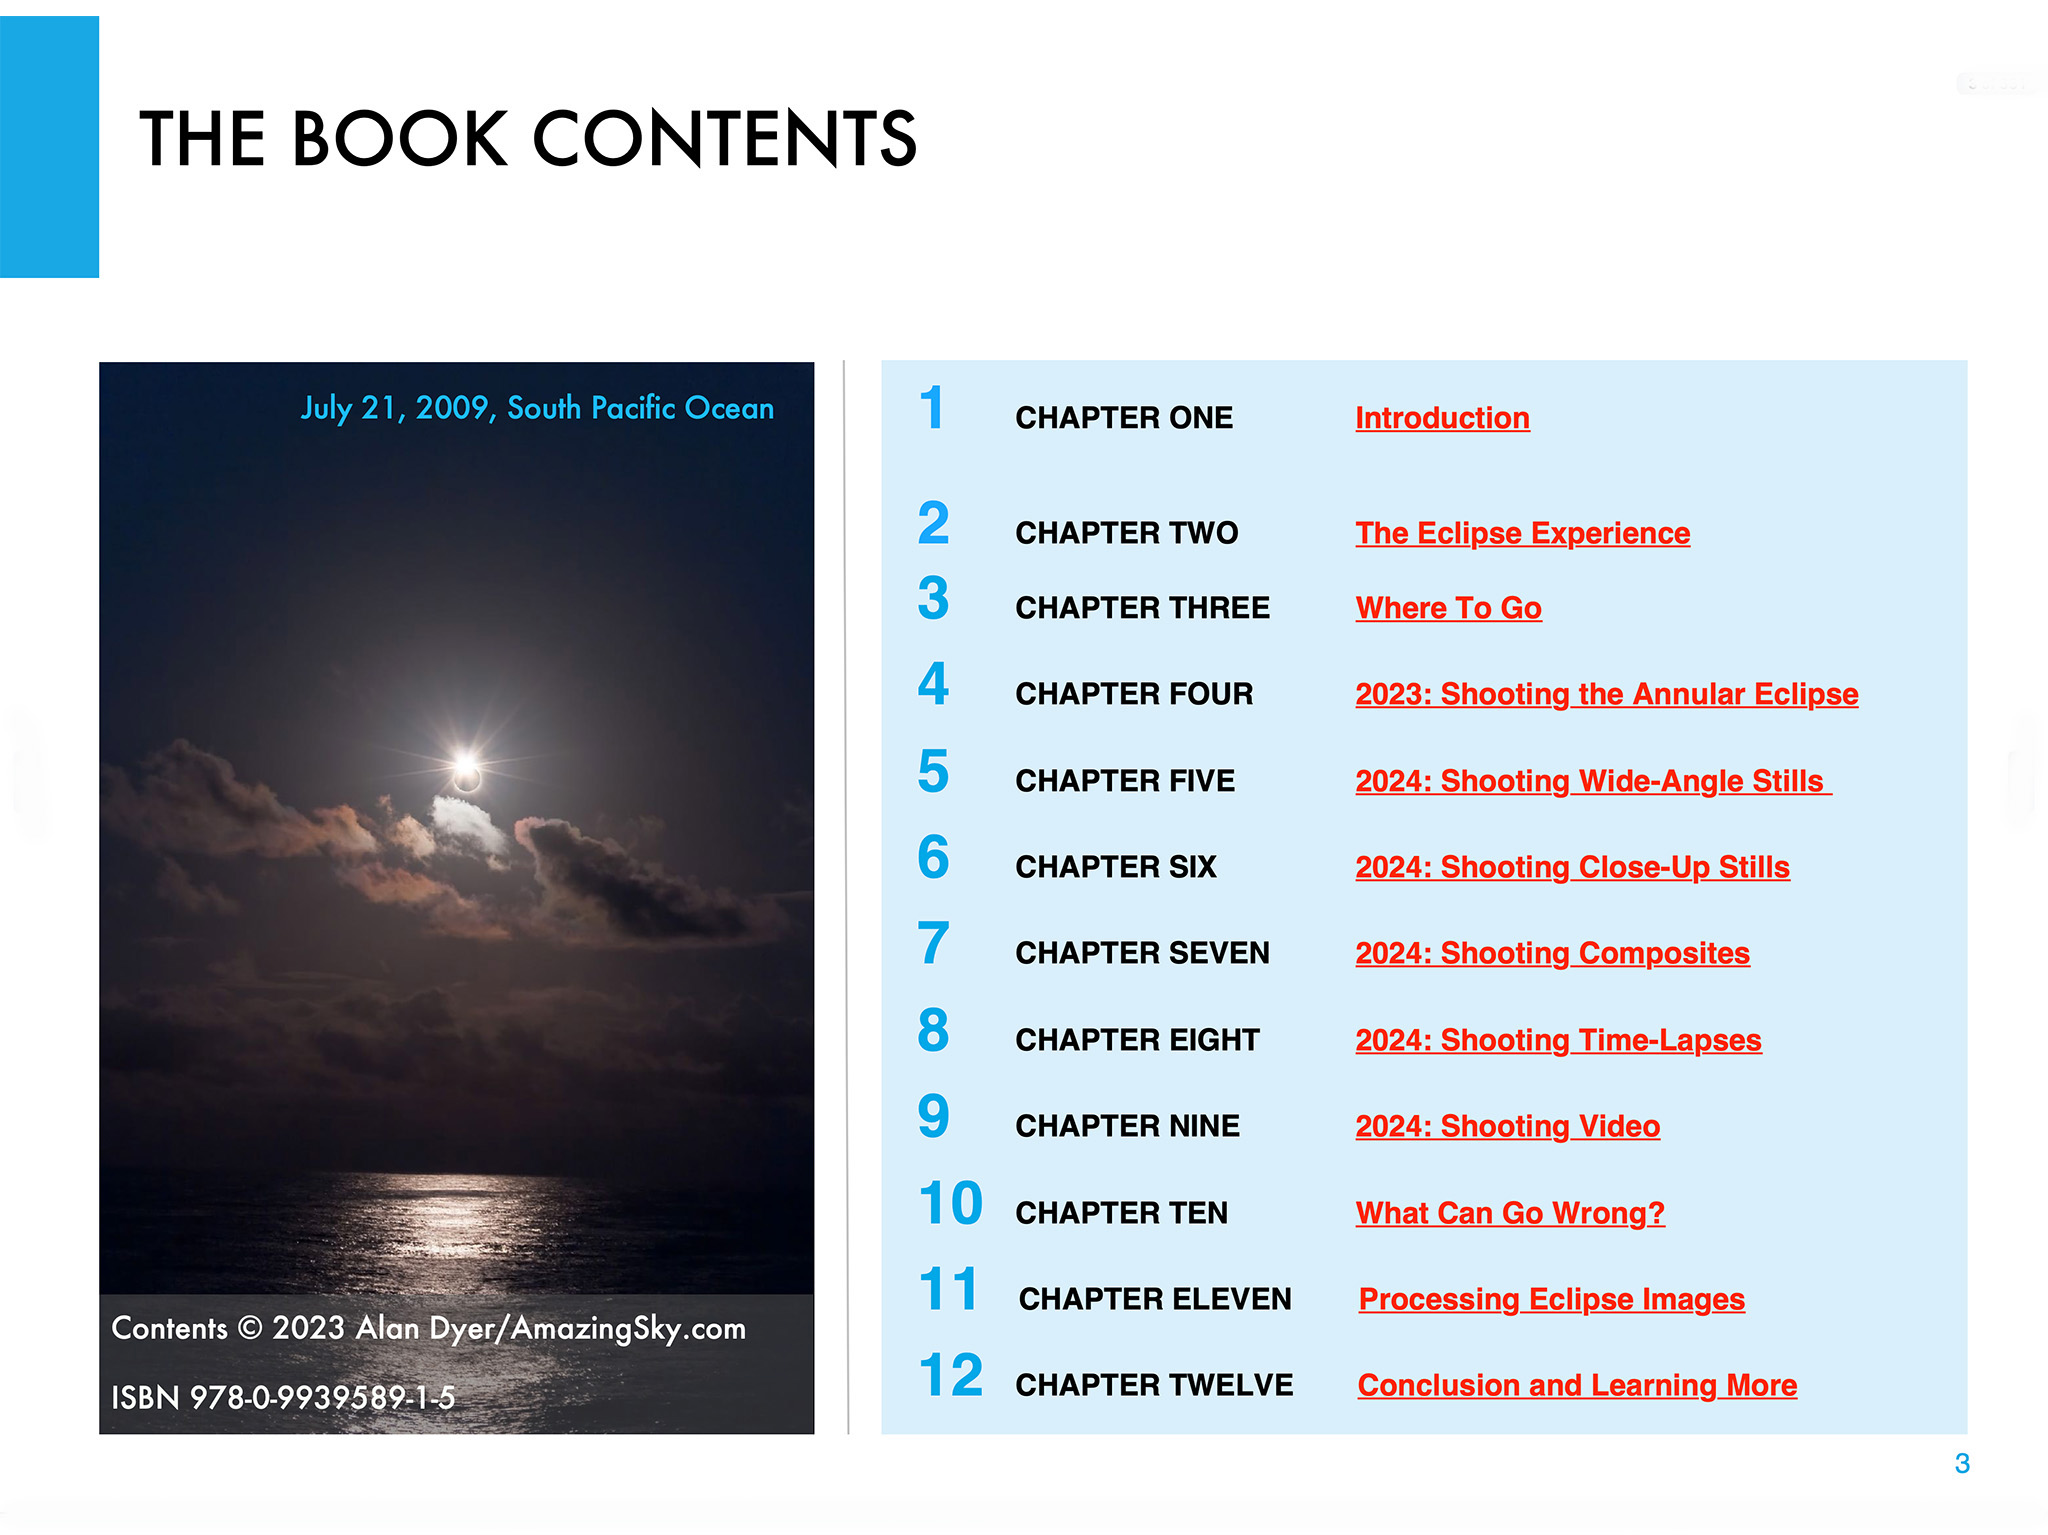
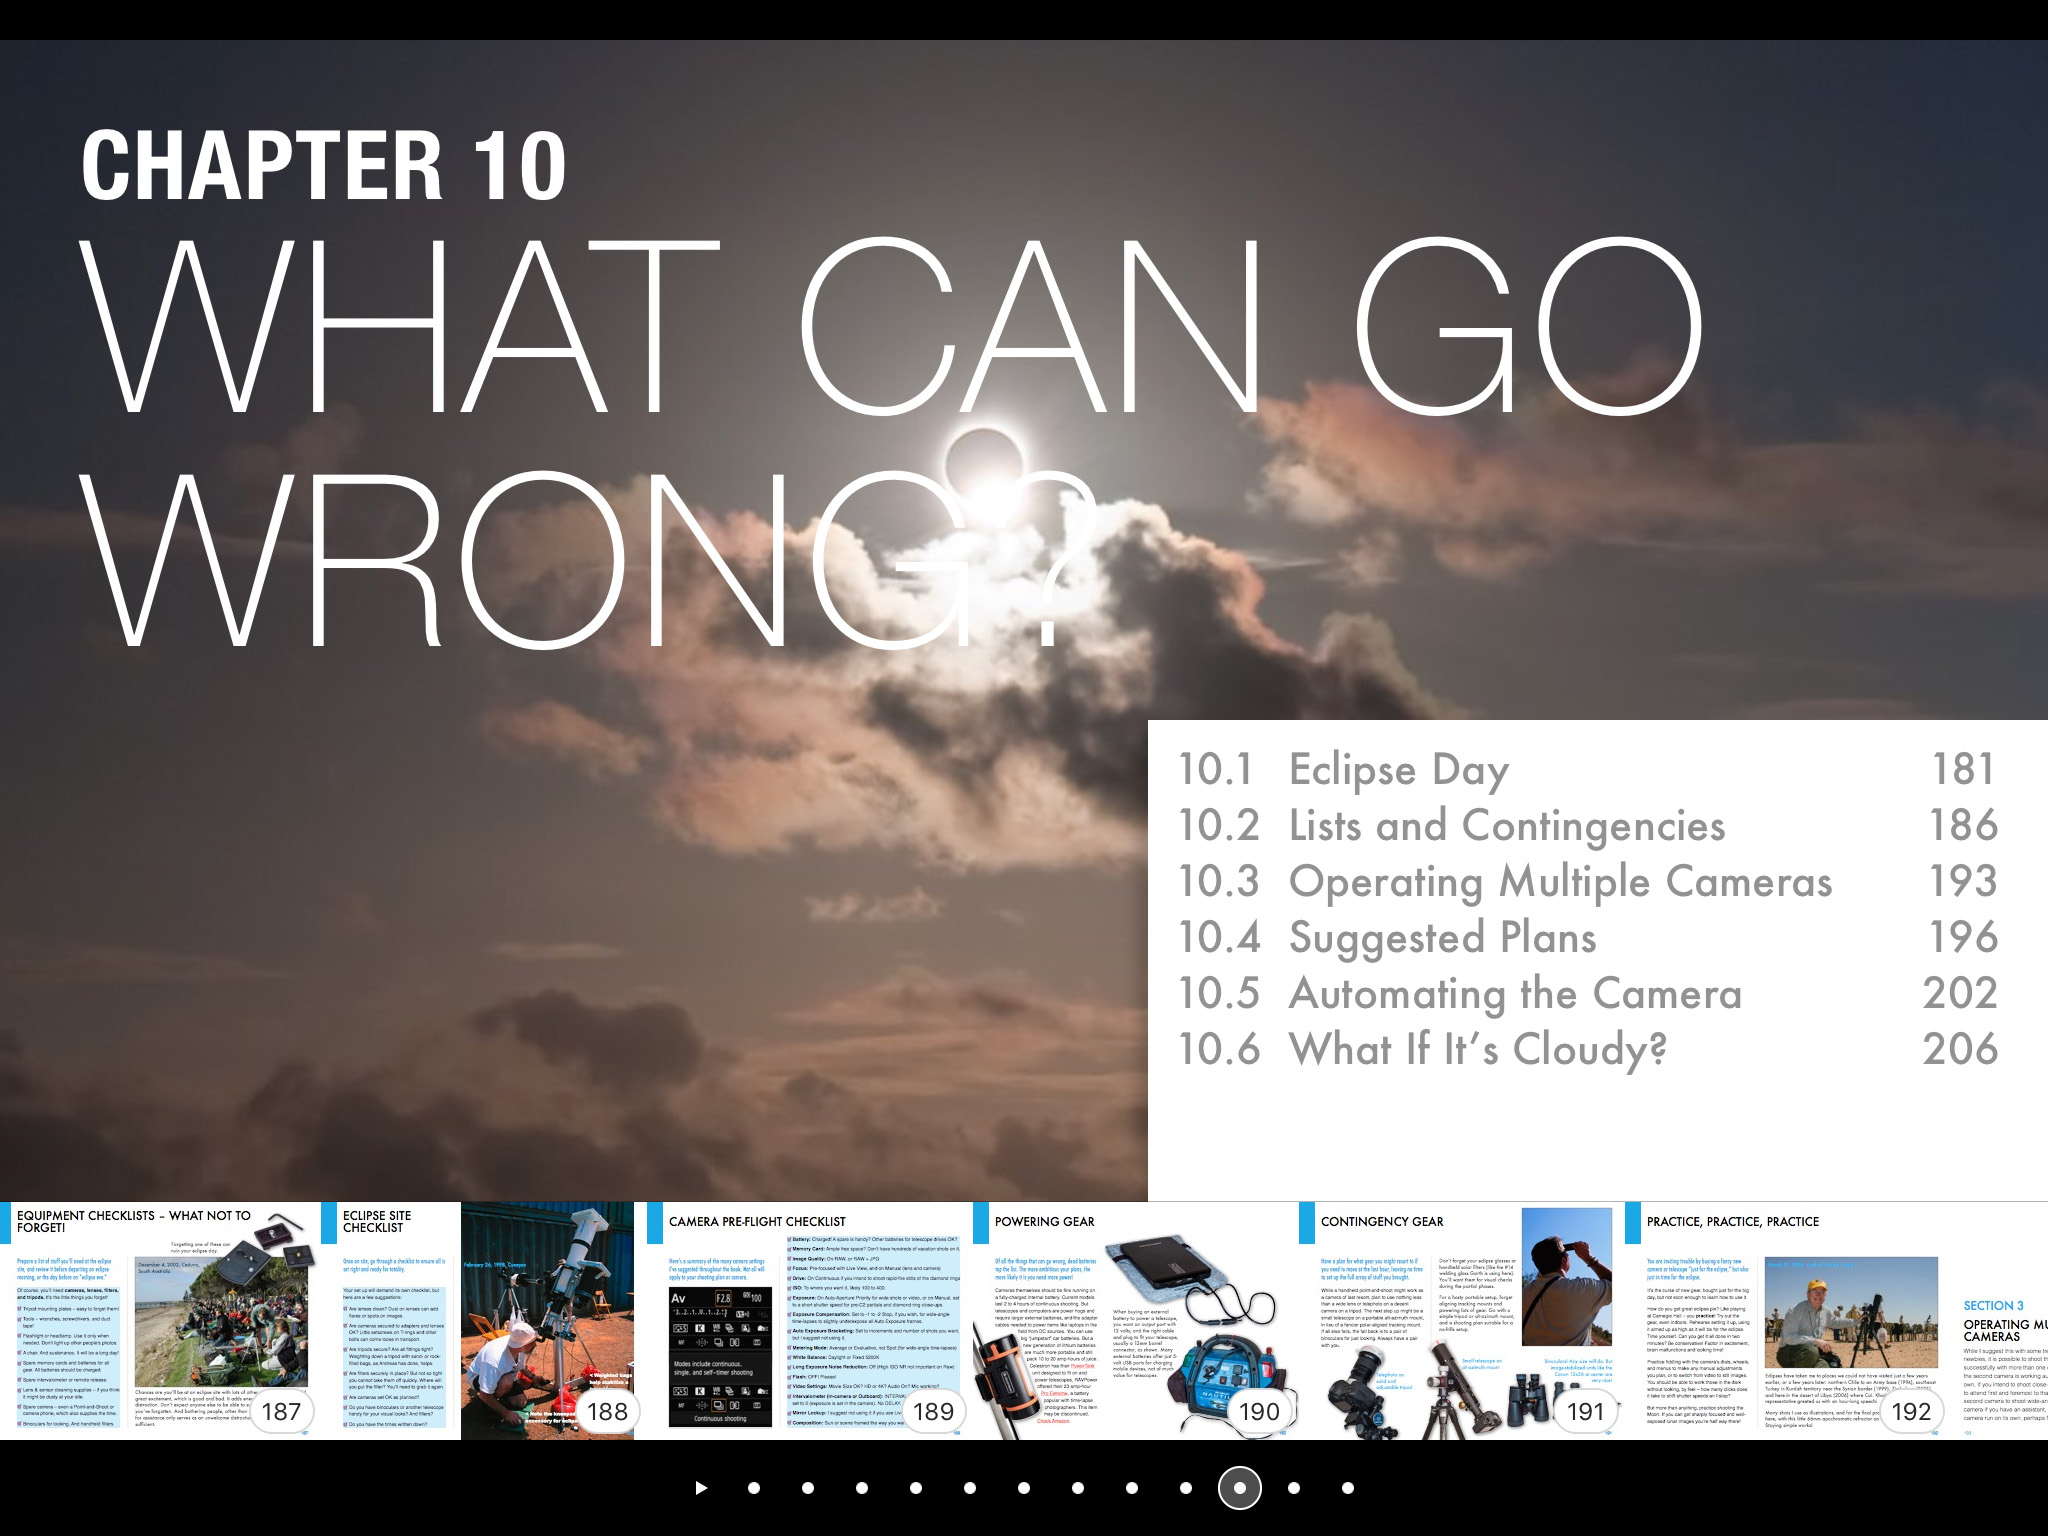
Above is the ebook’s Contents page, so you can see what topics it covers, over an extensive 350 pages. I provide not only advice on lots of techniques and gear, but also suggestions for what not to do, and what can go wrong!
The Fundamentals
I discuss the filters needed, comparing the various types available, and when to use them, and when to remove them. (A filter is always needed for the annular eclipse, but failing to remove the filter is a common failing at a total eclipse!)
For the 2023 annular eclipse I explain how to shoot close-ups, but also another type of image, the multiple exposure composite. Framing, timing and exposing correctly are crucial.
I do the same for the 2024 total eclipse, as a wide-angle shot of the eclipsed Sun over a landscape is one of the easiest ways to capture the event. It’s possible to set up a camera to take the images automatically, leaving you free to enjoy the view of the event without fussing with gear. I explain how best to do that.
For both eclipses, many people will want to shoot close-ups with telephoto lenses or telescopes. It takes more work and more can go wrong, but I show what’s required for equipment and exposures, and explain how to avoid the common flaws of fuzzy focus and trailed images.
But good exposure is also essential. However, for a total eclipse close-up, no one exposure is best. It takes a range of exposures to record the wide dynamic range of phenomena during totality. That demands work at the camera.
Setting Cameras
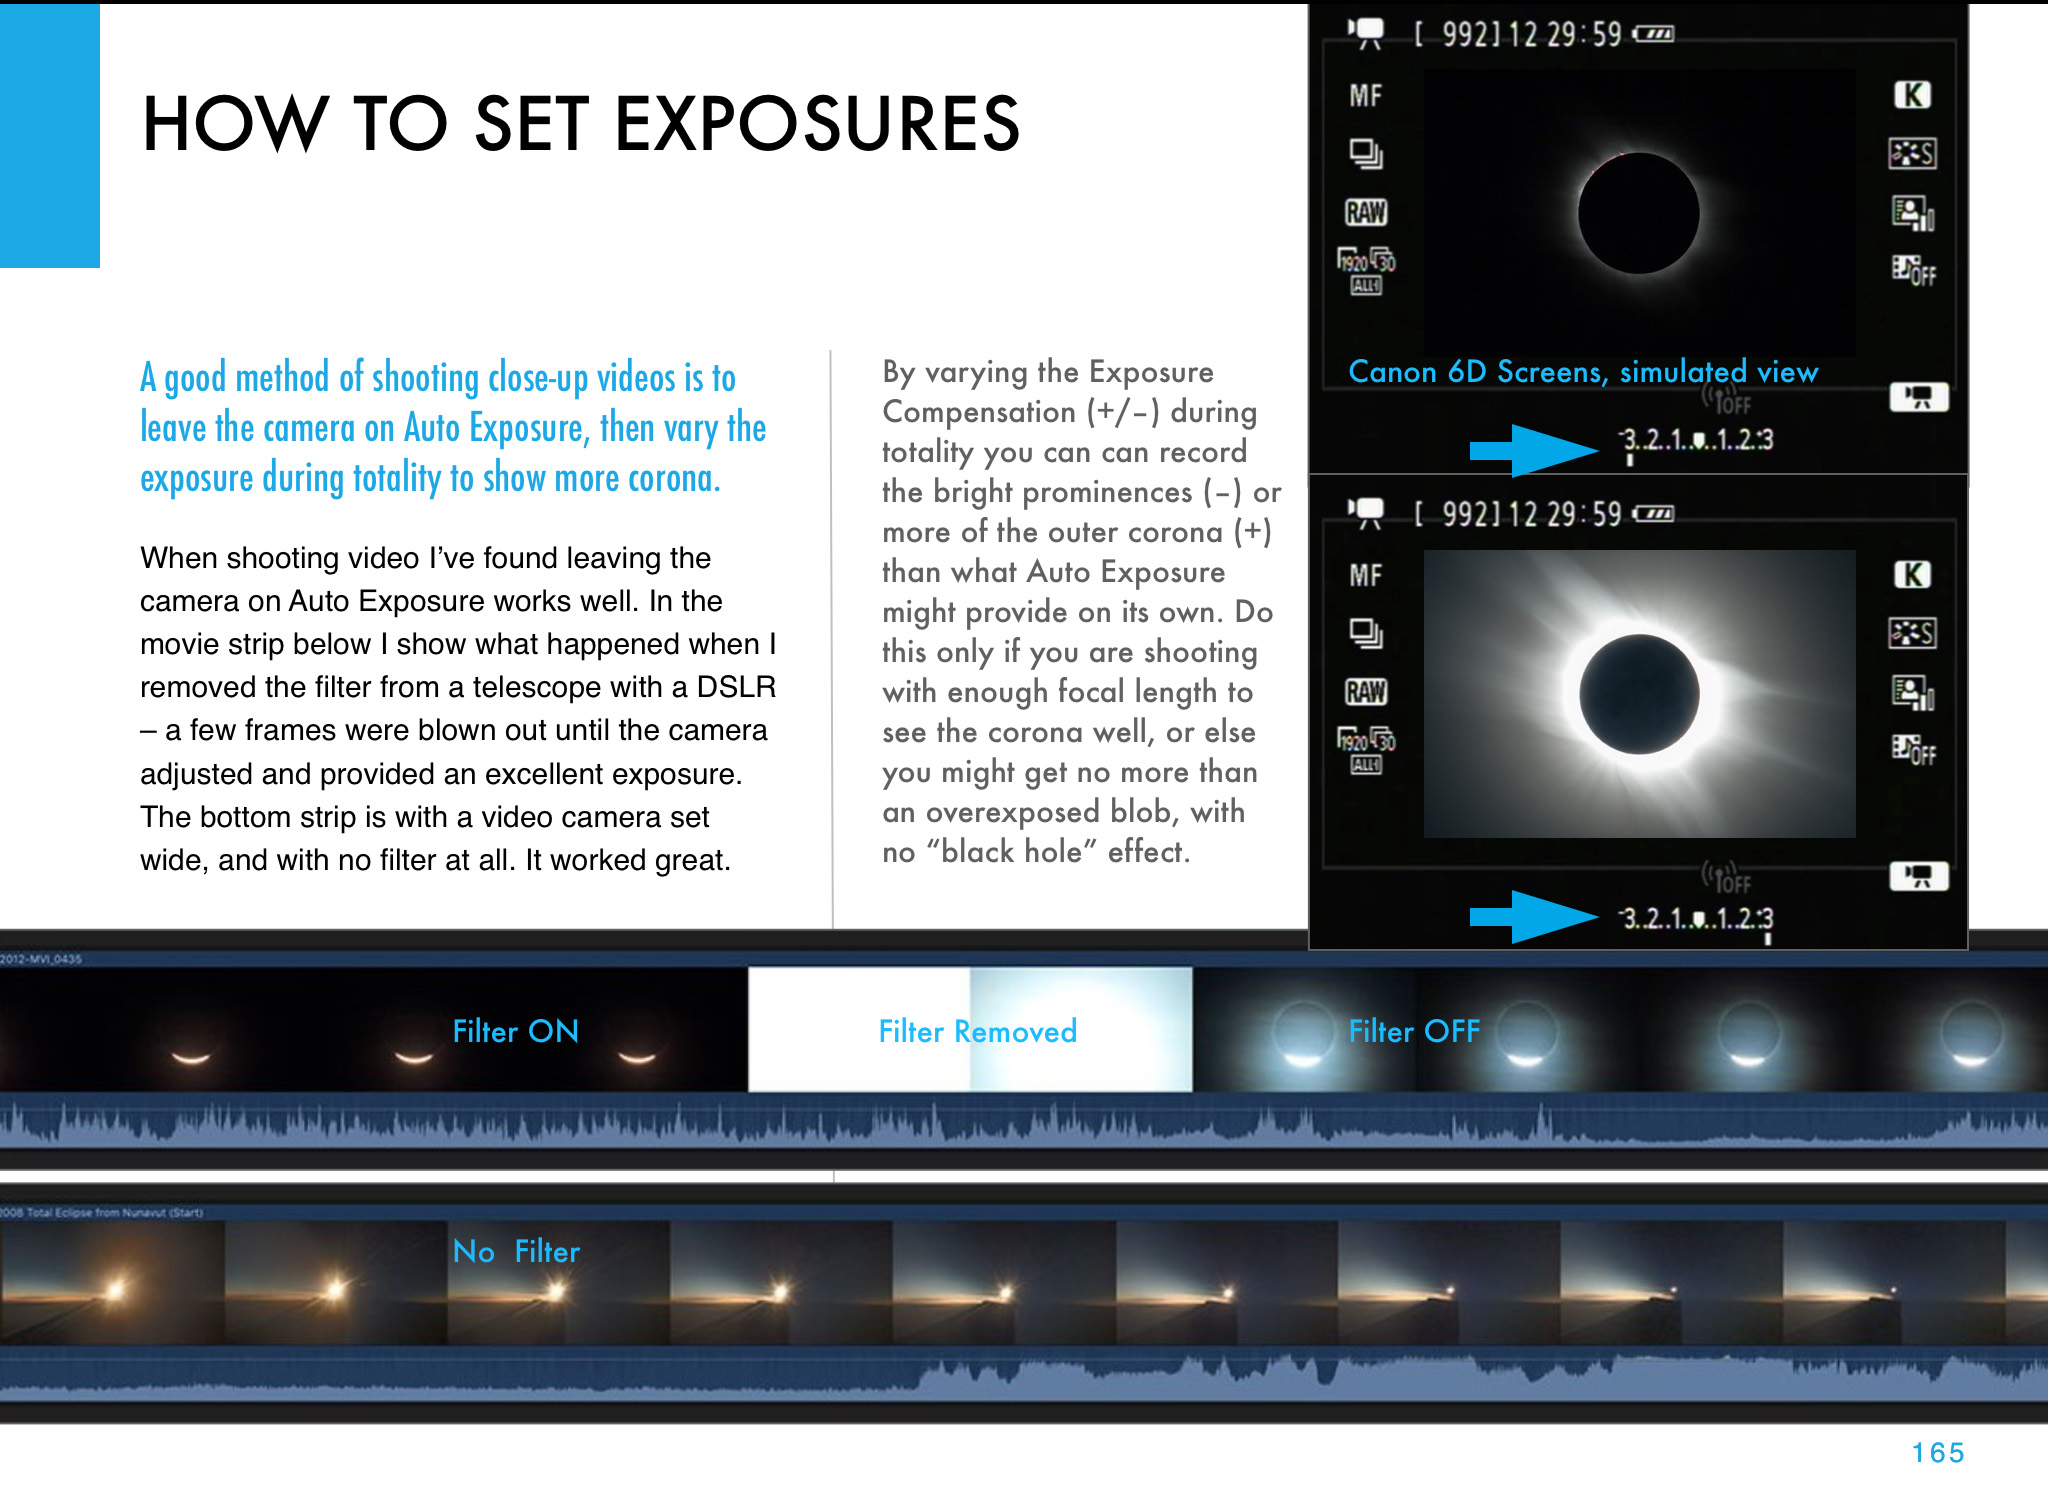
I show how we can use a camera’s auto-bracketing function to help automate the process of taking a set of exposures, from short exposures for the prominences, to long for the faint outer corona.
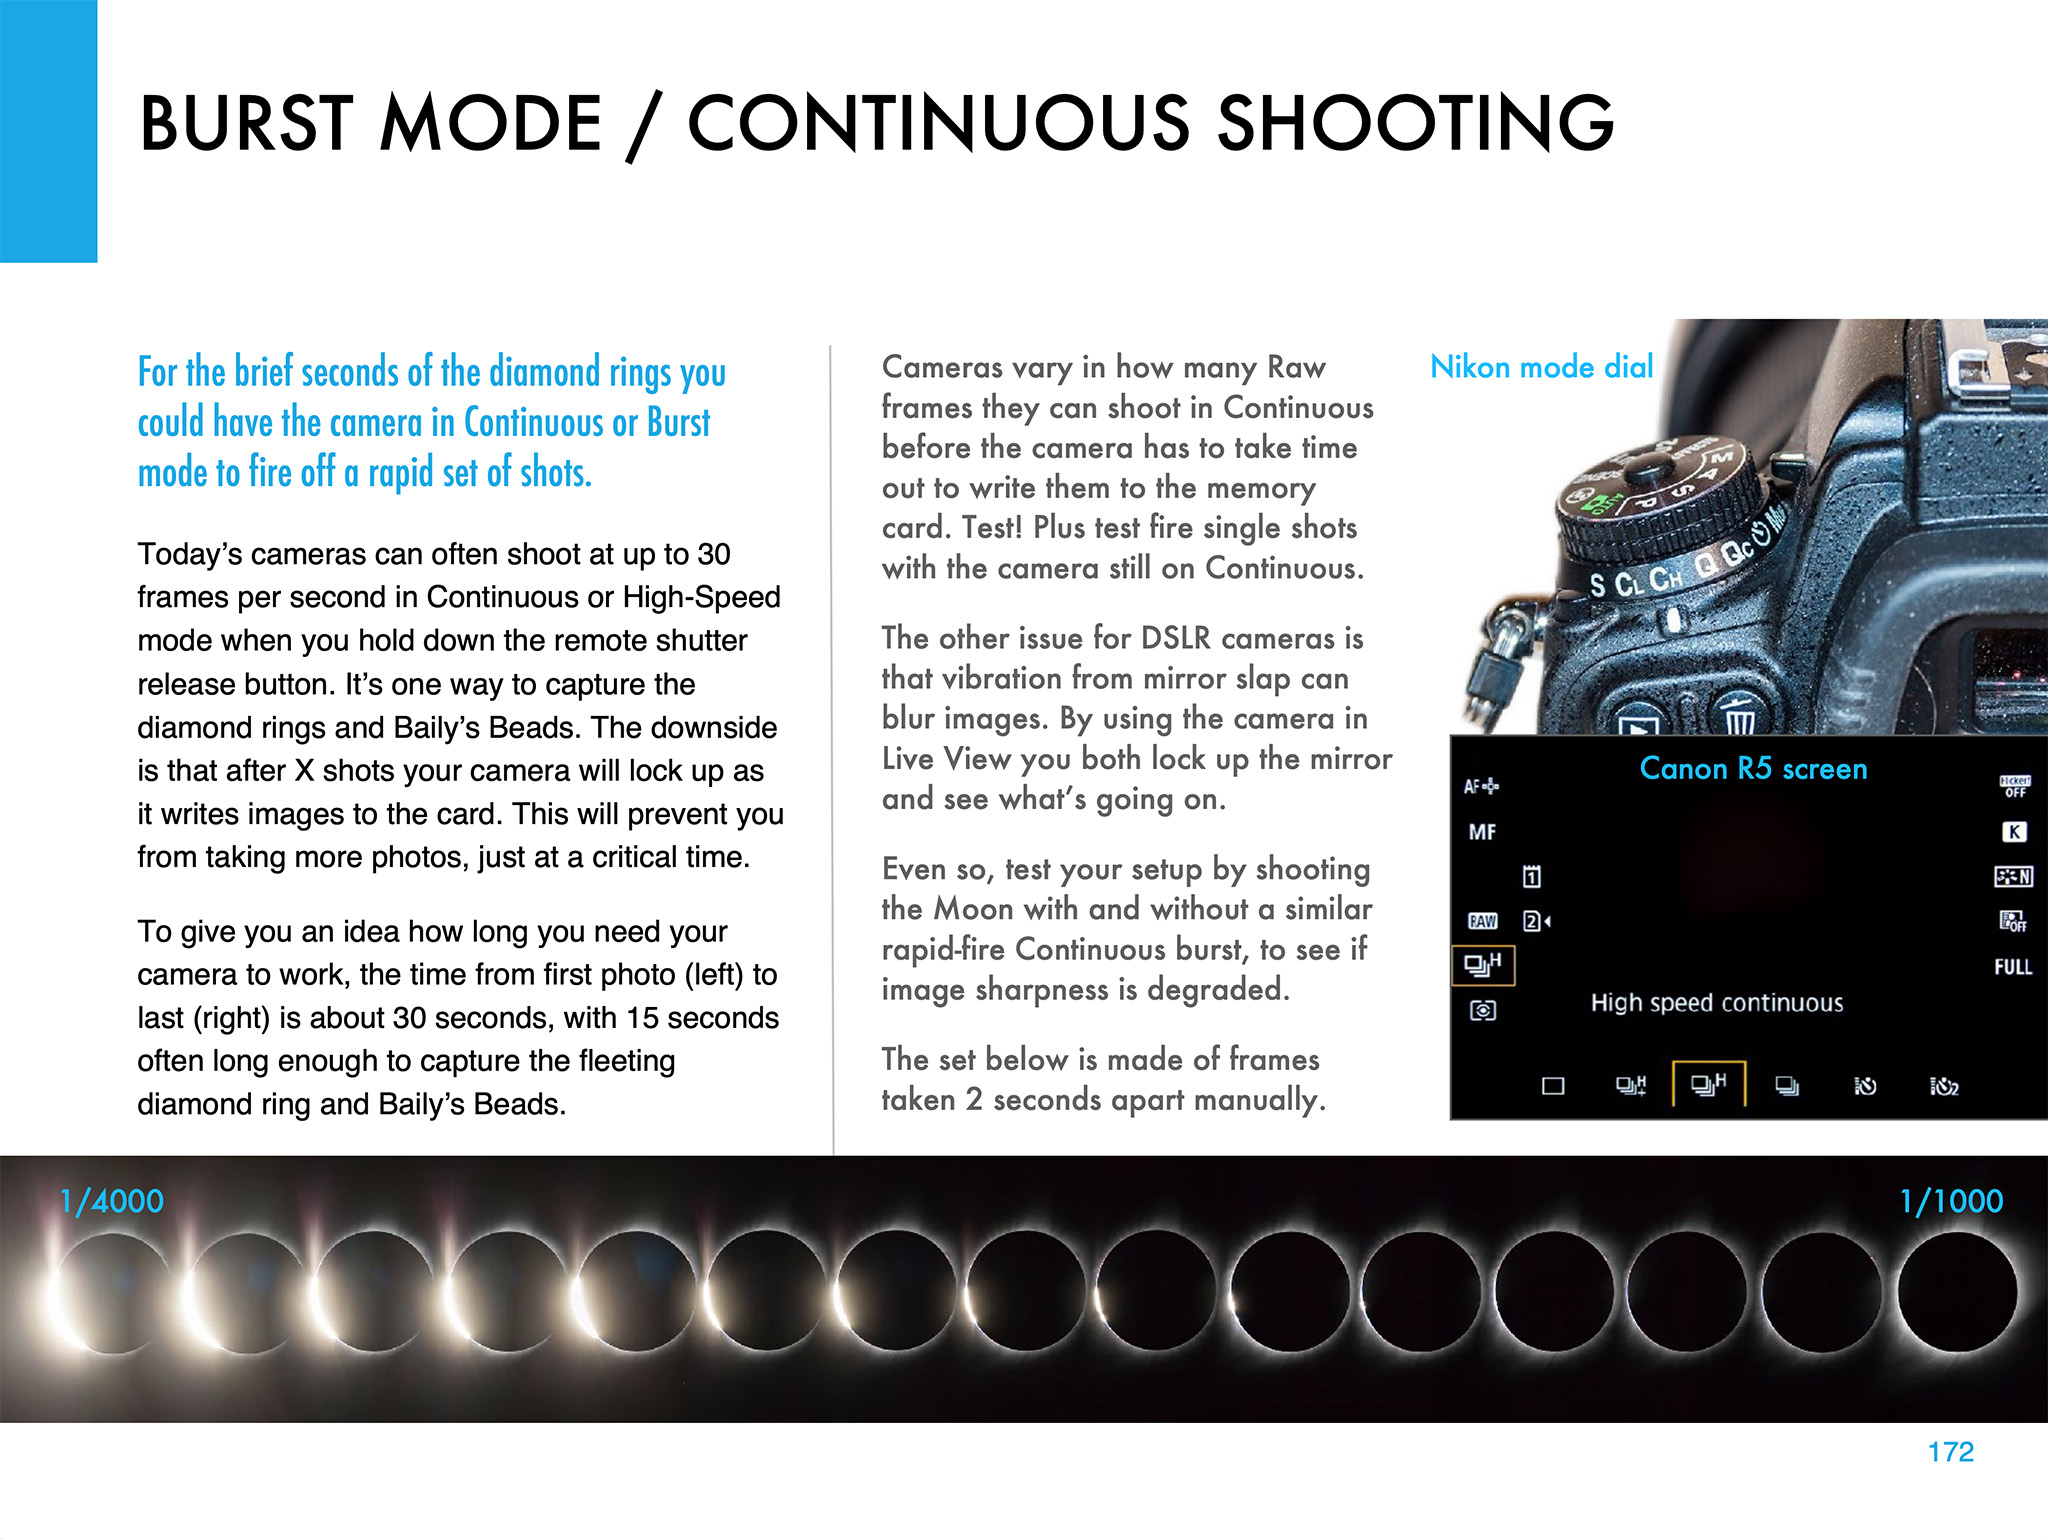
Another option is using a continuous burst mode to capture the fleeting moments of the diamond rings at the start and end of totality in 2024. But this can also be useful for capturing the “reverse Baily’s beads” that appear briefly as the Moon reaches the inner contact points at the start and end of the annular phase of the 2023 eclipse.
Using a tracking mount can help with shooting a set of images during totality. I describe the options for choosing the right mount and telescope, and how to set it up for accurate tracking. I discuss the advantages — and pitfalls — of using a tracking mount.
Shooting Video
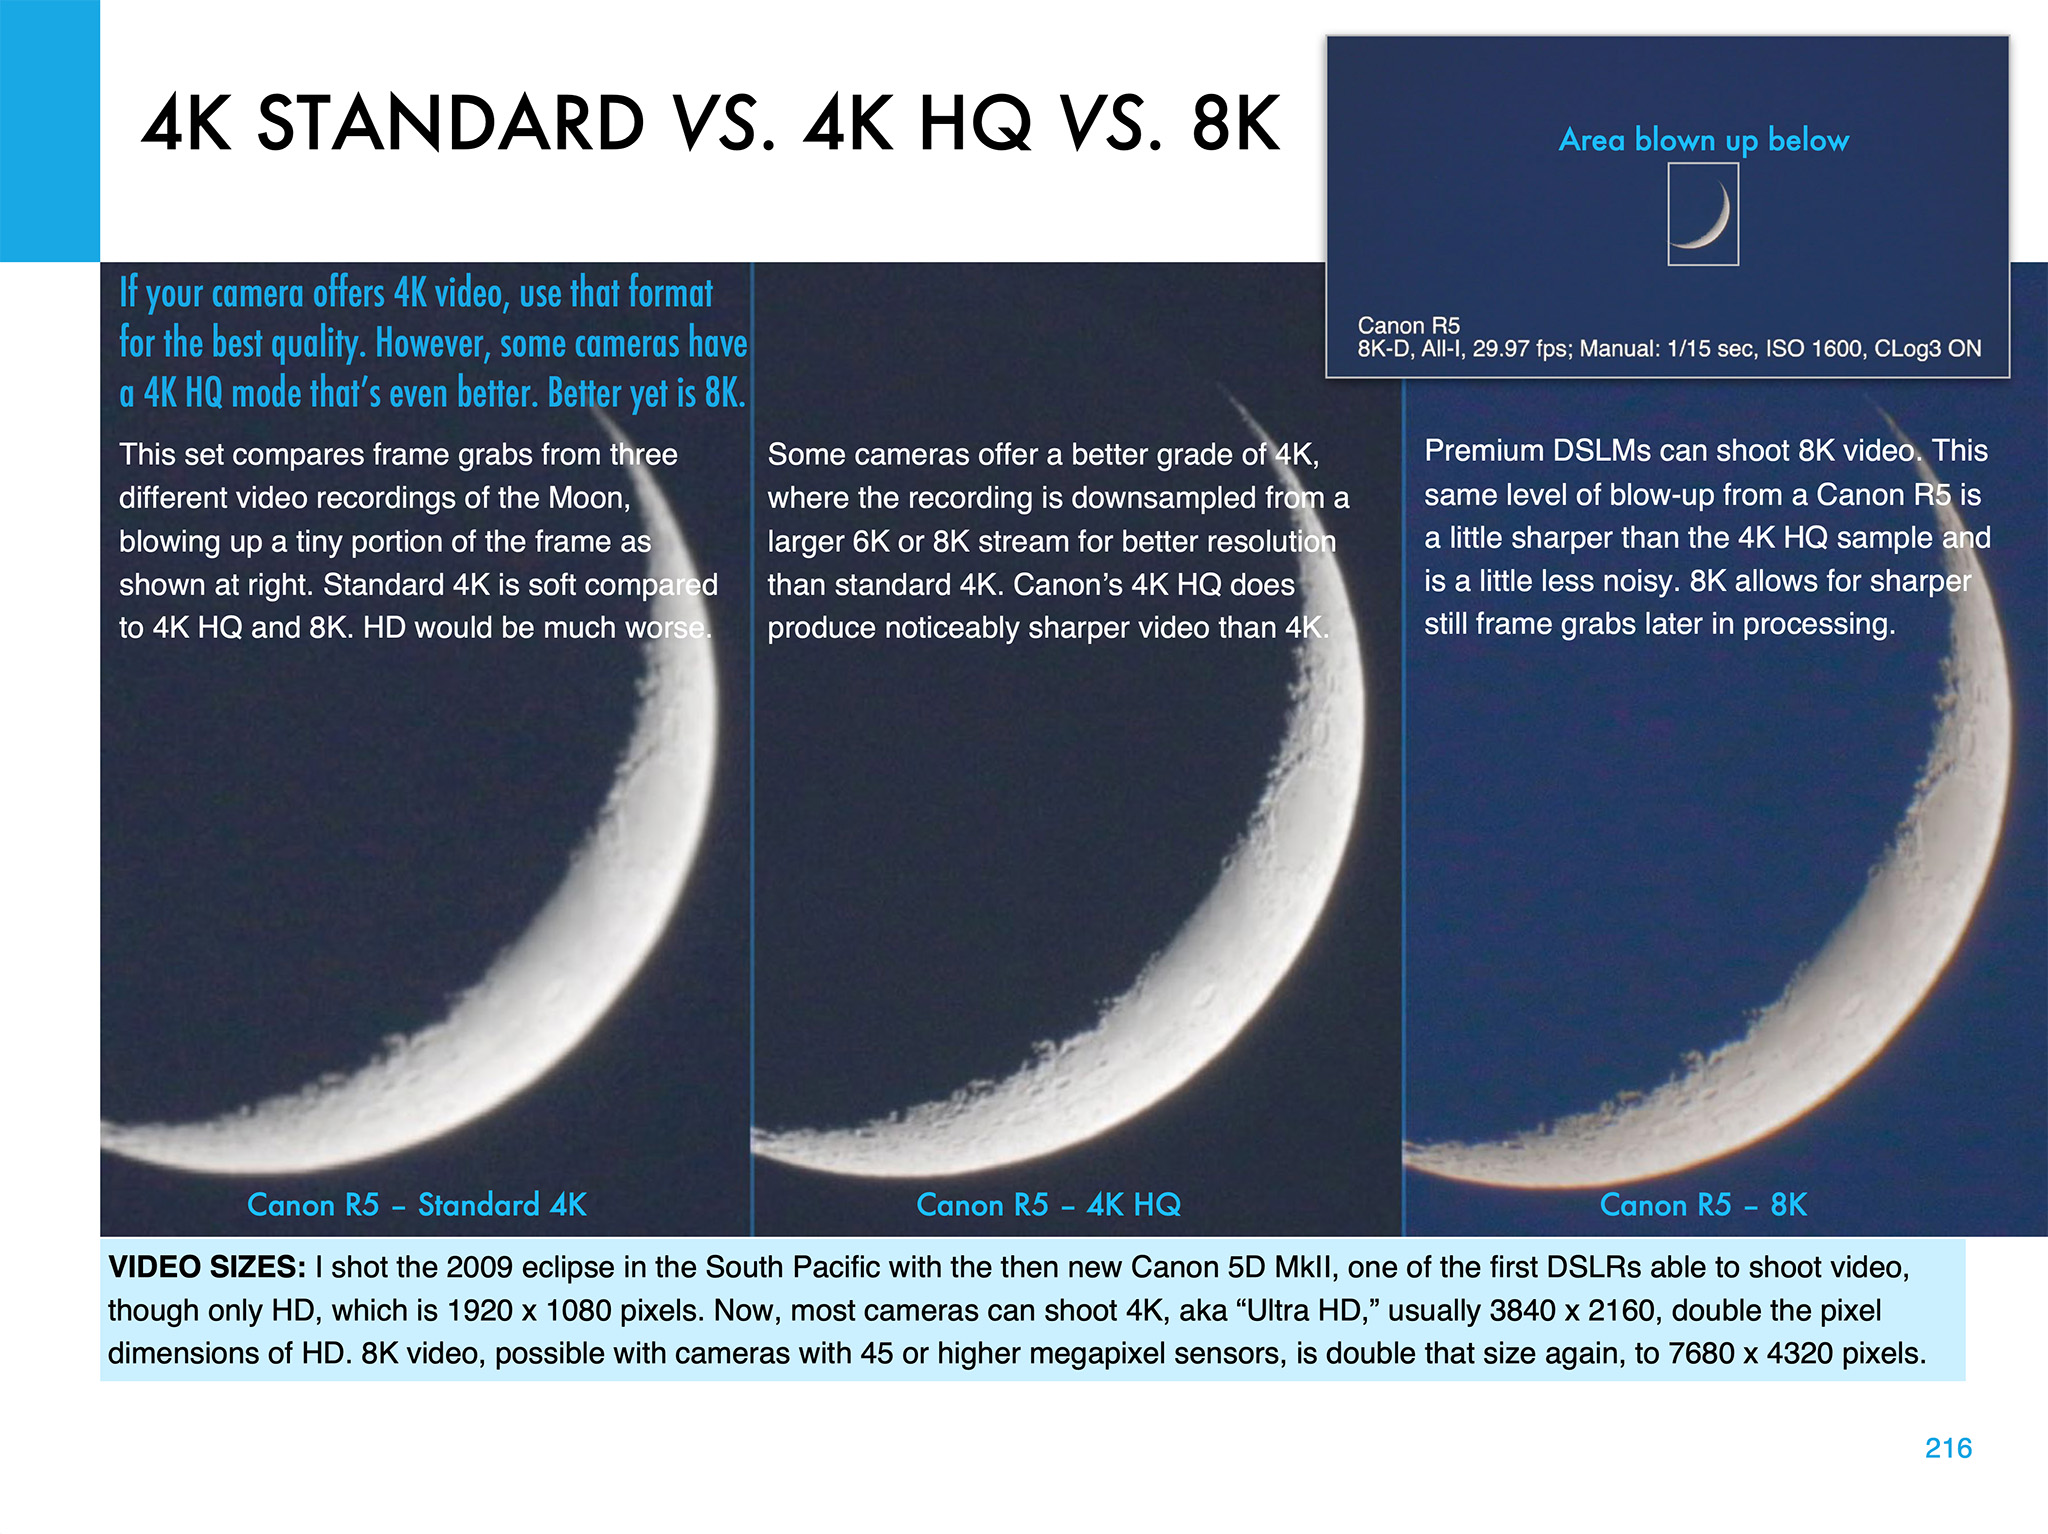
Video is now an important feature of many cameras. But the choices of formats and settings can be daunting! 4K, 8K, 4K HQ — what to use? I illustrate the differences, using the best practice target, the crescent Moon.
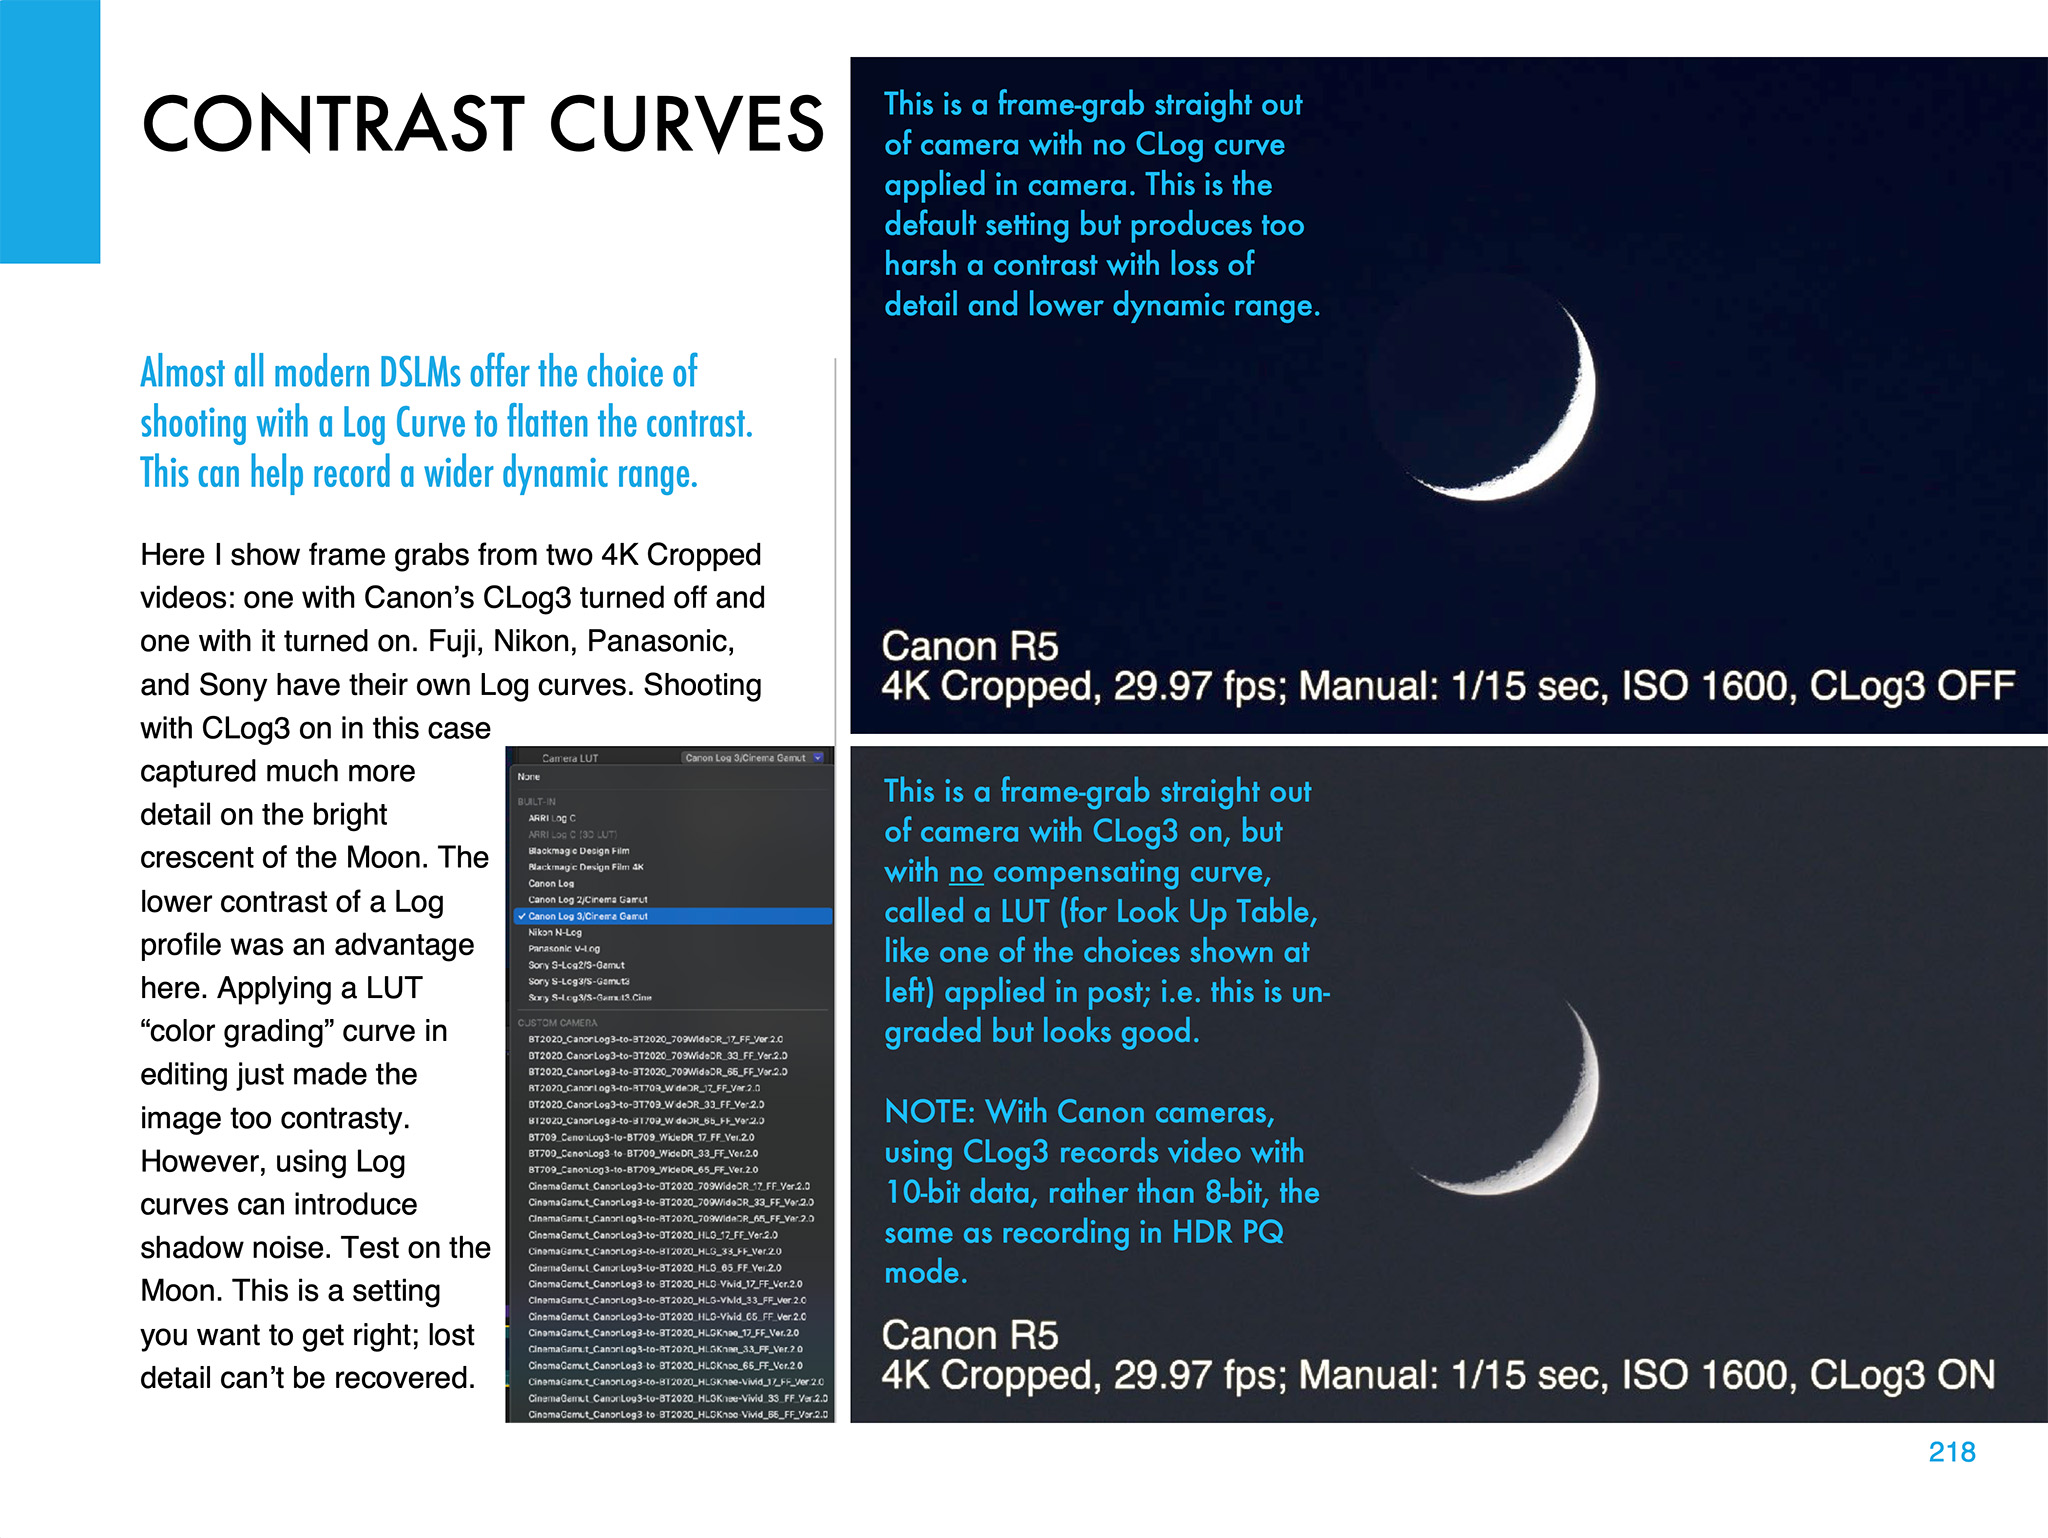
Choosing the right contrast curve for your video — such as CLog3 here — can also make a big difference to the final video quality. It’s important to get that right. You have only one chance!
I also devote a chapter to shooting time-lapses, with wide-angle lenses and telescopes.
Image Processing
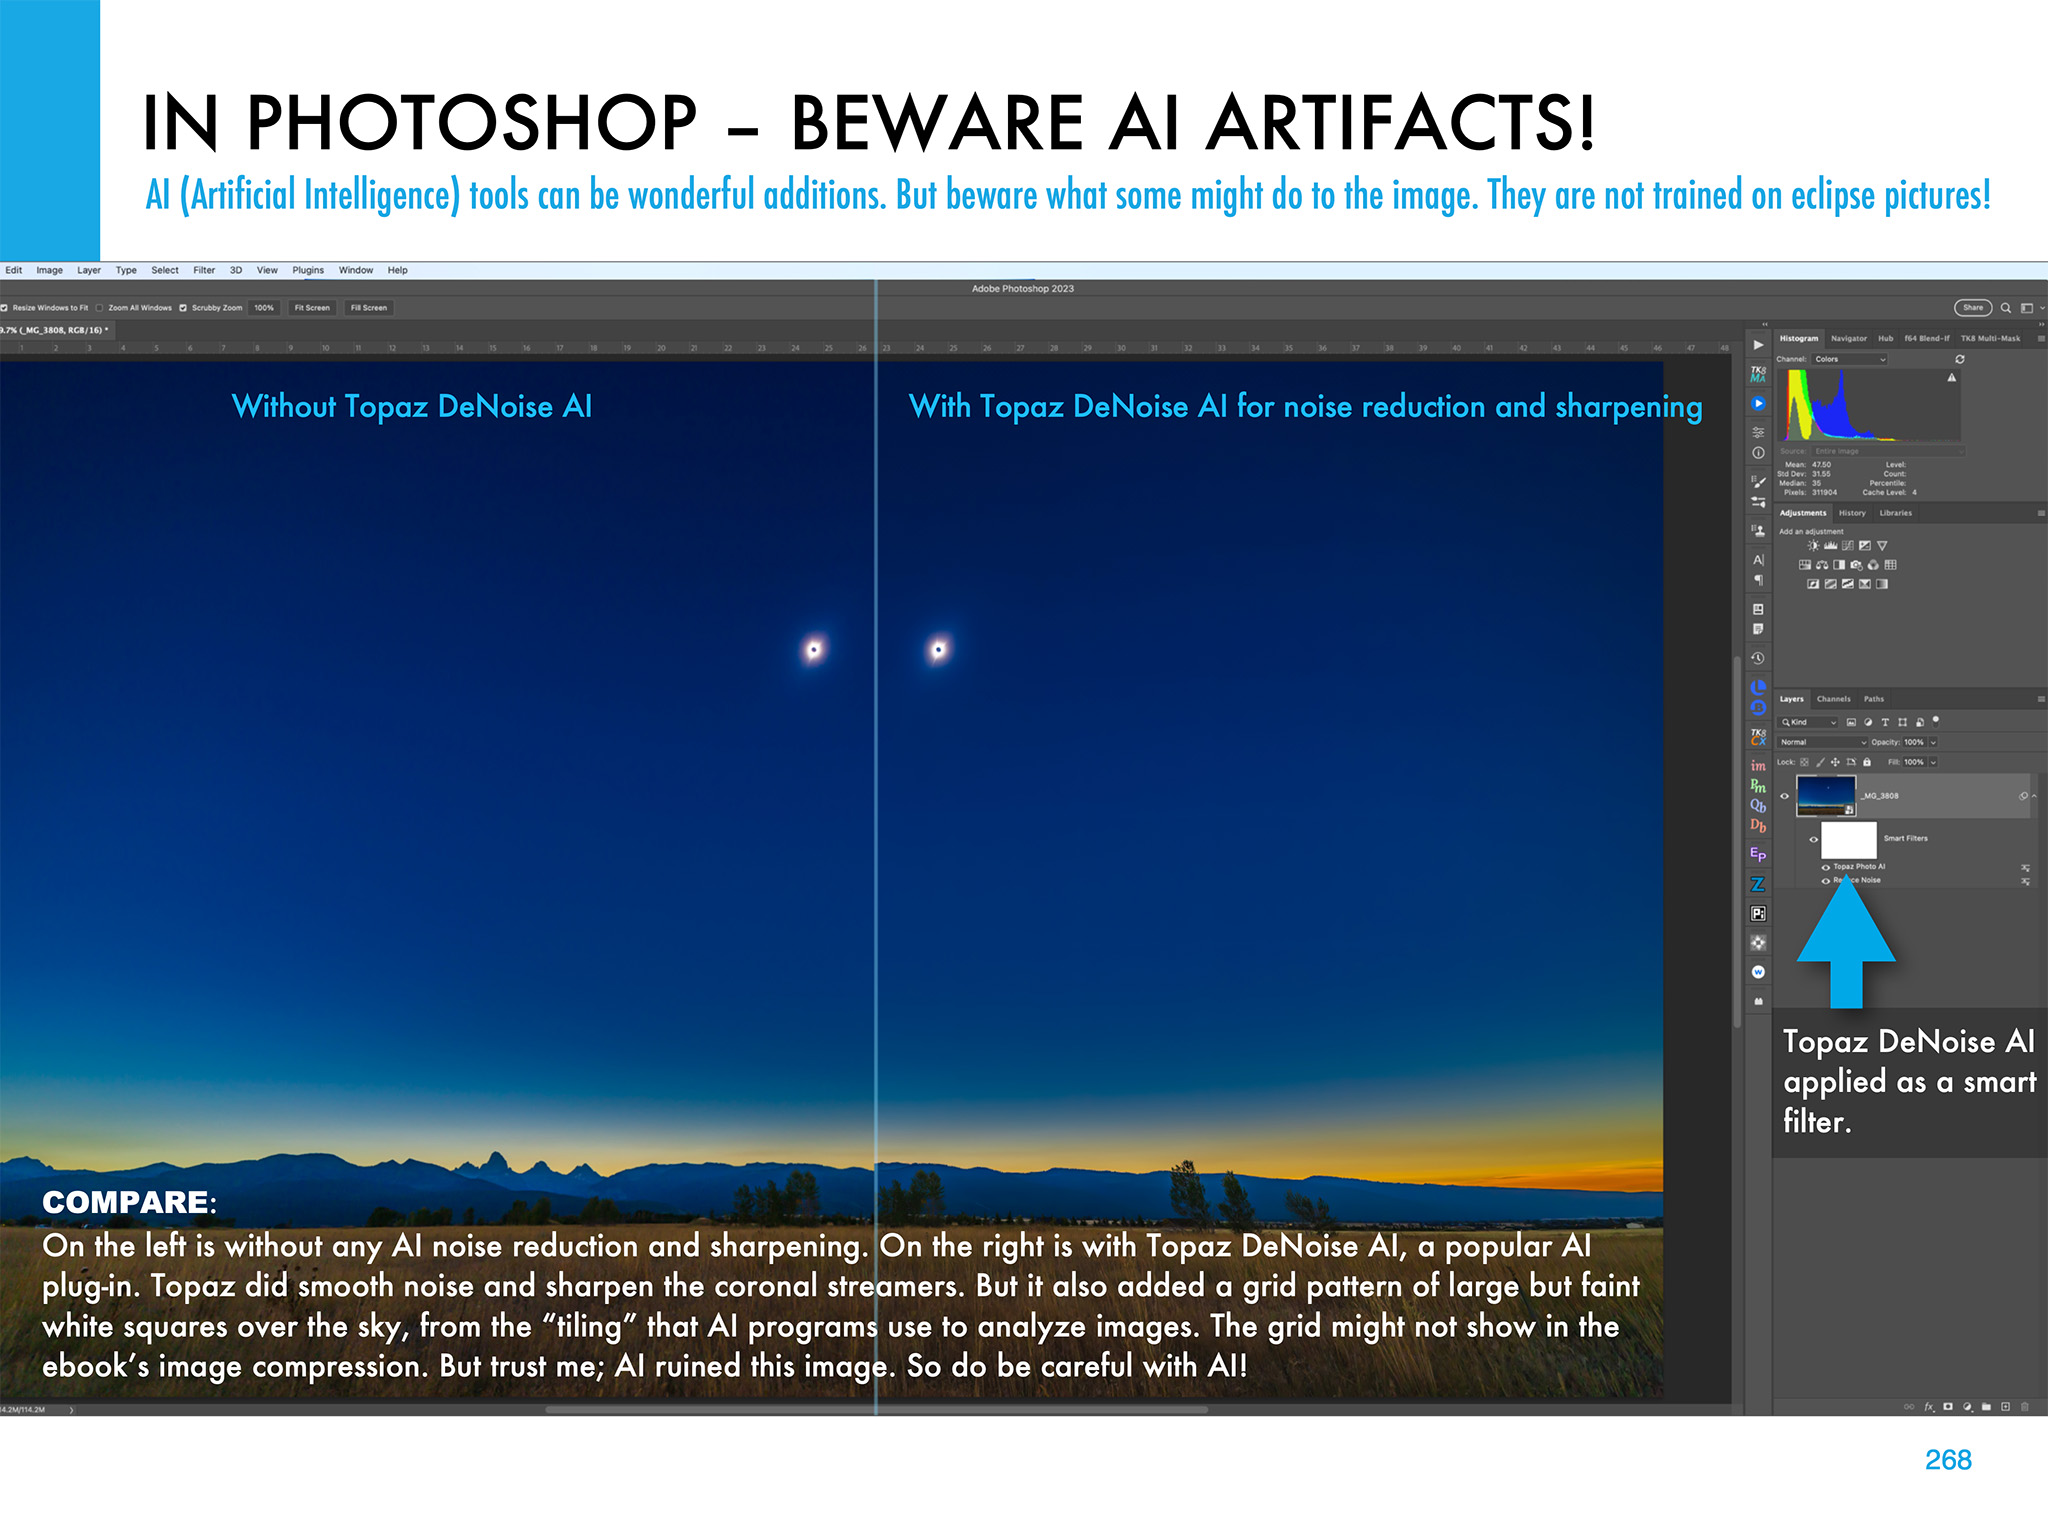
Chapter 11 is the biggest, with 68 pages of tutorials on how to process eclipse images, using the latest software. I show the benefit new AI tools can provide, but also the oddities they can impart to eclipse images.
I illustrate how to use HDR software (comparing sample results from several popular programs) to blend multiple exposures for greater dynamic range.
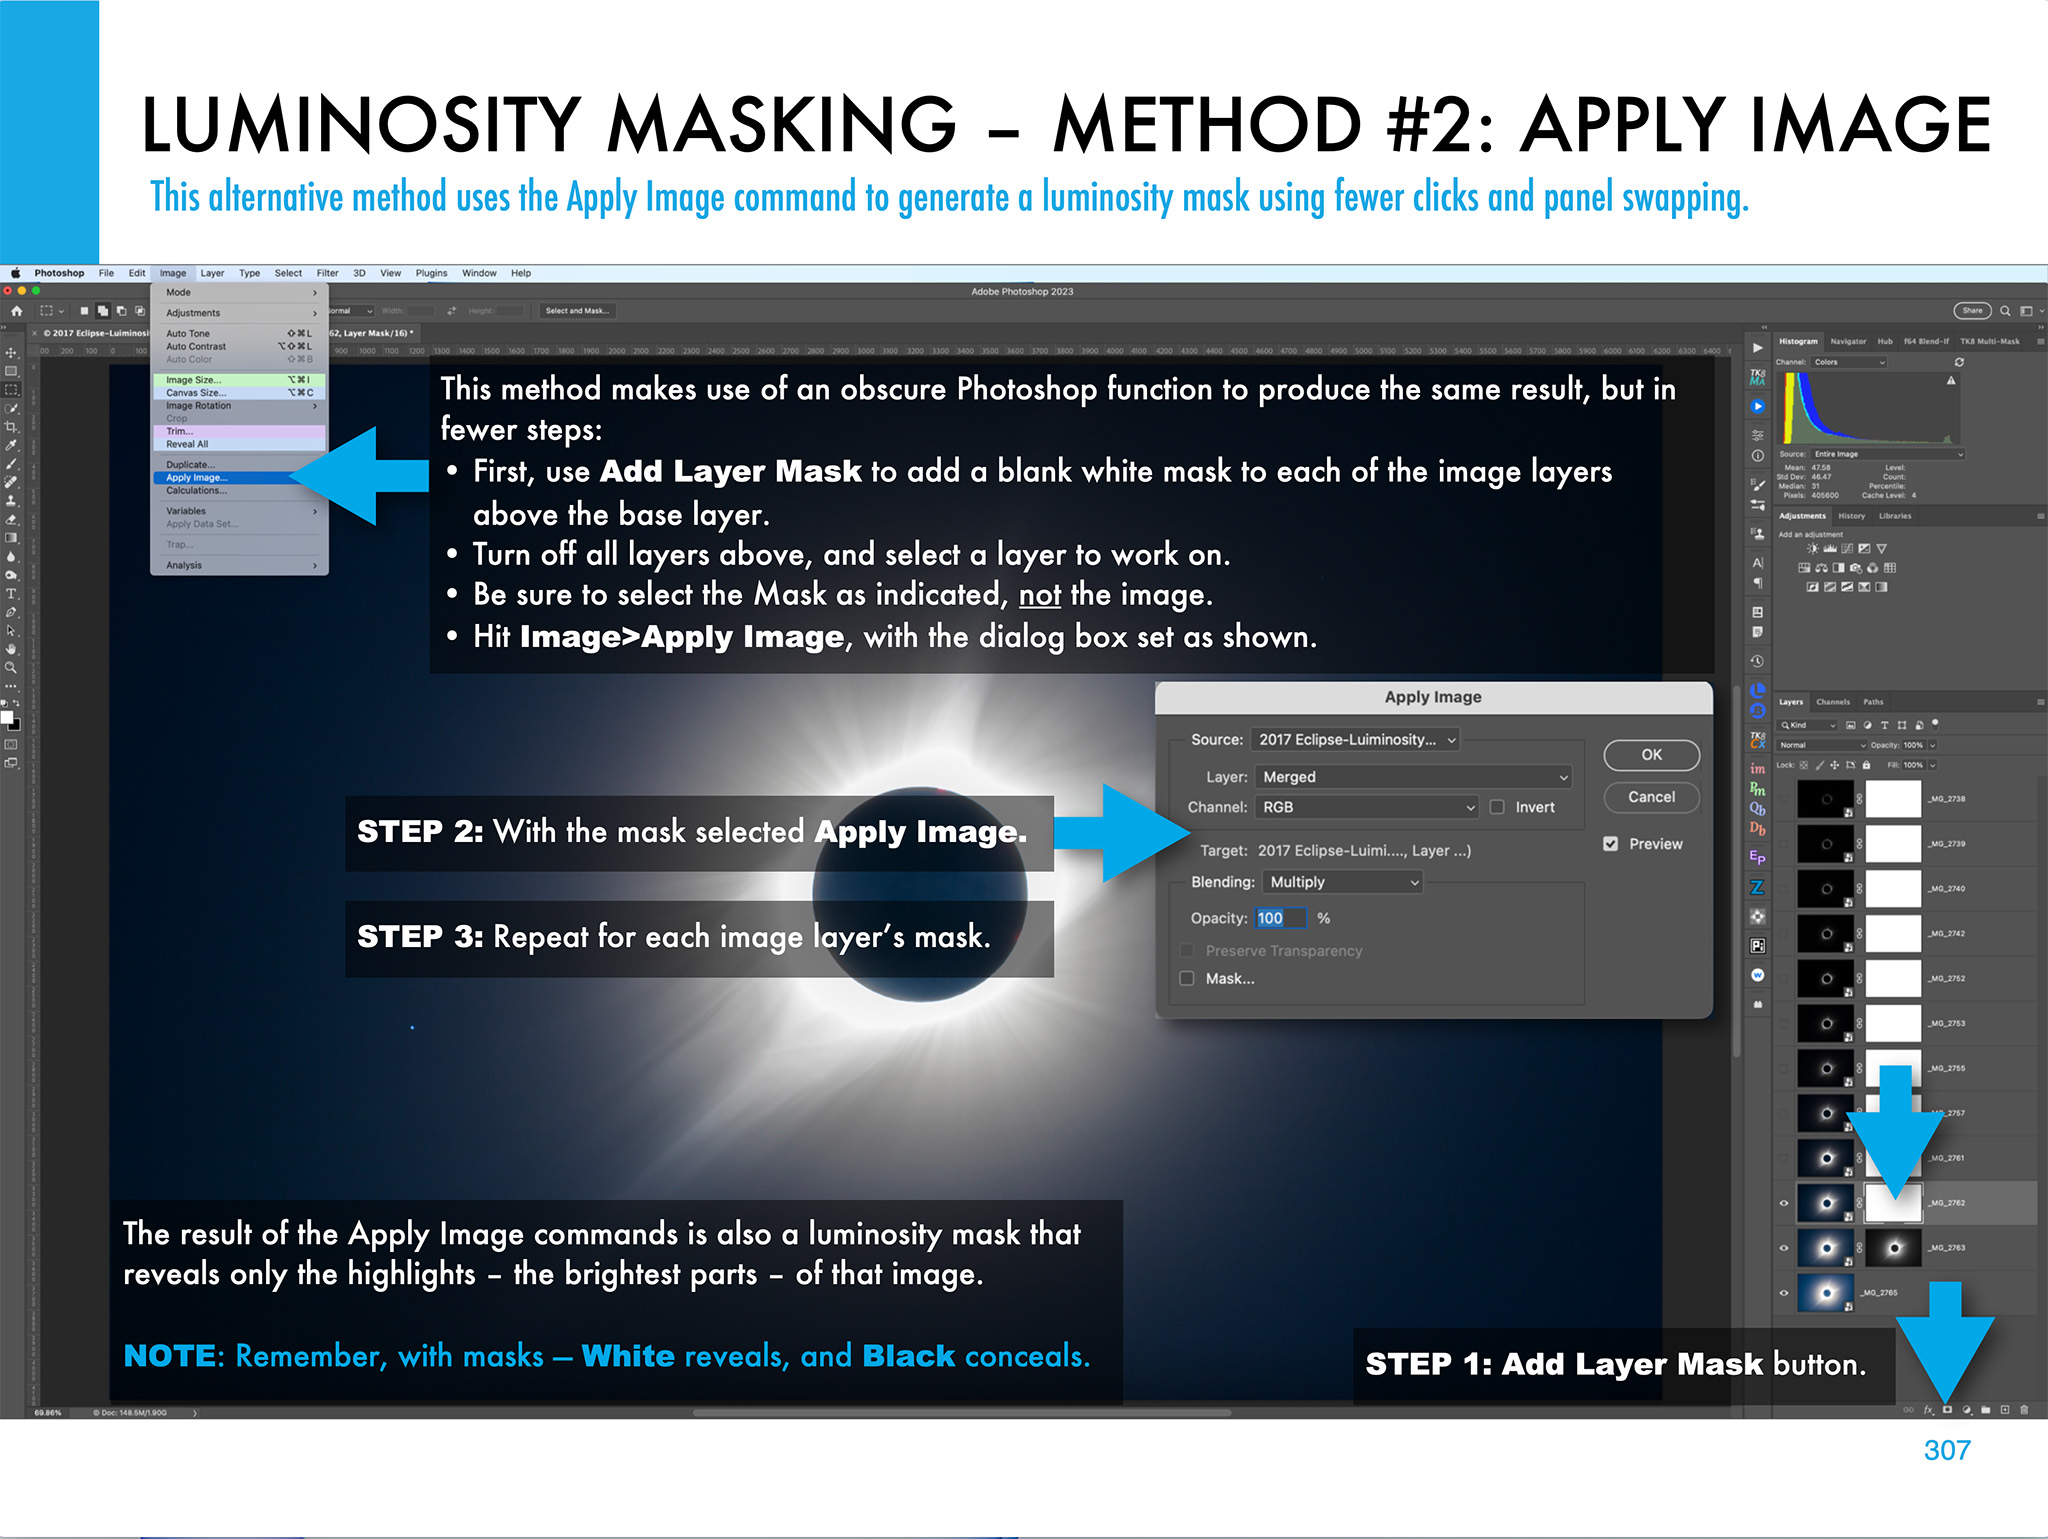
I illustrate other methods of stacking and blending exposure sets, such as luminosity masks and stack modes. Examples are all with Adobe products, but the methods are applicable to other layer-based programs such as Affinity Photo.
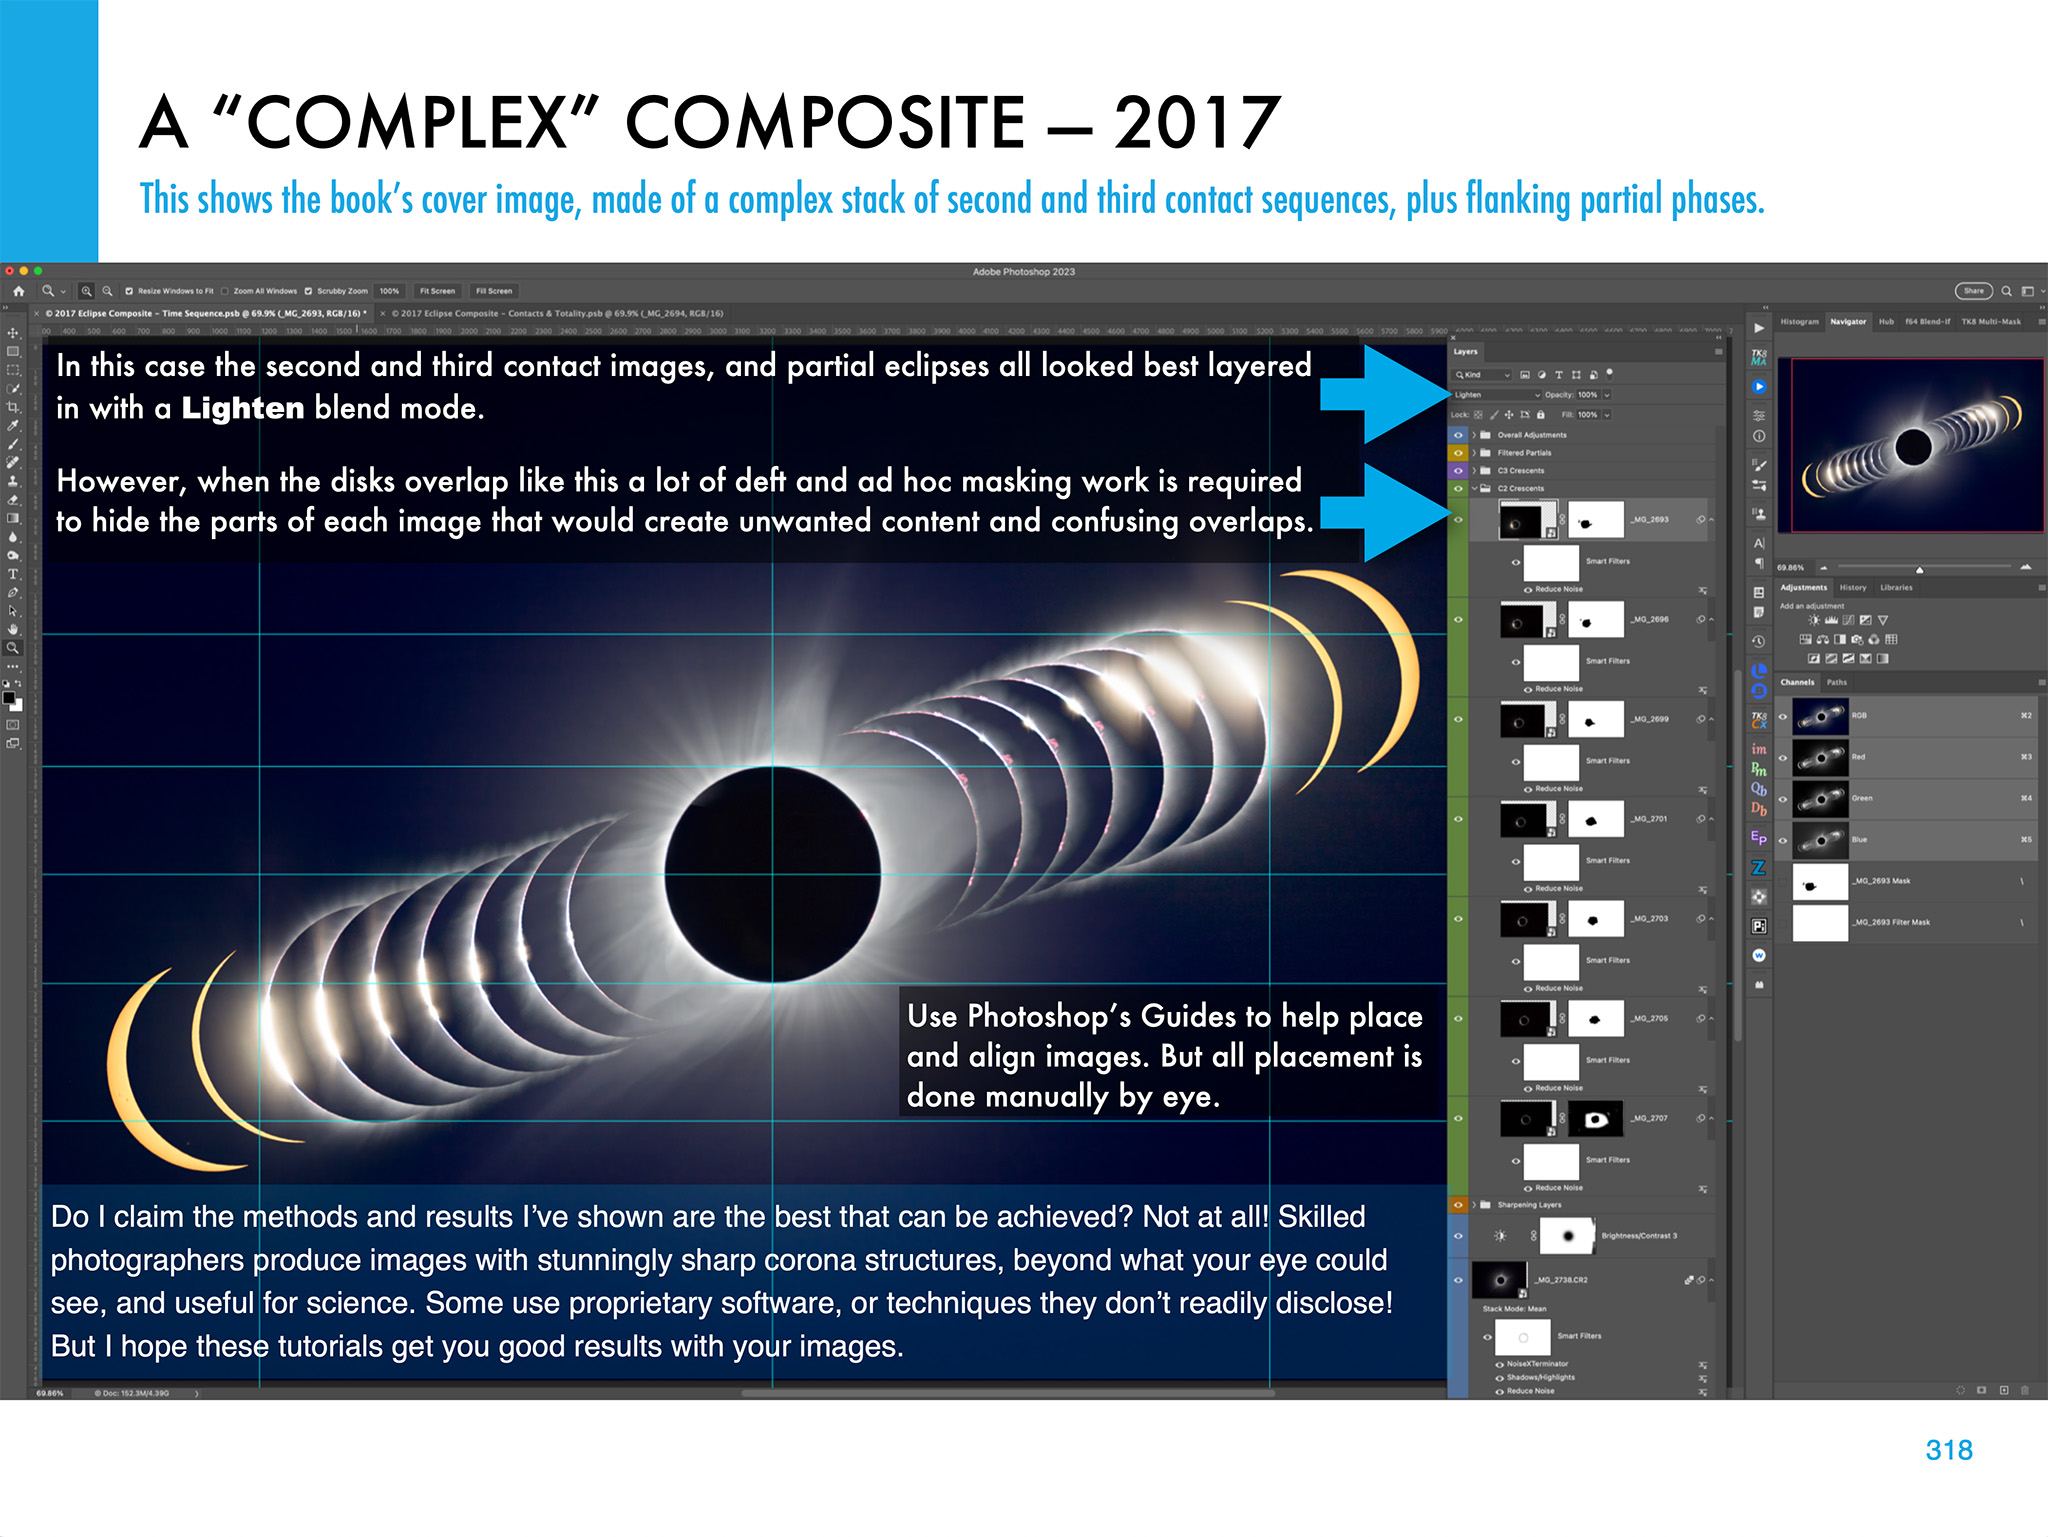
The processing chapter ends with illustrations on how to create layered composites from images taken at multiple stages of an eclipse.
What Can Go Wrong?
The ebook ends with advice for the ambitious (!) on how best to use several cameras to capture different aspects of the eclipse. And I includes lots of tips and checklists to ensure all goes well on eclipse day — or what to do for Plan B if all does not go well!
The ebook is available for Apple Books (for Macs and iPads) and as a PDF for all devices. Links to buy and more details on ebook content are at my website at www.amazingsky.com/EclipseBook.
I’ll be posting more eclipse “tips and techniques” blogs in the coming months, so be sure to subscribe.
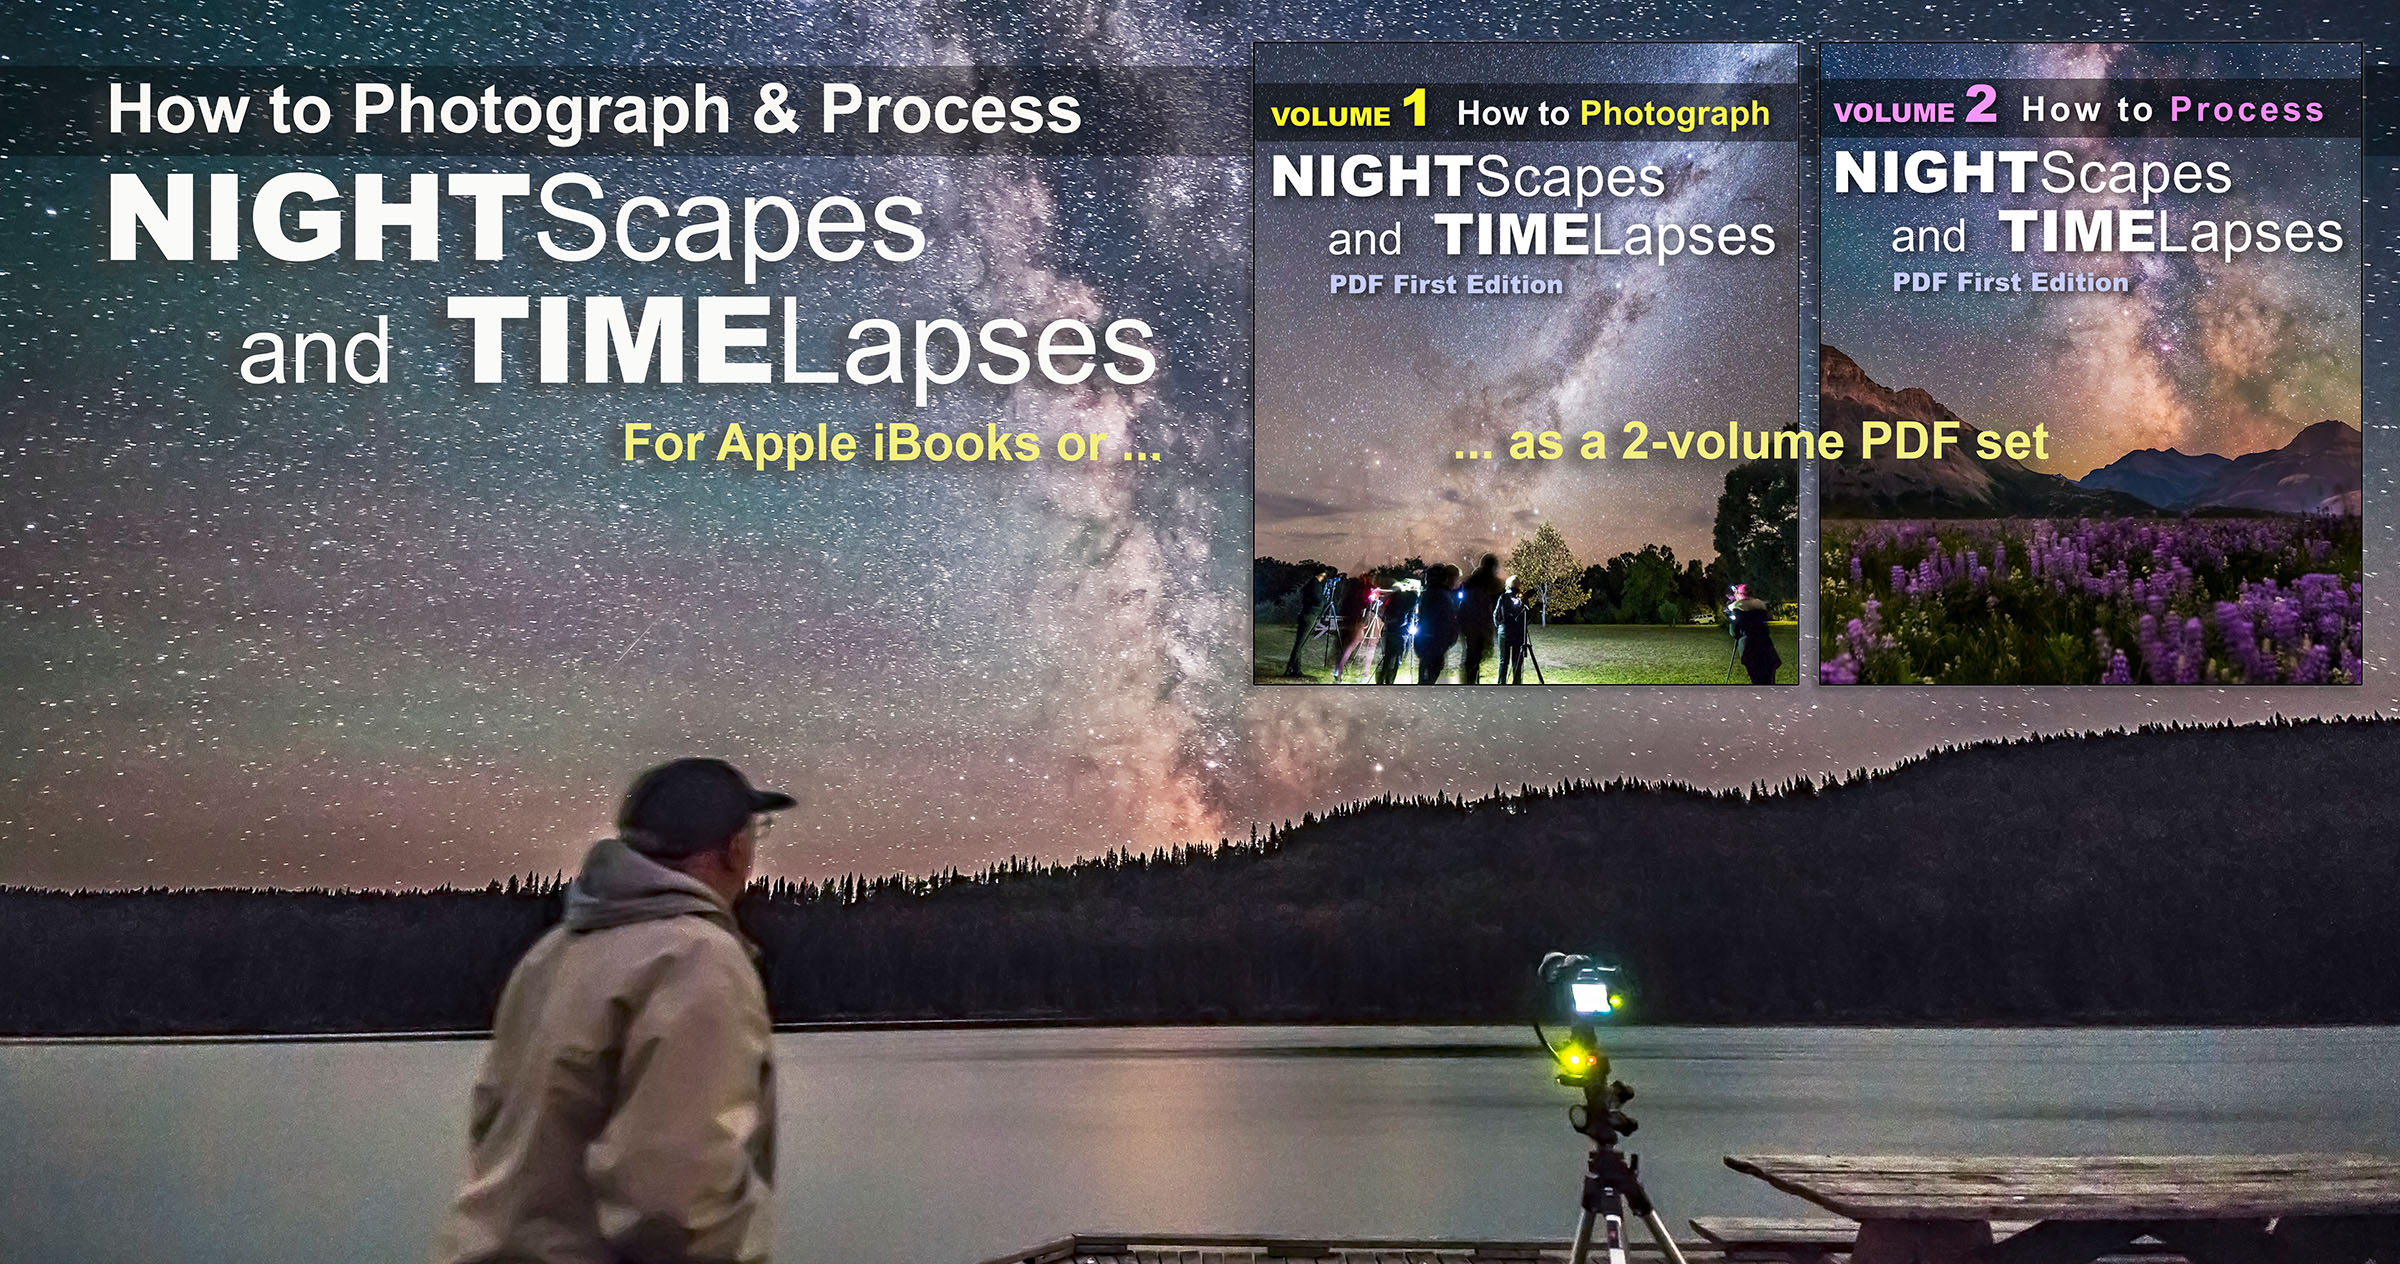
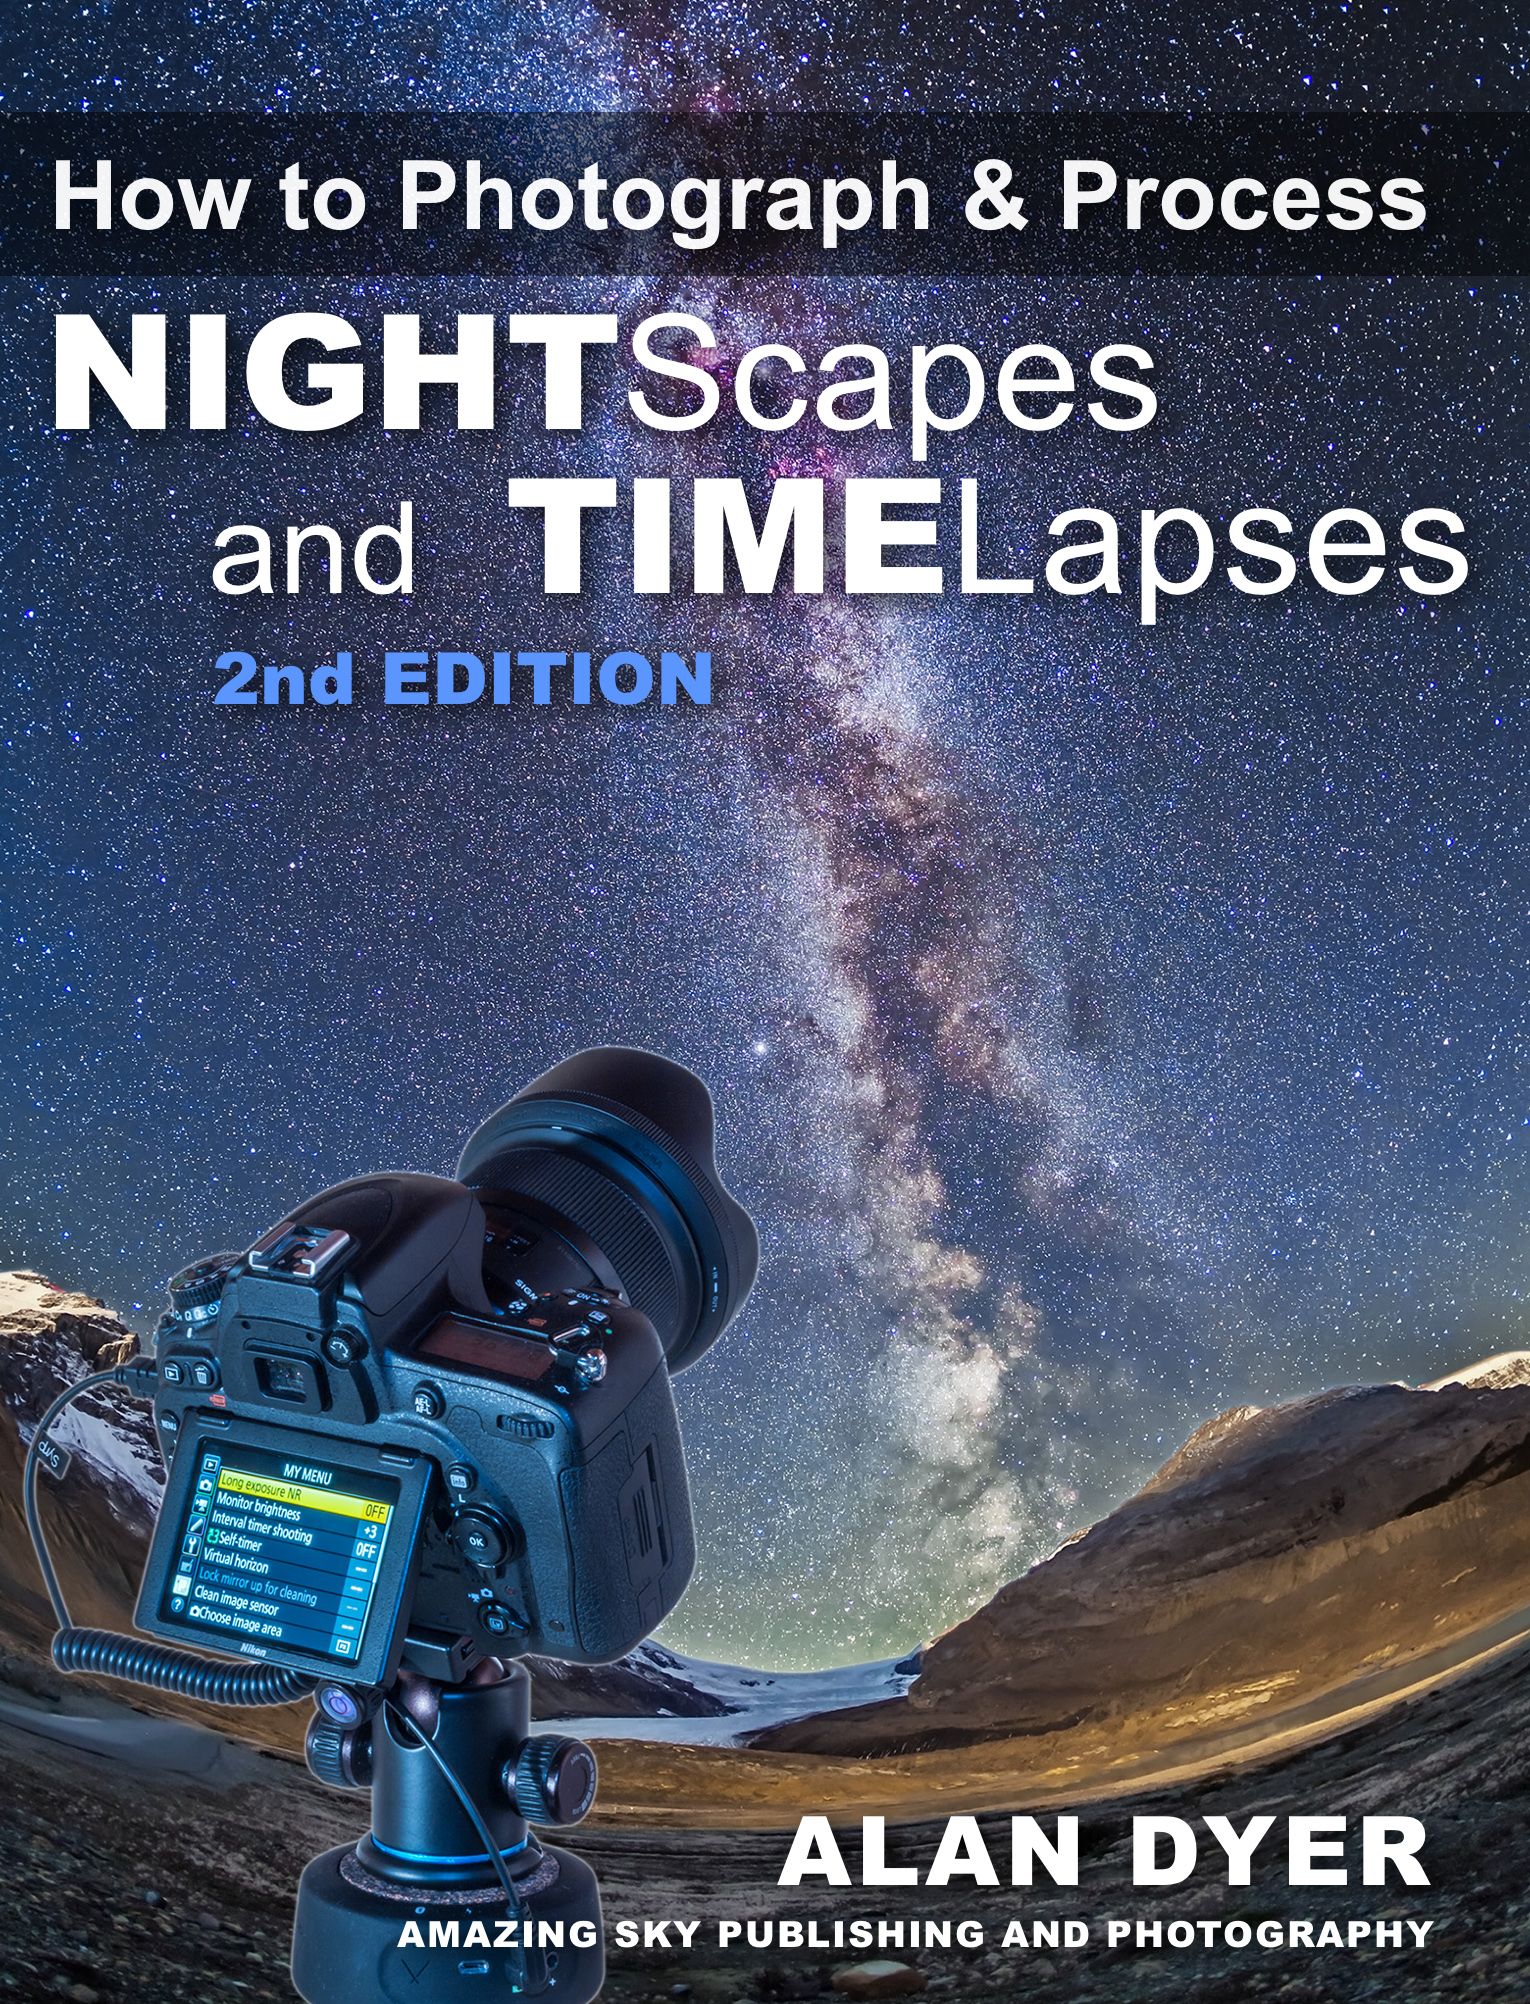
I’m pleased to announce that my “Nightscapes and Time-Lapses” eBook is now available for all devices as a “universal” PDF!
First published in 2014, and revised several times since then, my How to Photograph and Process Nightscapes and Time-Lapses eBook had been available only for Apple devices through the Apple iBooks Store. Not any more!
Over the years, many people have inquired about an edition for other devices, notably Android and Windows tablets. The only format that I can be sure the wide array of other devices can read and display as I intend it is PDF.
To convert the interactive Apple iBook into a PDF required splitting the content into two volumes:
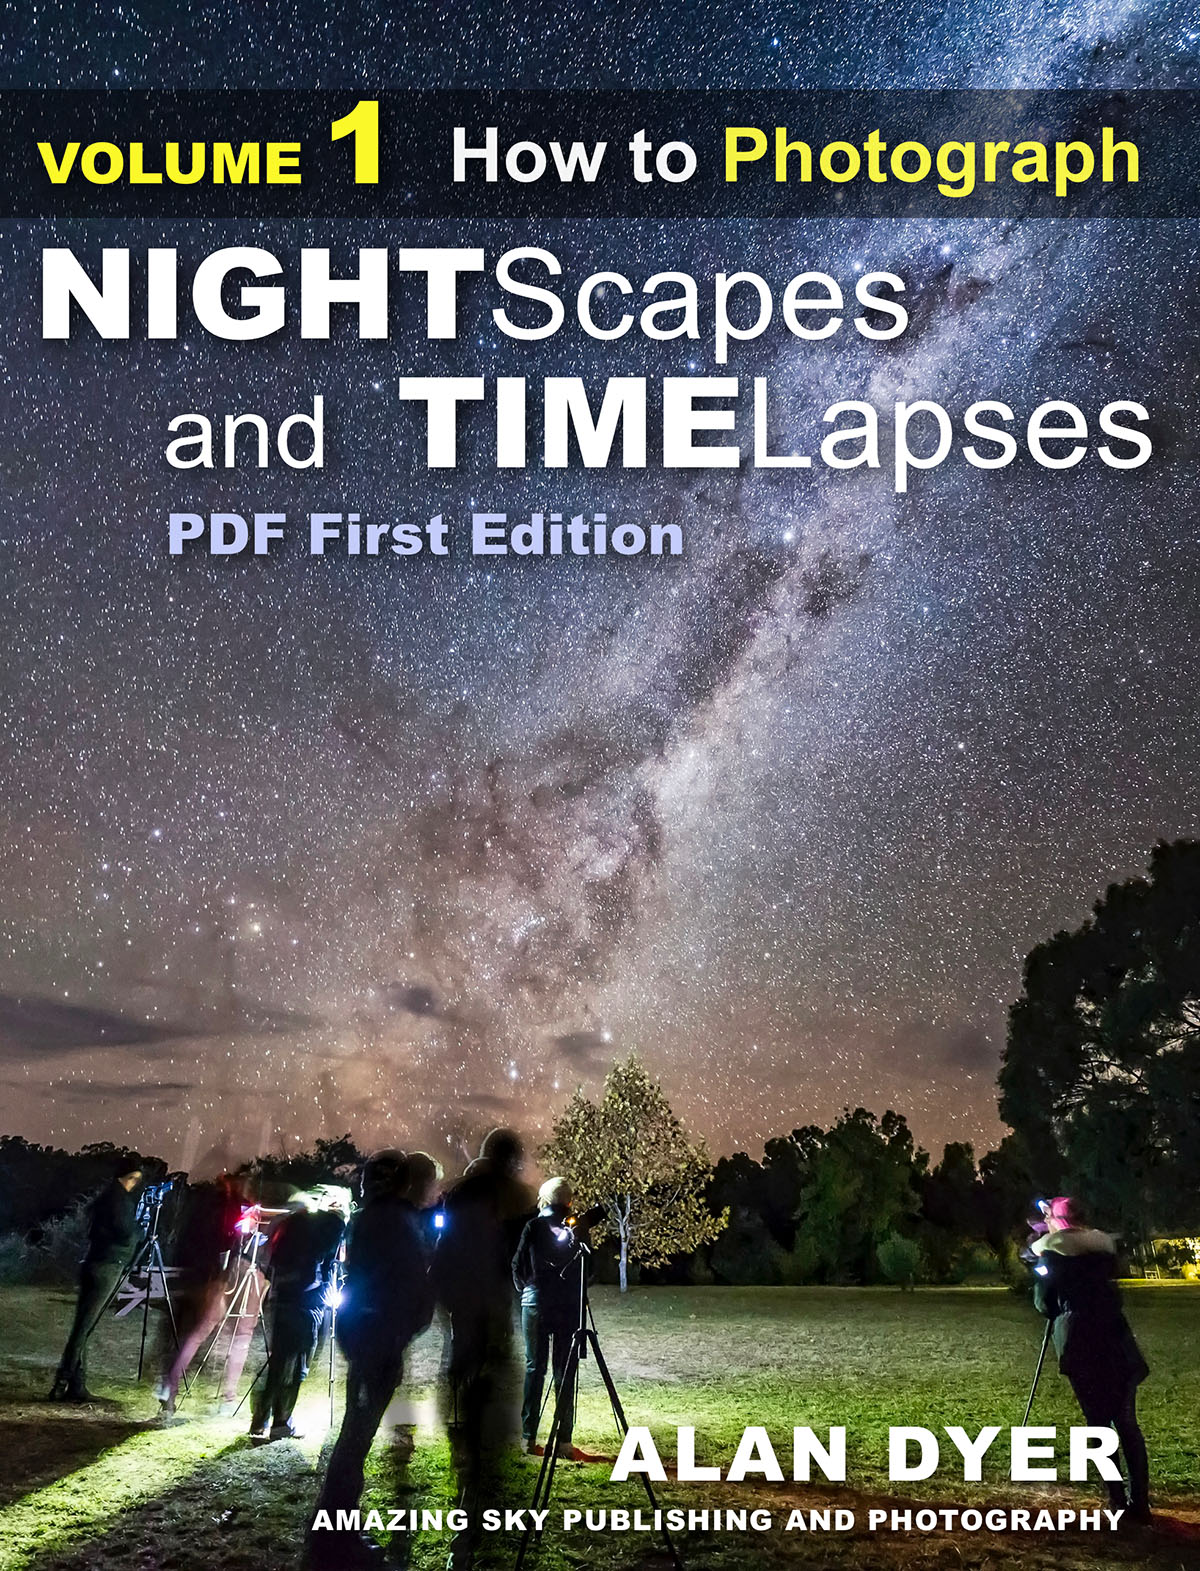
Volume 1 deals just with Photography in 425 pages.
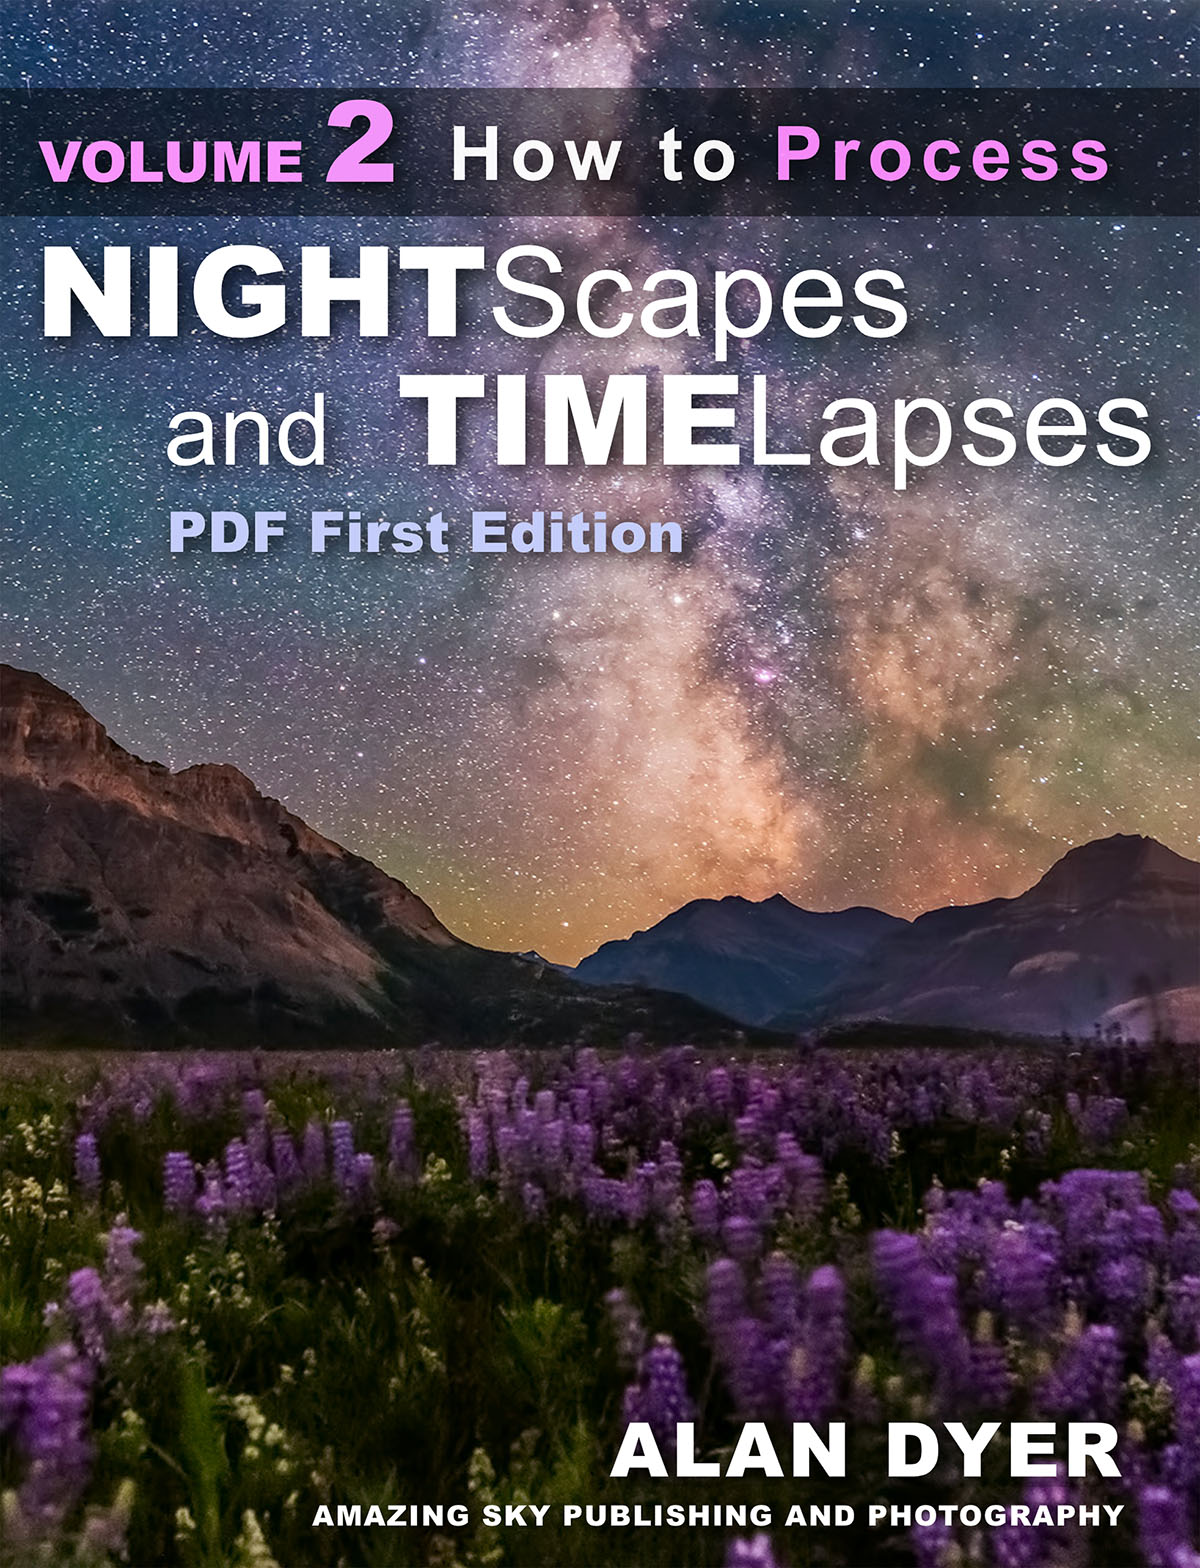
Volume 2 deals just with Processing, also in 425 pages.
Volume 2 includes all the same step-by-step tutorials as the Apple edition, but spread over many more pages. That’s because the Apple Edition allows “stacking” many processing steps into a one-page interactive gallery.
In the PDF version, however, those same steps are shown over several pages. And there are about 50 processing tutorials, including for selected non-Adobe programs such as Affinity Photo, ON1 Photo RAW, and DxO PhotoLab.
The other main difference is that, unlike the Apple version, I cannot embed videos. So all the videos are provided by links to Vimeo feeds, many “private” so only my ebook owners have access to those videos.
Otherwise, the combined content of the two PDFs is the same as the Apple iBooks edition.
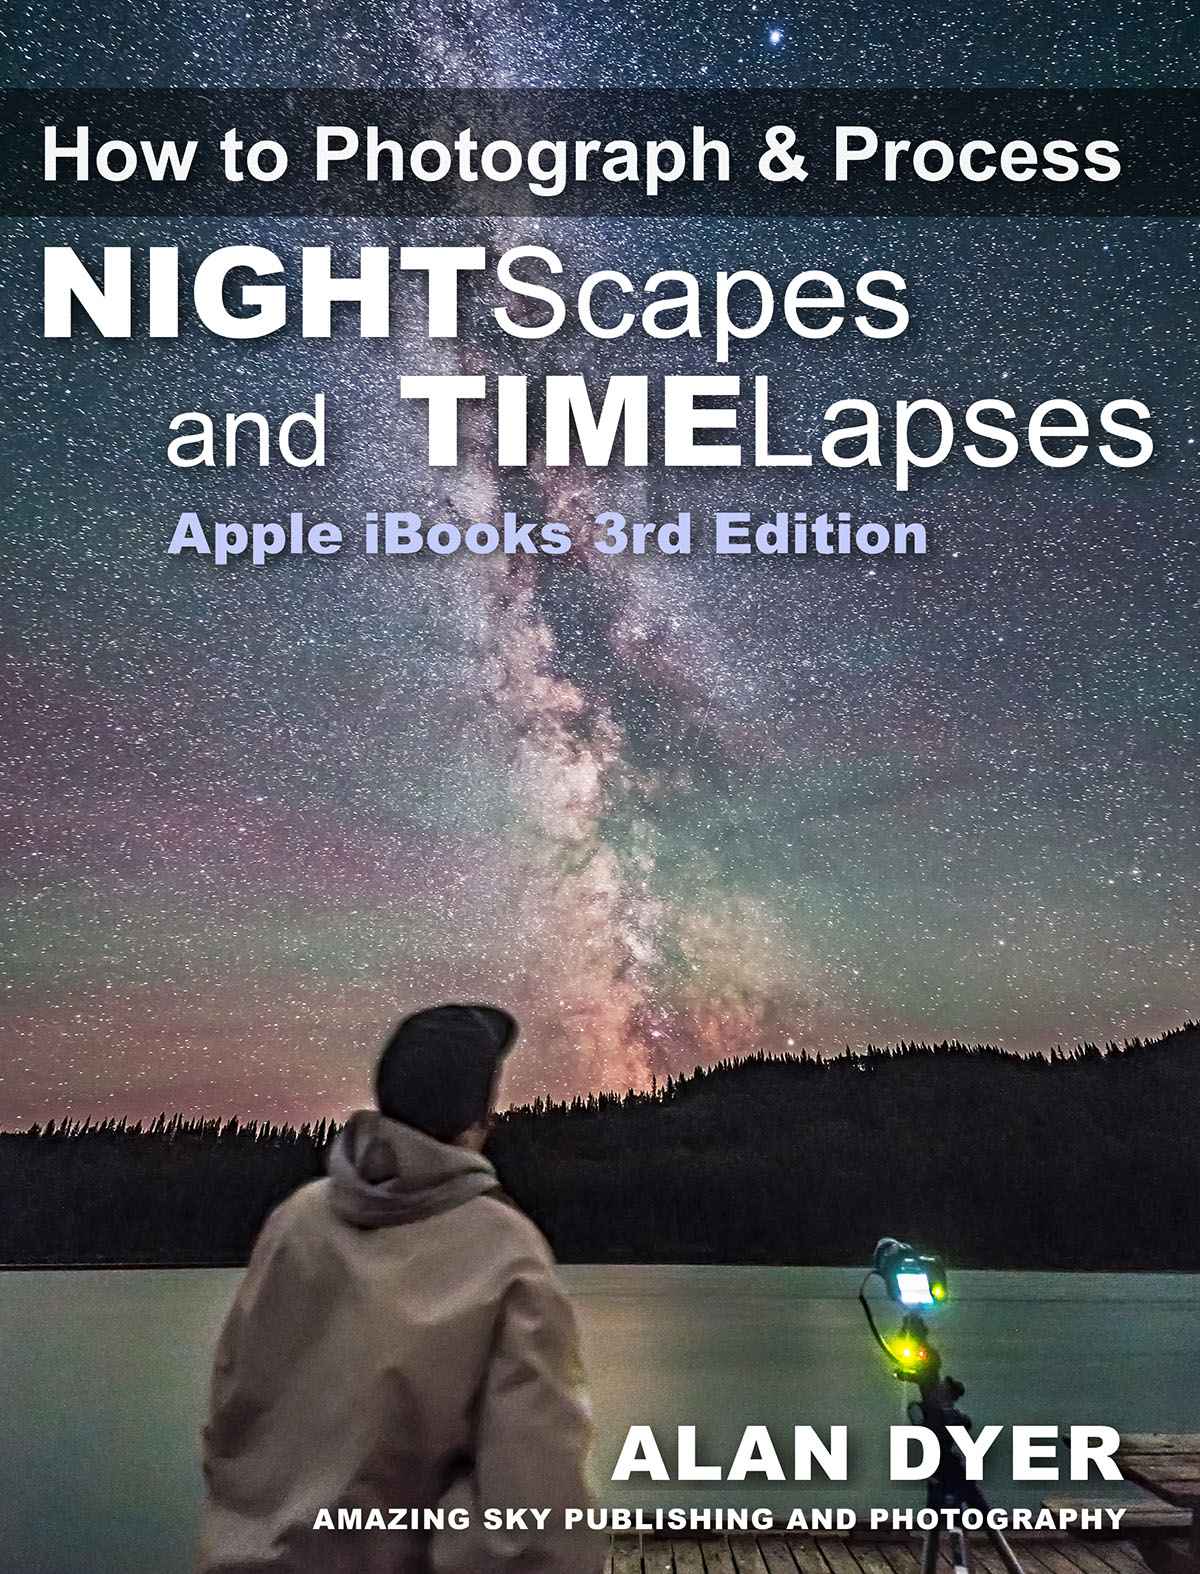
I’ve also updated the Apple iBooks version (to v3.1) to revise the content, and add a few new pages: on Luminosity Mask panel extensions, southern hemisphere Milky Way and Moon charts, and even the new Nikon Z6 camera. It is now 580 pages.
Owners of the previous Apple iBooks edition can get the updated version for free. In iBooks, check under Purchased>Updates.
Both Apple and PDF editions are now in sync and identical in content. I think you’ll find them the most comprehensive works on the subject in print and in digital.
I present my Top 10 Tips for photographing the August 21 total eclipse of the Sun.
If the August total eclipse will be your first, then you could heed the advice of many and simply follow “Tip #0:” Just don’t photograph it! Look up and around to take in the spectacle. Even then, you will not see it all.
However, you might see less if you are operating a camera.
But I know you want pictures! To help you be successful, here are my tips for taking great photos without sacrificing seeing the eclipse.
An iPhone in a tripod bracket and on a small tabletop tripod.
TIP #1: Keep It Simple
During the brief minutes of totality, the easiest way to record the scene is to simply hold your phone camera up to the sky and shoot. Zoom in if you wish, but a wide shot may capture more of the twilight effects and sky colors, which are as much a part of the experience as seeing the Sun’s gossamer corona around the dark disk of the Moon.
Better yet, use an adapter to clamp your phone to a tripod. Frame the scene as best you can (you might not be able to include both the ground and Sun) and shoot a time-lapse, or better yet, a video.
Start it 2 or 3 minutes before totality (if you can remember in the excitement!) and let the camera’s auto exposure take care of the rest. It’ll work fine.
That way you’ll also record the audio of your excited voices. The audio may serve as a better souvenir than the photos. Lots of people will have photos, but nobody else will record your reactions!
Just make sure your phone has enough free storage space to save several minutes of HD video or, if your camera has that feature, 4K video.
A wide shot of the 2006 eclipse in Libya with a high altitude Sun. 10mm lens on a cropped-frame Canon 20Da camera.
TIP #2: Shoot Wide With a DSLR
For better image quality, step up to this hands-off technique.
Use a tripod-mounted camera that accepts interchangeable lenses (a digital single lens reflex or a mirrorless camera) and use a lens wide enough to take in the ground below and Sun above.
Depending on where you are and the sensor size in your camera, that’ll likely mean a 10mm to 24mm lens.
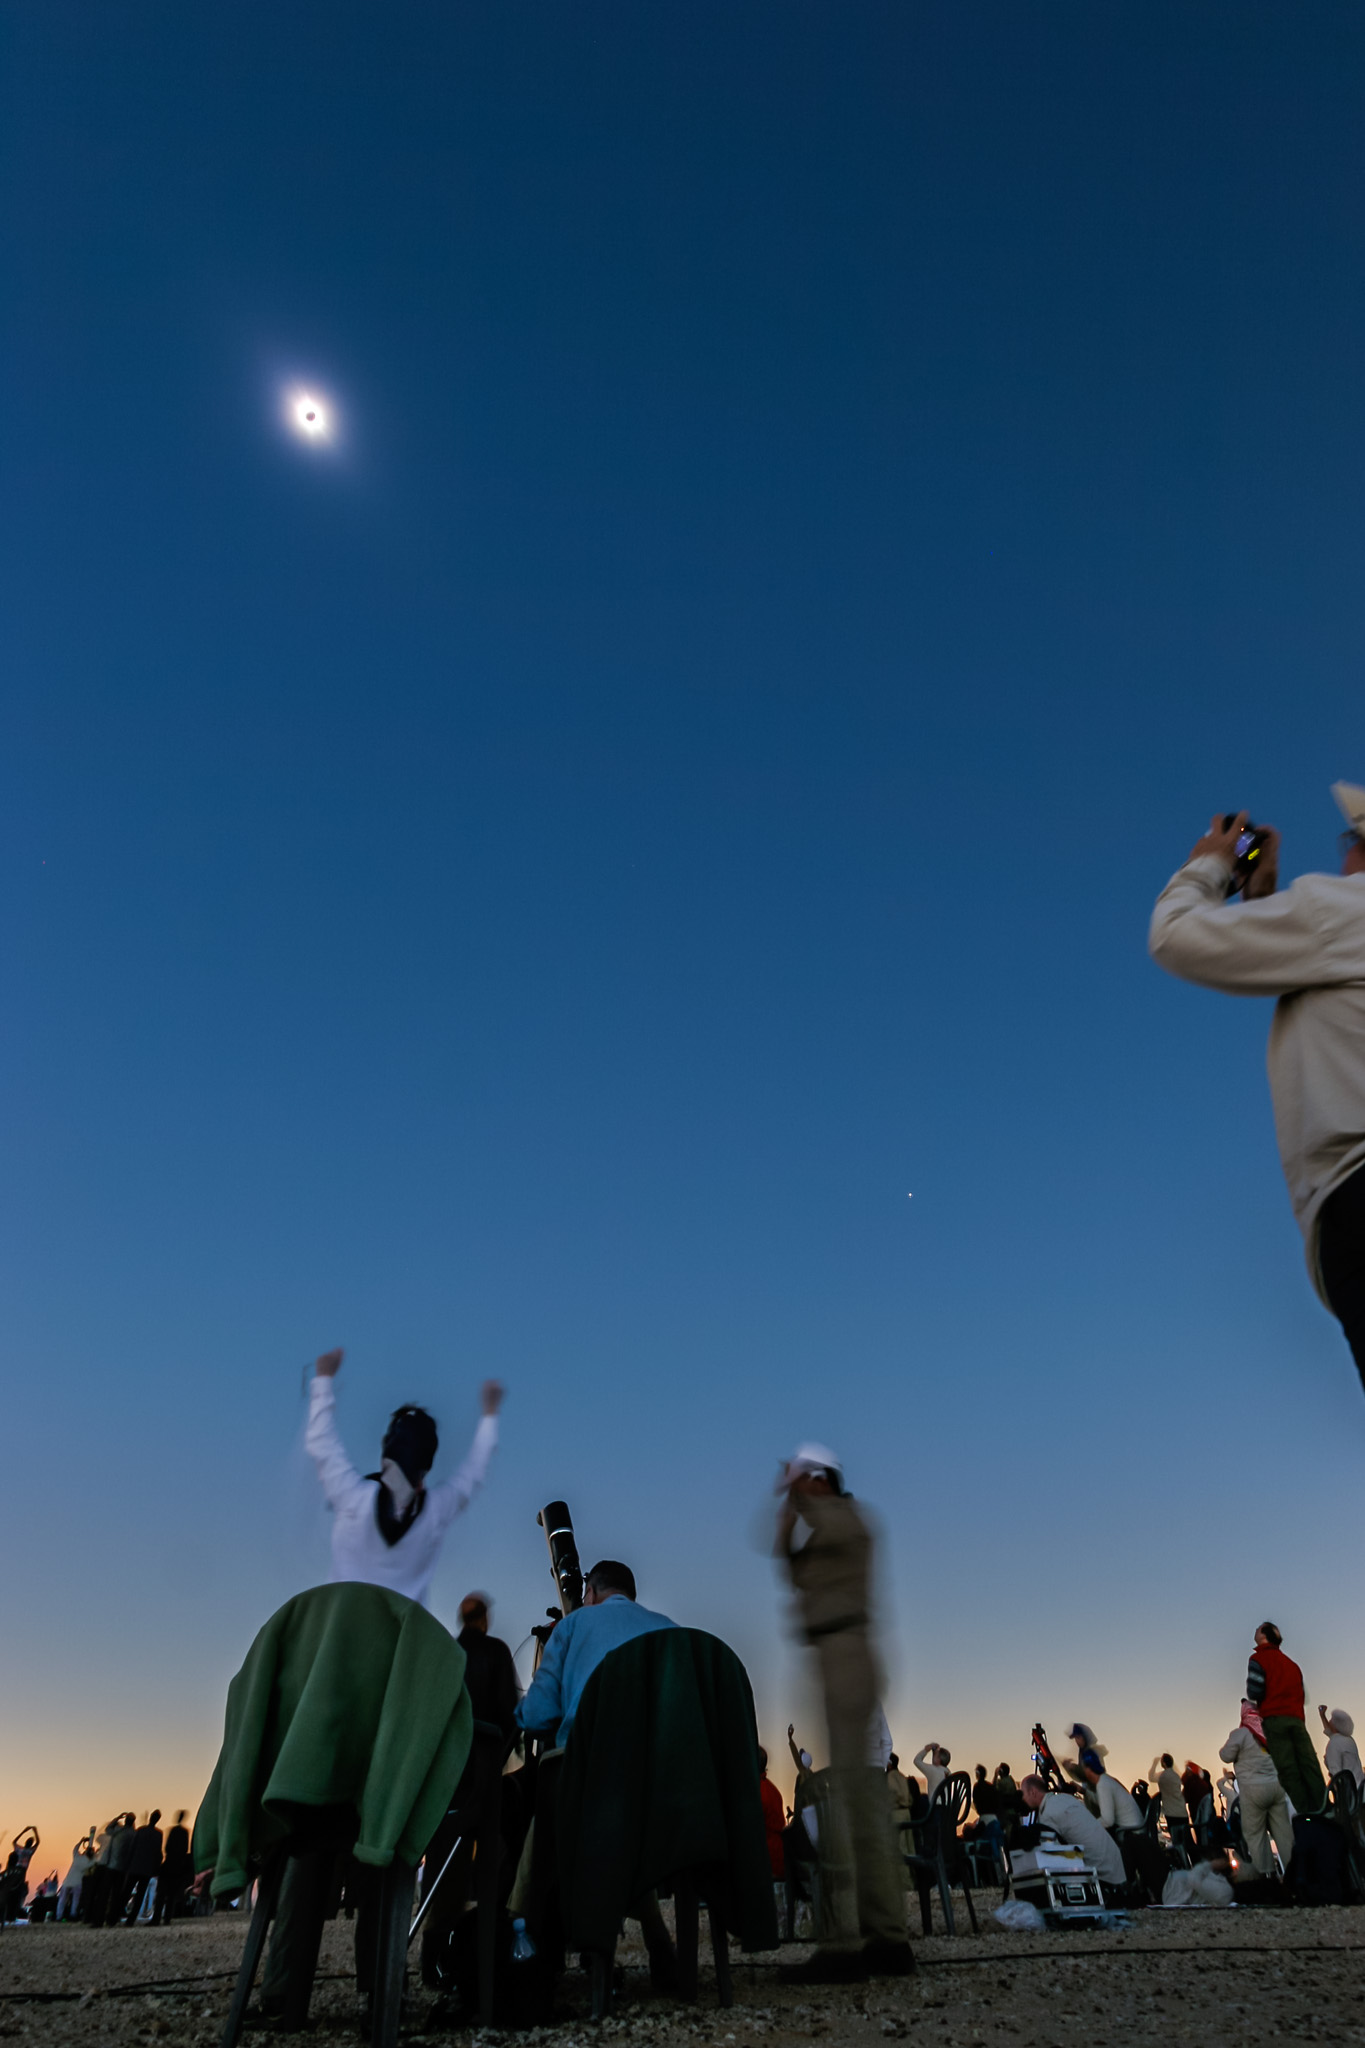
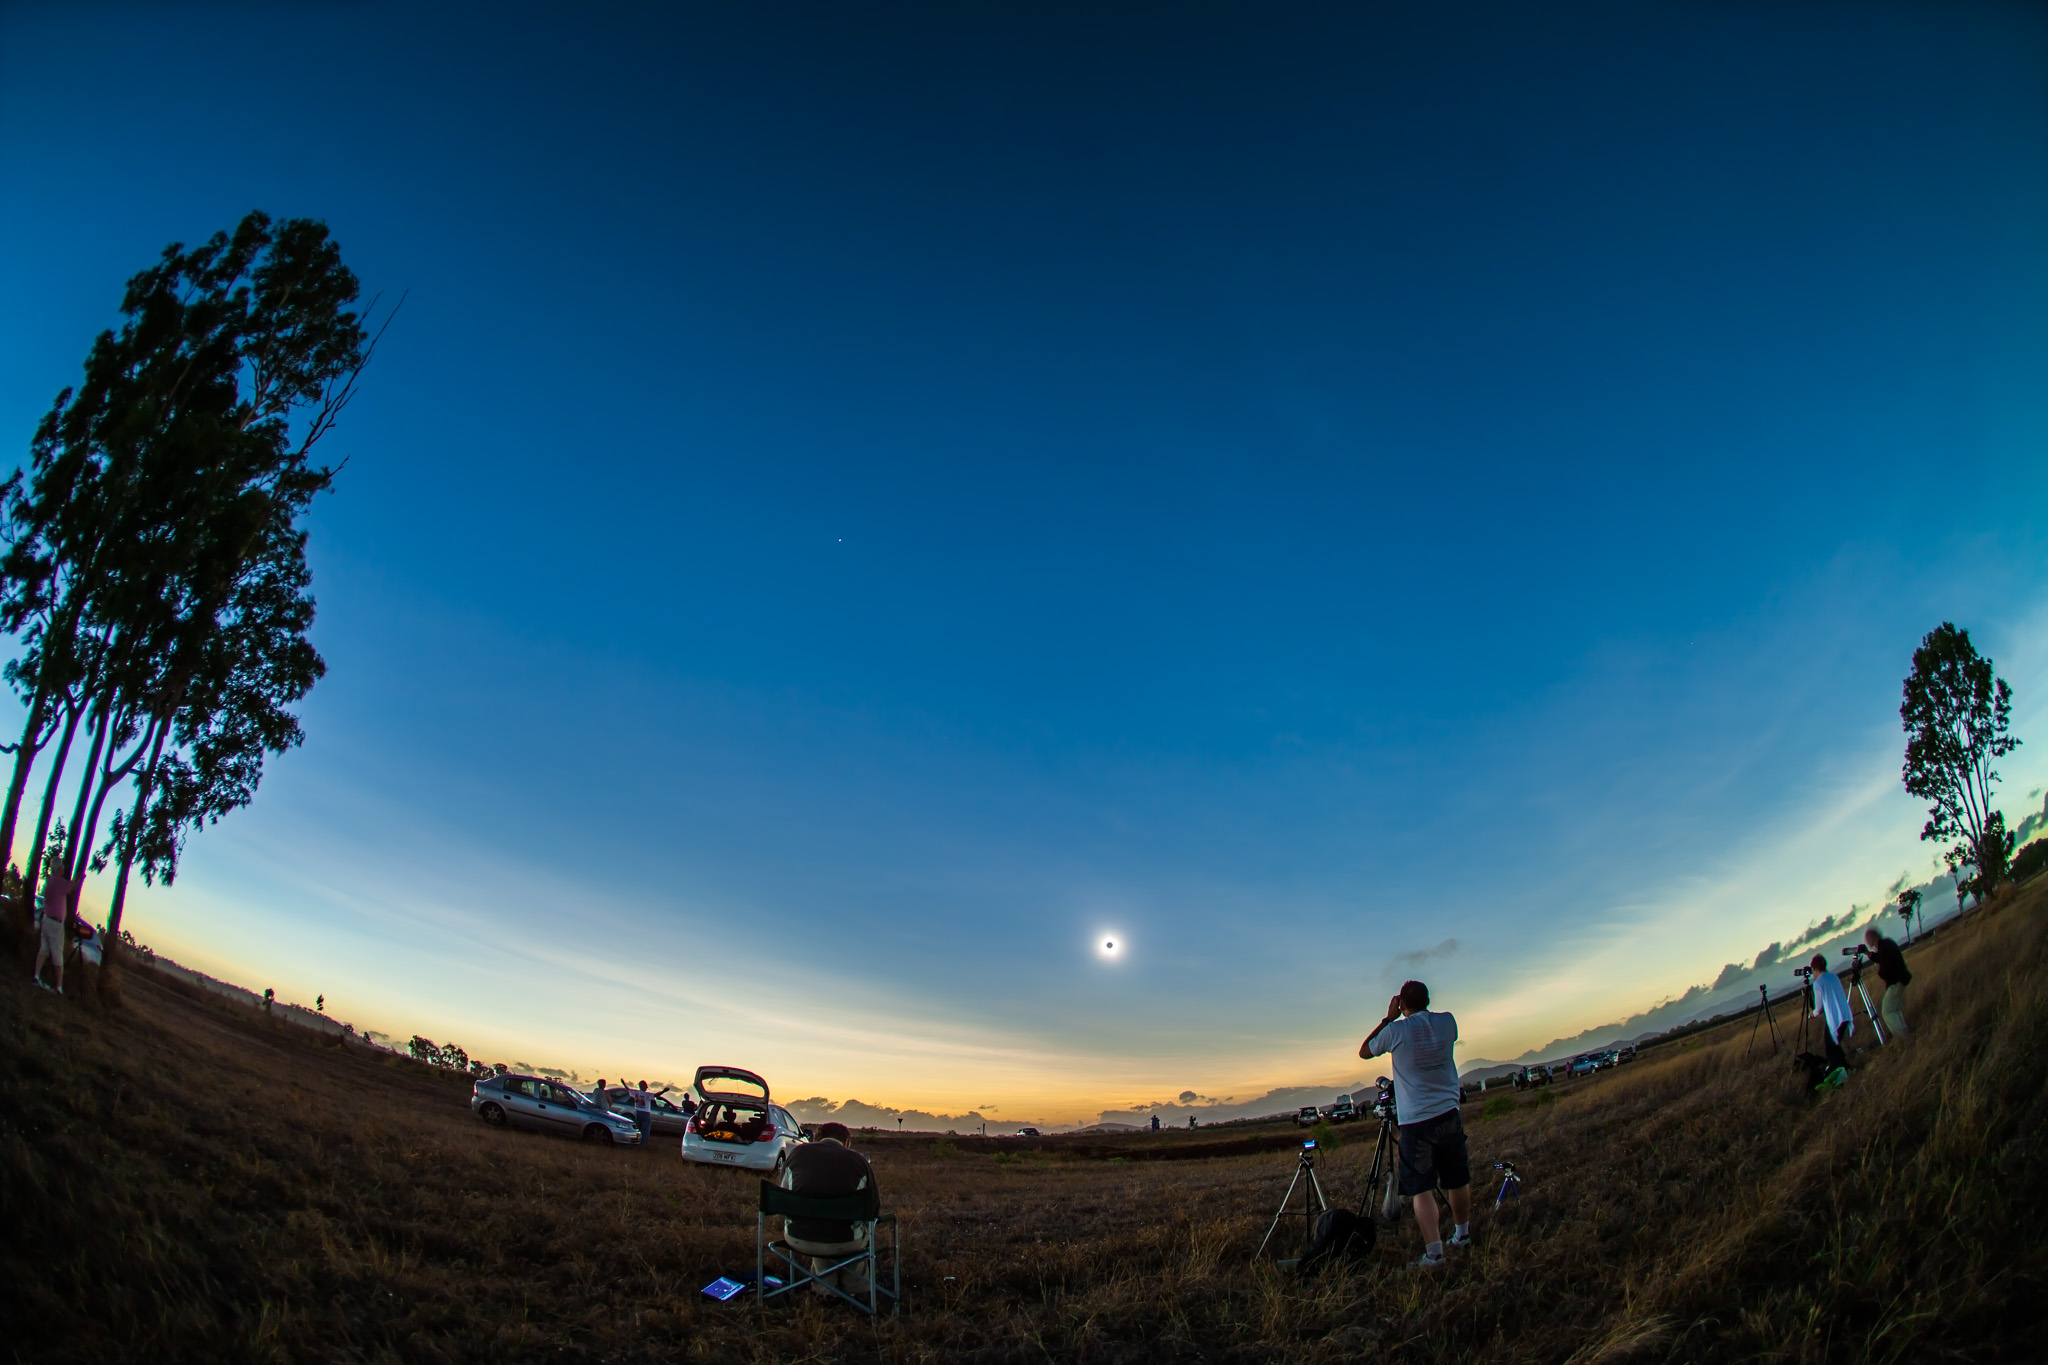
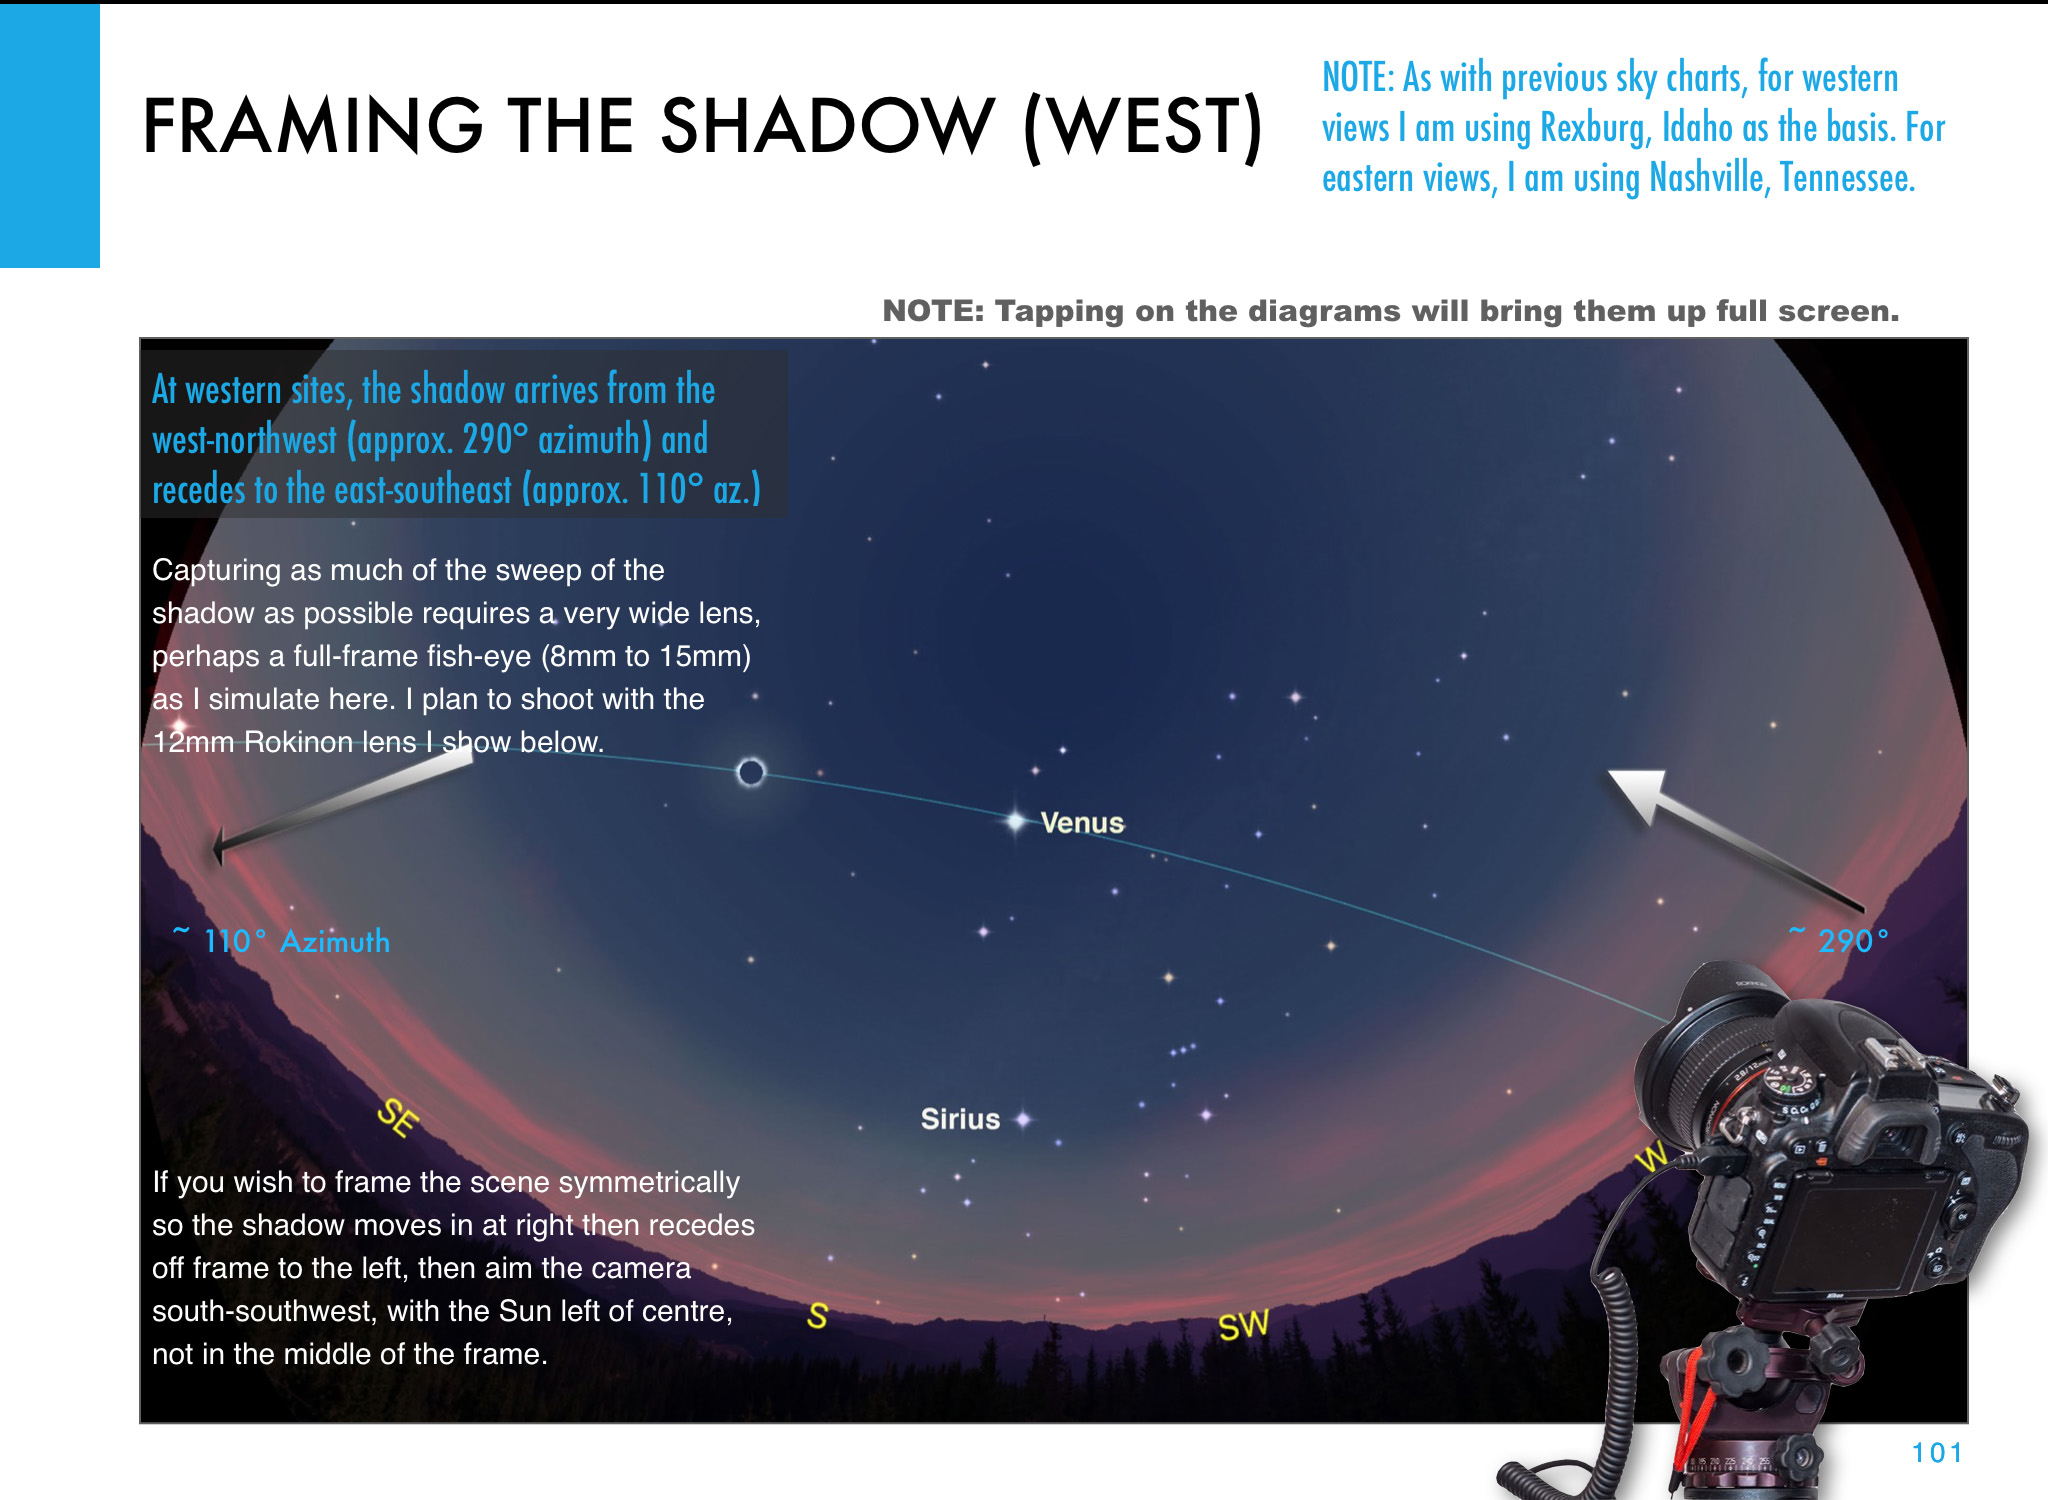
By going wide you won’t record details in the corona of the Sun or its fiery red prominences. But you can record the changing sky colors and perhaps the dark shadow of the Moon sweeping from right to left (west to east) across the sky. You can also include you and your eclipse group silhouetted in the foreground. Remember, no one else will record you at the eclipse.
A sequence of shots of the 2012 eclipse from Australia, with a wide 15mm lens and camera on Auto Exposure showing the change of sky color.
The total eclipse of the Sun, November 14, 2012, from a site near Lakeland Downs, Queensland, Australia. Shot with the Canon 5D Mark II and 15mm lens for a wide-angle view showing the Moon’s conical shadow darkening the sky and the twilight glow on the horizon. Taken near mid-eclipse.
TIP #3: Shoot on Auto Exposure
For wide shots, there’s no need to attend to the camera during the eclipse. Set the camera on Auto Exposure – Aperture Priority (Av), the camera ISO between 100 to 400, and your lens aperture to f/2.8 (fast) to f/5.6 (slow).
Use a higher ISO if you are using a slower lens such as a kit zoom. But shoot at ISO 100 and at f/2.8 if you have a wide lens that fast.
In Av mode the camera will decide what shutter speed to use as the lighting changes. I’ve used this technique at many eclipses and it works great.
An accessory intervalometer set for an interval of 1 second.
TIP #4: Let the Camera Do the Shooting
To make this wide-angle technique truly hands-off use an intervalometer (either built into your camera or a separate hardware unit) to fire the shutter automatically.
Once again, start the sequence going 3 to 5 minutes before totality, with the intervalometer set to fire the shutter once every second. Don’t shoot at longer intervals, or you’ll miss too much. Shutter speeds won’t likely exceed one second.
Again, be sure your camera’s memory card has enough free space for several hundred images. And don’t worry about a solar filter on your lens. It’ll be fine for the several minutes you’ll have it aimed up.
Out of the many images you’ll get, pick the best ones, or turn the entire set into a time-lapse movie.
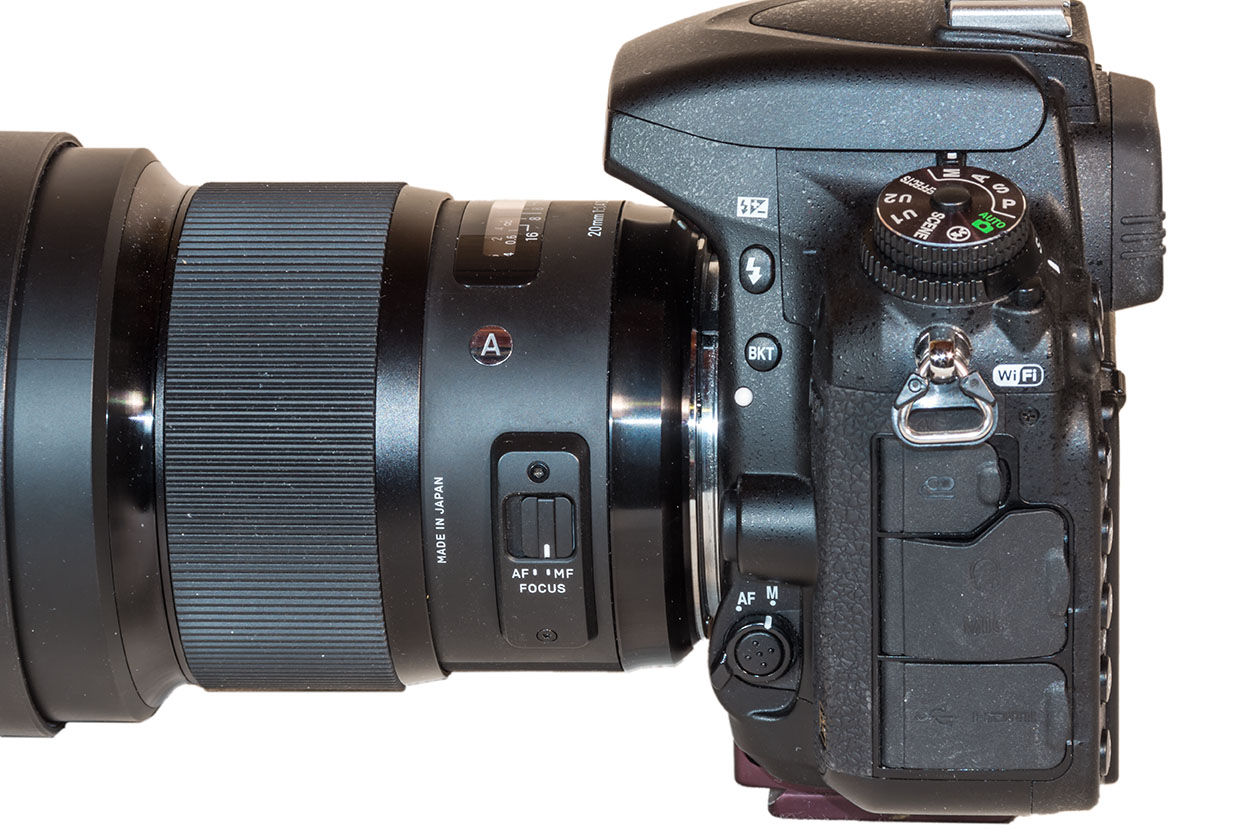
A Nikon DSLR and lens set to Manual Focus.
TIP #5: Shoot on Manual Focus
Use Auto Exposure and an intervalometer. But … don’t use Auto Focus.
Switch your lens to Manual Focus (MF) and focus on a distant scene element using Live View.
Or use Auto Focus to first focus on something in the distance, then switch to Manual and don’t touch focus after that. If you leave your lens on Auto Focus the shutter might not fire if the camera decides it can’t focus on the blank sky.
A comparison of a Raw image as it came from the camera (left) and after developing in Lightroom (right).
TIP #6: Shoot Raw
For demanding subjects like a solar eclipse always shoot your images in the Raw file format. Look in your camera’s menus under Image Quality.
Shoot JPGs, too, if you like, but only Raw files record the widest range of colors and brightness levels the camera sensor is capable of detecting.
Later in processing you can extract amazing details from Raw files, both in the dark shadows of the foreground, and in the bright highlights of the distant twilight glows and corona around the Sun. Software to do so came with your camera. Put it to use.
A 200mm telephoto and 1.4x Extender, with the camera on a sturdy and finely adjustable tripod head.
TIP #7: OK, Use a Telephoto Lens! But …
If you really want to shoot close-ups, great! But don’t go crazy with focal length. Yes, using a mere 135mm or 200mm lens will yield a rather small image of the eclipsed Sun. But you don’t need a monster 600mm lens or a telescope, which typically have focal lengths starting at 600mm. With long focal lengths come headaches like:
•Keeping the Sun centered. The Earth is turning! During the eclipse that motion will carry the Sun (and Moon) its own diameter across your frame from east to west during the roughly two minutes of totality. While a motorized tracking mount can compensate for this motion, they take more work to set up properly, and must be powered. And, if you are flying to the eclipse, they will be much more challenging to pack. I’m trying to keep things simple!
•Blurring from vibration. This can be an issue with any lens, but the longer your lens, the more your chances of getting fuzzy images because of camera shake, especially if you are touching the camera to alter settings.
An ideal focal length is 300mm to 500mm. But …
When using any telephoto lens, always use a sturdy tripod with a head that is easy to adjust for precise aiming, and that can aim up high without any mechanical issues. The Sun will be halfway, or more, up the sky, not a position some tripod heads can reach.
A re-processed version of a still frame of the total solar eclipse of November 14, 2012 taken from our site at Lakeland Downs, Queensland, Australia. This is a still frame shot during the shooting of an HD video of the eclipse, using the cropped-frame Canon 60Da and Astro-Physics Traveler 4-inch apo refractor telescope at f/5.8 (580mm focal length). The image is 1/60th second at ISO 100. This is a full-sized still not a frame grab taken from the movie.
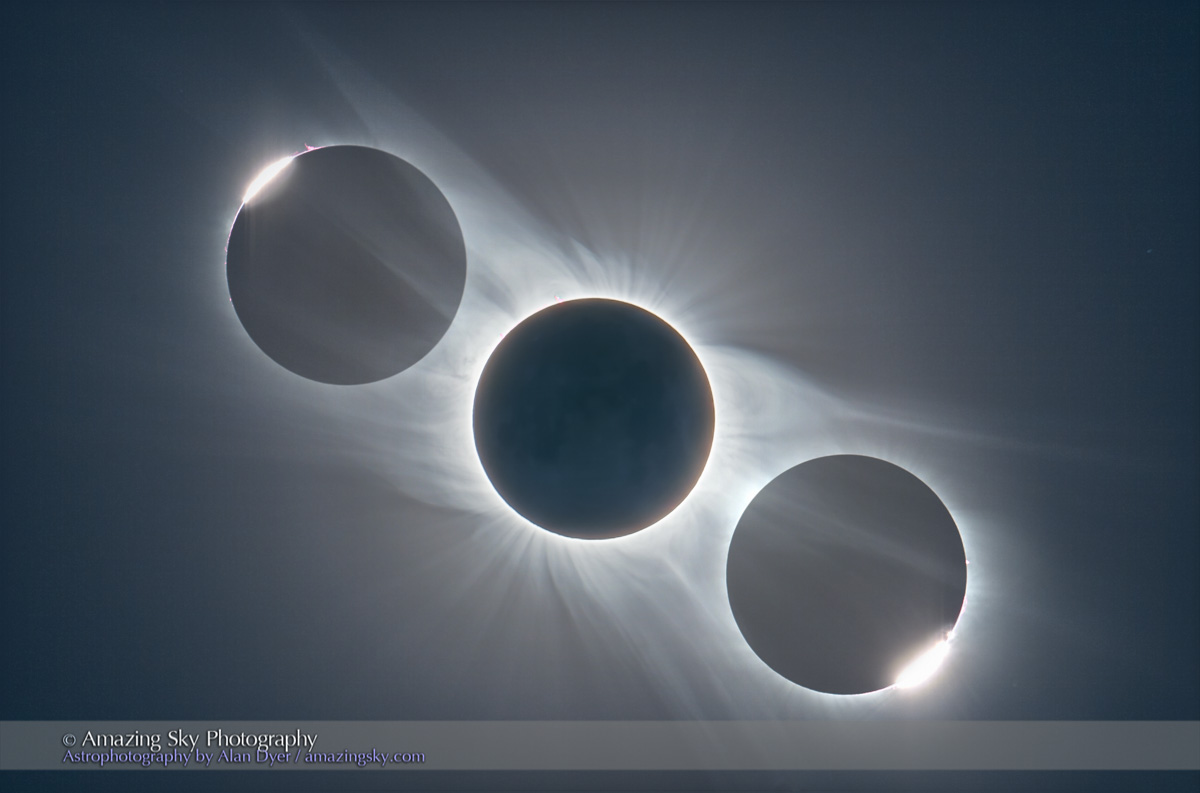
A sequence from a movie showing the camera adjusting the exposure automatically when going from a filtered view (left) to an unfiltered view of the diamond ring (right).
TIP #8: Use Auto Exposure, or … Shoot a Movie
During totality with your telephoto, you could manually step through a rehearsed set of exposures, from very short shutter speeds (as short as 1/4000 second) for the diamond rings at either end of totality, to as long as one or two seconds at mid-totality for the greatest extent of the corona’s outermost streamers.
But that takes a lot of time and attention away from looking. Yes, there are software programs for automating a camera, or techniques for auto bracketing. But if this is your first eclipse an easier option is to simply use Auto Exposure/Aperture Priority and let the camera set the shutter speed. Again, you could use an intervalometer to fire the shutter so you can just watch.
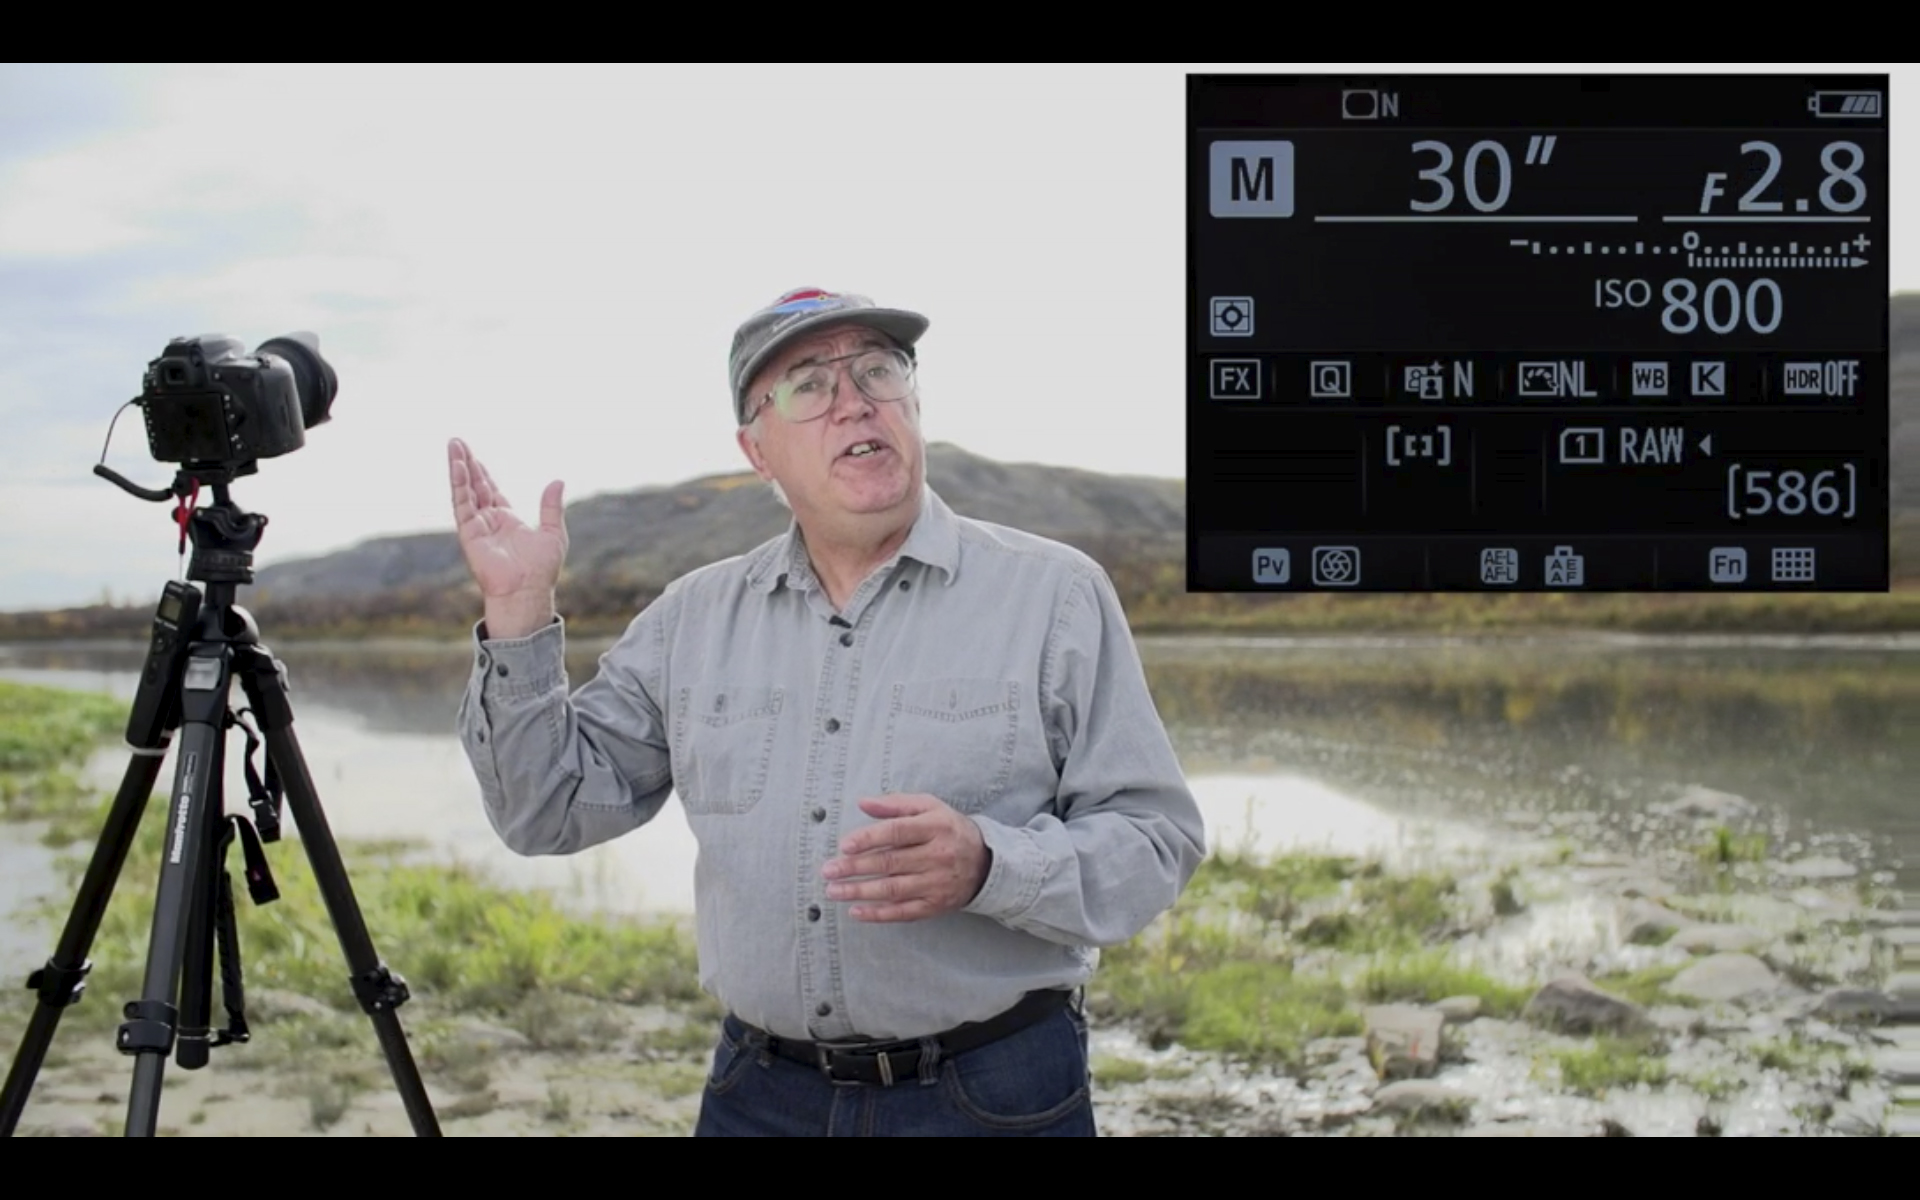
Don’t use high ISO speeds. A low ISO of 100 to 400 is all you need and will produce less noise. The eclipsed Sun is still bright. You don’t need ISO 800 to 3200.
Even on Auto Exposure, you’ll get good shots, just not of the whole range of phenomena an eclipsed Sun displays.
Or, once again and better yet – put your camera into video mode and shoot an HD or 4K movie. Auto Exposure will work just fine, allowing you to start the camera then forget it.
Place the Sun a solar diameter or two to the left of the frame and let the sky’s motion drift it across the frame for added effect. Start the sequence running a minute or two before totality with your solar filter on. Then just let the camera run … except …
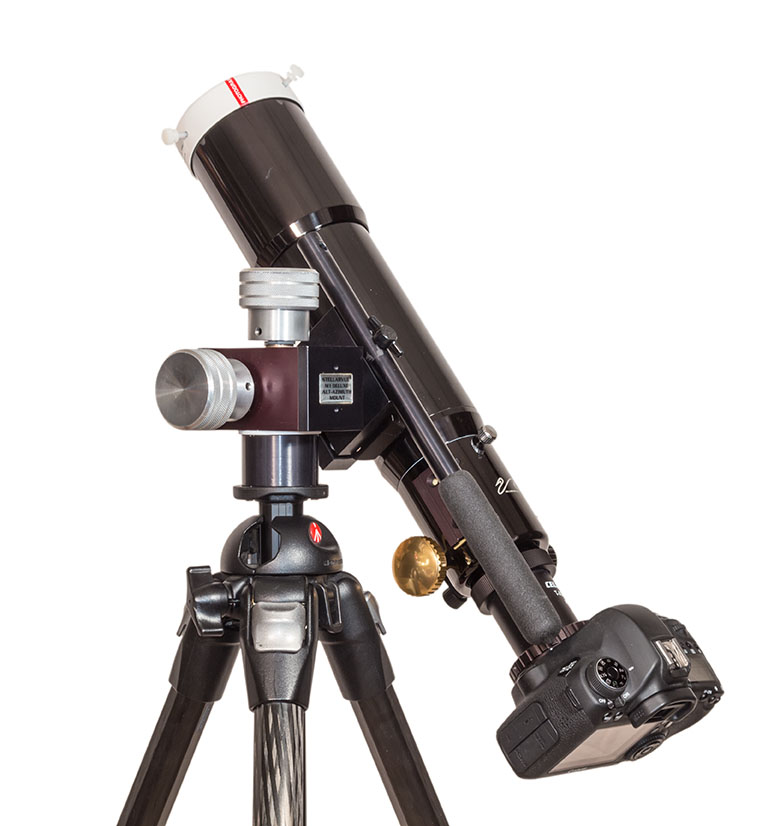
A small refractor telescope with a solar filter over the front aperture. That filter has to be removed for totality.
TIP #9: Remember to Remove the Filter!
You will need a safe solar filter over your lens or telescope to shoot the partial phases of the eclipse, and to frame and focus the Sun. This cannot be a photo neutral density or polarizing filter. It must be a filter designed for observing and shooting the Sun, made of metal-coated glass or Mylar plastic. Anything else is not safe and likely far too bright.
But you do NOT need the filter for totality.
Remove it … when?
The answer: a minute or so before totality if you want to capture the first diamond ring just before totality officially starts. Set a timer to remind you, as visually it is very difficult to judge the right moment with your unaided eye. The eclipse will start sooner than you expect.
If you have your camera on Auto Exposure, it will compensate just fine for the change in brightness, from the filtered to the unfiltered view.
But don’t leave your unfiltered camera aimed at the Sun. Replace the filter no more than a minute or so after totality and the second diamond ring ends.
The partial eclipse of the Sun, October 23, 2014, shot through a mylar filter, on the front of the 66mm f/7 apo refractor shown above (450mm focal length), using a cropped-frame Canon 60Da camera for 1/8000 second exposure at ISO 100. Focus on the sharp tips of the crescent Sun or a sunspot if one is present.
TIP #10: Focus!
Everyone worries about getting the “best exposure.” Don’t! You’ll get great looking telephoto eclipse close-ups with any of a wide range of exposures.
What ruins most eclipse shots, other than filter forgetfulness, is fuzzy images, from either shaky tripods or poor focus.
Focus manually using Live View on the filtered partially eclipsed Sun. Zoom up on the edge of the Sun or sharp tip of the crescent. Re-focus a few minutes before totality, as the changing temperature can shift the focus of long lenses and telescopes.
But you needn’t worry about re-focusing after you remove the filter. The focus will not change with the filter off.
Me in Libya in 2006 with my eclipse setup: a small telescope on an alt-azimuth mount.
TIP #1 AGAIN: Keep It Simple!
I’ll remind you to keep things simple for a reason other than giving you time to enjoy the view, and that’s mobility.
You might have to move at the last minute to escape clouds. Complex photo gear can be just too much to take down and set up, often with minutes to spare, as many an eclipse chaser can attest is often necessary. Keep your gear light, easy to use, and mobile. Committing to an overly ambitious and inflexible photo plan and rig could be your undoing.
By following both my “Ten Tips” advice blogs you should be able to get great eclipse images to wow your friends and fans, all without missing the experience of actually seeing … and feeling … the eclipse.
However … may I recommend …
My 295-page ebook on photographing the August 21 total eclipse of the Sun is now available. See http://www.amazingsky.com/eclipsebook.html It covers all techniques, for both stills, time-lapses, and video, from basic to advanced, plus a chapter on image processing. And a chapter on What Can Go Wrong?! The web page has all the details on content, and links to order the book from Apple iBooks Store (for the best image quality and navigation) or as a PDF for all other devices and platforms. Thanks! Clear skies on eclipse day, August 21, 2017.
For much more detailed advice on shooting options and techniques, and for step-by-step tutorials on processing eclipse images, see my 295-page eBook on the subject, available as an iBook for Apple devices and as a PDF for all computers and tablets.
The most spectacular sight the universe has to offer is coming to a sky near you this summer.
On August 21 the Moon will eclipse the Sun, totally!, along a path that crosses the continental USA from coast to coast. All the details of where to go are at the excellent website GreatAmericanEclipse.com.
If this will be your first total solar eclipse, you might want to just watch it. But many will want to photograph or video it. It can be easy to do, or it can be very complex, for those who are after ambitious composites and time-lapses.
To tell you how to shoot the eclipse, with all types of cameras, from cell phones to DSLRs, with all types of techniques, from simple to advanced, I’ve prepared a comprehensive ebook, How to Photograph the Solar Eclipse.
It is 295 pages of sage advice, gathered over 38 years of shooting 15 total solar eclipses around the world.
The book is filled with illustrations designed specifically for the 2017 eclipse – where the Sun will be, how to frame the scene, what will be in the sky, how the shadow will move, where the diamond rings will be, what lenses to use, etc.
Here are a few sample pages:
I cover shooting with everything from wide-angle cameras for the entire scene, to close-ups with long telephotos and telescopes, both on tripods and on tracking mounts.
I cover all the details on exposures and camera settings, and on focusing and ensuring the sharpest images. Most bad eclipse pix are ruined not by poor exposure but poor focus and blurry images – the Sun is moving!
A big chapter covers processing of eclipse images, again, from simple images to complex stacks and composites.
For example, I show how to produce a shot like this, from 2012, combining a short diamond ring image with a long-exposure image of the corona.
A final chapter covers “what can go wrong!” and how to avoid the common mistakes.
The ebook is available on the Apple iBooks Store for Mac and iOS devices. This version has the best interactivity (zoomable images), higher quality images (less compression), and easiest content navigation.
However, for non-Apple people and devices, the ebook can also be purchased directly from my website as a downloadable PDF, which has embedded hyperlinks to external sites.
I think you’ll find the ebook to be the most comprehensive guide to shooting solar eclipses you’ll find. It is up to date (as of last week!) and covers all the techniques for the digital age.
Many thanks, and clear skies on August 21, wherever you may be in the shadow of the Moon!
After a year of work, the new edition of my Nightscapes and Time-Lapse ebook is on the e-shelves at the Apple iBooks Store.
In the two years since I first published this ebook, the field of nightscape shooting has enjoyed many changes, to equipment, software and techniques. Not to mention I’ve learned a lot!
All those changes are reflected in this new and expanded edition. It is 100 pages bigger – 500 pages now – than the first edition. It contains:
• 60 step-by-step image processing tutorials, all with current late-2016 software
• a dozen galleries of comparison “before-and-after” images
• 40 HD videos of time-lapse examples
• reviews of current equipment
• reviews of software, some very new – like this week! – to use in place of Adobe
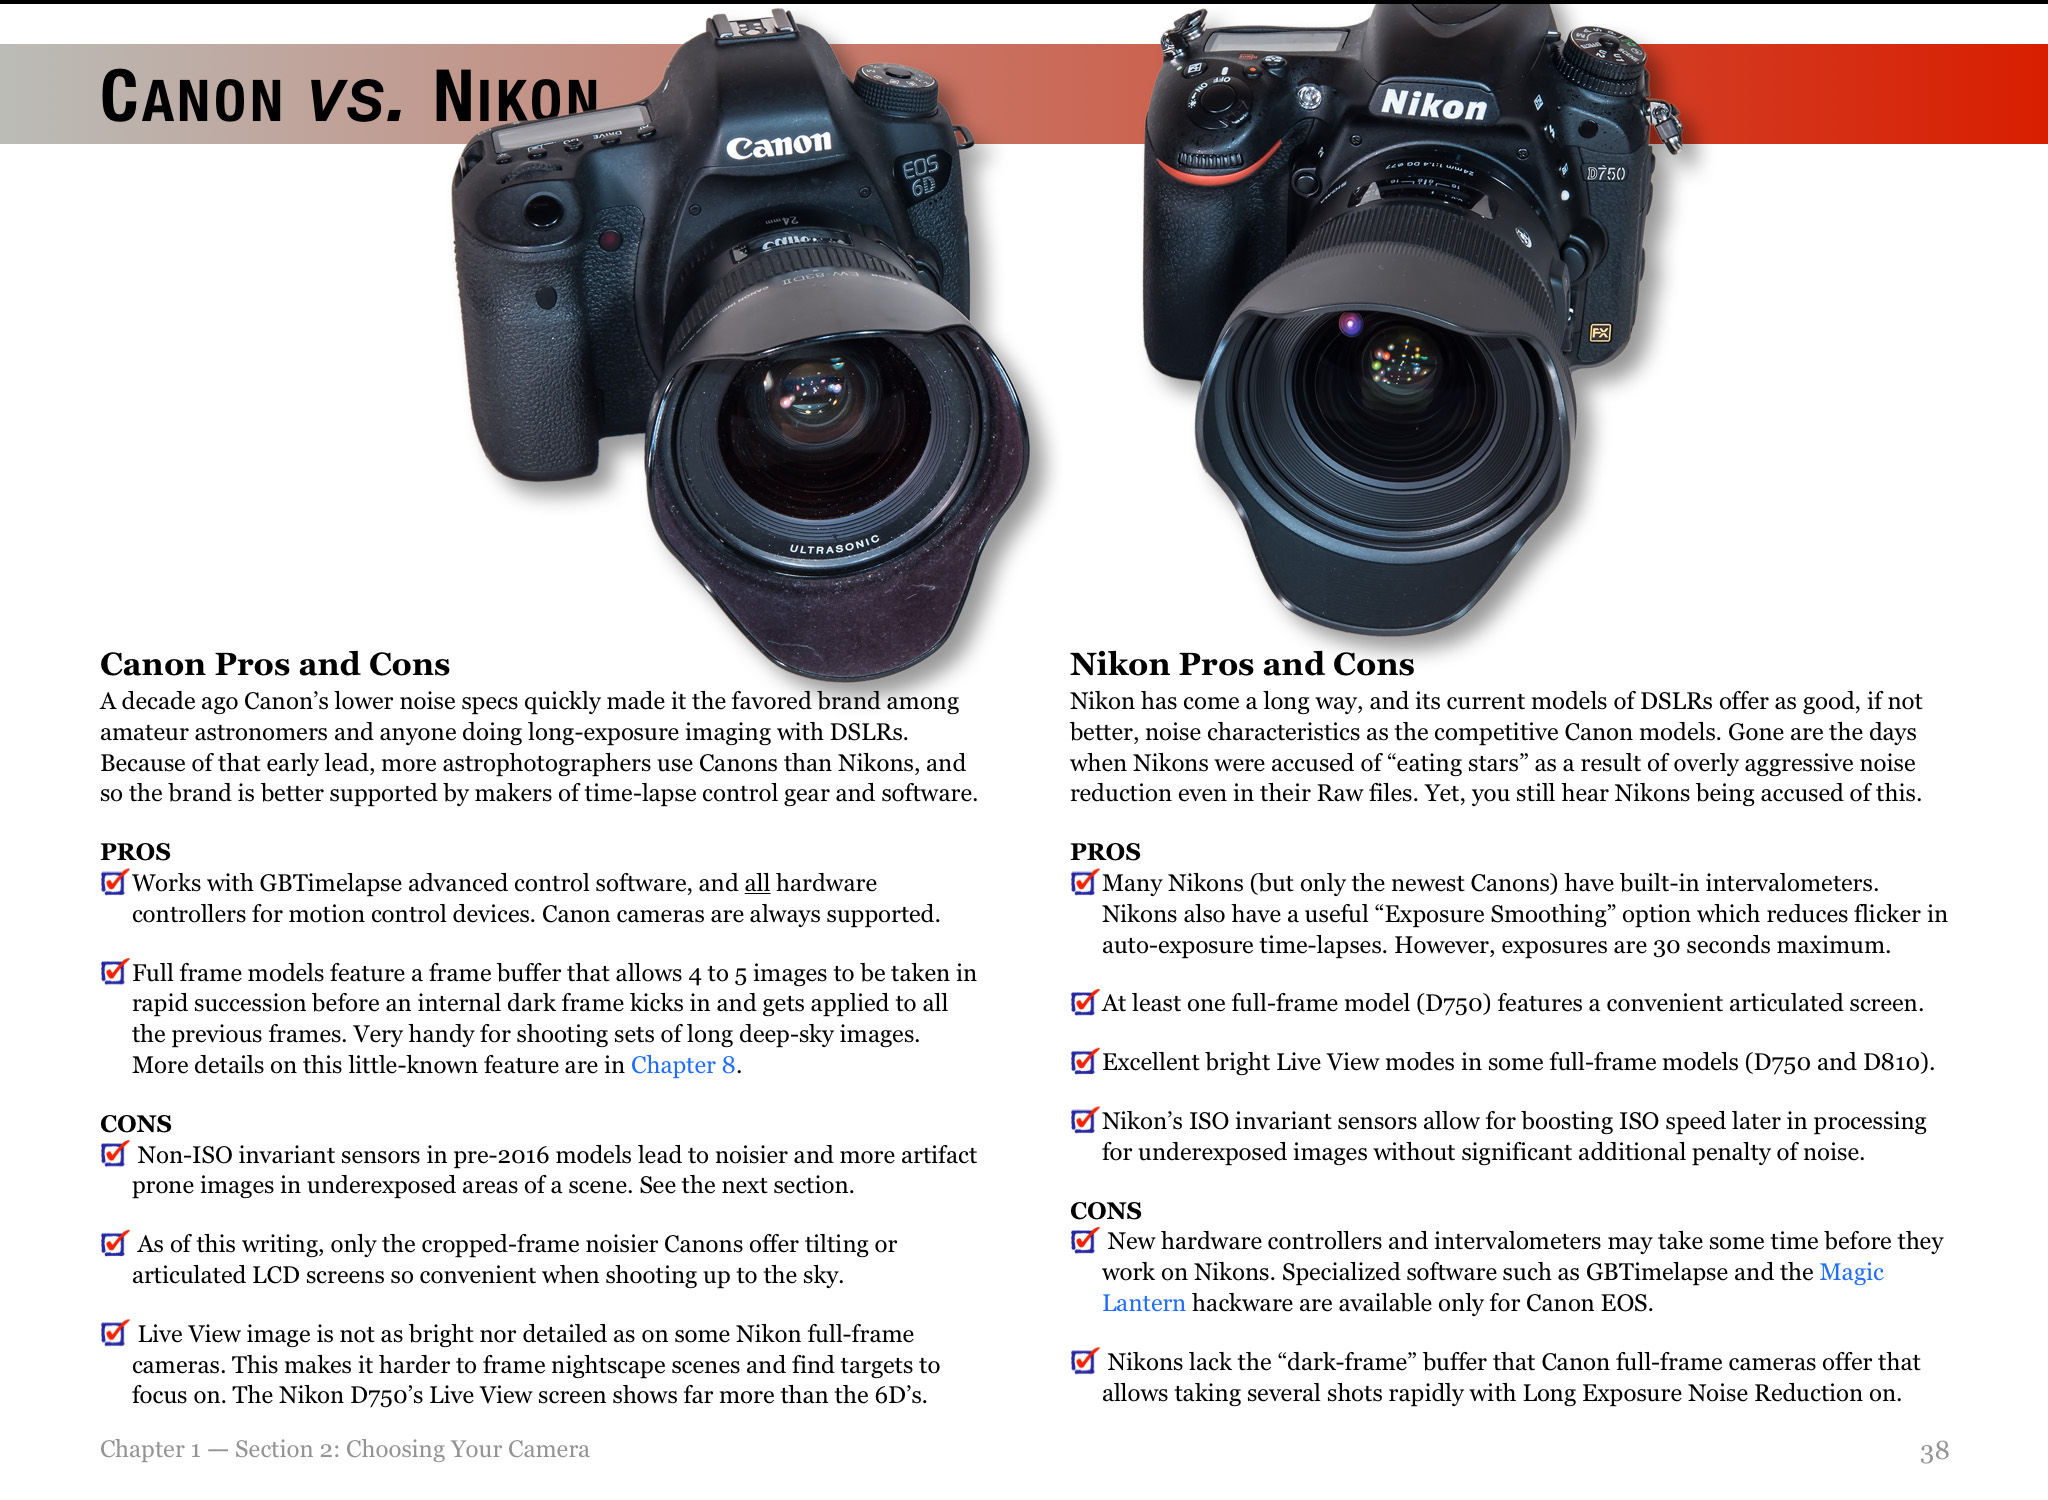
• information on Nikon and Pentax cameras, as well as Canons
• In addition, many images can be tapped on to zoom up. And most text can now be enlarged in a Scrolling View for use on small-screen devices.
The previous 2014 edition garnered rave reviews, with readers calling it:
“Incredibly well put together and visually stunning.”
“Simply amazing! From hardware to software, it’s all covered. Alan Dyer got it right!”
and “It is a must-have resource for anyone doing nightscape and time-lapse photography.”
As with the first edition, I’ve designed the ebook to appeal to both amateur astronomers and landscape photographers by providing what I feel is the most comprehensive information available in any ebook on the hugely popular field of nightscape and time-lapse photography.
This isn’t a simple 50-page PDF pamphlet, as so many ebooks are. This is an extensive and detailed tutorial, with loads of interactive and multi-media content.
There’s loads of information on cameras and lenses
I’ve included information on setting Nikons and Pentaxes. Sony mirrorless camera will wait for the next edition!
I’ve added many new images, with lots of information on how to set cameras for many sky subjects.
The ever popular Milky Way gets its own chapter, with information on how to – and how NOT to – process the Milky Way.
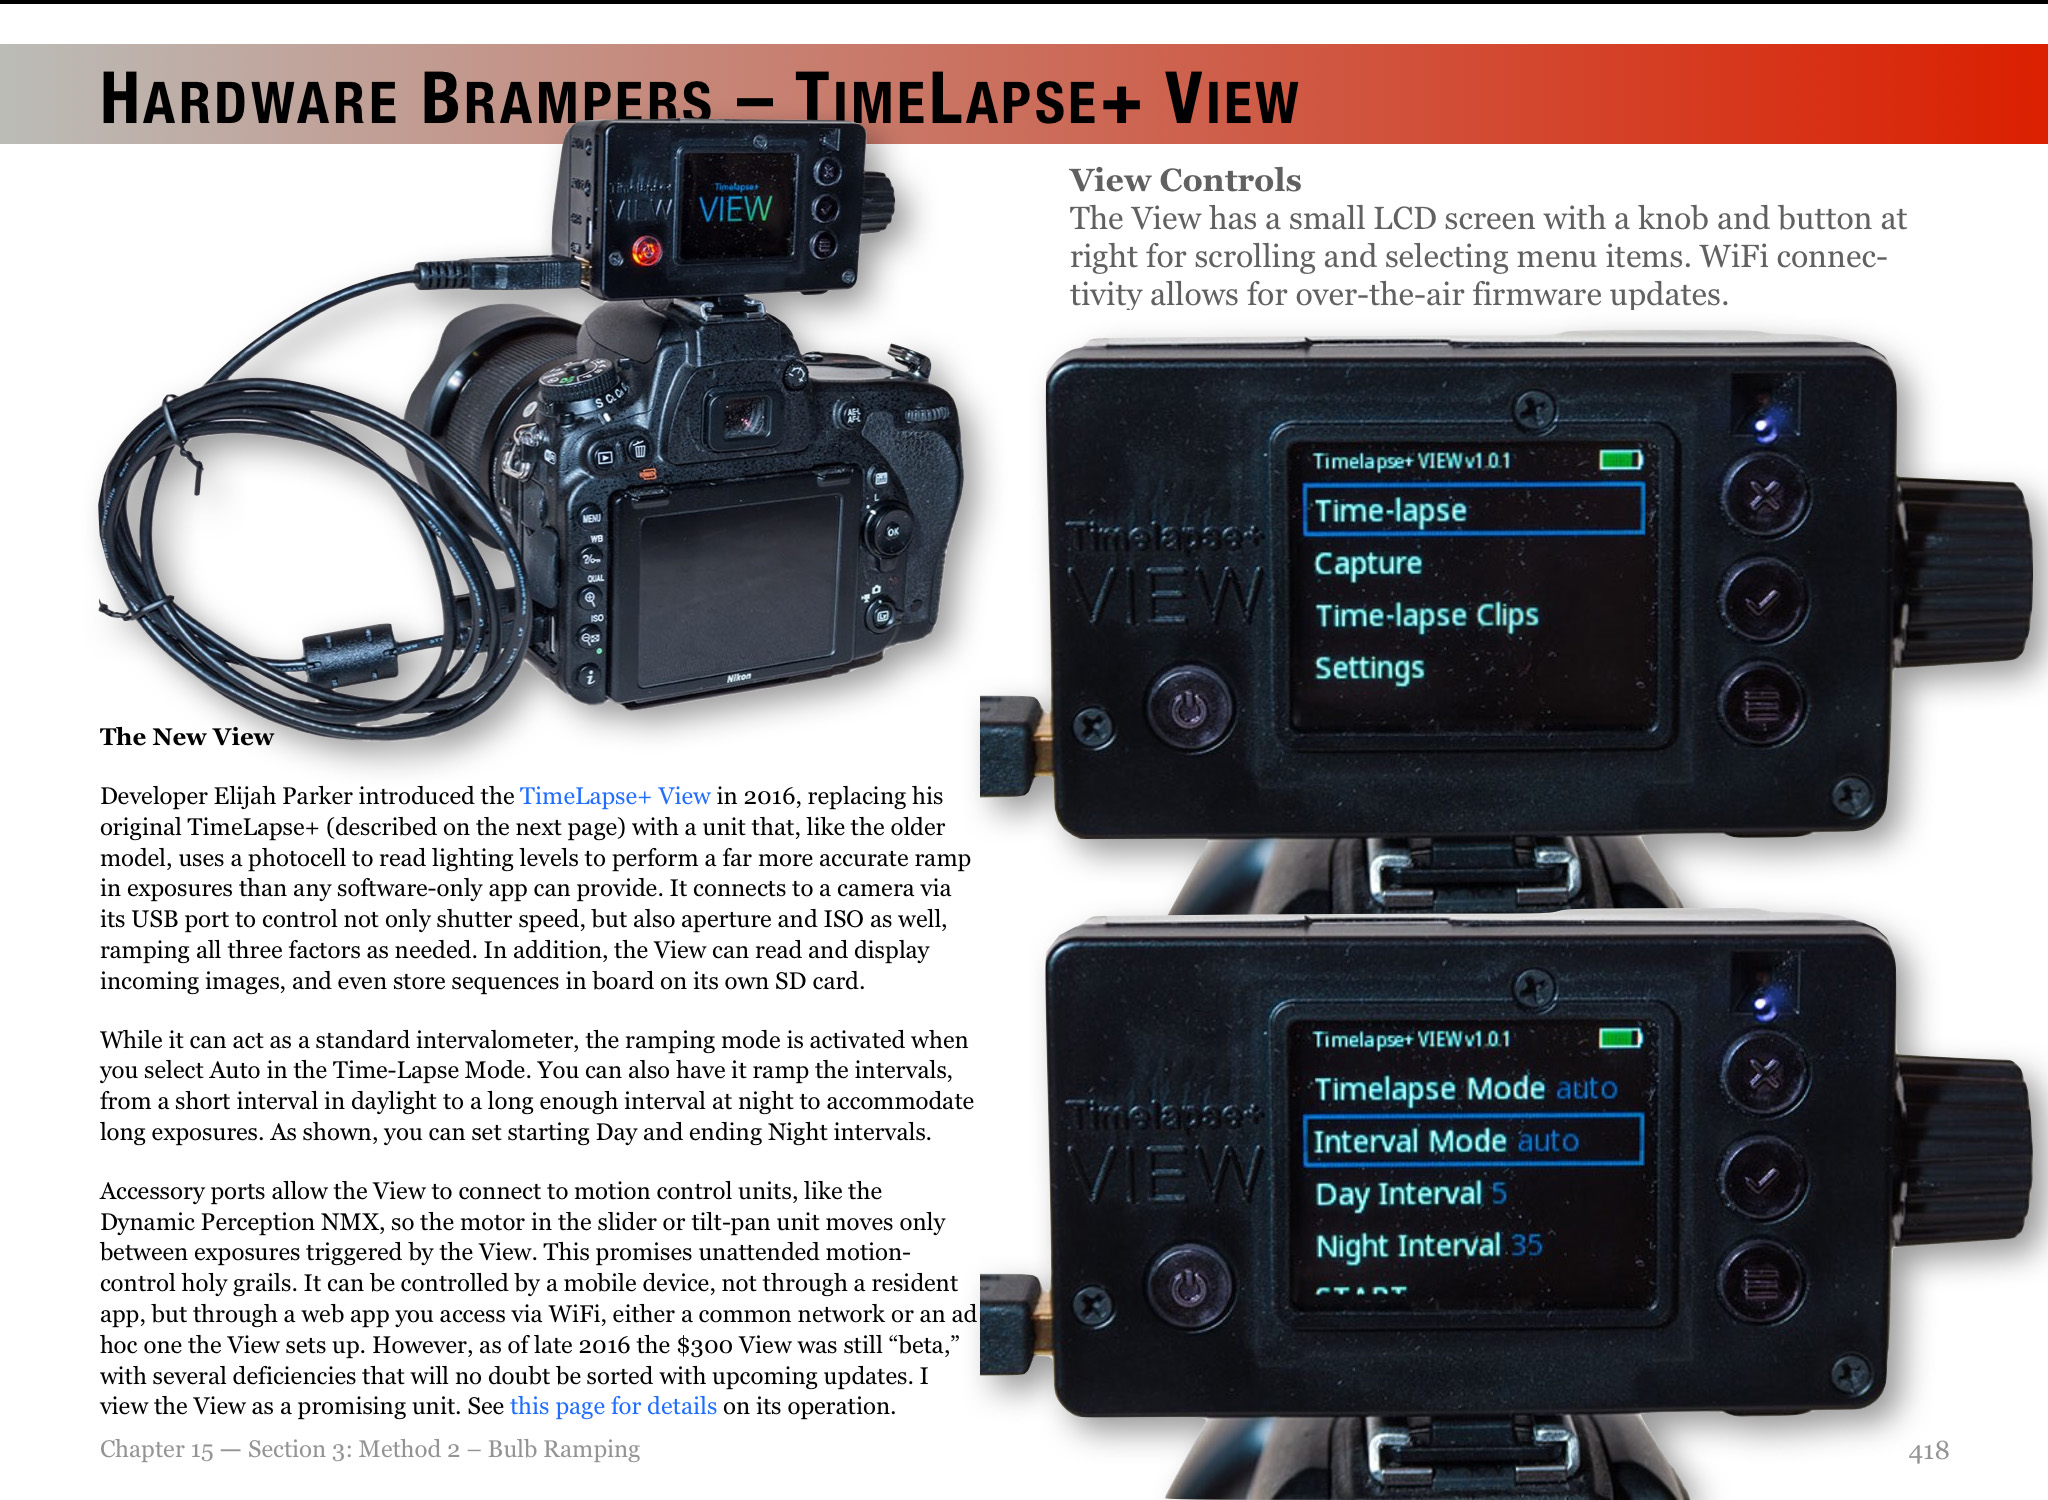
I’ve included lots of information about new time-lapse gear, including some units, like the TimeLapse+ View bramping intervalometer that aren’t even available for general sale yet.
Lots of embedded HD videos illustrate time-lapse techniques. A book about shooting time-lapse movies ought to have time-lapse movies in it. Most don’t!
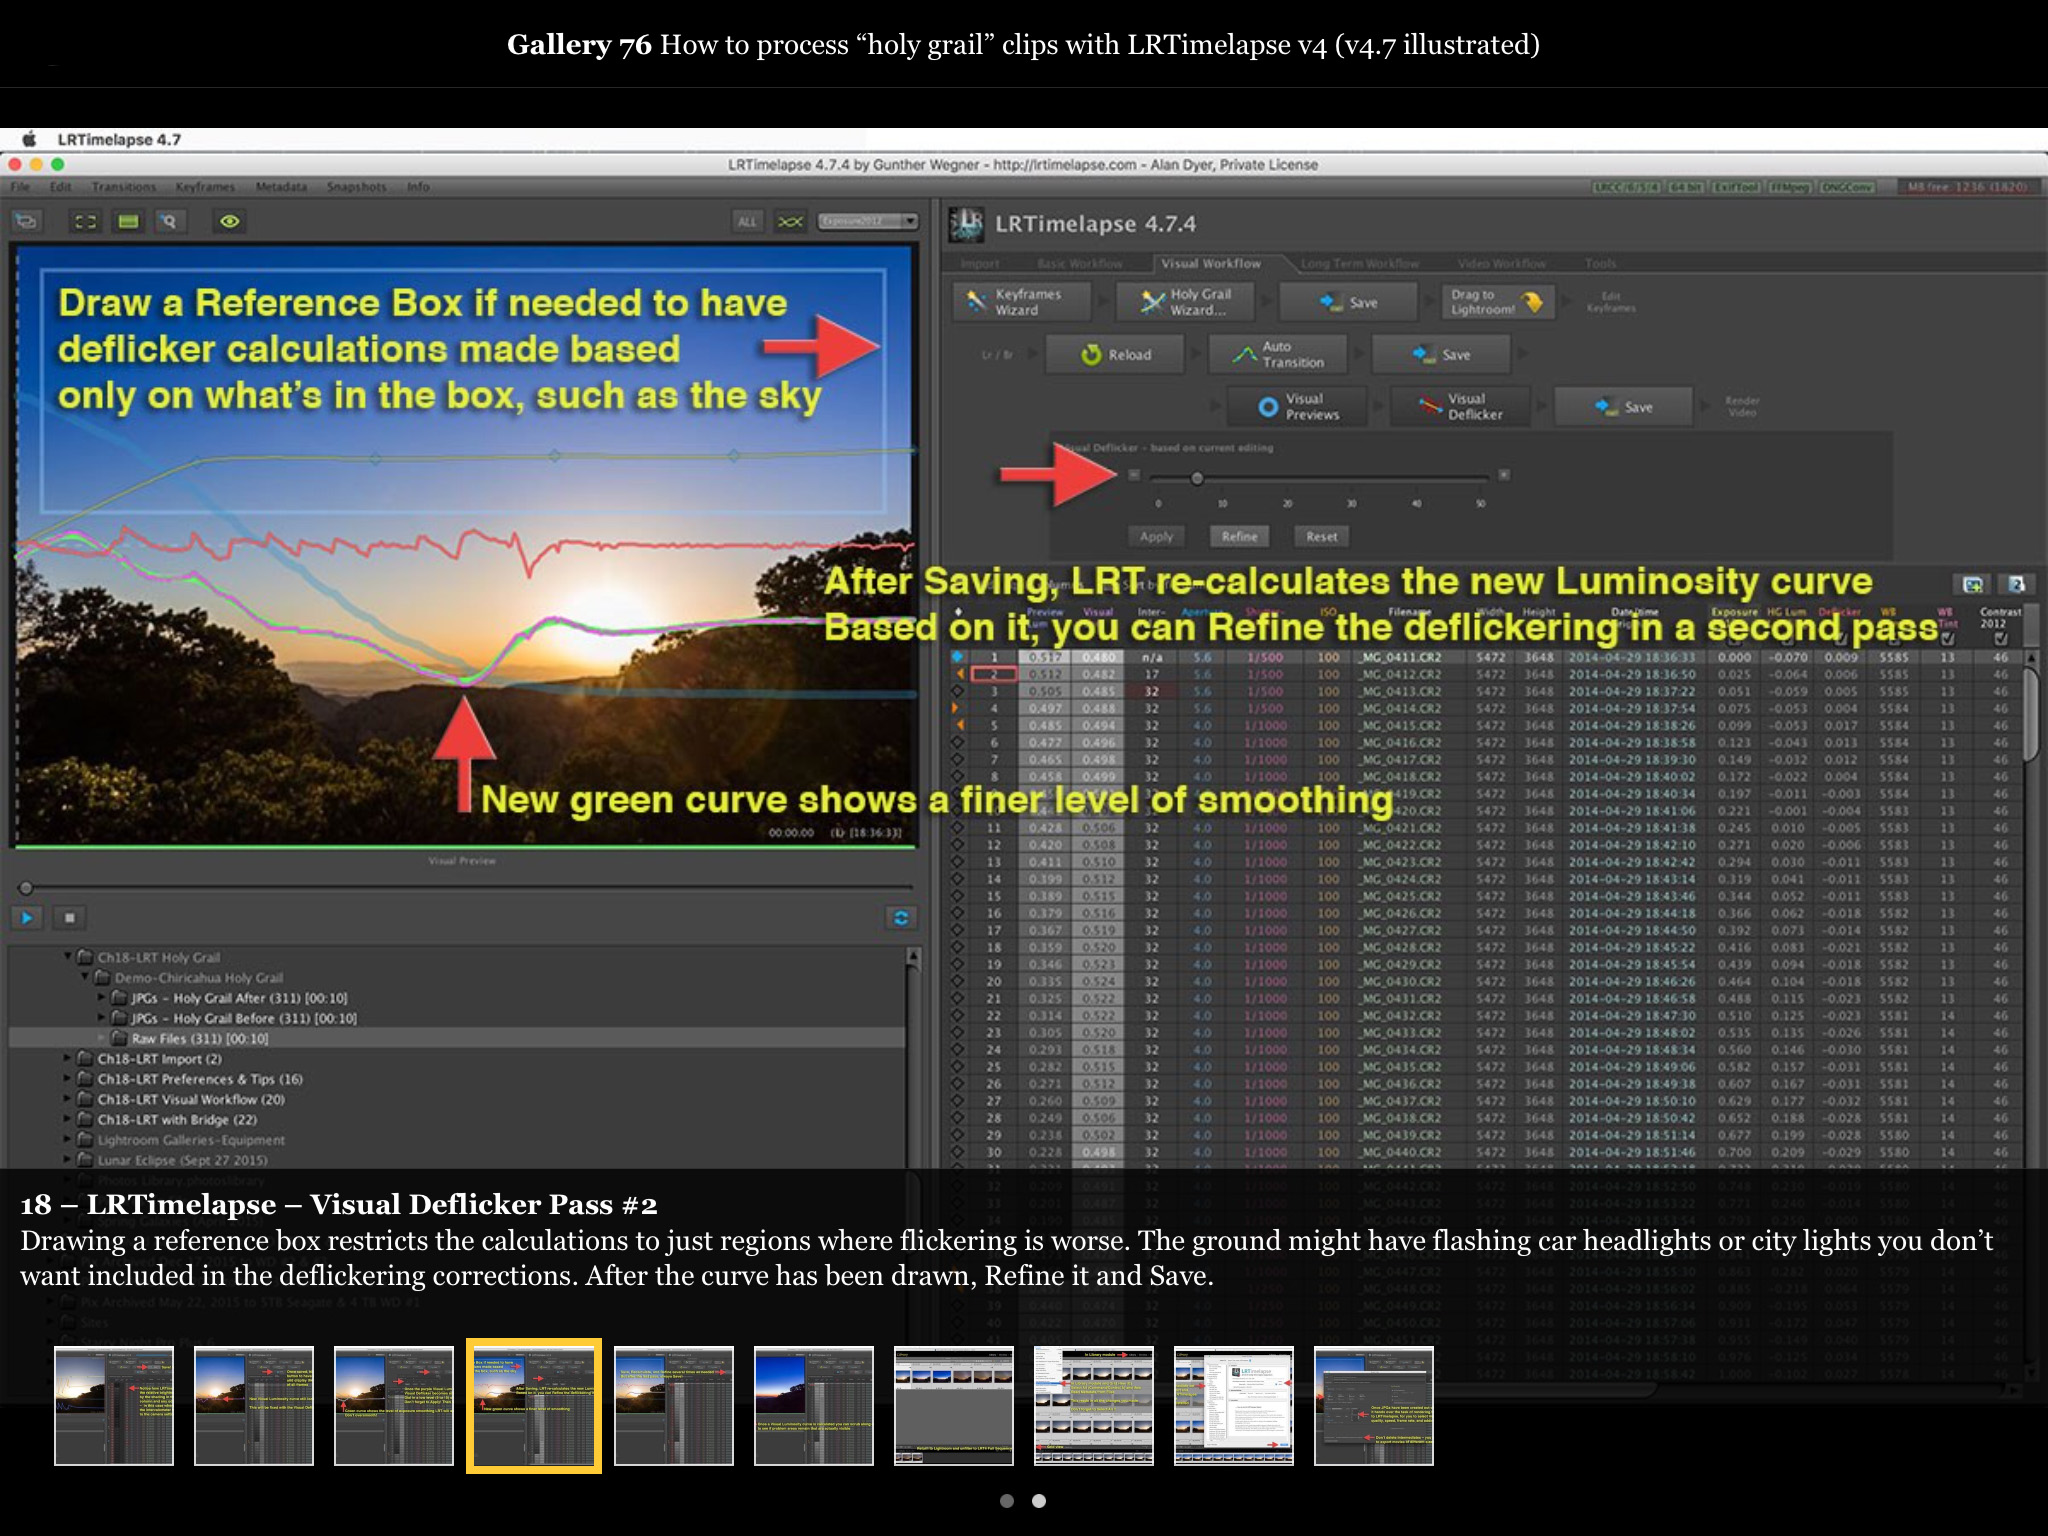
Step-by-step tutorials show you how to process with Lightroom, Camera Raw, Photoshop, and LRTimelapse (shown here), an essential tool for time-lapse work.
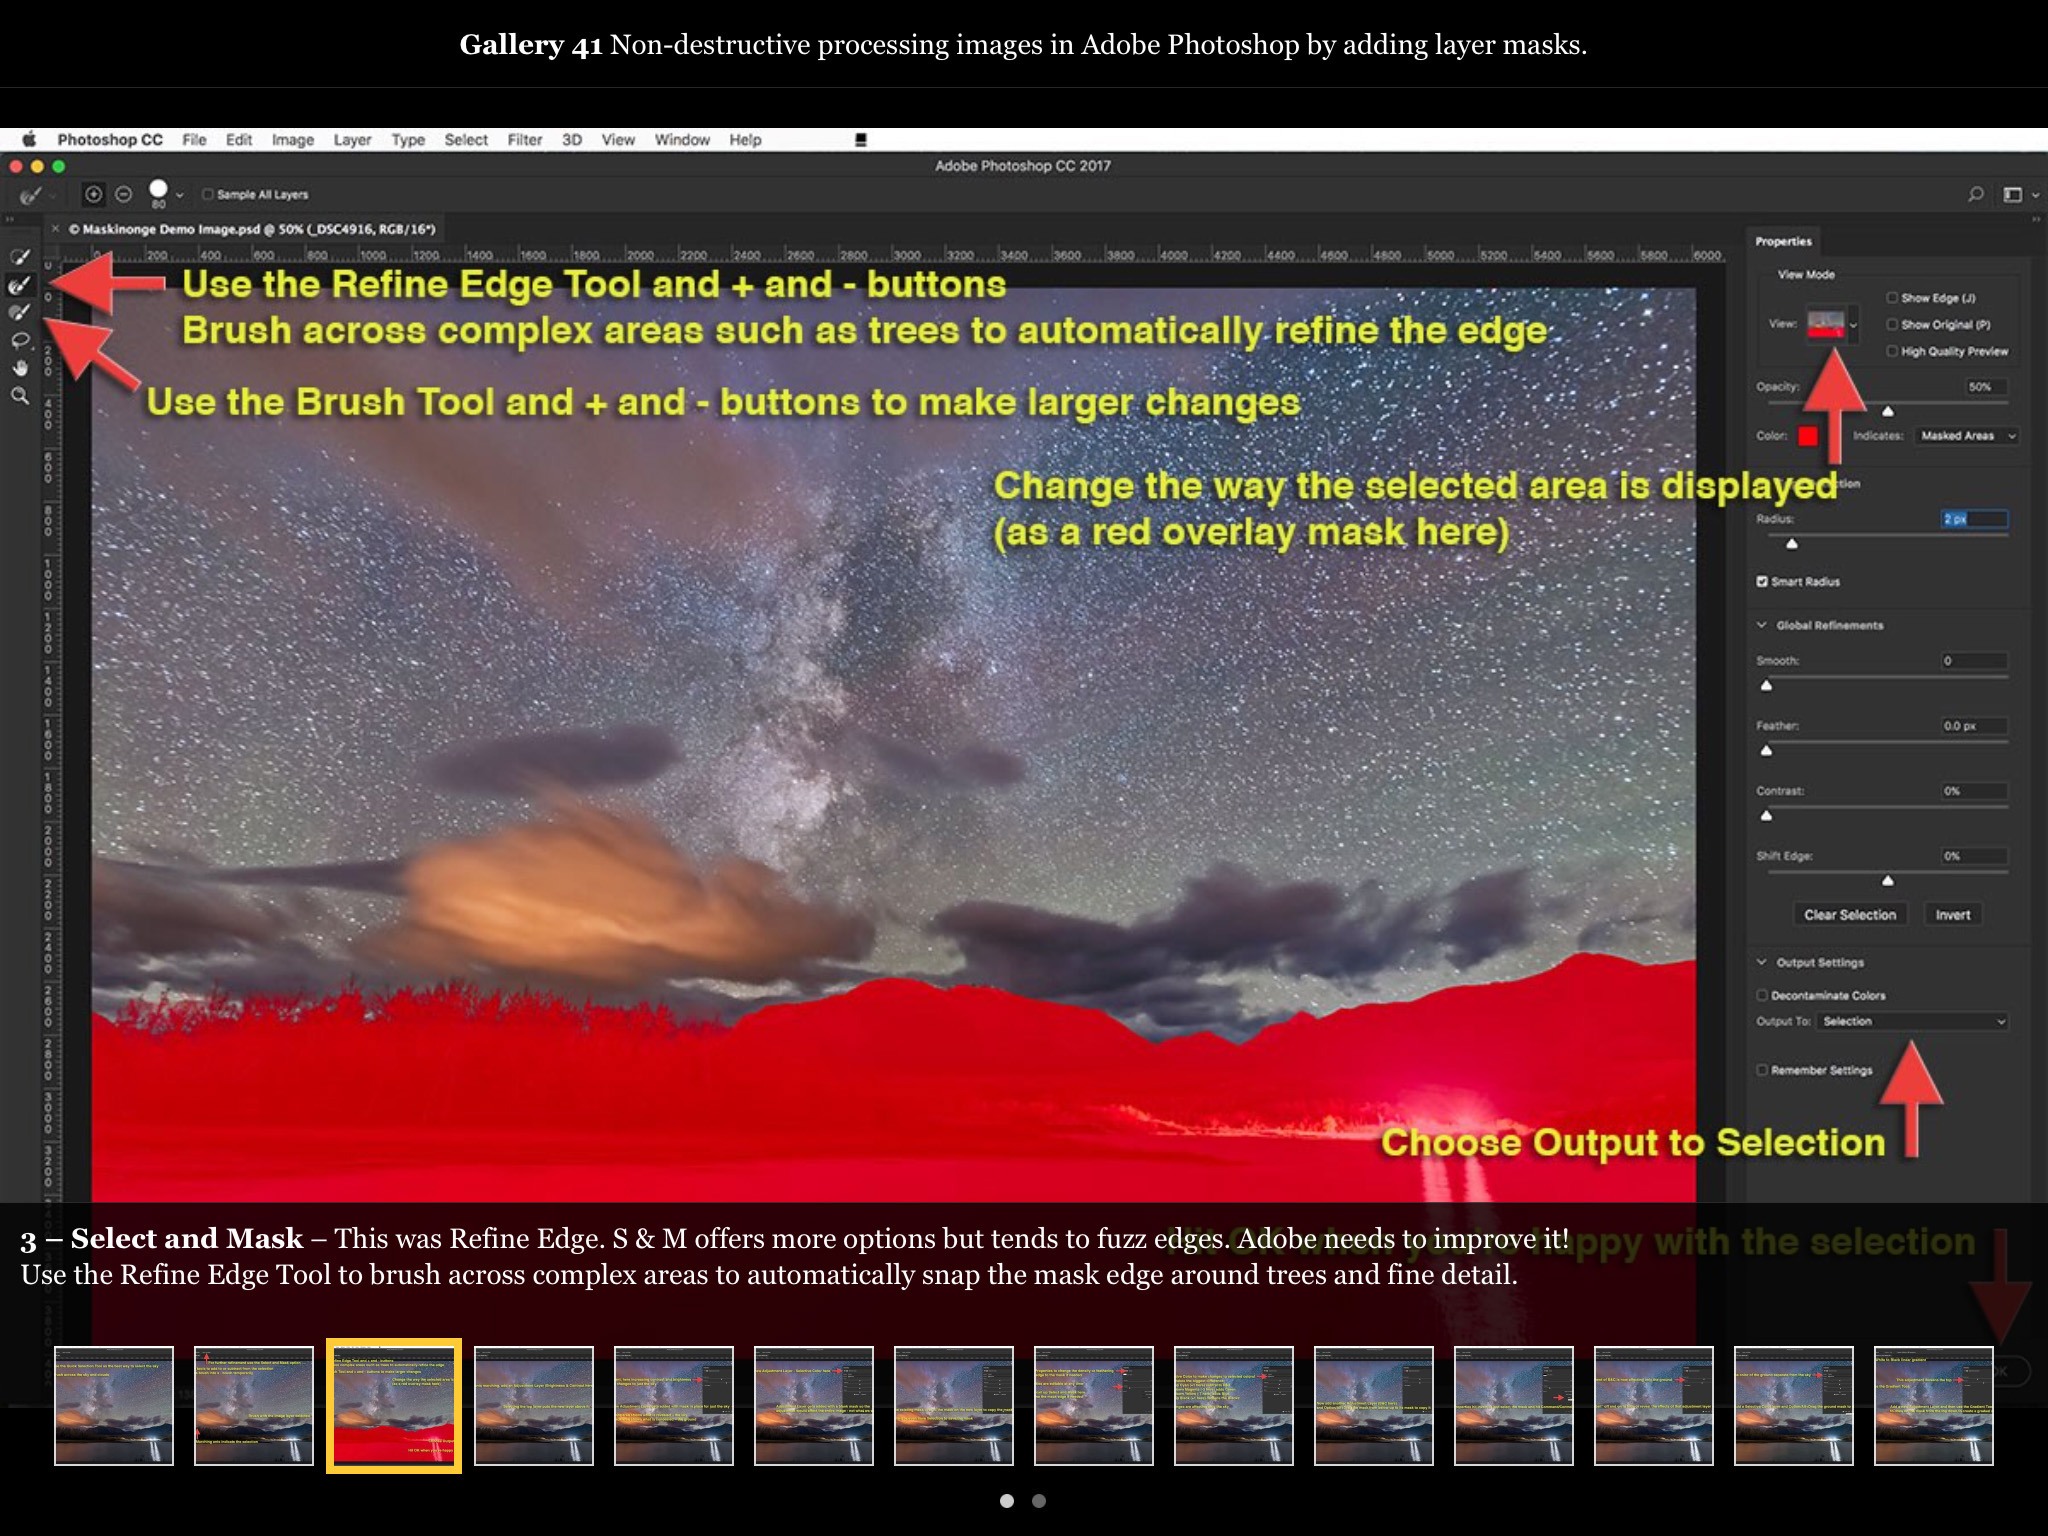
Tutorials cover still image processing, from the basics to advanced techniques such as masking and compositing. Stacking meteor showers and star trails? It’s all covered!
The size and media content of the ebook make it impossible to publish on Kindle/Amazon or Google Play/Android.
How to Photograph & Process Nightscapes and Time-Lapses is available worldwide exclusively through the Apple iBooks Store, for the iBooks app on Apple Macs, iPads and iPhones.
Owners of the original edition get the update for FREE! Just open iBooks on your Mac or iOS device and check Purchased and Updates.
For new buyers, the price remains unchanged: $24.99 US (prices vary with country due to exchange rates and local GST). The book is sold in every one of the 51 countries Apple sells into.
Enjoy! And do leave a review or star rating for the new edition at iTunes/iBooks Store.
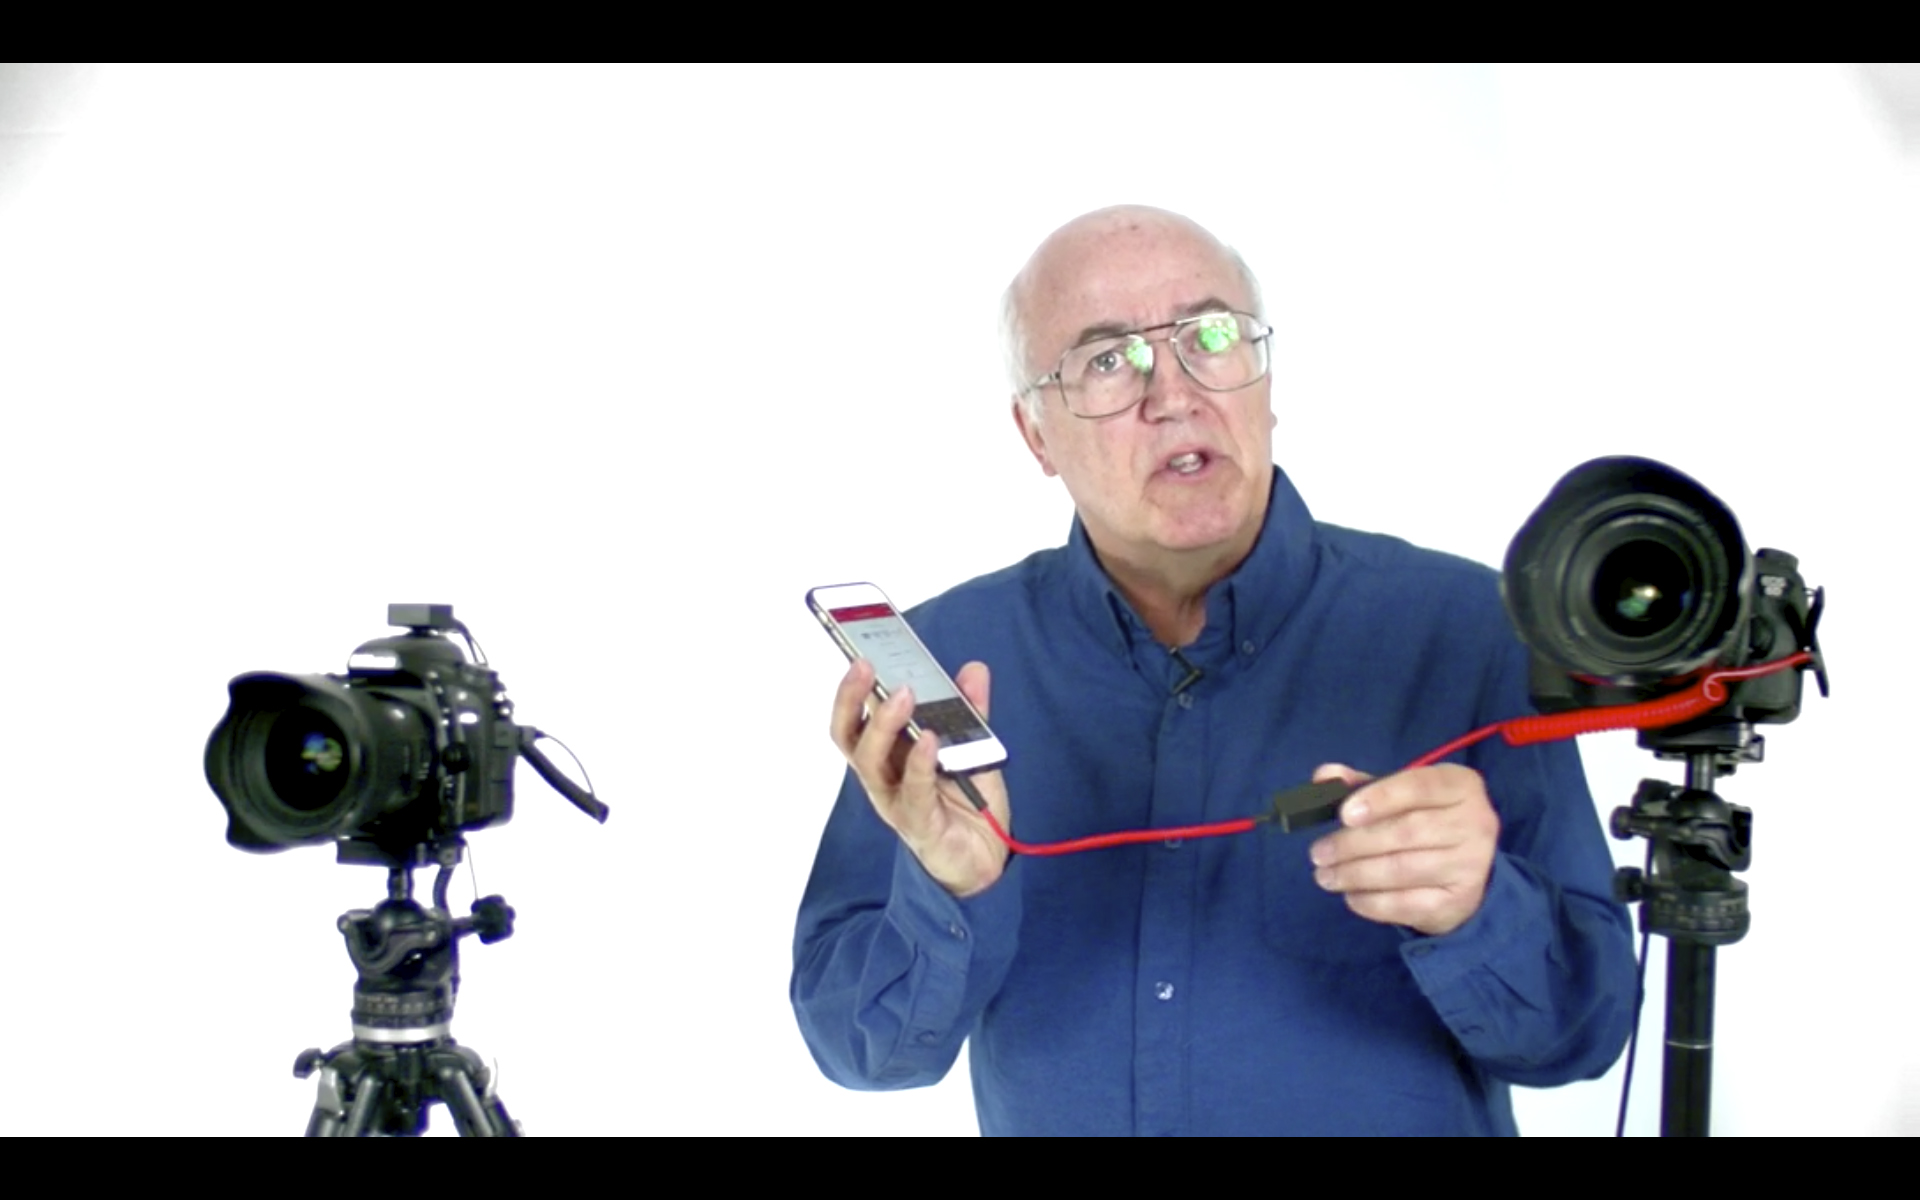
I’m pleased to announce that after a year in production, our video tutorial series, Nightscapes and Time-Lapses: From Field to Photoshop, is now available.
It’s been quite a project! Over the last few years I’ve presented annual astrophoto workshops in conjunction with our local telescope dealer All-Star Telescope to great success.
However, we always had requests for the workshops on video. Attempts to video the actual workshops never produced satisfactory results. So we spent a year shooting in the field and in the studio to produce a “purpose-built” series of programs.
They are available now as a set of three programs, totalling 4 hours of instruction, for purchase and download at Vimeo at
For those wanting “hard copies” we will also be selling the programs on mailed USB sticks. See All-Star Telescope for info and prices. The downloaded version can also be ordered from there.
This series deals with the basics of capturing, then processing nightscape still images and time-lapse movies of the night sky and landscapes lit by moonlight and starlight.
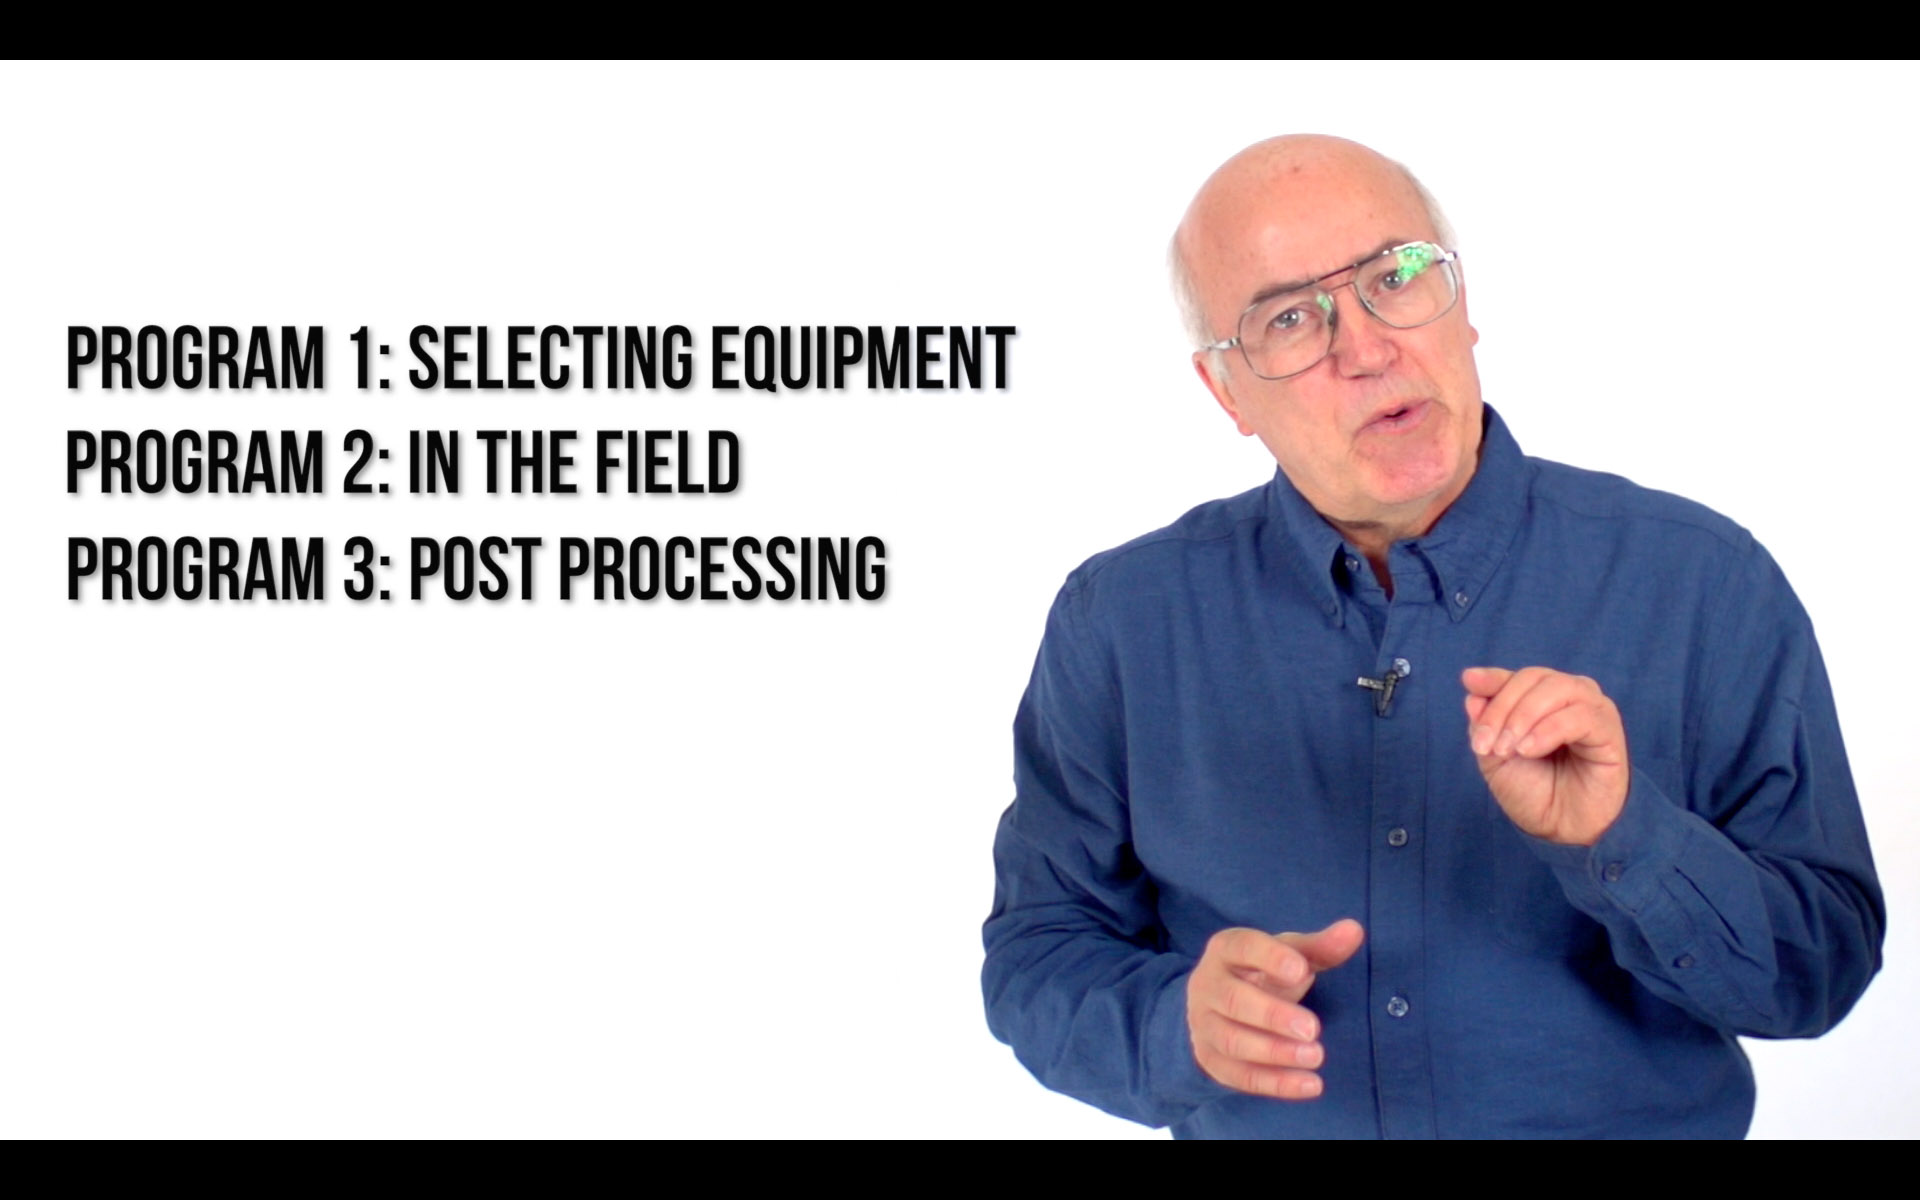
Here’s the content outline:
Program 1 – Choosing Equipment (1 Hour)
• Tips for Getting Started • Essential Gear • Choosing A Camera • Photo 101 – Exposure Triangle • Setting Exposure • Expose to the Right • Setting a Camera – File Types • Photo 101 – Noise Sources • Setting a Camera – Noise Reduction • Setting a Camera – Focusing • Setting a Camera – Other Menus • Choosing Lenses • Choosing an IntervalometerSummary and Tips
Program 2 – Shooting in the Field (1 hour)
• Climbing the Learning Curve • Twilights • Astronomy 101 – Conjunctions • Shooting Conjunctions • Moonrises • Shooting Auroras • Astronomy 101 – Auroras • Photo 101 – Composing • Moonlit Nightscapes • Astronomy 101 – Where is the Moon? • Choosing a Location • Shooting the Milky Way • Astronomy 101 – Where is the Milky Way? • Astronomy 101 – Daily Sky Motion • Tracking the Sky • Shooting Star Trails • Shooting Time-Lapses • Calculating Time-Lapses • A Pre-Flight Checklist • Summary and Tips
Program 3 – Processing Nightscapes and Time-Lapses (2 hours)
• Workflows • Using Adobe Bridge – Importing and Selecting • Photo 101 – File Formats • Using Adobe Lightroom – Importing and Selecting • Adobe Camera Raw – Essential Settings • Adobe Camera Raw – Developing Raw Images • Adobe Lightroom – Develop Module • Adobe Photoshop – Introduction • Photoshop – Setup • Photoshop – Smart Filters • Photoshop – Adjustment Layers • Photoshop – Masking • Photoshop – Processing Star Trails & Time-Lapses • Stacking Star Trails • Assembling Time-Lapse Movies • Archiving • Summary & Finale
If this first introductory series is successful we may produce follow-up programs on more advanced techniques.