

 I present my Top 10 Tips for photographing the August 21 total eclipse of the Sun.
If the August total eclipse will be your first, then you could heed the advice of many and simply follow “Tip #0:” Just don’t photograph it! Look up and around to take in the spectacle. Even then, you will not see it all.
However, you might see less if you are operating a camera.
But I know you want pictures! To help you be successful, here are my tips for taking great photos without sacrificing seeing the eclipse.

TIP #1: Keep It Simple
During the brief minutes of totality, the easiest way to record the scene is to simply hold your phone camera up to the sky and shoot. Zoom in if you wish, but a wide shot may capture more of the twilight effects and sky colors, which are as much a part of the experience as seeing the Sun’s gossamer corona around the dark disk of the Moon.
Better yet, use an adapter to clamp your phone to a tripod. Frame the scene as best you can (you might not be able to include both the ground and Sun) and shoot a time-lapse, or better yet, a video.
Start it 2 or 3 minutes before totality (if you can remember in the excitement!) and let the camera’s auto exposure take care of the rest. It’ll work fine.
That way you’ll also record the audio of your excited voices. The audio may serve as a better souvenir than the photos. Lots of people will have photos, but nobody else will record your reactions!
Just make sure your phone has enough free storage space to save several minutes of HD video or, if your camera has that feature, 4K video.
TIP #2: Shoot Wide With a DSLR
For better image quality, step up to this hands-off technique.
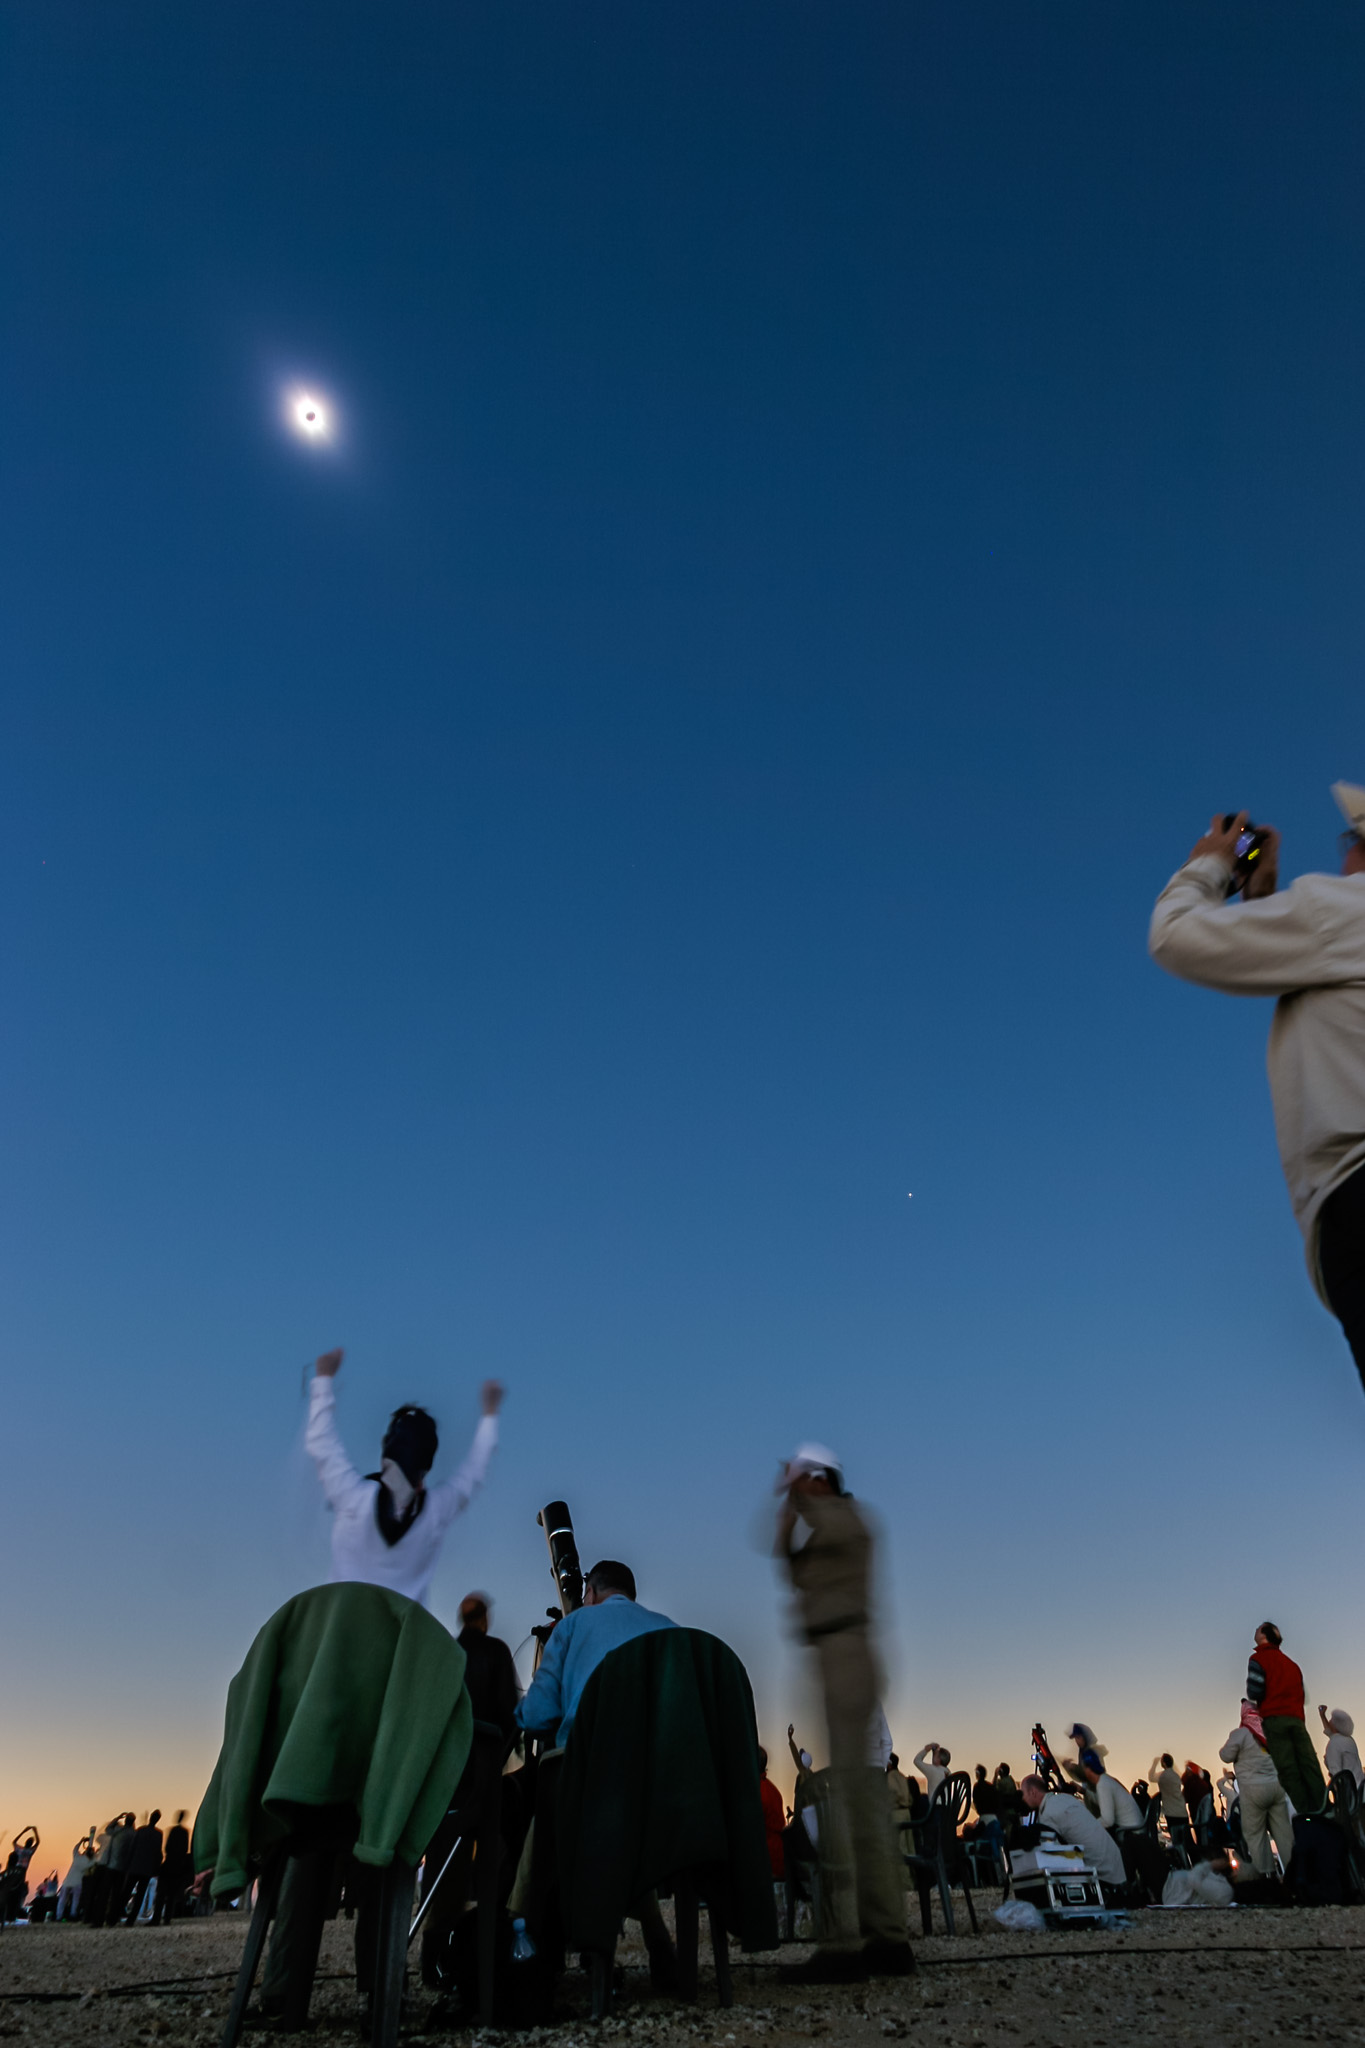
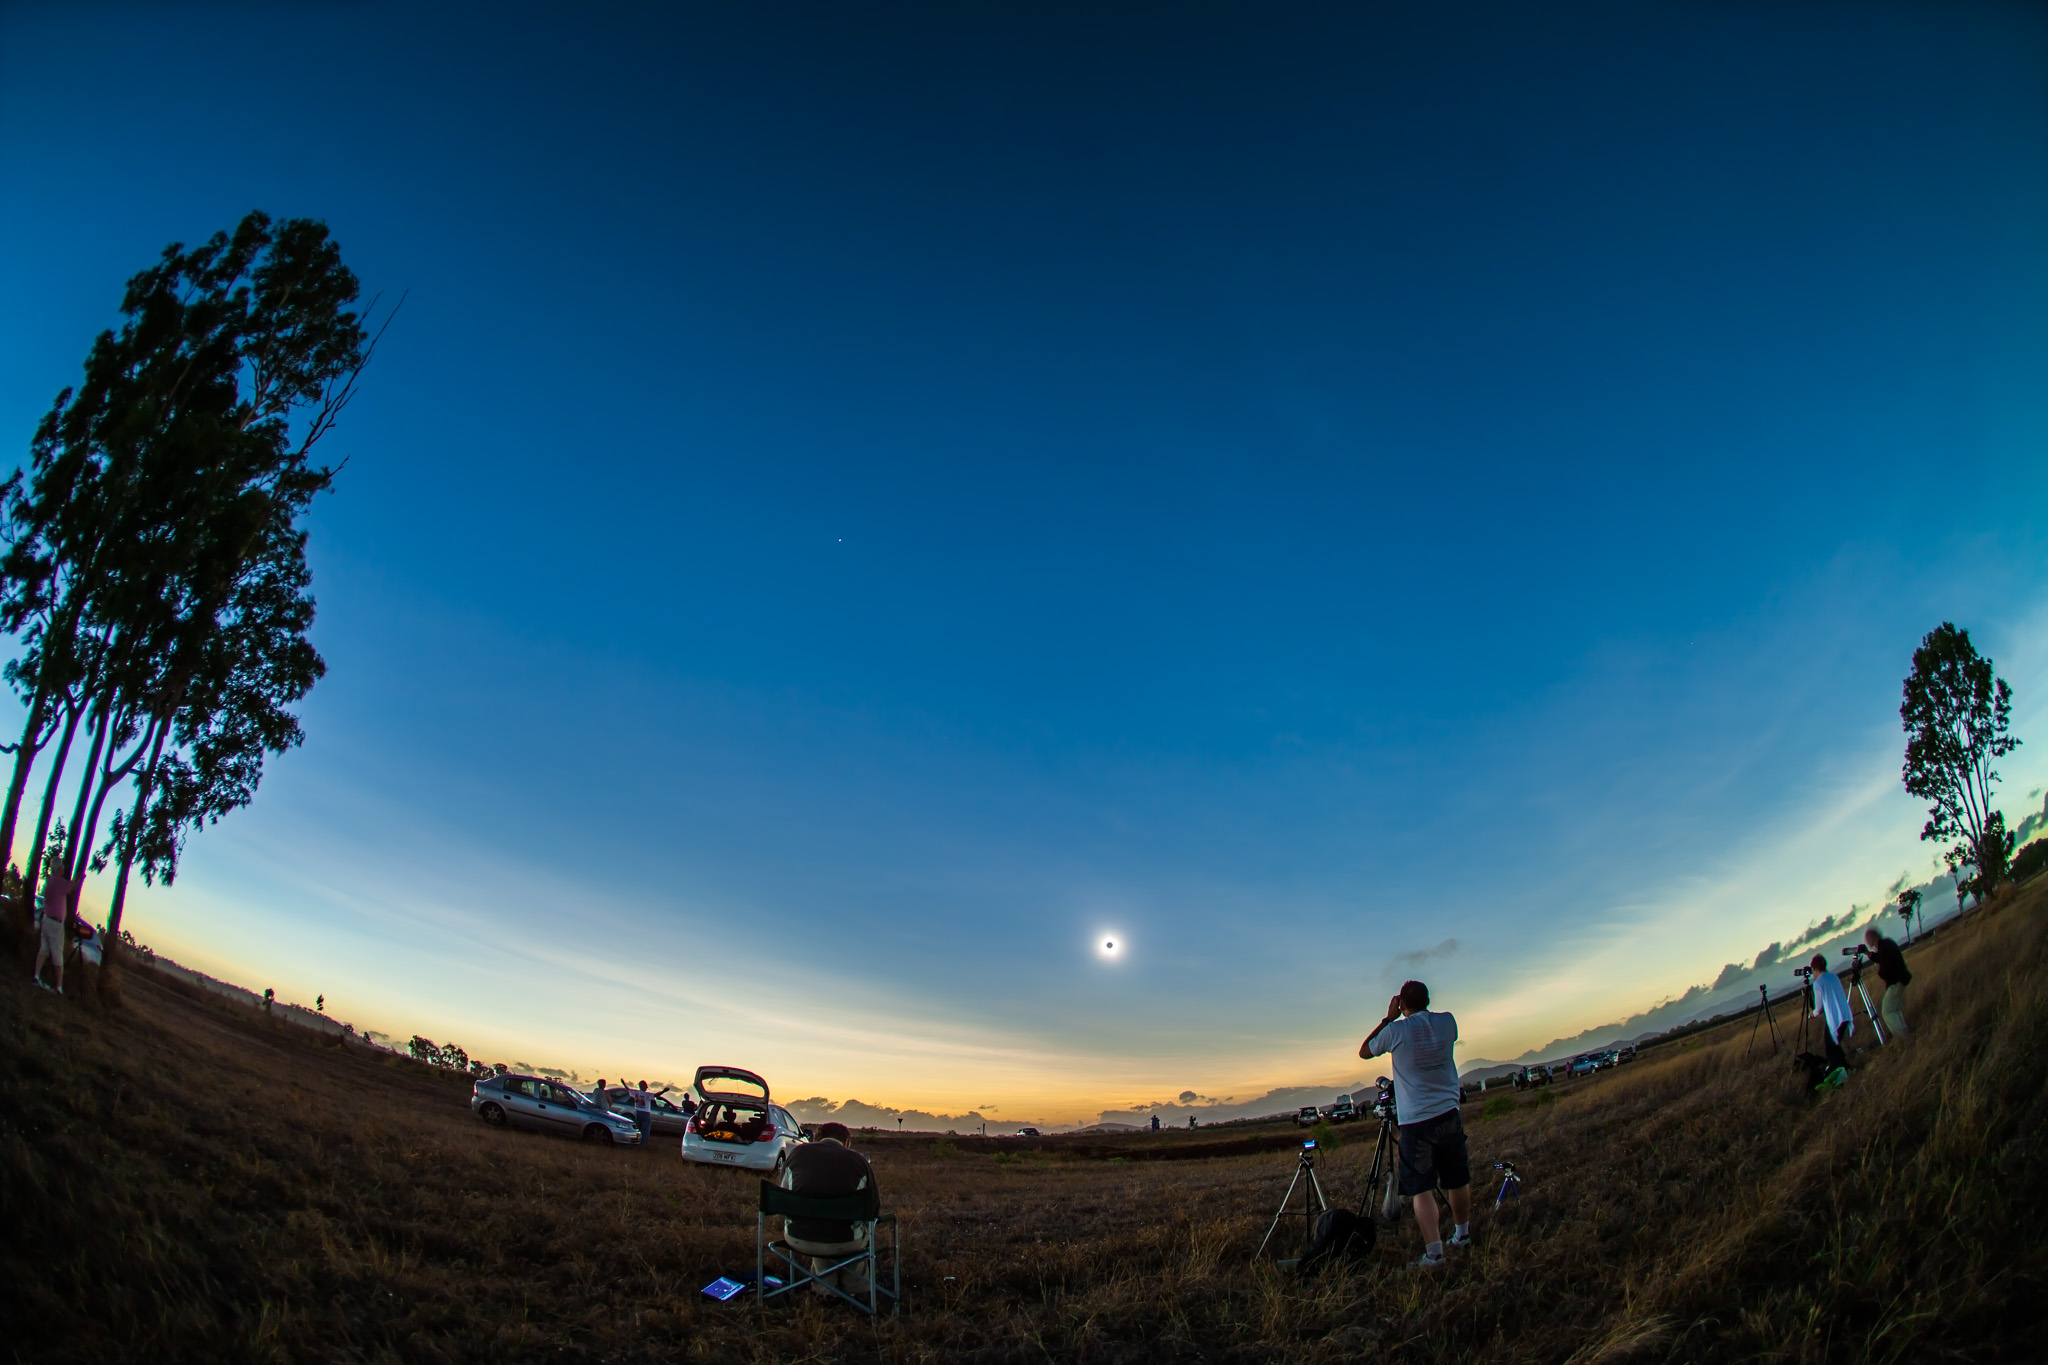
Use a tripod-mounted camera that accepts interchangeable lenses (a digital single lens reflex or a mirrorless camera) and use a lens wide enough to take in the ground below and Sun above.
Depending on where you are and the sensor size in your camera, that’ll likely mean a 10mm to 24mm lens.
By going wide you won’t record details in the corona of the Sun or its fiery red prominences. But you can record the changing sky colors and perhaps the dark shadow of the Moon sweeping from right to left (west to east) across the sky. You can also include you and your eclipse group silhouetted in the foreground. Remember, no one else will record you at the eclipse.

TIP #3: Shoot on Auto Exposure
For wide shots, there’s no need to attend to the camera during the eclipse. Set the camera on Auto Exposure – Aperture Priority (Av), the camera ISO between 100 to 400, and your lens aperture to f/2.8 (fast) to f/5.6 (slow).
Use a higher ISO if you are using a slower lens such as a kit zoom. But shoot at ISO 100 and at f/2.8 if you have a wide lens that fast.
In Av mode the camera will decide what shutter speed to use as the lighting changes. I’ve used this technique at many eclipses and it works great.
TIP #4: Let the Camera Do the Shooting
To make this wide-angle technique truly hands-off use an intervalometer (either built into your camera or a separate hardware unit) to fire the shutter automatically.
Once again, start the sequence going 3 to 5 minutes before totality, with the intervalometer set to fire the shutter once every second. Don’t shoot at longer intervals, or you’ll miss too much. Shutter speeds won’t likely exceed one second.
Again, be sure your camera’s memory card has enough free space for several hundred images. And don’t worry about a solar filter on your lens. It’ll be fine for the several minutes you’ll have it aimed up.
Out of the many images you’ll get, pick the best ones, or turn the entire set into a time-lapse movie.
TIP #5: Shoot on Manual Focus
Use Auto Exposure and an intervalometer. But … don’t use Auto Focus.
Switch your lens to Manual Focus (MF) and focus on a distant scene element using Live View.
Or use Auto Focus to first focus on something in the distance, then switch to Manual and don’t touch focus after that. If you leave your lens on Auto Focus the shutter might not fire if the camera decides it can’t focus on the blank sky.

TIP #6: Shoot Raw
For demanding subjects like a solar eclipse always shoot your images in the Raw file format. Look in your camera’s menus under Image Quality.
Shoot JPGs, too, if you like, but only Raw files record the widest range of colors and brightness levels the camera sensor is capable of detecting.
Later in processing you can extract amazing details from Raw files, both in the dark shadows of the foreground, and in the bright highlights of the distant twilight glows and corona around the Sun. Software to do so came with your camera. Put it to use.
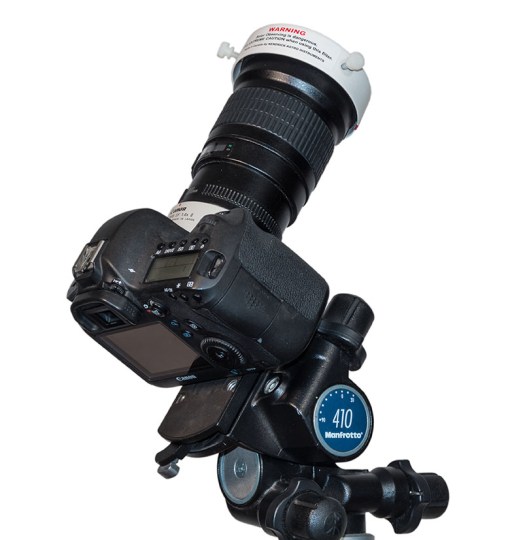
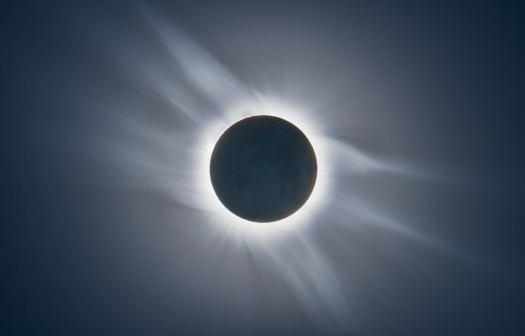
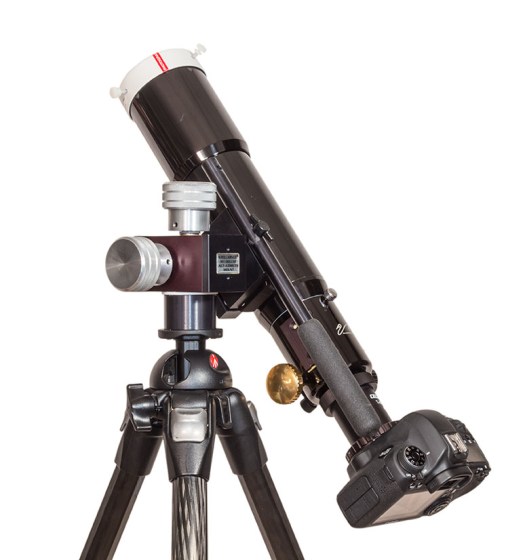
TIP #7: OK, Use a Telephoto Lens! But …
If you really want to shoot close-ups, great! But don’t go crazy with focal length. Yes, using a mere 135mm or 200mm lens will yield a rather small image of the eclipsed Sun. But you don’t need a monster 600mm lens or a telescope, which typically have focal lengths starting at 600mm. With long focal lengths come headaches like:
• Keeping the Sun centered. The Earth is turning! During the eclipse that motion will carry the Sun (and Moon) its own diameter across your frame from east to west during the roughly two minutes of totality. While a motorized tracking mount can compensate for this motion, they take more work to set up properly, and must be powered. And, if you are flying to the eclipse, they will be much more challenging to pack. I’m trying to keep things simple!
• Blurring from vibration. This can be an issue with any lens, but the longer your lens, the more your chances of getting fuzzy images because of camera shake, especially if you are touching the camera to alter settings.
An ideal focal length is 300mm to 500mm. But …
When using any telephoto lens, always use a sturdy tripod with a head that is easy to adjust for precise aiming, and that can aim up high without any mechanical issues. The Sun will be halfway, or more, up the sky, not a position some tripod heads can reach.

TIP #8: Use Auto Exposure, or … Shoot a Movie
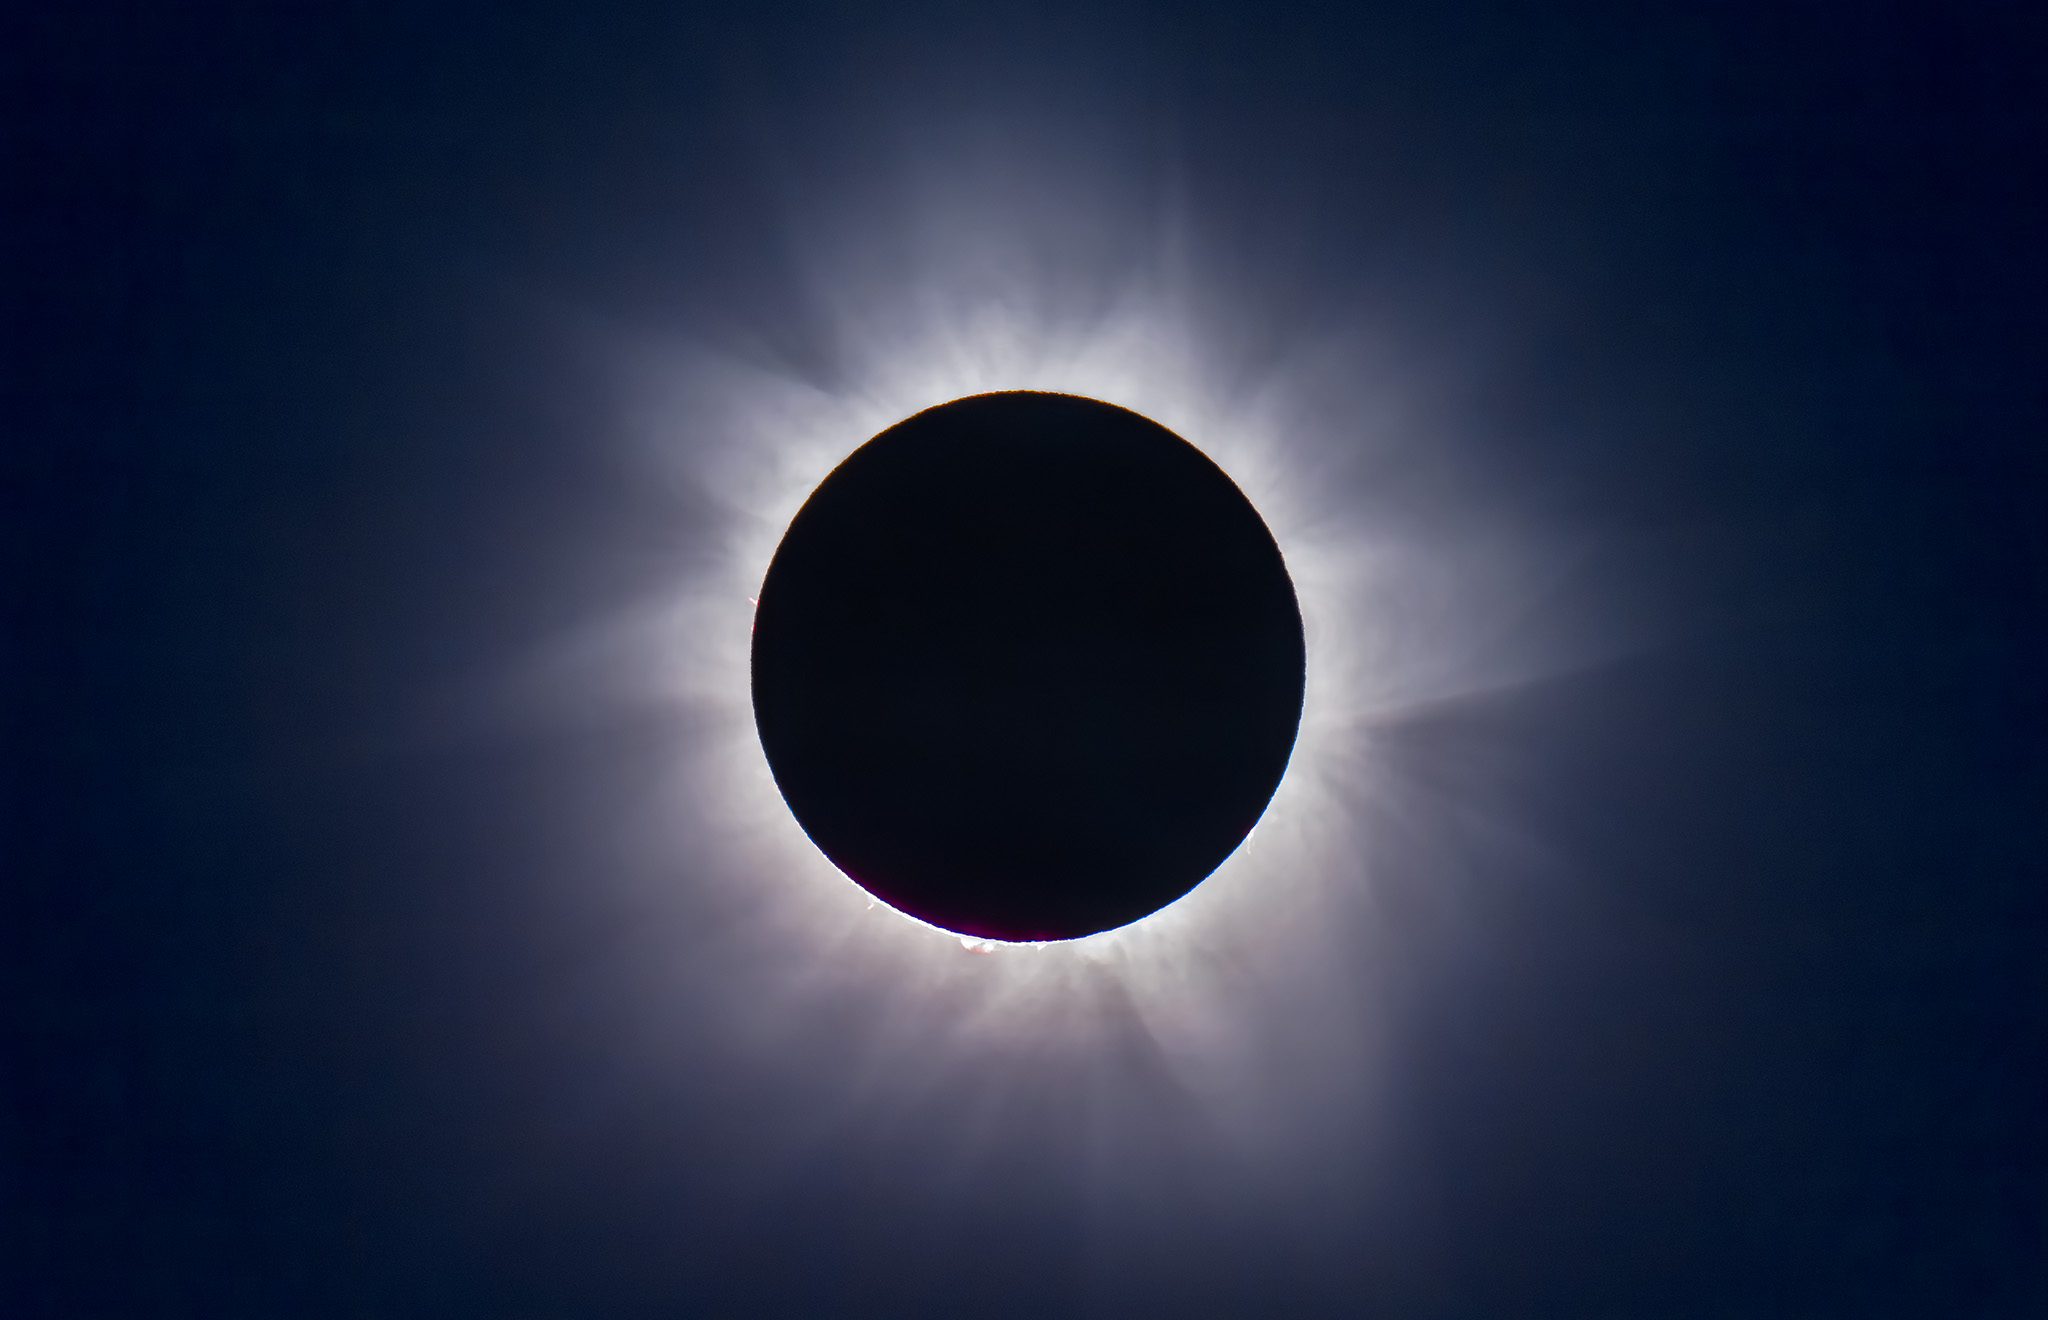
During totality with your telephoto, you could manually step through a rehearsed set of exposures, from very short shutter speeds (as short as 1/4000 second) for the diamond rings at either end of totality, to as long as one or two seconds at mid-totality for the greatest extent of the corona’s outermost streamers.
But that takes a lot of time and attention away from looking. Yes, there are software programs for automating a camera, or techniques for auto bracketing. But if this is your first eclipse an easier option is to simply use Auto Exposure/Aperture Priority and let the camera set the shutter speed. Again, you could use an intervalometer to fire the shutter so you can just watch.
Don’t use high ISO speeds. A low ISO of 100 to 400 is all you need and will produce less noise. The eclipsed Sun is still bright. You don’t need ISO 800 to 3200.
Even on Auto Exposure, you’ll get good shots, just not of the whole range of phenomena an eclipsed Sun displays.
Or, once again and better yet – put your camera into video mode and shoot an HD or 4K movie. Auto Exposure will work just fine, allowing you to start the camera then forget it.
Place the Sun a solar diameter or two to the left of the frame and let the sky’s motion drift it across the frame for added effect. Start the sequence running a minute or two before totality with your solar filter on. Then just let the camera run … except …
TIP #9: Remember to Remove the Filter!
You will need a safe solar filter over your lens or telescope to shoot the partial phases of the eclipse, and to frame and focus the Sun. This cannot be a photo neutral density or polarizing filter. It must be a filter designed for observing and shooting the Sun, made of metal-coated glass or Mylar plastic. Anything else is not safe and likely far too bright.
But you do NOT need the filter for totality.
Remove it … when?
The answer: a minute or so before totality if you want to capture the first diamond ring just before totality officially starts. Set a timer to remind you, as visually it is very difficult to judge the right moment with your unaided eye. The eclipse will start sooner than you expect.
If you have your camera on Auto Exposure, it will compensate just fine for the change in brightness, from the filtered to the unfiltered view.
But don’t leave your unfiltered camera aimed at the Sun. Replace the filter no more than a minute or so after totality and the second diamond ring ends.

TIP #10: Focus!
Everyone worries about getting the “best exposure.” Don’t! You’ll get great looking telephoto eclipse close-ups with any of a wide range of exposures.
What ruins most eclipse shots, other than filter forgetfulness, is fuzzy images, from either shaky tripods or poor focus.
Focus manually using Live View on the filtered partially eclipsed Sun. Zoom up on the edge of the Sun or sharp tip of the crescent. Re-focus a few minutes before totality, as the changing temperature can shift the focus of long lenses and telescopes.
But you needn’t worry about re-focusing after you remove the filter. The focus will not change with the filter off.
TIP #1 AGAIN: Keep It Simple!
I’ll remind you to keep things simple for a reason other than giving you time to enjoy the view, and that’s mobility.
You might have to move at the last minute to escape clouds. Complex photo gear can be just too much to take down and set up, often with minutes to spare, as many an eclipse chaser can attest is often necessary. Keep your gear light, easy to use, and mobile. Committing to an overly ambitious and inflexible photo plan and rig could be your undoing.
To help ensure success, check out my next blog entry, Top 10 Tips for Practicing for the Eclipse.
By following both my “Ten Tips” advice blogs you should be able to get great eclipse images to wow your friends and fans, all without missing the experience of actually seeing … and feeling … the eclipse.
However … may I recommend …

For much more detailed advice on shooting options and techniques, and for step-by-step tutorials on processing eclipse images, see my 295-page eBook on the subject, available as an iBook for Apple devices and as a PDF for all computers and tablets.
Check it out at my website page.
Thanks and clear skies on August 21!
— Alan, June 23, 2017 / © 2017 Alan Dyer / amazingsky.com

I’m excited to try using my phone for time-lapse video during totality.