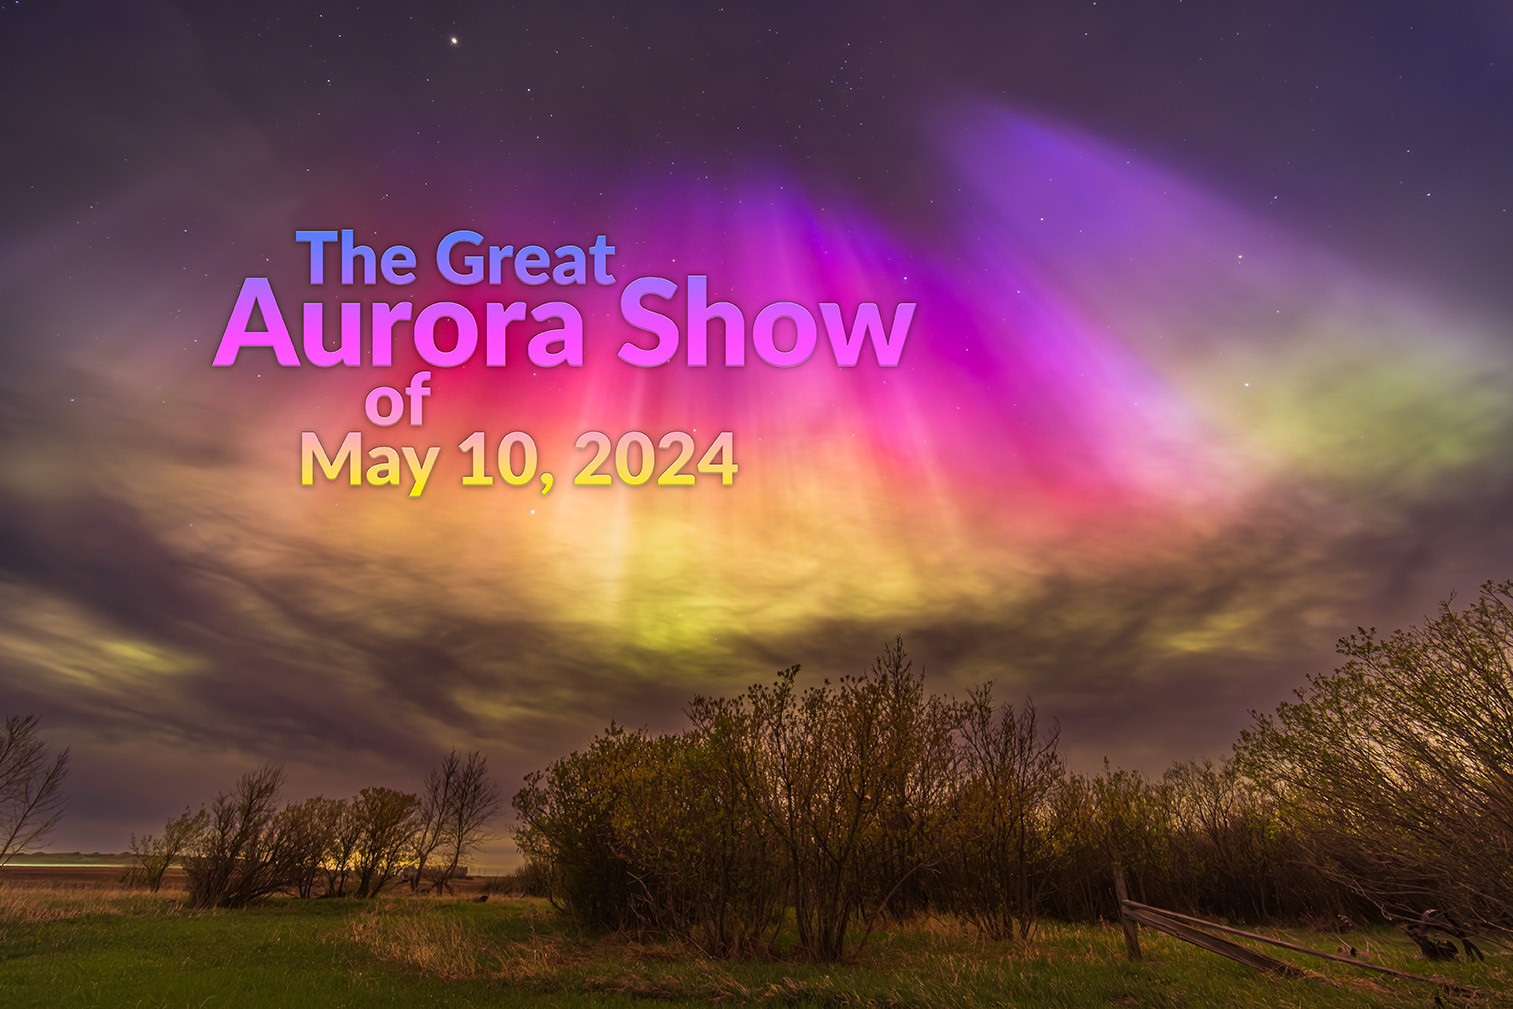
It has been many years since we were treated to an aurora as widely seen as the show on May 10, 2024. Here’s my tale of the great display.
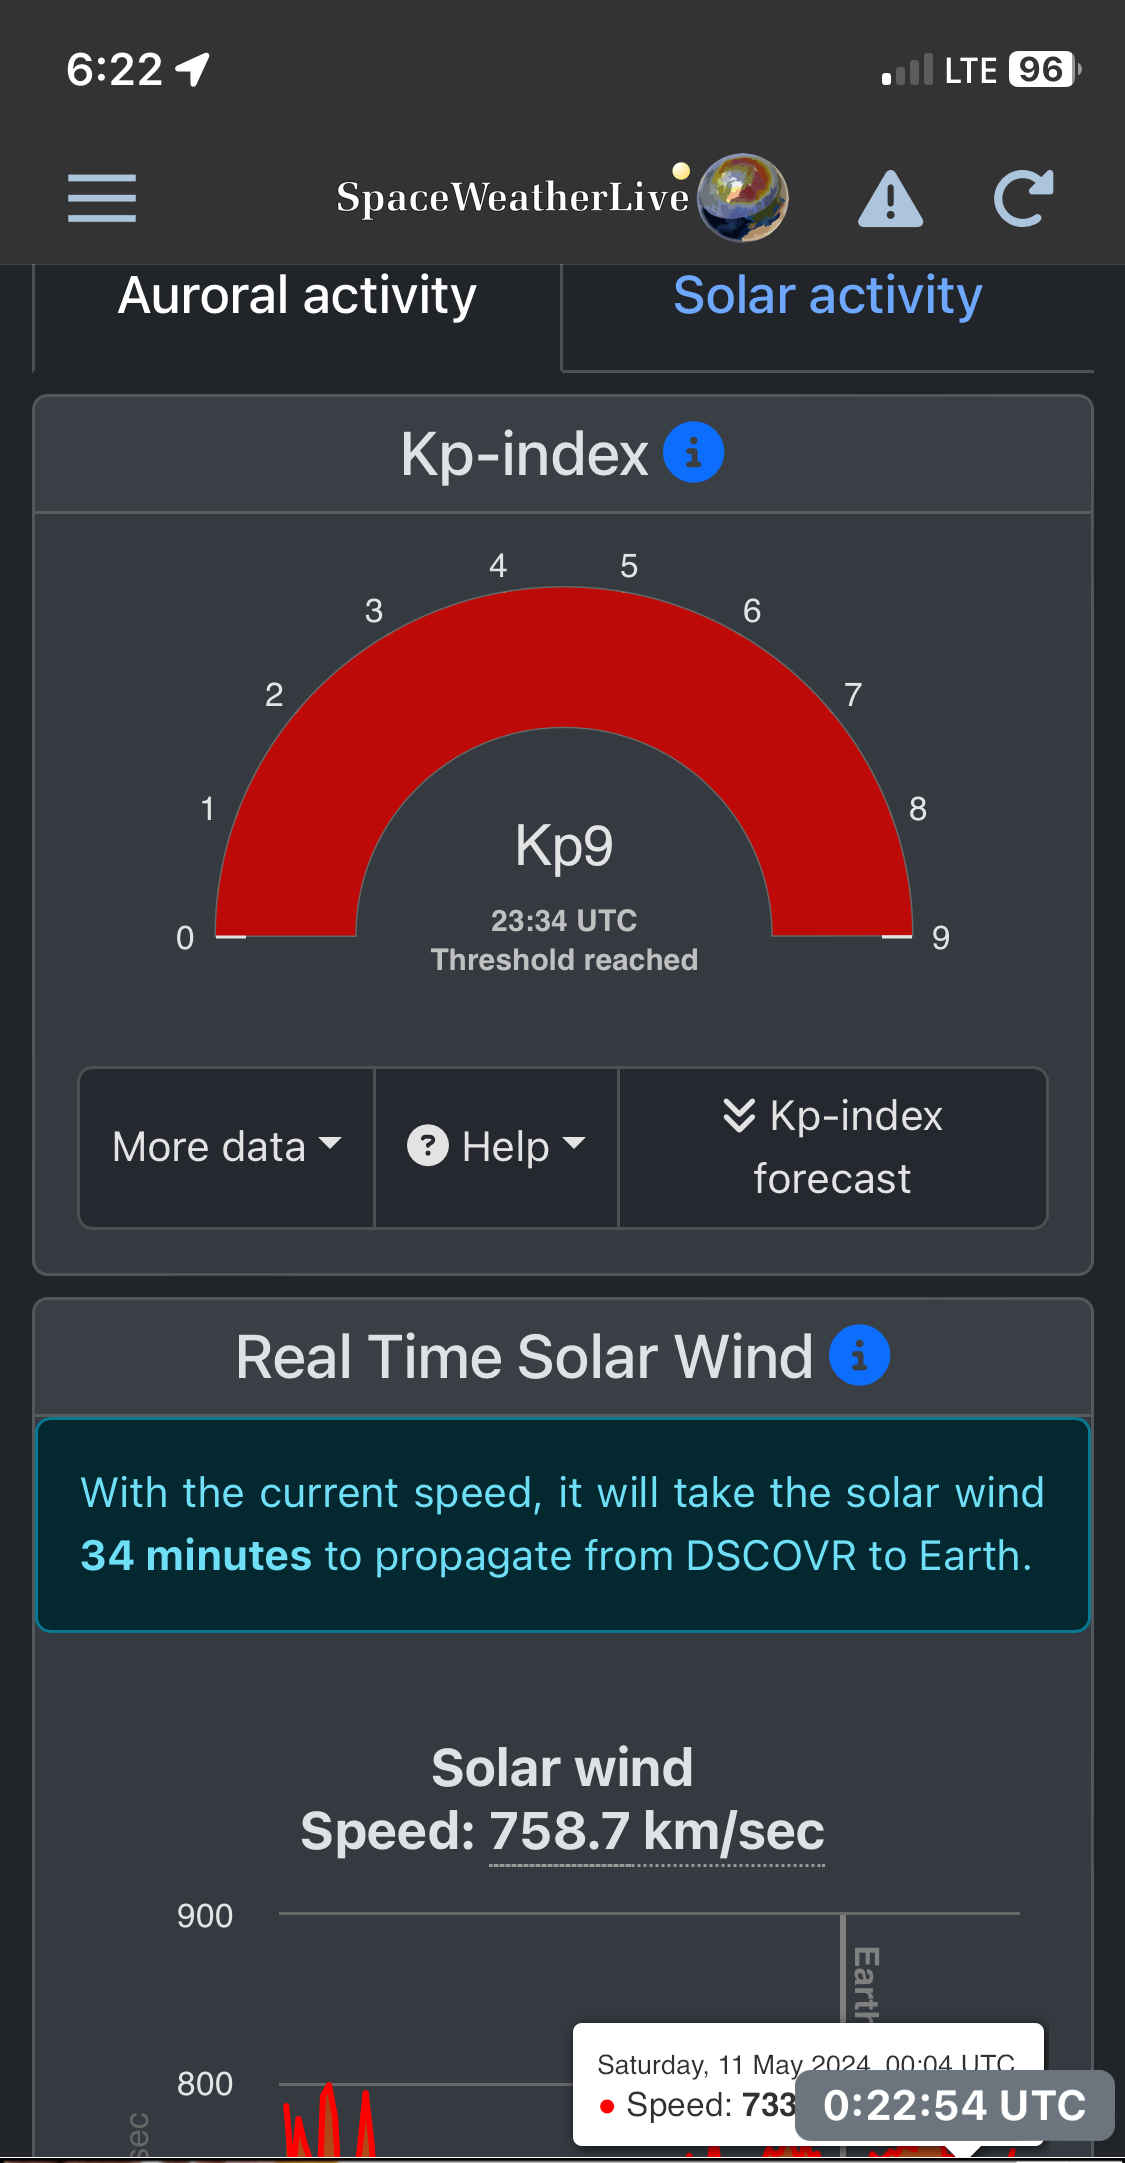
As the sky darkened around the world on May 10/11, 2024, sky watchers in both the northern and southern hemispheres were amazed to see the sky lit by the deep reds, greens and pinks of a massive display of aurora. For me, this was my first Kp8 to 9 show (to use one measure of aurora intensity) in more than 20 years, back in the film era!
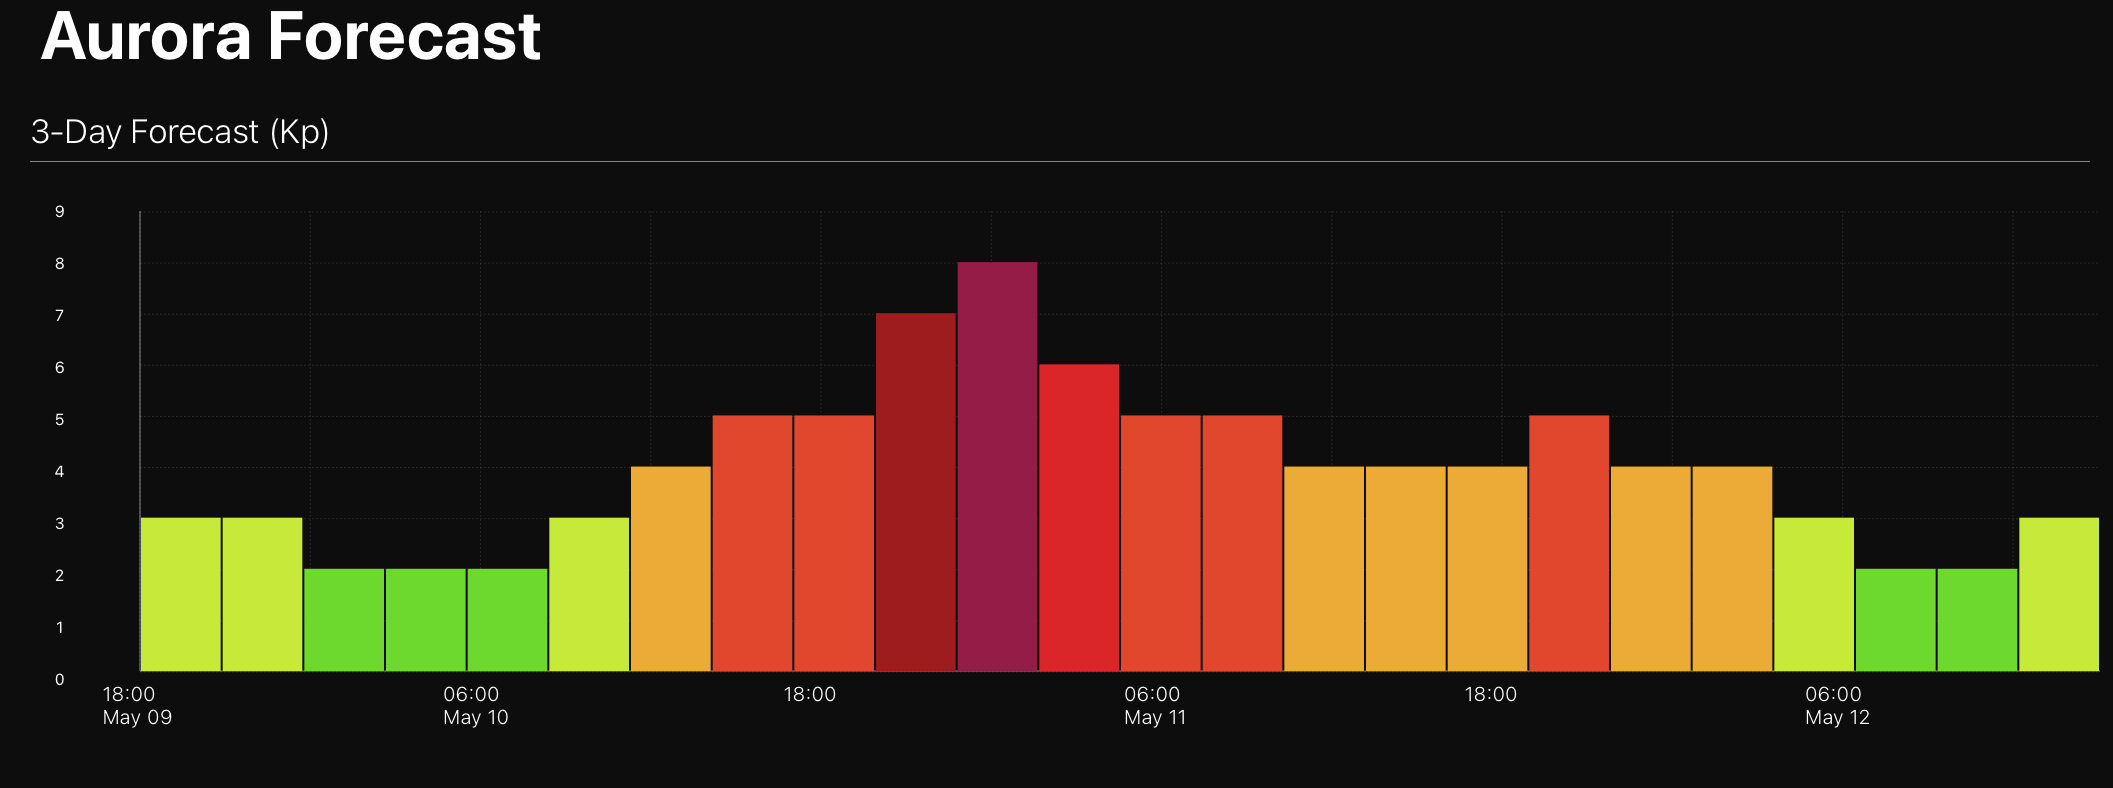
Throughout the day, aurora chasers’ phones (mine included) had been beeping with alerts of the arrival of a major solar storm, with the usual indicators of auroral activity pinned to the top of the scale.
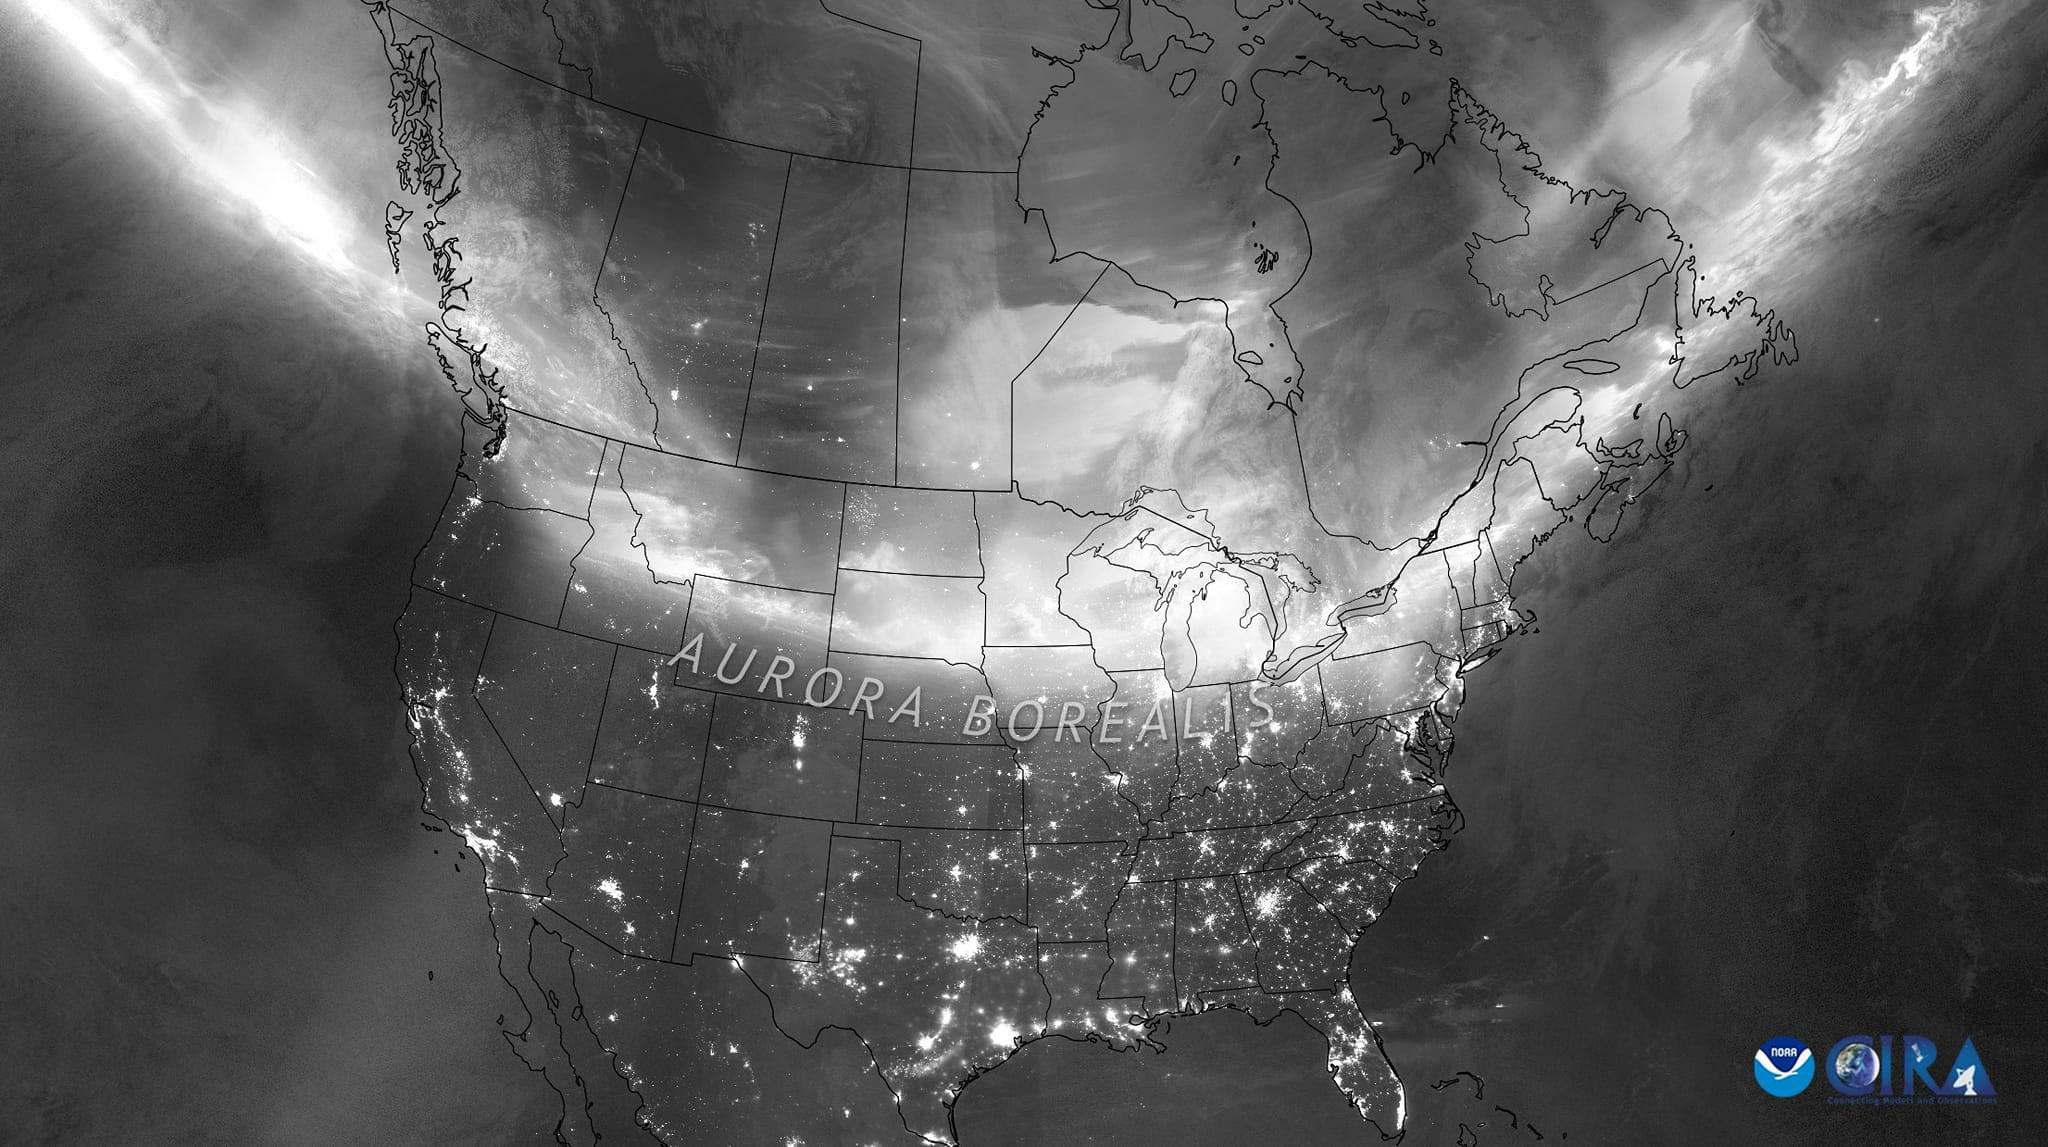
As I show below, the graphic of the intensity of the band of aurora, the auroral oval, was lit up red and wide. This was a night we didn’t have to chase north to see the Northern Lights or aurora borealis — they were coming south to meet us (as I show above).

Observers in the southern hemisphere had the normally elusive aurora australis move much farther north than usual, bringing the Southern Lights even to tropical latitudes in Australia, South America and Africa.
The cause was a massive sunspot group on the Sun which had let off several intense solar flares.
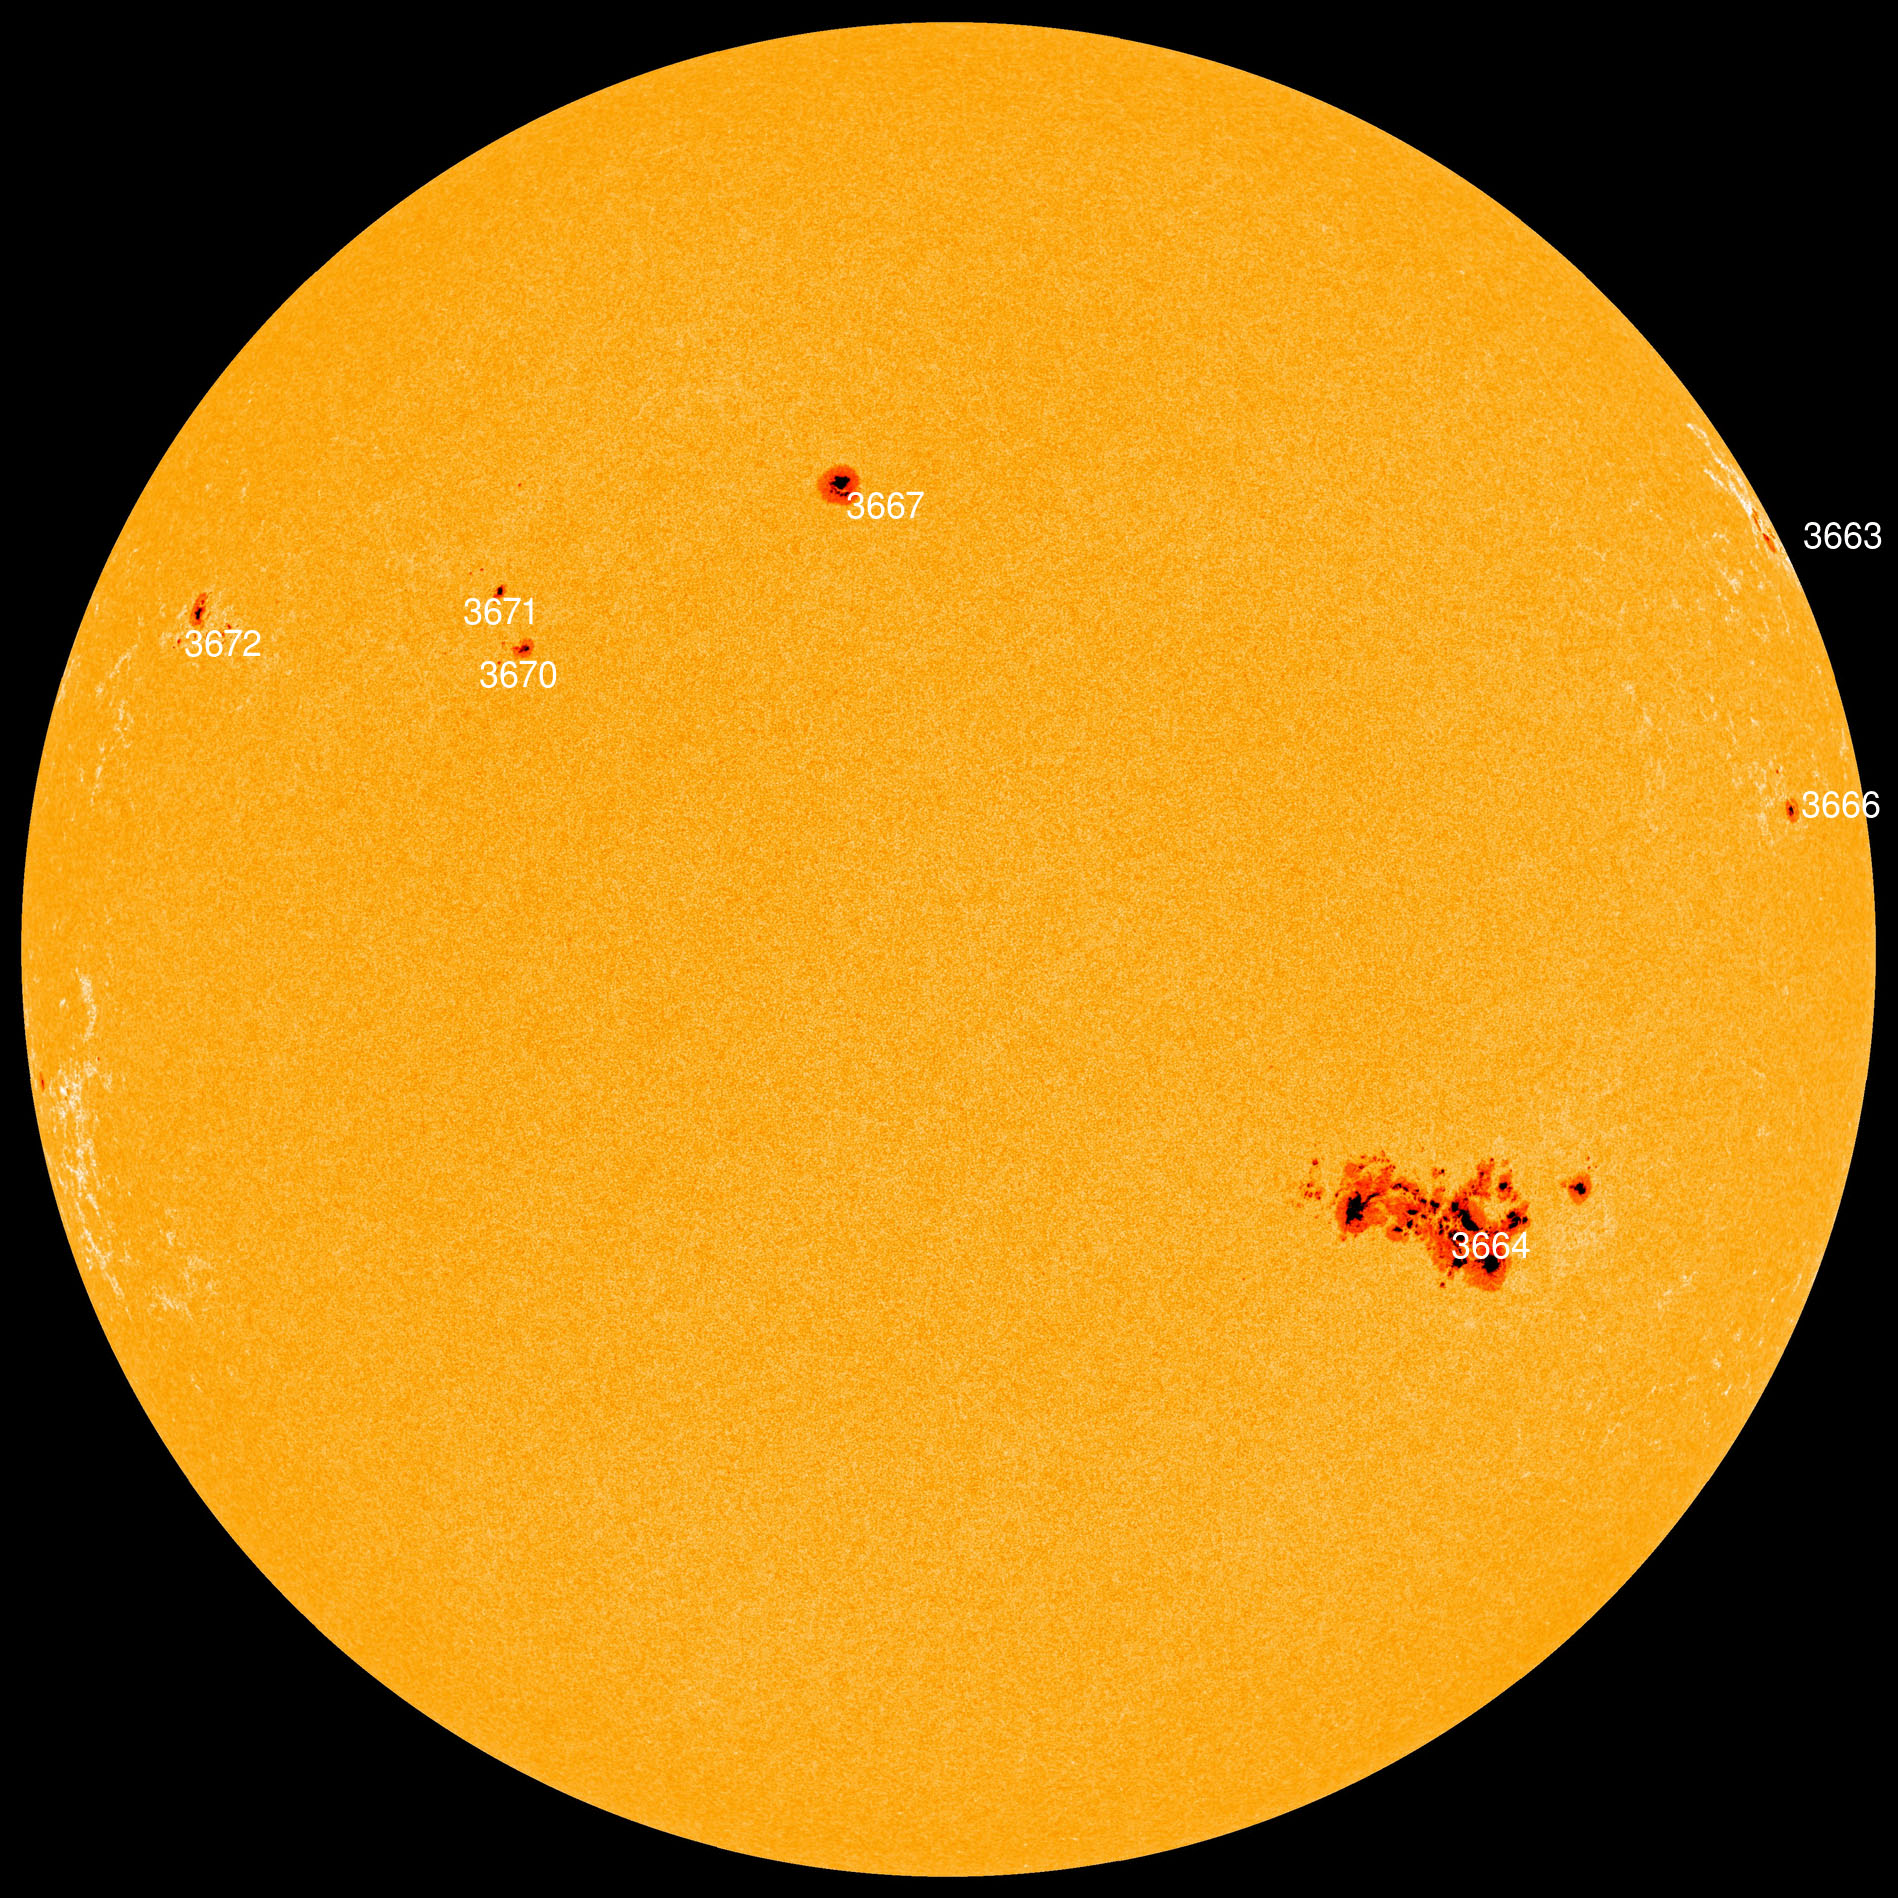
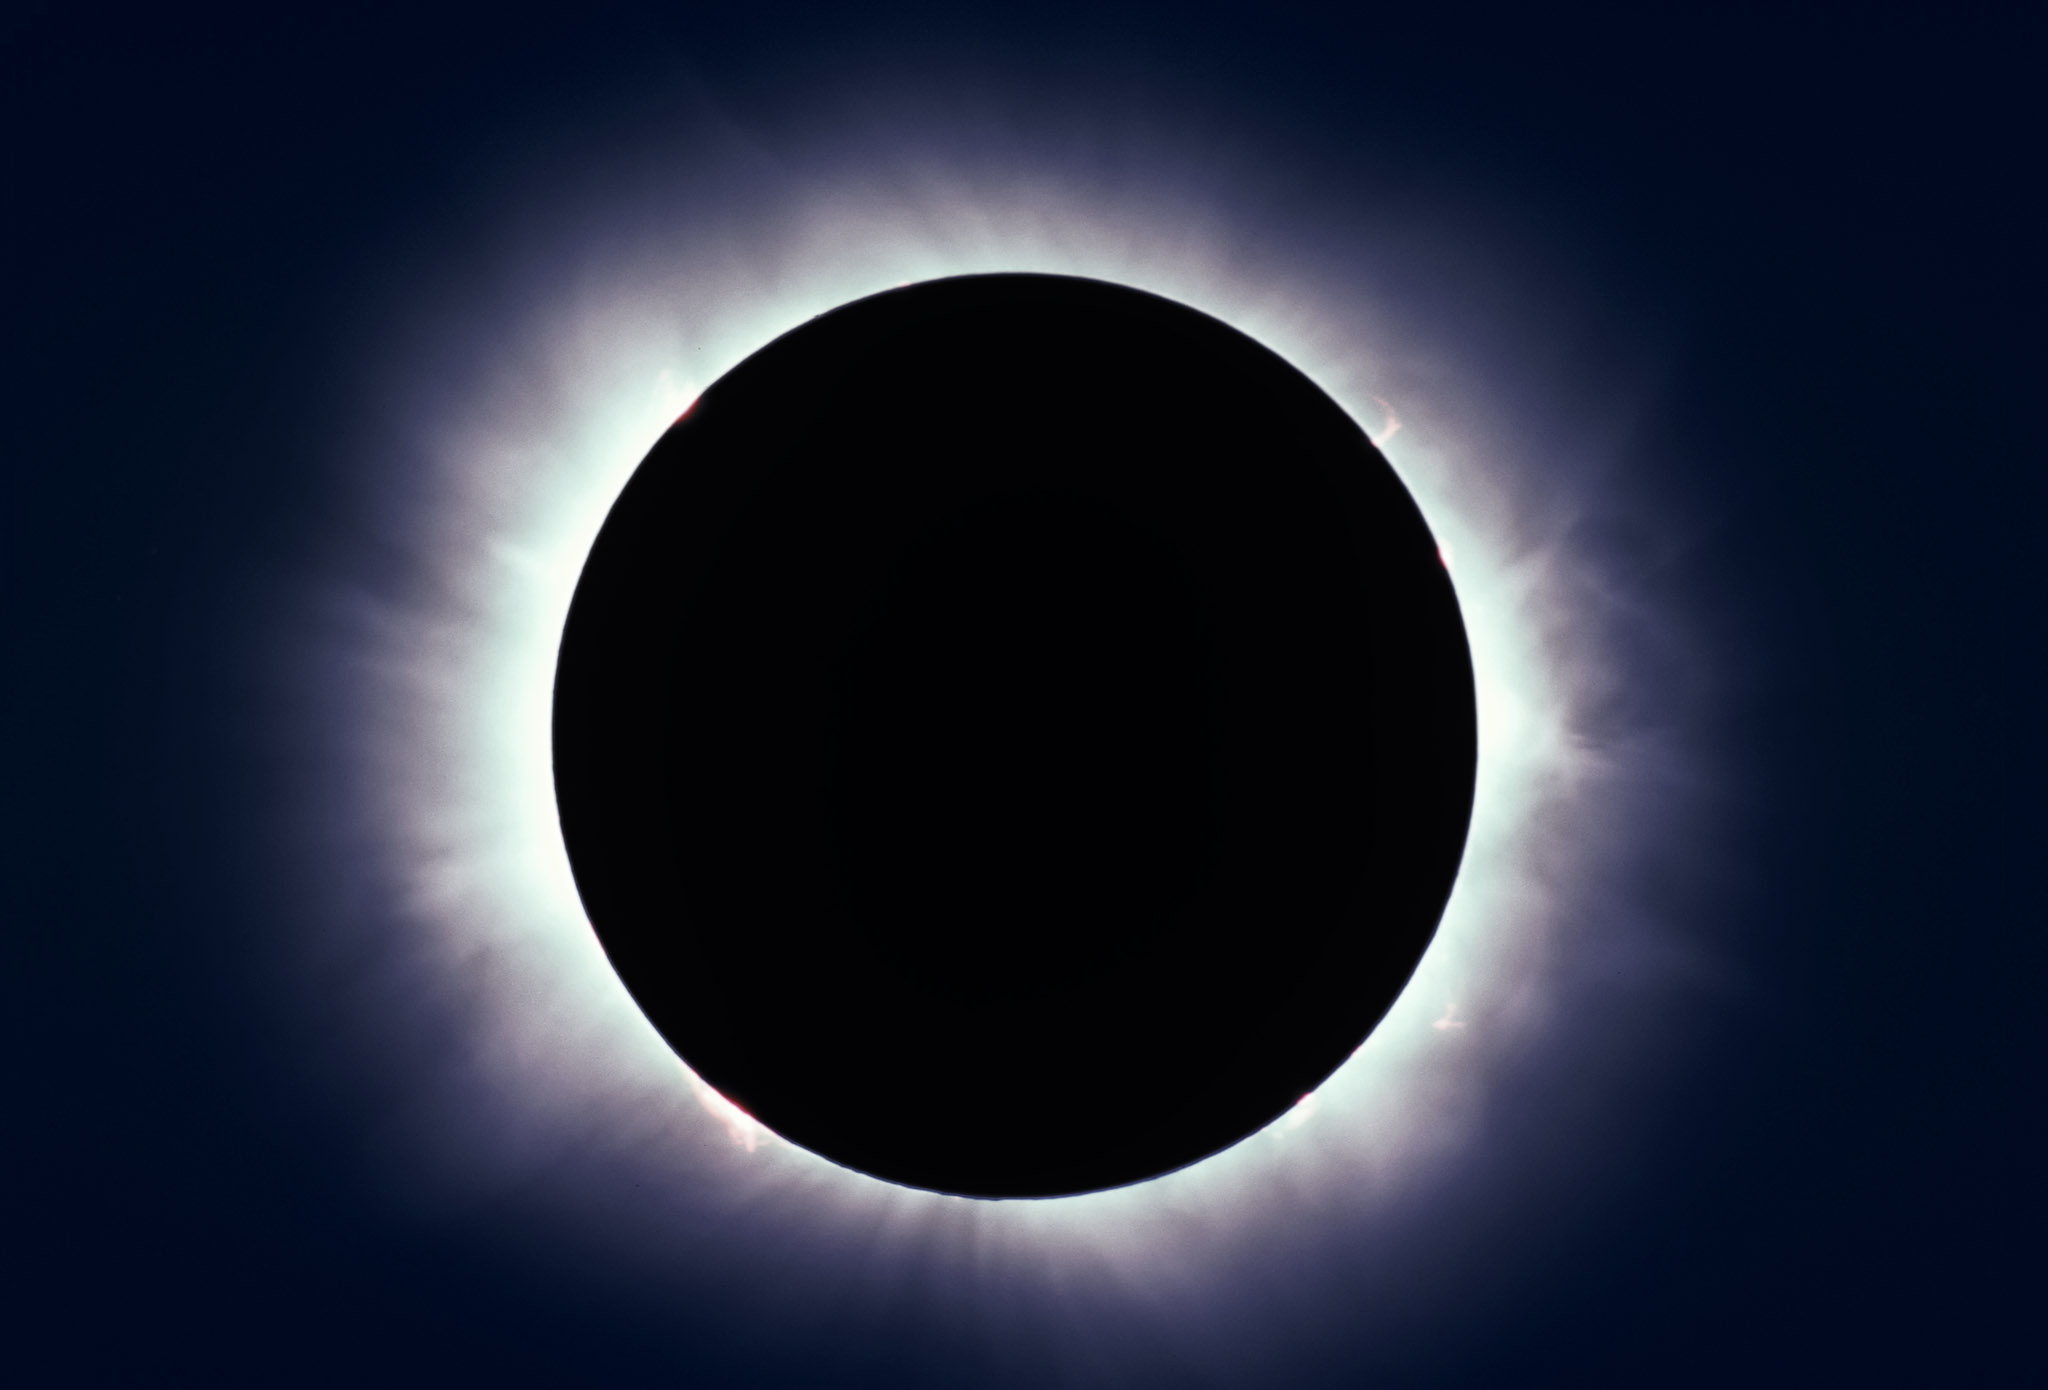
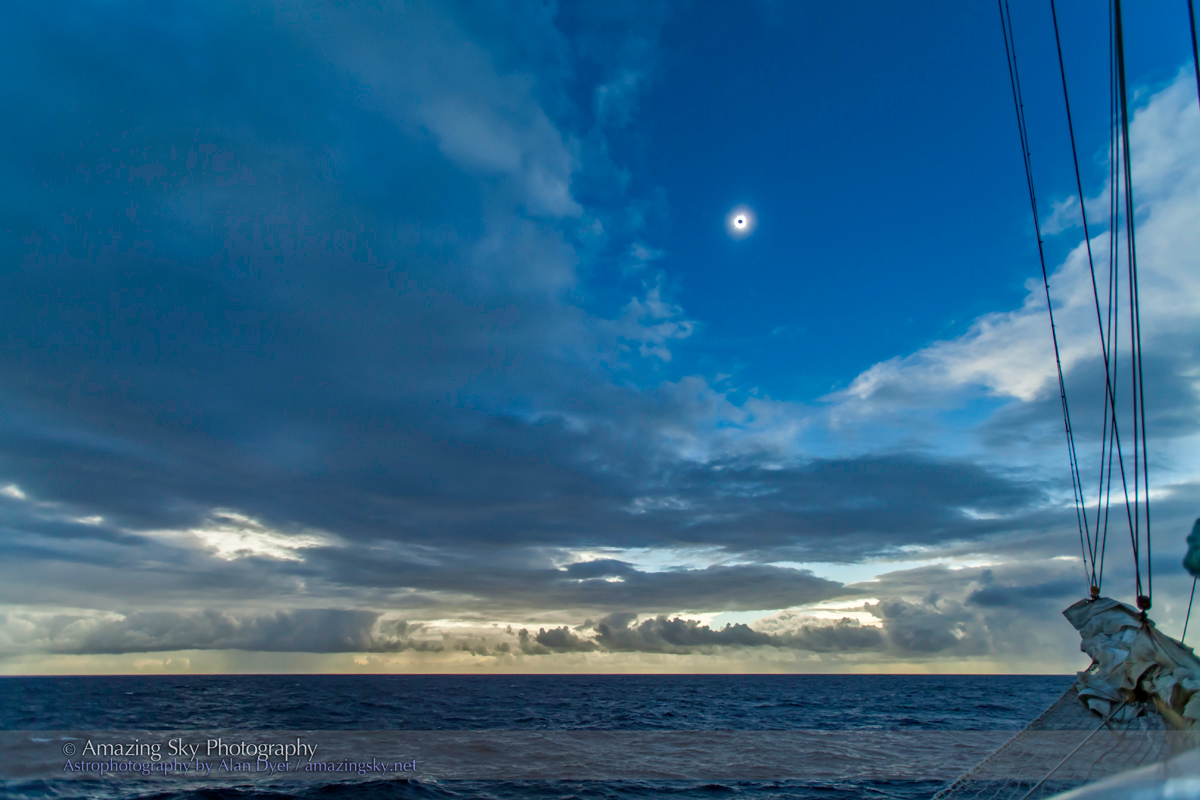
The flares had in turn blown off parts of the Sun’s atmosphere, the corona, that anyone who saw the total eclipse a month earlier had admired so much. But a month later, the corona was being blown our way, in a series of Coronal Mass Ejections (CMEs), to collide with Earth.
As it happened I was scheduled to give a community talk in the nearby town early in the evening of May 10, on the topic of The Amazing Sky! Watching the indicators, I could more or less promise the audience that we would indeed see an amazing sky later that evening as it got dark.
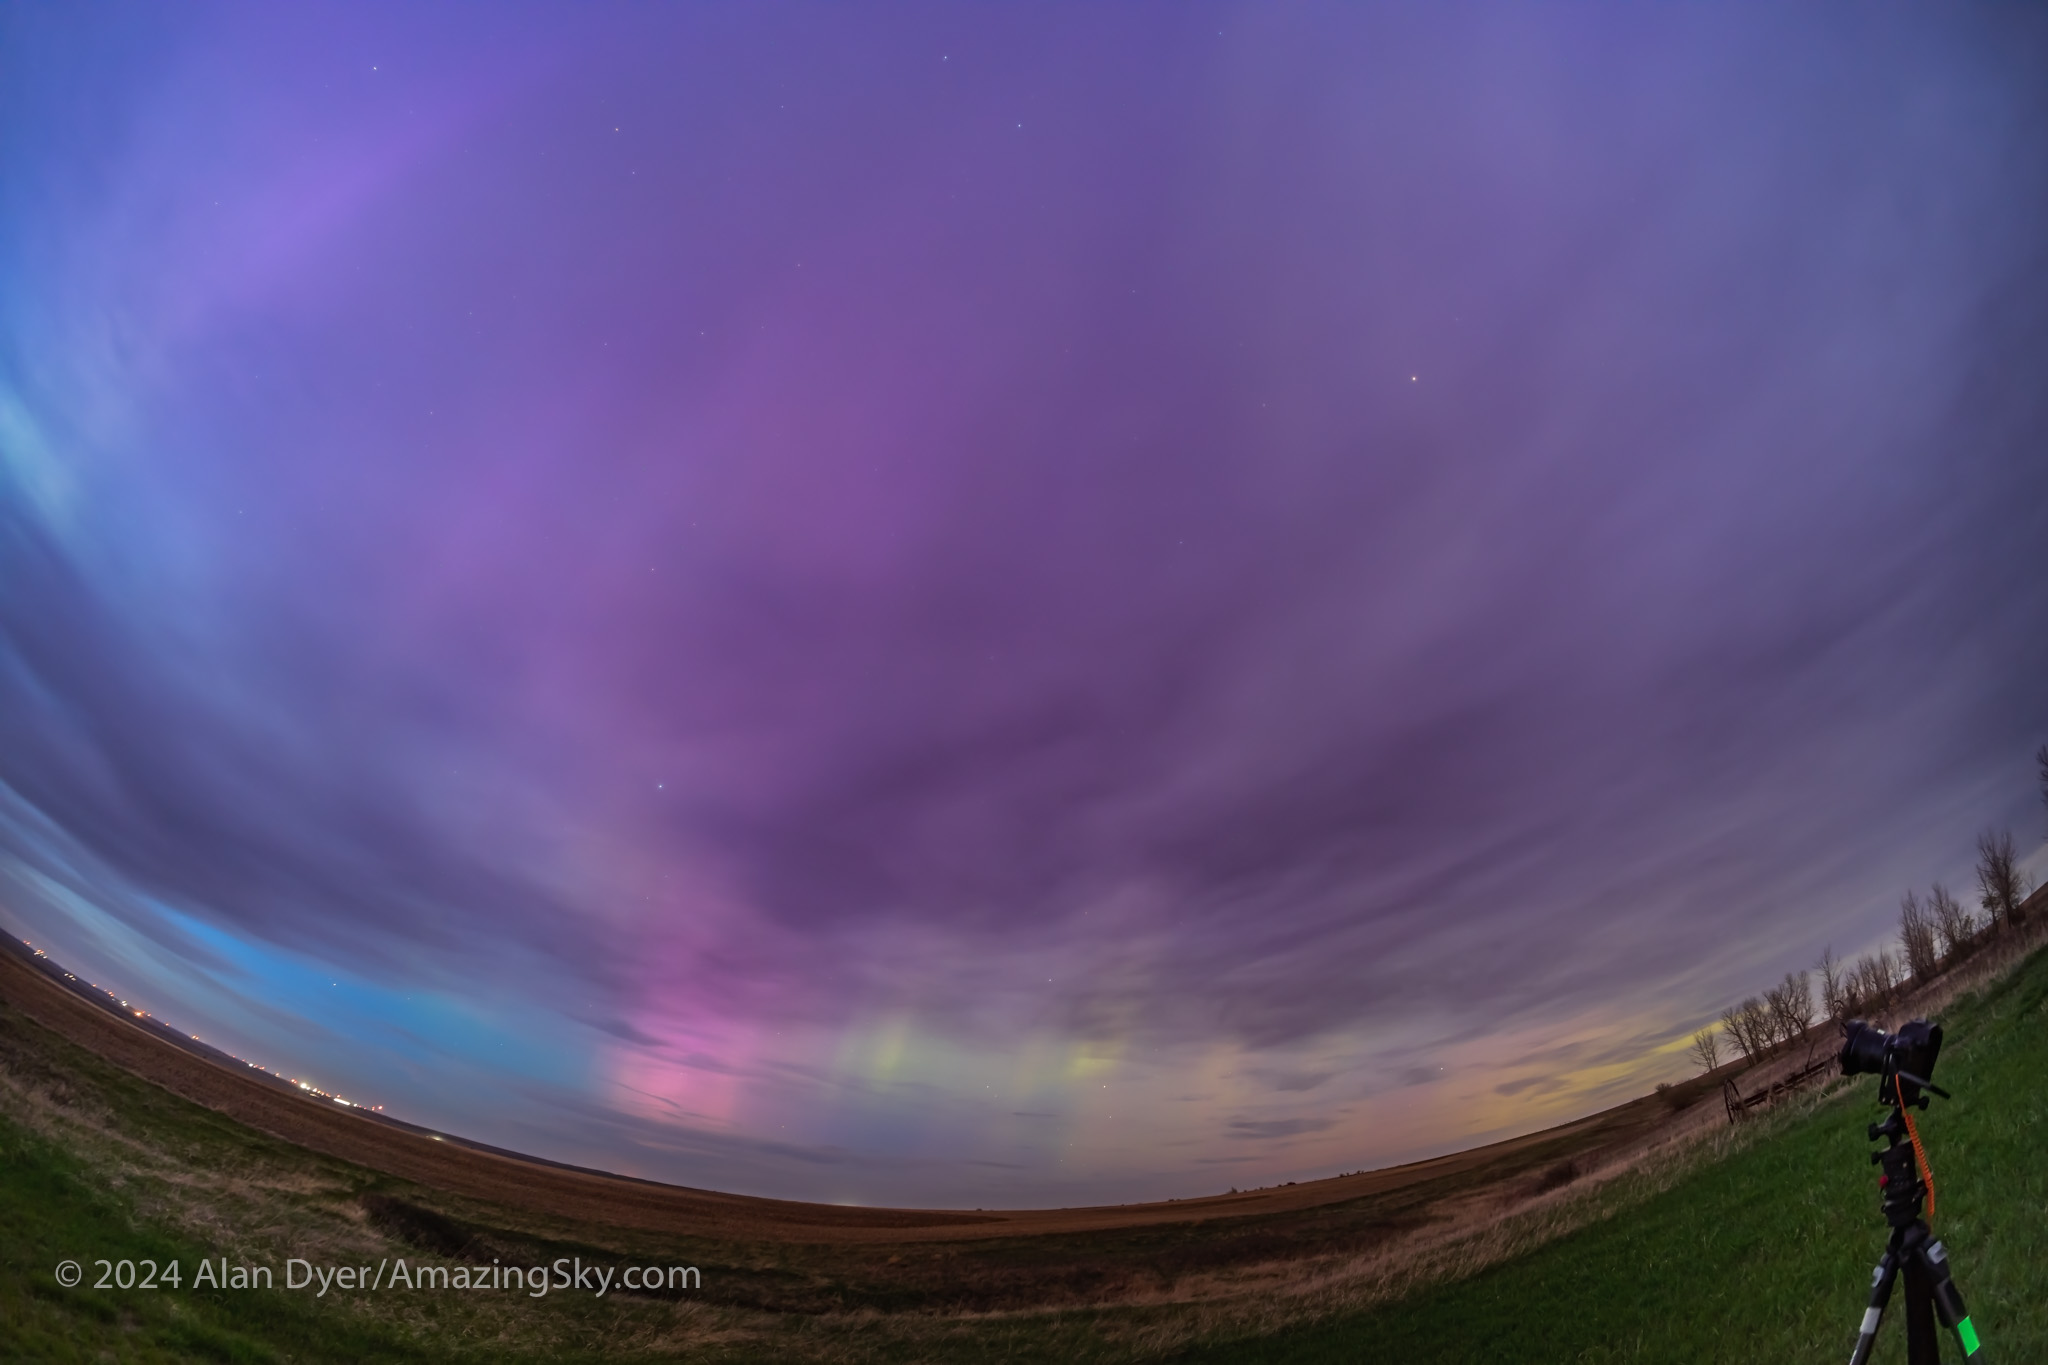
Post talk, I hurried home to get the cameras ready, choosing to forgo more hurried driving out to a scenic site in southern Alberta, for the convenience of shooting from my rural backyard. As the sky darkened, the clouds were lit purple, and curtains of aurora appeared in the clear patches.

Something big was going on! This was promising to be the best show of Northern Lights I had seen from home in a year. (Spring 2023 had three great shows at monthly intervals, followed by an aurora drought for many months. See The Great April Aurora.)

I shot with four cameras (a Canon EOS R, Ra, R5 and R6) — two for time-lapses, one for real-time movies, and one for still images. I used the latter to take many multi-image panoramas, as they are often the best way to capture the wide extent of an aurora across the sky.
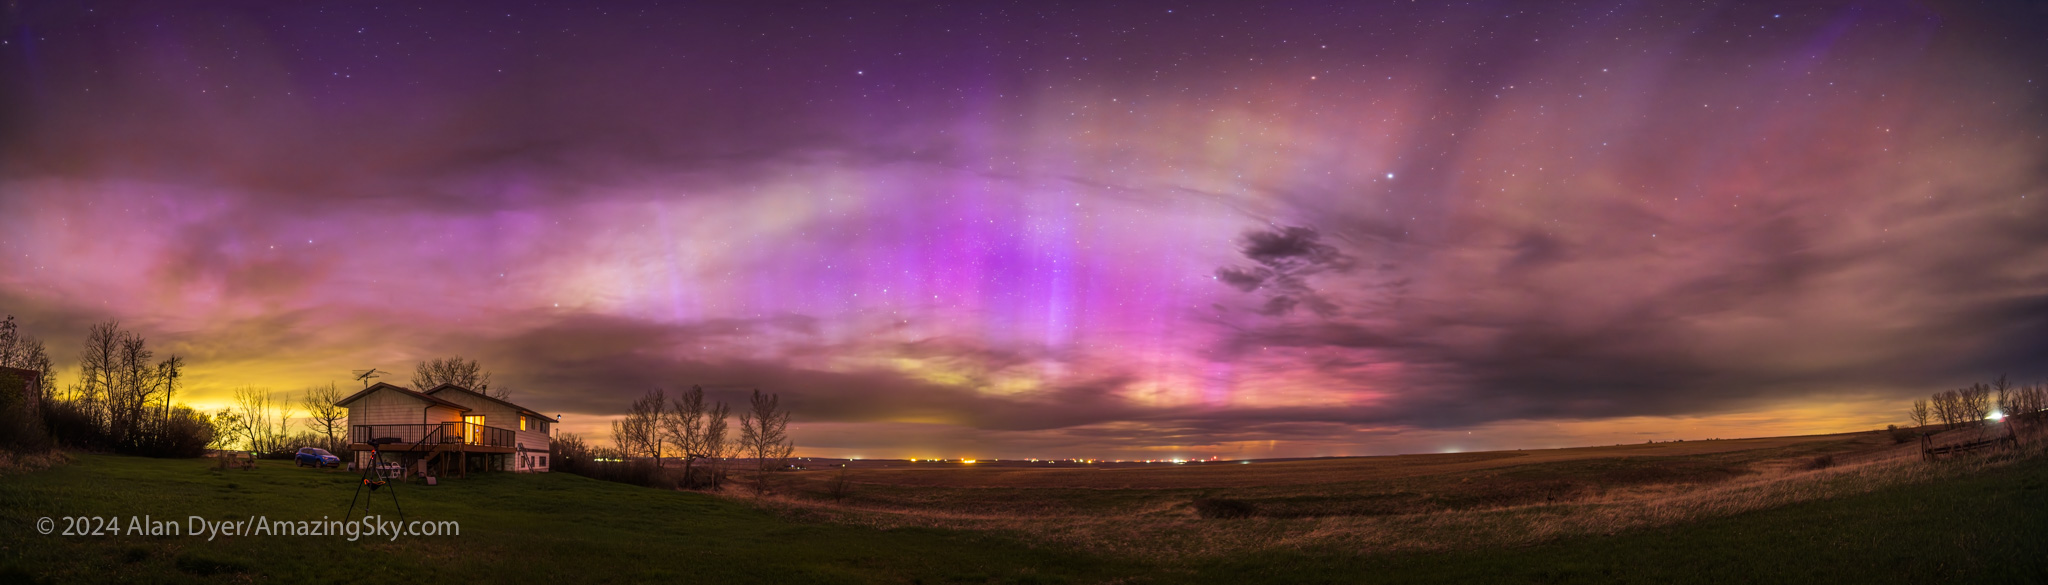
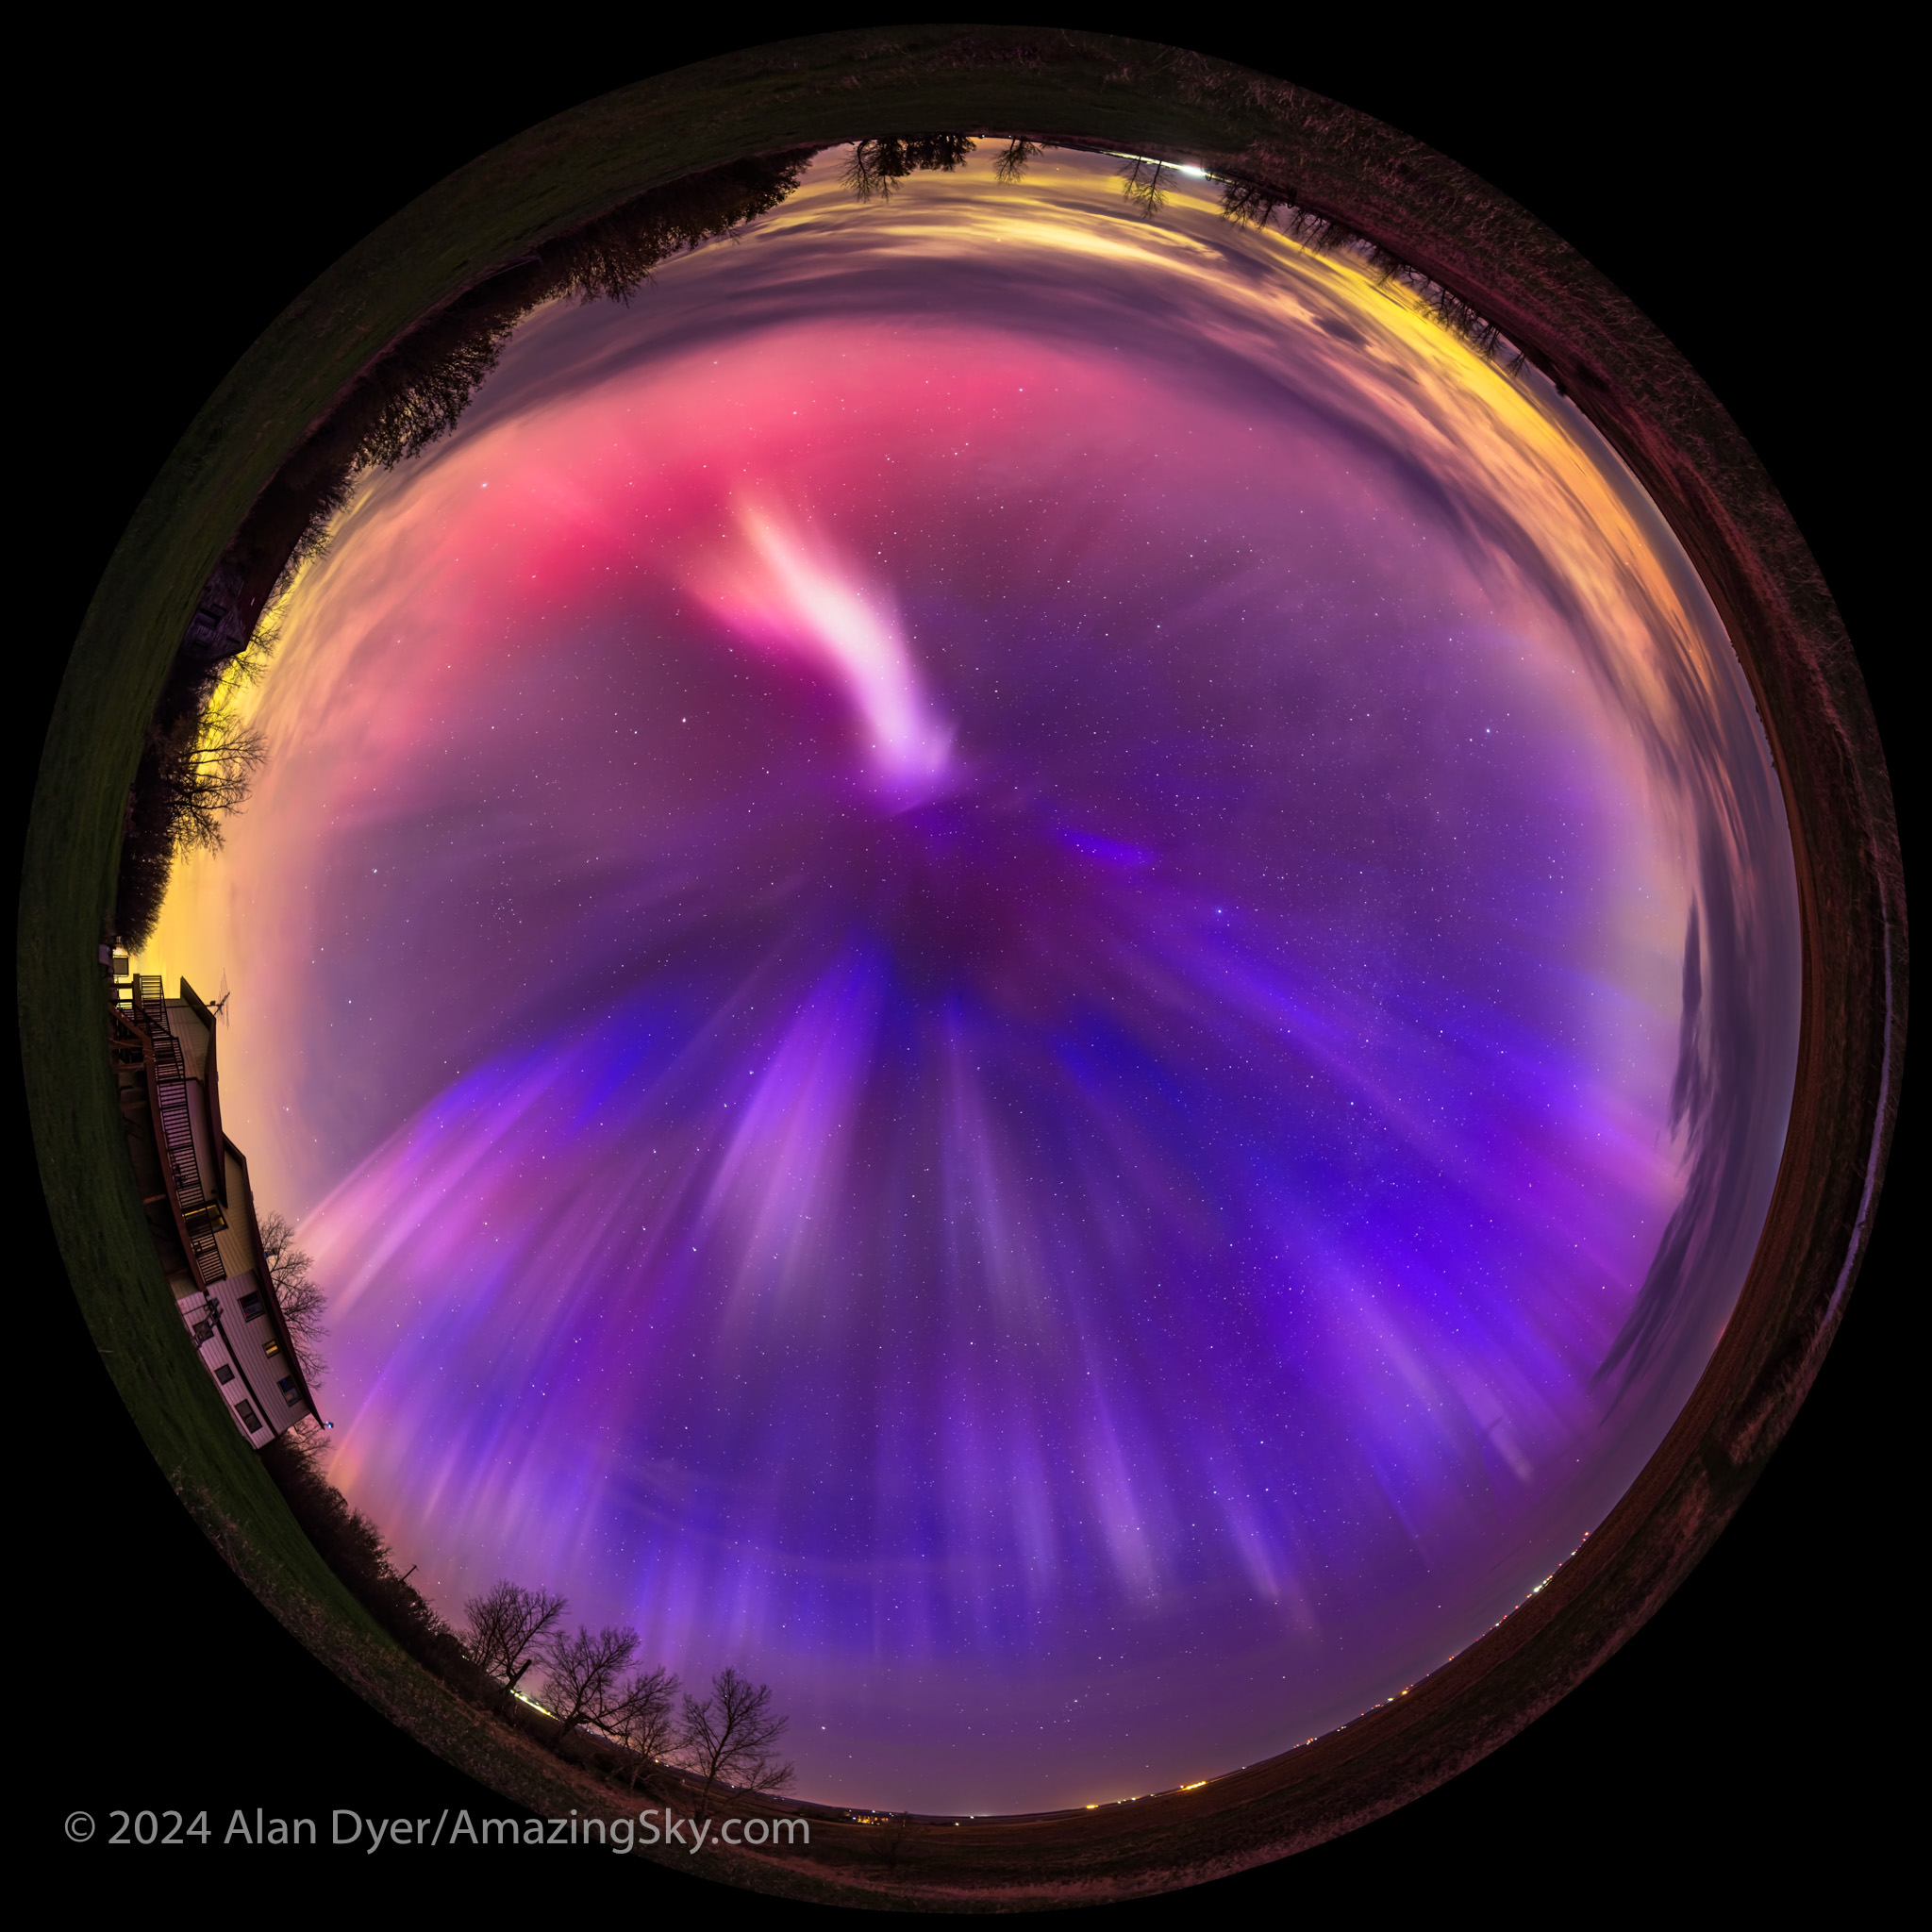
Early in the evening the arc of aurora wasn’t the usual green from oxygen, but shades of purple, pink, and even white, likely from sunlit nitrogen. The panorama above is looking north toward a strangely coloured arc of nitrogen (?) aurora.
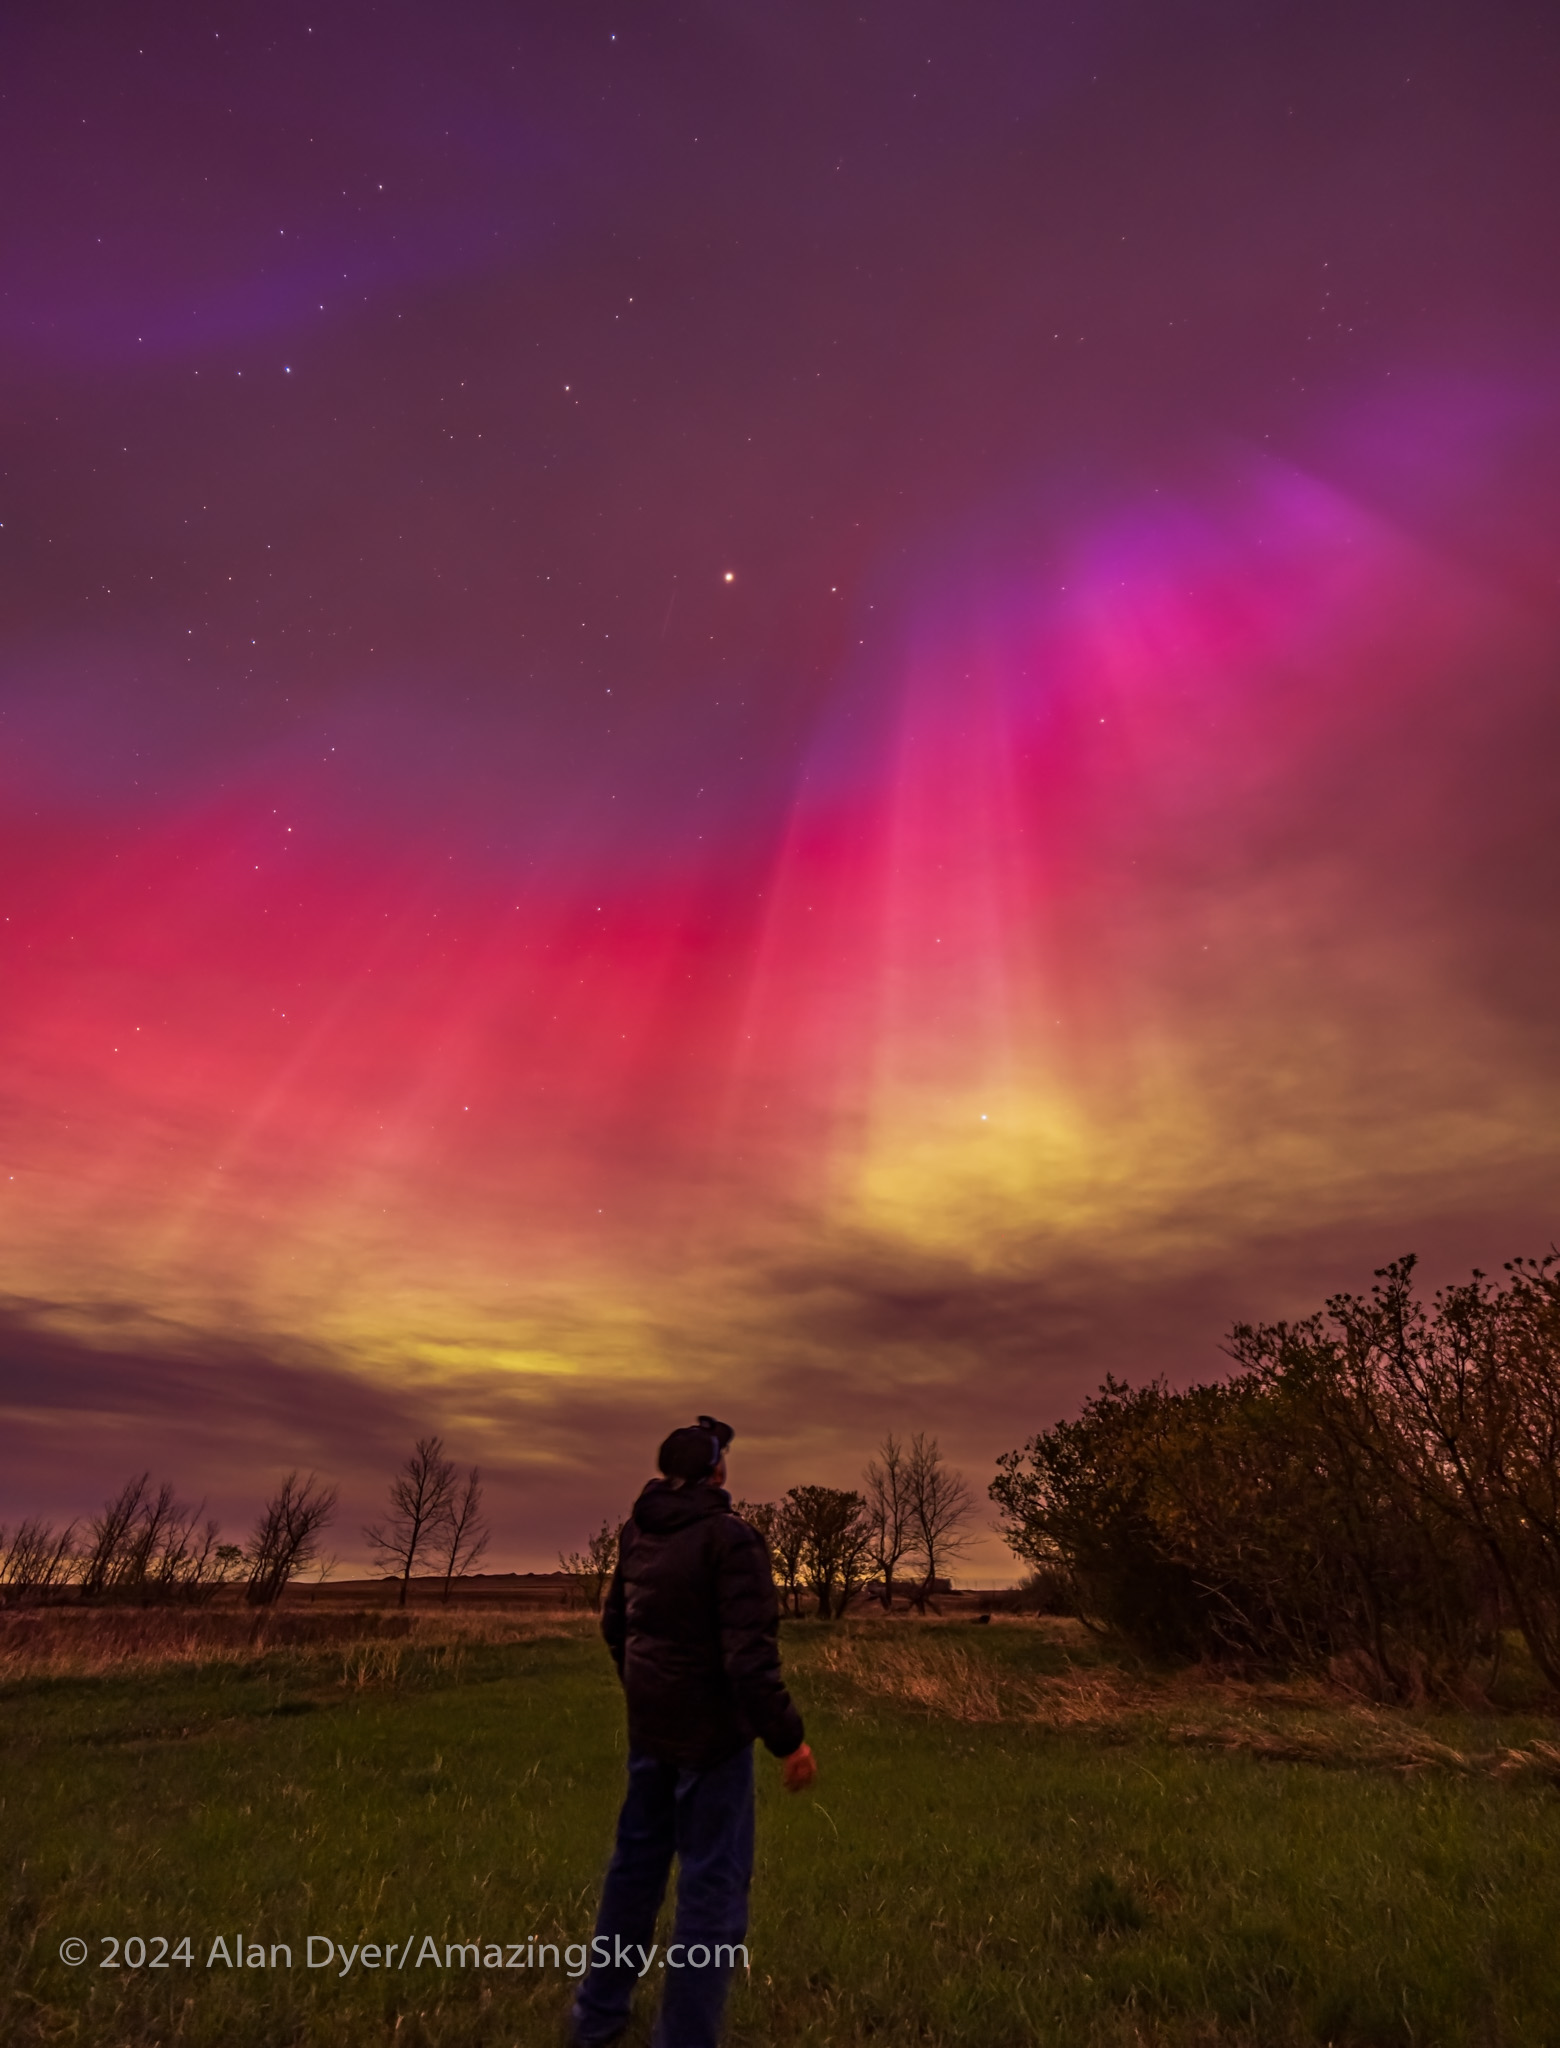
Then after midnight a more normal curtain appeared suddenly, but toward the south, brightening and rising to engulf much of the southern sky and the sky overhead.

It is at local midnight to 1 a.m. when substorms usually hit, as we are then looking straight down Earth’s magnetic tail, toward the rain of incoming aurora particles bombarding the Earth. During a substorm, the rain turns into a deluge — the intensity of the incoming electrons increases, sparking a sudden brightening of the aurora, making it dance all the more rapidly.
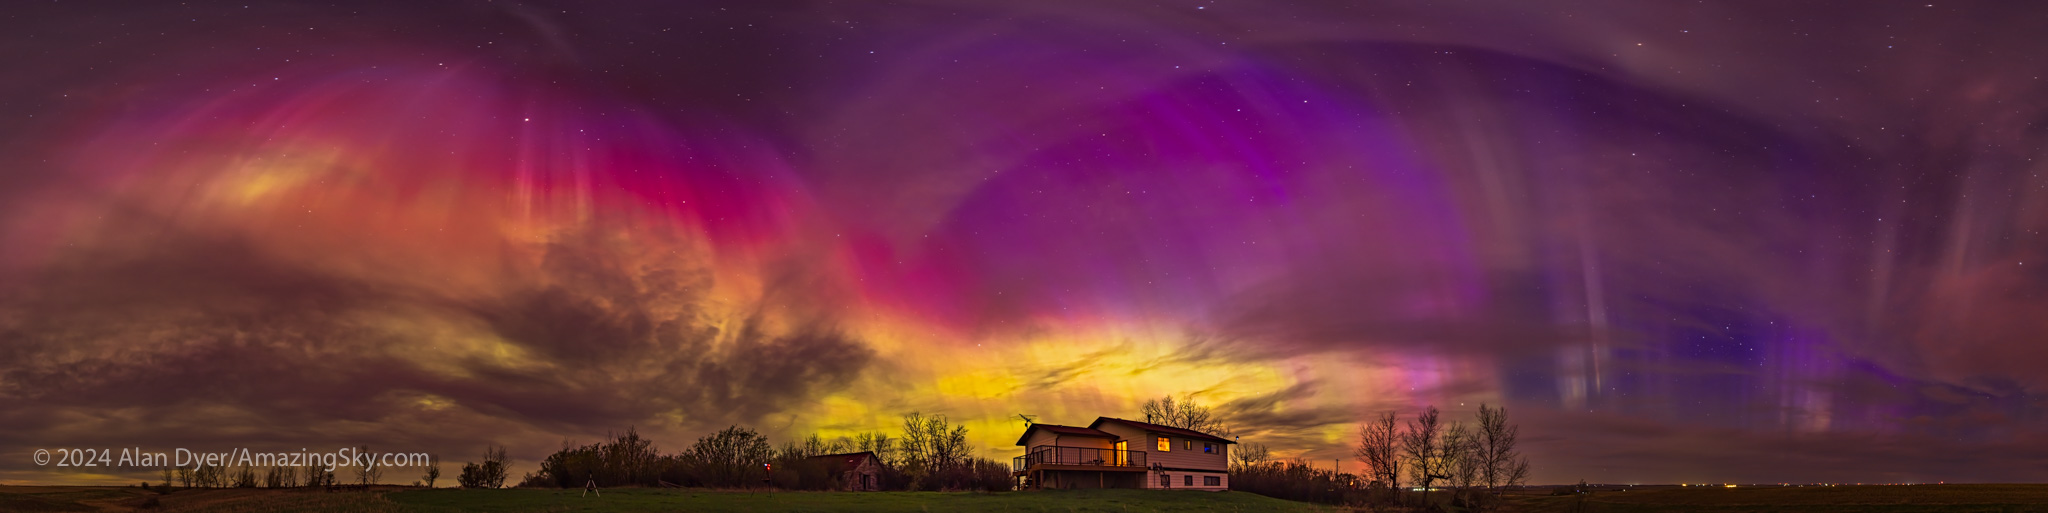
As the aurora explodes in brightness it often swirls up to the zenith (or more correctly, the magnetic zenith) to form one of the sky’s greatest sights, a coronal outburst. Rays and beams converge overhead to form a tunnel effect. It is jaw-dropping.
I’ve seen this many times from northern sites such as Churchill and Yellowknife, where the aurora often dances straight up. And from my latitude of 51° N in western Canada, the aurora does often come down to us.
But this night, people at latitudes where, at best, the aurora might be seen just as a glow on the horizon, saw it dance overhead in a corona show to rival the solar eclipse, and that other corona we saw on April 8!
Yes, the long exposures of aurora photos (even those taken with phone cameras) show the colours better than your eye can see them (insensitive as our eyes are to colour in dim light). But this night portions of the arcs and rays were bright enough that greens and pinks were easily visible to the naked eye.
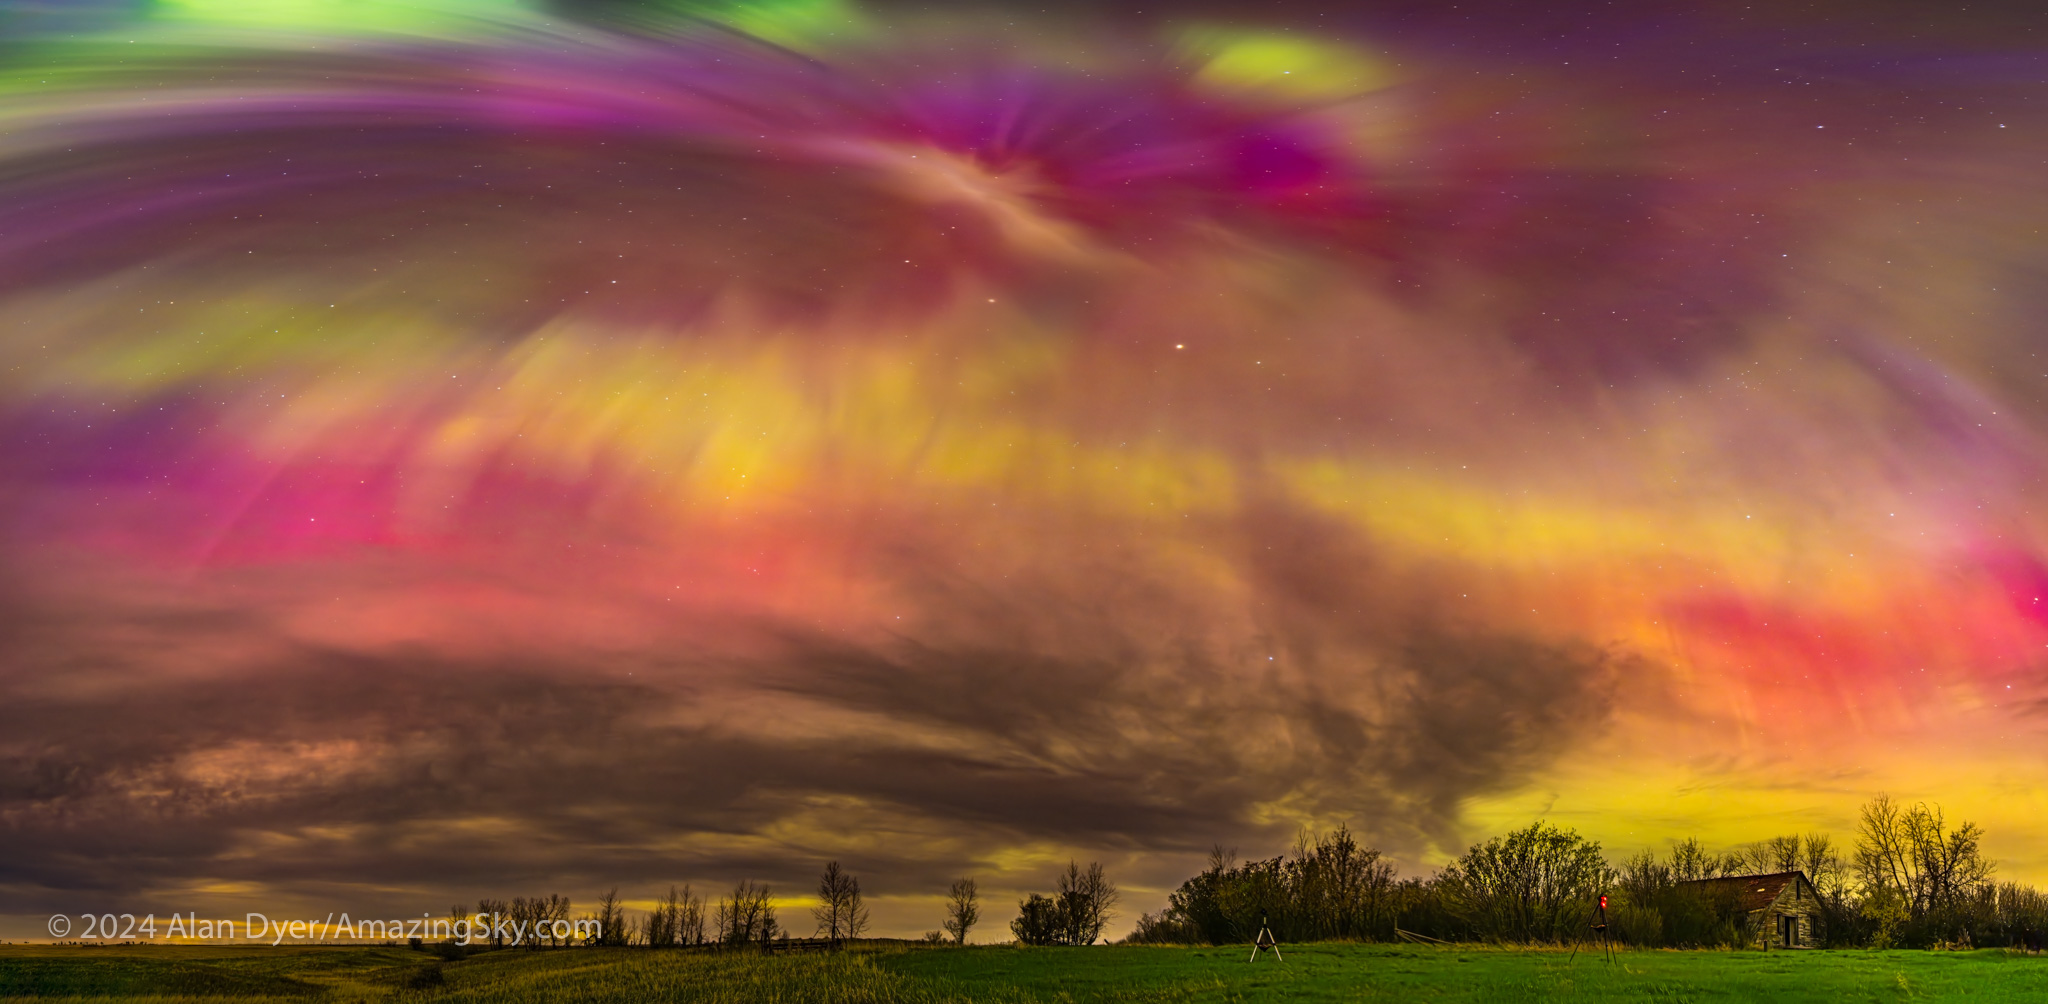
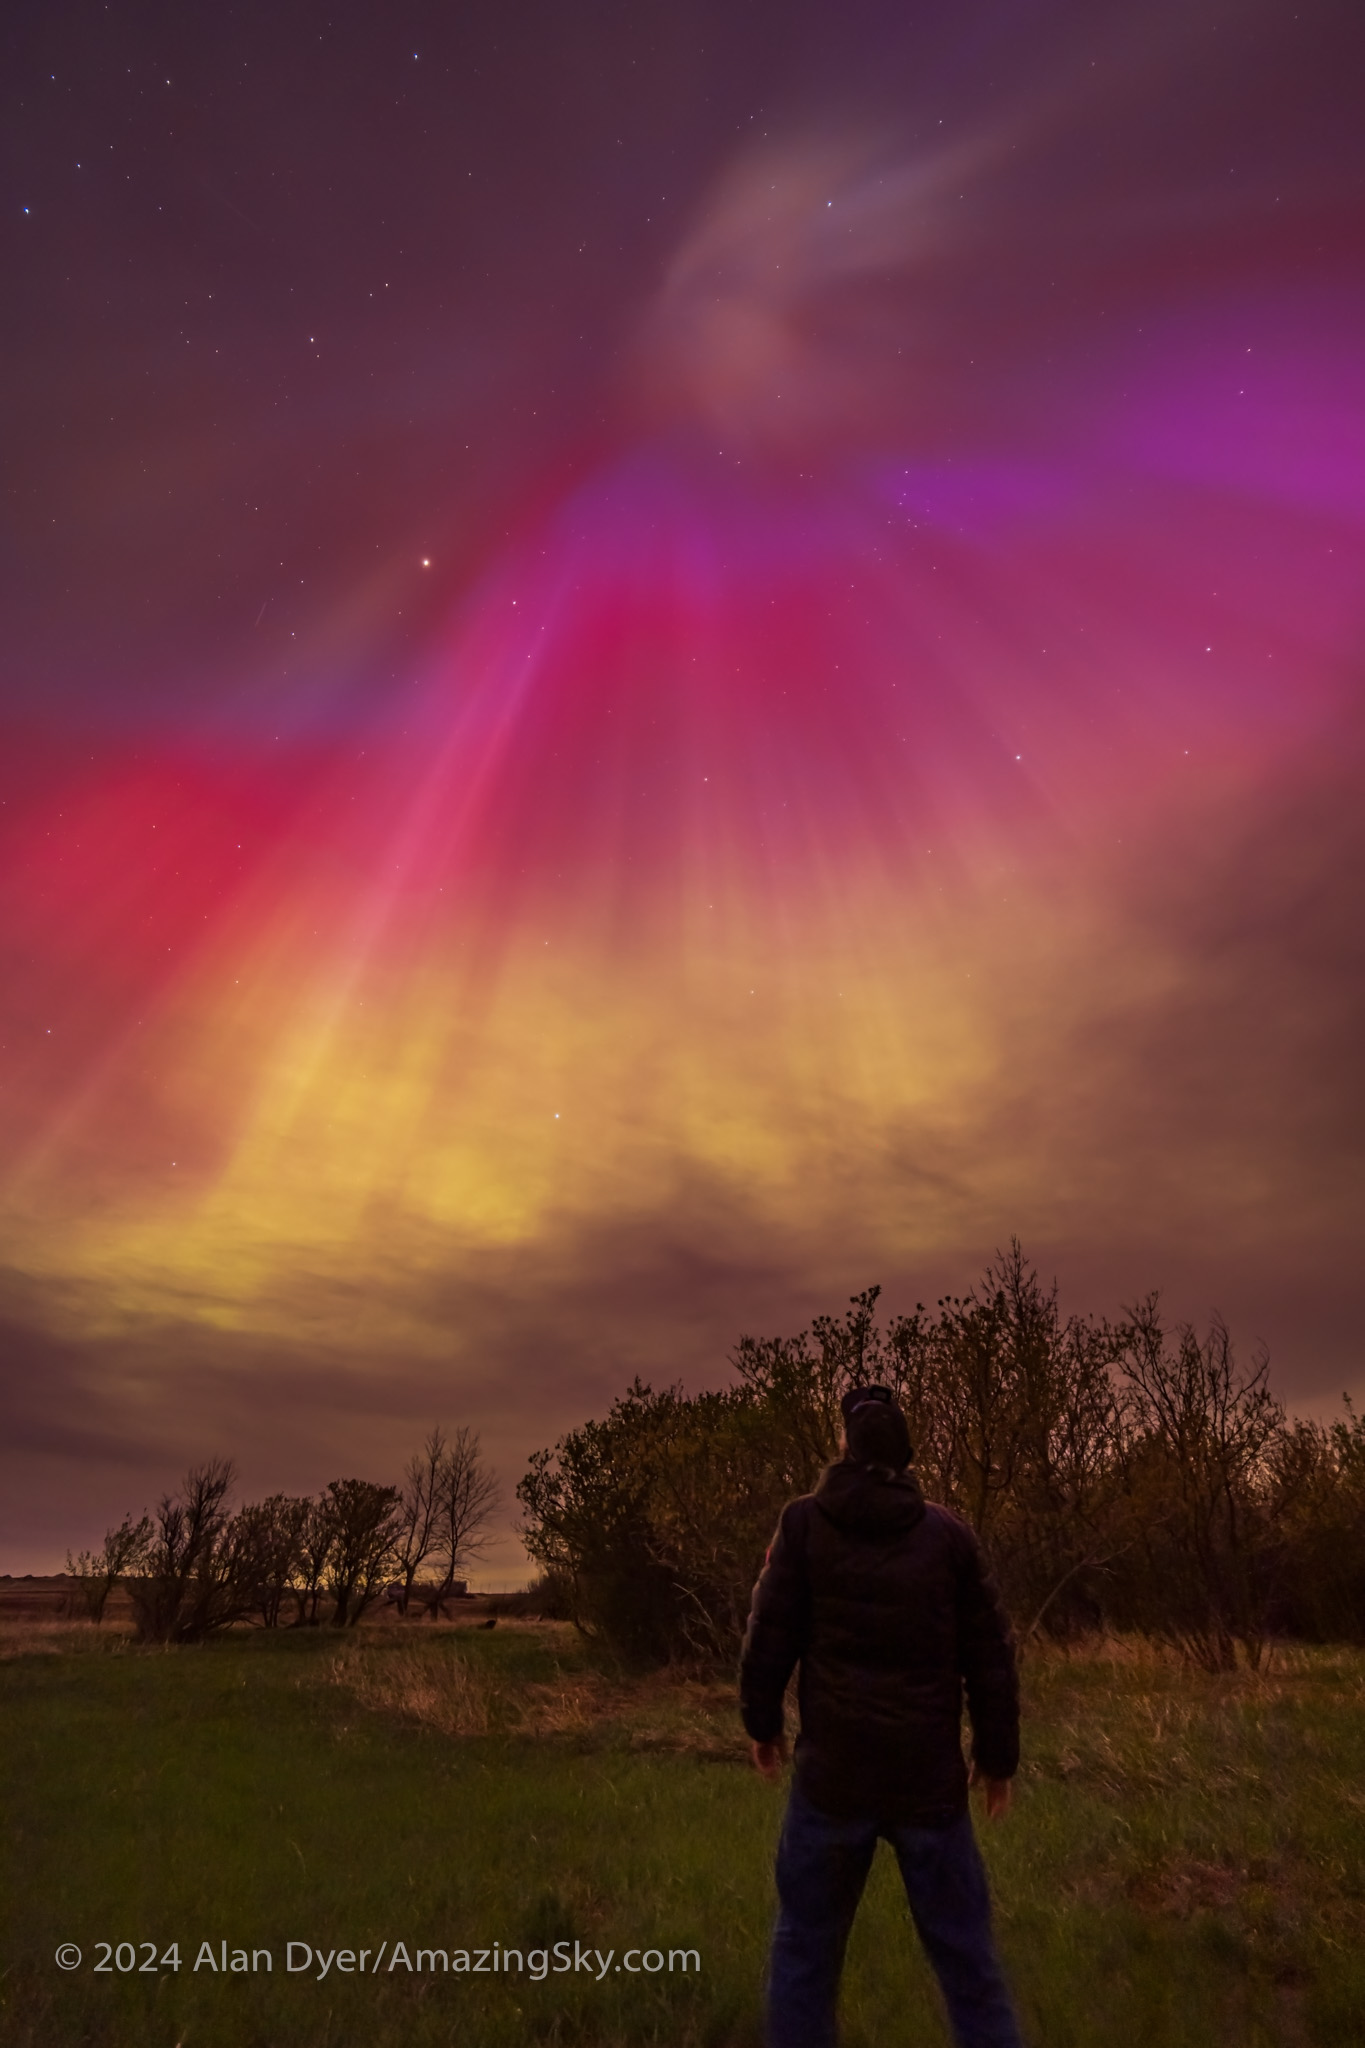
This is a single 9-second exposure of the peak of a bright outburst at 1 a.m. MDT. It was with the Laowa 7.5mm circular fish-eye lens at f/2 on the Canon R5 at ISO 800. It is one frame from a time-lapse sequence.


At its peak the show was changing rapidly enough, I couldn’t get to all the cameras to aim and frame them, especially the movie camera. The brightest outburst at 1 a.m. lasted just a minute — the time-lapse cameras caught it. The sequence below shows the view in 9-second exposures taken consecutively just 1 second apart.

Here’s another sequence of frames taken as part of a time-lapse sequence with the 11mm lens. It shows the change in the aurora over the 80 minutes or so that it was most active for me at my site.
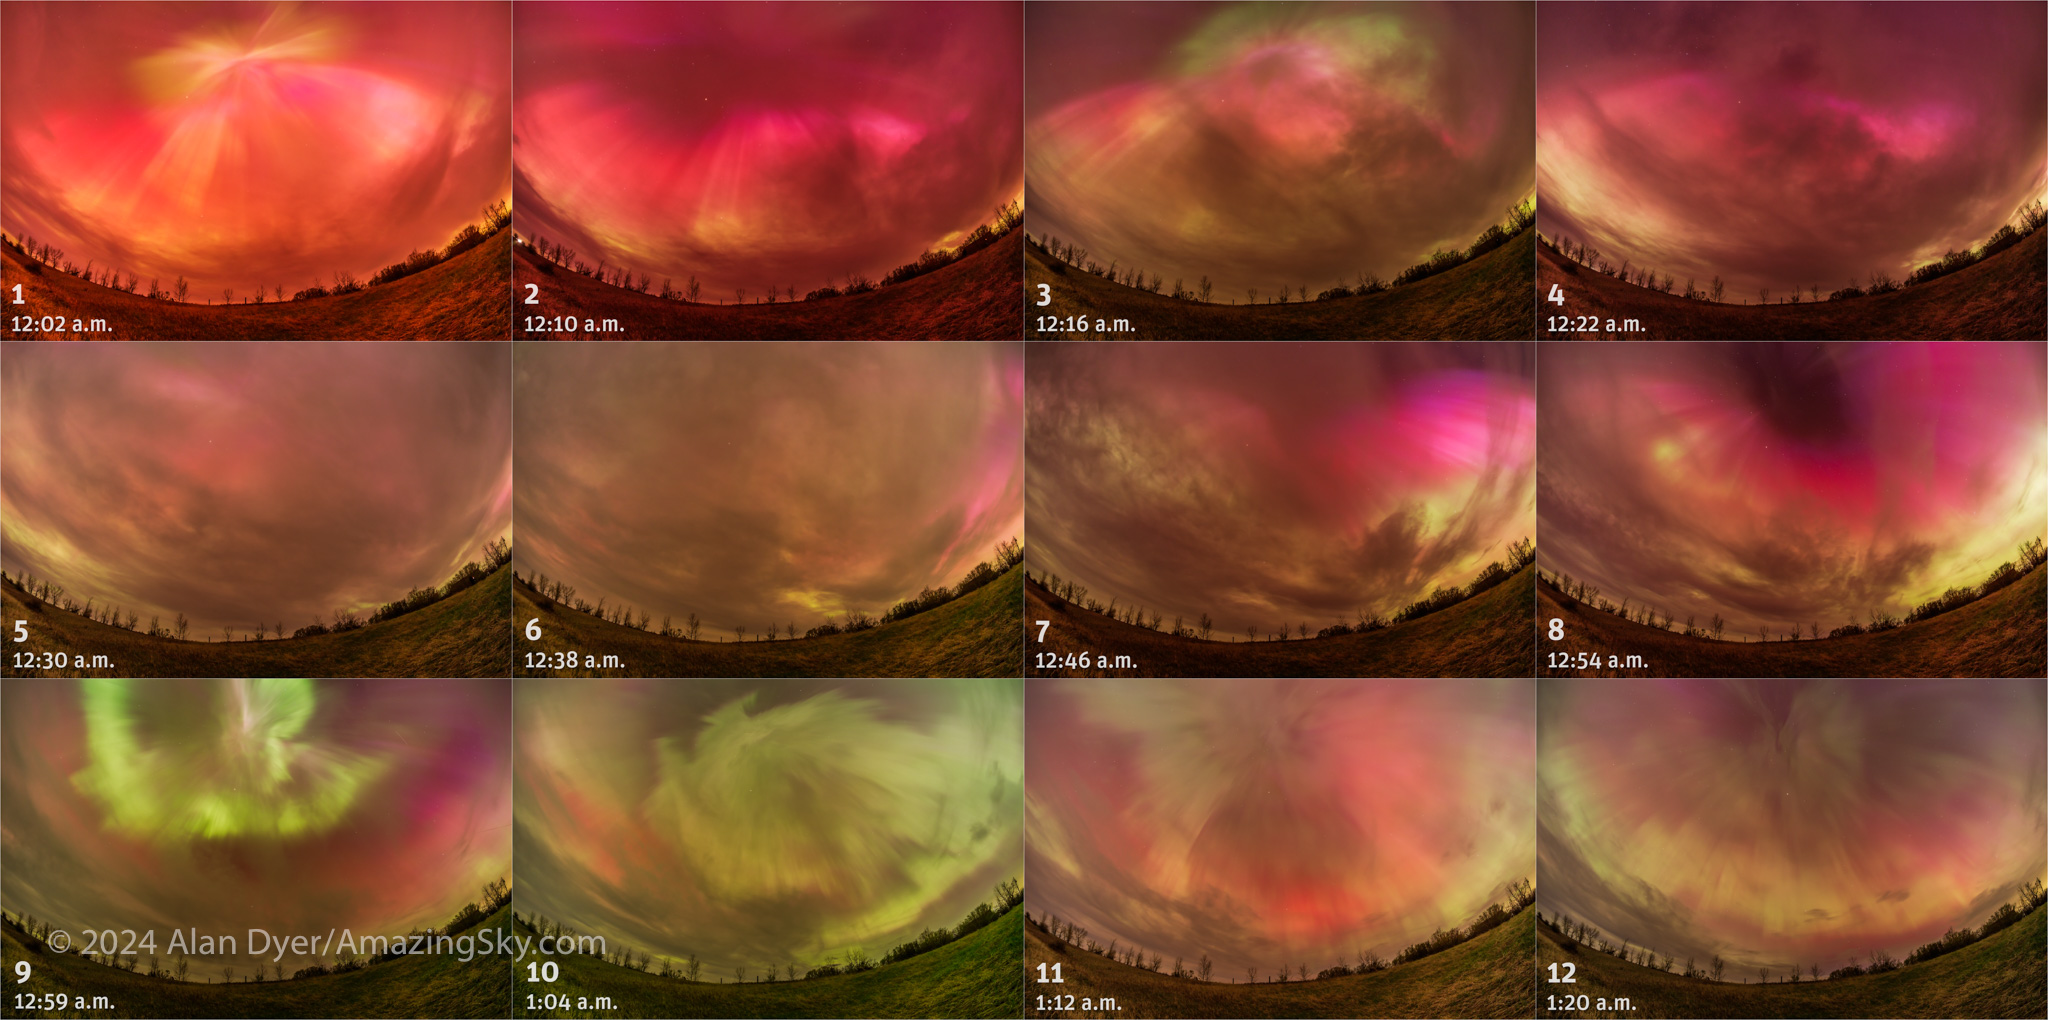
The time between these 12 images is usually 8 minutes, though to include some interesting activity at a bright outburst, the interval is 5 minutes for three of the images around 1 a.m. Each is a 7- or 9-second exposure taken as part of a time-lapse sequence using the 11mm TTArtisan lens at f/2.8 on the Canon R at ISO 800 or 1600.
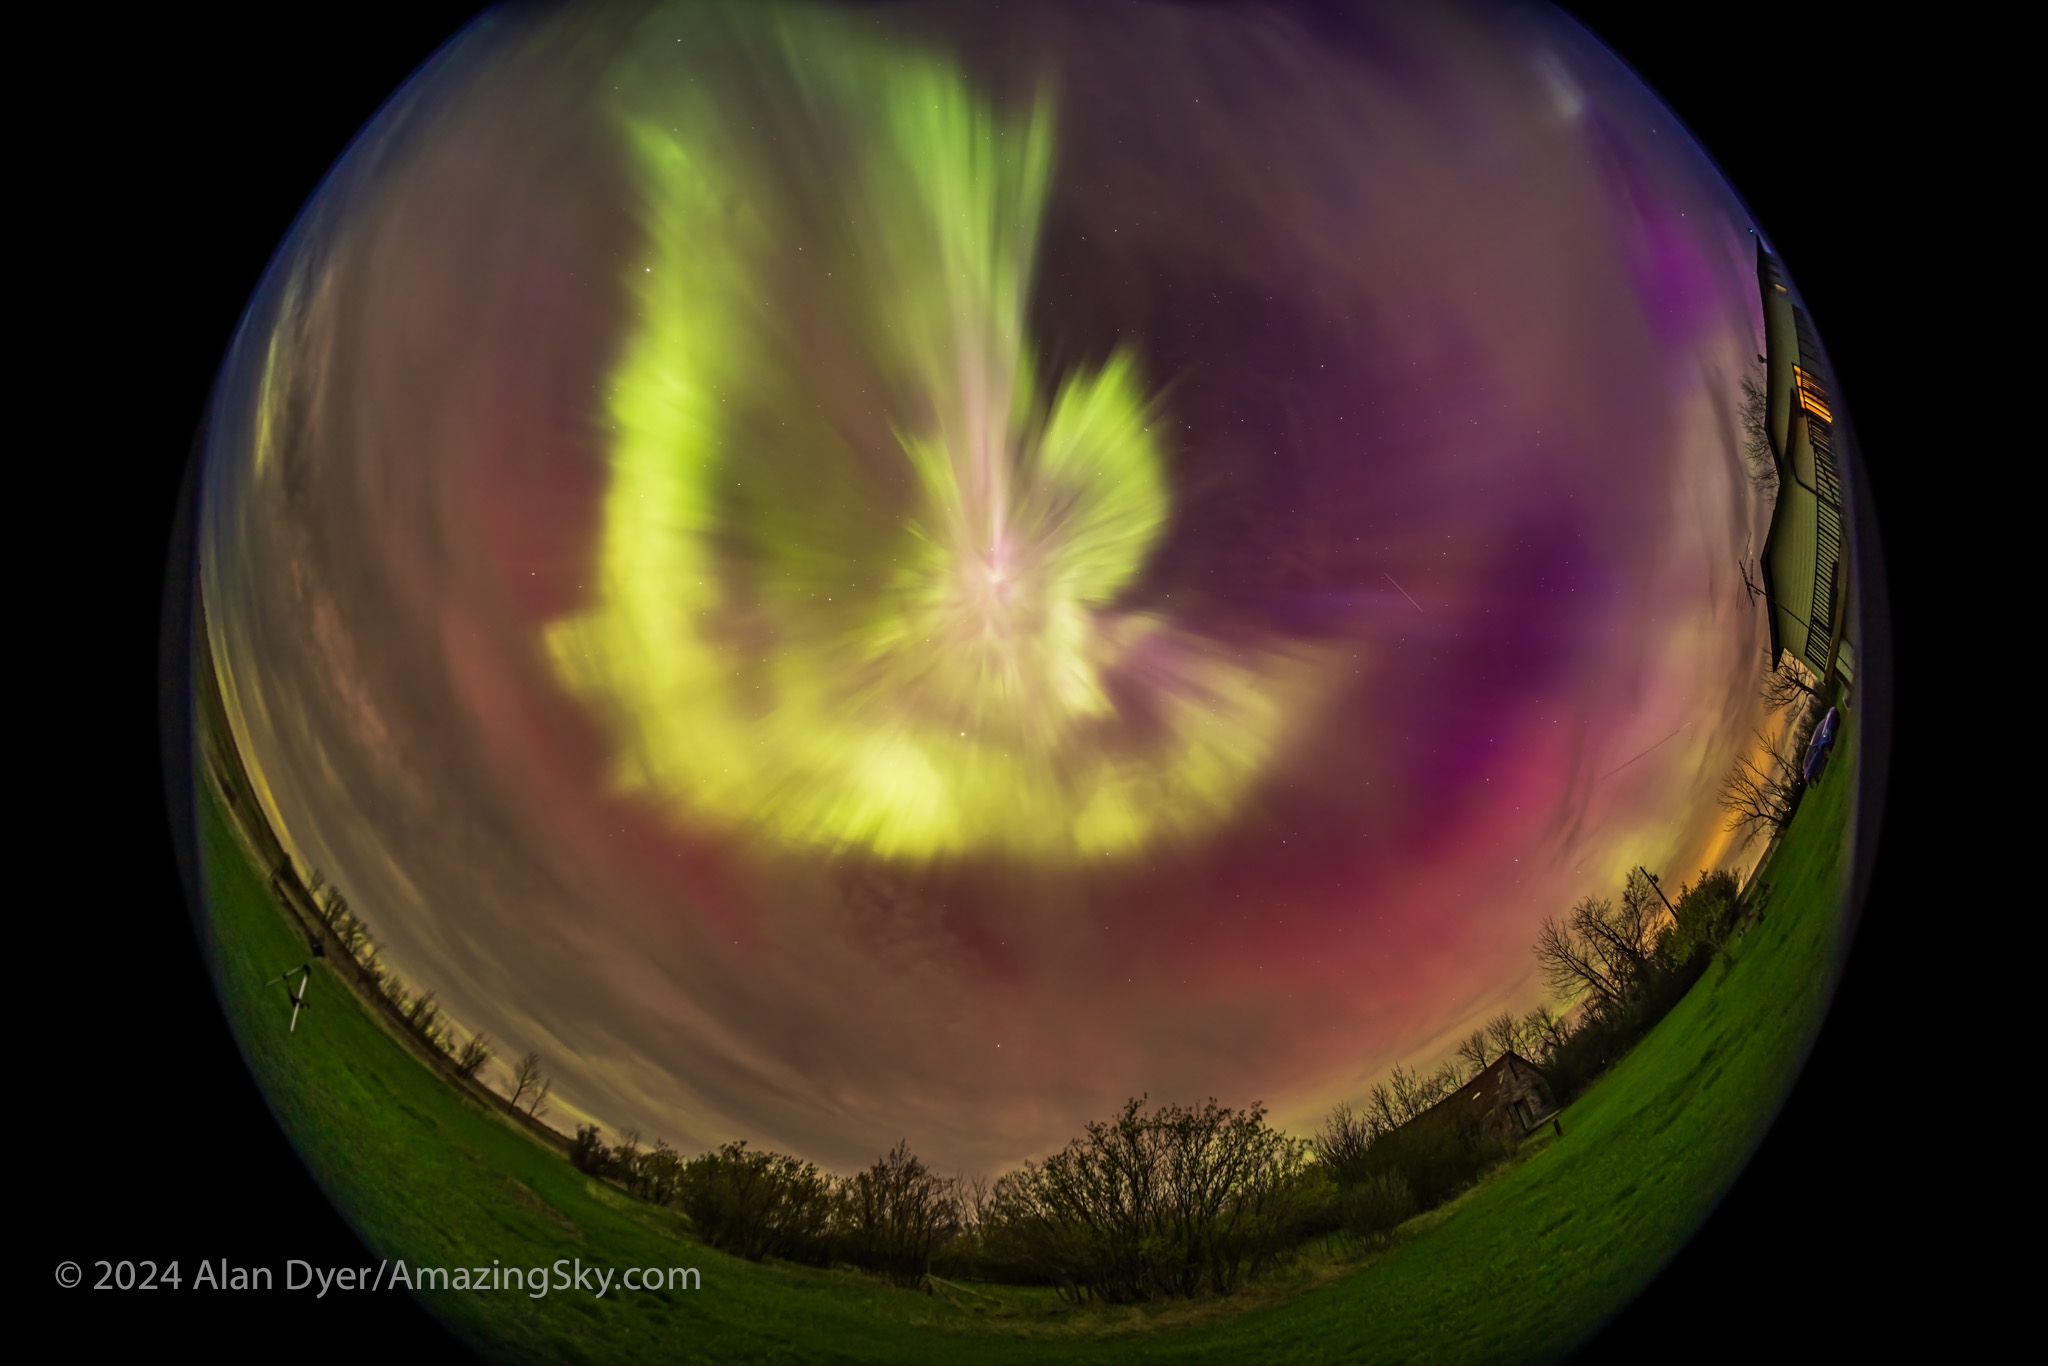
Shooting time-lapses with fish-eye lenses captures the show with a minimum of attention needed (except to adjust ISO or exposure times when the aurora brightens!). I could use the still camera (with the Laowa 15mm f/2 lens) to take individual shots, such as more selfies and home shots.
This is a single 6-second exposure with the Laowa 15mm lens at f/2 and Canon Ra at ISO 2000.

As colourful as the aurora was at its best between midnight and 1:30 a.m., I think the most unique shots came after the show had subsided to appear just as faint rays across the north again, much as it had begun. To the eye it didn’t look like much, but even on the camera’s live screen I could see unusual colours.
I took more panoramas, to capture one of the most unusual auroral arcs I’ve even seen — a blue and magenta aurora across the north, similar to how the night started.
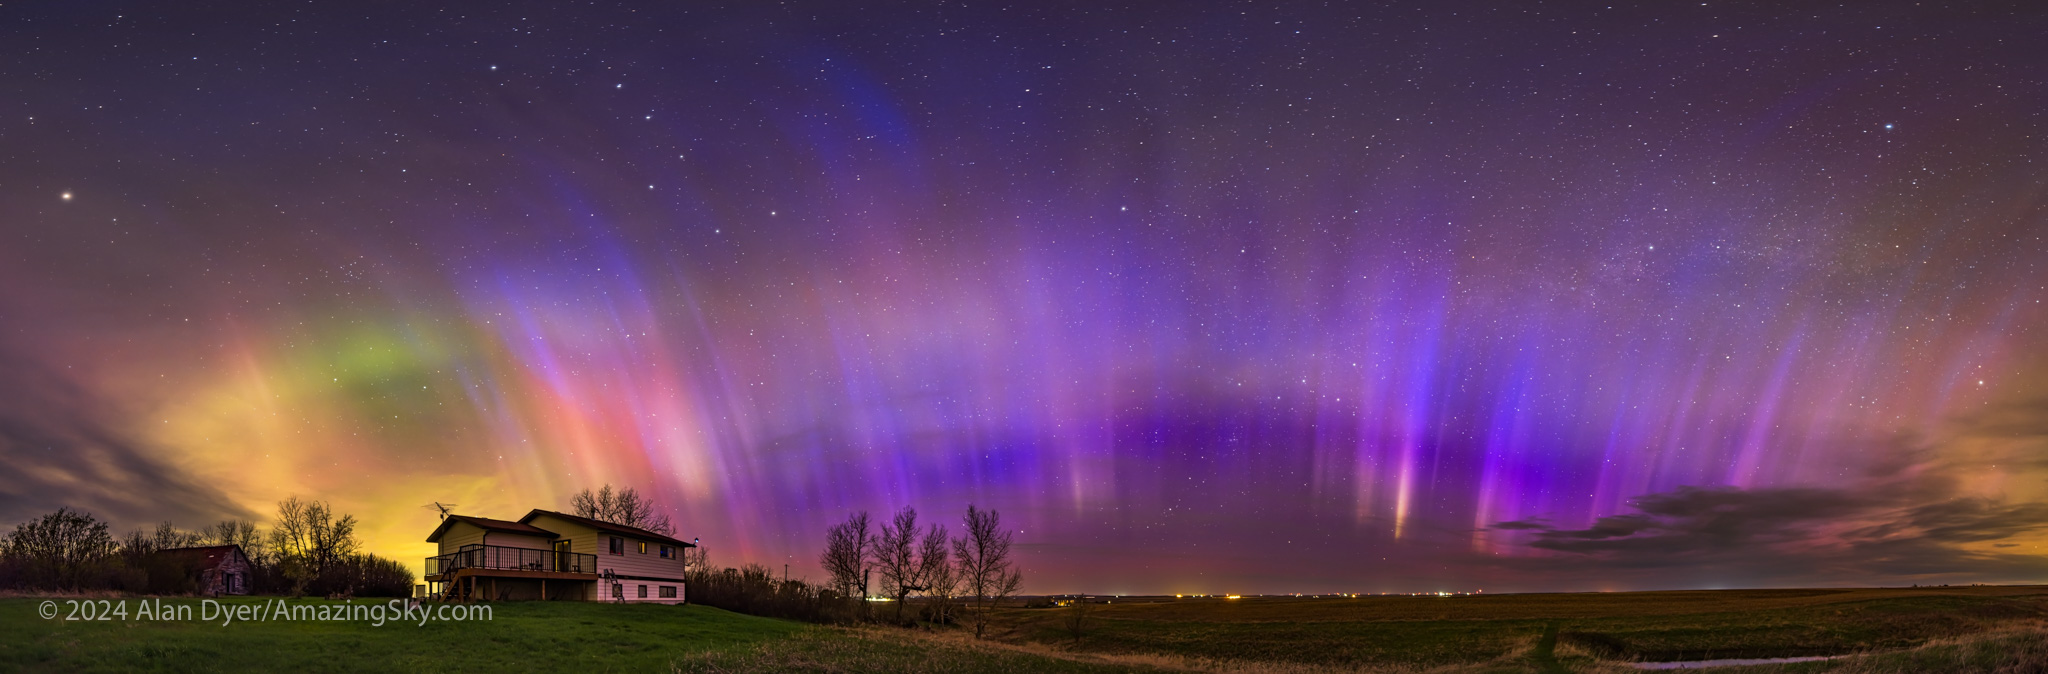
The colours may be from nitrogen glowing, which tends to light up in blues and purples, especially when illuminated by sunlight at high altitudes. At 2 to 2:30 a.m. the Sun might have been illuminating the aurora at a height of 150 to 400 km, and far to the north.
I’d seen blue-topped green auroras before (and there’s a green aurora off to the west at left here). But this was the first time I’d seen an all-blue aurora, no doubt a product of the intense energy flowing in the upper atmosphere this night. And the season and my latitude.
The weirdest aurora was at 2:30 a.m., when in addition to the blue rays of nitrogen, an odd white and magenta patch appeared briefly to the south. What was that??
The lesson here? During a bright show do not go back to sleep when things seem to be dying down. Interesting phenomena can appear in the post-storm time, as we’ve learned with STEVE and other odd red arcs and green proton blobs that we aurora photographers have helped document.
I end with a finale music video, mostly made of the time-lapses I shot this night.
Enjoy!
Bring on more aurora shows as the Sun peaks in activity, perhaps this year. But the best shows often occur in the 2 or 3 years after solar max. So we have several more years to look forward to seeing the Lights dance in our skies.
Watch in full screen and in 4K if you can. For all the tech details click through to YouTube and check the description below the video.
Thanks and clear skies!
— Alan, May 18, 2024 amazingsky.com