
If you saw the total eclipse in 2024 (or you missed it!) you have three chances in the next three years to see another. But you will have to travel.
Typically, total eclipses of the Sun occur about 18 to 24 months apart. Unusually, in the next three years, we have a trio of total eclipses each only a year apart. Or to be precise, a lunar year — 12 lunar phase cycles — apart.
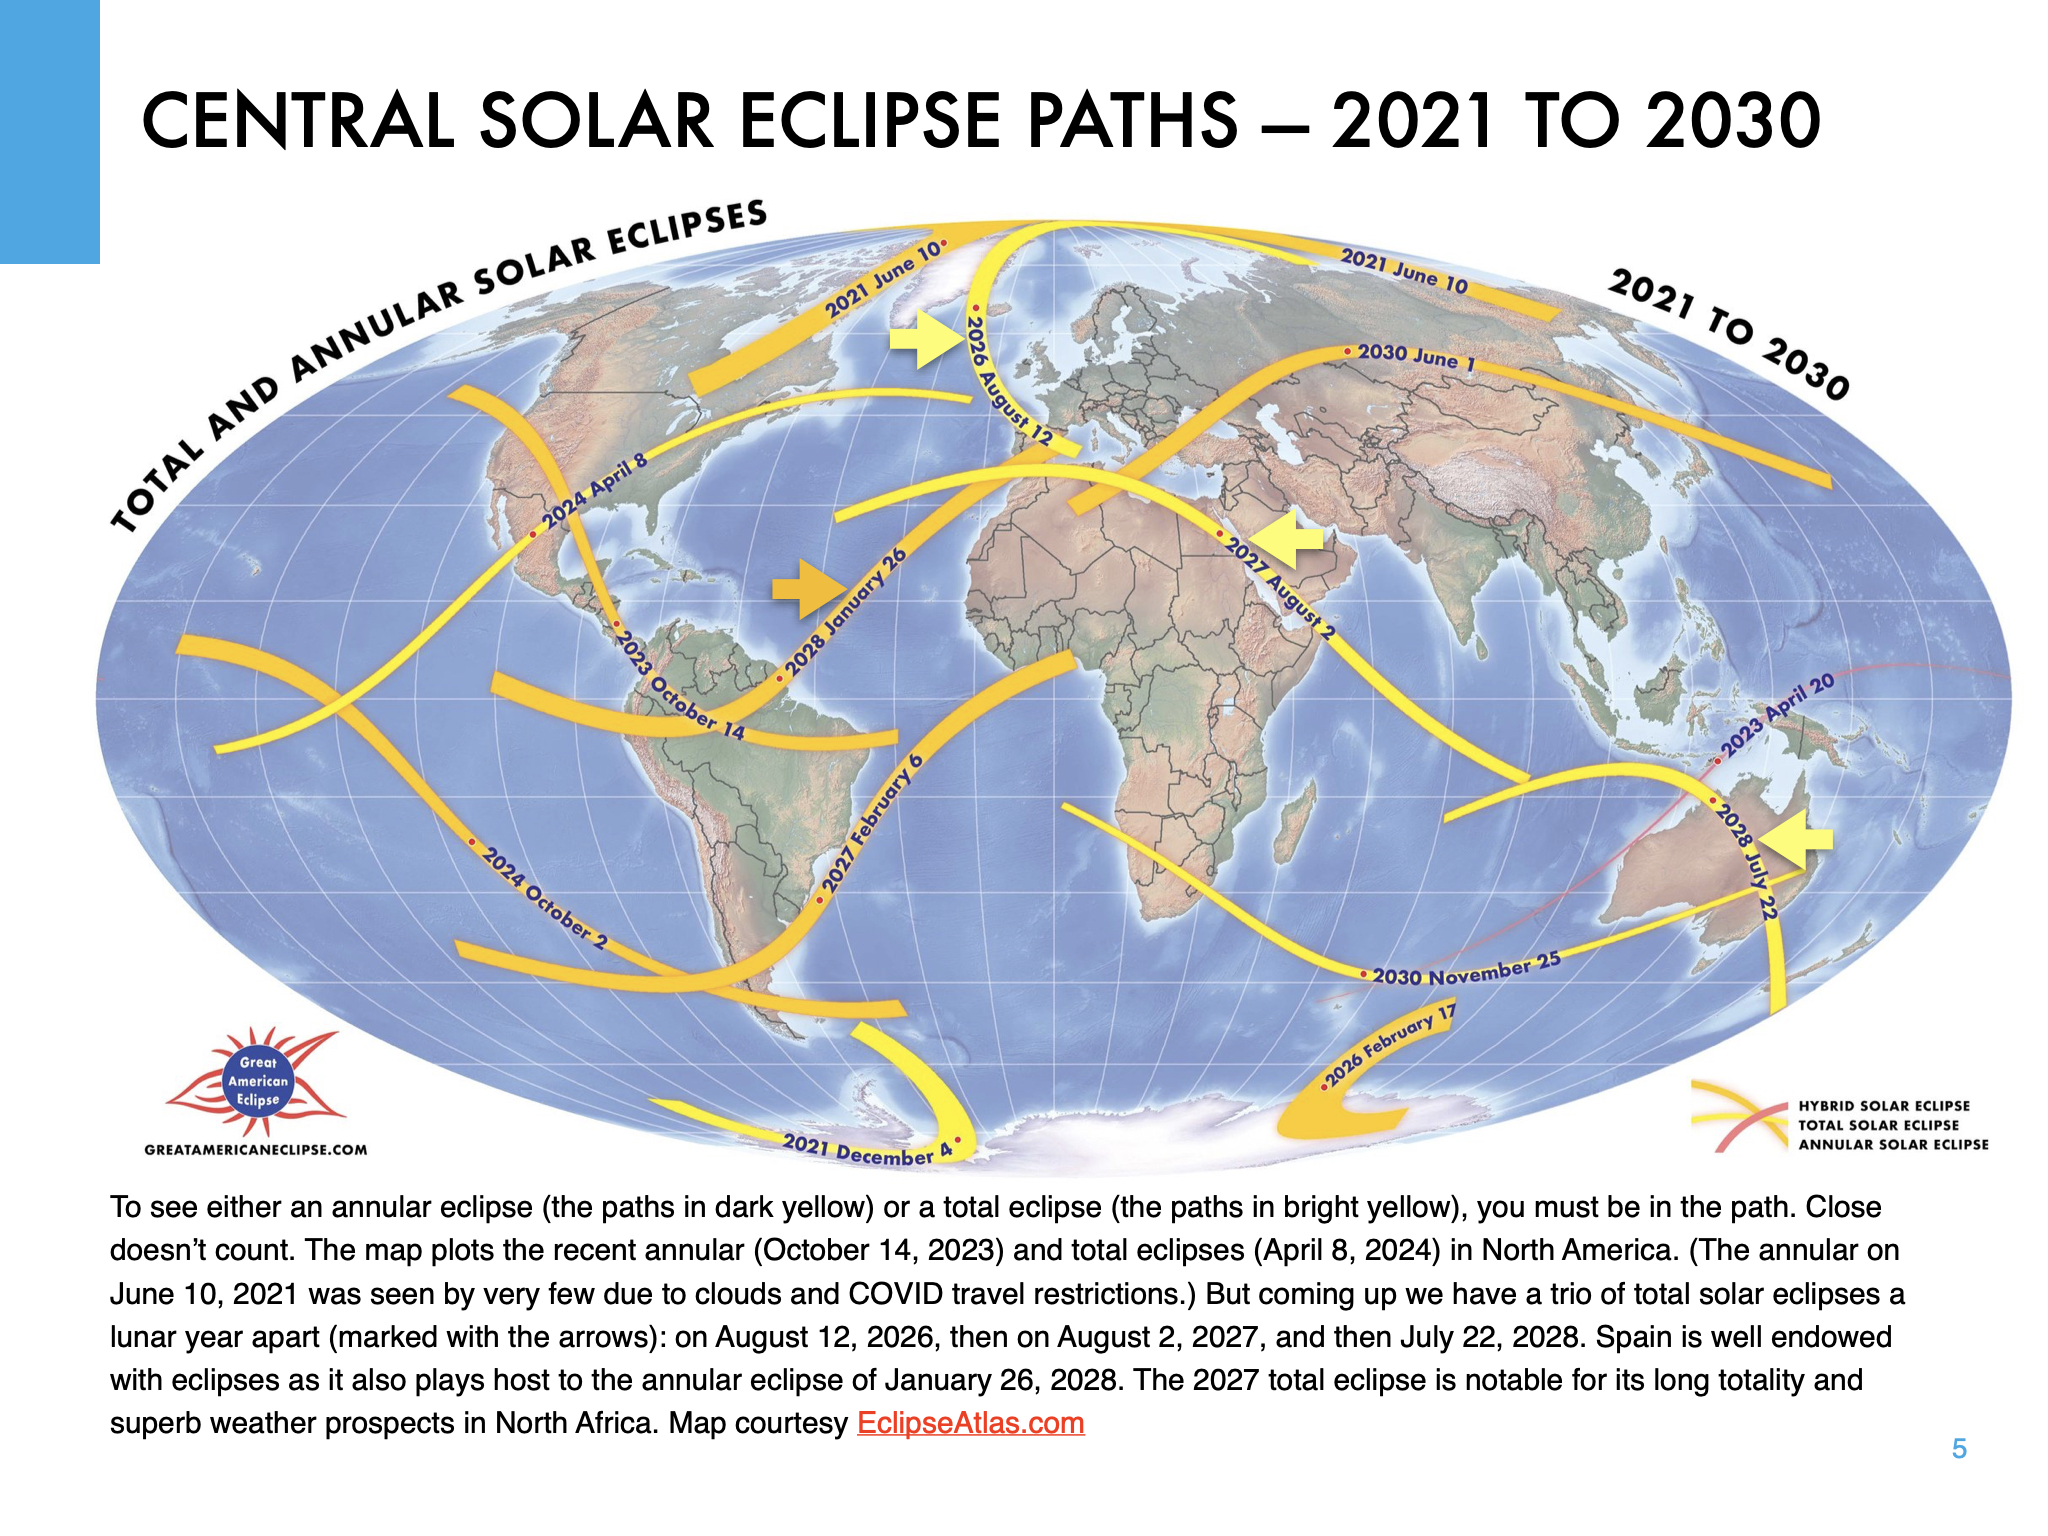
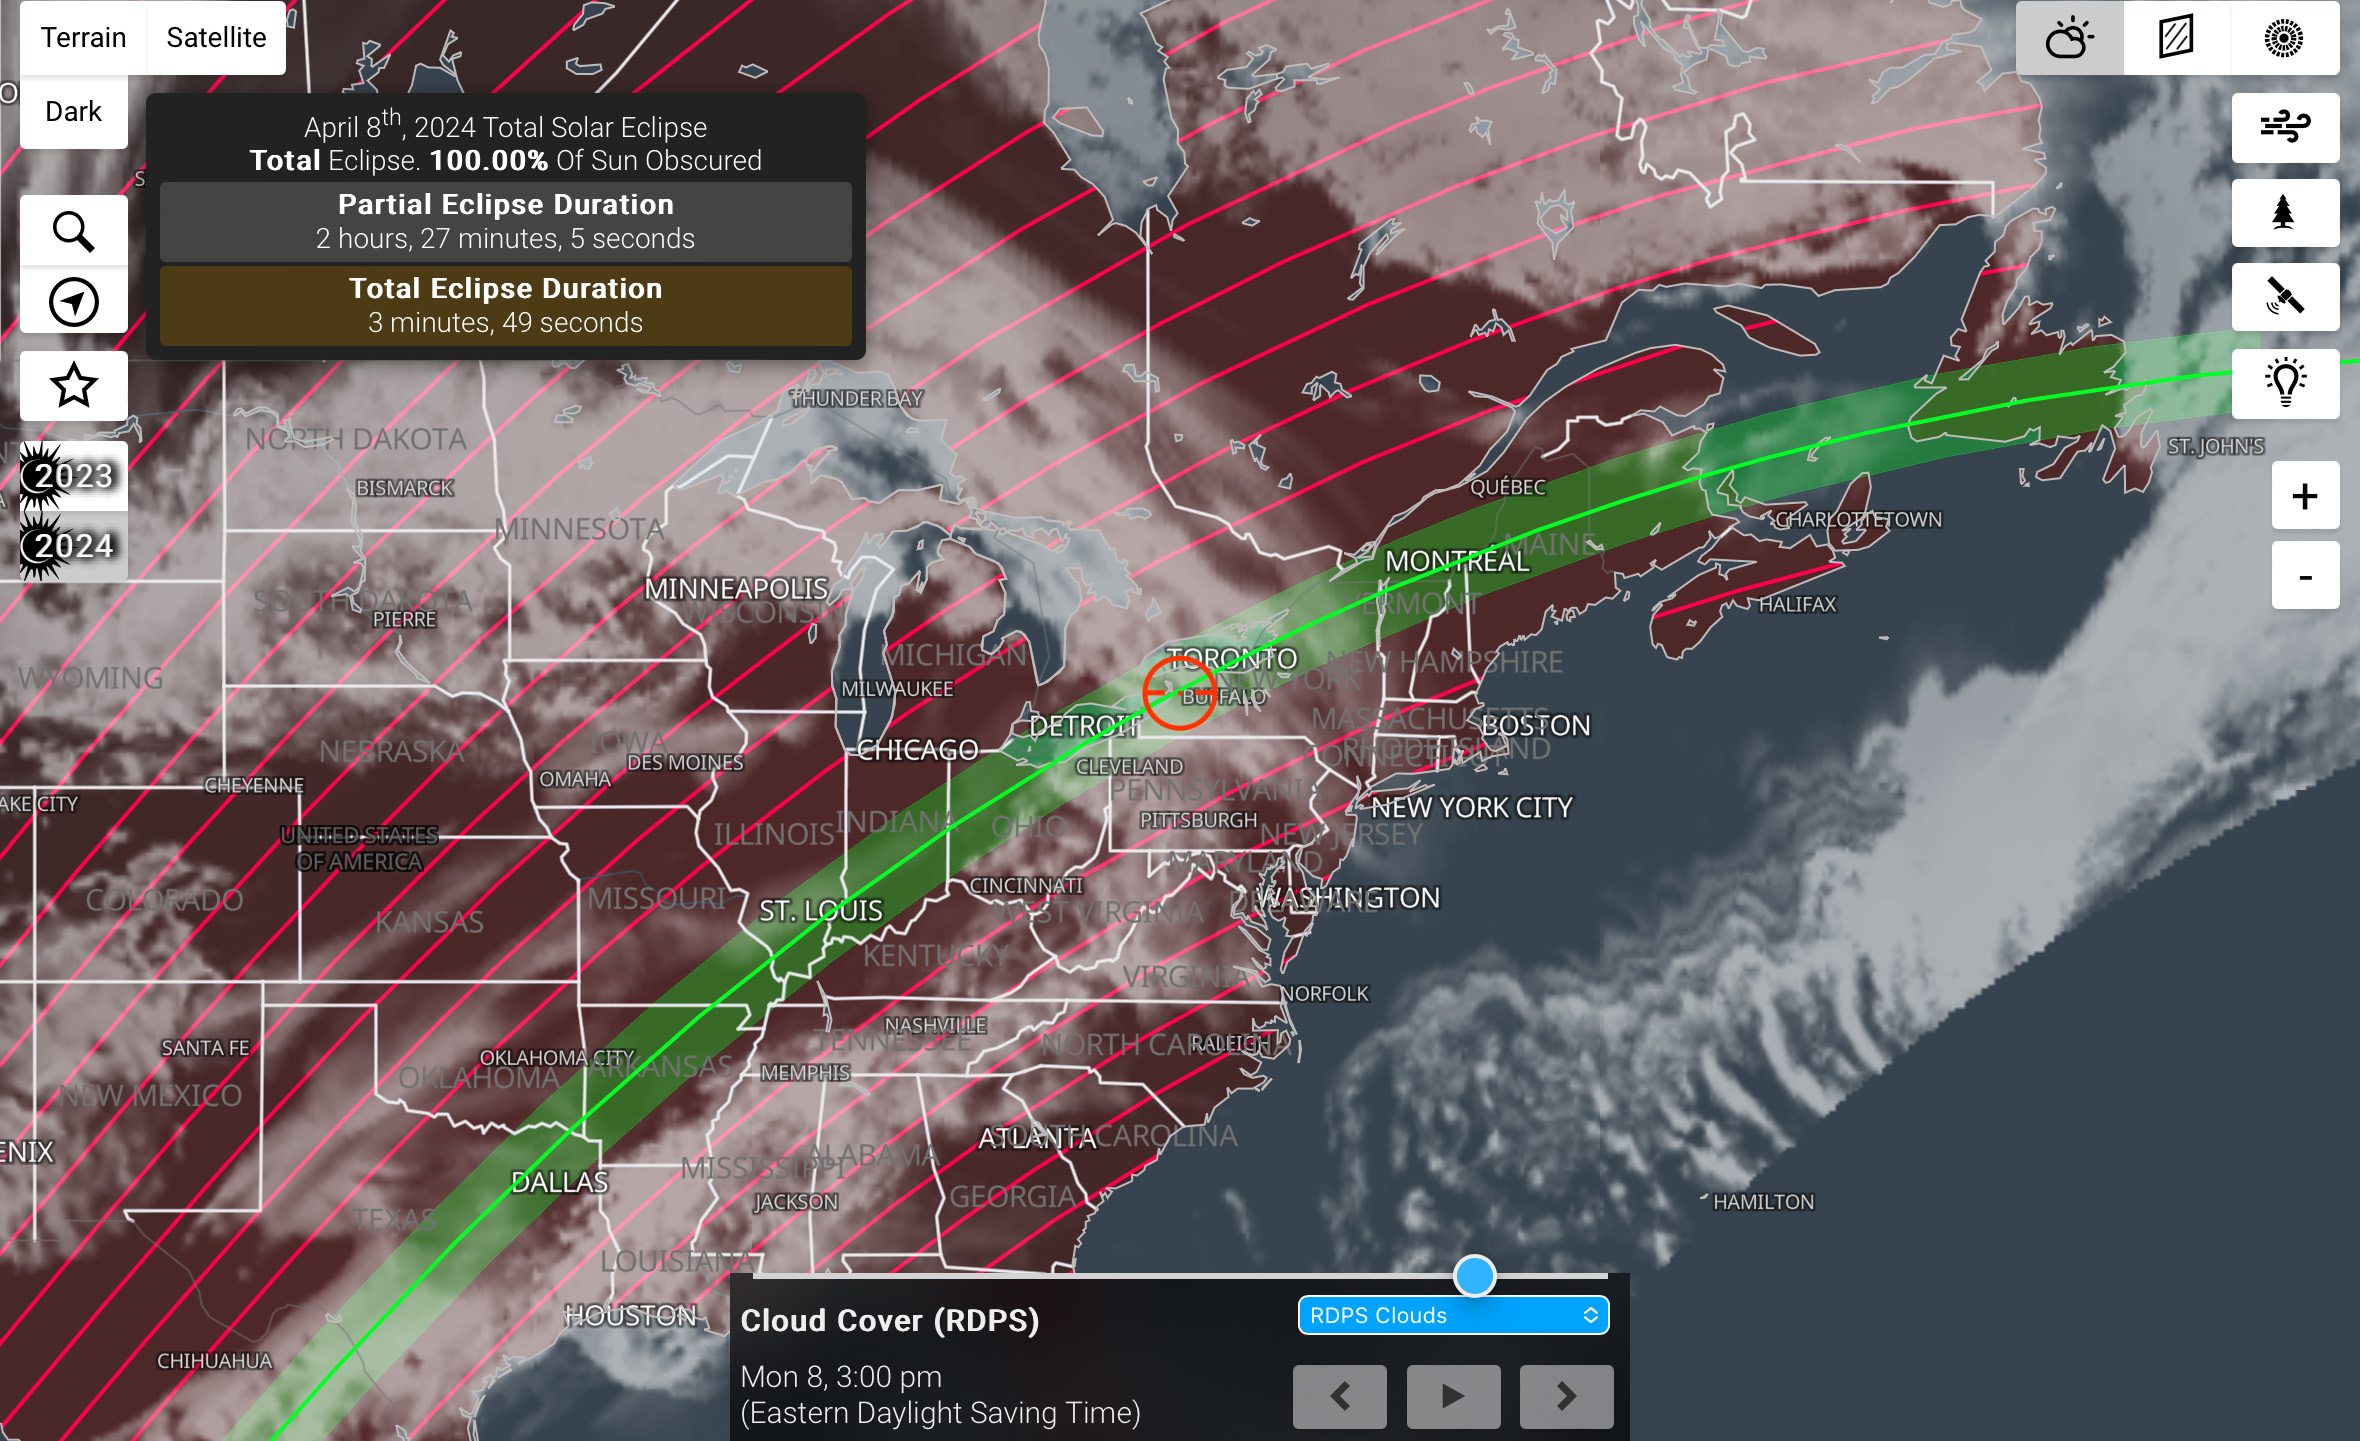
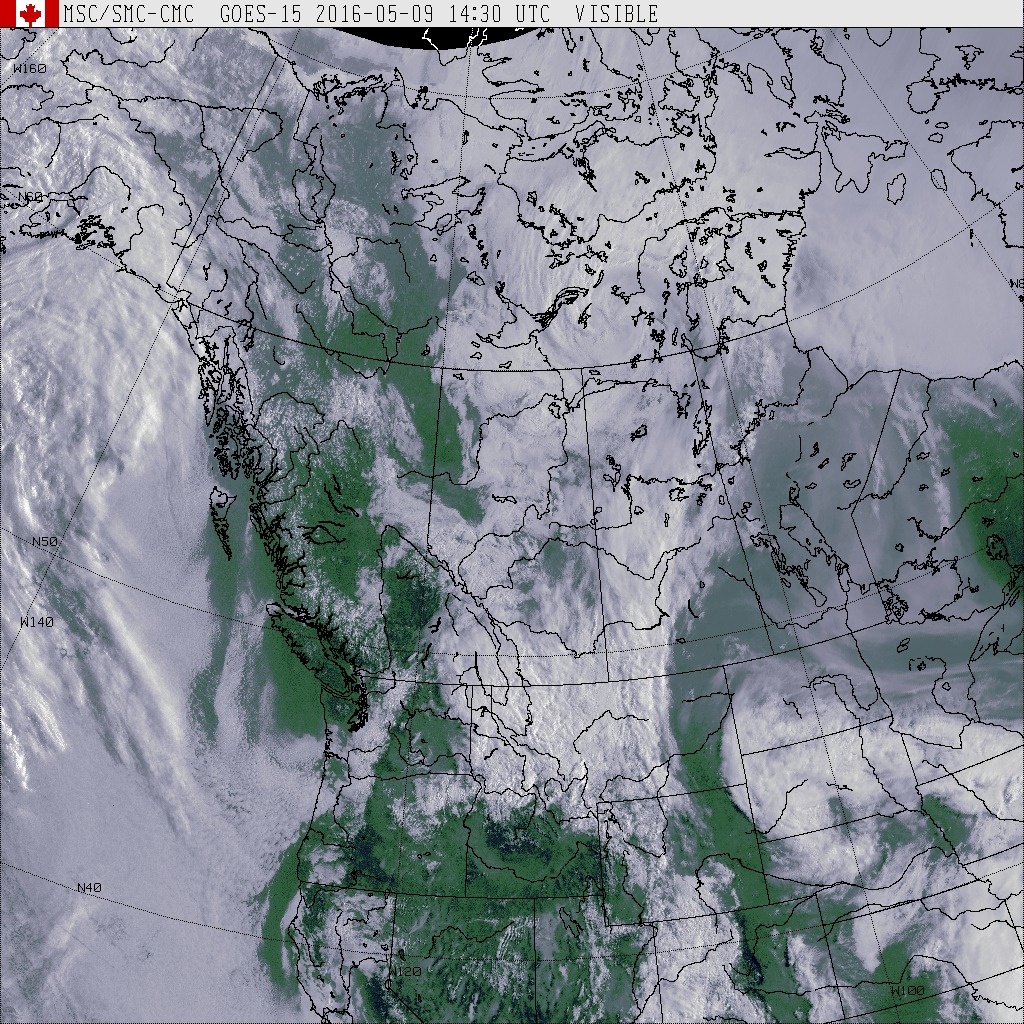
The map above (courtesy EclipseAtlas.com) plots the paths of all central solar eclipses (annulars, totals and hybrids) from 2021 to 2030. Included are the paths of the 2023 annular and 2024 total in North America you might have seen.
But the next total eclipse in populated North America is not until August 2044, then again in August 2045. To see a total eclipse in the next few years, those of us in the Americas will have to travel.
However, those in Europe can drive to the next eclipse, to their first total eclipse at home since August 1999.
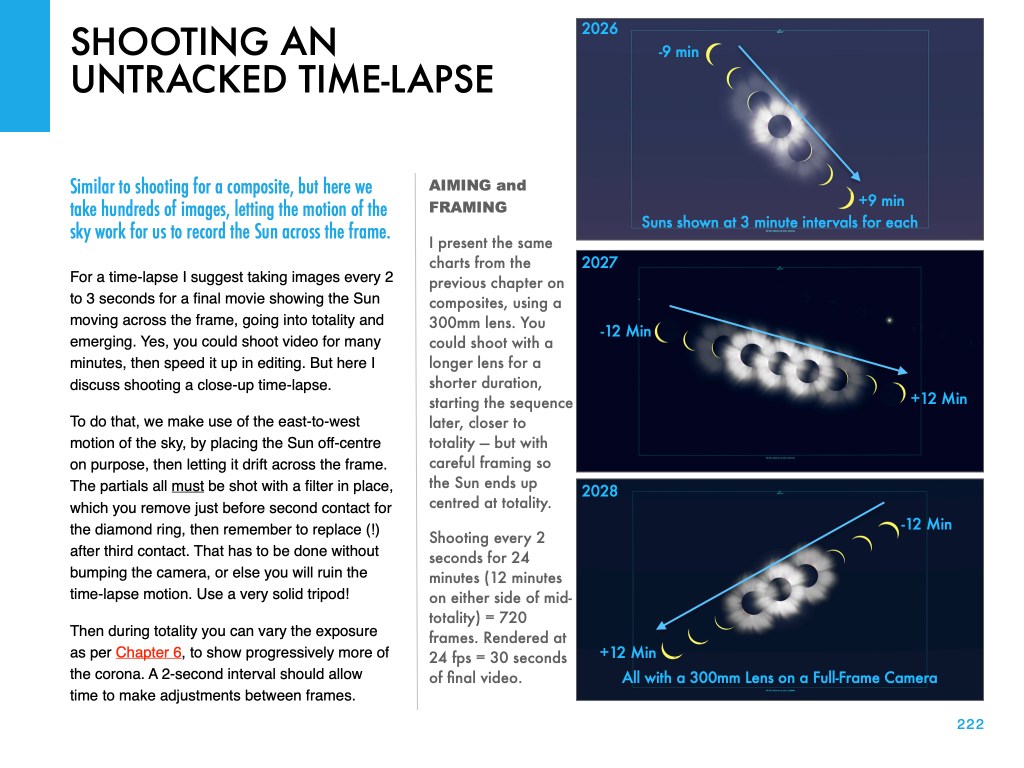
August 12, 2026
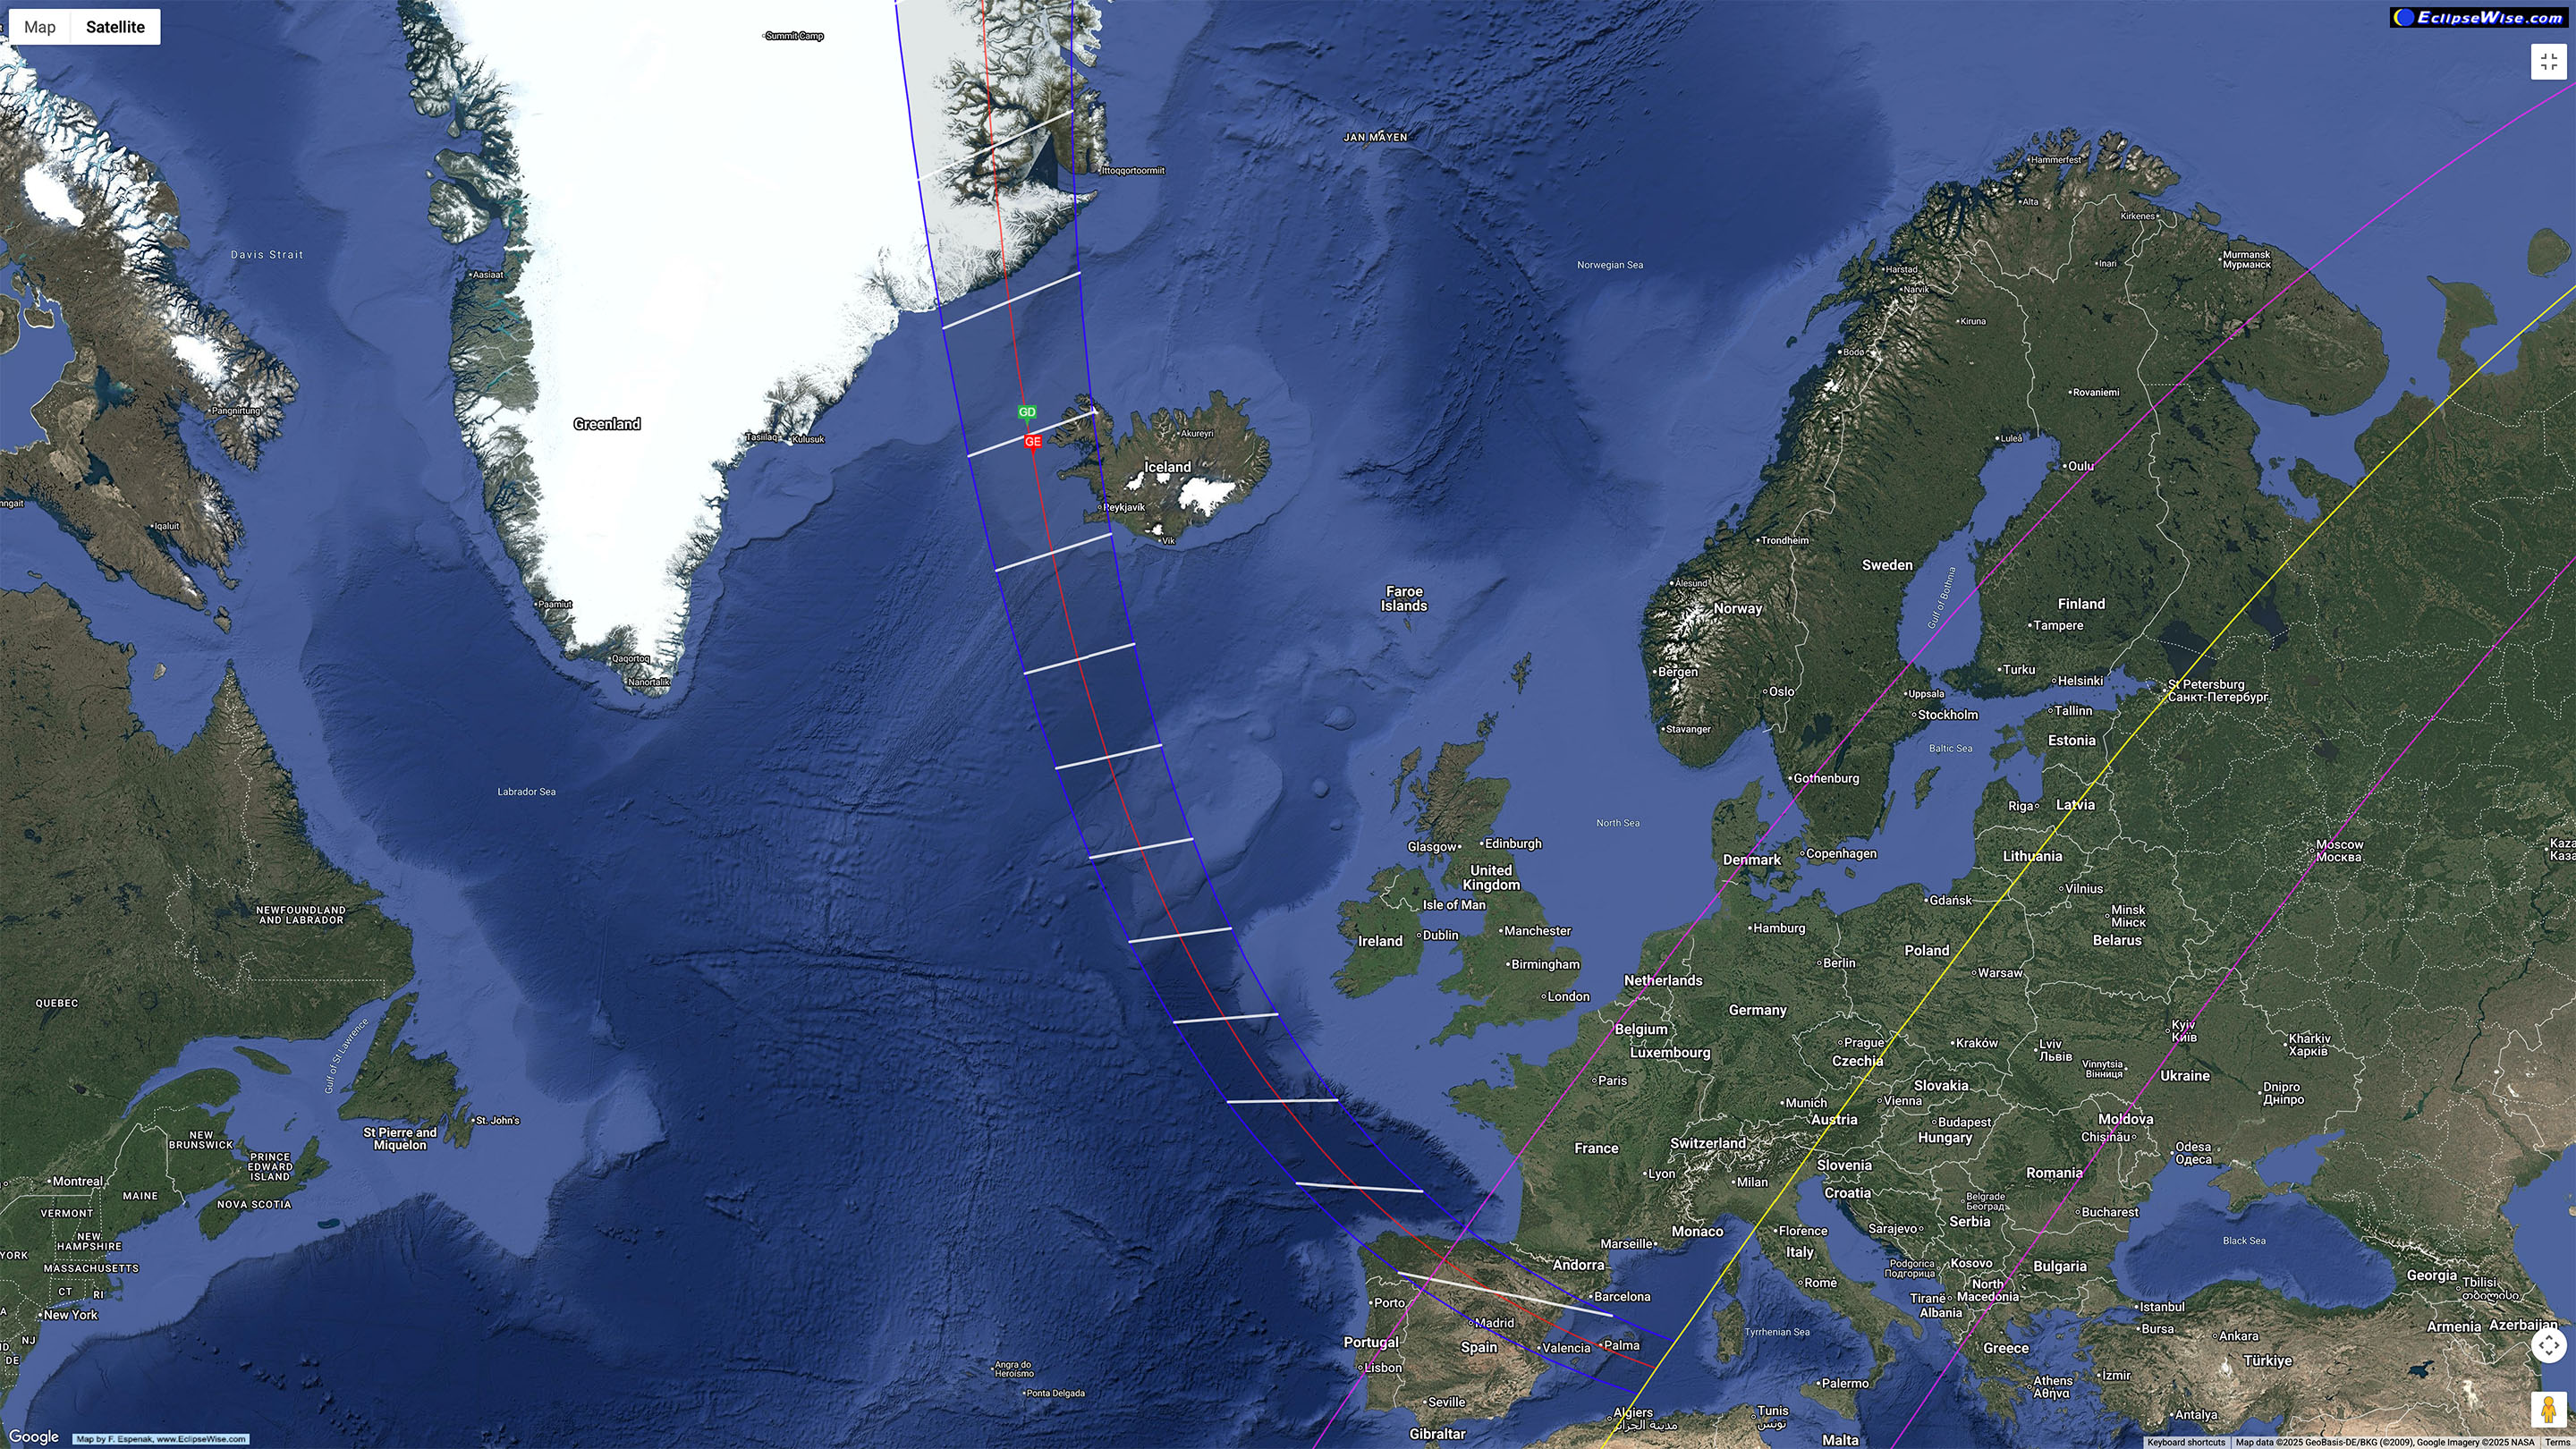
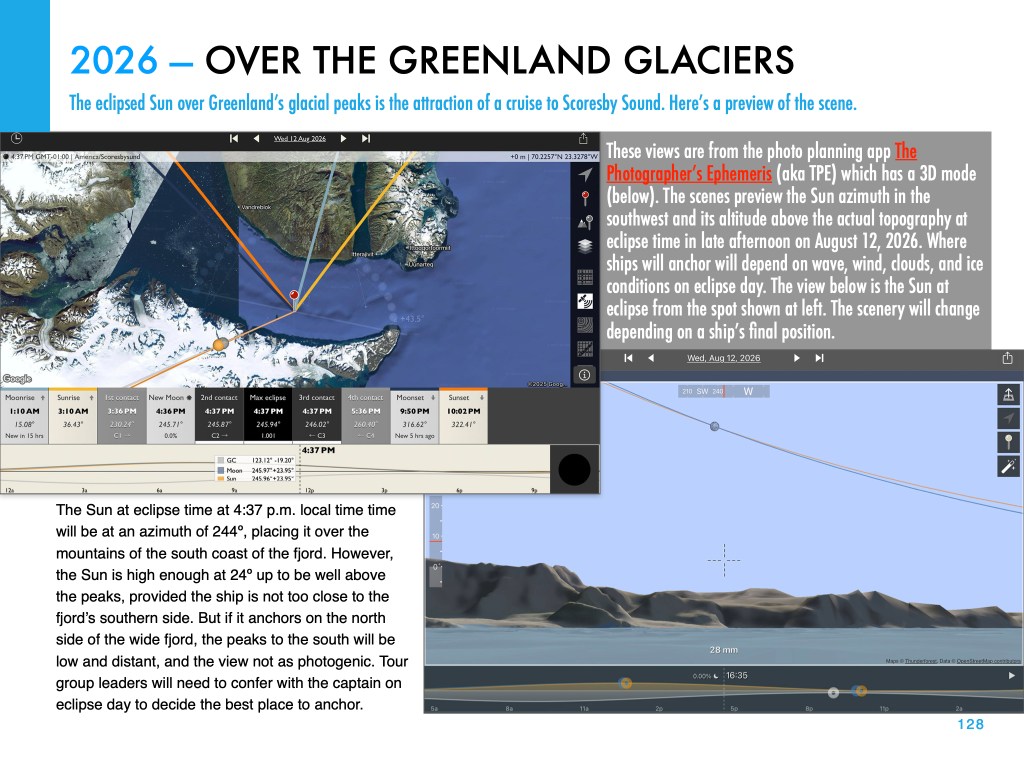
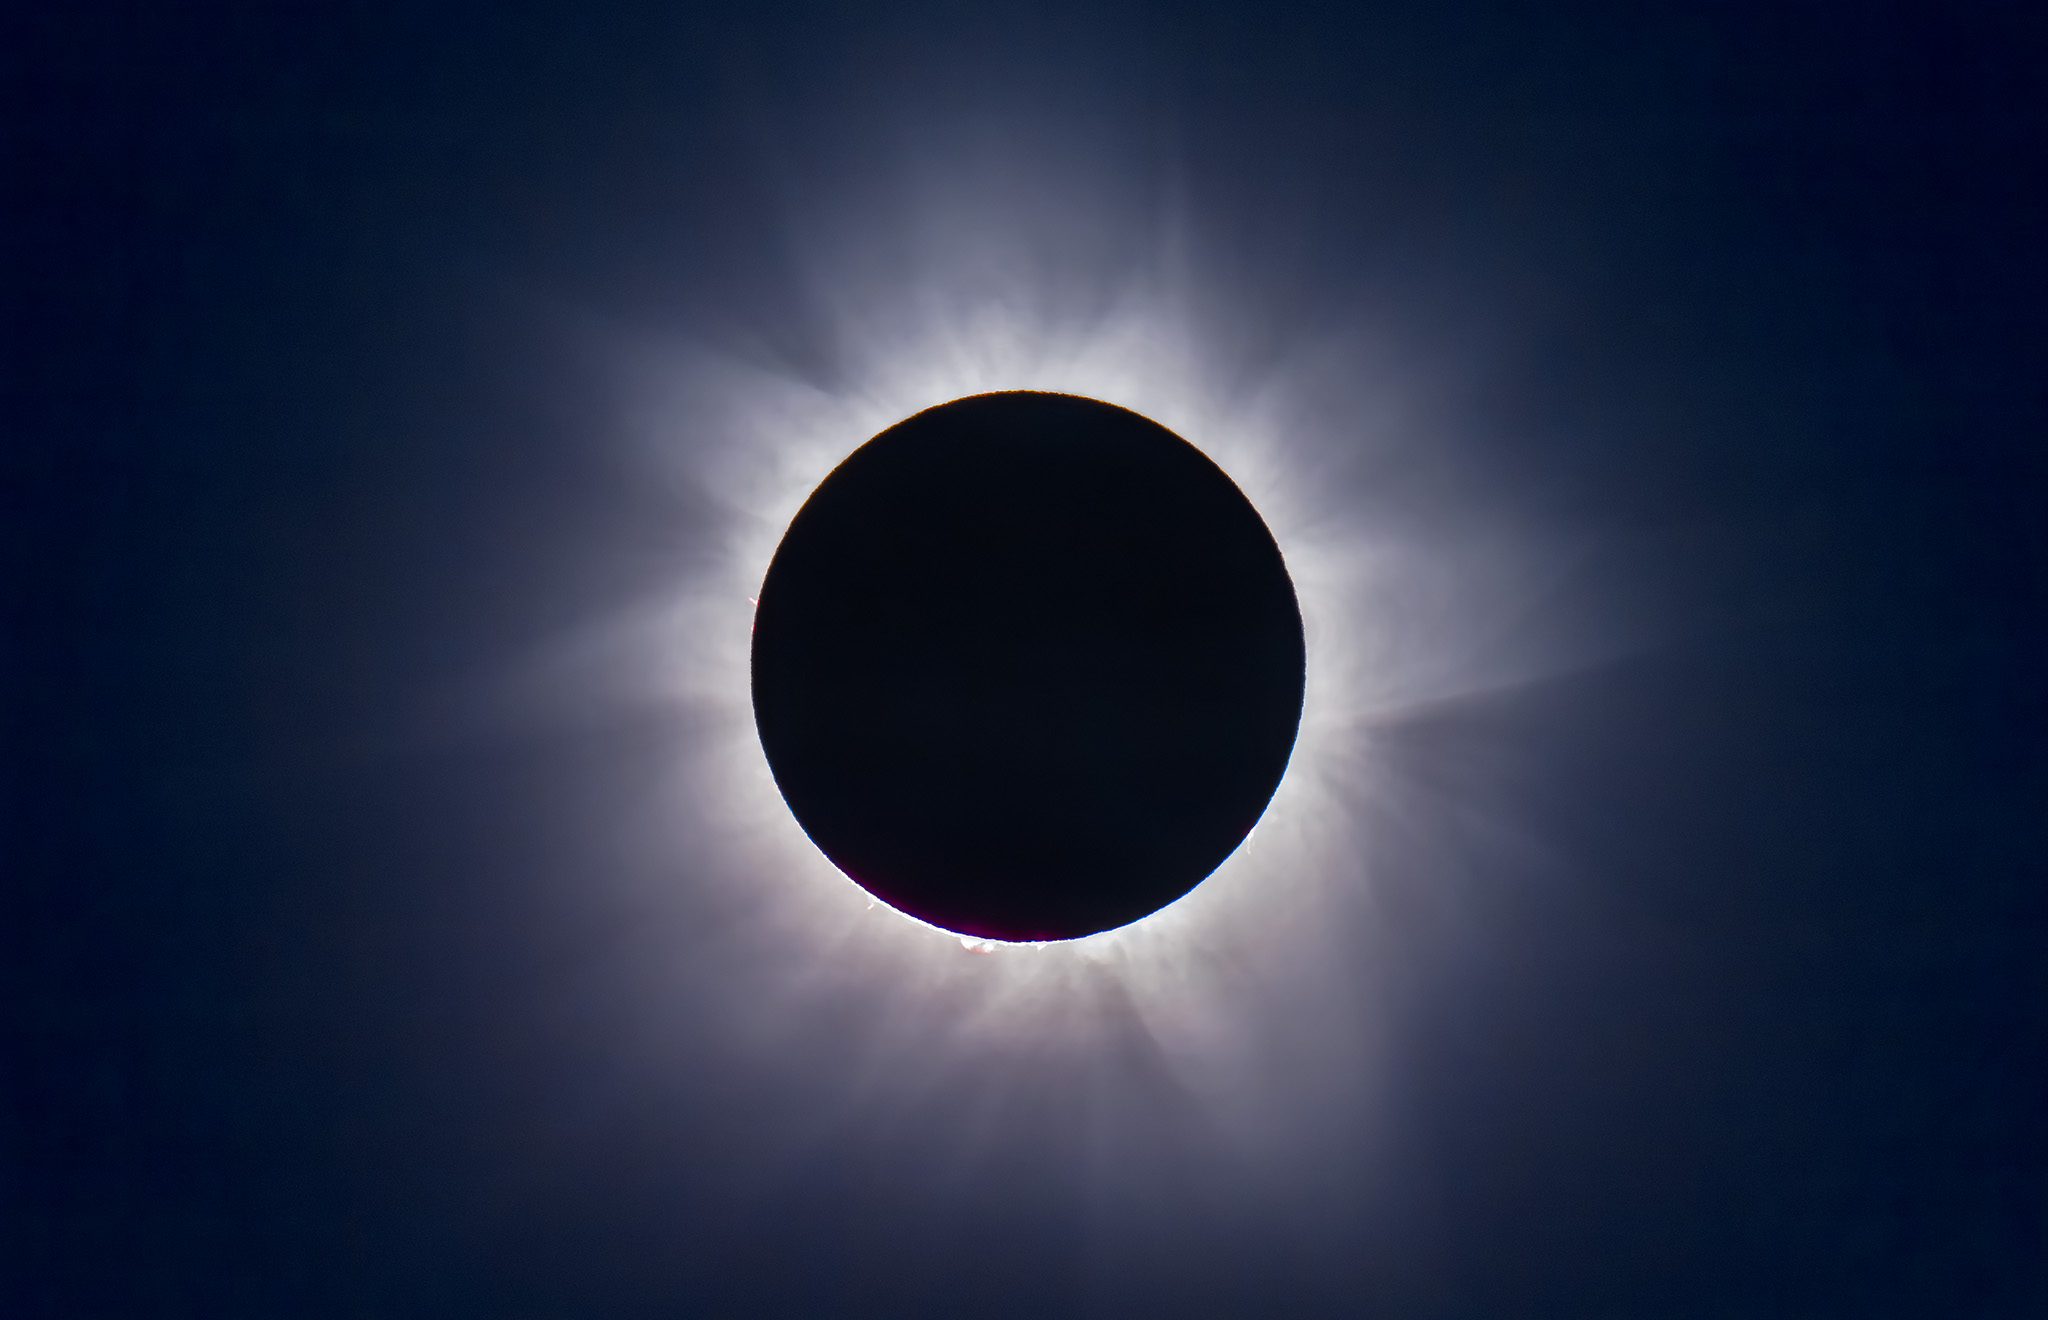
A year from now as I write this, the Moon’s umbral shadow will intercept the Earth for the first time since April 8, 2024. The path of this next total eclipse is unusual in that it starts in northern Russia, travels north over the North Pole, then sweeps down from the north to cross eastern Greenland, nipping the west coast of Iceland, then crossing Spain, to end at sunset over the Balearic Islands of Spain.
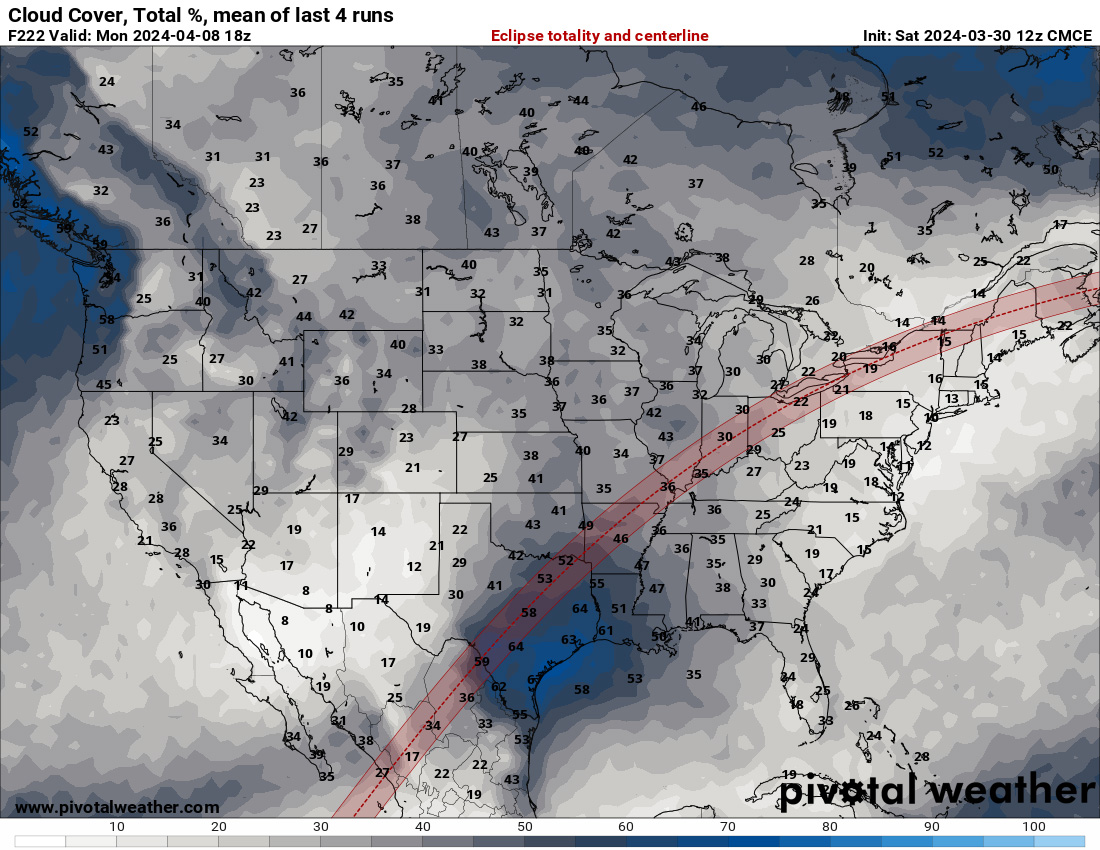
Weather prospects are surprisingly good for the several cruise ships planning to be in a Greenland fjord. Iceland is iffy, but had the eclipse been this year (on August 12, 2025) many people would have seen it. Spain was the opposite — statistically it has the best weather prospects along the 2026 path, but on August 12, 2025 most of the country was beset by storms.
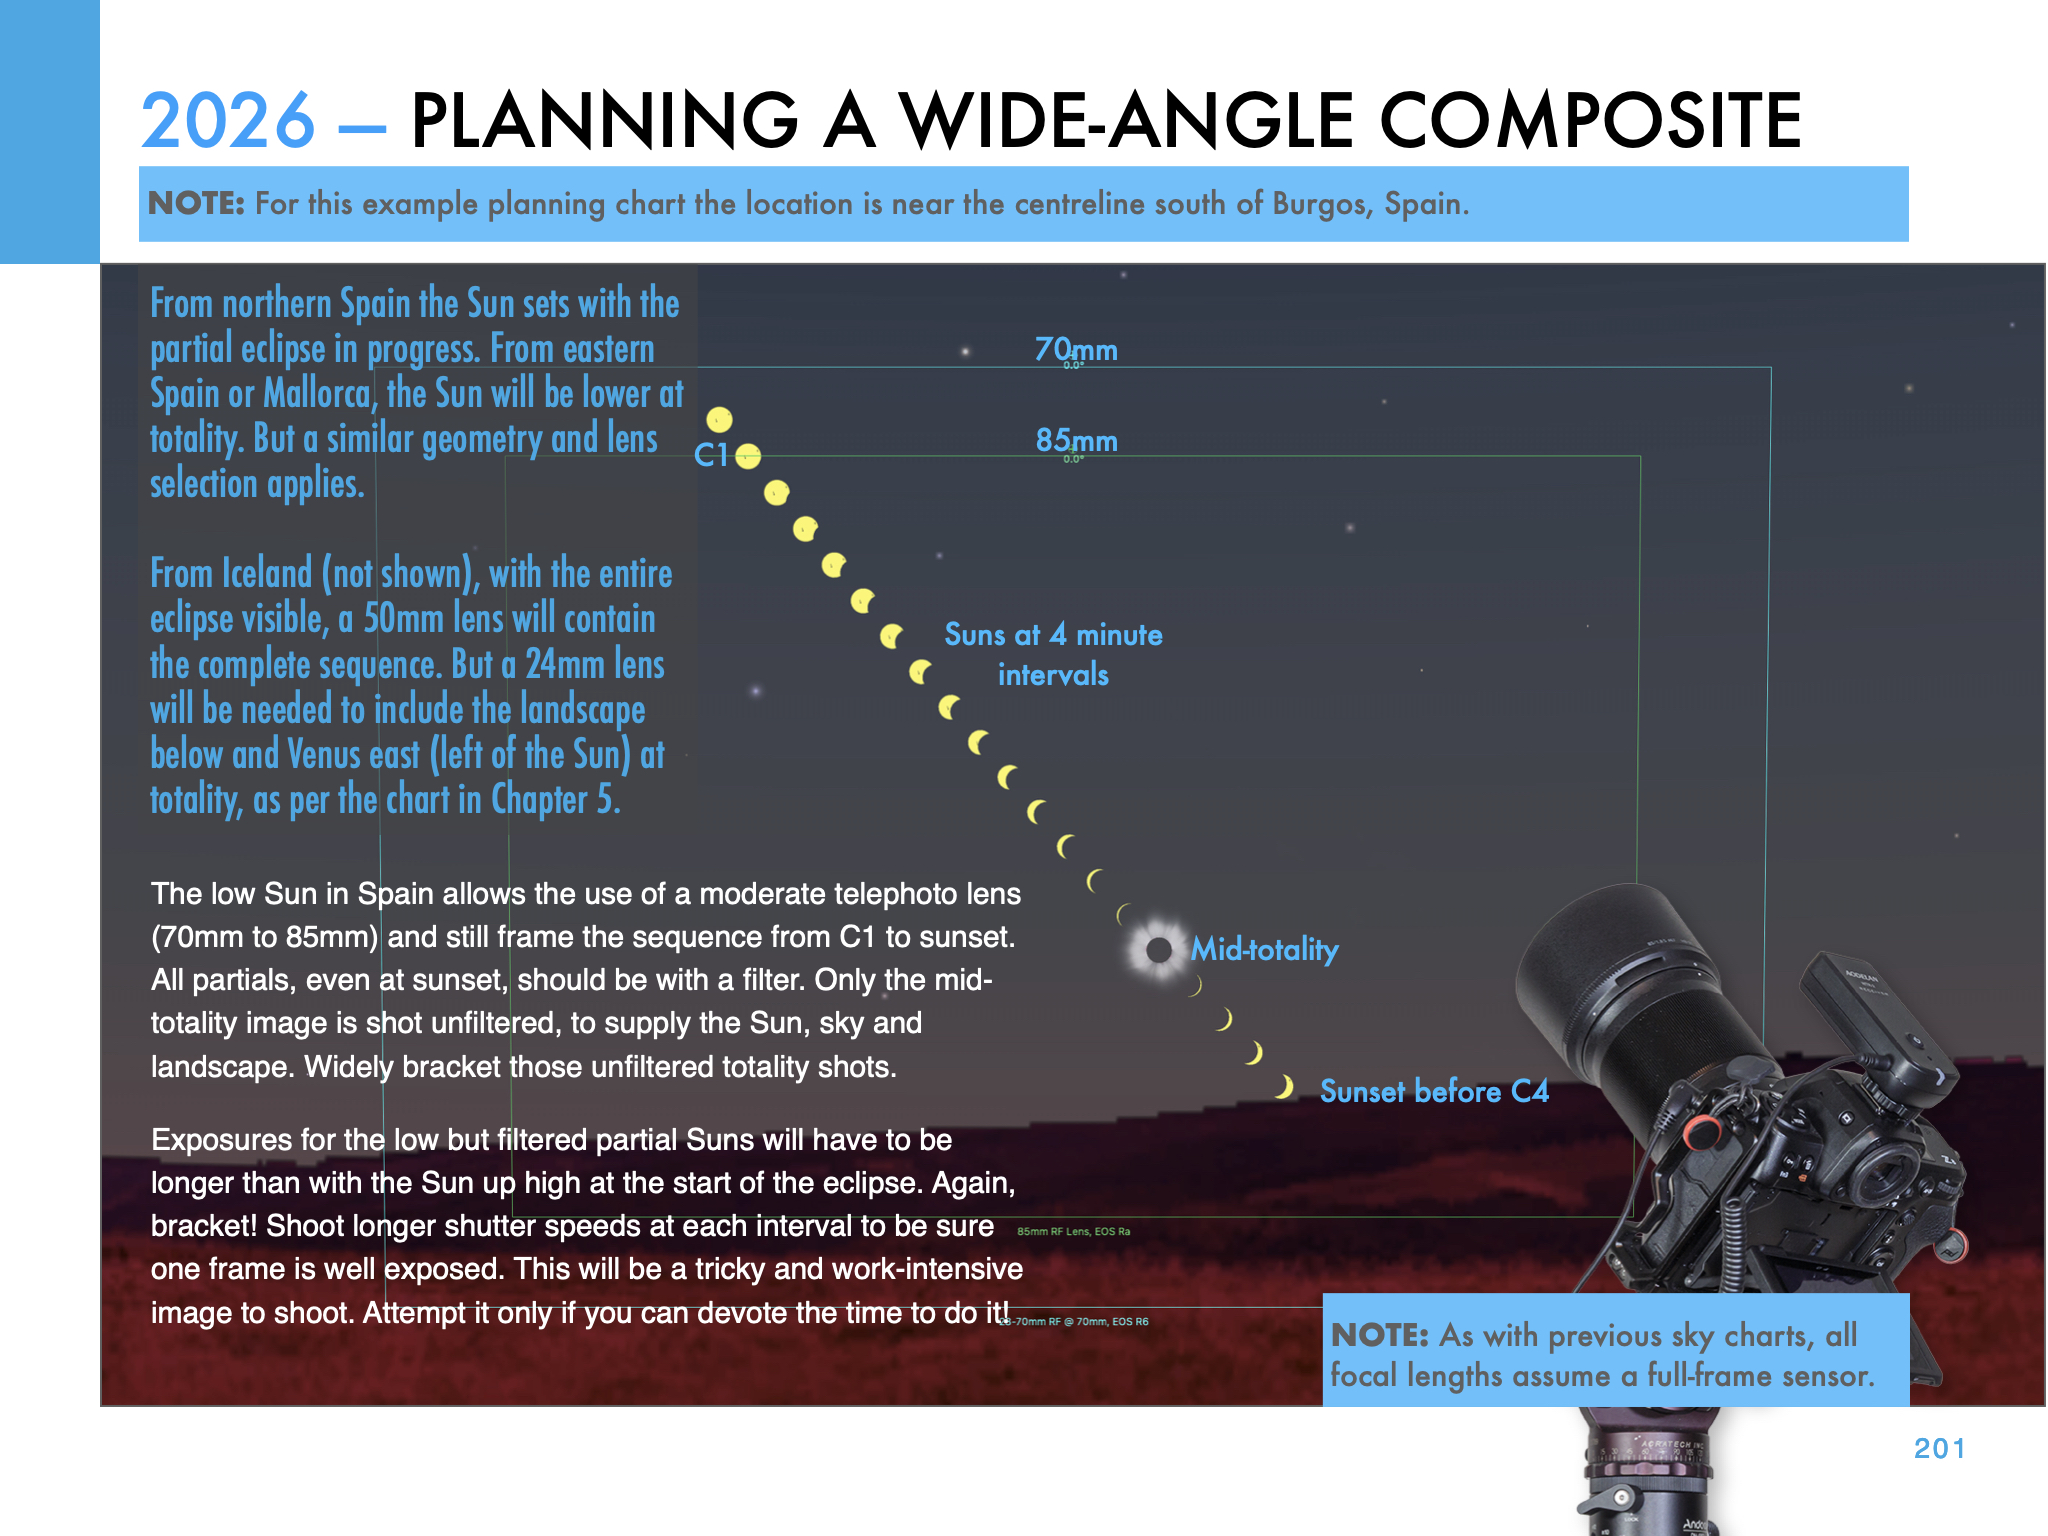
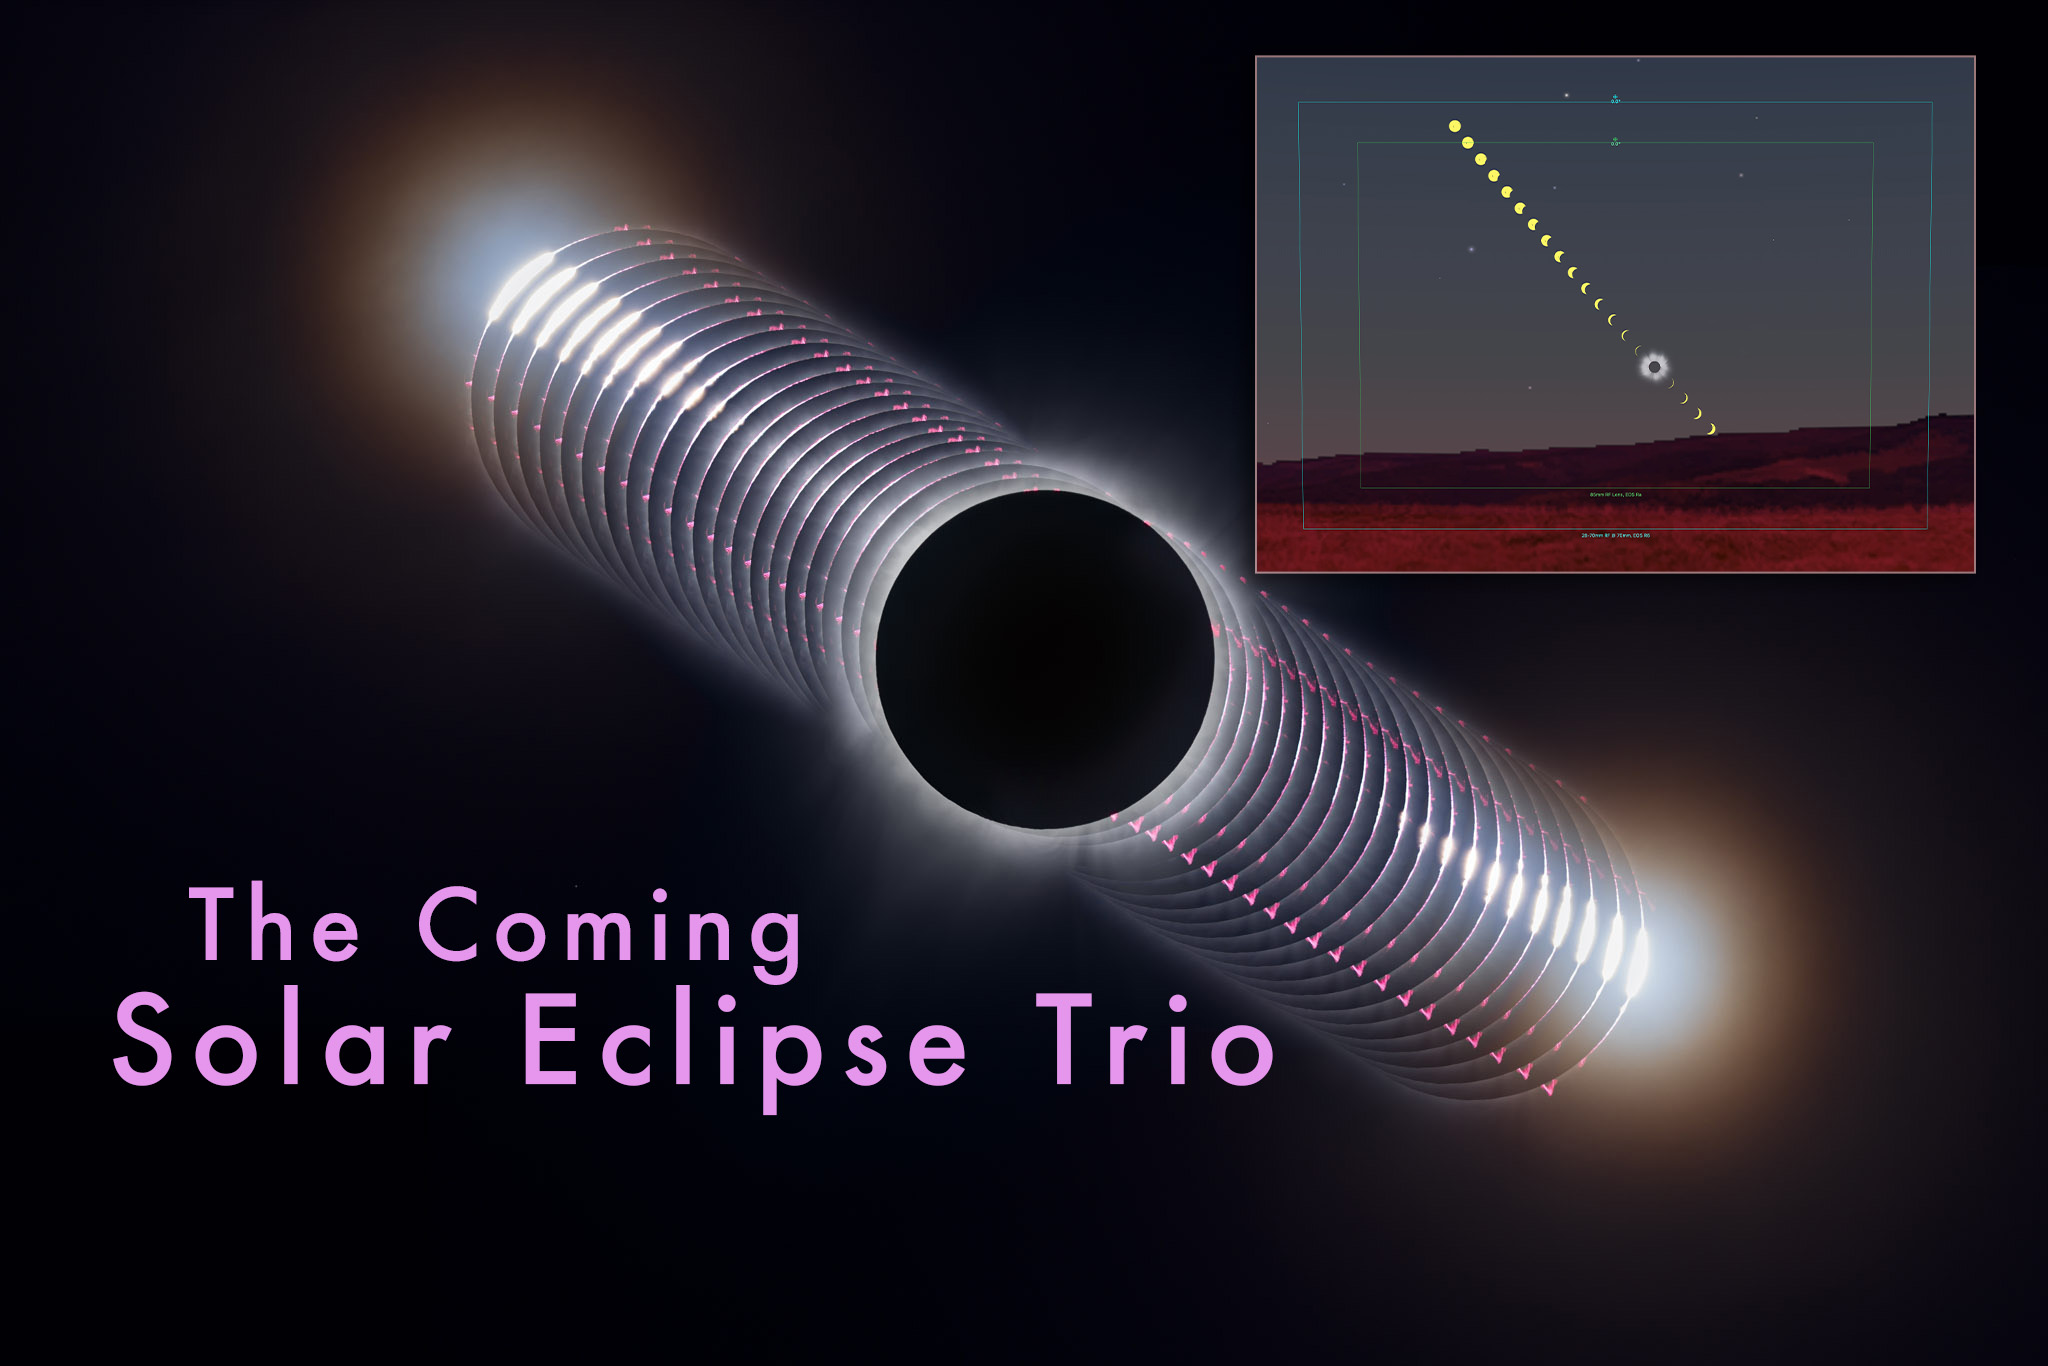
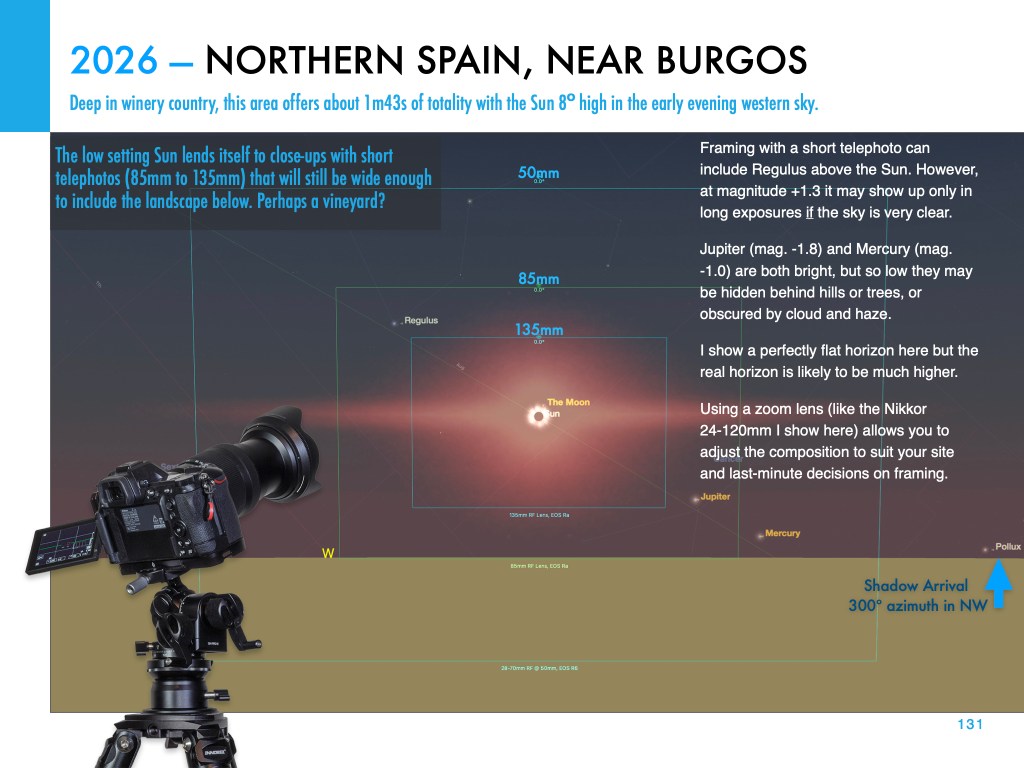
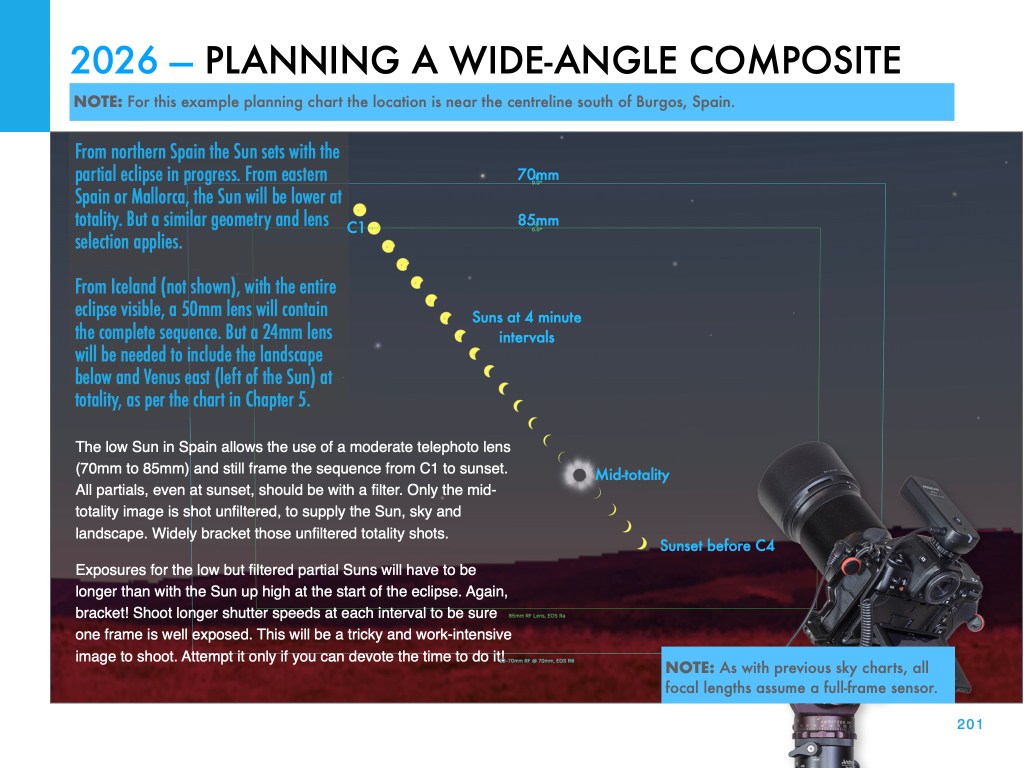
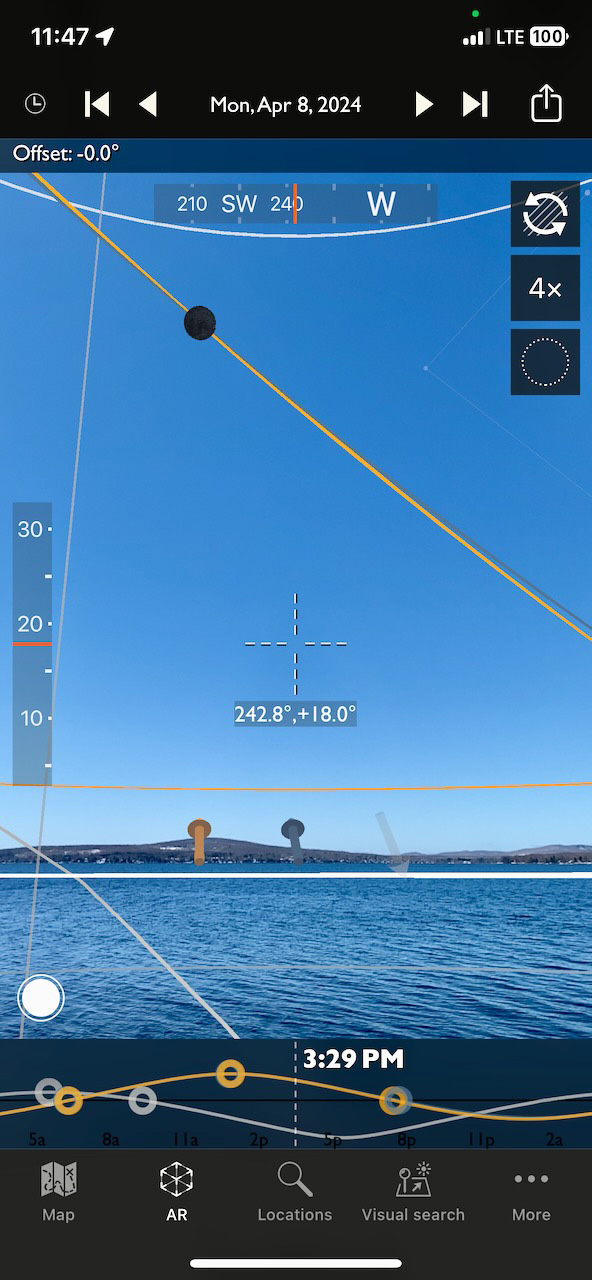
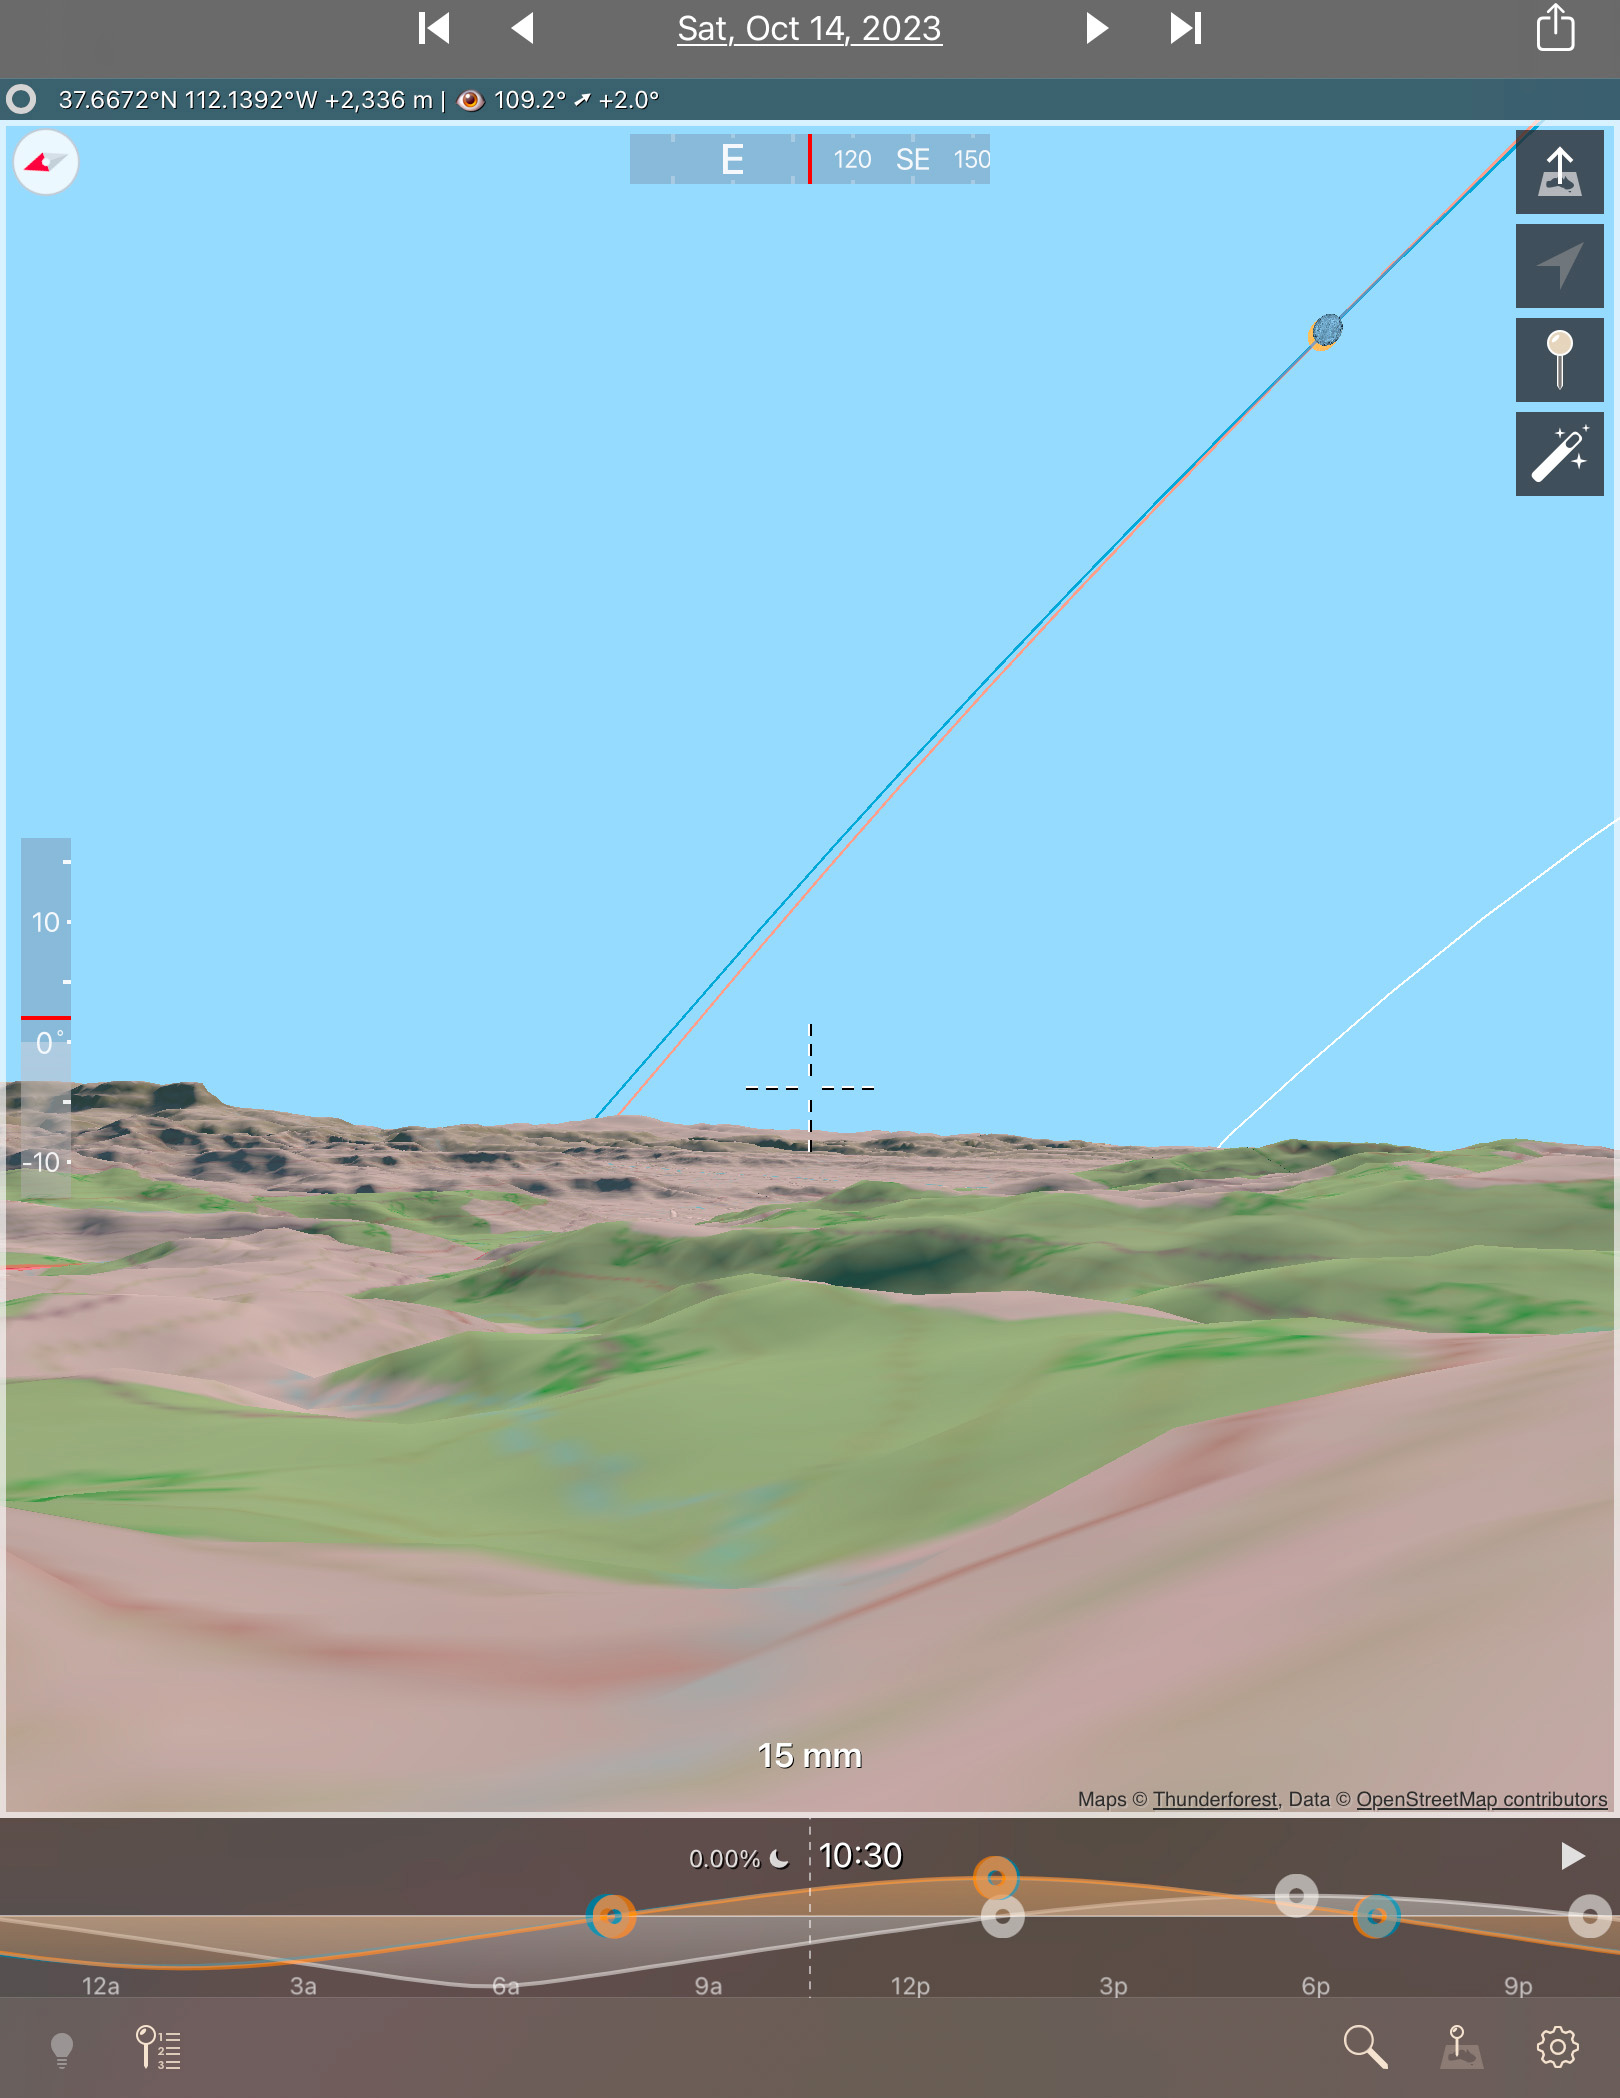
From northern Spain, where I intend to be and as I show above, the Sun will be low in the west in the early evening sky, for a relatively short 1m40s of totality. A low eclipse can be spectacular, but riskier as there’s a greater chance of clouds hiding a low Sun.
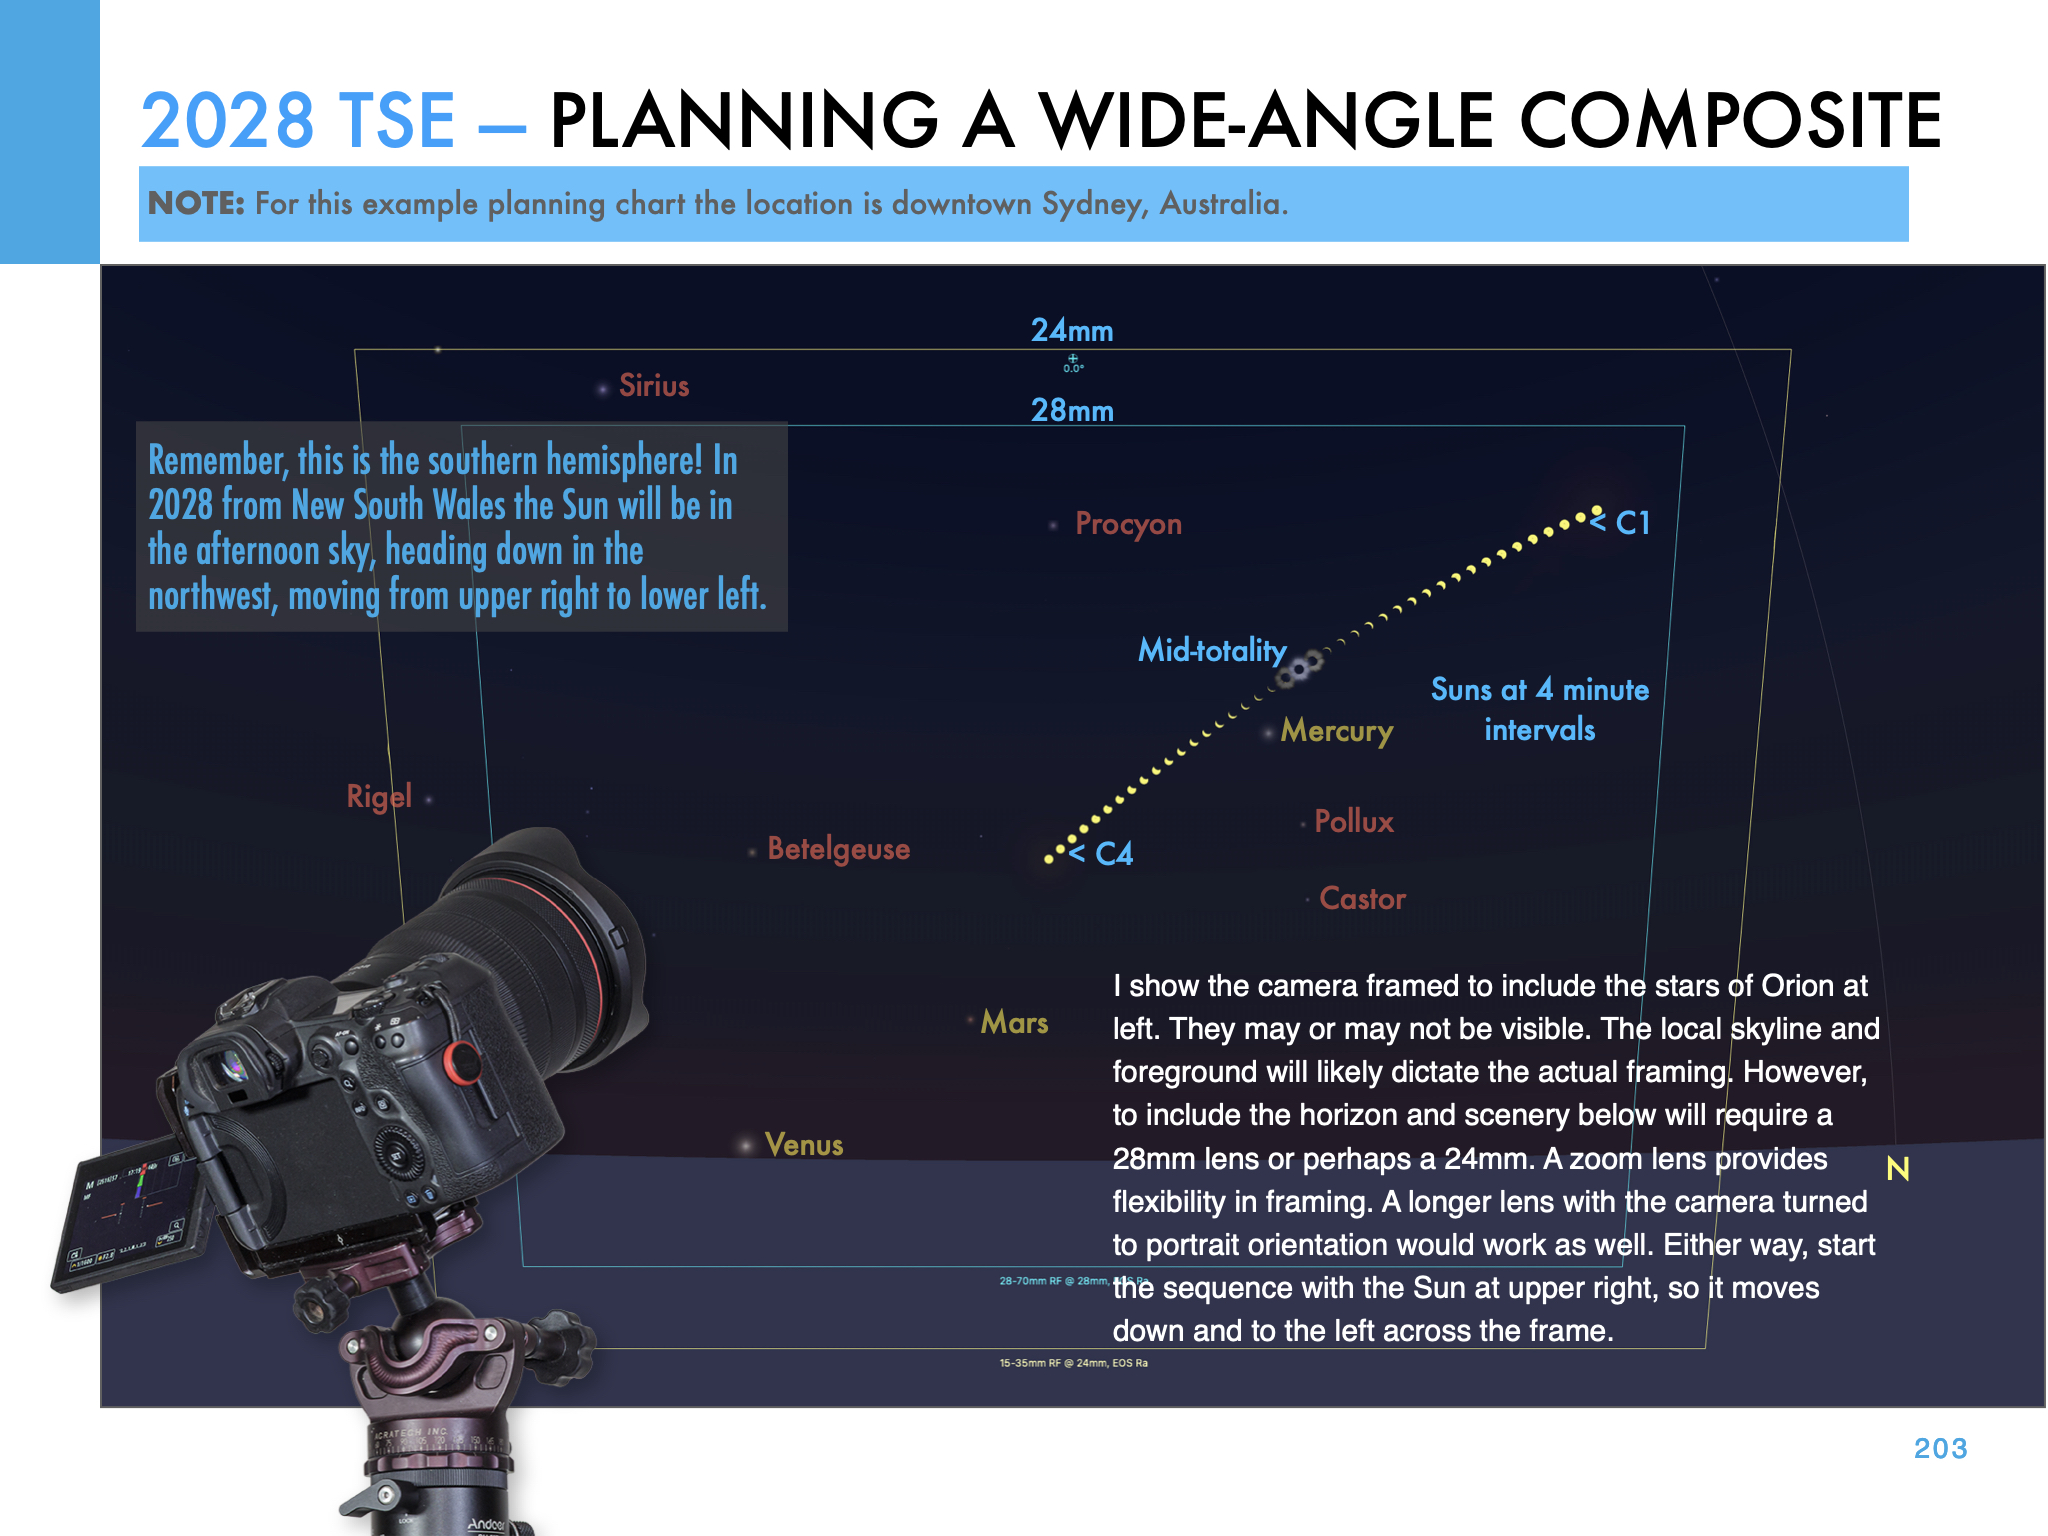
This and the other images of the Sun’s position at each eclipse are pages from my eclipse ebook, described below.
August 2, 2027
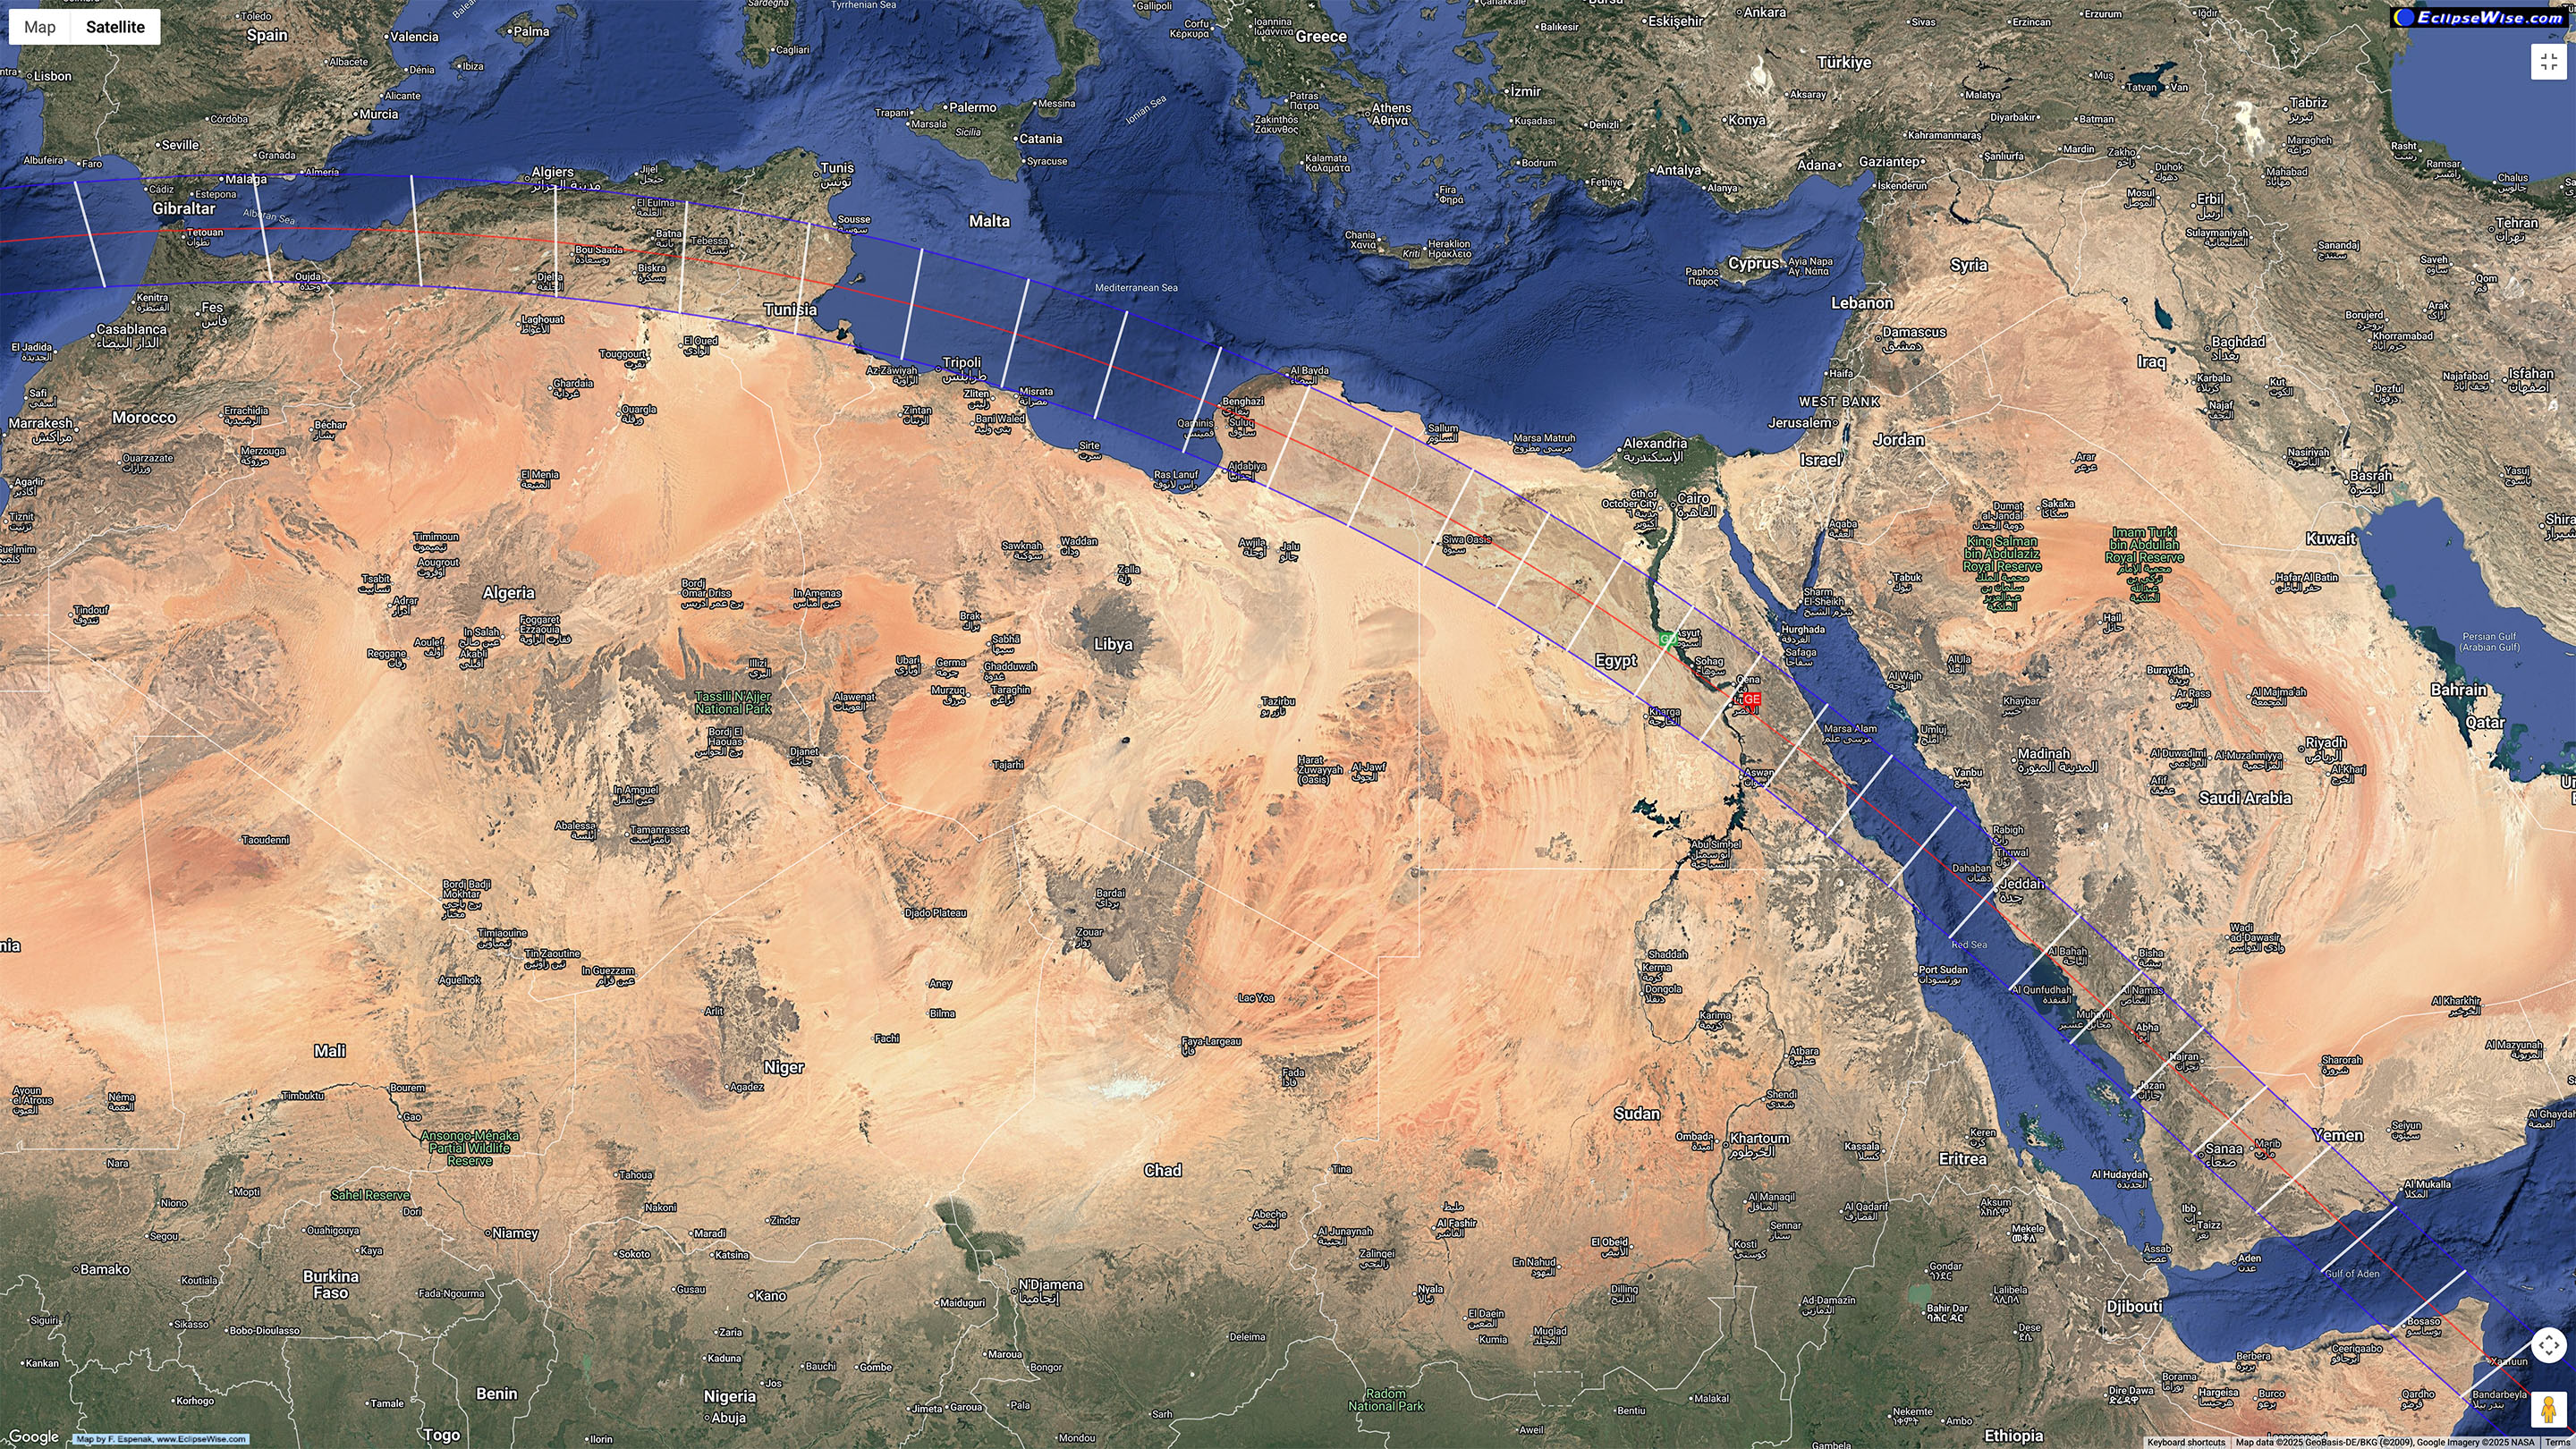
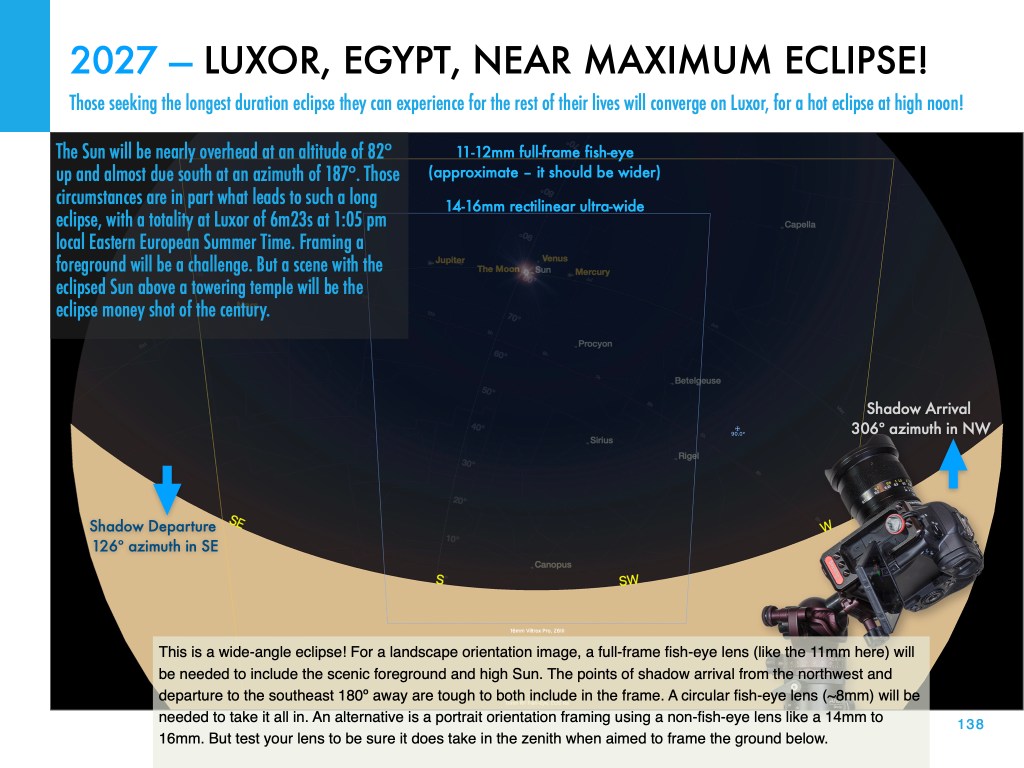
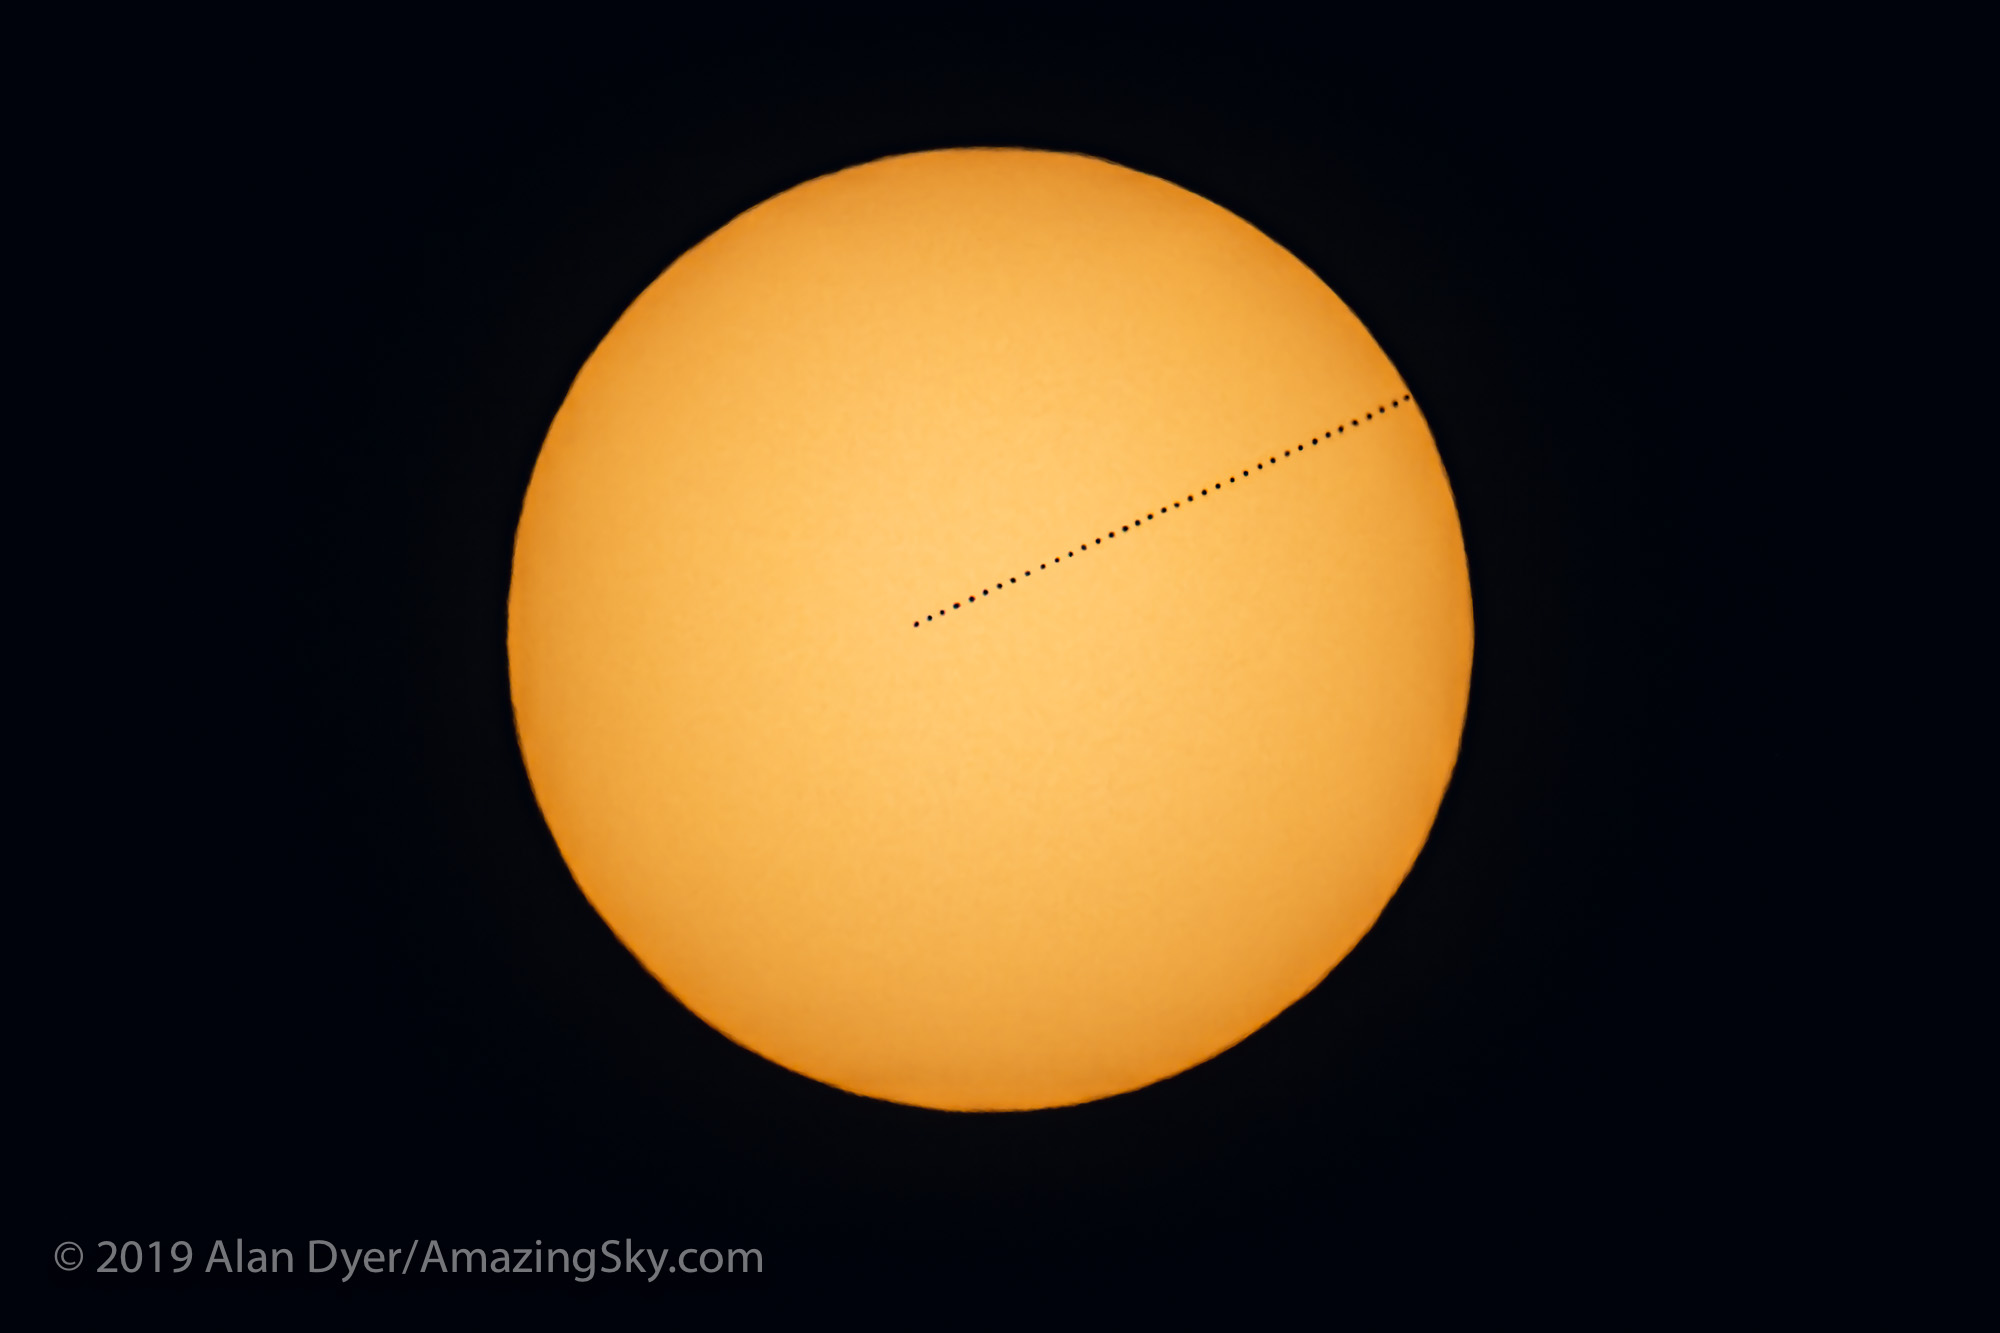
Twelve new Moons later, the lunar shadow again crosses the Earth, this time passing over North Africa where skies are almost always clear in summer. But the days are hot! The shadow crosses the Strait of Gibraltar and passes over Morocco, Algeria, Tunisia, Libya, Egypt, and Saudi Arabia. In addition to the good weather, the attraction is that this is the longest total eclipse for the rest of the 21st century.
The spectacular temples of Luxor, Egypt are at the point of maximum eclipse, with an unusual 6m23s of totality with the Sun high overhead. Even at Gibraltar, totality is 4m35s, seven seconds longer than the maximum in Mexico in 2024.
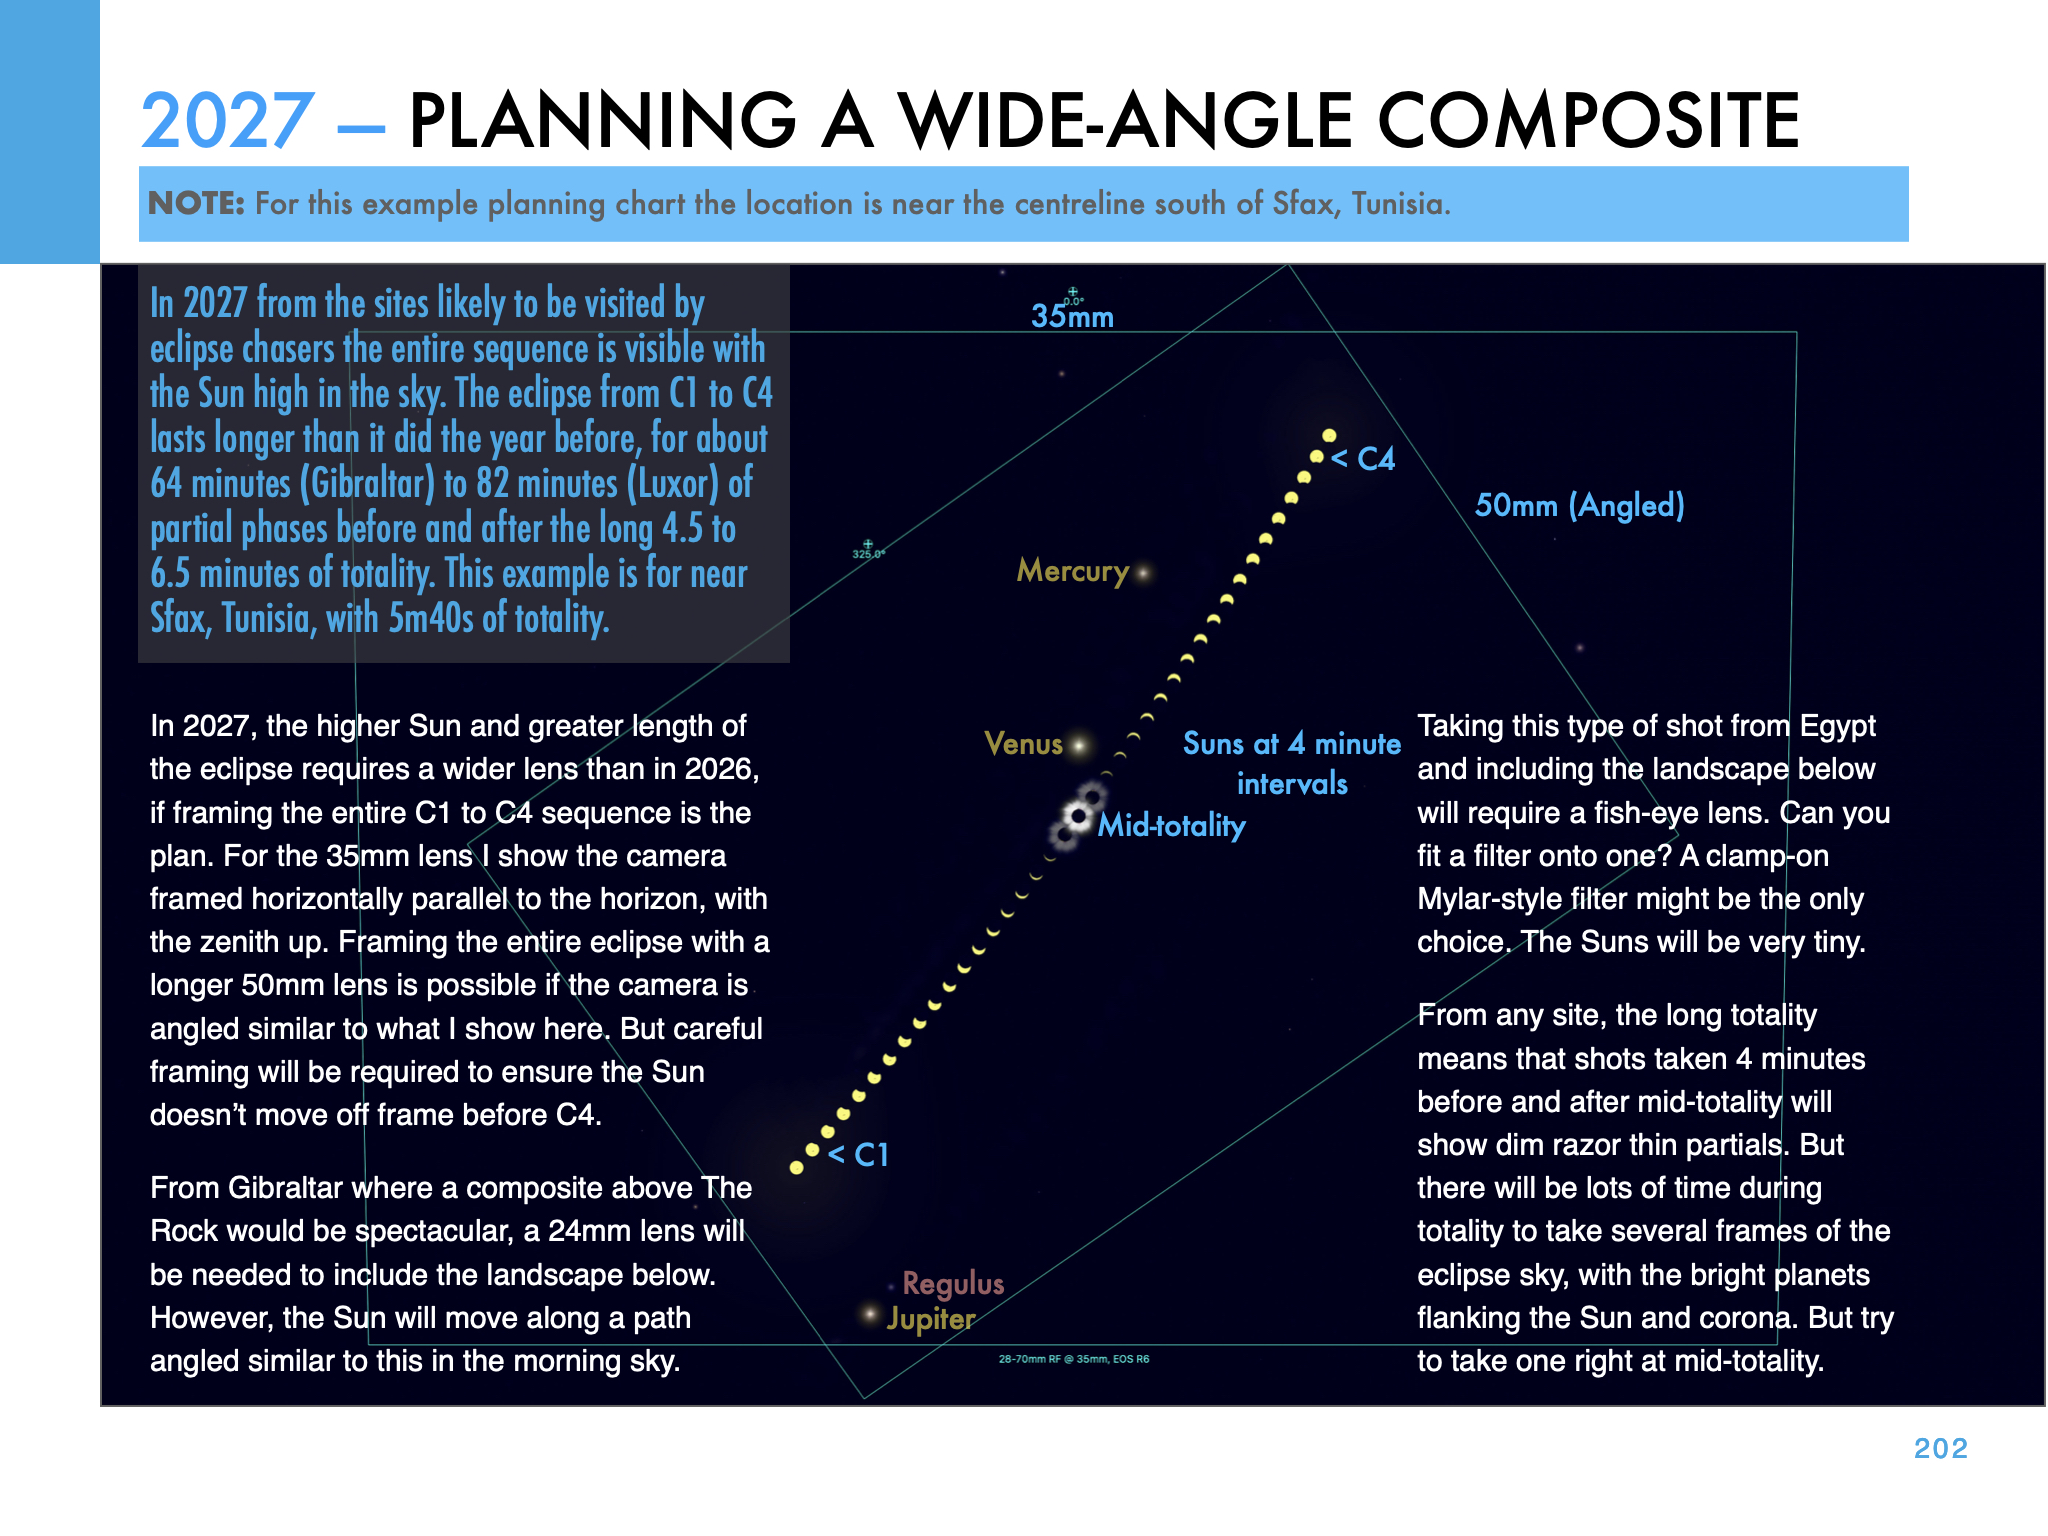
From Tunisia, as I show above, the Sun is 55º high over the Mediterranean, and totality is a generous 5m44s.
July 22, 2028
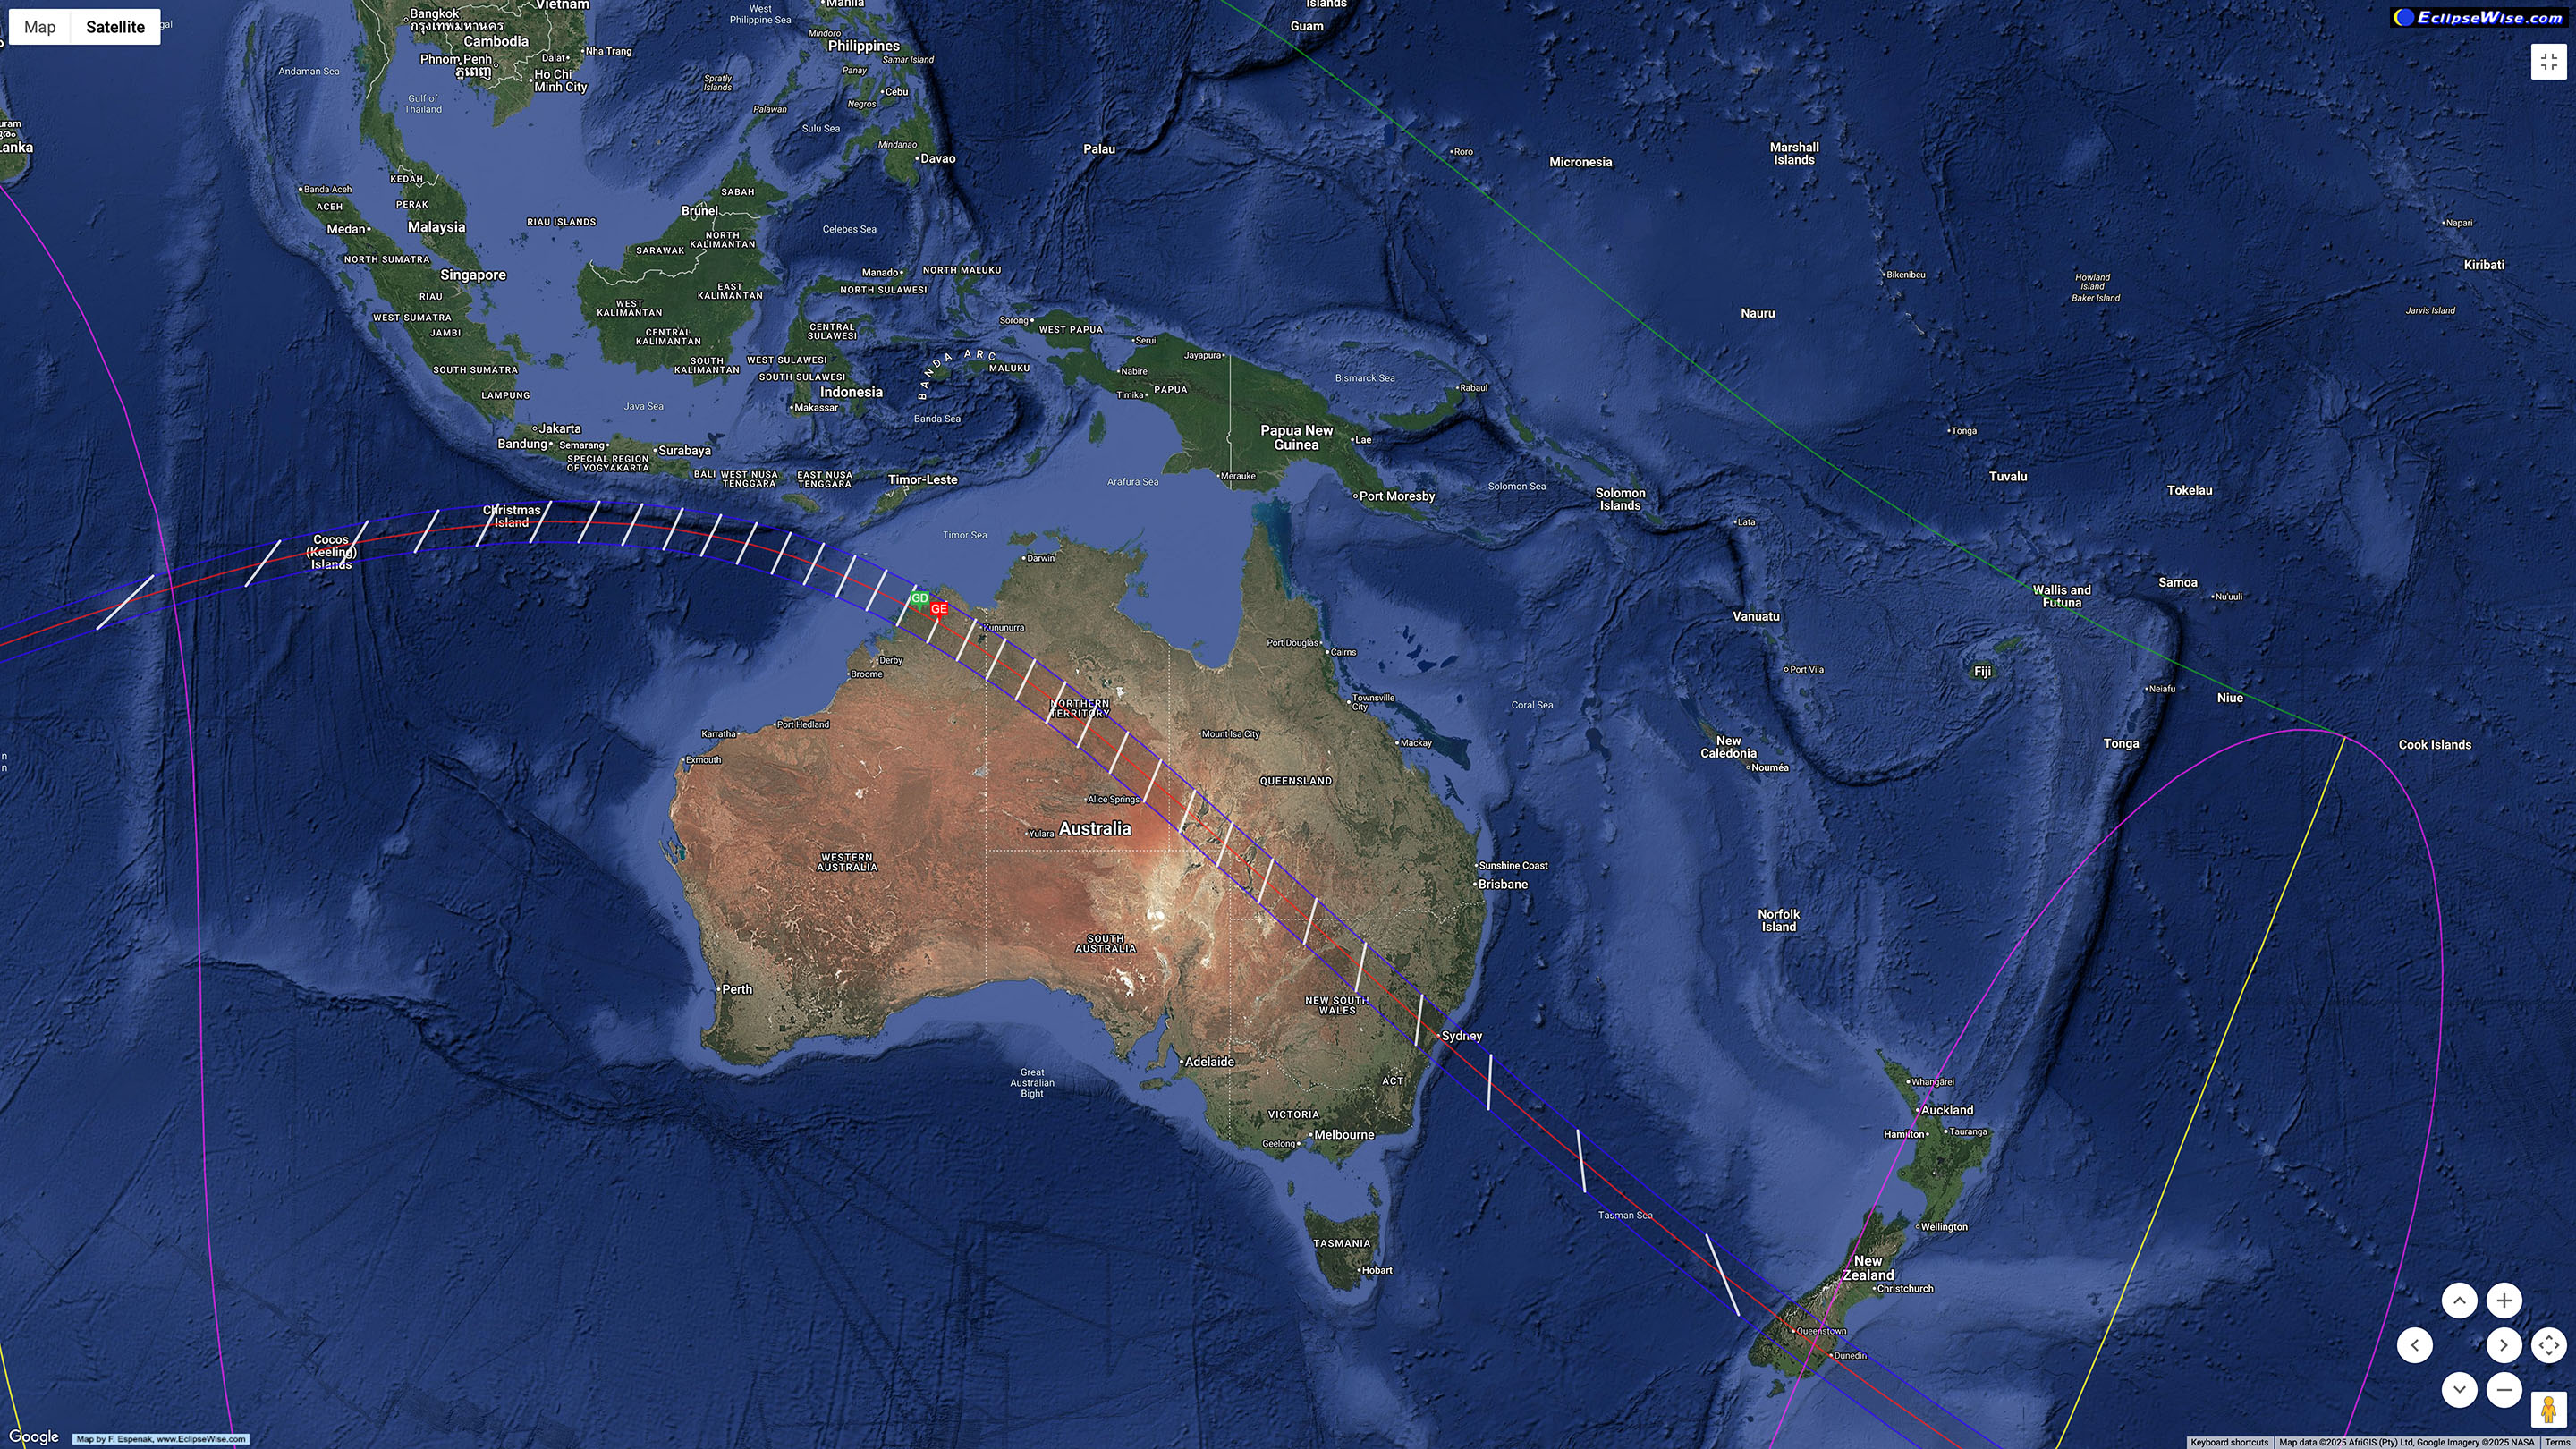
Another 12 lunar months later, the Moon shadow sweeps across the southern hemisphere, for another generously long eclipse. Remote Western Australia enjoys 5m10s of totality on a winter’s day.
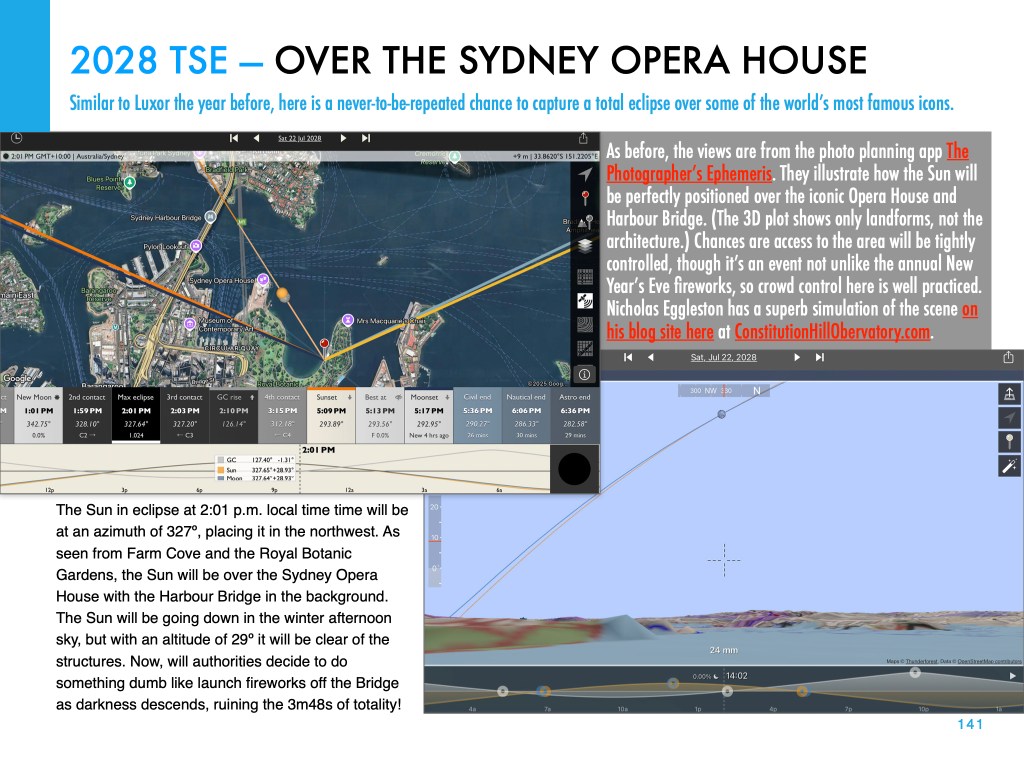
But millions lie in the path in New South Wales, where Sydneysiders can watch a total eclipse over Sydney Harbour lasting 3m48s. The sky scene is below, with a late afternoon winter Sun heading down in the west. From Farm Cove, the eclipsed Sun will be over the Opera House and Harbour Bridge, for a never-to-be-repeated photo op.
The South Island of New Zealand sees a sunset eclipse (the shadow passes over Milford Sound) that lasts 2m55s, longer than the 2017 eclipse in the United States.
Coincidentally, Australia also hosts the next total eclipse to follow, after a gap of 28 months, on November 25, 2030. And the lunar shadow crosses Australia on July 13, 2037 and December 26, 2038 — a Boxing Day eclipse down under. So Australia is the place to be for the next decade or so.
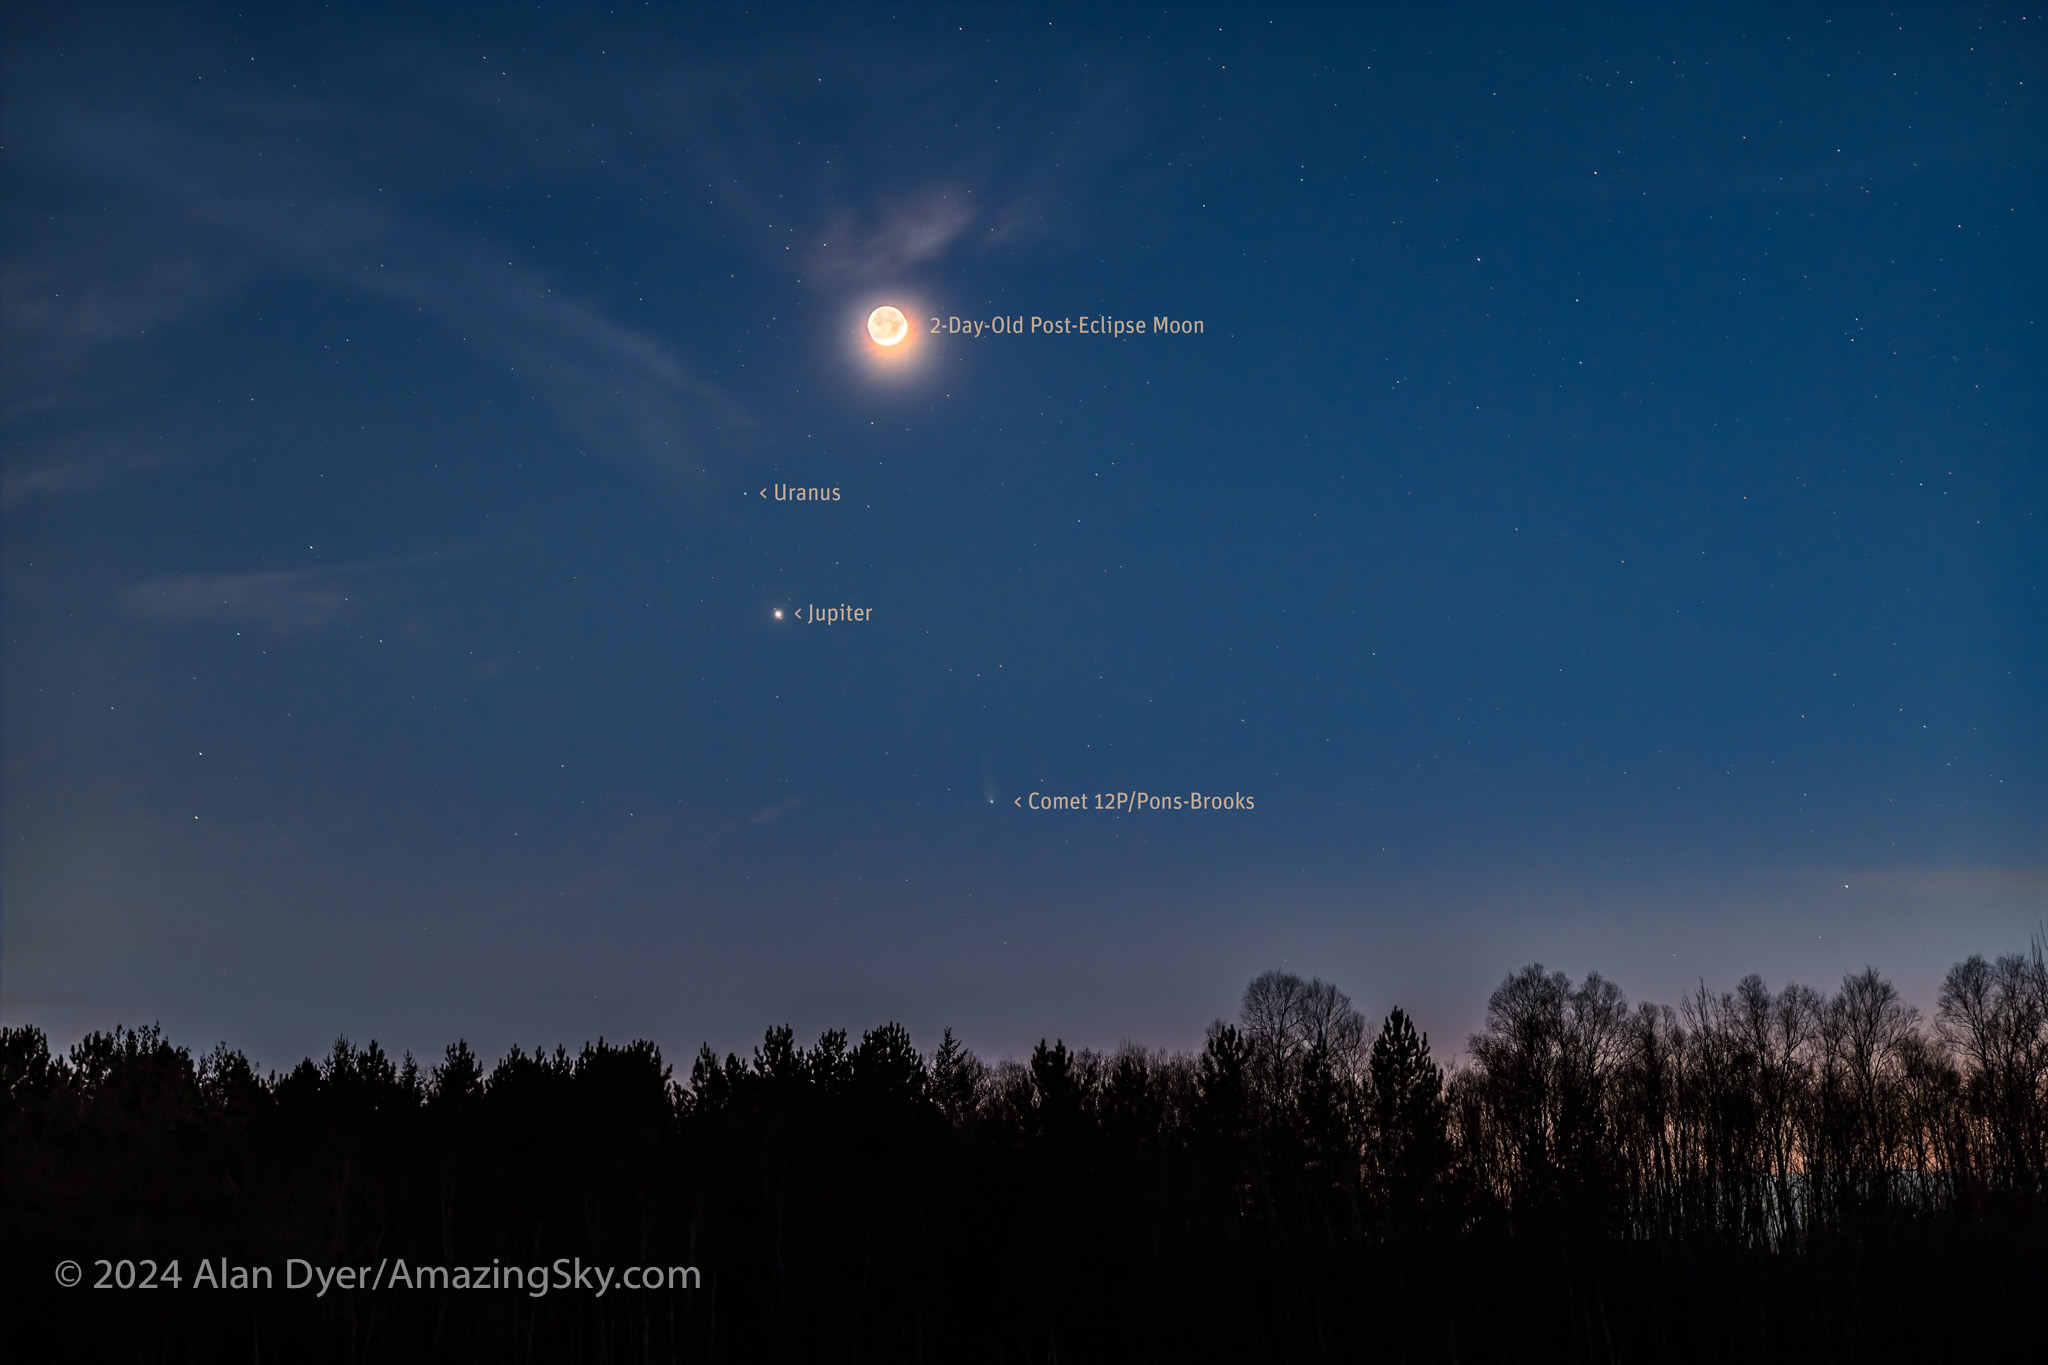
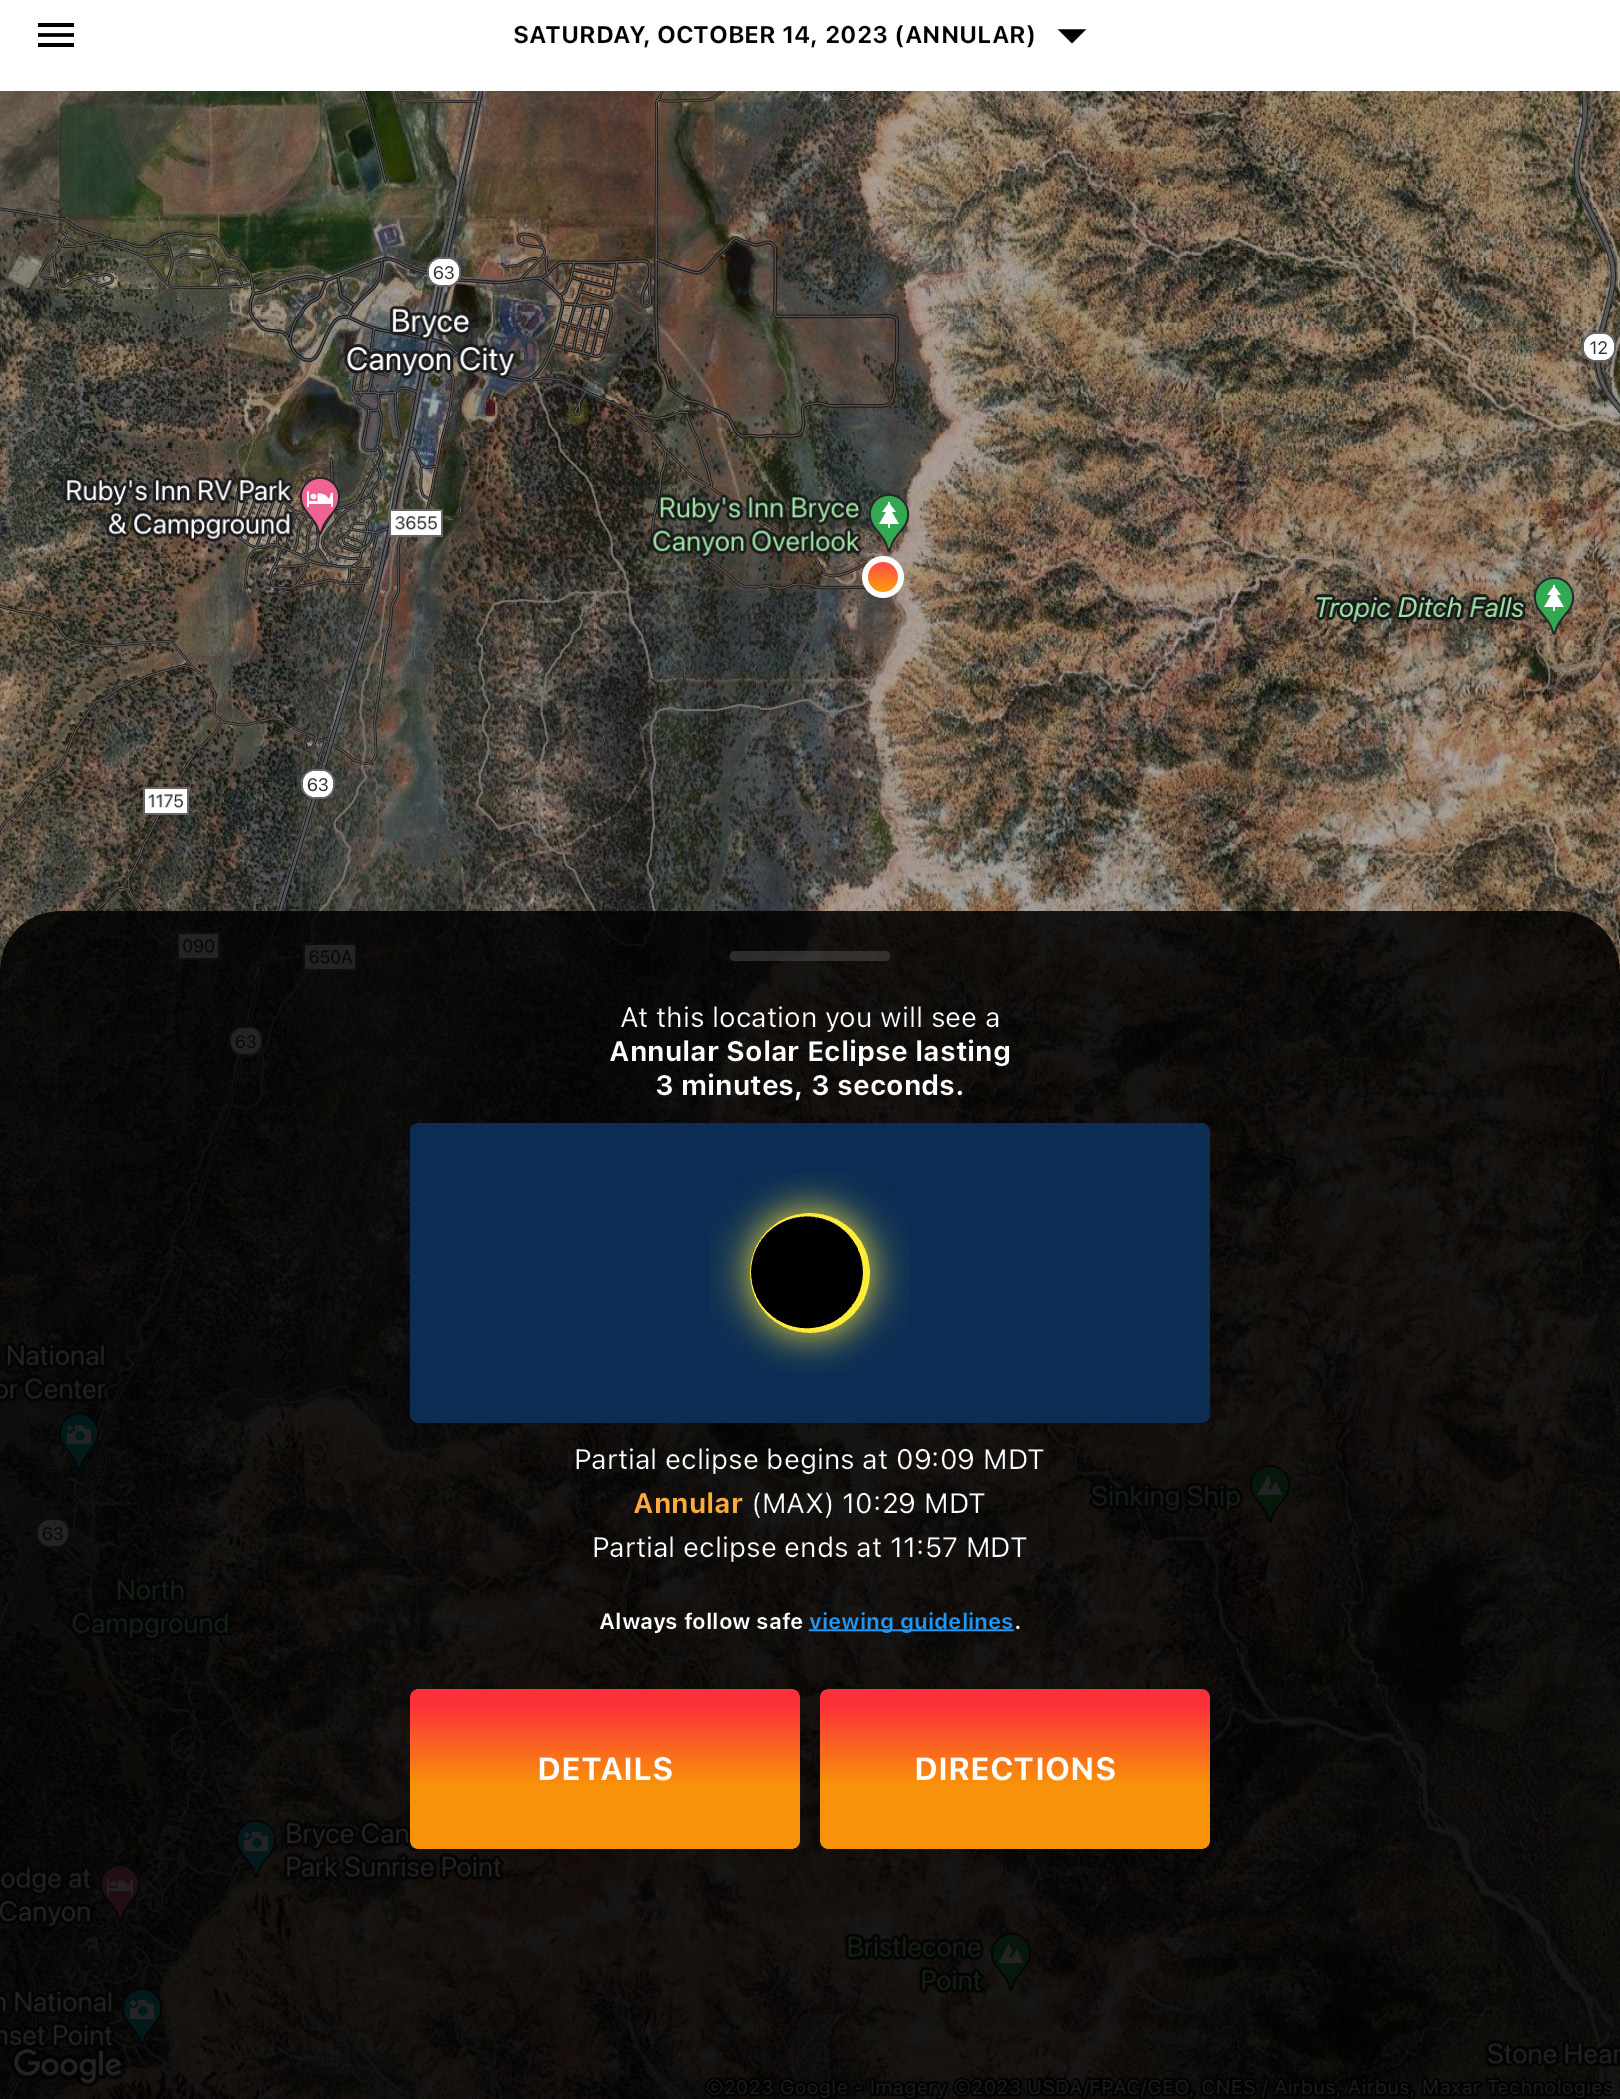
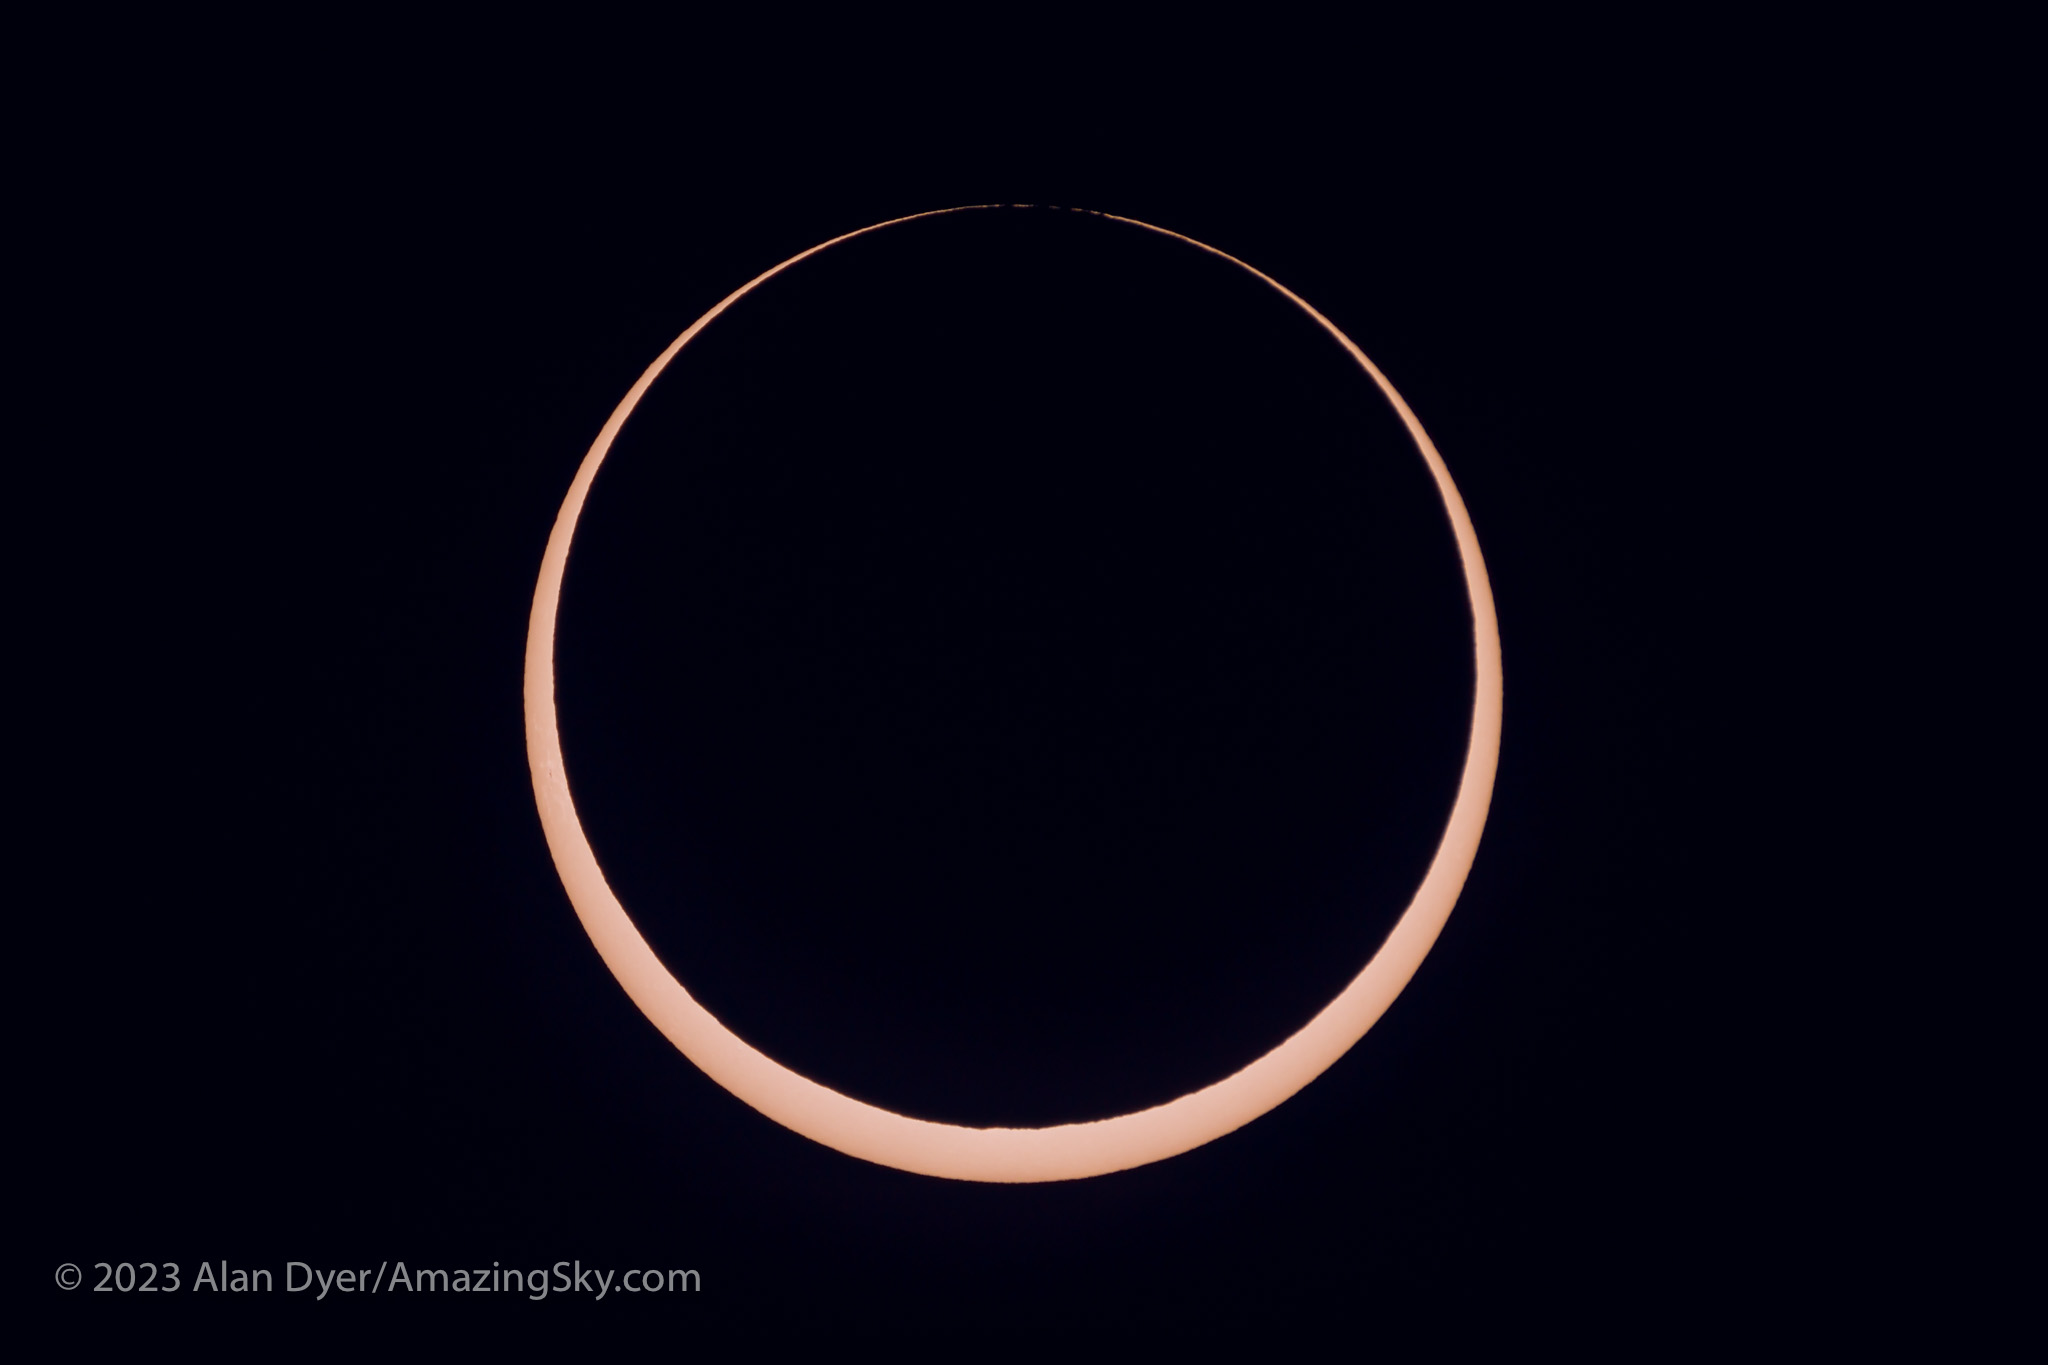
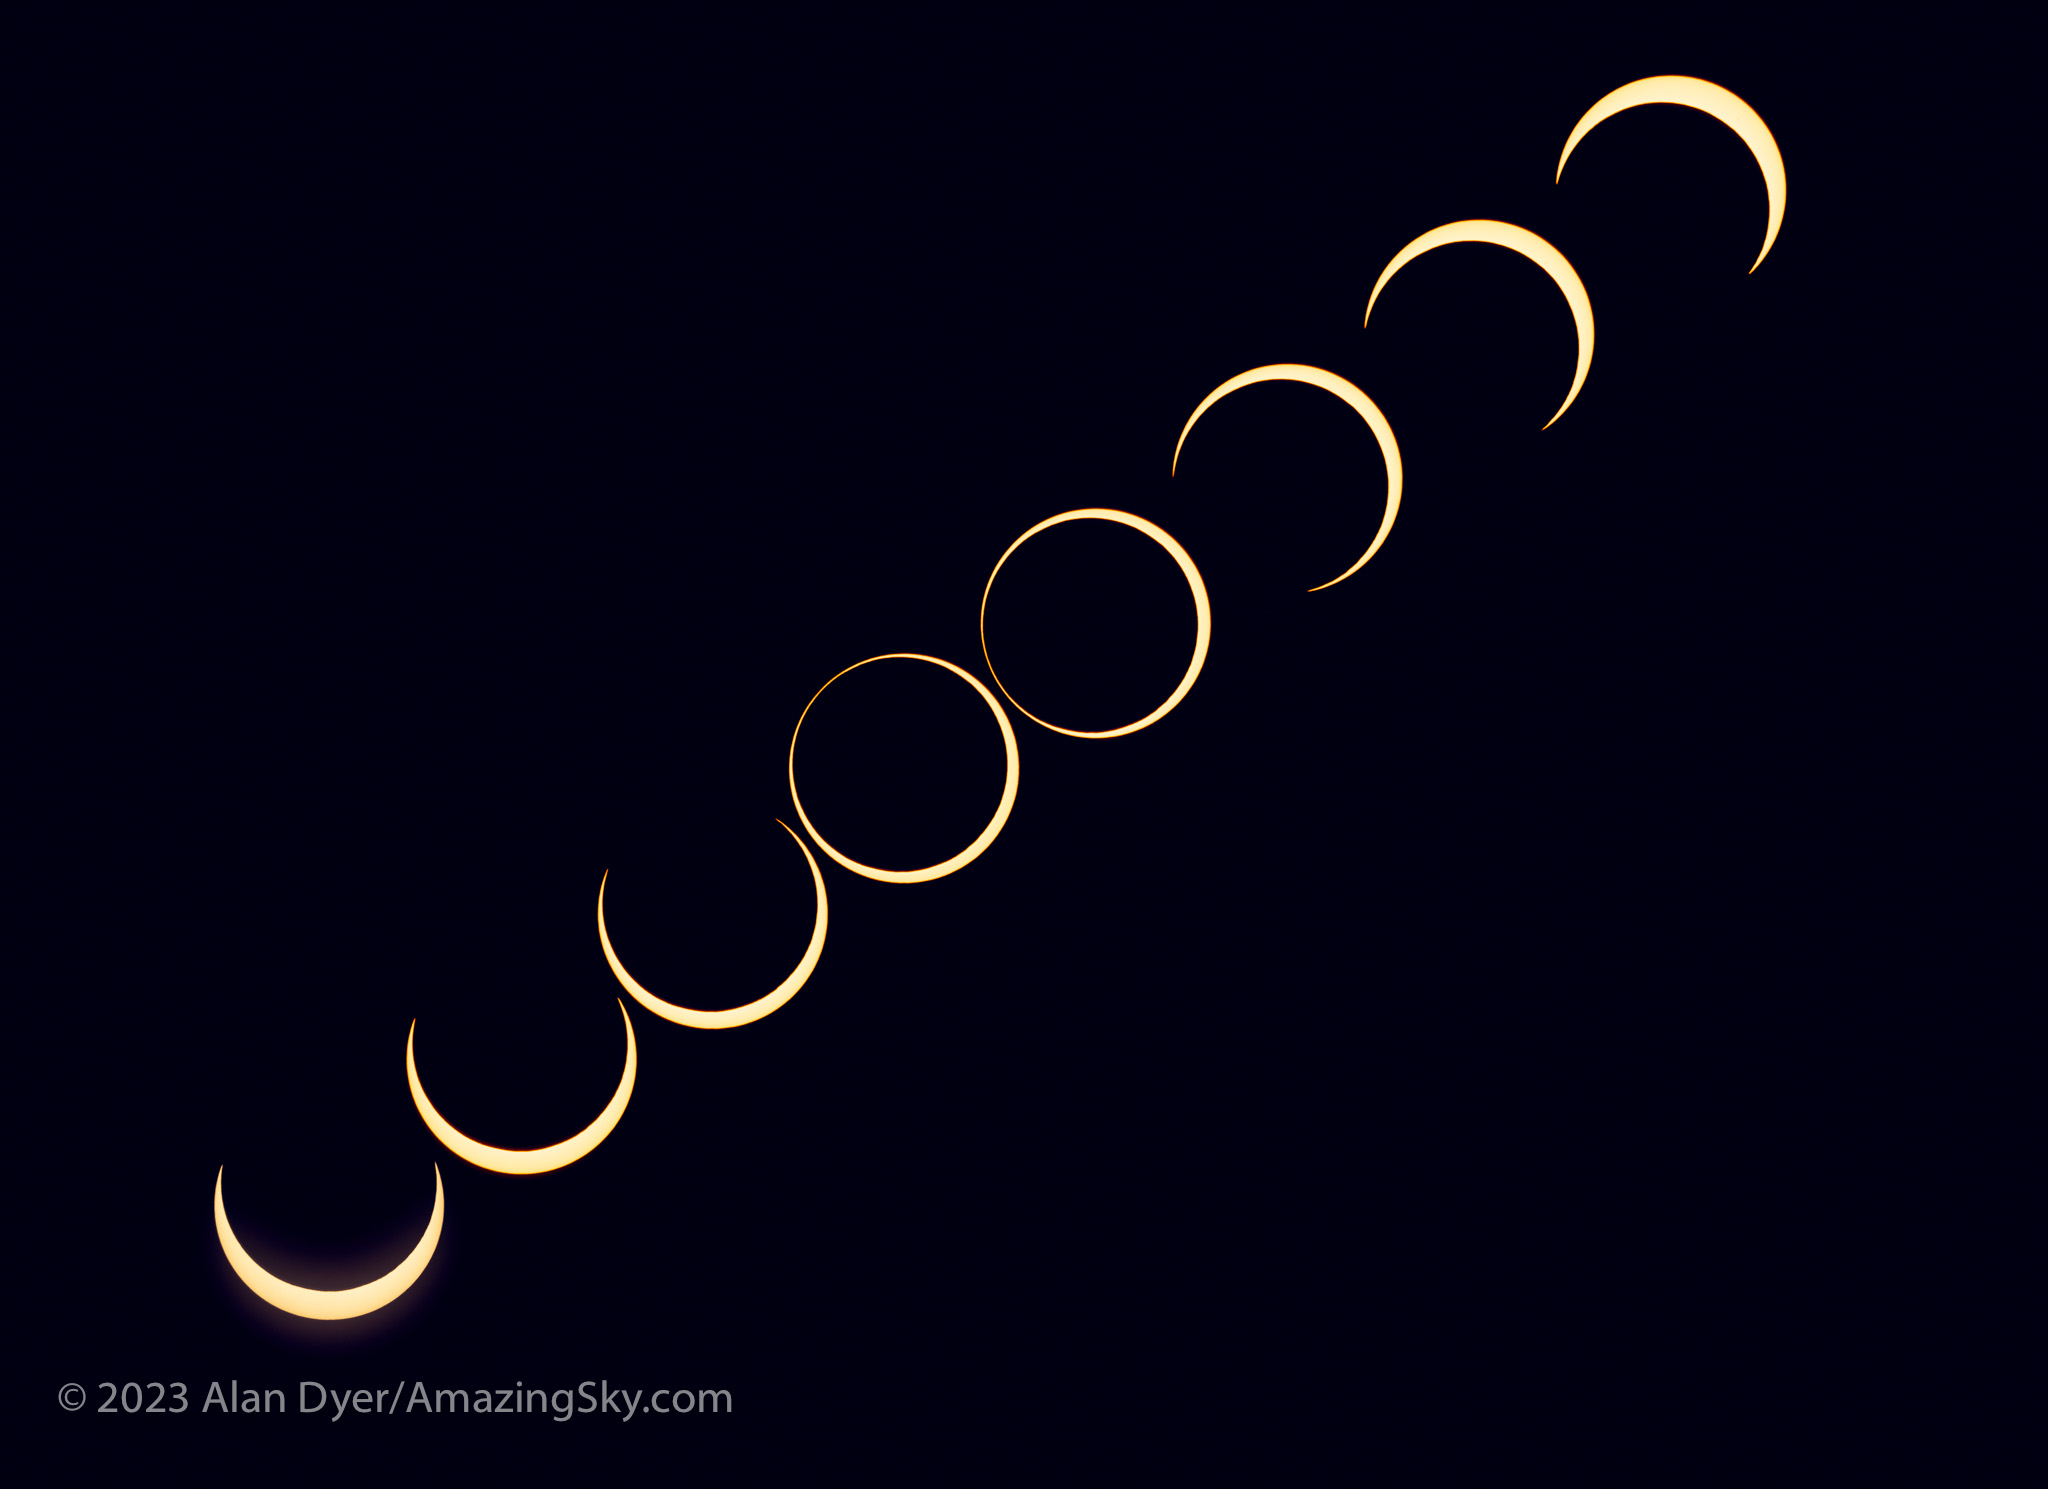
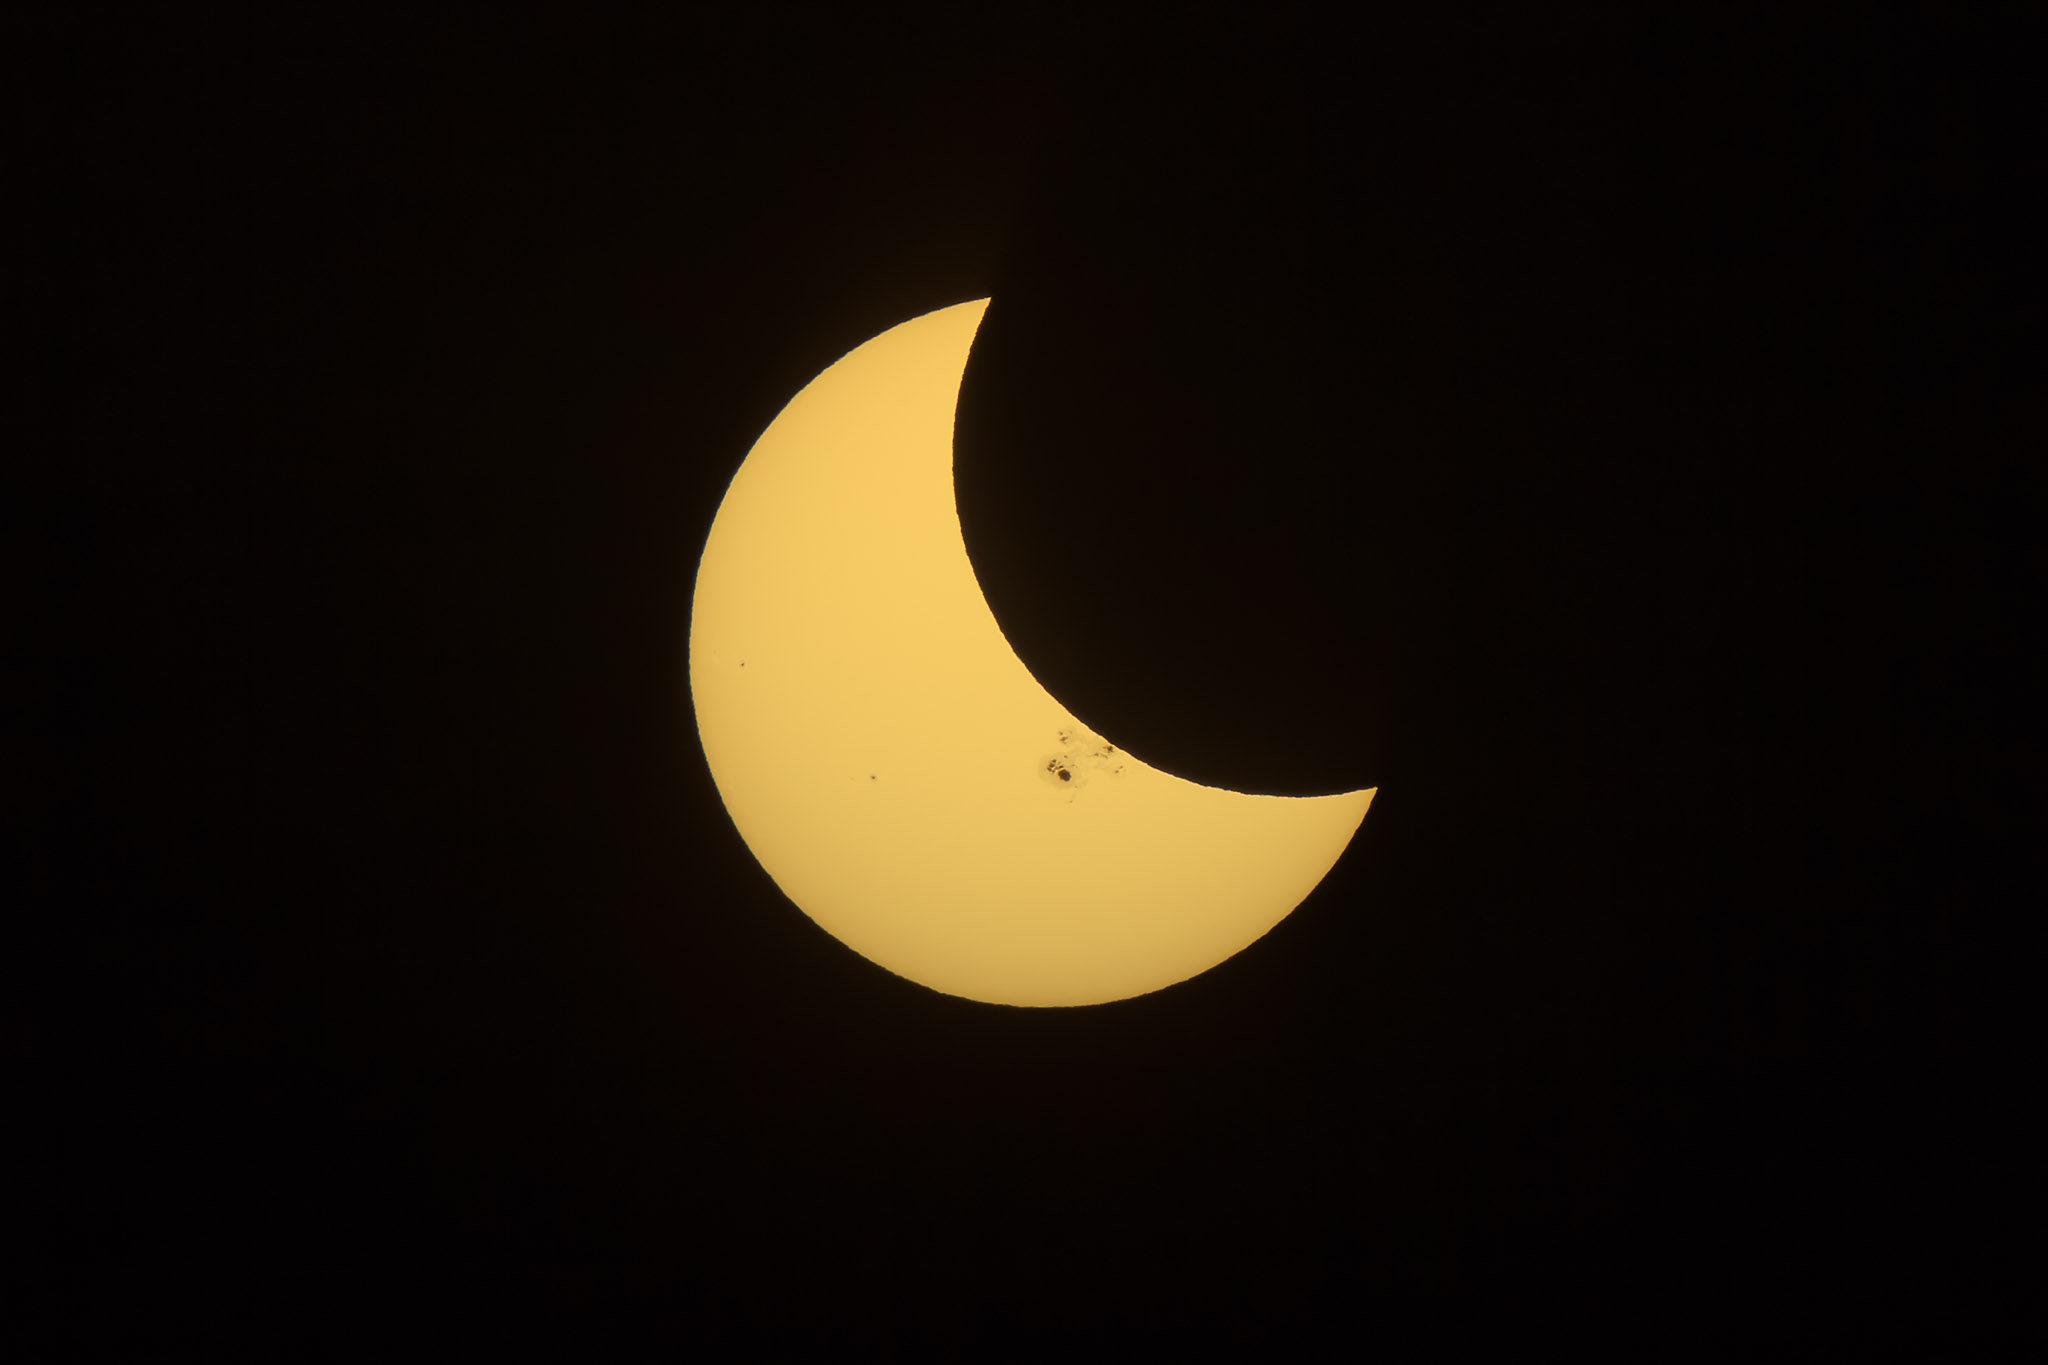
But between 2026 and 2028, Spain is host to three eclipses, as the 2027 total crosses Spanish territory, and the January 26, 2028 annular eclipse ends at sunset in western Spain. At this eclipse the Moon is not large enough to completely hide the Sun, so at mid-eclipse we see a bright ring of light, similar to the annular eclipse here in North America on October 14, 2023.
My Plans
Where will I be? For 2026 I have signed onto a trip to Spain with the well-travelled photo tour company CaptureTheAtlas.com.
They are planning a very photo-centric tour to Spain for viewing the eclipse from a winery near Burgos. I’ll be one of the instructors, among a stellar line-up of eclipse veterans and astrophoto experts. I invite you to check out the details of the tour here at its webpage. We’d love to have you join us!
For 2027 I am planning to be in Tunisia, on the Mediterranean coast, with a tour group from Astro-Trails.com.
For 2028 I can return to Australia on my own, to view the eclipse from the very areas I go to anyway on my trips down under for night sky photography.
The path of totality passes just a few kilometres from Coonabarabran, the “Astronomy Capital of Australia,” as the Siding Spring Observatory is just down the Timor Road in the path. In July the Milky Way is at its best, with the centre of the Galaxy high overhead at nightfall. That’s a sight equal to an eclipse for bucket-list spectacle.
My EBook
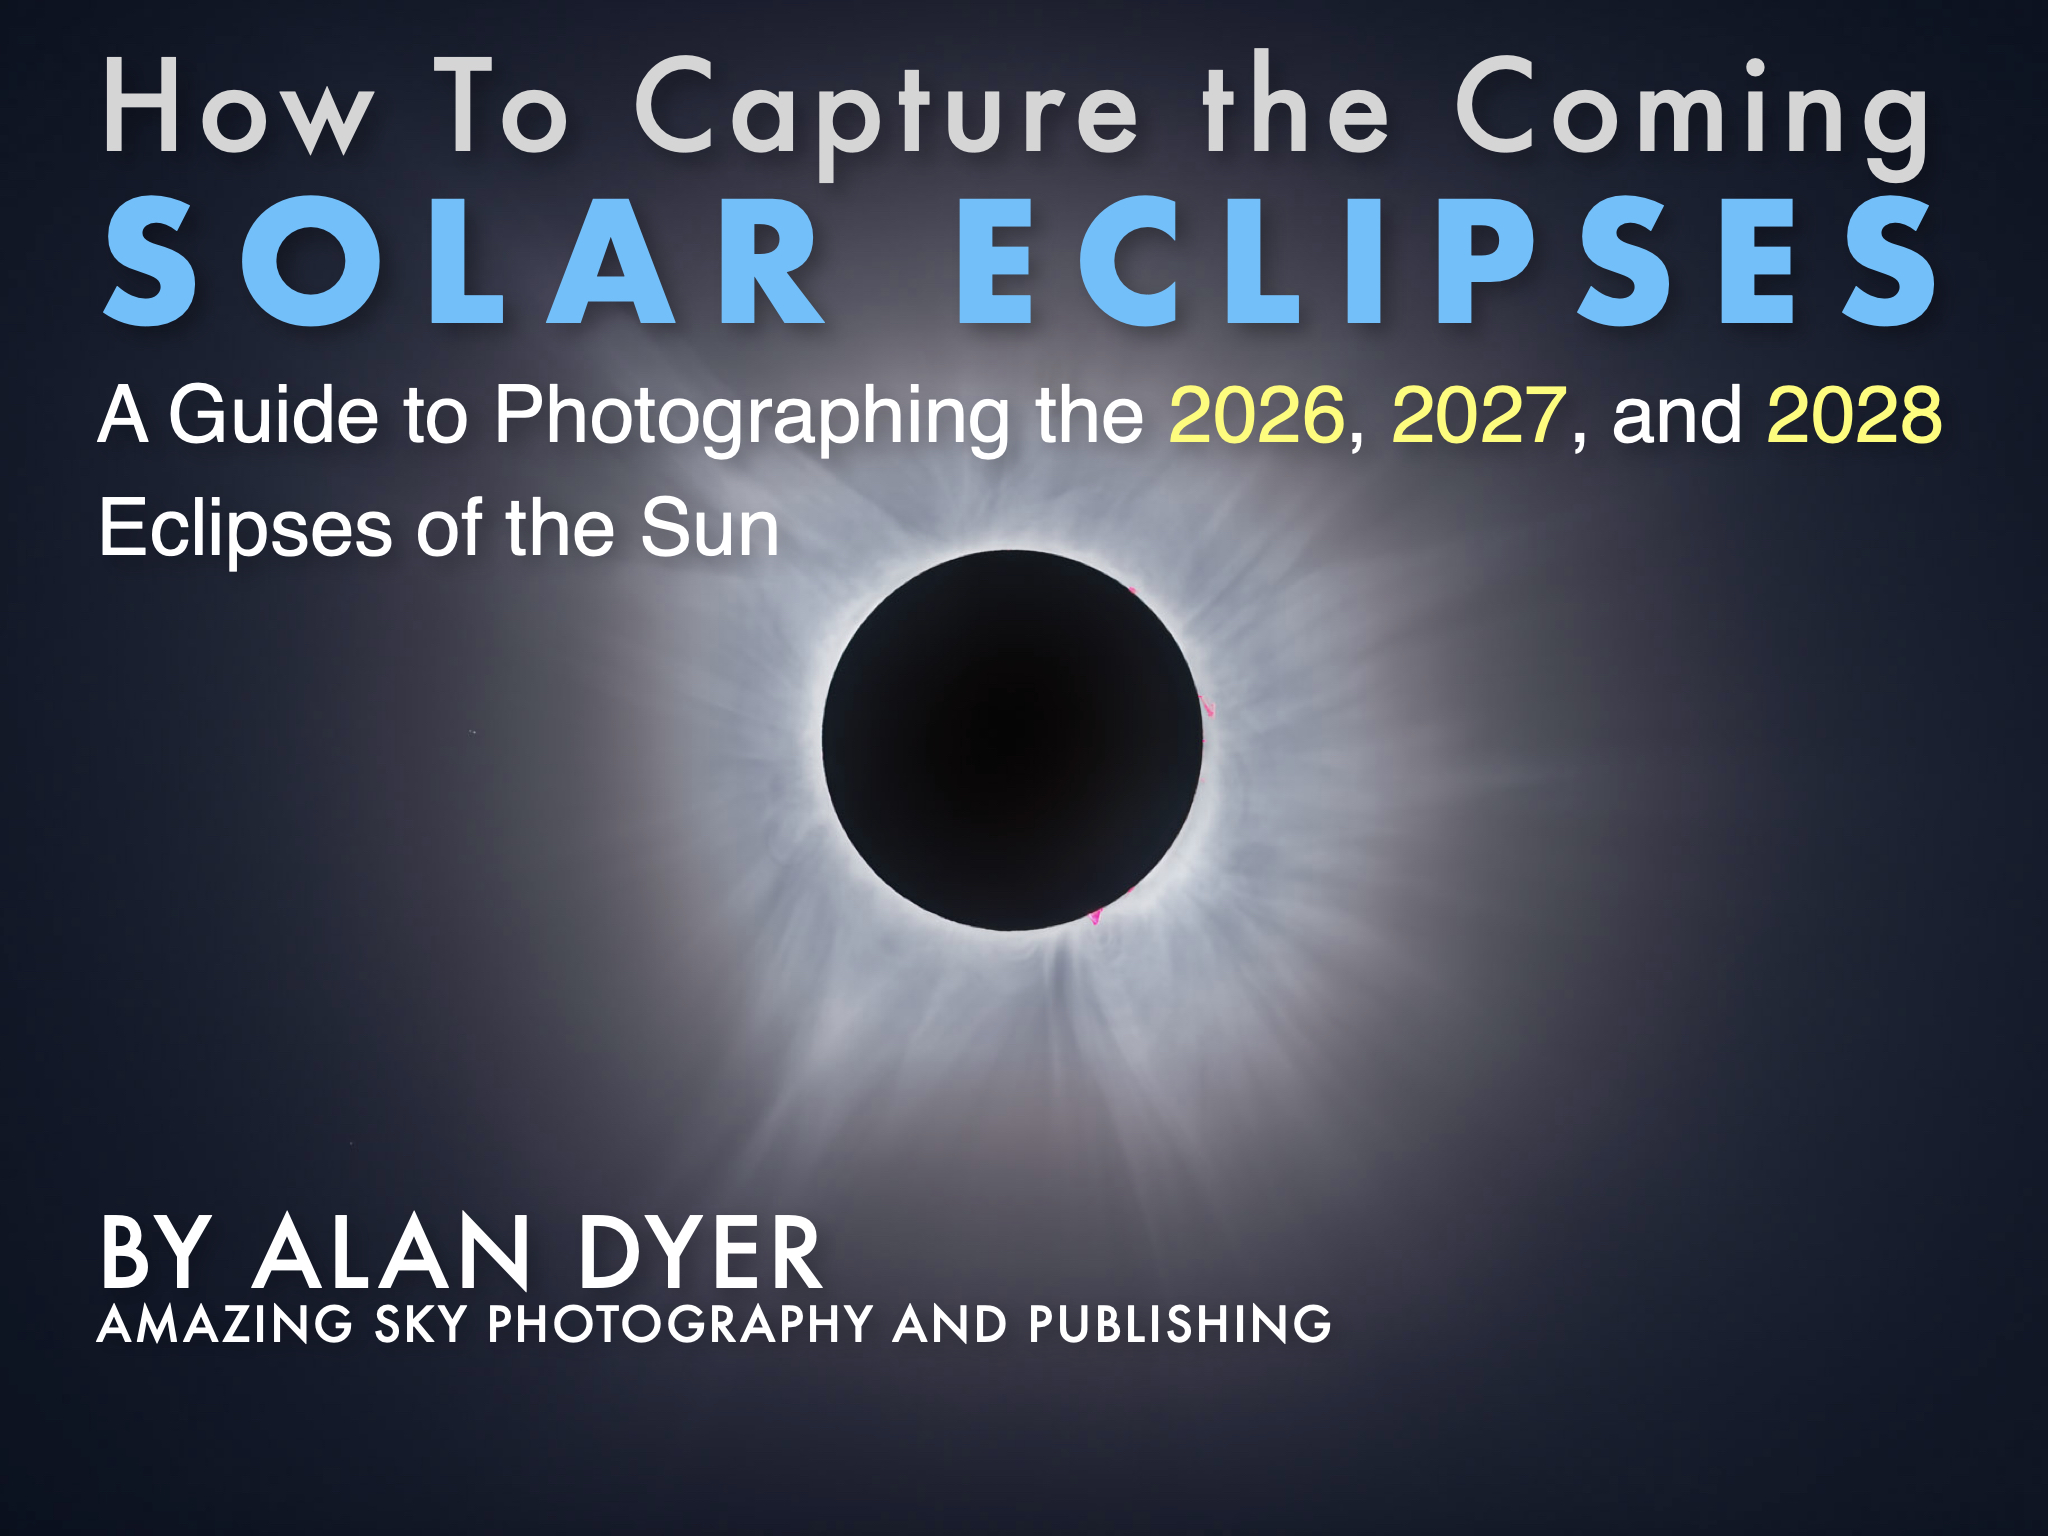
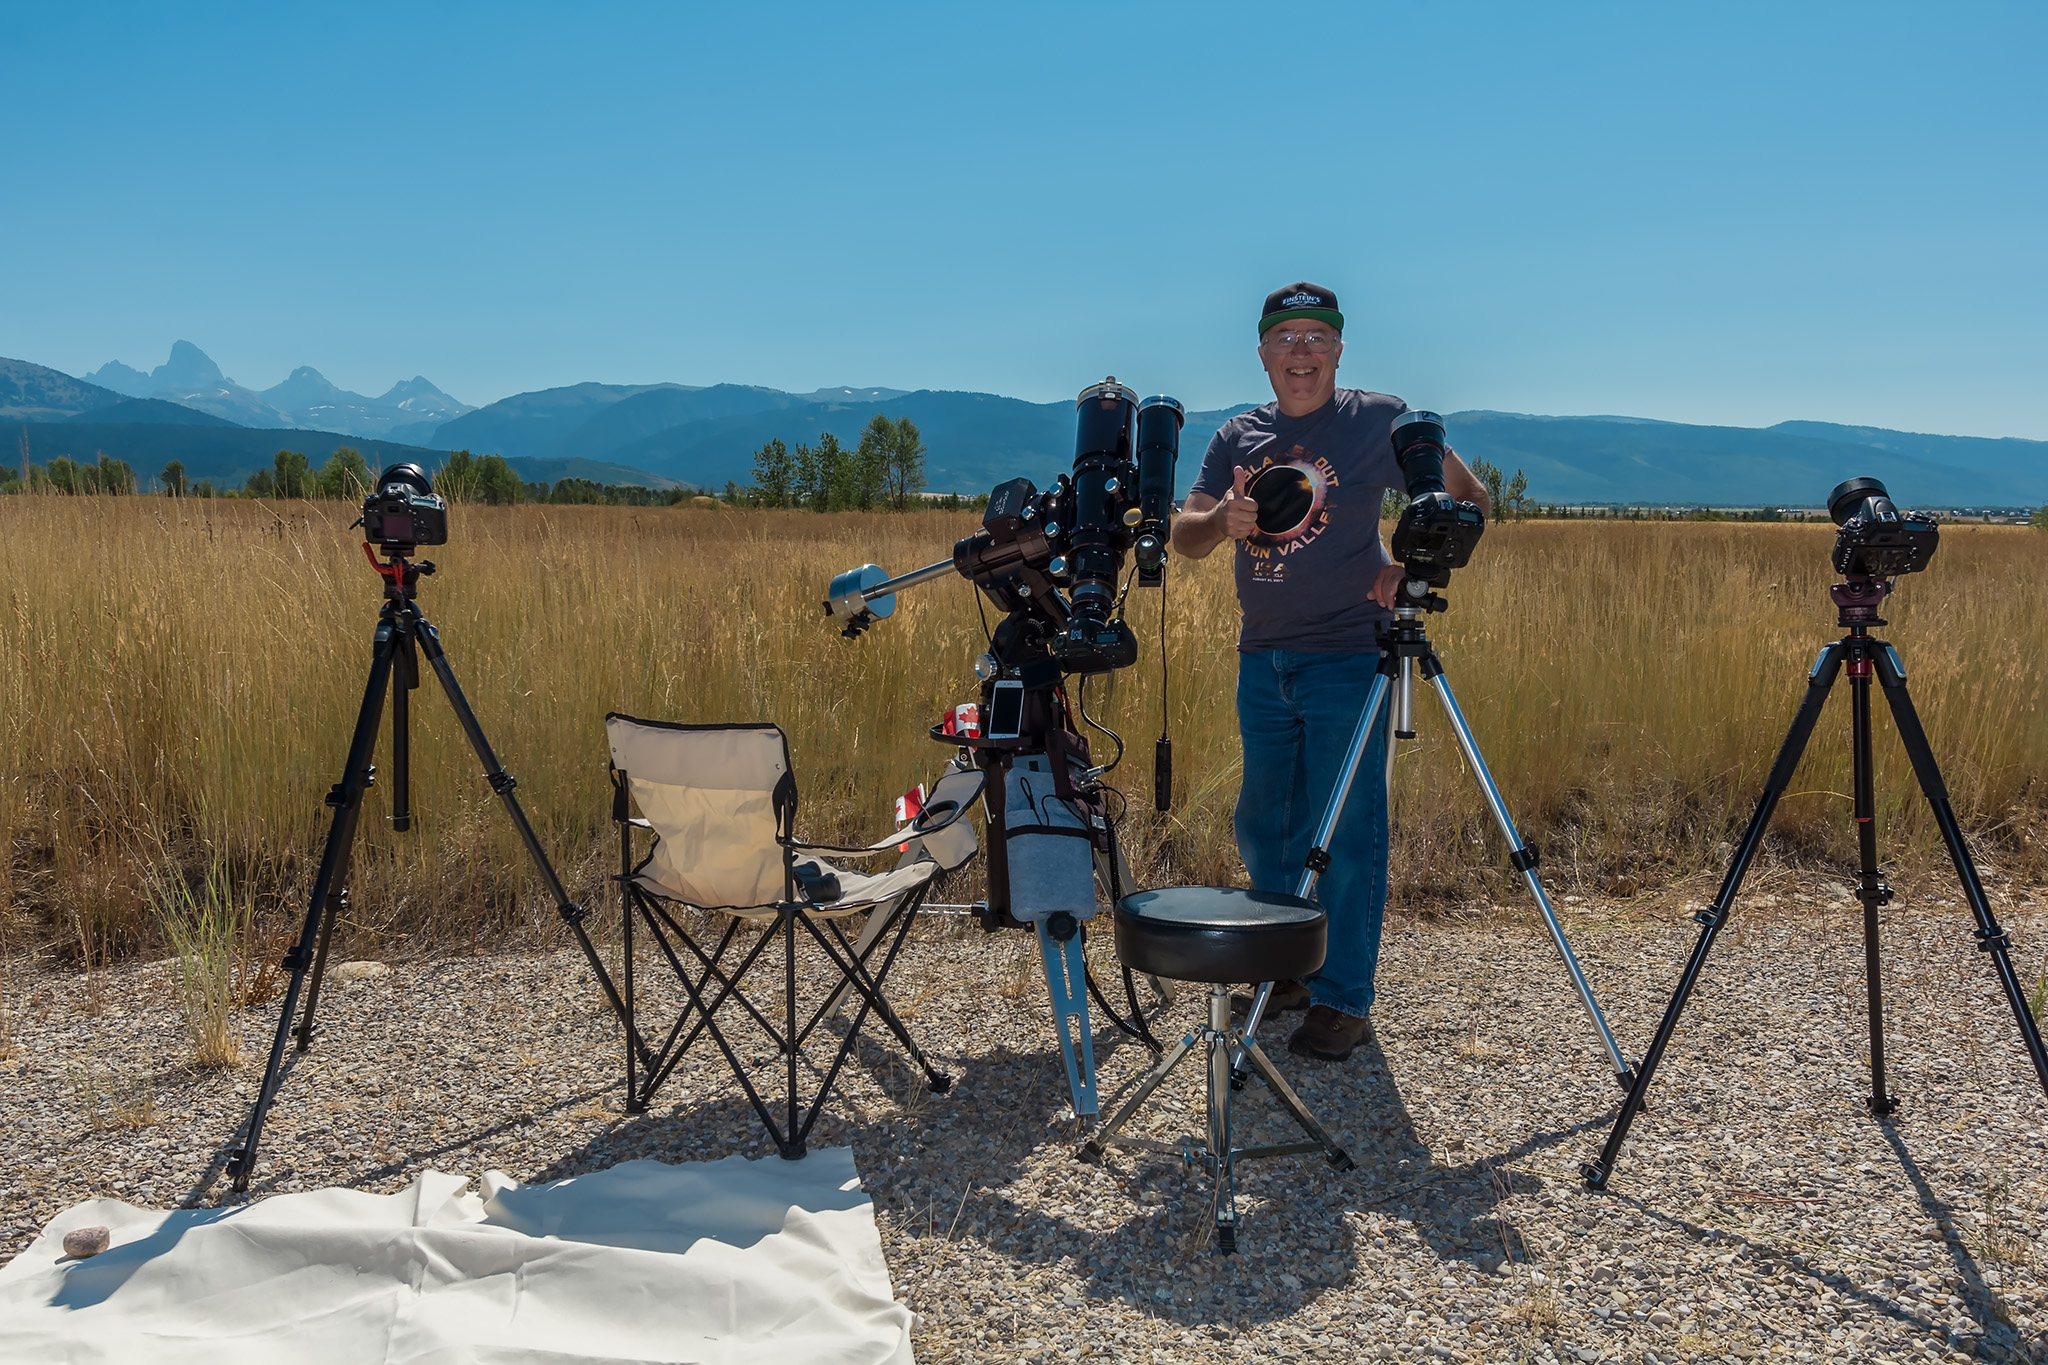
For 2017’s eclipse I prepared an ebook on how to photograph it. It proved popular, and so for the 2023 and 2024 eclipses I revised it to cover both the annular and total eclipses.
Its popularity prompted me to revise it again, this time to cover the coming trio of eclipses, plus I included pages on the January 2028 annular, as many who visit Spain for the totals may plan to return for the sunset annular (low annulars are also the most spectacular!).
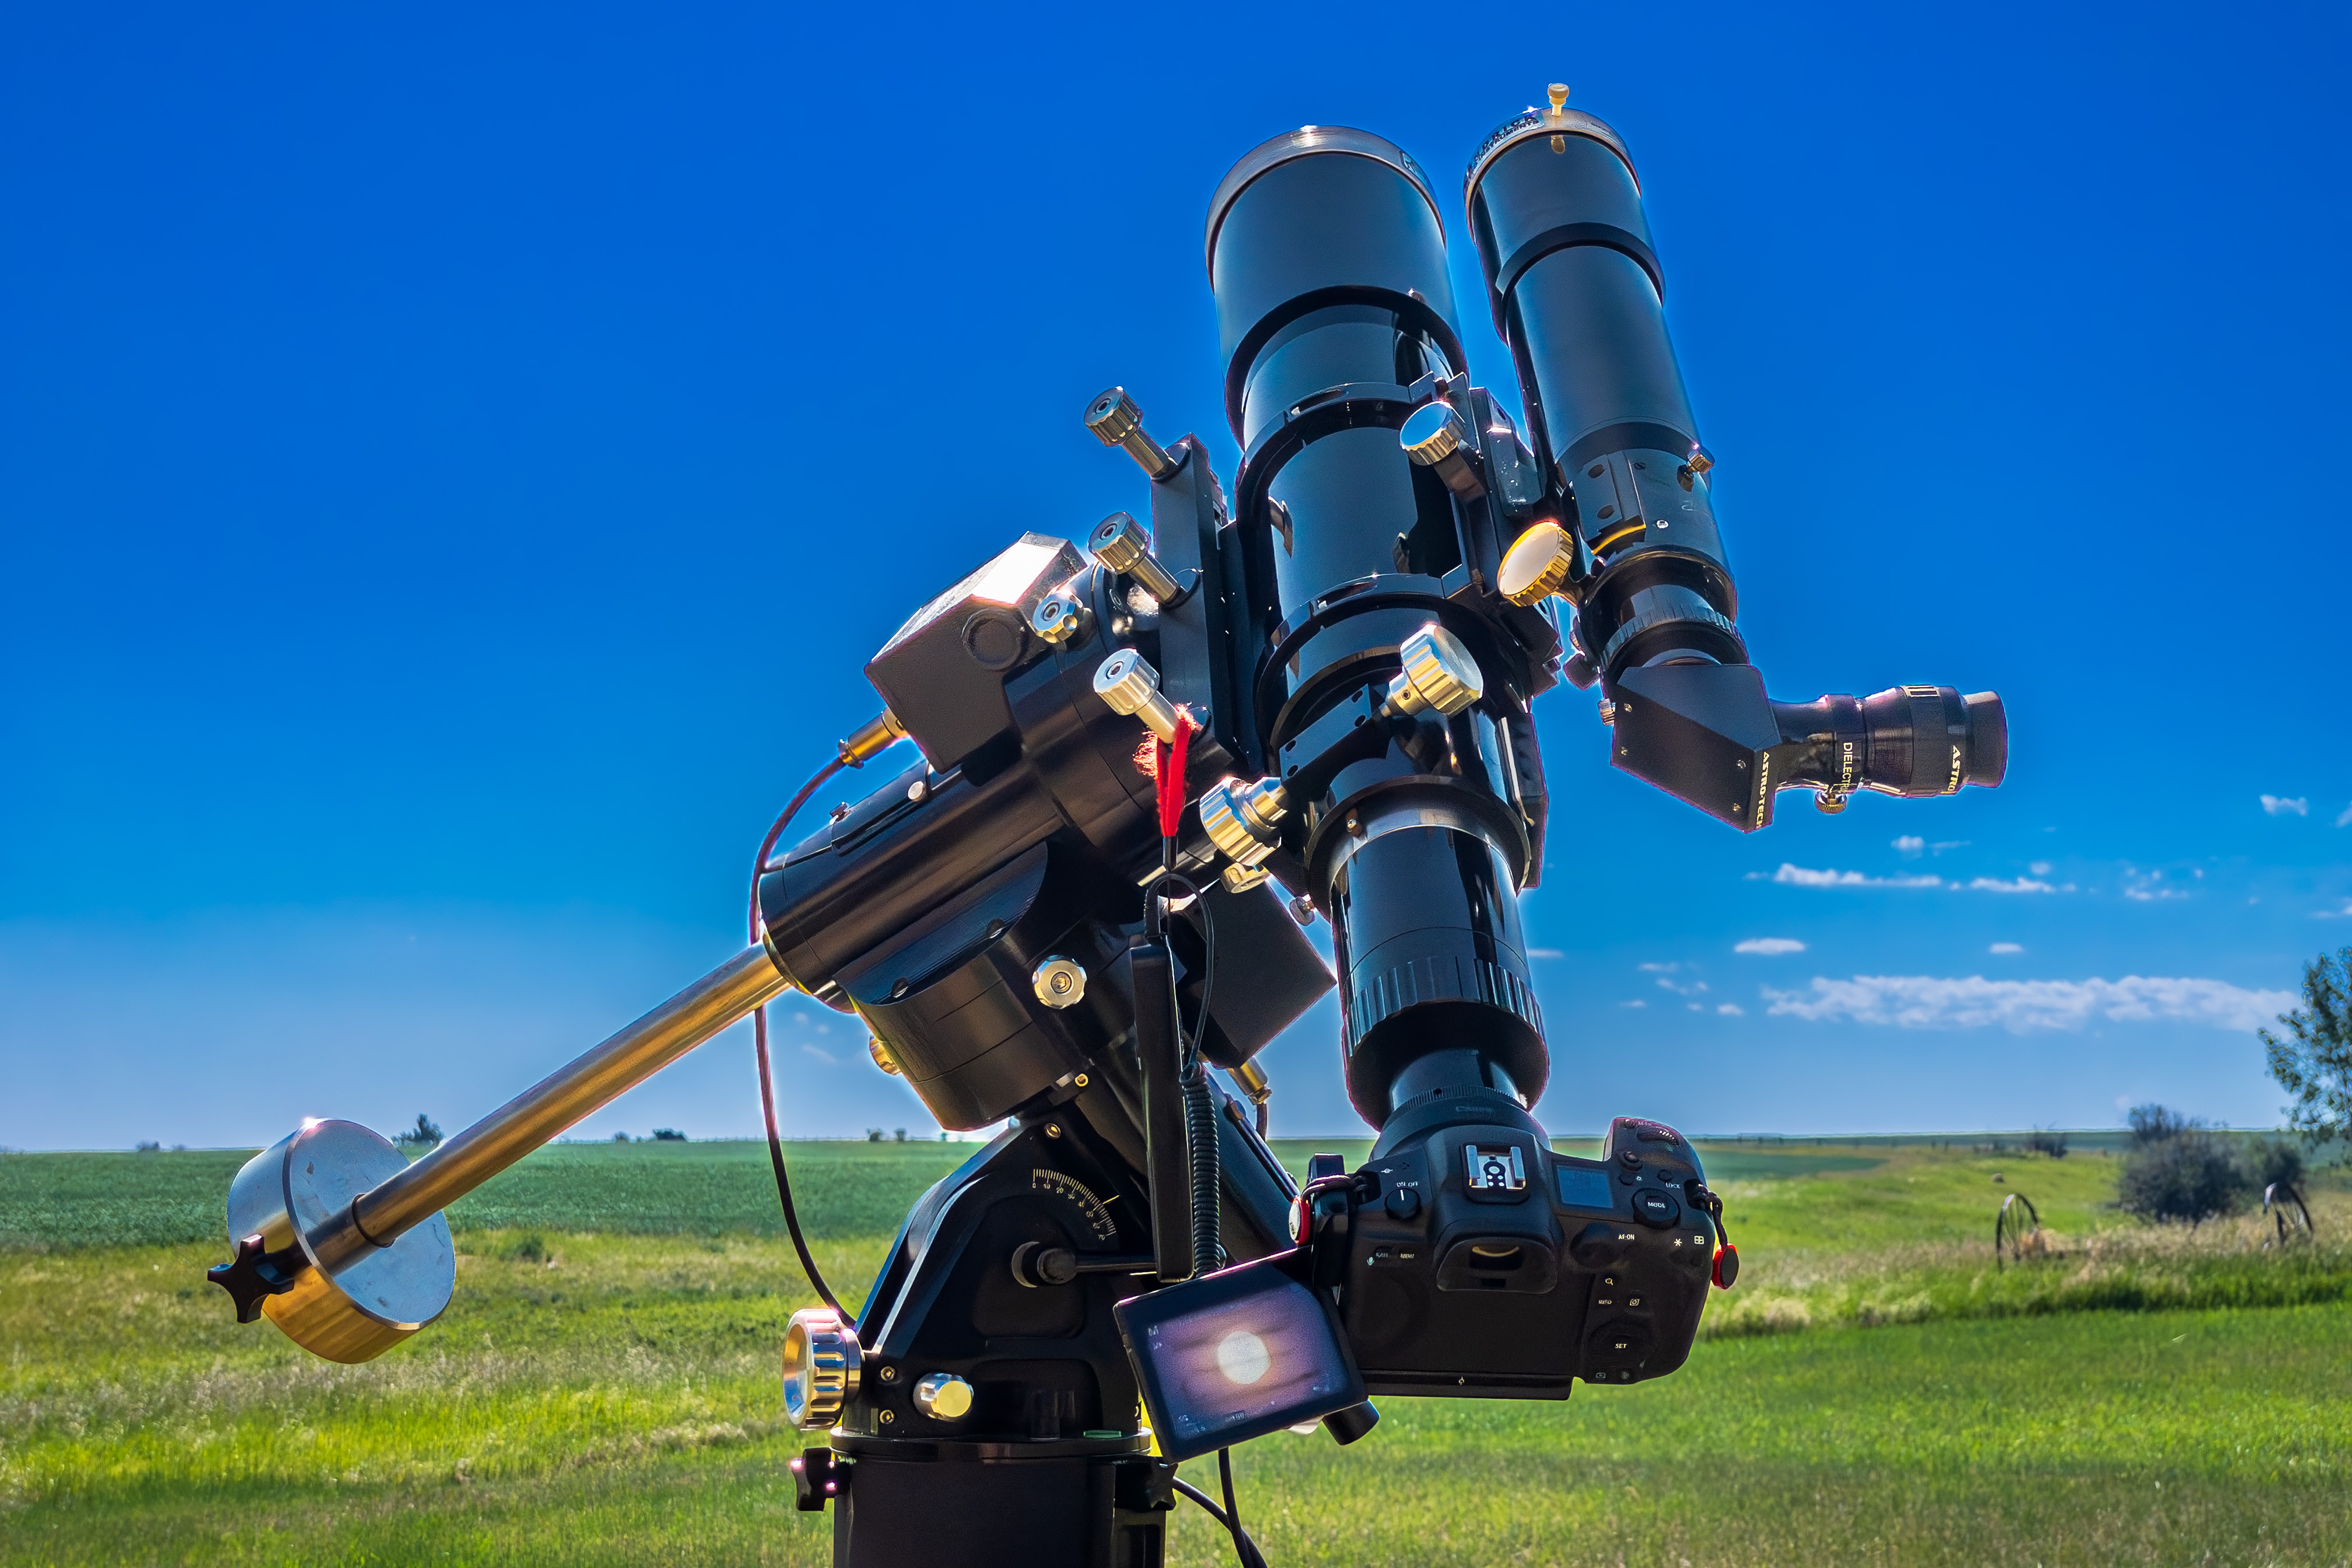
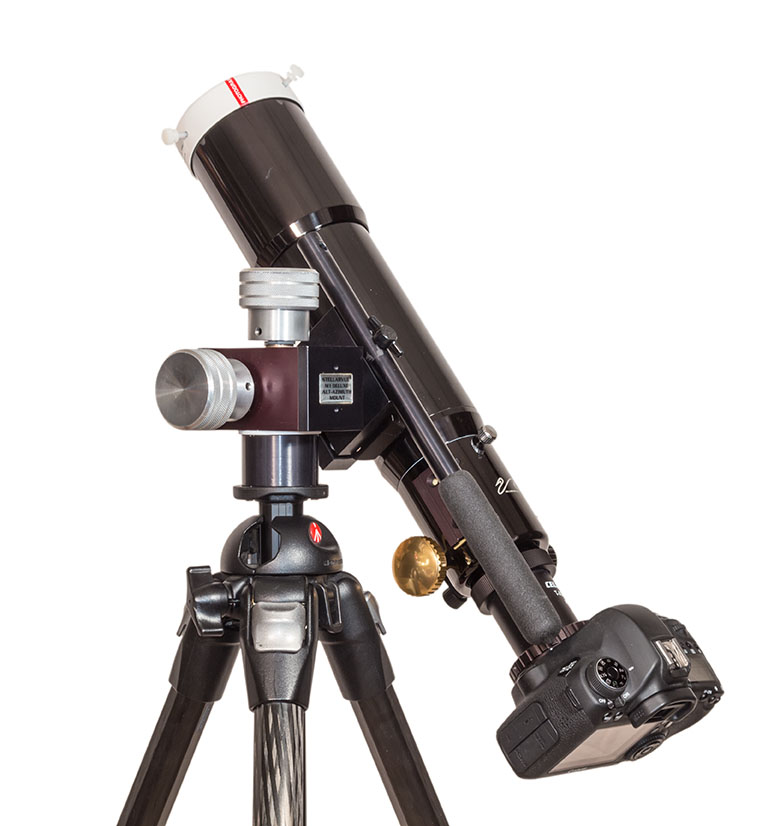
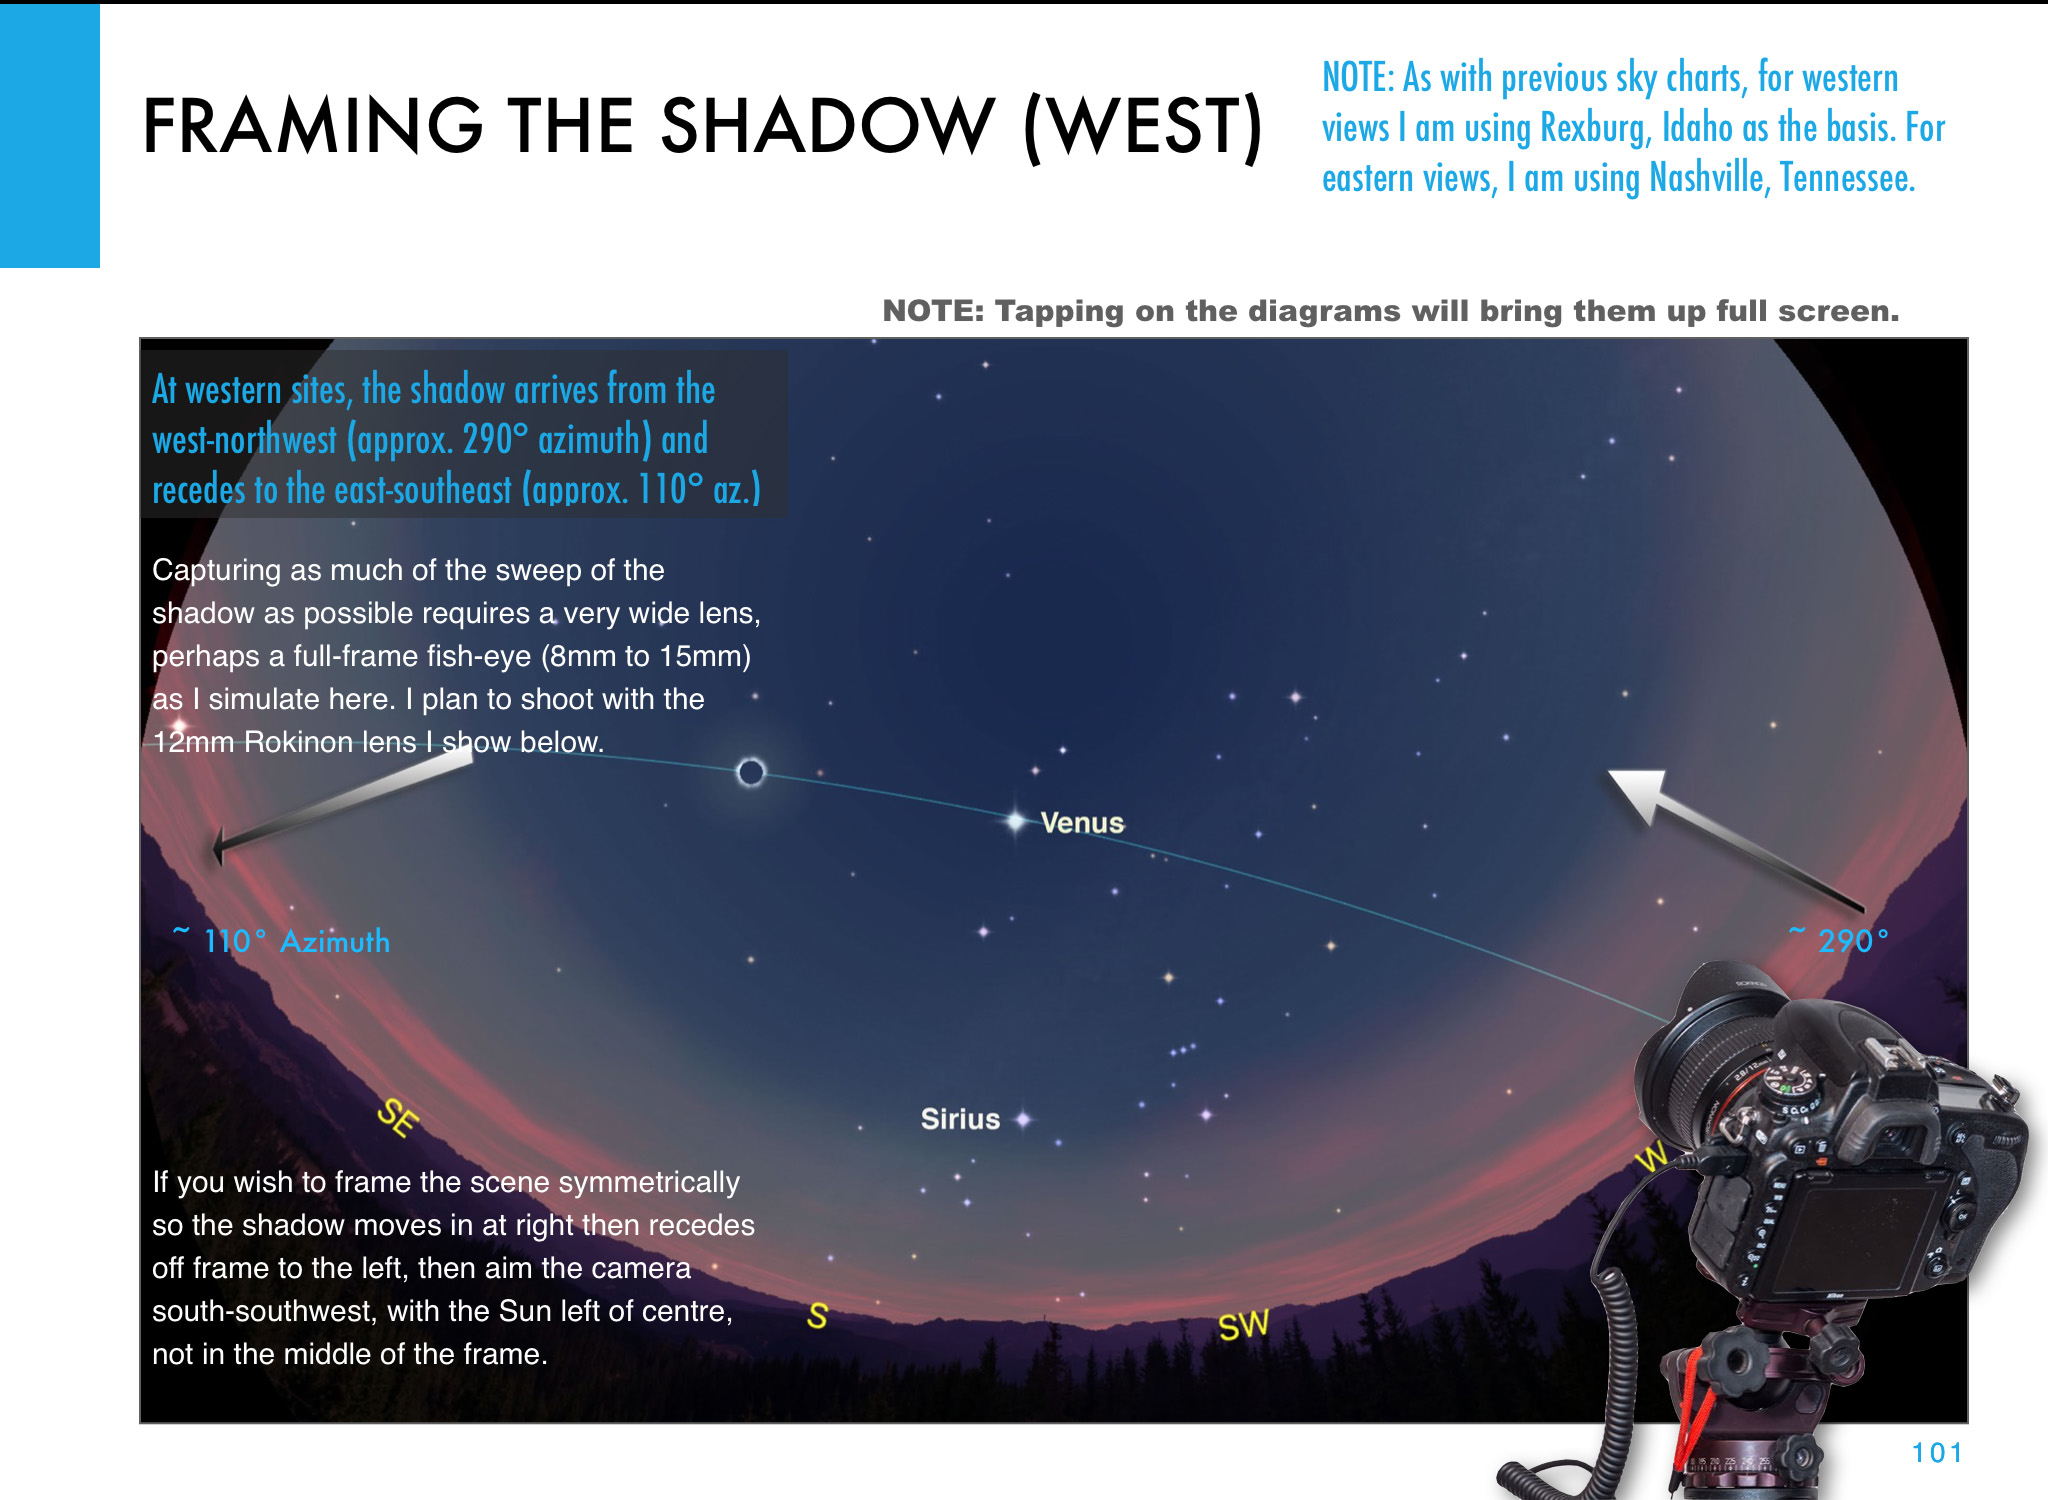
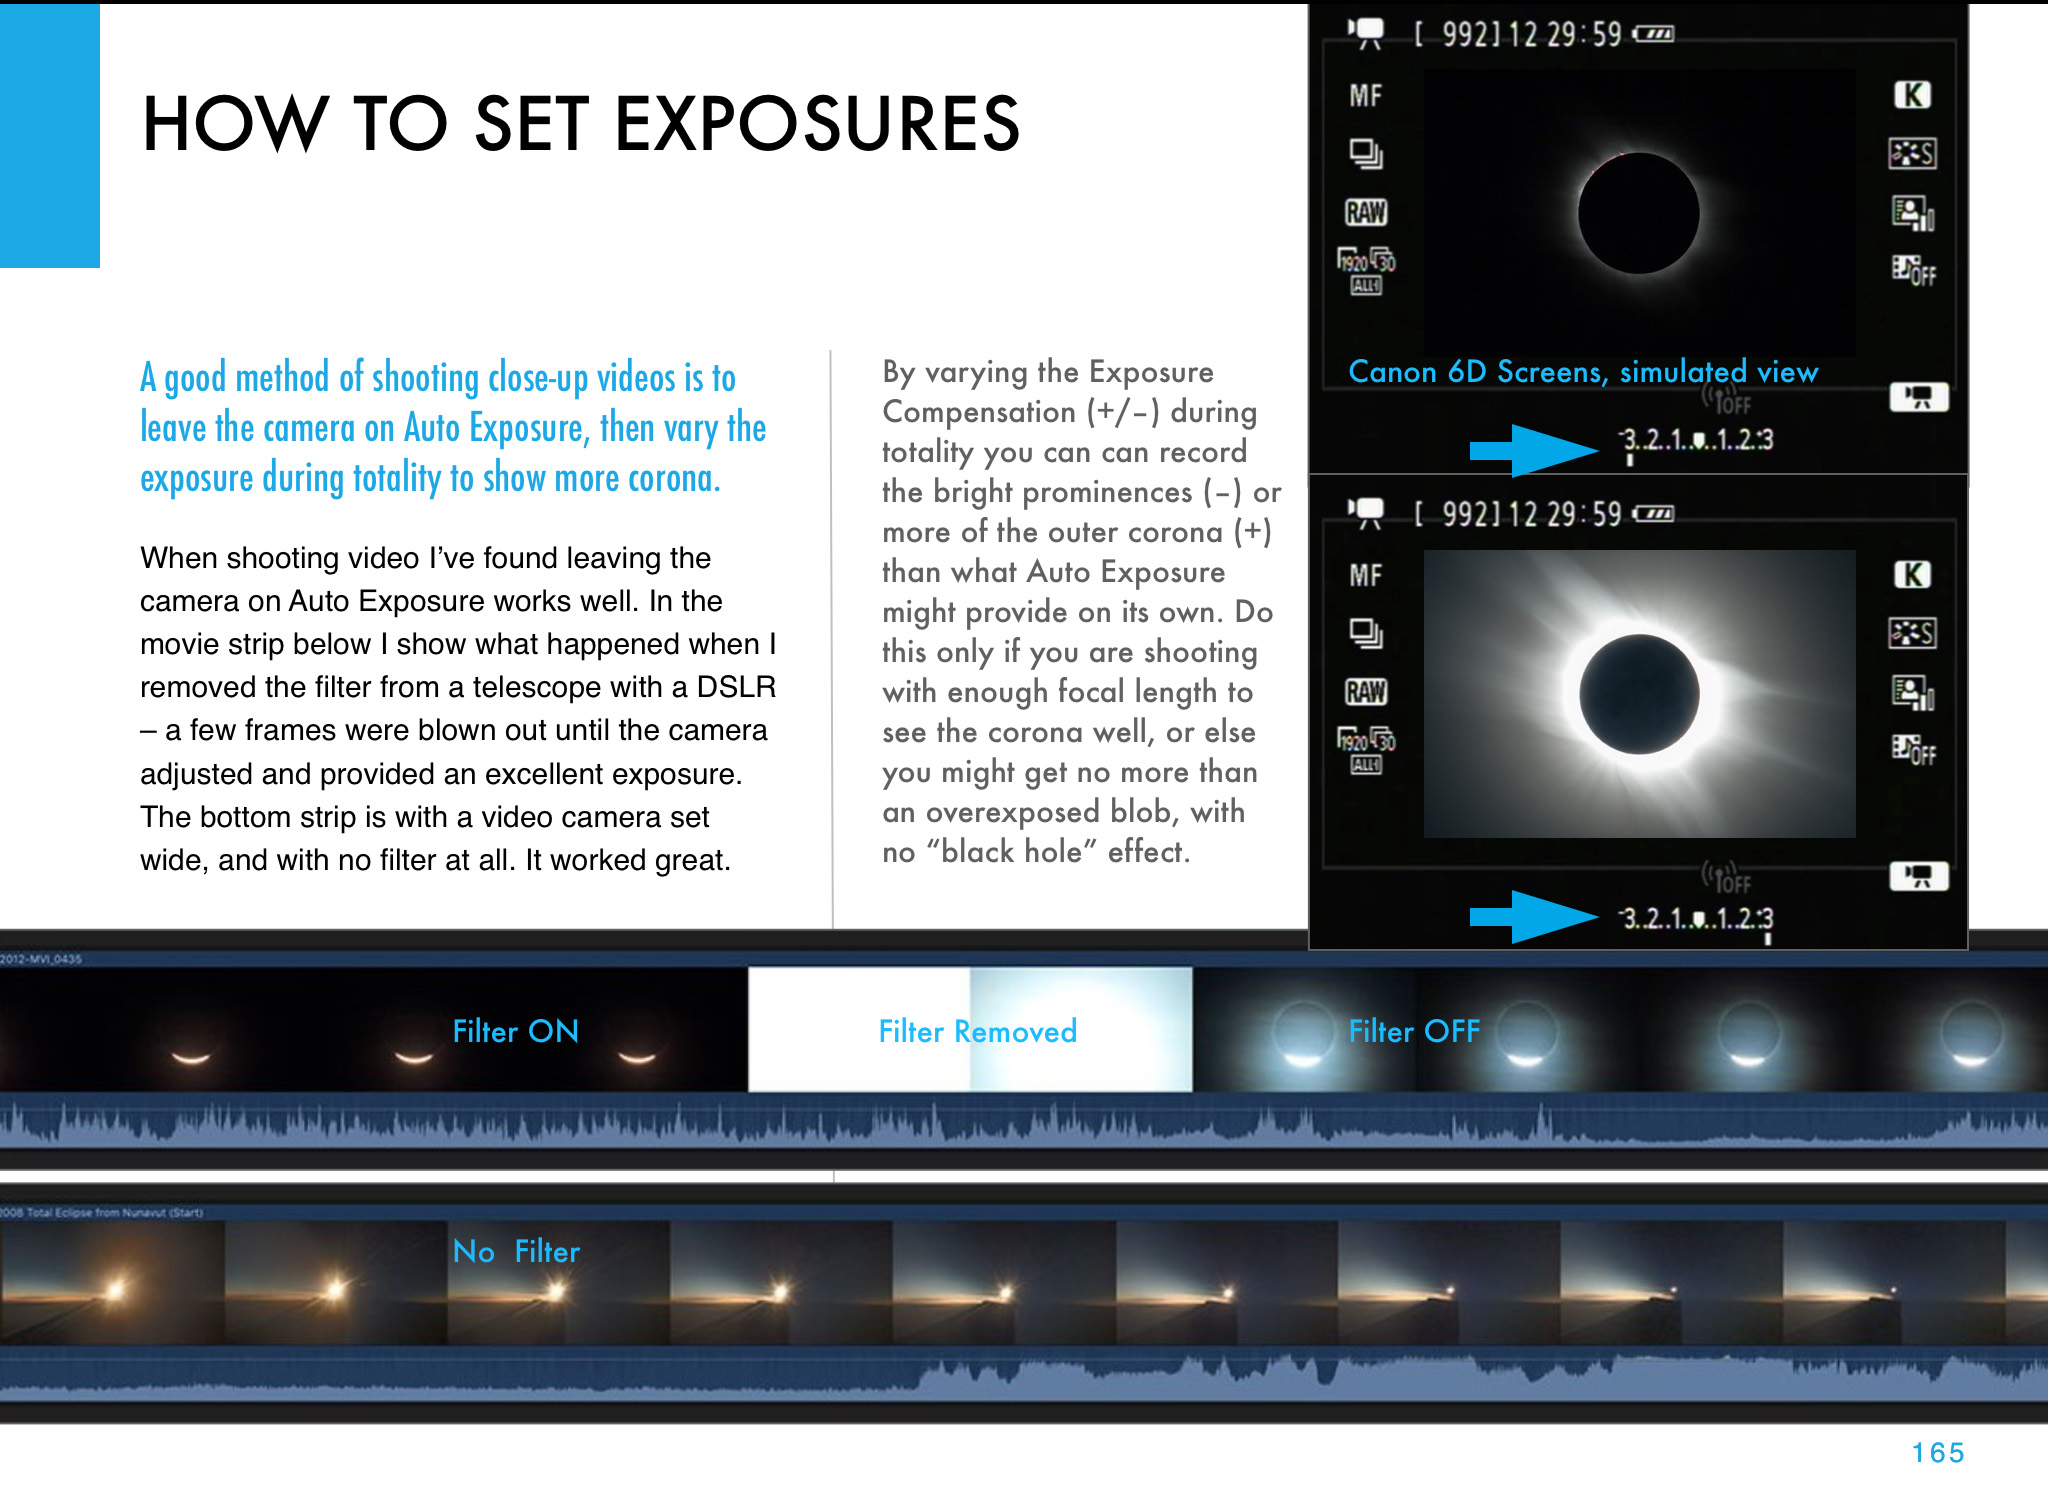
My new ebook is 40 pages larger than the previous edition, with most of the added content in the 100-page chapter on processing eclipse images, from wide-angles, to time-lapses, and to blended exposures of totality close-ups. I include lots of information on choosing the right gear — filters, camera, lenses, telescopes, and tracking mounts.


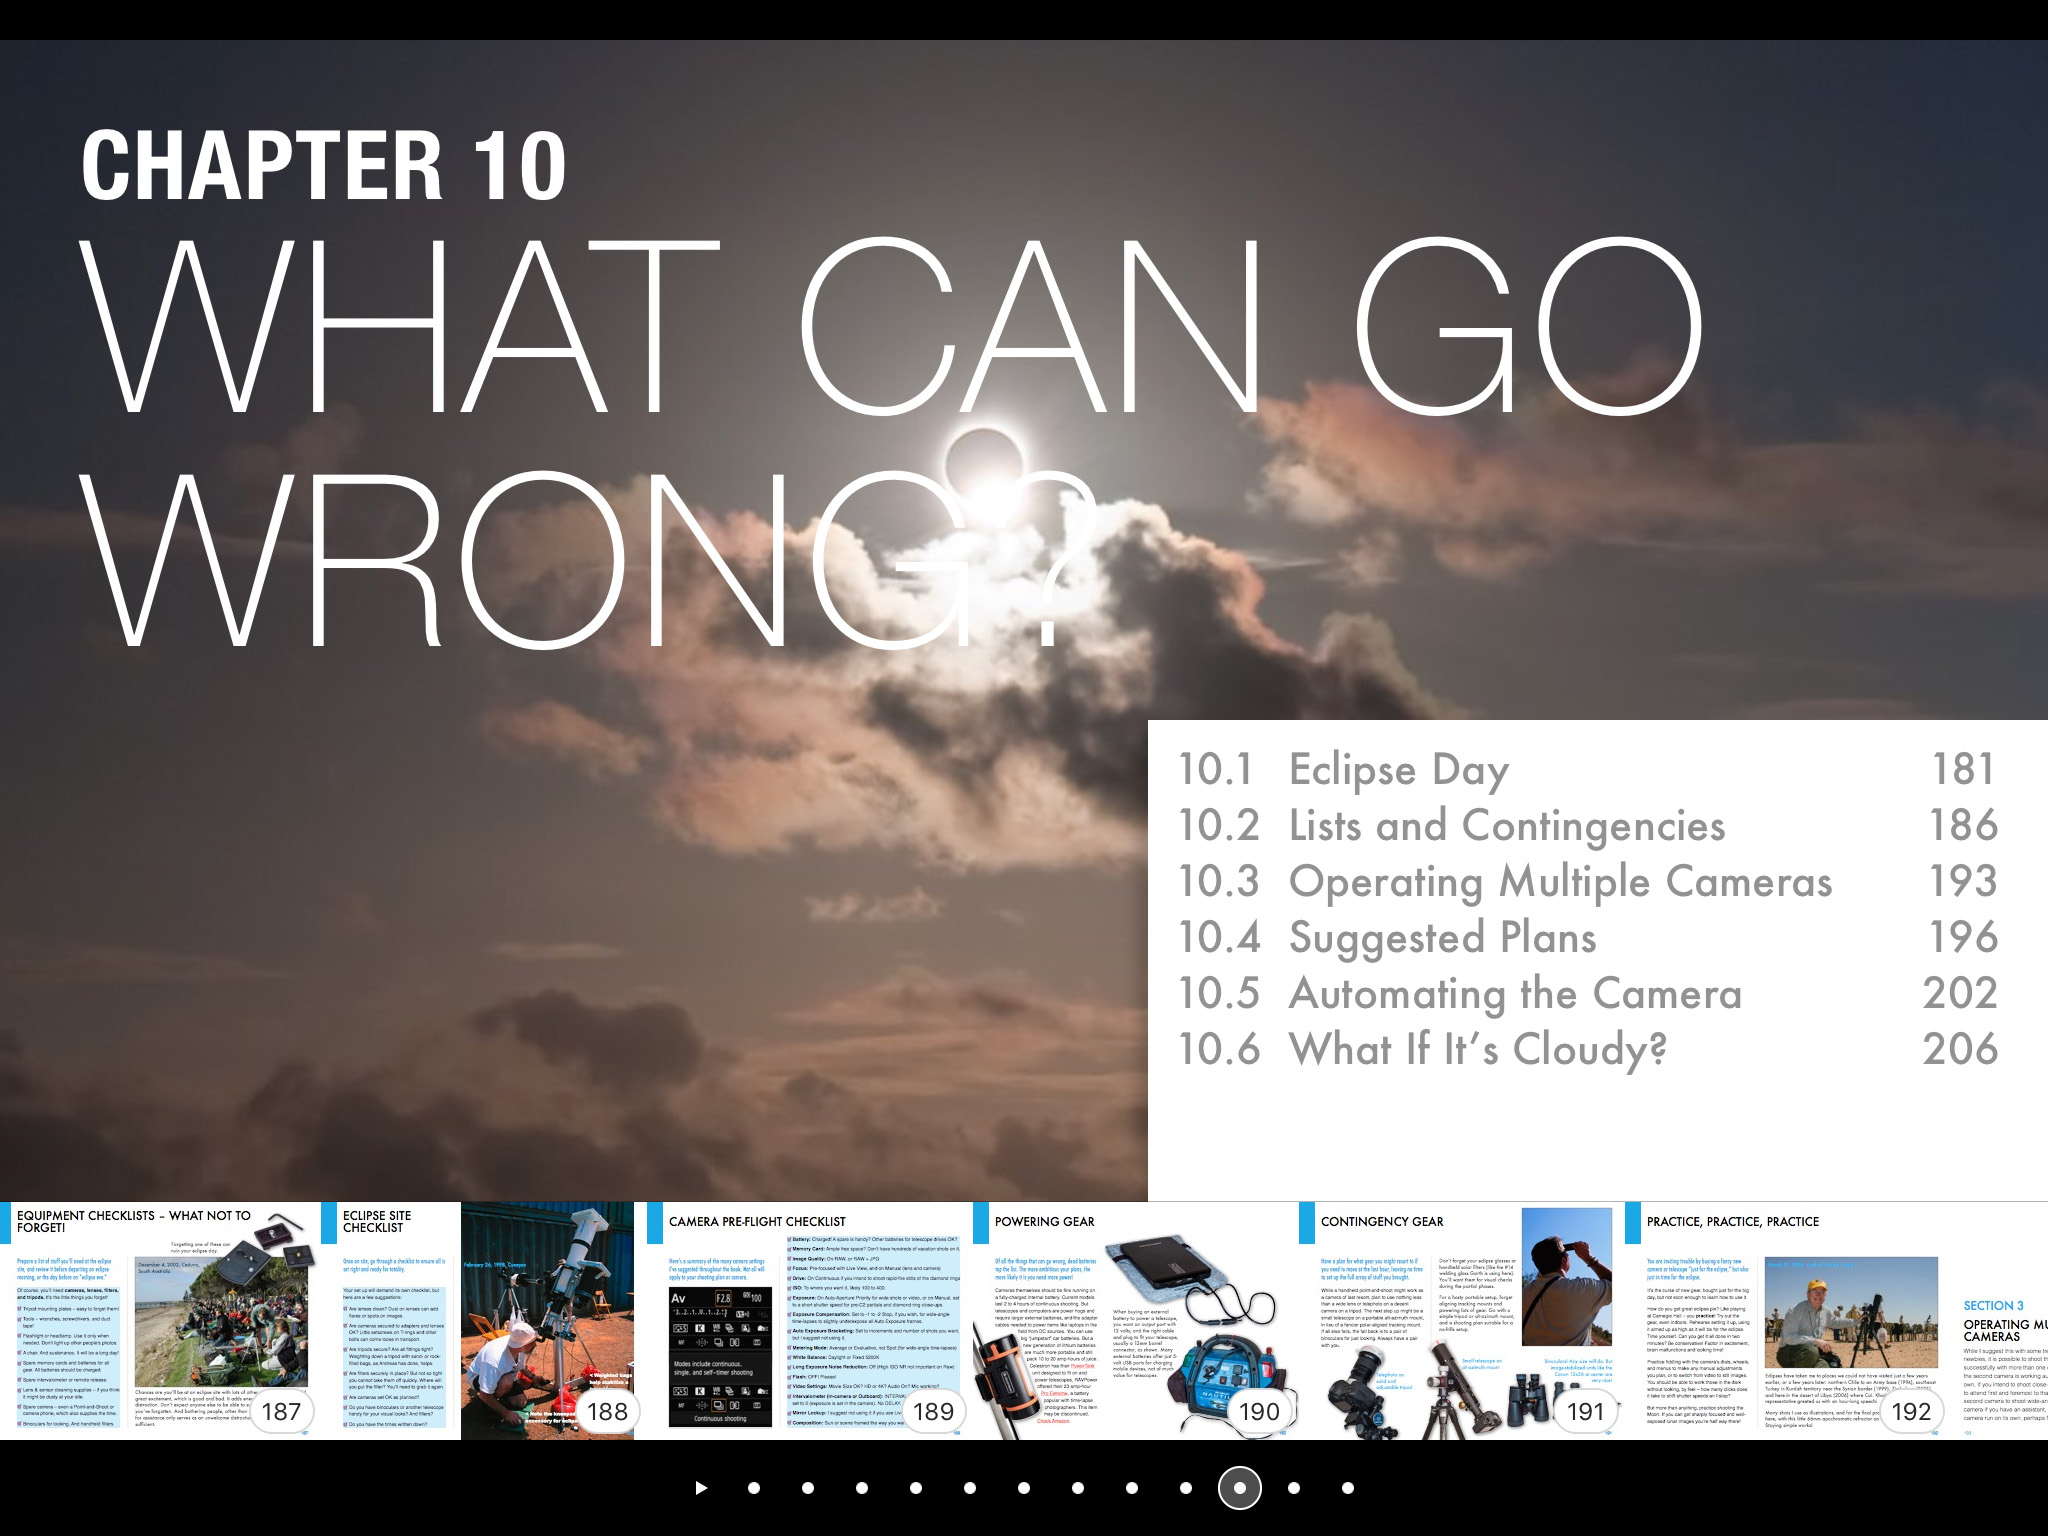
The slide show above presents images of sample pages. Do page through the gallery for a look at the content.
But for all the details and links to buy the book (from Apple Books or as a PDF for all platforms) see its webpage at my website.
It will be a busy three years for eclipse chasers, as rarely do we get three-in-a-row like this. The diversity of locations and eclipse circumstances make this an exciting trio to chase. But you can just go back to Spain to see most of them!
— Alan, August 14, 2025 / AmazingSky.com


")
")
")
")
")
