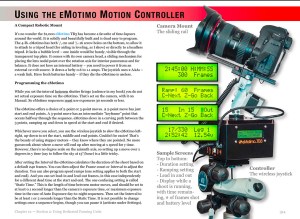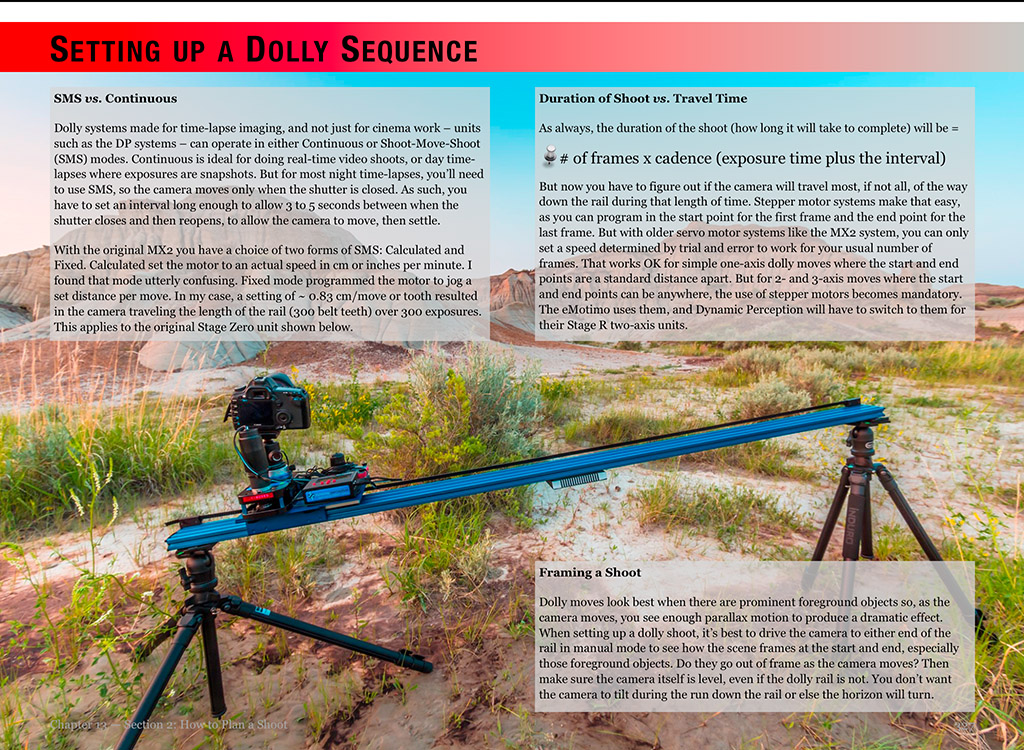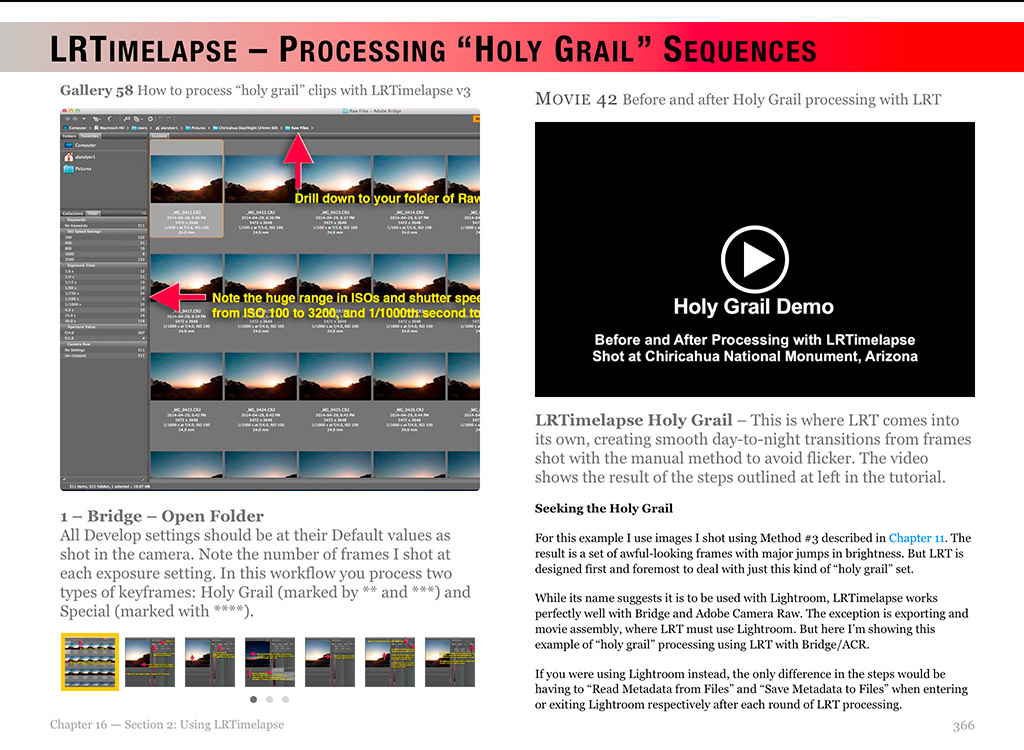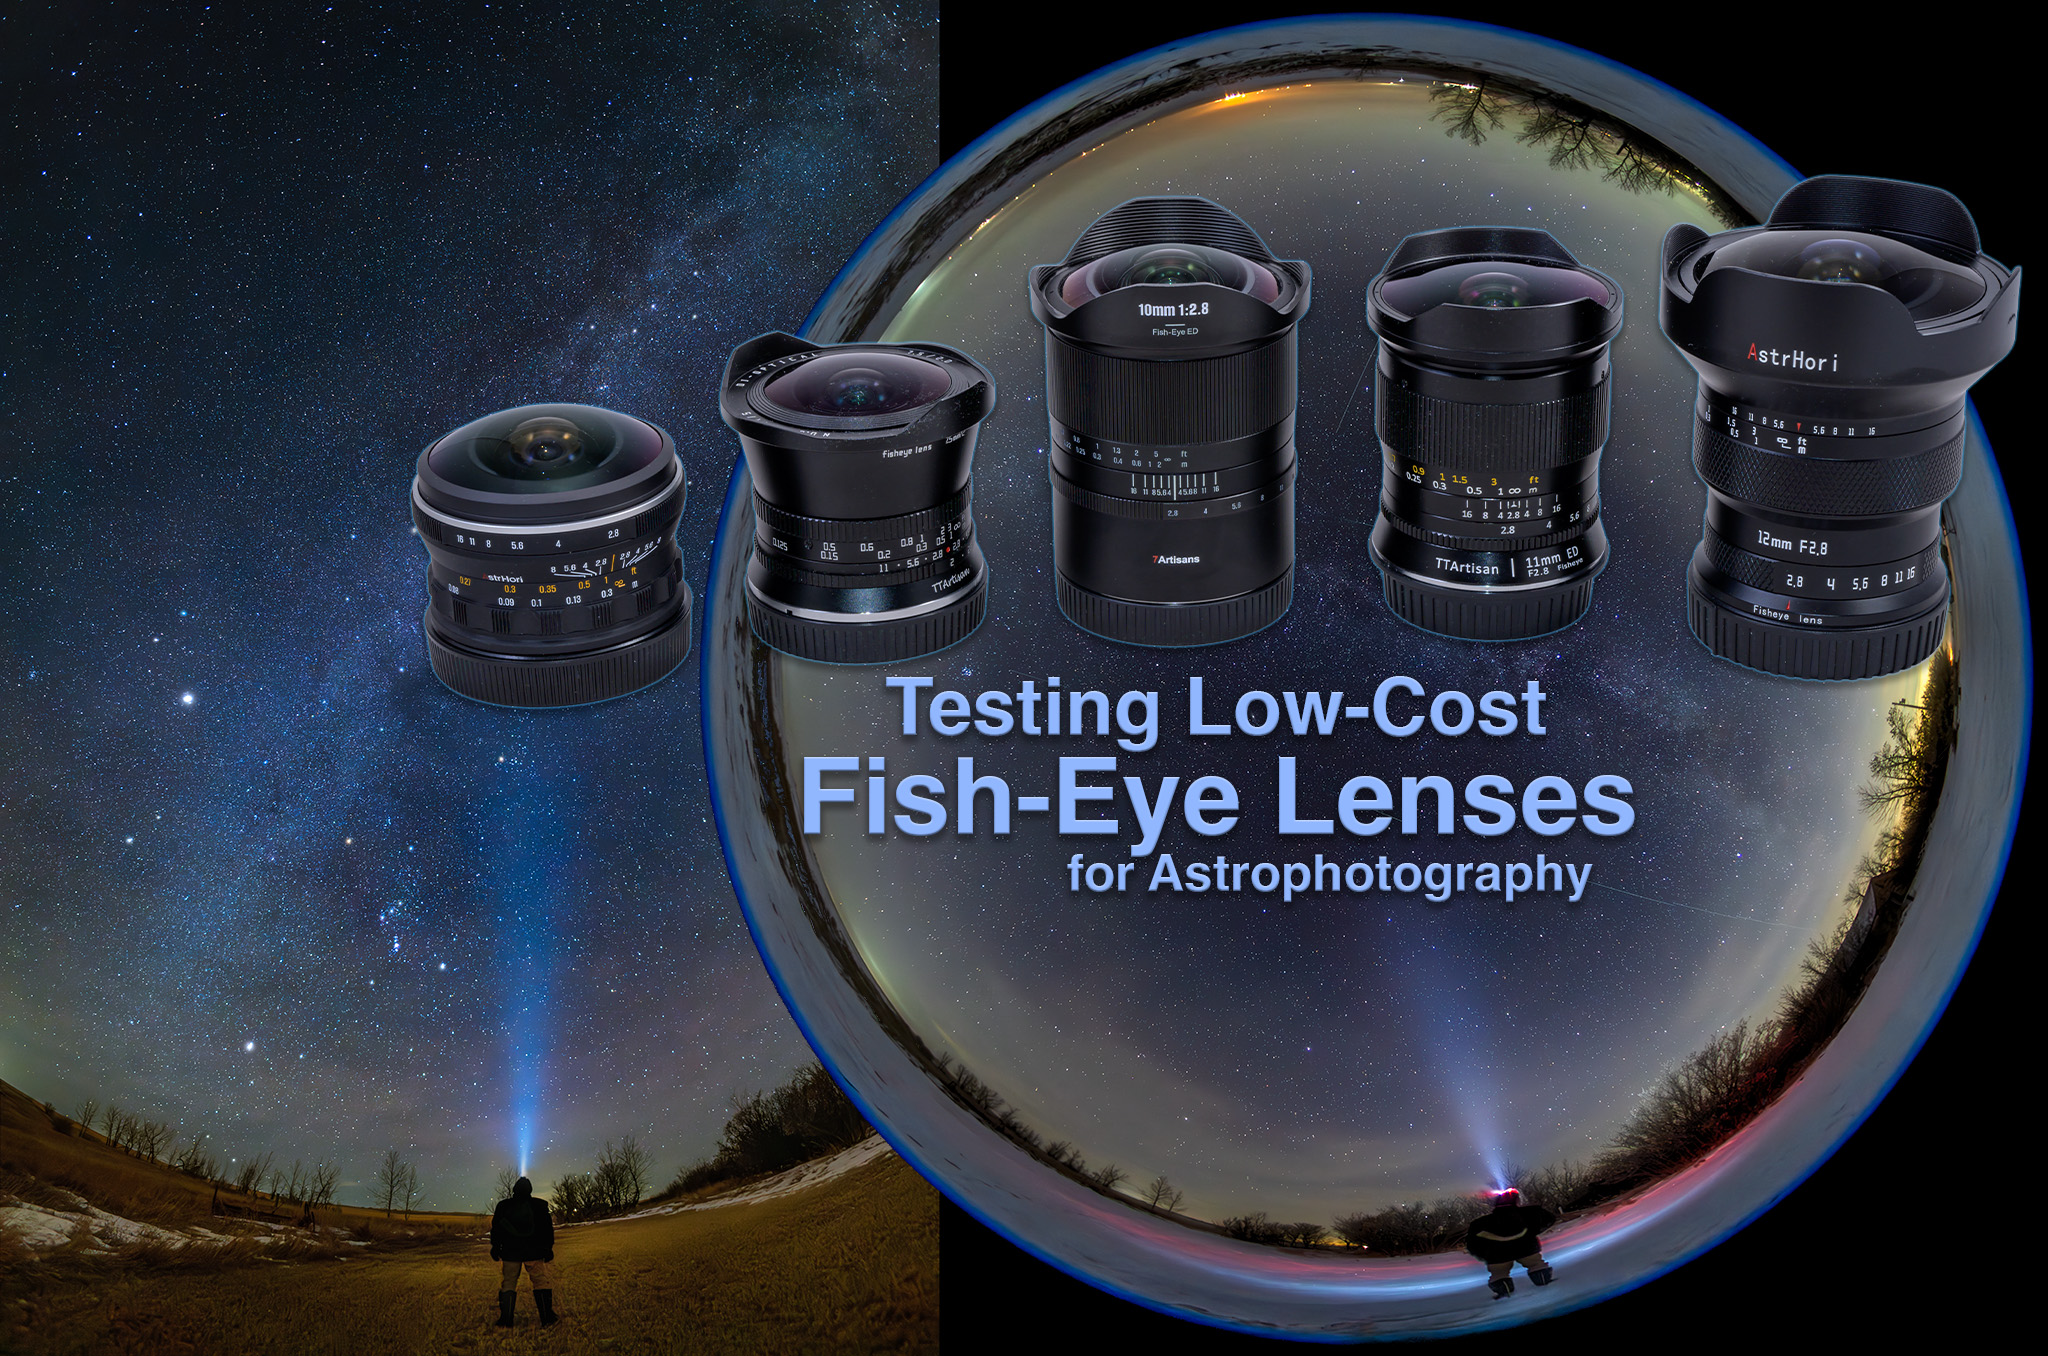
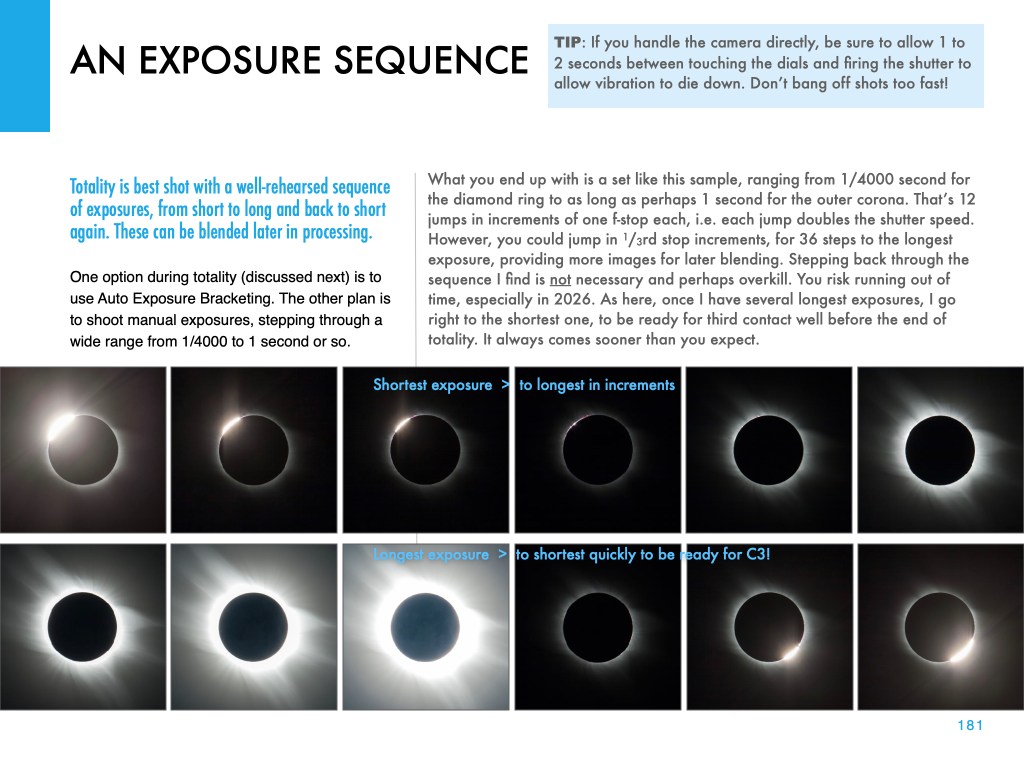
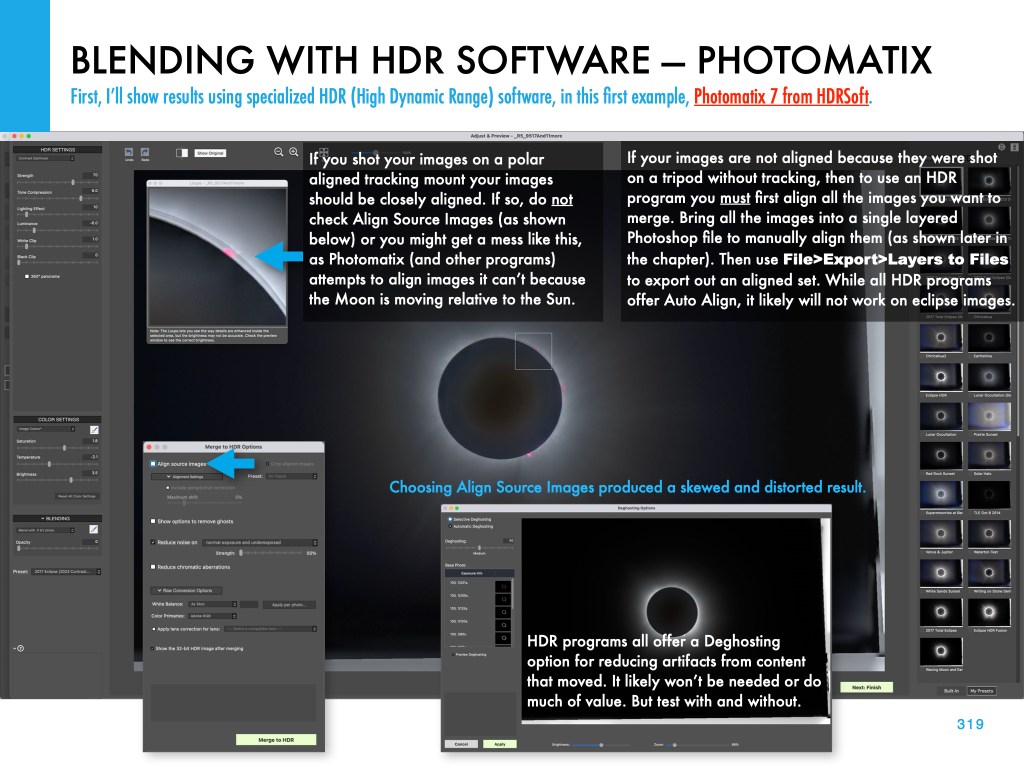
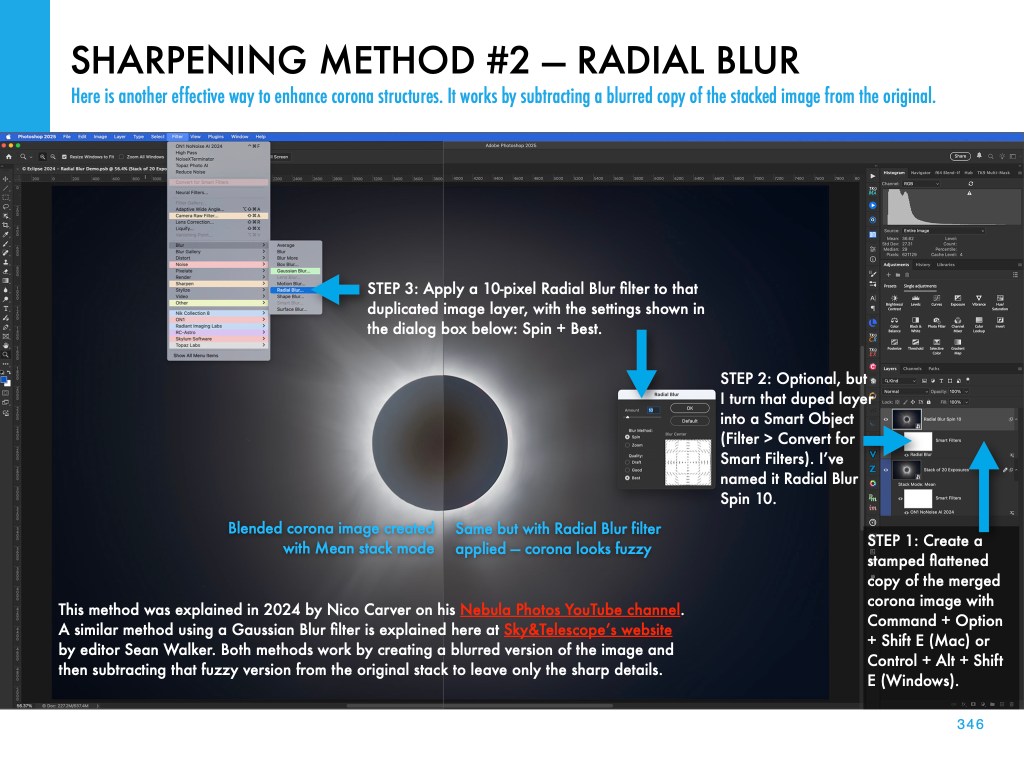
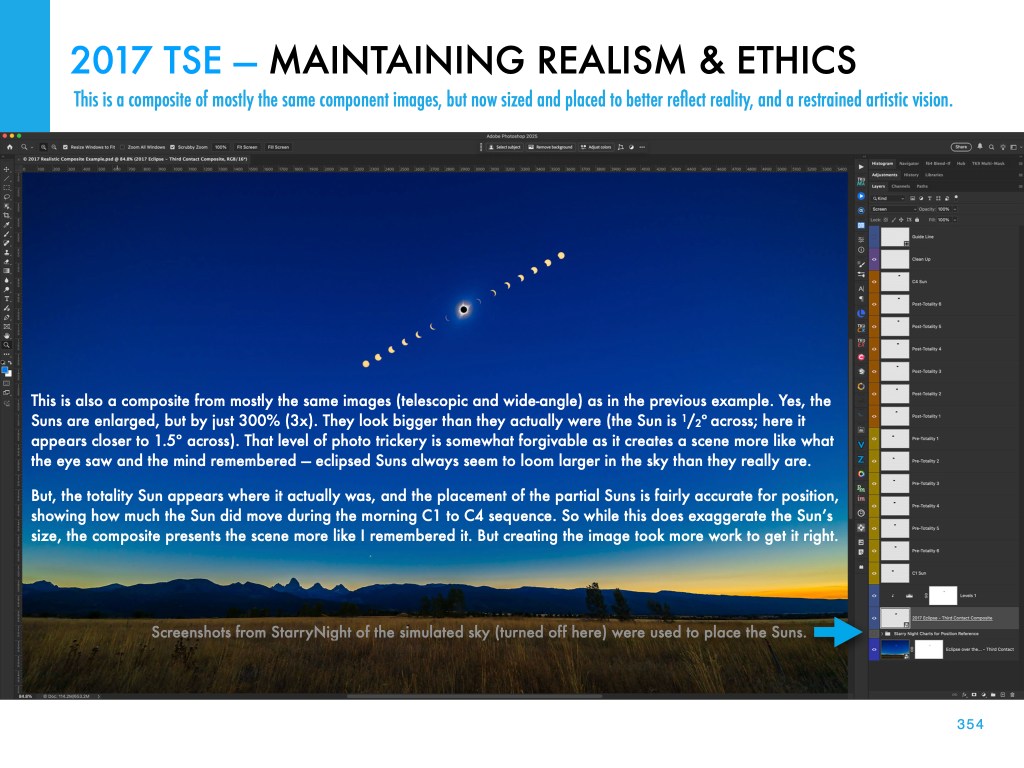
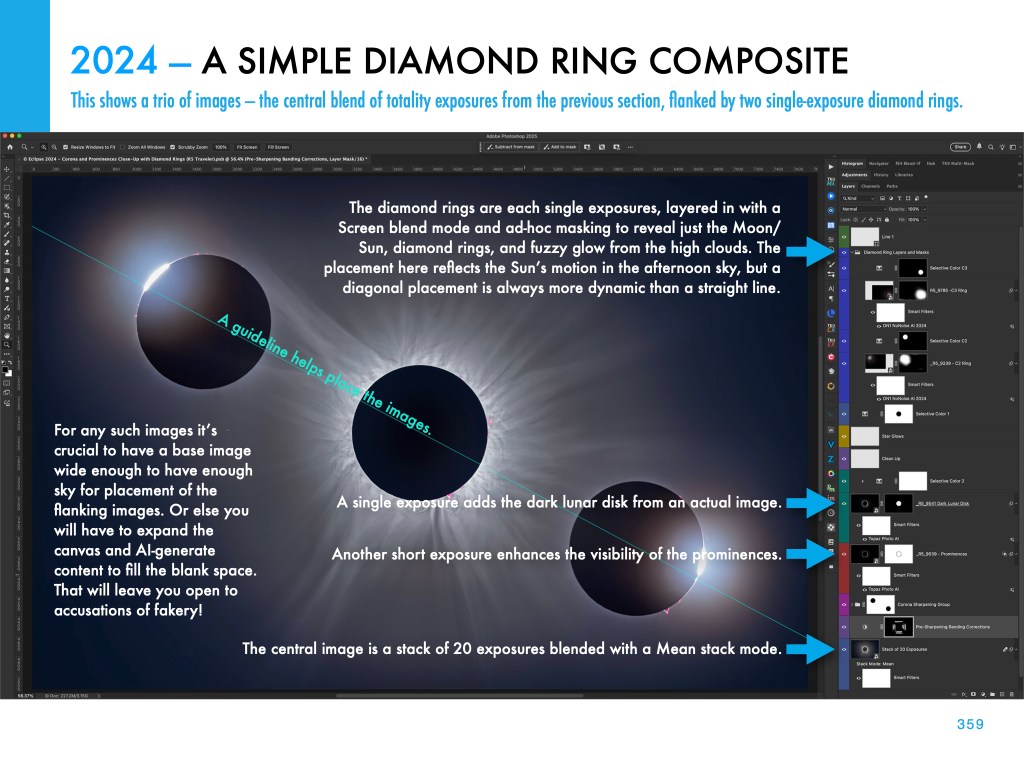
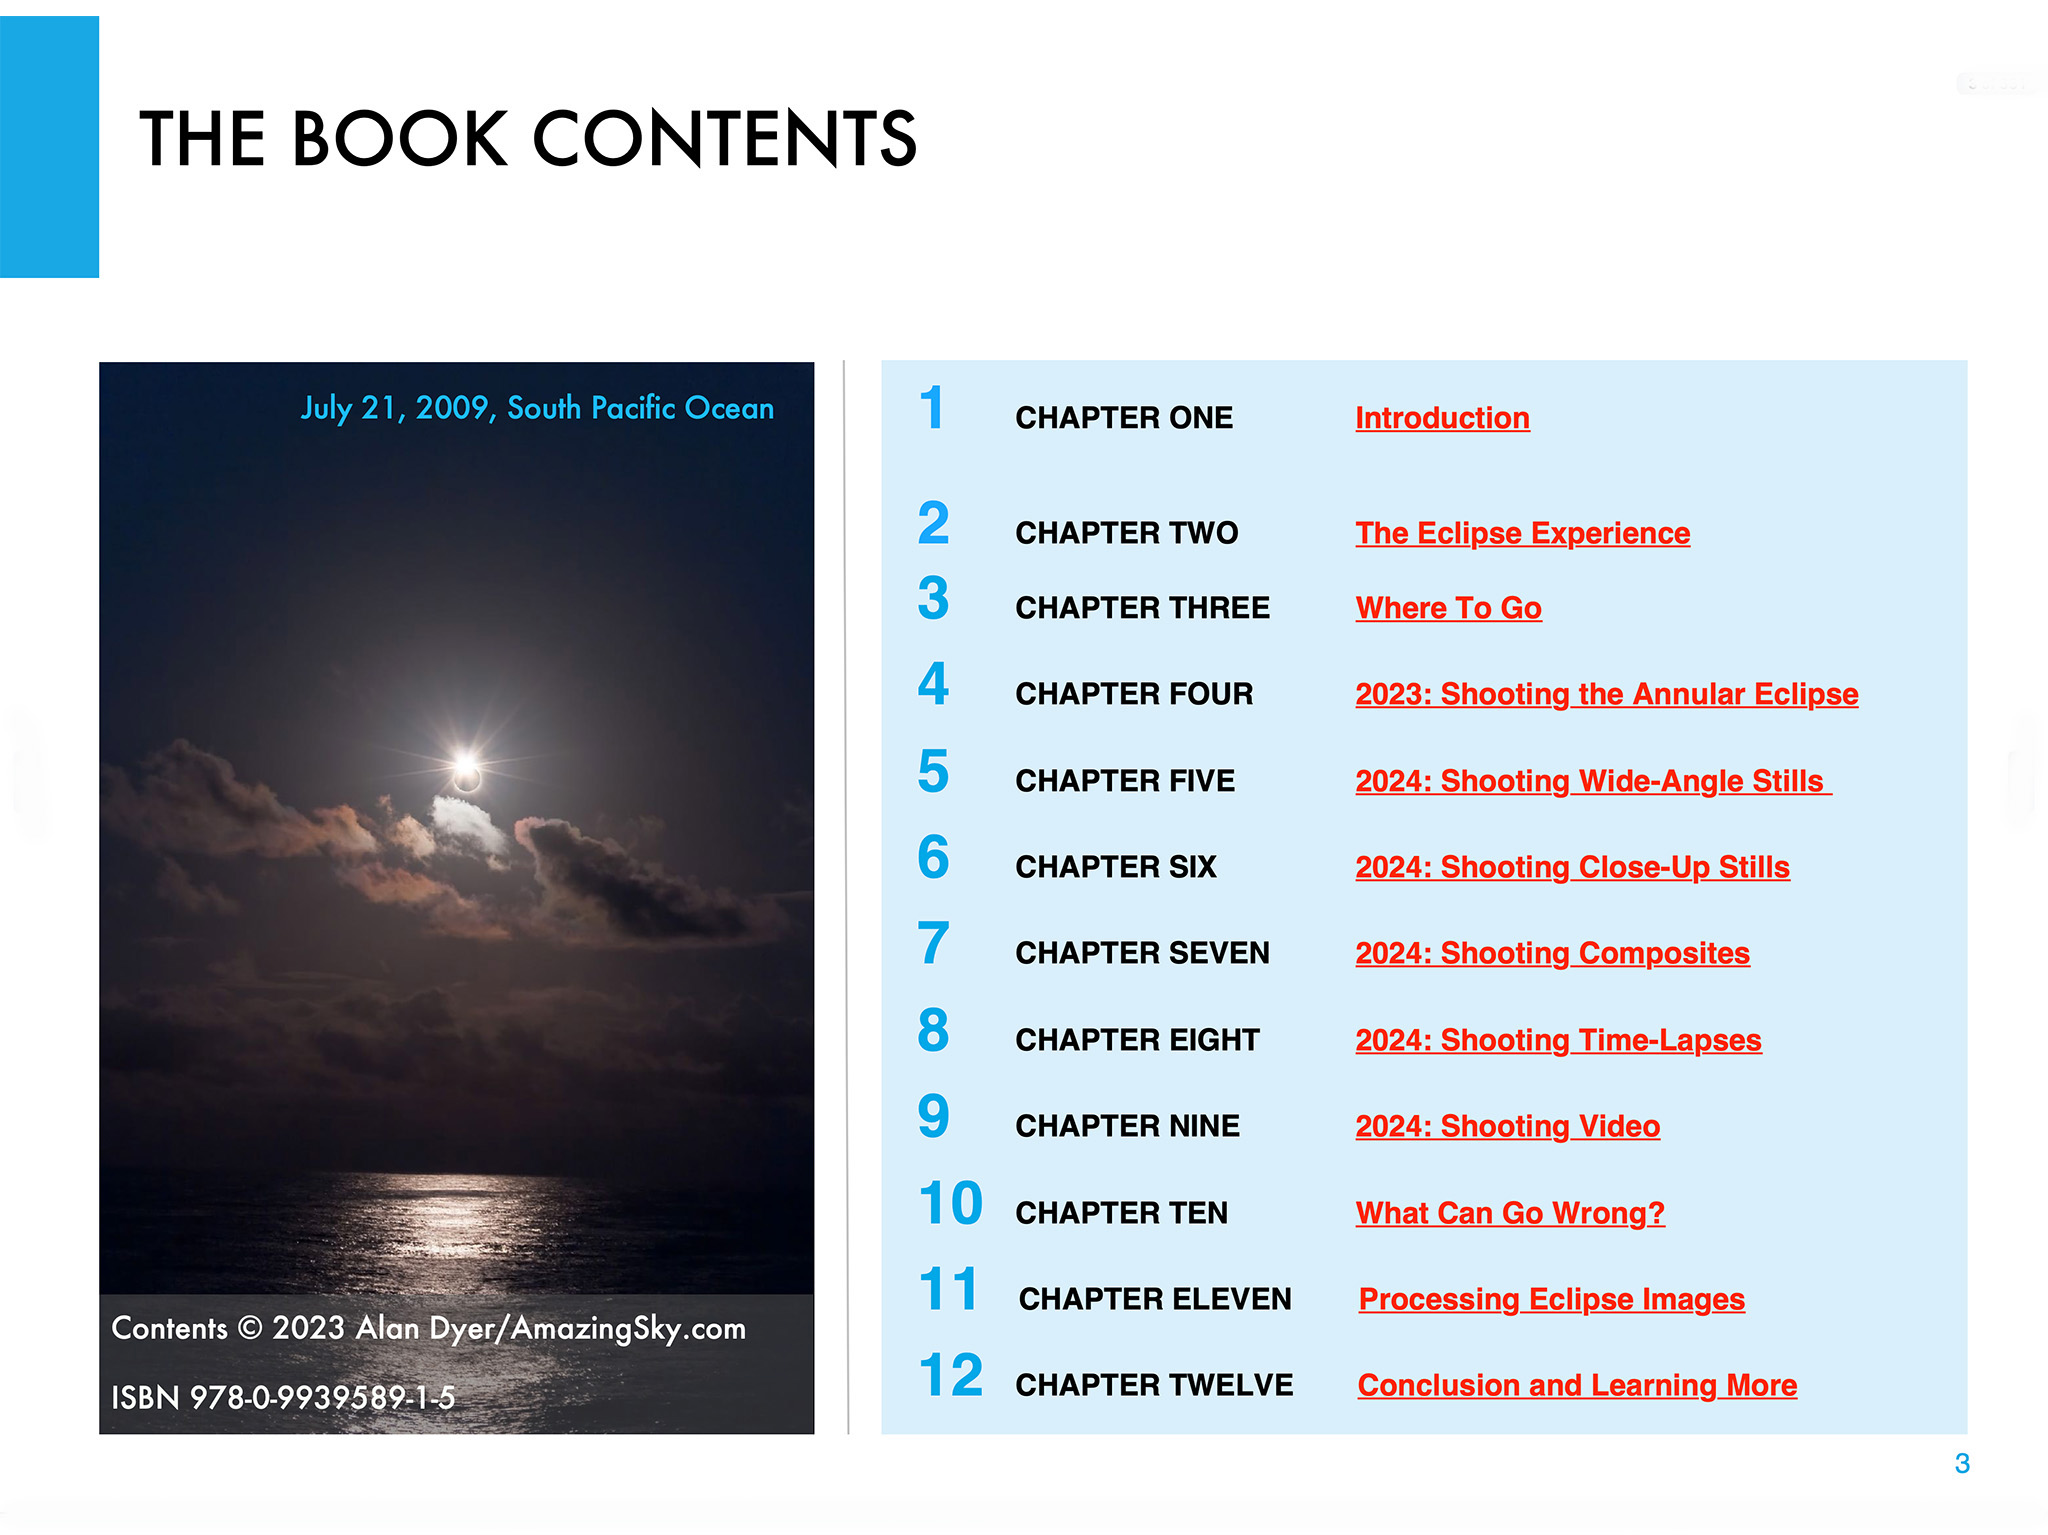
We have a bevy of new and very affordable fish-eye lenses to choose from. They can work great for astrophotography. But which one is best?
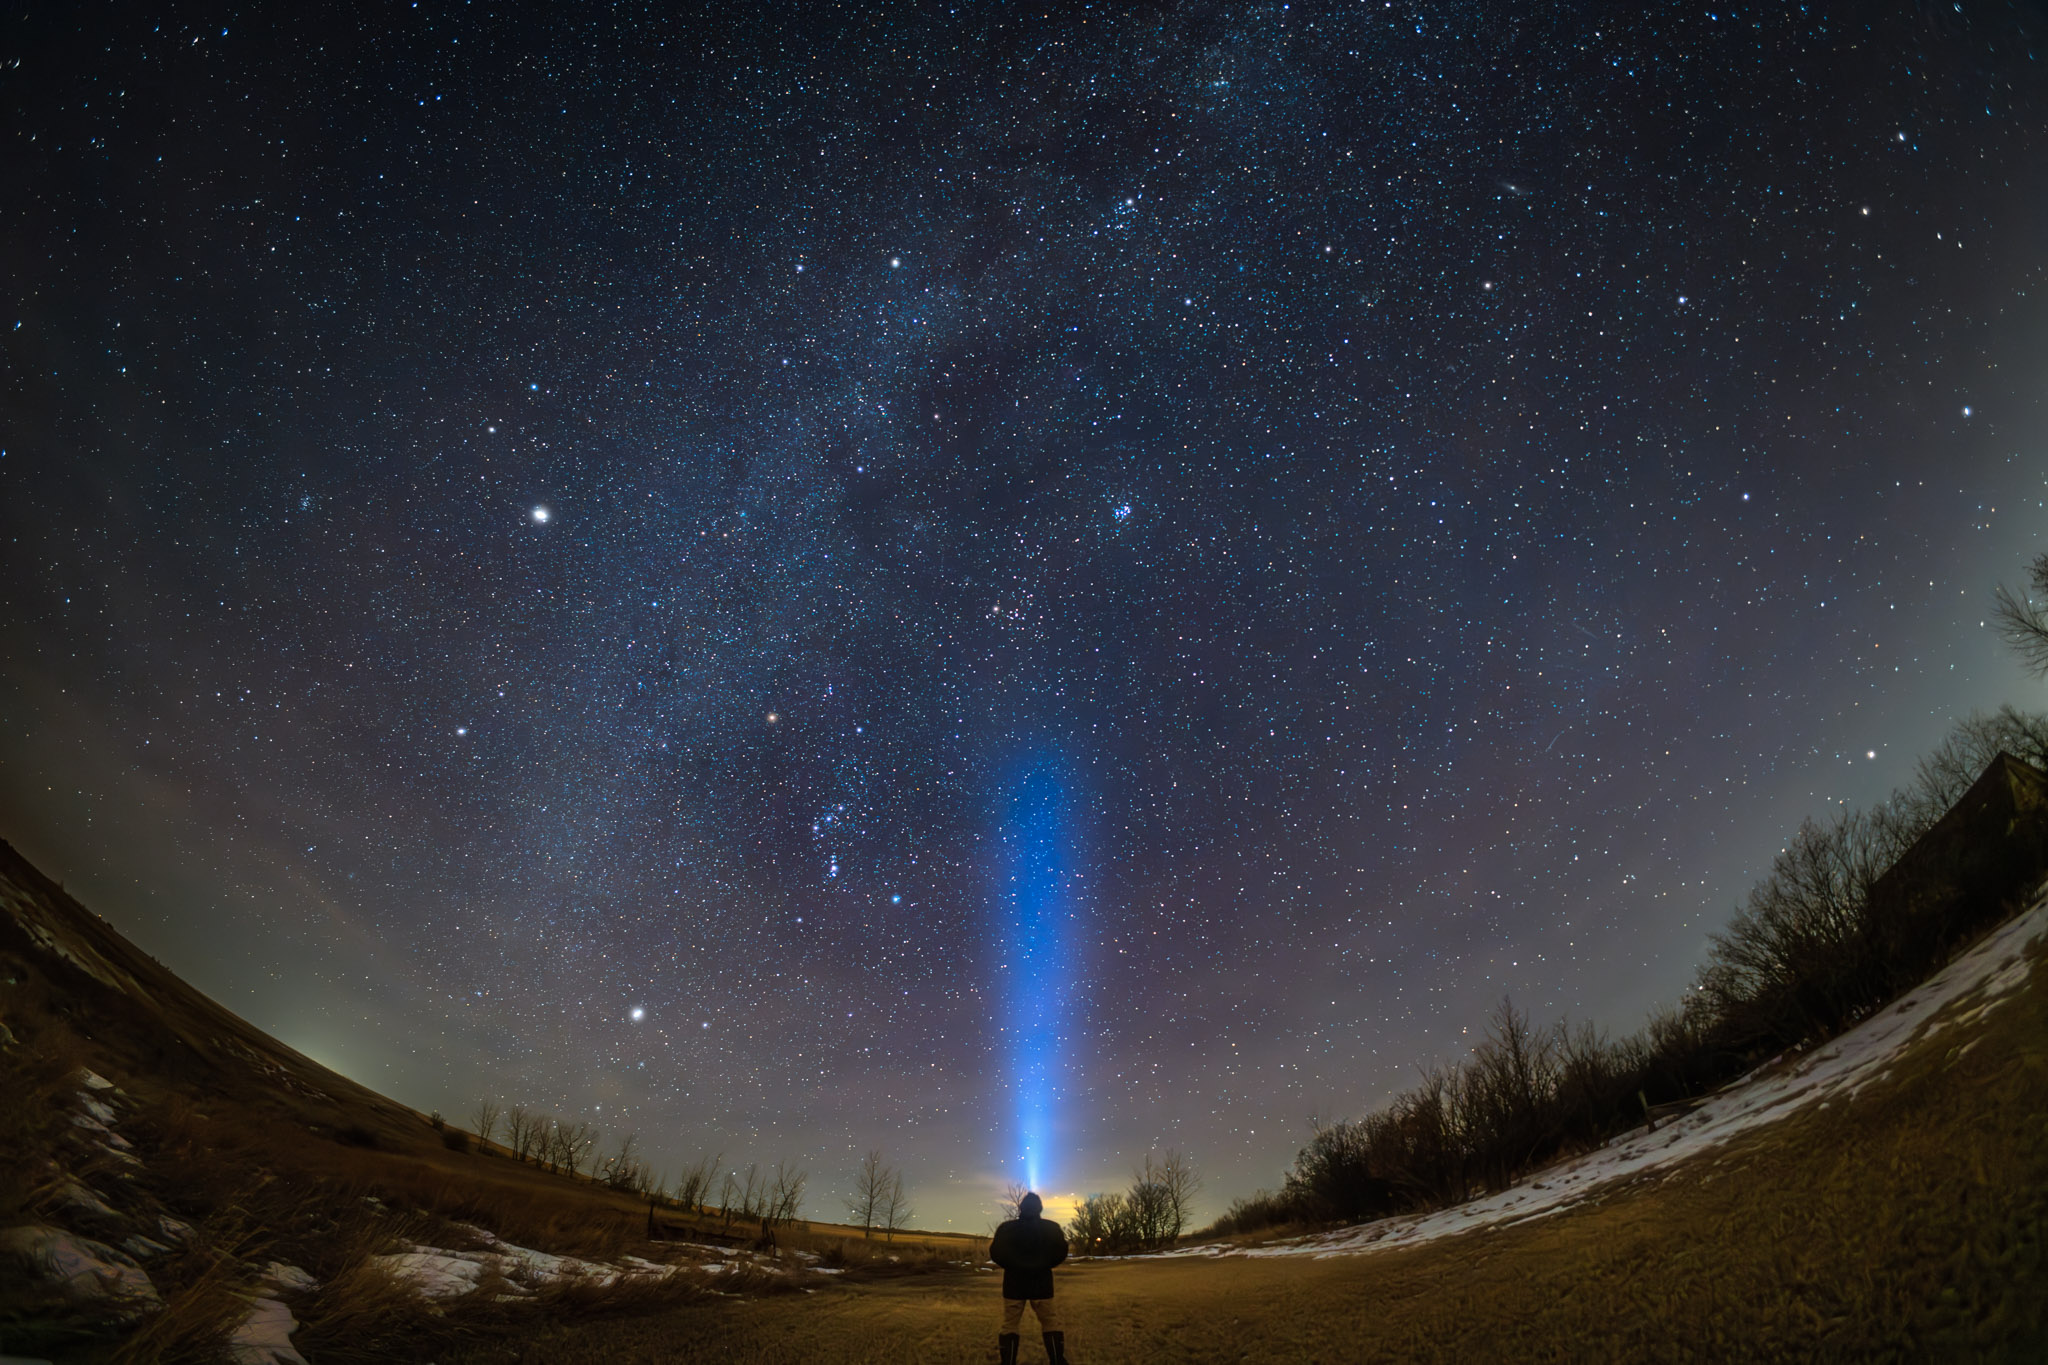
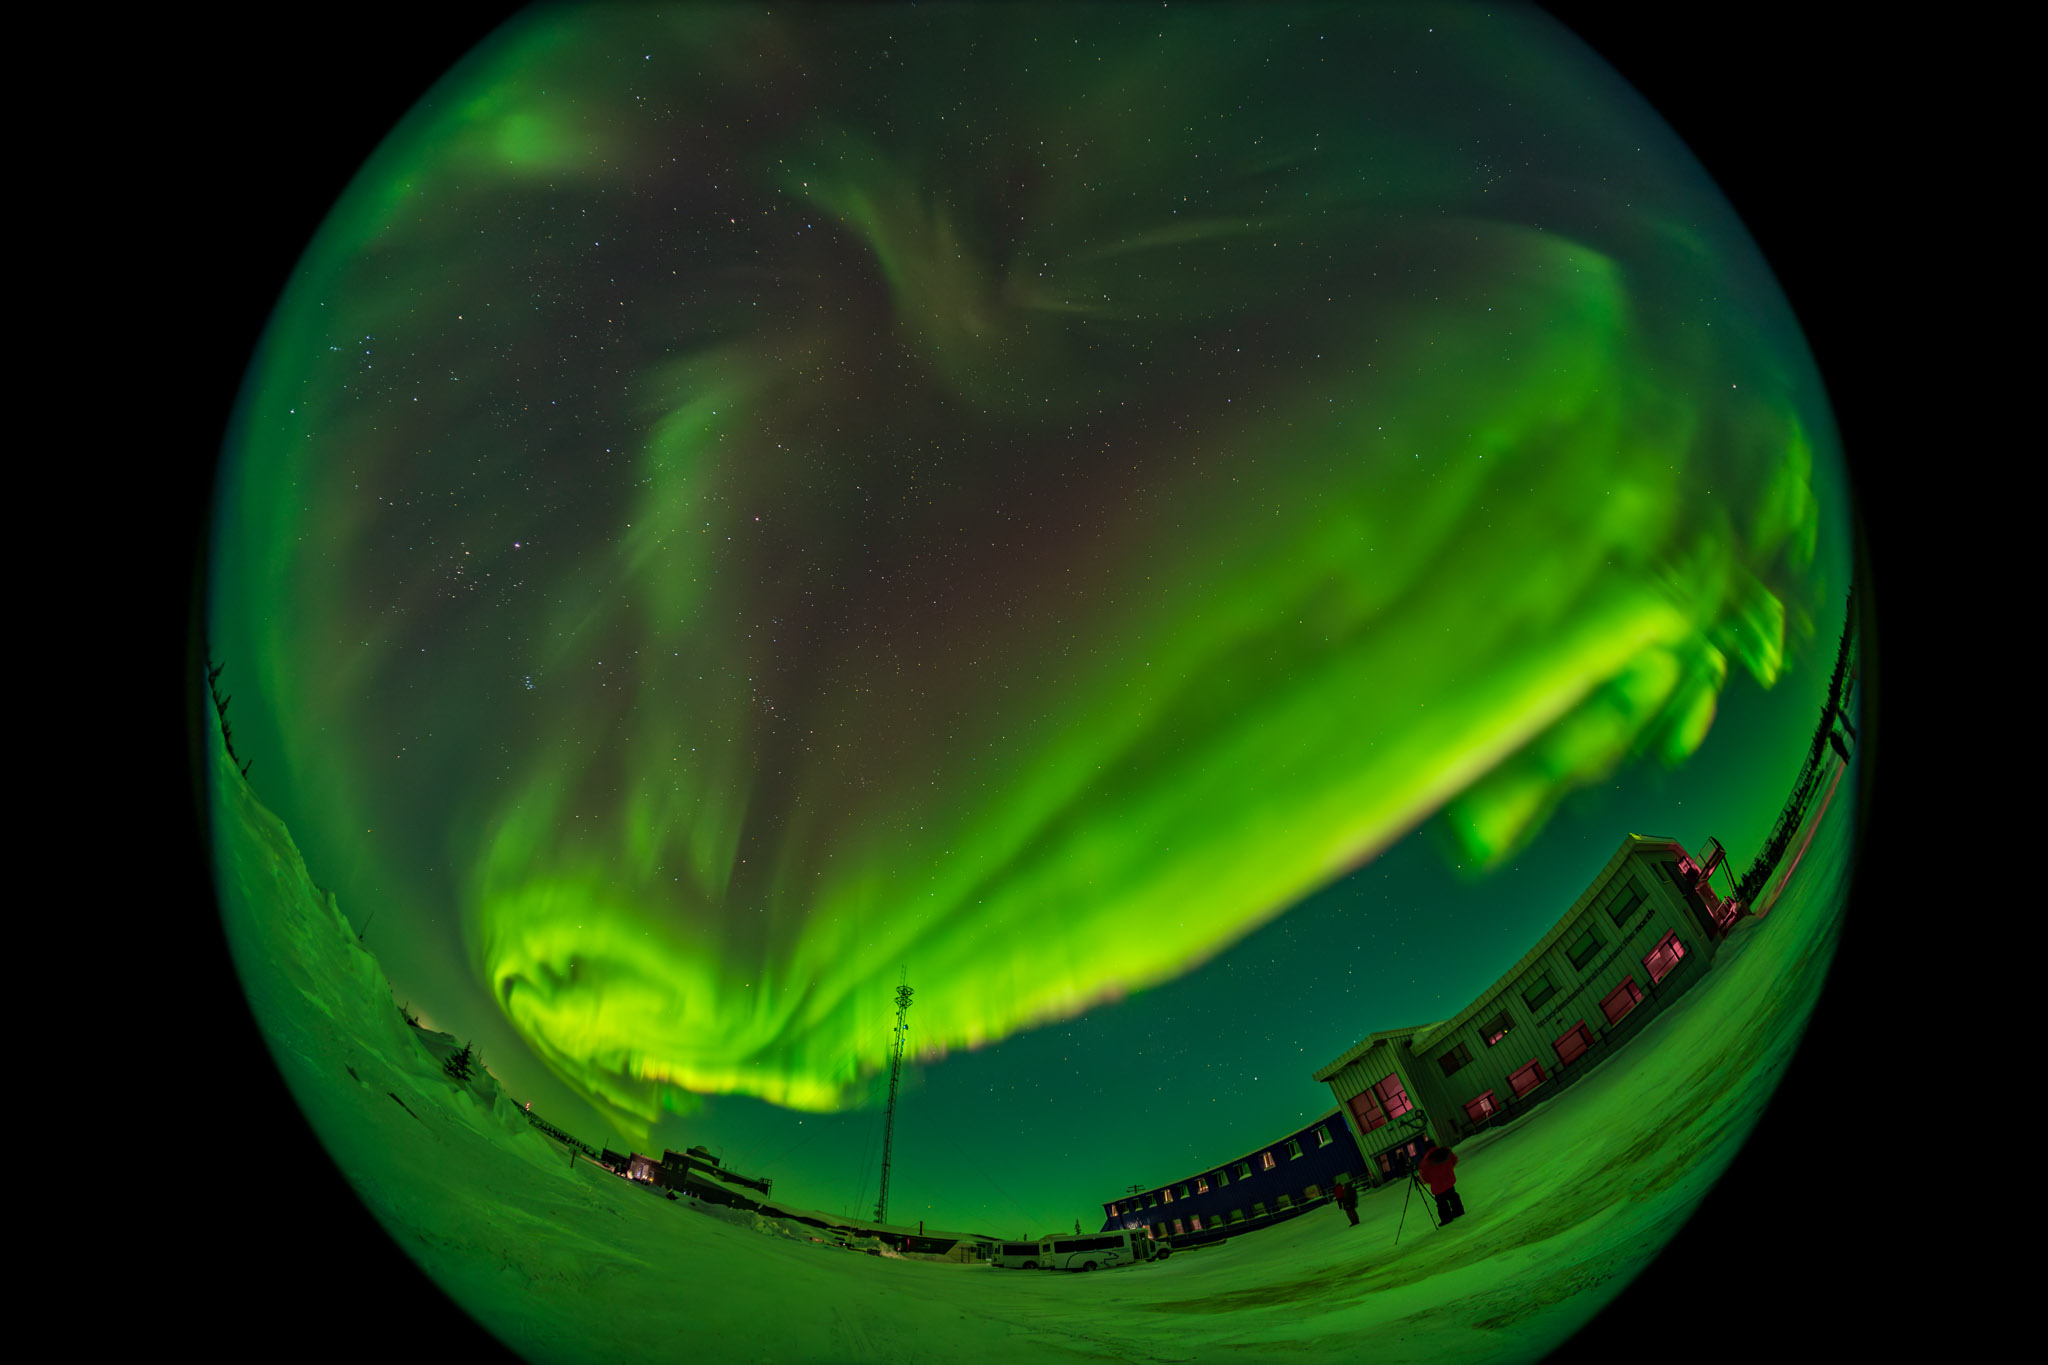
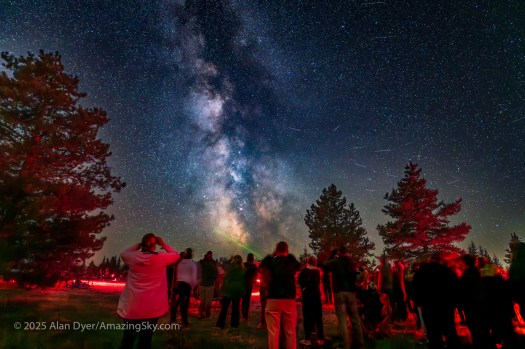
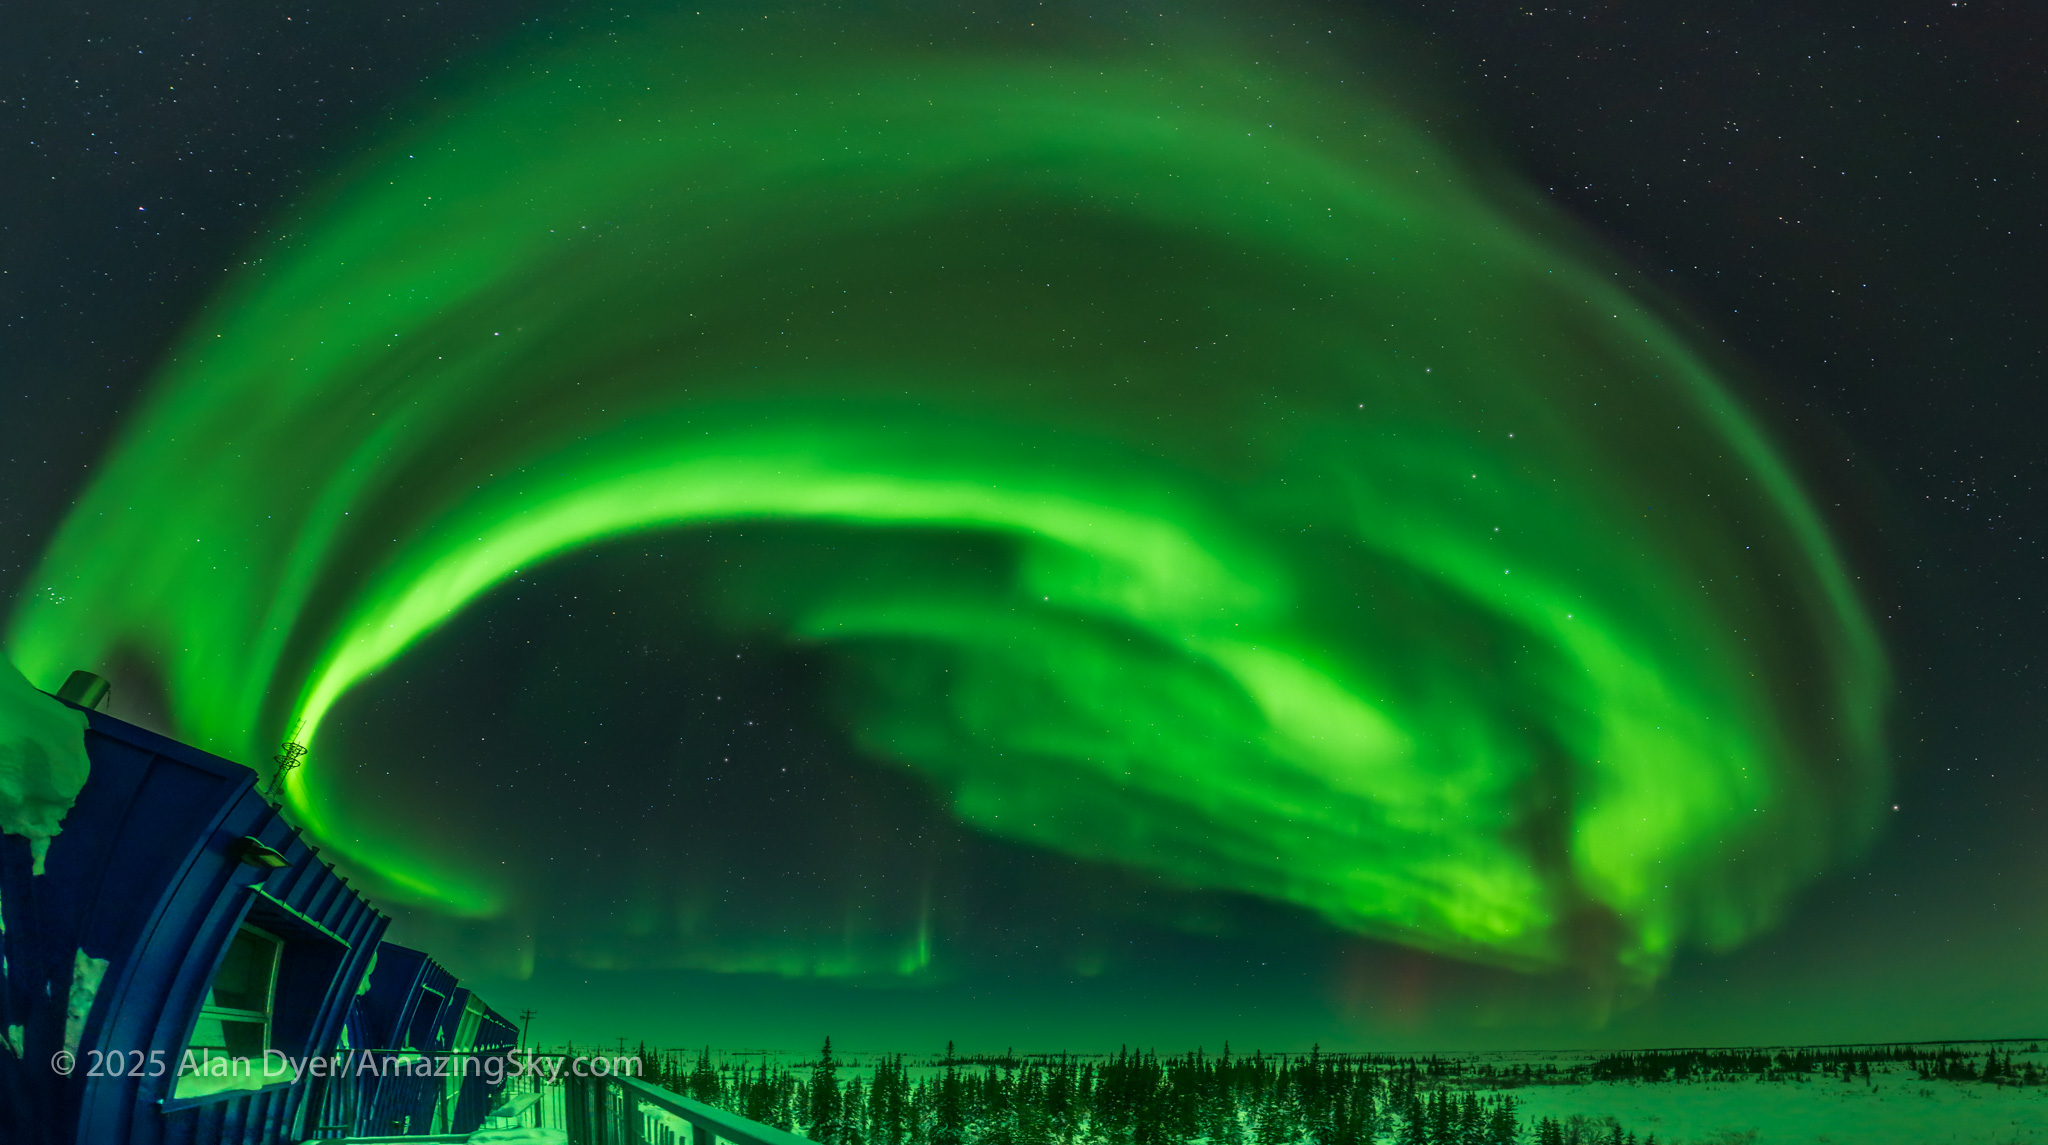
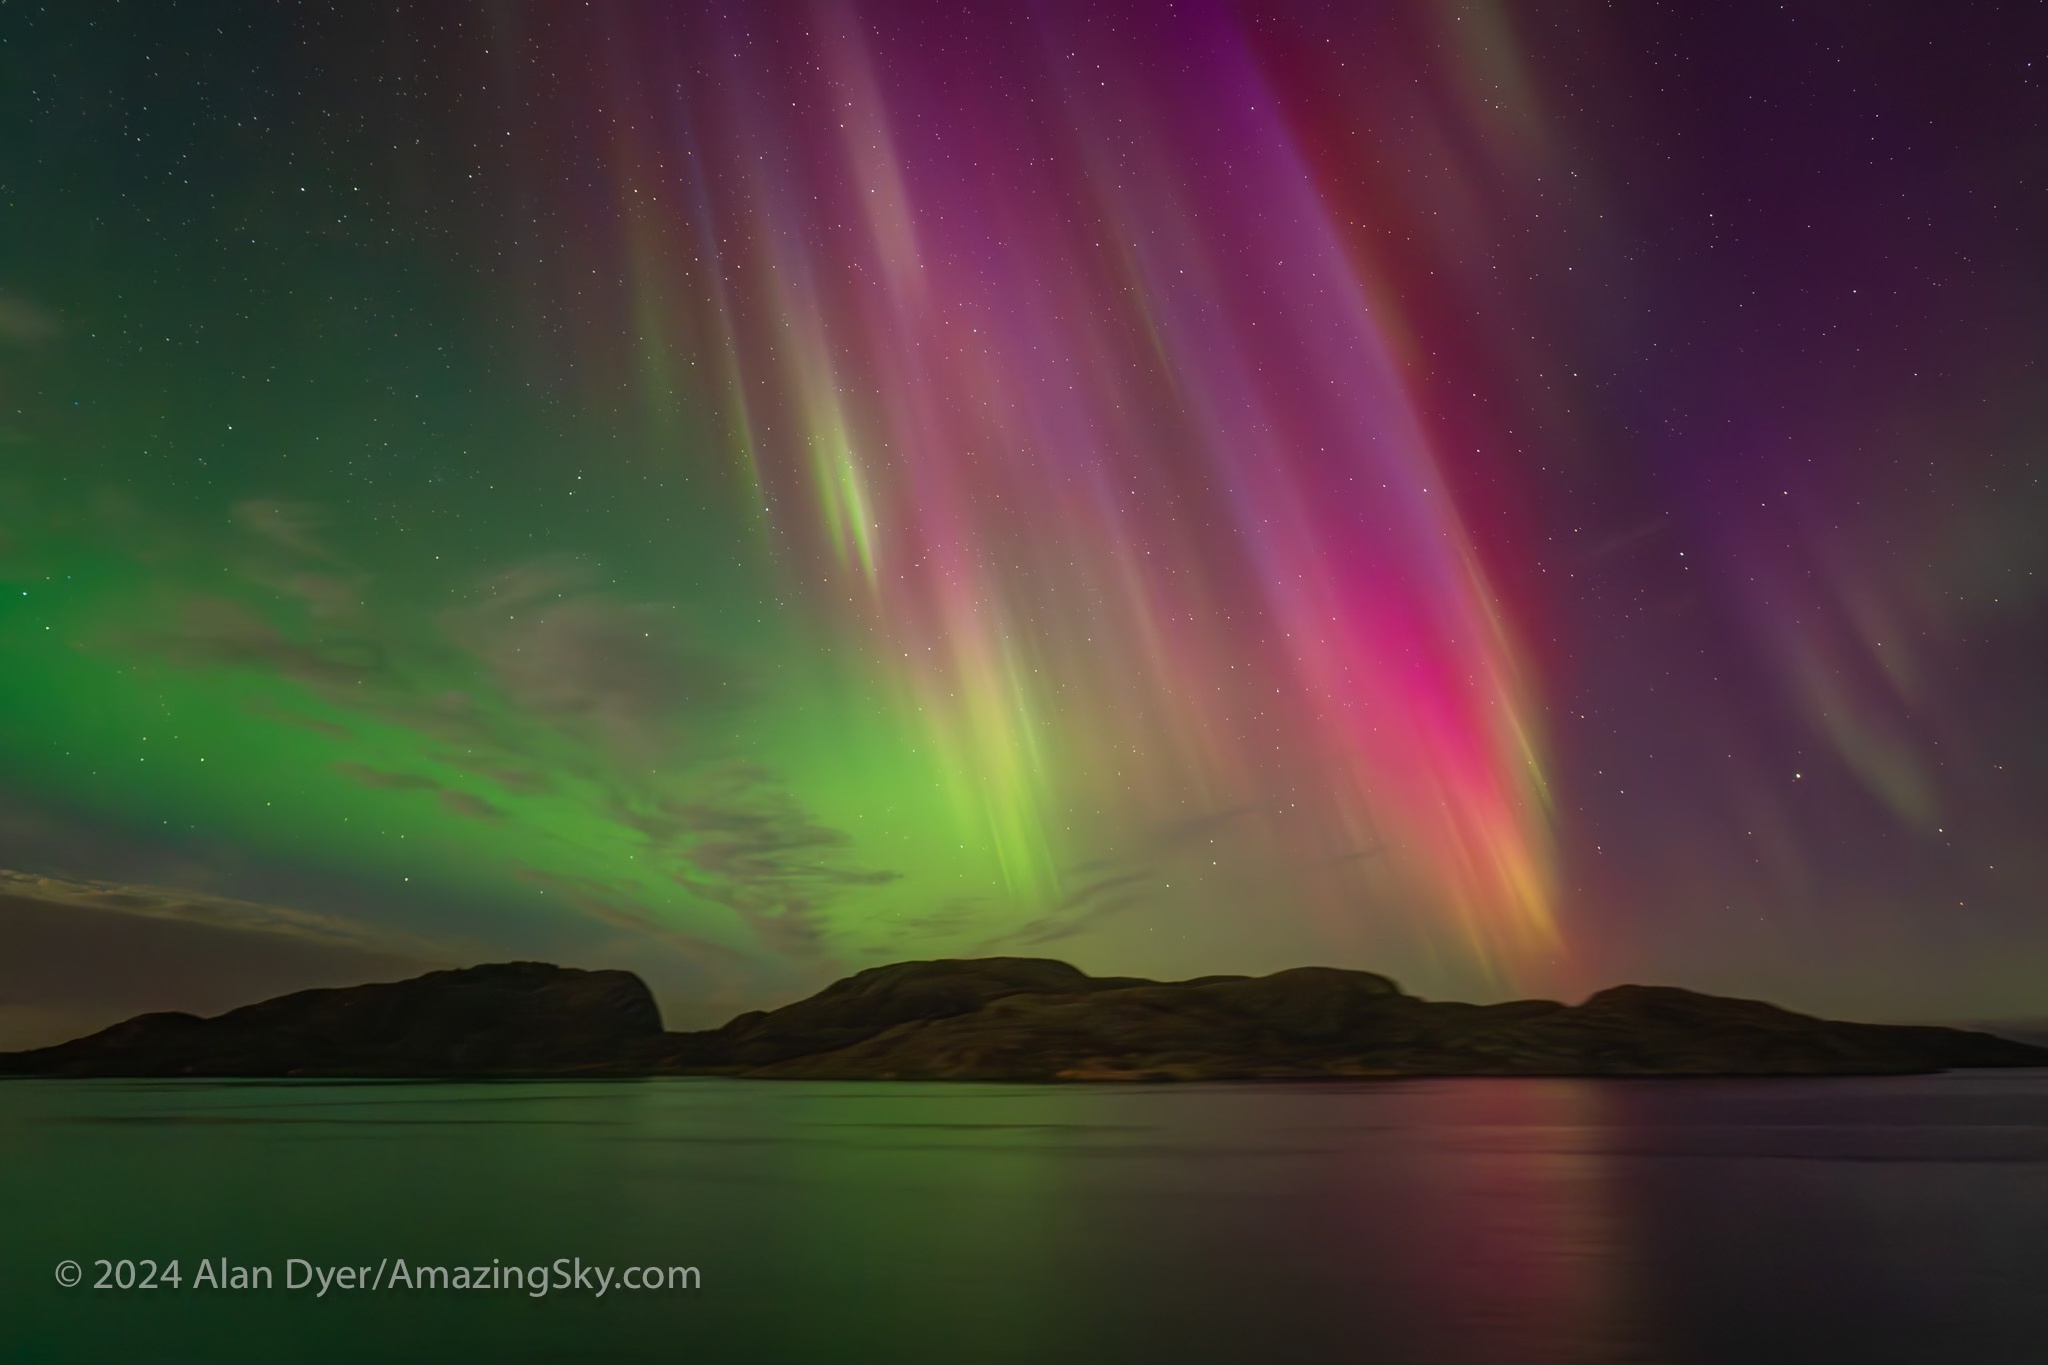
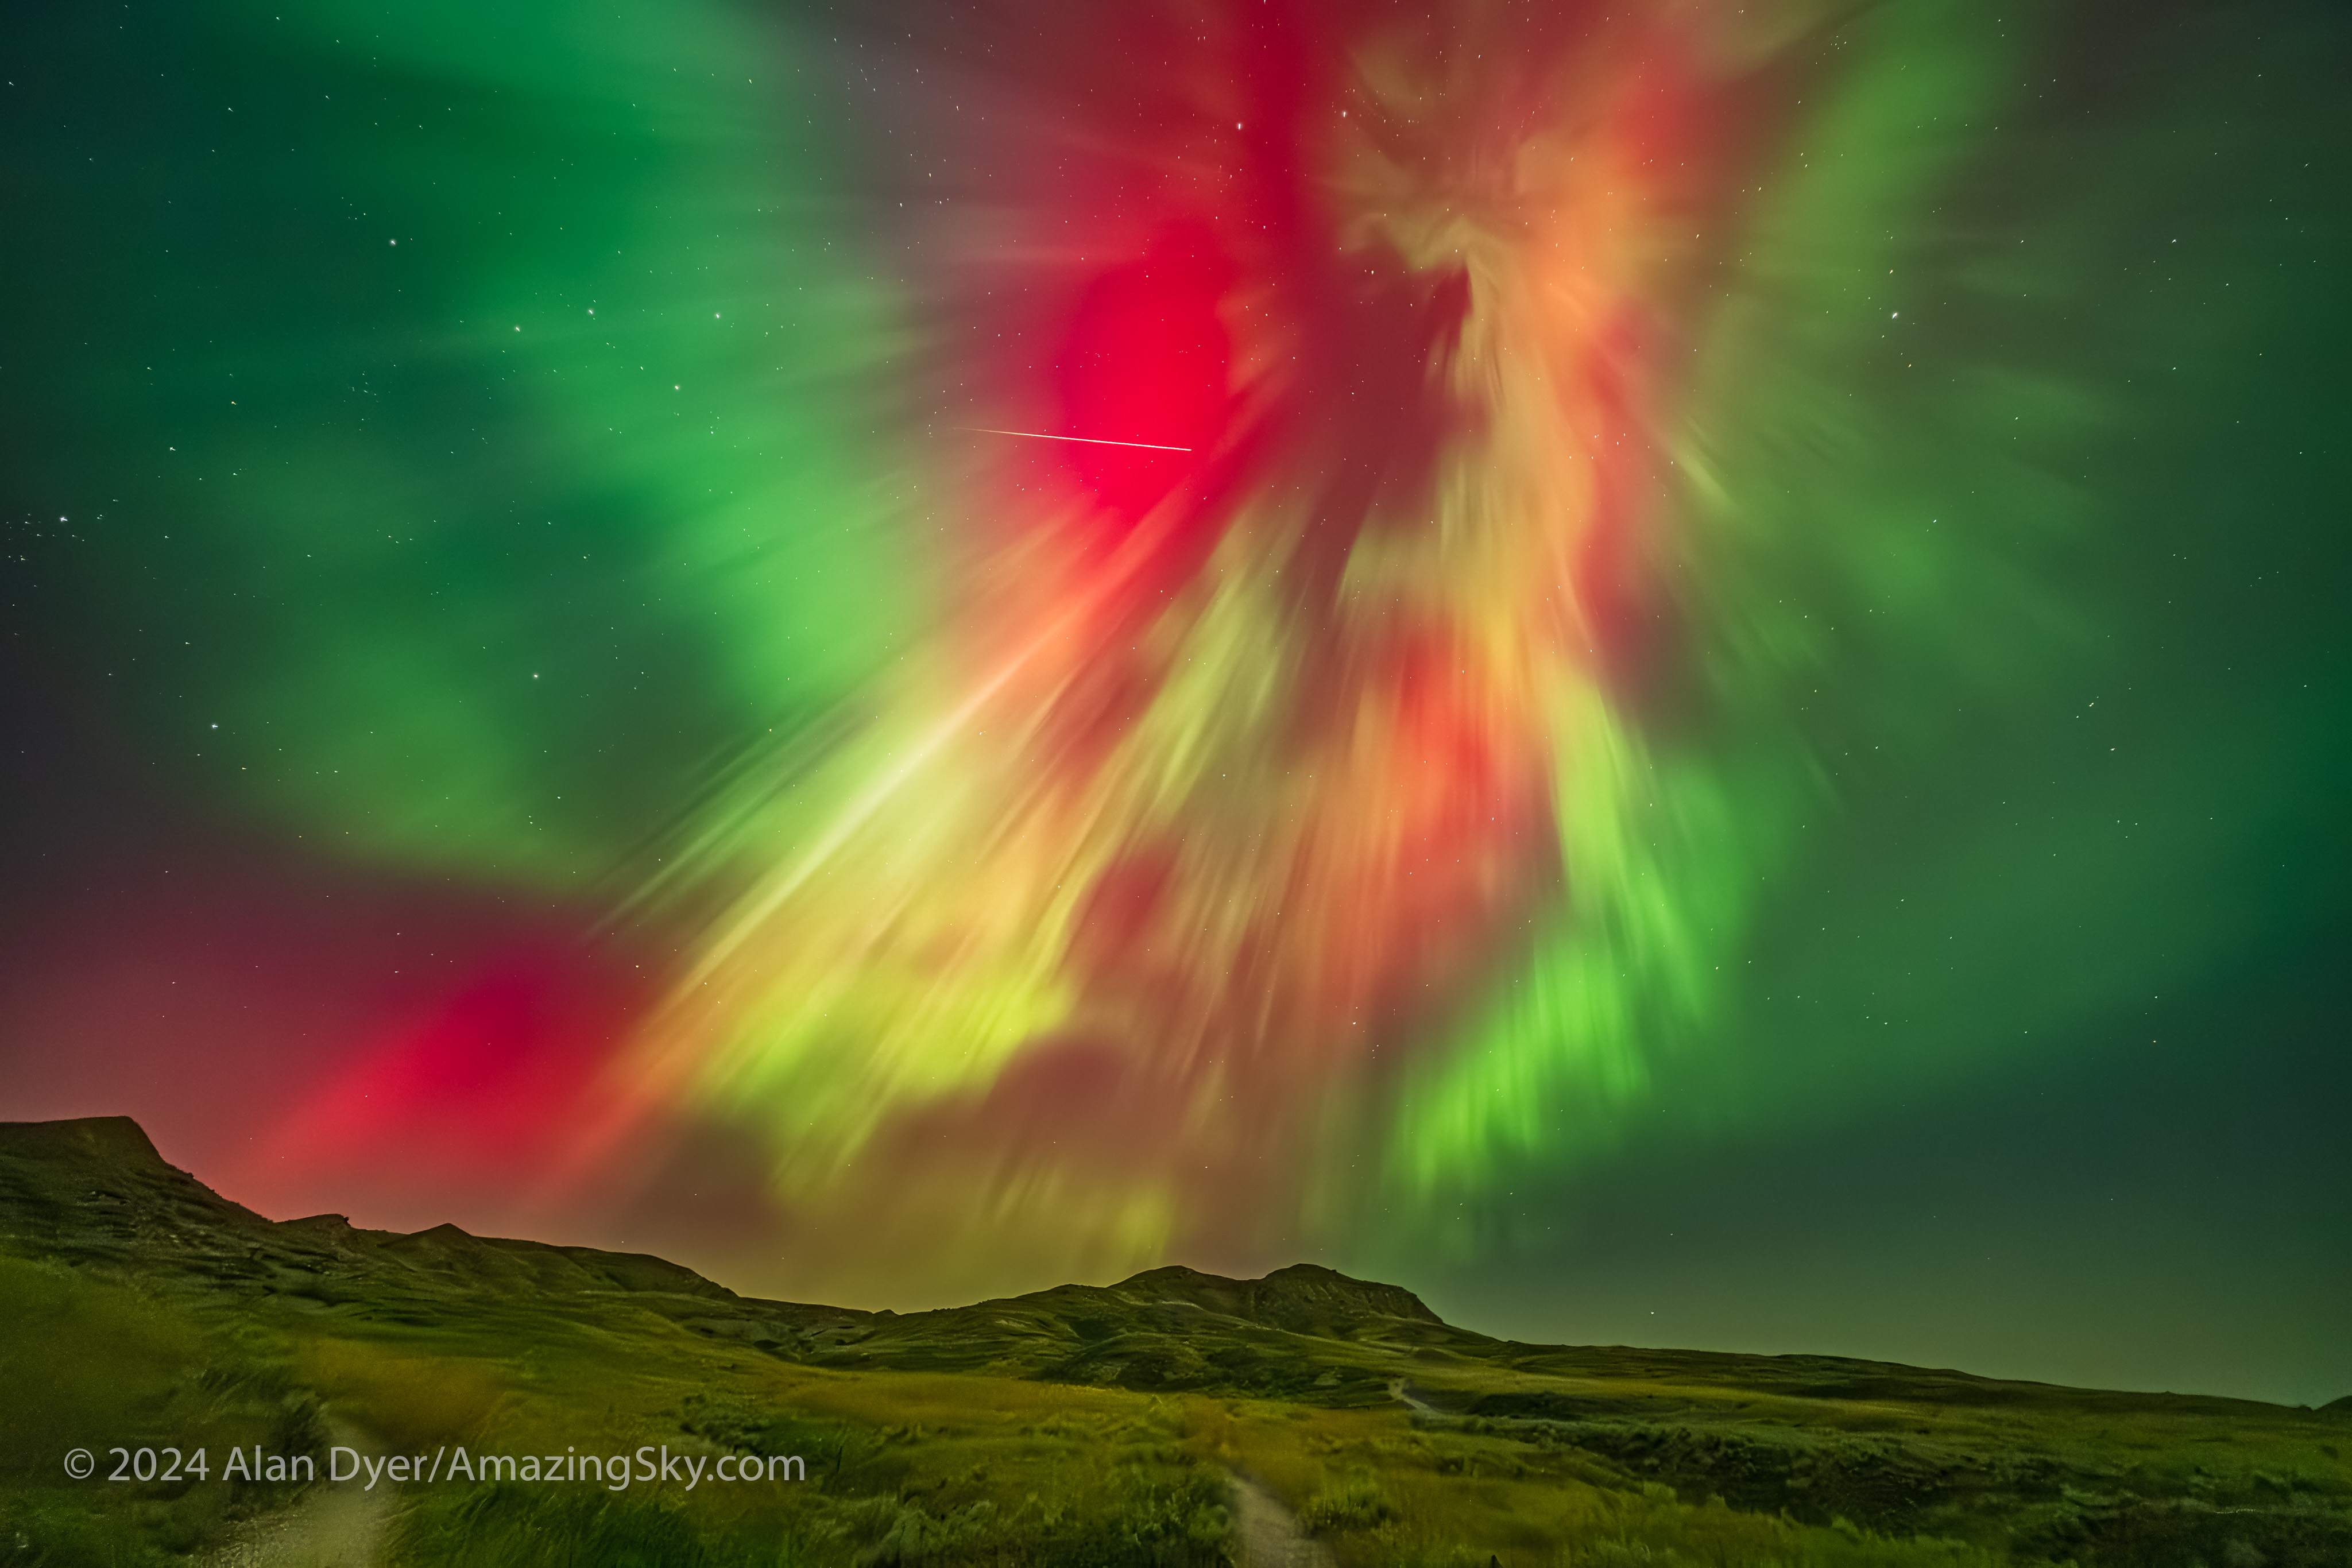
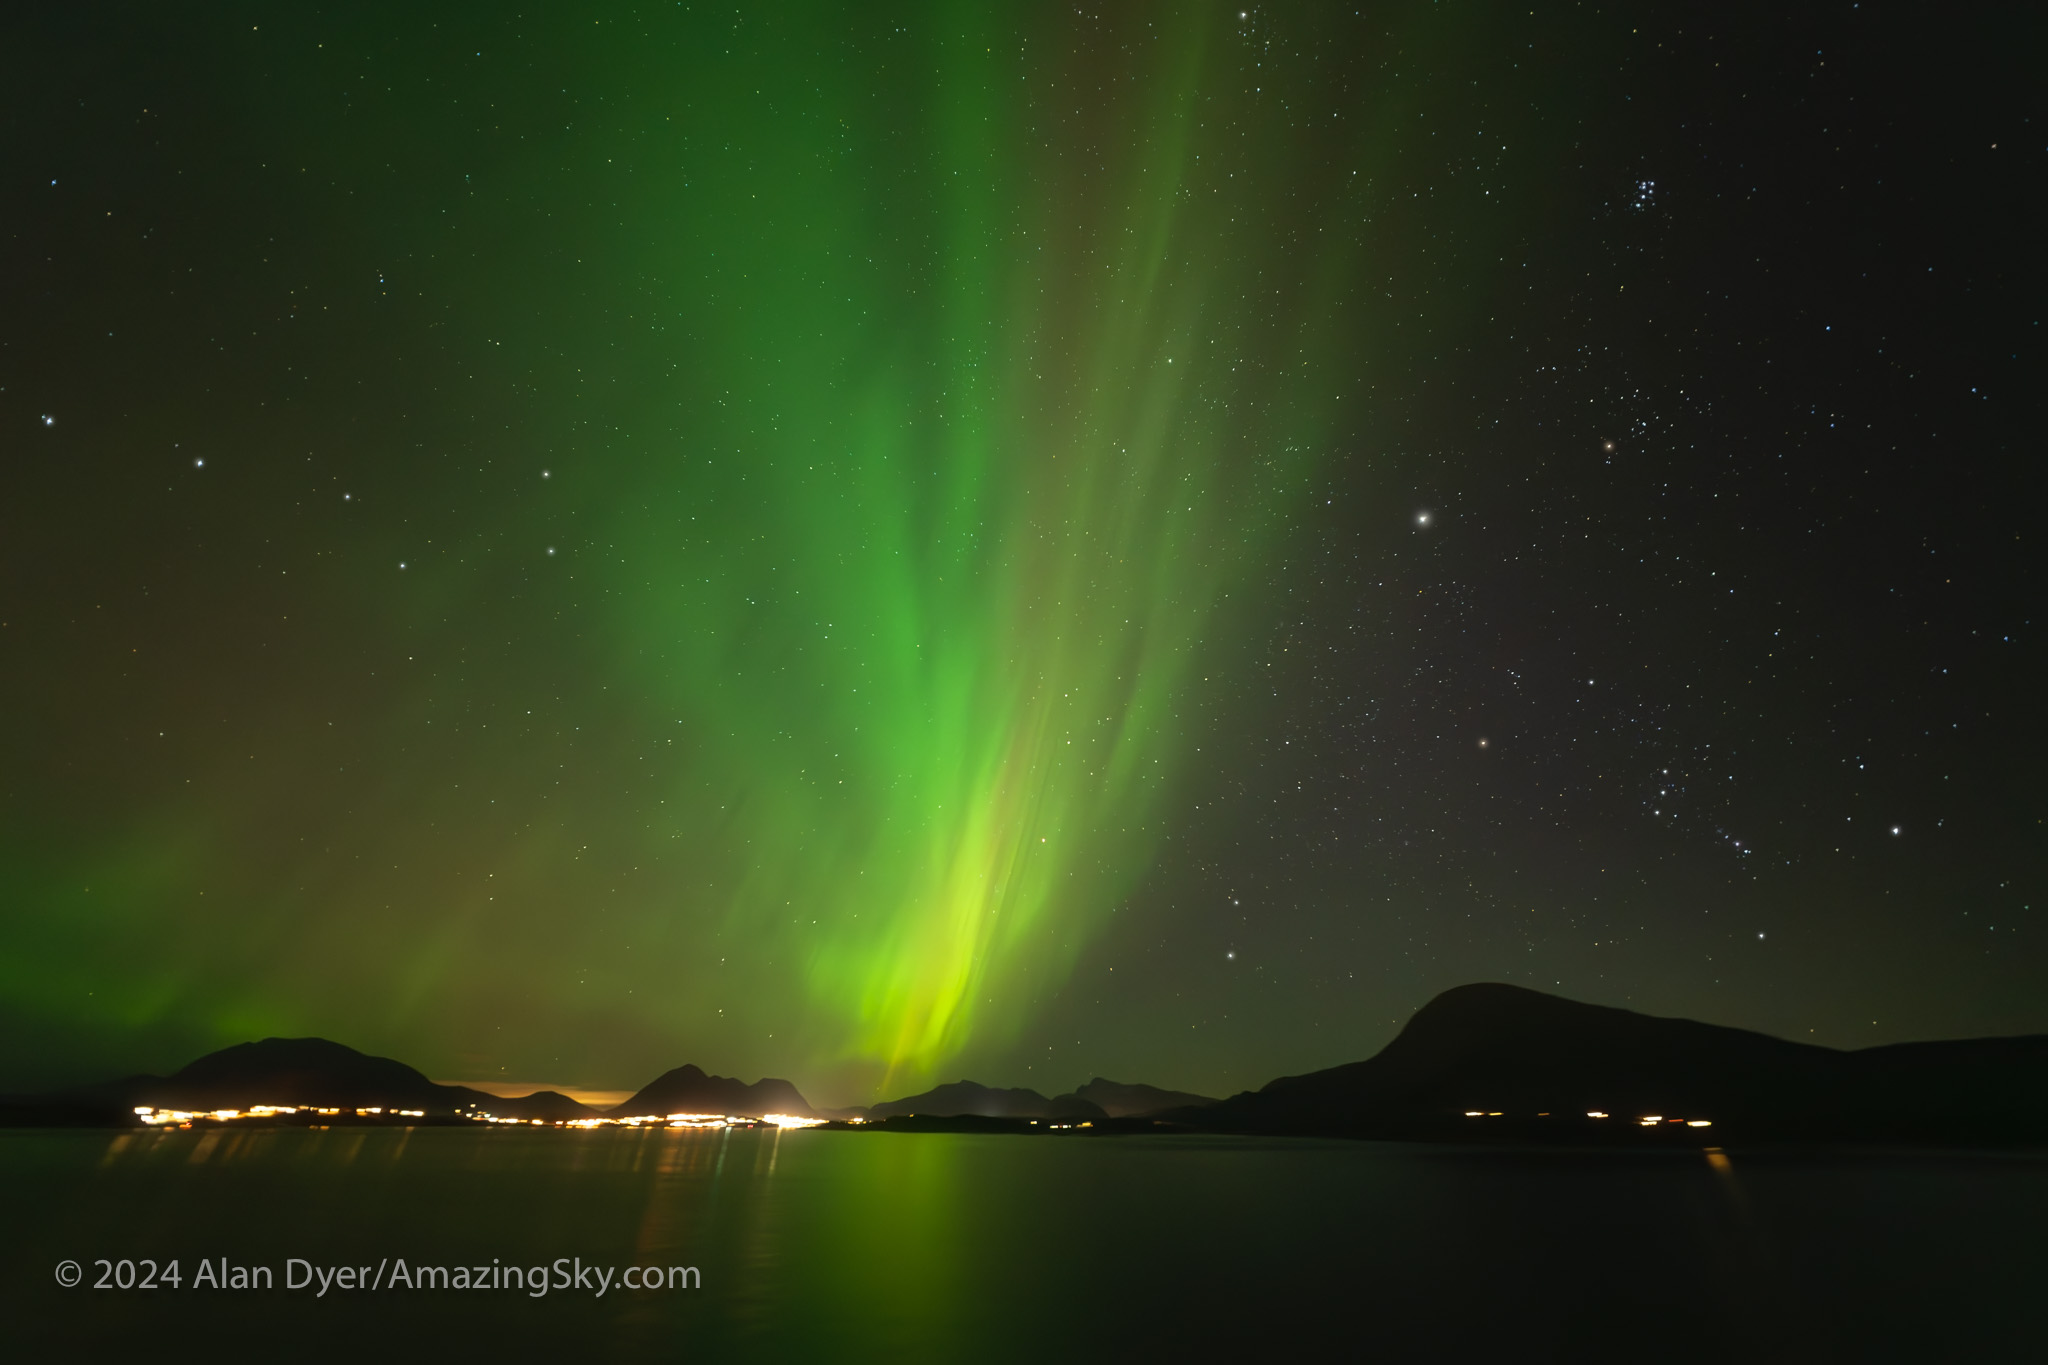
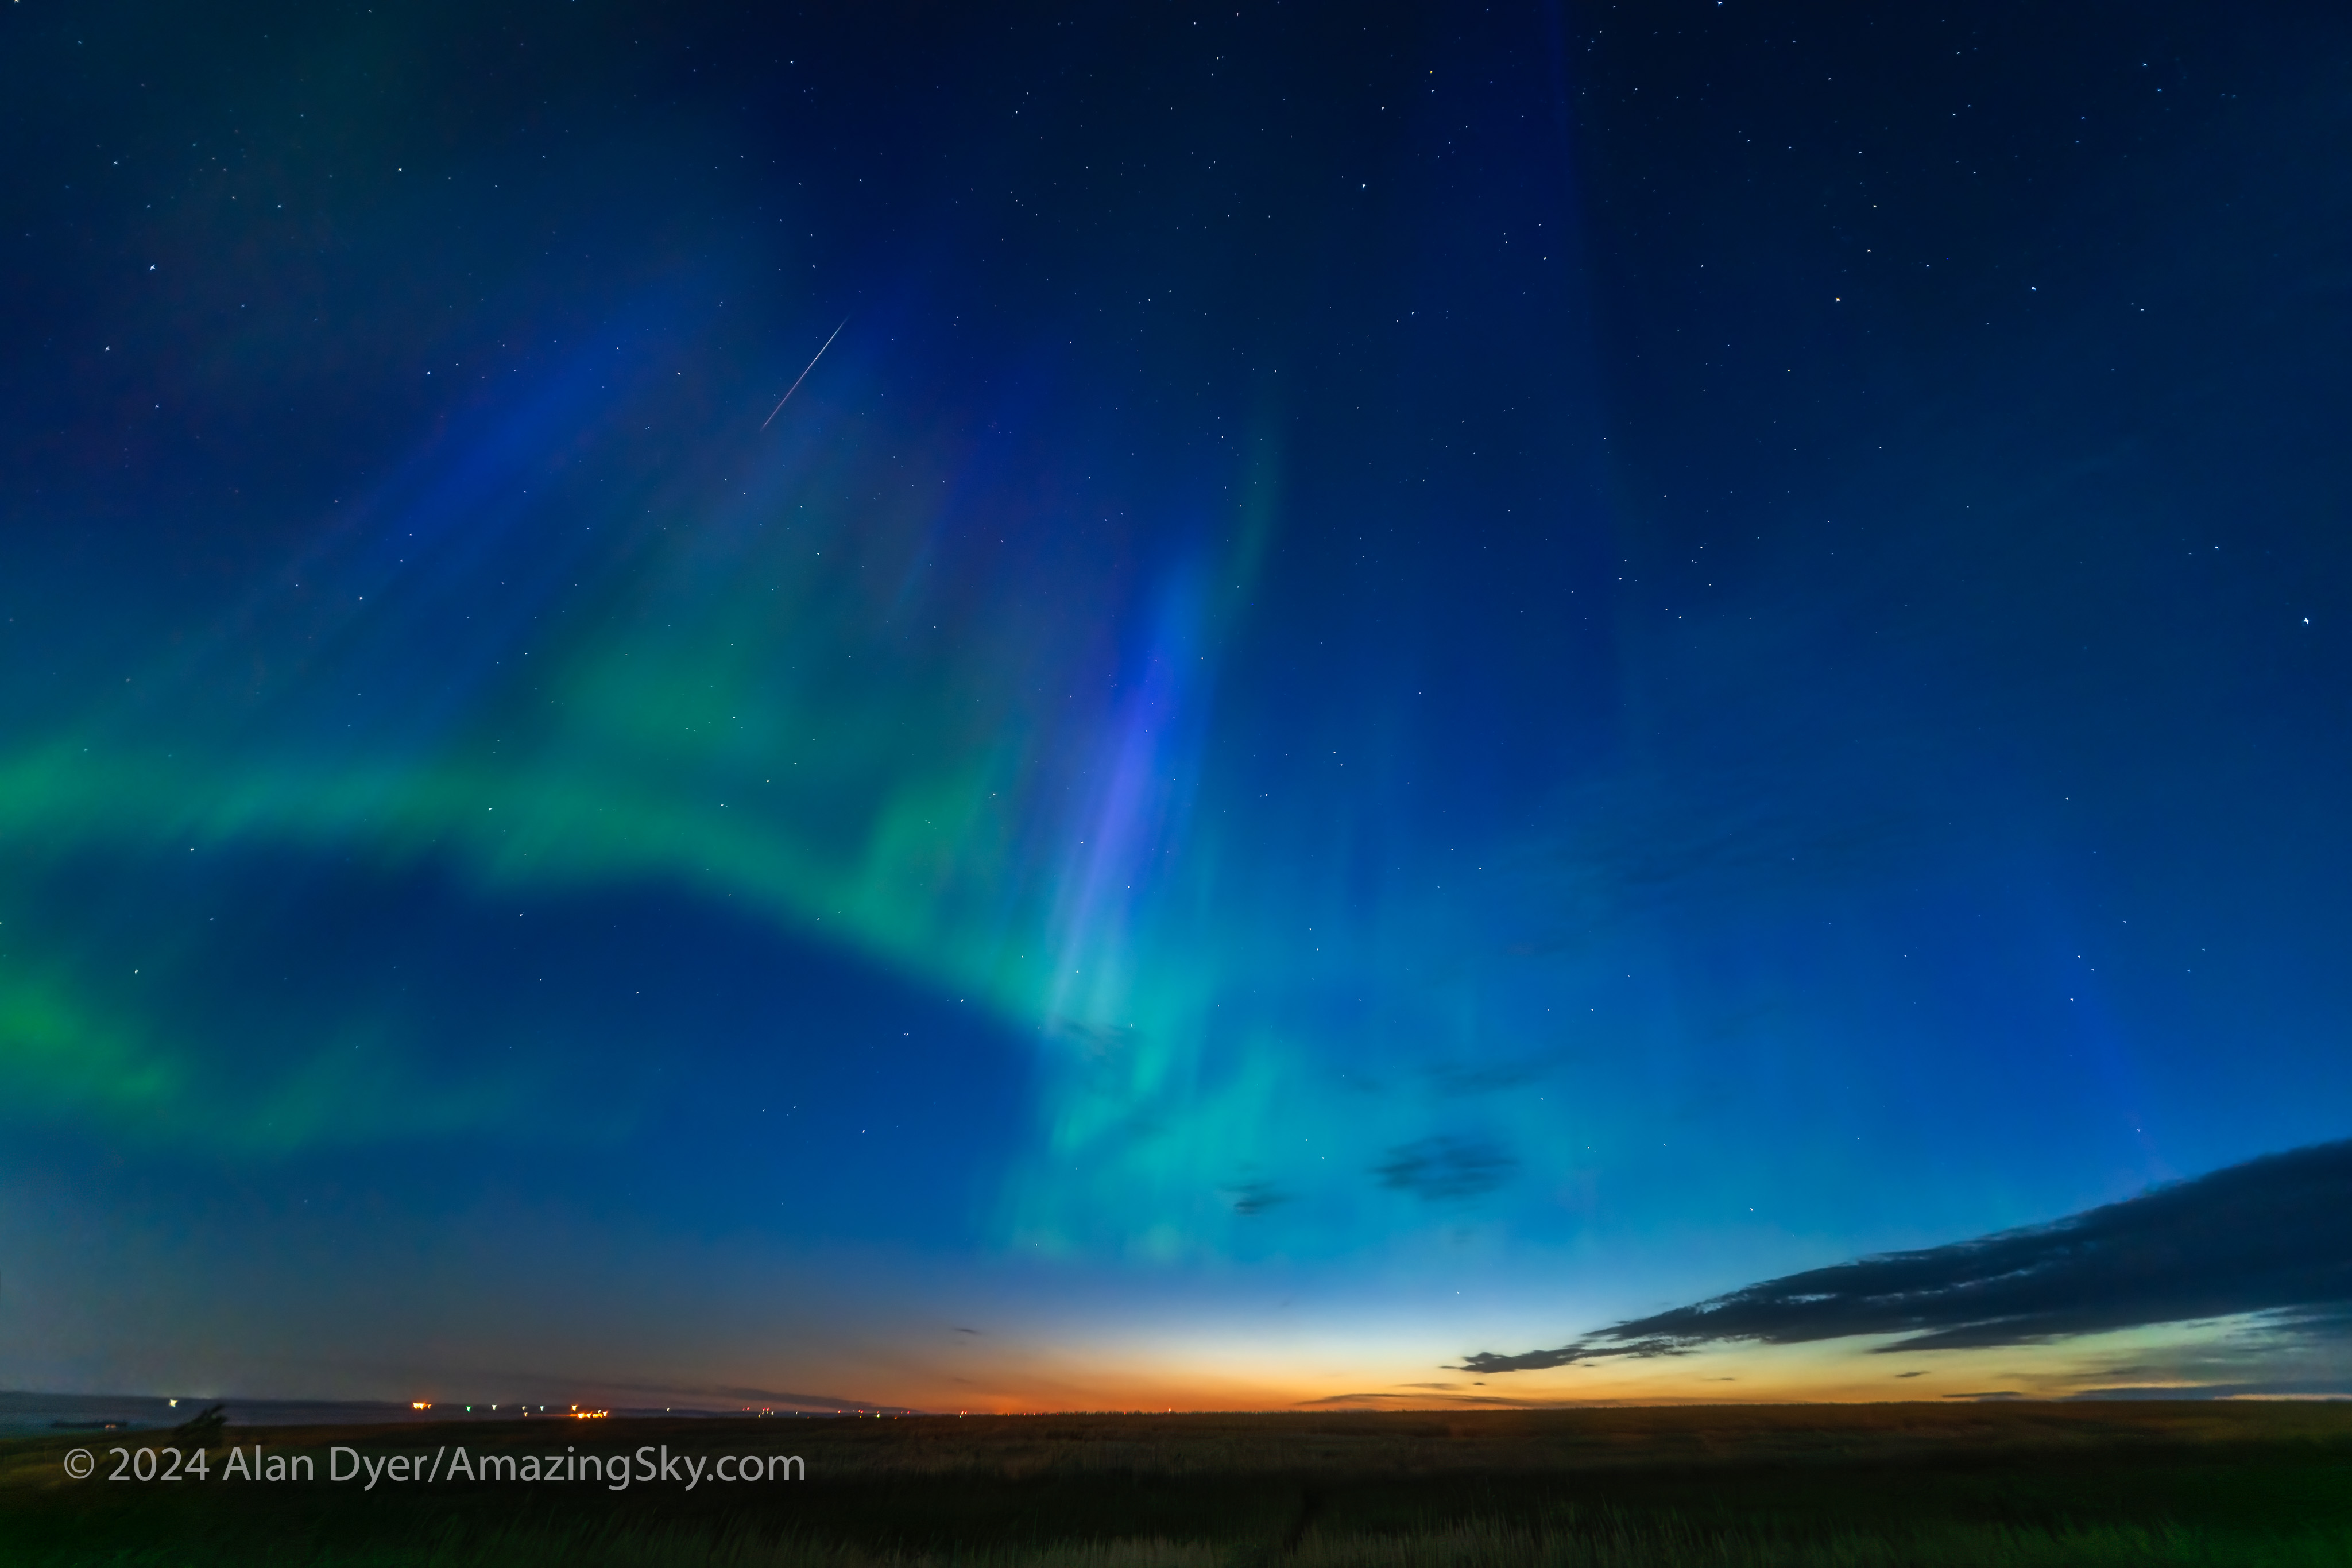
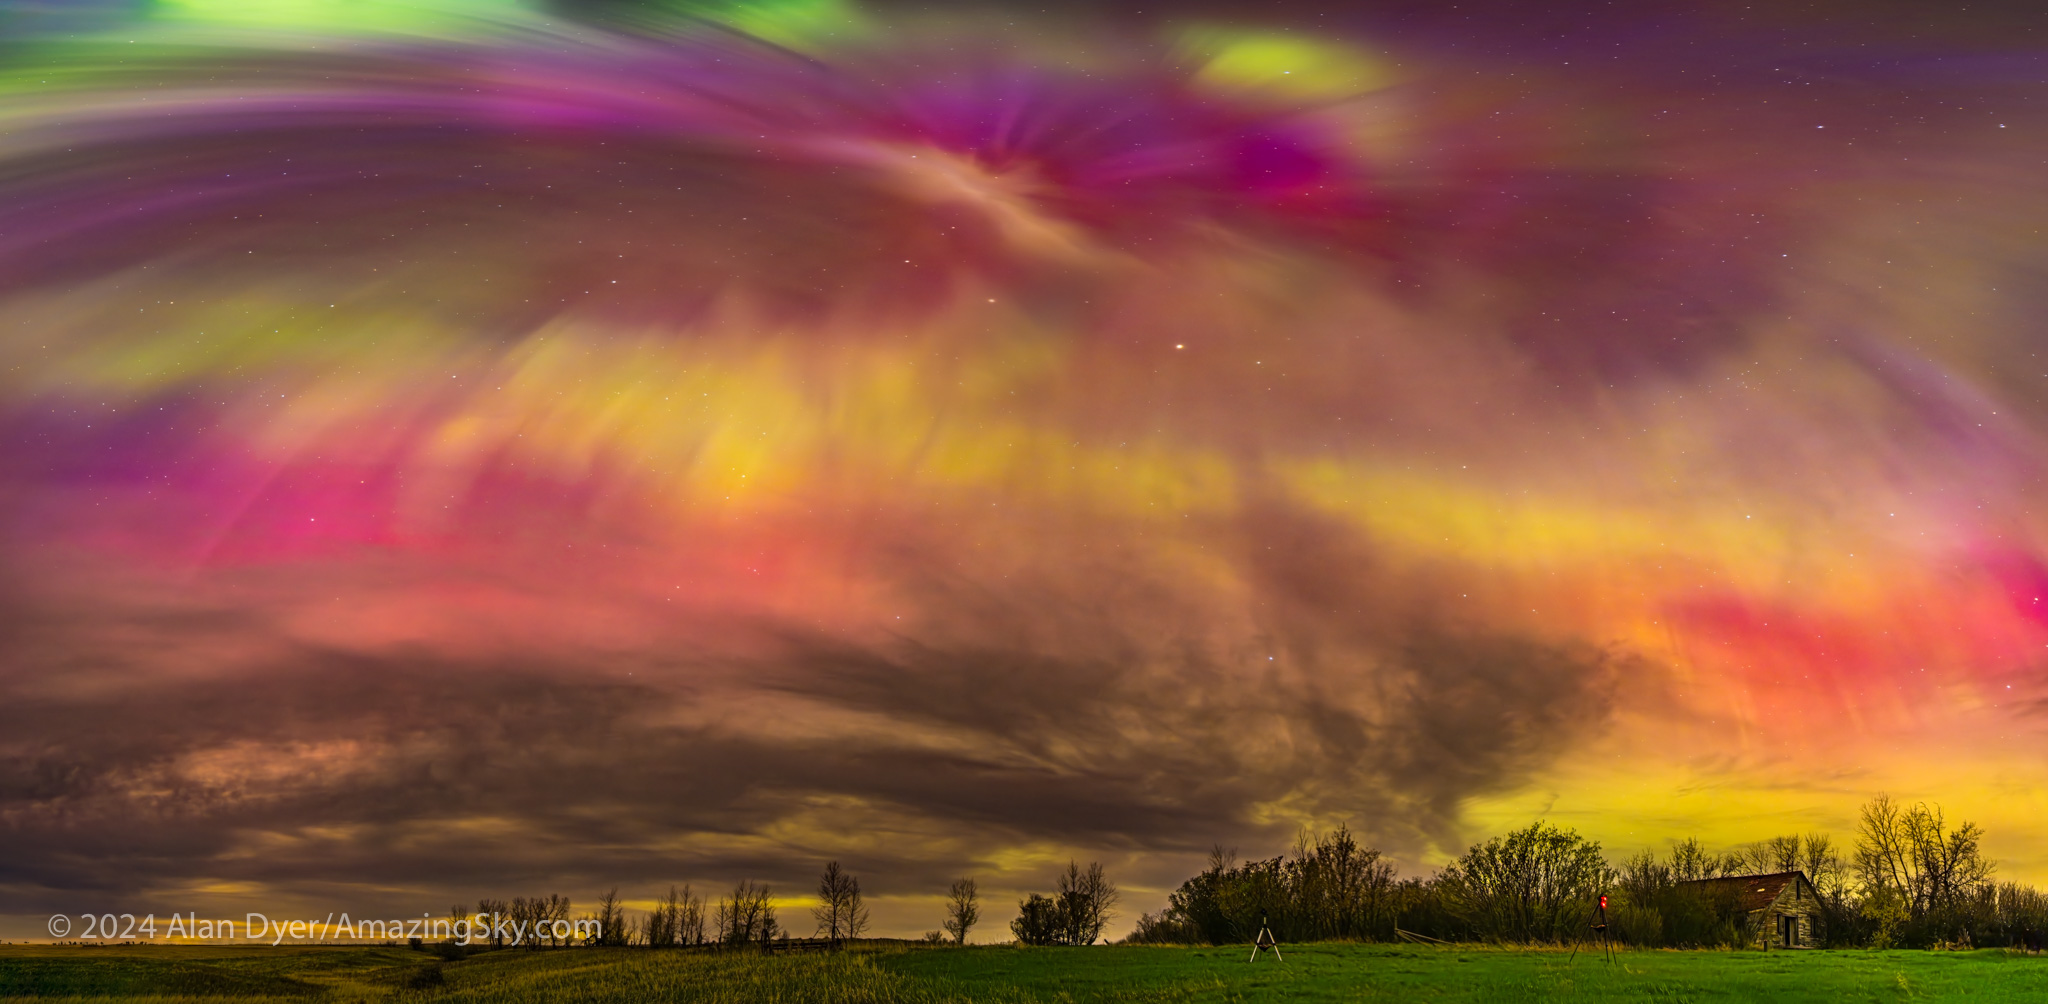
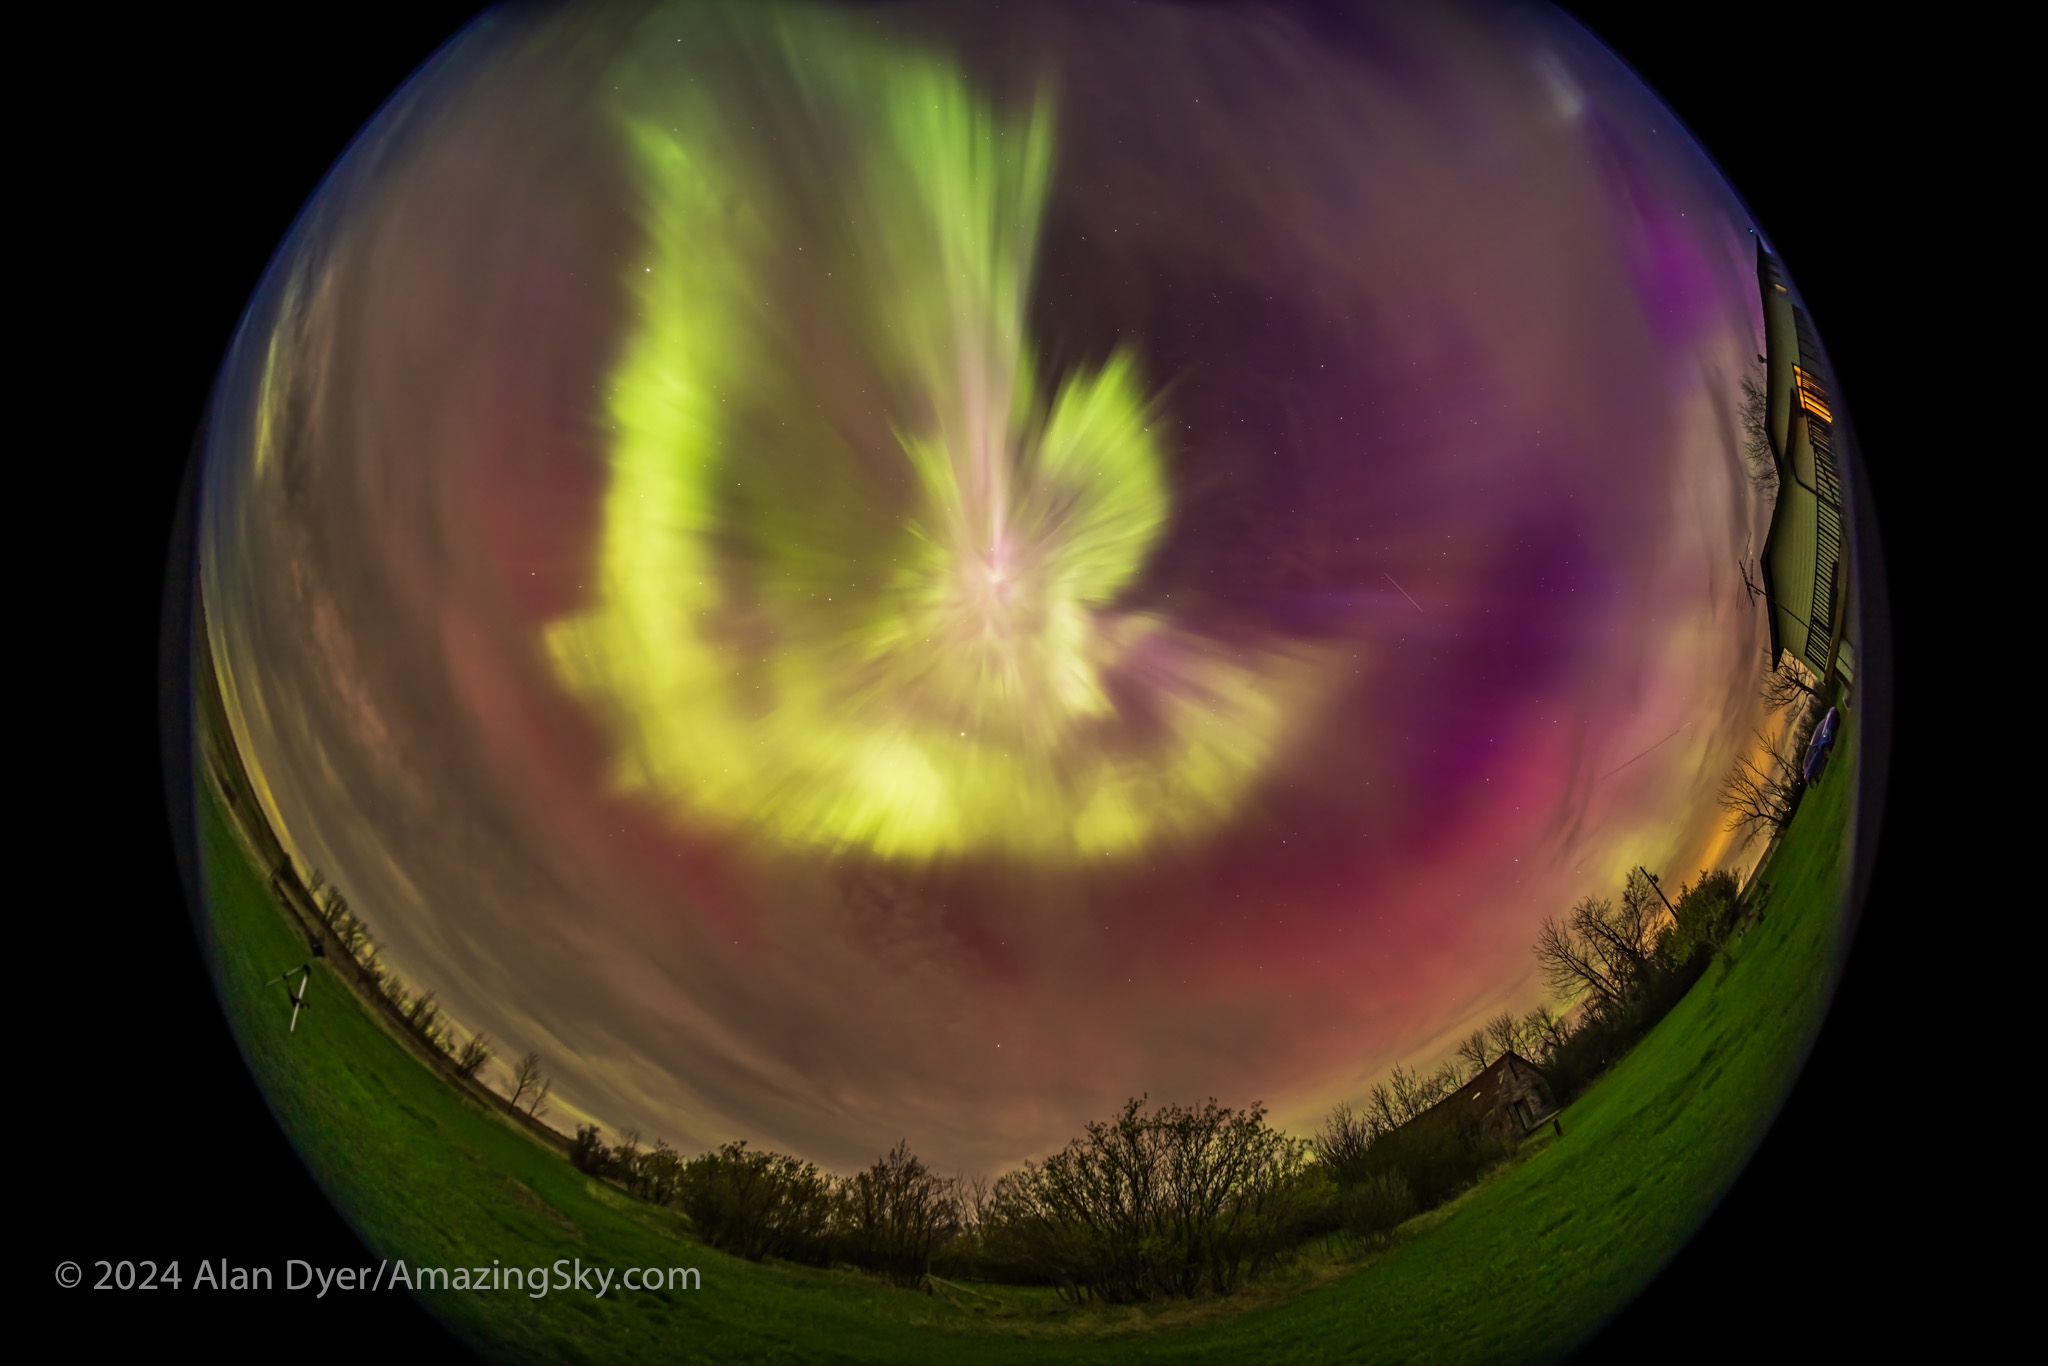
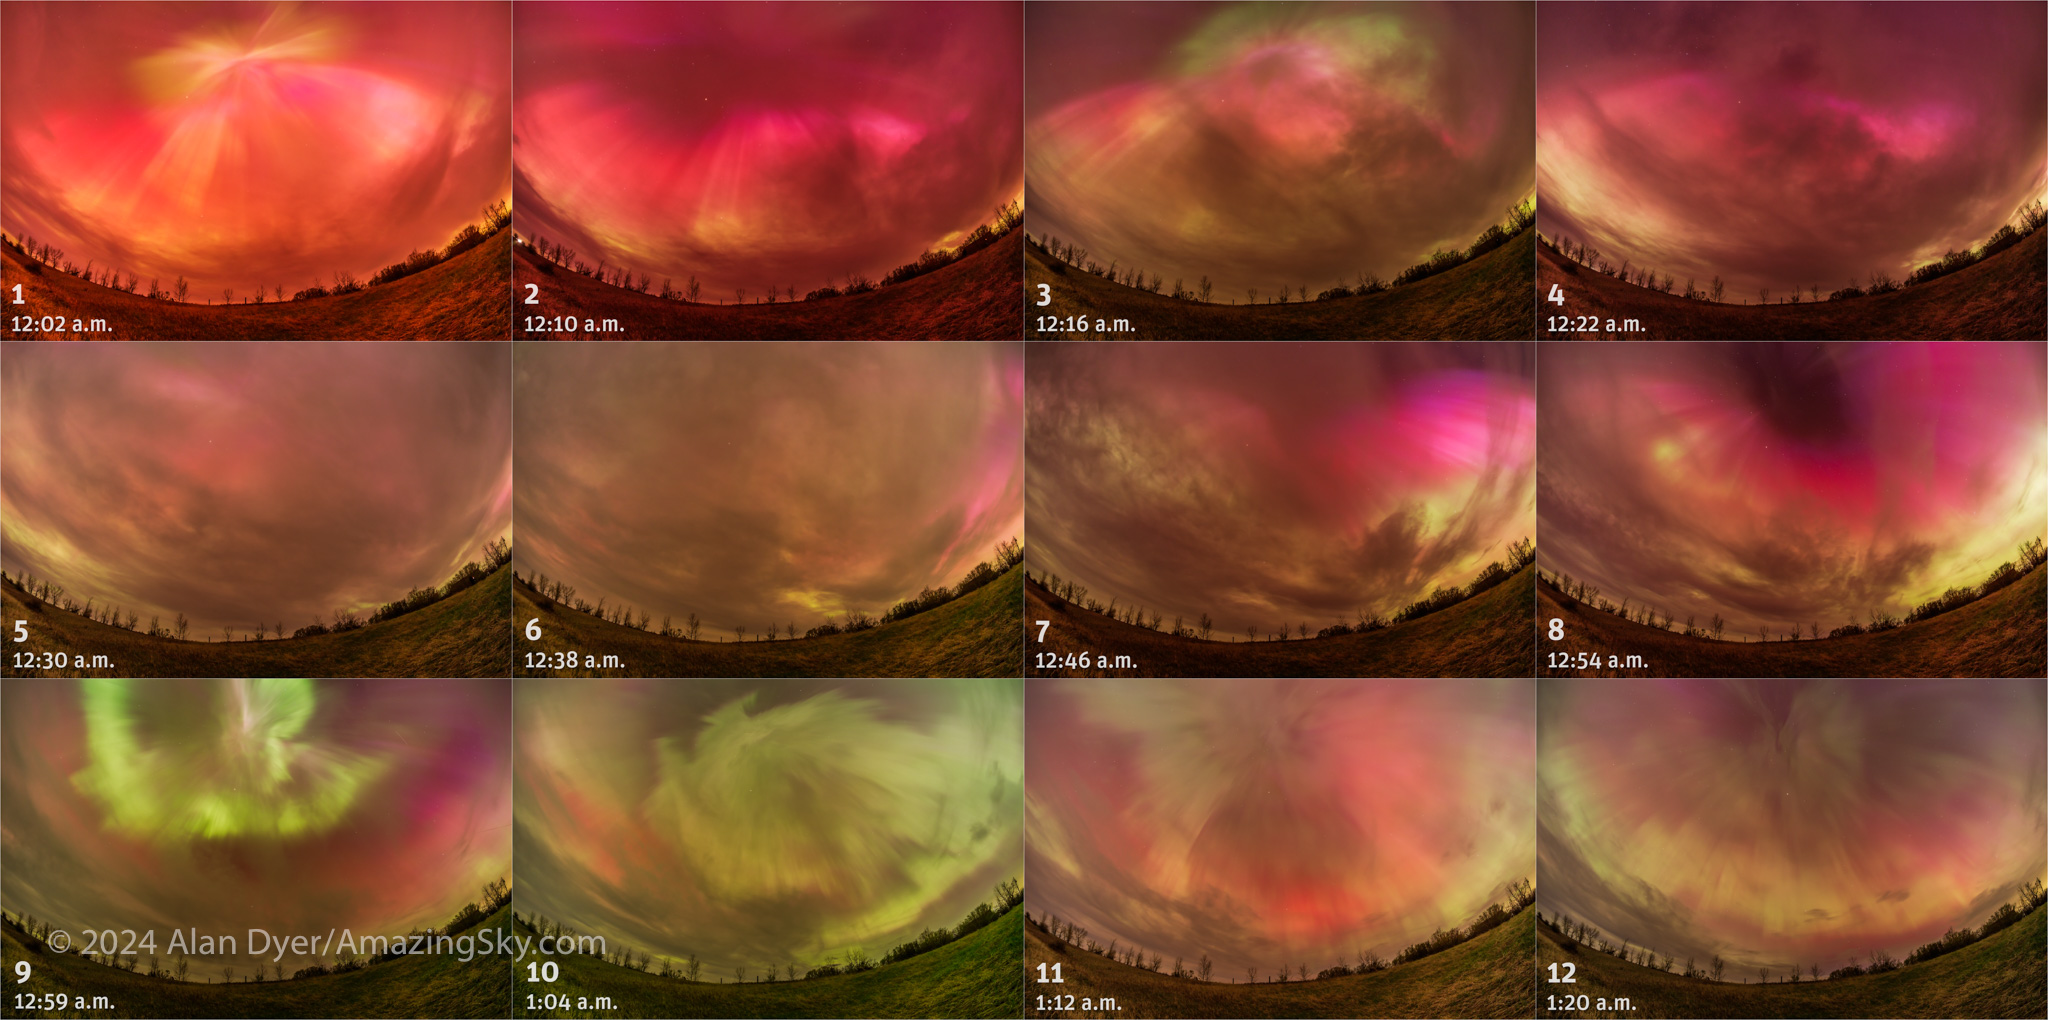
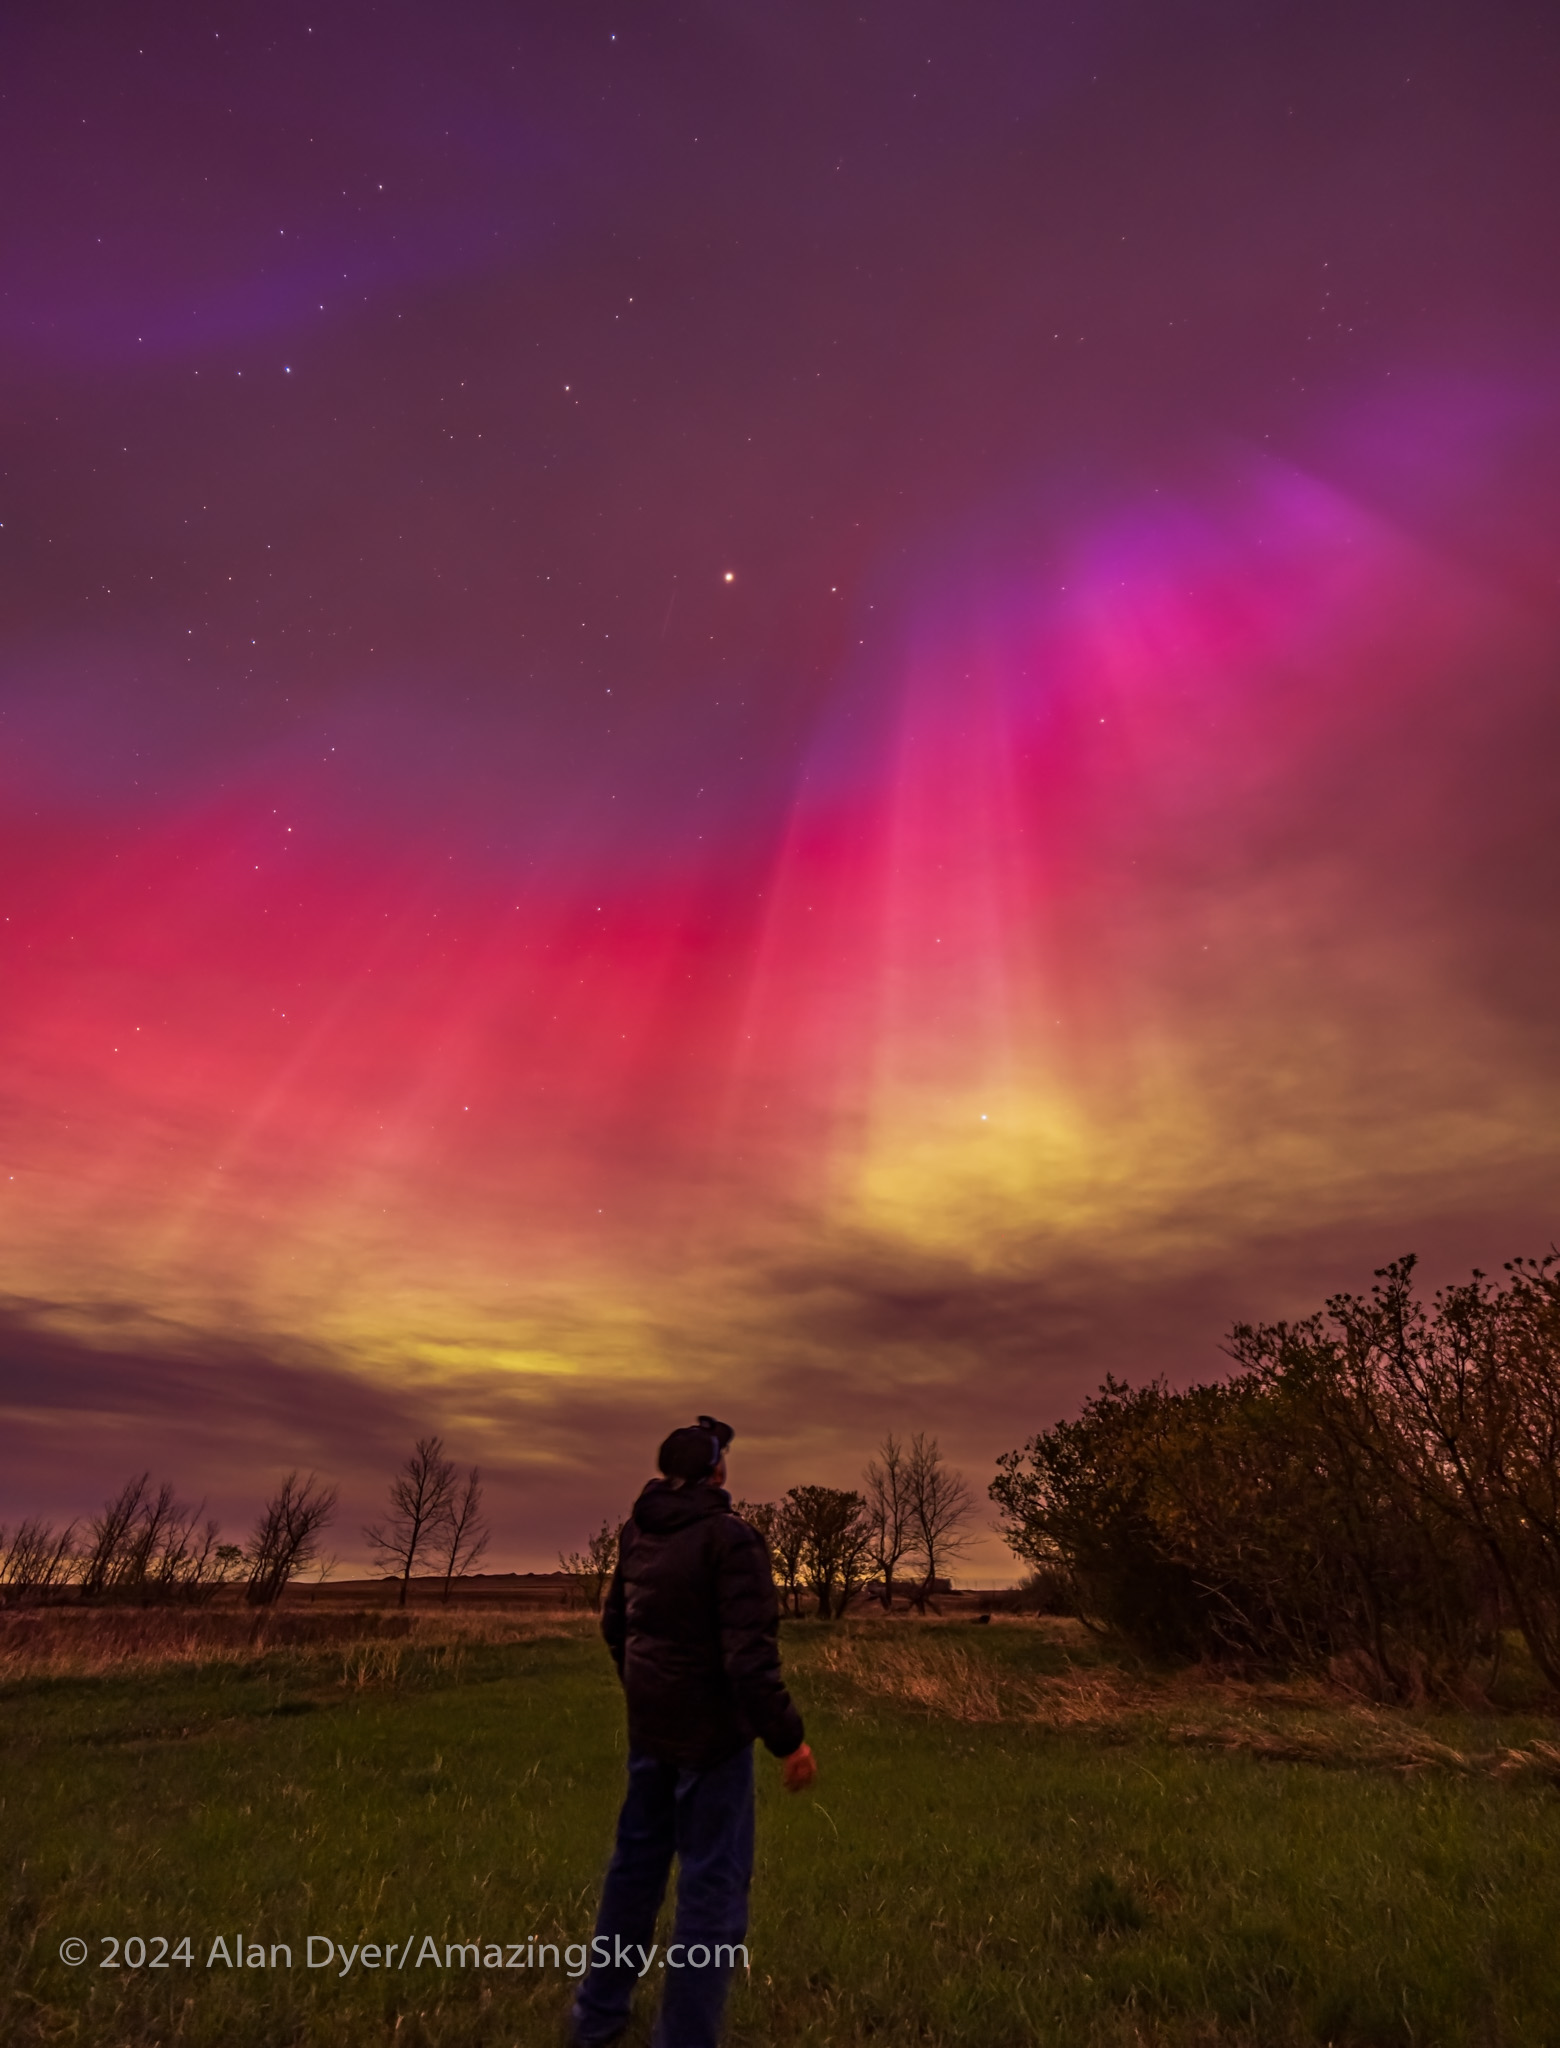
Chinese lens makers are showering the market with affordable lenses, and for the most part they’re of quite good quality. Among them are fish-eyes, very special-purpose lenses. One of those purposes is astrophotography — shooting wide swaths of the night sky, if not the entire sky, in one frame. That’s ideal for capturing sky-filling auroras, or the sweep of the Milky Way.
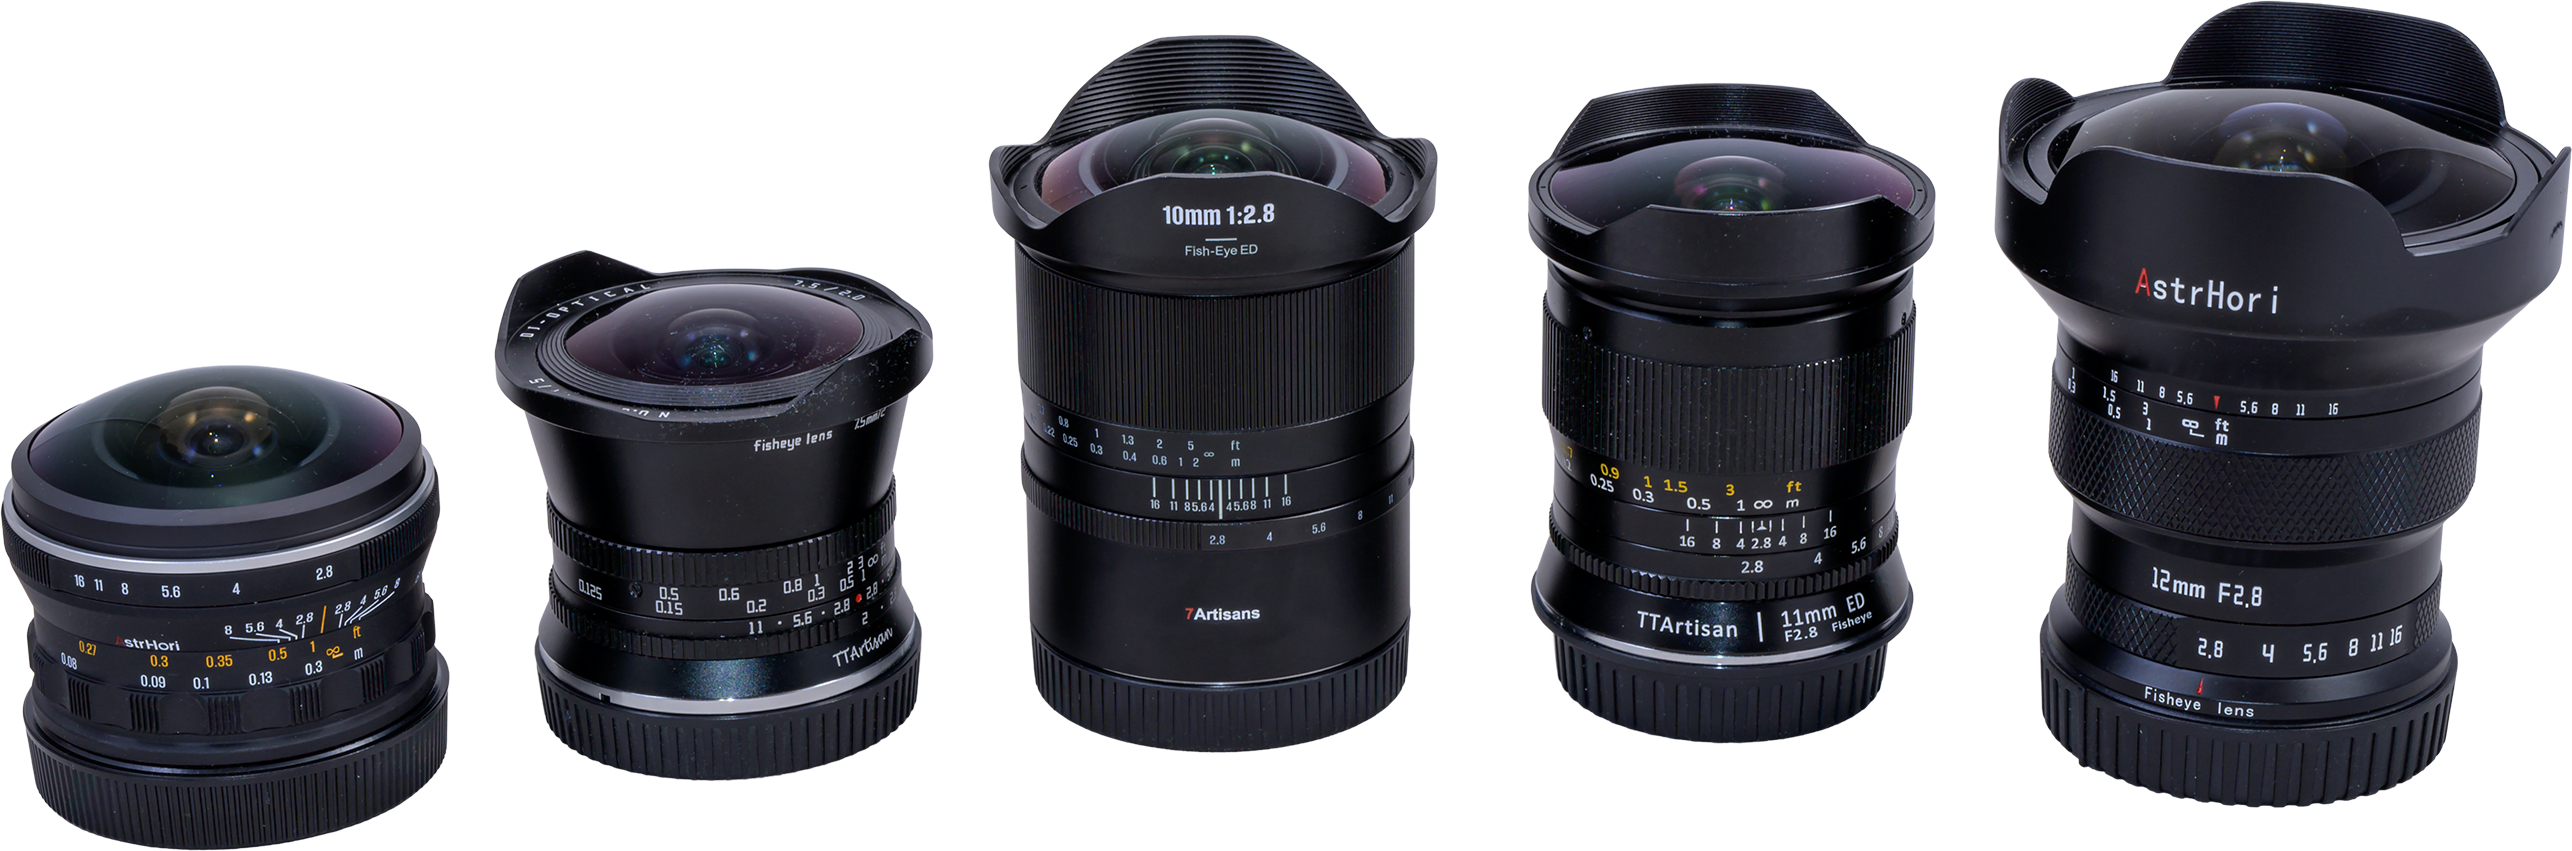
Here I test five low-cost fish-eyes on the night sky:
The 7Artisans 10mm at f/2.8 on the Nikon Z8.
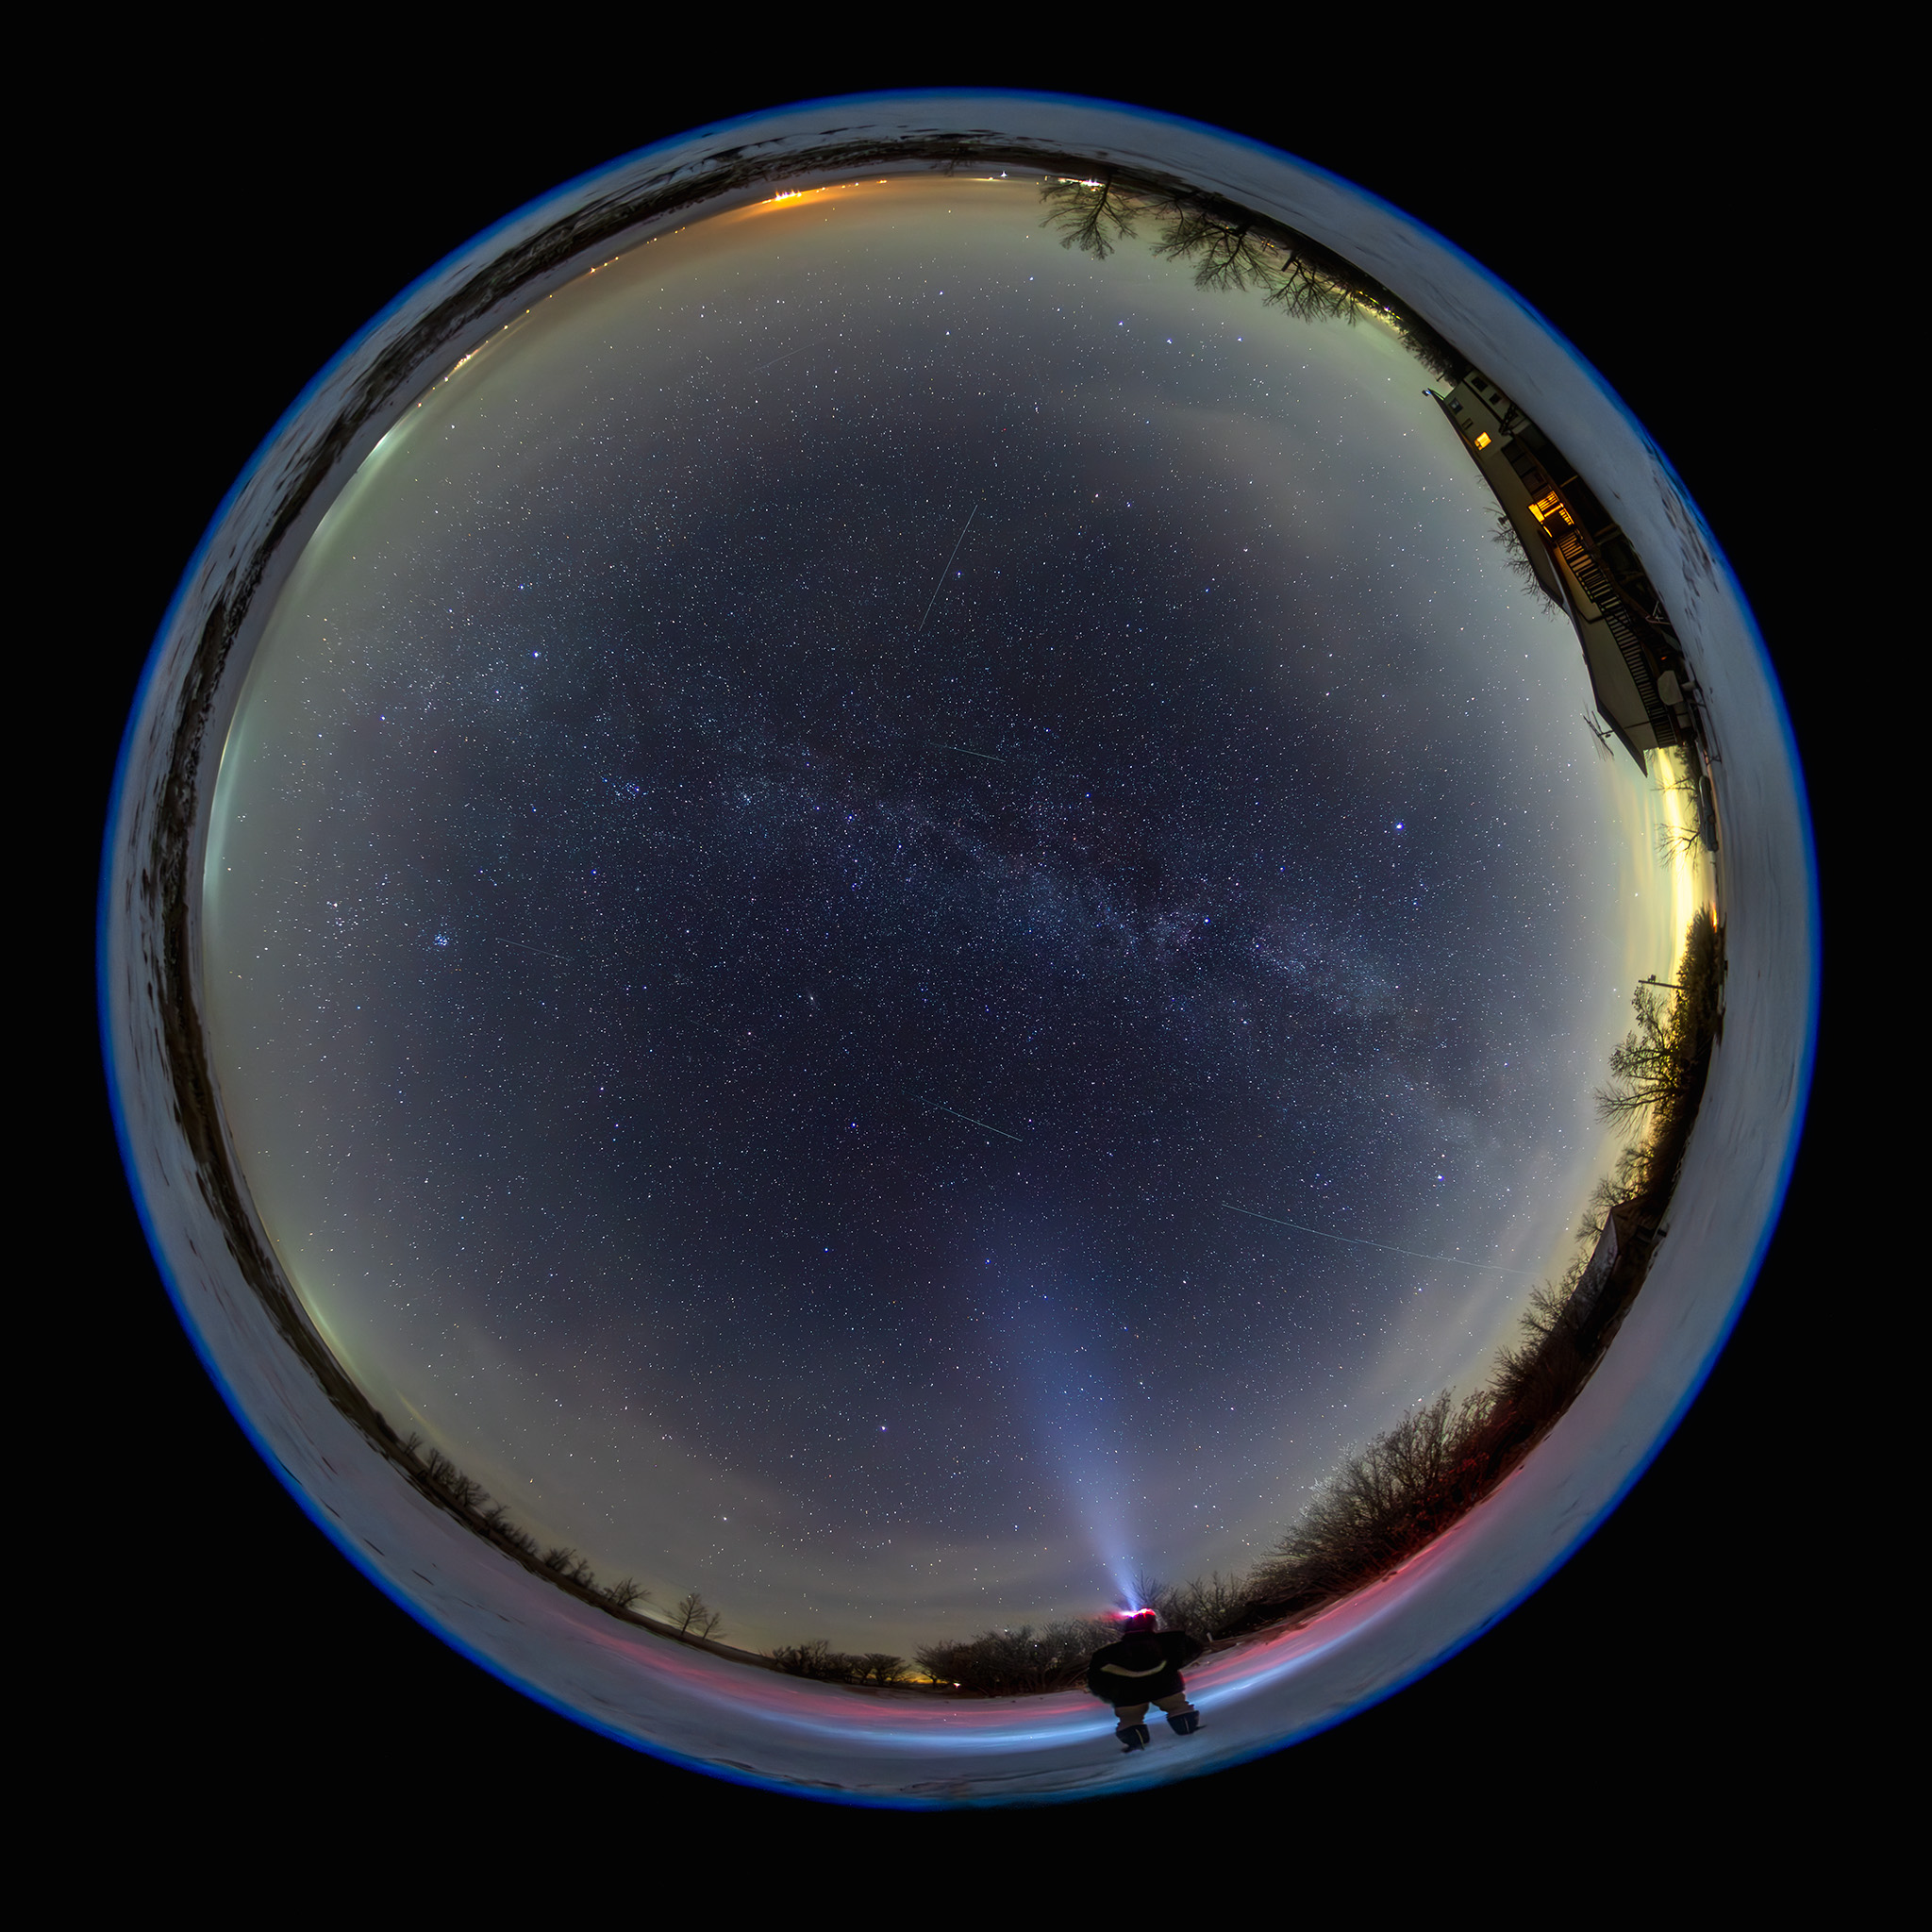
– Two circular format lenses that project a round image taking in a full 360° by 180º within the rectangular frame, plus …
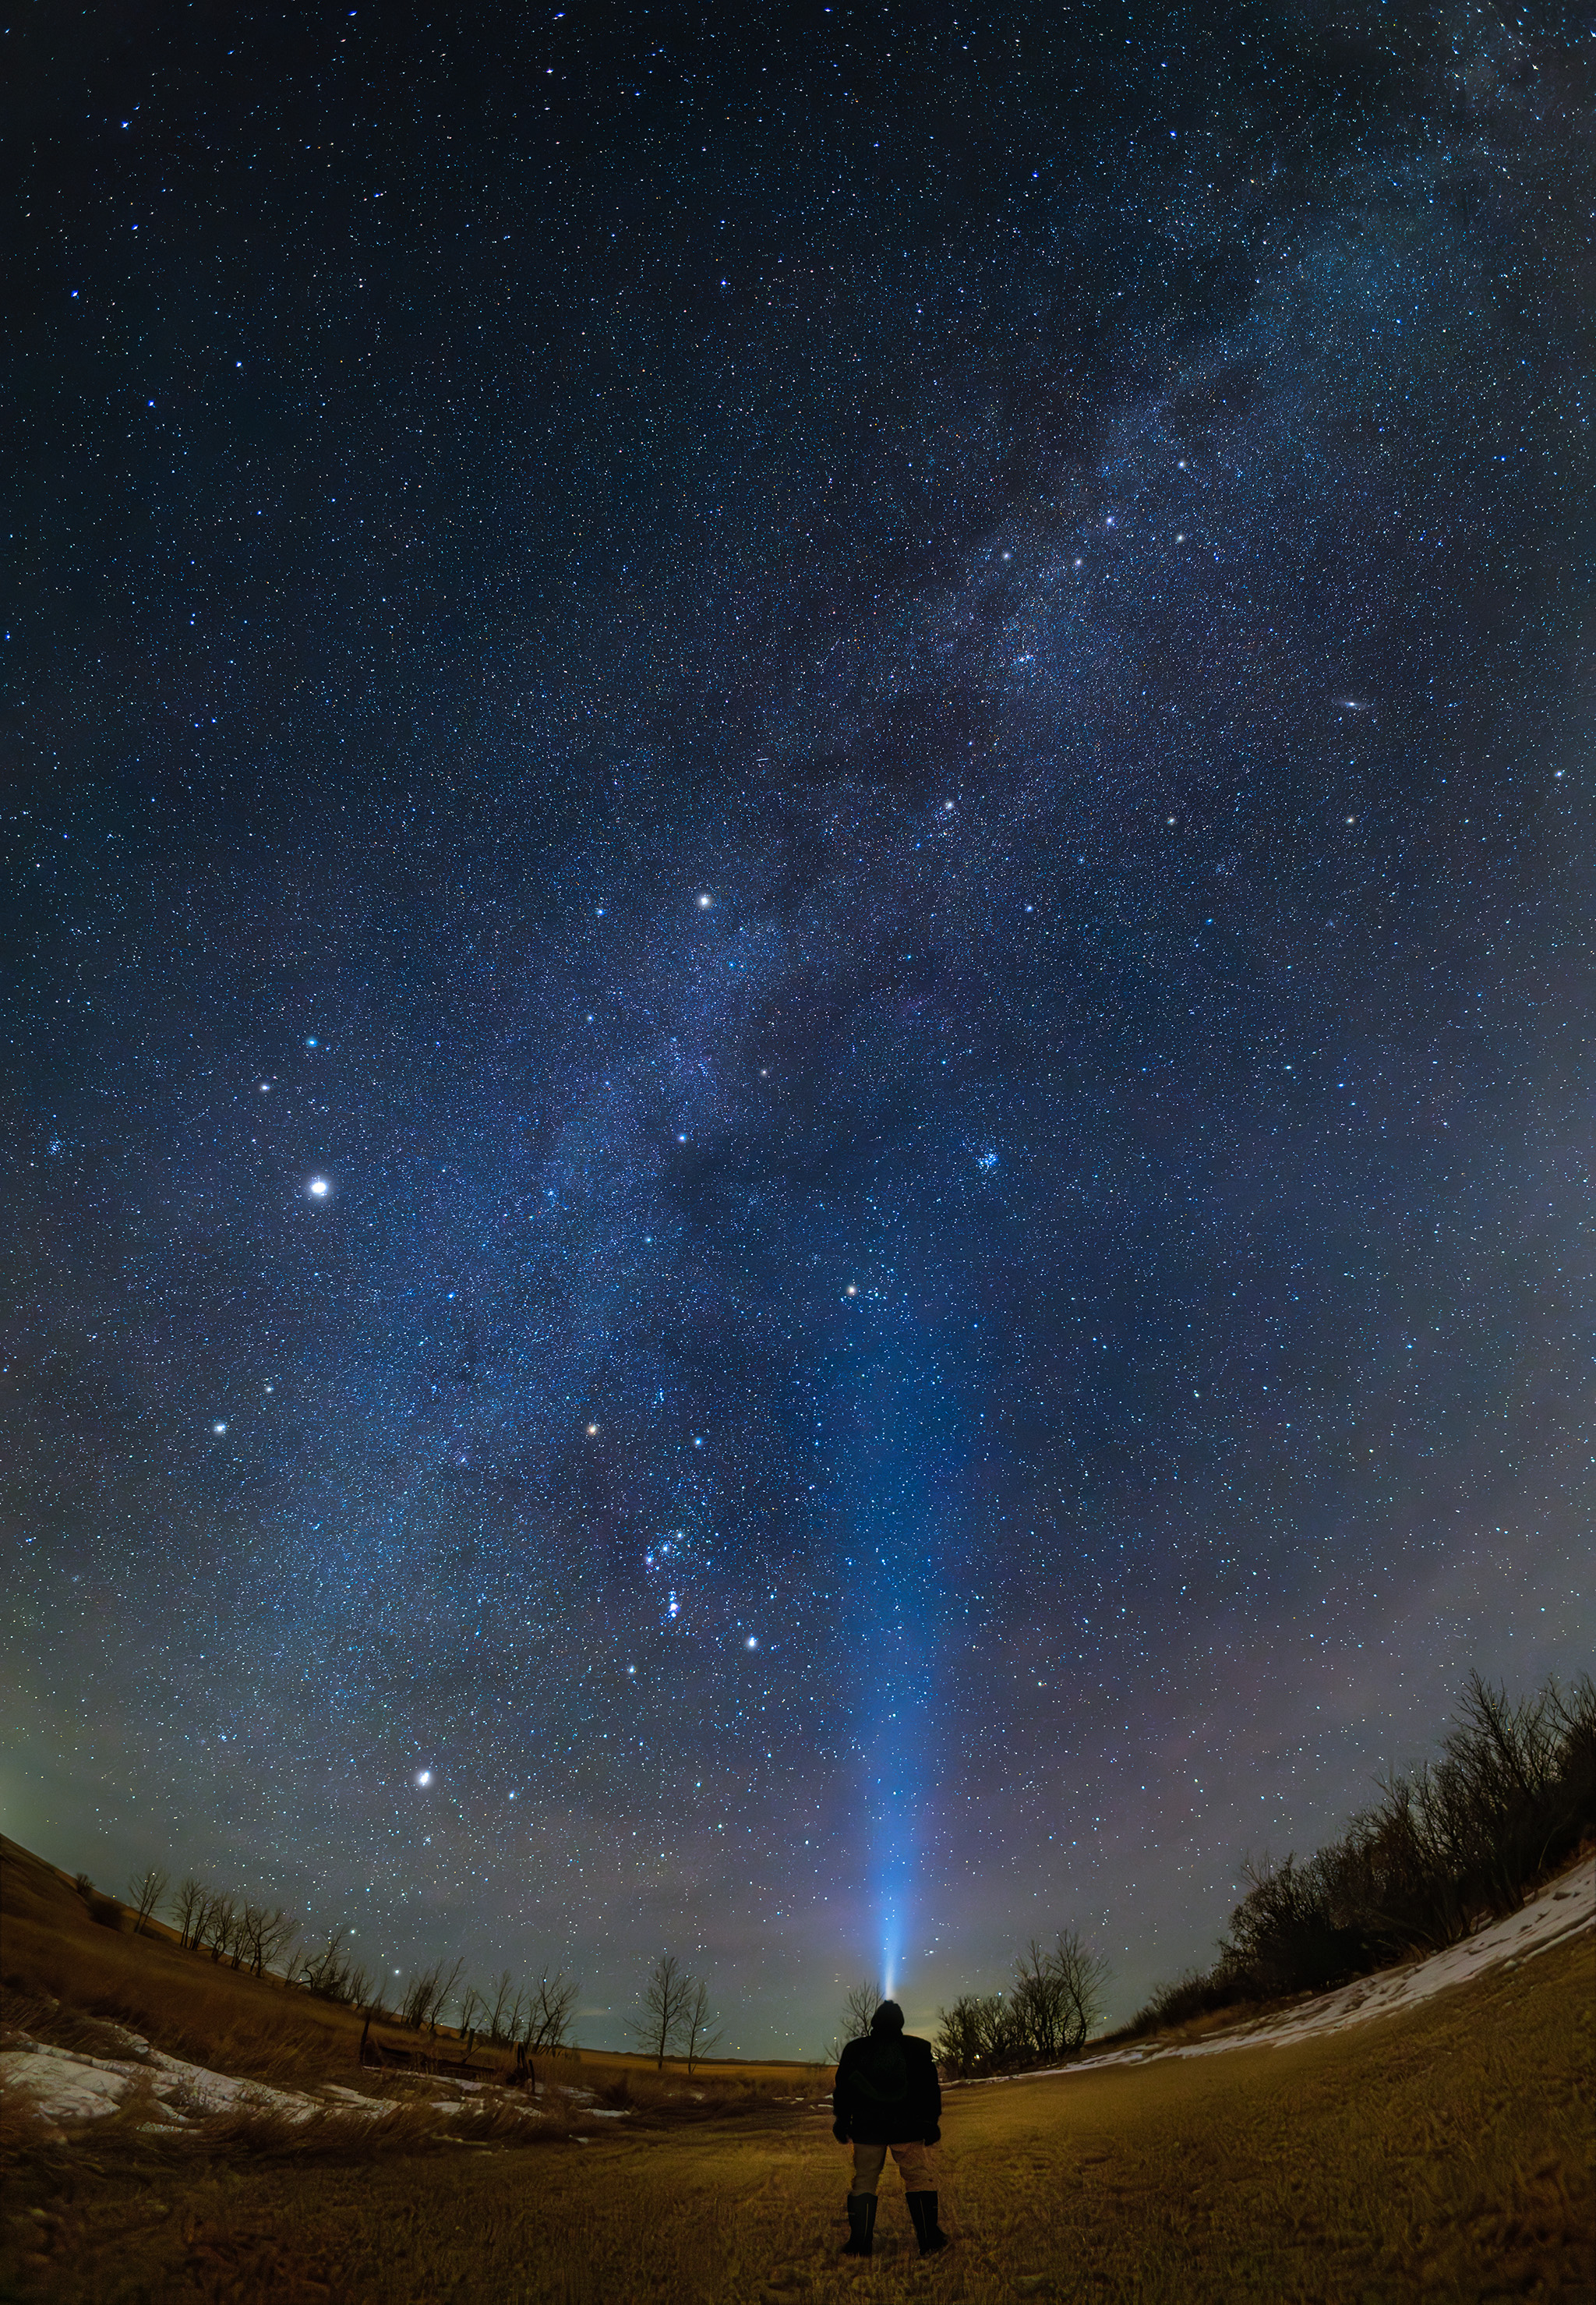
– Three lenses that fill the rectangular frame corner to corner (i.e. they are “full-frame” or “diagonal” fish-eyes) with a field that is about 180º wide across the frame diagonal. They present curved horizons; they are not “zero-distortion” ultra-wide lenses.
All five lenses work well on full-frame (36mm x 24mm sensor) cameras. All have fast f/2.8 or f/2 optics, making them suitable for astrophotography. Slower f/4 and f/5.6 fish-eyes are not so well suited.
I tested them all under a dark starry sky, checking for horizon-to-horizon sharpness and edge artifacts, and on a moonlit night looking for lens flares.
NOTE: My blog features many high-resolution images that may take a while to load.
However, you can CLICK or TAP on a test image to bring it up full screen for closer inspection, and save it as a JPG download.
All images are © 2026 by Alan Dyer/AmazingSky.com. By all means share a link to the blog. But sharing individual images or publishing them without permission is prohibited.
TL;DR SUMMARY
All five lenses work surprisingly well for such low-cost optics. And all are well made, with smooth, well-dampened manual focusing. None are “plastic-fantastic” junk.
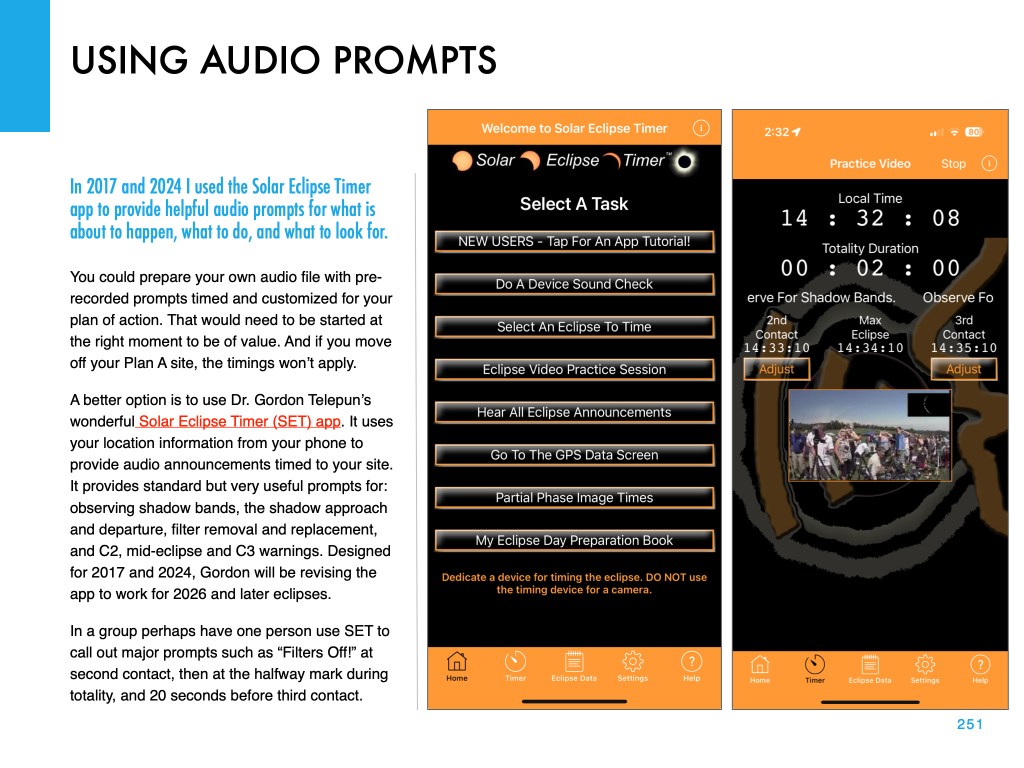
For a full-frame fish-eye the 7Artisans 10mm stands out for astro use, for its optical quality and good features such as the glow-in-the-dark markings, and an excellent storage case. It will be the best lens here for Milky Way images where star sharpness counts most.
For a circular fish-eye, the 6mm AstrHori and the 7.5mm TTArtisan each have unique features: an amazing 220º field of view for the 6mm, and fast f/2 speed for the 7.5mm. Both would be superb for capturing all-sky aurora shows, perhaps for projection in digital planetarium domes.
THE LENSES
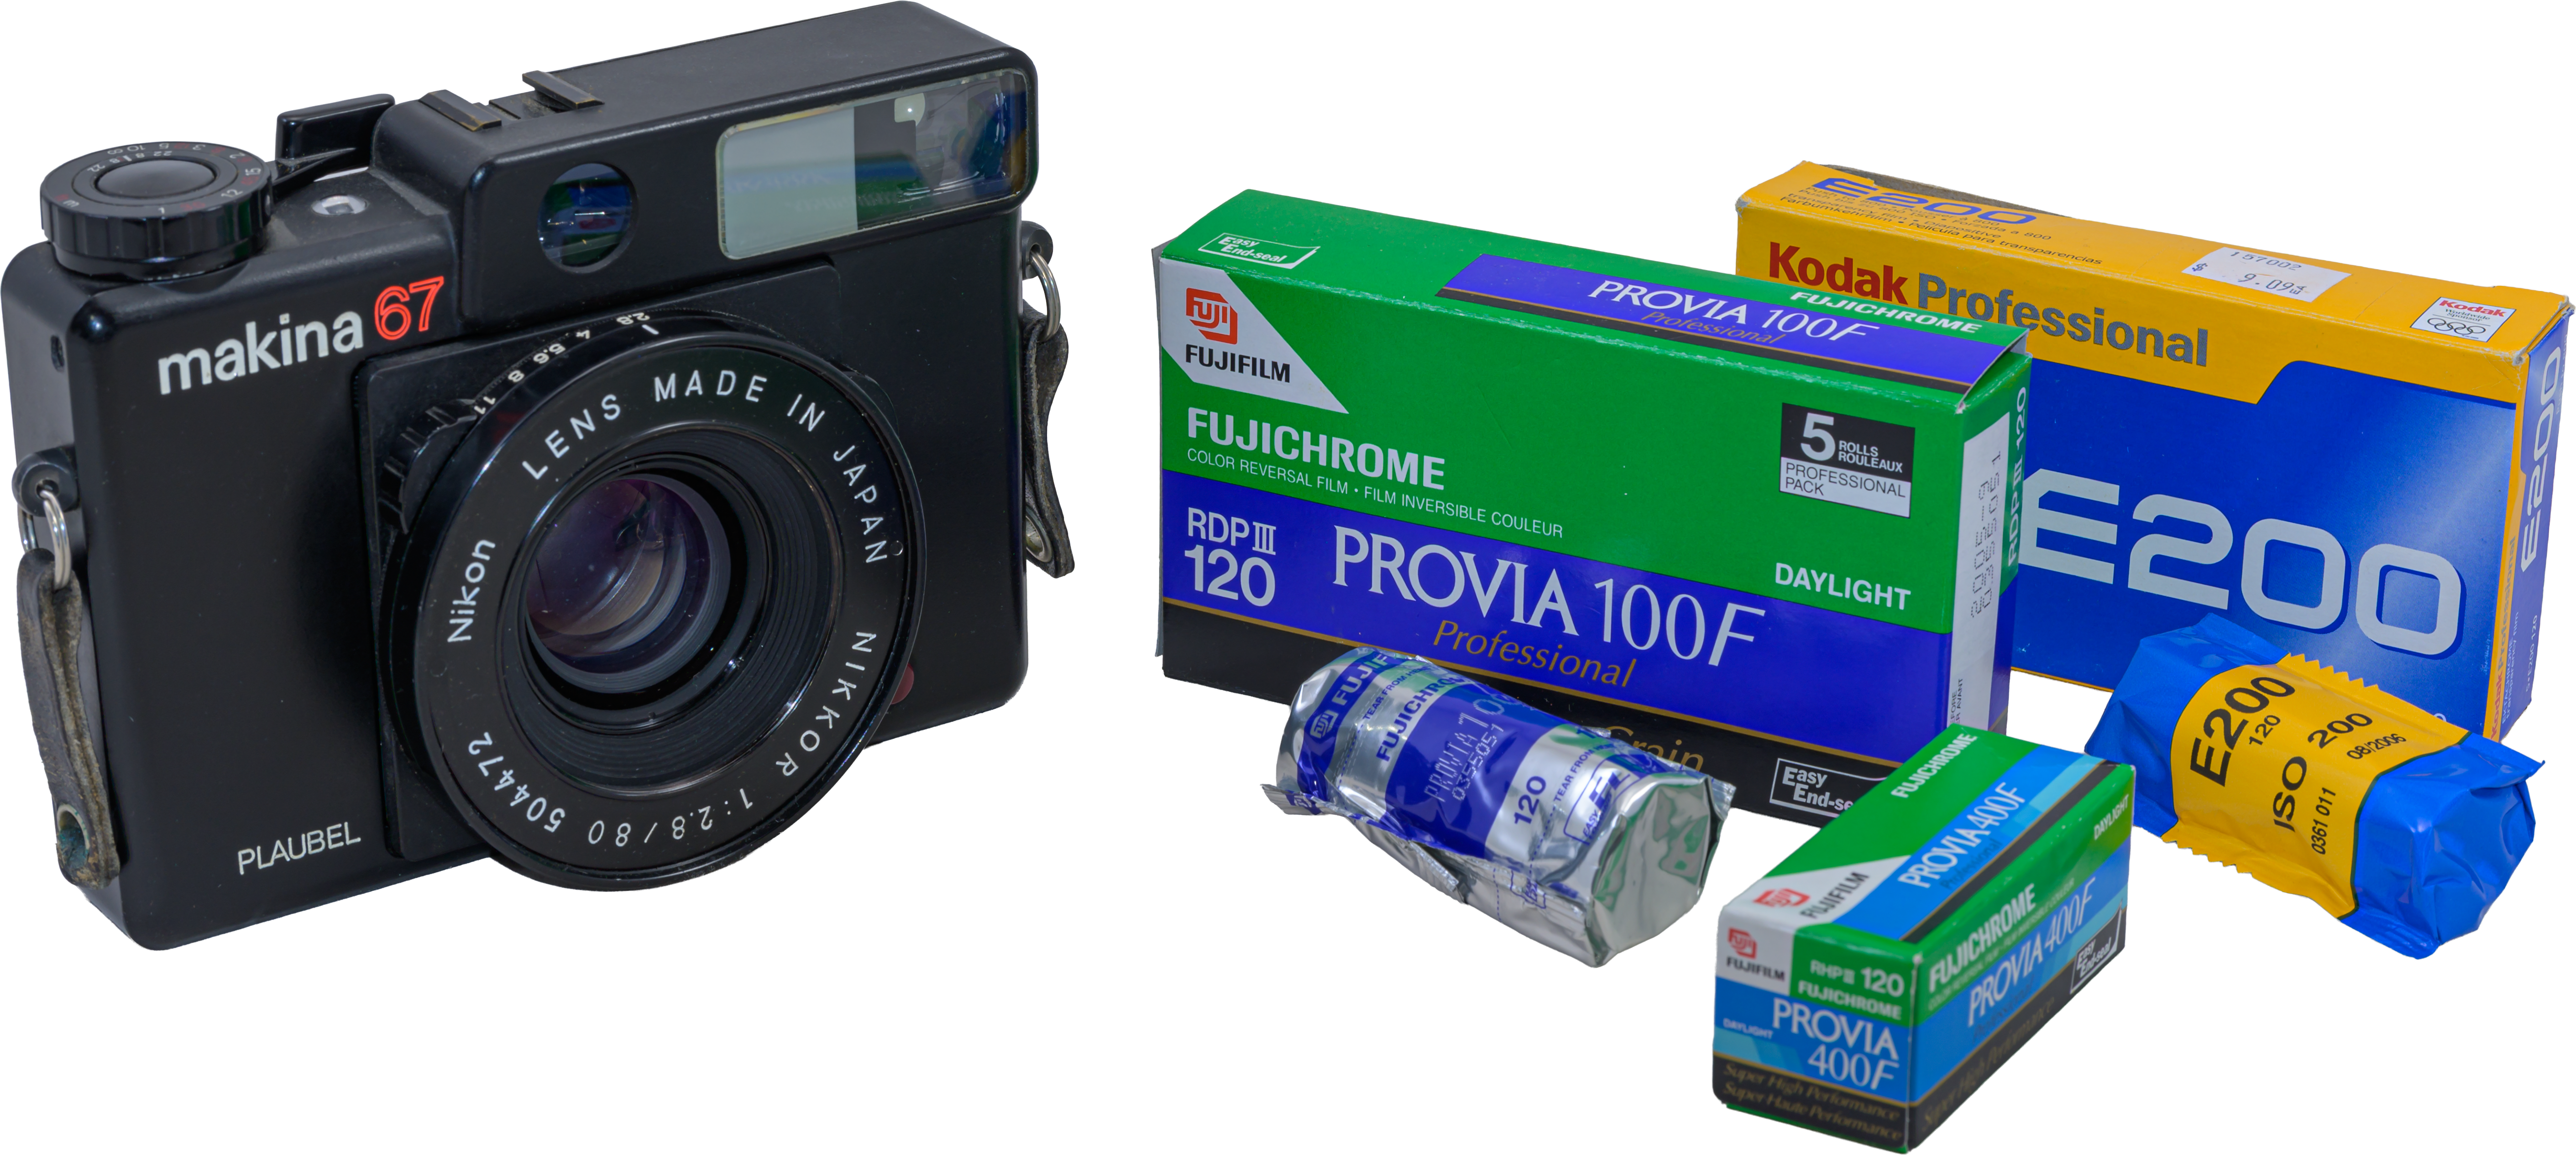
Here are the five lenses under test, in order of increasing focal length, shown above from L to R to compare their sizes —
— 6mm f/2.8 AstrHori circular fish-eye – with an advertised 220º field of view
— 7.5mm f/2 TTArtisan circular fish-eye – 180º field of view (advertised)
— 10mm f/2.8 7Artisans full-frame fish-eye – 185º diagonal field of view (advertised)
— 11mm f/2.8 TTArtisan full-frame fish-eye – 180º diagonal field of view (advertised)
— 12mm f/2.8 AstrHori full-frame fish-eye – 185º diagonal field of view (advertised)
The 6mm, 11mm and 12mm lenses I tested on a 45 megapixel Canon R5.
The 7.5mm and 10mm lenses I tested on a 45 megapixel Nikon Z8.
However, all the lenses are available for a wide range of camera brands, as I list below. All are manual-focus only, with no electrical connections to the camera body. So there is no restriction from Canon in offering them in RF-mount versions. But when using them on any camera, no EXIF metadata is recorded for lens brand, focal length or aperture.
With the exception of the TTArtisan 11mm (which has versions for older Canon EF and Nikon F mounts), the lenses are for mirrorless cameras only — they will not fit on DSLR camera bodies. By virtue of their design, none of the lenses accept filters, either front- or rear-mounted. None feature a rear weather sealing gasket.
But the key factor is that none sell for more than $300; some cost less than $200. At that price, why not have one? Or two?

WHY DIDN’T YOU TEST…?
First, I am not a test lab; I bought these lenses for personal use and out of curiosity. I selected low-cost lenses made for full-frame mirrorless cameras, what I shoot with. Indeed, the short flange distance of mirrorless cameras is what makes these lens designs possible.
I did not test fish-eyes made just for APS-C or Micro4/3rds cameras, for example from the Chinese brands Meike (their 3.5mm and 7.5mm) and Brightin Star (their 7.5mm).
However, despite it being made for full-frame cameras, I chose not to buy and include the new Brightin Star 11mm f/2.8 Mark II ($270), a decision based on expert lens reviewer Christopher Frost’s test here on his YouTube channel. The lens’s edge performance, important for astro work, was shown as poor, even when stopped down. I saved my money.
Nor did I test the new Laowa/Venus Optics 8-15mm f/2.8 zoom fish-eye, which offers a circular-format and full-frame fish-eye in one lens. It might perform well but is $700 US, so not a low-cost option – but you do get two lenses for the price of one. Ditto on the new Canon RF7-14mm f/2.8-f/3.5 L fish-eye – it has autofocus and is $1,900 US.
TESTING NOTES:
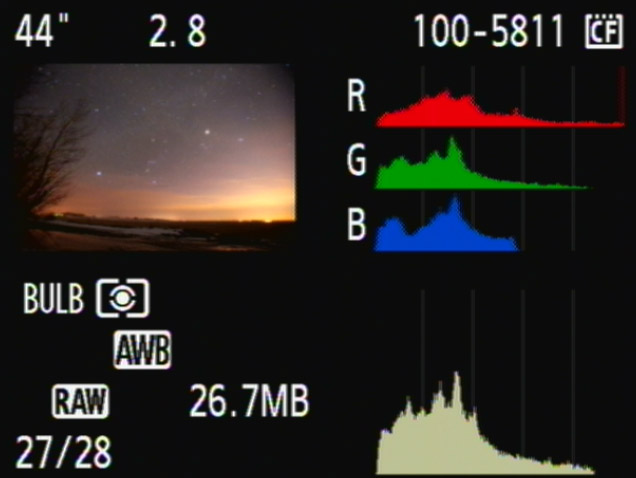
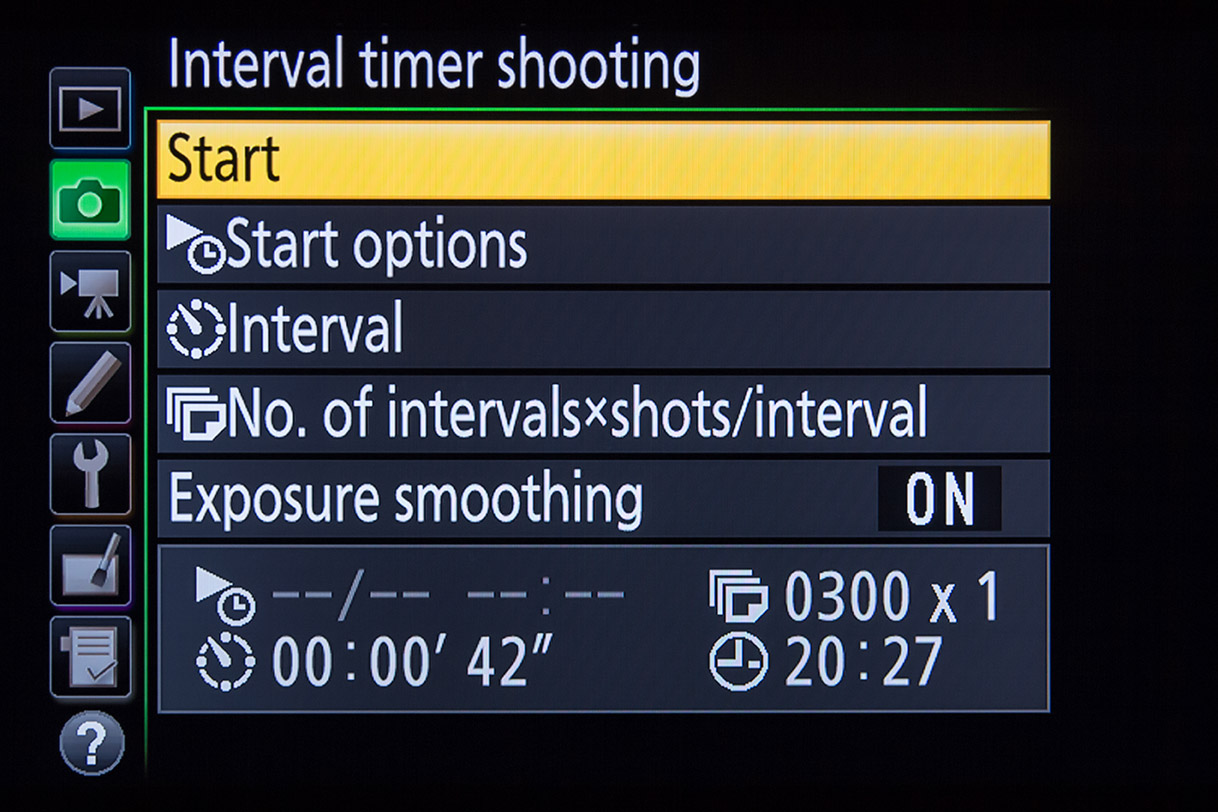
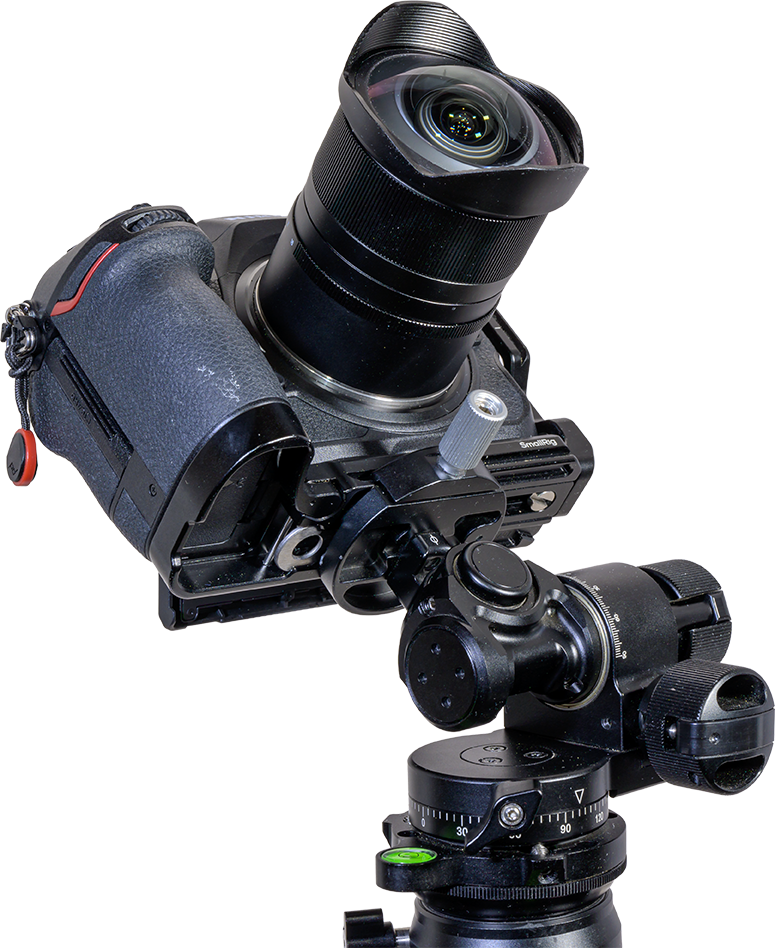
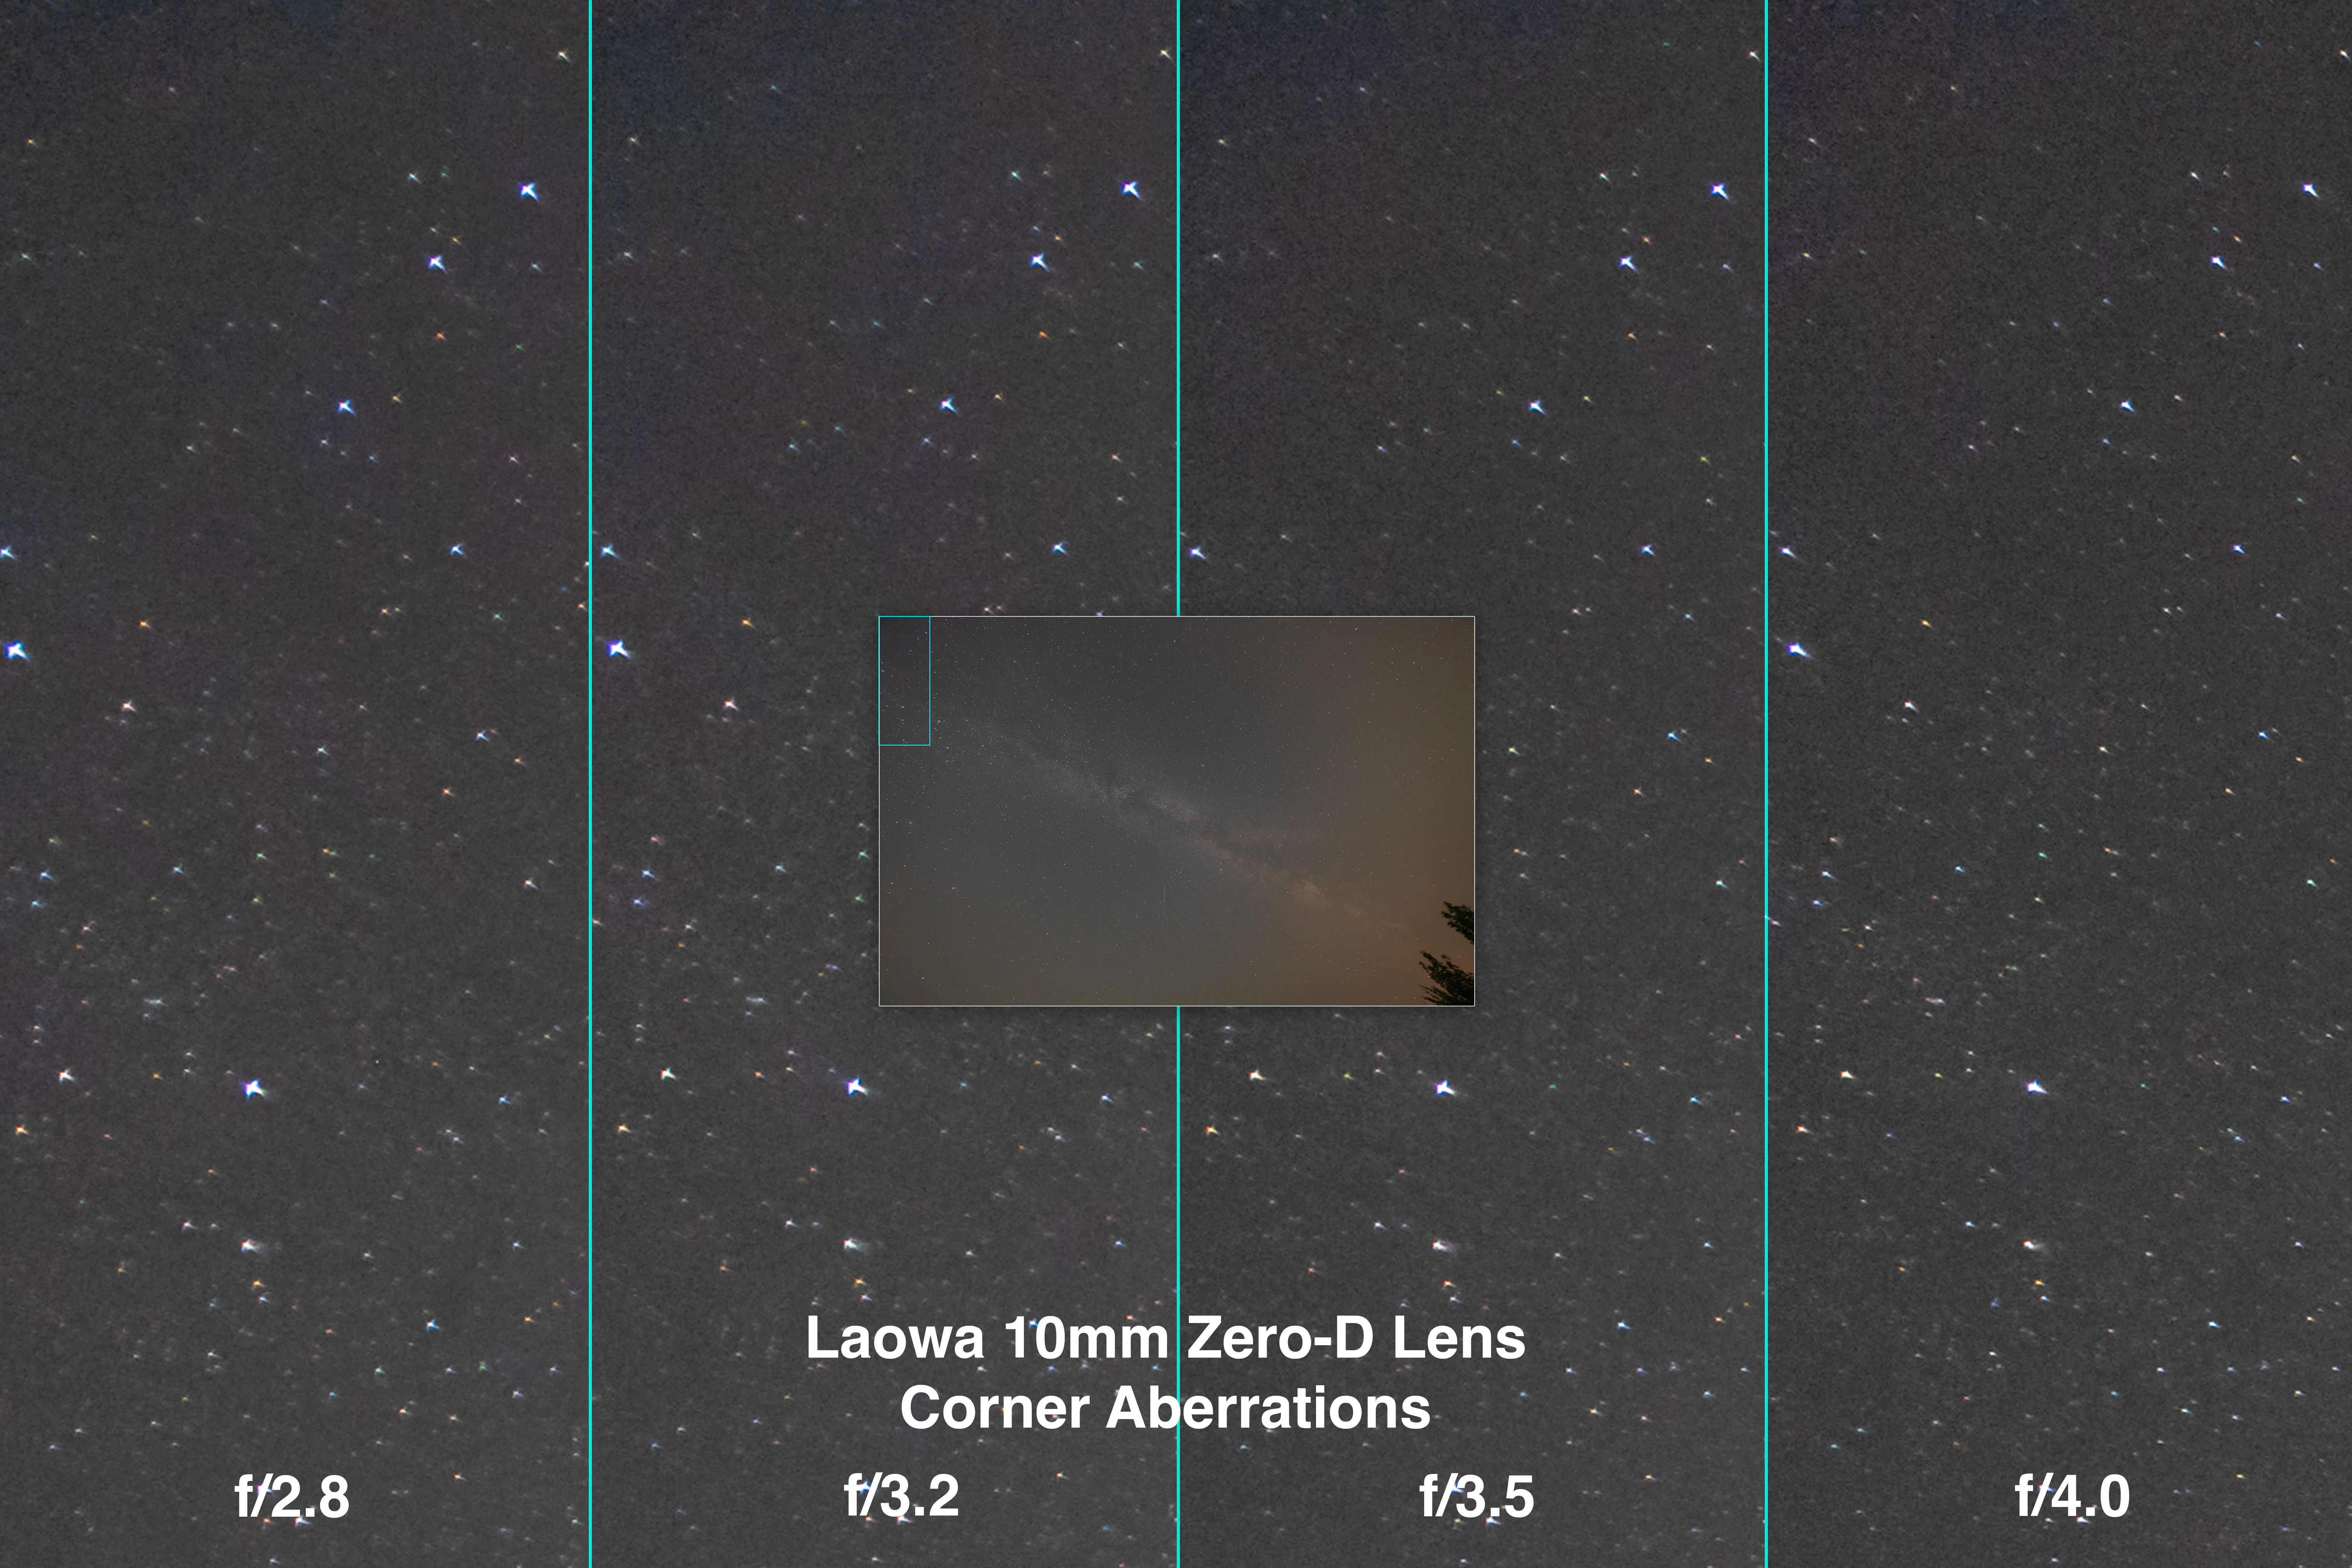
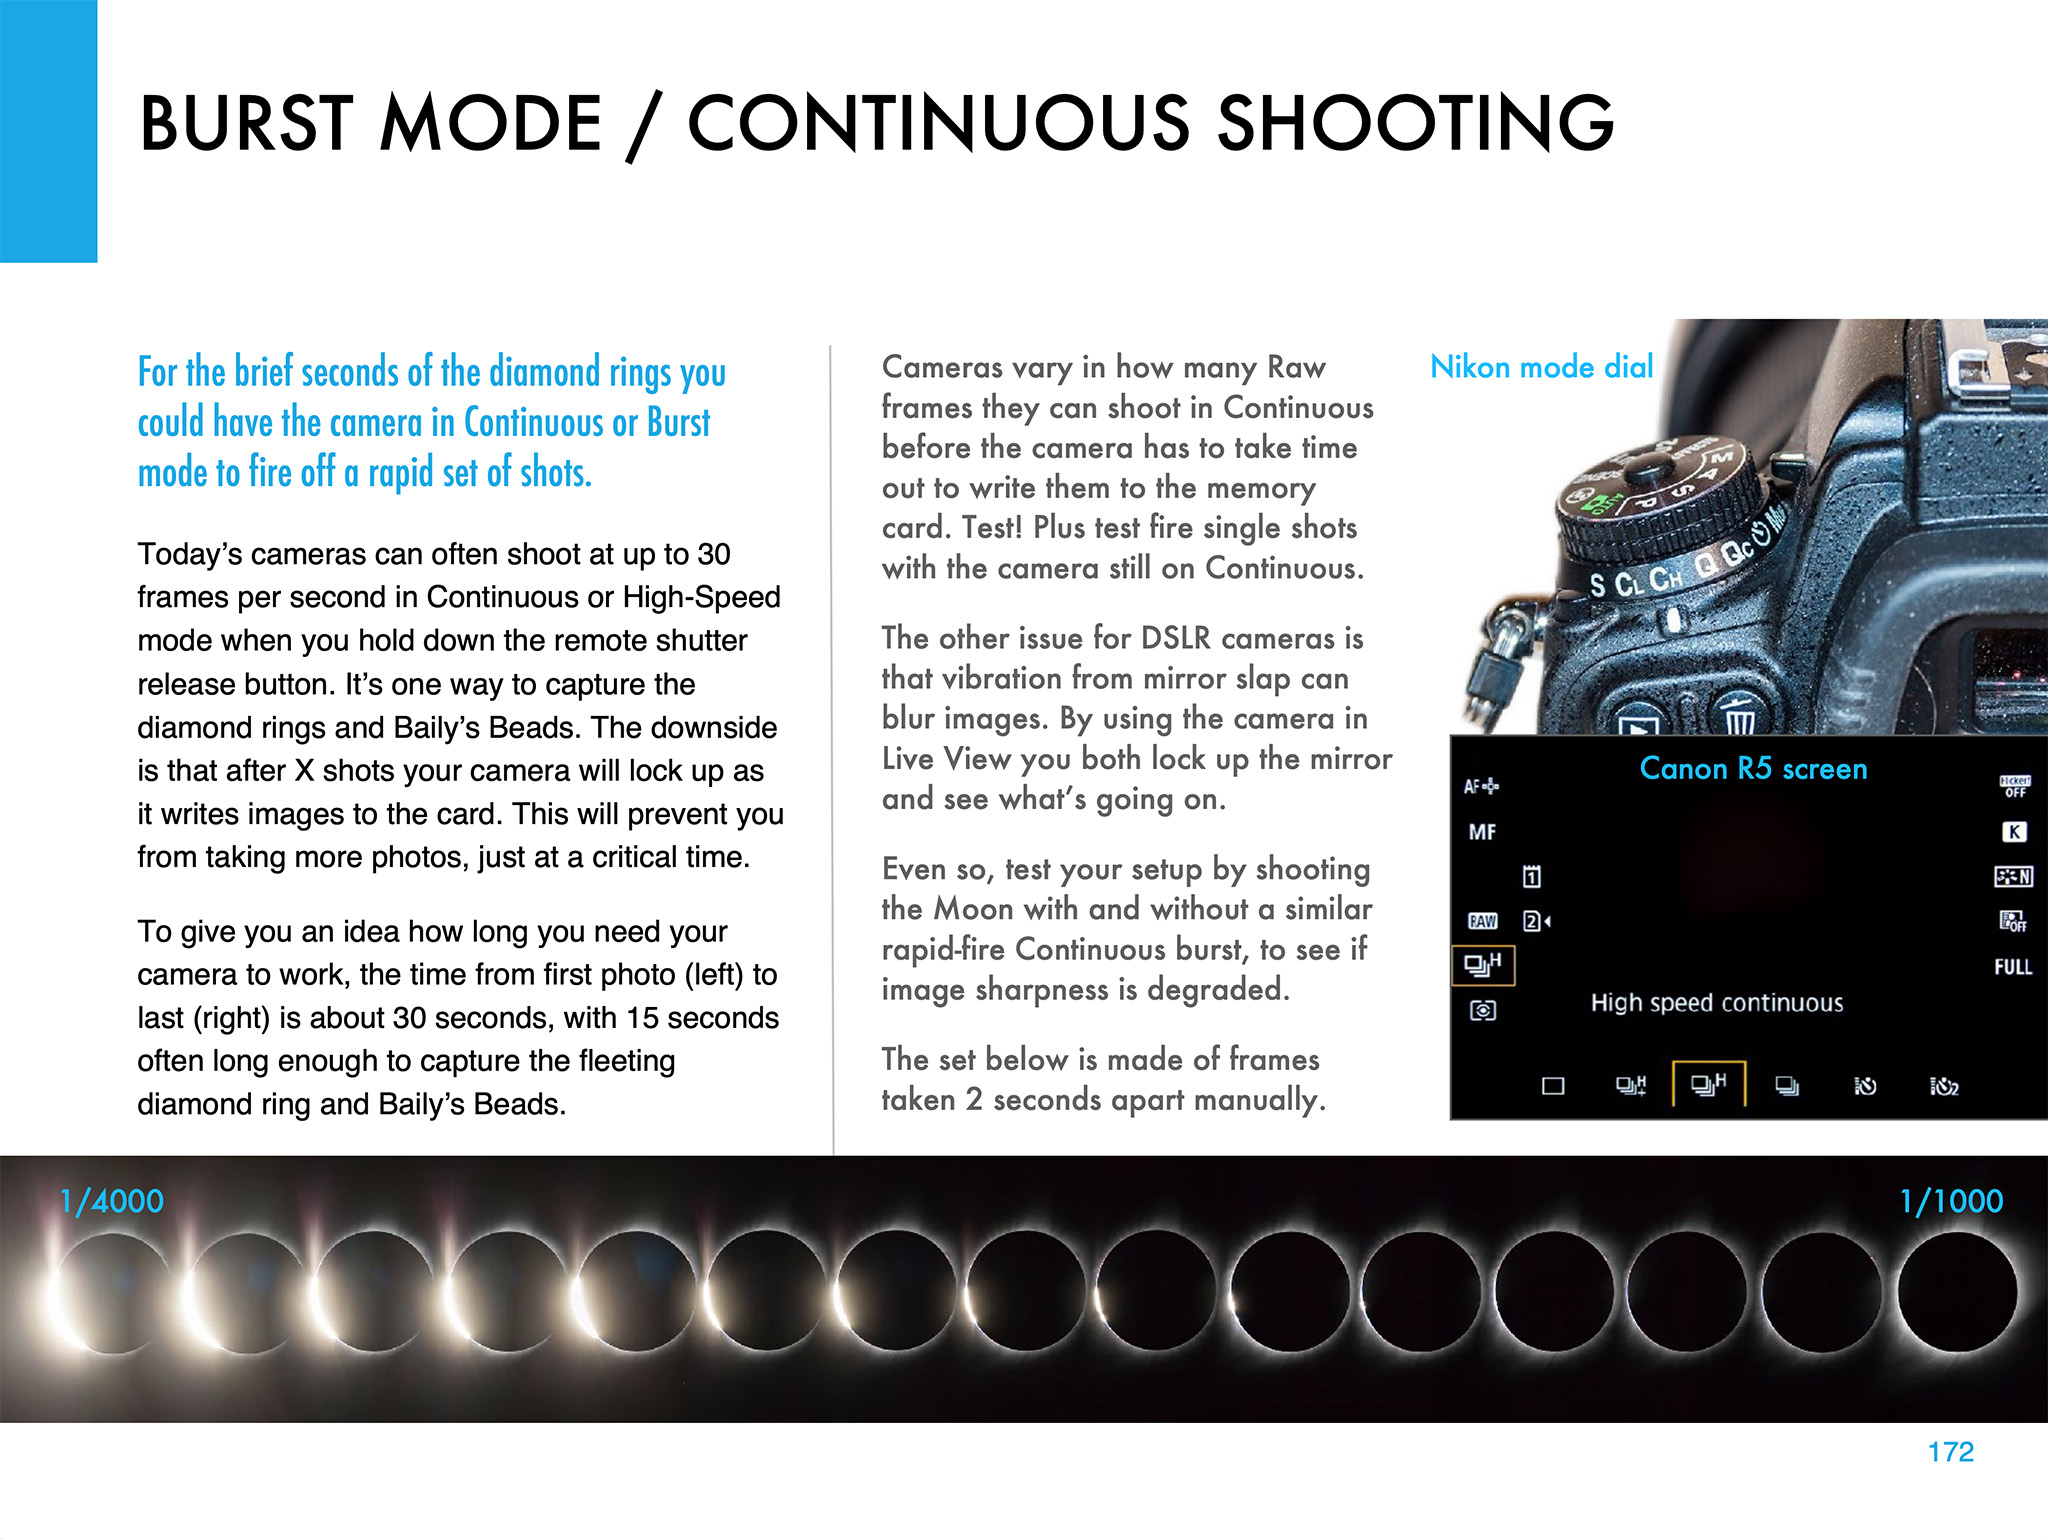
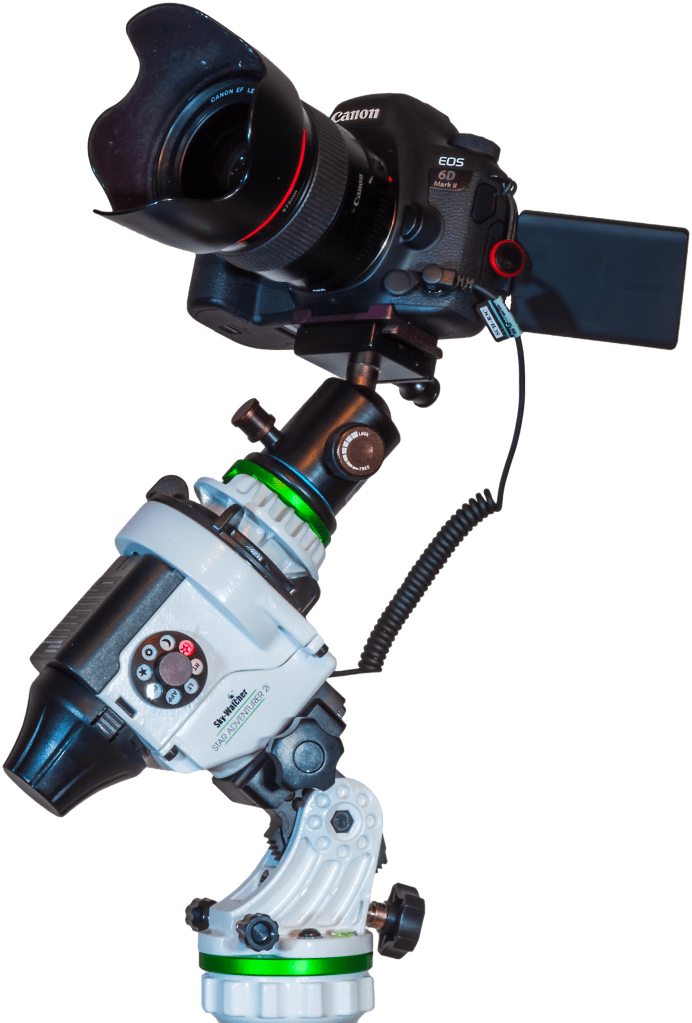
— For my aberration tests I shot all the lenses on the same moonless night, with them aimed straight up to take in as much sky as possible to put stars across the frame. The cameras were on a star tracker (not shown) to eliminate star trails that can mask or mimic aberrations.
— In all cases where I show examples shot at different apertures, both images were shot for equal exposure value (by doubling the ISO for the smaller aperture shot), and then processed identically. So any brightness difference you see is from the lens performance, not my exposure or processing.
— I did not apply any lens corrections or brighten the edges to compensate for vignetting. However, none of the diagonal fish-eyes suffer from obvious corner vignetting, unlike rectilinear ultra-wides that can exhibit very dark corners from extreme light fall-off.
— For my lens flare tests I shot all the lenses on the same moonlit night with a waxing Moon in the southwest which I placed off-centre to prompt internal reflections. The cameras were also on a tracker.
— I bought most of these lenses directly from the manufacturers from their on-line stores in China. Delivery in all cases was quick by mail, fulfilled from a North American distribution point. While I had no issues, product quality for bargain lenses can vary, so consider buying from a source where you can easily return the lens for a replacement or a refund.
I will state at the outset that none of these lenses offer pinpoint stars to the edges of their image circles, certainly not at their maximum apertures. You can’t expect aberration-free performance at these prices.
If you wish optical perfection in a fish-eye lens then look at the Sigma 15mm f/1.4 DG DN, for $2,200 US. (See Nico Carver’s test of that lens here on his Nebula Photos YouTube channel.)
Here are the test details, with the five fish-eyes presented in order of increasing focal length.
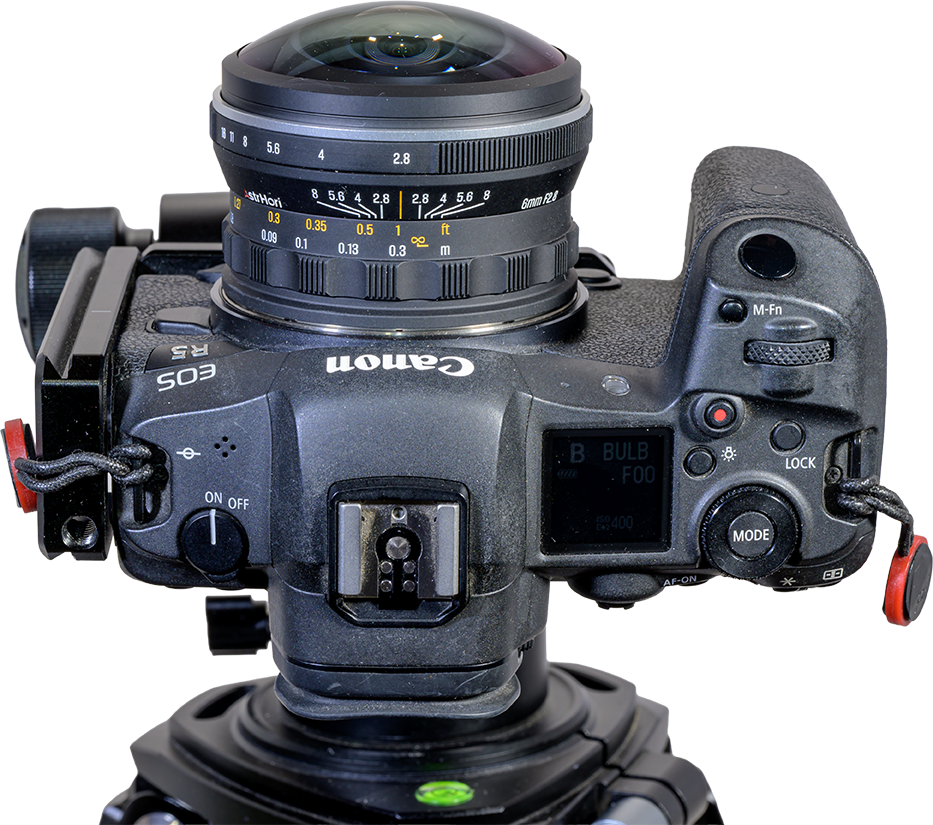
The AstrHori 6mm f/2.8 Circular Fish-Eye
Available for Sony E, Panasonic L, Canon RF, Nikon Z Lens Mounts
$300 US.
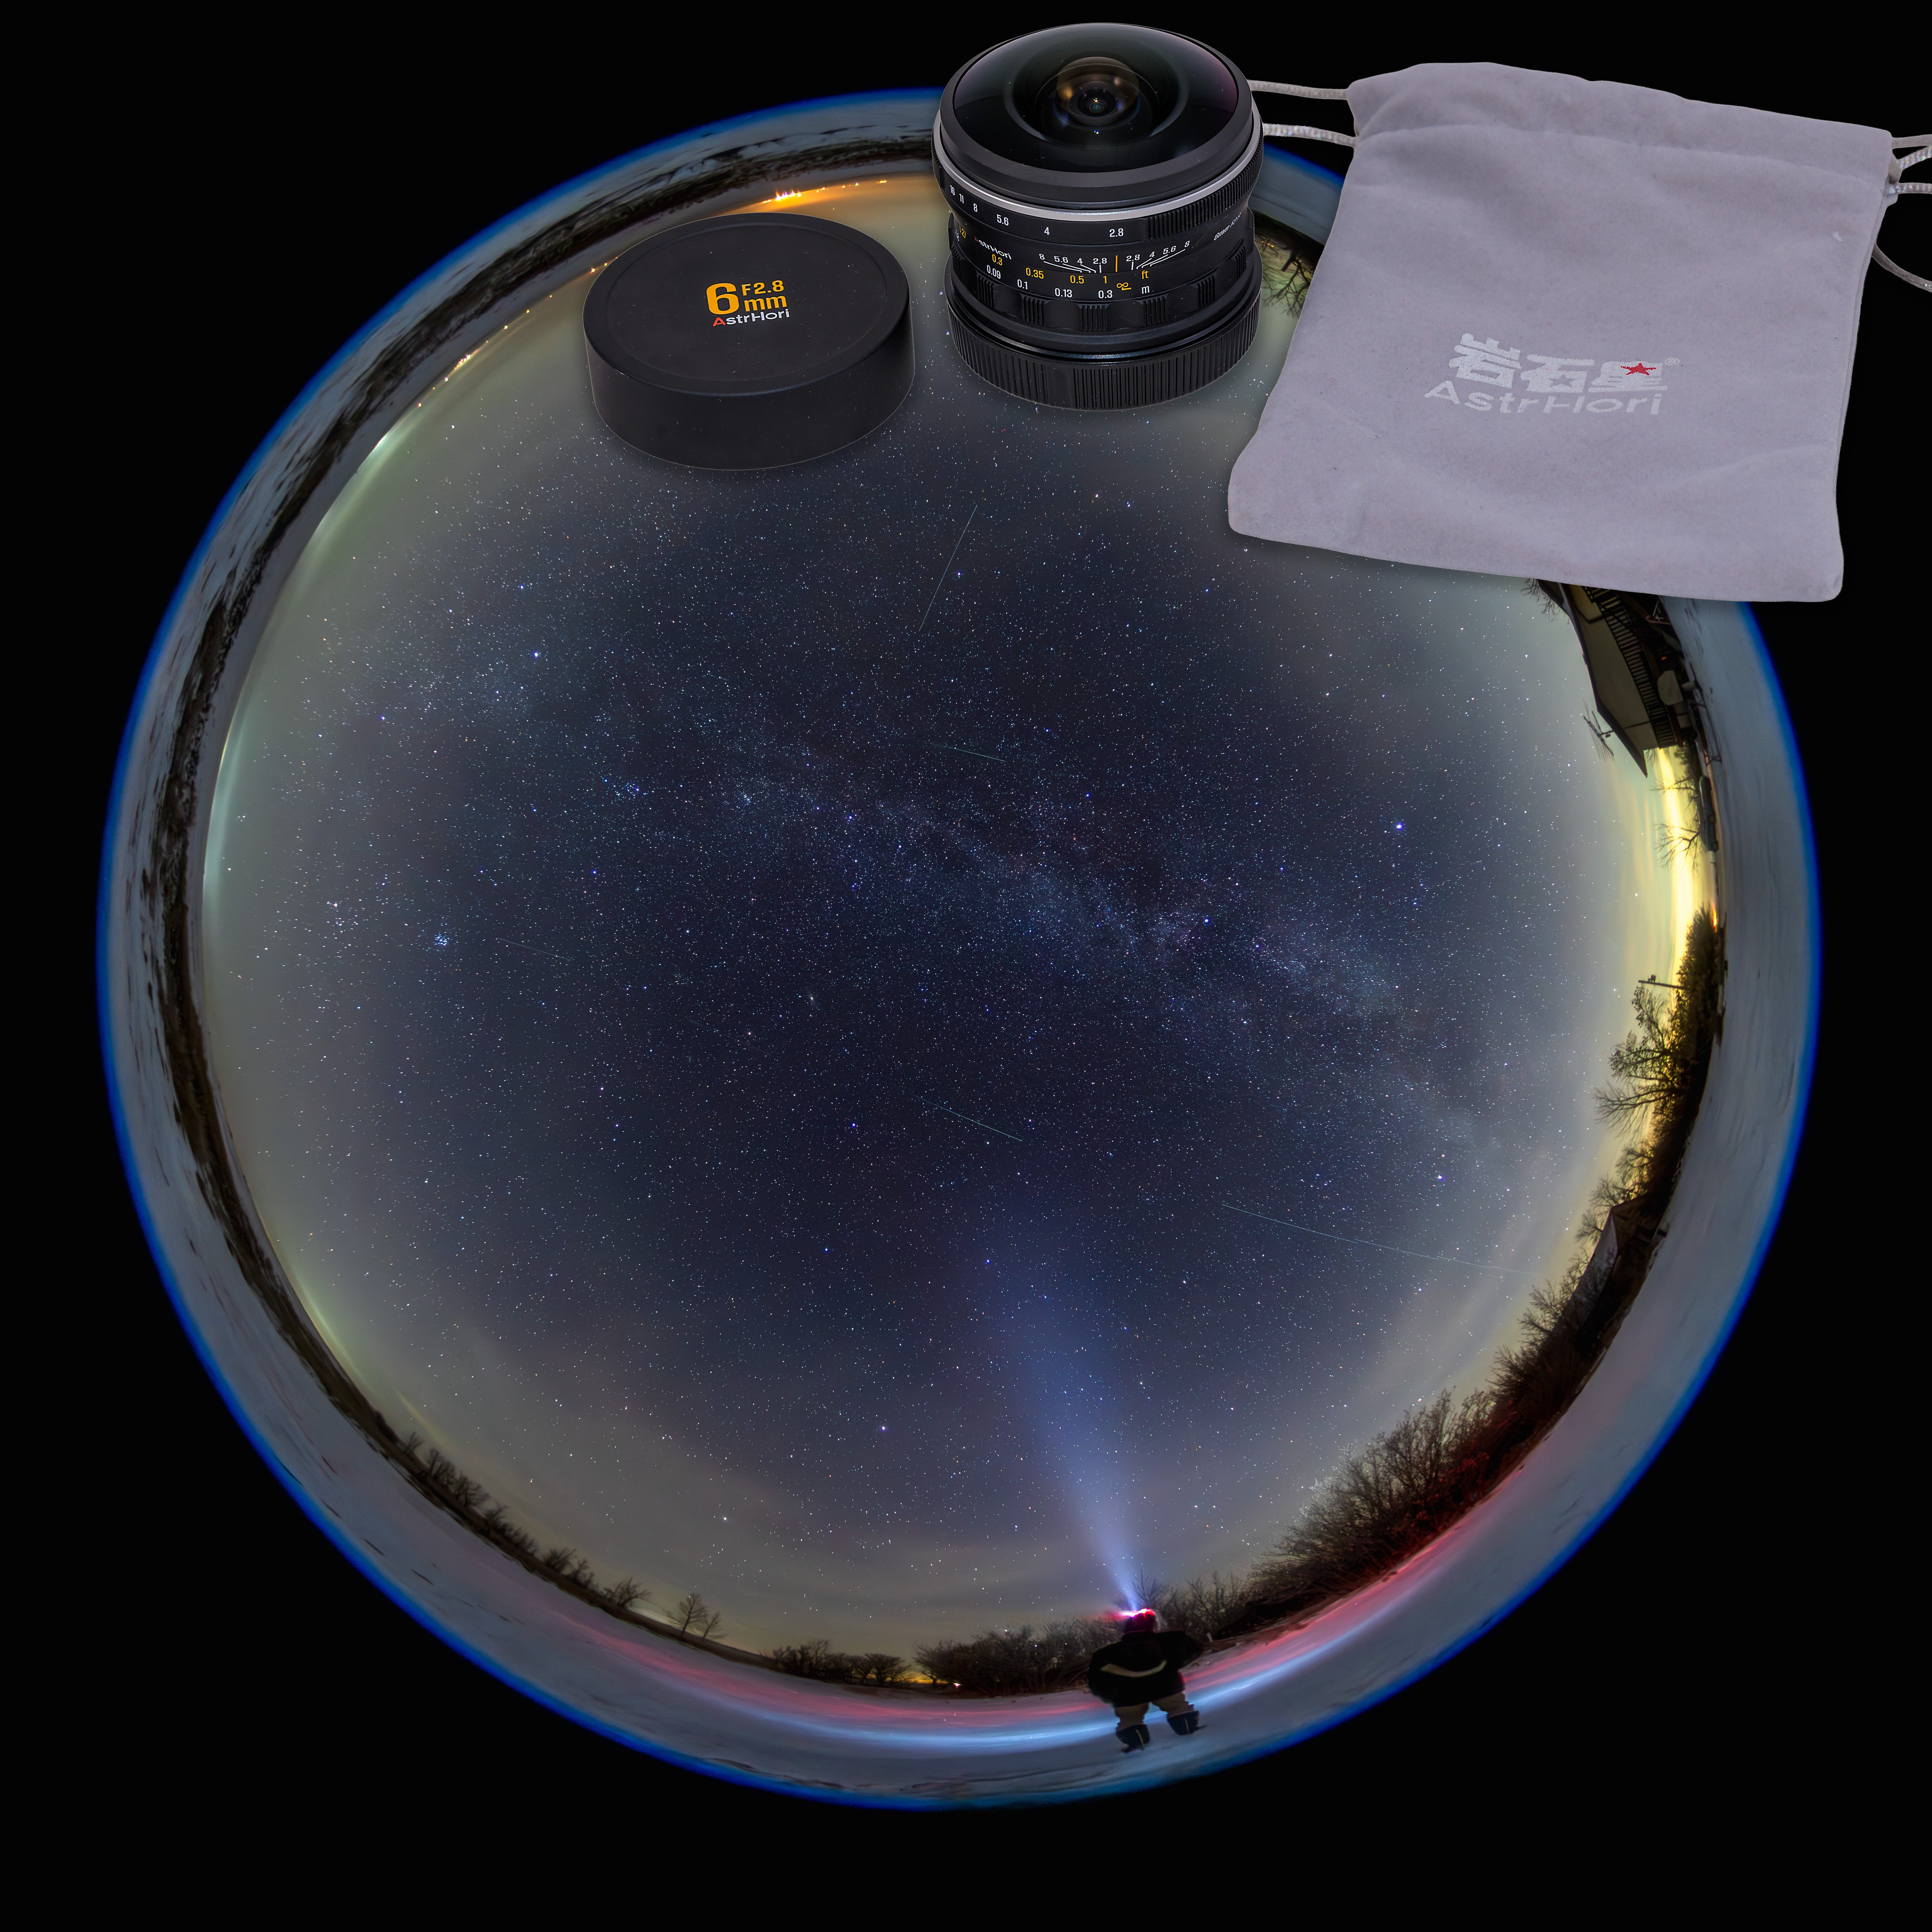
The unique selling point of this lens is that it has an amazing 220º field of view across its image circle. It can actually see behind itself! To stay out of the frame, duck!
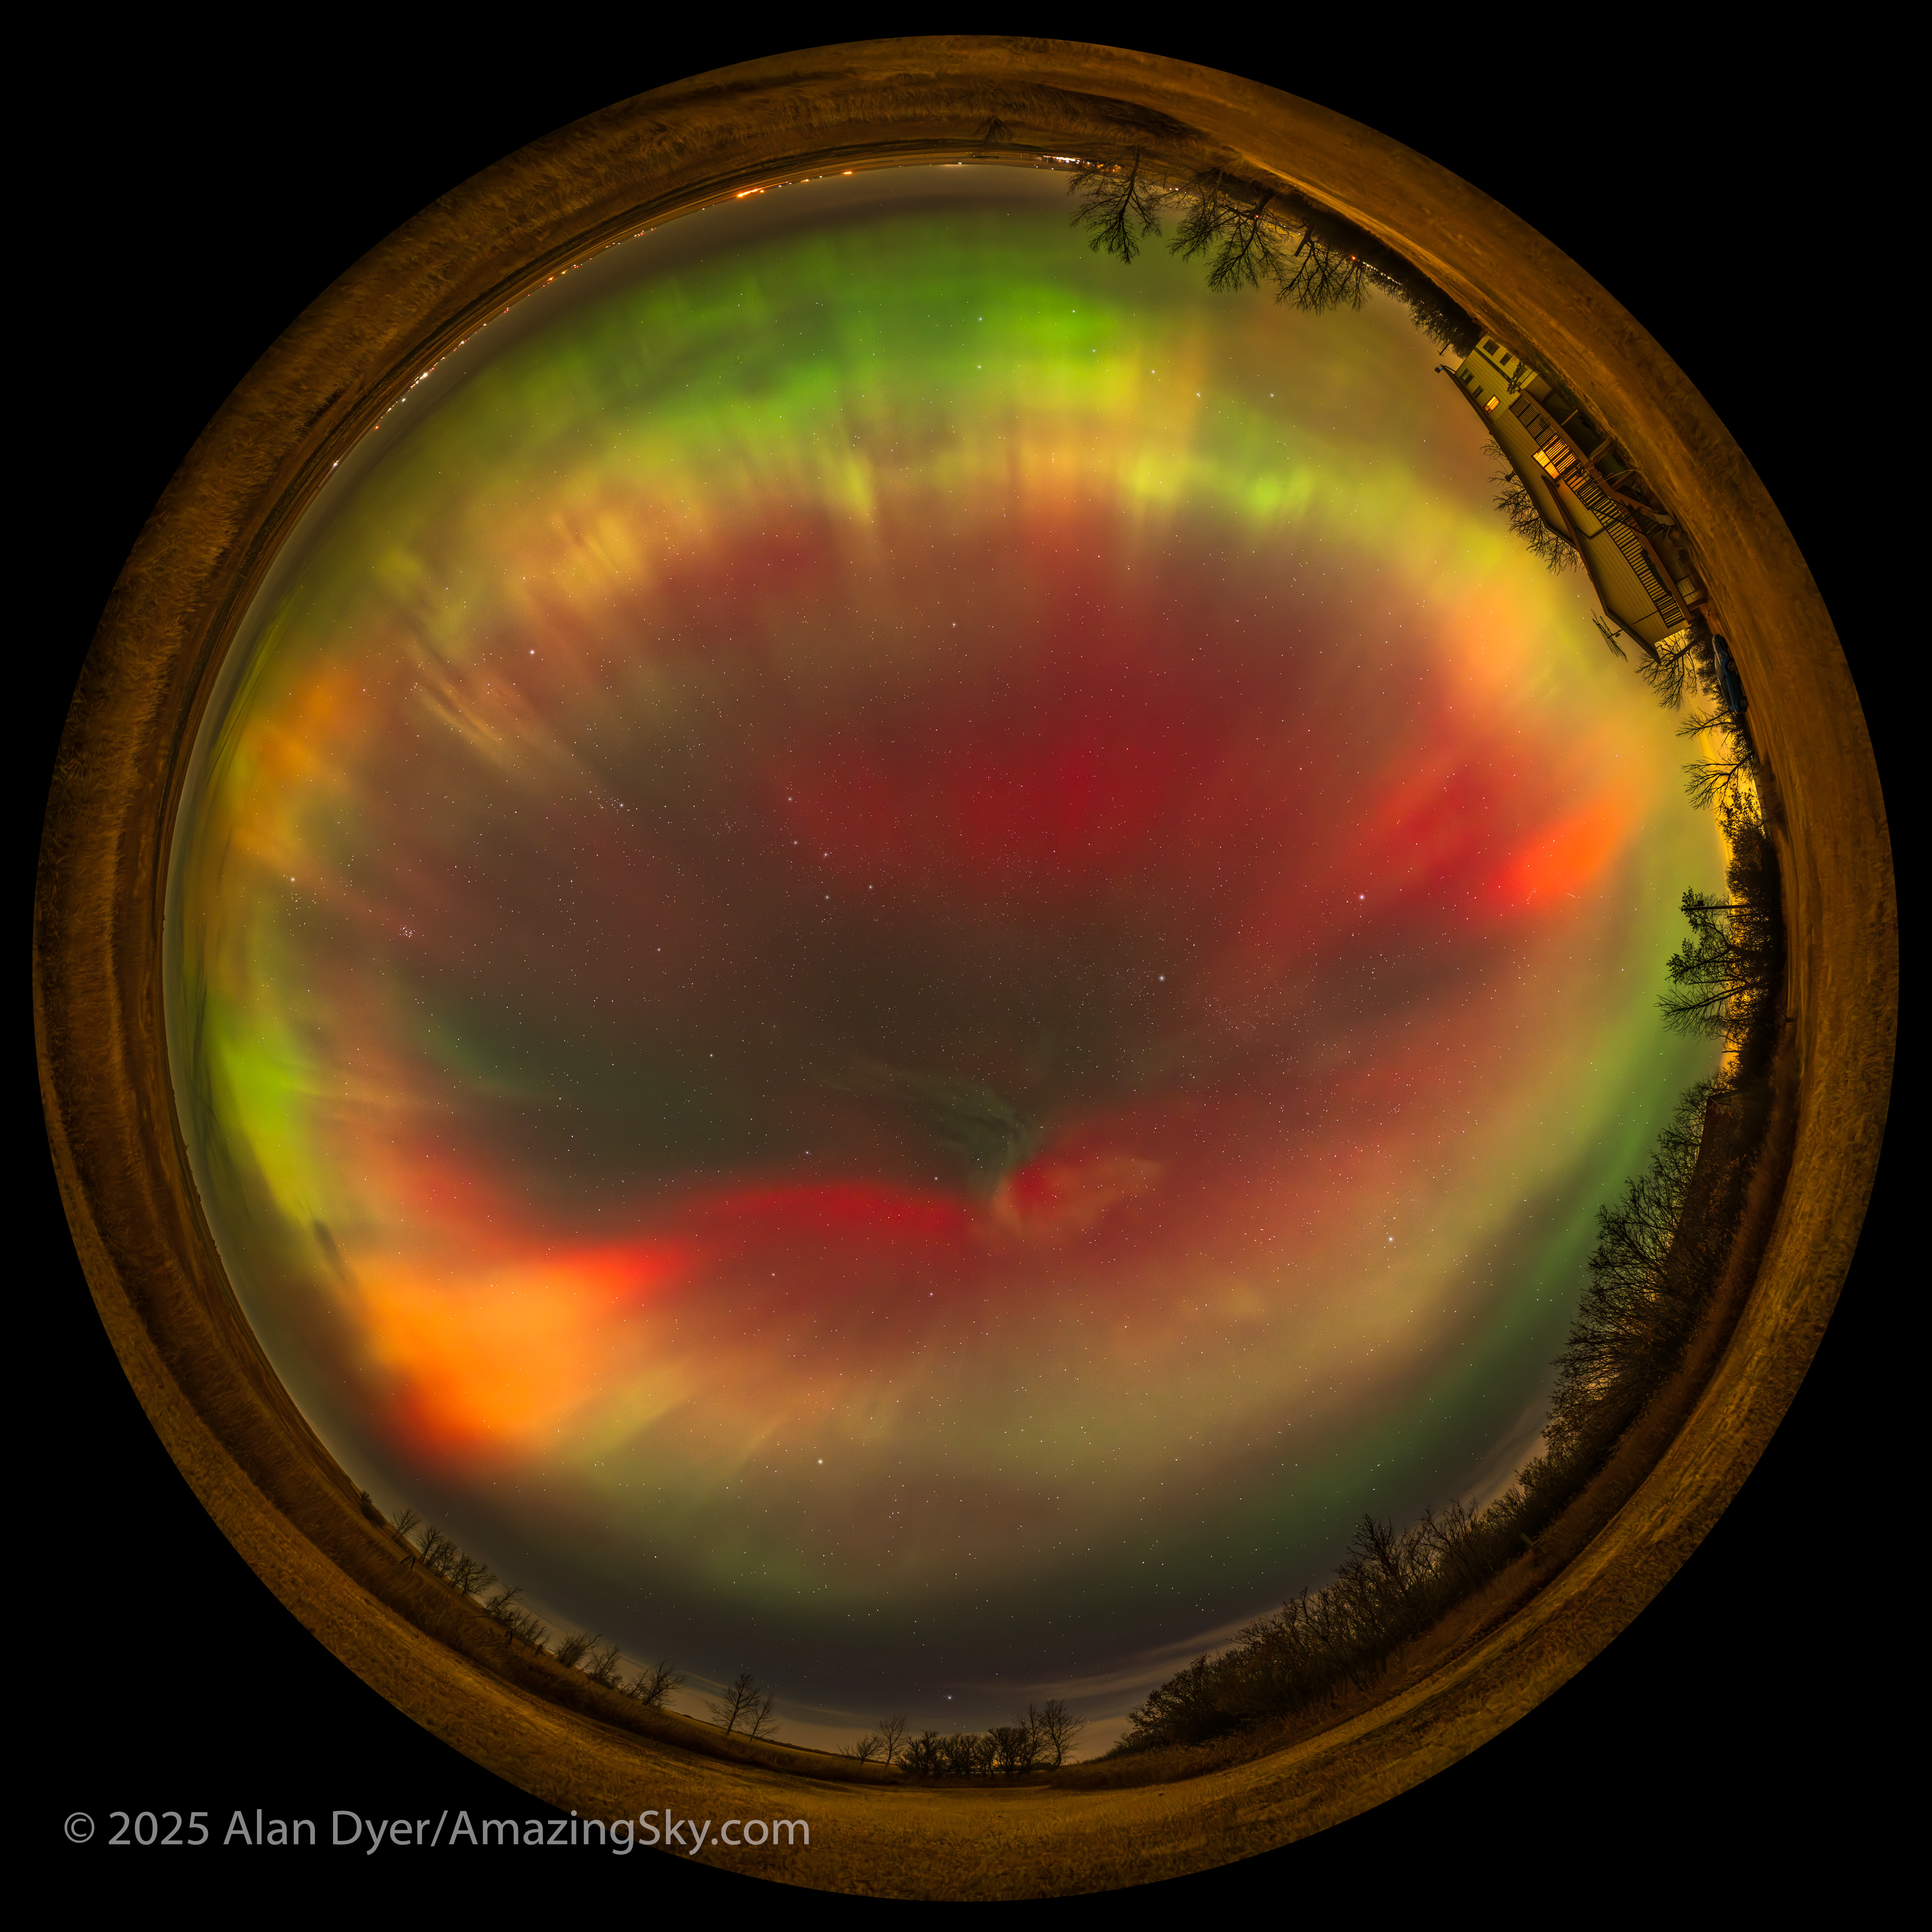
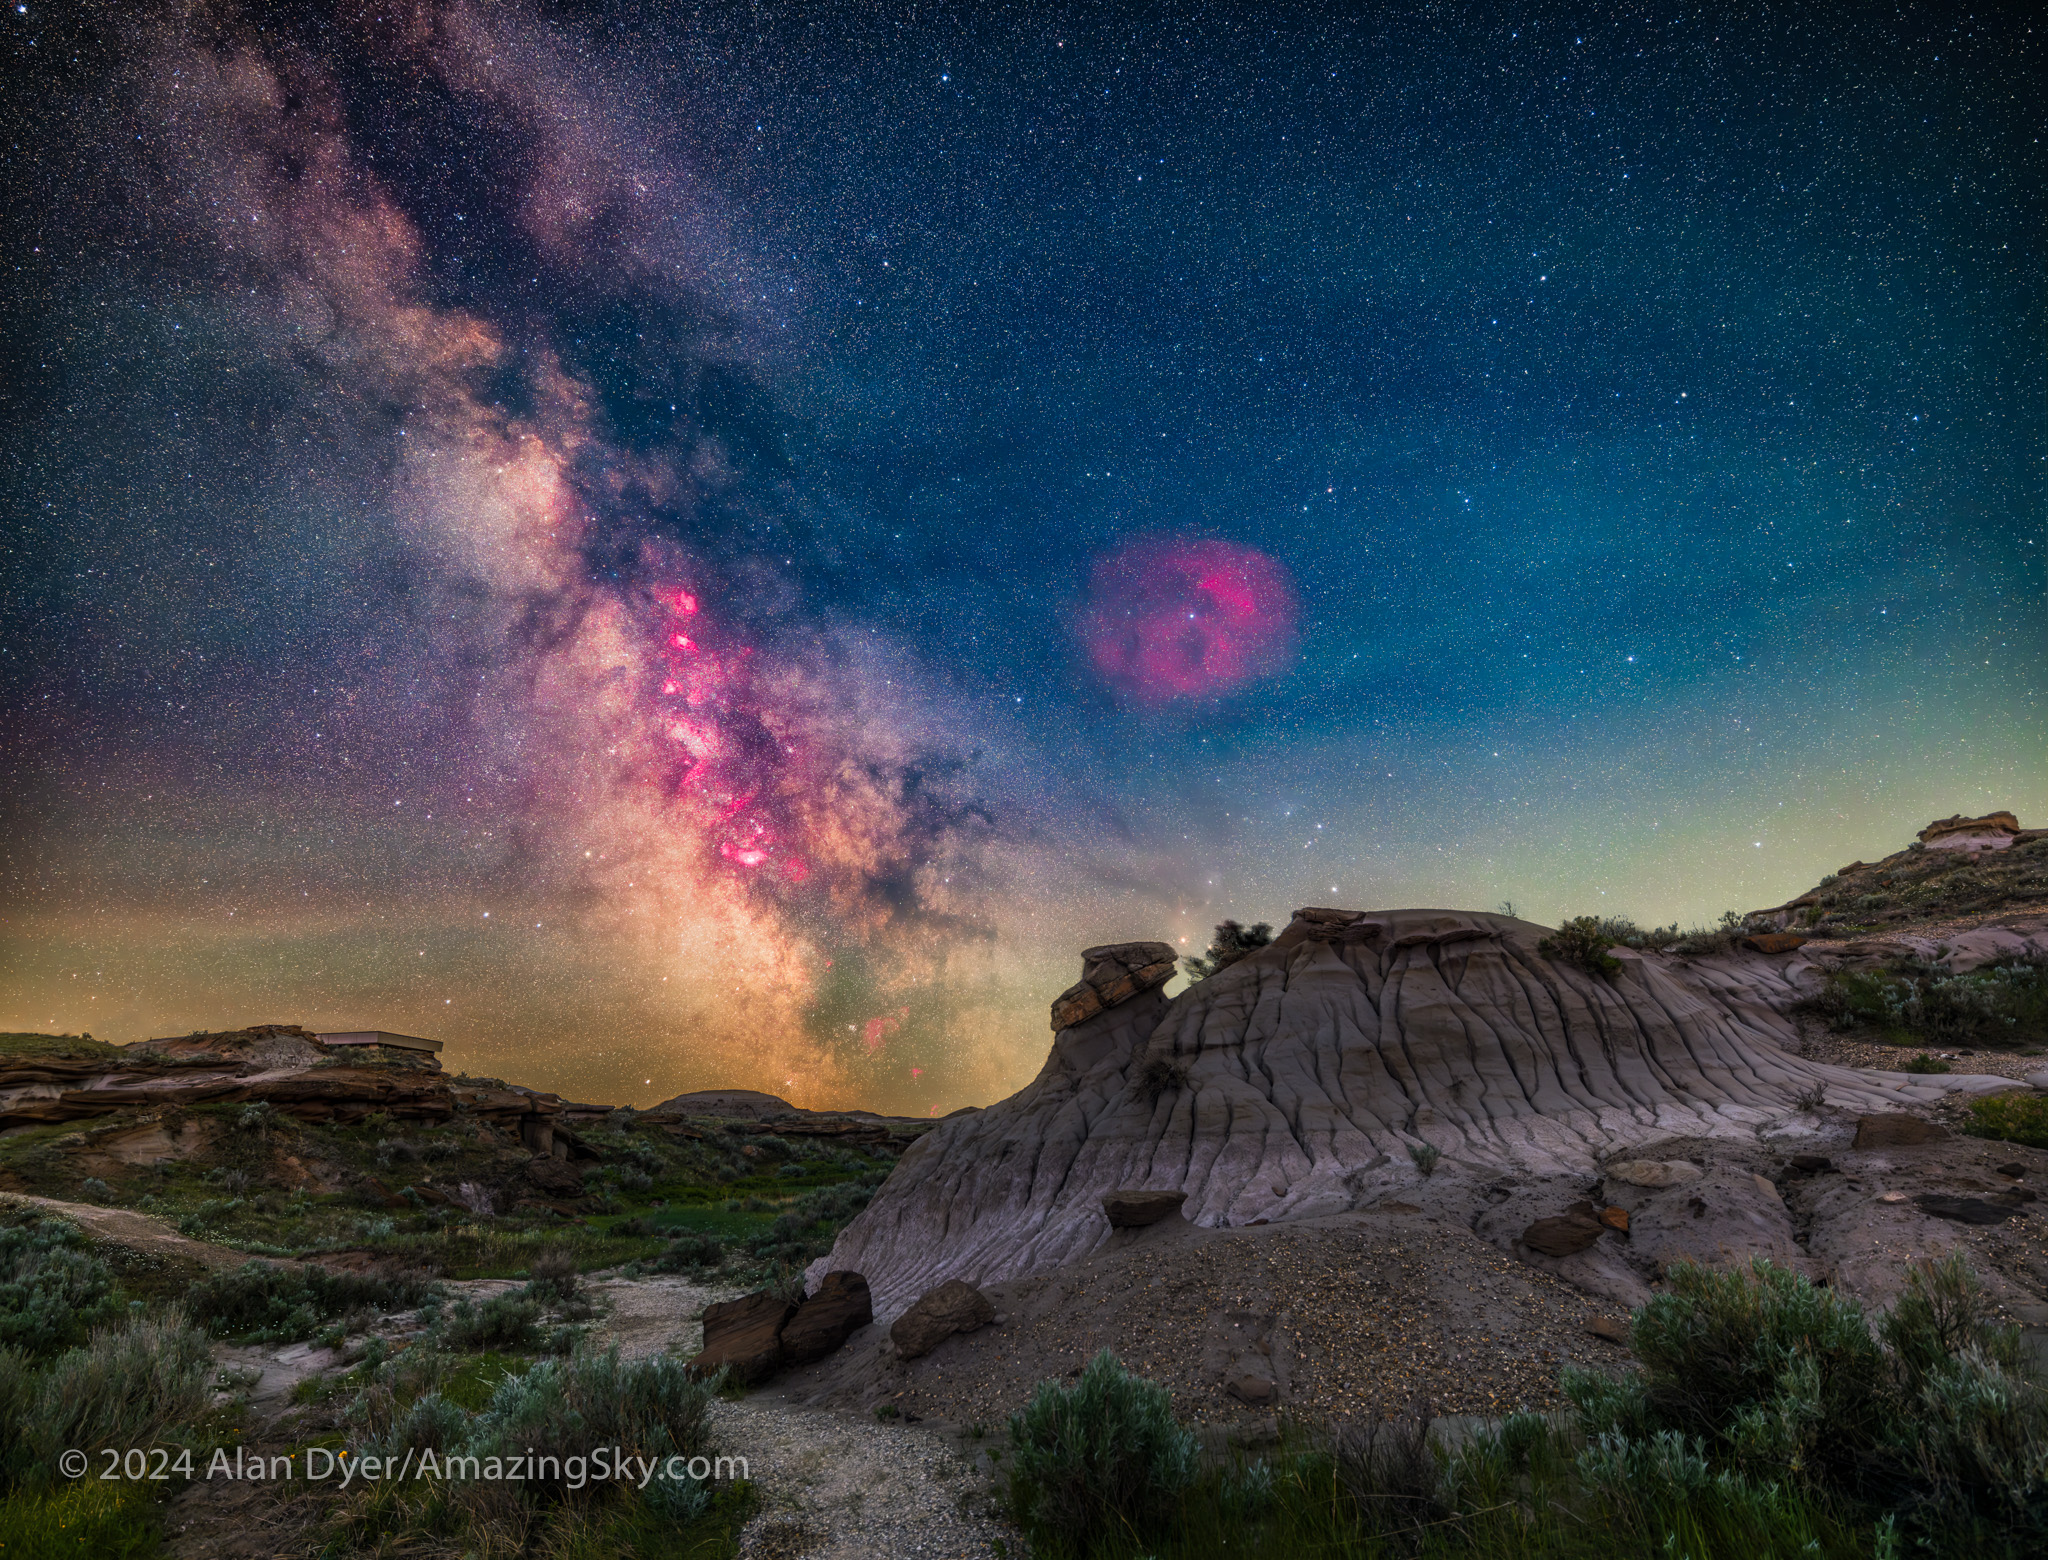
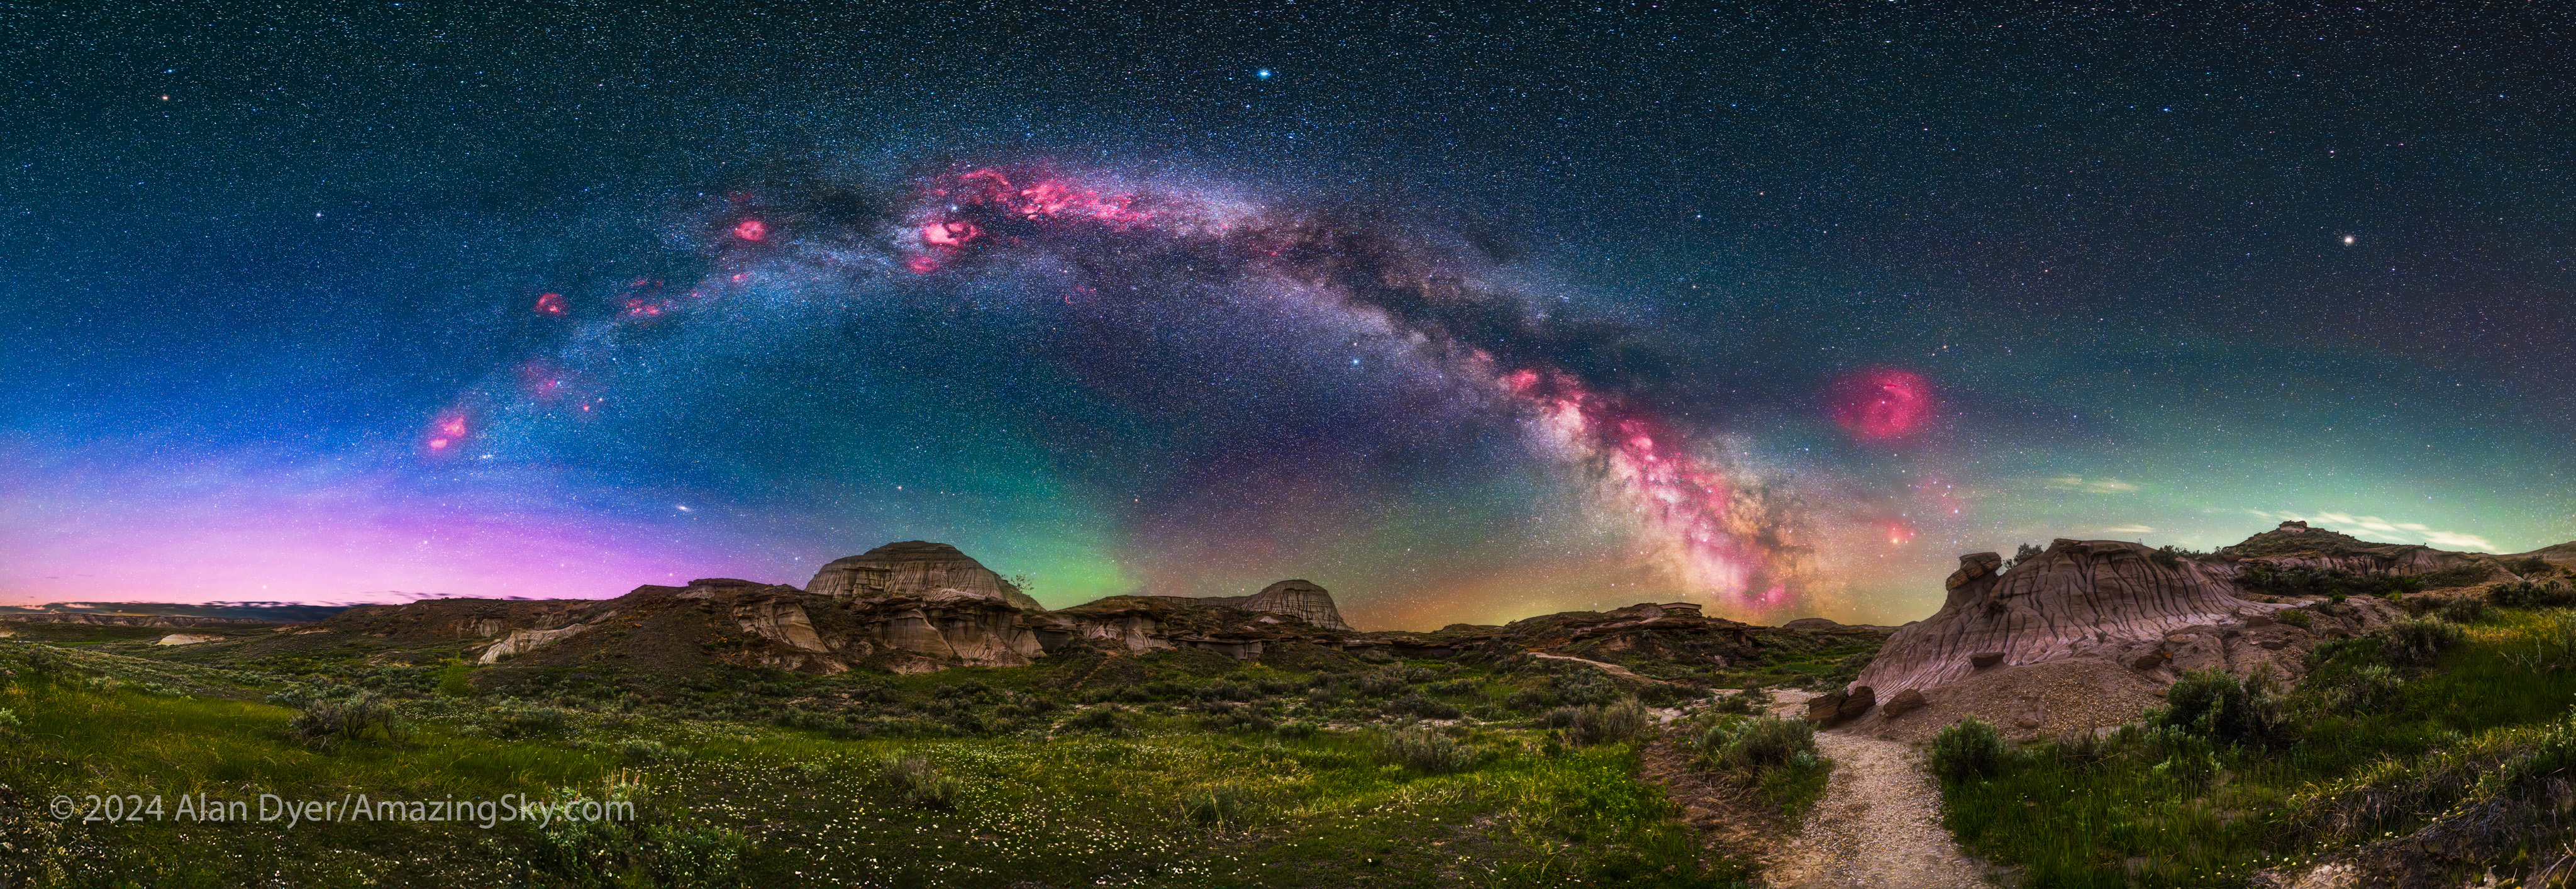
When aimed straight up it will include not only the entire sky down to the horizon, but also the ground well below the horizon, good for putting the sky in context to the landscape below. Doing so with any other lens requires shooting a multi-segment panorama. While panos have the benefit of higher resolution, the 6mm lens allows for all-sky time-lapses and movies.
Previously, to get such a field of view with such a speed (f/2.8) you had to pay more than $100,000 (!!!) for a rare sample of the massive 6mm f/2.8 Nikkor lens made in limited quantities in the early 1980s. By contrast, the 6mm from AstrHori (it is not AstroHori!) is downright tiny. And cheap!
The lens has a knurled manual focus ring that turns smoothly, and a ribbed aperture ring with firm clicks at each f-stop. Infinity focus, with the stars sharpest, proved to be slightly shy of the centre of the infinity mark, so the lens requires careful manual focusing. The lens can focus past infinity.
The press-on metal lens cap is boldly marked with the lens identity. Like all AstrHori lenses, the 6mm comes with a thick soft cloth pouch.
The short length of the lens makes it difficult to wrap an anti-dew heater coil around it, certainly not without risk of shifting the focus or aperture. That’s a consideration, as aimed straight up its lens is bound to attract dew or frost over long shoots.
IMAGE QUALITY
The 6mm AstrHori doesn’t quite fill the frame across the sensor’s short dimension (24mm). Instead, the lens’s image circle is about 21mm across. The edge of the image circle is soft but clean – it is not rimmed by odd colours or internal reflections.
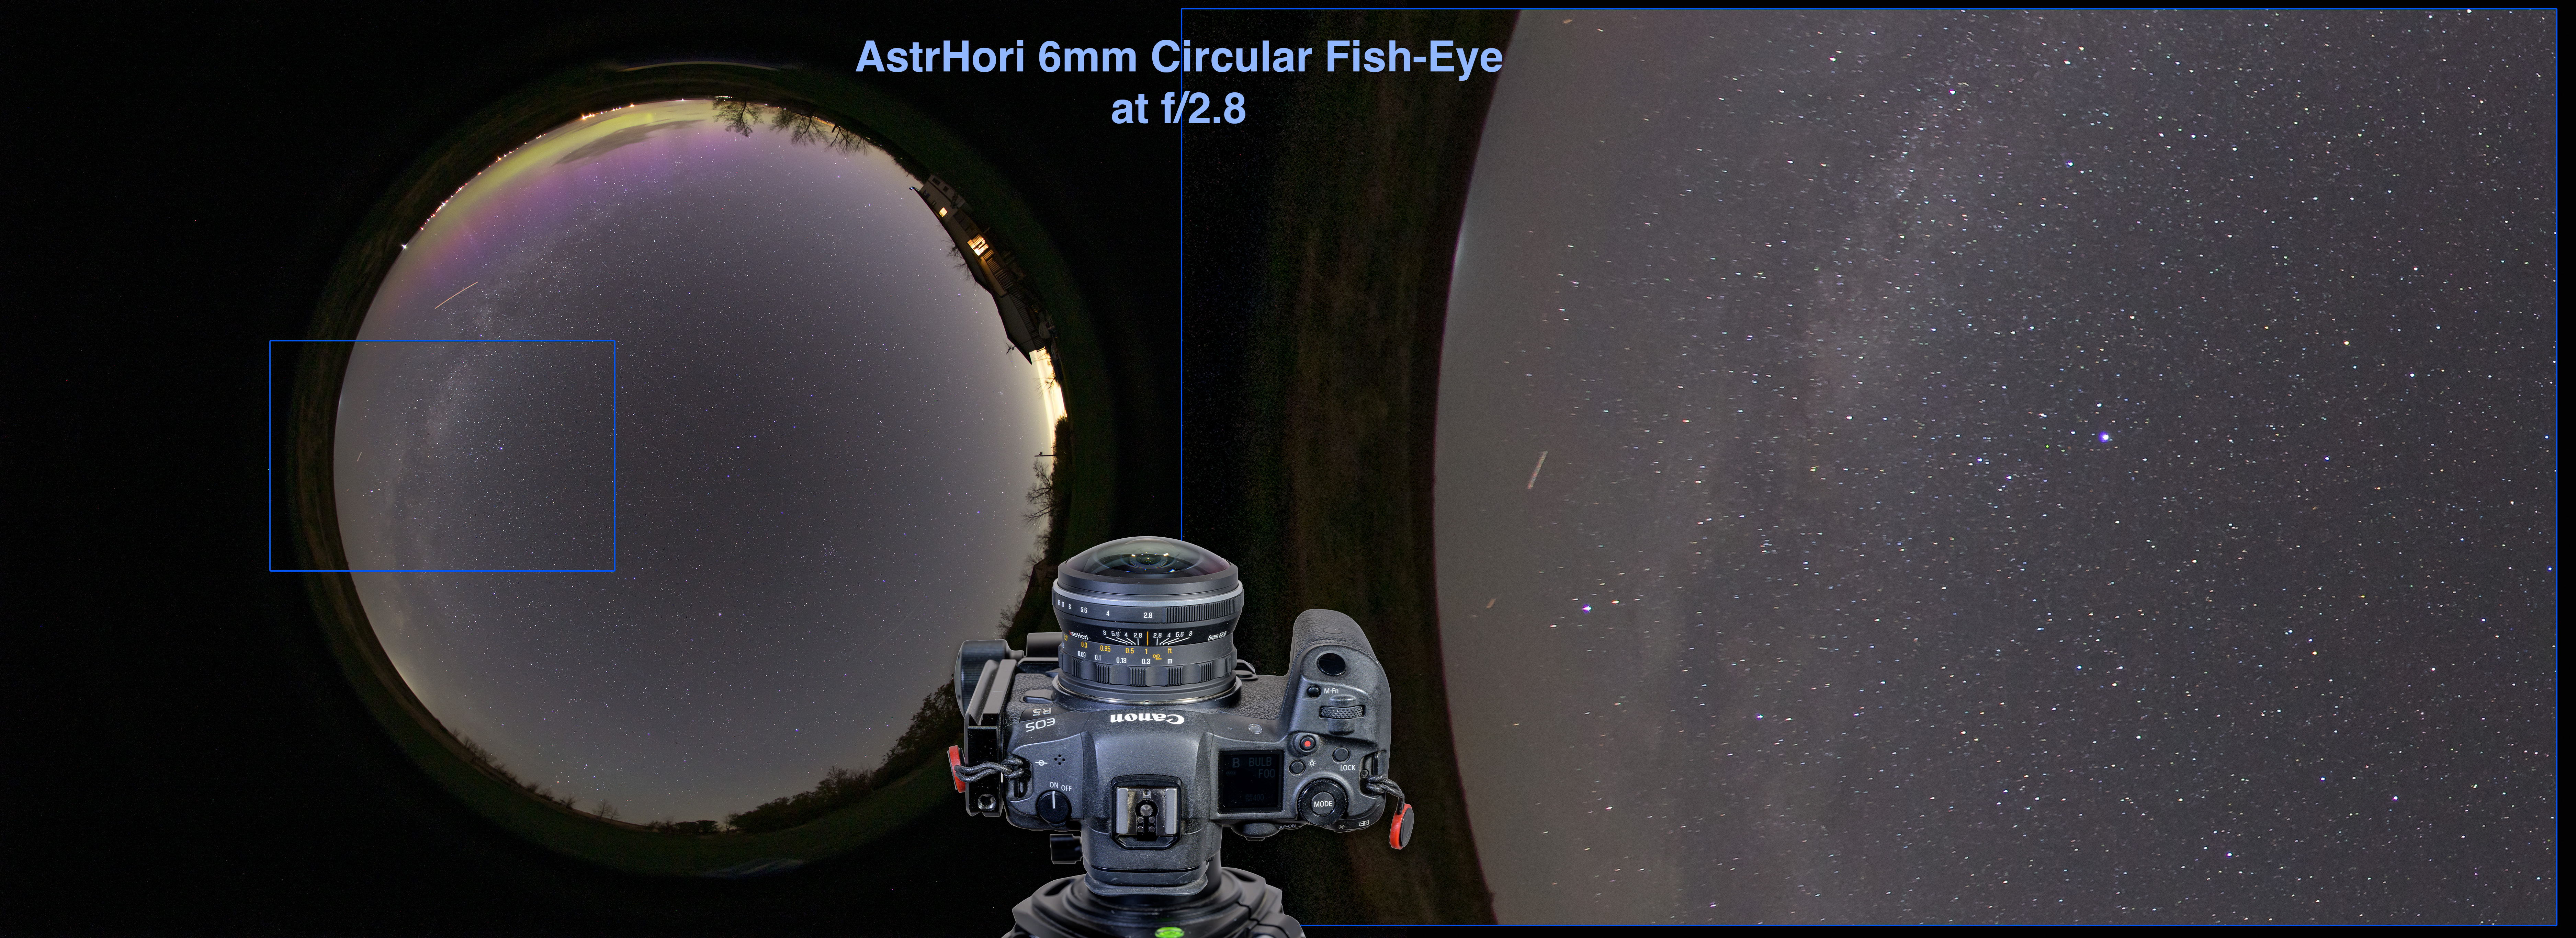
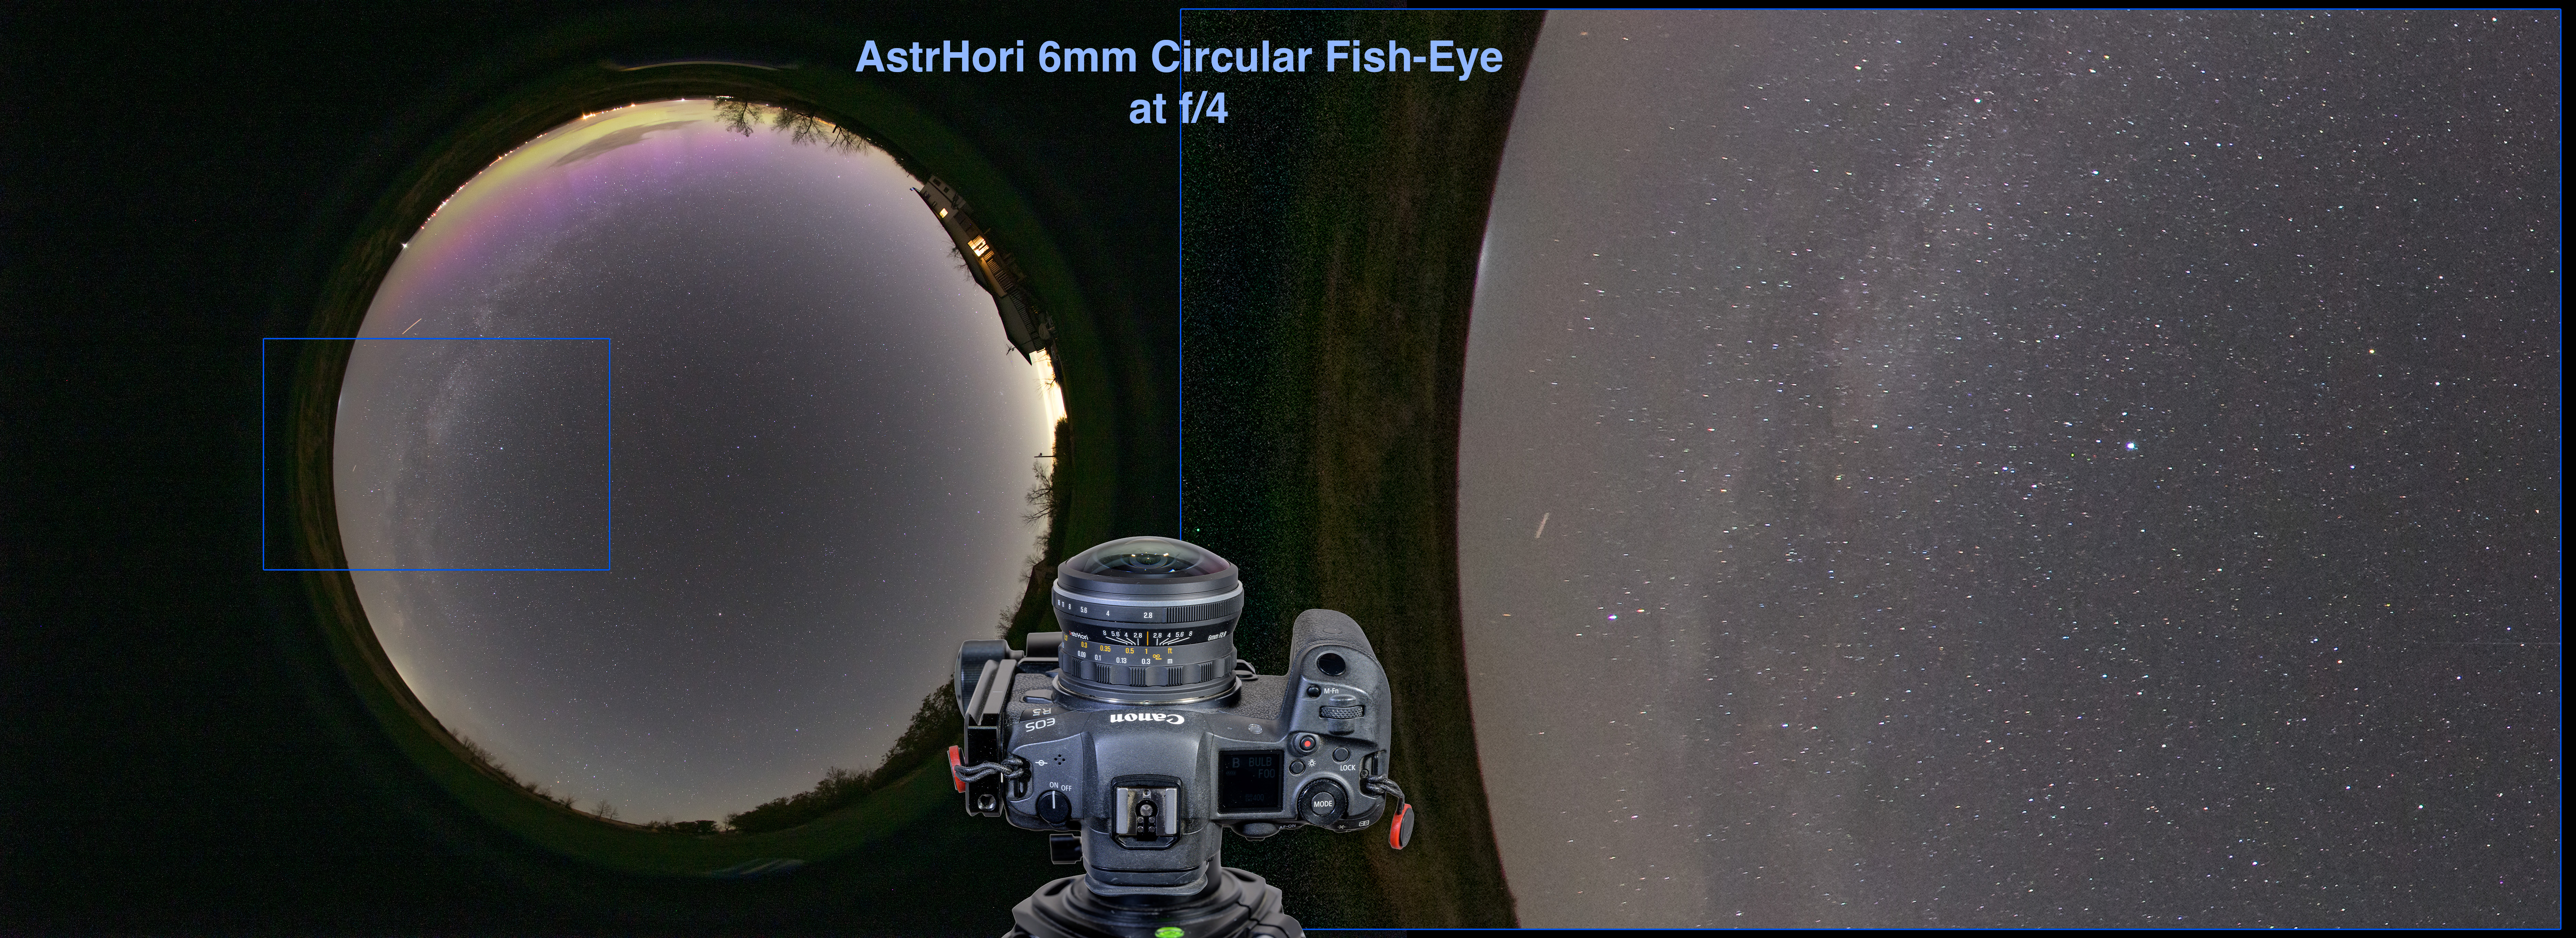
Stars in the centre are tack sharp at f/2.8, with some longitudinal chromatic aberration (LoCA) adding small blue halos. The LoCA is gone at f/4. Stars toward the edges show an increasing amount of elongation from astigmatism, and exhibit colour streaks from lateral chromatic aberration (LaCA). Both diminish at f/4 but are still present.
By comparison, Sigma’s old 8mm f/3.5 circular fish-eye, now long discontinued but that I used for many years on my Canon DSLRs, had smaller but still noticeable levels of astigmatism and lateral chromatic aberration at the edges, even when stopped down to f/4 or f/4.5. So the $300 AstrHori is not far below the classic but much more costly Sigma 8mm for edge sharpness.
The main benefit to stopping down the AstrHori 6mm is the reduced vignetting that brightens the field overall, but especially the horizon around the edges. So if the horizon content is important, stop the lens down. Otherwise, this lens works well at f/2.8.
LENS FLARES
A 30-second exposure at f/2.8 with the Moon in the frame (if it’s in the sky it’ll be in the frame with this lens!) showed only a small lens flare (arrowed) opposite the Moon. It tightened up at f/4 (not shown) but was still present. In all, this is a good performance.
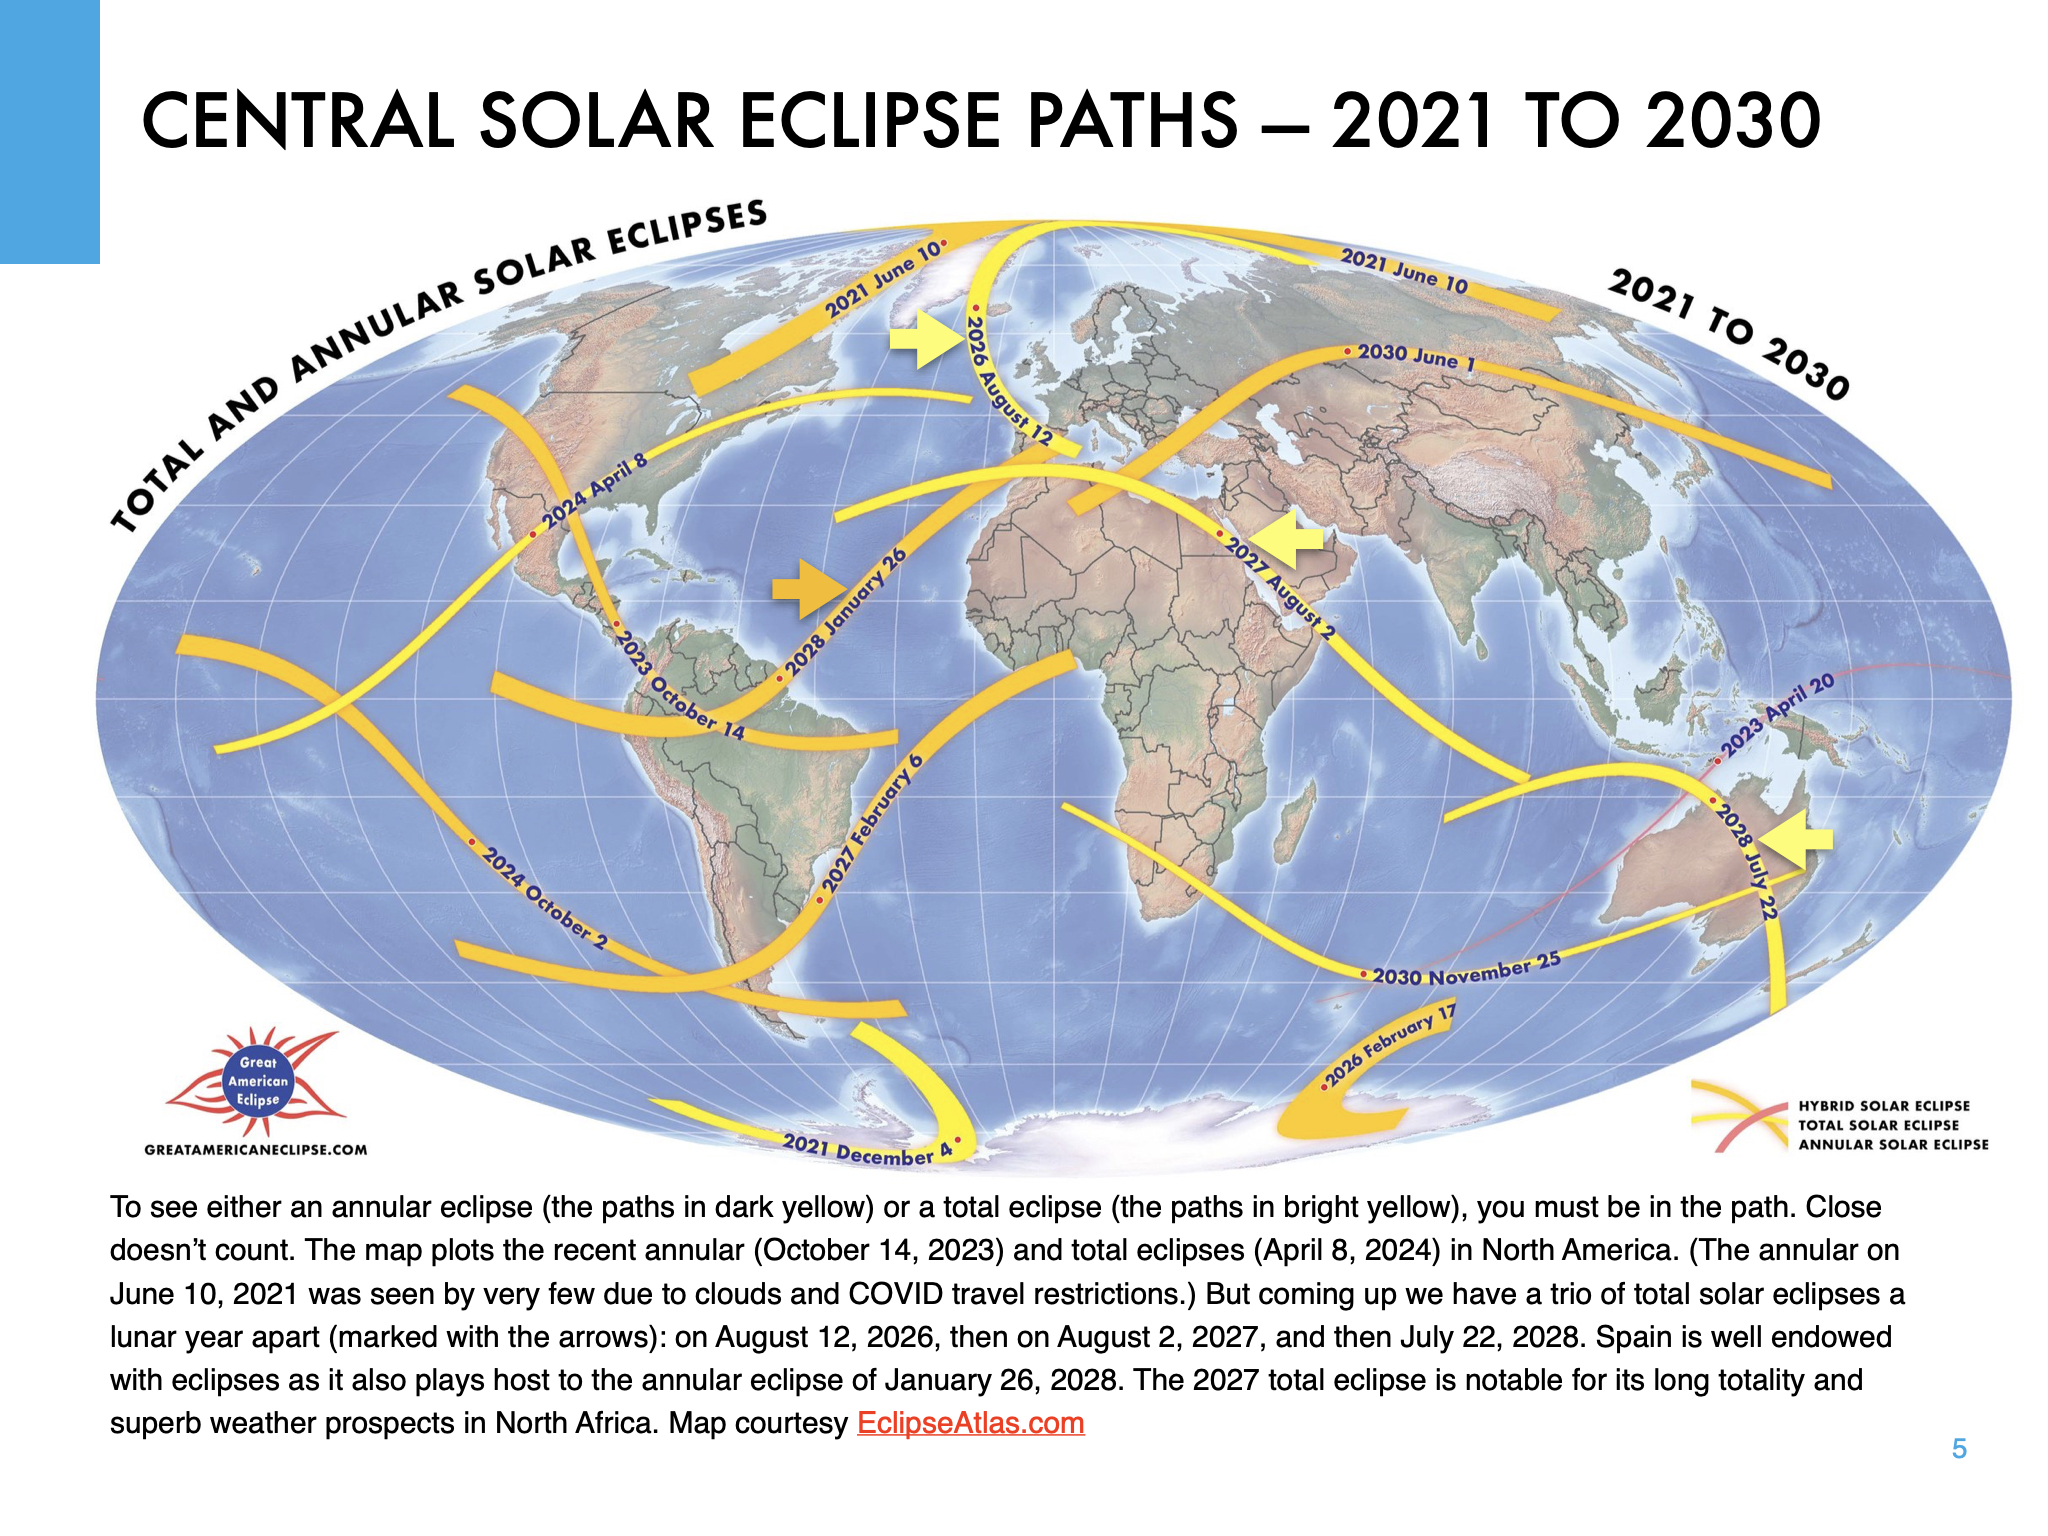
But for all-sky time-lapses with the Moon up, expect to see a lens flare moving opposite the Moon. The same might be true of all-sky images of a total solar eclipse. The eclipse of August 2, 2027 with the Sun at the zenith from Egypt would be a great use-case for this lens!
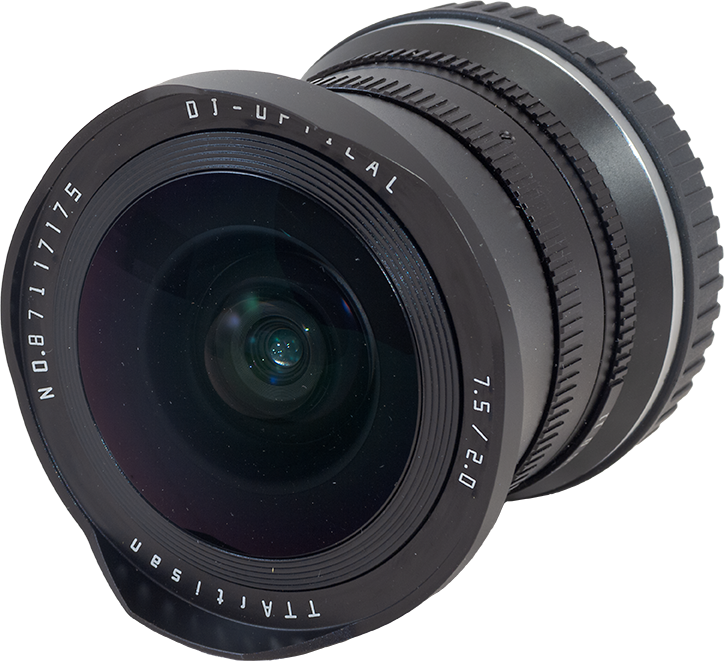
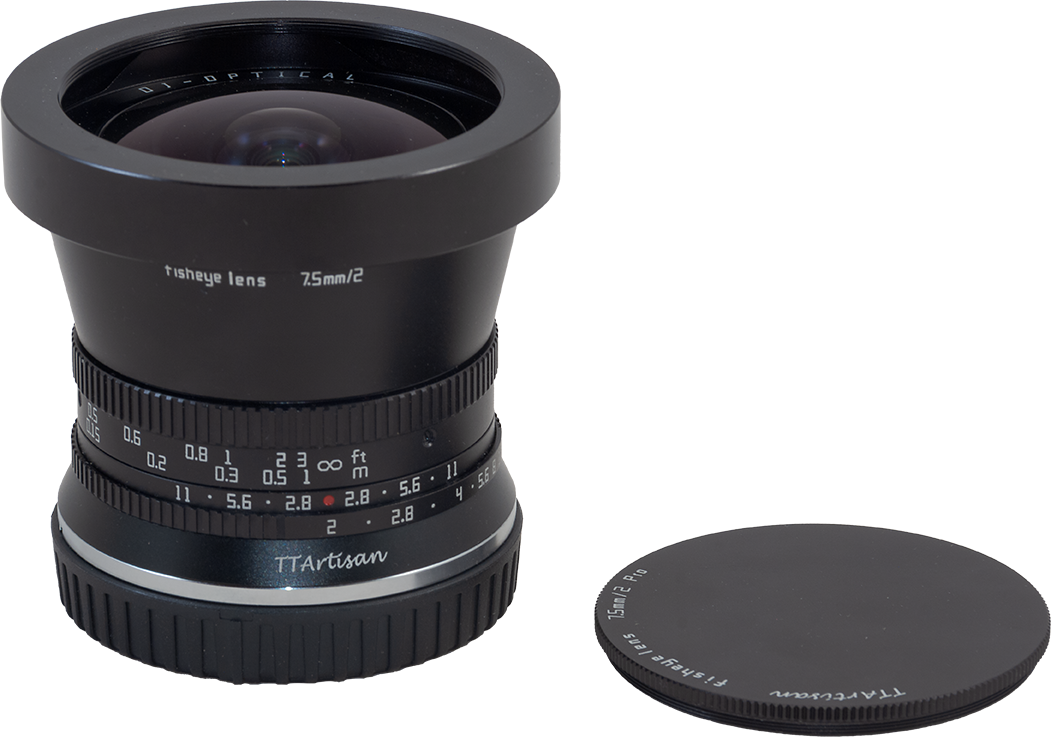
The TTArtisan 7.5mm f/2 Circular Fish-Eye
Available for Sony E, Leica L, Canon RF, Fuji X, Nikon Z Lens Mounts
$140 US.
Link to the TTArtisan 7.5mm web page
The unique selling point of this lens is its speed – f/2! All the others are f/2.8. However, technically this is a lens made for APS-C sensor cameras, where it would serve as a full-frame fish-eye. But it works as a near-circular-format fish-eye on full-frame cameras, though with the image truncated at the top and bottom, as I show. You don’t get a full circle. But you do get a much wider field than with the full-frame fish-eyes that follow.
The 7.5mm does not come with a case or pouch, unlike lenses from TTArtisan’s competitors. (The case I show above is one I bought extra for this lens.) The lens has a metal front cap with a thread-on central disk, as shown above. With the disk removed, the remaining ring acts as an iris that mechanically vignettes the image to a 24mm-wide circle, but with much less than 180° horizon-to-horizon coverage. I’ve never used this lens that way; I prefer to record as much of the image as the lens projects, then mask down the image later if needed.
I like this lens so much I bought it twice – for Canon RF and for Nikon Z. The Nikon copy I test here has better optics with less tilt (or “decentering”) in the lens elements. The Canon copy is notably soft on the left side. I asked TTArtisan about this, hoping to get a replacement for my Canon RF unit, but their rep said that’s within their acceptable level of performance. That’s the drawback of low-cost lenses like these; expect unit-to-unit variations.
The best focus, with the stars sharpest, proved to be well short of the infinity mark, requiring manual focusing. But I suspect that, too, will vary from unit to unit, likely true of most of these lenses.
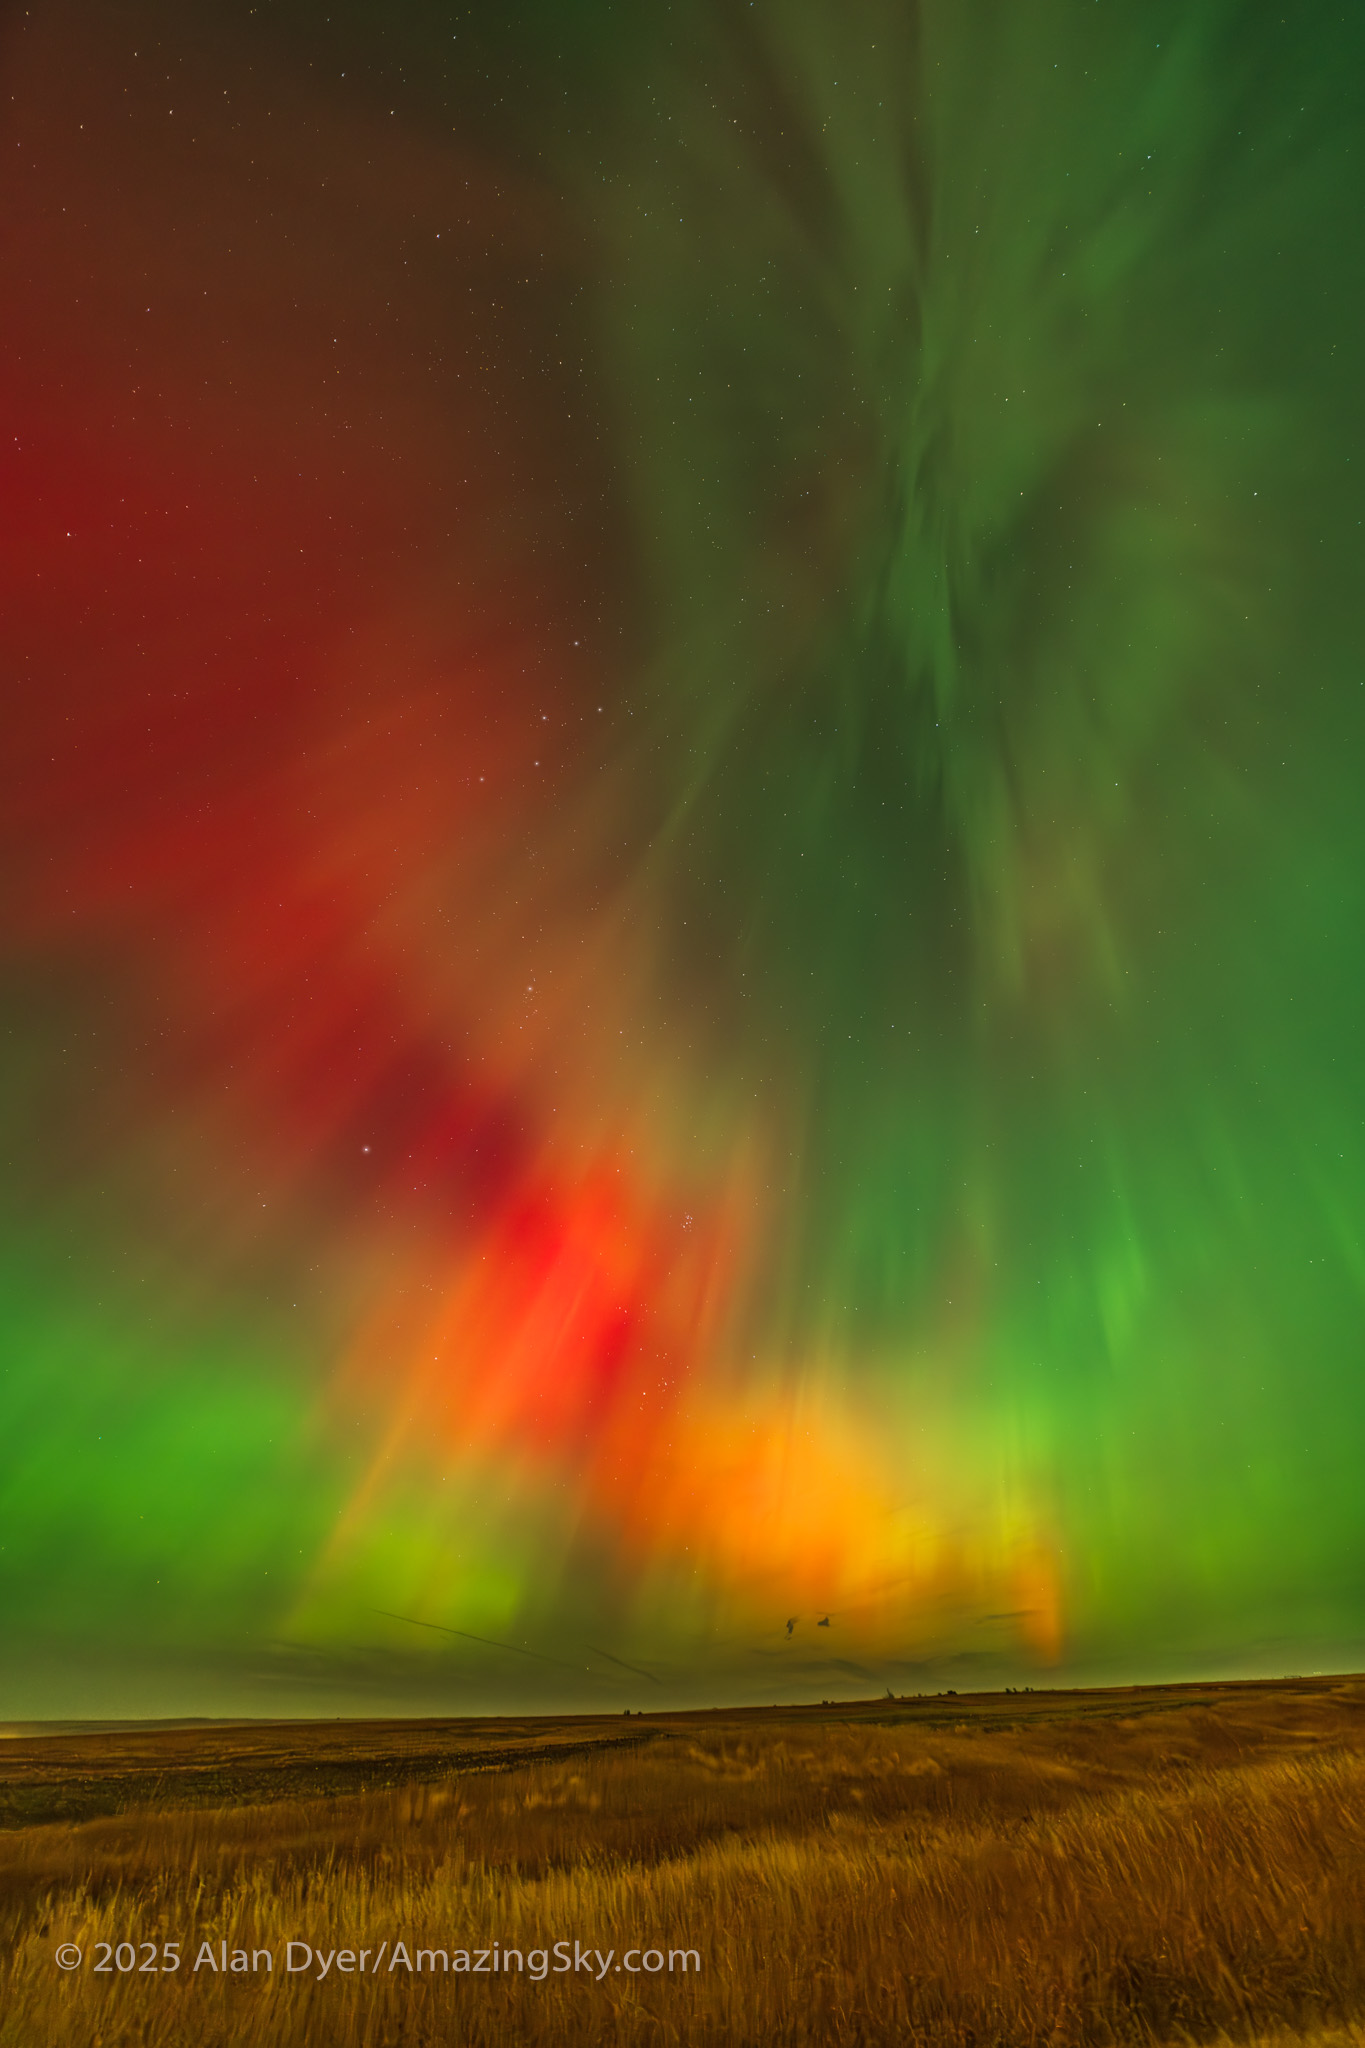
With its f/2 speed, the 7.5mm is great for rapid-fire time-lapses of fast-moving auroras, or even real-time 4K or 8K aurora movies where fast lens speed is essential, to keep the ISO lower for less noise.
IMAGE QUALITY
The image circle is fairly cleanly defined, but does show two small dark shadows protruding into both the top and bottom of the frame from some mechanical vignetting. A dark blue glow also rims the periphery of the image circle. Keep in mind, on the APS-C cameras the lens is designed for you wouldn’t see the outer part of the image circle.
At f/2 stars are quite sharp at the centre, but begin to soften and elongate from what looks like coma as well as astigmatism in the outer third of the image circle.
Star sharpness improves at f/2.8, and more at f/4, by which point stars now look very sharp almost to the edge of the image circle.
As the examples show, the image also brightens and becomes more evenly illuminated as you stop down. In all, shooting at f/2.8 will work best for most astrophoto situations. Shoot at f/2 if you need the extra speed for rapid time-lapses or movies. Shoot at f/4 if star sharpness is paramount, such as for projection in a digital planetarium dome.
LENS FLARES
The TTArtisan 7.5mm proved surprisingly immune to lens flares. I didn’t see any in the sky itself. What you do get is a flare around the periphery from an internal reflection off bright lights, like the Moon here. This might need masking out in the final images.
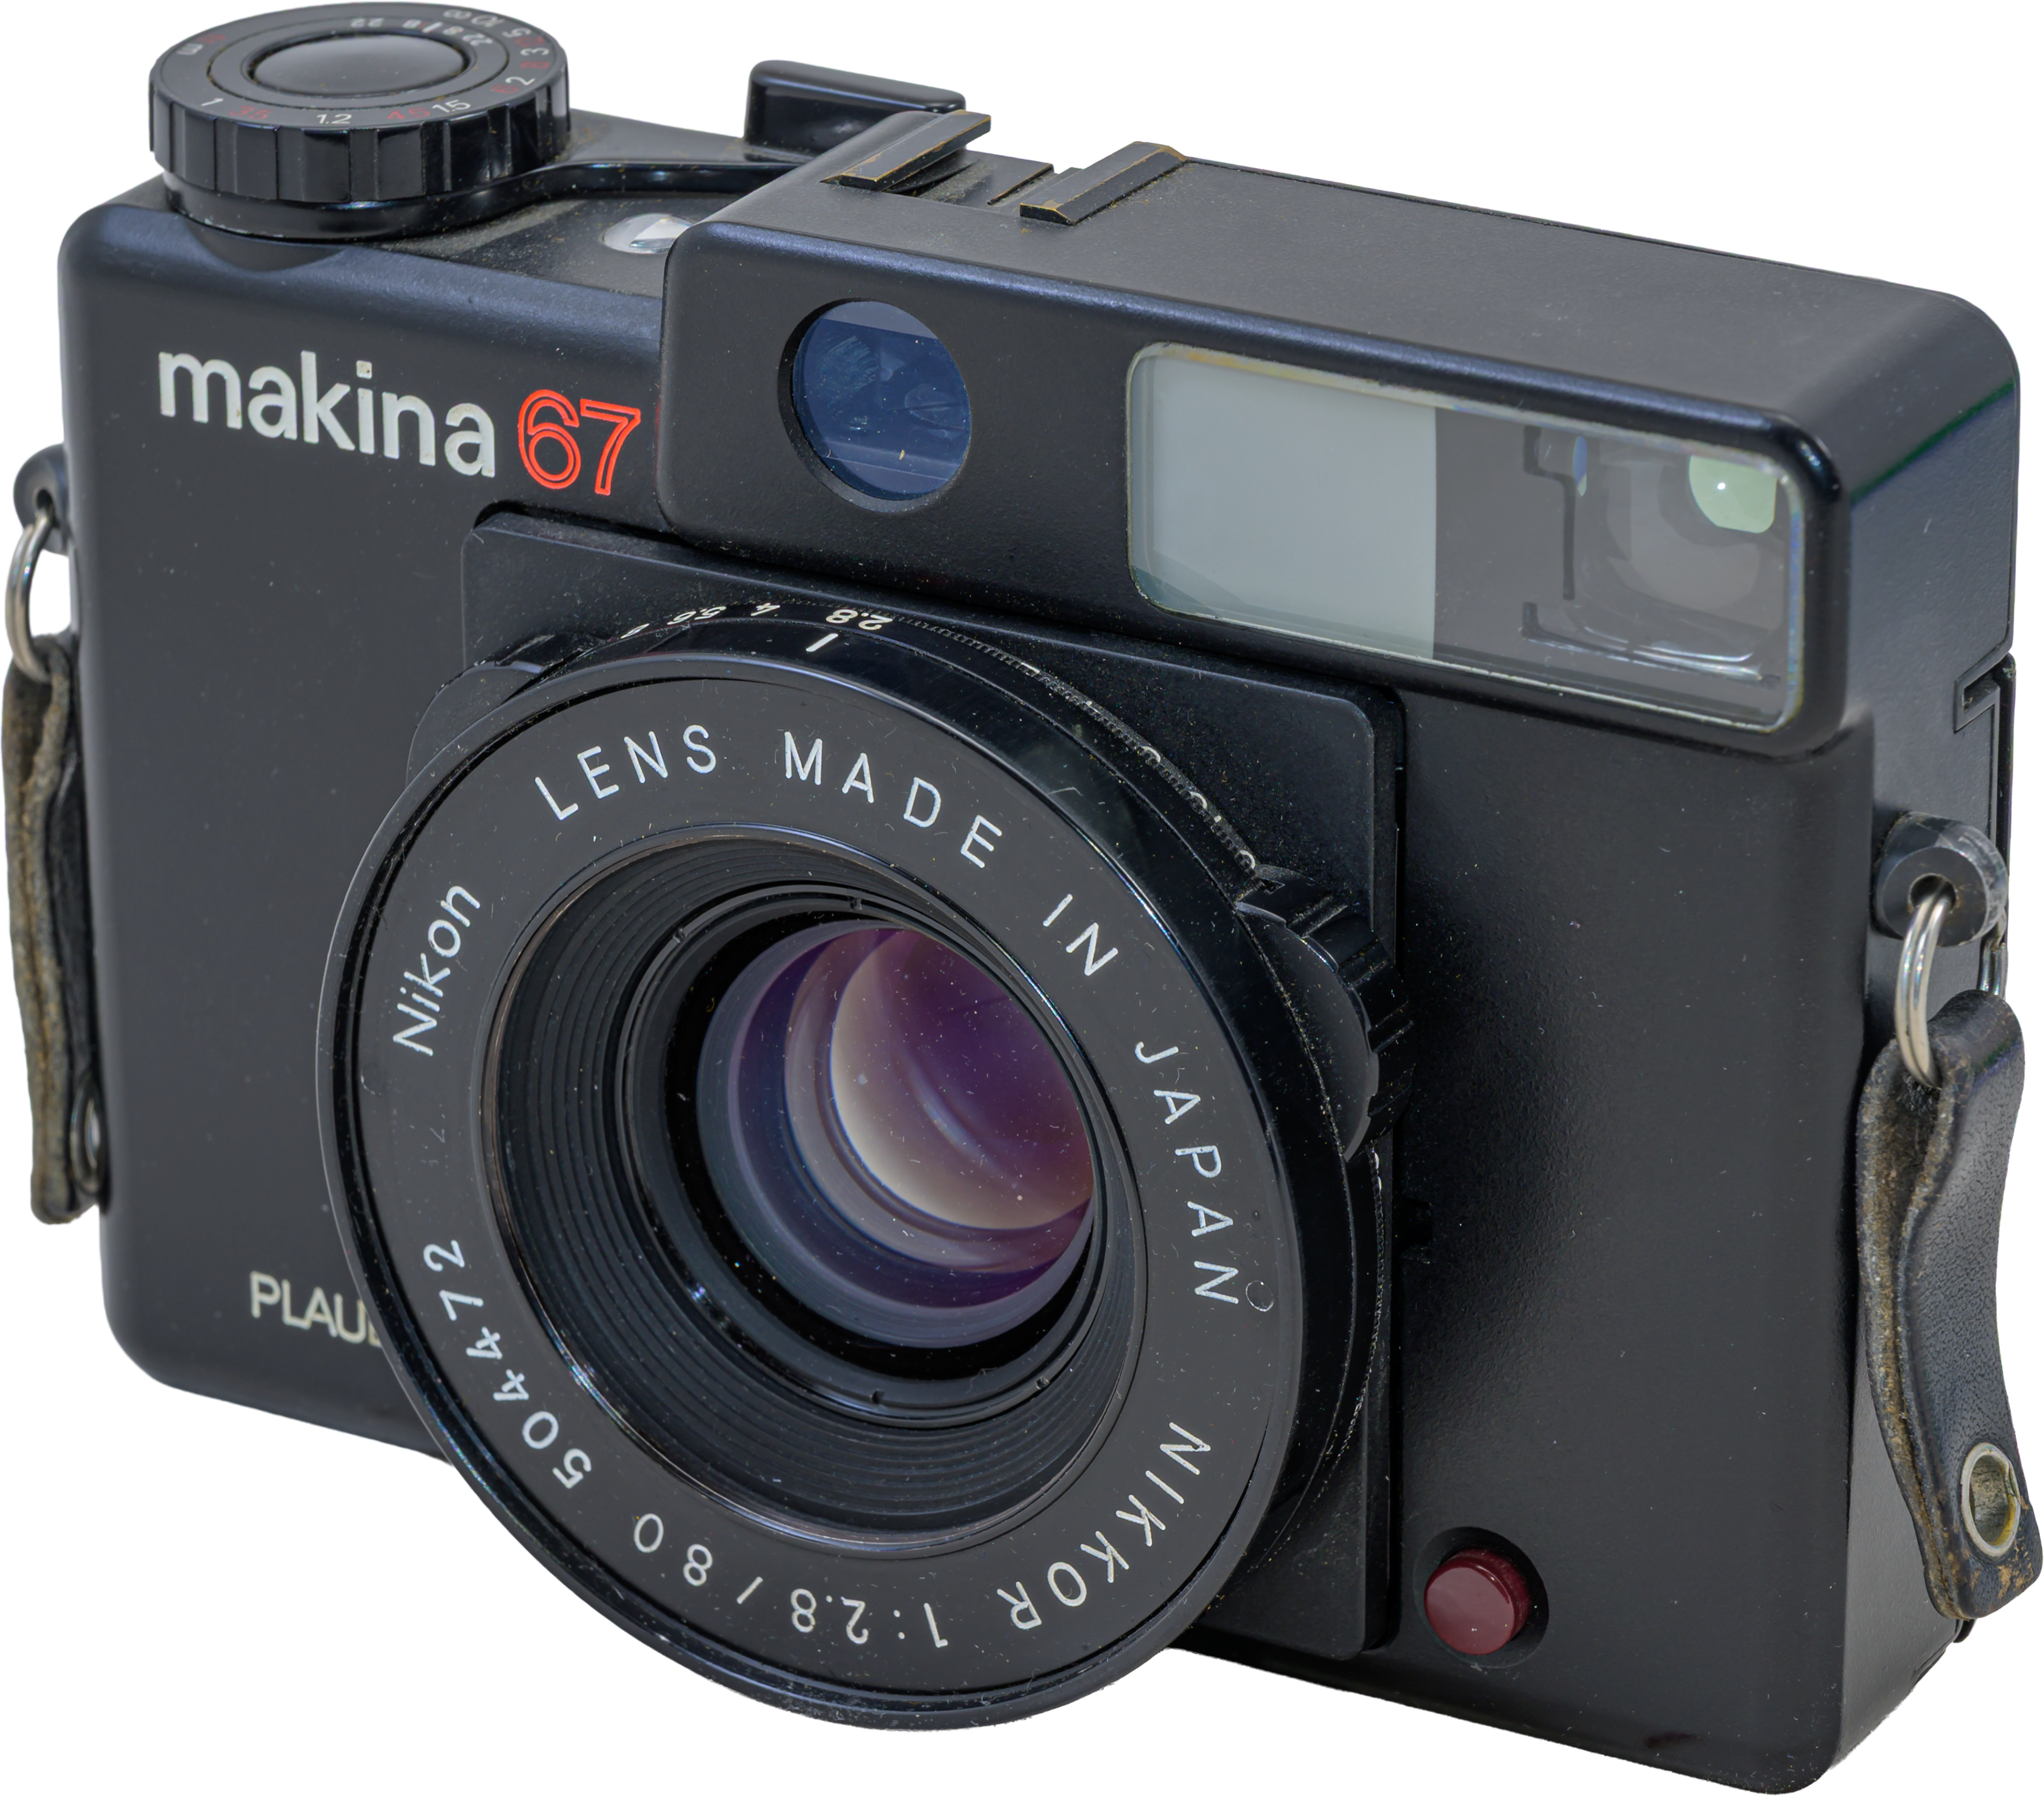
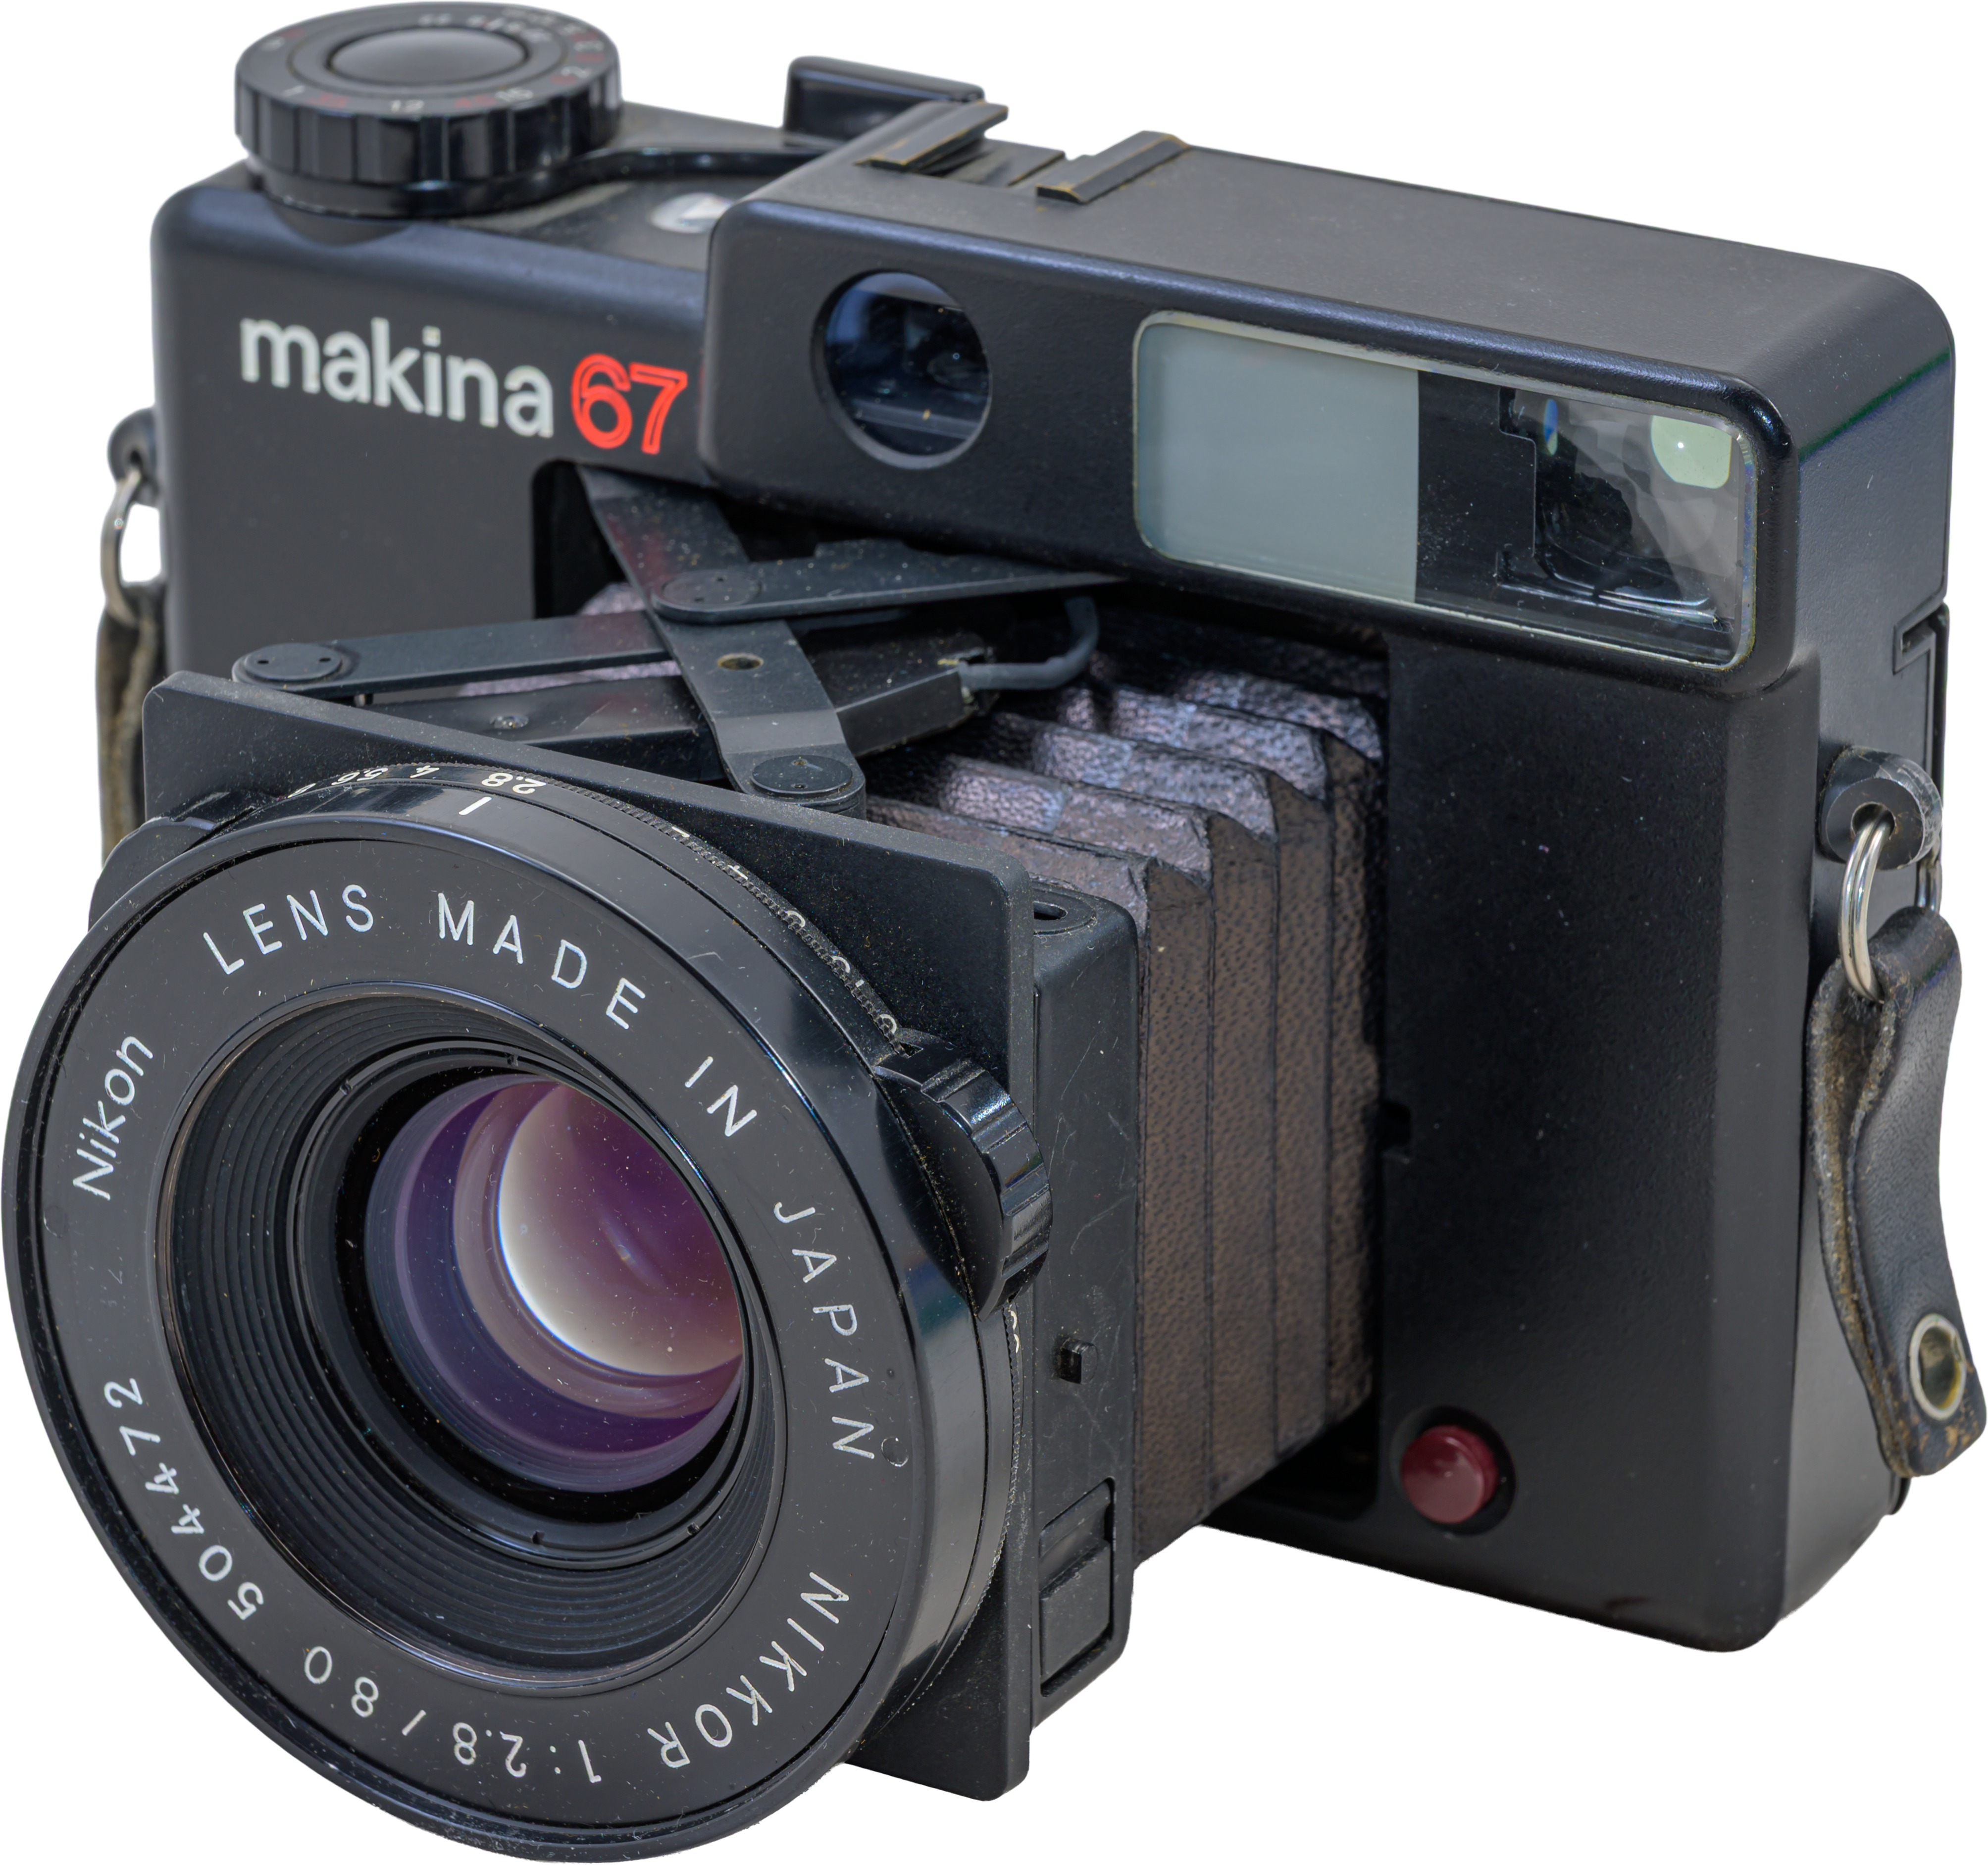
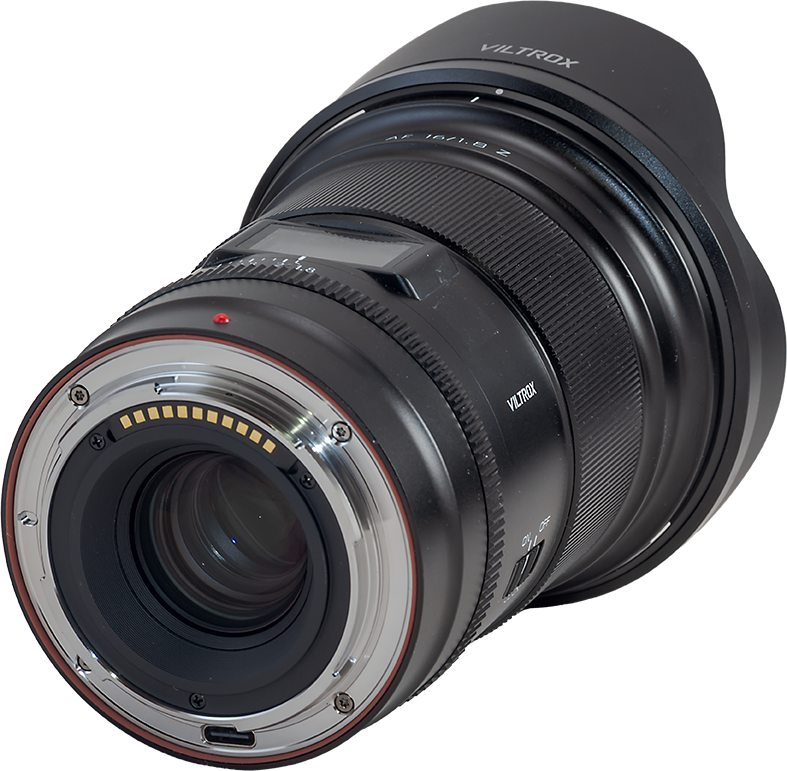
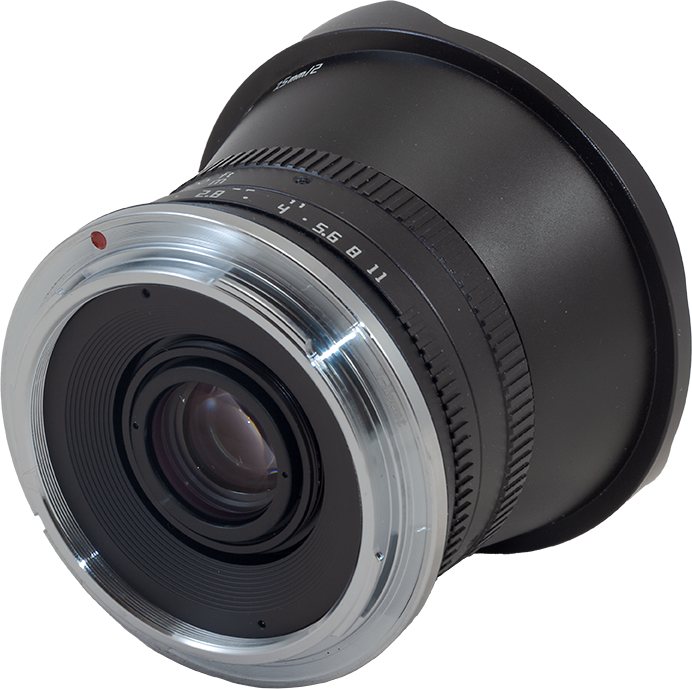
The 7Artisans 10mm f/2.8 Mark II Full-Frame Fish-Eye
Available for Sony E, Leica L, Canon RF, Nikon Z Lens Mounts
$280 US.
This is the first, and so far only, lens I have used from the China-based company 7Artisans. I am impressed with it. The 10mm came with both a cloth lens pouch and a hard-sided zippered lens case, both shown above. Very nice! Nikon should take note and be so generous with their premium S-line lenses.
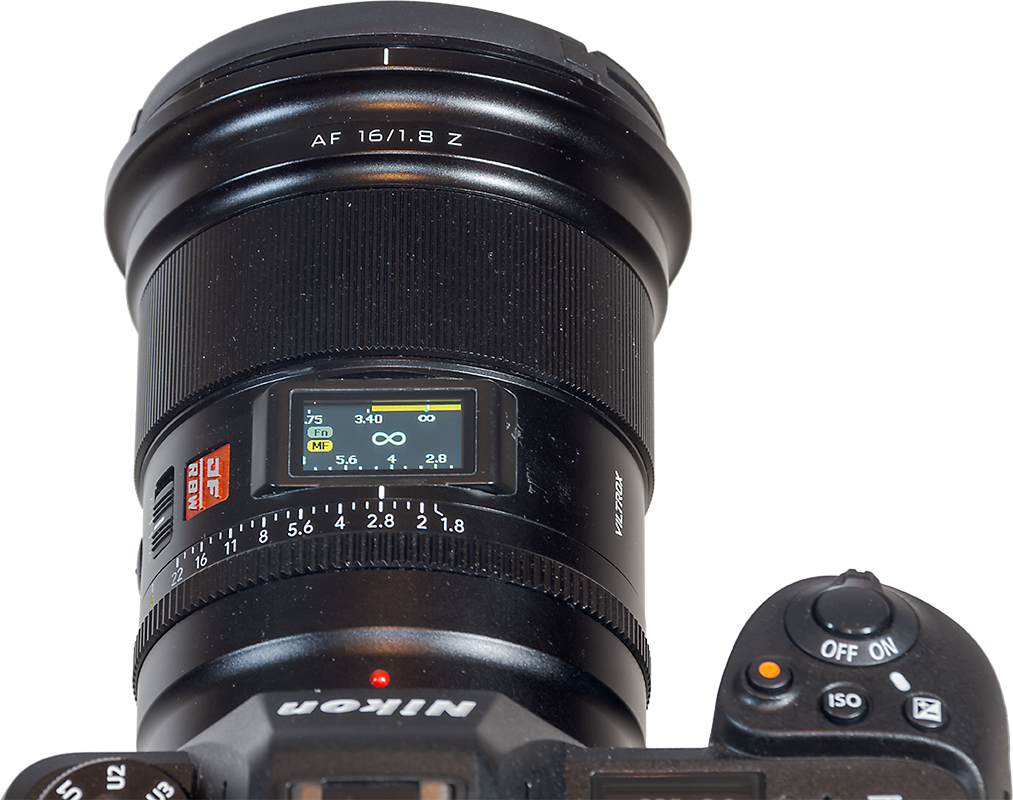
The lens is solid, with all-metal construction and a metal press-on lens cap. The rear cap is plastic, true of all the lenses. The focus movement is smooth with a good level of resistance or dampening. Infinity focus, with the stars sharpest, proved to be left of the infinity mark. The lens focuses past infinity, so careful manual focusing is needed. The aperture ring is click-less, preferred for video use, but a bit of a nuisance for photography.
An added bonus, clearly showing this lens has been designed for night use in mind, is that the focus and depth of field markings are fluorescent. Hit the lens with white light and they will glow in the dark for a while, as above. Nice!
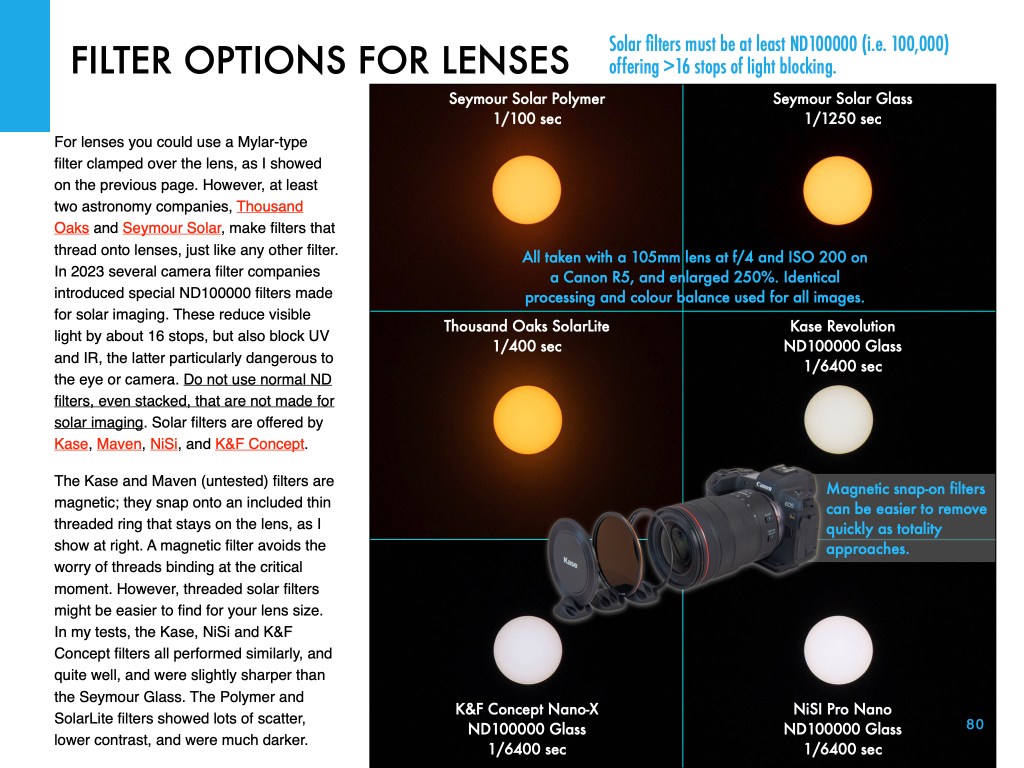
I tested the new Manual Focus Mark II model, advertised as having “enhanced performance” over the original lens – with two of the 11 lens elements being ED glass, versus the original model’s single ED element. I never used the original 10mm, so I can’t comment on how the Mark II version has improved. And don’t confuse this new MkII 10mm with another 10mm f/2.8 AF lens 7Artisans also sells. That 10mm has auto-focus but is only for APS-C cameras.
IMAGE QUALITY
I aimed all the full-frame fish-eyes straight up to the zenith, to put stars in all corners. However, I am zooming in on the edge of the long dimension in these samples. Click or tap on an image to download a high-resolution JPG for closer inspection of all parts of an image.
The 7Artisans 10mm proved very sharp at the centre and toward the edges of the frame, showing only a small level of astigmatism and lateral colour at the edges at f/2.8. Bright stars at the very corners did show “wings” from astigmatism.
Stars tightened up at f/4, but still had some astigmatism at the pixel-peeping level. The 10mm also had the widest field of view of the three full-frame fish-eyes, by a slight margin.
The image edges brightened with the lens at f/4, as expected from the reduced vignetting all wide-angle lenses show when stopped down. But unless you are very fussy about star shapes, the 7Artisans 10mm will work very well when shot wide-open at f/2.8.
LENS FLARES
I didn’t see any noticeable flares in my moonlight test shots, quite remarkable! What slight halo you can see around the Moon, here shot at f/2.8, is in the sky, from the thin clouds this night.
The TTArtisan 11mm f/2.8 Full-Frame Fish-Eye
Available for Sony E, Leica L, Panasonic/Olympus M43, Canon RF, Fuji X, Nikon Z Lens Mounts plus for Nikon F and Canon EF DSLR cameras in a different model.
$235 US.
Link to the TTArtisan 11mm web page
I’ve owned this lens for several years during which time it has served me well for many aurora shows. As best I can tell the lens sold today is the same as the one I bought some 5 years ago. Like the 7.5mm, the 11mm does not come with a case or pouch, a shortcoming of TTArtisan lenses. The case I show above is an extra one I had on hand that works well for this lens.
Note, this is the one lens of the group that is available for DSLR cameras – for Canon EF and Nikon F – though in a different optical design than the lens I tested.
The lens is compact, solid and dense, with all-metal construction, including the front lens cap. The focus turns smoothly with just the right amount of dampening. Infinity focus, with the stars sharpest, proved to be actually at the infinity mark with the focus at the extreme end. The lens does not focus past infinity, making it the easiest lens of the group to focus in the field. The aperture ring is click-less, again not ideal for photography.
IMAGE QUALITY
The 11mm TTArtisan’s test images proved to be about 1/2-stop darker than images with the 10mm 7Artisans and 12mm AstrHori, when all were shot at the same camera settings.
The 11mm also had the narrowest field of the three diagonal fish-eyes, even compared to the 12mm AstrHori, though the difference was slight.
Stars were sharp in the centre of the frame with minimal LoCA. Astigmatism increasingly elongated the stars into streaks toward the edges of the frame at f/2.8, though with minimal lateral colour. Stars tightened up at f/4 but still showed more aberration than did the 10mm 7Artisans.
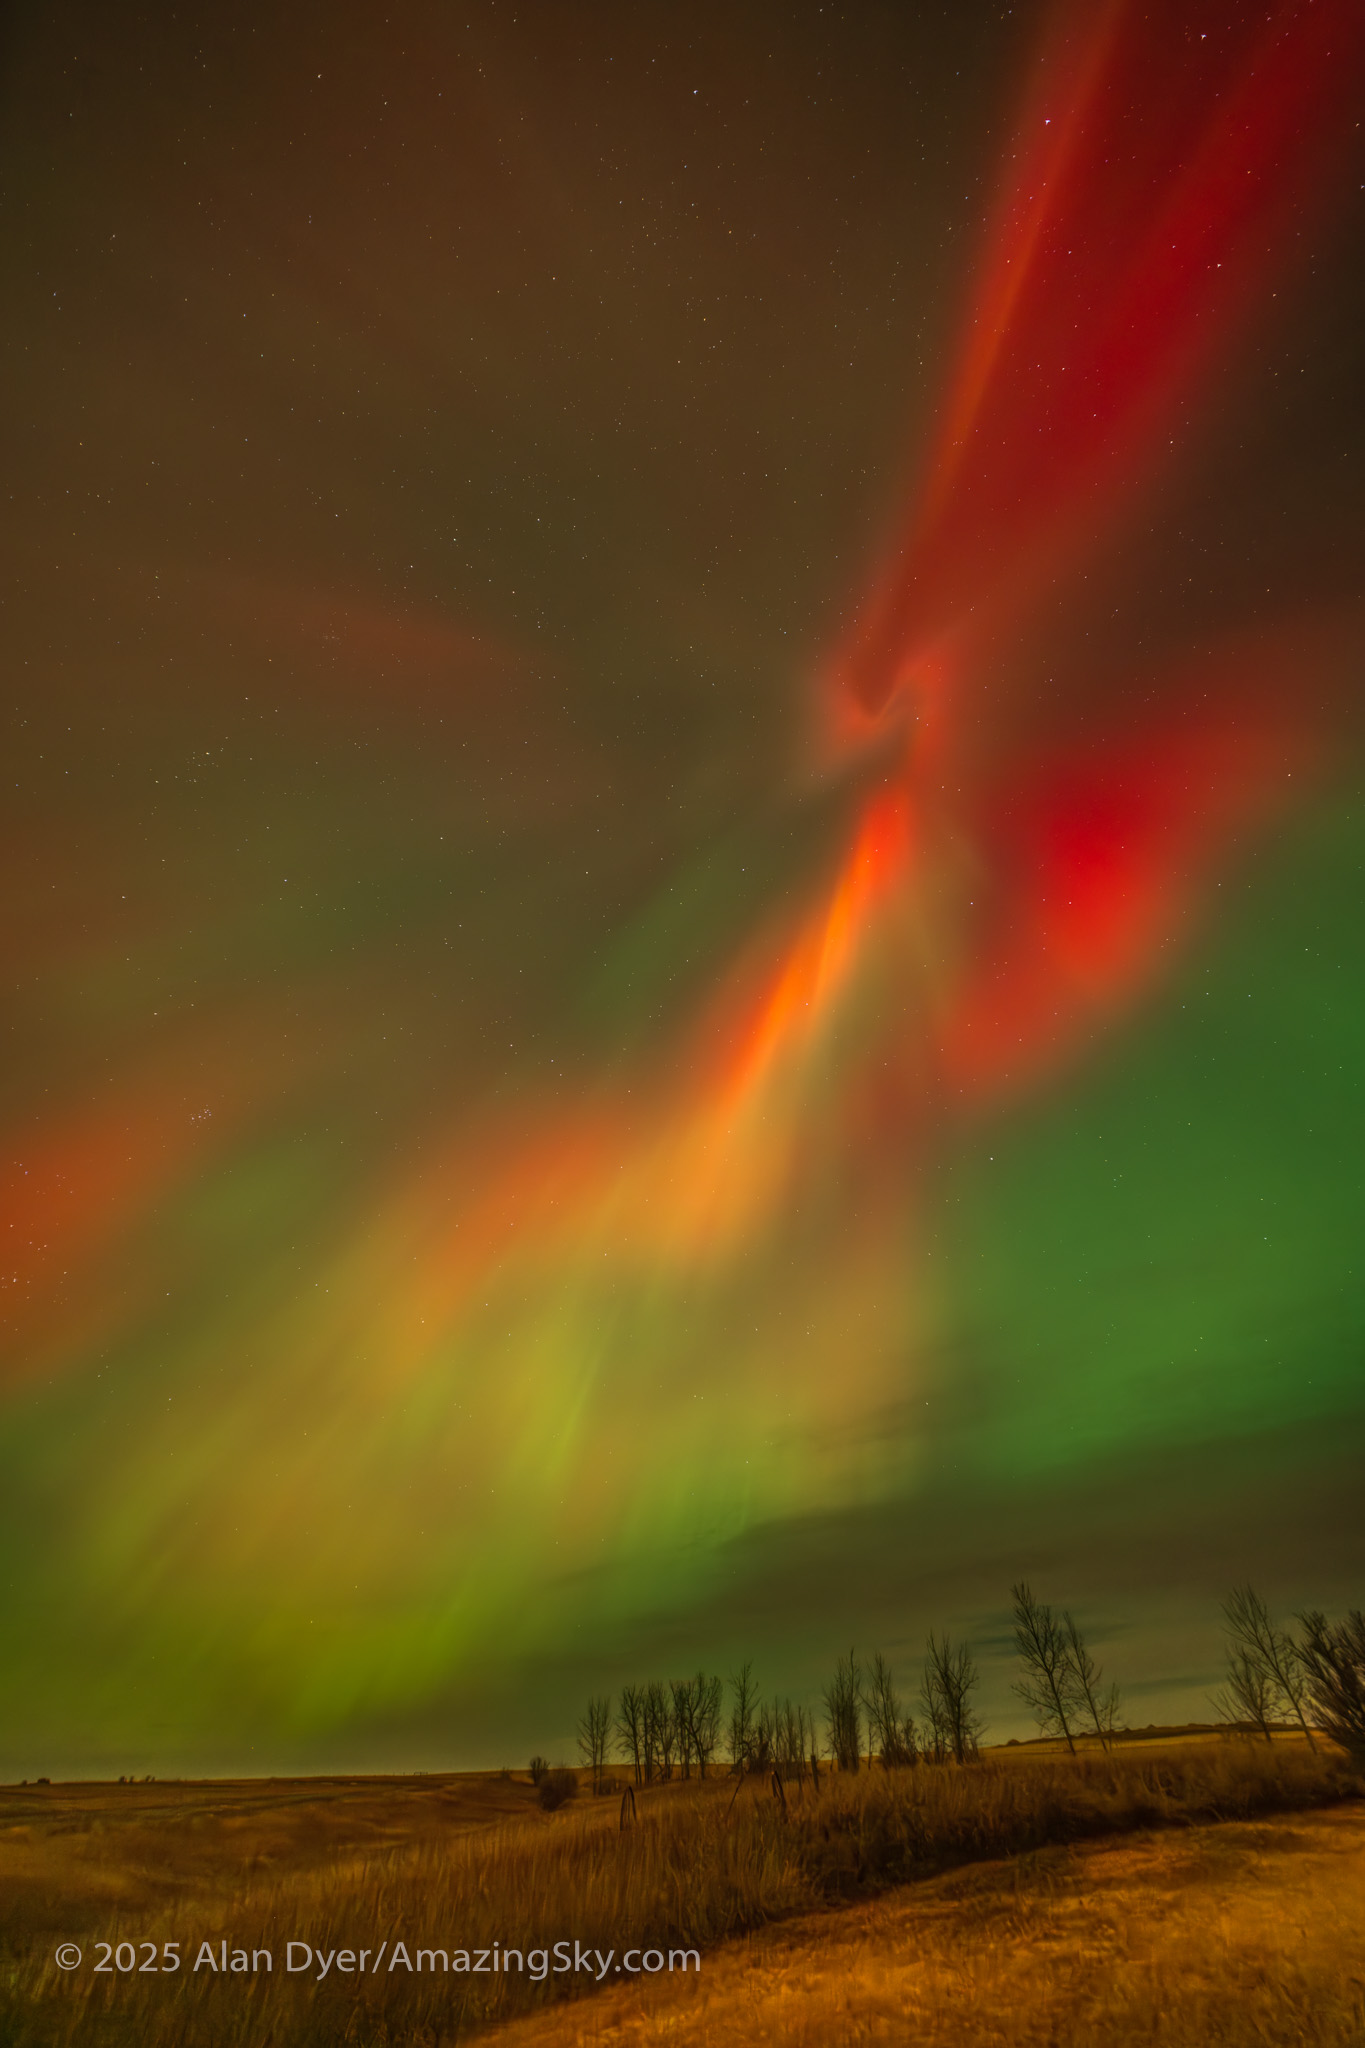
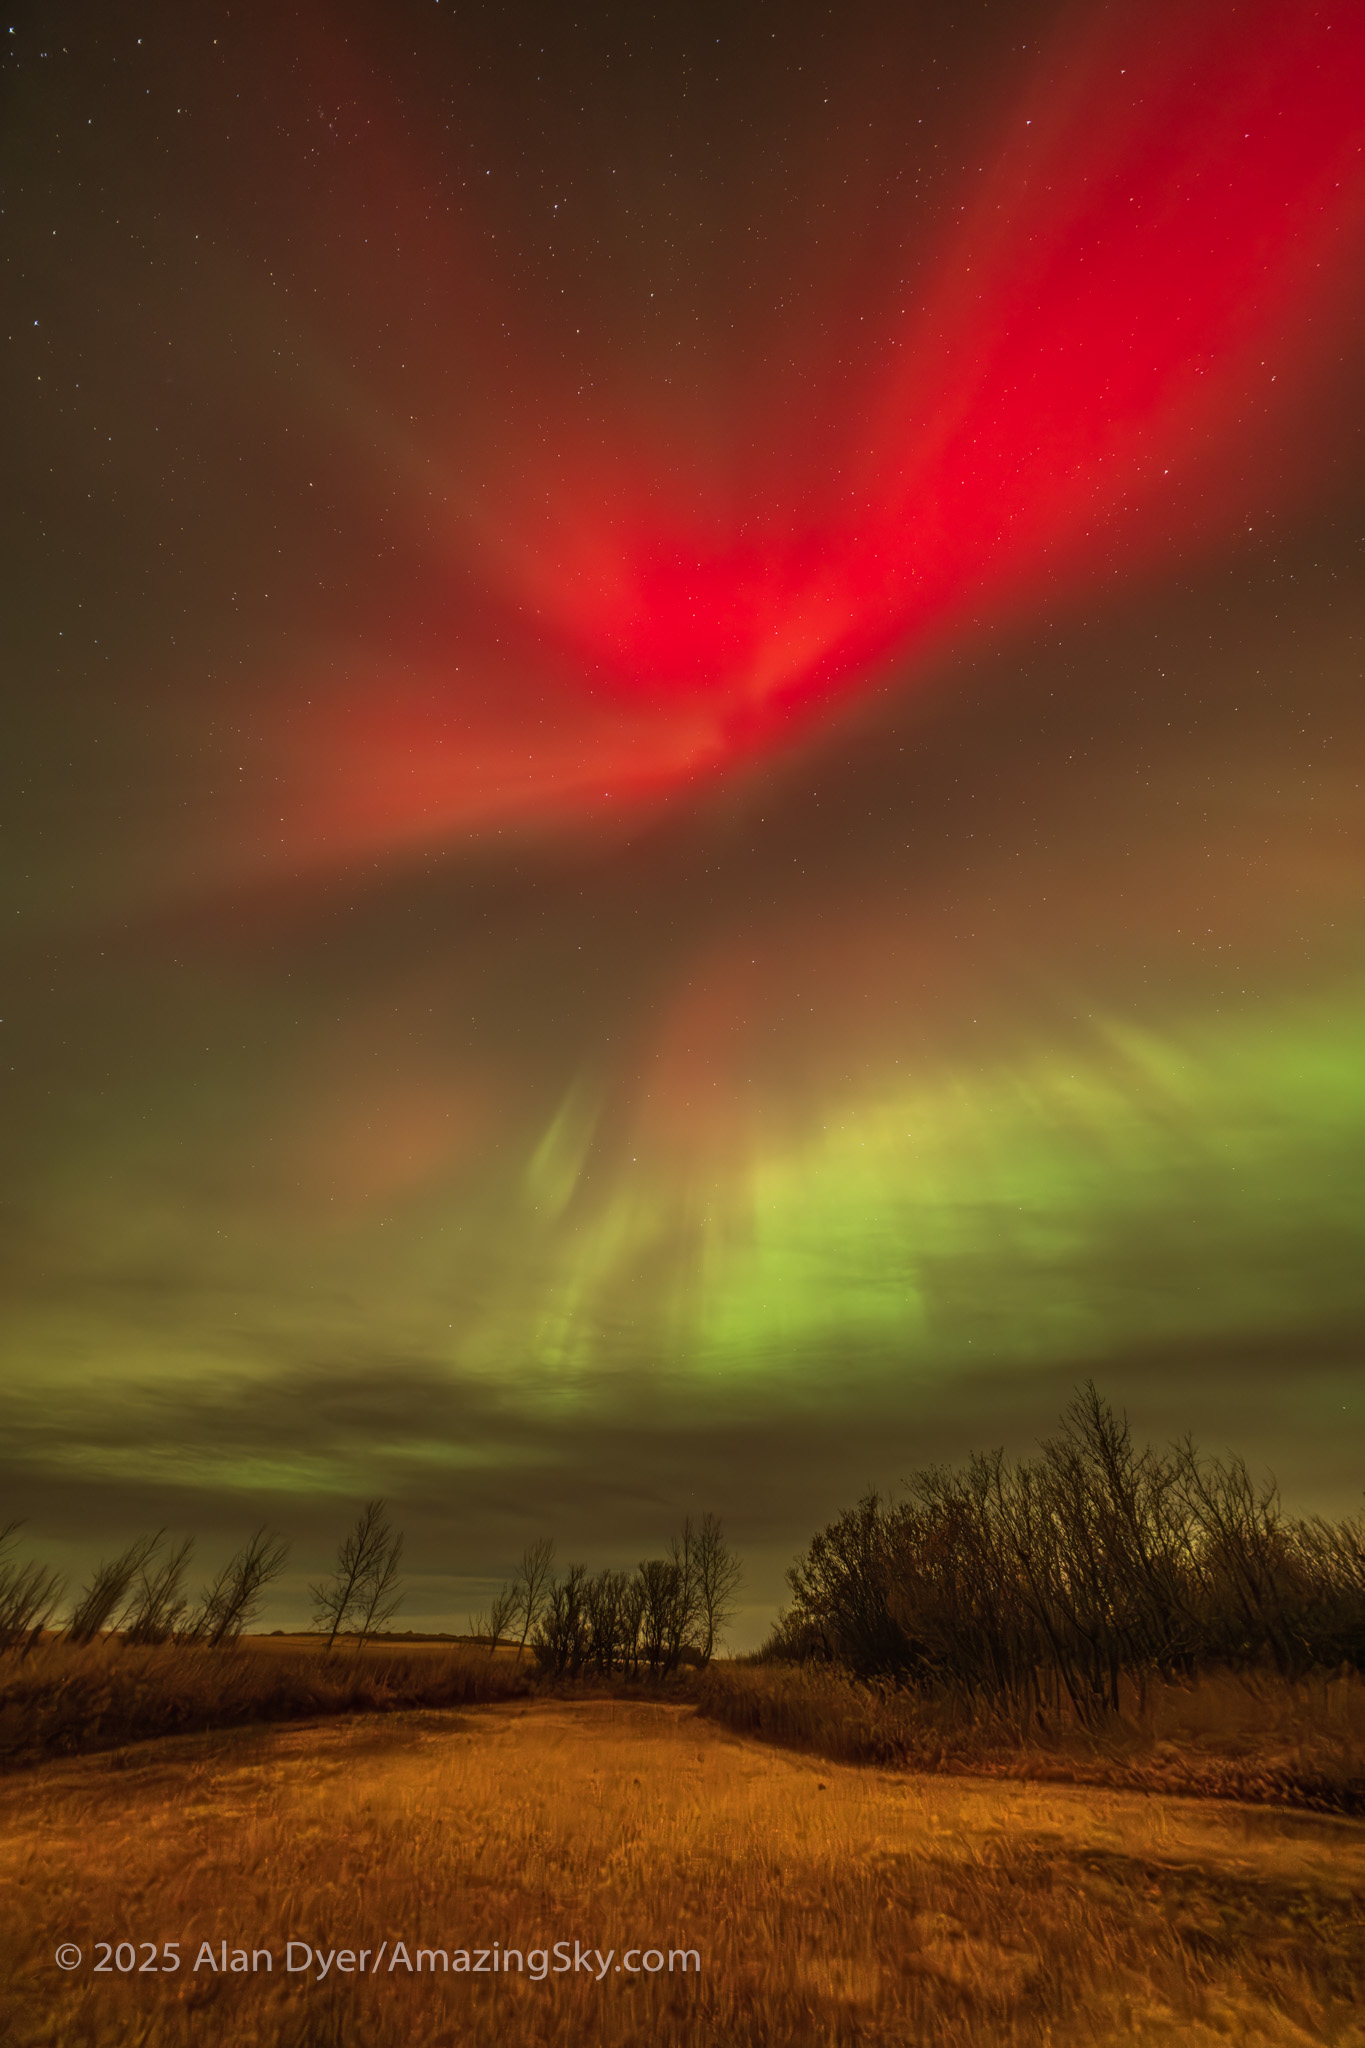
Stopping down brightened the frame edges. But overall, this lens can work well at f/2.8, which is how I’ve used it for most shooting, mostly of auroras. If Milky Way nightscapes are your priority, look at the 7Artisans 10mm.
LENS FLARES
The TTArtisan 11mm was fairly immune to lens flares, showing only a slight coloured flare (arrowed) opposite the Moon in my test images. So its coatings must be performing fairly well, despite the overall lower level of light transmission of this older lens.
The Astrhori 12mm f/2.8 Full-Frame Fish-Eye
Available for Sony E, Leica L, Canon RF, Nikon Z Lens Mounts
$260 US.
AstrHori offers a 12mm as their diagonal fish-eye for full-frame cameras. It is solidly made, but larger than the others with a bulbous front lens element. It is also the heaviest lens of the group, weighing 830 grams with lens caps, compared to 700 grams for the 7Artisans 10mm, and 550 grams for the much smaller TTArtisan 11mm.
While the 12mm came with AstrHori’s standard lens pouch it is far too small for this lens. What were they thinking? The lens has a smoothly-turning manual focus ring and, similar to the others, with a good level of dampening. Infinity focus with the stars sharpest was shy of the infinity mark, between 1 metre and infinity. The lens focused past infinity, so careful manual focusing is required, true of all the lenses except the TTArtisan 11mm.
The aperture ring has firm click stops at 1/2-stop intervals from f/2.8 to f/8, and one each for f/11 and f/16. This is the only lens of the group with a plastic front cap, but it is deep and presses on very securely. The aperture values have large white figures making them easy to read in the dark.
IMAGE QUALITY
Stars are sharp in the centre with only slight LoCA-induced blue halos at f/2.8 that disappear at f/4. Stars begin to soften and elongate from astigmatism at the outermost edges of the field at f/2.8.
They tighten somewhat at f/4 but not by much compared to f/2.8. The entire field, not just the field edges, brightens at f/4 from the more uniform illumination.
Of the three full-frame fish-eyes I’d rank the 12mm as #2 for across-the-field star sharpness, behind the 10mm 7Artisans but ahead of the 11mm TTArtisan.
LENS FLARES
I don’t need to add an arrow to point out the lens flares here! Wow! They are extreme.
Wide open at f/2.8 the lens shows rainbows of internal lens reflections, with an odd split appearance. Stopping down to the click stop halfway between f/2.8 and f/4 (about f/3.2) eliminates half the reflections. Stopping down to f/4 gets rid of all of them. Very odd.
Either the lenses are not properly edge blackened, or the lens hood is inducing reflections in the bulbous front element, or there is some shiny component inside adding the reflections.
The flares get larger as the light source (the Moon here) moves to the edge of the frame. With the Moon closer to the centre (as shown above), the coloured rings disappear but there are still radial streaks pointing away from the Moon. They disappear at f/4.
I never noticed these flares on dark sky shots of the stars and aurora. But this is not a lens you can shoot the sky with if the Moon or Sun are in it, at least not at f/2.8. If you shoot an eclipse sky time-lapse with this lens, you must stop it down.
This is a serious flaw AstrHori needs to fix in a Mark II version of this lens.
Recommendations
I think every astrophotographer should have a fish-eye lens in their kit, especially true of aurora chasers. The low cost of these new Chinese lenses makes it easy to add one, for the few special nights it’ll be used.
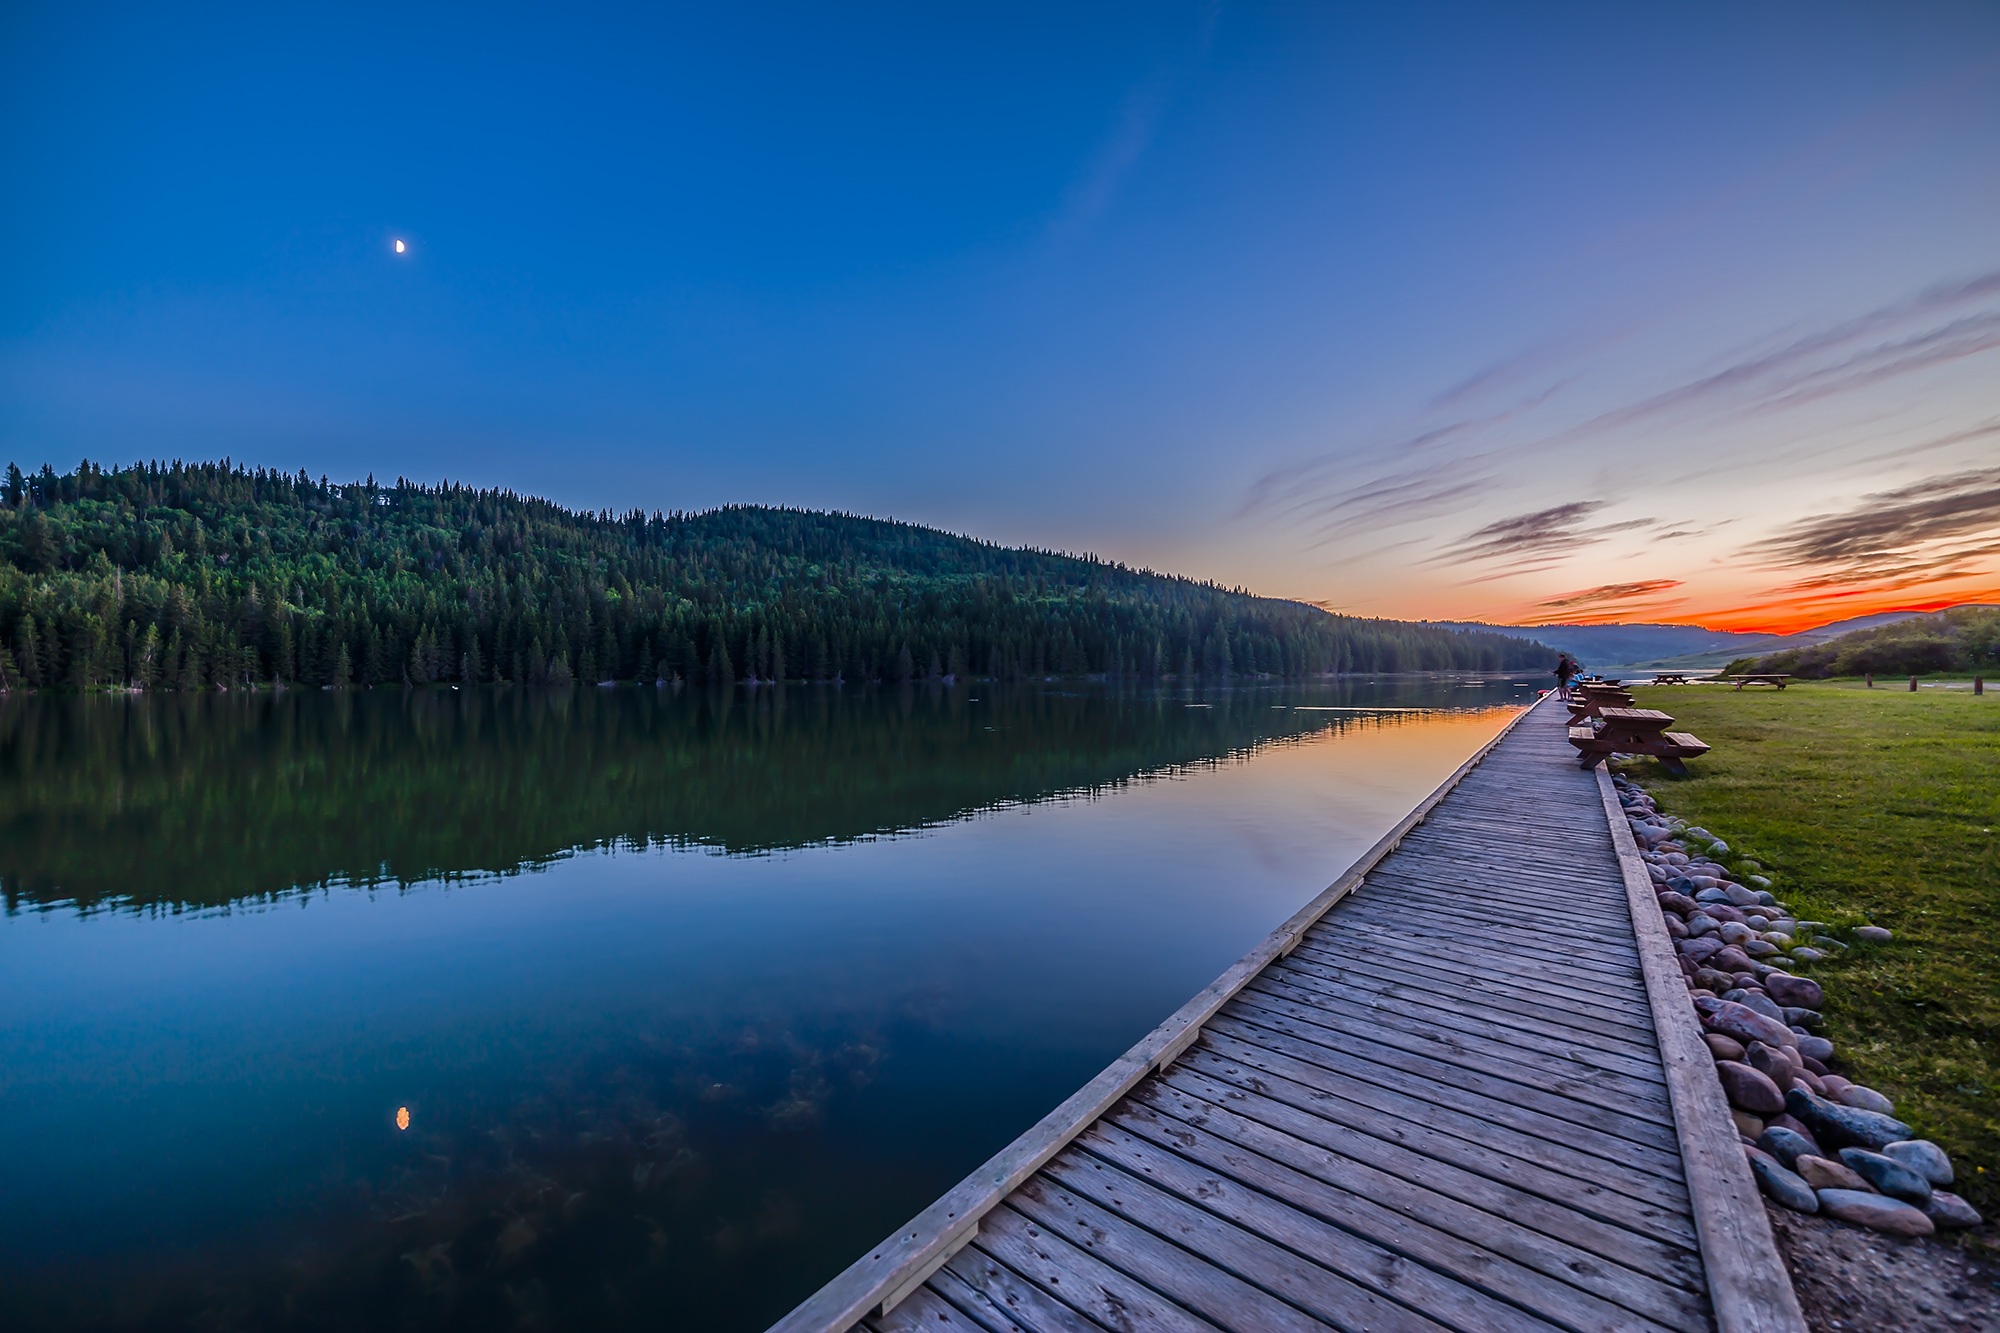
A full-frame fish-eye is the first choice I would recommend. But do note they produce a curved horizon, as above. If that’s not to your liking, buy an ultra-wide rectilinear lens. But none have as a wide a field as a fish-eye, and rectilinears will distort objects much more by stretching them at the corners.
Of the three full-frame fish-eyes I tested I liked the 10mm 7Artisans the best. It offered the best optical quality, nice fittings with its glow-in-the-dark markings, an excellent hard storage case, and it was compact.
The 12mm AstrHori was bright and relatively sharp, but much larger than the others so is not a lens you can tuck away in a bag in case you might need it. And its wild lens flares made it unsuitable for use wth the Sun or Moon in the frame, at least when shot wide open.
The 11mm TTArtisan was compact but darker than the others, showing its older coatings perhaps, and lower light transmission. Again, mine was an older unit.
The f/2 speed of the 7.5mm TTArtisan is great if you intend to take time-lapses or movies of the aurora. It would be good for sequences shot for tilt-dome planetariums.
Otherwise, the unique 220º 6mm AstrHori is perfect for capturing all the sky and ground below on one frame. It would be good for shooting stills or time-lapses of auroras or sky motion for planetarium projection, especially in non-tilt-dome (flat-floor) theatres.
I hope this test has helped you make a choice. We have some fine lenses to pick from now, and at appealing prices, compared to the DSLR days when there were few fish-eyes on offer, all costly.
— Alan, May 27, 2026 / © 2026 Alan Dyer / AmazingSky.com


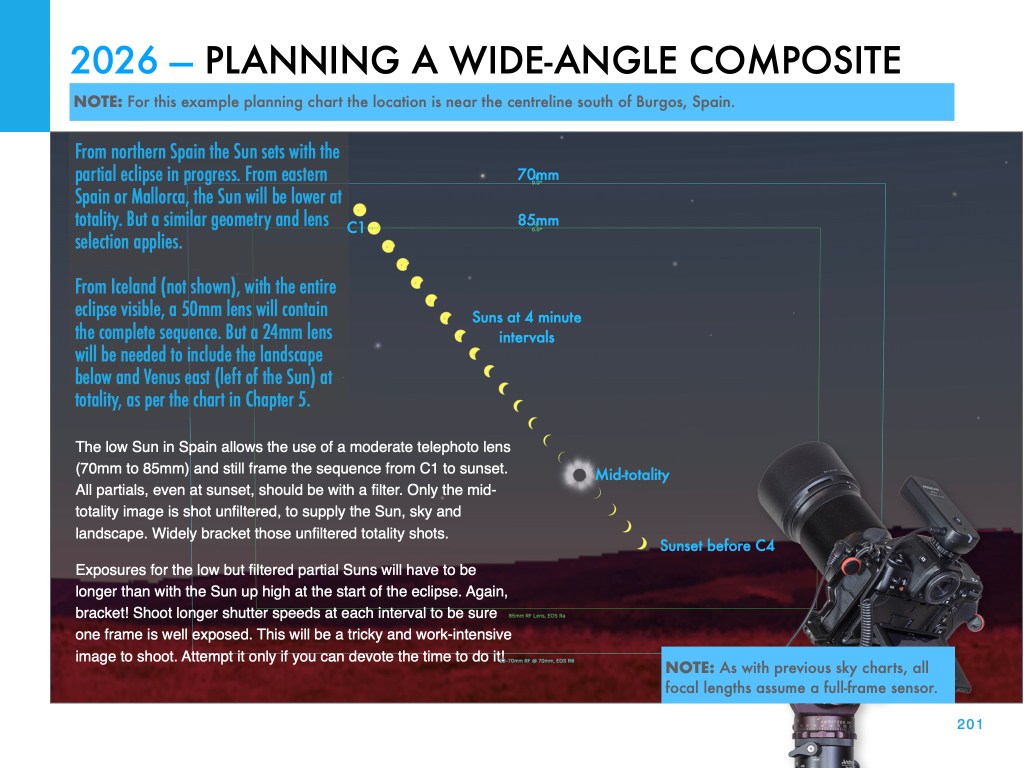
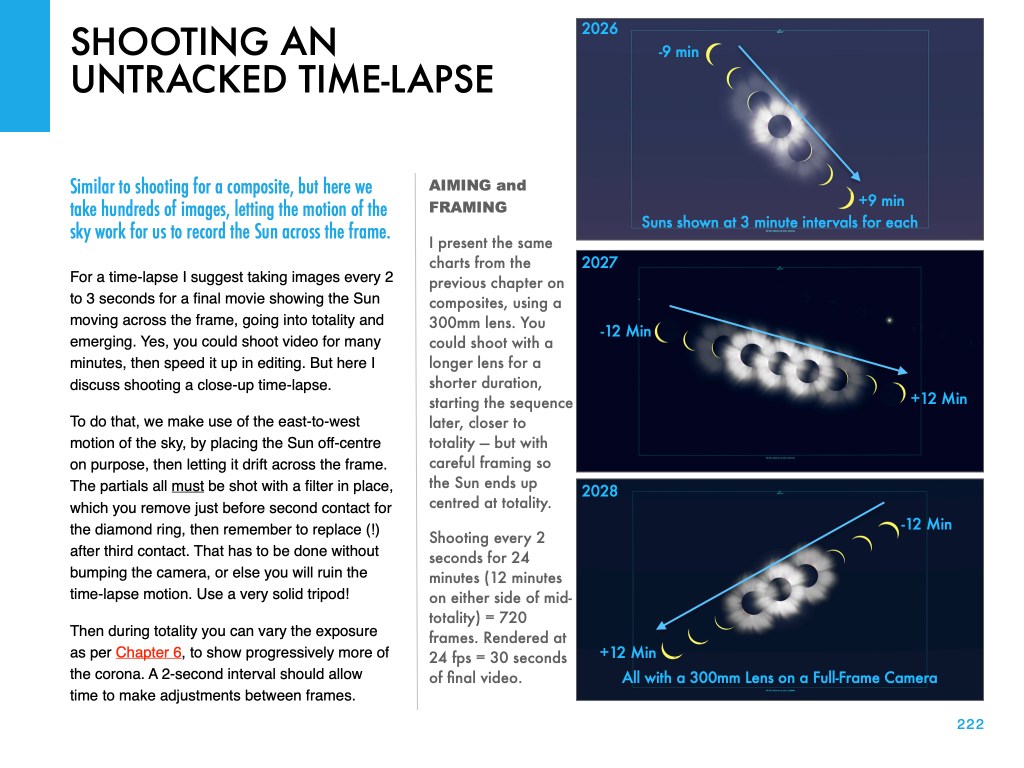
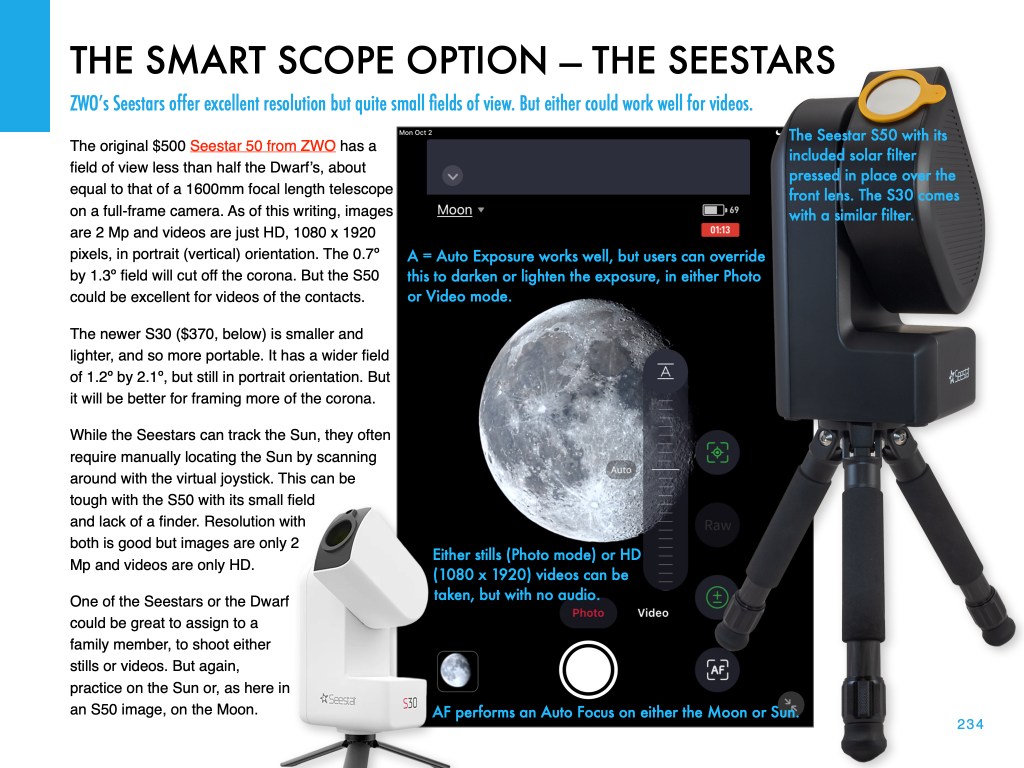
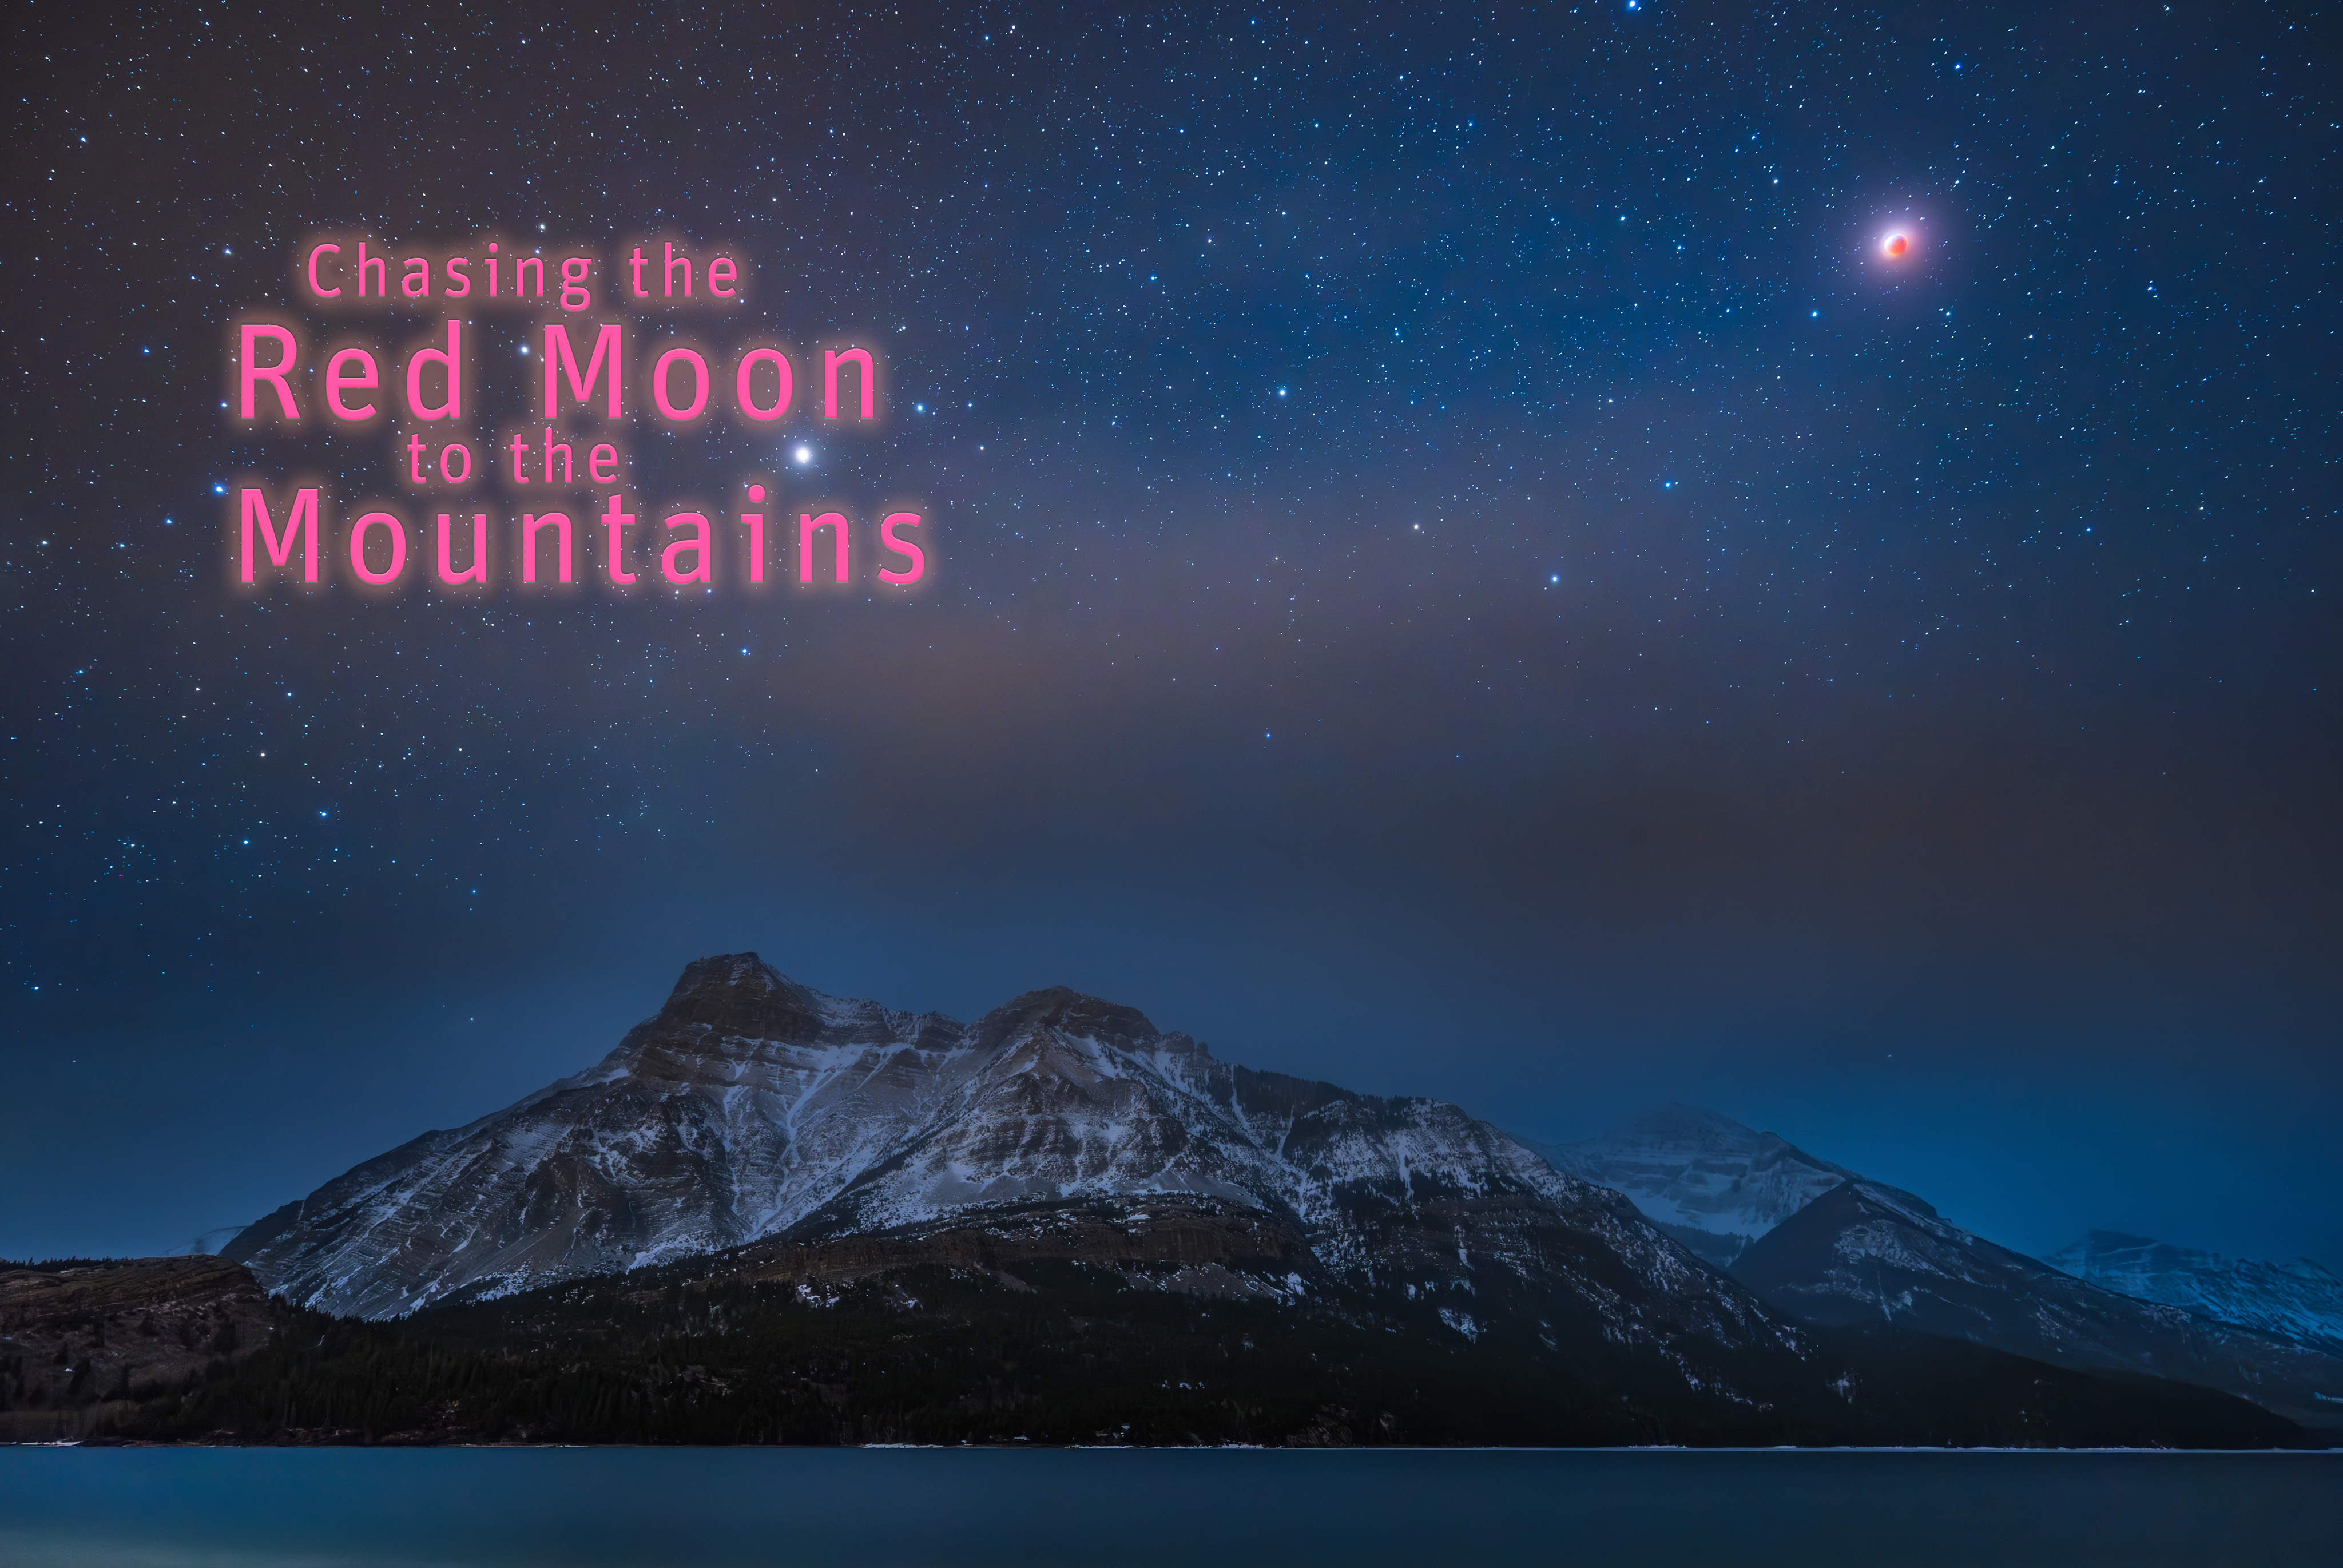
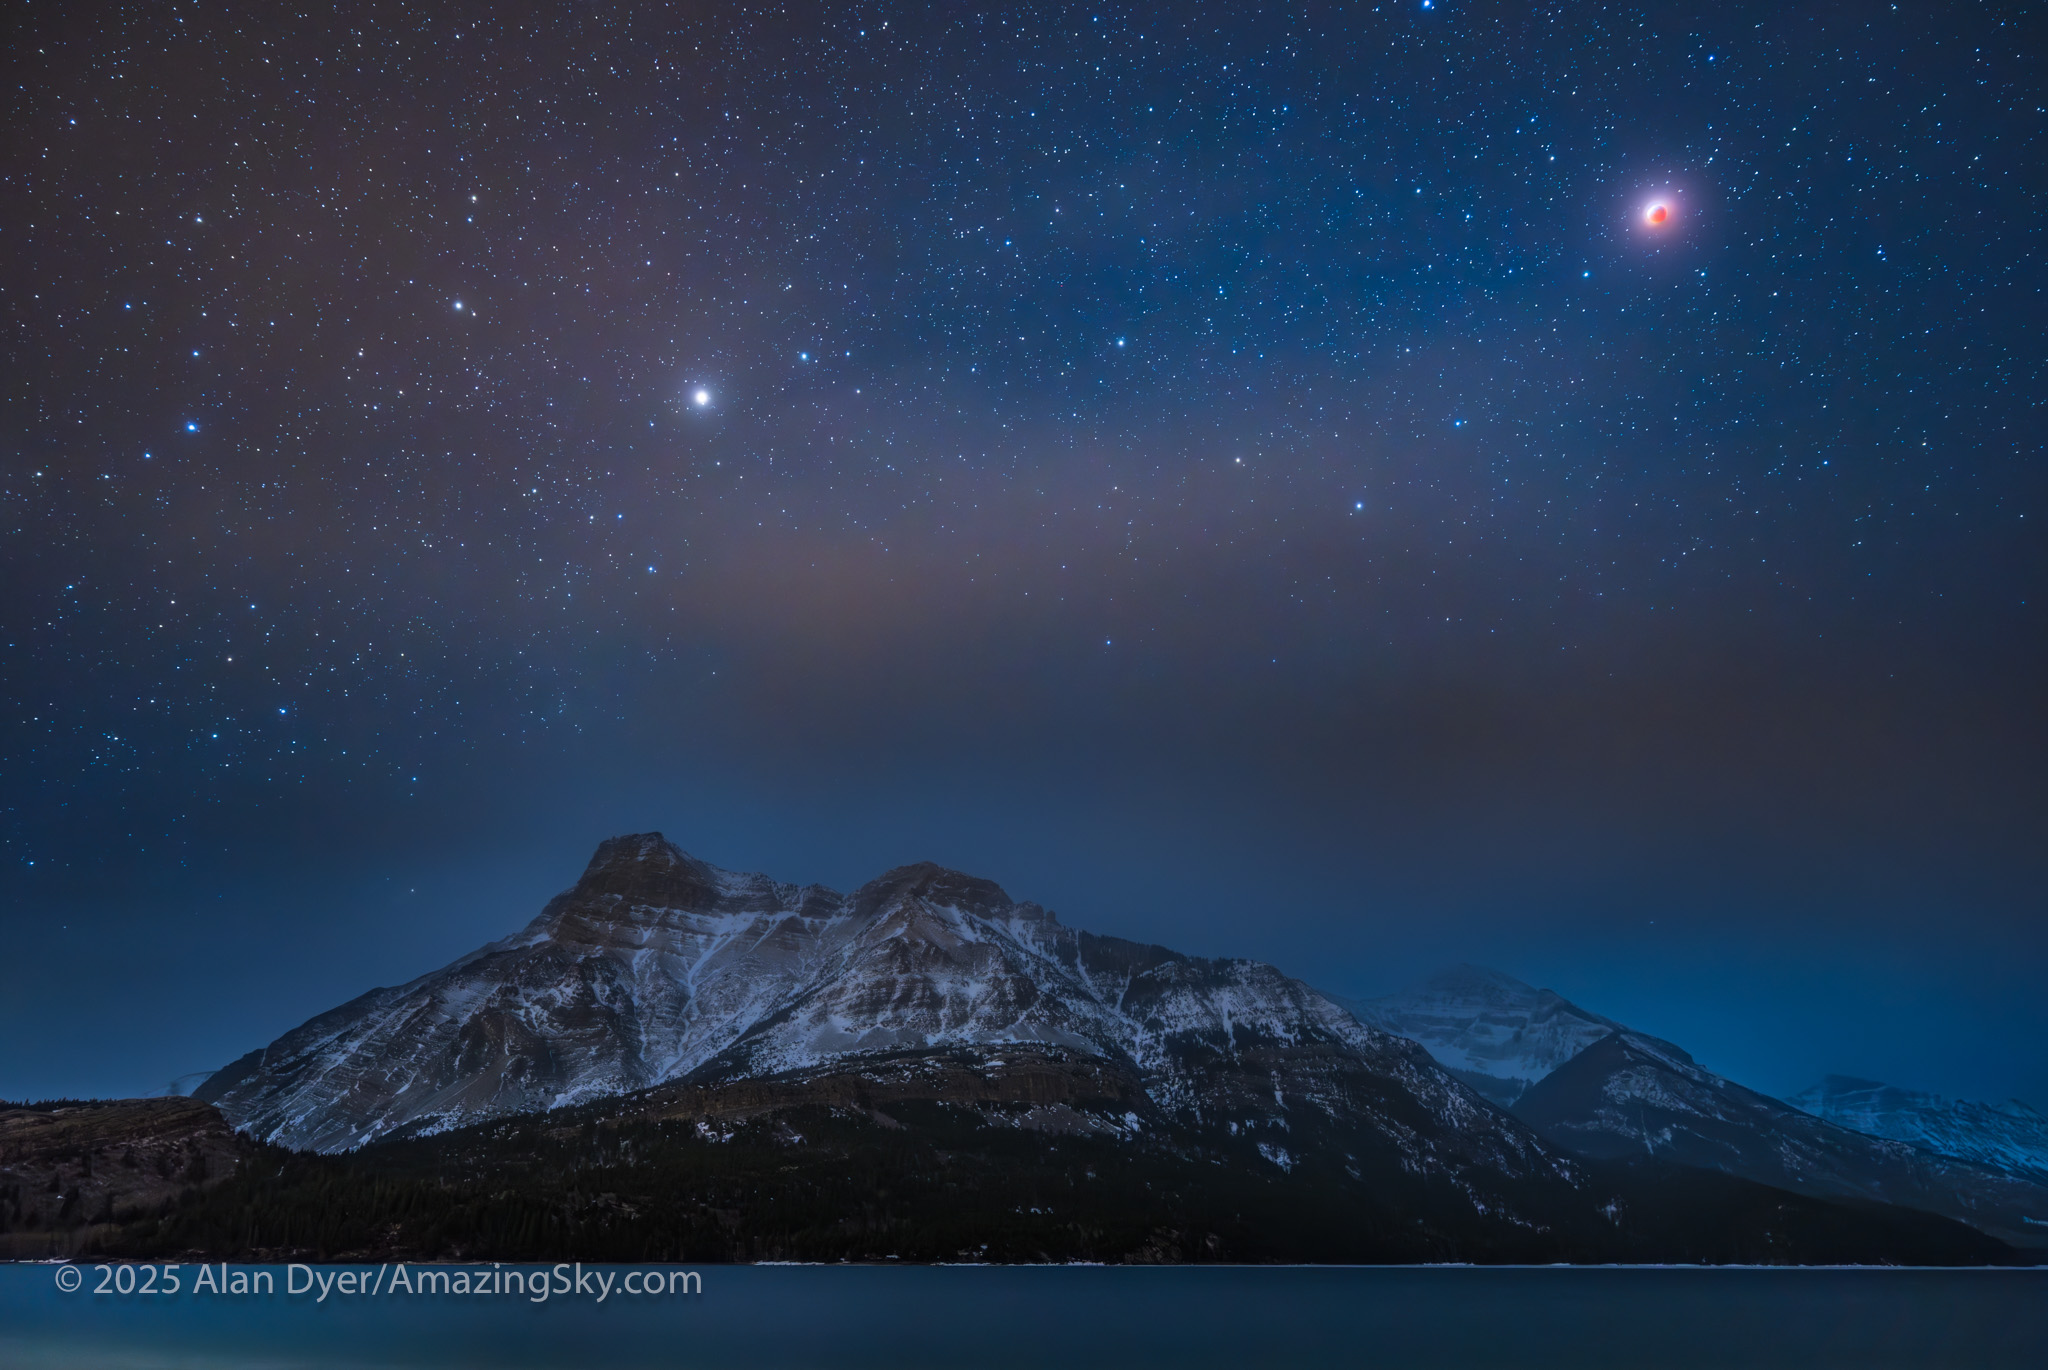
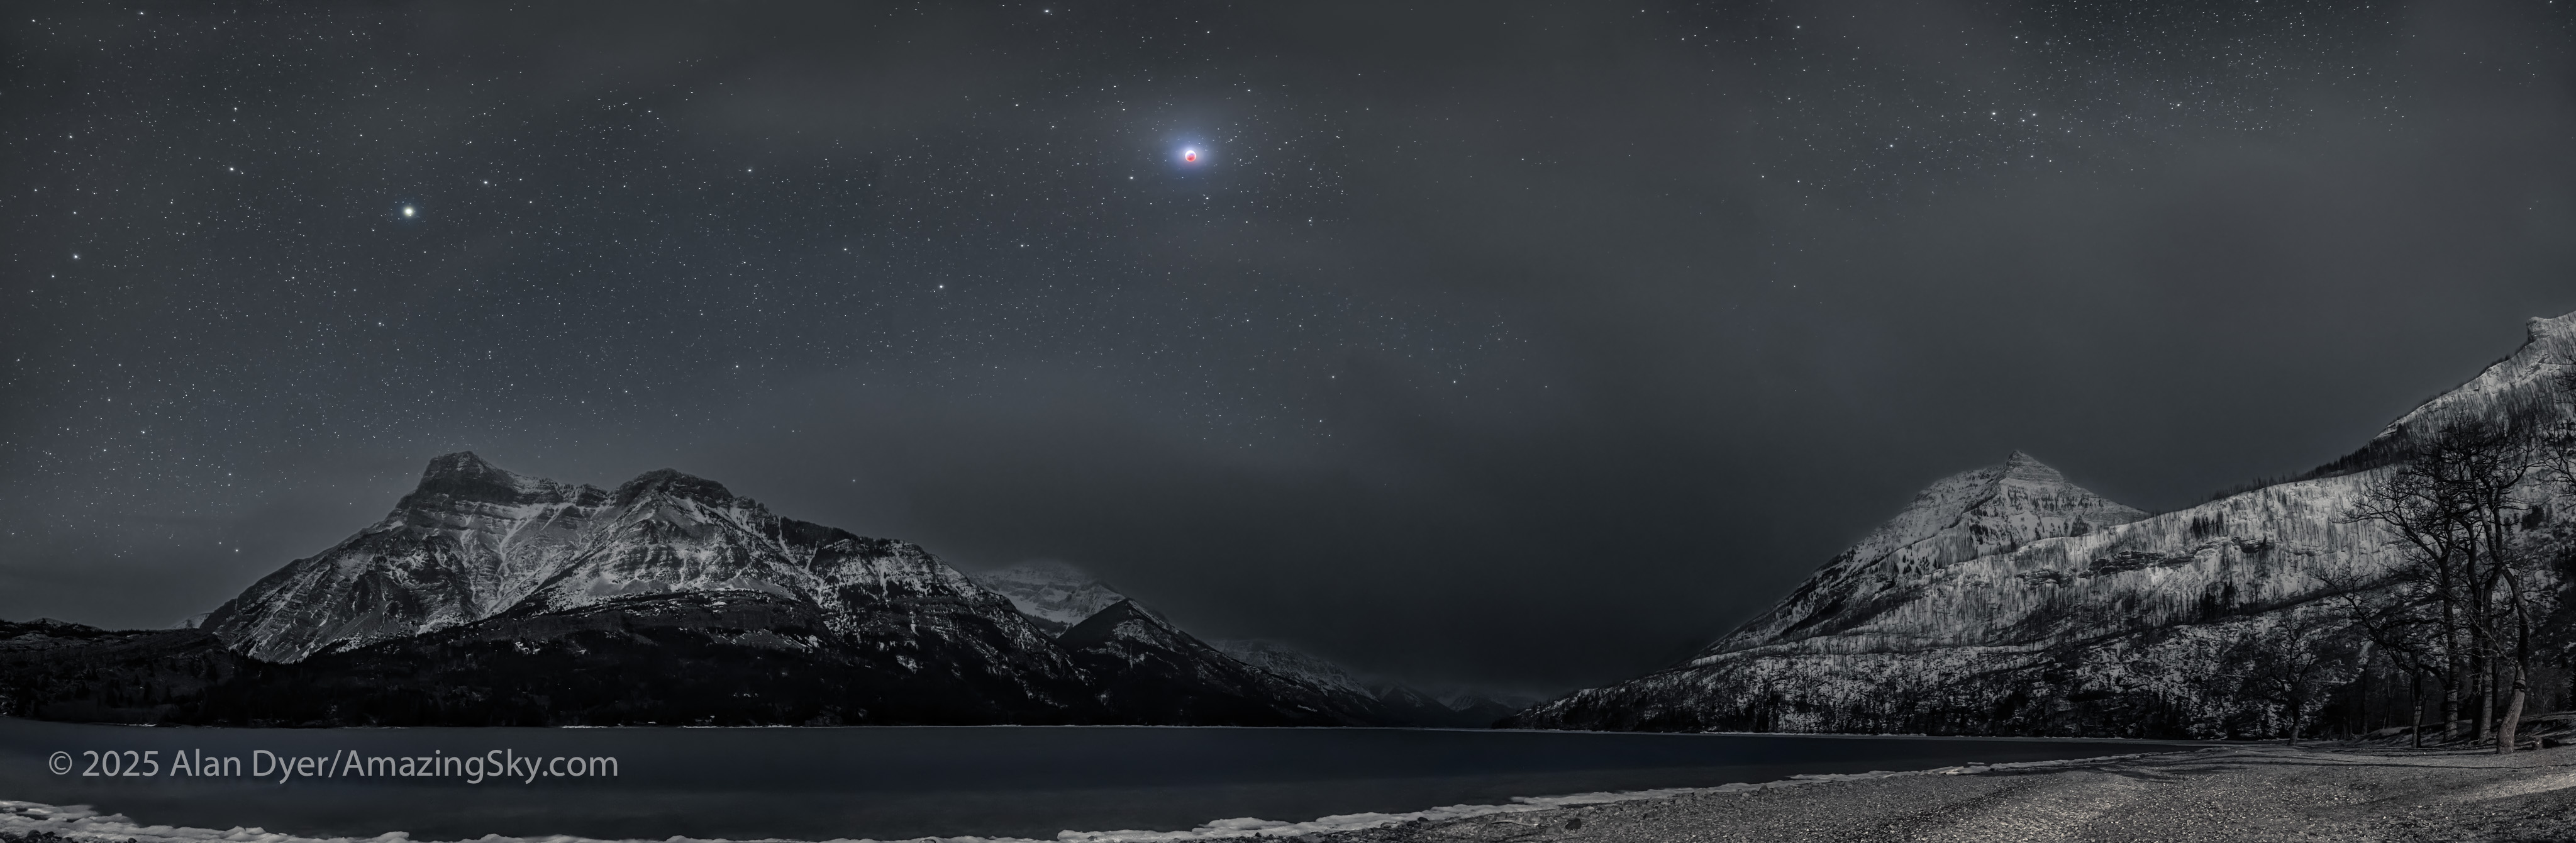
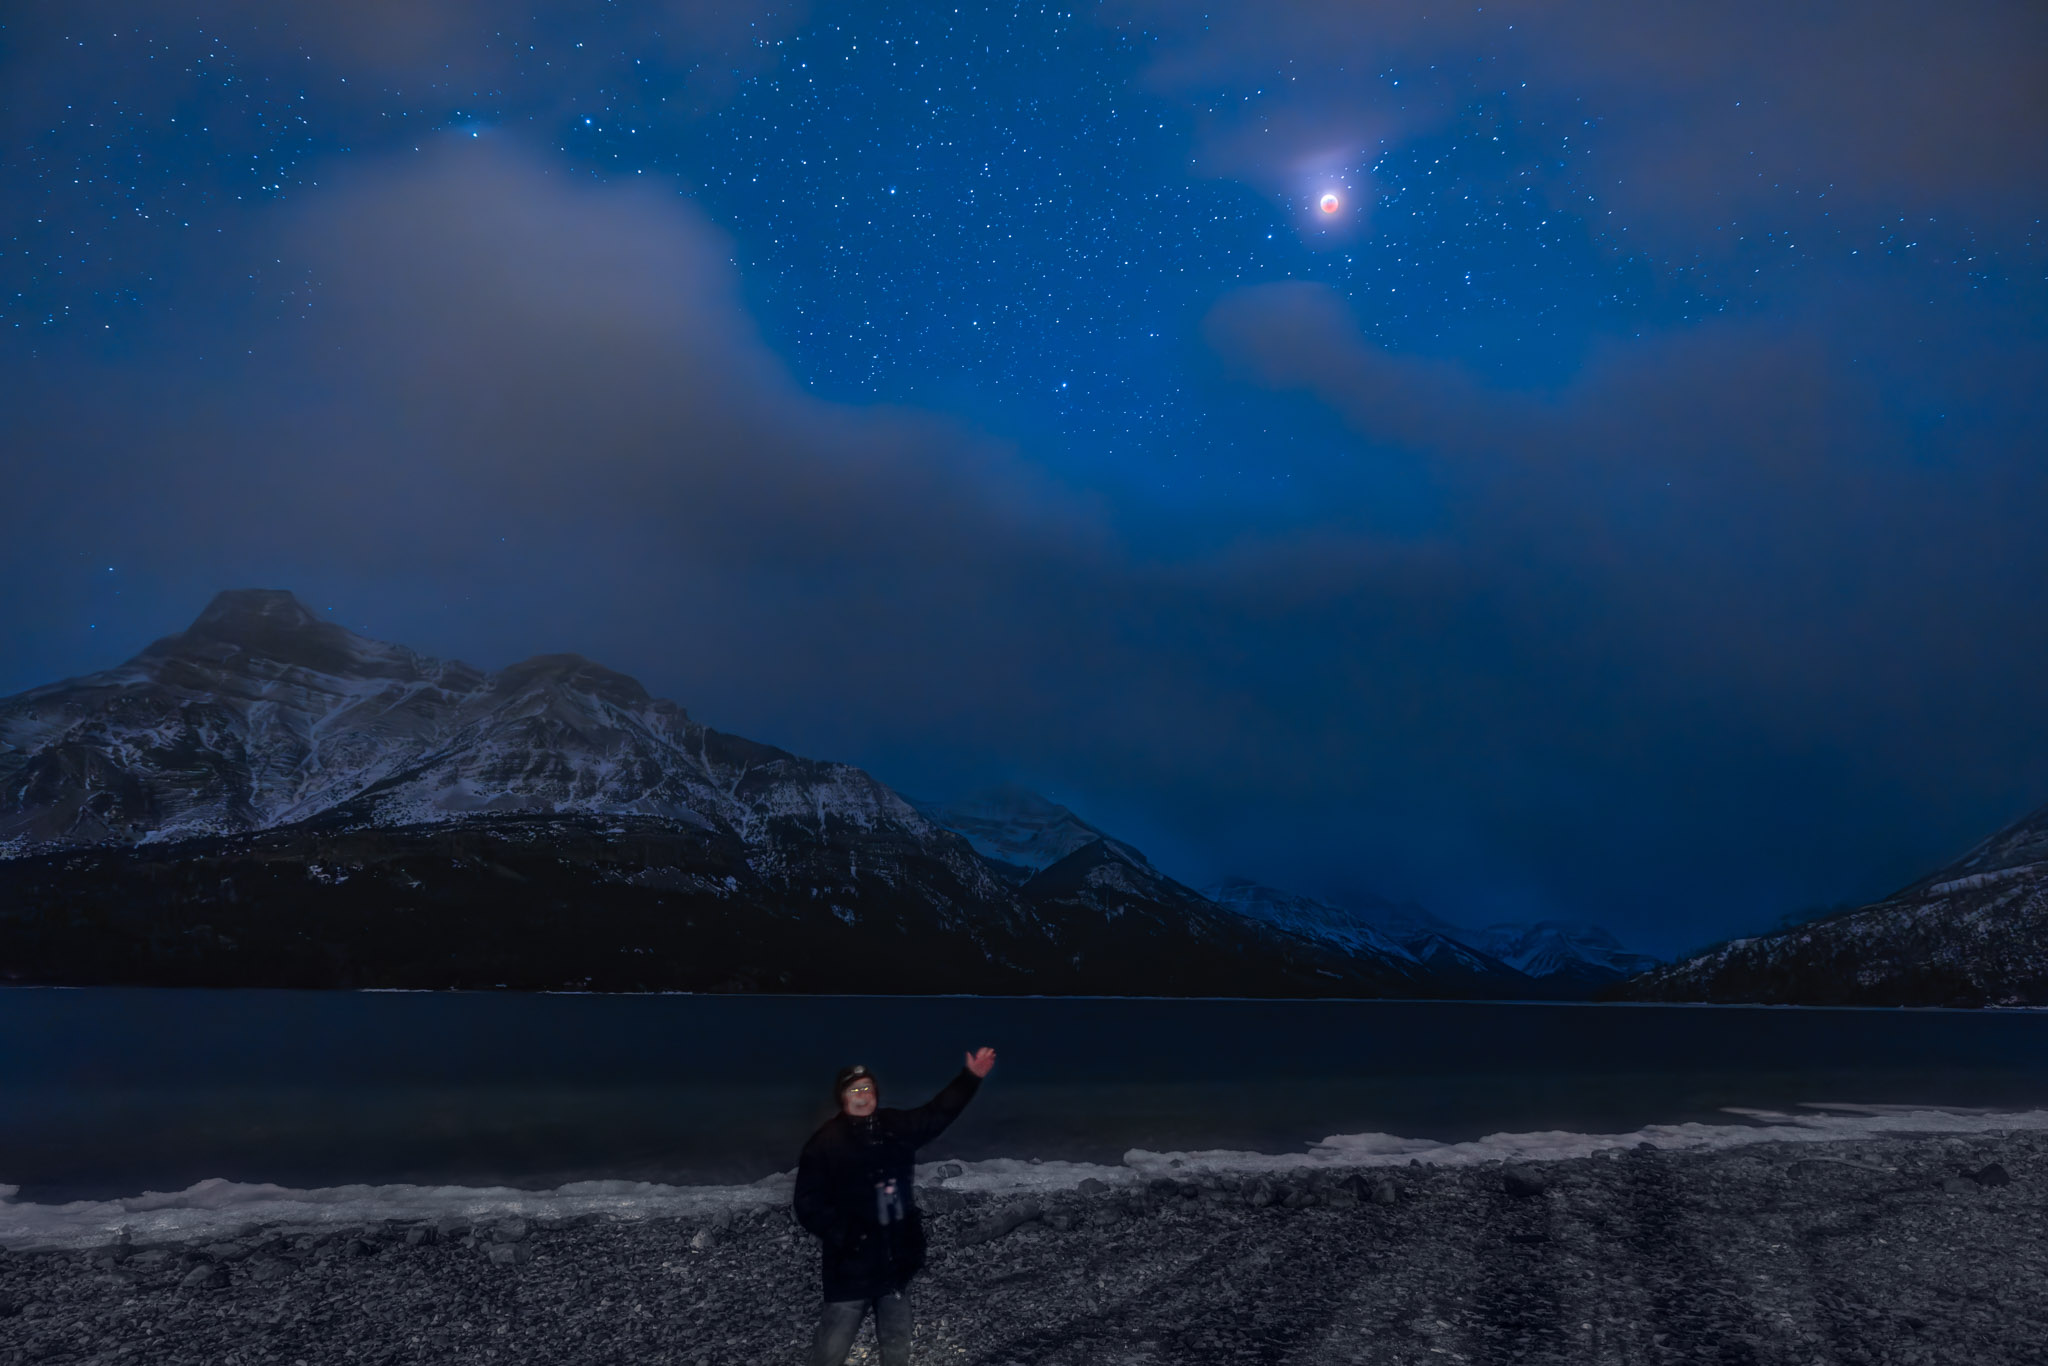


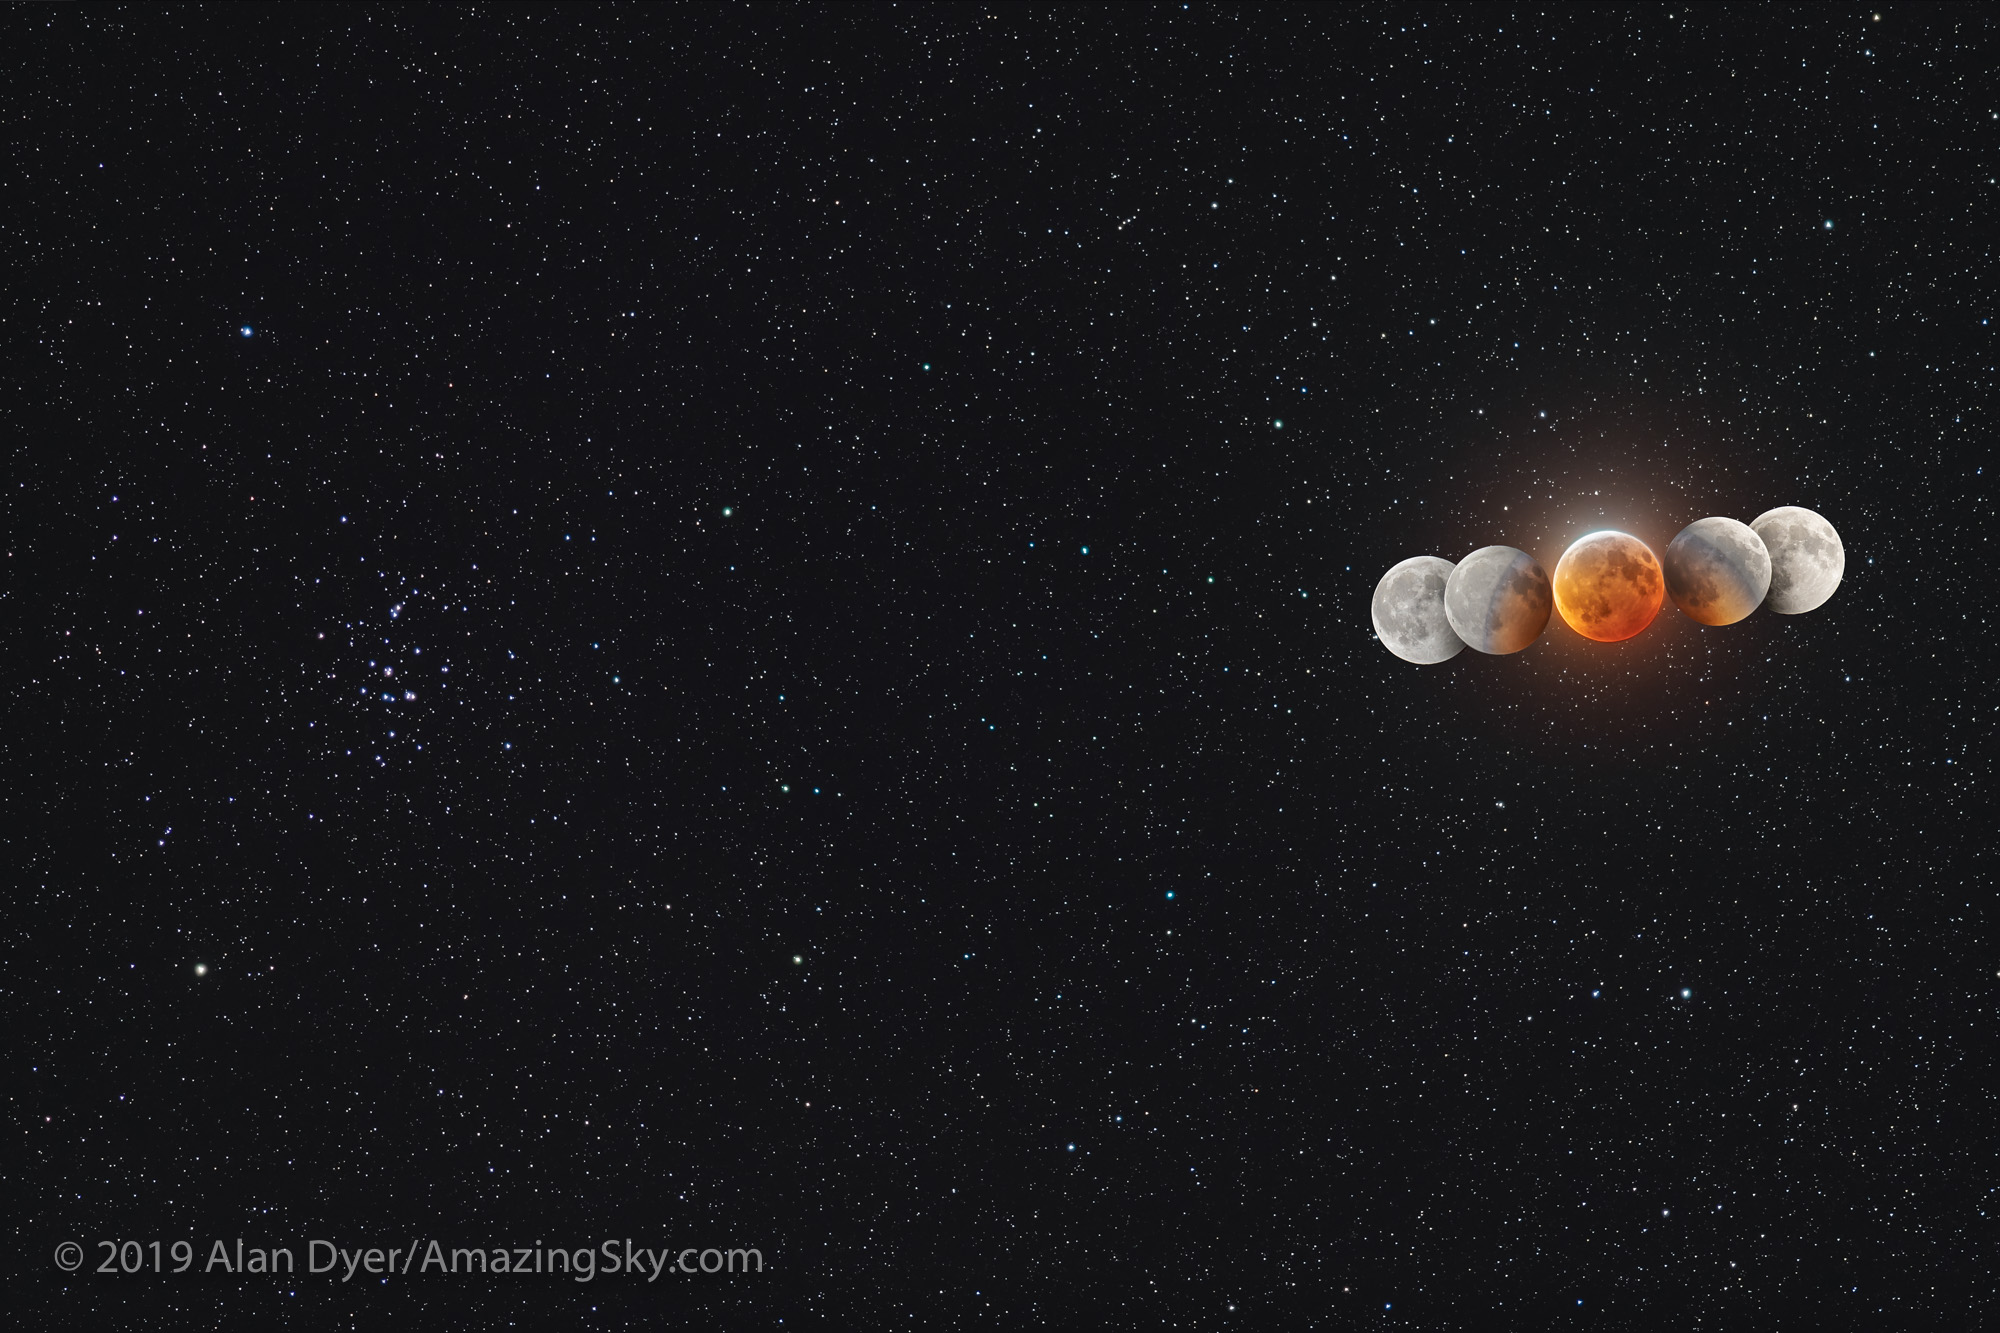


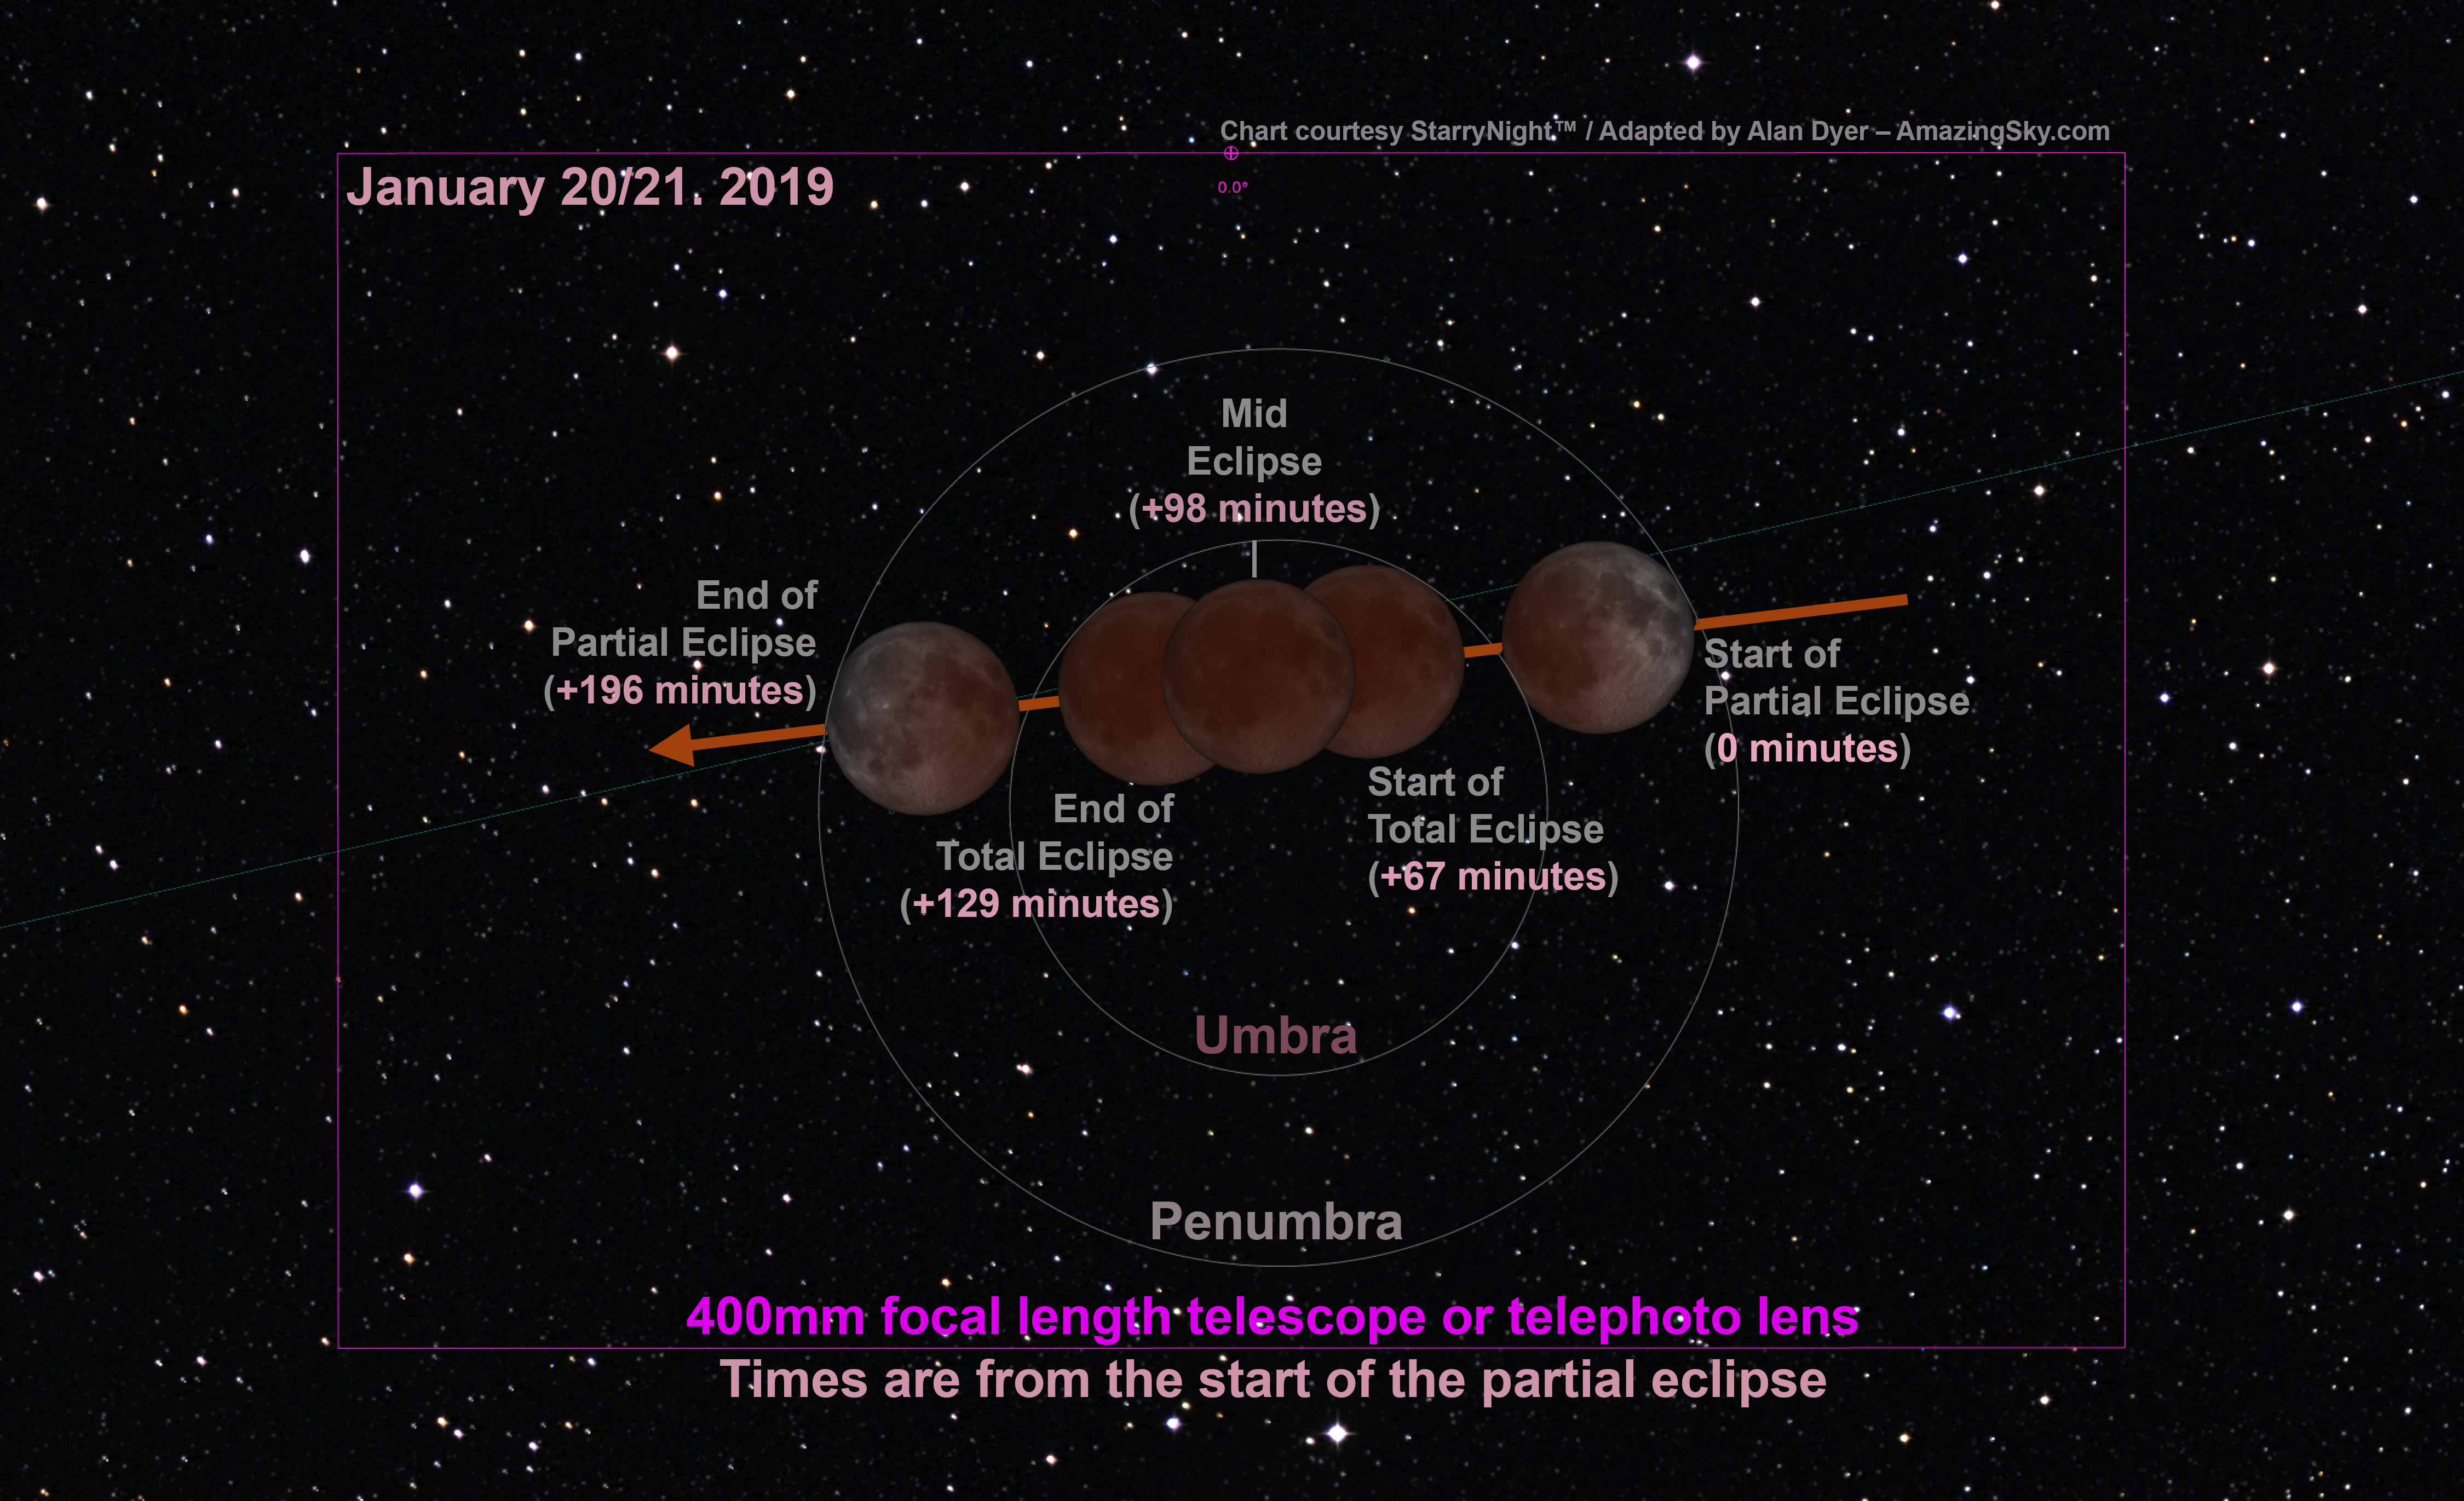
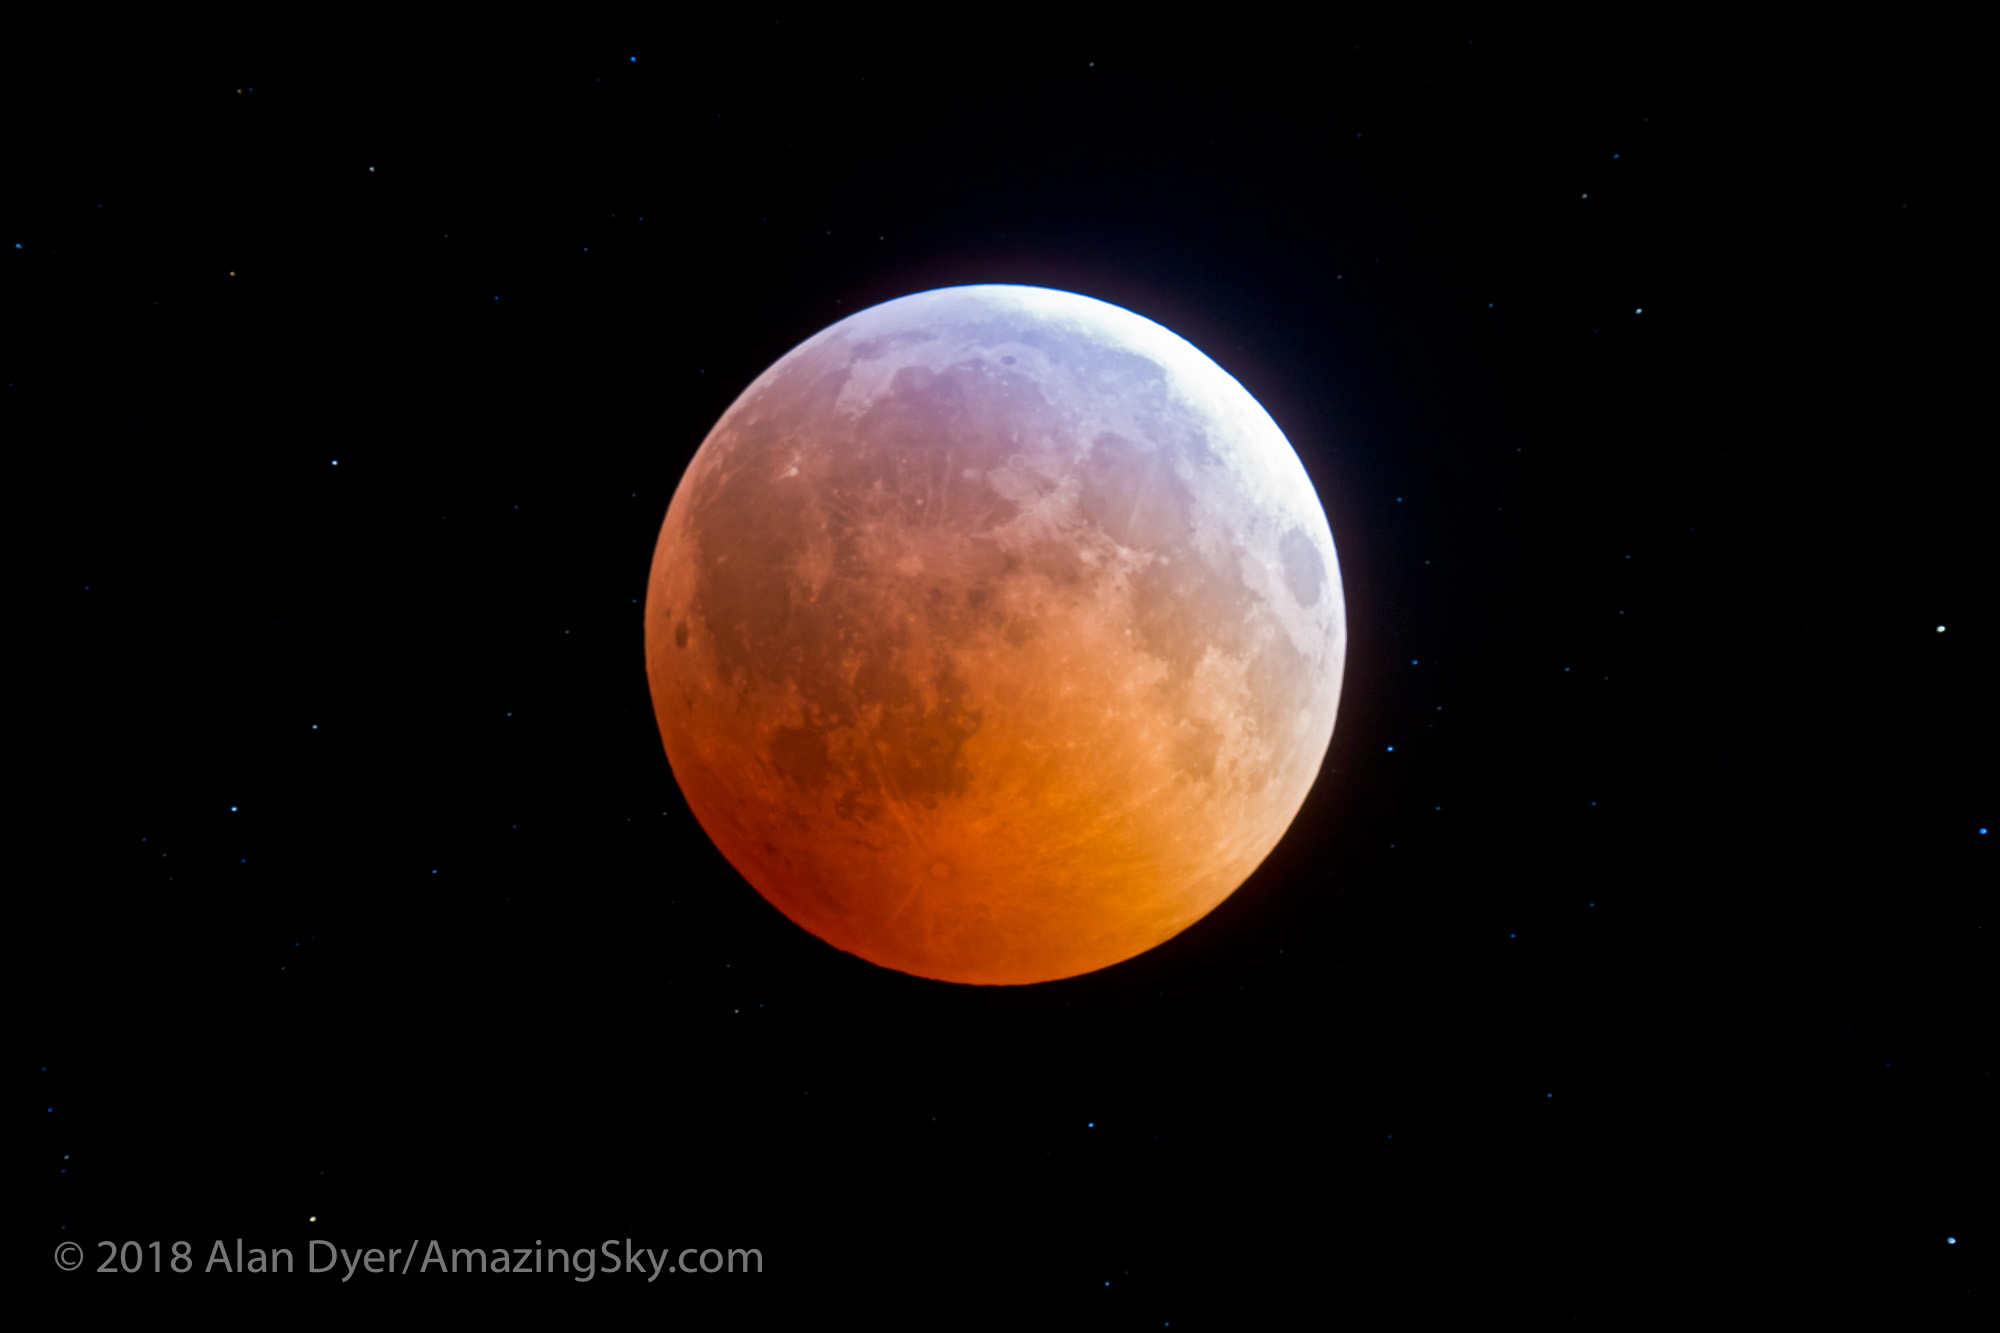
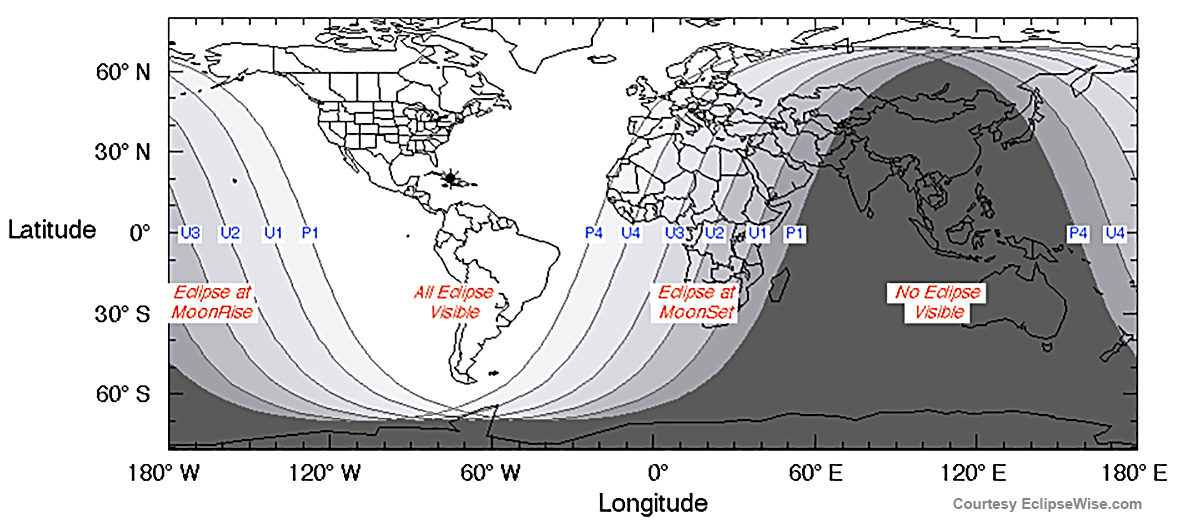
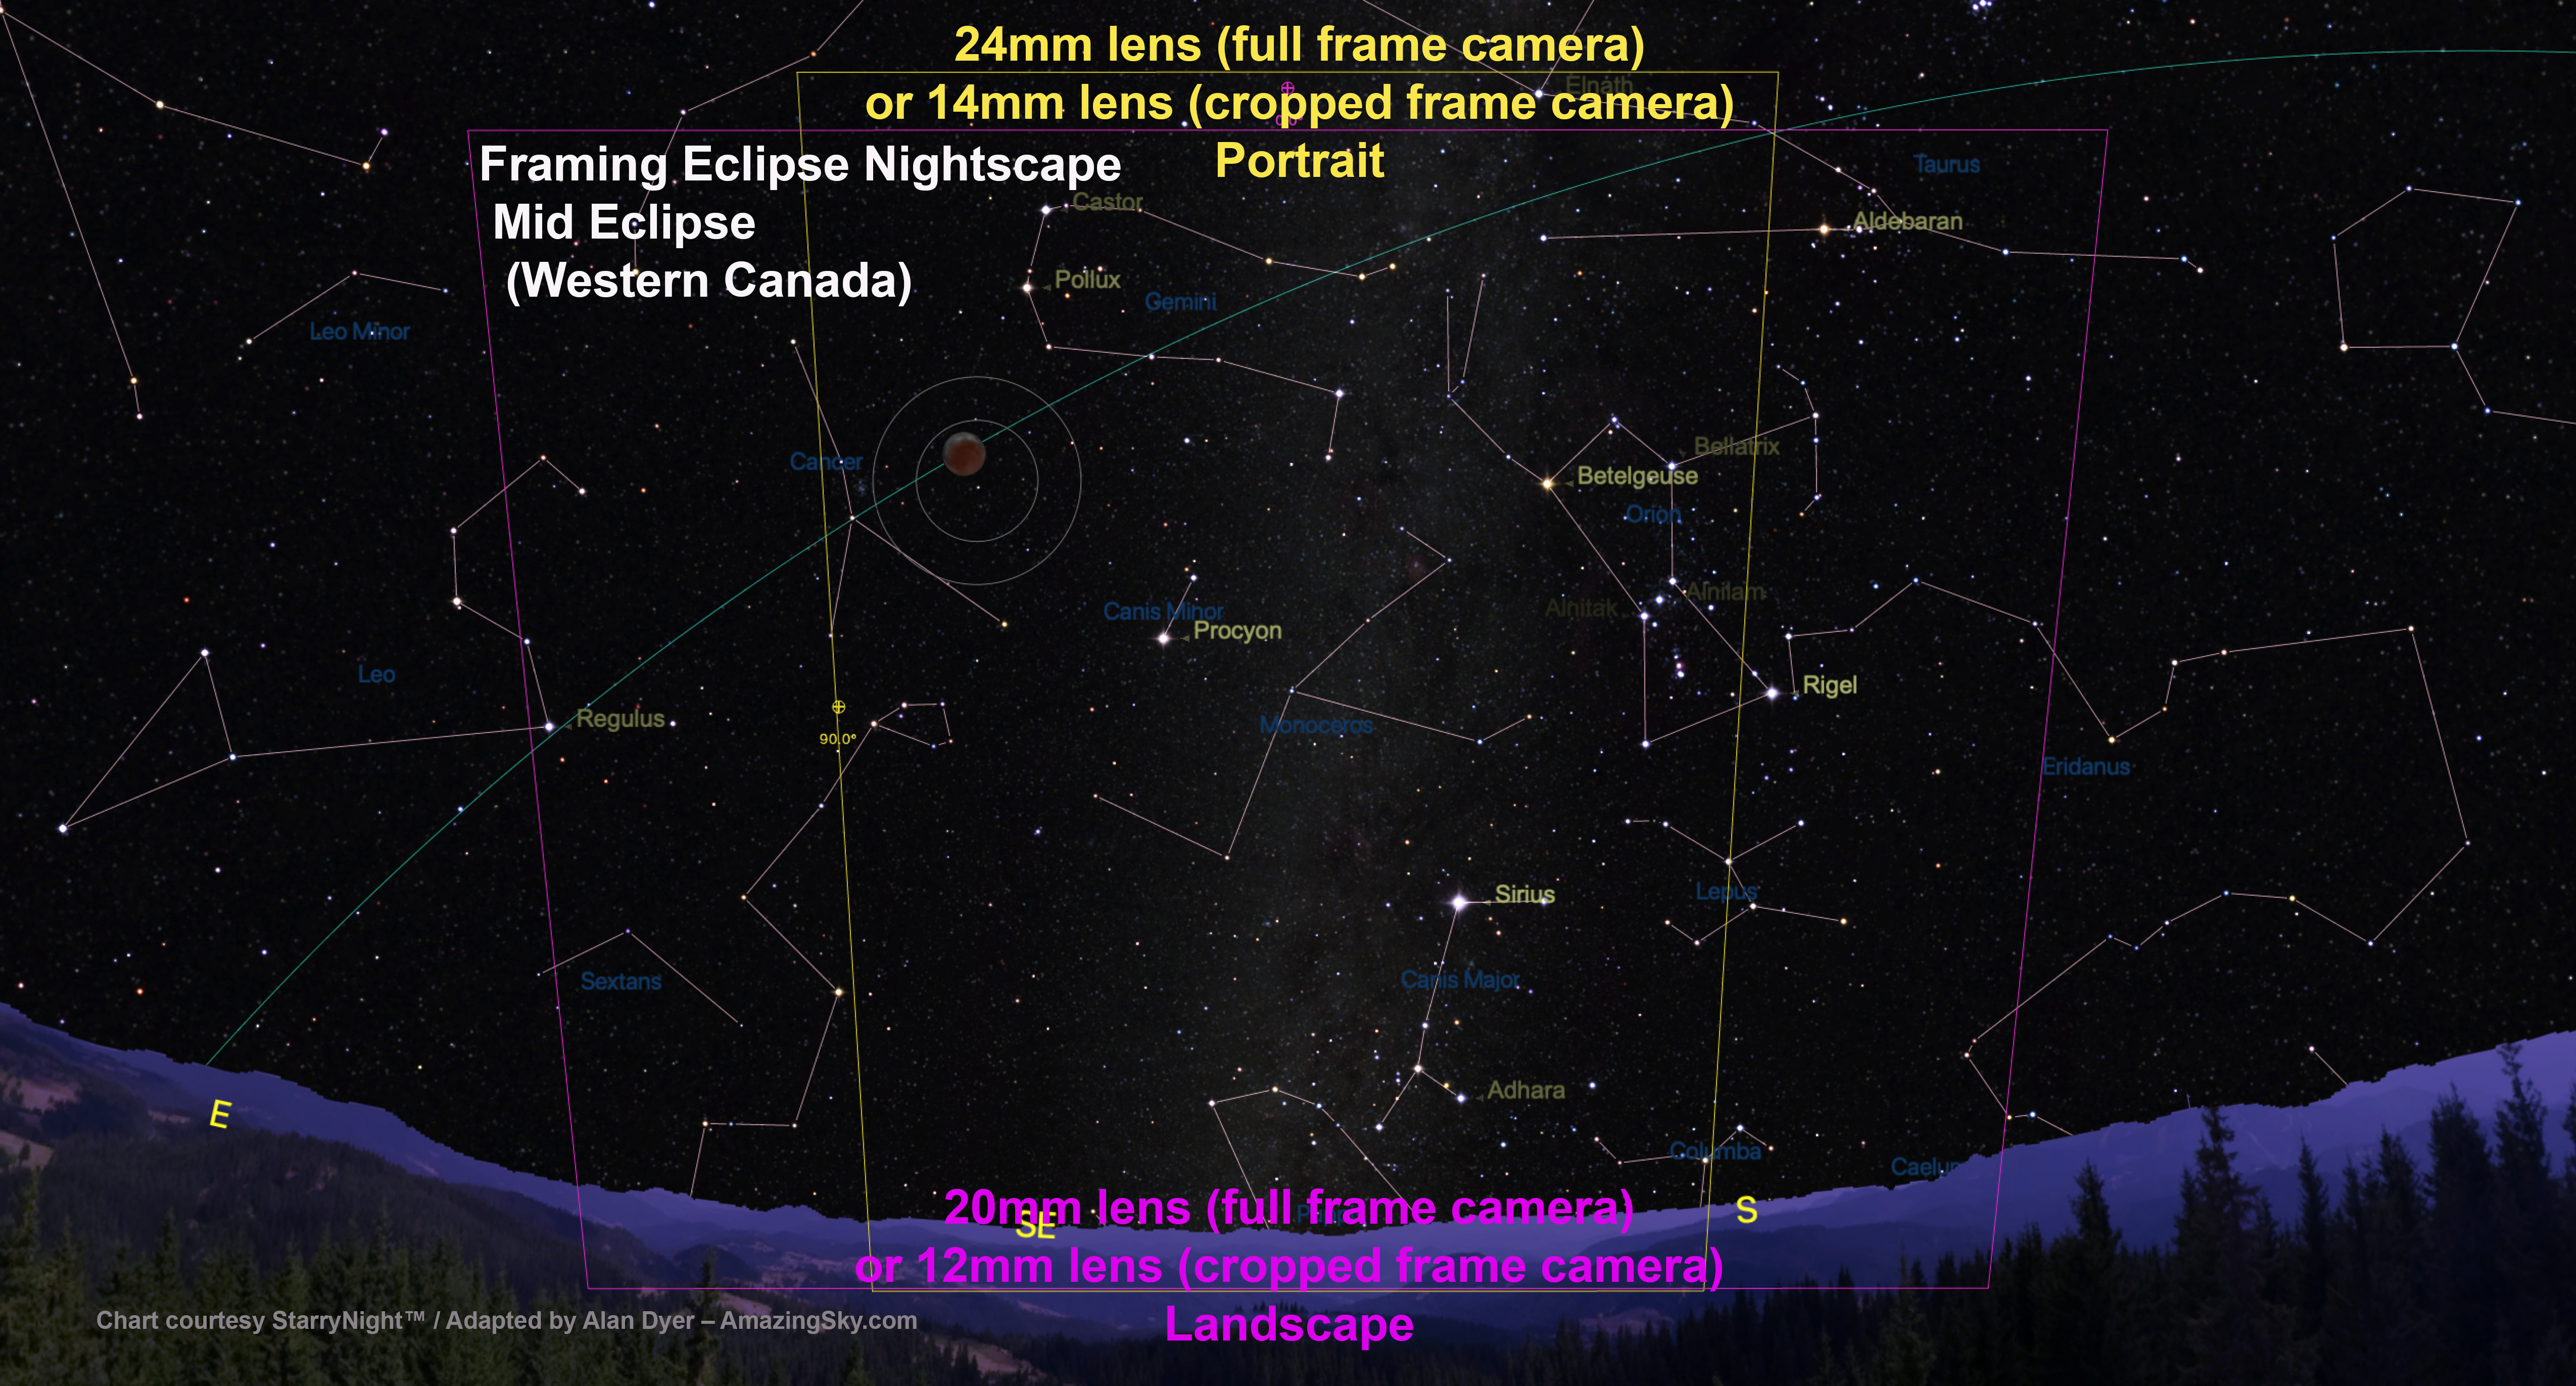
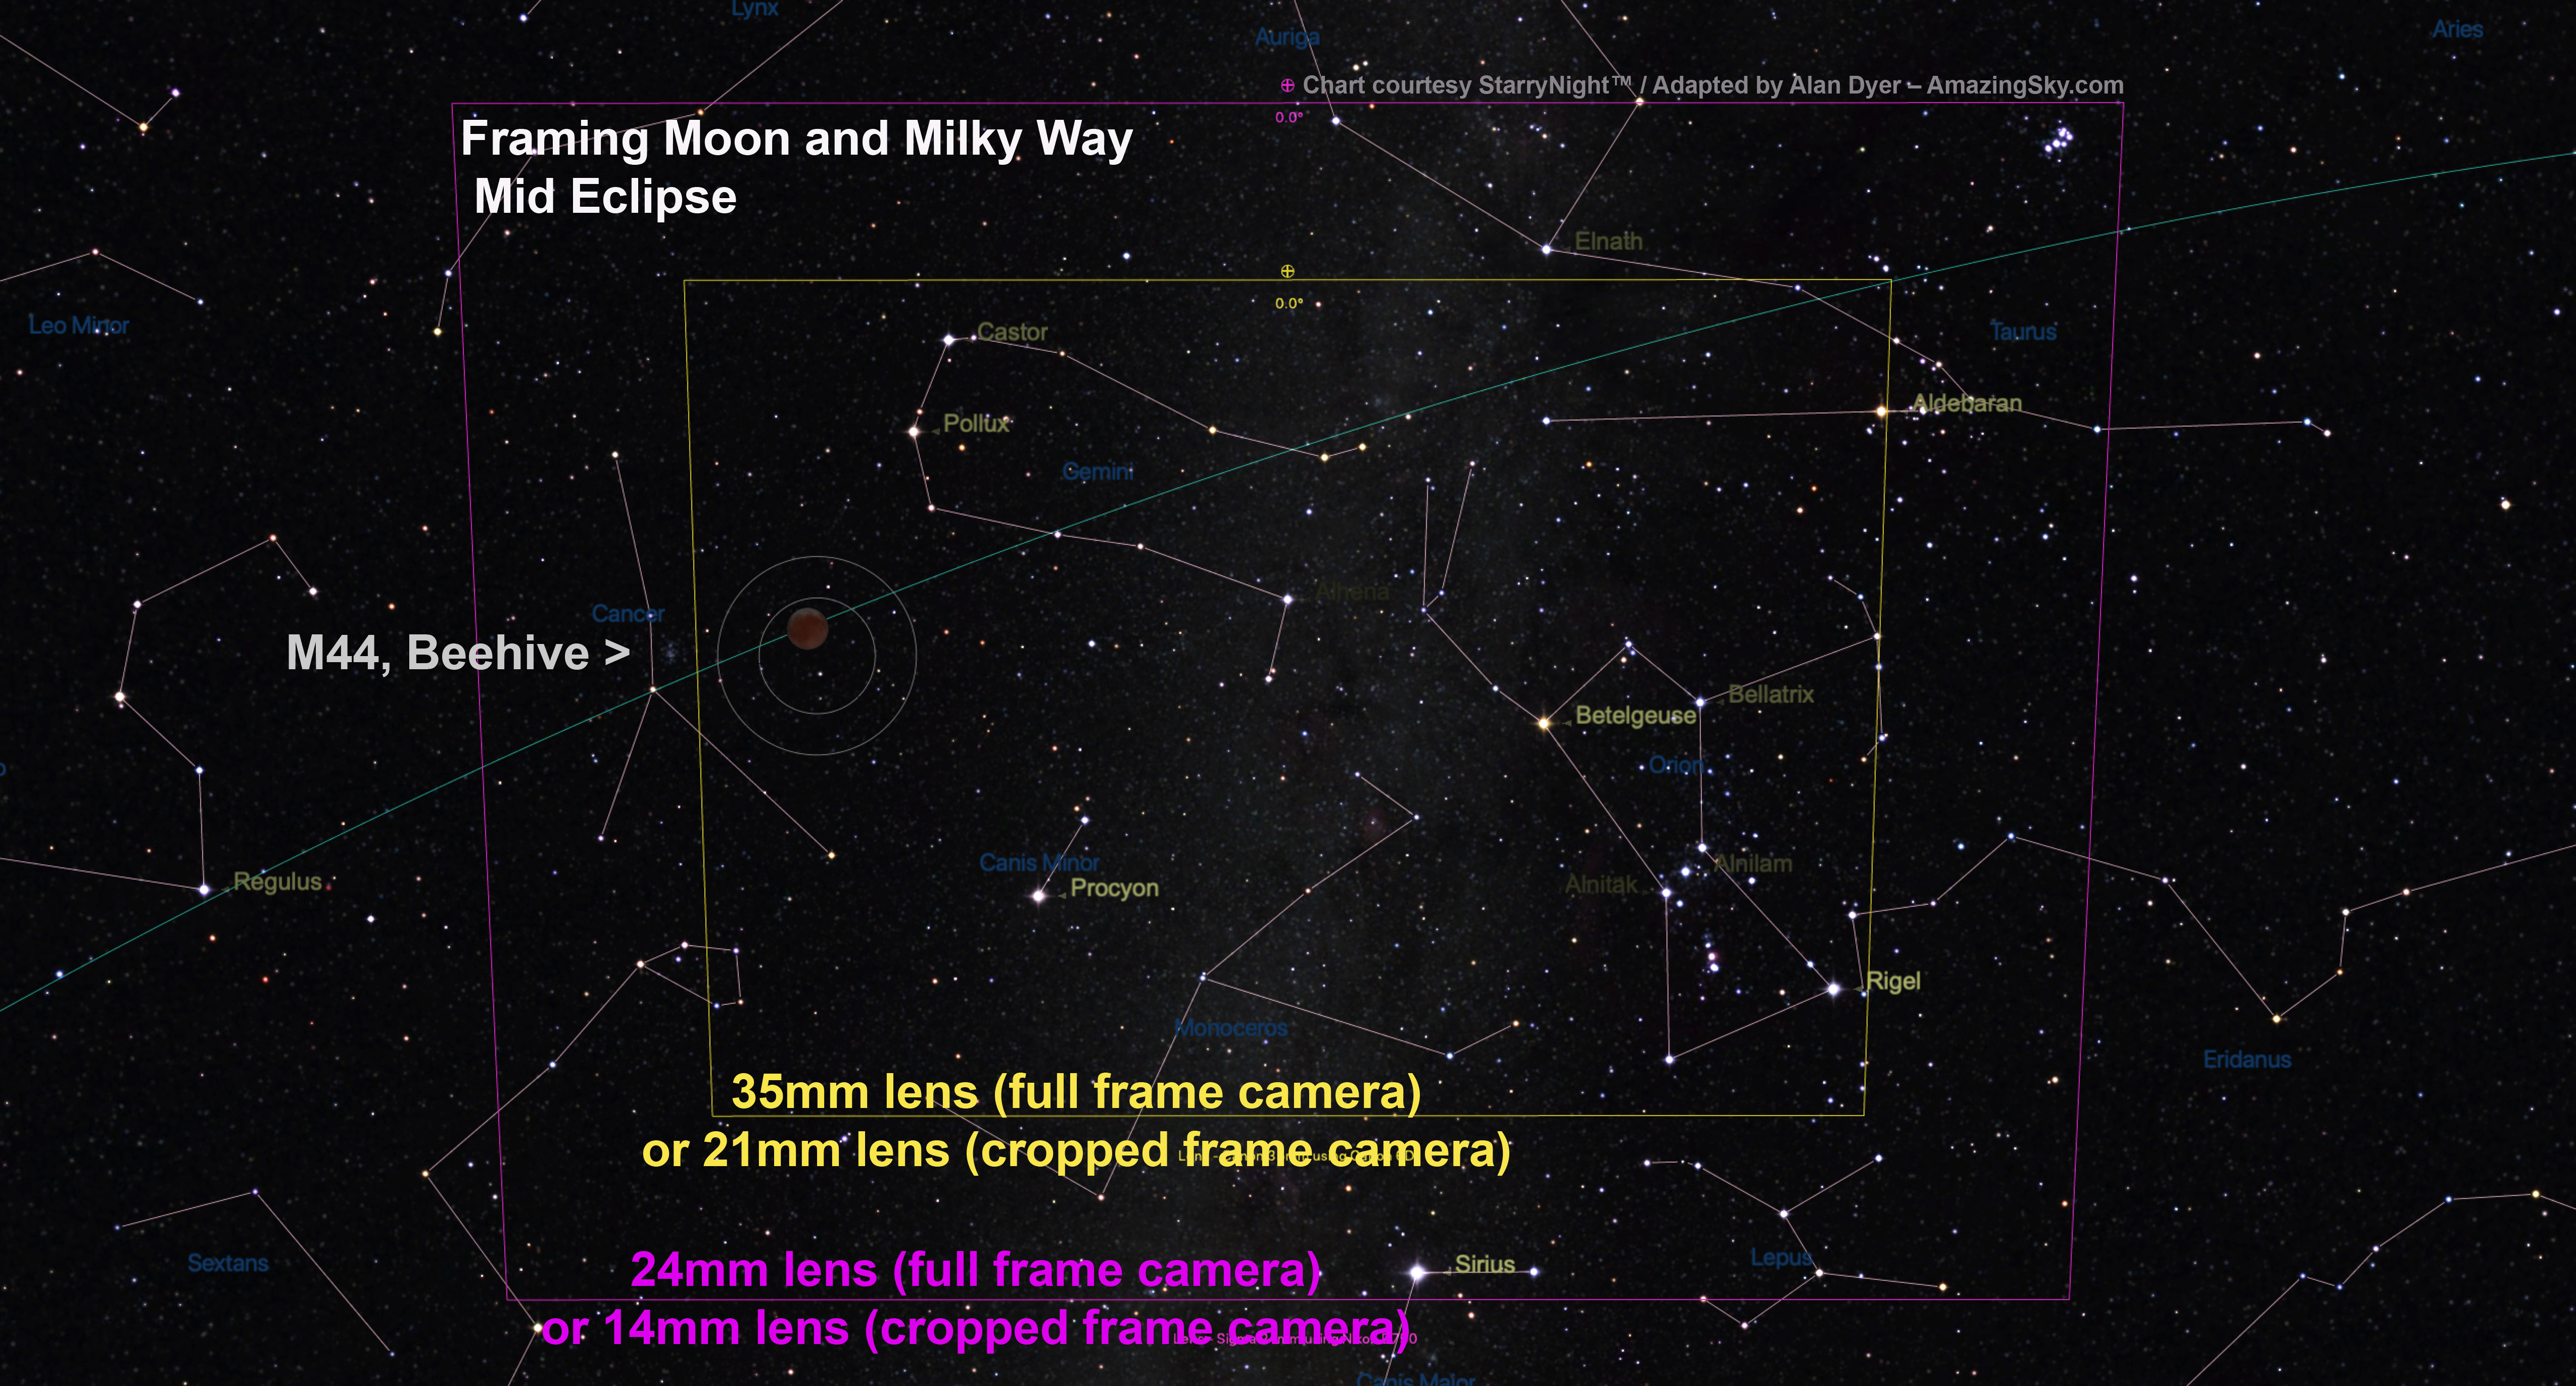
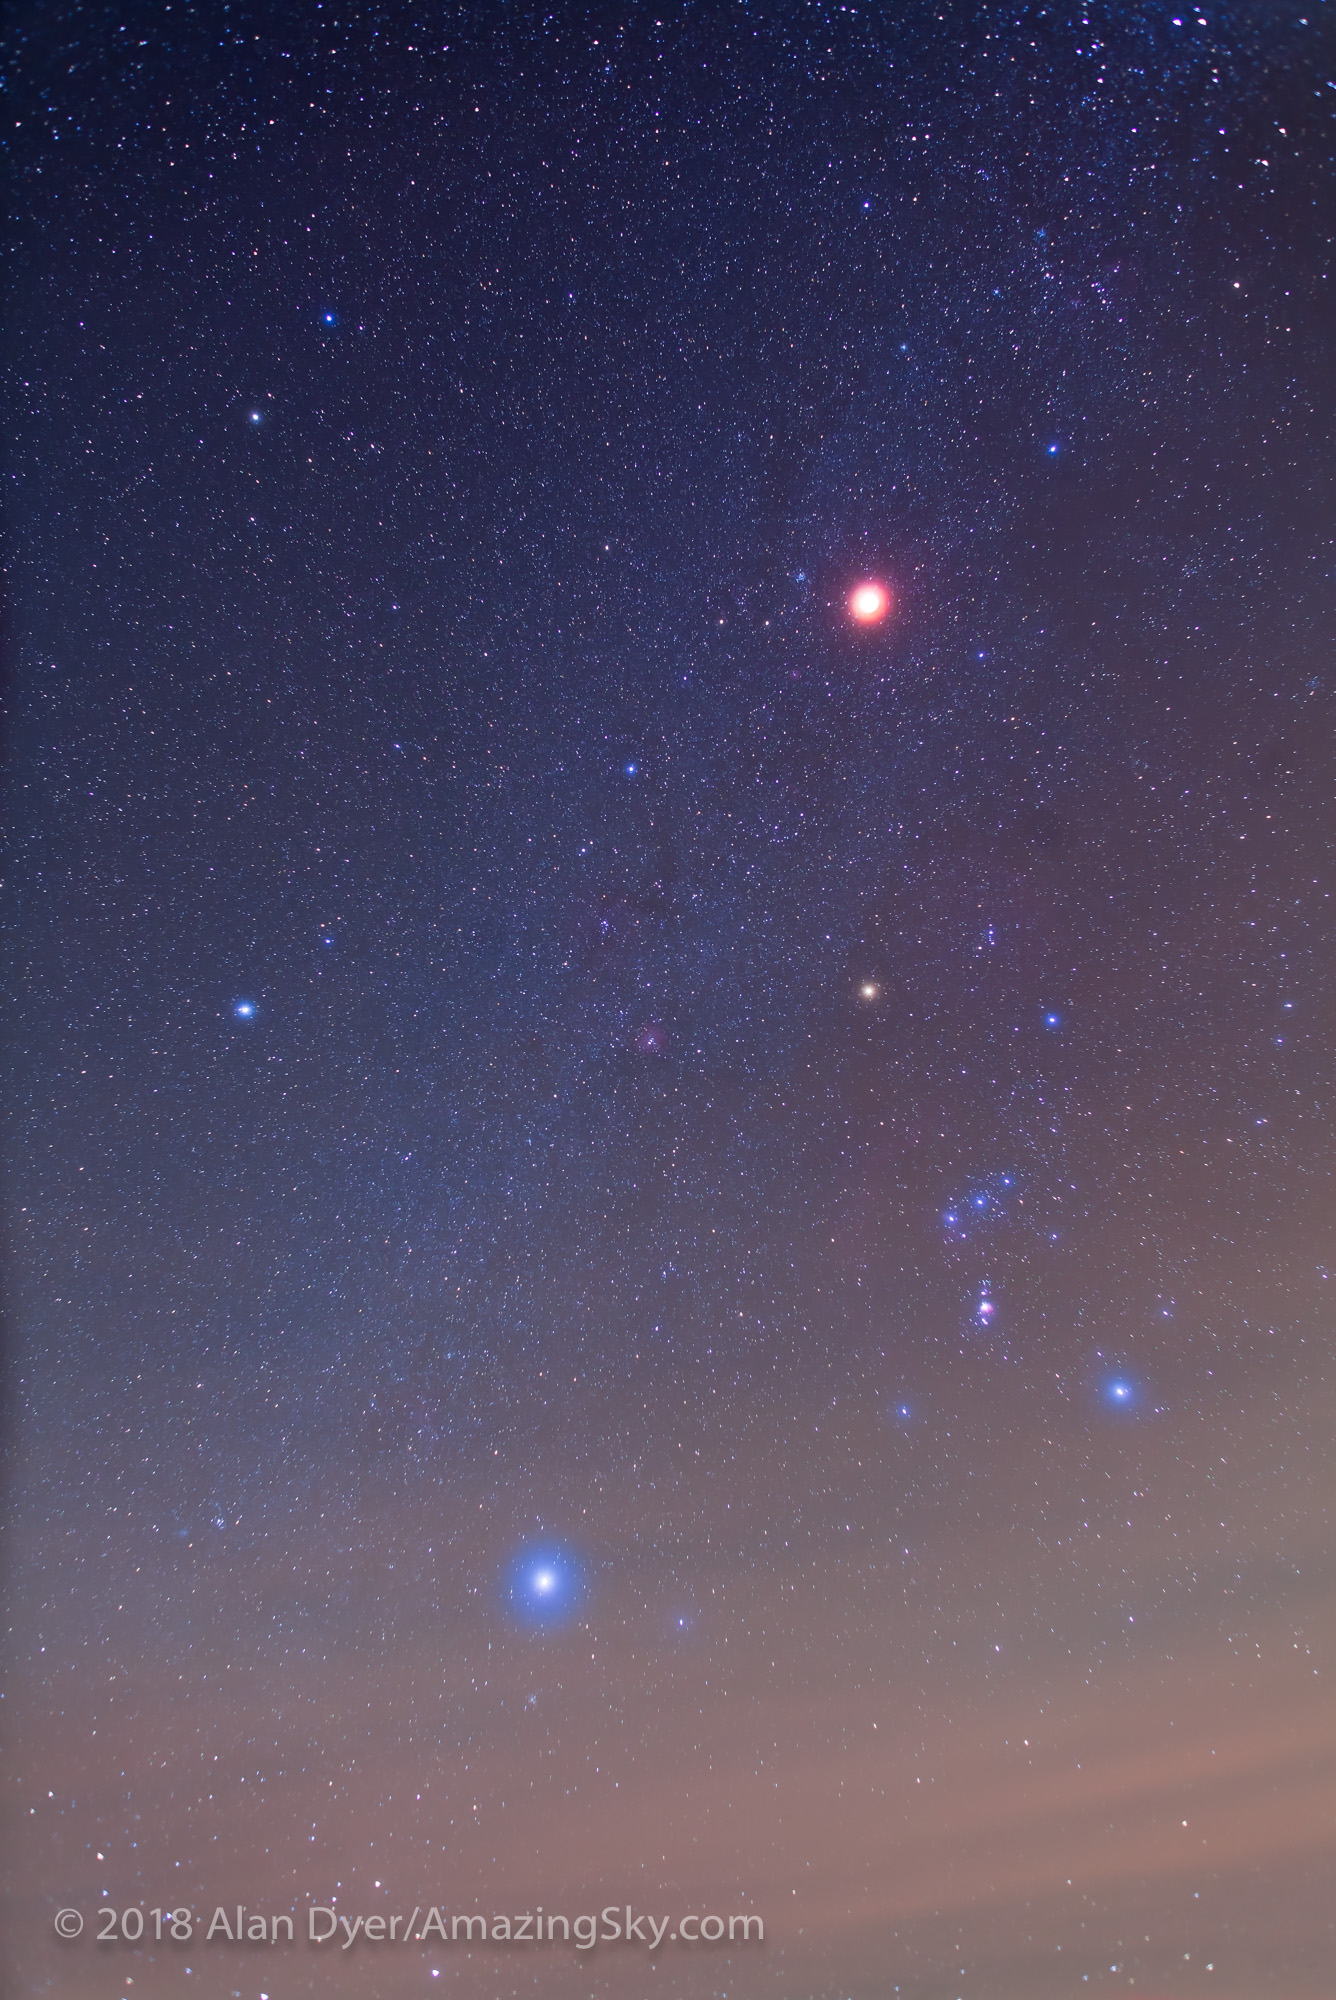
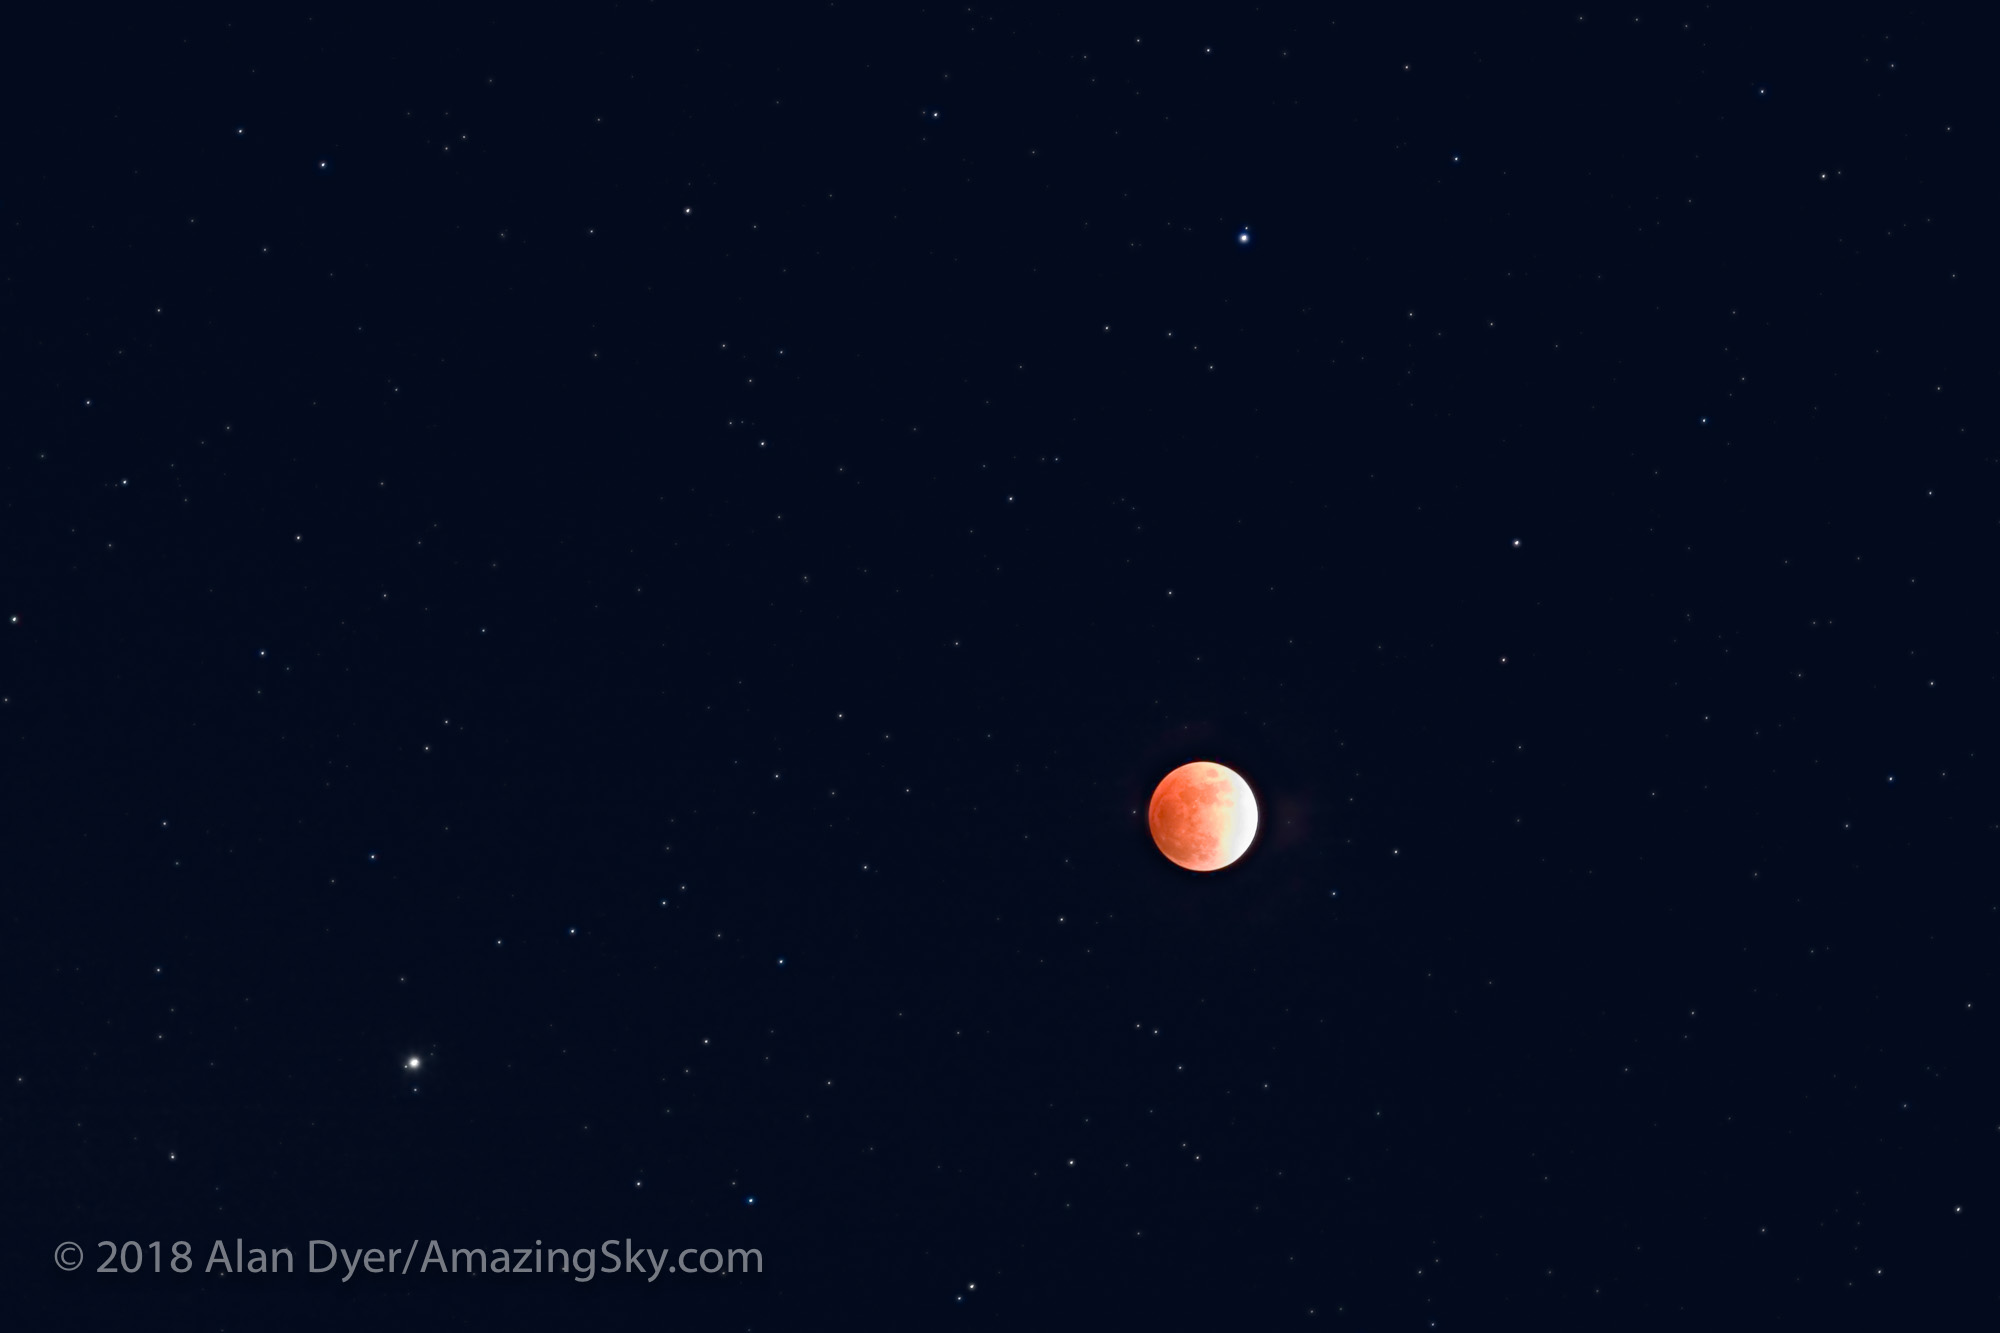
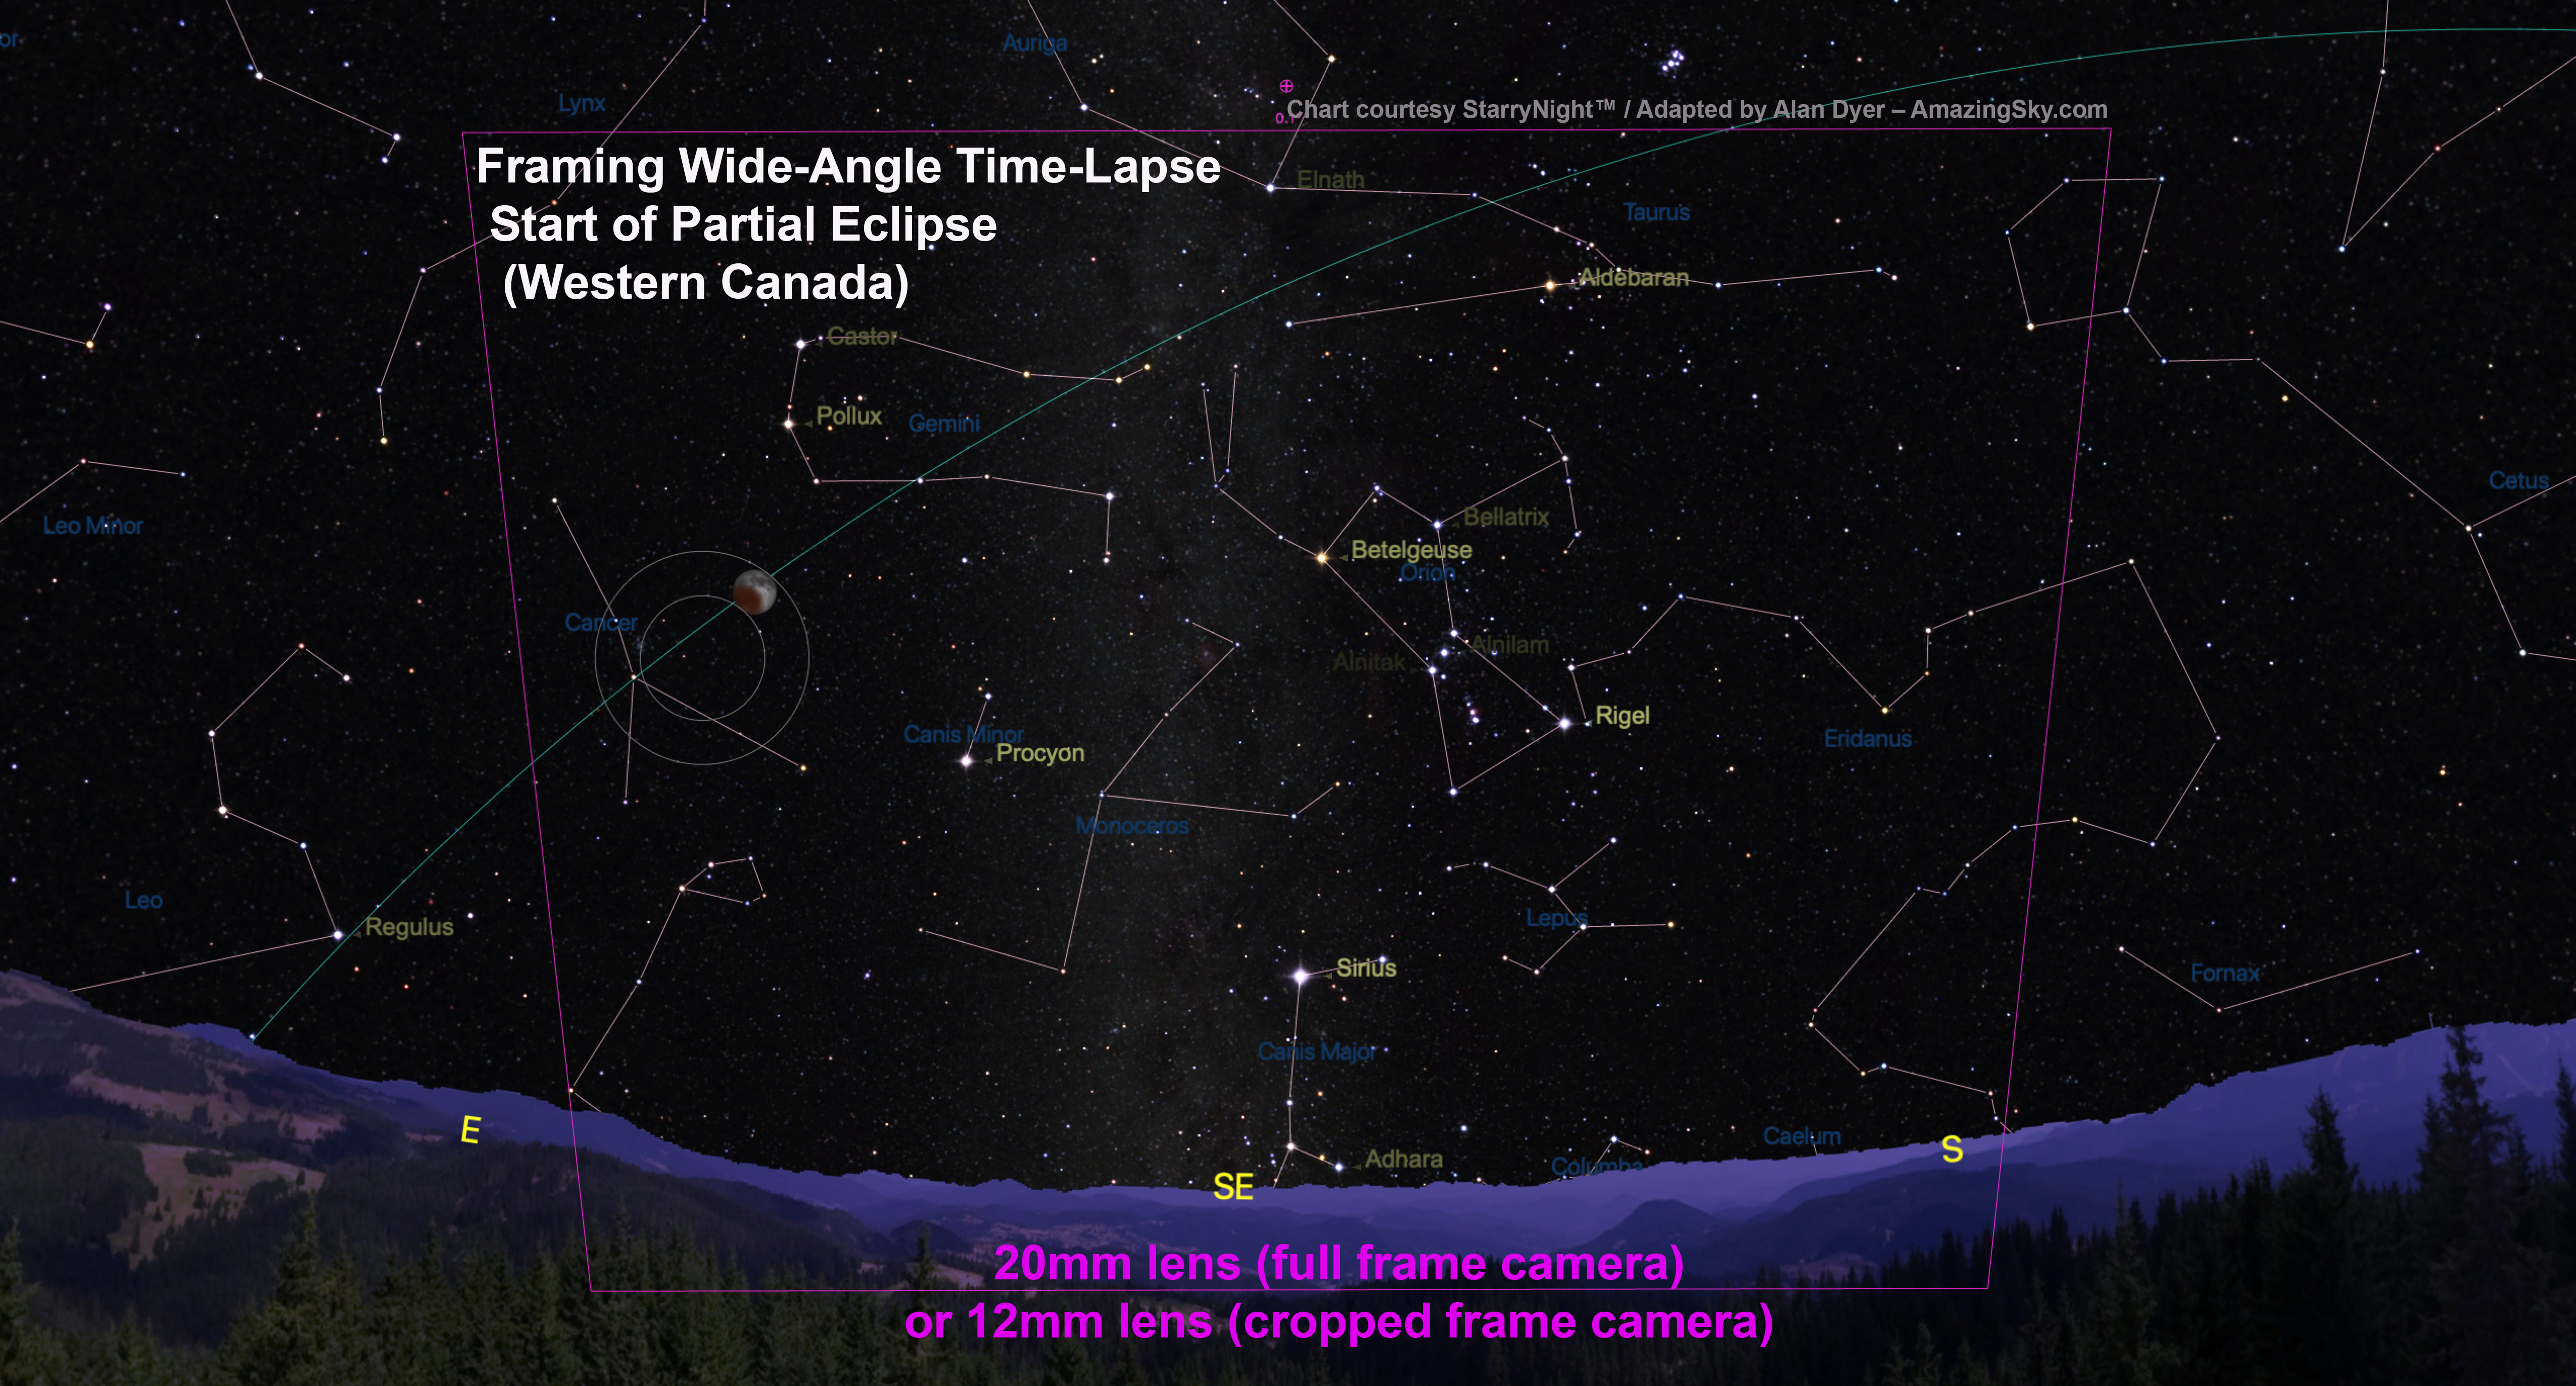
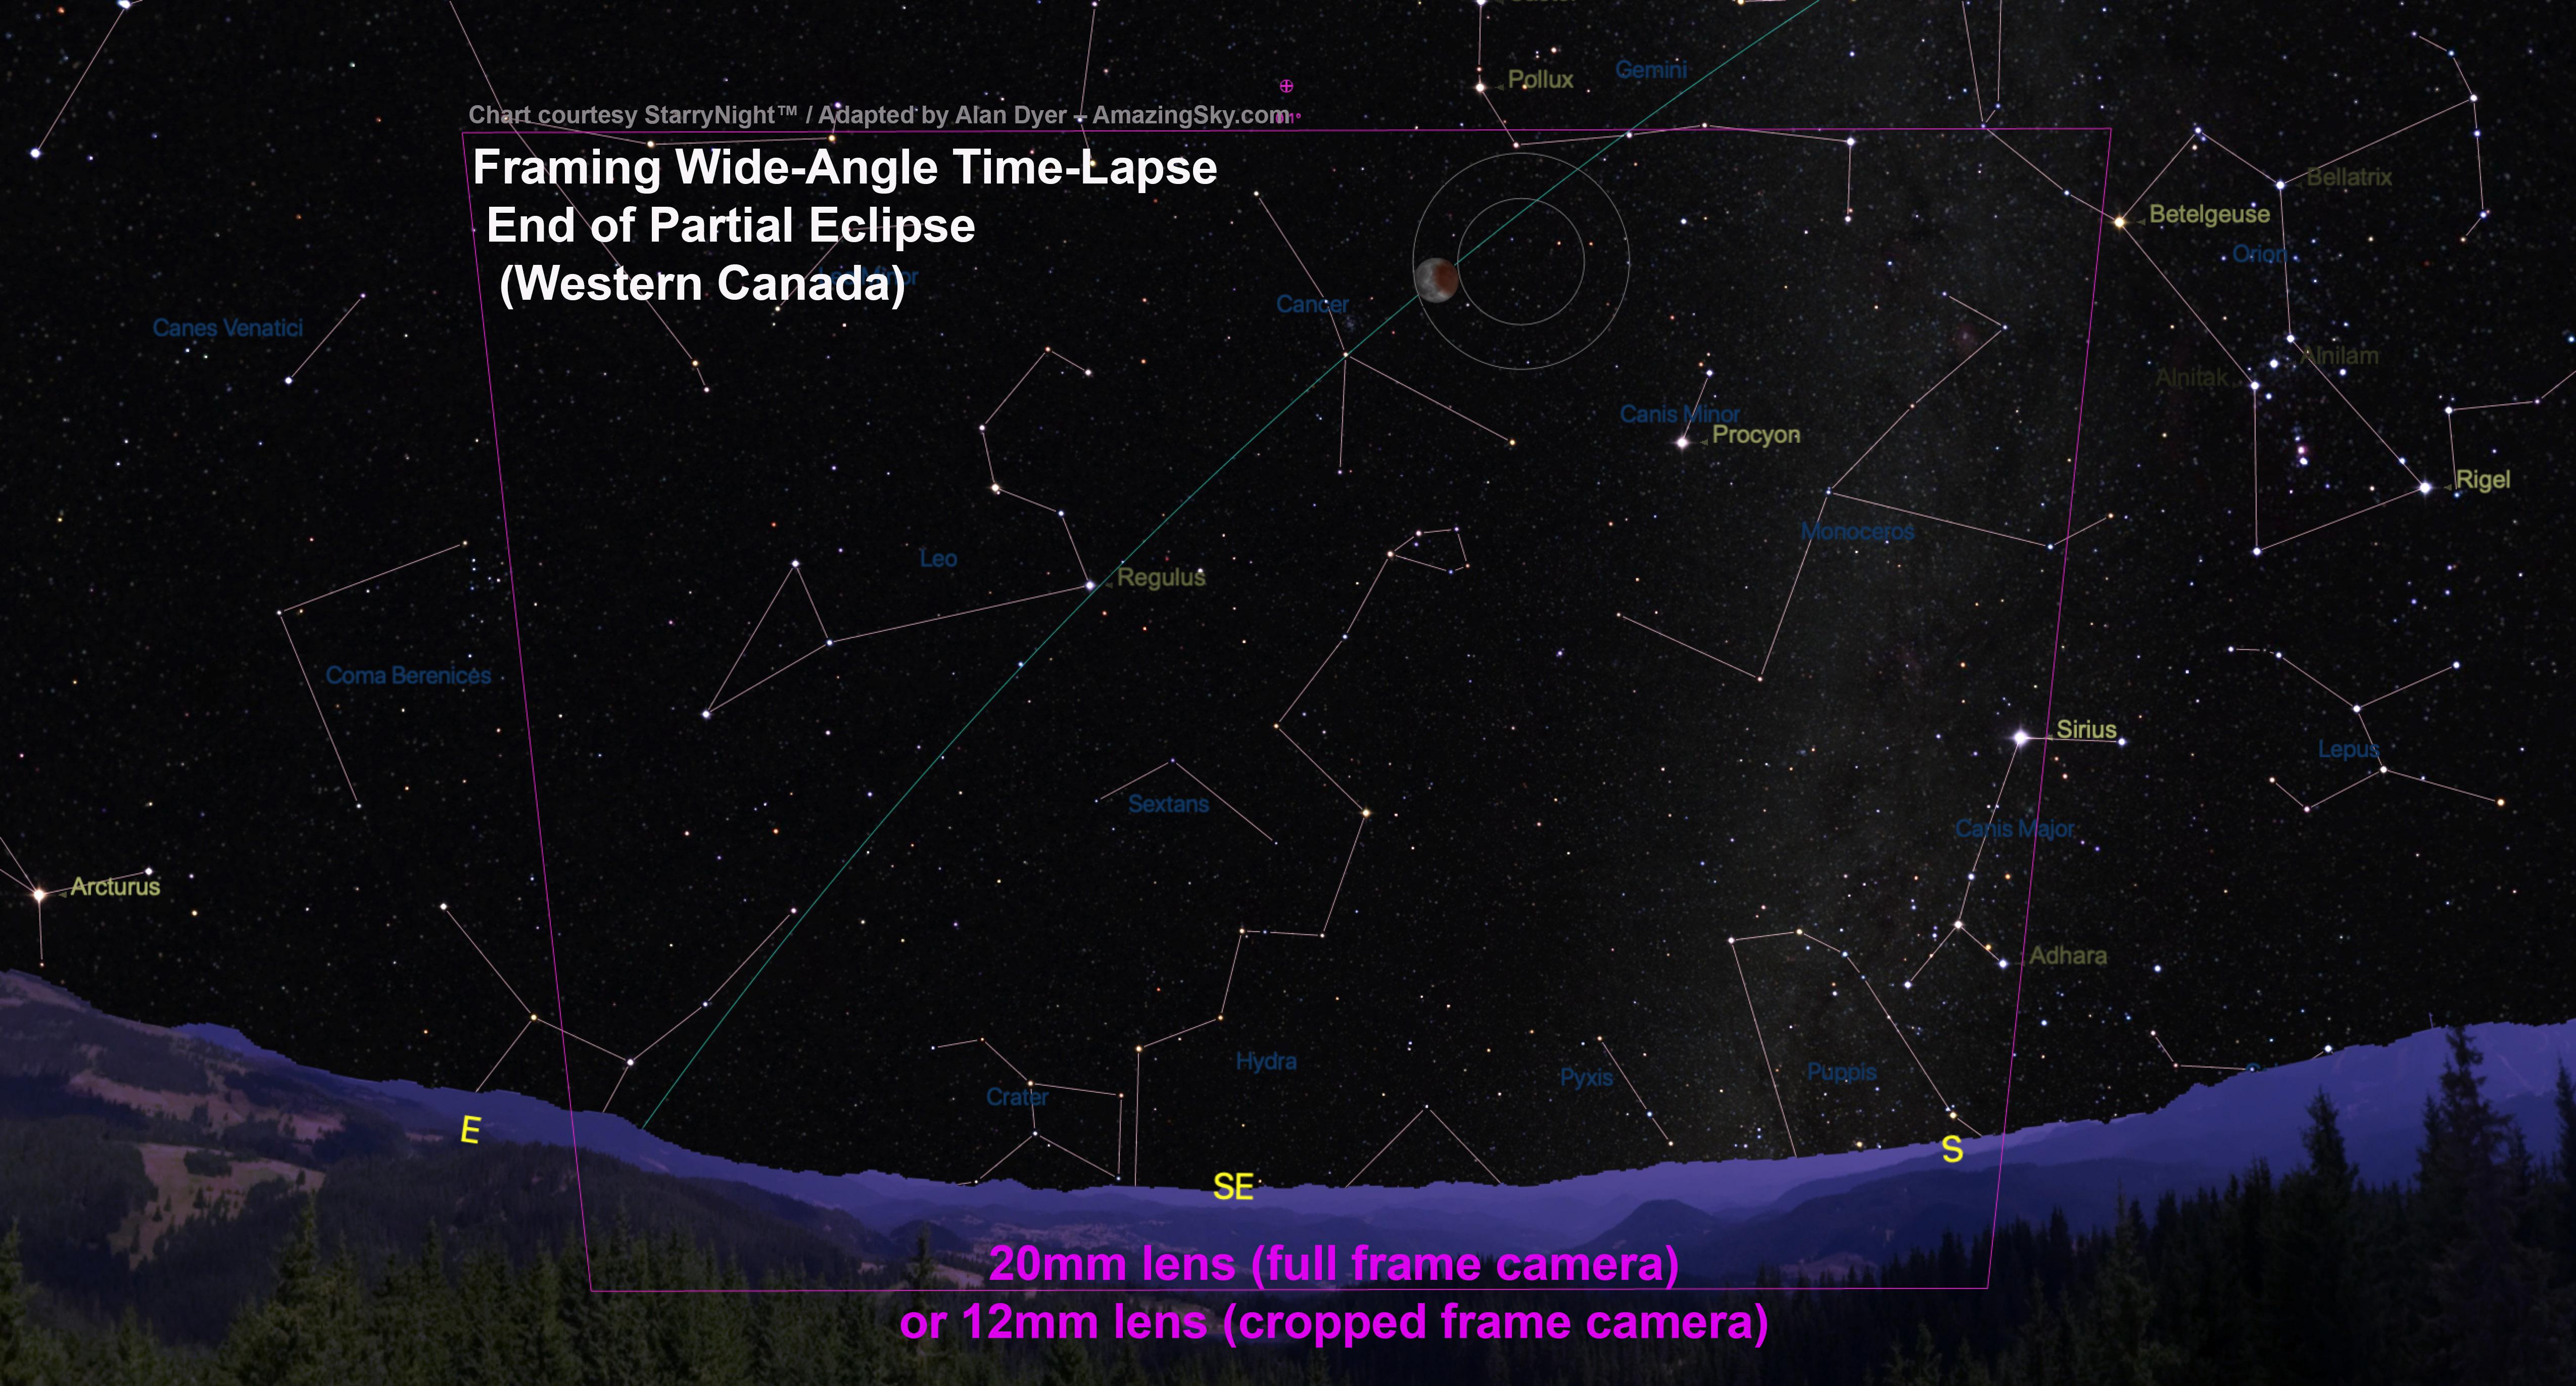
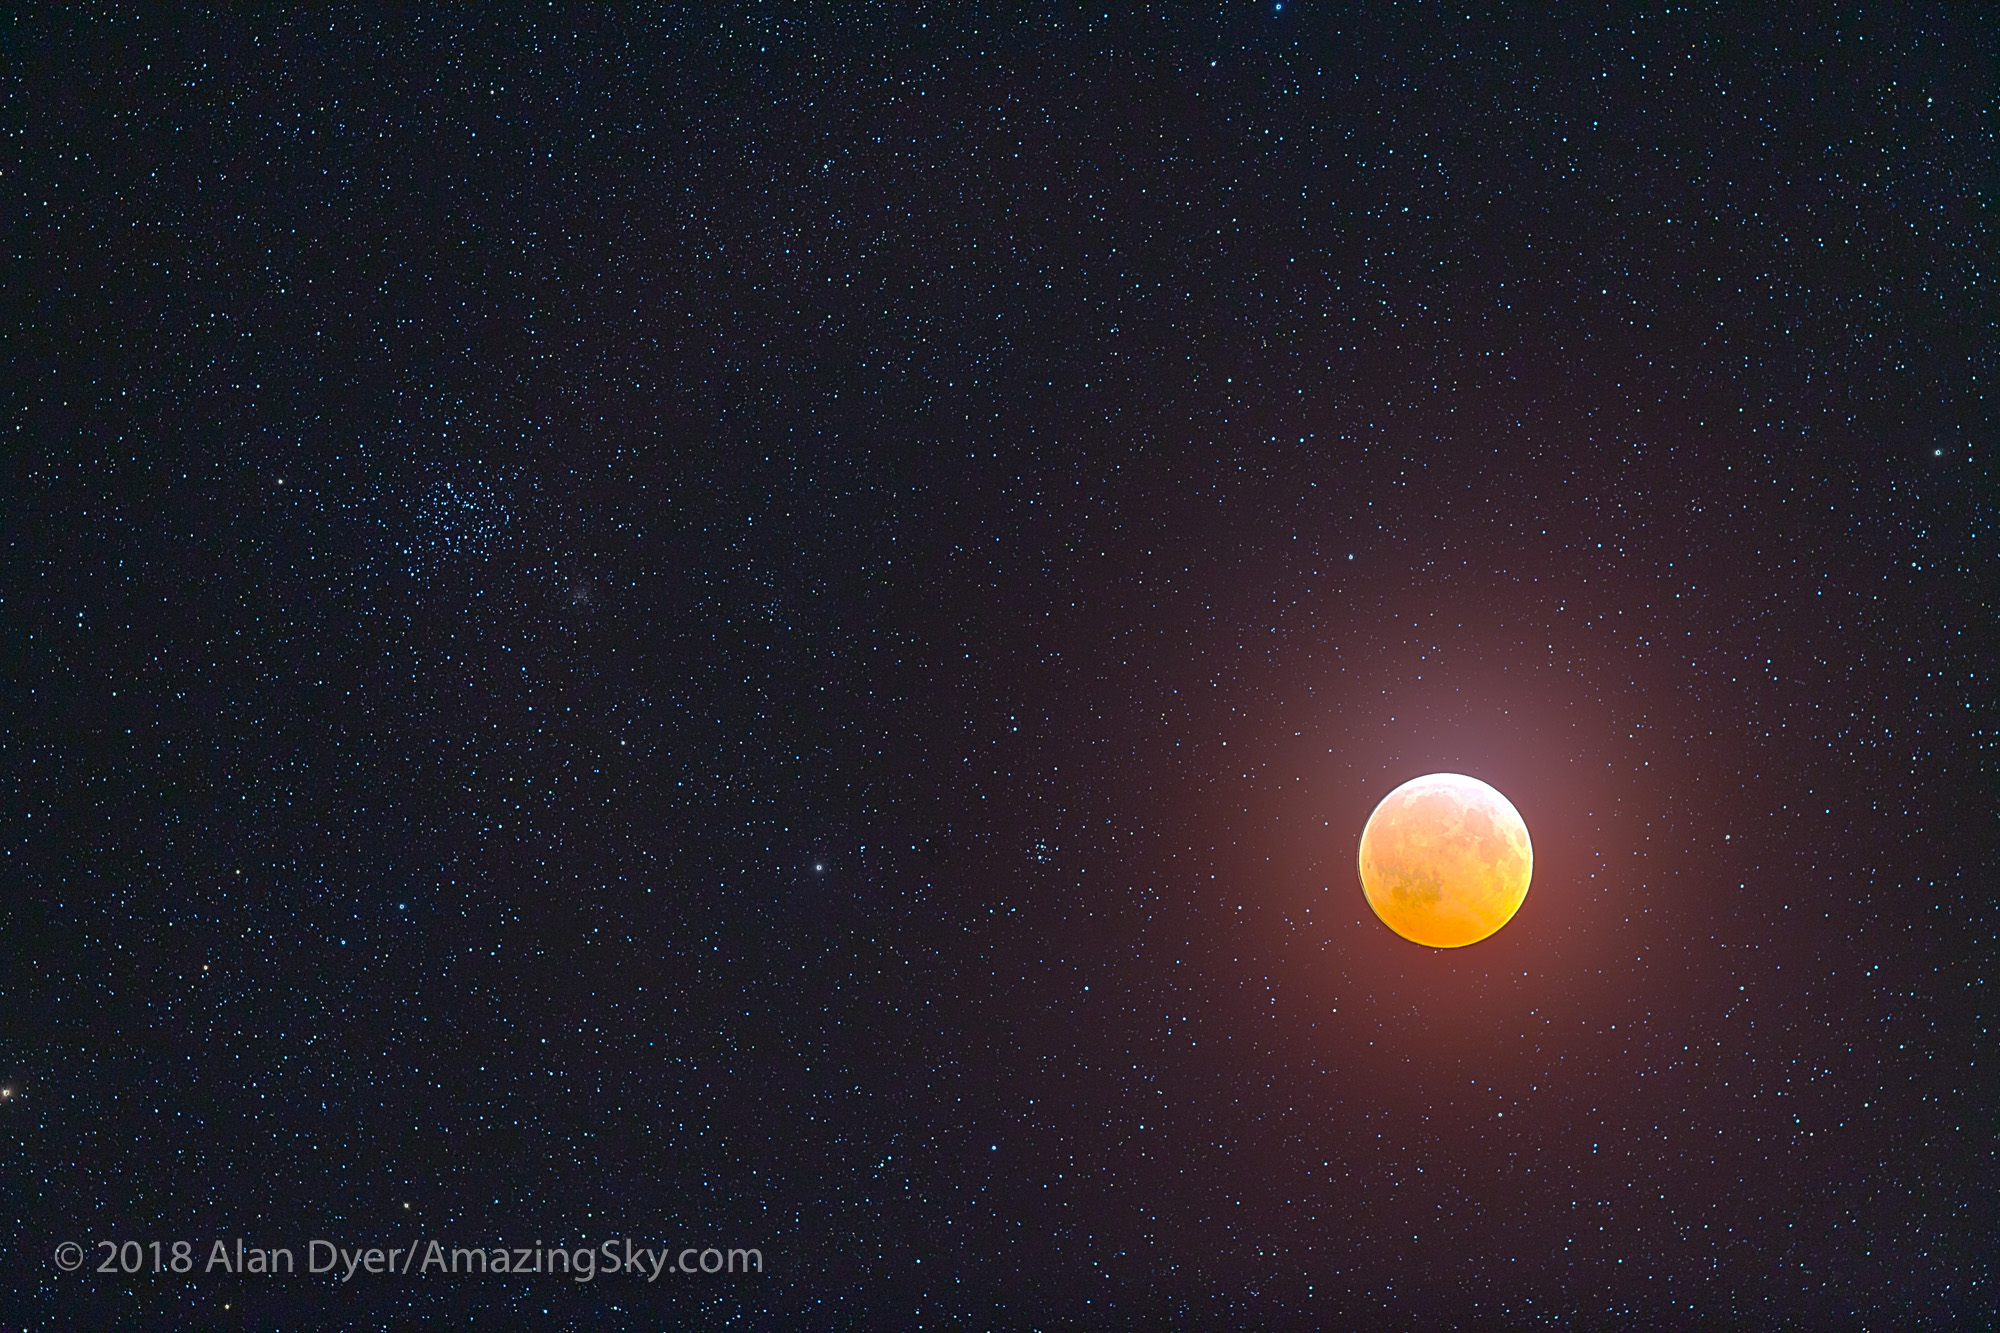
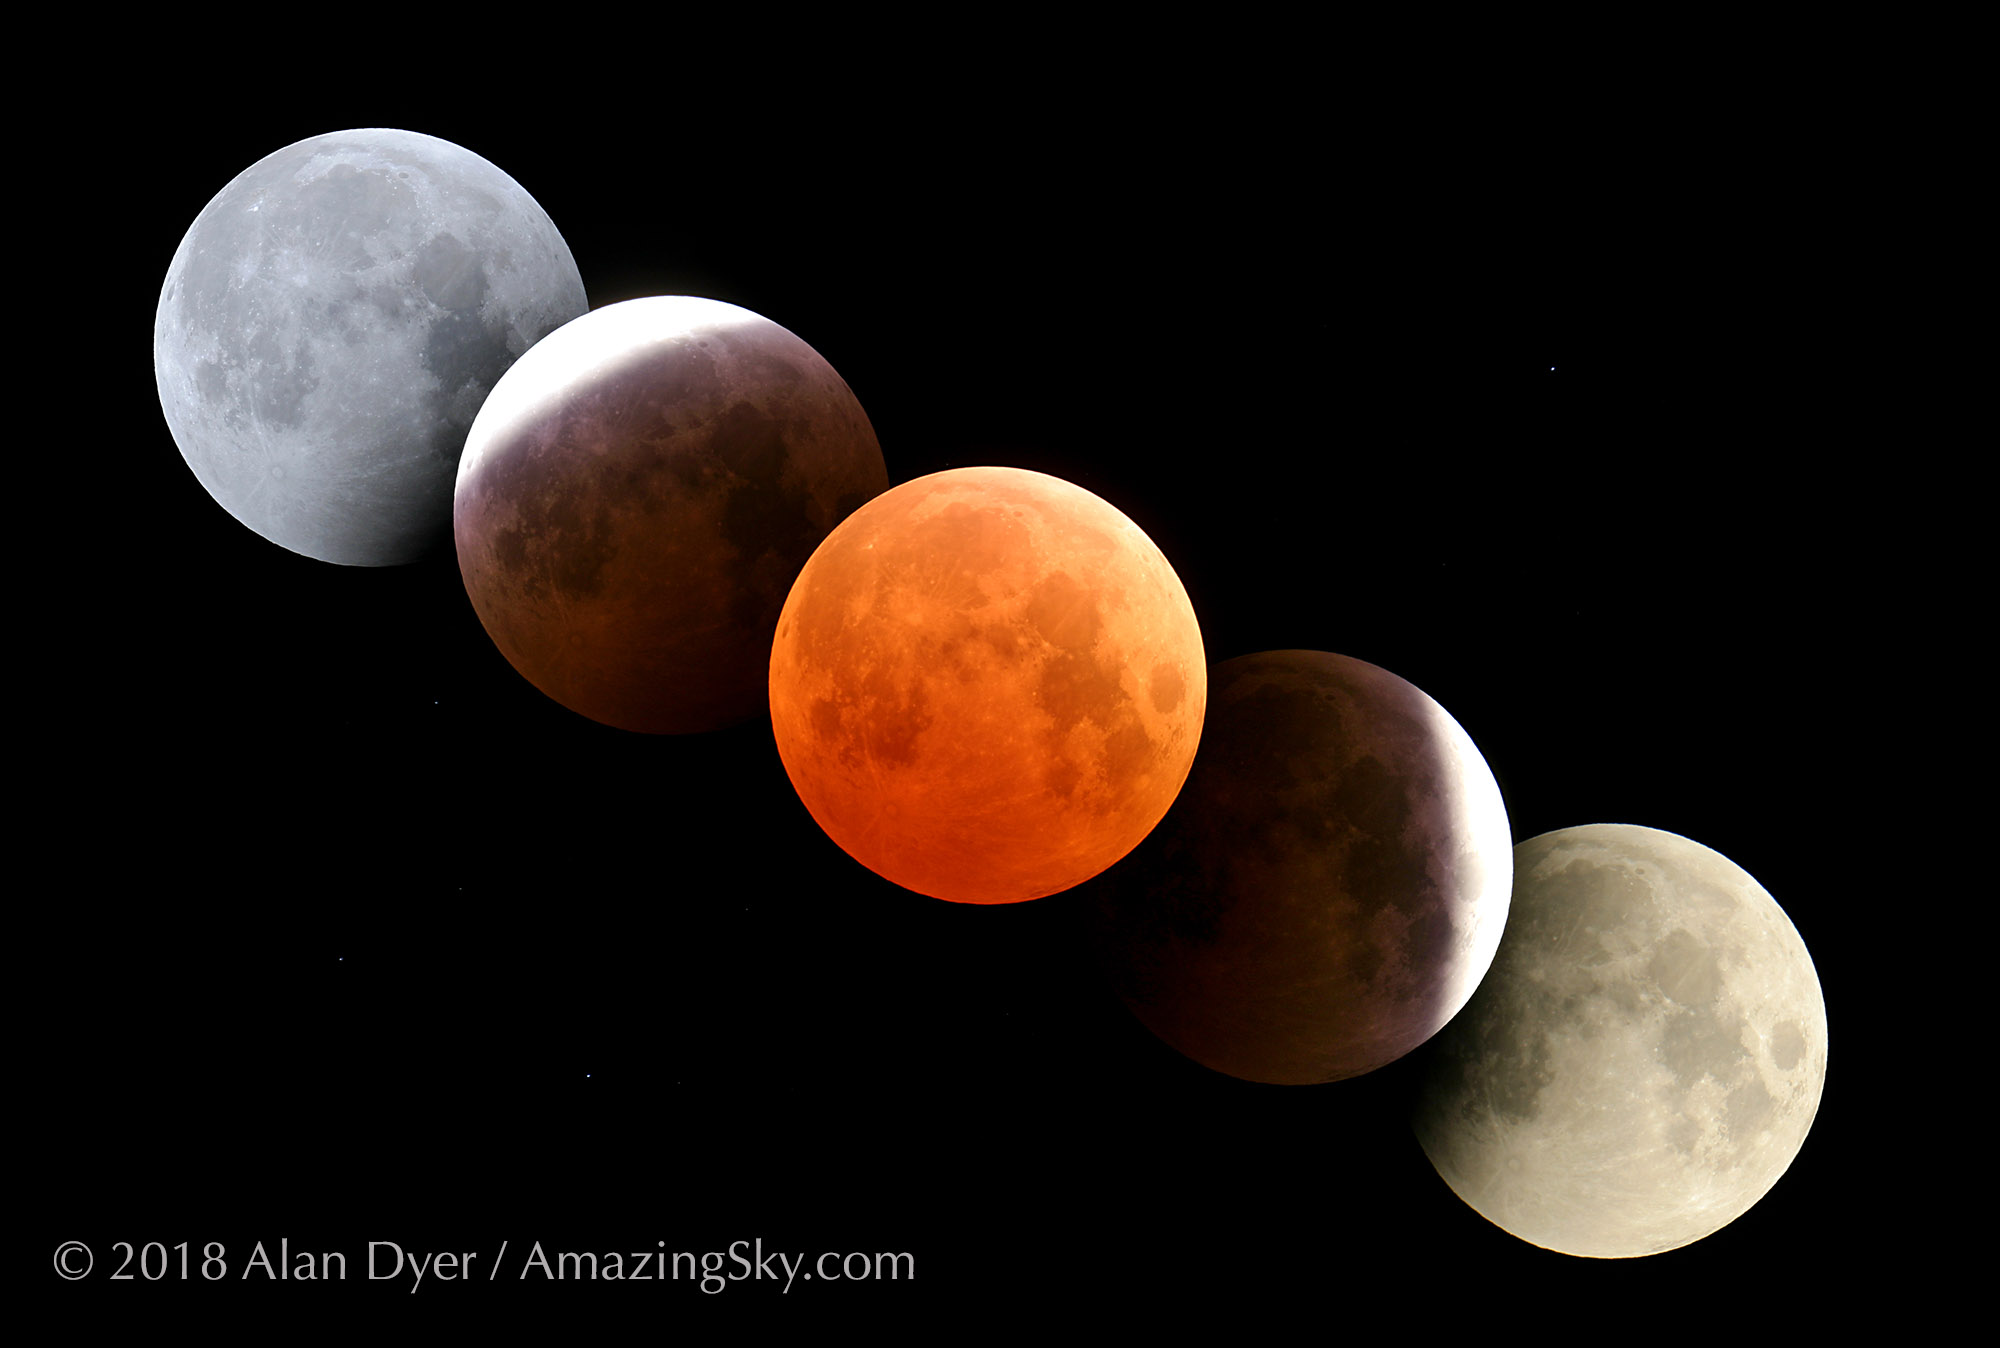
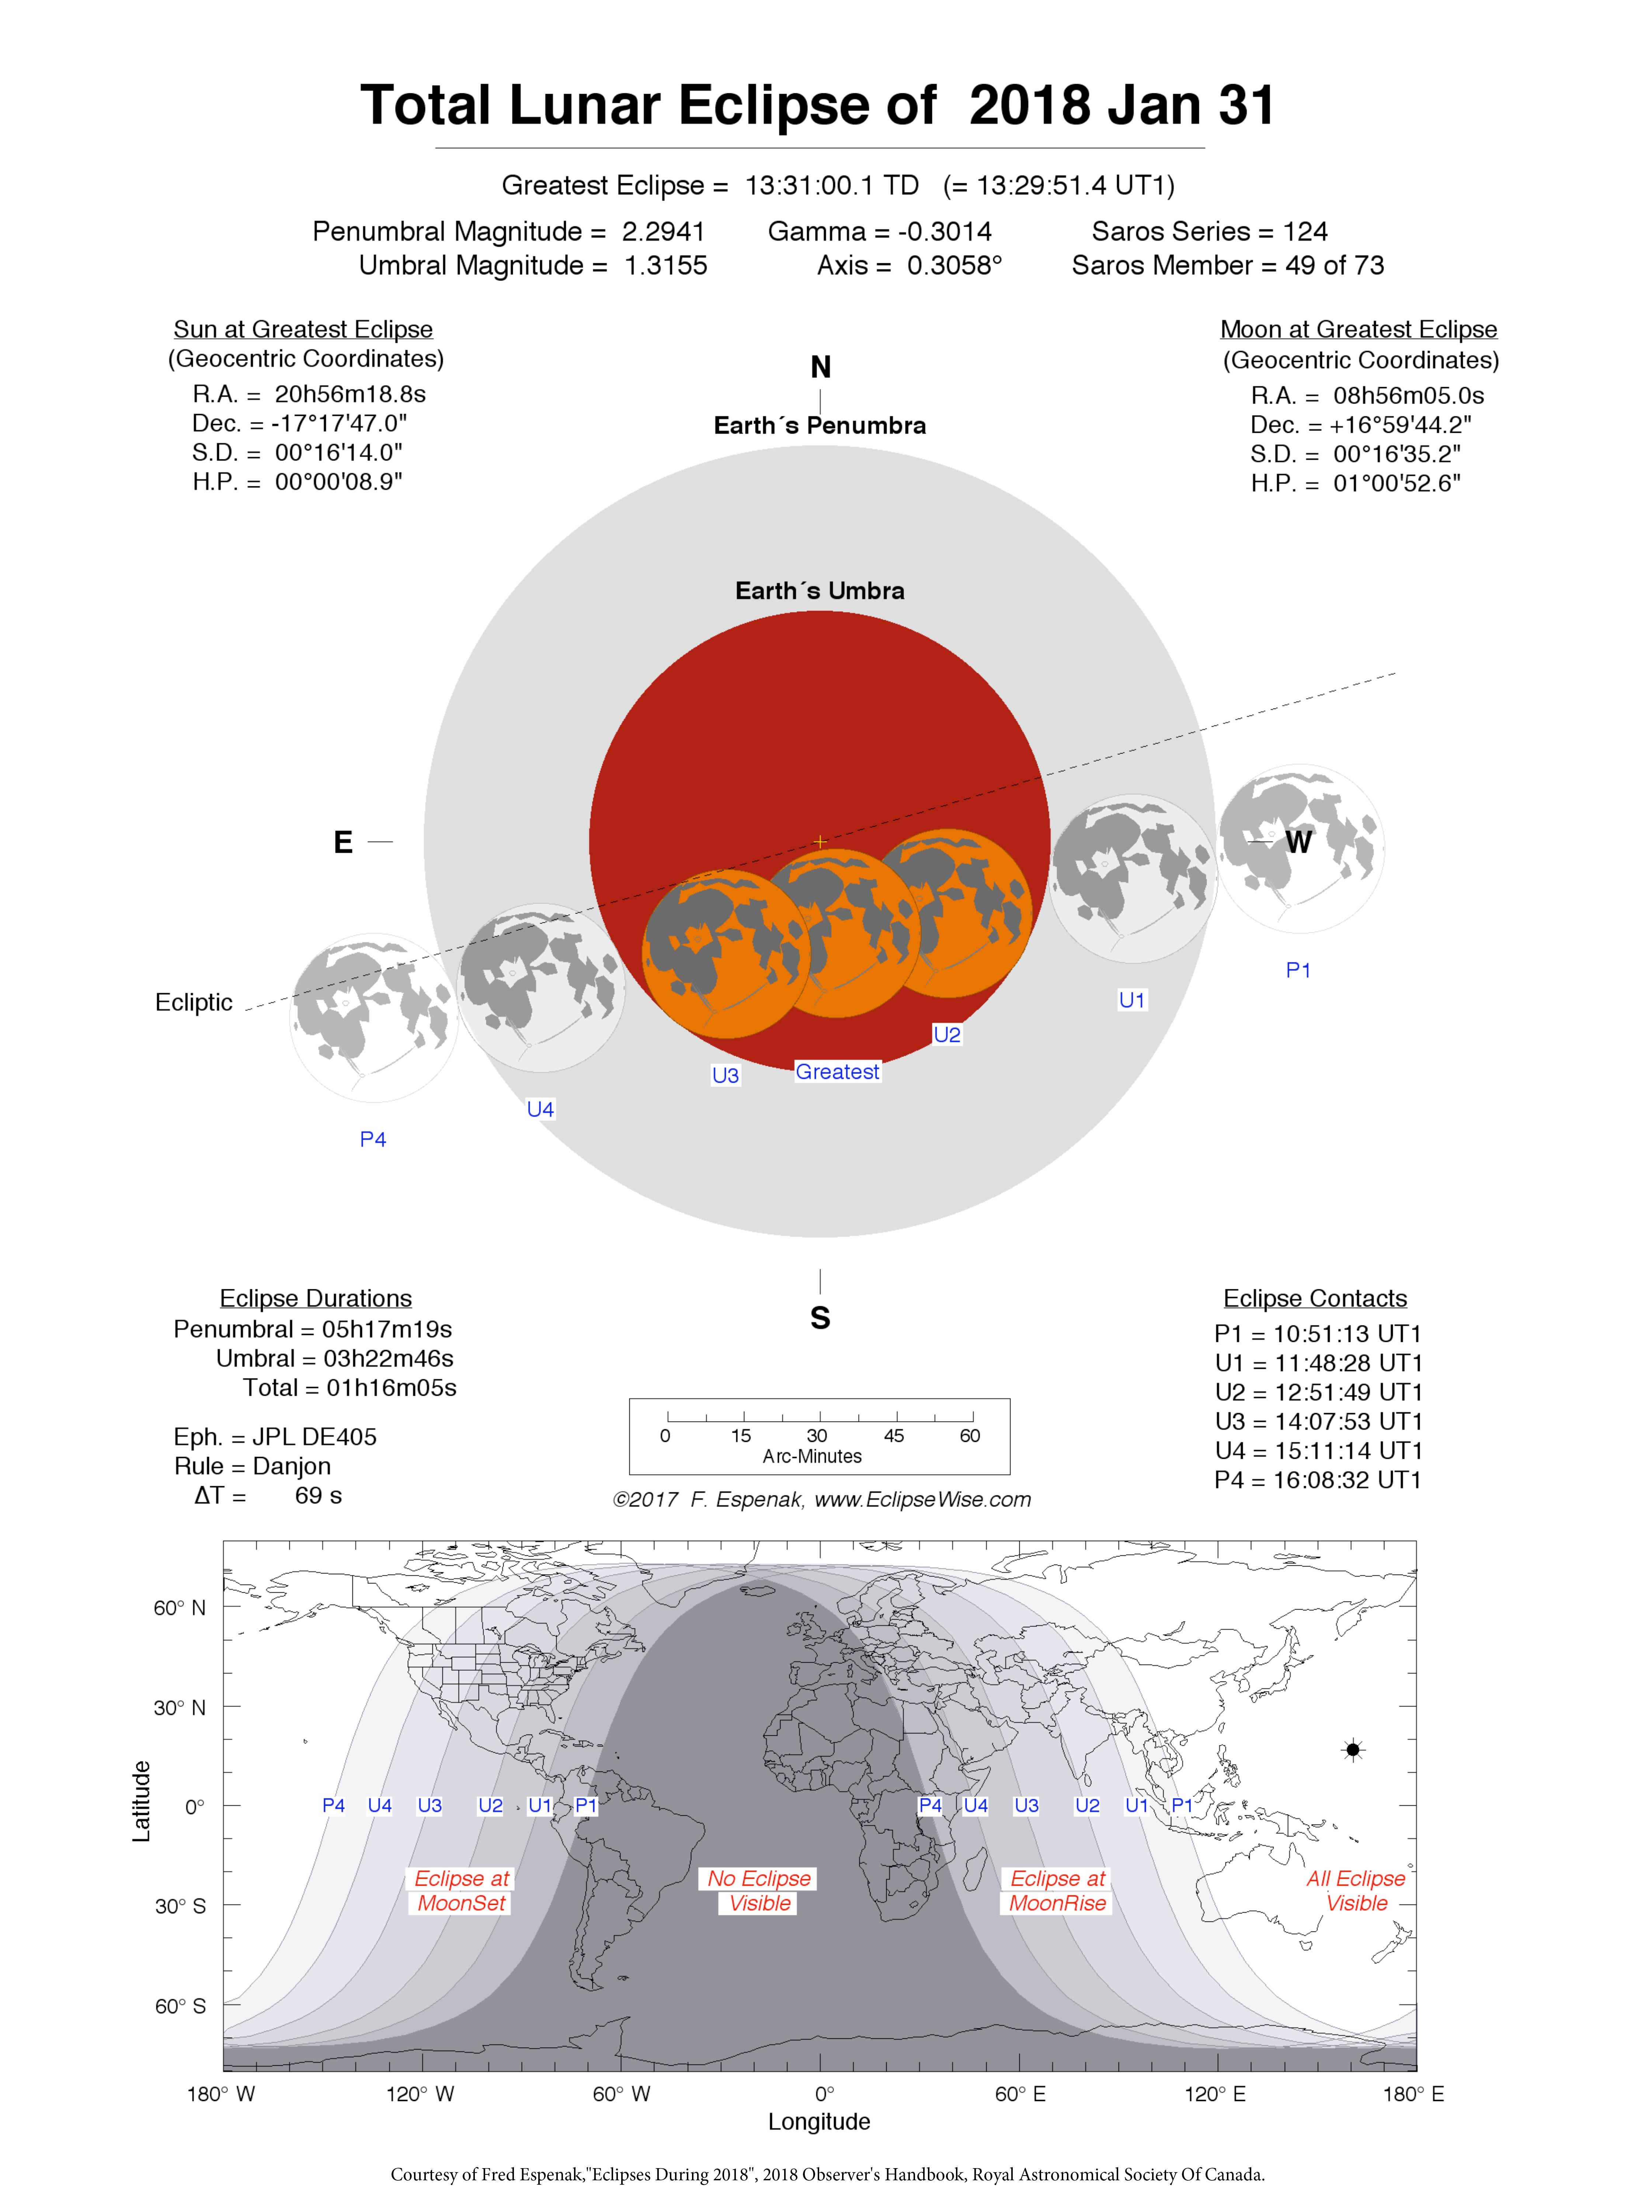
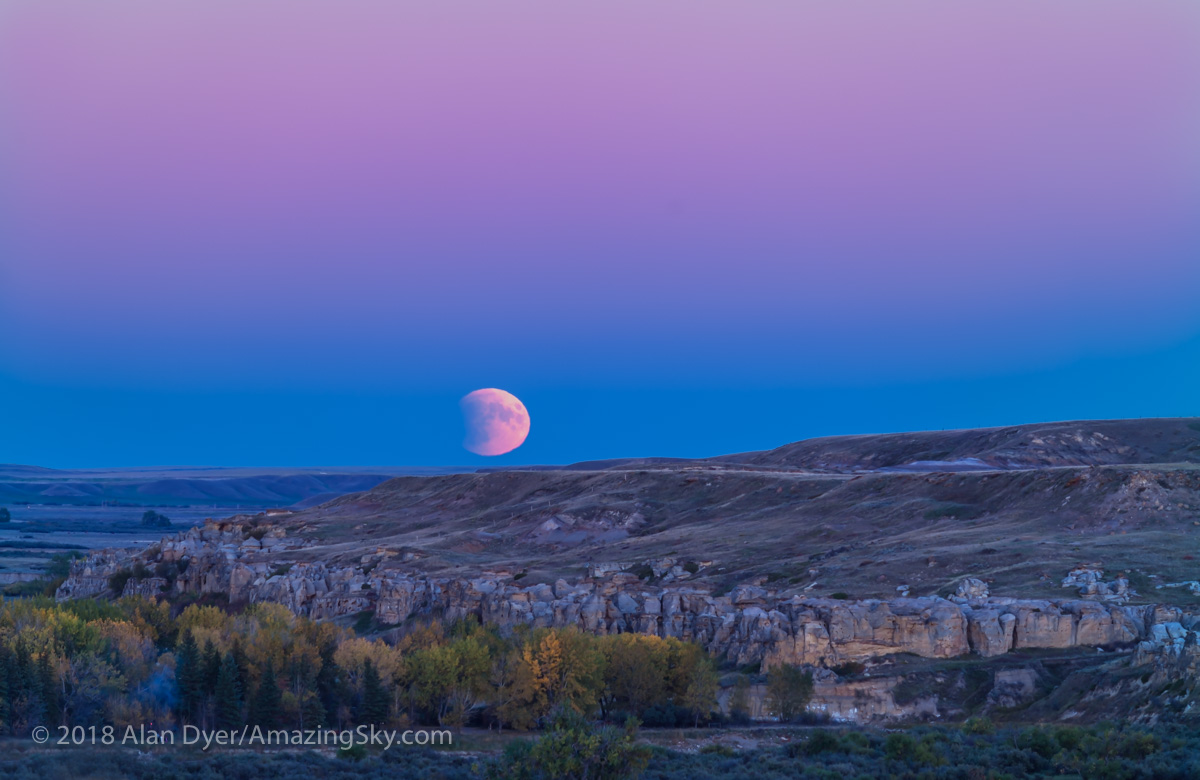
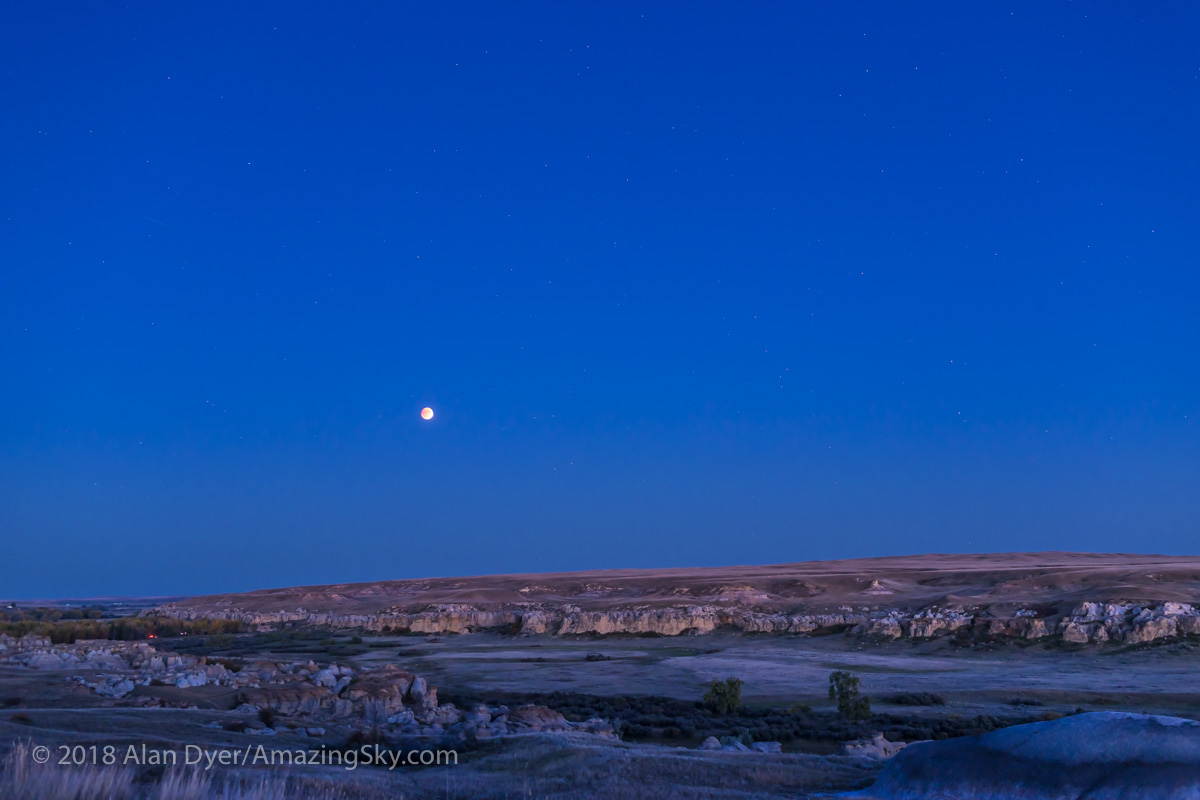
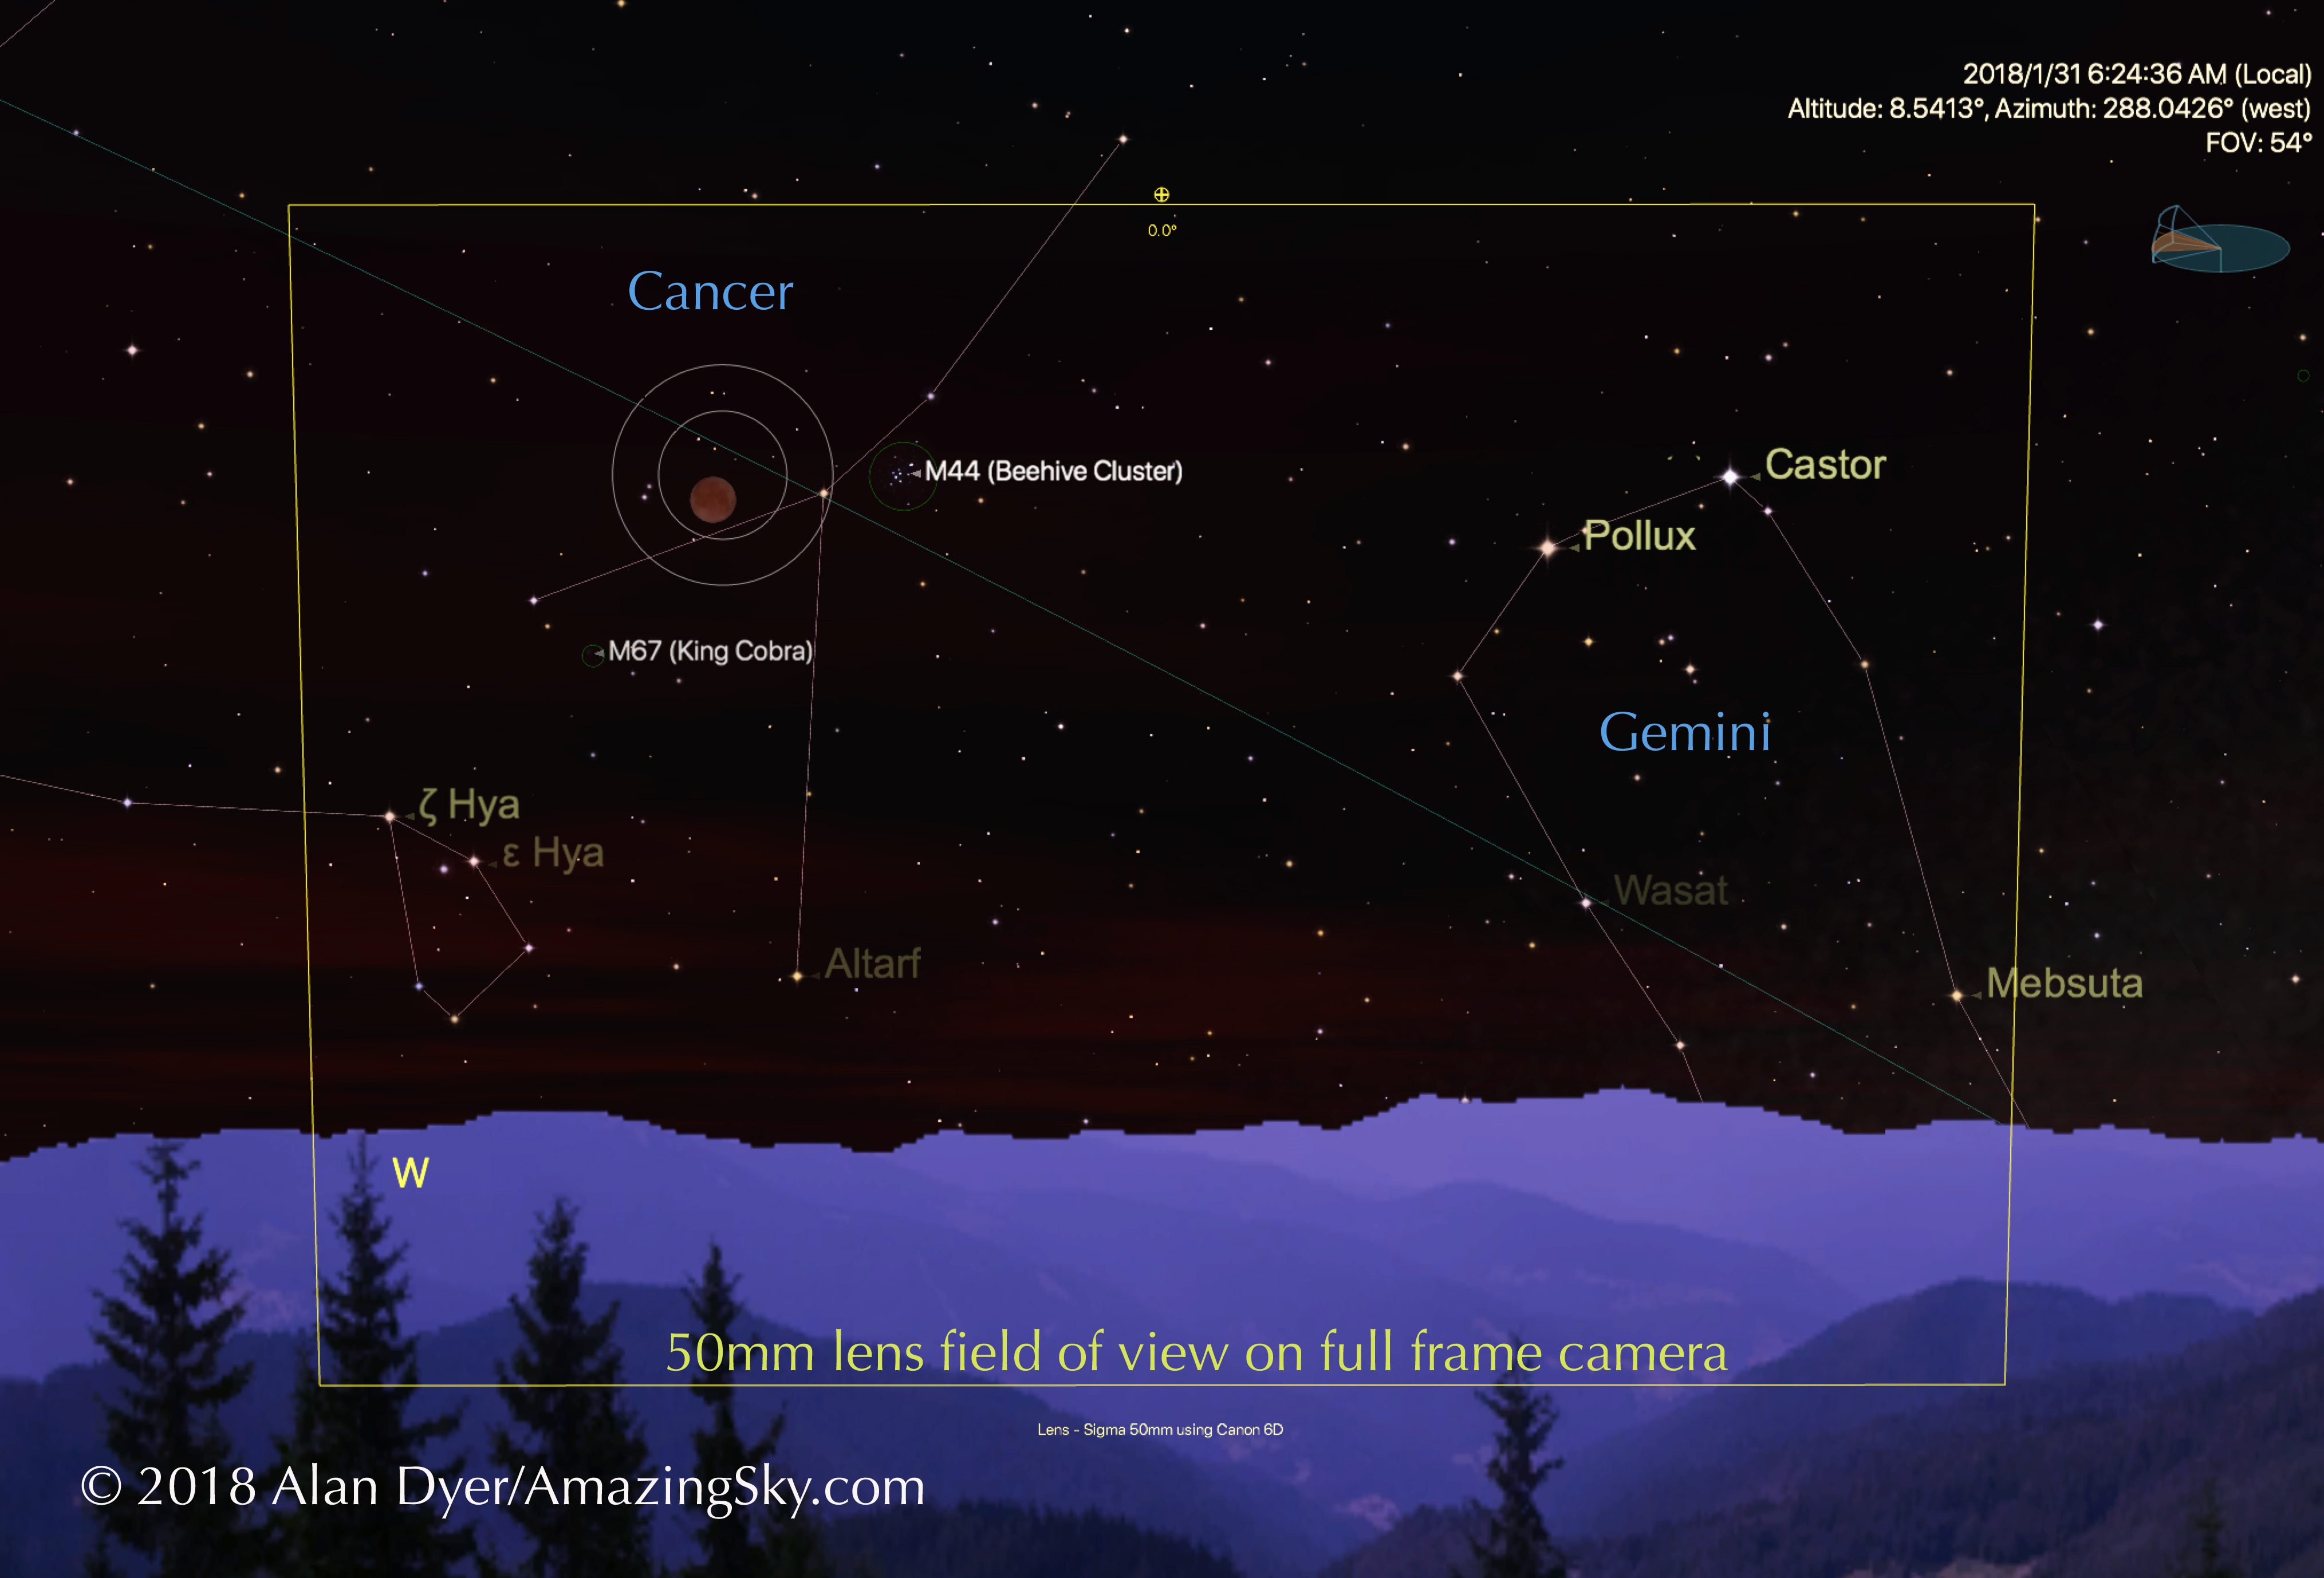
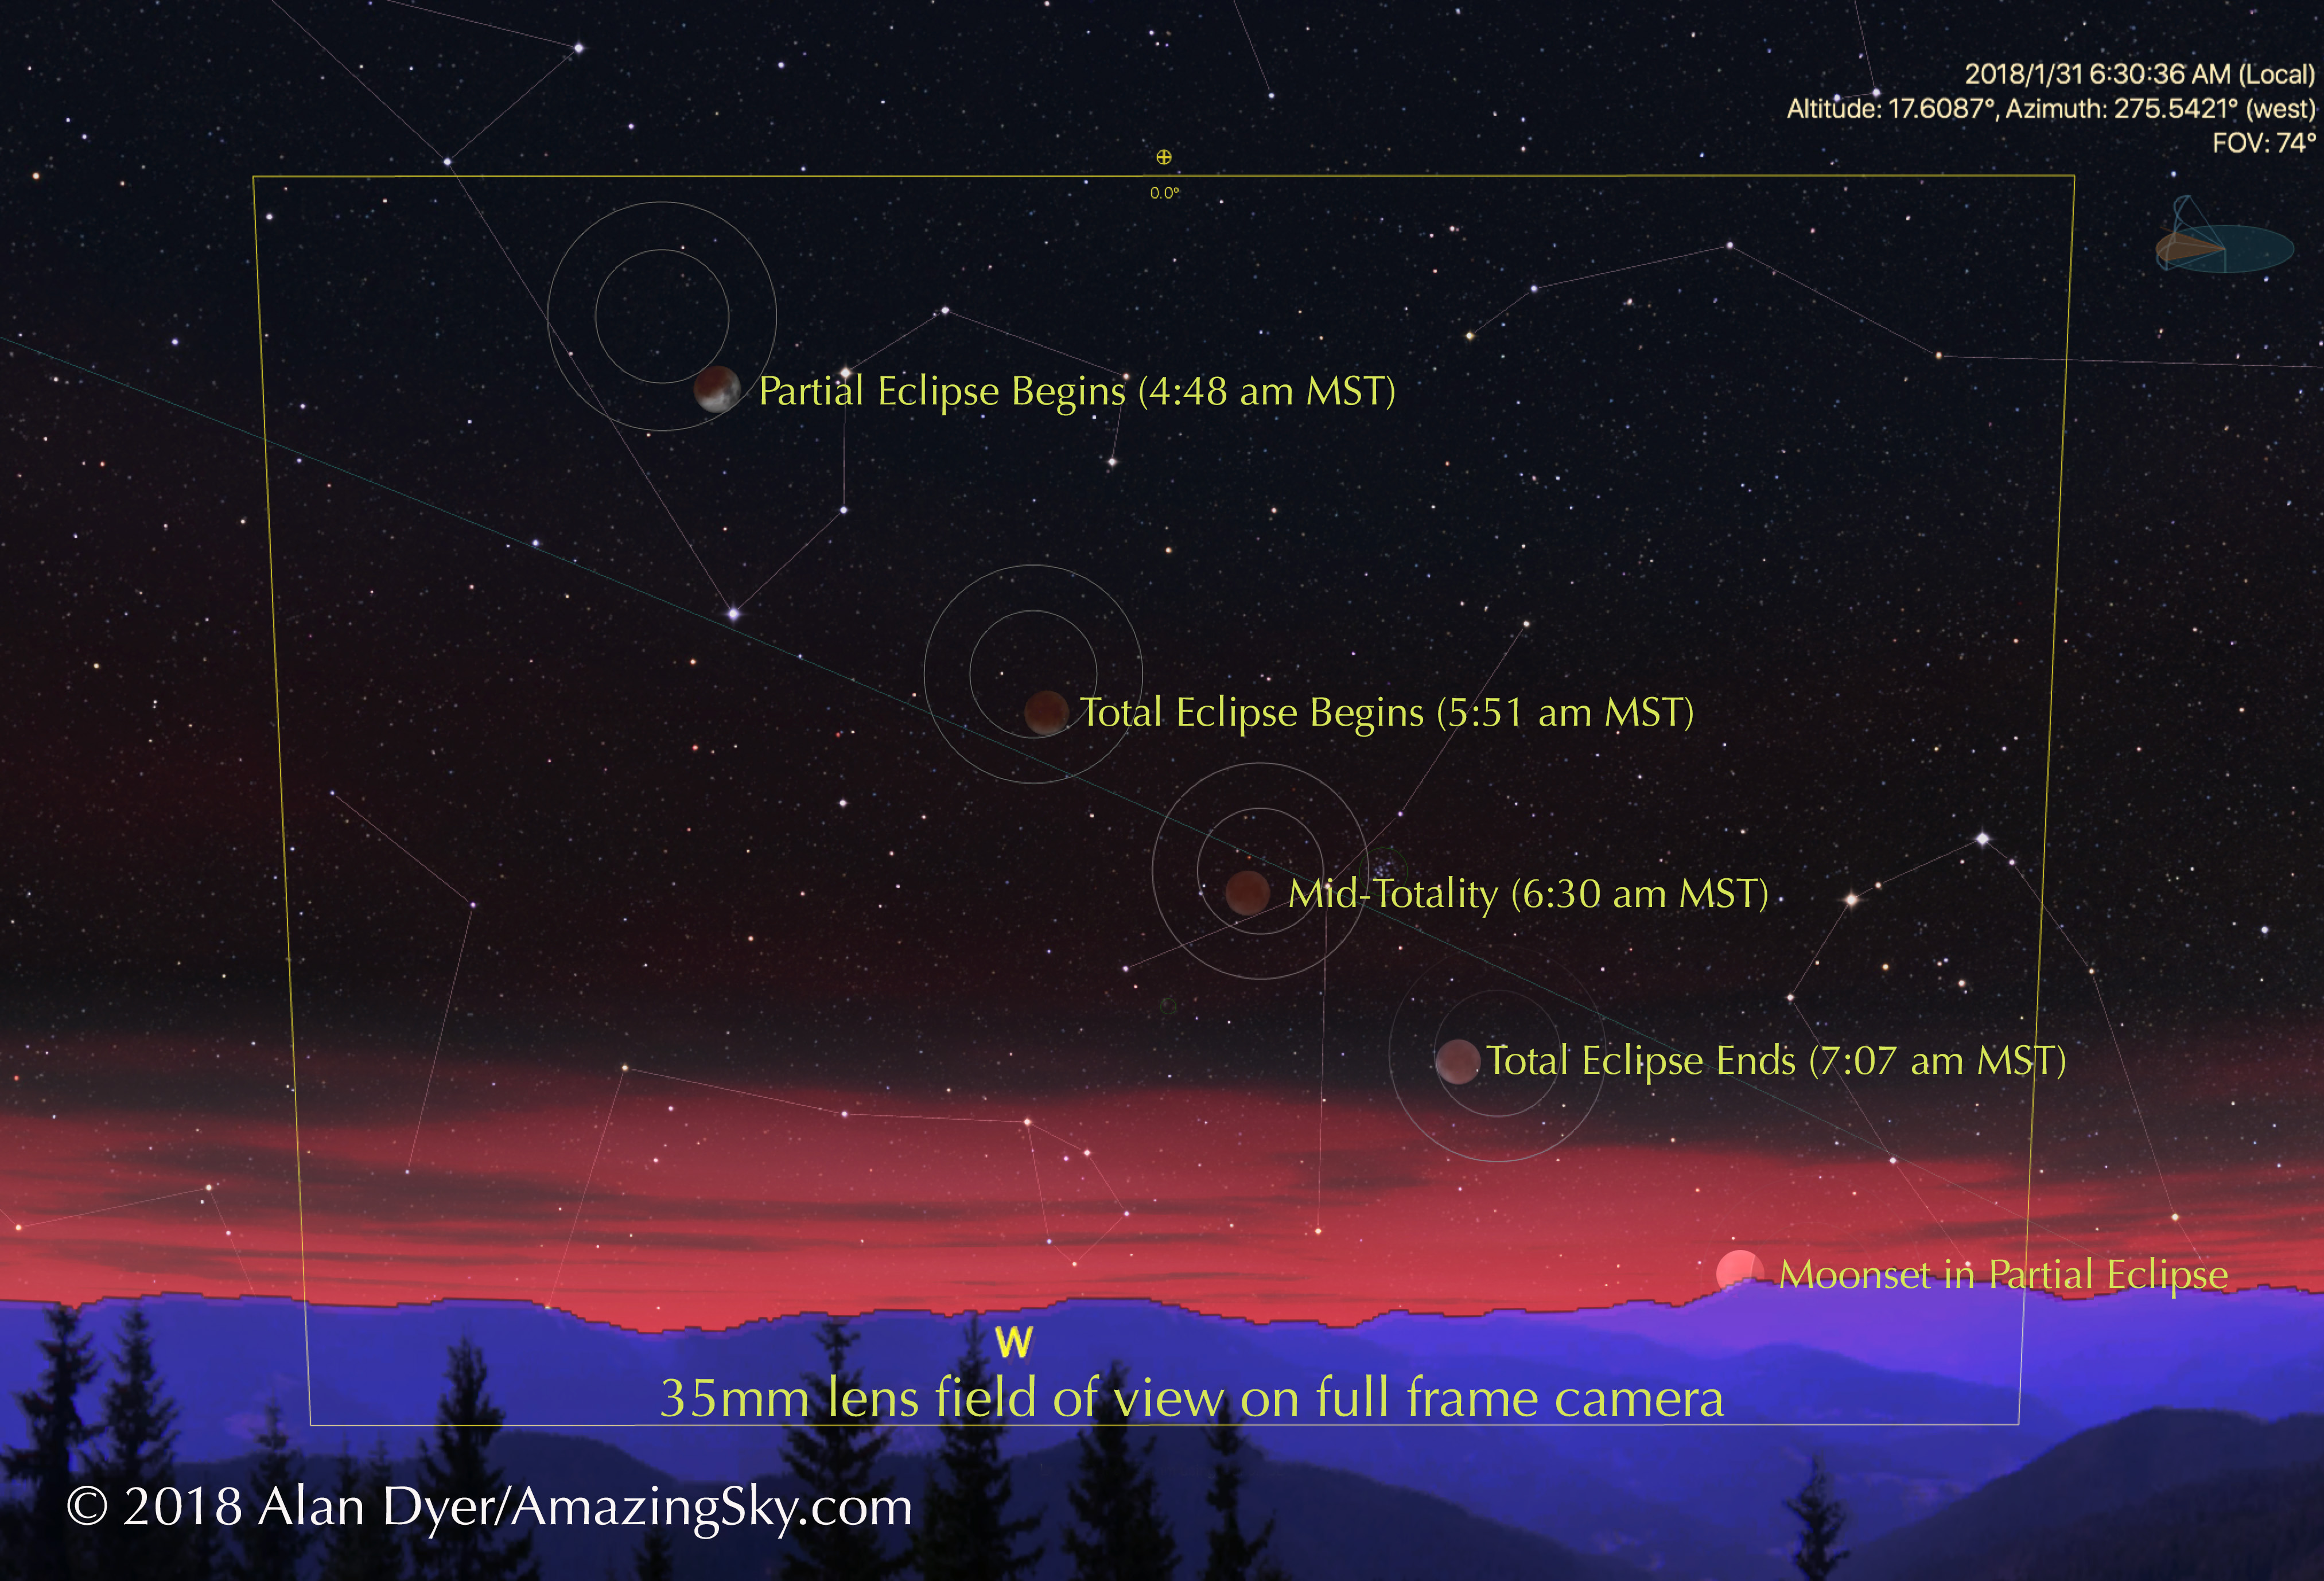
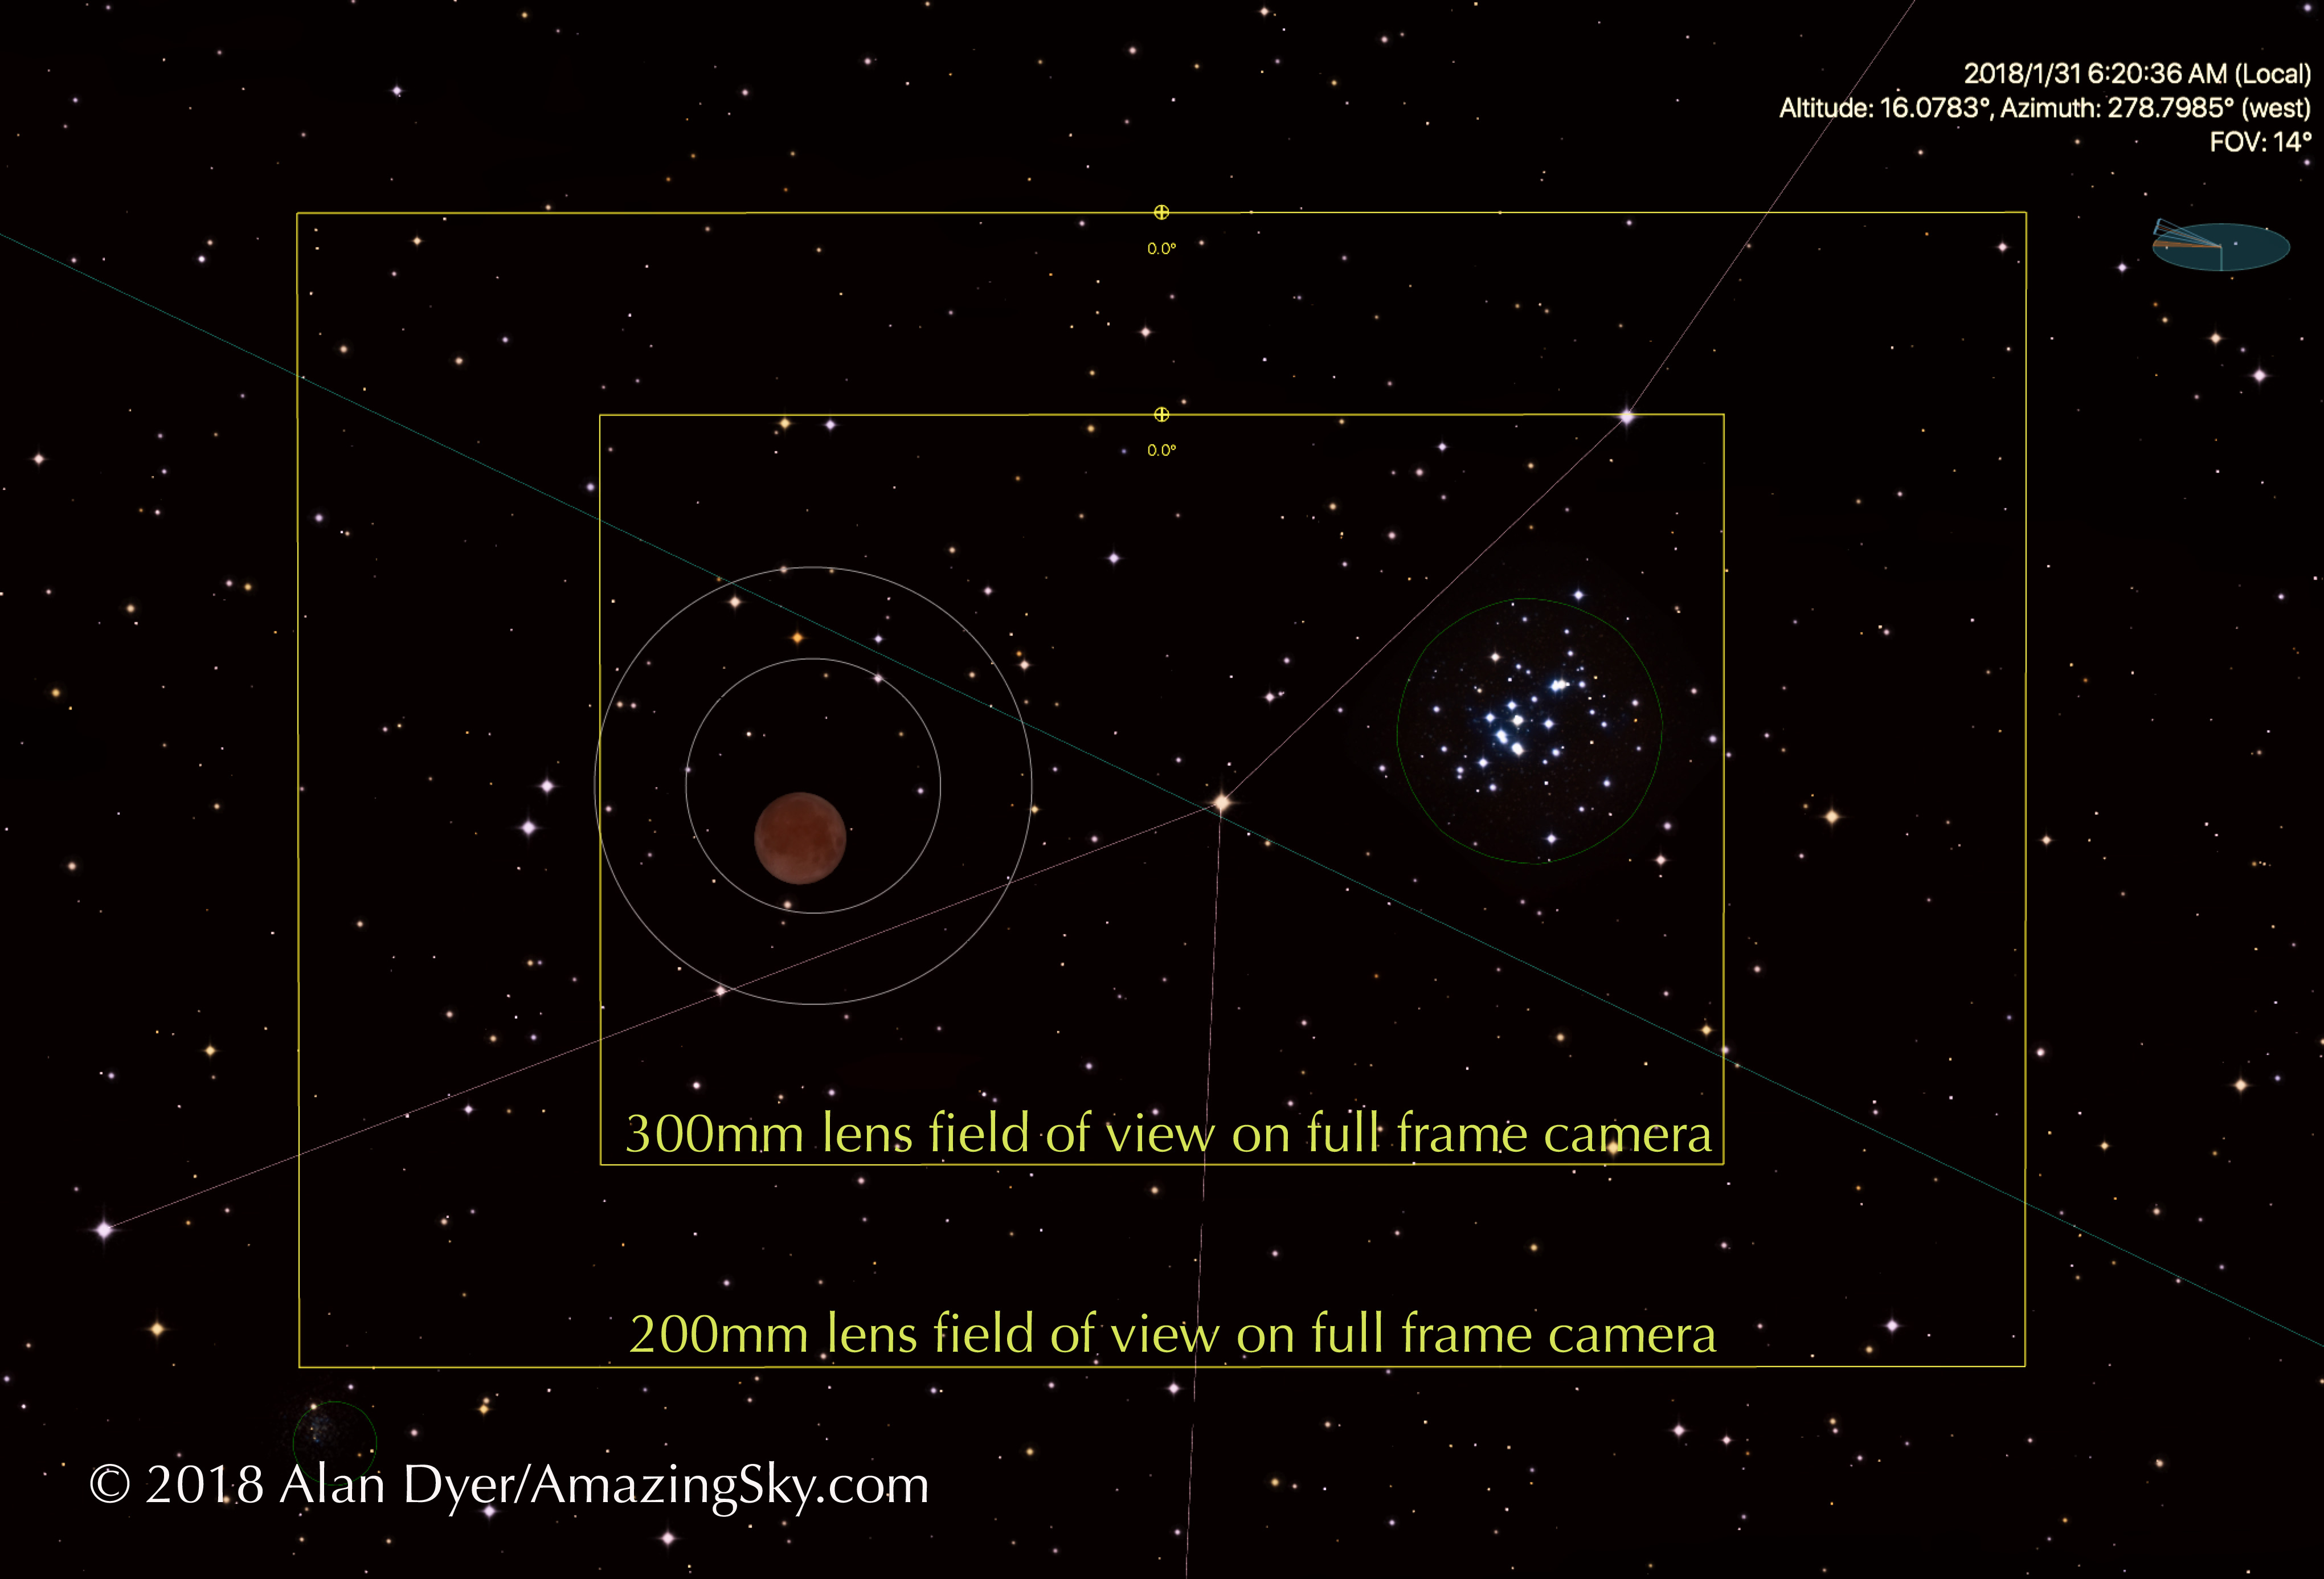
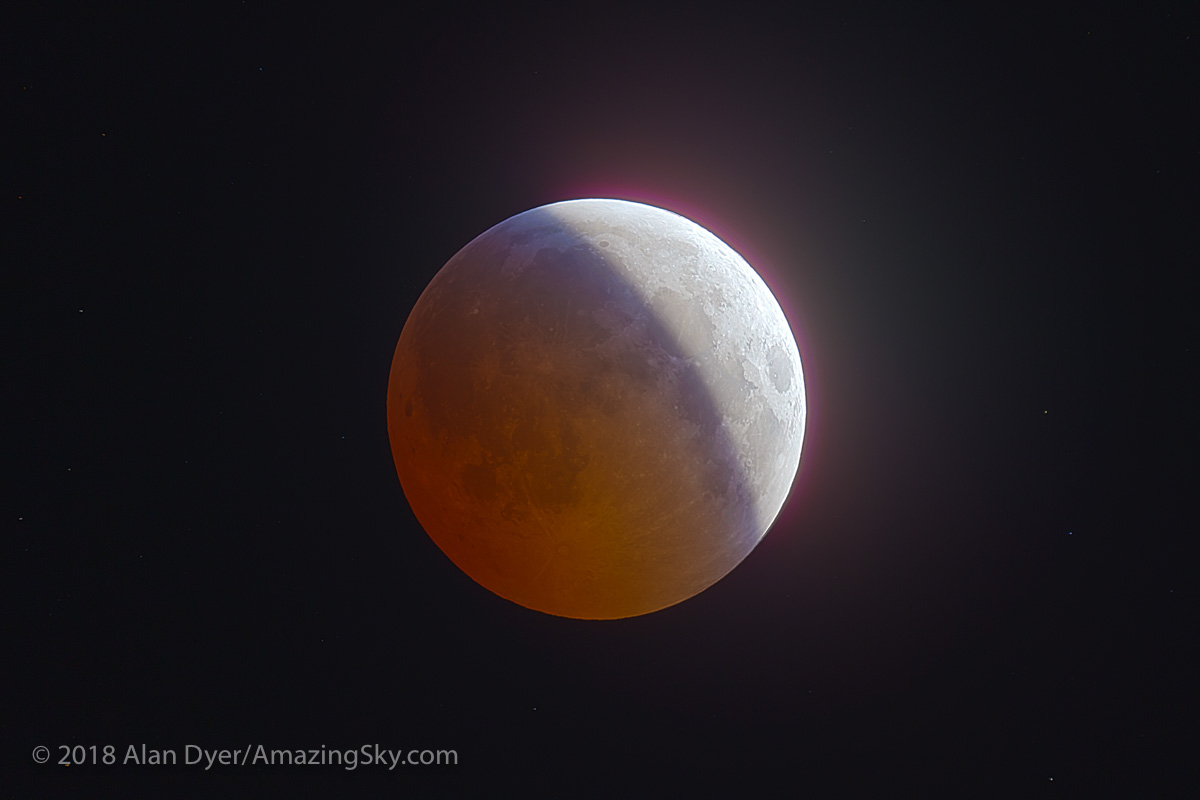
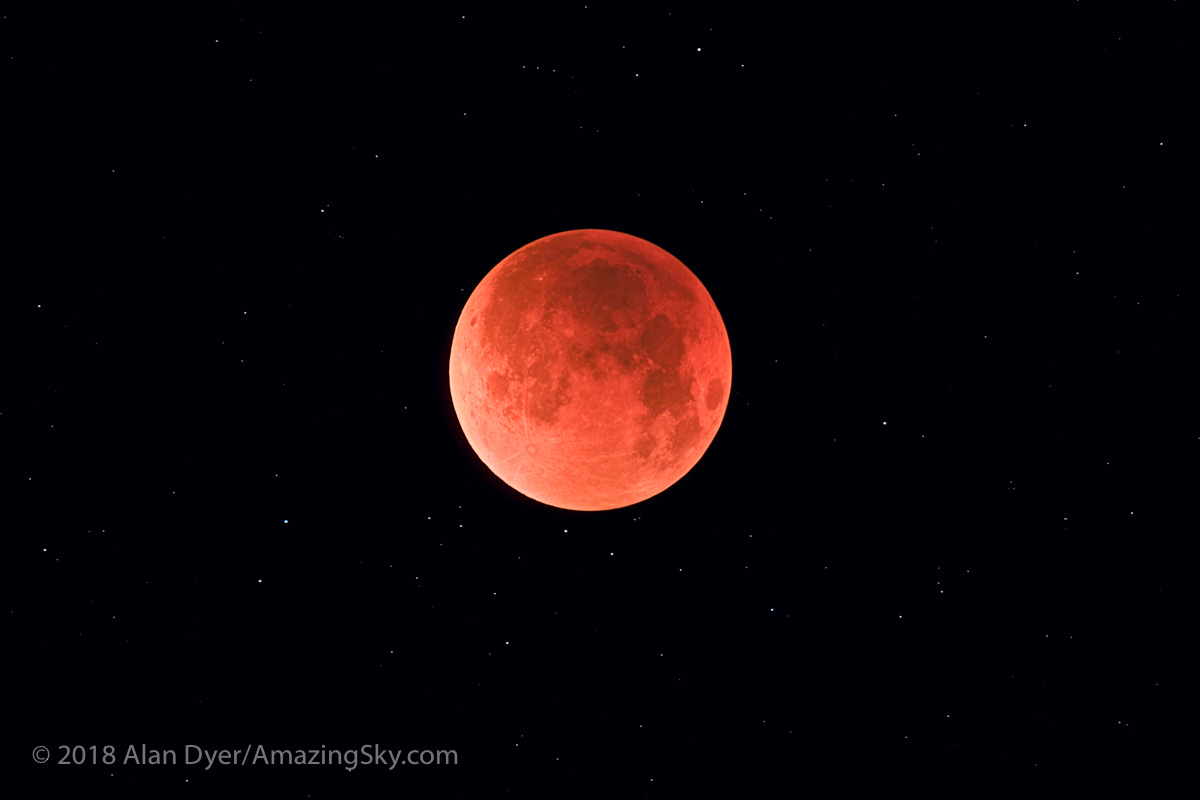
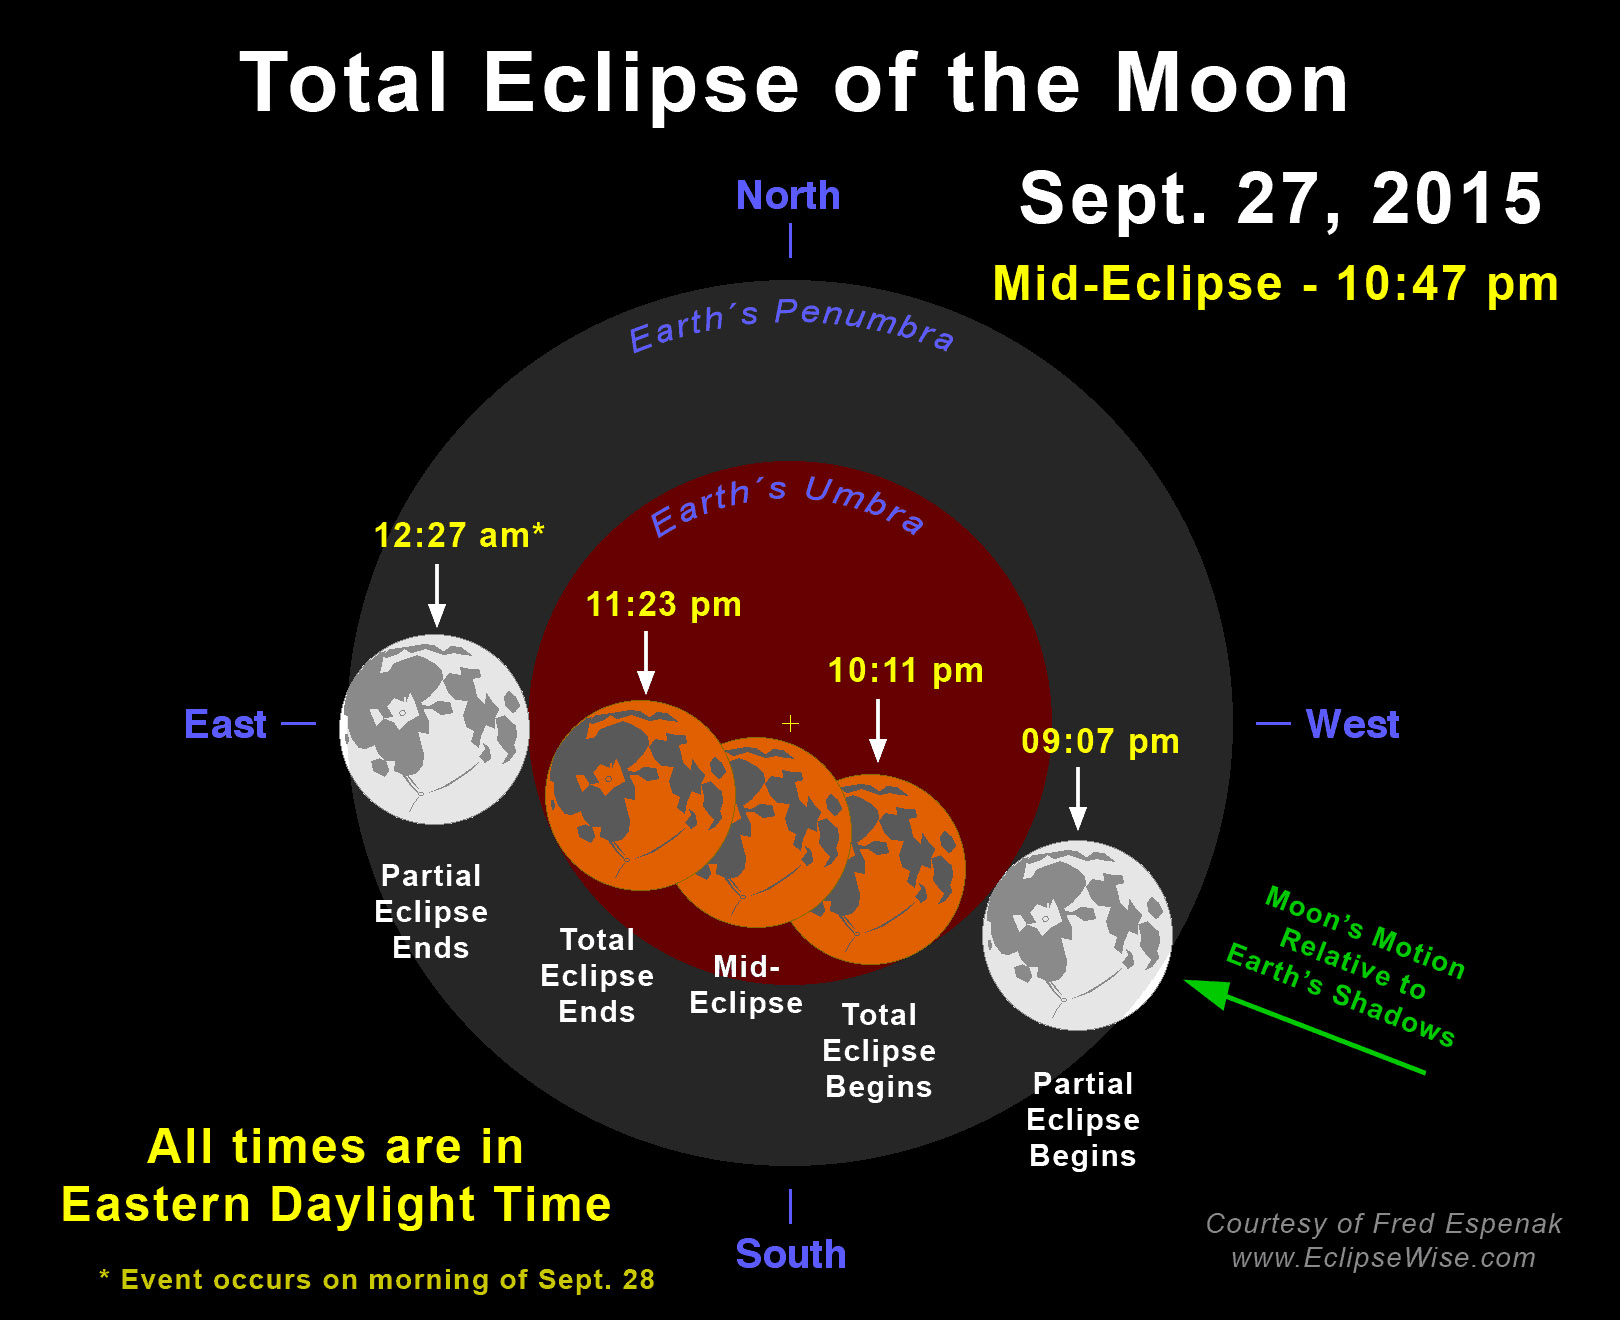
 On the evening of January 20 for North America, the Full Moon passes through the umbral shadow of the Earth, creating a total eclipse of the Moon.