

It’s Perseid meteor shower time. Here are tips for seeing and shooting the meteors.
What are the Perseids?
They are an annual meteor shower, perhaps the most widely observed of the year, that peak every year about August 12. They are caused by Earth passing through a dust stream left by Comet Swift-Tuttle, last seen near Earth in 1992.
Each “shooting star” is really a bit of comet dust burning up in our atmosphere as it ploughs into us at 200,000 kilometres an hour. They don’t stand a chance of surviving – and none do.
All Perseid particles burn up. None reach Earth.

When are the Perseids?
The peak night of the Perseids this year is the night of Wednesday, August 12 into the early morning hours of August 13, with the peak hour occurring about midnight Mountain Daylight Time or 2 a.m. on the 13th for Eastern Daylight Time.
For North America, this is ideal timing for a good show this year. However, a good number of meteors will be visible the night before and night after peak night.
Even better, the Moon is near New and so won’t interfere with the viewing by lighting up the sky.
In all, except for the mid-week timing, conditions this year in 2015 couldn’t be better!

What do they look like?
Any meteor looks like a brief streak of light shooting across the sky. The brightest will outshine the brightest stars and are sure to evoke a “wow!” reaction.
However, the spectacular Perseids are the least frequent. From a dark site, expect to see about 40 to 80 meteors in an hour of patient and observant watching, but of those, only a handful – perhaps only 1 or 2 – will be “wow!” meteors.
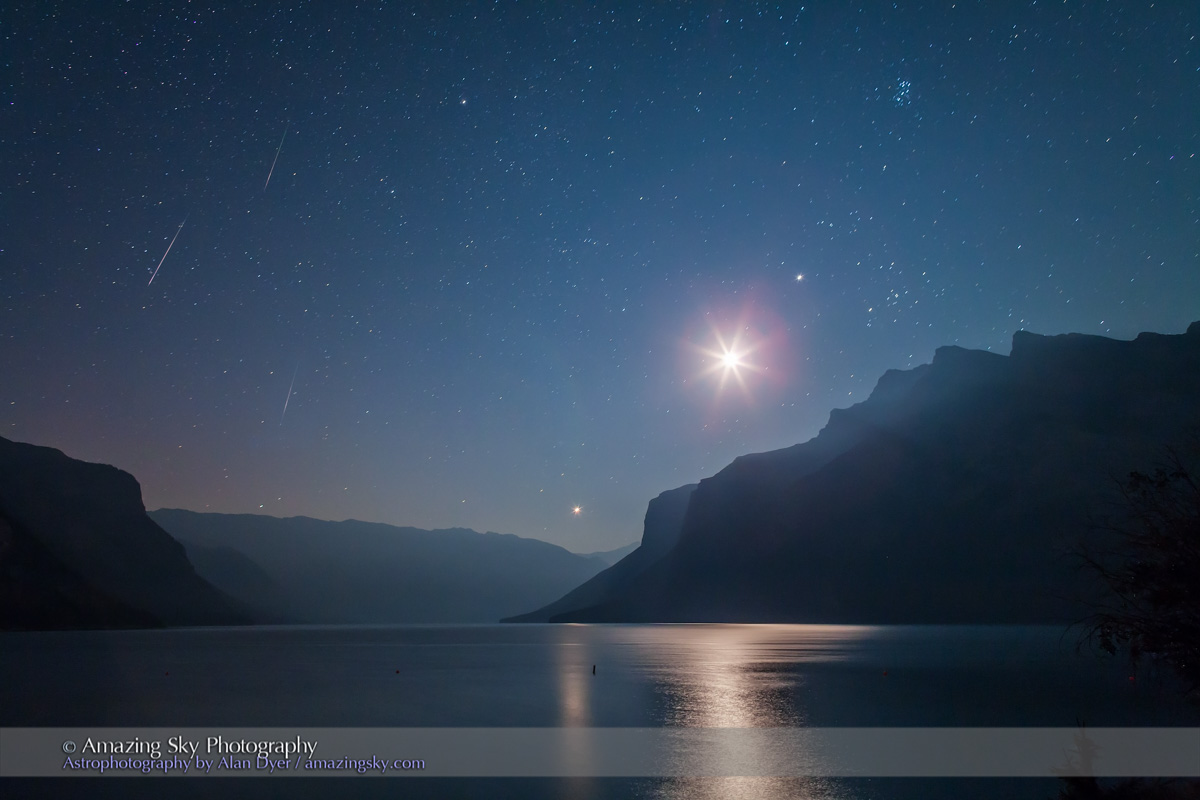
Taken the night of Saturday, August 11 into the wee hours of Sunday, August 12, 2012 with the Canon 7D and 10-22mm Canon lens. This is a stack of two exposures, one for each meteor, each for 60 seconds at ISO 1250 and f/4.
Where do I look?
All the meteors will appear to radiate from a point in the constellation of Perseus in the northeastern sky in the early hours of the night, climbing to high overhead by dawn.
So you can face that direction if you wish, but Perseids can appear anywhere in the sky, with the longest meteor trails often opposite the radiant point, over in the southwest.
How do I look?
Simple – just lie back on a comfy lawn chair or patch of grass and look up!
But … you need to be at a dark location away from city lights to see the most meteors. You’ll see very little in a city or light-polluted suburbs.
Head to a site as far from city lights as you can, to wherever you’ll be safe and comfortable.
How do I take pictures?
To stand any chance of capturing these brief meteors you’ll need a good low-noise camera (a DSLR or Compact System Camera) with a fast (f/2.8 or faster) wide-angle lens (10mm to 24mm).
Sorry, keep your point-and-shoot camera and phone camera tucked away in your pocket – they won’t work.
Set up you camera on a tripod, open the lens to f/2.8 (wide open perhaps) and the ISO to 800 to 3200) and take a test exposure of 20 to 40 seconds. You want a well-exposed image but not over-exposed so the sky is washed out.
Set your exposure time accordingly – most cameras allow a maximum exposure of 30 seconds. Exposures longer than 30 seconds require a separate intervalometer to set the exposure, with the camera set on Bulb (B).
Take lots of pictures!
To up your chances of catching a meteor, you need to set the camera to shoot lots of frames in rapid succession.
Use an intervalometer to take shots one after the other with as little time between as possible – because that’s when a meteor will appear!
Barring an intervalometer, if you have standard switch remote control, set the camera on High Speed Continuous, and the shutter speed to 30 seconds, then lock the remote’s switch to ON to keep the camera firing. As soon as one exposure ends it’ll fire another.

What else do I need to know?
• Focus the lens carefully so the stars are sharp – the Live Focus mode helps for this. Focus on a bright star or distant light.
• Aim the camera to take in a wide swath of the sky but include a well-composed foreground for the most attractive shot.
• Aim northeast to capture meteors streaking away from the radiant. But you can aim the camera to any direction that lends itself to a good composition and still capture a meteor.
• To increase your chances, shoot with two or more cameras aimed to different areas of the sky. Meteors always appear where your camera isn’t aimed!
• Be patient! Despite shooting hundreds of frames only a handful will record a meteor, as only the brightest will show up.
Can I track the sky?
If you have a motorized equatorial mount or a dedicated sky tracking device (the iOptron Sky Tracker and Sky-Watcher Star Adventurer, each about $400, are popular), you can follow the stars while taking lots of shots. This avoids the stars trailing and allows you to use longer exposures.
The video above shows a Star Adventurer tracking the sky as it turns about its polar axis which is aimed up to a point near Polaris. Click the Enlarge and HD buttons to view the video properly.
Polar align the tracker, but then perhaps aim the camera to frame the summer Milky Way overhead. Take lots of 1- to 3-minute exposures, again at f/2.8 and ISO 800 to 1600. Some exposures will pick up meteors – with luck!
Tracking then stacking
Later, in processing, because the sky has remained fixed on the frame, it’s then possible to stack the images (using a “Lighten” blend mode on each image layer) so that the final composite frame contains more meteors, for an image with lots of meteors captured over an hour or more of shooting.
While it is possible to stack shots taken on a static tripod to produce such a meteor composite, doing so requires a lot of manual cutting, pasting and aligning of meteor images by hand. The result is a bit of a fake, though I’ve done it myself – the image at top is an example, though with only a trio of meteors.
Good luck and happy meteor watching!
– Alan, August 6, 2015 / © 2015 Alan Dyer / www.amazingsky.com

This was great to reead