How to Photograph the Geminid Meteor Shower


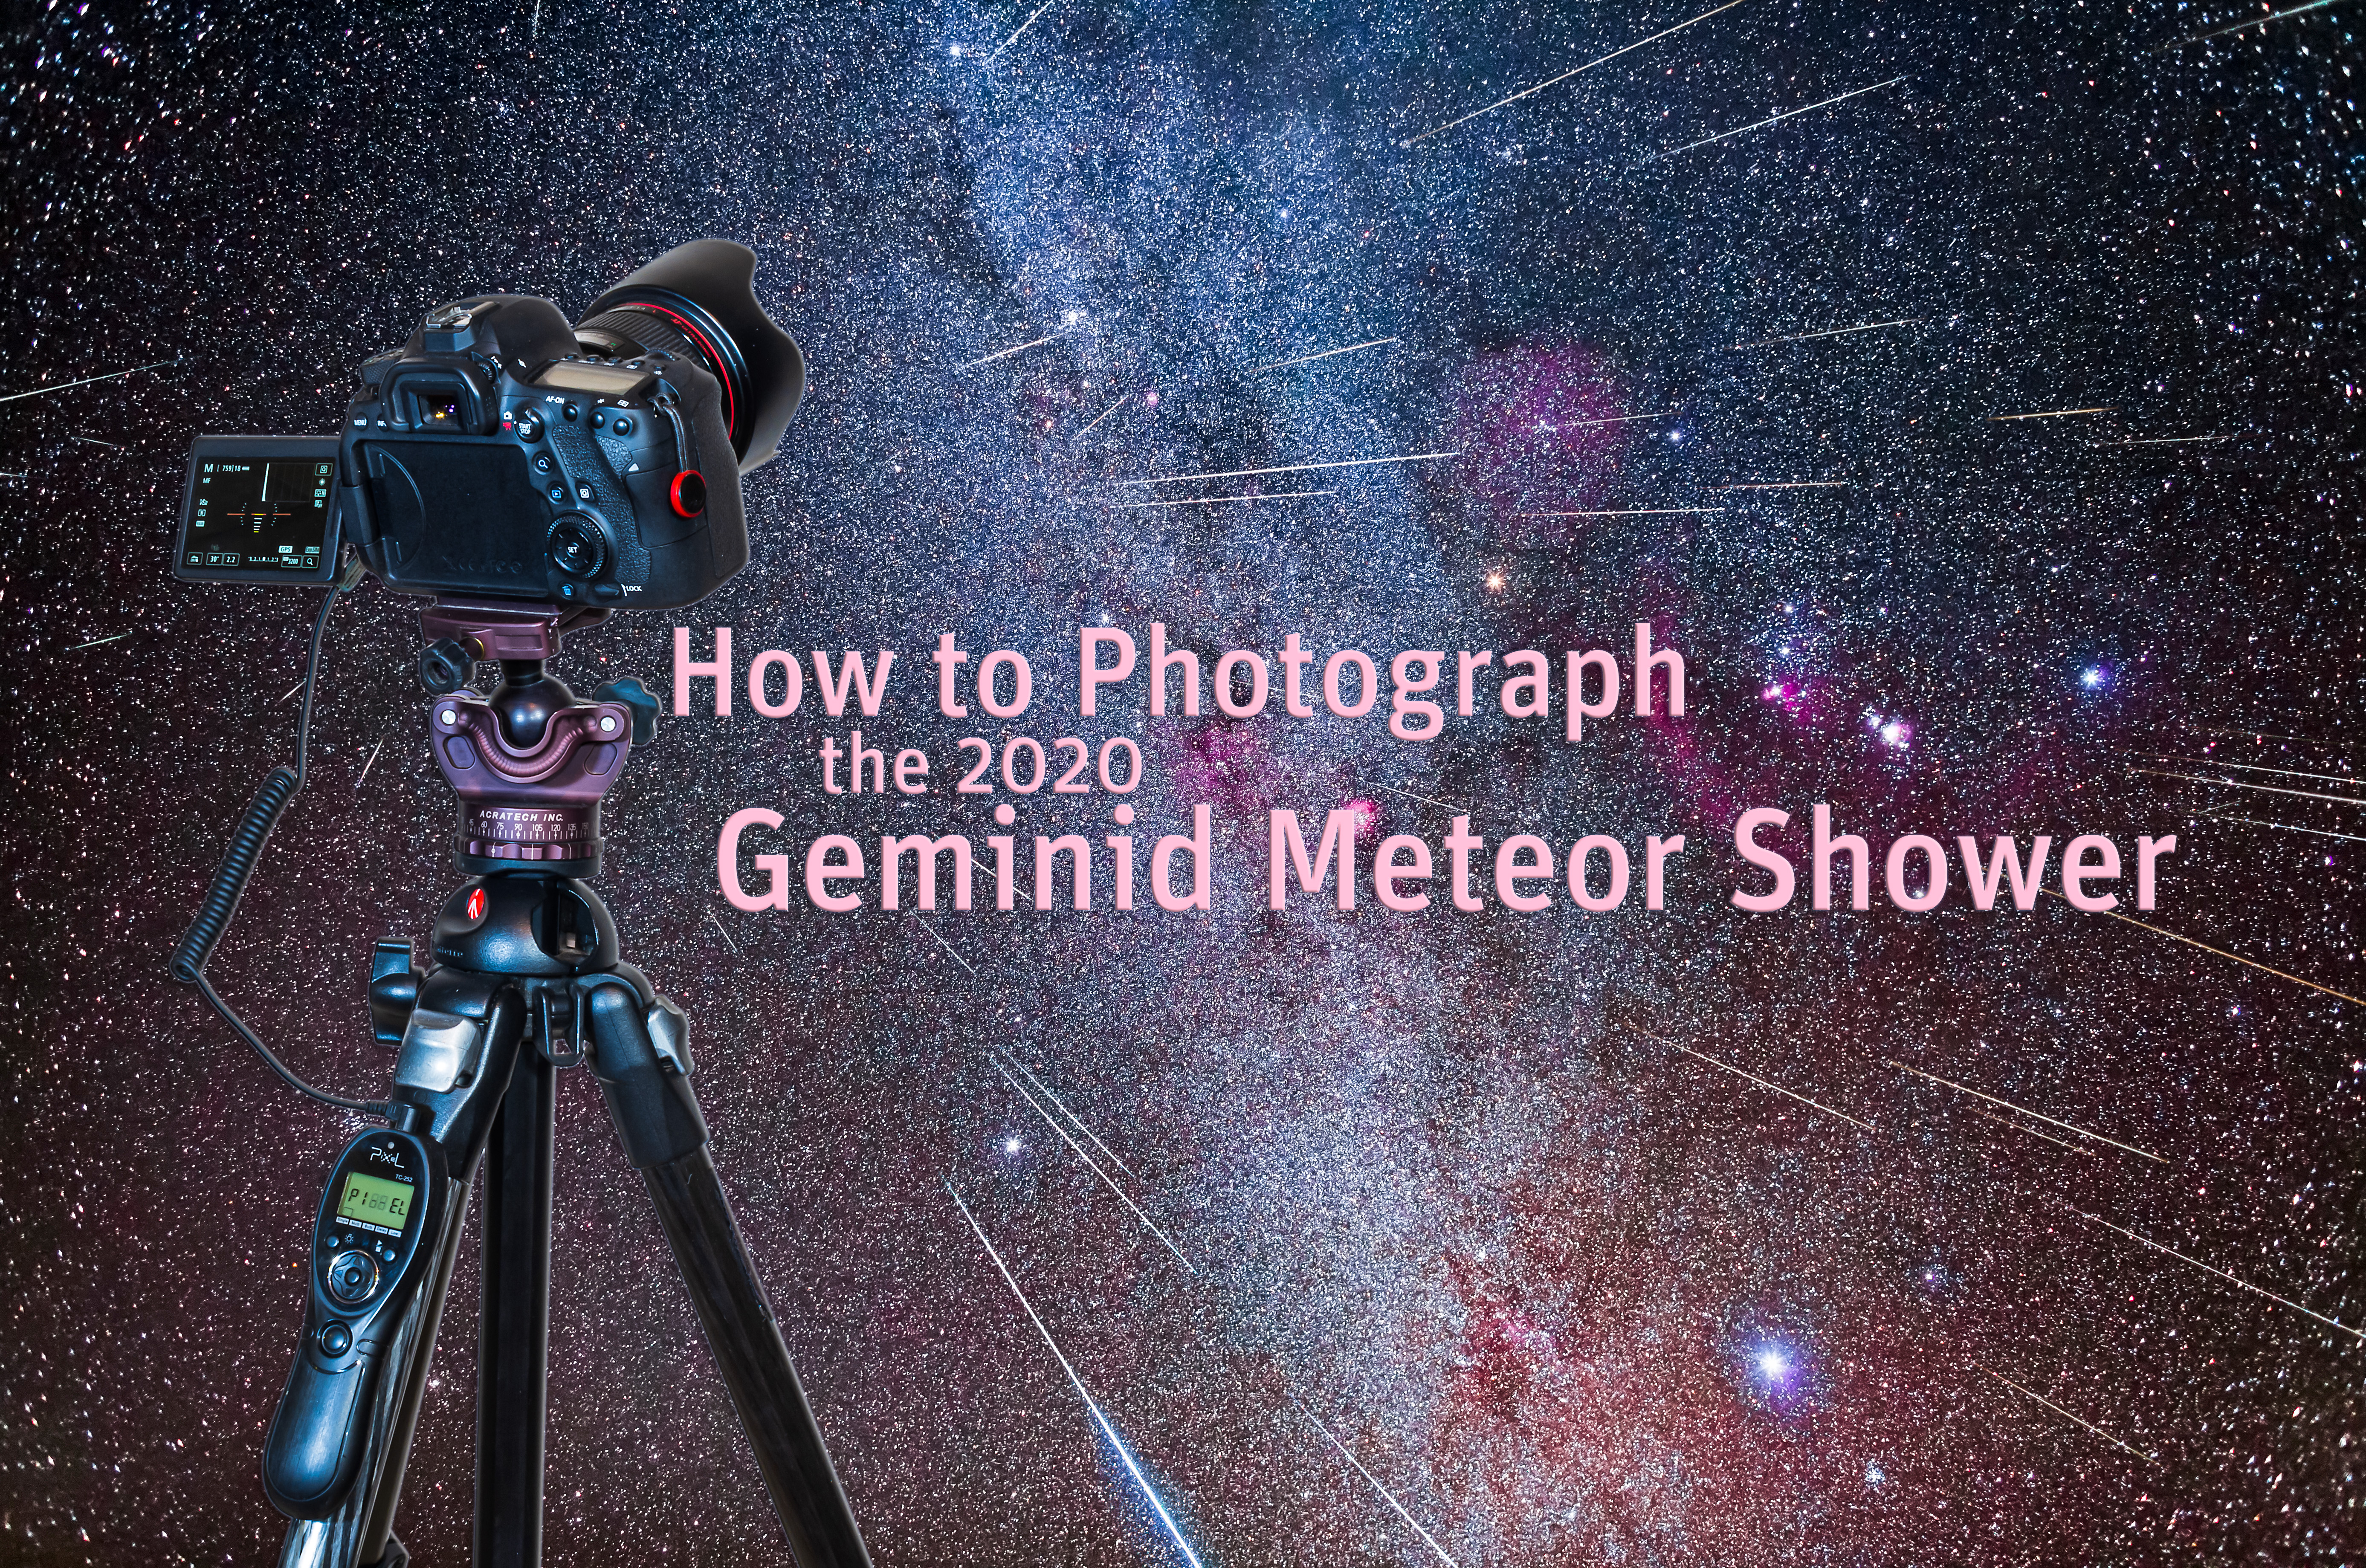
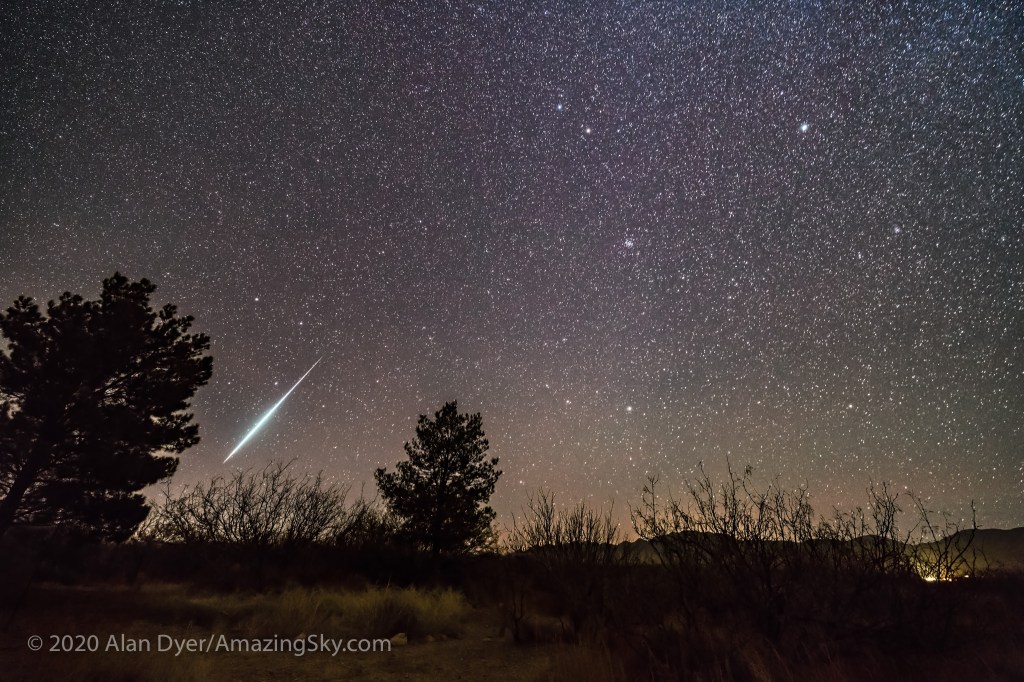
The annual Geminid meteor shower peaks under ideal conditions this year, providing a great photo opportunity. 

The Geminids is the best meteor shower of the year, under ideal conditions capable of producing rates of 80 to 120 meteors an hour, higher than the more widely observed Perseids in August. And this year conditions are ideal! 

The Perseids get better PR because they occur in summer. For most northern observers the Geminids demand greater dedication and warm clothing to withstand the cool, if not bitterly cold night. 

A Good Year for Geminids

While the Geminids occur every year, many years are beset by a bright Moon or poor timing. This year conditions couldn’t be better:

• The shower peaks on the night of December 13-14 right at New Moon, so there’s no interference from moonlight at any time on peak night.

• The shower peaks in the early evening of December 13 for North America, about 8 p.m. EST (5 p.m. PST). This produces a richer shower than if it peaked in the daytime hours, as it can in some years. 

The two factors make this the best year for the Geminids since 2017 when I shot all the images here. 

A composite of the 2017 Geminid meteor shower looking east to the radiant point. This is a stack of 40 images, each a 30-second exposure at f/2.5 with the Rokinon 14mm SP lens and Canon 6D MkII at ISO 6400. The images are the 40 frames with meteors out of 357 taken over 3.25 hours. The ground is a stack of 8 images, mean combined to smooth noise. The background base-image sky is from one exposure. The camera was on a fixed tripod, not tracking the sky. I rotated and moved each image in relation to the base image and around Polaris at upper left, in order to place each meteor at approximately the correct position in relation to the background stars, to preserve the effect of the meteors streaking from the radiant near Castor at centre.

What Settings to Use?

To capture the Geminids, as is true of any meteor shower, you need:

  • A good DSLR or mirrorless camera set to ISO 1600 to 6400.
  • A fast, wide-angle lens (14mm to 24mm) set to f/2.8 or wider, perhaps f/2. Slow f/4 to f/.6 kit zooms are not very suitable.
  • Exposures of 30 to 60 seconds each.
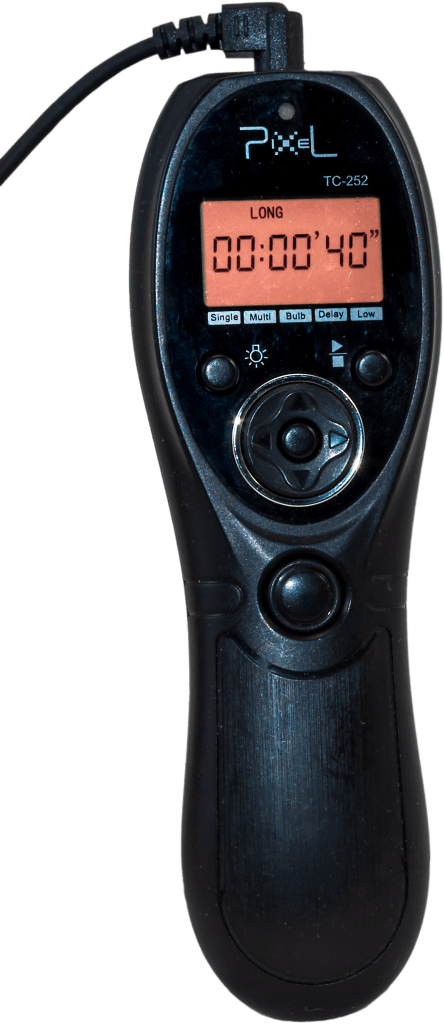
  • An intervalometer to fire the shutter automatically with no more than 1 second between exposures. As soon as one exposure ends and the shutter closes, the next exposure begins. 
  • Take hundreds of images over as long a time period as you can on peak night.
Use an intervalometer to control the shutter speed, with the camera on Bulb. Set the interval to one second to minimize the time the shutter is closed.

Out of hundreds of images, a dozen or more should contain a meteor! You increase your chances by using:

  • A high ISO, so the meteor records in the brief second or two it appears.
  • A wide aperture, to again increase the light-gathering ability of the lens for those fainter meteors.
  • A wide-angle lens so you capture as much area of sky as possible. 
  • Running two or more cameras aimed at different spots, perhaps to the east and south to maximize sky coverage.
  • A minimum interval between exposures. Increase the interval to more than a second and you know it’s during that “dark time” when the shutter is closed that the brightest meteor of the night will occur. Keep the shutter open as much as possible.
This sky chart looking east for December 13, 2020 shows the position of the radiant and the constellation of Gemini at about 7 p.m. local time. Orion is just rising in the east.

When to Shoot?

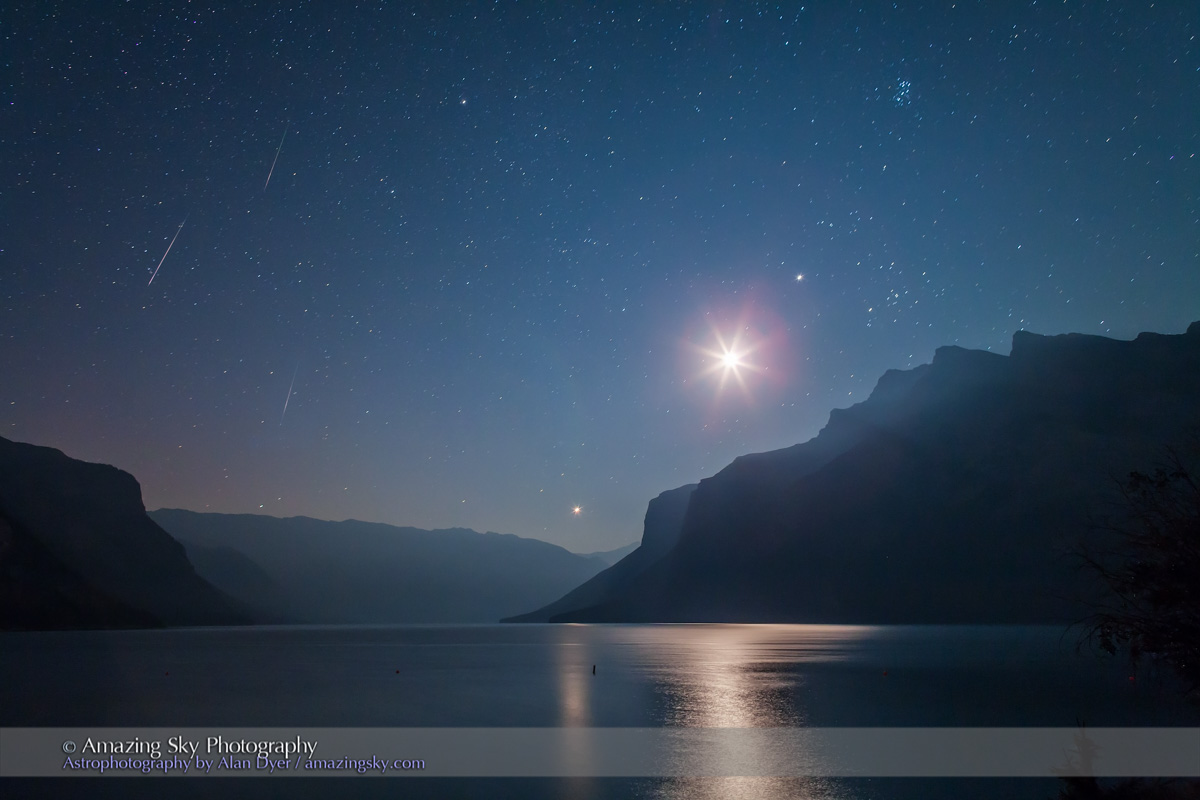
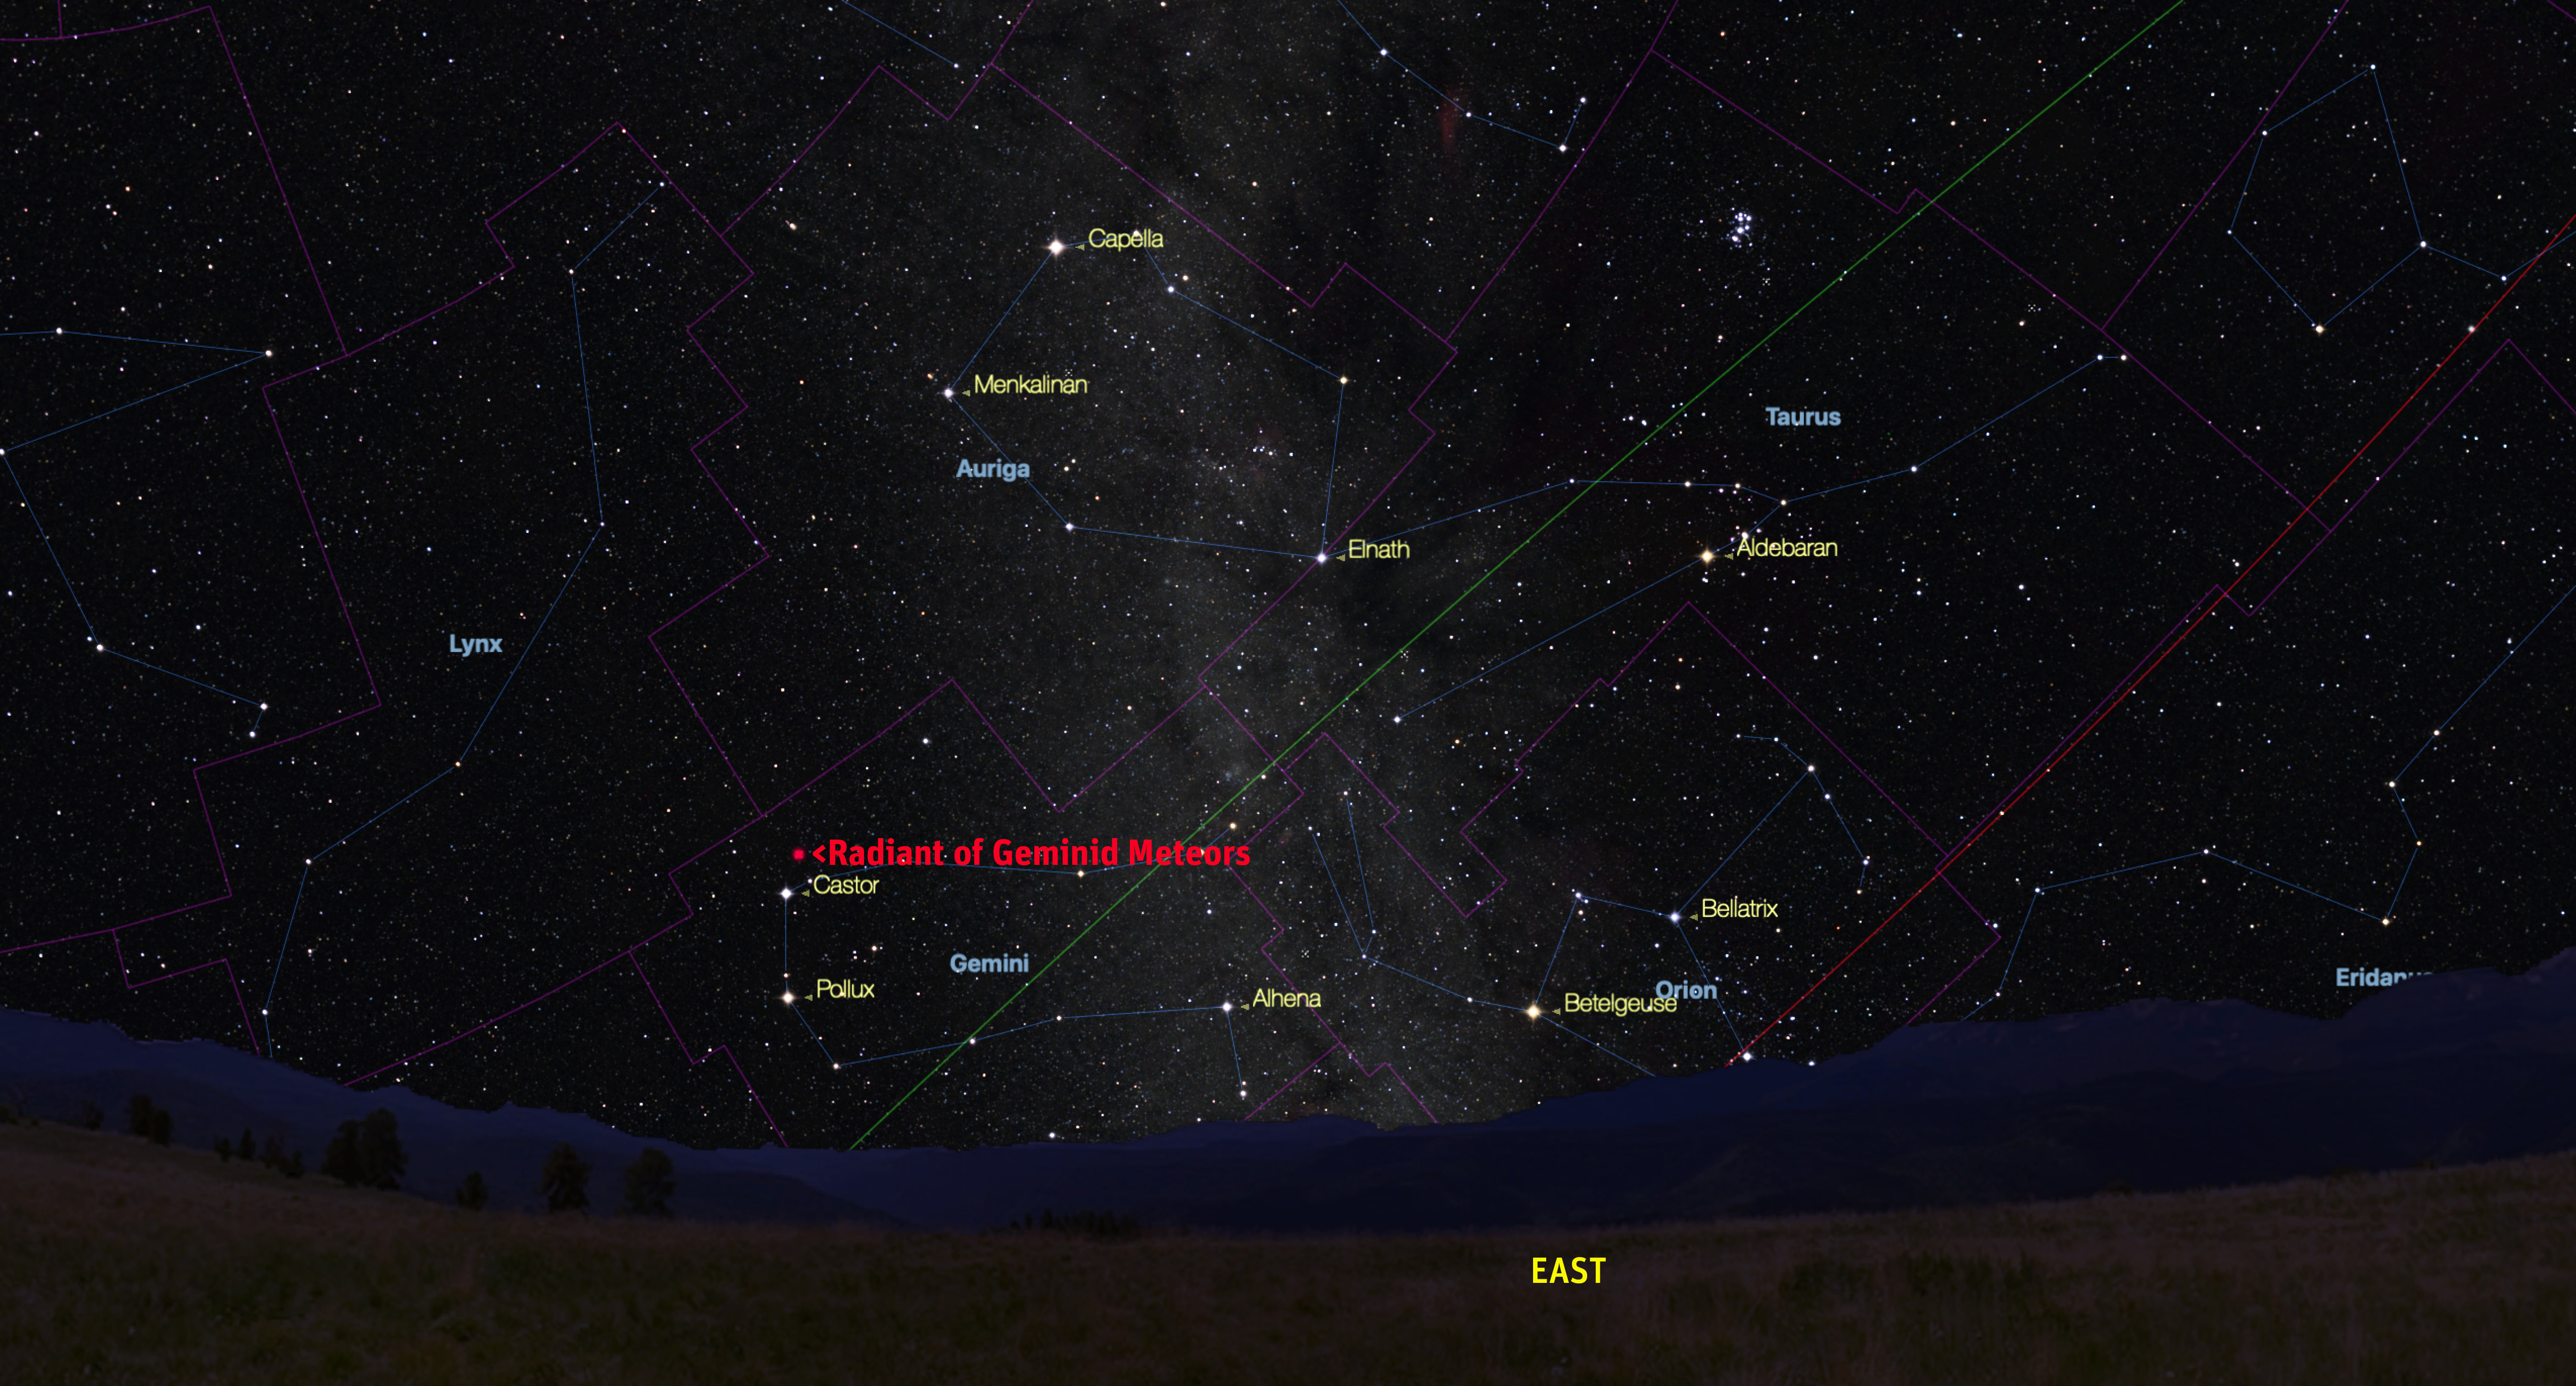
The radiant point of the shower meteors in Gemini rises in the early evening, so you might see some long, slow Earth-grazing meteors early in the night, streaking out of the east.

For Europe the peak of the shower occurs in the middle of the night of December 13/14. 

For North America, despite the peak occurring in the early evening hours, meteors will be visible all night and will likely be best after your local midnight.

So wherever you are, start shooting as the night begins and keep shooting for as long as you and your camera can withstand the cold! 

A single bright meteor from the Geminid meteor shower of December 2017, dropping toward the horizon in Ursa Major. Gemini itself and the radiant of the shower is at top centre. It is one frame from a 700-frame sequence for stacking and time-lapses. The ground is a mean stack of 8 frames to smooth noise. Exposures were 30 seconds at ISO 6400 with the Rokinon 14mm lens at f/2.5 and Canon 6D MkII.

Where to Go?

To take advantage of the moonless night, get away from urban light pollution to as dark a sky as you can. Preferably, put the major urban skyglow to the west or north. 

While from brightly lit locations the very brightest meteors will show up, they are the rarest, so you’d be fortunate to capture one in a night of shooting from a city or town. 

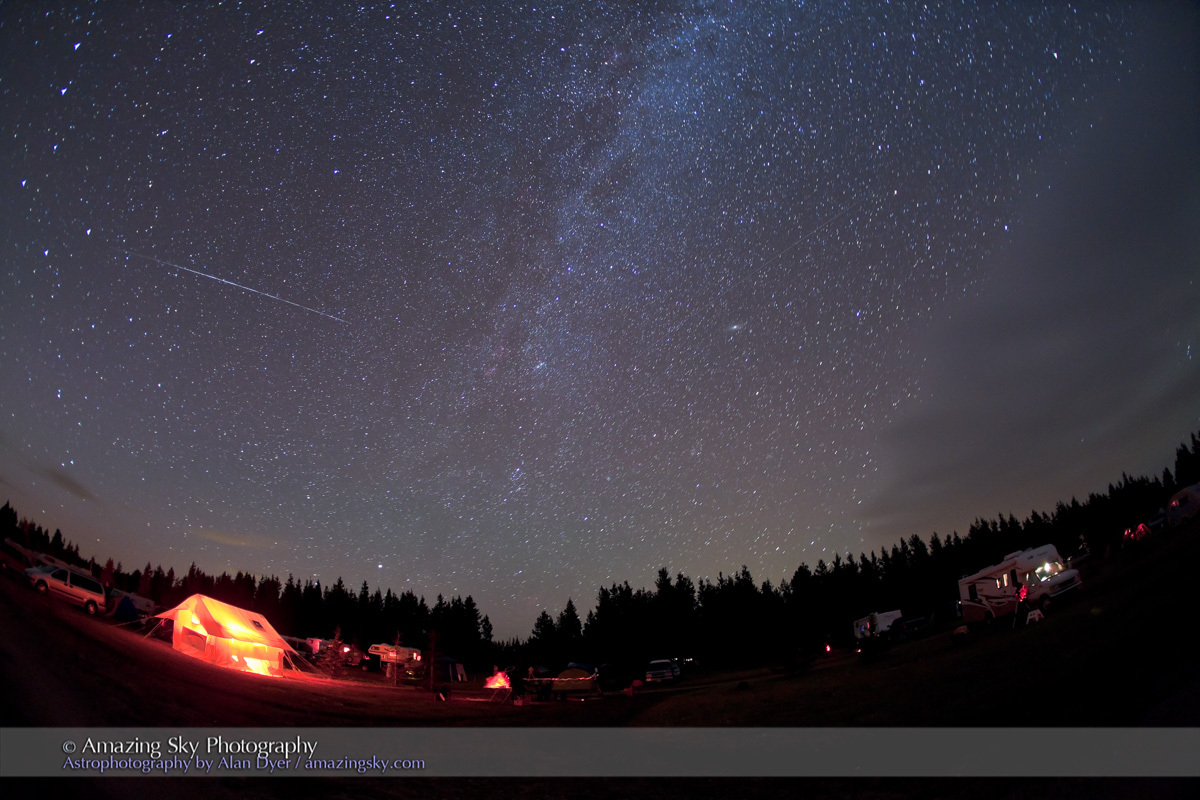
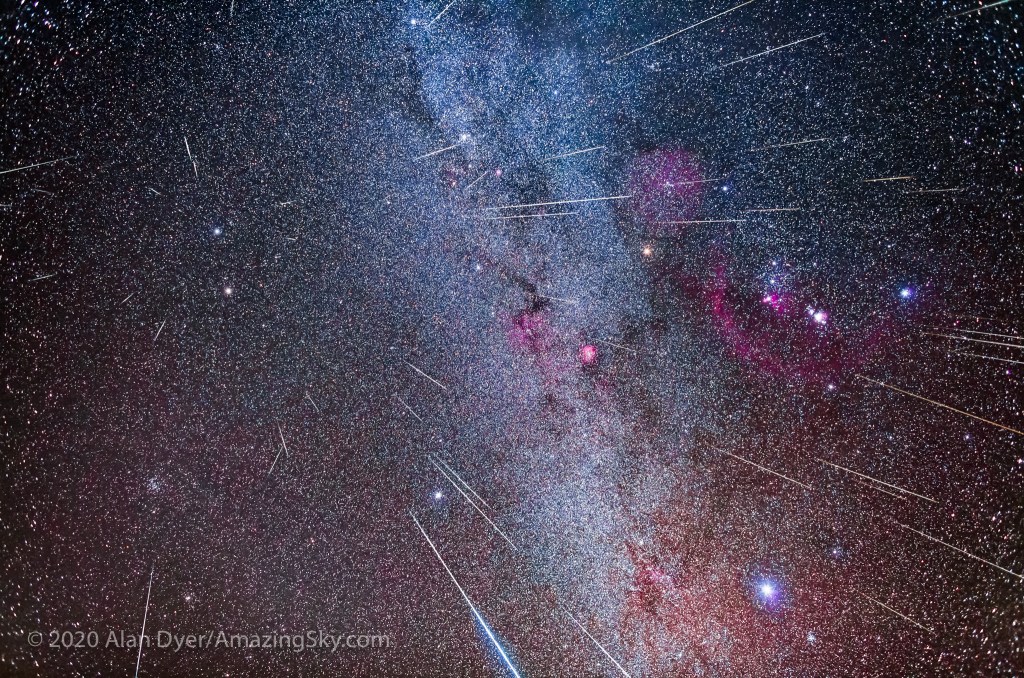
From a dark site, you can use longer exposures, wider apertures and higher ISOs to boost your chances of capturing more and fainter meteors. Plus the Milky Way will show up. 

The Geminid meteor shower of December 13, 2017 in a view framing the winter Milky Way from Auriga (at top) to Puppis (at bottom) with Gemini itself, the radiant of the shower at left, and Orion at right. The view is looking southeast. This is a composite stack of one base image with the brightest meteor, then 20 other images layered in each with a meteor. The camera was not tracking the sky, so I rotated and moved each of the layered-in frames so that their stars mroe or less aligned with the base layer. The images for this composite were taken over 107 minutes, with 22 images containing meteors picked from 196 images in total over that time. Each exposure was 30 seconds with the Rokinon 14mm SP lens at f/2.5 and Canon 6D MkII at ISO 6400.

Where to Aim?

You can aim a camera any direction, even to the west. 

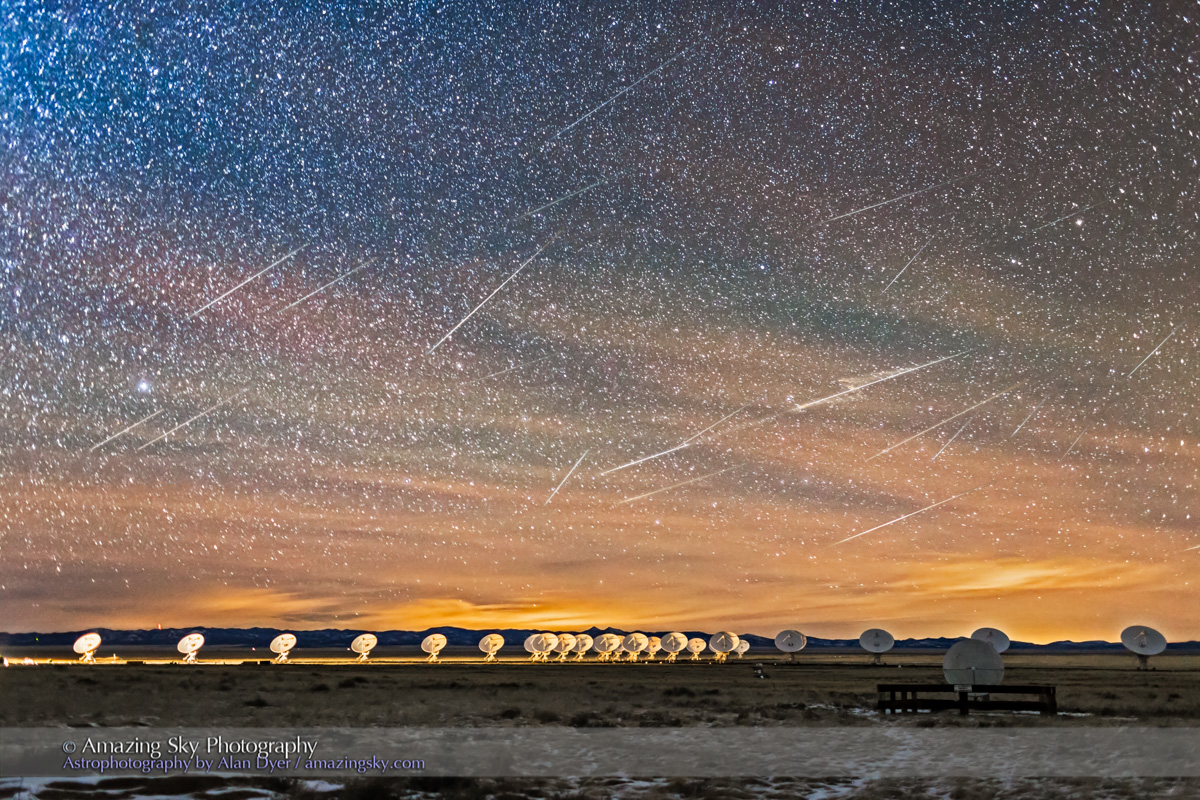
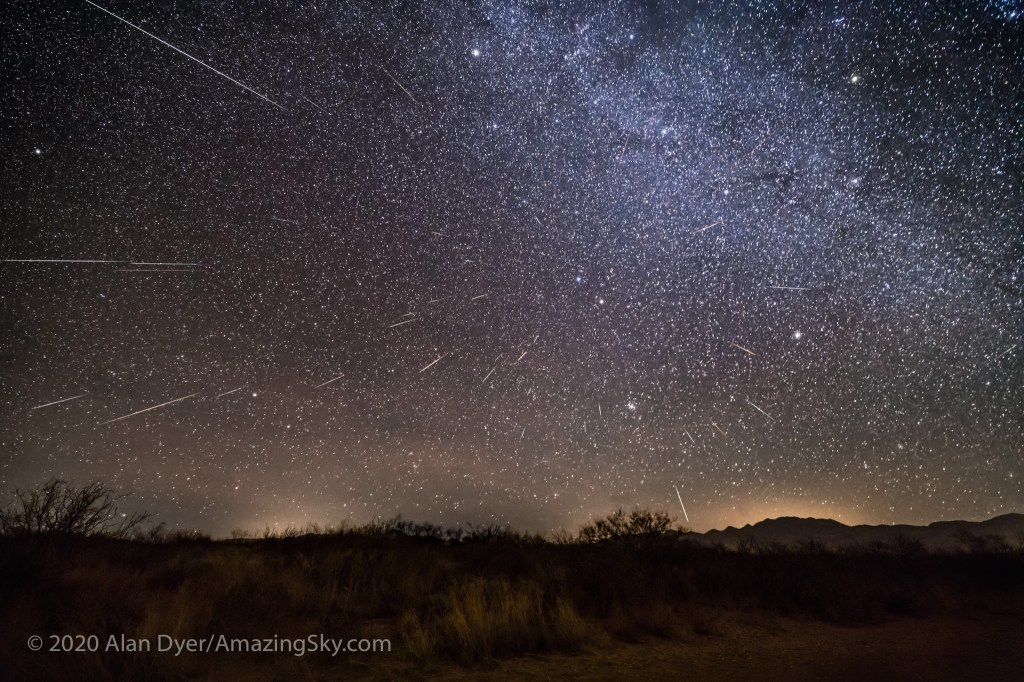
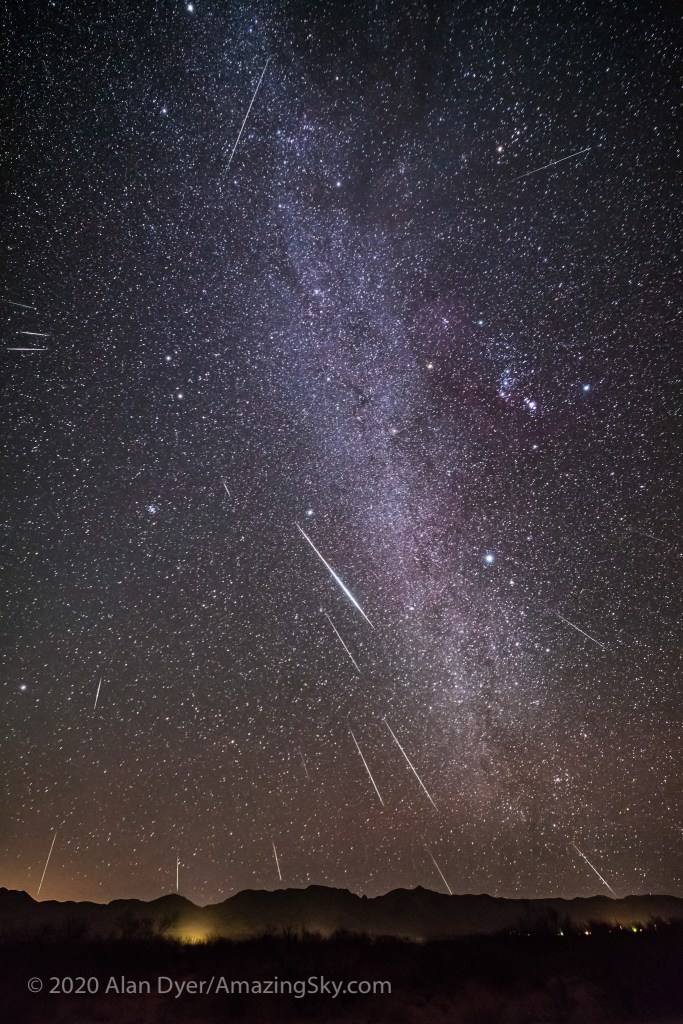
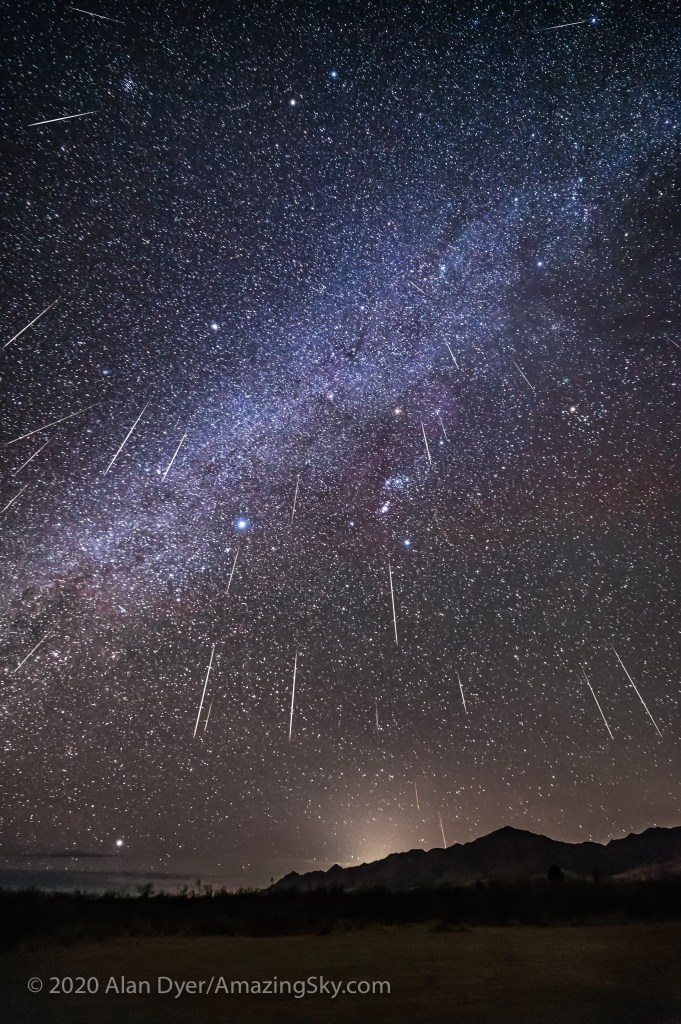
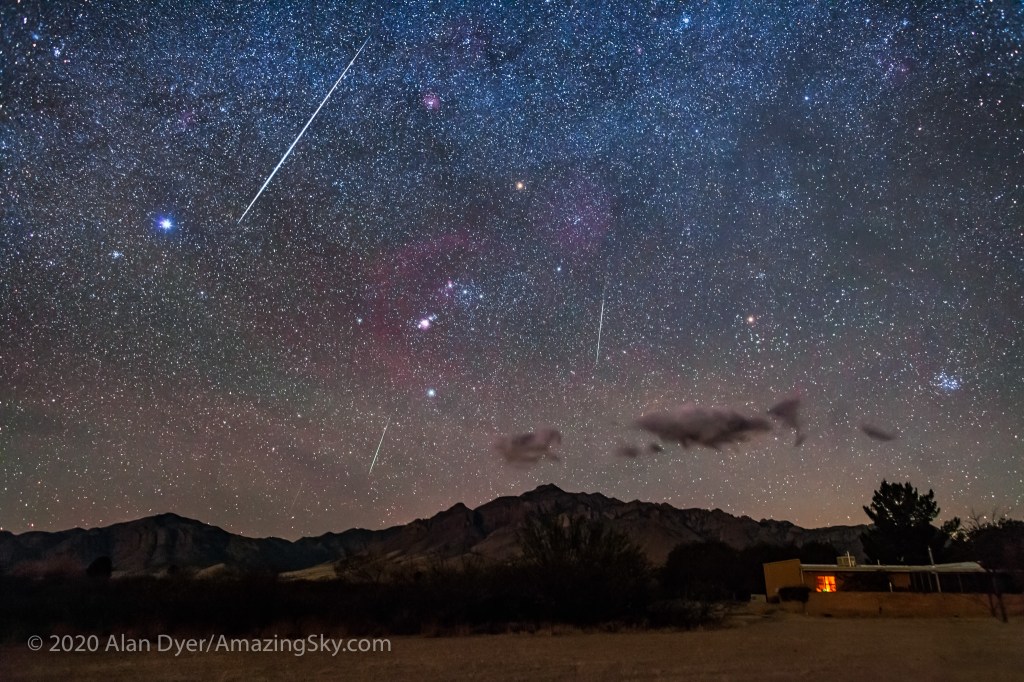
But aiming east to frame the constellation of Gemini (marked by the twin stars Castor and Pollux) will include the radiant point, perhaps capturing the effect of meteors streaking away from that point, especially if you stack multiple images into one composite, as most of my images here are. 
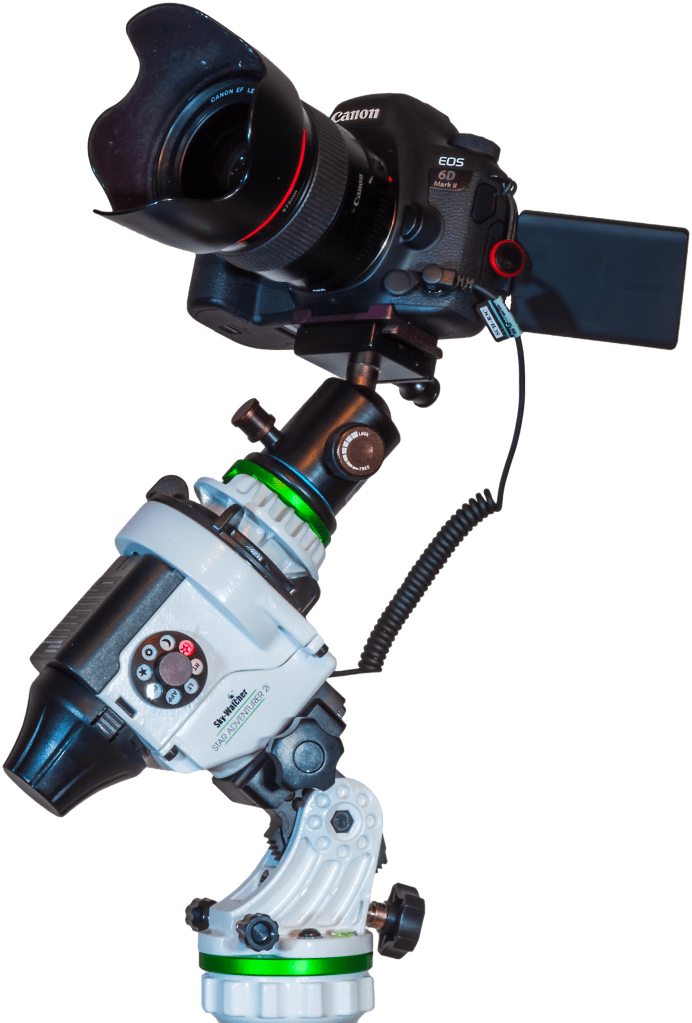
The Star Adventurer star tracker, on its optional equatorial wedge to aid precise polar alignment of its motorized rotation axis.

Using a Tracker

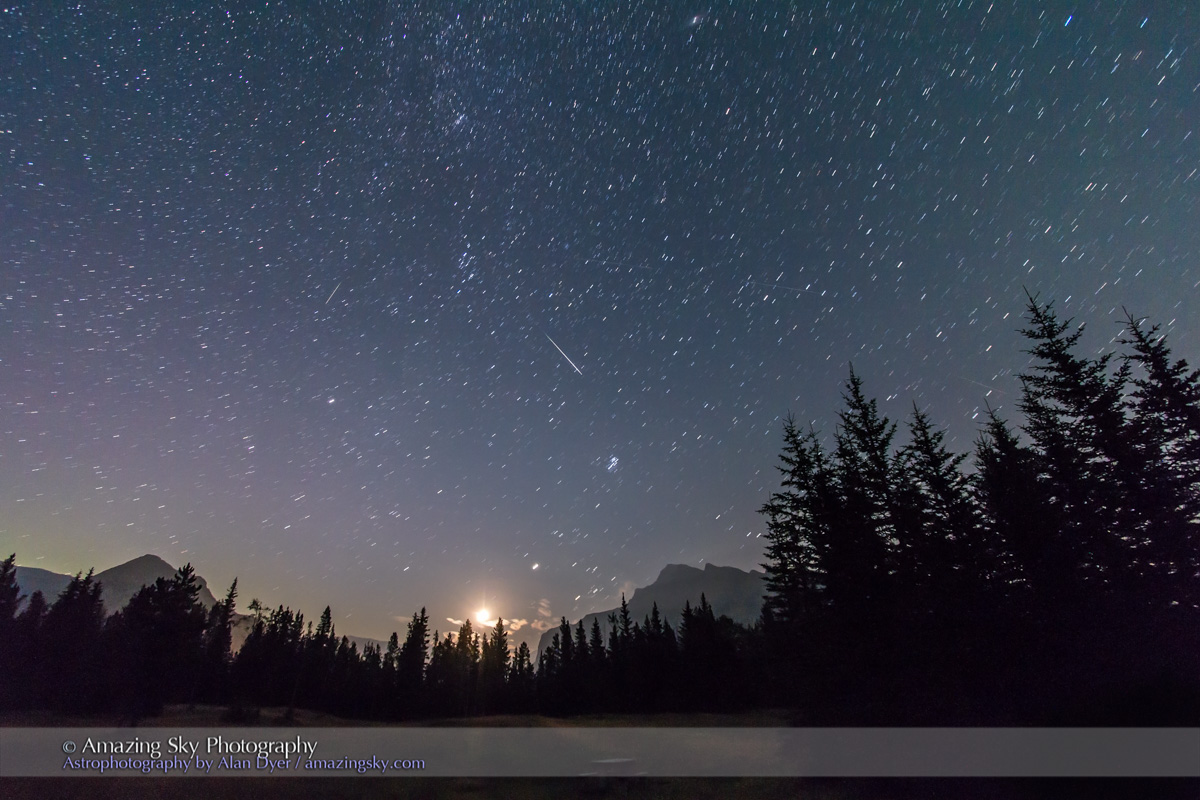
Using a star tracker such as the Sky-Watcher Star Adventurer shown here, makes it possible to obtain images with stars that remain untrailed even in 1- or 2-minute exposures. The sky remains framed the same through hours of shooting, making it much easier to align and stack the images for a multi-meteor composite. 

A tracked composite showing the 2017 Geminid meteors streaking from the radiant point in Gemini at upper left. This is a stack of 43 exposures, each 1-minute with the 24mm Canon lens at f/2.5 and filter-modified Canon 5D MkII camera at ISO 6400, set fast to pick up the fainter meteors. These were 43 exposures with meteors (some with 2 or 3 per frame) out of 455 taken over 5 hours. The background sky comes from just one of the exposures. All the other frames are masked to show just the meteor.

However, a tracker requires accurate polar alignment of its rotation axis (check its instruction manual to learn how to do this) or else the images will gradually shift out of alignment through a long shoot. Using Photoshop’s Auto-Align feature or specialized stacking programs can bring frames back into registration. But good polar alignment is still necessary. 

If you aim east you can frame a tracked set so the first images include the ground. The camera frame will move away from the ground as it tracks the rising sky. 

A composite of the 2017 Geminid meteor shower, from the peak night of December 13, with the radiant in Gemini, at top, high overhead. So meteors appear to be raining down to the horizon. This was certainly the visual impression. This is a stack of 24 images, some with 2 or 3 meteors per frame, each a 30-second exposure at f/2.5 with the Rokinon 14mm SP lens and Canon 6D MkII at ISO 6400. The images are the 24 frames with meteors out of 171 taken over 94 minutes. The ground is a stack of 8 images, mean combined to smooth noise. The background base-image sky is from one exposure. The camera was on a fixed tripod, not tracking the sky.

Using a Tripod and Untracked Camera

The simpler method for shooting is to just use a camera (or two!) on a fixed tripod, and keep exposures under about 30 seconds to minimize star trailing. That might mean using a higher ISO than with tracked images, especially with slower lenses. 

The work comes in post-processing, as stacking untracked images will produce a result with meteors streaking in many different orientation and locations, ruining the effect of meteors bursting from a single radiant. 

To make it easier to stack untracked images, try to include Polaris in the field of the wide-angle lens, perhaps in the upper left corner. The sky rotates around Polaris, so it will form the easy-to-identify point around which you can manually rotate images in editing to bring them back into at least rough alignment.

Covering the steps to composite tracked and untracked meteor shower images is beyond the purview of this blog. 

But I cover the process in multi-step tutorials in my How to Photograph and Process Nightscapes and Time-Lapses ebook, linked to above. 

The images shown here were layered, masked and blended with those steps and are used as examples in the book’s tutorials. 

A trio of Geminid meteors over the Chiricahua Mountains in southeast Arizona, with Orion and the winter stars setting. I shot this at the end of the night of December 13/14, 2017 with the rising waxing crescent Moon providing some ground illumination. This is a stack of one image for the ground and two fainter meteors, and another image with the bright meteor. The camera was on a Star Adventurer Mini tracker so the stars are not trailed, though the ground will be slightly blurred. All were 30-second exposures at f/2.8 with the 24mm Canon lens and filter-modified Canon 5D MkII at ISO 5000.

Keeping Warm

Keeping yourself warm is important. But your camera is going to get cold. It should work fine but its battery will die sooner than it would on a warm night. Check it every hour, and have spare, warm batteries ready to swap in when needed.

Lenses can frost up. The only way to prevent this is with low-voltage heater coils, such as the DewDestroyer from David Lane. It works very well. Other types are available on Amazon. 

Good luck and happy meteor hunting!

— Alan, December 2, 2020 / © 2020 AmazingSky.com 


Capturing the Quadrantids


Quadrantid Meteor Shower Composite

The Quadrantid meteors streaked out of the northern sky on a fine winter’s night.

The temperature was mild and skies clear in the early evening for the annual Quadrantid meteor shower. This is a prolific but short-lived shower with a brief peak. The cold and low altitude of its radiant point keeps this shower from becoming better known.

This was the first year I can recall shooting it. I had some success during a 2-hour shoot on January 3, from 9 to 11 pm MST.

The result above is a stack of 14 images, the best out of 600 shot that recorded meteors. The ground and sky comes from one image with the best Quad of the night, and the other meteor images were masked and layered into that image, with no attempt to align their paths with the moving radiant point.

However, over the 2 hours, the radiant point low in the north would not have moved too much, as it rose higher into the northern sky.

Most of the meteors here are Quads, but the very bright bolide at left, while it looks like it is coming from the radiant, it is actually streaking toward the radiant, and is not a Quadrantid. But oh so close! I left it in the composite for the sake of the nice composition!

Light clouds moving in added the natural star glows around the Big Dipper stars.

All frames were 10 seconds at f/2 with the 24mm lens and Nikon D750 at ISO 3200.

— Alan, January 4, 2016 / © 2016 Alan Dyer / www.amazingsky.com 

Meteor Shower over the VLA


Raining Meteors over the VLA Dishes

Meteors from the Geminid shower rain over the dishes of the VLA radio telescope.

Sunday night was a prime night for the annual Geminid meteor shower, one of the best of the year. To capture it, I traveled to the Plains of San Agustin in the high desert of New Mexico.

It’s there that the National Radio Astronomy Observatory operates the 27 dishes of the Very Large Array radio telescope, one of the most photogenic – and photographed – astronomical facilities in the world.

I set up at a viewing point near the entrance, to look northwest over the dishes, arrayed that night, and all season, in its most compact configuration, with all the dishes clustered closest together.

It was an active meteor shower! One particularly bright meteor left a persistent “train” – a smoke trail that lasted over 15 minutes. It creates the fuzzy cloud around the meteor at right. The bright bolide is on two frames, as the shutter closed then opened again as the meteor was still flying! So its bright streak got cut in two. Pity!

I shot with two cameras. The image here is from one, using a 35mm lens to shoot 334 frames over 3 hours. Each exposure was 32 seconds at f/2 and at ISO 3200.

I’ve taken about two dozen of the frames, the ones with meteors, and stacked them here, with the sky and ground coming from one frame. The camera was not tracking the sky.

Bands of natural airglow and clouds illuminated by the lights of Albuquerque to the north add colour to the sky.

I would have shot for longer than three hours, but this was a very cold night, with a brisk wind and temperatures below freezing. A snowstorm had even closed some roads the day before. Three hours was enough on the high plains of San Agustin this night.

— Alan, December 14, 2015 / © 2015 Alan Dyer / www.amazingsky.com


How to See & Shoot the Perseids


A trio of Perseid meteors shoot at left in the pre-dawn sky over Lake Minnewanka in Banff National Park. The overexposed waning crescent Moon shines between Venus (below) and Jupiter (above), with Jupiter near the Hyades and below the Pleiades in Taurus. Taken the morning of Sunday, August 12, 2012 with the Canon 5D MkII and 24mm Canon L-series lens. This is a composite of three exposures, one for each meteor, each for 40 seconds at ISO 2000 and f/5. Landscape is from one image, two other meteors from two other frames layered in and registered in the correct position in the base layer.

It’s Perseid meteor shower time. Here are tips for seeing and shooting the meteors.

What are the Perseids?

They are an annual meteor shower, perhaps the most widely observed of the year, that peak every year about August 12. They are caused by Earth passing through a dust stream left by Comet Swift-Tuttle, last seen near Earth in 1992.

Each “shooting star” is really a bit of comet dust burning up in our atmosphere as it ploughs into us at 200,000 kilometres an hour. They don’t stand a chance of surviving – and none do.

All Perseid particles burn up. None reach Earth.

Perseid meteor caught night of August 12-13 2009 from Cypress Hills Prov Park in Saskatchewan at the annual Saskatchewan Summer Star Party. One frame of 250 shot as part of a time-lapse movie. Taken with Canon 5D MkII and 24mm lens at f/2.5 for 30s at ISO1600.

When are the Perseids?

The peak night of the Perseids this year is the night of Wednesday, August 12 into the early morning hours of August 13, with the peak hour occurring about midnight Mountain Daylight Time or 2 a.m. on the 13th for Eastern Daylight Time.

For North America, this is ideal timing for a good show this year. However, a good number of meteors will be visible the night before and night after peak night.

Even better, the Moon is near New and so won’t interfere with the viewing by lighting up the sky.

In all, except for the mid-week timing, conditions this year in 2015 couldn’t be better!

Perseid meteor caught night of August 12-13 2009 from Cypress Hills Prov Park in Saskatchewan at the annual Saskatchewan Summer Star Party. One frame of 260 shot as part of a time-lapse movie. Taken with Canon 20Da and 15mm lens at f/2.8 for 45s at ISO1600.

What do they look like?

Any meteor looks like a brief streak of light shooting across the sky. The brightest will outshine the brightest stars and are sure to evoke a “wow!” reaction.

However, the spectacular Perseids are the least frequent. From a dark site, expect to see about 40 to 80 meteors in an hour of patient and observant watching, but of those, only a handful – perhaps only 1 or 2 – will be “wow!” meteors.

A pair of Perseid meteors shoot at left in the late night sky at the Upper Bankhead parking lot in Banff National Park. The  waning crescent Moon is just rising above the trees. A faint Perseid is at right, while a satellite trail goes from left to right as well.  Taken the night of Saturday, August 11 into the wee hours of Sunday, August 12, 2012 with the Canon 7D and 10-22mm Canon lens. This is a stack of two exposures, one for each meteor, each for 60 seconds at ISO 1250 and f/4. The stars are trailed slightly due to the two-minute exposure time in total.
A pair of Perseid meteors shoot at left in the late night sky at the Upper Bankhead parking lot in Banff National Park. The waning crescent Moon is just rising above the trees. 
Taken the night of Saturday, August 11 into the wee hours of Sunday, August 12, 2012 with the Canon 7D and 10-22mm Canon lens. This is a stack of two exposures, one for each meteor, each for 60 seconds at ISO 1250 and f/4. 

Where do I look?

All the meteors will appear to radiate from a point in the constellation of Perseus in the northeastern sky in the early hours of the night, climbing to high overhead by dawn.

So you can face that direction if you wish, but Perseids can appear anywhere in the sky, with the longest meteor trails often opposite the radiant point, over in the southwest.

Shows unusual Perseid meteor varying in brightness? Or is this a satellite that mimics Perseid for position (it comes right out of the radiant point).  Taken at SSSP, August 14, 2010, using Canon 5D MkII and 15mm lens.
Shows unusual Perseid meteor varying in brightness? Or is this a satellite that mimics Perseid for position (it comes right out of the radiant point). Taken at Saskatchewan Star Party, August 14, 2010, using Canon 5D MkII and 15mm lens.

How do I look?

Simple – just lie back on a comfy lawn chair or patch of grass and look up!

But … you need to be at a dark location away from city lights to see the most meteors. You’ll see very little in a city or light-polluted suburbs.

Head to a site as far from city lights as you can, to wherever you’ll be safe and comfortable.

How do I take pictures?

To stand any chance of capturing these brief meteors you’ll need a good low-noise camera (a DSLR or Compact System Camera) with a fast (f/2.8 or faster) wide-angle lens (10mm to 24mm).

Sorry, keep your point-and-shoot camera and phone camera tucked away in your pocket – they won’t work.

Set up you camera on a tripod, open the lens to f/2.8 (wide open perhaps) and the ISO to 800 to 3200) and take a test exposure of 20 to 40 seconds. You want a well-exposed image but not over-exposed so the sky is washed out.

Set your exposure time accordingly – most cameras allow a maximum exposure of 30 seconds. Exposures longer than 30 seconds require a separate intervalometer to set the exposure, with the camera set on Bulb (B).

Take lots of pictures!

To up your chances of catching a meteor, you need to set the camera to shoot lots of frames in rapid succession.

Use an intervalometer to take shots one after the other with as little time between as possible – because that’s when a meteor will appear!

Barring an intervalometer, if you have standard switch remote control, set the camera on High Speed Continuous, and the shutter speed to 30 seconds, then lock the remote’s switch to ON to keep the camera firing. As soon as one exposure ends it’ll fire another.

Twin Perseids in this photo? Or are these satellites?  Taken at SSSP, August 14, 2010, using Canon 5D MkII and 15mm lens.
Twin Perseids in this photo? Or are these satellites? Taken at SSSP, August 14, 2010, using Canon 5D MkII and 15mm lens.

What else do I need to know?

• Focus the lens carefully so the stars are sharp – the Live Focus mode helps for this. Focus on a bright star or distant light.

• Aim the camera to take in a wide swath of the sky but include a well-composed foreground for the most attractive shot.

• Aim northeast to capture meteors streaking away from the radiant. But you can aim the camera to any direction that lends itself to a good composition and still capture a meteor.

• To increase your chances, shoot with two or more cameras aimed to different areas of the sky. Meteors always appear where your camera isn’t aimed!

• Be patient! Despite shooting hundreds of frames only a handful will record a meteor, as only the brightest will show up.

Can I track the sky?

If you have a motorized equatorial mount or a dedicated sky tracking device (the iOptron Sky Tracker and Sky-Watcher Star Adventurer, each about $400, are popular), you can follow the stars while taking lots of shots. This avoids the stars trailing and allows you to use longer exposures.

The video above shows a Star Adventurer tracking the sky as it turns about its polar axis which is aimed up to a point near Polaris. Click the Enlarge and HD buttons to view the video properly.

Polar align the tracker, but then perhaps aim the camera to frame the summer Milky Way overhead. Take lots of 1- to 3-minute exposures, again at f/2.8 and ISO 800 to 1600. Some exposures will pick up meteors – with luck!

Tracking then stacking

Later, in processing, because the sky has remained fixed on the frame, it’s then possible to stack the images (using a “Lighten” blend mode on each image layer) so that the final composite frame contains more meteors, for an image with lots of meteors captured over an hour or more of shooting.

While it is possible to stack shots taken on a static tripod to produce such a meteor composite, doing so requires a lot of manual cutting, pasting and aligning of meteor images by hand. The result is a bit of a fake, though I’ve done it myself – the image at top is an example, though with only a trio of meteors.

Good luck and happy meteor watching!

– Alan, August 6, 2015 / © 2015 Alan Dyer / www.amazingsky.com 

Perseid Meteors and Planets over a Mountain Lake


It was quite a night, and a wonderful dawn. This was the scene at the end of a night of falling stars.

A trio of Perseid meteors zips down at left, while at right a trio of solar system worlds rises into the pre-dawn sky. The overexposed waning Moon is flanked by Jupiter above and Venus below. Jupiter shines near the Hyades star cluster and below the Pleiades cluster.

I took this shot (it is actually a composite of three shots, each with its own meteor) on the morning of Sunday, August 12 on the peak night of the annual Perseid meteor shower, widely publicized this year due to the lack of a Moon for most of the night, and the convenience of falling on a weekend. The scene is looking east over Lake Minnewanka in Banff National Park, Alberta, one of the few places in this part of the Rockies you can look east to a reasonably unobstructed sky.

Notice the glitter path on the water from not only the Moon but also Venus.

— Alan, August 13, 2012 / © 2012 Alan Dyer