I present the final cut of my eclipse music video, from the Teton Valley, Idaho.
I’ve edited my images and videos into a music video that I hope captures some of the awe and excitement of standing in the shadow of the Moon and gazing skyward at a total eclipse.
Totality over the Tetons from Alan Dyer on Vimeo.
The video can be viewed in up to 4K resolution. Music is by the Hollywood session group and movie soundtrack masters, Audiomachine. It is used under license.
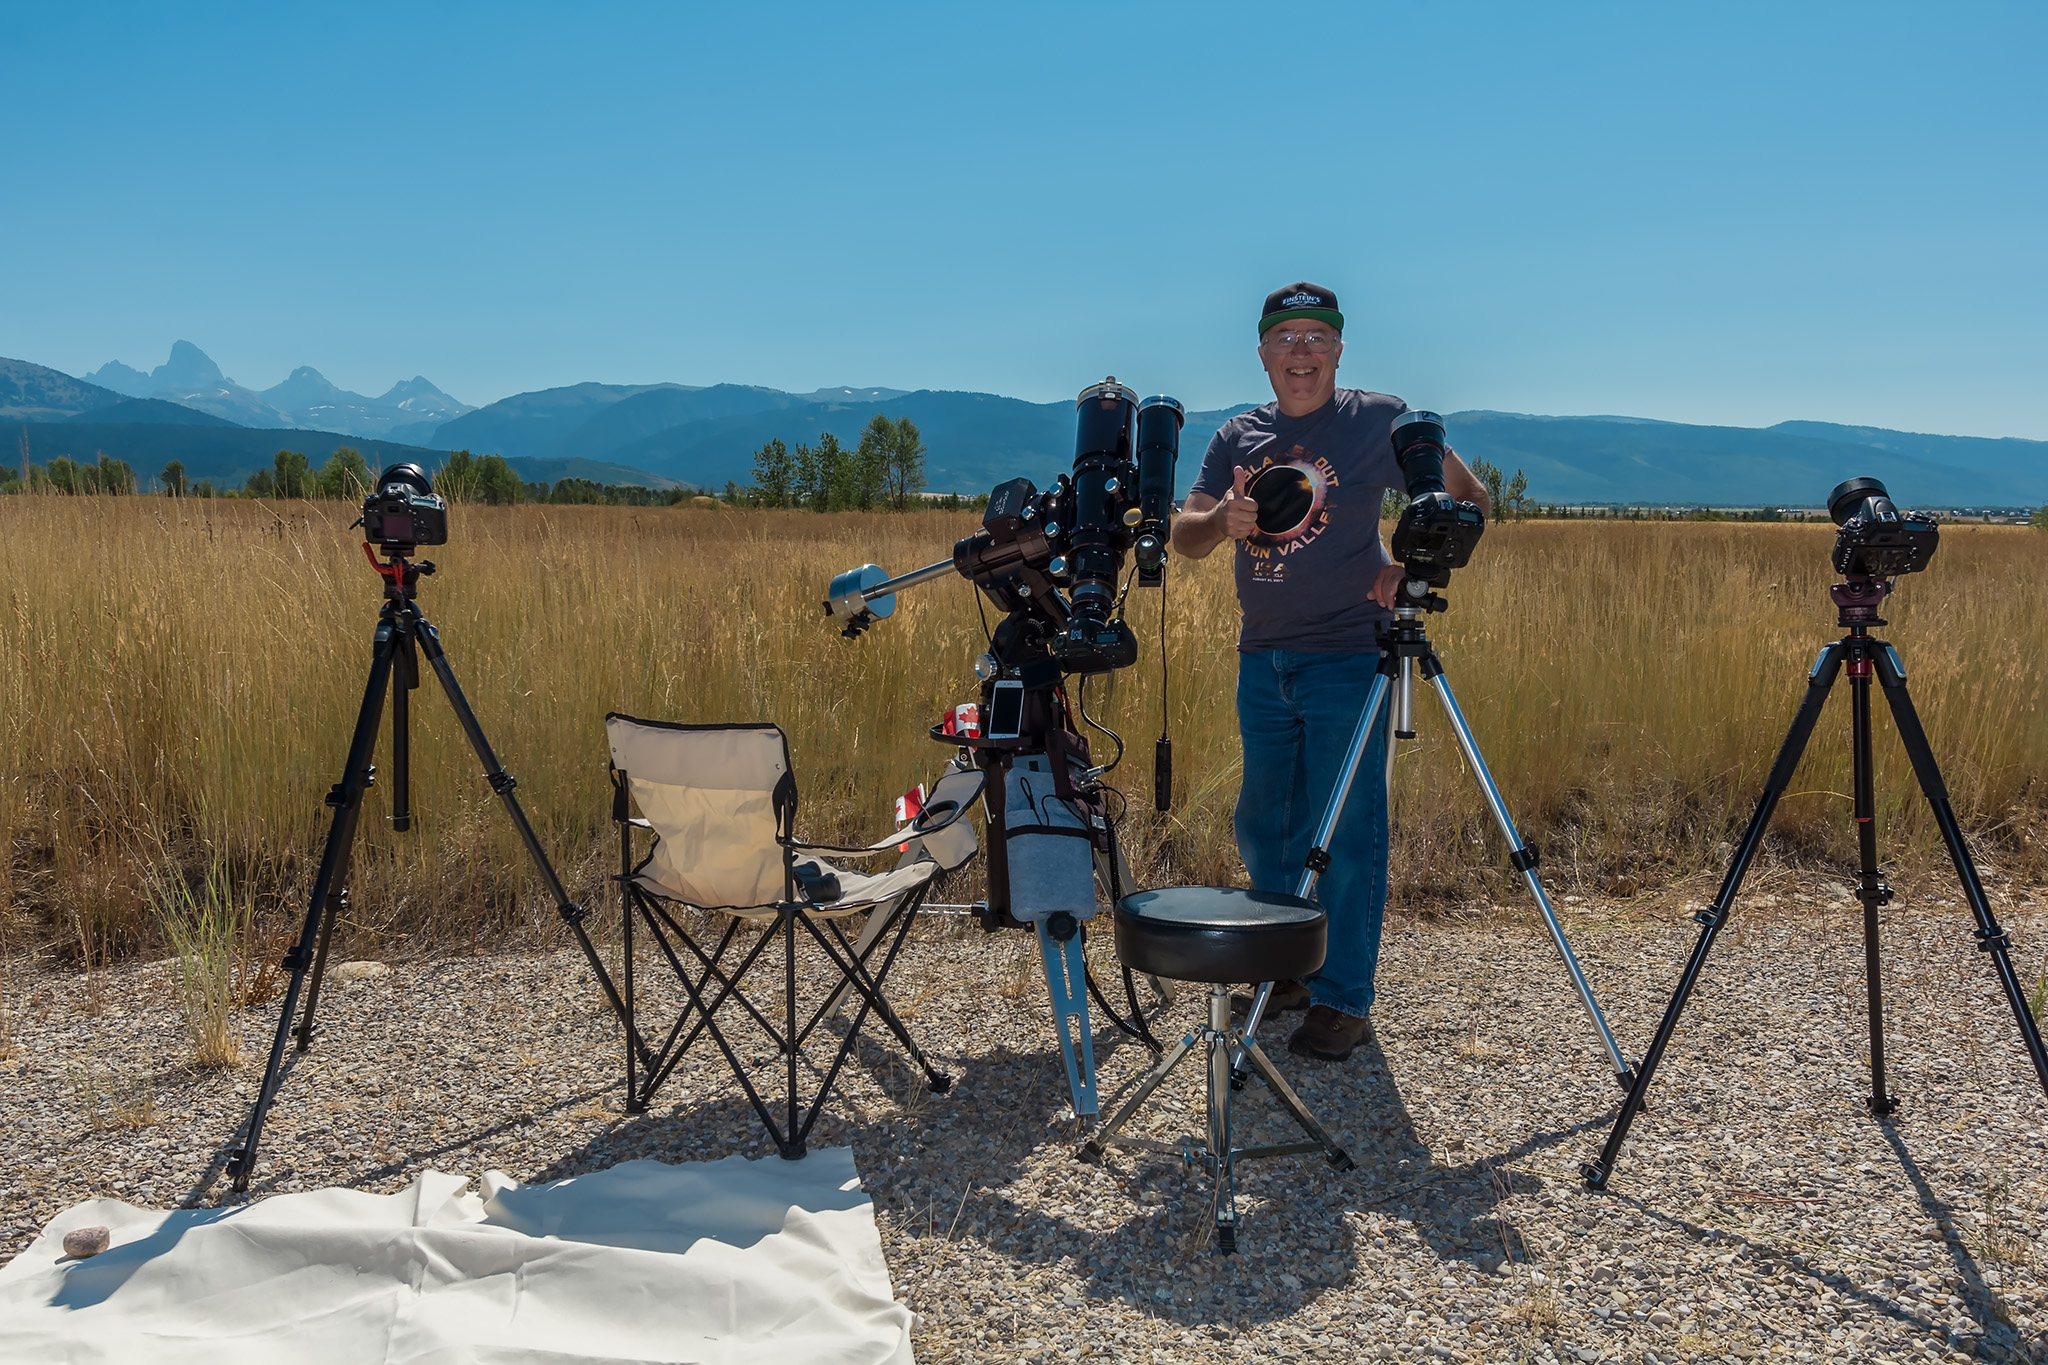
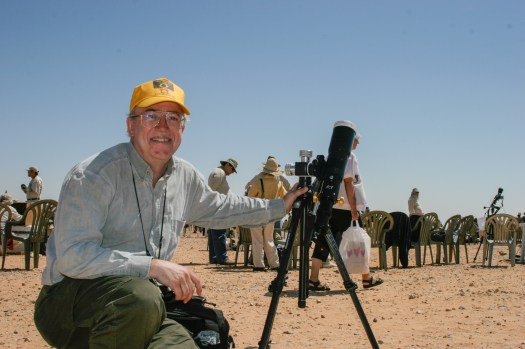
Me at the 2017 total solar eclipse celebrating post-eclipse with four of the camera systems I used, for close-up stills through a telescope, for 4K video through a telephoto lens, and two wide-angle time-lapse DSLRs. A fifth camera used to take this image shot an HD video selfie.Never before have I been able to shoot a total eclipse with so many cameras to capture the scene from wide-angles to close-ups, in stills, time-lapses, and videos, including 4K. Details on the setup are in the caption for the video on Vimeo. Click through to Vimeo.
I scouted this site north of Driggs, Idaho two years earlier, in April 2015. It was perfect for me. I could easily set up lots of gear, it had a great sightline to the Grand Tetons, and a clear horizon for the twilight effects. And I had the site almost to myself. Observing with a crowd adds lots of energy and excitement, but also distraction and stress. I had five cameras to operate. It was an eclipse experience I’ll likely never duplicate.
If you missed this eclipse, you missed the event of a lifetime. Sorry. Plain and simple.
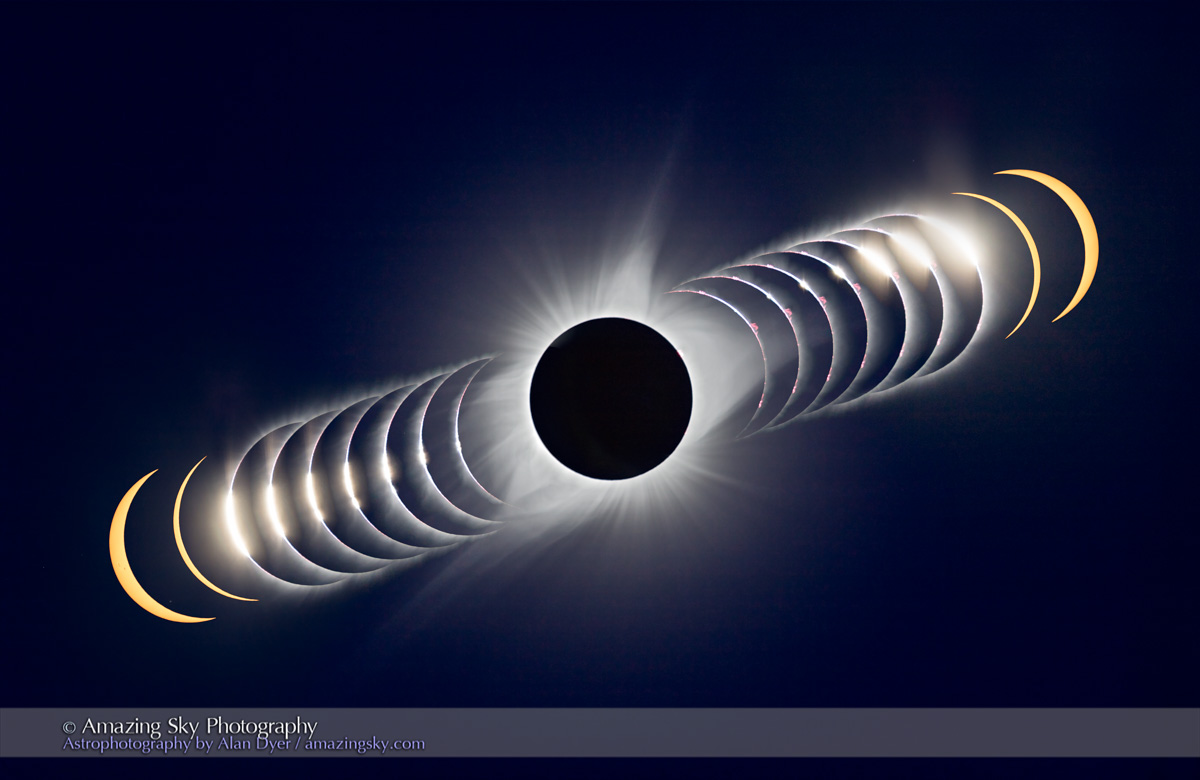
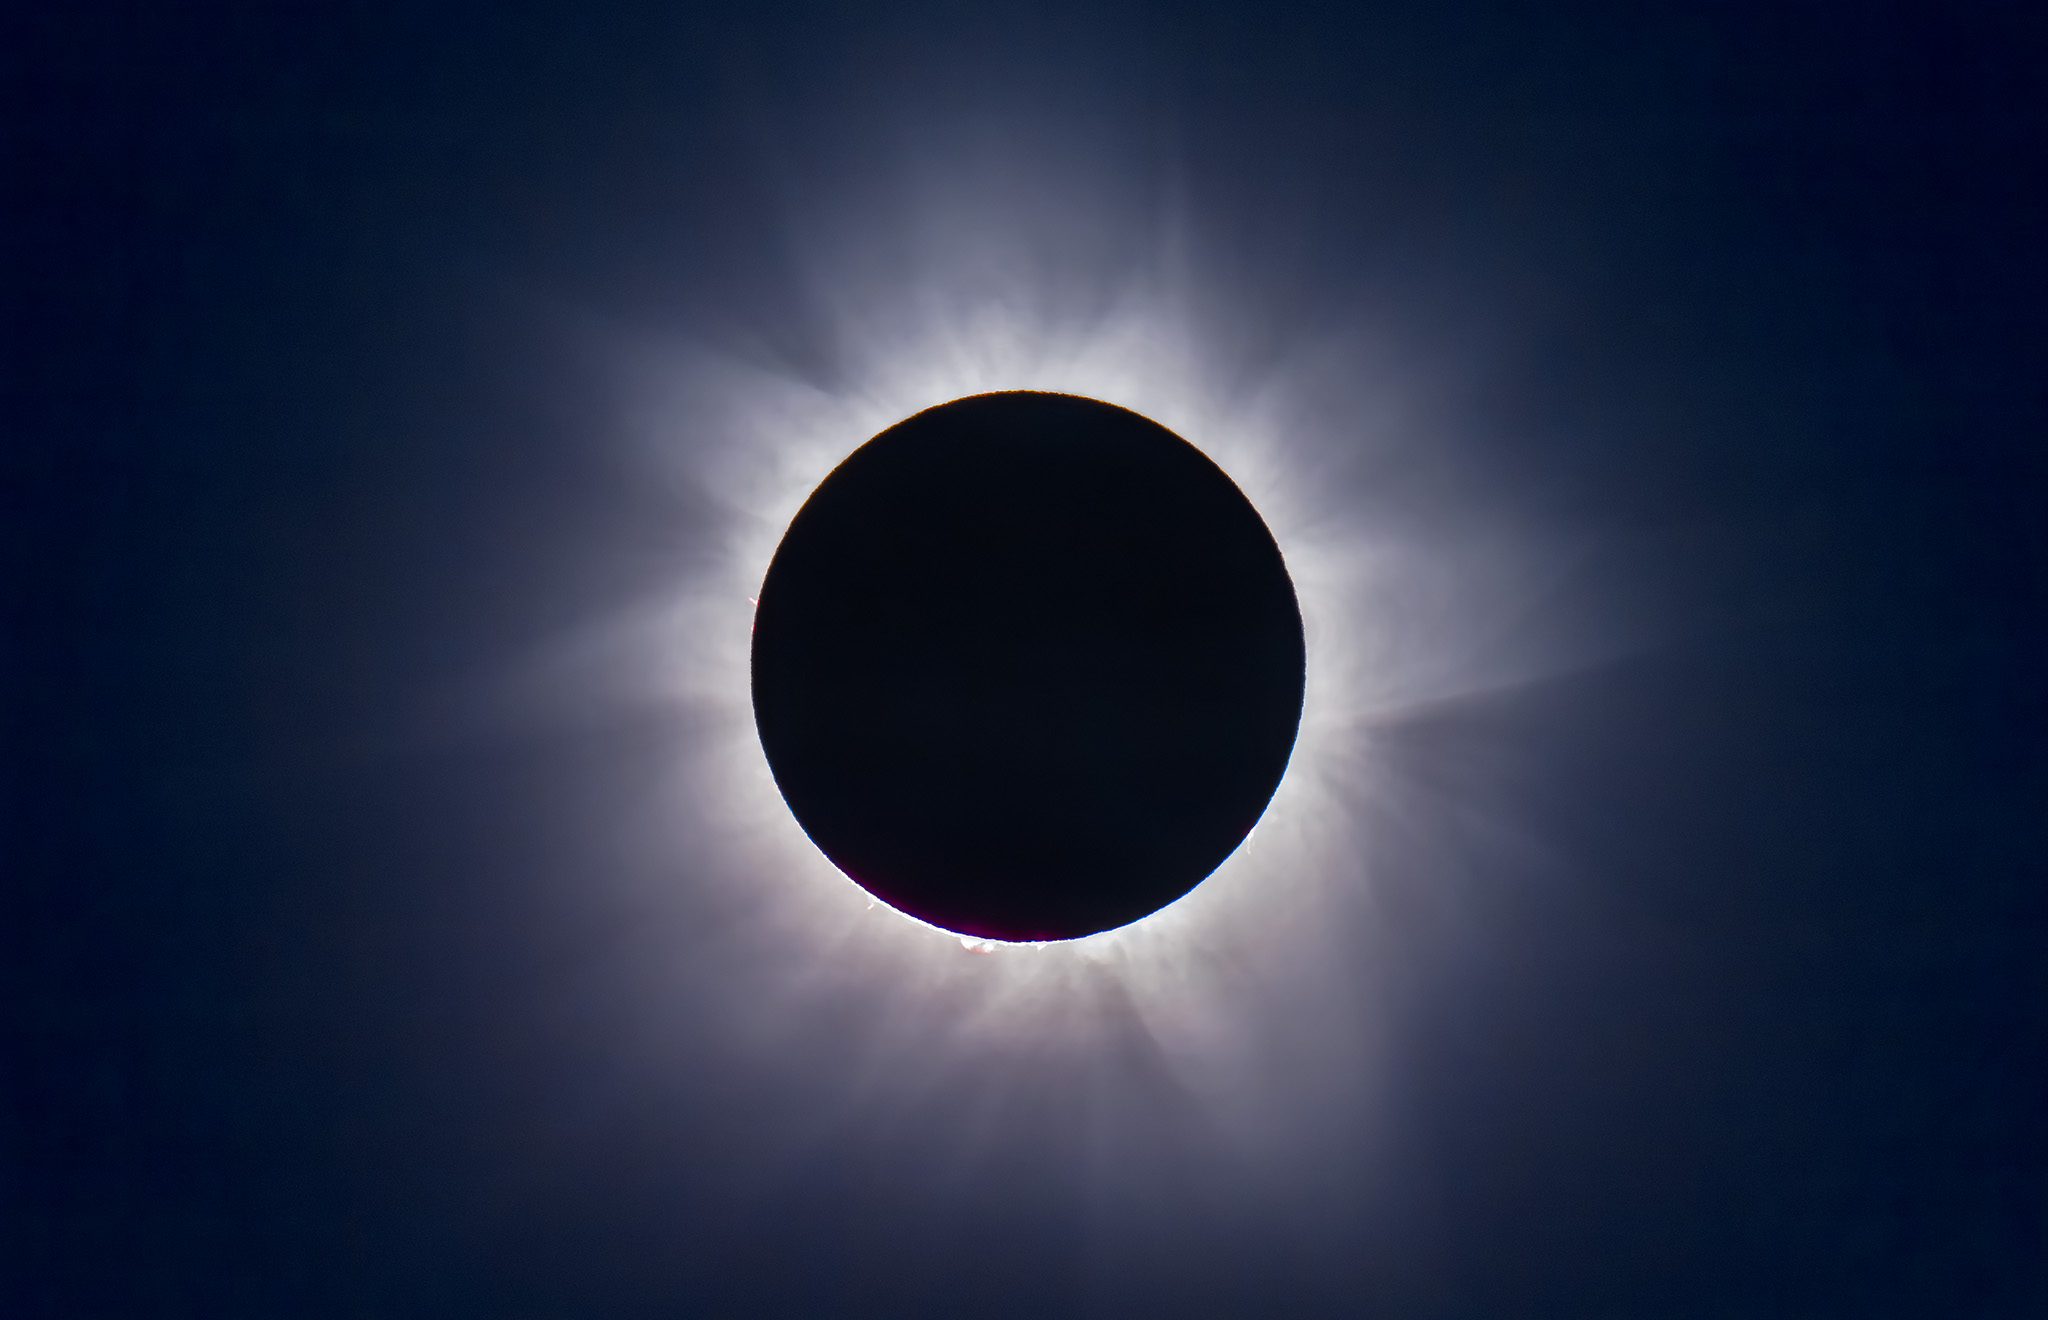
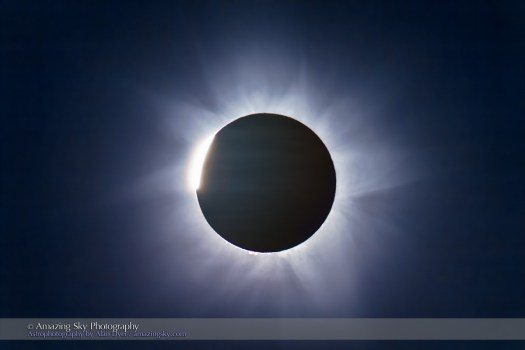
A composite of the 2017 eclipse with time running from left to right, depicting the onset of totality at left, then reappearance of the Sun at right. Taken with the 4-inch telescope shown above.If you saw the eclipse, and want to see more, then over the next few years you will have to travel far and wide, mostly to the southern hemisphere between now and 2024.
But on April 8, 2024 the umbral shadow of the Moon once again sweeps across North America, bringing a generous four minutes of totality to a narrow path from Mexico, across the U.S., and up into eastern Canada.
It will be the Great North American Eclipse. Seven years to go!
I present suggestions for how to ensure everything under your control will go well on eclipse day. The secret is: Practice, Practice, Practice!
The techniques I suggest practicing are outlined in my previous blog, Ten Tips for the Solar Eclipse. It’s prerequisite reading.
However, while you can read all about how to shoot the eclipse, nothing beats actually shooting to ensure success. But how do you do that, when there’s only one eclipse?
Here are my “Top 10” suggestions:
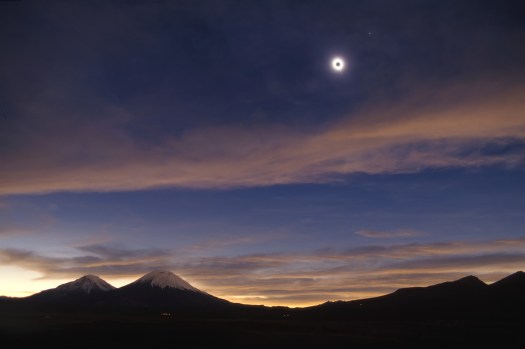
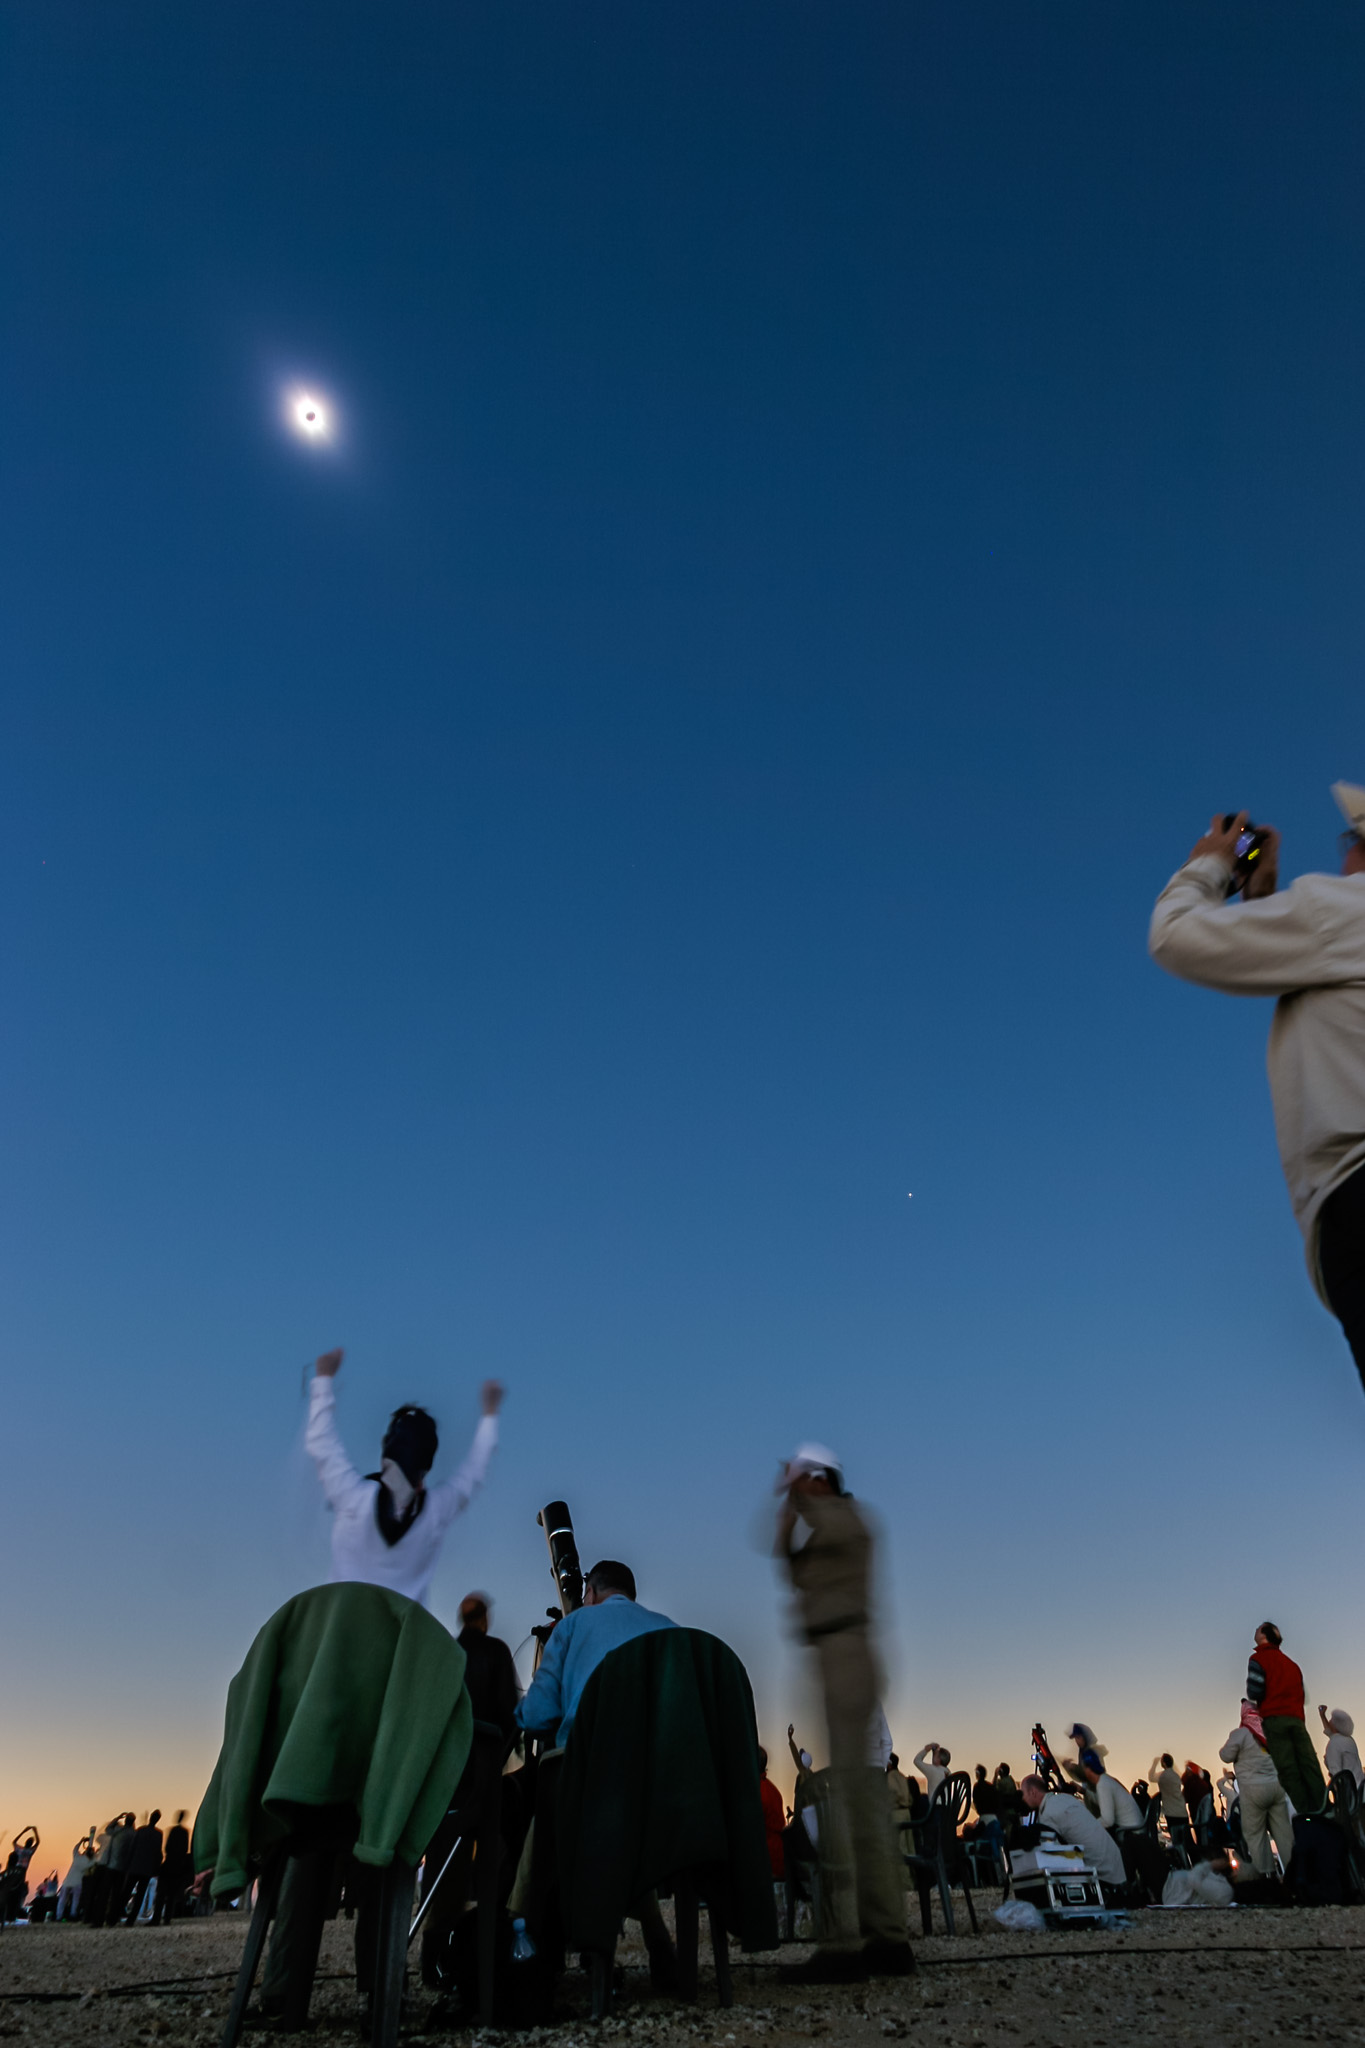
Total eclipse of the Sun, November 3, 2013 as seen from the middle of the Atlantic Ocean, from the Star Flyer sailing ship. I took this with a Canon 5D MkII and 16-35mm lens at 19mm for 1/40s at f/2.8 and ISO 800 on a heavily rolling ship.
Wide-Angle Shots – Shoot a Twilight Scene
The simplest way to shoot the eclipse is to employ a camera with a wide lens running on auto exposure to capture the changing sky colors and scene brightness.
Auto Exposure Check in Twilight
If you intend to shoot wide-angle shots of the eclipse sky and scene below, with anything from a mobile phone to a DSLR, practice shooting a time-lapse sequence or a movie under twilight lighting. Does your camera expose properly when set to Auto Exposure? If you are using a phone camera, does it have any issues focusing on the sky? How big a file does a movie create?
With Telephotos and Telescopes – Shoot the Filtered Sun
The toughest techniques involve using long lenses and telescopes to frame the eclipsed Sun up close. They need lots of practice.
Framing and Focusing
You’ll need to have your safe and approved solar filter purchased (don’t wait!) that you intend to use over your lens or telescope. With the filter in place, simply practice aiming your lens or telescope at the Sun at midday. It’s not as easy as you think! Then practice using Live View to manually focus on the edge of the Sun or on a sunspot. Can you get consistently sharp images?
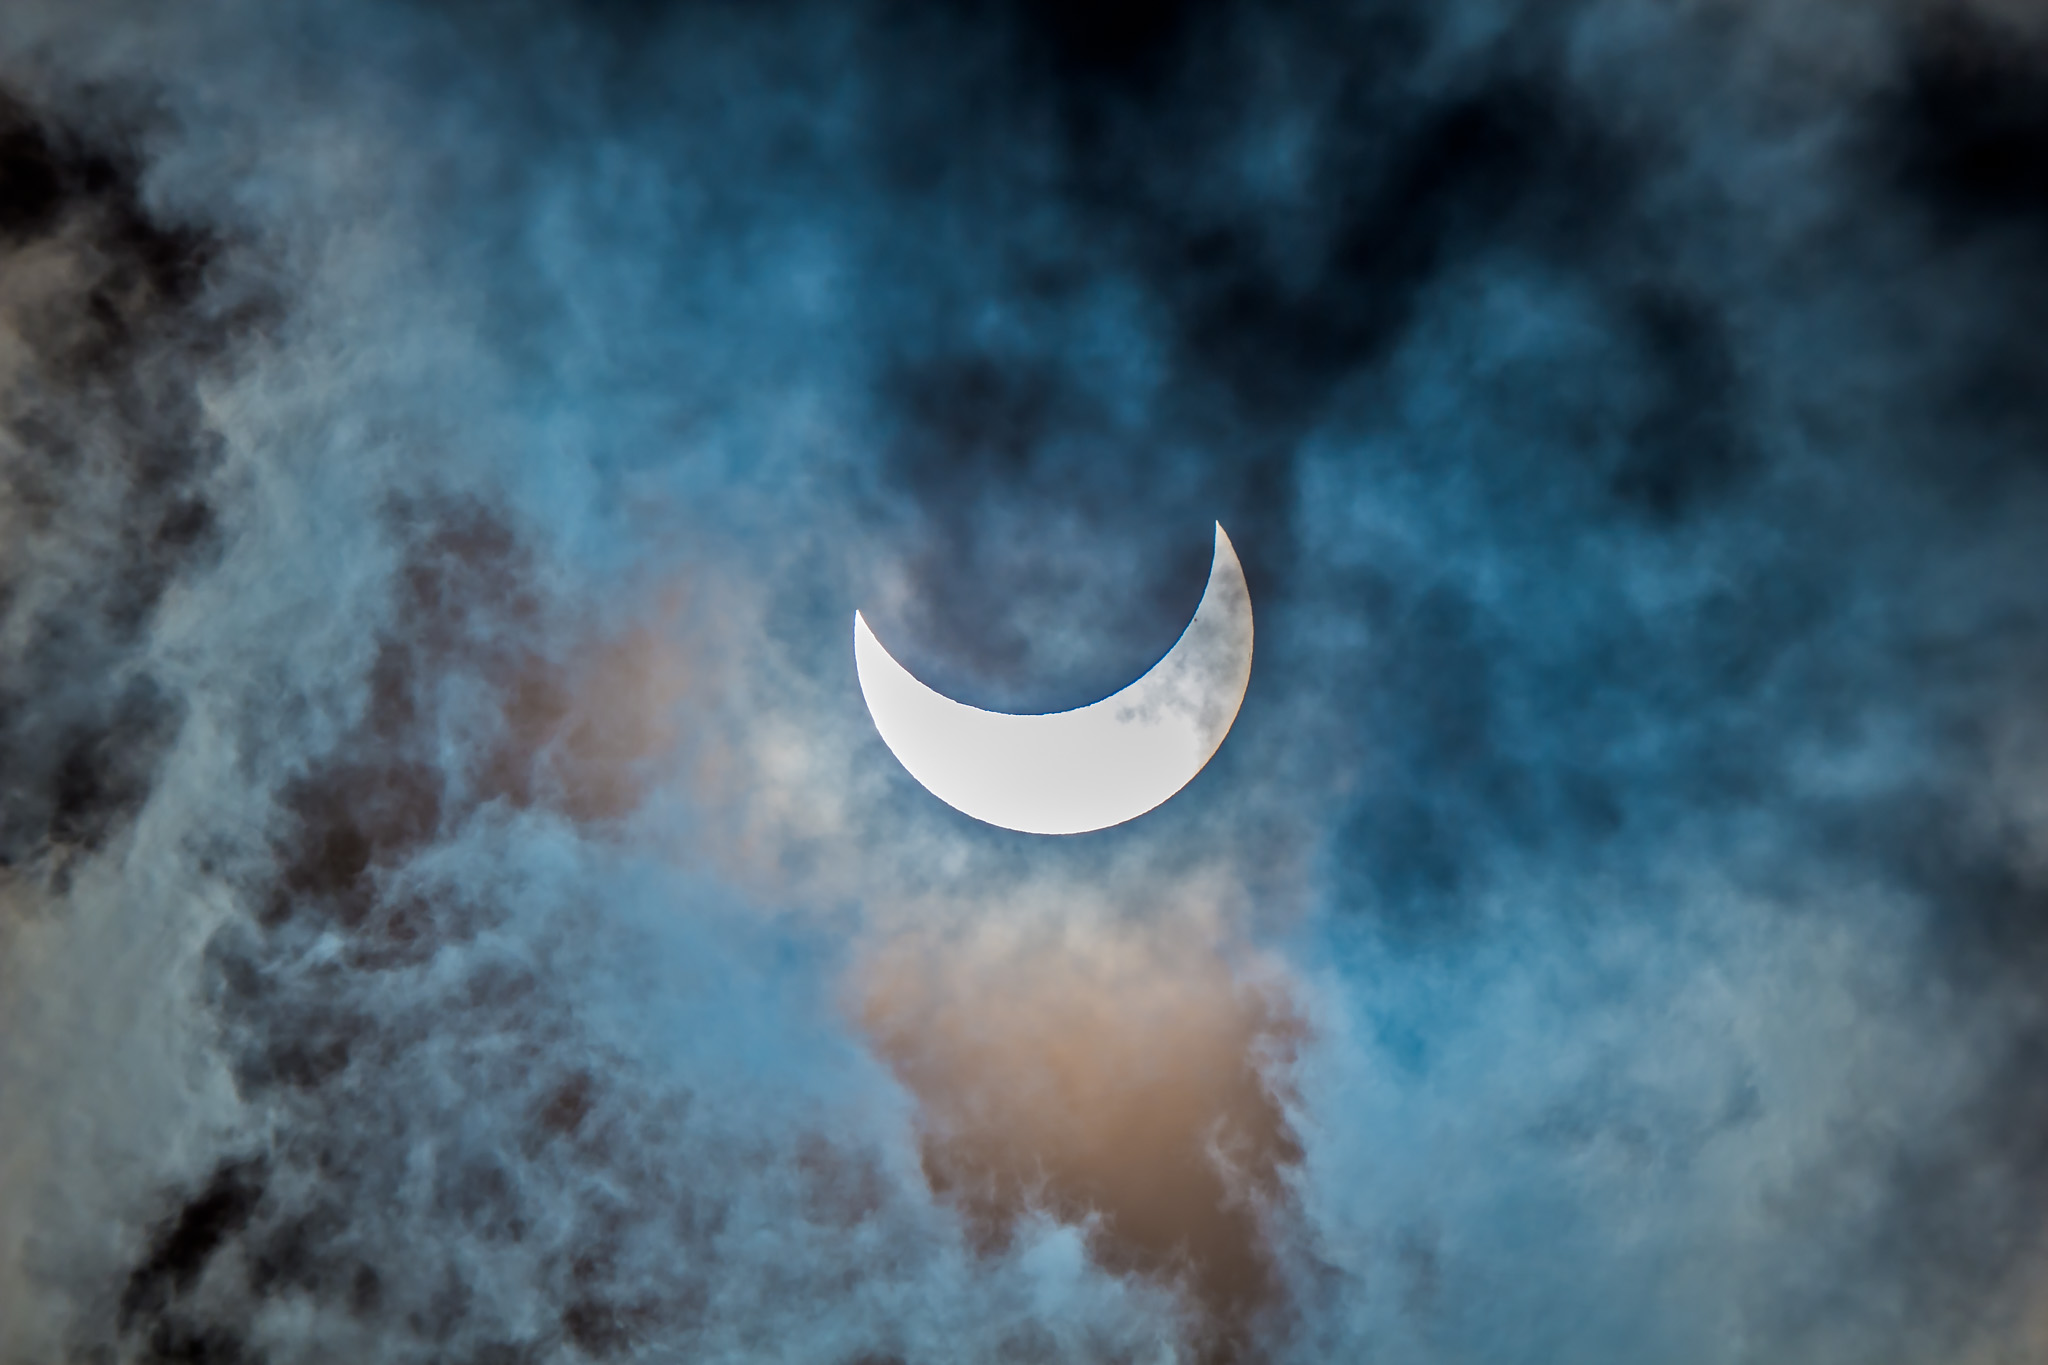
The partial eclipse of the Sun, October 23, 2014, shot through thin cloud, but that makes for a more interesting photo than one in a clear sky. Despite the cloud, this was still shot through a Mylar filter, on the front of telescope with 450mm focal length, using the Canon 60Da for 1/25 sec exposure at ISO 100.
Exposure Times
Exposures of the filtered Sun will be the same as during the partial phases, barring cloud or haze, as above, that can lengthen exposure times. Otherwise, only during the thin crescent phases will shutter speeds need to be 2 to 3 stops (or EV steps) longer than for a normal Sun.
Solar filters that clamp around the front of lenses are easier to remove than ones that screw onto lenses. They will bind and get stuck!
Filter Removal
With the camera aimed away from the Sun (very important!), perhaps at a distant landscape feature, practice removing the filter quickly. Can you do it without jarring the camera and bumping it off target? Perhaps try this on the Moon at night as well, as it’s important to also test this with the camera and tripod aimed up high.
Articulated LCD screens are a great aid for framing and viewing the eclipse in Live View when the camera is aimed up high, as it will be!
Ease of Use
With the Sun up high at midday (as it will be during the eclipse from most sites), check that you can still look through, focus, and operate the camera easily. Can you read screens in the bright daylight? What about once it gets darker, as in twilight, which is how dark it will get during totality.
The east-to-west motion of the sky will carry the Sun its own diameter across the frame during totality, making consistent framing an issue with very long lenses and telescopes.
Sun Motion
If you are using an untracked tripod, check how much the Sun moves across your camera frame during several minutes. For videos you might make use of that motion. For still shots, you’ll want to ensure the Sun doesn’t move too far off center.
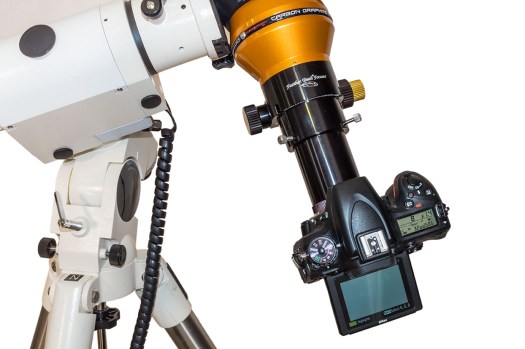
An equatorial mount like this is great but needs to be at least roughly polar aligned to be useful.
Aligning Tracking Mounts
If you plan to use a motorized equatorial mount capable of tracking the sky, “Plan A” might be to set it up the night before so it can be precisely polar aligned. But the reality is that you might need to move on eclipse morning. To prepare for that prospect, practice roughly polar aligning your mount during the day to see how accurate its tracking is over several minutes. Do that by leveling the mount, setting it to your site’s latitude, and aiming the polar axis as close as you can to due and true north. You don’t need precise polar alignment to gain the benefits of a tracking mount – it keeps the Sun centered – for the few minutes of totality.
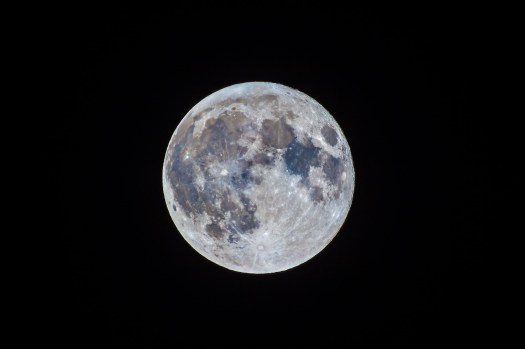
The Full Moon is the same brightness as the Sun’s inner corona.
Telephotos and Telescopes – Shoot Full Moon Closeups
Exposure Check
Shoot the Full Moon around July 8 or August 7. If you intend to use Auto Exposure during totality, check how well it works on the Full Moon. It’s the same brightness as the inner corona of the Sun, though the Moon occupies a larger portion of the frame and covers more metering sensor points. This is another chance to check your focusing skill.
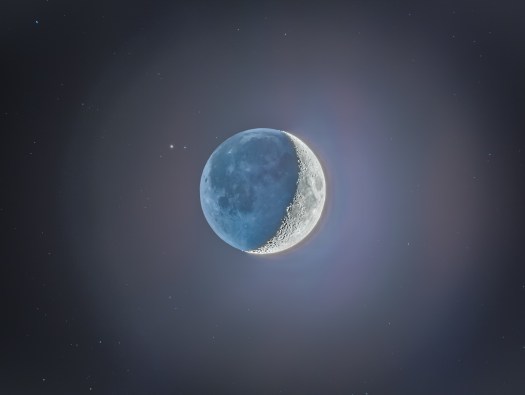
The crescent Moon has a huge range in brightness and serves as a good test object. Remember, the Moon is the same size as the Sun. That’s why we get eclipses!
Telescopes and Telescopes – Shoot Crescent Moon Closeups
Exposure Check
Shoot the waxing crescent moon in the evening sky during the last week of June and again in the last week of July. Again, test Auto Exposure with your camera in still or movie mode (if you intend to shoot video) to see how well the camera behaves on a subject with a large range in brightness. Or step through a range of exposures manually, from short for the bright sunlit crescent, to long for the dark portion of the Moon lit by Earthshine. It’s important to run through your range of settings quickly, just as you would during the two minutes of totality. But not too quickly, as you might introduce vibration. So …
Good focus matters for recording the fine prominences and sharp edge of the Moon.
Sharpness Check
In the resulting images, check for blurring from vibration (from you handling the camera), from wind, and from the sky’s east-to-west motion moving the Moon across the frame, during typical exposures of 1 second or less.
By practicing, you’ll be much better prepared for the surprises that eclipse day inevitably bring. Always have a less ambitious “Plan B” for shooting the eclipse simply and quickly should a last-minute move be needed.
However, may I recommend …
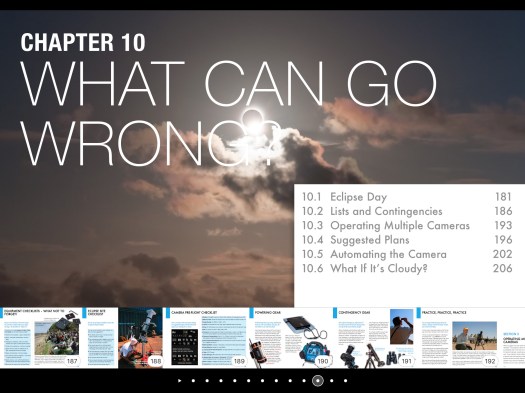
My 295-page ebook on photographing the August 21 total eclipse of the Sun is now available. See http://www.amazingsky.com/eclipsebook.html It covers all techniques, for both stills, time-lapses, and video, from basic to advanced, plus a chapter on image processing. And a chapter on What Can Go Wrong?! The web page has all the details on content, and links to order the book from Apple iBooks Store (for the best image quality and navigation) or as a PDF for all other devices and platforms.
For much more detailed advice on shooting options and techniques, and for step-by-step tutorials on processing eclipse images, see my 295-page eBook on the subject, available as an iBook for Apple devices and as a PDF for all computers and tablets.
I present my Top 10 Tips for photographing the August 21 total eclipse of the Sun.
If the August total eclipse will be your first, then you could heed the advice of many and simply follow “Tip #0:” Just don’t photograph it! Look up and around to take in the spectacle. Even then, you will not see it all.
However, you might see less if you are operating a camera.
But I know you want pictures! To help you be successful, here are my tips for taking great photos without sacrificing seeing the eclipse.
An iPhone in a tripod bracket and on a small tabletop tripod.
TIP #1: Keep It Simple
During the brief minutes of totality, the easiest way to record the scene is to simply hold your phone camera up to the sky and shoot. Zoom in if you wish, but a wide shot may capture more of the twilight effects and sky colors, which are as much a part of the experience as seeing the Sun’s gossamer corona around the dark disk of the Moon.
Better yet, use an adapter to clamp your phone to a tripod. Frame the scene as best you can (you might not be able to include both the ground and Sun) and shoot a time-lapse, or better yet, a video.
Start it 2 or 3 minutes before totality (if you can remember in the excitement!) and let the camera’s auto exposure take care of the rest. It’ll work fine.
That way you’ll also record the audio of your excited voices. The audio may serve as a better souvenir than the photos. Lots of people will have photos, but nobody else will record your reactions!
Just make sure your phone has enough free storage space to save several minutes of HD video or, if your camera has that feature, 4K video.
A wide shot of the 2006 eclipse in Libya with a high altitude Sun. 10mm lens on a cropped-frame Canon 20Da camera.
TIP #2: Shoot Wide With a DSLR
For better image quality, step up to this hands-off technique.
Use a tripod-mounted camera that accepts interchangeable lenses (a digital single lens reflex or a mirrorless camera) and use a lens wide enough to take in the ground below and Sun above.
Depending on where you are and the sensor size in your camera, that’ll likely mean a 10mm to 24mm lens.
By going wide you won’t record details in the corona of the Sun or its fiery red prominences. But you can record the changing sky colors and perhaps the dark shadow of the Moon sweeping from right to left (west to east) across the sky. You can also include you and your eclipse group silhouetted in the foreground. Remember, no one else will record you at the eclipse.
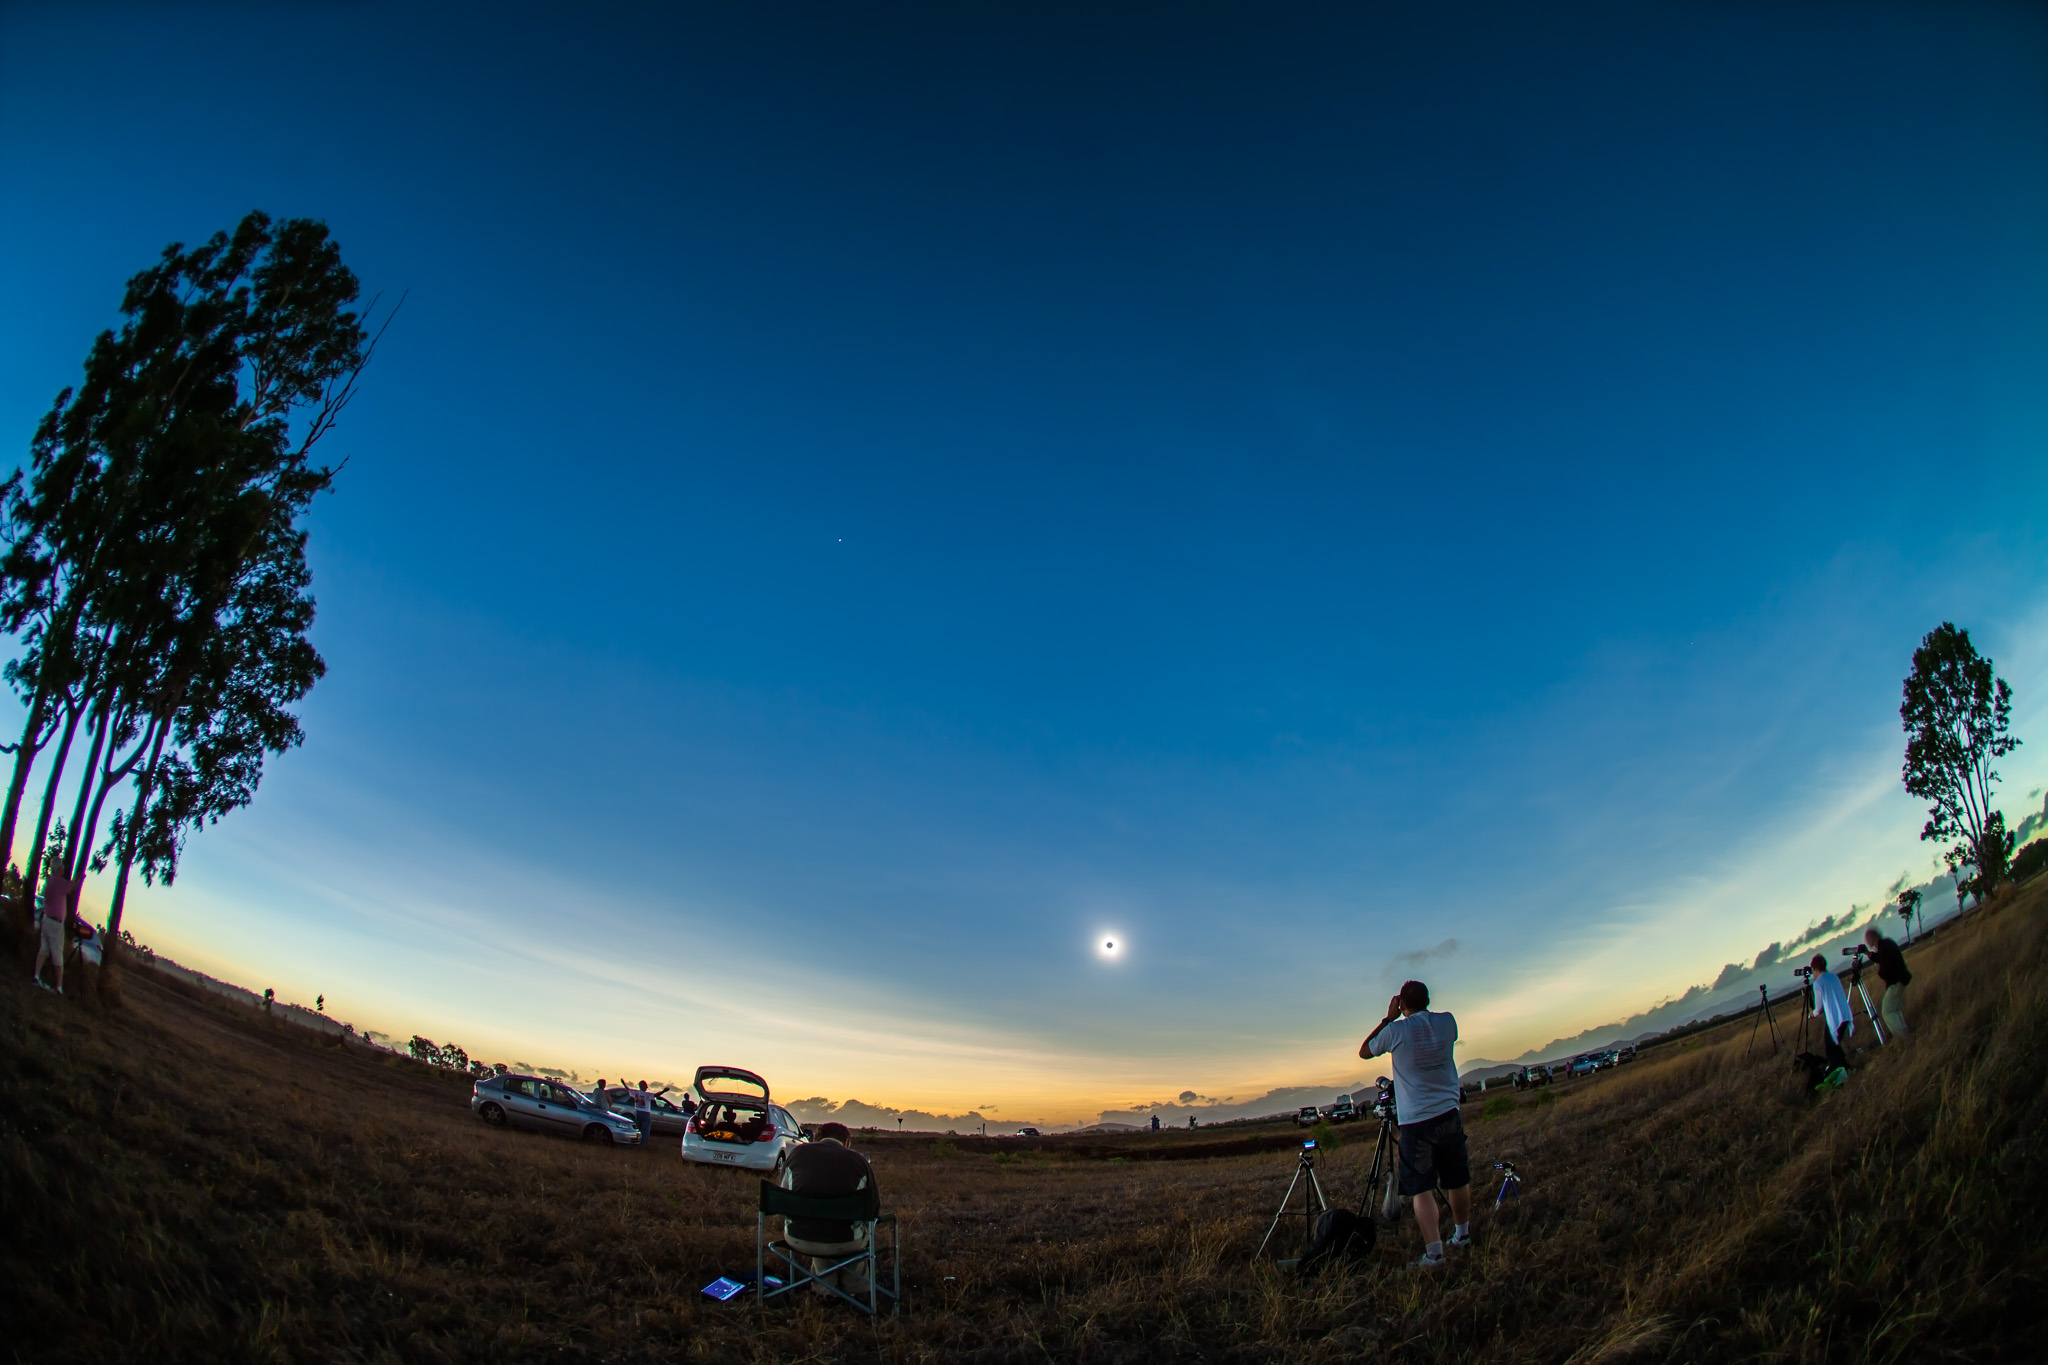
A sequence of shots of the 2012 eclipse from Australia, with a wide 15mm lens and camera on Auto Exposure showing the change of sky color.The total eclipse of the Sun, November 14, 2012, from a site near Lakeland Downs, Queensland, Australia. Shot with the Canon 5D Mark II and 15mm lens for a wide-angle view showing the Moon’s conical shadow darkening the sky and the twilight glow on the horizon. Taken near mid-eclipse.
TIP #3: Shoot on Auto Exposure
For wide shots, there’s no need to attend to the camera during the eclipse. Set the camera on Auto Exposure – Aperture Priority (Av), the camera ISO between 100 to 400, and your lens aperture to f/2.8 (fast) to f/5.6 (slow).
Use a higher ISO if you are using a slower lens such as a kit zoom. But shoot at ISO 100 and at f/2.8 if you have a wide lens that fast.
In Av mode the camera will decide what shutter speed to use as the lighting changes. I’ve used this technique at many eclipses and it works great.
An accessory intervalometer set for an interval of 1 second.
TIP #4: Let the Camera Do the Shooting
To make this wide-angle technique truly hands-off use an intervalometer (either built into your camera or a separate hardware unit) to fire the shutter automatically.
Once again, start the sequence going 3 to 5 minutes before totality, with the intervalometer set to fire the shutter once every second. Don’t shoot at longer intervals, or you’ll miss too much. Shutter speeds won’t likely exceed one second.
Again, be sure your camera’s memory card has enough free space for several hundred images. And don’t worry about a solar filter on your lens. It’ll be fine for the several minutes you’ll have it aimed up.
Out of the many images you’ll get, pick the best ones, or turn the entire set into a time-lapse movie.
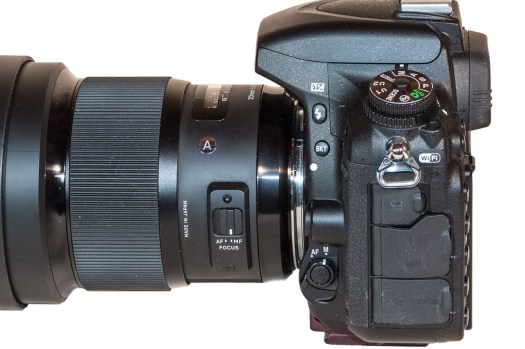
A Nikon DSLR and lens set to Manual Focus.
TIP #5: Shoot on Manual Focus
Use Auto Exposure and an intervalometer. But … don’t use Auto Focus.
Switch your lens to Manual Focus (MF) and focus on a distant scene element using Live View.
Or use Auto Focus to first focus on something in the distance, then switch to Manual and don’t touch focus after that. If you leave your lens on Auto Focus the shutter might not fire if the camera decides it can’t focus on the blank sky.
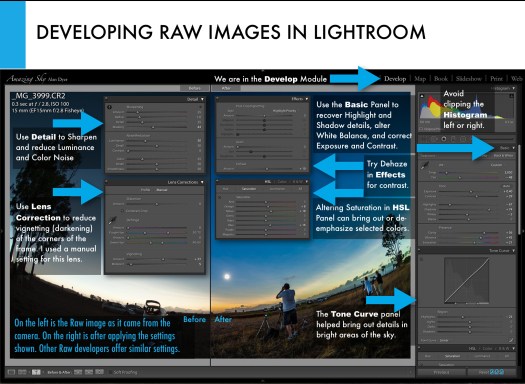
A comparison of a Raw image as it came from the camera (left) and after developing in Lightroom (right).
TIP #6: Shoot Raw
For demanding subjects like a solar eclipse always shoot your images in the Raw file format. Look in your camera’s menus under Image Quality.
Shoot JPGs, too, if you like, but only Raw files record the widest range of colors and brightness levels the camera sensor is capable of detecting.
Later in processing you can extract amazing details from Raw files, both in the dark shadows of the foreground, and in the bright highlights of the distant twilight glows and corona around the Sun. Software to do so came with your camera. Put it to use.
A 200mm telephoto and 1.4x Extender, with the camera on a sturdy and finely adjustable tripod head.
TIP #7: OK, Use a Telephoto Lens! But …
If you really want to shoot close-ups, great! But don’t go crazy with focal length. Yes, using a mere 135mm or 200mm lens will yield a rather small image of the eclipsed Sun. But you don’t need a monster 600mm lens or a telescope, which typically have focal lengths starting at 600mm. With long focal lengths come headaches like:
•Keeping the Sun centered. The Earth is turning! During the eclipse that motion will carry the Sun (and Moon) its own diameter across your frame from east to west during the roughly two minutes of totality. While a motorized tracking mount can compensate for this motion, they take more work to set up properly, and must be powered. And, if you are flying to the eclipse, they will be much more challenging to pack. I’m trying to keep things simple!
•Blurring from vibration. This can be an issue with any lens, but the longer your lens, the more your chances of getting fuzzy images because of camera shake, especially if you are touching the camera to alter settings.
An ideal focal length is 300mm to 500mm. But …
When using any telephoto lens, always use a sturdy tripod with a head that is easy to adjust for precise aiming, and that can aim up high without any mechanical issues. The Sun will be halfway, or more, up the sky, not a position some tripod heads can reach.
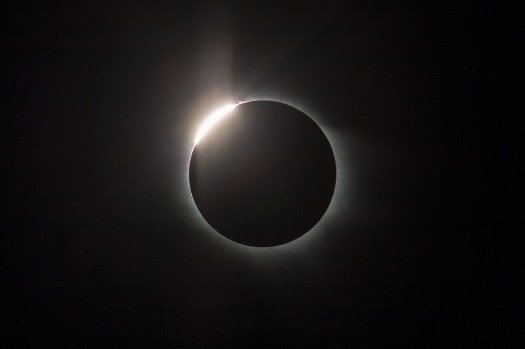
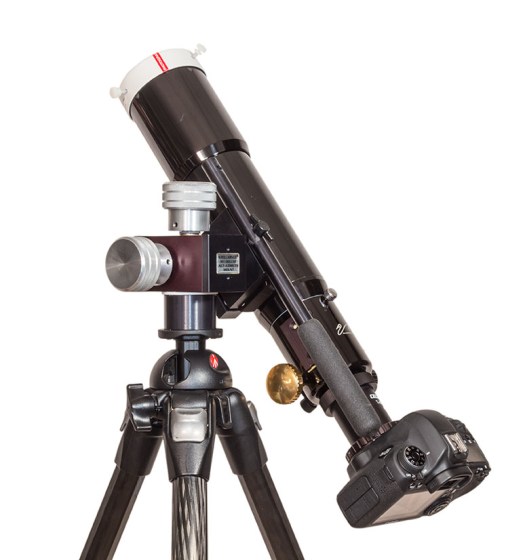
A re-processed version of a still frame of the total solar eclipse of November 14, 2012 taken from our site at Lakeland Downs, Queensland, Australia. This is a still frame shot during the shooting of an HD video of the eclipse, using the cropped-frame Canon 60Da and Astro-Physics Traveler 4-inch apo refractor telescope at f/5.8 (580mm focal length). The image is 1/60th second at ISO 100. This is a full-sized still not a frame grab taken from the movie.A sequence from a movie showing the camera adjusting the exposure automatically when going from a filtered view (left) to an unfiltered view of the diamond ring (right).
TIP #8: Use Auto Exposure, or … Shoot a Movie
During totality with your telephoto, you could manually step through a rehearsed set of exposures, from very short shutter speeds (as short as 1/4000 second) for the diamond rings at either end of totality, to as long as one or two seconds at mid-totality for the greatest extent of the corona’s outermost streamers.
But that takes a lot of time and attention away from looking. Yes, there are software programs for automating a camera, or techniques for auto bracketing. But if this is your first eclipse an easier option is to simply use Auto Exposure/Aperture Priority and let the camera set the shutter speed. Again, you could use an intervalometer to fire the shutter so you can just watch.
Don’t use high ISO speeds. A low ISO of 100 to 400 is all you need and will produce less noise. The eclipsed Sun is still bright. You don’t need ISO 800 to 3200.
Even on Auto Exposure, you’ll get good shots, just not of the whole range of phenomena an eclipsed Sun displays.
Or, once again and better yet – put your camera into video mode and shoot an HD or 4K movie. Auto Exposure will work just fine, allowing you to start the camera then forget it.
Place the Sun a solar diameter or two to the left of the frame and let the sky’s motion drift it across the frame for added effect. Start the sequence running a minute or two before totality with your solar filter on. Then just let the camera run … except …
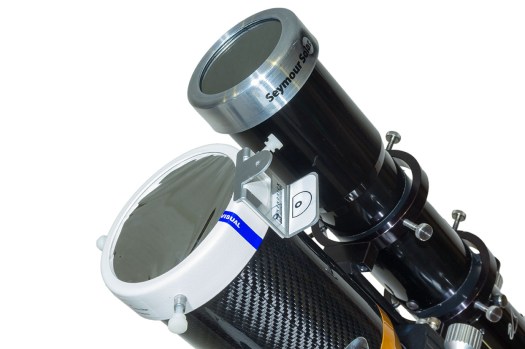
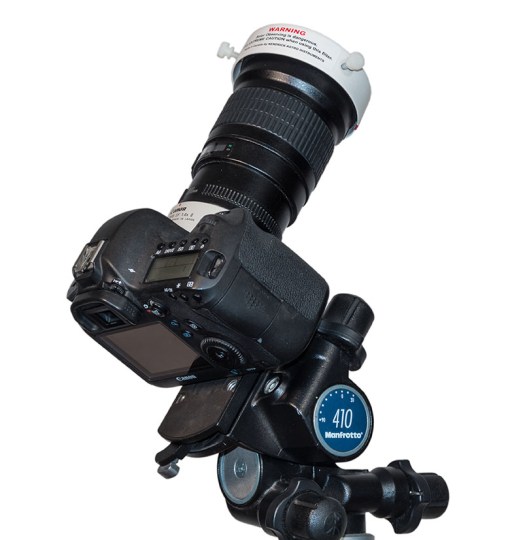
A small refractor telescope with a solar filter over the front aperture. That filter has to be removed for totality.
TIP #9: Remember to Remove the Filter!
You will need a safe solar filter over your lens or telescope to shoot the partial phases of the eclipse, and to frame and focus the Sun. This cannot be a photo neutral density or polarizing filter. It must be a filter designed for observing and shooting the Sun, made of metal-coated glass or Mylar plastic. Anything else is not safe and likely far too bright.
But you do NOT need the filter for totality.
Remove it … when?
The answer: a minute or so before totality if you want to capture the first diamond ring just before totality officially starts. Set a timer to remind you, as visually it is very difficult to judge the right moment with your unaided eye. The eclipse will start sooner than you expect.
If you have your camera on Auto Exposure, it will compensate just fine for the change in brightness, from the filtered to the unfiltered view.
But don’t leave your unfiltered camera aimed at the Sun. Replace the filter no more than a minute or so after totality and the second diamond ring ends.
The partial eclipse of the Sun, October 23, 2014, shot through a mylar filter, on the front of the 66mm f/7 apo refractor shown above (450mm focal length), using a cropped-frame Canon 60Da camera for 1/8000 second exposure at ISO 100. Focus on the sharp tips of the crescent Sun or a sunspot if one is present.
TIP #10: Focus!
Everyone worries about getting the “best exposure.” Don’t! You’ll get great looking telephoto eclipse close-ups with any of a wide range of exposures.
What ruins most eclipse shots, other than filter forgetfulness, is fuzzy images, from either shaky tripods or poor focus.
Focus manually using Live View on the filtered partially eclipsed Sun. Zoom up on the edge of the Sun or sharp tip of the crescent. Re-focus a few minutes before totality, as the changing temperature can shift the focus of long lenses and telescopes.
But you needn’t worry about re-focusing after you remove the filter. The focus will not change with the filter off.
Me in Libya in 2006 with my eclipse setup: a small telescope on an alt-azimuth mount.
TIP #1 AGAIN: Keep It Simple!
I’ll remind you to keep things simple for a reason other than giving you time to enjoy the view, and that’s mobility.
You might have to move at the last minute to escape clouds. Complex photo gear can be just too much to take down and set up, often with minutes to spare, as many an eclipse chaser can attest is often necessary. Keep your gear light, easy to use, and mobile. Committing to an overly ambitious and inflexible photo plan and rig could be your undoing.
By following both my “Ten Tips” advice blogs you should be able to get great eclipse images to wow your friends and fans, all without missing the experience of actually seeing … and feeling … the eclipse.
However … may I recommend …
My 295-page ebook on photographing the August 21 total eclipse of the Sun is now available. See http://www.amazingsky.com/eclipsebook.html It covers all techniques, for both stills, time-lapses, and video, from basic to advanced, plus a chapter on image processing. And a chapter on What Can Go Wrong?! The web page has all the details on content, and links to order the book from Apple iBooks Store (for the best image quality and navigation) or as a PDF for all other devices and platforms. Thanks! Clear skies on eclipse day, August 21, 2017.
For much more detailed advice on shooting options and techniques, and for step-by-step tutorials on processing eclipse images, see my 295-page eBook on the subject, available as an iBook for Apple devices and as a PDF for all computers and tablets.
The most spectacular sight the universe has to offer is coming to a sky near you this summer.
On August 21 the Moon will eclipse the Sun, totally!, along a path that crosses the continental USA from coast to coast. All the details of where to go are at the excellent website GreatAmericanEclipse.com.
If this will be your first total solar eclipse, you might want to just watch it. But many will want to photograph or video it. It can be easy to do, or it can be very complex, for those who are after ambitious composites and time-lapses.
To tell you how to shoot the eclipse, with all types of cameras, from cell phones to DSLRs, with all types of techniques, from simple to advanced, I’ve prepared a comprehensive ebook, How to Photograph the Solar Eclipse.
It is 295 pages of sage advice, gathered over 38 years of shooting 15 total solar eclipses around the world.
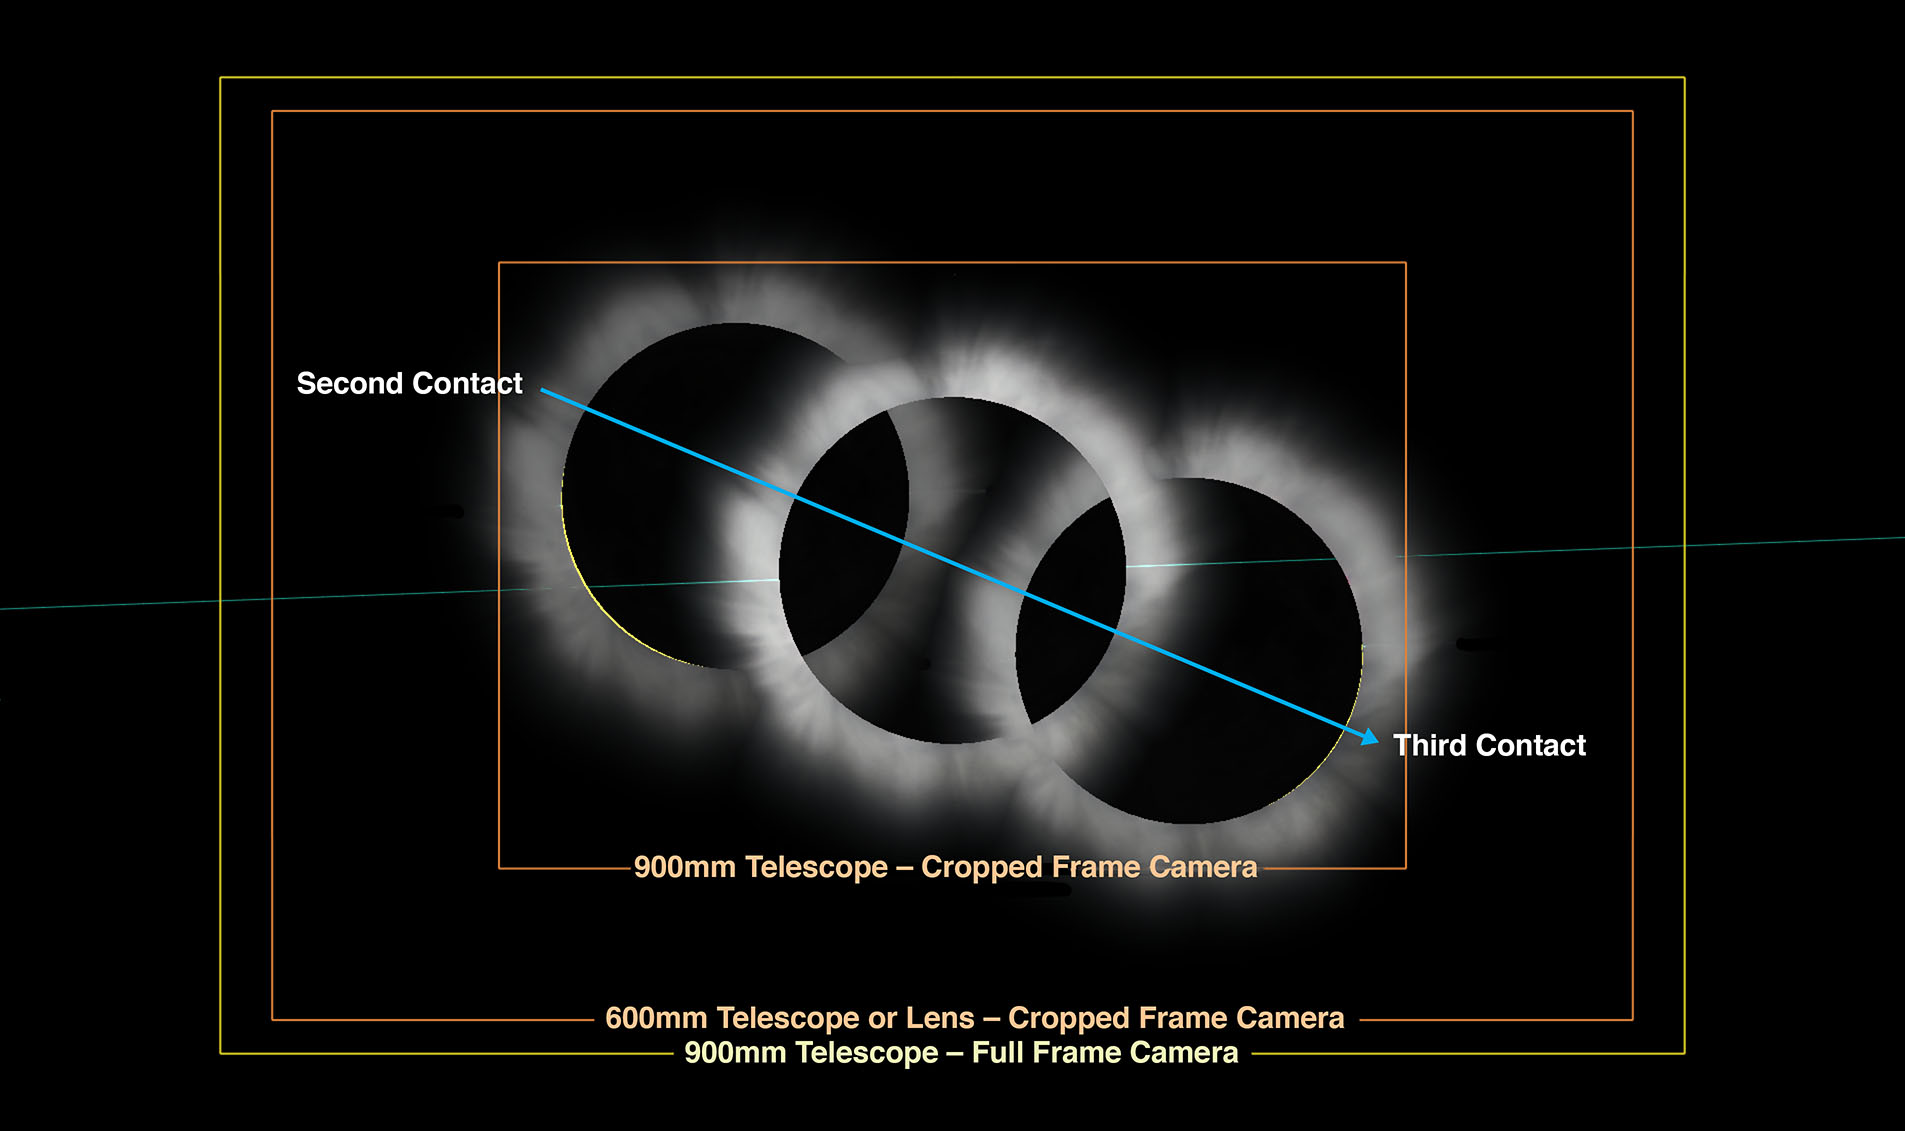
The book is filled with illustrations designed specifically for the 2017 eclipse – where the Sun will be, how to frame the scene, what will be in the sky, how the shadow will move, where the diamond rings will be, what lenses to use, etc.
Here are a few sample pages:
I cover shooting with everything from wide-angle cameras for the entire scene, to close-ups with long telephotos and telescopes, both on tripods and on tracking mounts.
I cover all the details on exposures and camera settings, and on focusing and ensuring the sharpest images. Most bad eclipse pix are ruined not by poor exposure but poor focus and blurry images – the Sun is moving!
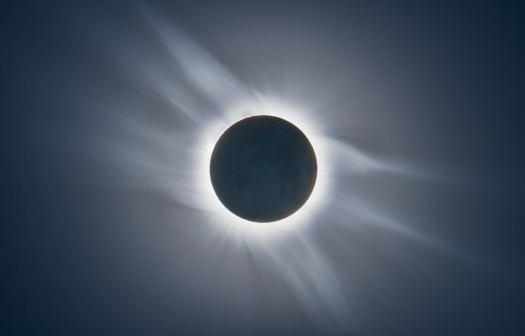
A big chapter covers processing of eclipse images, again, from simple images to complex stacks and composites.
For example, I show how to produce a shot like this, from 2012, combining a short diamond ring image with a long-exposure image of the corona.
A final chapter covers “what can go wrong!” and how to avoid the common mistakes.
The ebook is available on the Apple iBooks Store for Mac and iOS devices. This version has the best interactivity (zoomable images), higher quality images (less compression), and easiest content navigation.
However, for non-Apple people and devices, the ebook can also be purchased directly from my website as a downloadable PDF, which has embedded hyperlinks to external sites.
I think you’ll find the ebook to be the most comprehensive guide to shooting solar eclipses you’ll find. It is up to date (as of last week!) and covers all the techniques for the digital age.
Many thanks, and clear skies on August 21, wherever you may be in the shadow of the Moon!