

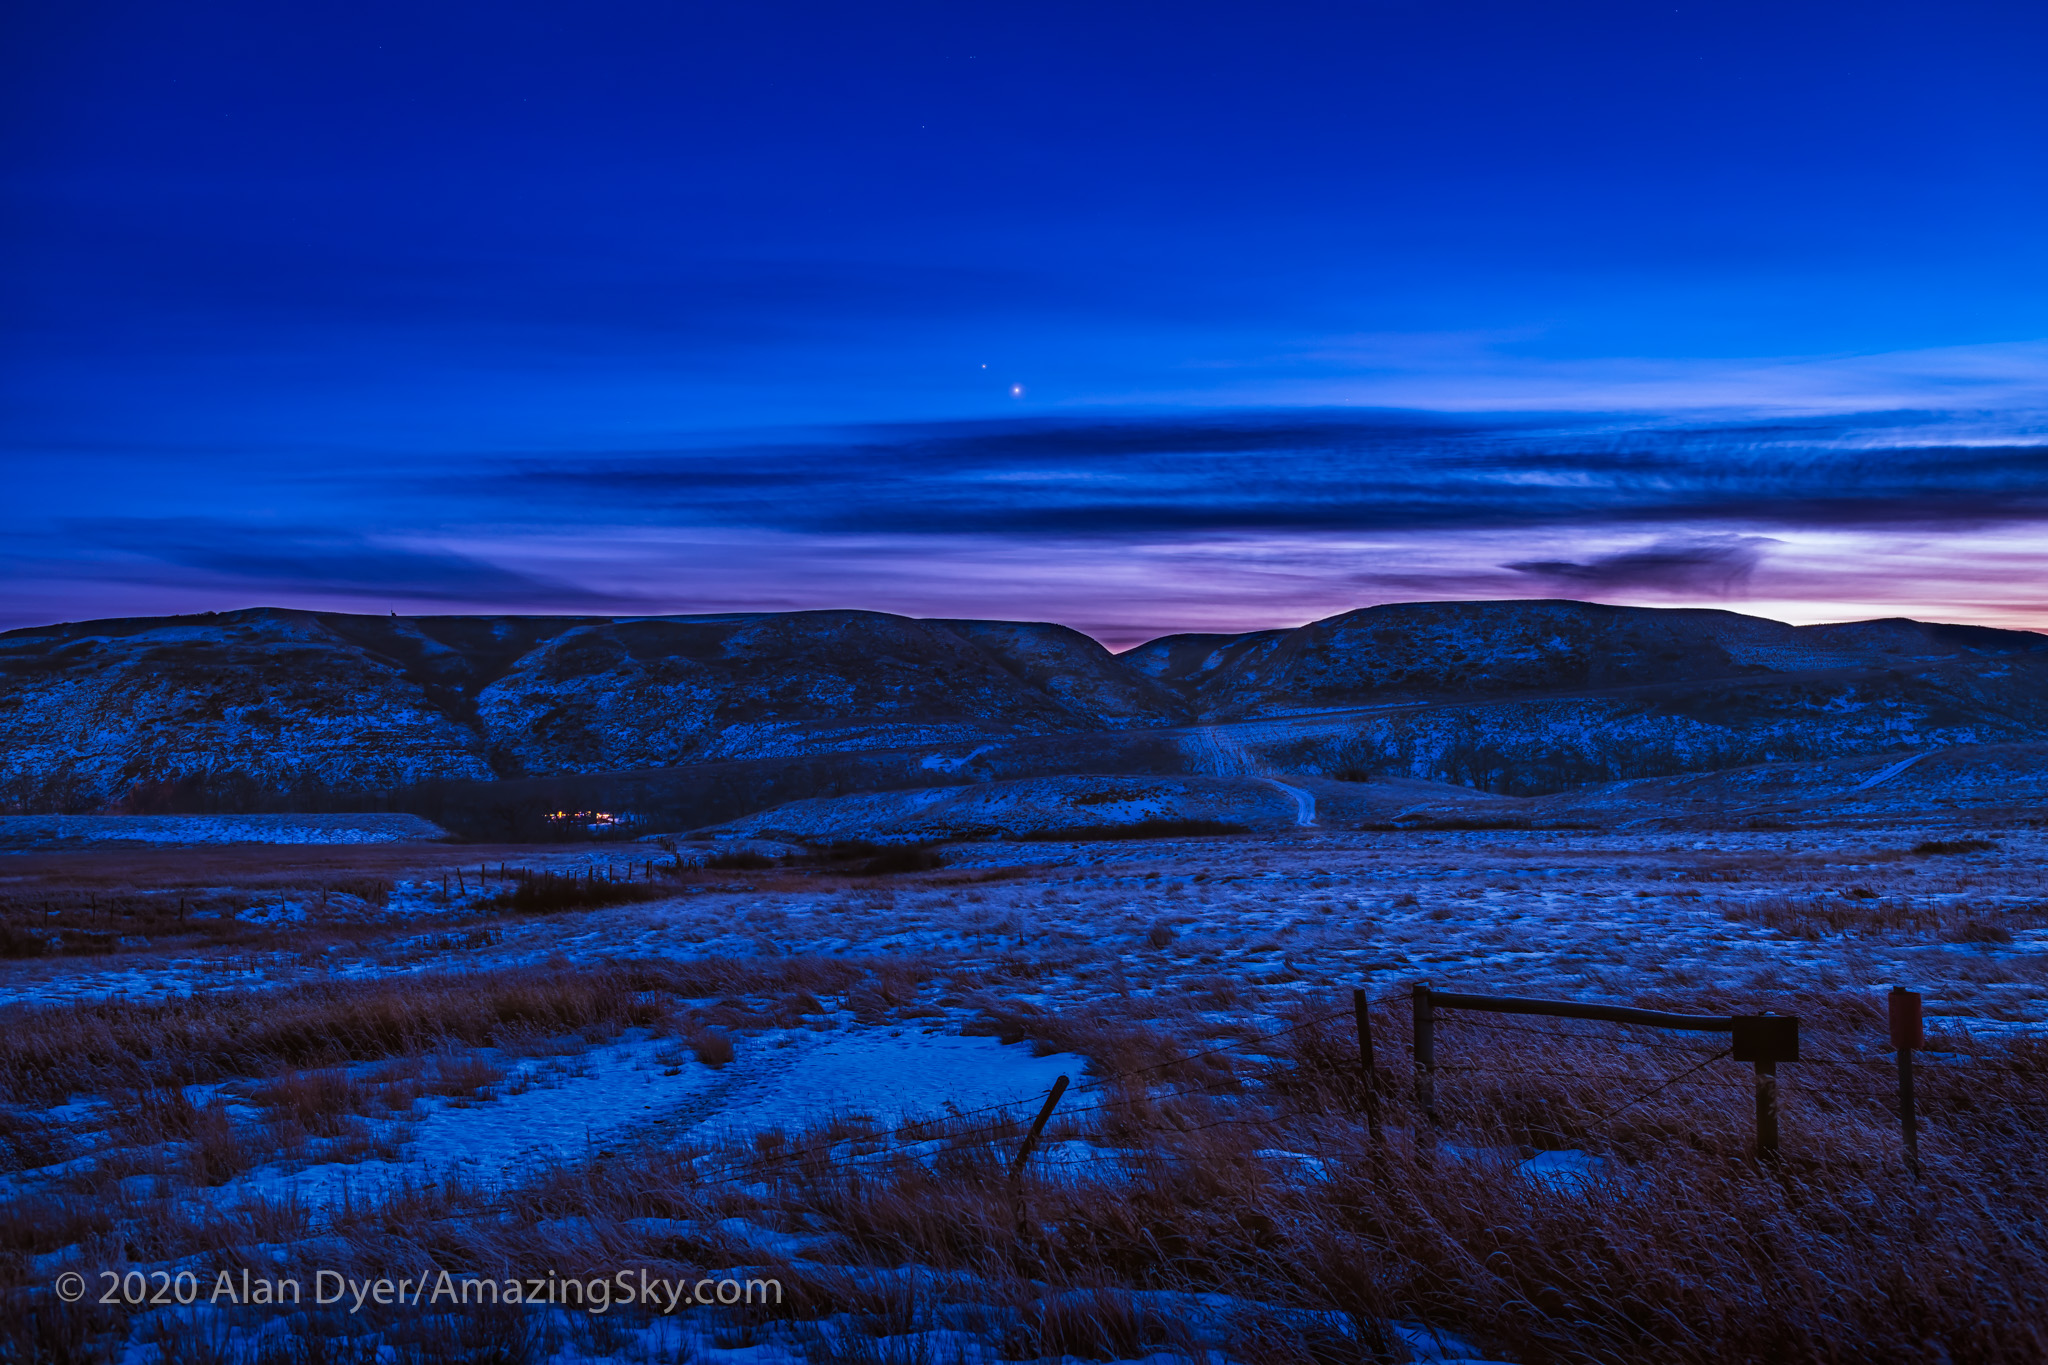
On December 21 we have a chance to see and shoot a celestial event that no one has seen since the year 1226.
As Jupiter and Saturn each orbit the Sun, Jupiter catches up to slower moving Saturn and passes it every 20 years. For a few days the two giant planets appear close together in our sky. The last time this happened was in 2000, but with the planets too close to the Sun to see.
Back on February 18, 1961 the two planets appeared within 14 arc minutes or 0.23° (degrees) of each other low in the dawn sky.
But on December 21 they will pass each other only 6 arc minutes apart. To find a conjunction that close and visible in a darkened sky you have to go all the way back to March 5, 1226 when Jupiter passed only 3 arc minutes above Saturn at dawn. Thus the media headlines of a “Christmas Star” no one has seen for 800 years!
Photographing the conjunction will be a challenge precisely because the planets will be so close to each other. Here are several methods I can suggest, in order of increasing complexity and demands for specialized gear.
Easy — Shooting Nightscapes with Wide Lenses

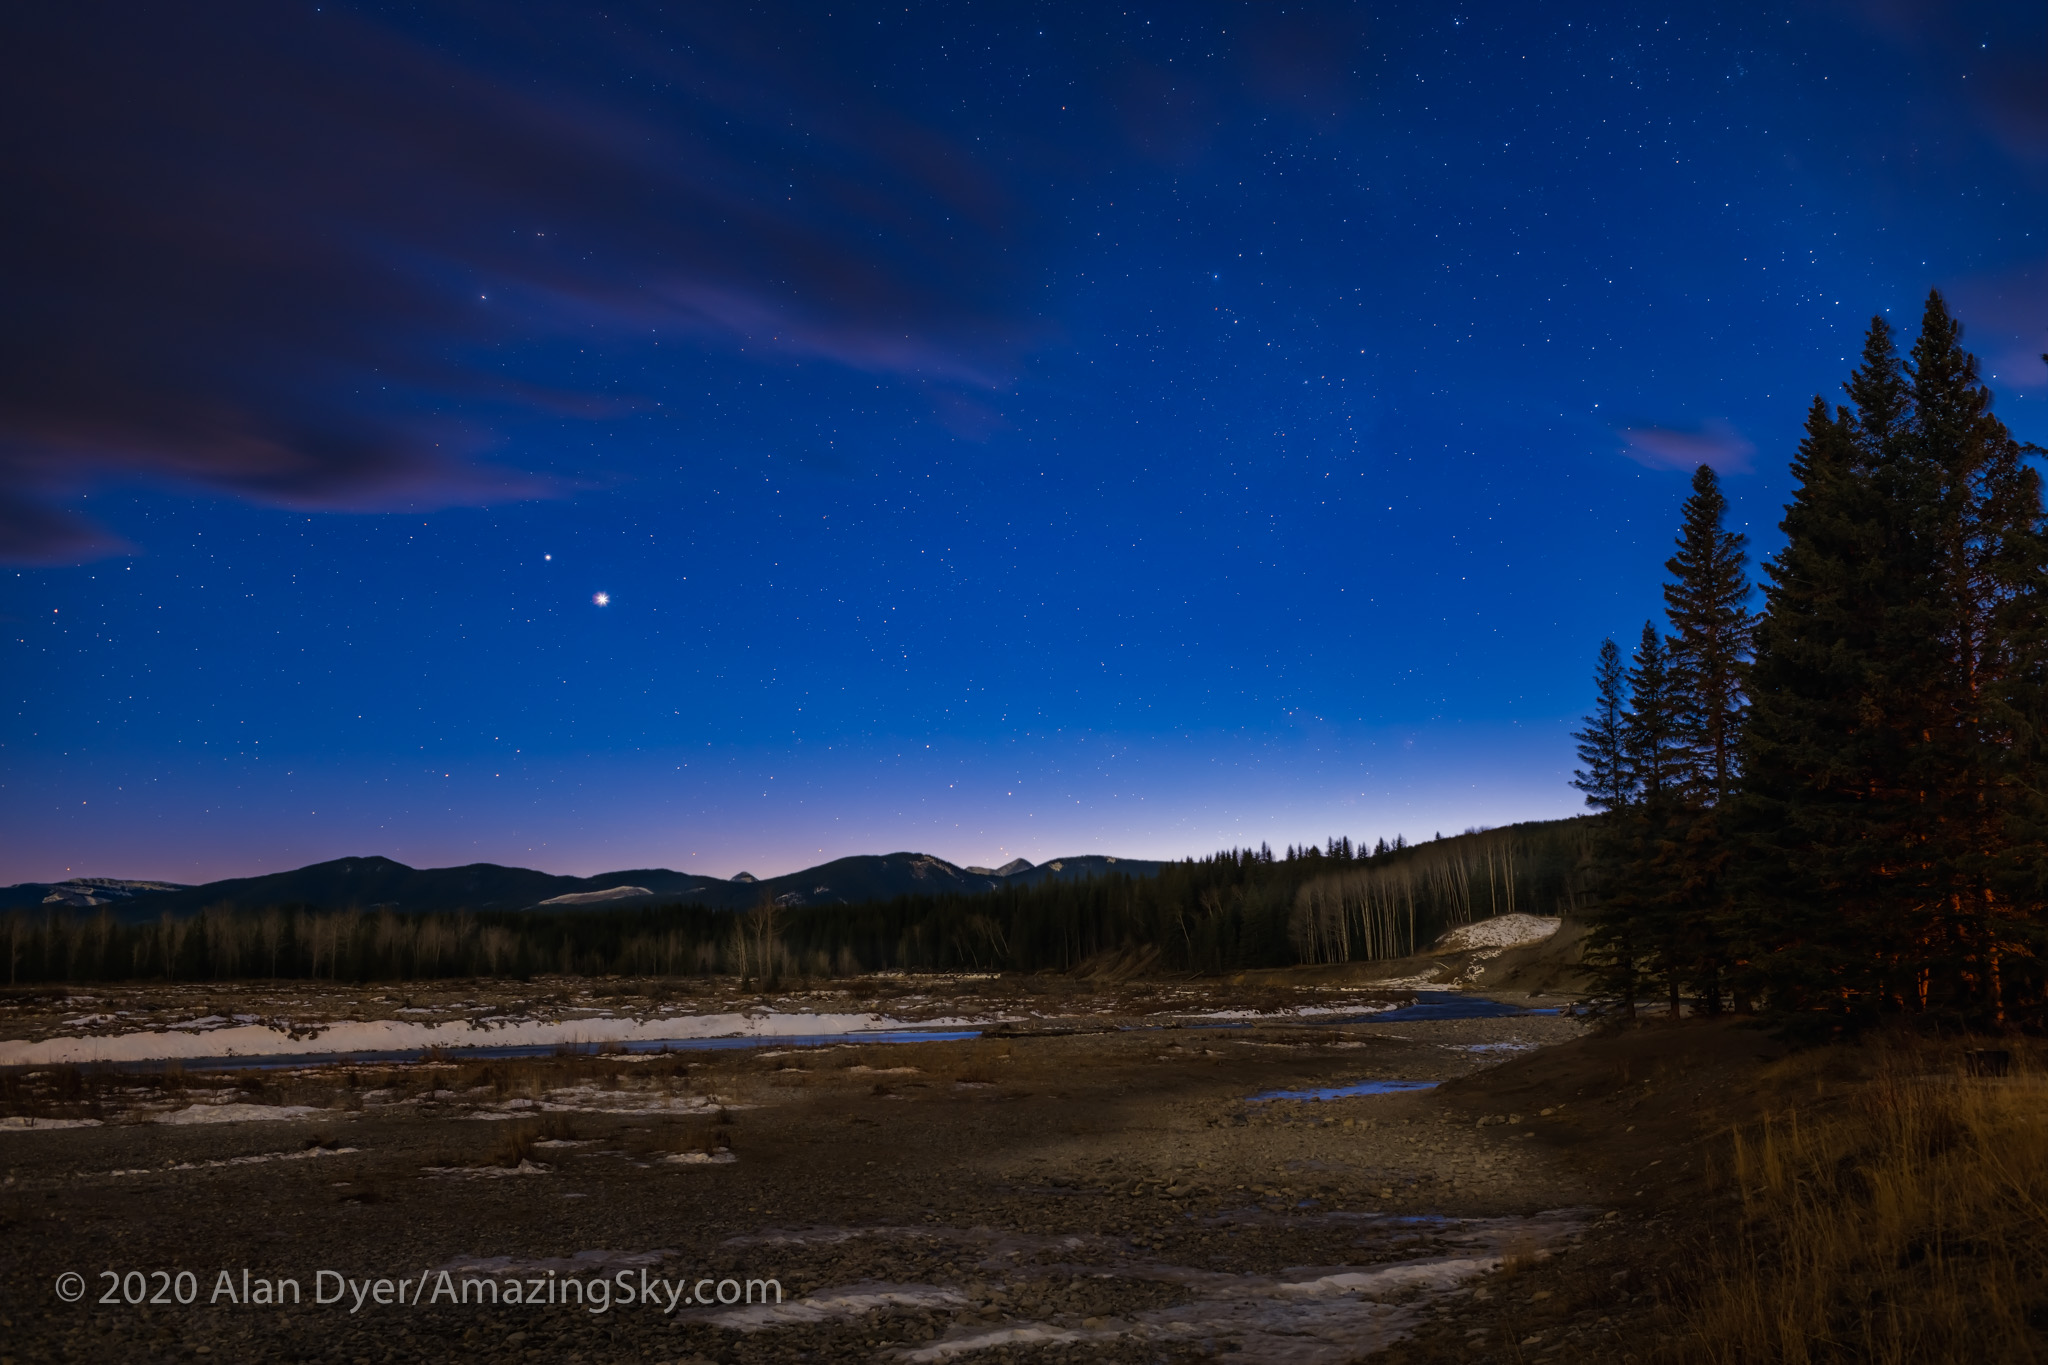
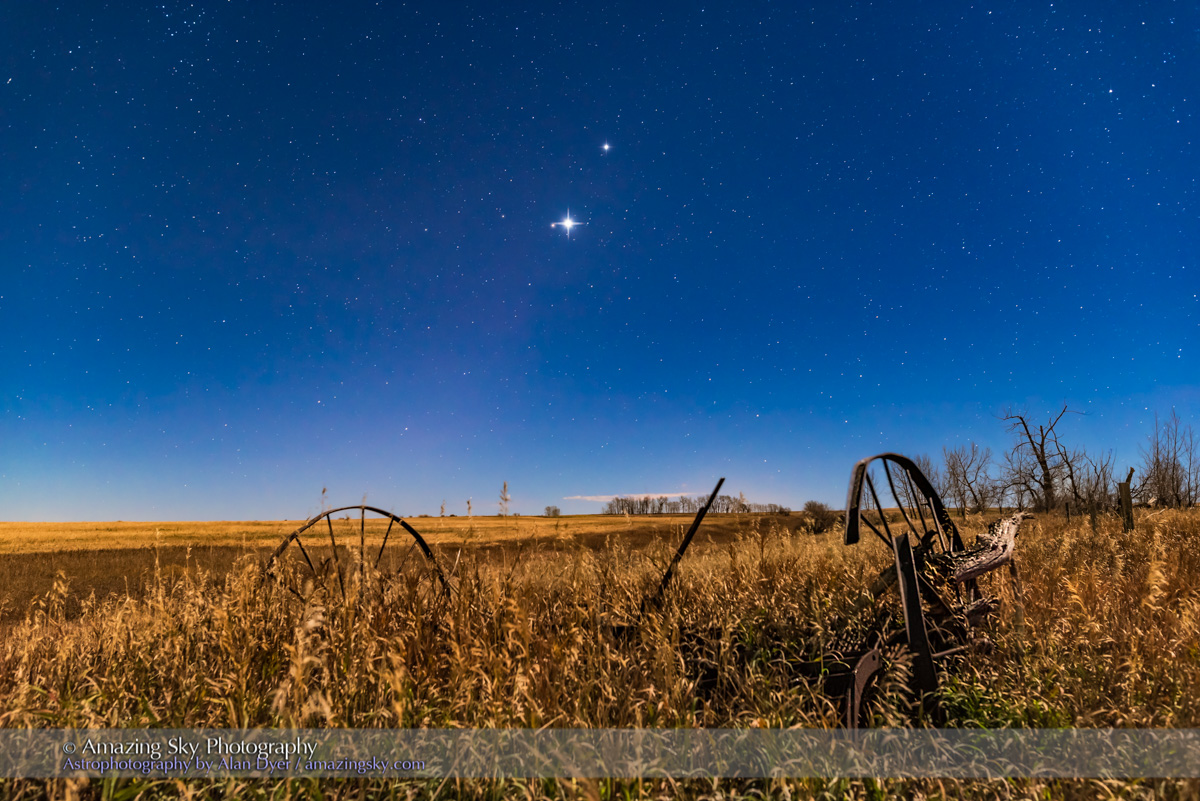
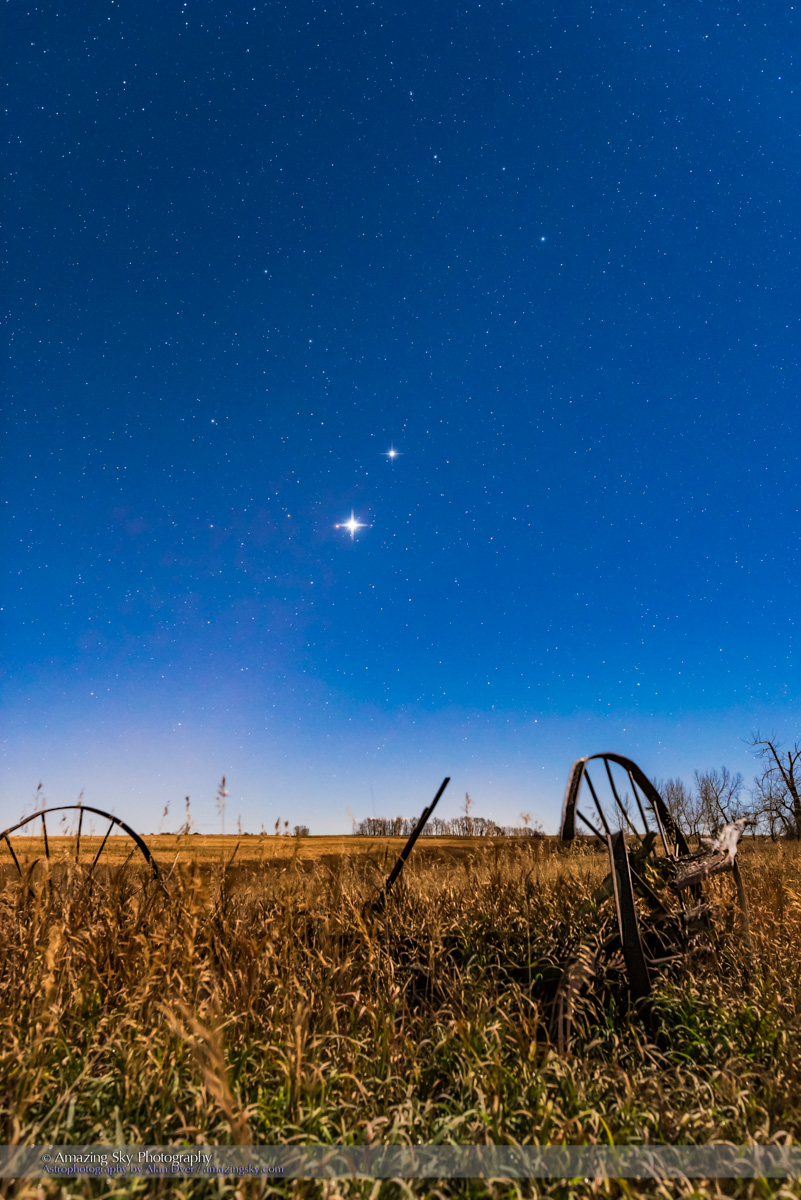
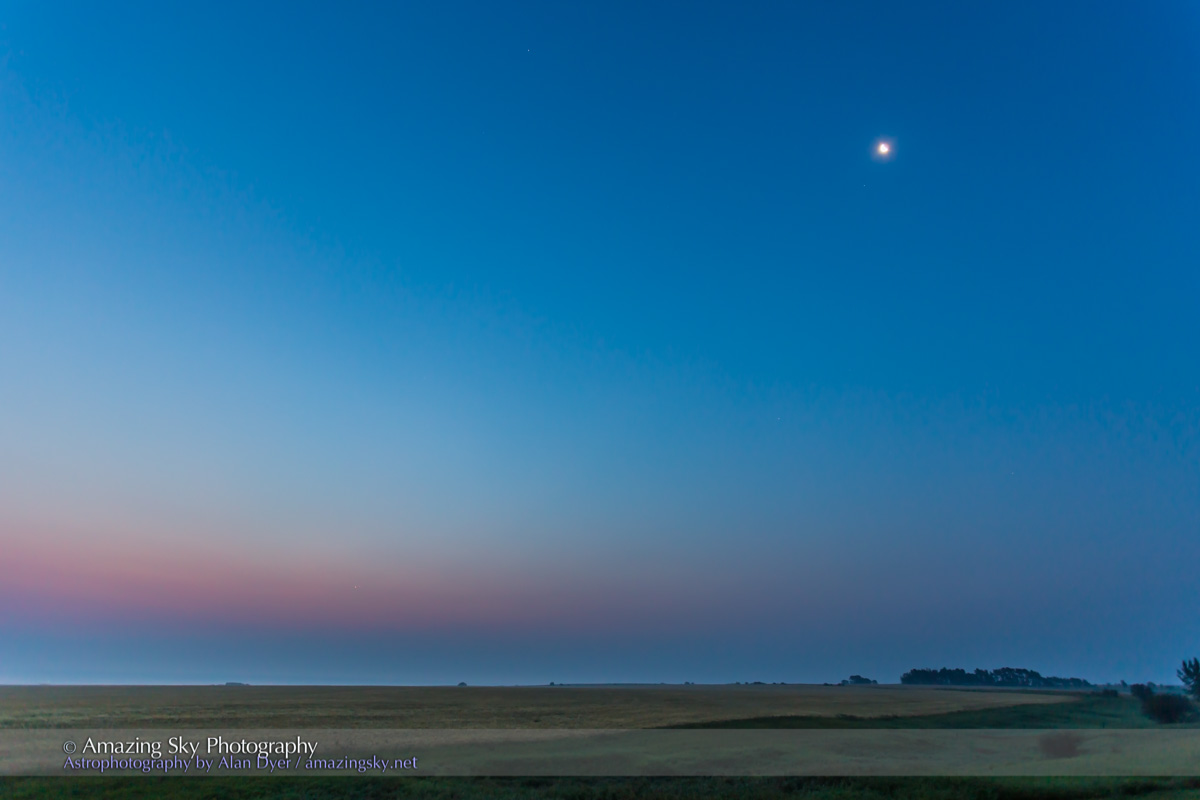
Conjunctions of planets in the dusk or dawn twilight are usually easy to capture. Use a wide-angle (24mm) to short telephoto (85mm) lens to frame the scene and exposures of no more than a few seconds at ISO 200 to 400 with the lens at f/2.8 to f/4.
The sky and horizon might be bright enough to allow a camera’s autoexposure and autofocus systems to work.
Indeed, in the evenings leading up to and following the closest approach date of December 21 that’s a good method to use. Capture the planet pair over a scenic landscape or urban skyline to place them in context.
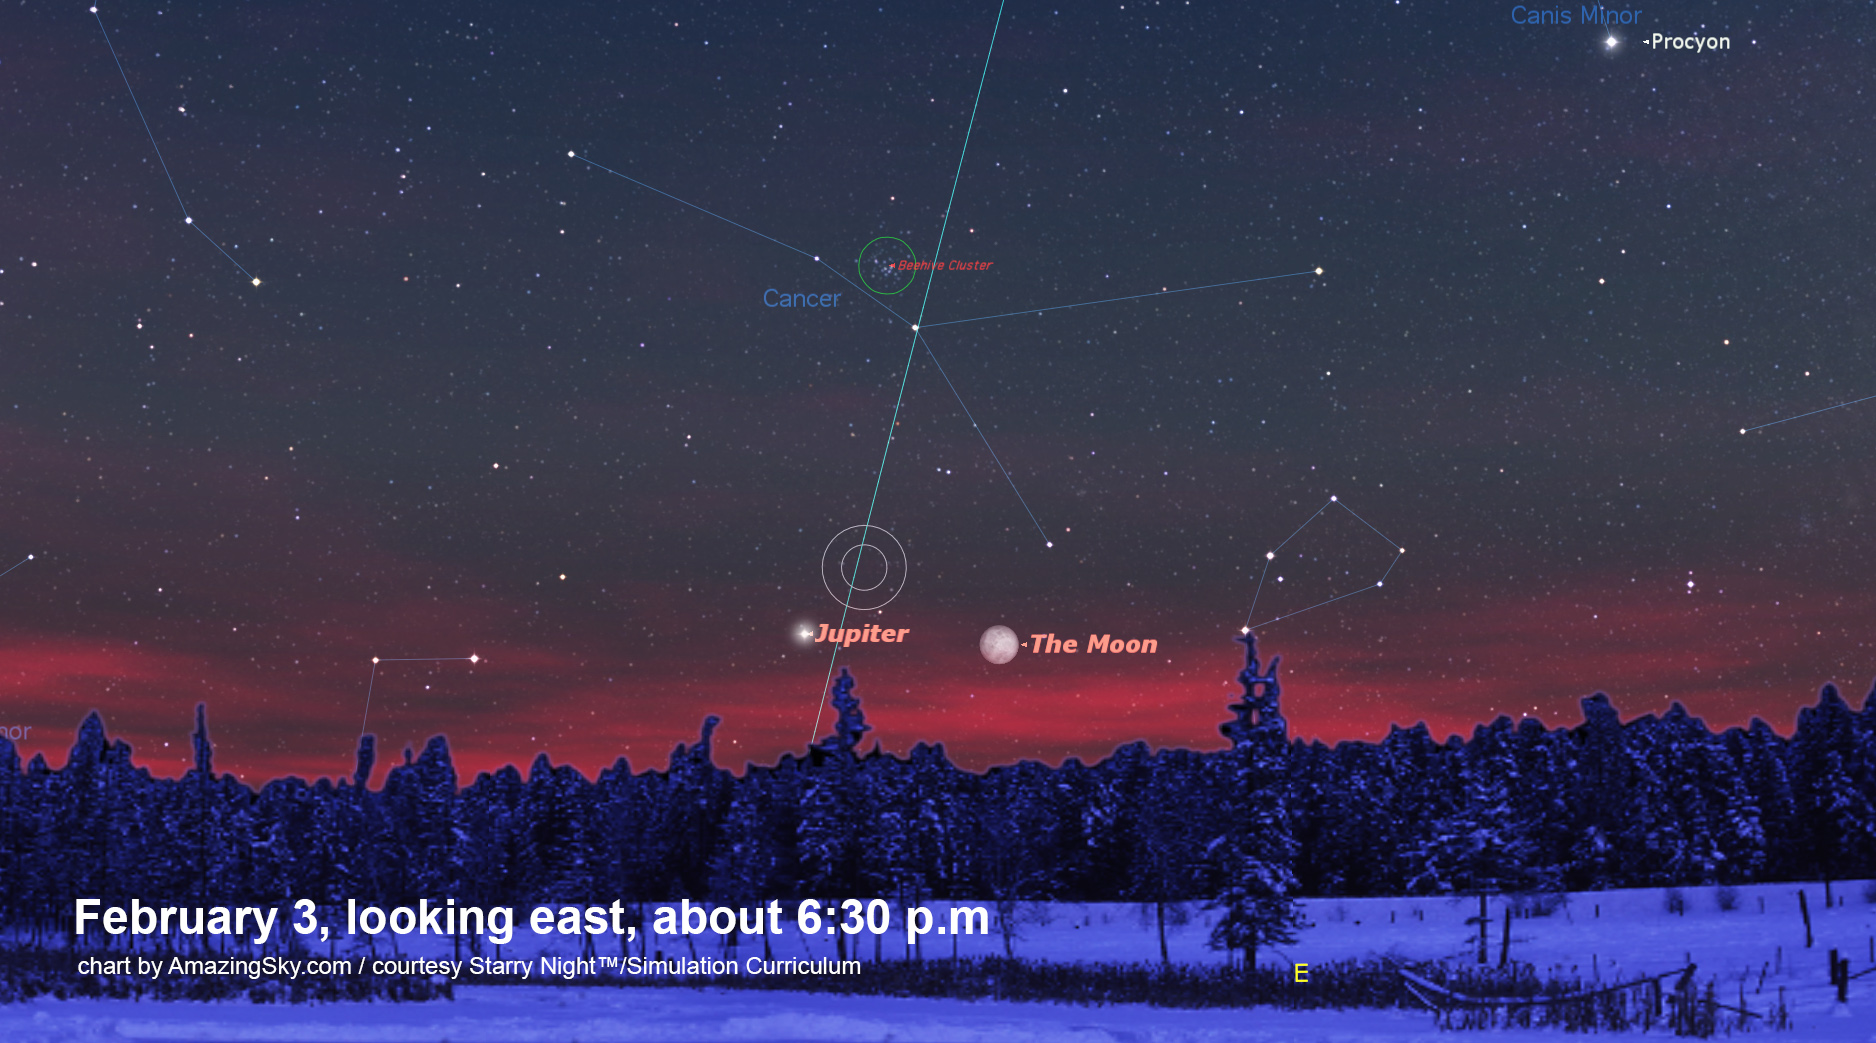
For most locations the planets will appear no higher than about 15° to 20° above the southwestern horizon as it gets dark enough to see and shoot them, at about 5 p.m. local time. A 50mm lens on a full-frame camera (or a 35mm lens on a cropped frame camera) will frame the scene well.

NIGHTSCAPE TIP — Use planetarium software such as Stellarium (free), SkySafari, or StarryNight (what I used here) to simulate the framing with your lens and camera. Use that software to determine where the planets will be in azimuth, then use a photo planning app such as PhotoPills or The Photographer’s Ephemeris to plan where to be to place the planets over the scene you want at that azimuth (they’ll be at about 220° to 230° — in the southwest — for northern latitude sites).
My ebook linked to at right has pages of tips and techniques for shooting nightscapes and time-lapses.
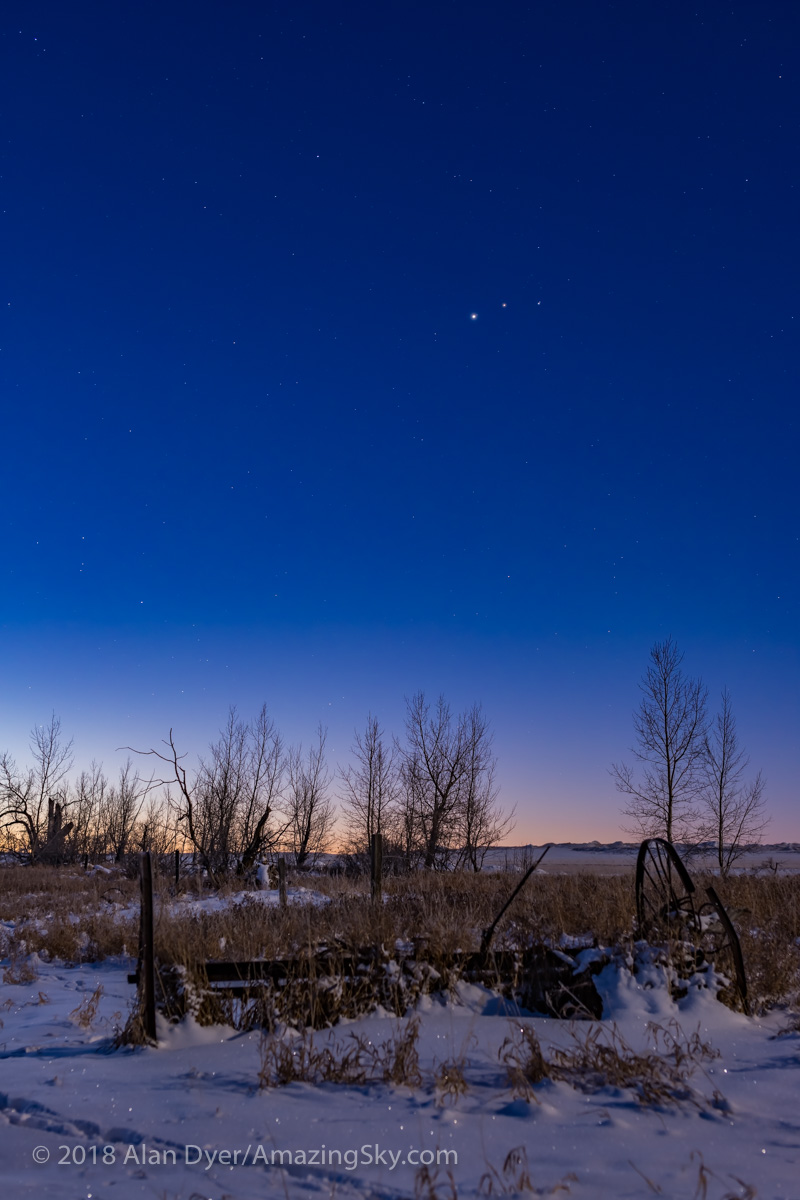
Harder — Shooting With Longer Lenses
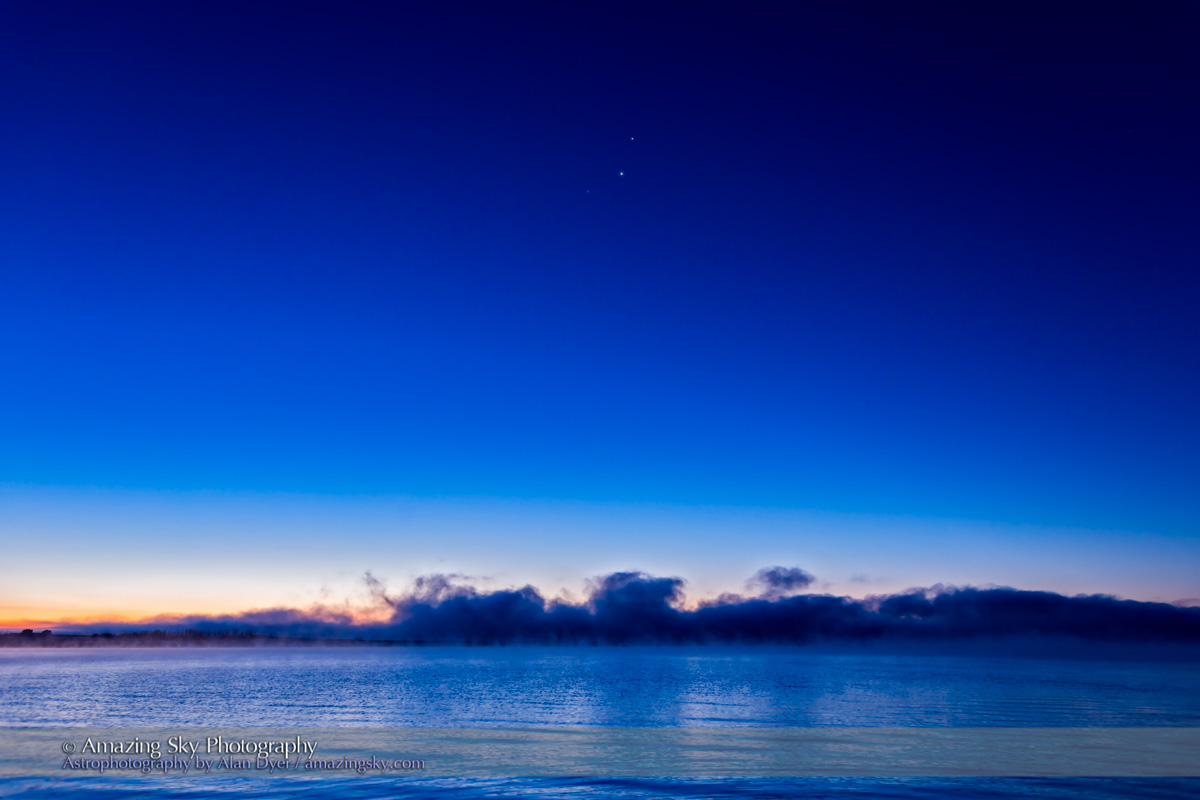
The planet pair will sink lower and closer to the horizon, to set about 7:00 to 7:30 p.m. local time each night.
As the sky darkens and the planet altitude decreases you can switch to ever-longer lenses to zoom in on the scene and still frame the planets above a carefully-chosen horizon, assuming you have very clear skies free of haze and cloud.
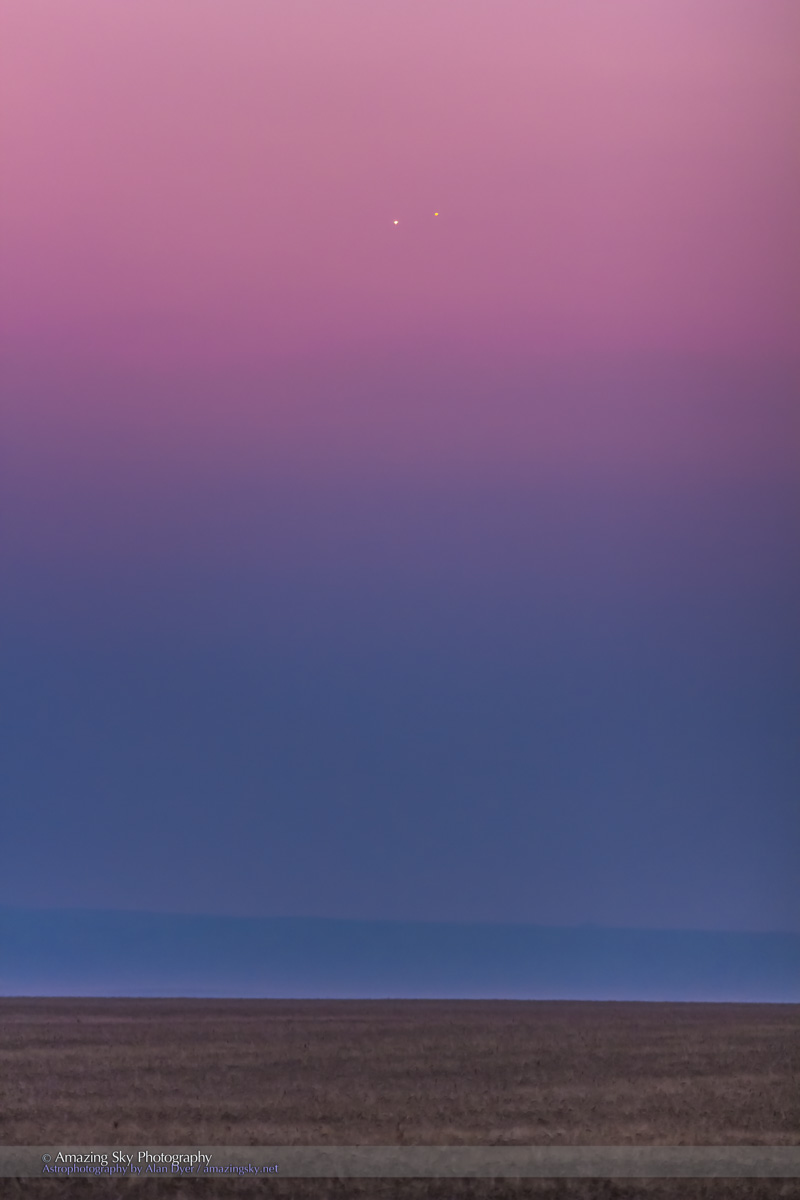
For example, by 6 p.m. they will be low enough to allow a 135mm telephoto to frame the planets and still have the horizon in the frame. Using a longer lens has the benefit or resolving the two planets better, showing them as two distinct objects, which will become more of a challenge the closer you are to December 21.
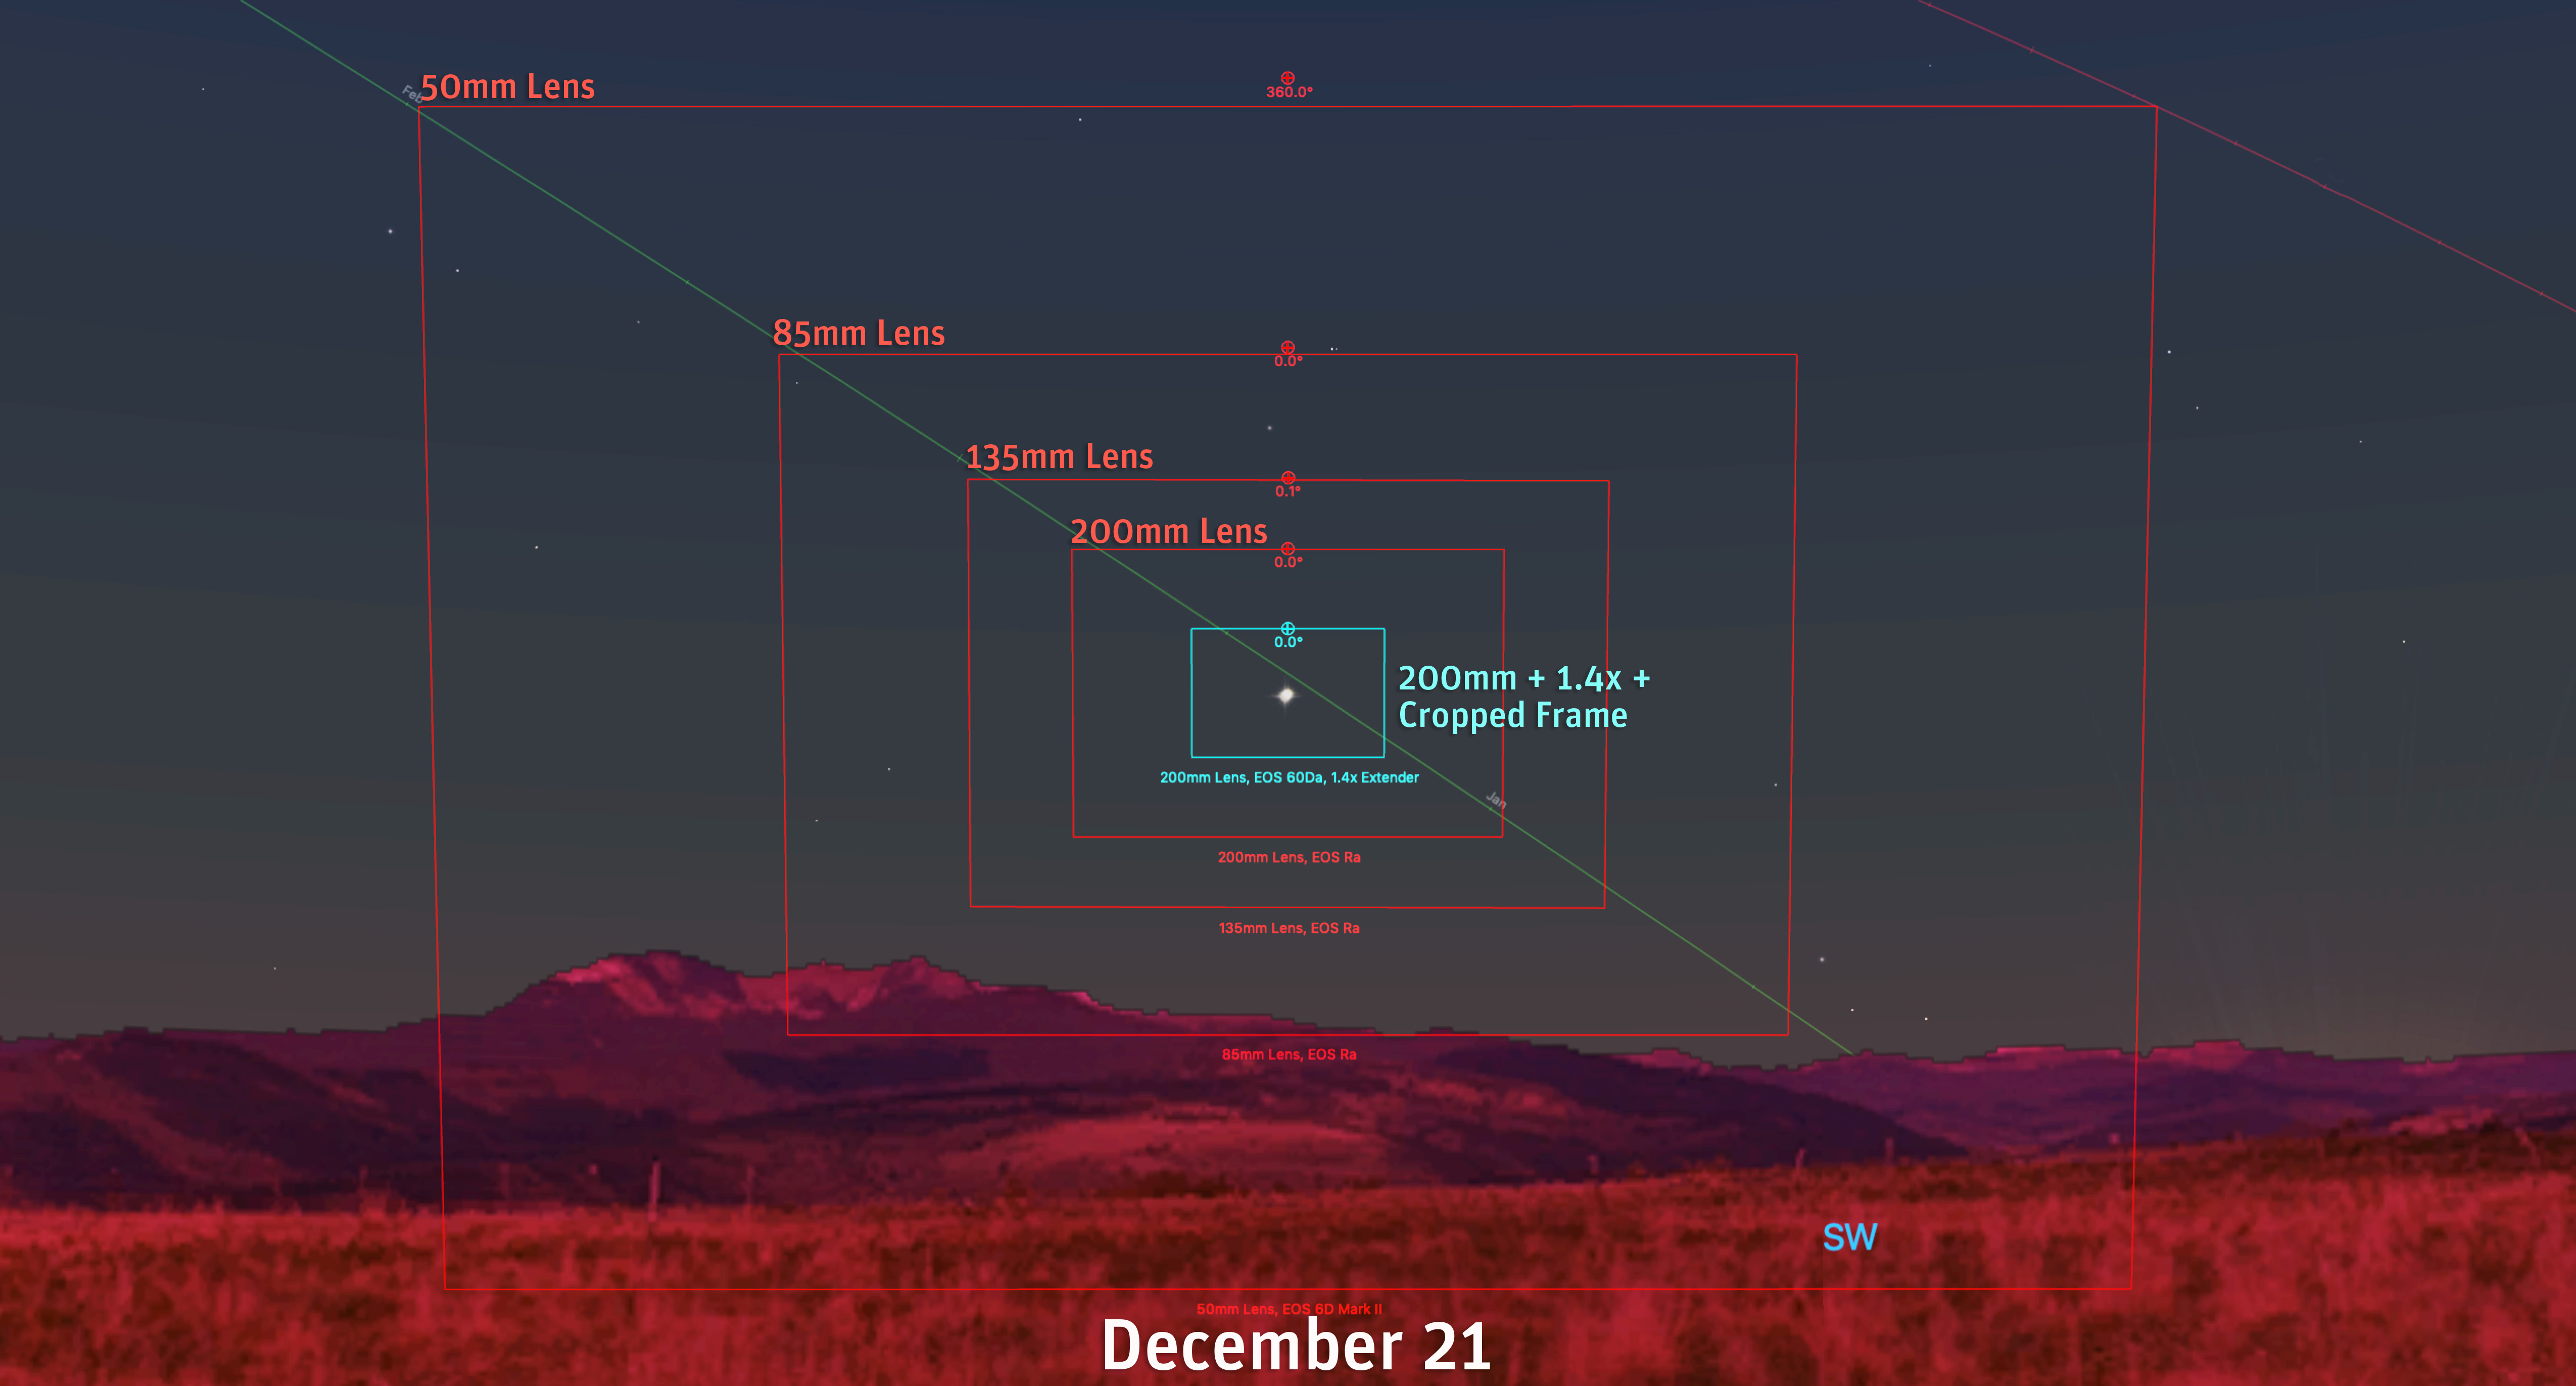
On closest approach day the planets will be so close that using a wide-angle or even a normal lens might only show them as an unresolved blob of light. You’ll need more focal length to split the planets well into two objects.
However, using longer focal lengths introduces a challenge — the motion of the sky will cause the planets to trail during long exposures, turning them from points into streaks. That trailing will get more noticeable more quickly the longer the lens you use.
A rule-of-thumb says the longest exposure you can employ before trailing becomes apparent is 500 / the focal length of the lens. So for a 200mm lens, maximum exposure is 500 / 200 = 2.5 seconds.
To be conservative, a “300 Rule” might be better, restricting exposures with a 200mm telephoto to 300 / 200 = 1.5 seconds. Now, 1.5 seconds might be long enough for the scene, especially if you use a fast lens wide open at f/2.8 or f/2 and a faster ISO such as 400 or 800.
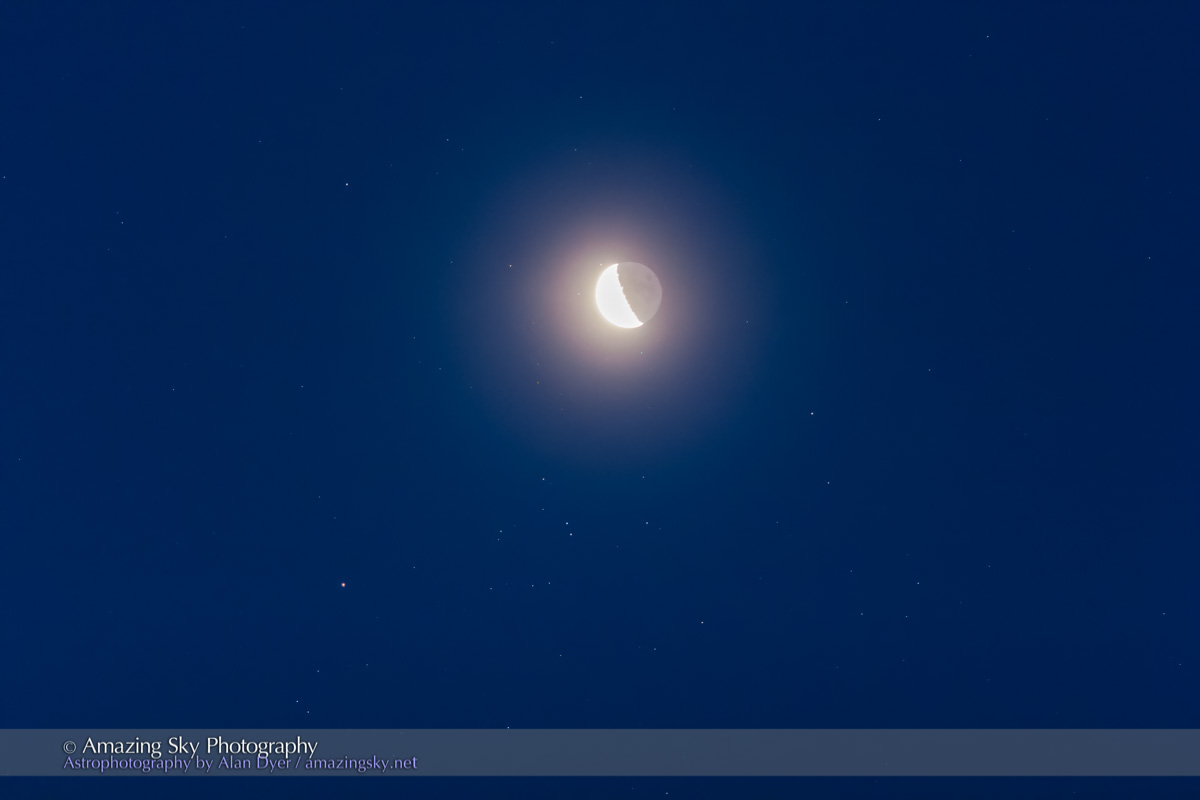
TELEPHOTO TIP — Be sure to focus carefully using Live View to manually focus on a magnified image of the planets. And refocus through an evening of shooting. While people fuss about getting the one “correct” exposure, it is poor focus that ruins more astrophotos.
Even More Demanding — Tracking Longer Lenses

However, longer exposures might be needed later in the evening when the sky is darker, to set the planets into a starry background. After December 17 we will have a waxing Moon in the evening sky to light the sky and foreground, so the sky will not be dark, even from a rural site.
Even so, to ensure untrailed images with long telephotos — and certainly with telescopes — you will need to employ a sky tracker, a device to automatically turn the camera to follow the sky. If you don’t have one, it’s probably too late to get one and learn how to use it! But if you have one, here’s a great opportunity to put it to use.
Polar align it (you’ll have to wait for it to get dark enough to see the North Star) and then use it to take telephoto close-up images of the planets with exposure times that can now be as long as you like, though they likely won’t need to be more than 10 to 20 seconds.
You can now also use a slower ISO speed for less noise.
TRACKER TIP — Use a telephoto to frame just the planets, or include some foreground content such as a hilltop, if it can be made to fit in the frame. Keep in mind that the foreground will now blur from the tracking, which might not be an issue. If it is, take exposures of the foreground with the tracker motor off, to blend in later in processing.
The Most Difficult Method — Using a Telescope

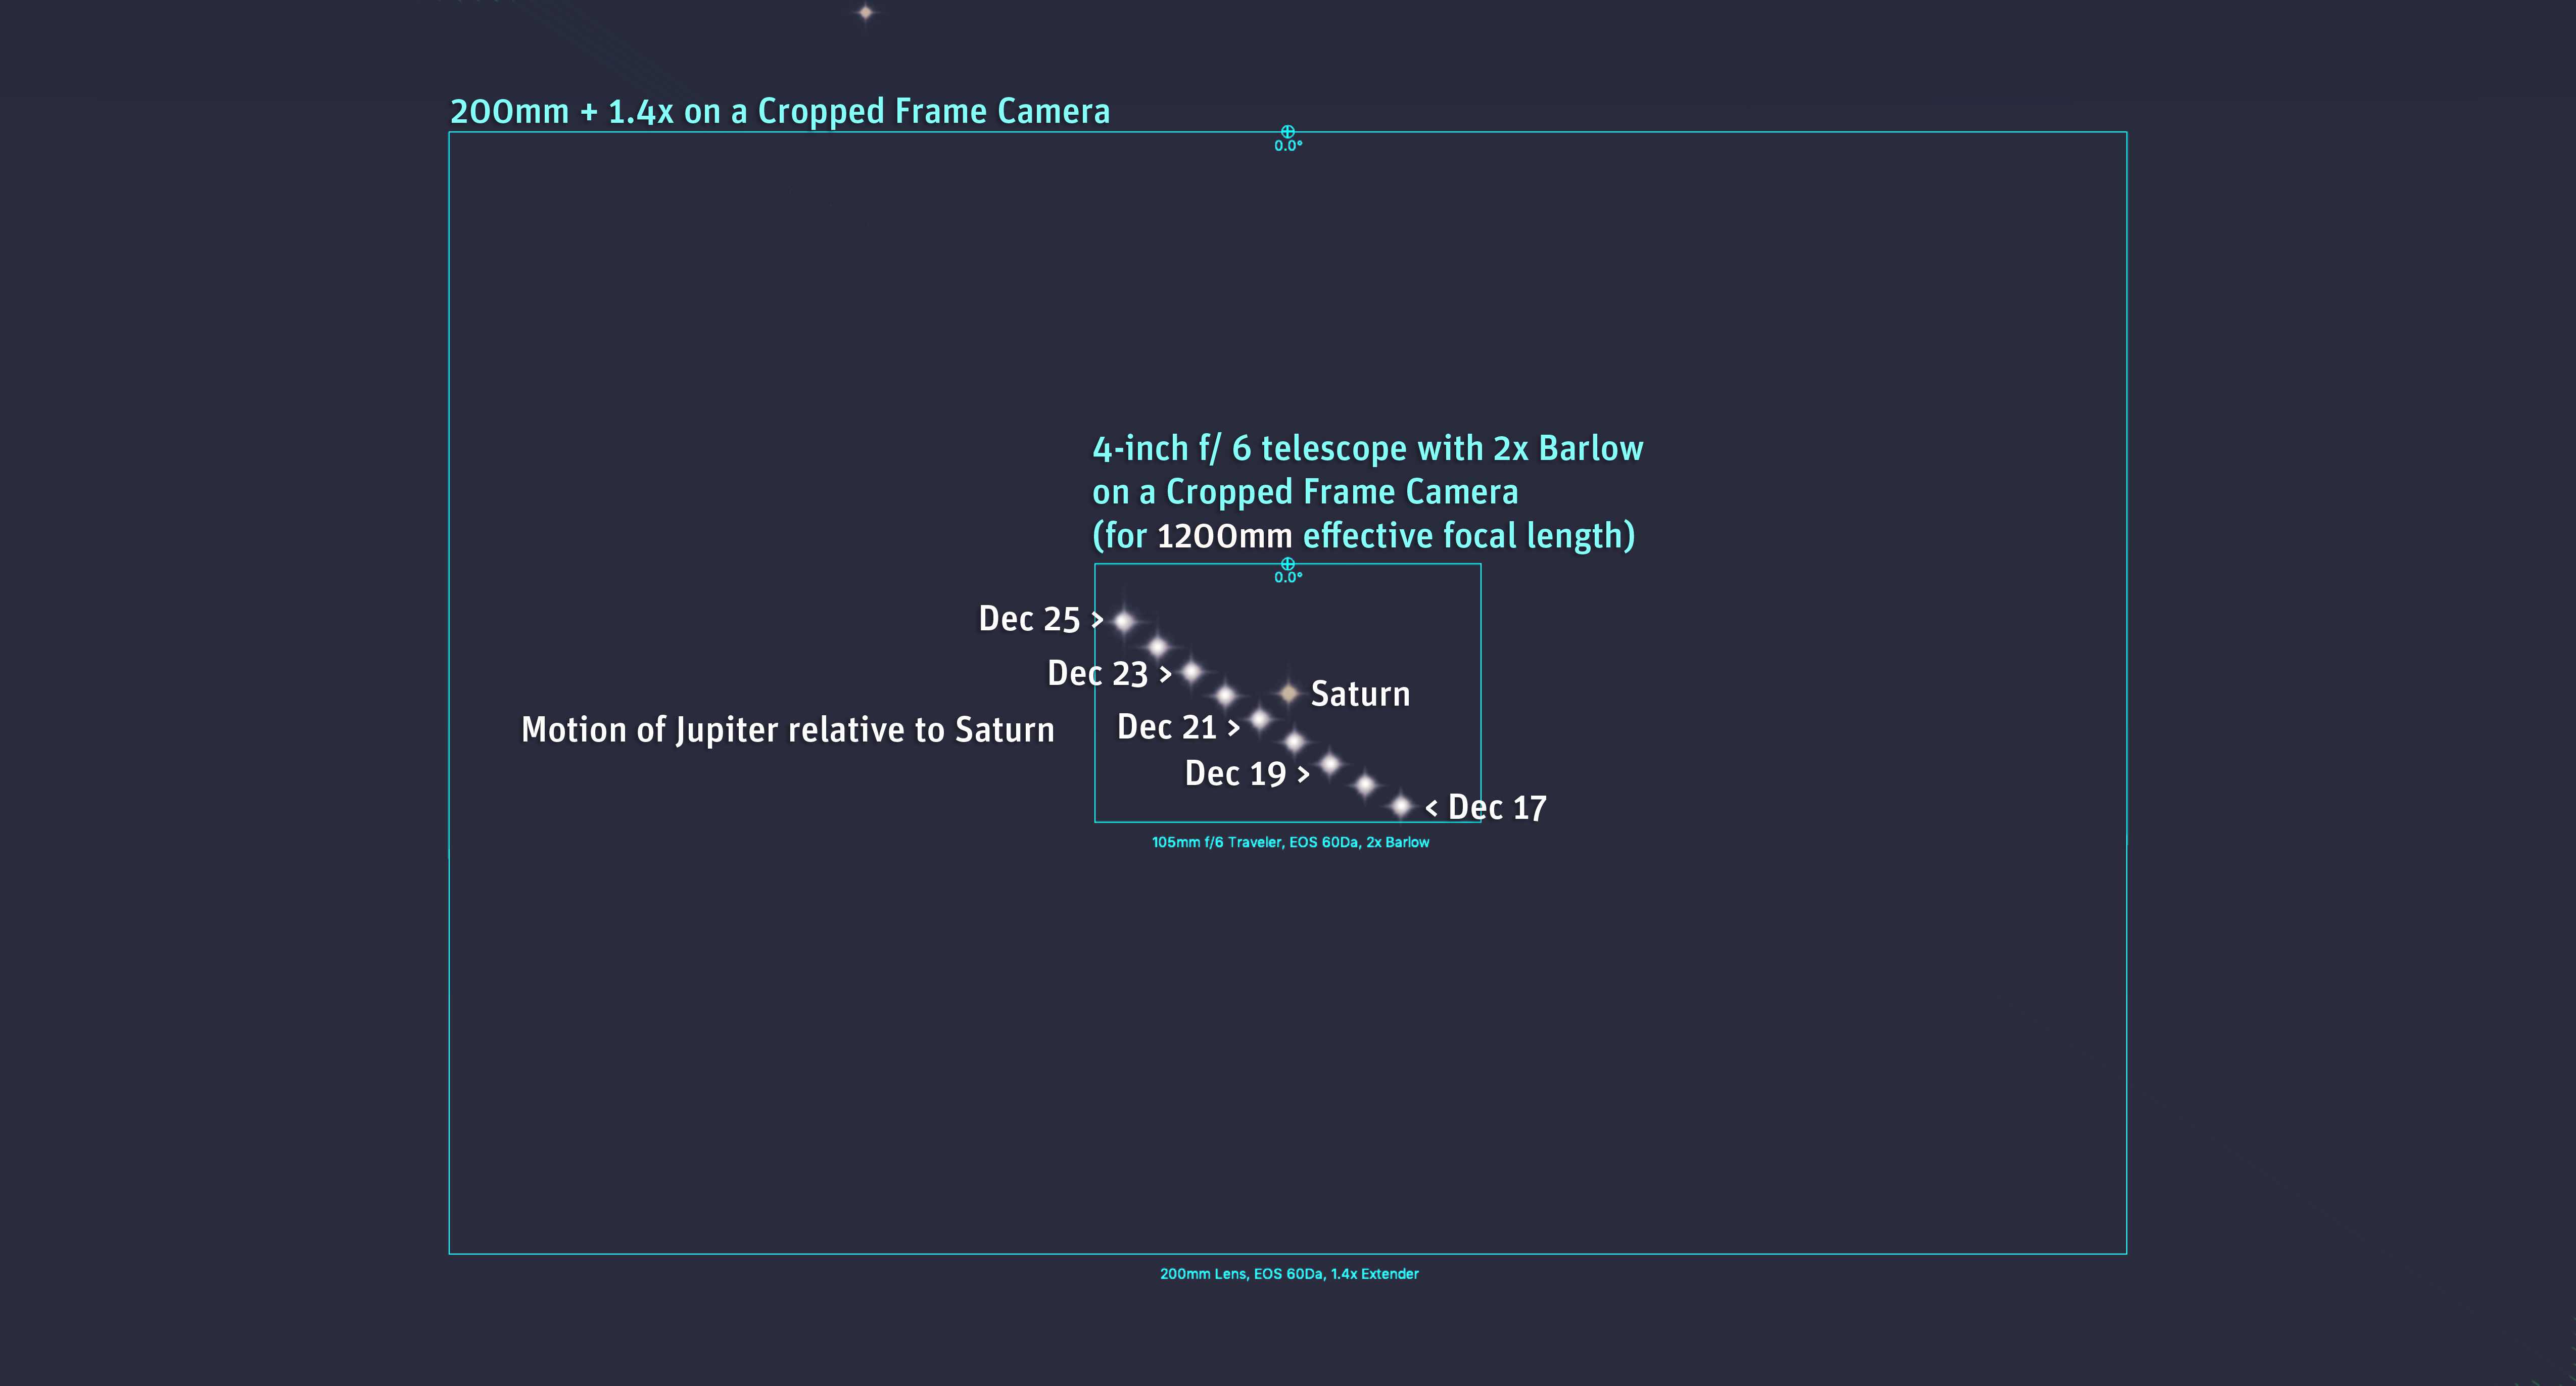
Capturing the rare sight of the planets as two distinct disks (not just dots of light) accompanied by their moons, all together in the same frame, is possible anytime between now and the end of the year.
But … resolving the disks of the planets takes focal length — a lot of focal length! And that means using a telescope on a mount that can track the stars.
While a sky tracker might work, they are not designed to handle long and heavy lenses and telescopes. You’d need a telescope on a solid mount, though it could be a “GoTo” telescope on an alt-azimuth mount. Such a mount, while normally not suited for long-exposure deep-sky imaging, will be fine for the short exposures needed for the planets.
You will need to attach your camera to the telescope using a camera adapter, so the scope becomes the lens. If you have never done this, to shoot closeups of the Moon for example, and don’t have the right adapters and T-rings, then this isn’t the time to learn how to do it.
TELESCOPE TIP — As an alternative, it might be possible to shoot the planets using a phone camera clamped to the low-power eyepiece of a telescope, but focusing and setting the exposure can be tough. It might not be worth the fuss in the brief time you have in twilight, perhaps on the one clear night you get! Just use your telescope to look and enjoy the view!
But if you have experience shooting the Moon through your telescope with your DSLR or mirrorless camera, then you should be all set, as the gear and techniques to shoot the planets are the same.

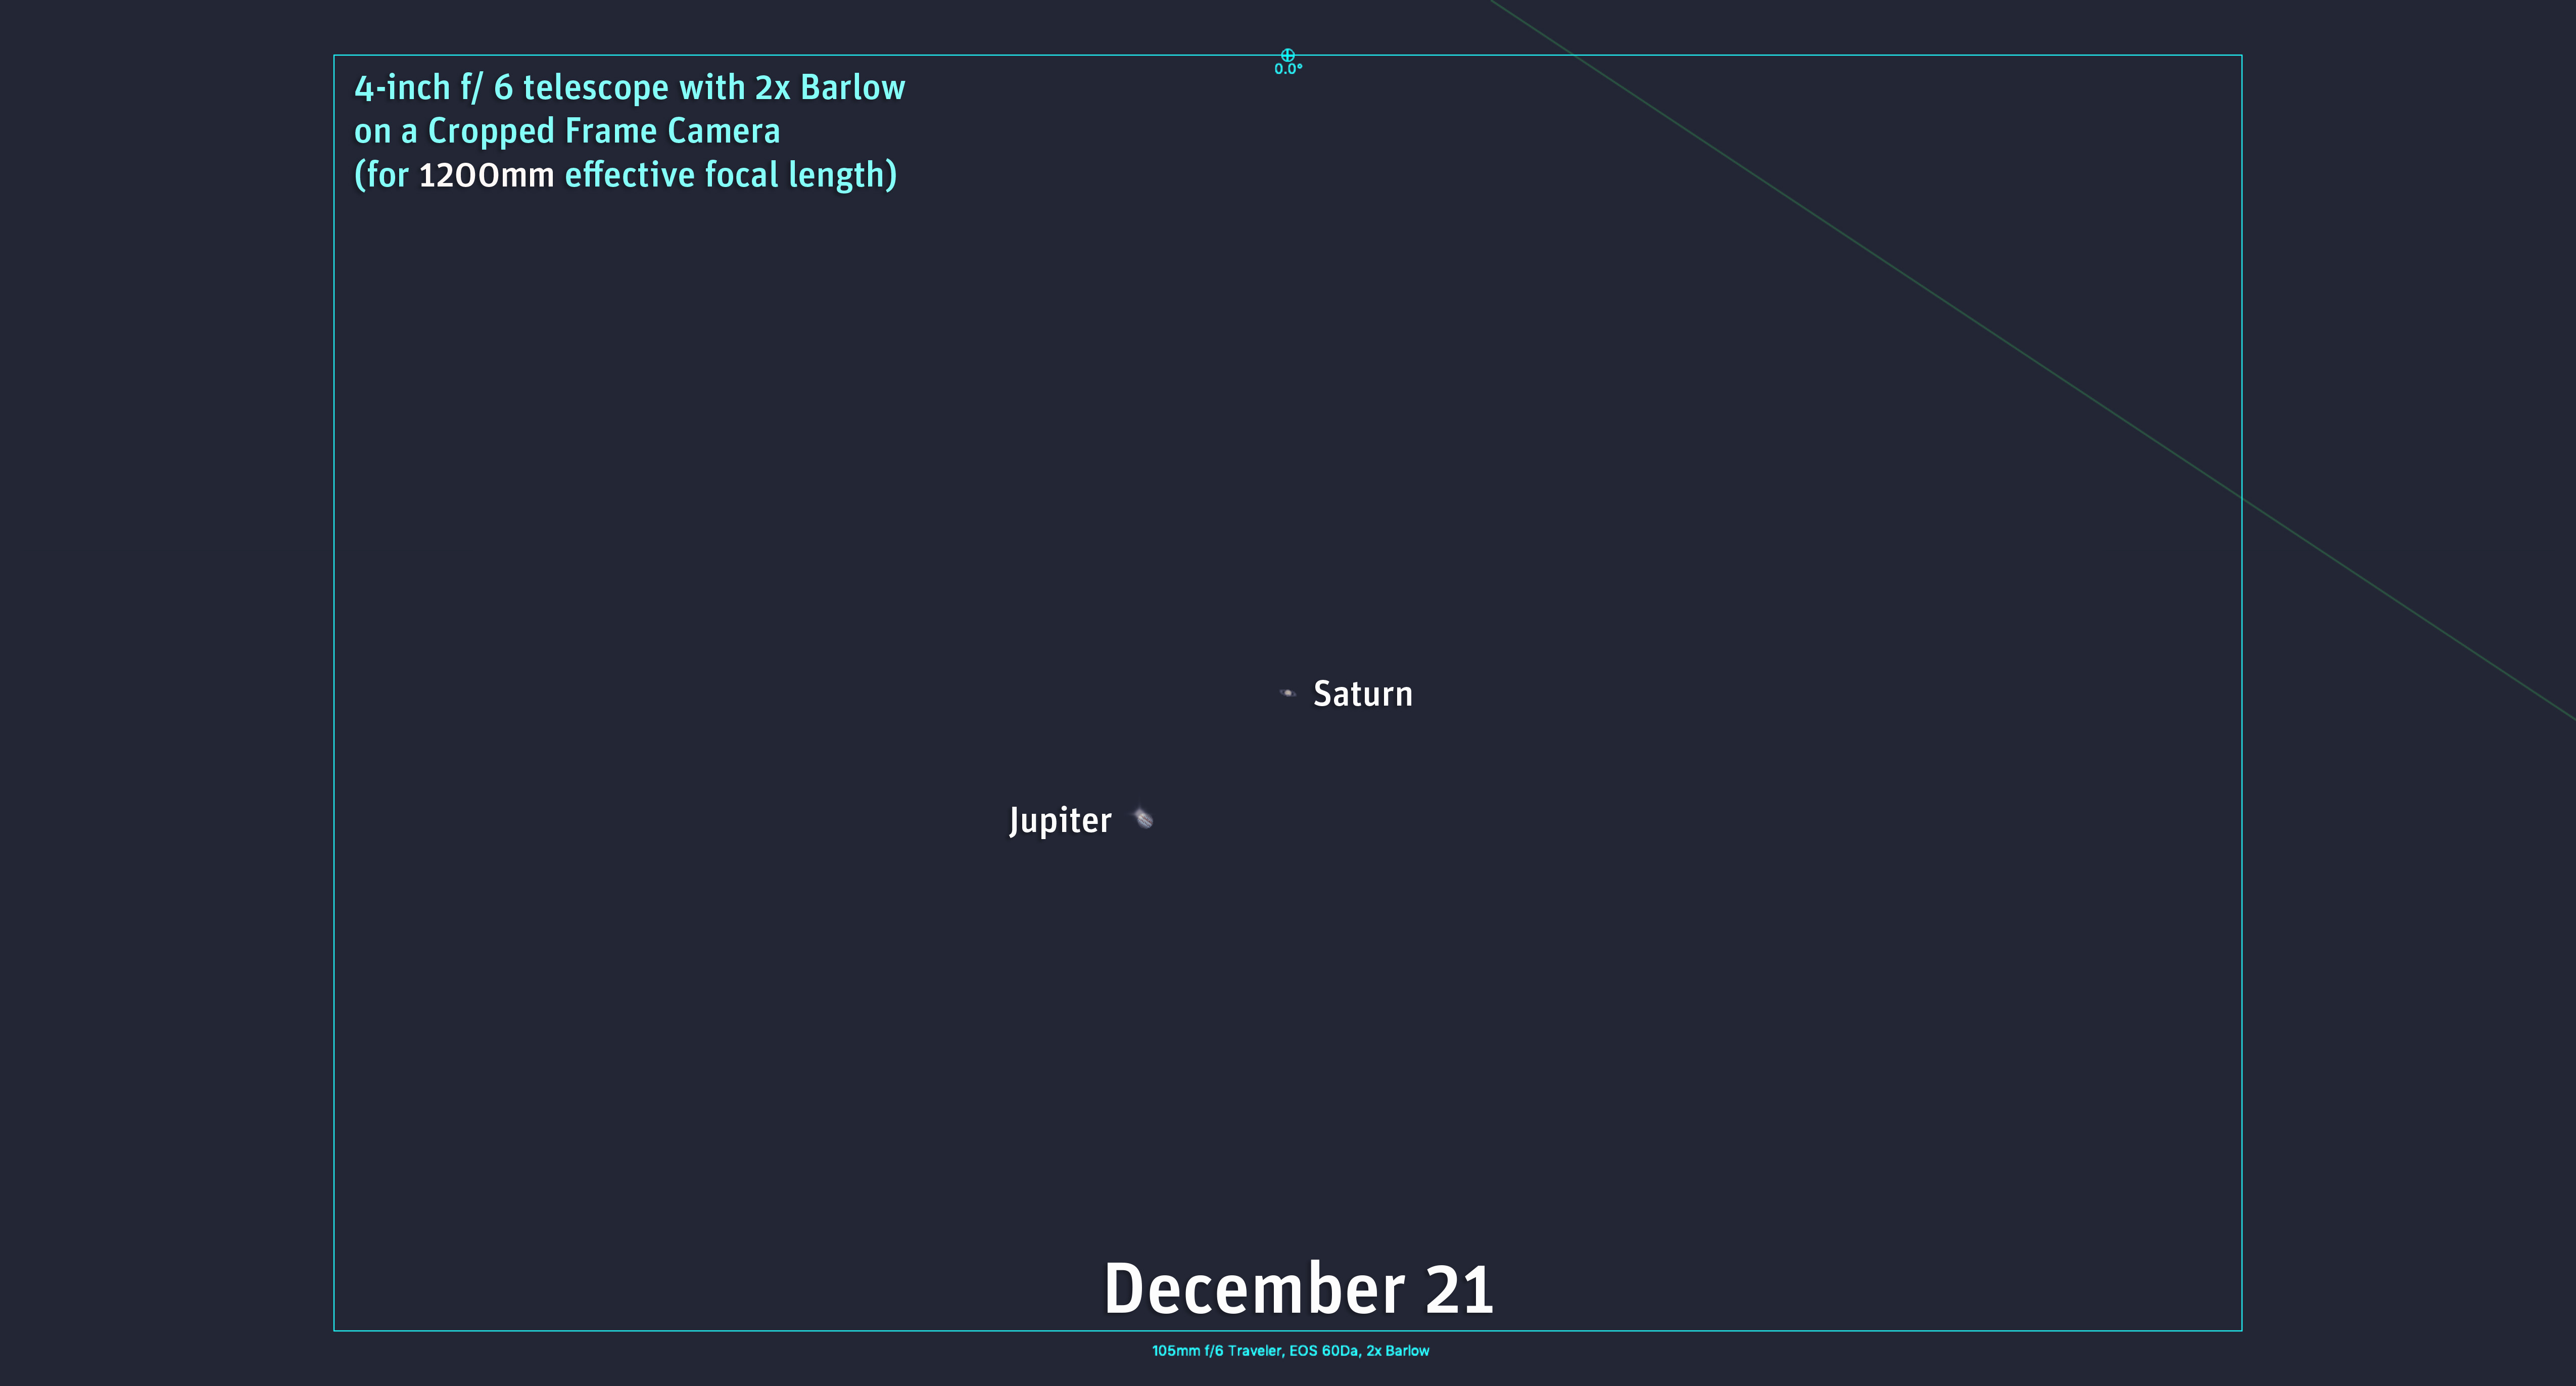
However, once again the challenge is just how close the planets are going to get to each other. Even a telescope with a focal length of 1200mm (typical for a small scope) still gives a field of view 1° wide using a cropped frame camera. That’s 60 arc minutes, ten times the 6 arc minute separation of Jupiter and Saturn on December 21!
TELESCOPE TIP — Use a 2x or 3x Barlow lens if needed to increase the effective focal length of the scope. Beware that introducing a Barlow into the light path usually requires racking the focus out and/or adding extension tubes to reach focus. Test your configuration as soon as possible to make sure you can focus it.
TELESCOPE TIP — With such long focal lengths shoot lots of exposures. Some will be sharper than others.
TELESCOPE TIP — But be sure to focus precisely, and refocus over the hour or so you might be shooting, as changing temperatures will shift the focus. You can’t fix bad focus!
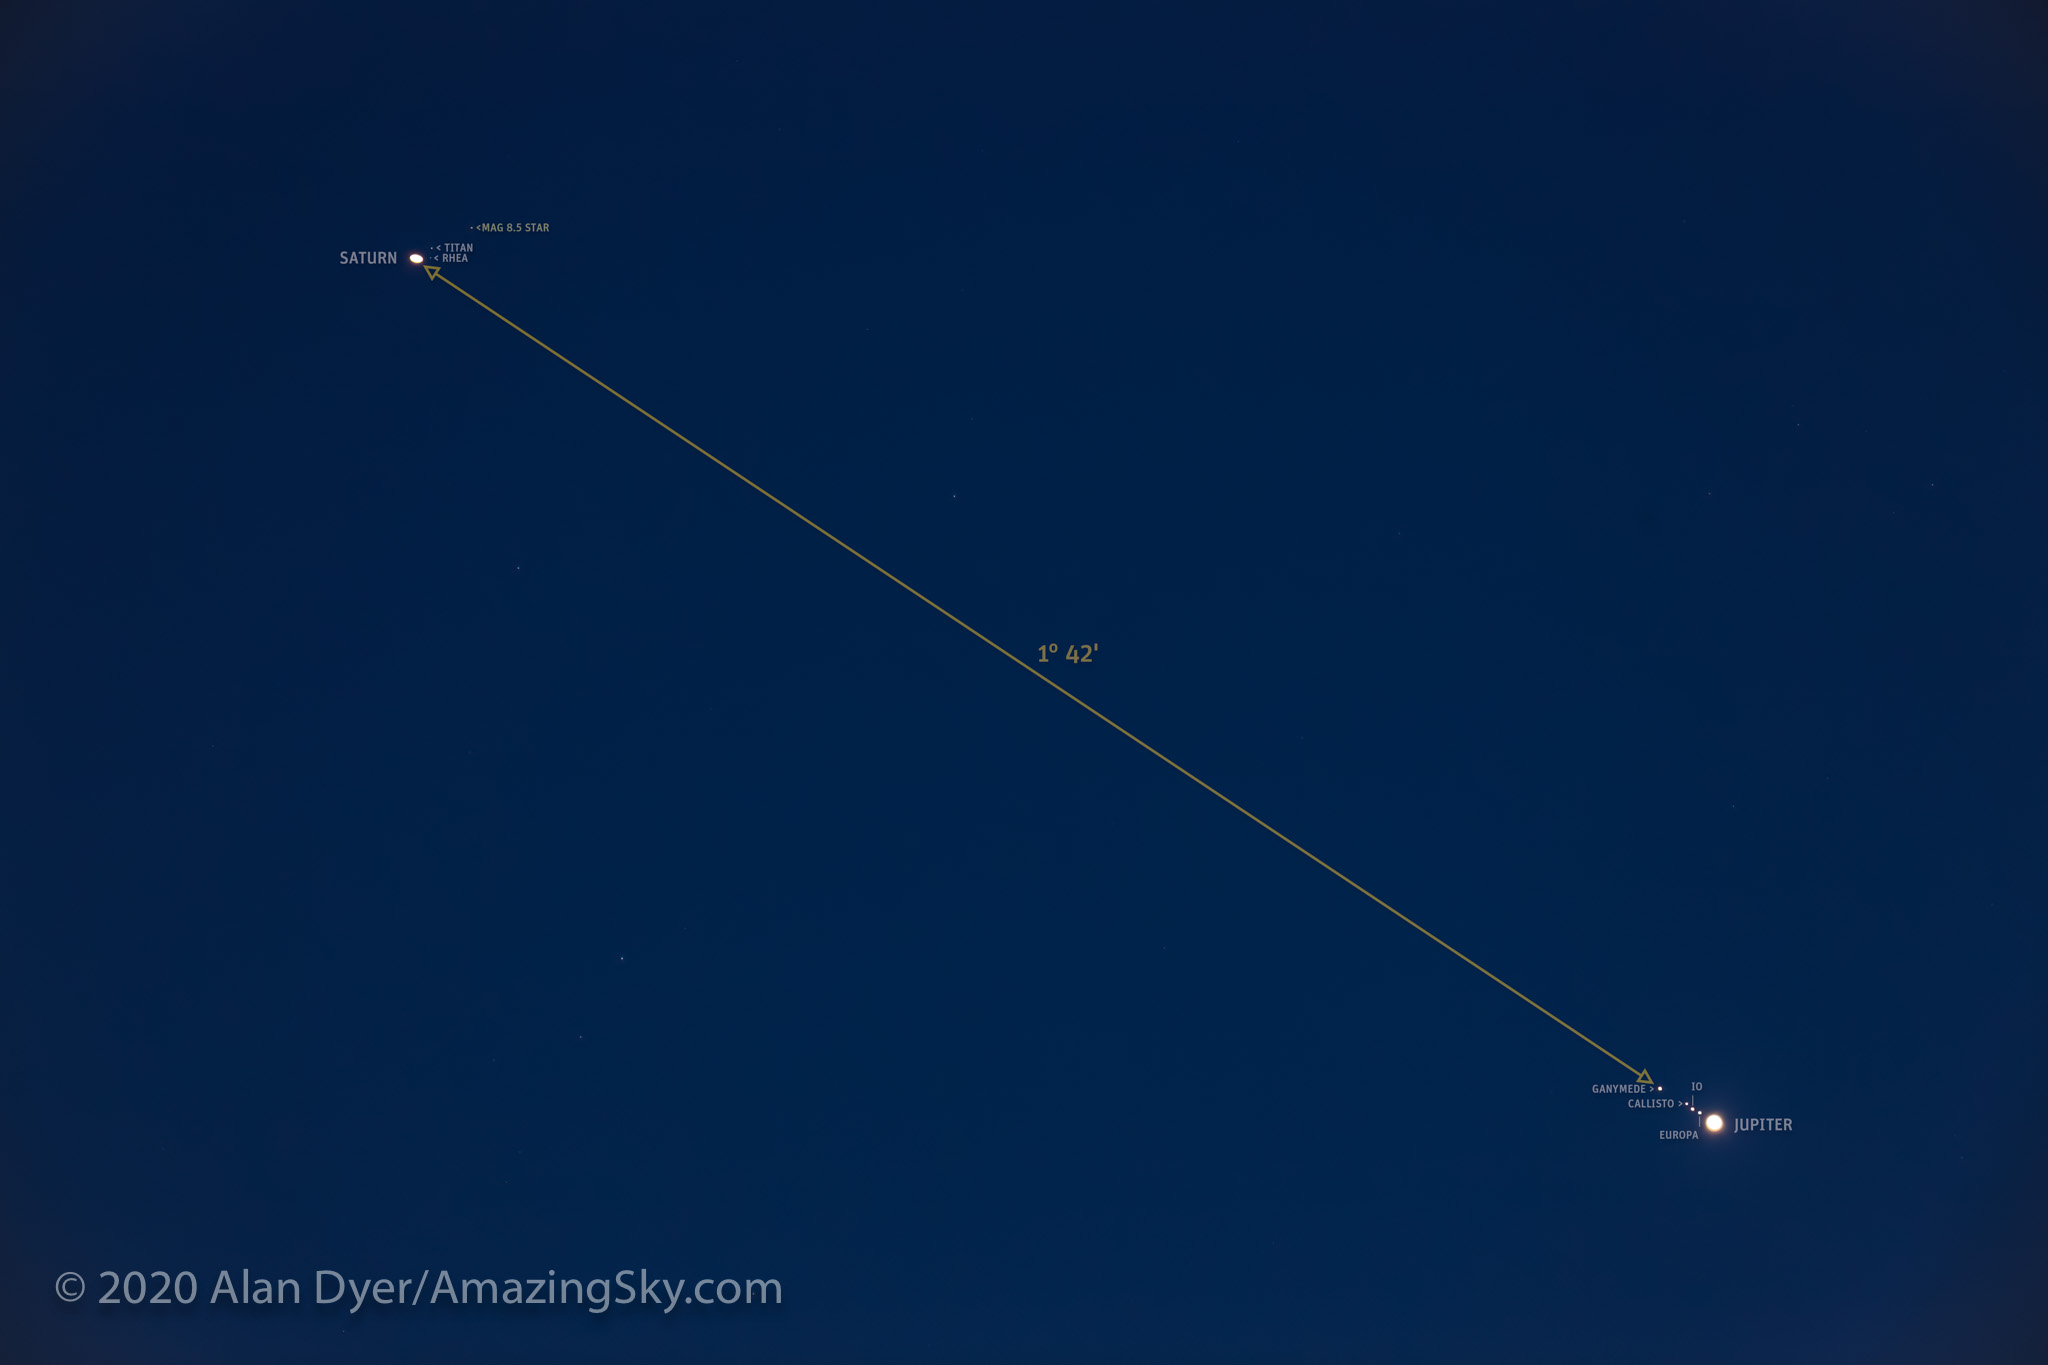
Short exposures under one second might be needed to keep the planet disks from overexposing. Capturing the moons of Jupiter (it has four bright moons) and Saturn (it has two, Titan and Rhea, that are bright) will require exposures of several seconds. Going even longer will pick up background stars.
Or … with DSLRs and mirrorless cameras, try shooting HD or 4K movies. They will likely demand a high and noisy ISO, but might capture the view more like you saw and remember it.
FINAL TIP — Whatever combination of gear you decide to use, test it! Don’t wait until December 21 to see if it works, nor ask me if I think such-and-such a mount, telescope or technique will work. Test for yourself to find out.
Don’t Fret or Compete. Enjoy!
The finest images will come from experienced planetary imagers using high-frame-rate video cameras to shoot movies, from which software extracts and stacks the sharpest frames. Again, if you have no experience with doing that (I don’t!), this is not the time to learn!
And even the pros will have a tough time getting sharp images due to the planets’ low altitude, even from the southern hemisphere, where some pro imagers have big telescopes at their disposal, to get images no one else in the world can compete with!
In short, use the gear you have and techniques you know to capture this unique event as best you can. And if stuff fails, just enjoy the view!

If you miss closest approach day due to cloud, don’t worry.
Even when shooting with telephoto lenses the photo ops will be better in the week leading up to and following December 21, when the greater separation of the planets will make it easier to capture a dramatic image of the strikingly close pairing of planets over an Earthly scene.
Clear skies!
— Alan, © 2020 AmazingSky.com


")


")
")
