

It was a magical night as the rising Moon lit the Badlands with a golden glow.
When doing nightscape photography it’s often best not to fight the Moon, but to embrace it and use it as your light source.
I did this on a fine night, Easter Sunday, at one of my favourite nightscape spots, Dinosaur Provincial Park.
I set up two cameras to frame different views of the hoodoos as they lit up with the light of the rising waning Moon.
The night started out as a dark moonless evening as twilight ended. Then about 90 minutes after the arrival of darkness, the sky began to brighten again as the Moon rose to illuminate the eroded formations of the Park.
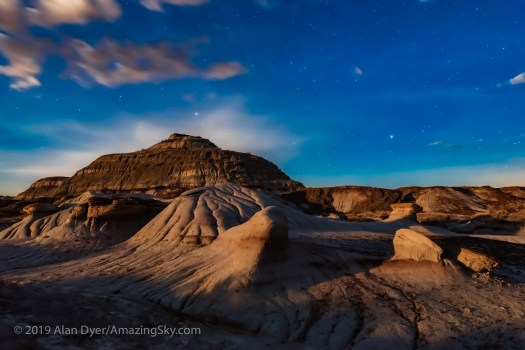
This was a fine example of “bronze hour” illumination, as some have aptly called it.
Photographers know about the “golden hour,” the time just before sunset or just after sunrise when the low Sun lights the landscape with a golden glow.
The Moon does the same thing, with a similar tone, though greatly reduced in intensity.
The low Moon, especially just after Full, casts a yellow or golden tint over the scene. This is caused by our atmosphere absorbing the “cold” blue wavelengths of moonlight, and letting through the “warm” red and yellow tones.
Making use of the rising (or setting) Moon to light a scene is one way to capture a nightscape lit naturally, and not with artificial lights, which are increasingly being frowned upon, if not banned at popular nightscape destinations.

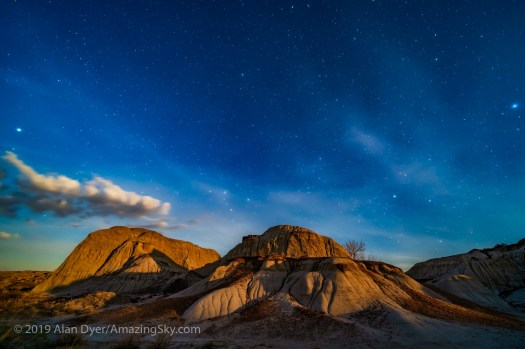
“Bronze hour” lighting is great in still-image nightscapes. But in time-lapses the effect is more striking — indeed, in time-lapse lingo it is called a “moonstrike” scene.
The dark landscape suddenly lights up as if it were dawn, yet stars remain in the sky.
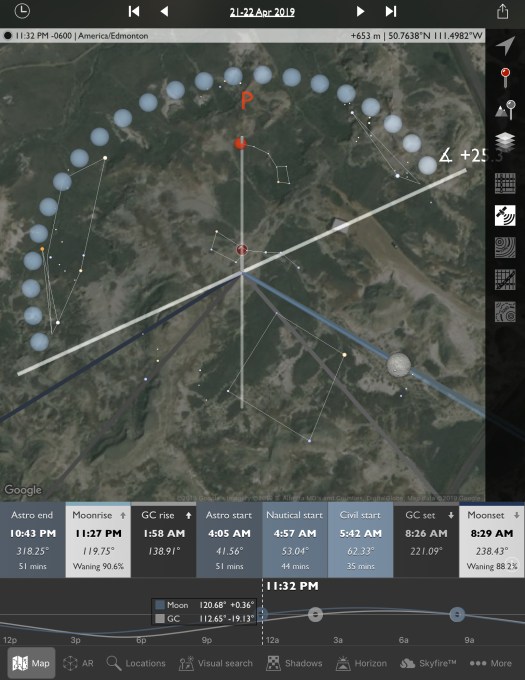
The best nights for such a moonstrike are ones with a waning gibbous or last quarter Moon. At these phases the Moon rises after sunset, to re-light a scene after evening twilight has faded.
On April 21 I made use of such a circumstance to shoot moonstrike stills and movies, not only for their own sake, but for use as illustrations in the next edition of my Nightscapes and Time-lapse eBook (at top here).

One camera, the Nikon D750, I coupled with a device called a bramping intervalometer, in this case the TimeLapse+ View, shown above. It works great to automatically shift the shutter and ISO speeds as the sky darkens then brightens again.
Yes, in bright situations the camera’s own Auto Exposure and Auto ISO modes might accomplish this.
But … once the sky gets dark the Auto circuits fail and you’re left with hugely underexposed images.
The TimeLapse+ View, with its more sensitive built-in light meter, can track right through into full darkness, making it possible to shoot so-called “holy grail” time-lapses that go from daylight to darkness, from sunset to the Milky Way, all shot unattended.
For the other camera, the Sony a7III (with the Laowa 15mm lens I just reviewed) I set the camera manually, then shifted the ISO and shutter speed a couple of times to accommodate the darkening, then brightening of the scene.
Processing the resulting RAW files in the highly-recommended program LRTimelapse smoothed out all the jumps in brightness to make a seamless transition.
I also used the new intervalometer function that Sony has just added to the a7III with its latest firmware update. Hurray! I complained about the lack of an intervalometer in my original review of the Sony a7III. But that’s been fixed.
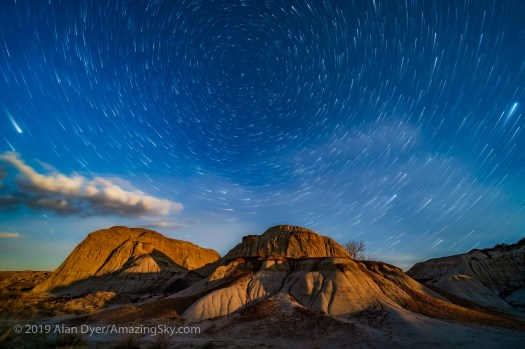
I shot 425 frames with the Sony, which I not only turned into a movie but, as one can with time-lapse frames, I also stacked into a star trail still image, in this case looking north to the circumpolar stars.
To do the stacking I used the Advanced Stacker Plus actions for Photoshop, developed and sold by StarCircleAcademy.
I prefer this action set over dedicated programs such as StarStaX, because it works directly with the developed Raw files. There’s no need to create a set of JPGs to stack, compromising image quality, and departing from the non-destructive workflow I prefer to maintain.
While the still images are very nice, the intended final result was this movie above, a short time-lapse vignette using clips from both cameras. Do watch in HD.
I rendered out the frames from the Sony both as a “normal” time-lapse, and as one with accumulating star trails, again using the Advanced Stacker Plus actions to create the intermediate frames for assembling into the movie.
All these techniques, gear, and apps are explained in tutorials in my eBook, above. However, it’s always great to get a night perfect for putting the methods to work on a real scene.
— Alan, April 27, 2019 / © 2019 Alan Dyer / AmazingSky.com
