
I put the new Nikon Z6 mirrorless camera through its paces for astrophotography.
Following Sony’s lead, in late 2018 both Nikon and Canon released their entries to the full-frame mirrorless camera market.
Here I review one of Nikon’s new mirrorless models, the Z6, tested solely with astrophotography in mind. I did not test any of the auto-exposure, auto-focus, image stabilization, nor rapid-fire continuous mode features.
For full specs and details on the Z-series cameras see Nikon USA’s website.

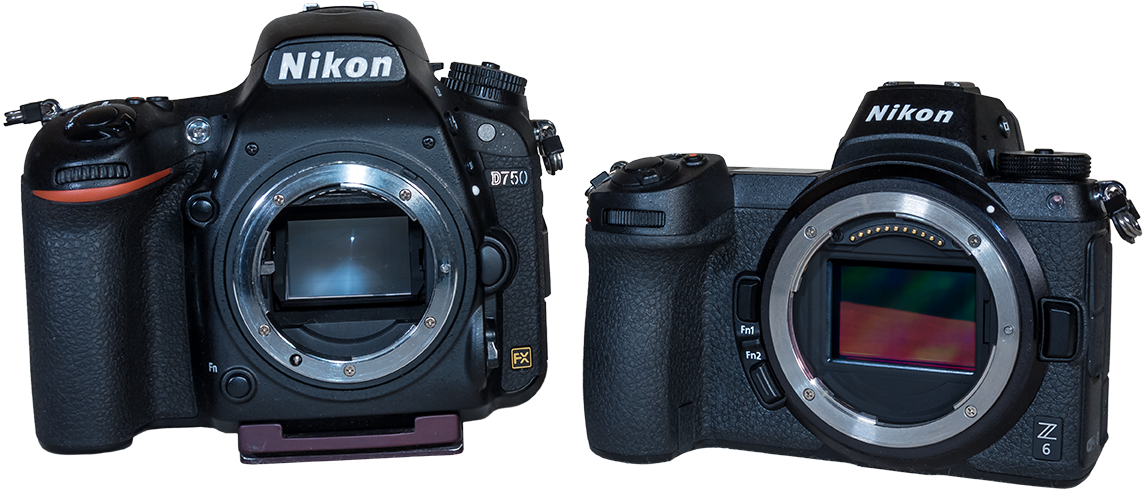
In my testing I compared the Nikon Z6 (at right above) to two competitive cameras, the relatively new Sony a7III mirrorless (at left above) and 2015-vintage Nikon D750 DSLR.
All three are “entry-level” full-frame cameras, with 24 megapixels and in a similar $2,000 price league, though the older D750 now often sells at a considerable discount.
Disclosure
I should state at the outset that my conclusions are based on tests conducted over only three weeks in mid-winter 2019 while I had the camera on loan from Nikon Canada’s marketing company.
I don’t own the camera and didn’t have many moonless nights during the loan period to capture a lot of “beauty” shots under the stars with the Z6.

However, I think my testing was sufficient to reveal the camera’s main traits of interest — as well as deficiencies it might have — for astrophotography.
I should also point out that I do not participate in “affiliate links,” so I have no financial motivation to prompt you to buy gear from merchants.
But if you buy my ebook (at right), which features reams of sections on camera and time-lapse gear, I would be very pleased!
TL;DR Conclusions
In short — I found the Nikon Z6 superb for astrophotography.
Summary:
• It offers as low a noise level as you’ll find in a 24-megapixel full-frame camera, though its noise was not significantly lower than the competitive Sony a7III, nor even the older Nikon D750.
• The Z6’s ISO-invariant sensor proved excellent when dealing with the dark underexposed shadows typical of Milky Way nightscapes.
• The Live View was bright and easy to enhance to even brighter levels using the Movie mode to aid in framing nightscapes.
• When shooting deep-sky images through telescopes using long exposures, the Z6 did not exhibit any odd image artifacts such as edge vignetting or amplifier glows, unlike the Sony a7III. See my review of that camera in my blog from 2018.
Recommendations:
• Current owners of Nikon cropped-frame cameras wanting to upgrade to full-frame would do well to consider a Z6 over any current Nikon DSLR.
• Anyone wanting a full-frame camera for astrophotography and happy to “go Nikon” will find the Z6 nearly perfect for their needs.
Nikon Z6 vs. Z7

I opted to test the Z6 over the more expensive Z7, as the 24-megapixel Z6 has 6-micron pixels resulting in lower noise (according to independent tests) than the 46 megapixel Z7 with its 4.4 micron pixels.
In astrophotography, I feel low noise is critical, with 24-megapixel cameras hitting a sweet spot of noise vs. resolution.
However, if the higher resolution of the Z7 is important for your daytime photography needs, then I’m sure it will work well at night. The Nikon D850 DSLR, with a sensor similar to the Z7, has been proven by others to be a good astrophotography camera, albeit with higher noise than the lesser megapixel Nikons such as the D750 and Z6.
NOTE: Tap or click on images to download and display them full screen for closer inspection.
High ISO Noise

To test noise in a real-world situation, I shot a dark nightscape scene with the three cameras, using a 24mm Sigma Art lens on the two Nikons, and a 24mm Canon lens on the Sony via a MetaBones adapter. I shot at ISOs from 800 to 12,800, typical of what we use in nightscapes and deep-sky images.
The comparison set above shows performance at the higher ISOs of 3200 to 12,800. I saw very little difference among the trio, with the Nikon Z6 very similar to the Sony a7III, and with the four-year-old Nikon D750 holding up very well against the two new cameras.
The comparison below shows the three cameras on another night and at ISO 3200.

Both the Nikon Z6 and Sony a7III use a backside illuminated or “BSI” sensor, which in theory is promises to provide lower noise than a conventional CMOS sensor used in an older camera such as the D750.
In practice I didn’t see a marked difference, certainly not as much as the one- or even 1/2-stop improvement in noise I might have expected or hoped for.
Nevertheless, the Nikon Z6 provides as low a noise level as you’ll find in a camera offering 24 megapixels, and will perform very well for all forms of astrophotography.
ISO Invariance
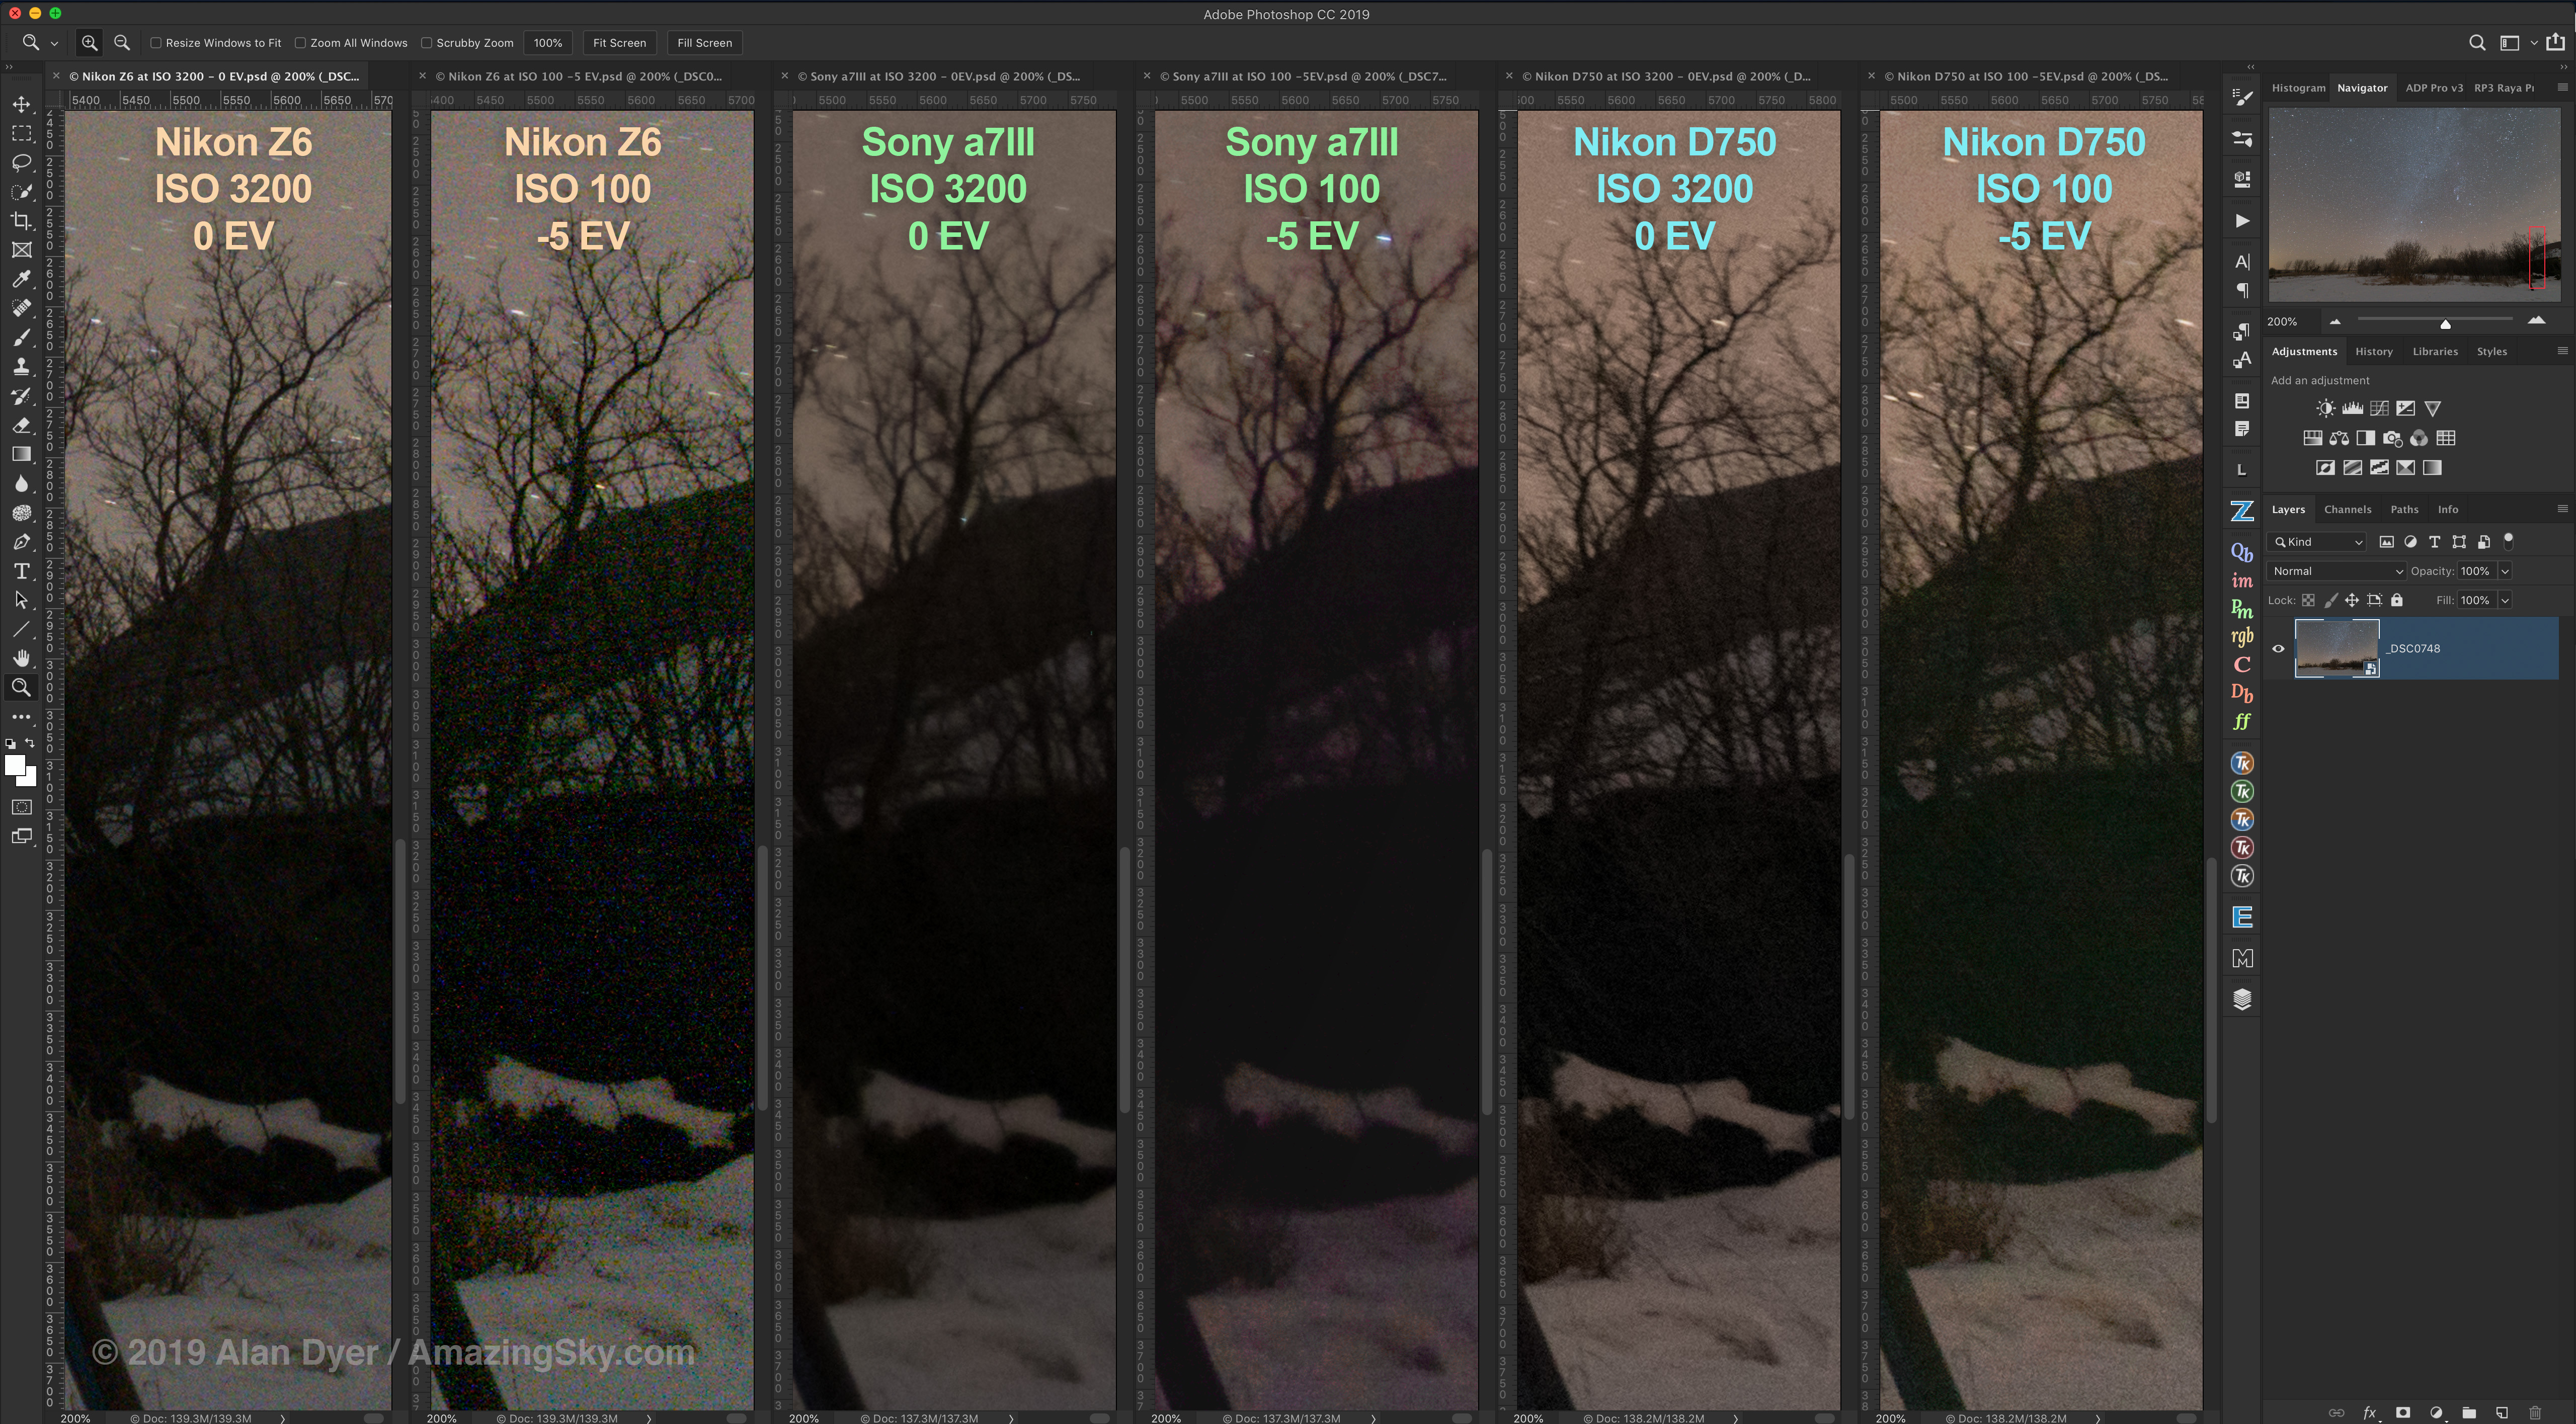
Nikon and Sony both employ an “ISO-invariant” signal flow in their sensor design. You can purposely underexpose by shooting at a lower ISO, then boost the exposure later “in post” and end up with a result similar to an image shot at a high ISO to begin with in the camera.
I find this feature proves its worth when shooting Milky Way nightscapes that often have well-exposed skies but dark foregrounds lit only by starlight. Boosting the brightness of the landscape when developing the raw files reveals details in the scene without unduly introducing noise, banding, or other artifacts such as magenta tints.
That’s not true of “ISO variant” sensors, such as in most Canon cameras. Such sensors are far less tolerant of underexposure and are prone to noise, banding, and discolouration in the brightened shadows.
See my test of the Canon 6D MkII for its performance under the differing demands of nightscape photography and deep-sky imaging.
To test the Z6’s ISO invariance (as shown above) I shot a dark nightscape at ISO 3200 for a properly exposed scene, and also at ISO 100 for an image underexposed by a massive 5 stops. I then boosted that image by 5 stops in exposure in Adobe Camera Raw. That’s an extreme case to be sure.
I found the Z6 provided very good ISO invariant performance, though with more chrominance specking than the Sony a7III and Nikon D750 at -5 EV.
Below is a less severe test, showing the Z6 properly exposed on a moonlit night and at 1 to 4 EV steps underexposed, then brightened in processing. Even the -4 EV image looks very good.

In my testing, even with frames underexposed by -5 EV, I did not see any of the banding effects (due to the phase-detect auto-focus pixels) reported by others.
As such, I judge the Z6 to be an excellent camera for nightscape shooting when we often want to extract detail in the shadows or dark foregrounds.
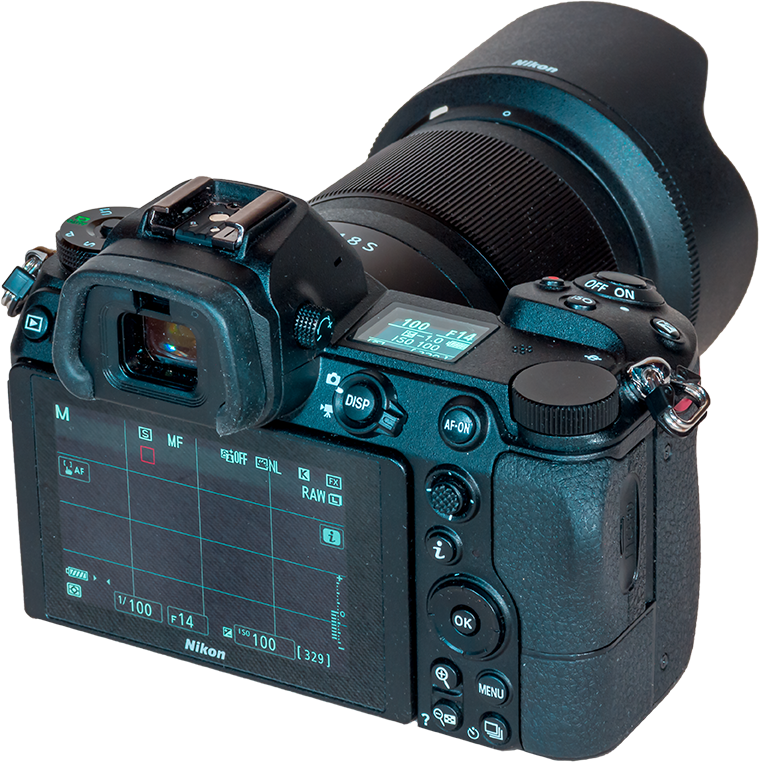
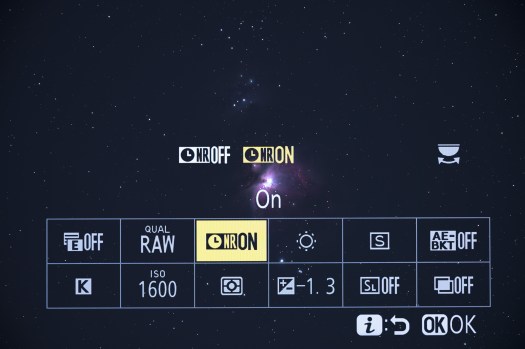
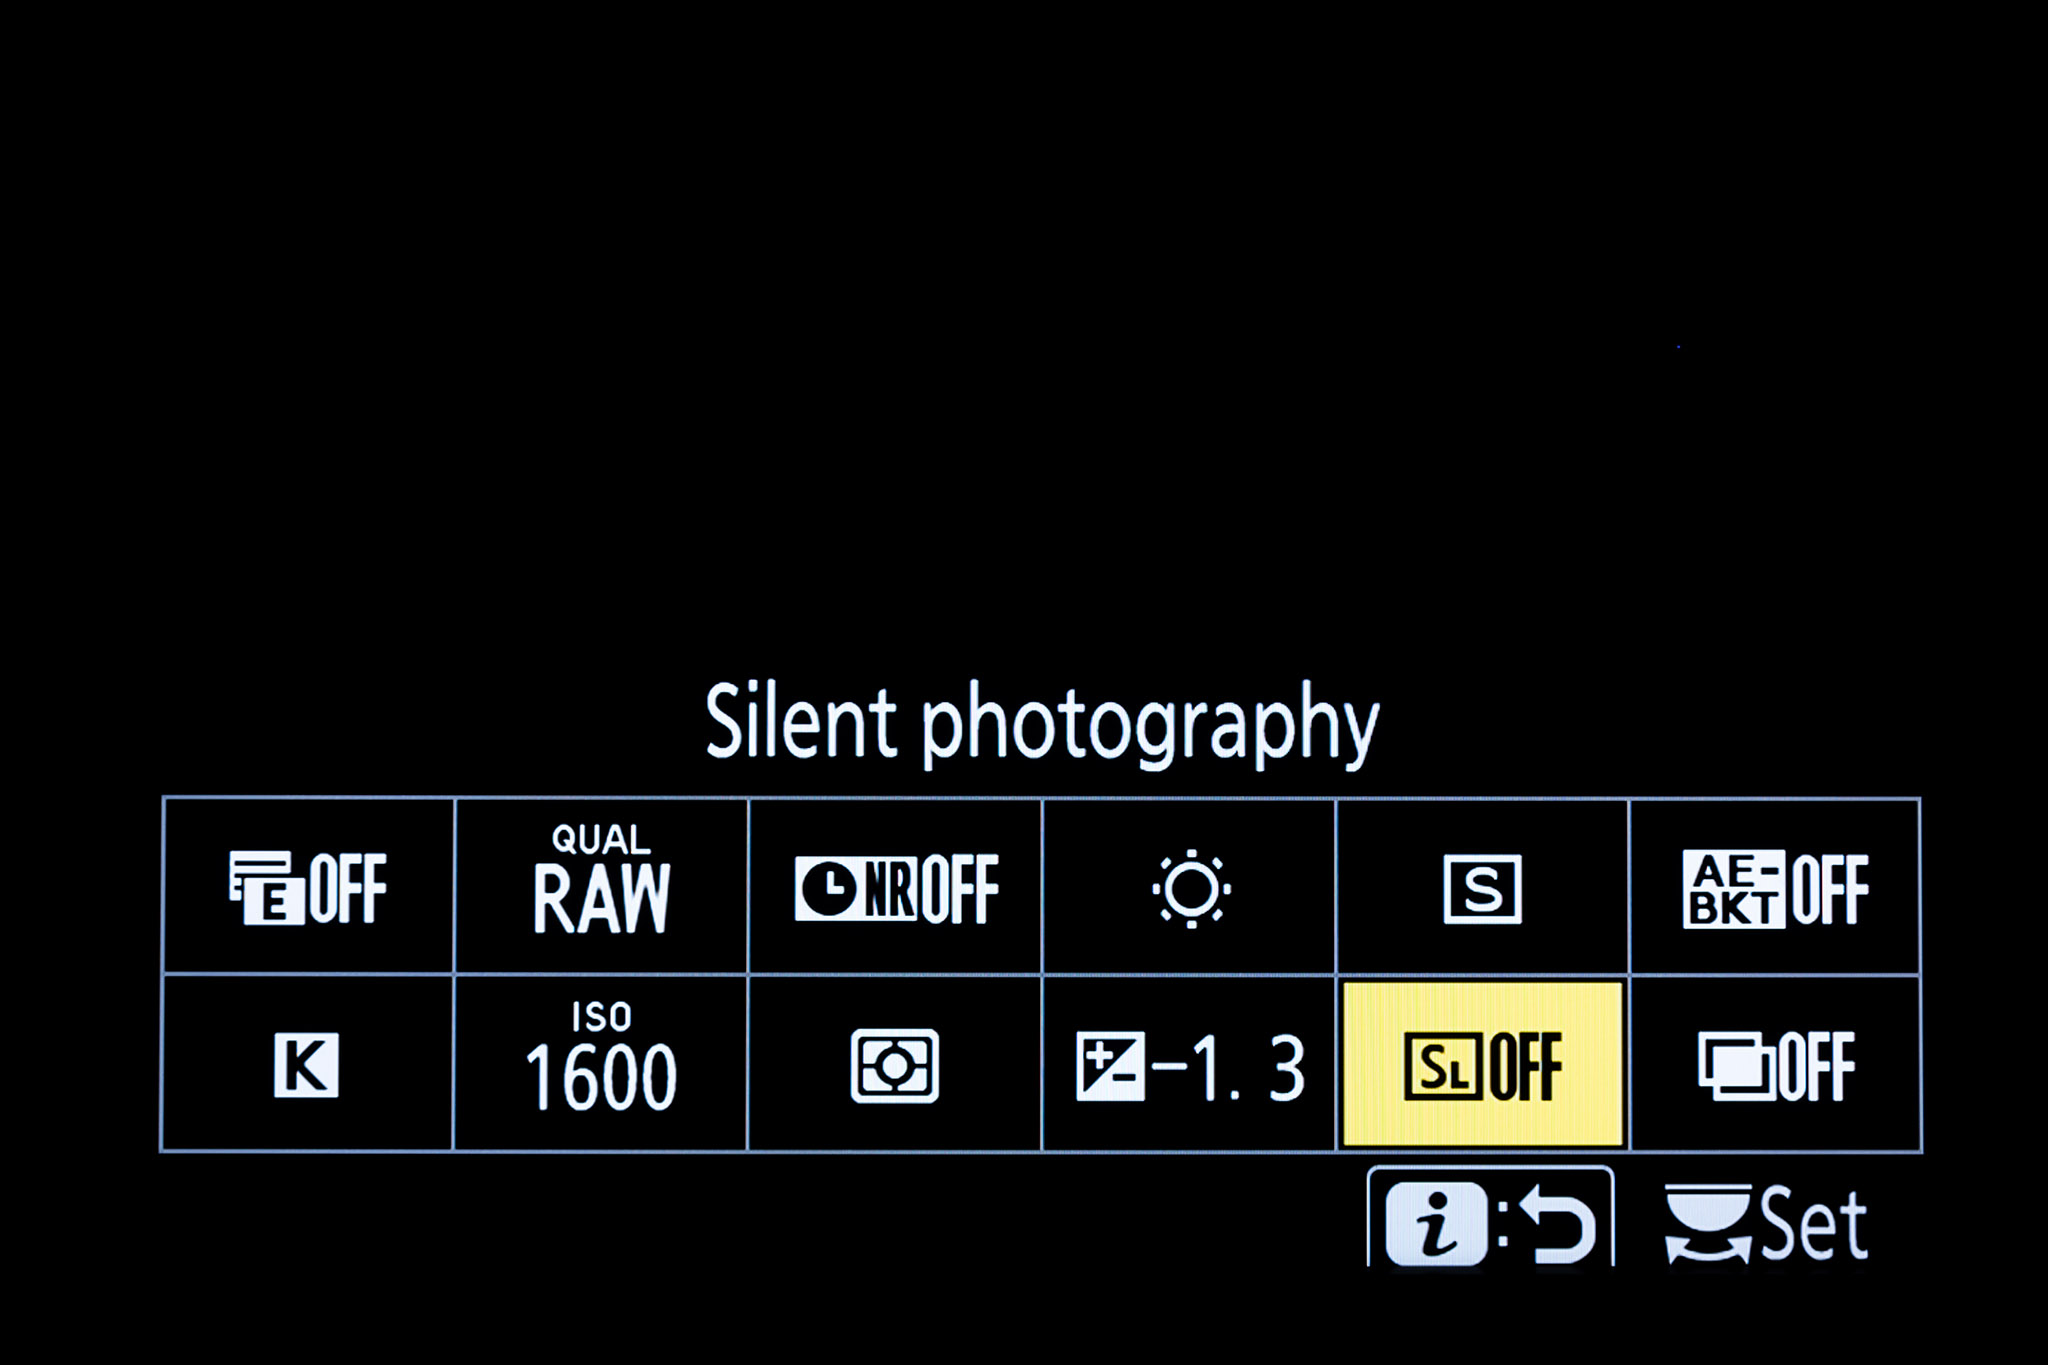
Compressed vs. Uncompressed / Raw Large vs. Small

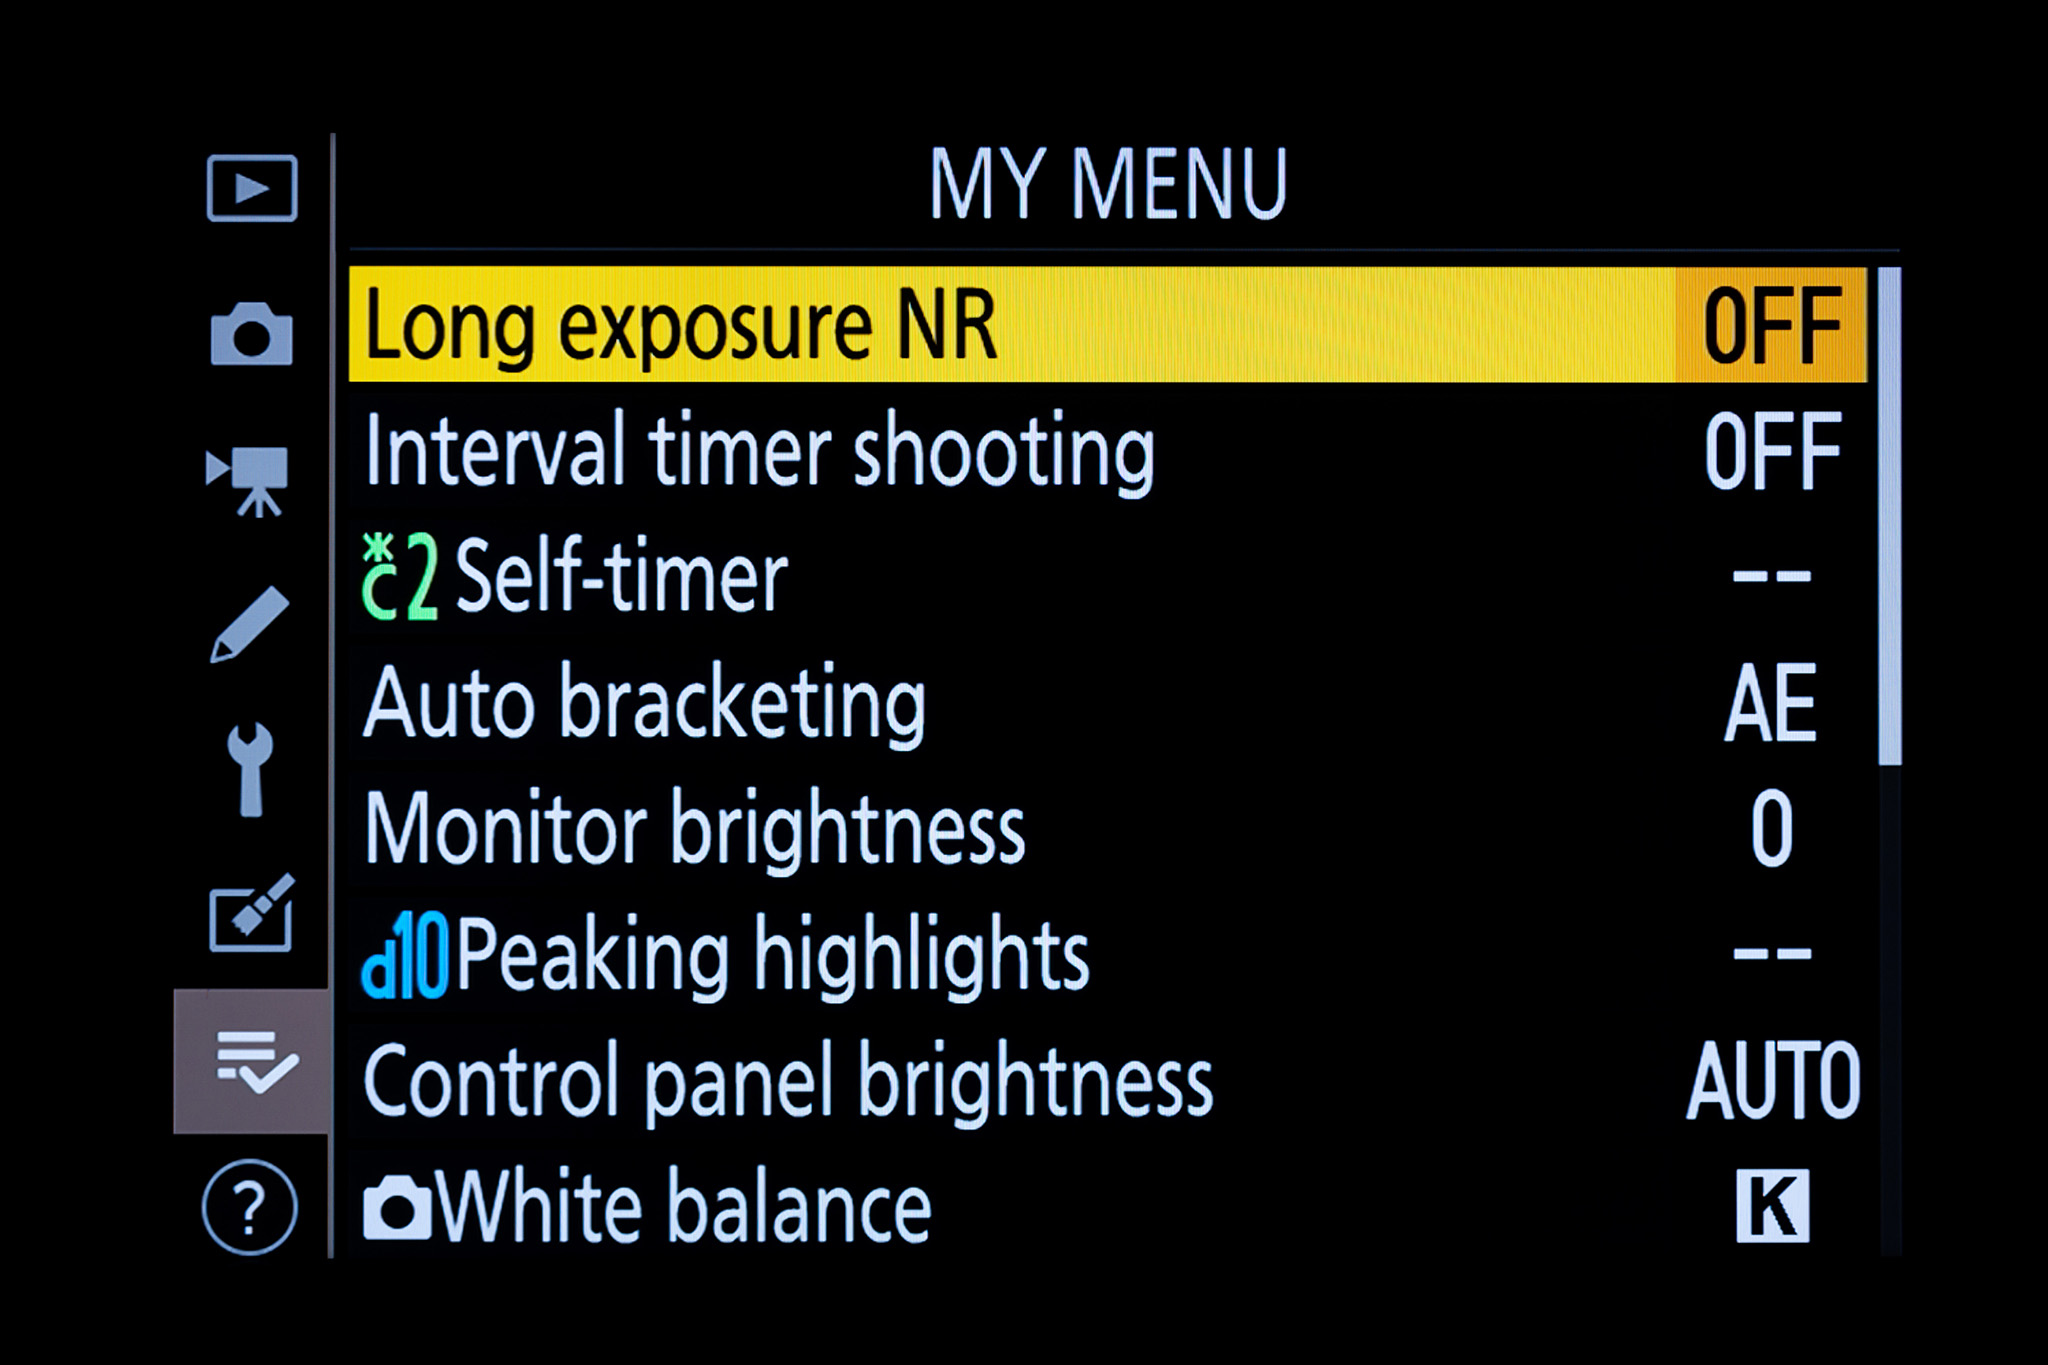
The Z6, as do many Nikons, offers a choice of shooting 12-bit or 14-bit raws, and either compressed or uncompressed.
I shot all my test images as 14-bit uncompressed raws, yielding 46 megabyte files with a resolution of 6048 x 4024 pixels. So I cannot comment on how good 12-bit compressed files are compared to what I shot. Astrophotography demands the best original data.

However, as the menu above shows, Nikon now also offers the option of shooting smaller raw sizes. The Medium Raw setting produces an image 4528 x 3016 pixels and a 18 megabyte file (in the files I shot), but with all the benefits of raw files in processing.

The Medium Raw option might be attractive when shooting time-lapses, where you might need to fit as many frames onto the single XQD card as possible, yet still have images large enough for final 4K movies.
However, comparing a Large Raw to a Medium Raw did show a loss of resolution, as expected, with little gain in noise reduction.
This is not like “binning pixels” in CCD cameras to increase signal-to-noise ratio. I prefer to never throw away information in the camera, to allow the option of creating the best quality still images from time-lapse frames later.
Nevertheless, it’s nice to see Nikon now offer this option on new models, a feature which has long been on Canon cameras.
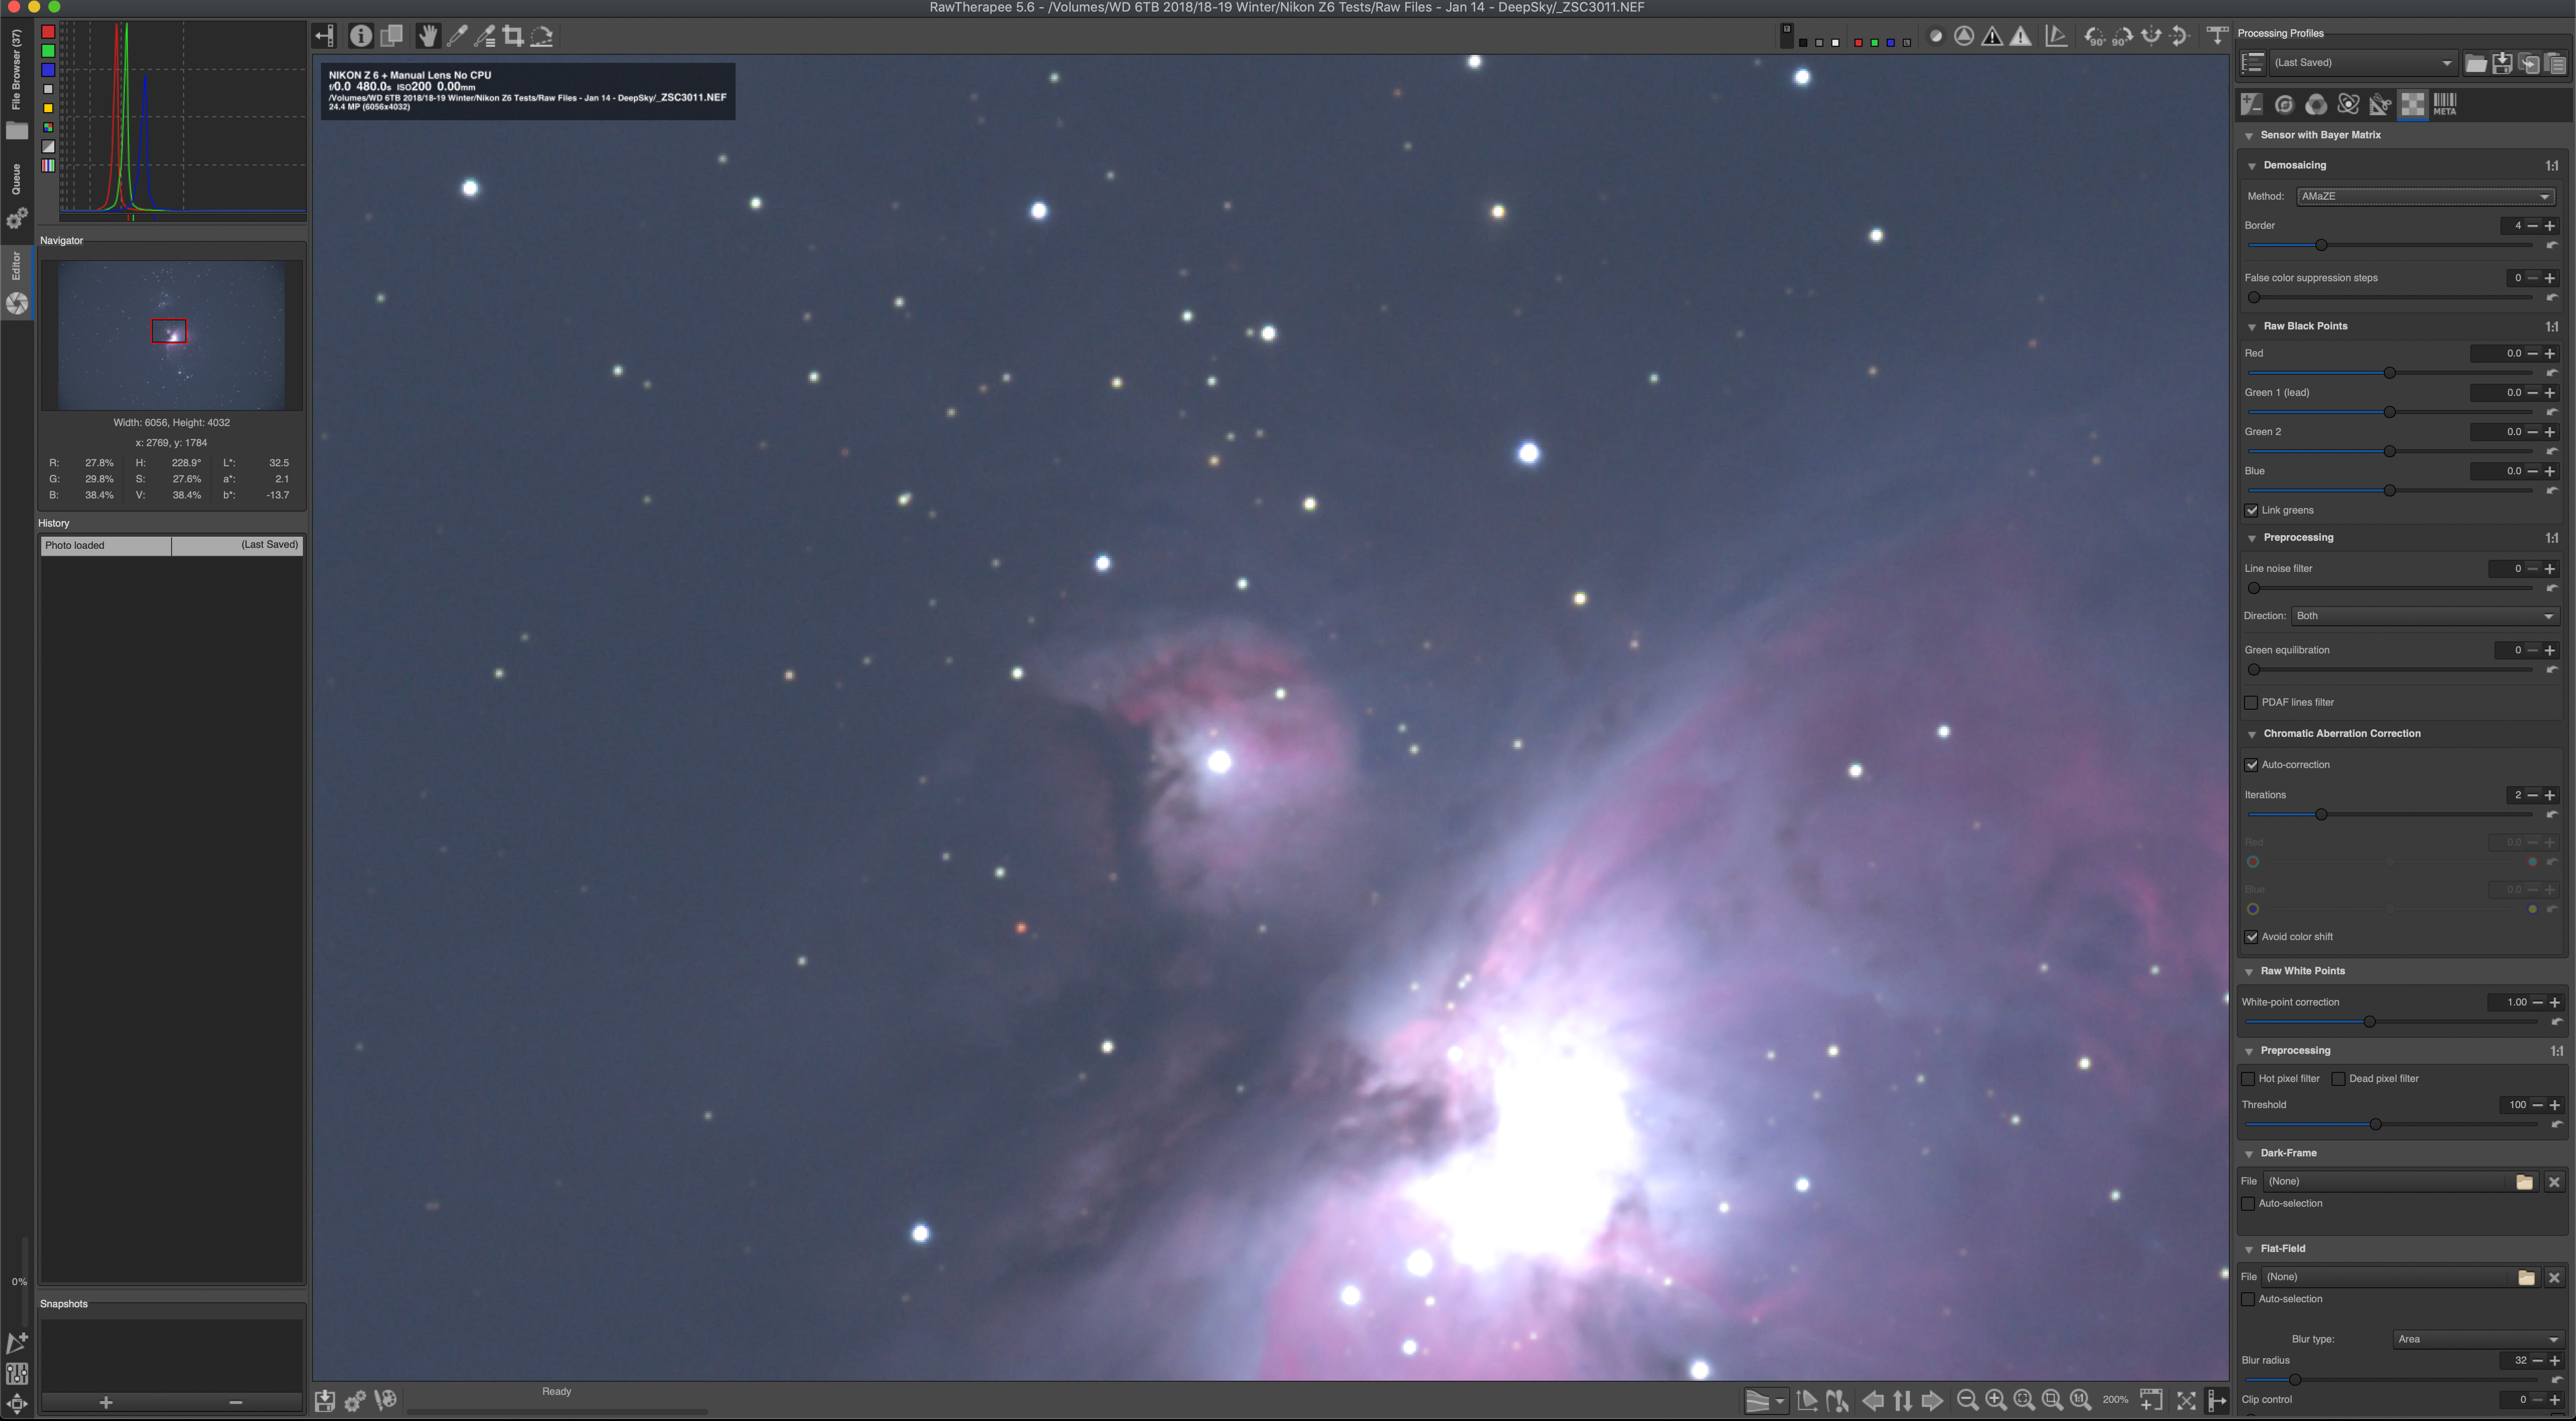
Star Image Quality
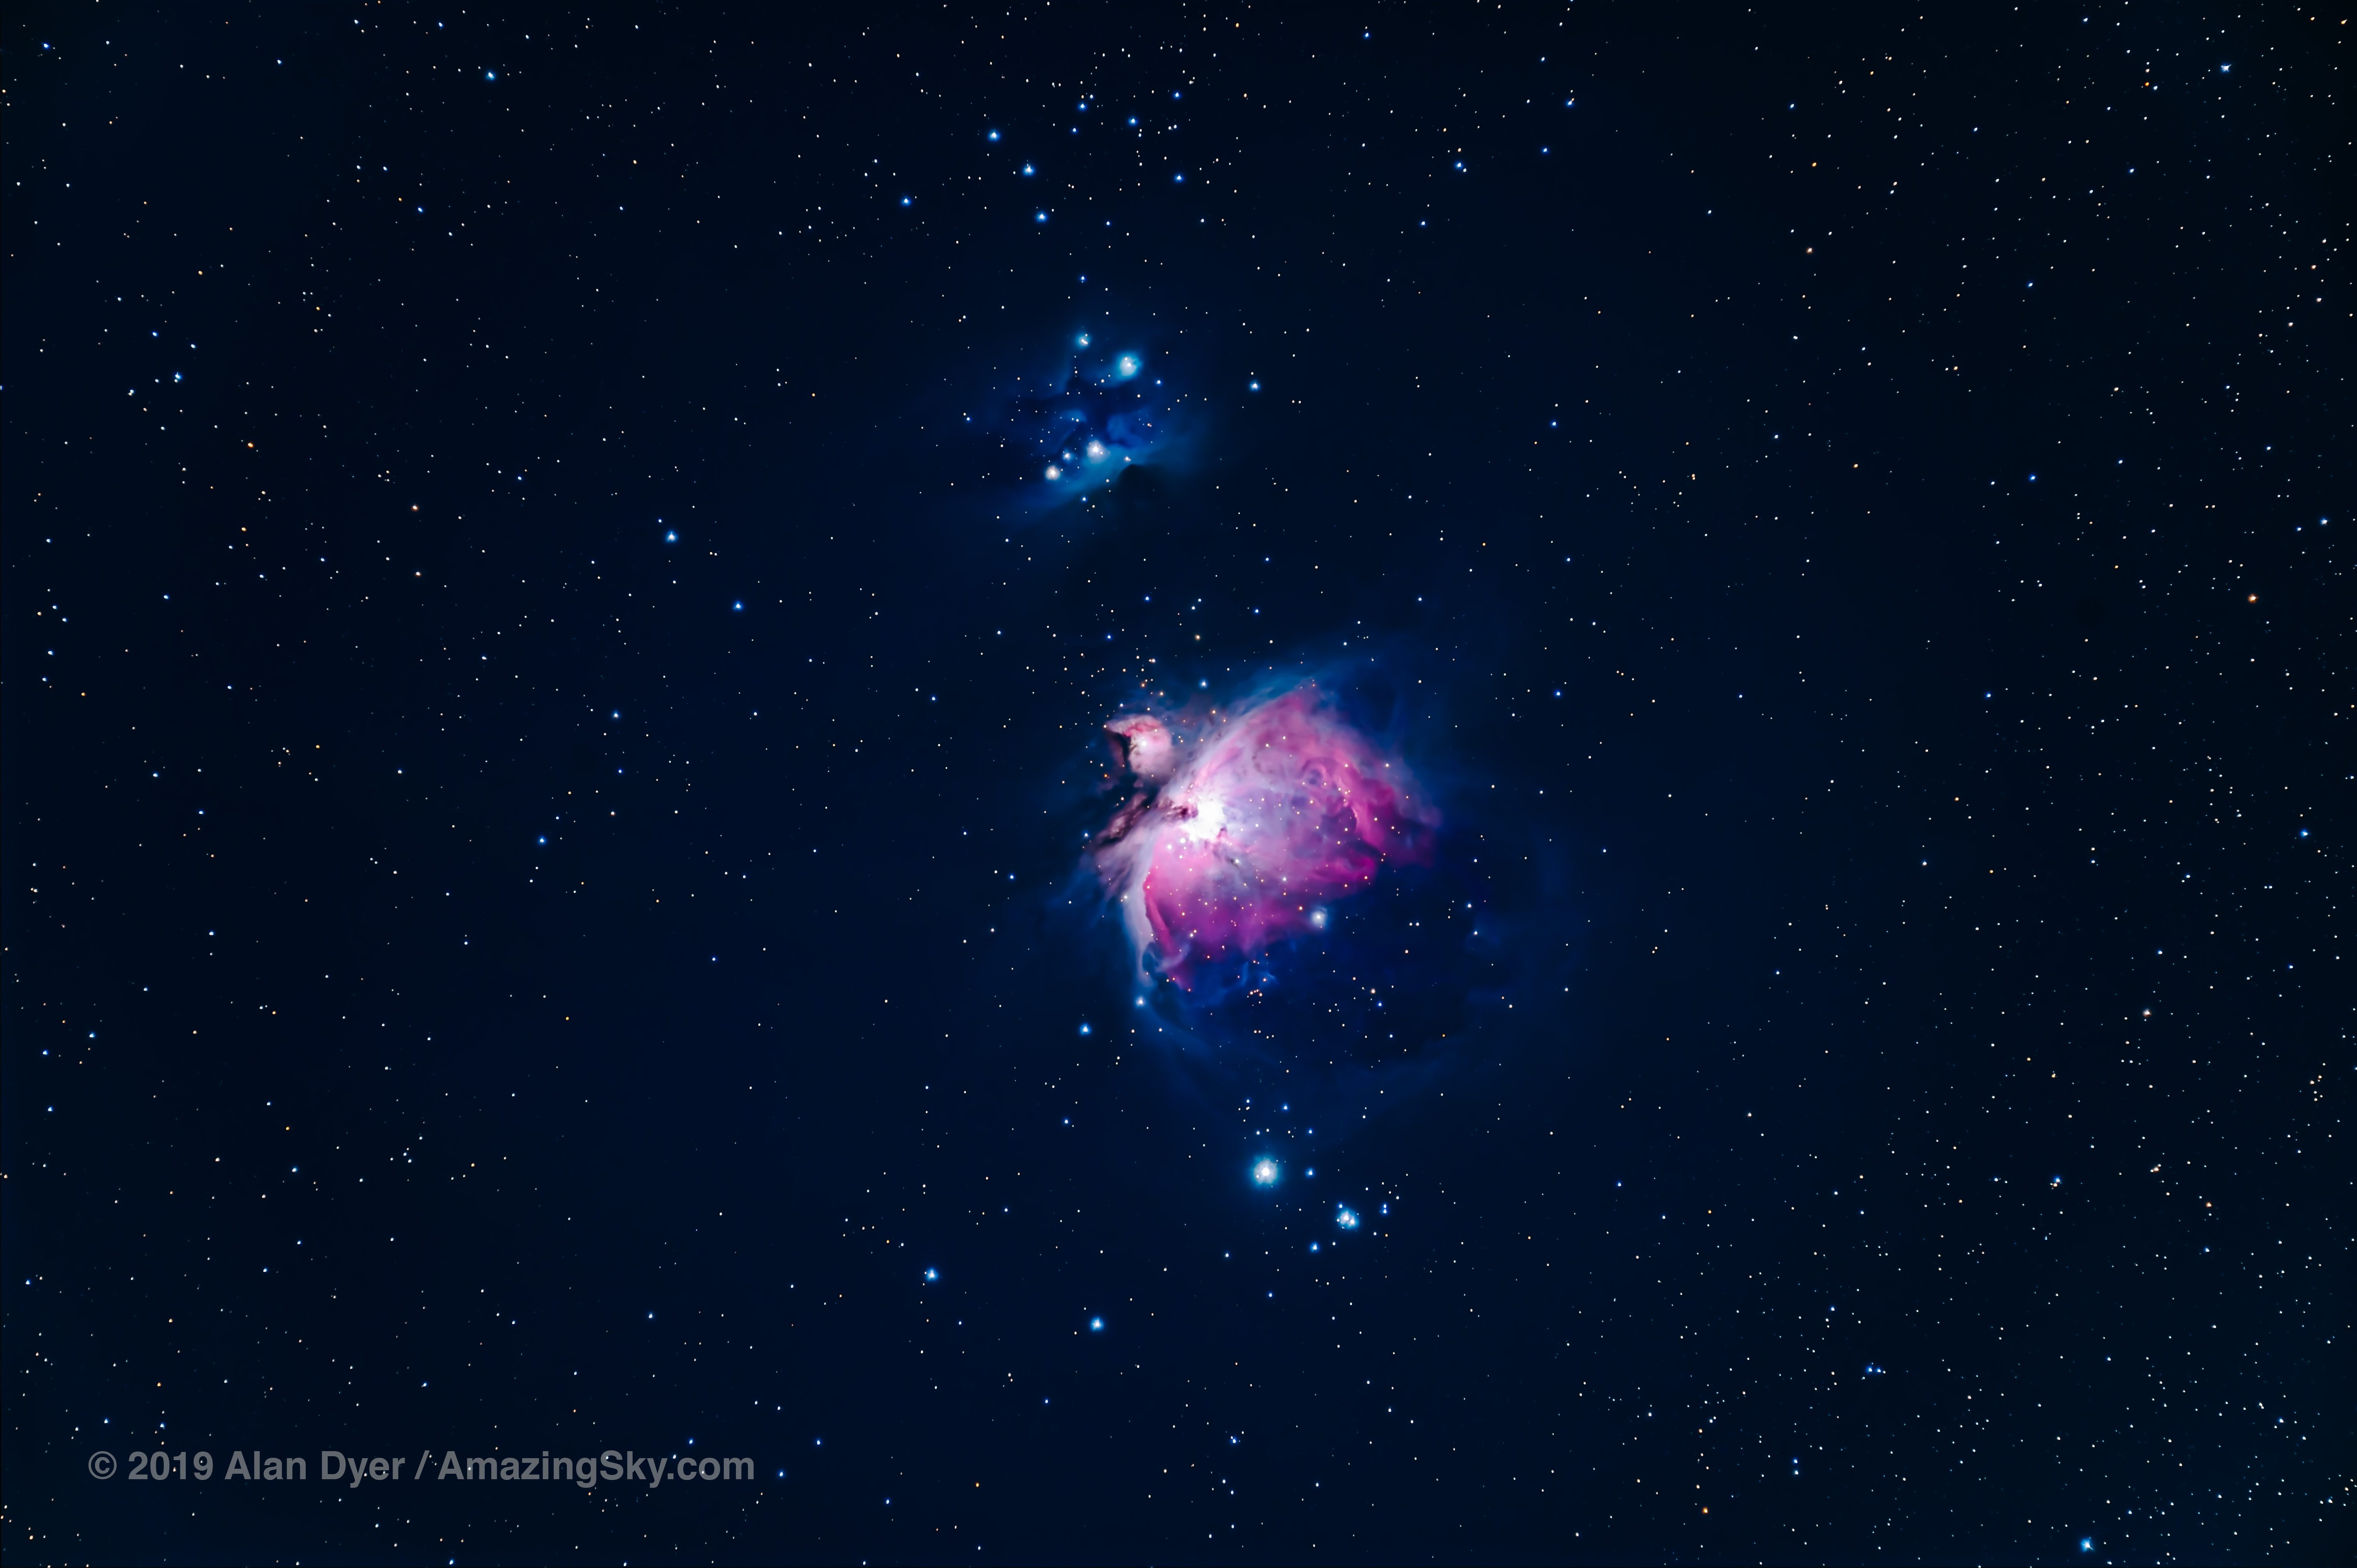
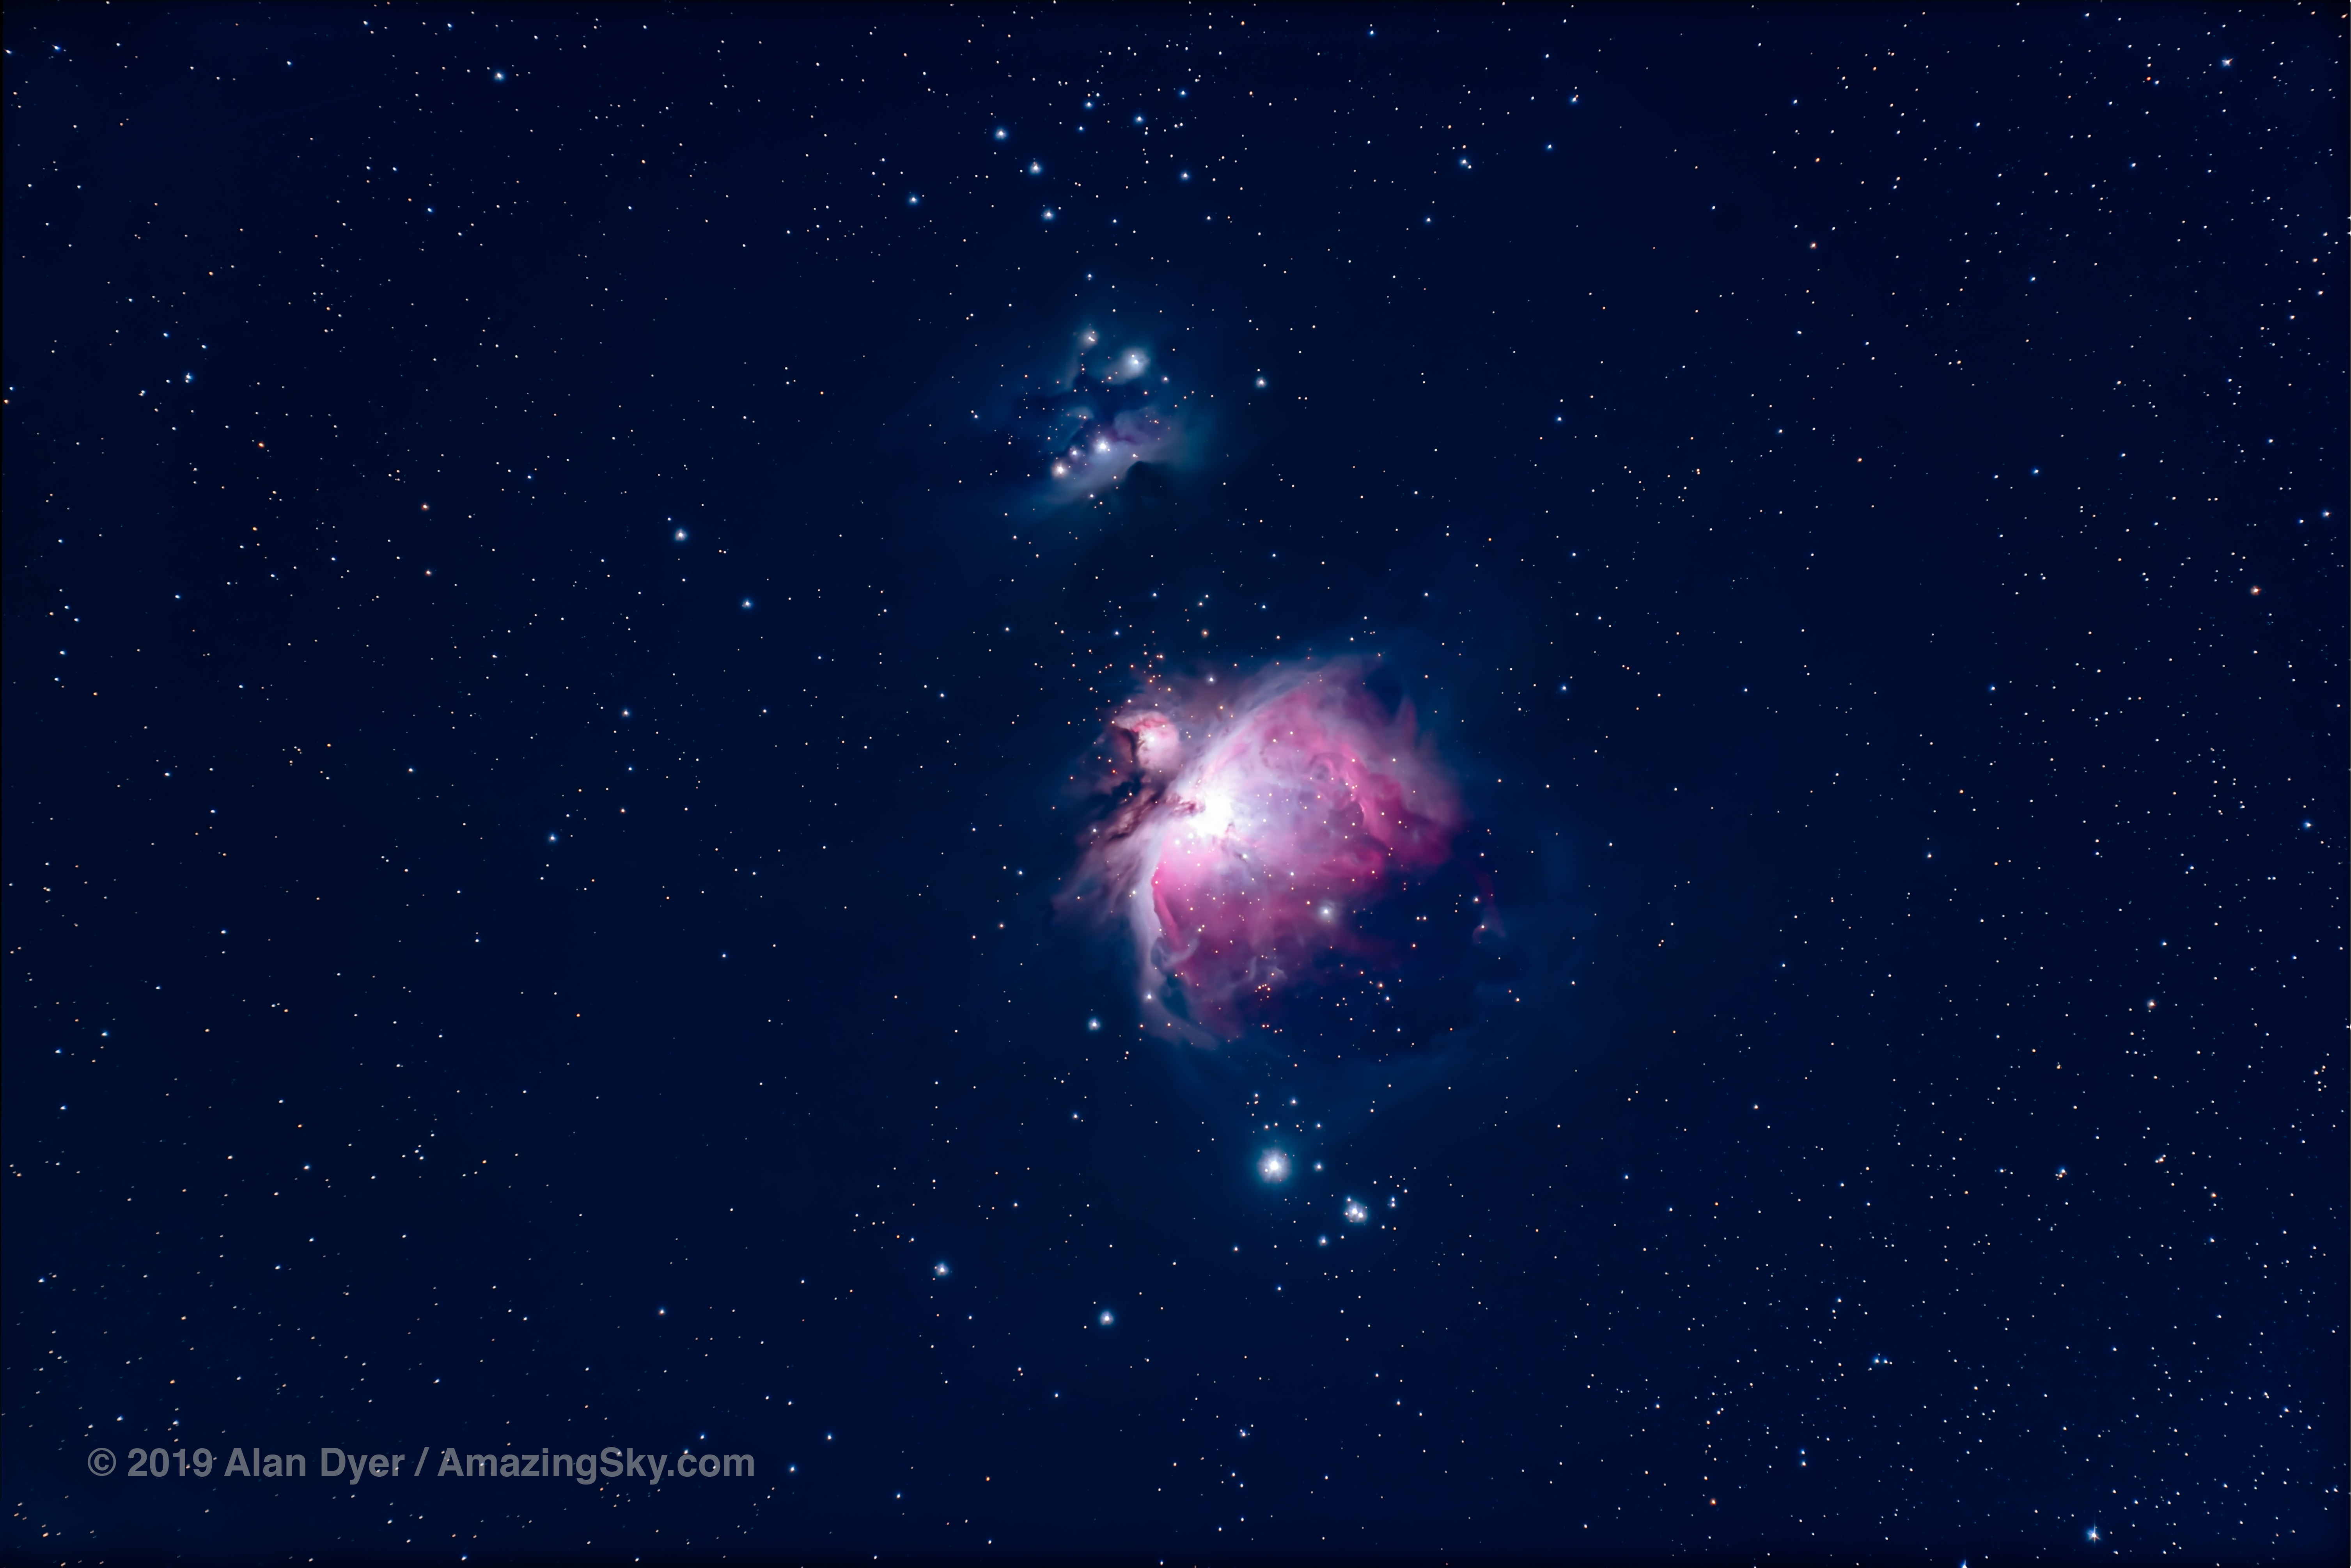
Above is the Orion Nebula with the D750 and with the Z6, both shot in moonlight with the same 105mm refractor telescope.
I did not find any evidence for “star-eating” that Sony mirrorless cameras have been accused of. (However, I did not find the Sony a7III guilty of eating stars either.) Star images looked as good in the Z6 as in the D750.

Raw developers (Adobe, DxO, ON1, and others) decoded the Z6’s Bayer-array NEF files fine, with no artifacts such as oddly-coloured or misshapen stars, which can arise in cameras lacking an anti-alias filter.
LENR Dark frames


Above, 8-minute exposures of nothing, taken with the lens cap on at room temperature: without LENR, and with LENR, both boosted a lot in brightness and contrast to exaggerate the visibility of any thermal noise. These show the reduction in noise speckling with LENR activated, and the clean result with the Z6. At small size you’ll likely see nothing but black!
For deep-sky imaging a common practice is to shoot “dark frames,” images recording just the thermal noise that can then be subtracted from the image.
The Long Exposure Noise Reduction feature offered by all cameras performs this dark frame subtraction internally and automatically by the camera for any exposures over one second long.
I tested the Z6’s LENR and found it worked well, doing the job to effectively reduce thermal noise (hot pixels) without adding any other artifacts.
NOTE:
Some astrophotographers dismiss LENR and never use it. By contrast, I prefer to use LENR to do dark frame subtraction. Why? Through many comparison tests over the years I have found that separate dark frames taken later at night rarely do as good a job as LENR darks, because those separate darks are taken when the sensor temperature, and therefore the noise levels, are different than they were for the “light” frames.
I’ve found that dark frames taken later, then subtracted “in post” inevitably show less or little effect compared to images taken with LENR darks. Or worse, they add a myriad of pock-mark black specks to the image, adding noise and making the image look worse.
The benefit of LENR is lower noise. The penalty of LENR is that each image takes twice as long to shoot — the length of the exposure + the length of the dark frame. Because …
As Expected on the Z6 … There’s no LENR Dark Frame Buffer
Only Canon full-frame cameras offer this little known but wonderful feature for astrophotography. Turn on LENR and it is possible to shoot three (with the Canon 6D MkII) or four (with the Canon 6D) raw images in quick succession even with LENR turned on. The Canon 5D series also has this feature.
The single dark frame kicks in and locks up the camera only after the series of “light frames” are taken. This is excellent for taking a set of noise-reduced deep-sky images for later stacking without need for further “image calibration.”
No Nikon has this dark frame buffer, not even the “astronomical” D810a. And not the Z6.
ANOTHER NOTE:
I have to mention this every time I describe Canon’s dark frame buffer: It works only on full-frame Canons, and there’s no menu function to activate it. Just turn on LENR, fire the shutter, and when the first exposure is complete fire the shutter again. Then again for a third, and perhaps a fourth exposure. Only then does the LENR dark frame lock up the camera as “Busy” and prevent more exposures. That single dark frame gets applied to each of the previous “light” frames, greatly reducing the time it takes to shoot a set of dark-frame subtracted images.
But do note that Canon’s dark frame buffer will not work if…:
a) You leave Live View on. Don’t do that for any long exposure shooting.
b) You control the camera through the USB port via external software. It works only when controlling the camera via its internal intervalometer or via the shutter port using a hardware intervalometer.
Sensor Illumination
With DSLRs deep-sky images shot through telescopes, then boosted for contrast in processing, usually exhibit a darkening along the bottom of the frame. This is caused by the upraised mirror shadowing the sensor slightly, an effect never noticed in normal photography.
Mirrorless cameras should be free of this mirror box shadowing. The Sony a7III, however, still exhibits some edge shadows due to an odd metal mask in front of the sensor. It shouldn’t be there and its edge darkening is a pain to eliminate in the final processing.
As I show in my review of the a7III, the Sony also exhibits a purple edge glow in long-exposure deep-sky images, from an internal light source. That’s a serious detriment to its use in deep-sky imaging.
Happily, the Z6 proved to be free of any such artifacts. Images are clean and evenly illuminated to the edges, as they should be. I saw no amp glows or other oddities that can show up under astrophotography use. The Z6 can produce superb deep-sky images.
Red Sensitivity

During my short test period, I was not able to shoot red nebulas under moonless conditions. So I can’t say how well the Z6 performs for recording H-alpha regions compared to other “stock” cameras.
However, I would not expect it to be any better, nor worse, than the competitors. Indeed, the stock Nikon D750 I have does a decent job at picking up red nebulas, though nowhere near as well as Nikon’s sadly discontinued D180a. See my blog post from 2015 for an example shot with that camera.
With the D810a gone, if it is deep red nebulosity you are after with a Nikon, then consider buying a filter-modified Z6 or having yours modified.
Both LifePixel and Spencer’s Camera offer to modify the Z6 and Z7 models. However, I have not used either of their services, so cannot vouch for them first hand.
Live View Focusing and Framing
For all astrophotography manually focusing with Live View is essential. And with mirrorless cameras there is no optical viewfinder to look through to frame scenes. You are dependent on the live electronic image (on the rear LCD screen or in the eye-level electronic viewfinder, or EVF) for seeing anything.
Thankfully, the Z6 presents a bright Live View image making it easy to frame, find, and focus on stars. Maximum zoom for precise focusing is 15x, good but not as good as the D750’s 20x zoom level, but better than Canon’s 10x maximum zoom in Live View.
The Z6 lacks the a7III’s wonderful Bright Monitoring function that temporarily ups the ISO to an extreme level, making it much easier to frame a dark night scene. However, something similar can be achieved with the Z6 by switching it temporarily to Movie mode, and having the ISO set to an extreme level.
As with most Nikons (and unlike Sonys), the Z6 remembers separate settings for the still and movie modes, making it easy to switch back and forth, in this case for a temporarily brightened Live View image to aid framing.
That’s very handy, and the Z6 works better than the D750 in this regard, providing a brighter Live View image, even with the D750’s well-hidden Exposure Preview option turned on.
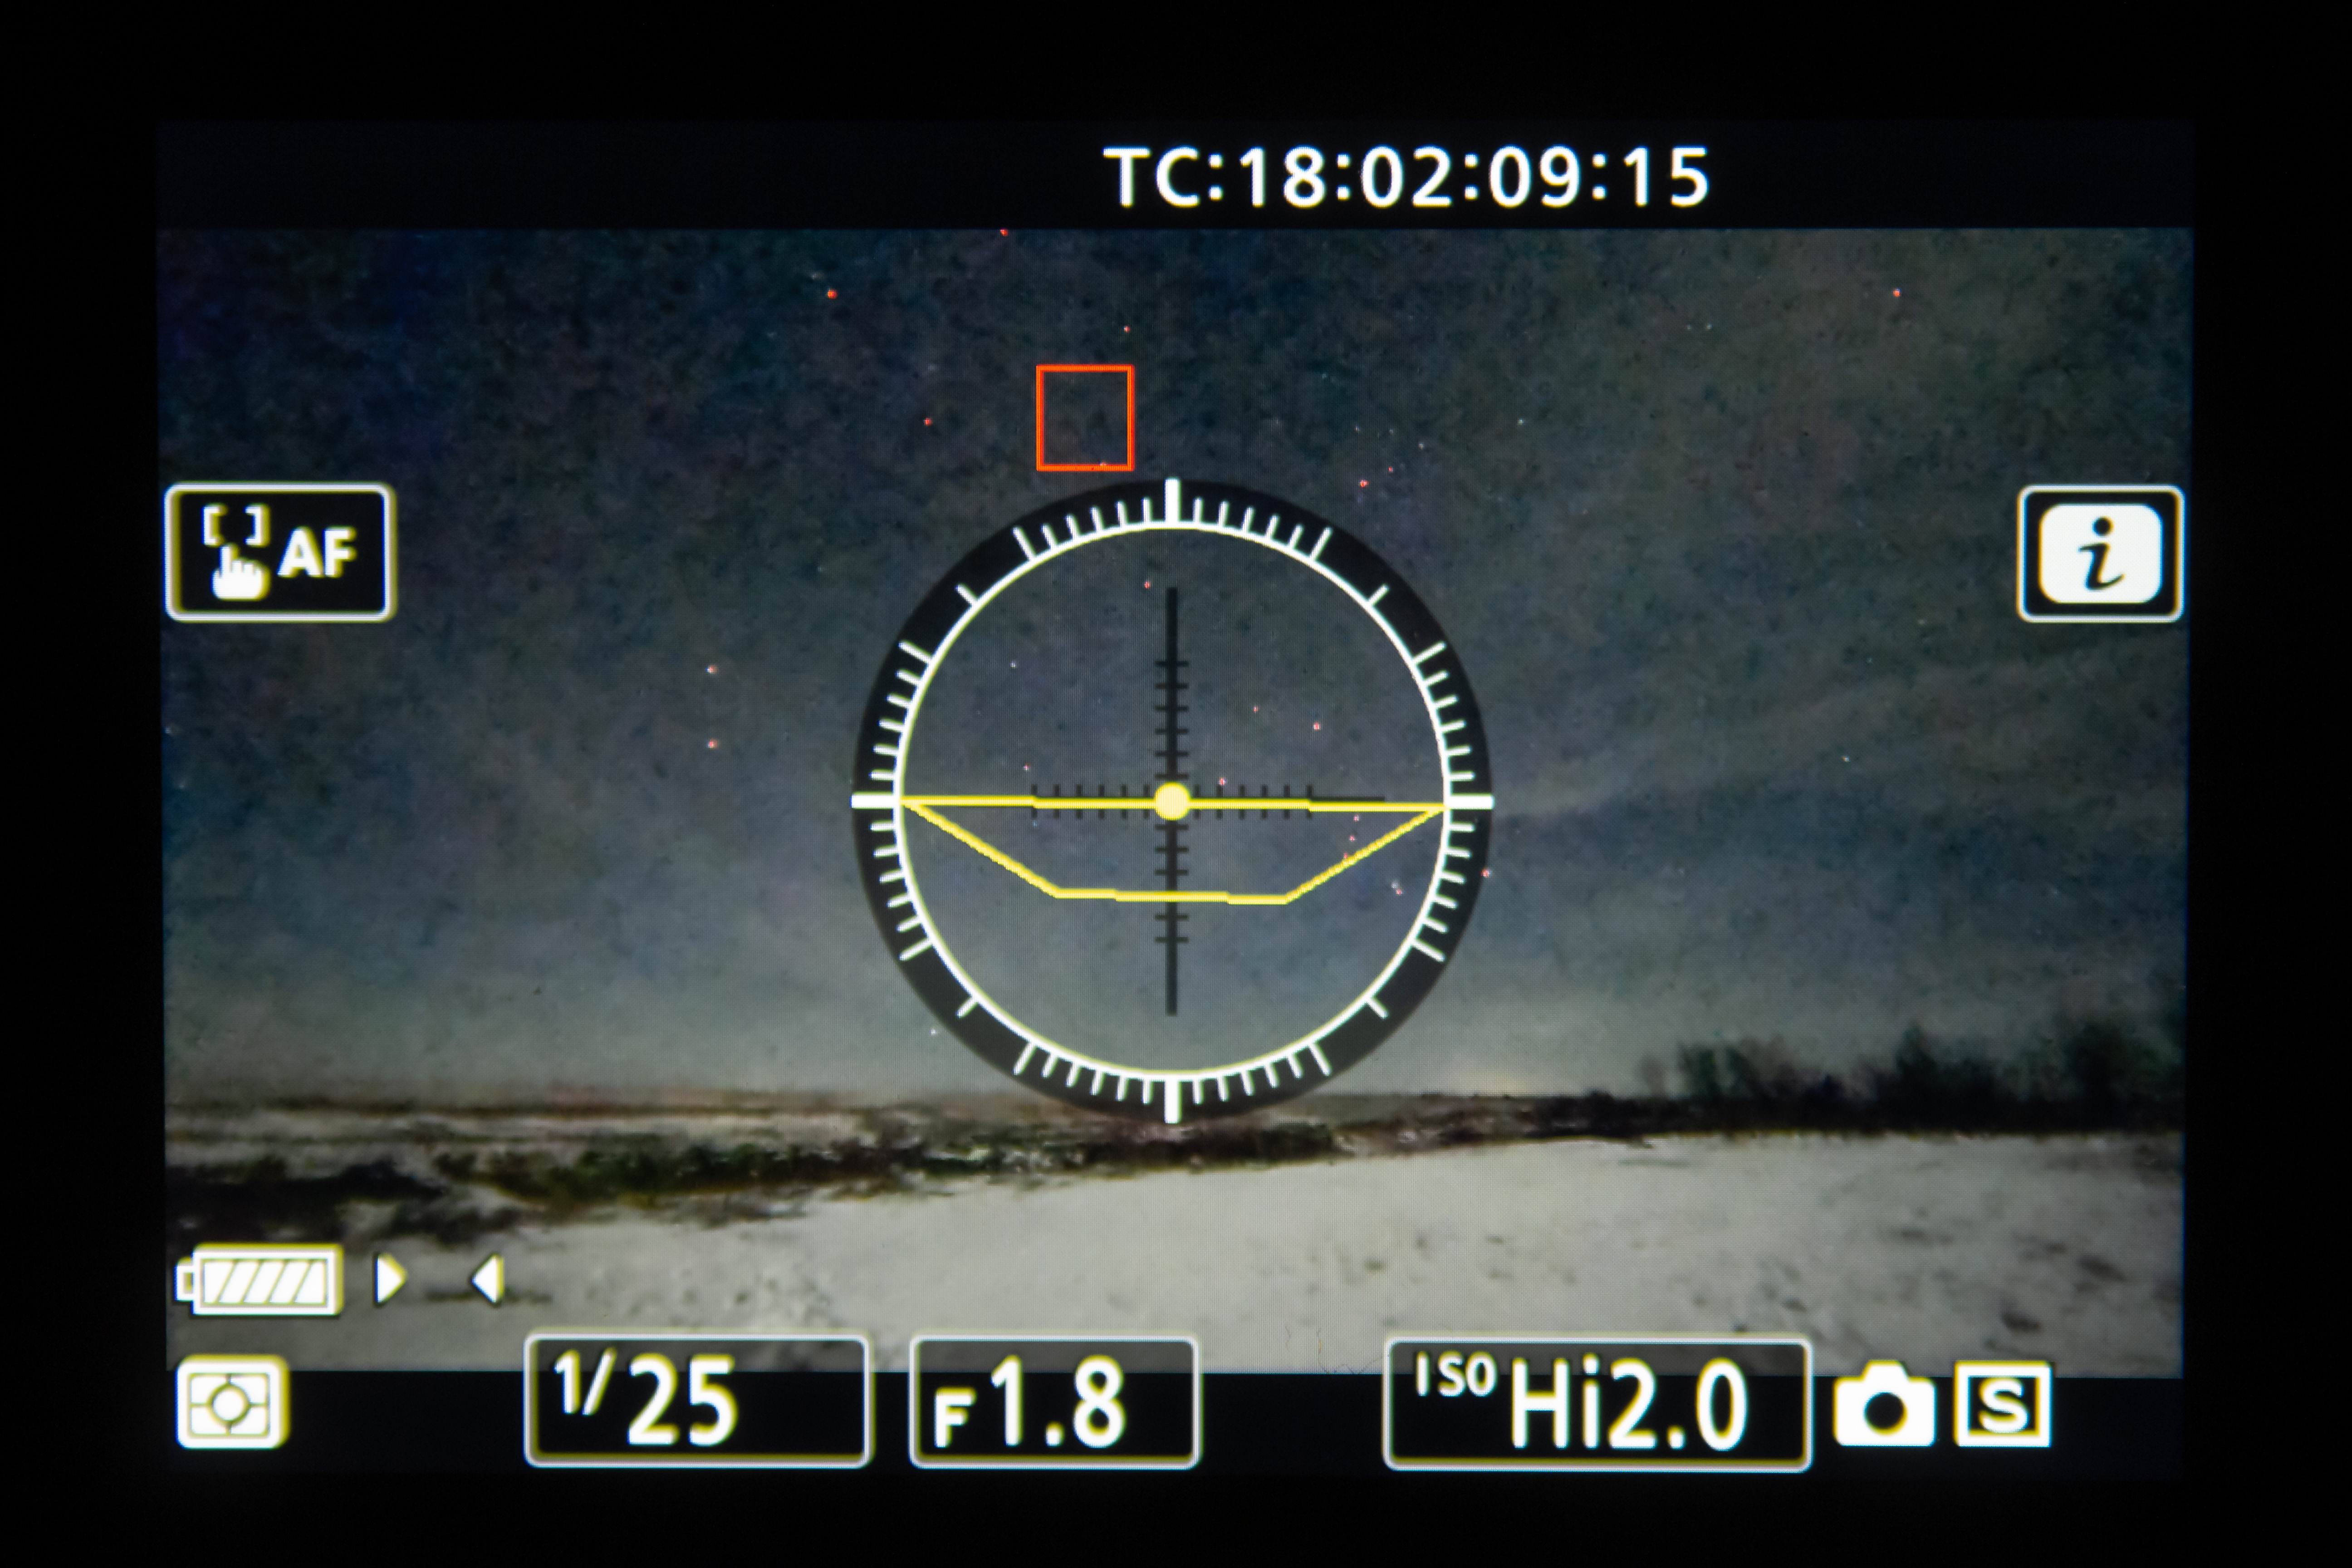
Video Capability

Where the Z6 pulls far ahead of the otherwise similar D750 is in its movie features.
The Z6 can shoot 4K video (3840 x 2160 pixels) at either 30, 25, or 24 frames per second. Using 24 frames per second and increasing the ISO to between 12,800 to 51,200 (the Z6 can go as high as ISO 204,800!) it is possible to shoot real-time video at night, such as of auroras.
But the auroras will have to be bright, as at 24 fps, the maximum shutter speed is 1/25-second, as you might expect.
The a7III, by comparison, can shoot 4K movies at “dragged” shutter speeds as slow as 1/4 second, even at 24 fps, making it possible to shoot auroras at lower and less noisy ISO speeds, albeit with some image jerkiness due to the longer exposures per frame.
The D750 shoots only 1080 HD and, as shown above, produces very noisy movies at ISO 25,600 to 51,200. It’s barely usable for aurora videos.
The Z6 is much cleaner than the D750 at those high ISOs, no doubt due to far better internal processing of the movie frames. However, if night-sky 4K videos are an important goal, a camera from the Sony a7 series will be a better choice, if only because of the option for slower dragged shutter speeds.
For examples of real-time auroras shot with the Sony a7III see my music videos shot in Yellowknife and in Norway.
Battery Life
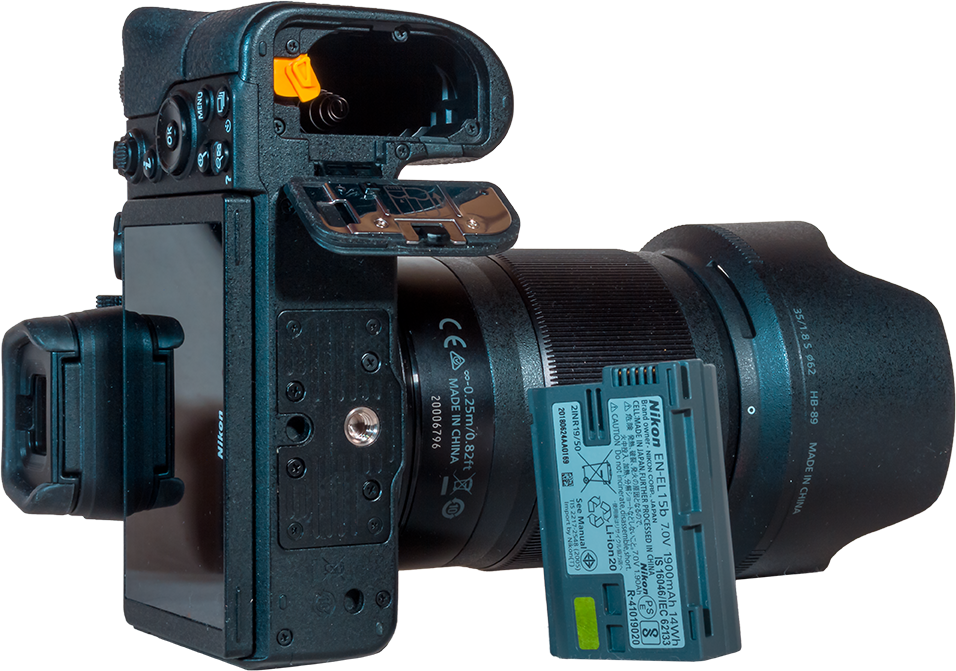
The Z6 uses the EN-EL15b battery compatible with the battery and charger used for the D750. But the “b” variant allows for in-camera charging via the USB port.
In room temperature tests the Z6 lasted for 1500 exposures, as many as the D750 was able to take in a side-by-side test. That was with the screens off.
At night, in winter temperatures of -10 degrees C (14° F), the Z6 lasted for three hours worth of continuous shooting, both for long deep-sky exposure sets and for a test time-lapse I shot, shown below.
A time-lapse movie, downsized here to HD from the full-size originals, shot with the Z6 and its internal intervalometer, from twilight through to moonrise on a winter night. Processed with Camera Raw and LRTimelapse.
However, with any mirrorless camera, you can extend battery life by minimizing use of the LCD screen and eye-level EVF. The Z6 has a handy and dedicated button for shutting off those screens when they aren’t needed during a shoot.
The days of mirrorless cameras needing a handful of batteries just to get through a few hours of shooting are gone.
Lens and Telescope Compatibility
As with all mirrorless cameras, the Nikon Z cameras use a new lens mount, one that is incompatible with the decades-old Nikon F mount.
The Z mount is wider and can accommodate wider-angle and faster lenses than the old F mount ever could, and in a smaller package. While we have yet to see those lenses appear, in theory that’s the good news.
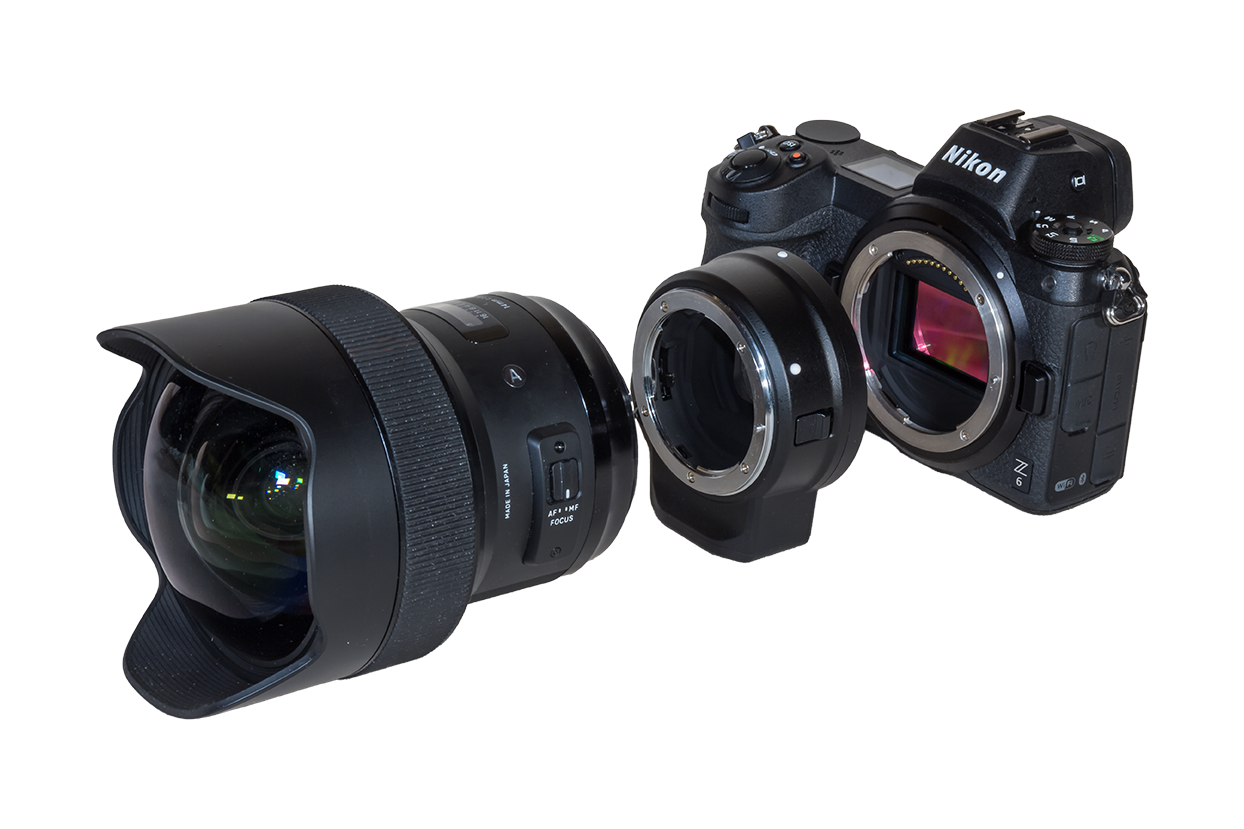
The bad news is that you’ll need Nikon’s FTZ lens adapter to use any of your existing Nikon F-mount lenses on either the Z6 or Z7. As of this writing, Nikon is supplying an FTZ free with every Z body purchase.
I got an FTZ with my loaner Z6 and it worked very well, allowing even third-party lenses like my Sigma Art lenses to focus at the same point as they normally do (not true of some thIrd-party adapters), preserving the lens’s optical performance. Autofocus functions all worked fine and fast.
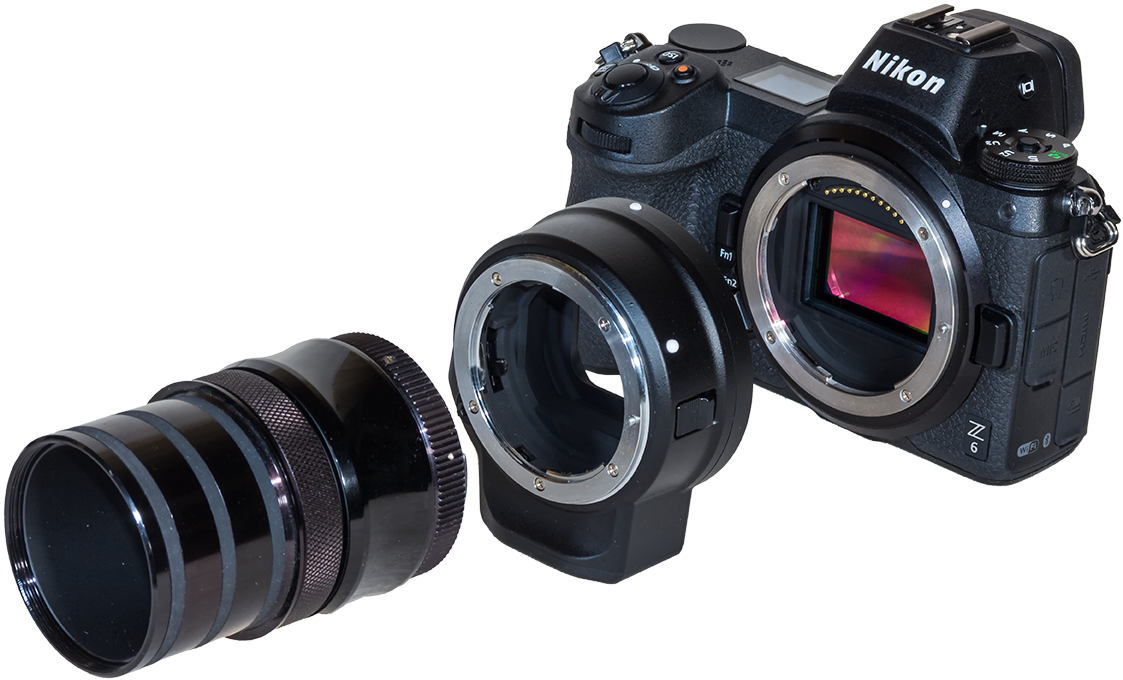
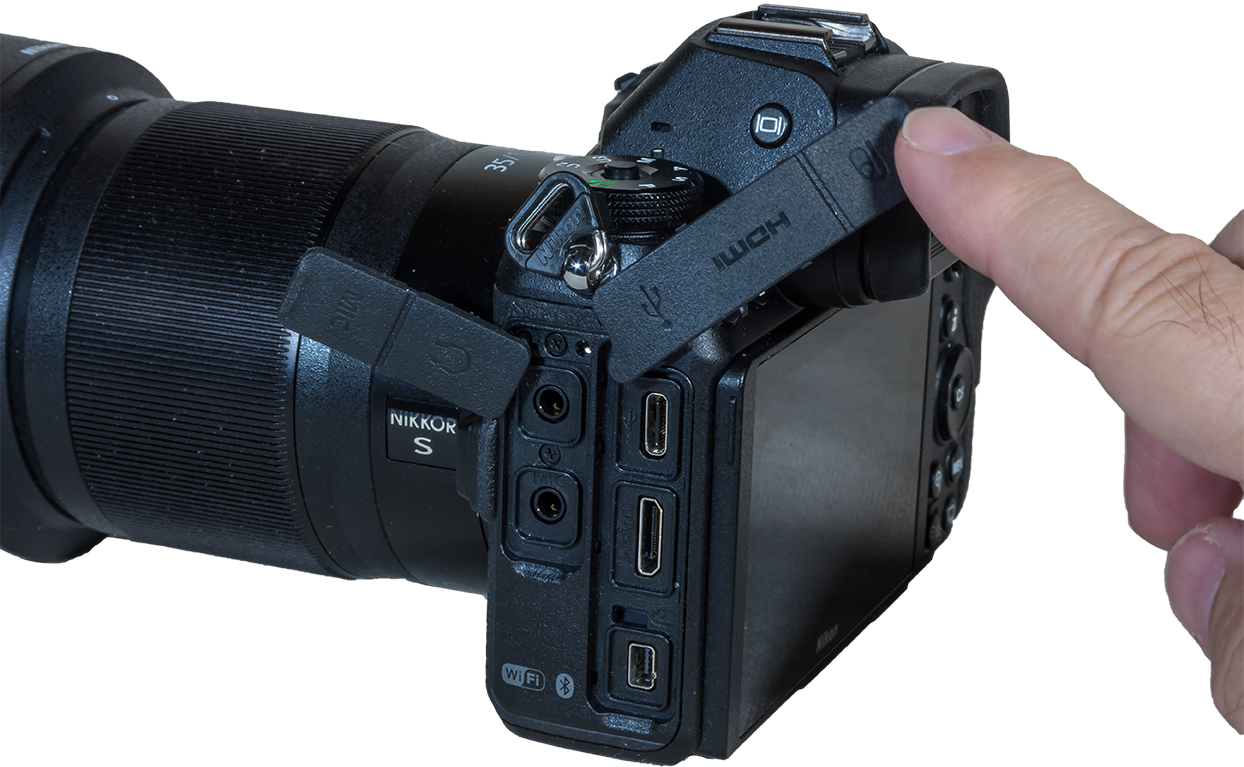
You’ll also need the FTZ adapter for use on a telescope, as shown above, to go from your telescope’s camera adapter, with its existing Nikon T-ring, to the Z6 body.
T-rings are becoming available for the Z-mount, but even these third-party adapters are actually extension tubes, not just rings.
The reason is that the field flattener or coma corrector lenses often required with telescopes are designed to work best with the longer lens-to-sensor distance of a DSLR body. The FTZ adapter provides the necessary spacing, as do third-party adapters.
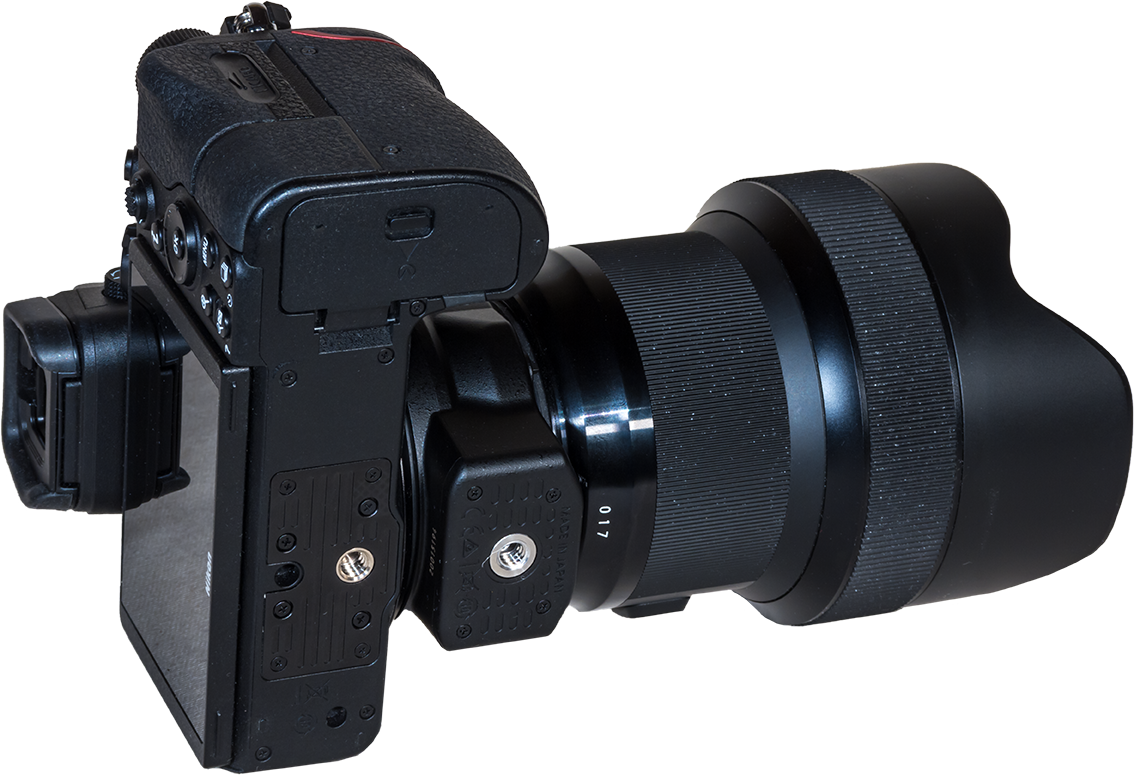
The only drawback to the FTZ is that any tripod plate attached to the camera body itself likely has to come off, and the tripod foot incorporated into the FTZ used instead. I found myself often having to swap locations for the tripod plate, an inconvenience.
Camera Controller Compatibility
Since it uses the same Nikon-type DC2 shutter port as the D750, the Z6 it should be compatible with most remote hardware releases and time-lapse motion controllers that operate a Nikon through the shutter port. An example are the controllers from SYRP.
On the other hand, time-lapse devices and external intervalometers that run Nikons through the USB port might need to have their firmware or apps updated to work with the Z6.
For example, as of early May 2019, CamRanger lists the Z6 as a supported camera; the Arsenal “smart controller” does not. Nor does Alpine Labs for their Radian and Pulse controllers, nor TimeLapse+ for its excellent View bramping intervalometer. Check with your supplier.
For those who like to use laptops to run their camera at the telescope, I found the Windows program Astro Photography Tool (v3.63) worked fine with the Z6, in this case connecting to the camera’s USB-C port using the USB-C to USB-A cable that comes with the camera. This allows APT to shift not only shutter speed, but also ISO and aperture under scripted sequences.
However, BackyardNikon v2.0, current as of April 2019, does not list the Z6 as a supported camera.
Raw File Compatibility
Inevitably, raw files from brand new cameras cannot be read by any raw developer programs other than the one supplied by the manufacturer, Nikon Capture NX in this case. However, even by the time I did my testing in winter 2019 all the major software suppliers had updated their programs to open Z6 files.
Adobe Lightroom and Photoshop, Affinity Photo, DxO PhotoLab, Luminar 3, ON1 PhotoRAW, and the open-source Raw Therapee all open the Z6’s NEF raw files just fine.
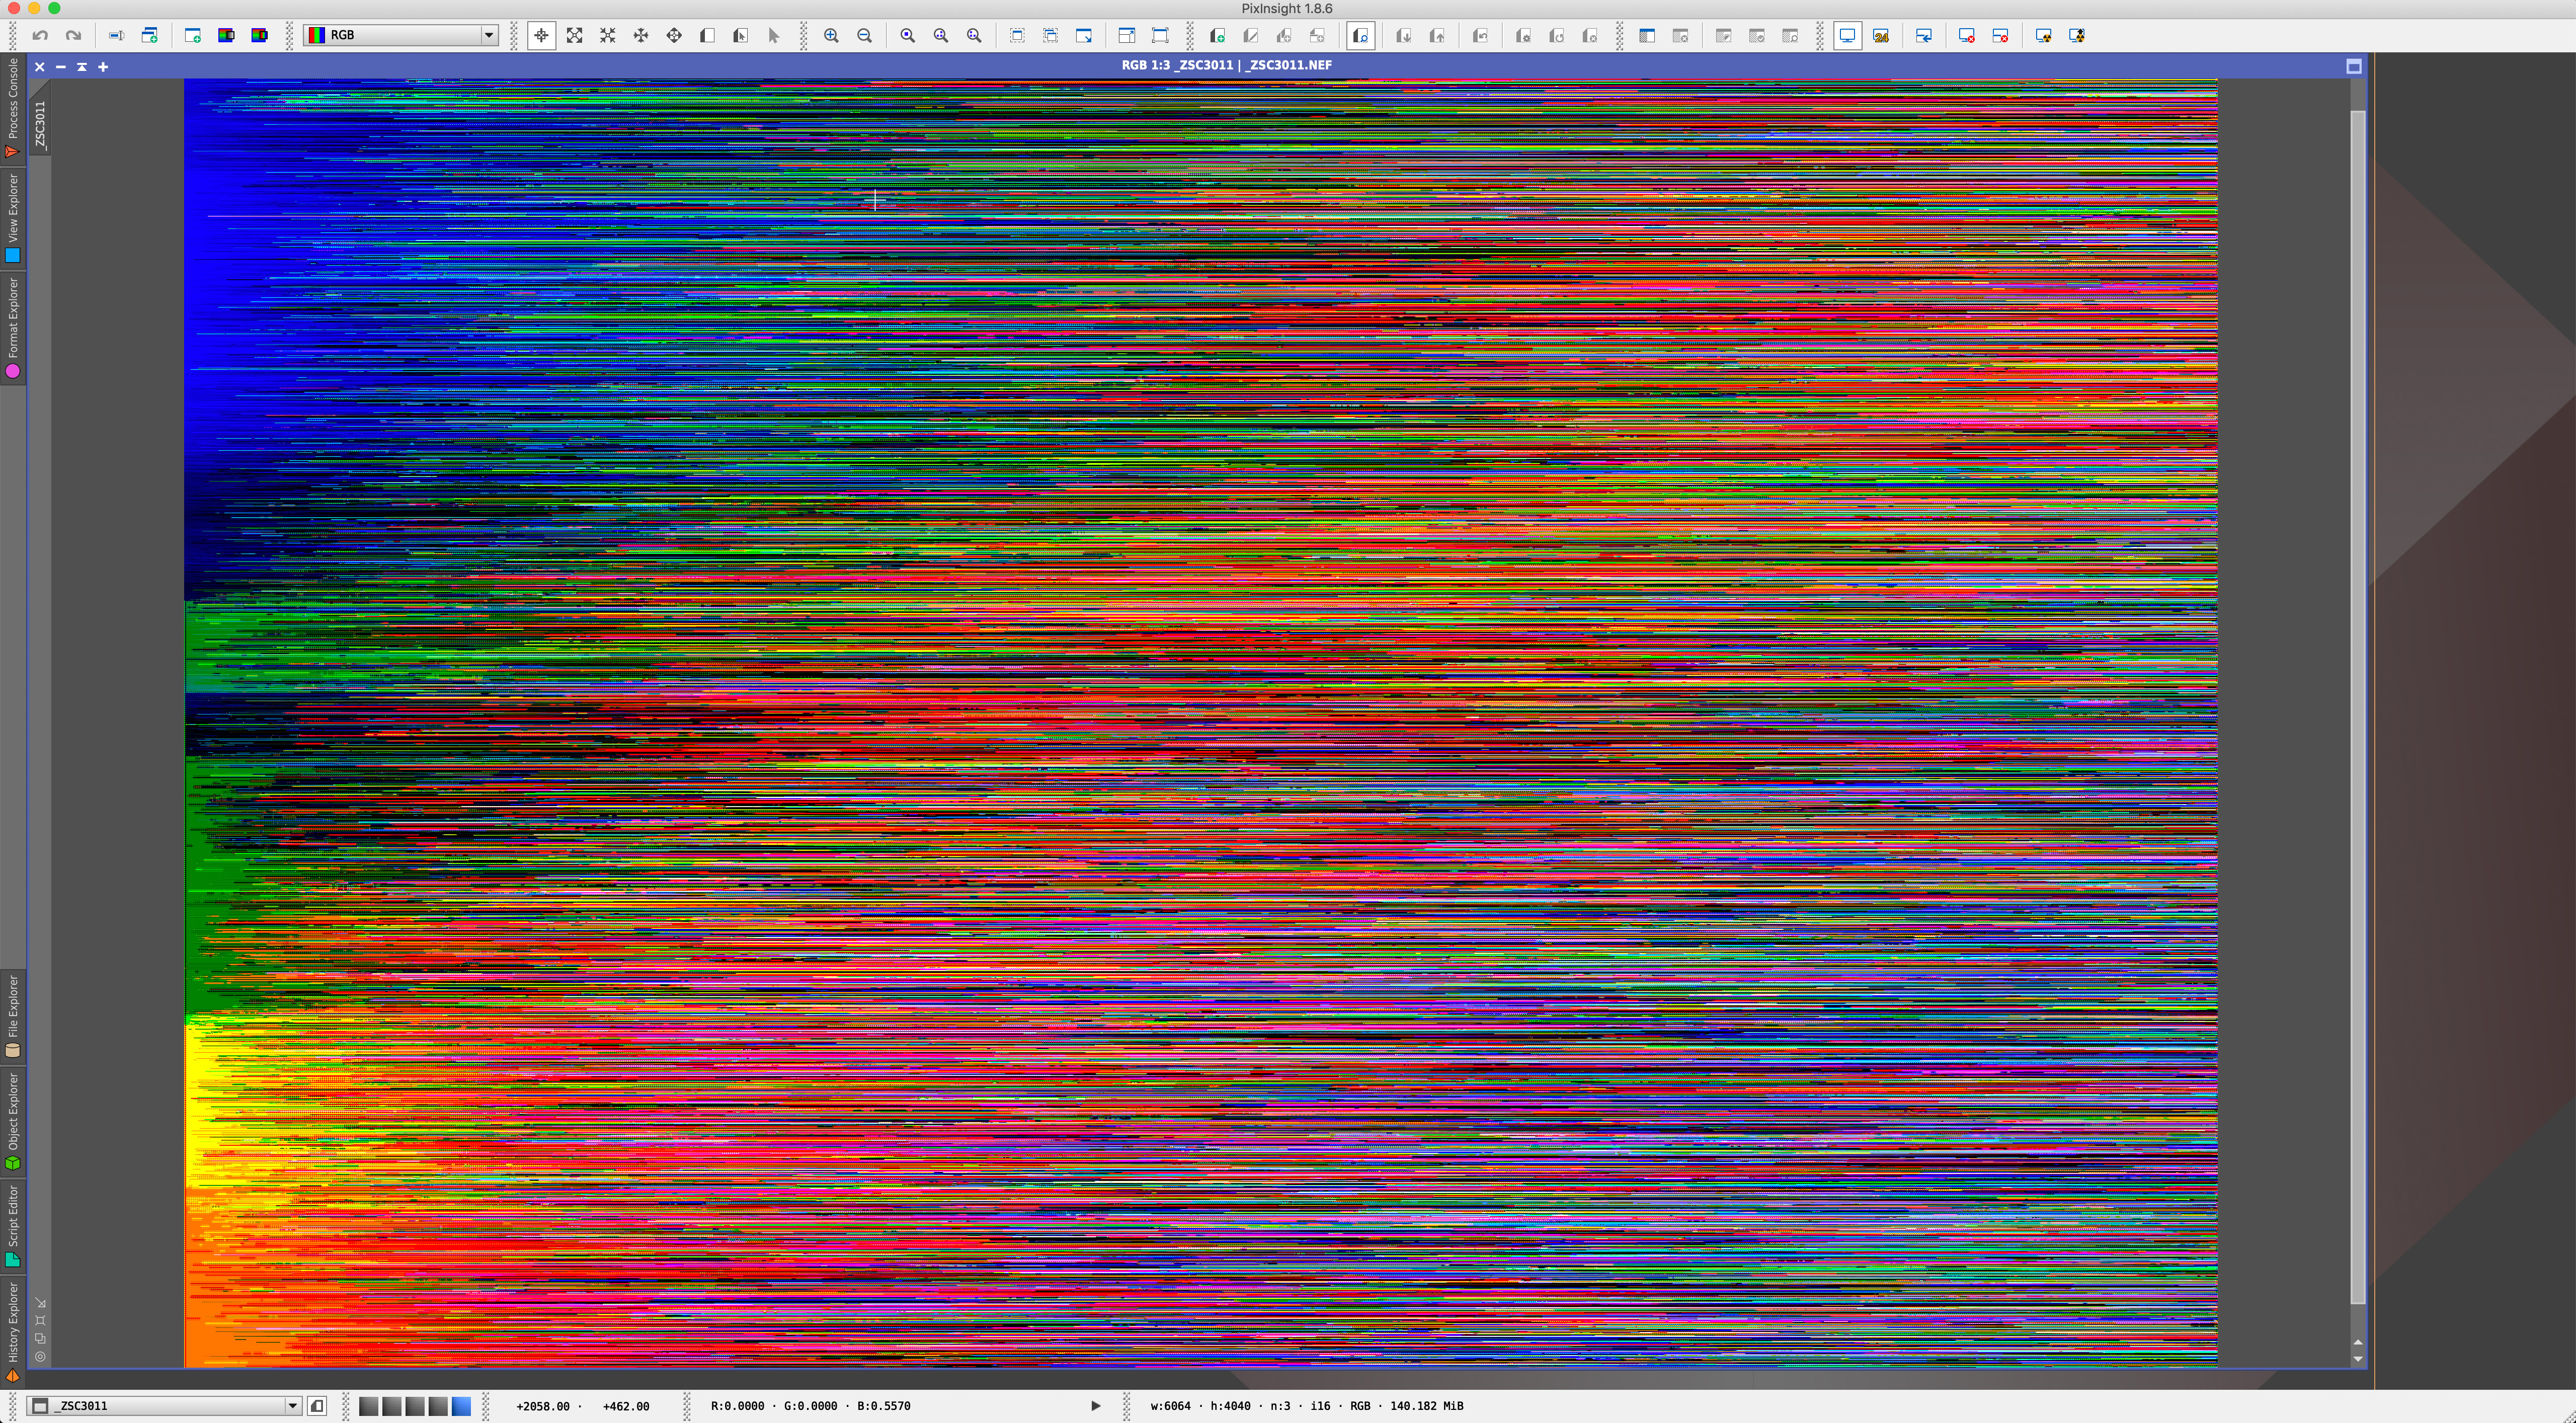
Specialized programs for processing astronomy images might be another story. For example, as of v1.08.06, PixInsight, a favourite program among astrophotographers, does not open Z6 raw files. Nor does Nebulosity v4. But check with the developers for updates.
Other Features for Astrophotography
Here are other Nikon Z6 features I found of value for astrophotography, and for operating the camera at night.

Tilting LCD Screen
Like the Nikon D750 and Sony A7III, the Z6 offers a tilting LCD screen great for use on a telescope or tripod when aimed up at the sky. However, the screen does not flip out and reverse, a feature useful for vloggers, but seldom needed for astrophotography.

OLED Top Screen (Above)
The Sony doesn’t have one, and Canon’s low-cost mirrorless Rp also lacks one. But the top-mounted OLED screen of the Z6 is a great convenience for astrophotography. It makes it possible to monitor camera status and battery life during a shoot, even with the rear LCD screen turned off to prolong battery life.

Touch Screen
Sony’s implementation of touch-screen functions is limited to just choosing autofocus points. By contrast, the Nikon Z6 offers a full range of touchscreen functions, making it easy to navigate menus and choose settings.
I do wish there was an option, as there is with Pentax, to tint the menus red for preserving night vision.

Built-in Intervalometer
As with other Nikons, the Z6 offers an internal intervalometer capable of shooting time-lapses, just as long as individual exposures don’t need to be longer than 30 seconds.
In addition, there’s the Exposure Smoothing option which, as I have found with the D750, is great for smoothing flickering in time-lapses shot using auto exposure.
Sony has only just added an intervalometer to the a7III with their v3 firmware update, but with no exposure smoothing.
Custom i Menu / Custom Function Buttons
The Sony a7III has four custom function buttons users can assign to commonly used commands, for quick access. For example, I assign one Custom button to the Bright Monitoring function which is otherwise utterly hidden in the menus, but superb for framing nightscapes, if only you know it’s there!
The Nikon Z6 has two custom buttons beside the lens mount. However, I found it easier to use the “i” menu (shown above) by populating it with those functions I use at night for astrophotography. It’s then easy to call them up and adjust them on the touch screen.
Thankfully, the Z6’s dedicated ISO button is now on top of the camera, making it much easier to find at night than the awkwardly placed ISO button on the back of the D750, which I am always mistaking for the Image Quality button, which you do not want to adjust by mistake.
My Menu
As most cameras do, the Z6 also has a “My Menu” page which you can also populate with favourite menu commands.
Lighter Weight / Smaller Size
The Z6 provides similar imaging performance, if not better (for movies) than the D750, and in a smaller and lighter camera, weighing 200 grams (0.44 pounds) less than the D750. Being able to downsize my equipment mass is a welcome plus to going mirrorless.
Electronic Front Curtain Shutter / Silent Shooting
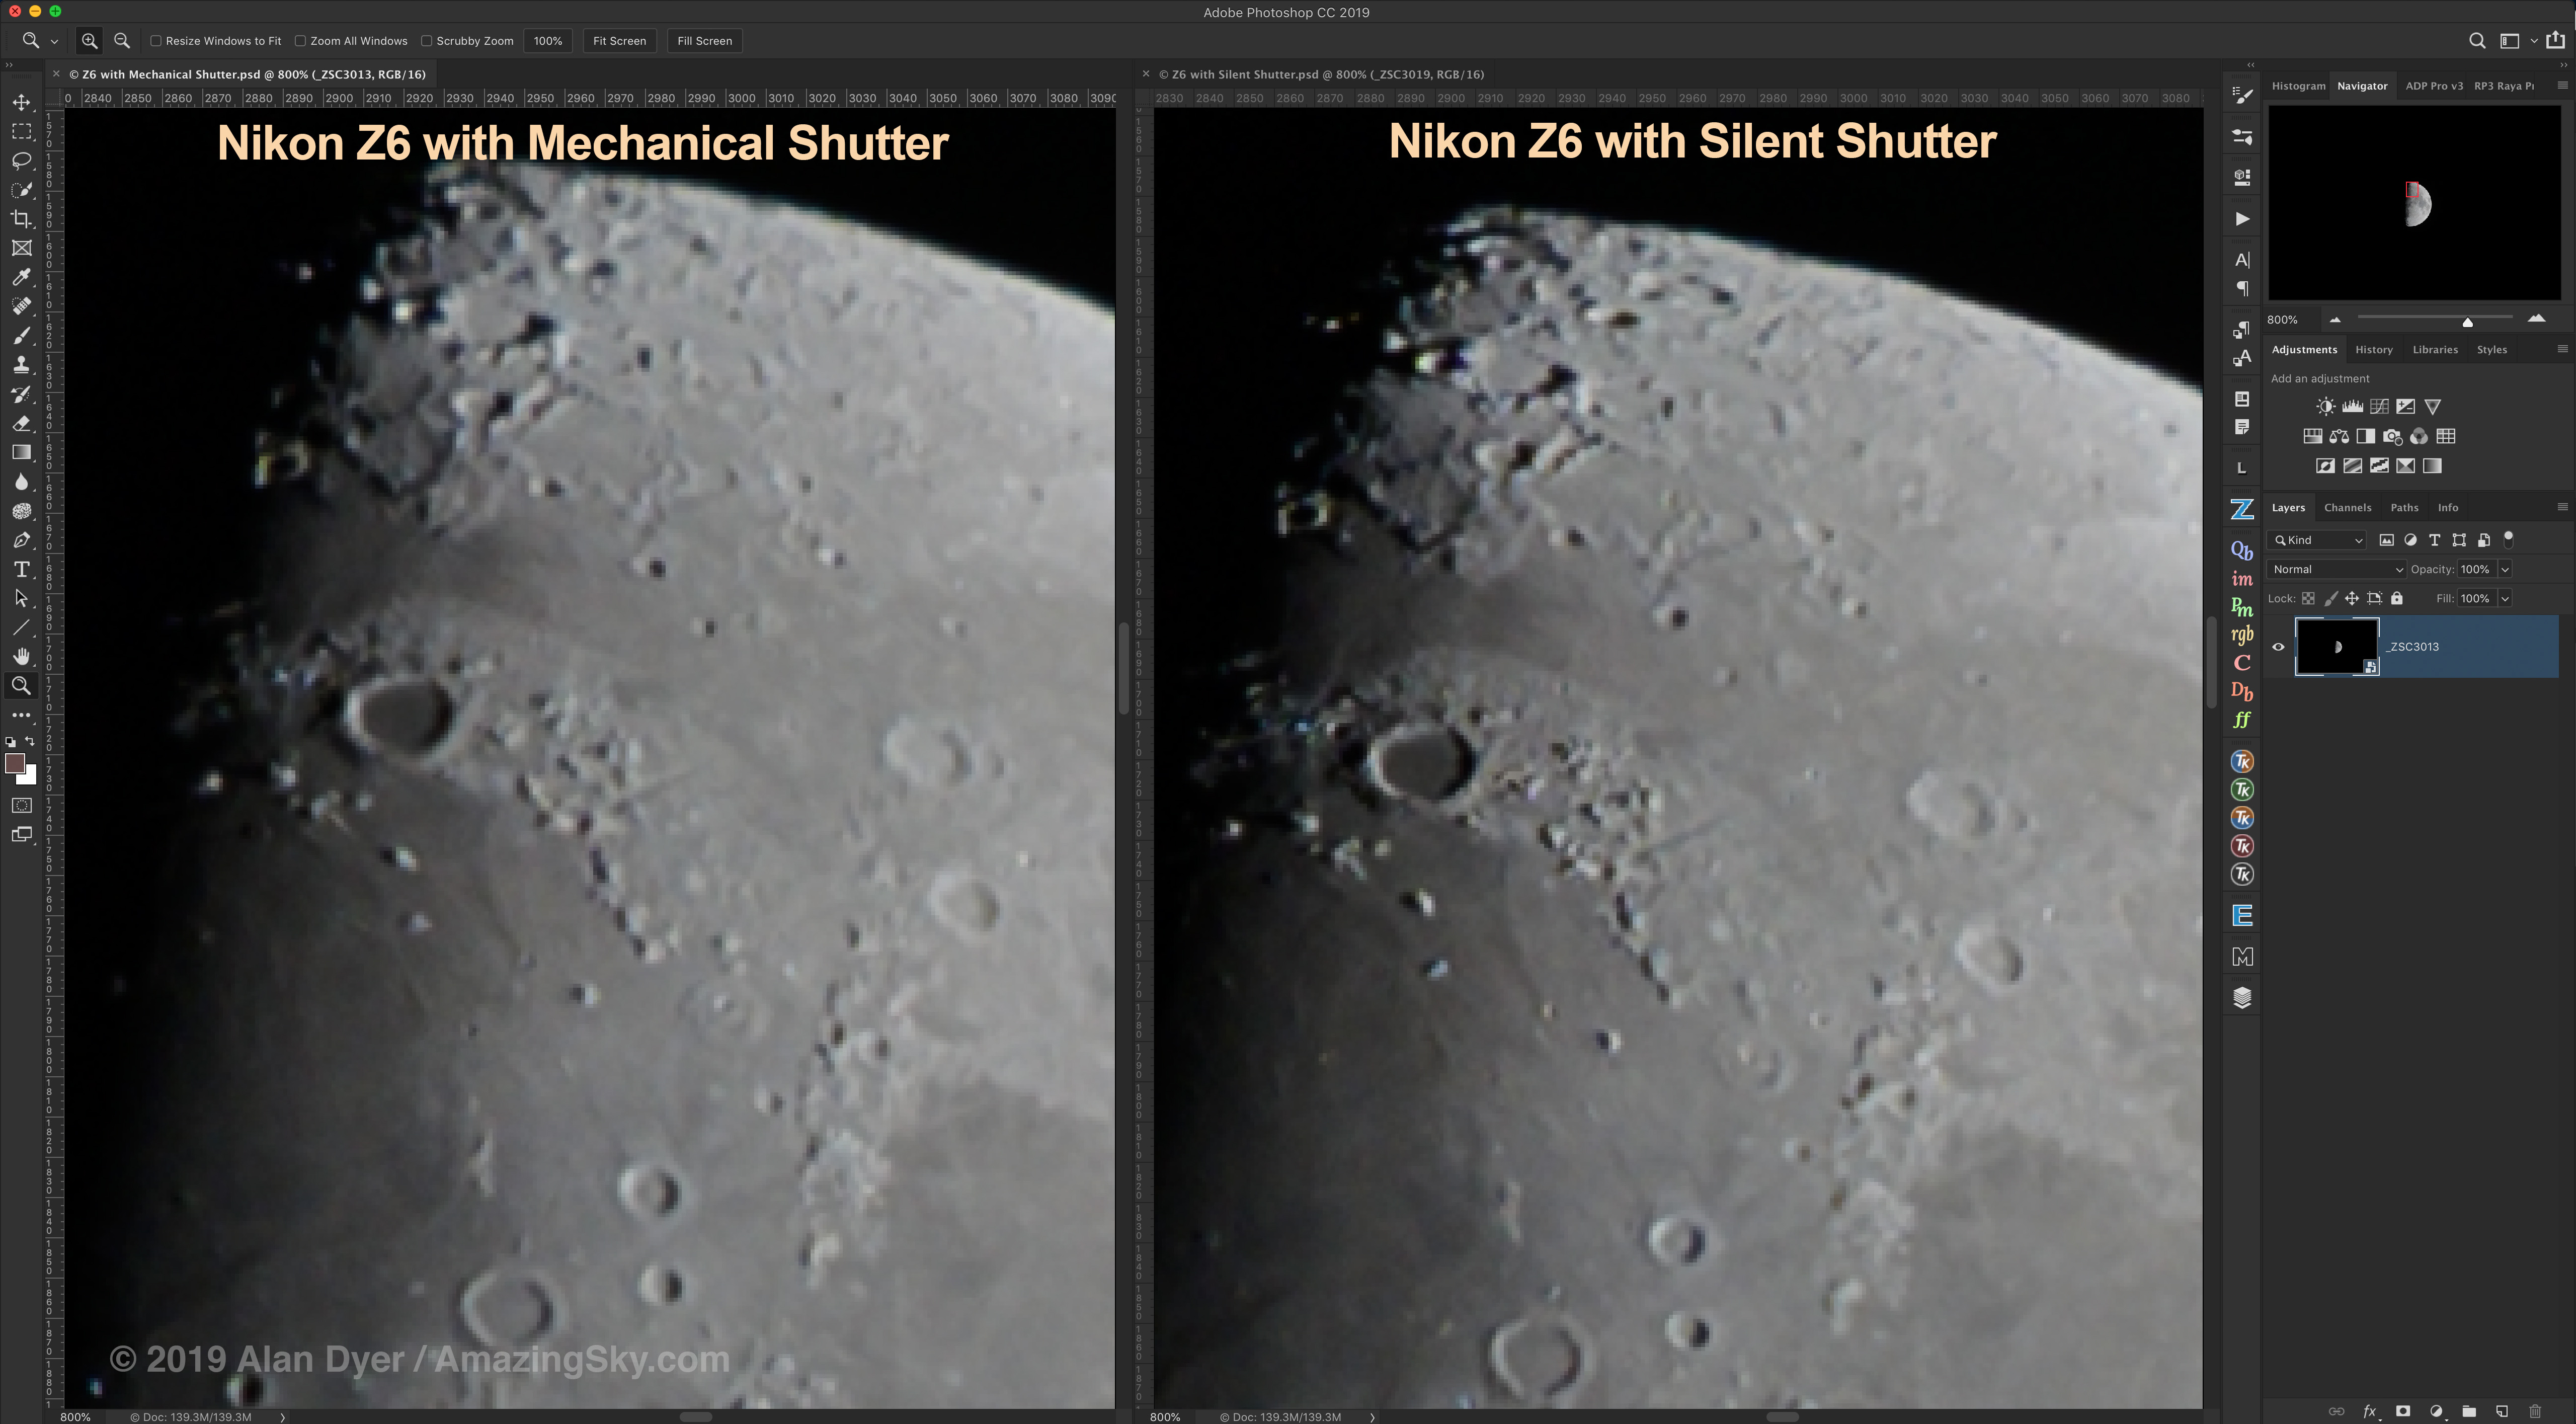
By design, mirrorless cameras lack any vibration from a bouncing mirror. But even the mechanical shutter can impart vibration and blurring to high-magnification images taken through telescopes.
The electronic front curtain shutter (lacking in the D750) helps eliminate this, while the Silent Shooting mode does just that — it makes the Z6 utterly quiet and vibration free when shooting, as all the shutter functions are now electronic. This is great for lunar and planetary imaging.
What’s Missing for Astrophotography (not much!)
Bulb Timer for Long Exposures
While the Z6 has a Bulb setting, there is no Bulb Timer as there is with Canon’s recent cameras. A Bulb Timer would allow setting long Bulb exposures of any length in the camera, though Canon’s cannot be combined with the intervalometer.
Instead, the Nikon must be used with an external Intervalometer for any exposures over 30 seconds long. Any number of units are compatible with the Z6, through its shutter port which is the same type DC2 jack used in the D750.

In-Camera Image Stacking to Raws
The Z6 does offer the ability to stack up to 10 images in the camera, a feature also offered by Canon and Pentax. Images can be blended with a Lighten (for star trails) or Average (for noise smoothing) mode.
However, unlike with Canon and Pentax, the result is a compressed JPG not a raw file, making this feature of little value for serious imaging. Plus with a maximum of only 10 exposures of up to 30-seconds each, the ability to stack star trails “in camera” is limited.
Illuminated Buttons
Unlike the top-end D850, the Z6’s buttons are not illuminated, but then again neither are the Z7’s.
As a bonus — the Nikon 35mm S-Series Lens

With the Z6 I also received a Nikkor 35mm f/1.8 S lens made for the Z-mount, as the lens perhaps best suited for nightscape imaging out of the native Z-mount lenses from Nikon. See Nikon’s website for the listing.
If there’s a downside to the Z-series Nikons it’s the limited number of native lenses that are available now from Nikon, and likely in the future from anyone, due to Nikon not making it easy for other lens companies to design for the new Z mount.
In testing the 35mm Nikkor on tracked shots, stars showed excellent on- and off-axis image quality, even wide open at f/1.8. Coma, astigmatism, spherical aberration, and lateral chromatic aberration were all well controlled.
However, as with most lenses now offered for mirrorless cameras, the focus is “by-wire” using a ring that doesn’t mechanically adjust the focus. As a result, the focus ring turns continuously and lacks a focus scale.
So it is not possible to manually preset the lens to an infinity mark, as nightscape photographers often like to do. Focusing must be done each night.
Until there is a greater selection of native lenses for the Z cameras, astrophotographers will need to use the FTZ adapter and their existing Nikon F-mount or third-party Nikon-mount lenses with the Zs.
Recommendations
I was impressed with the Z6.

For any owner of a Nikon cropped-frame DSLR (from the 3000, 5000, or 7000 series for example) wanting to upgrade to full-frame for astrophotography I would suggest moving to the Z6 over choosing a current DSLR.
Mirrorless is the way of the future. And the Z6 will yield lower noise than most, if not all, of Nikon’s cropped-frame cameras.

For owners of current Nikon DSLRs, especially a 24-megapixel camera such as the D750, moving to a Z6 will not provide a significant improvement in image quality for still images.
But … it will provide 4K video and much better low-light video performance than older DSLRs. So if it is aurora videos you are after, the Z6 will work well, though not quite as well as a Sony alpha.
In all, there’s little downside to the Z6 for astrophotography, and some significant advantages: low noise, bright live view, clean artifact-free sensor images, touchscreen convenience, silent shooting, low-light 4K video, all in a lighter weight body than most full-frame DSLRs.
I highly recommend the Nikon Z6.
— Alan, April 30, 2019 / © 2019 Alan Dyer / AmazingSky.com
