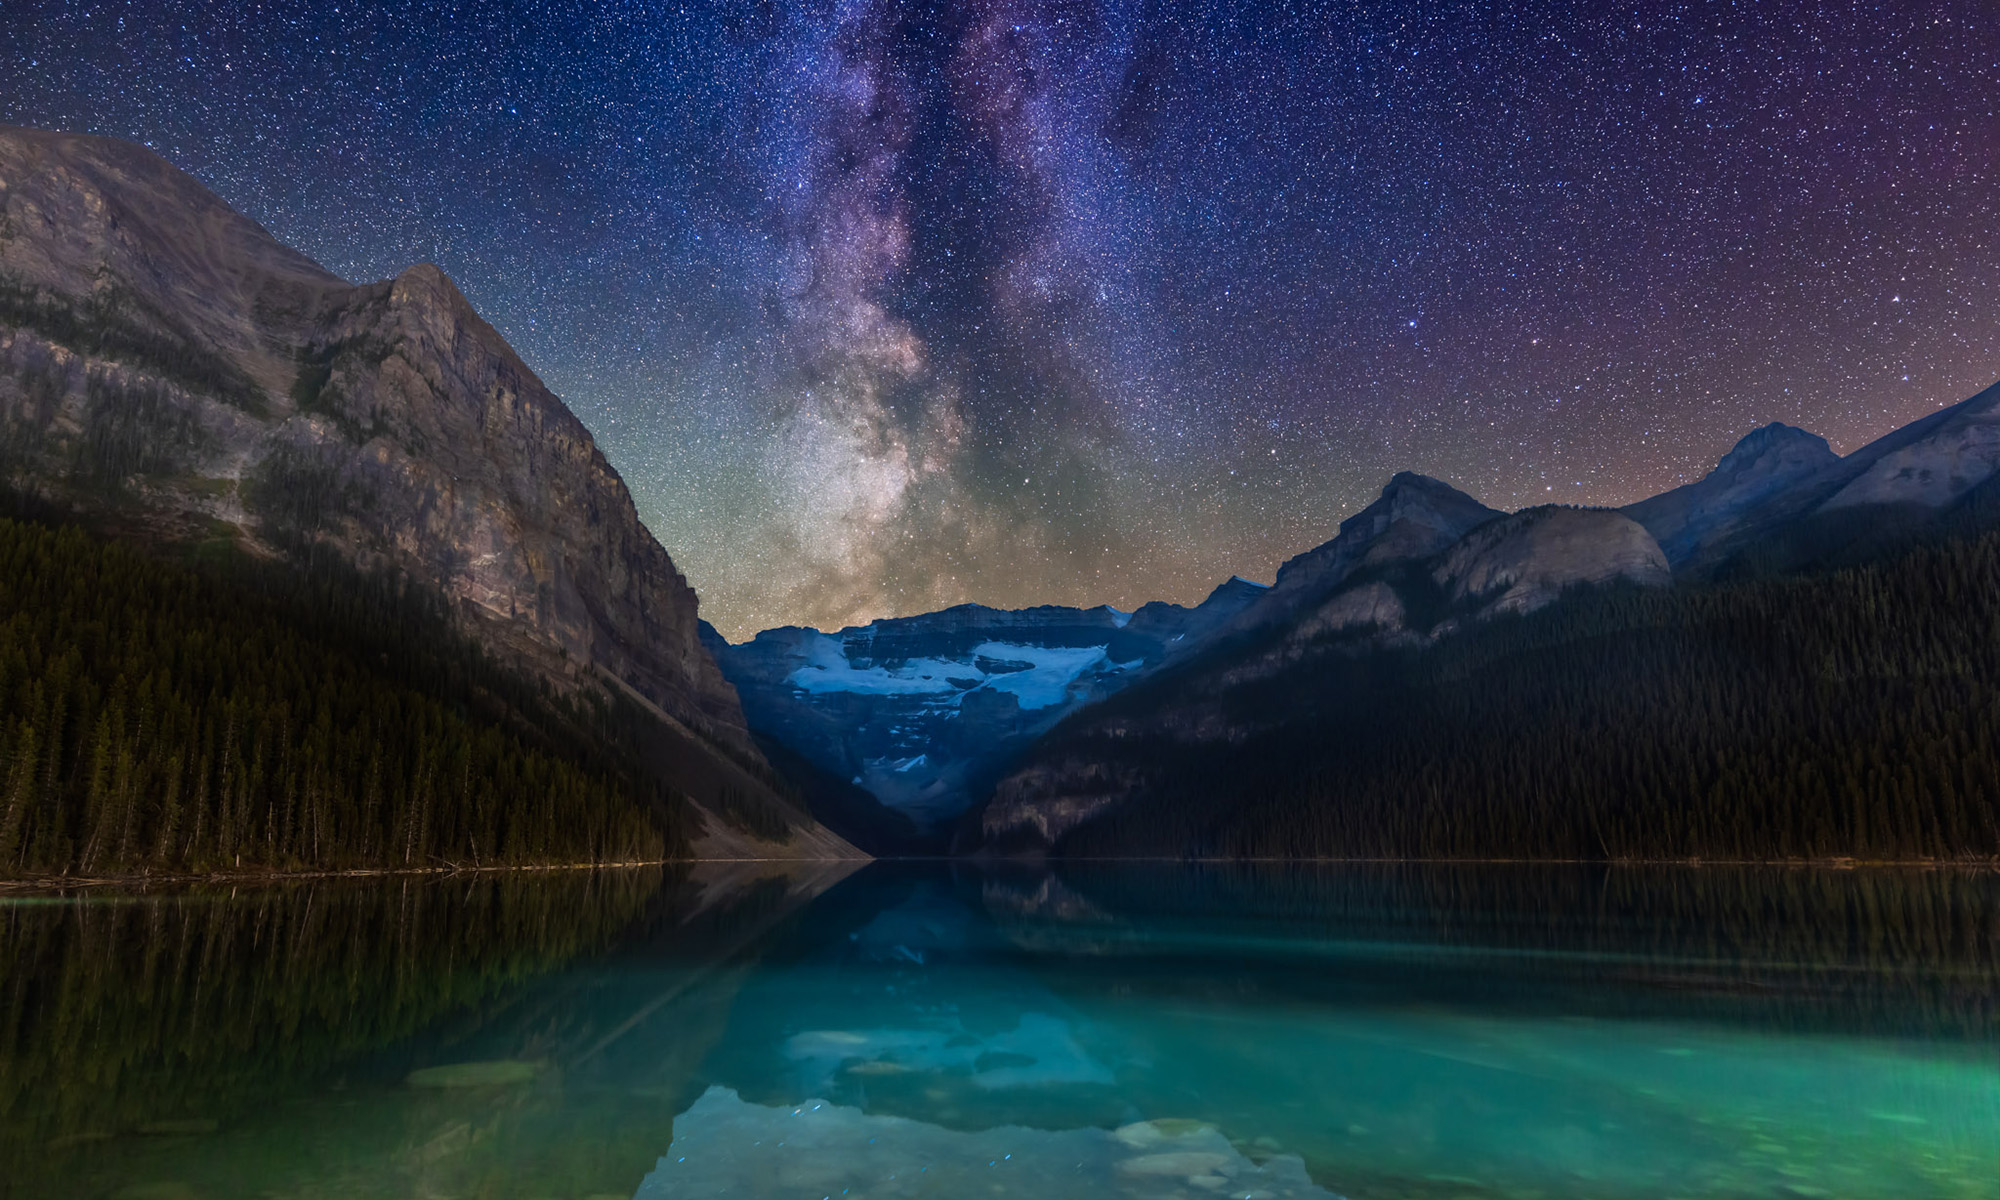
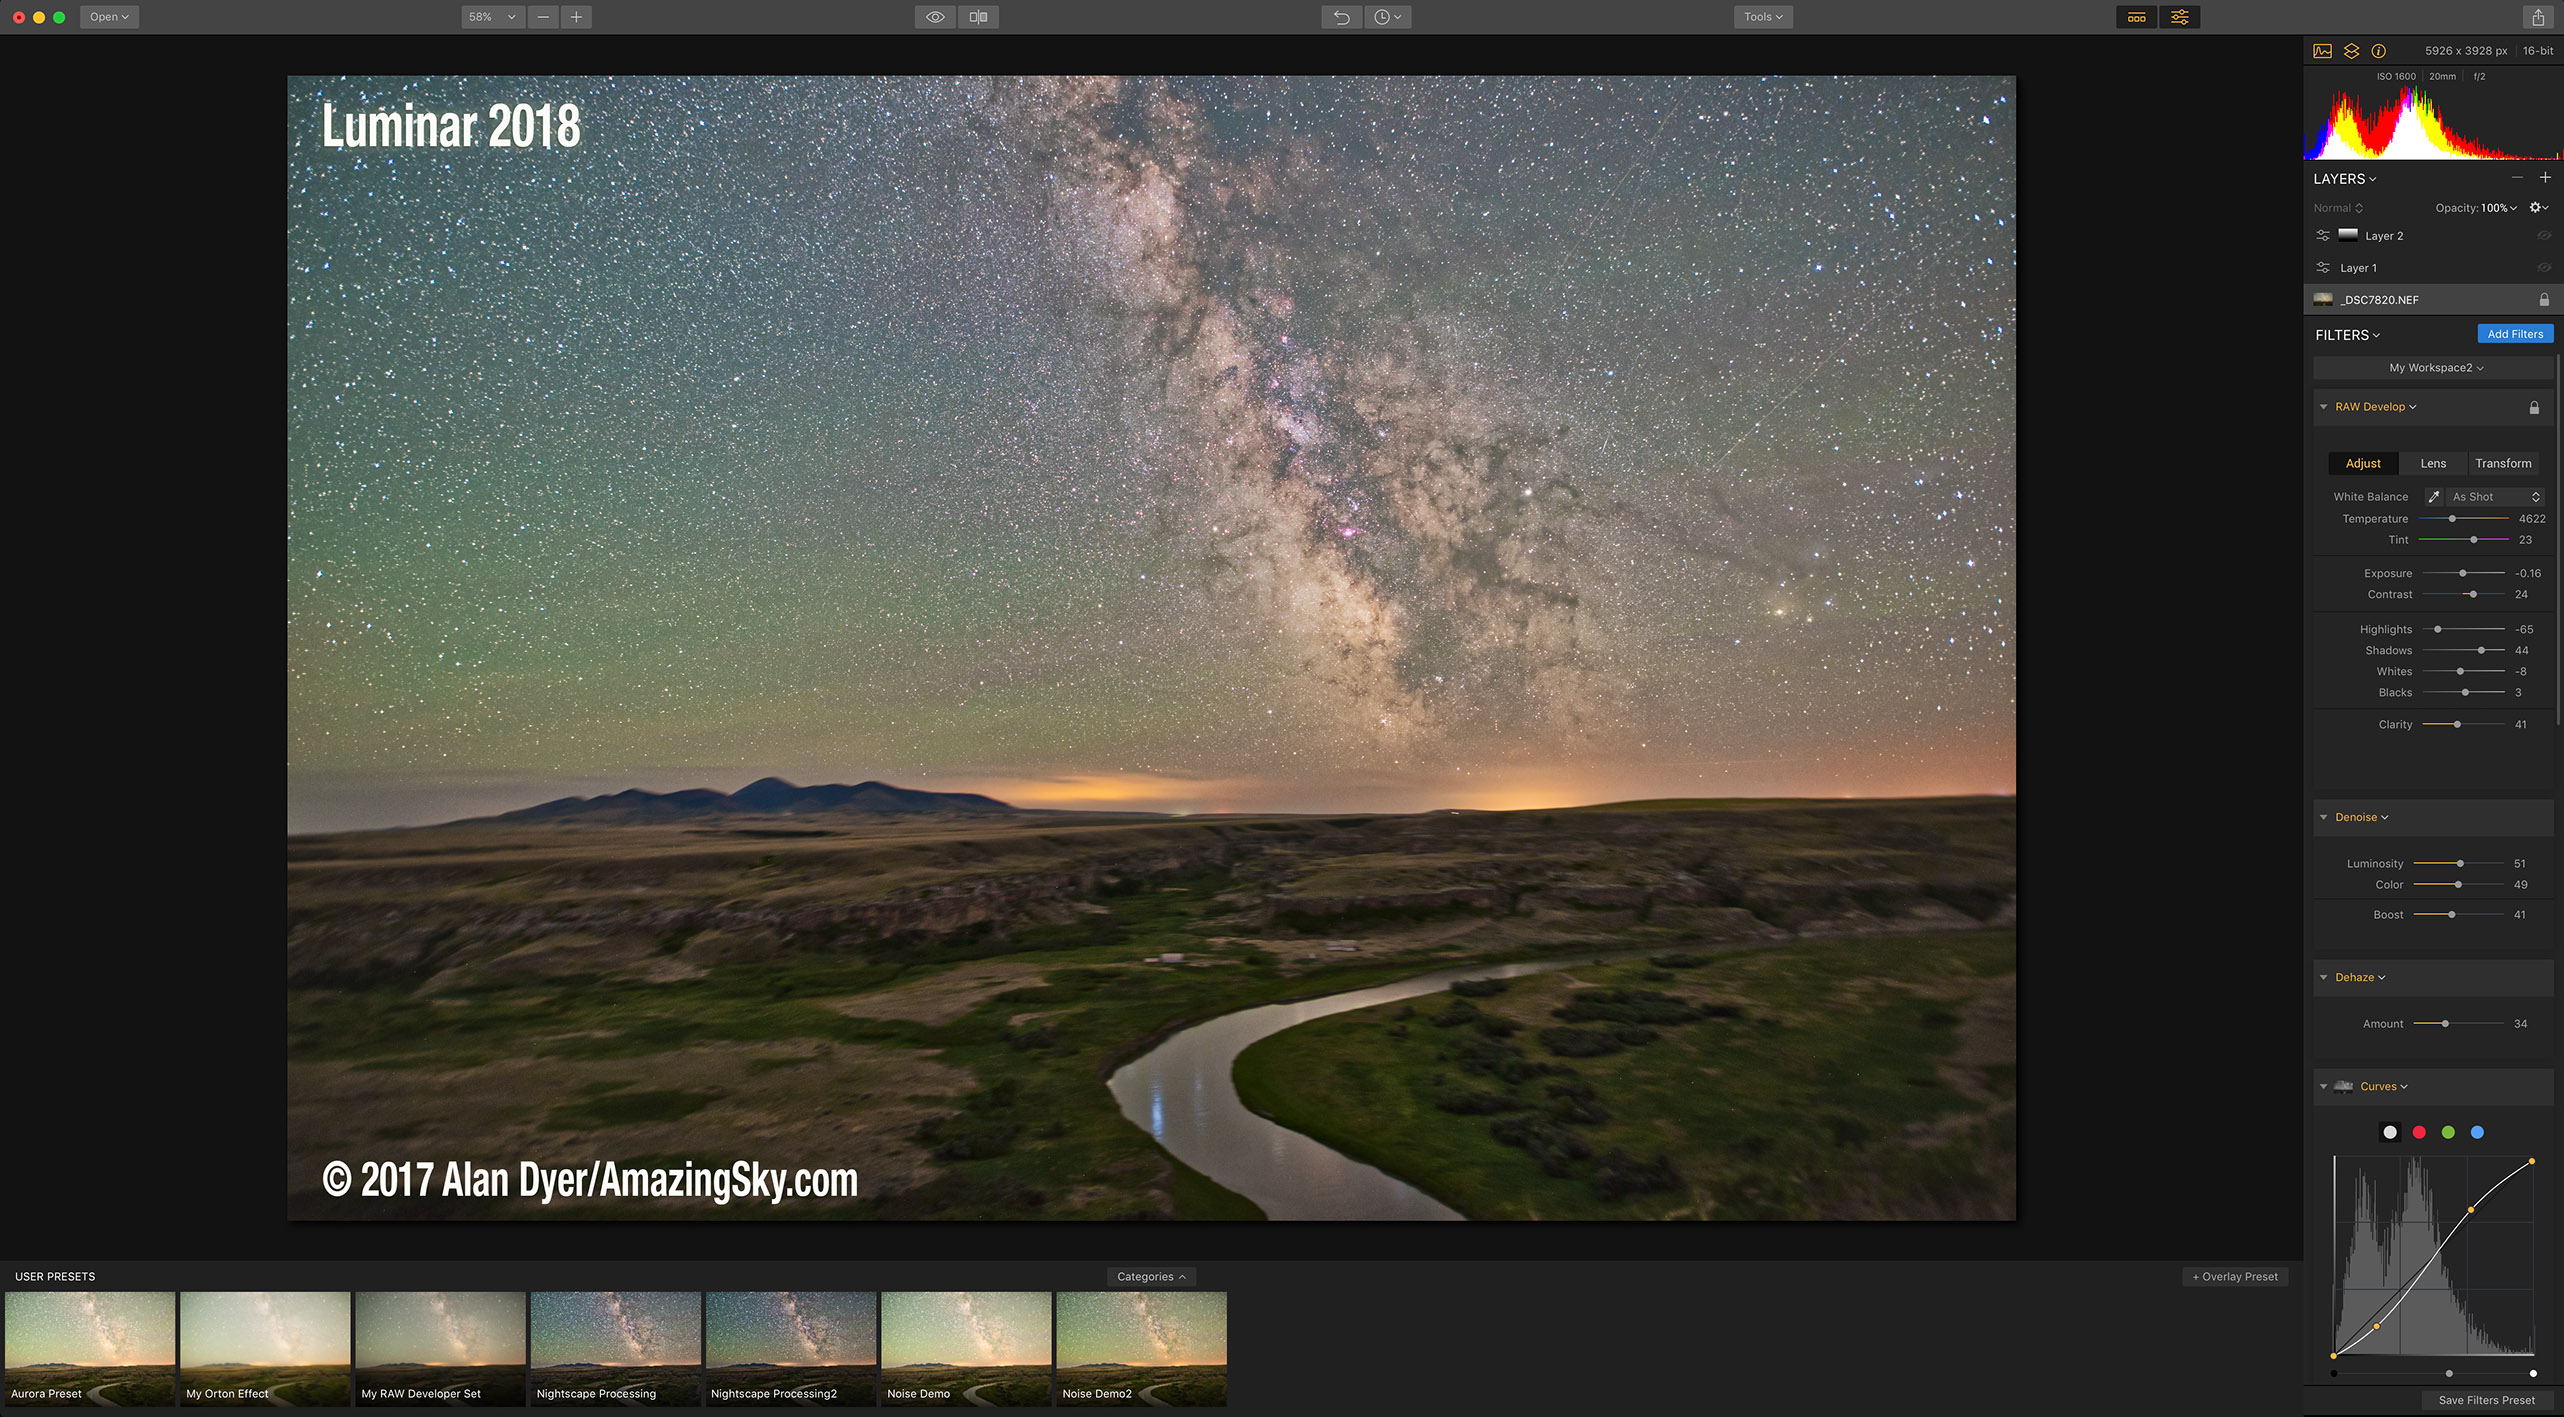
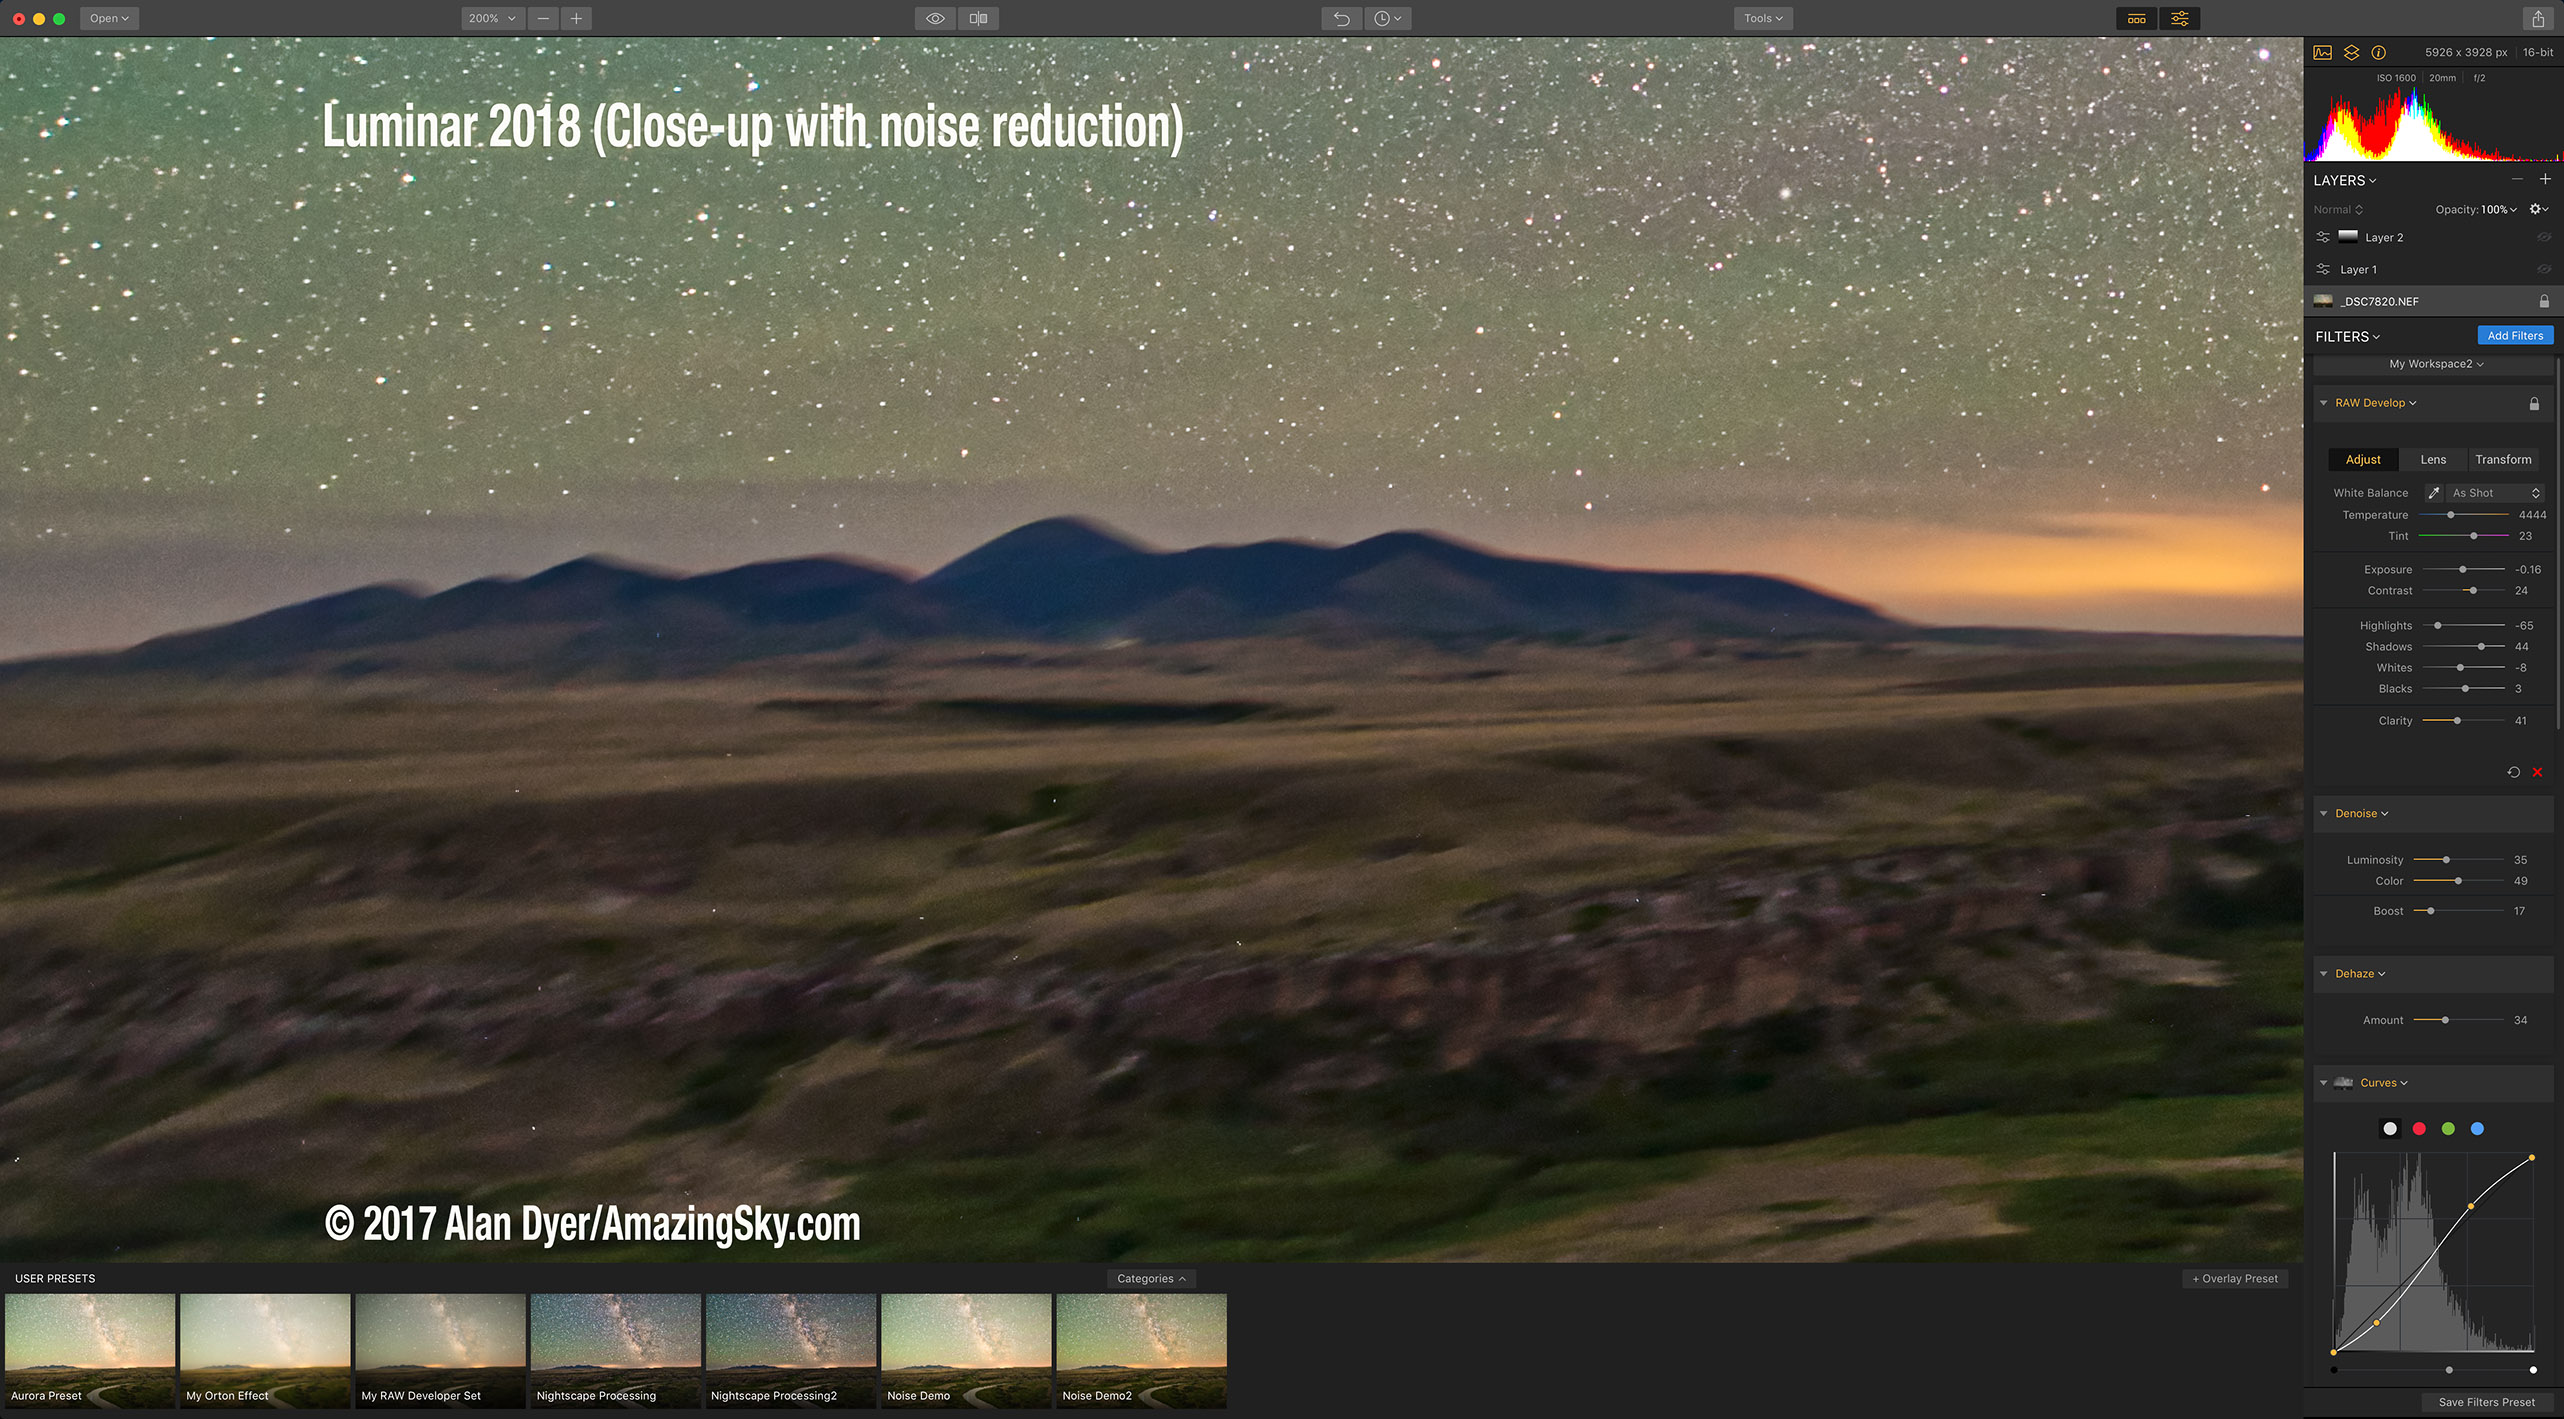
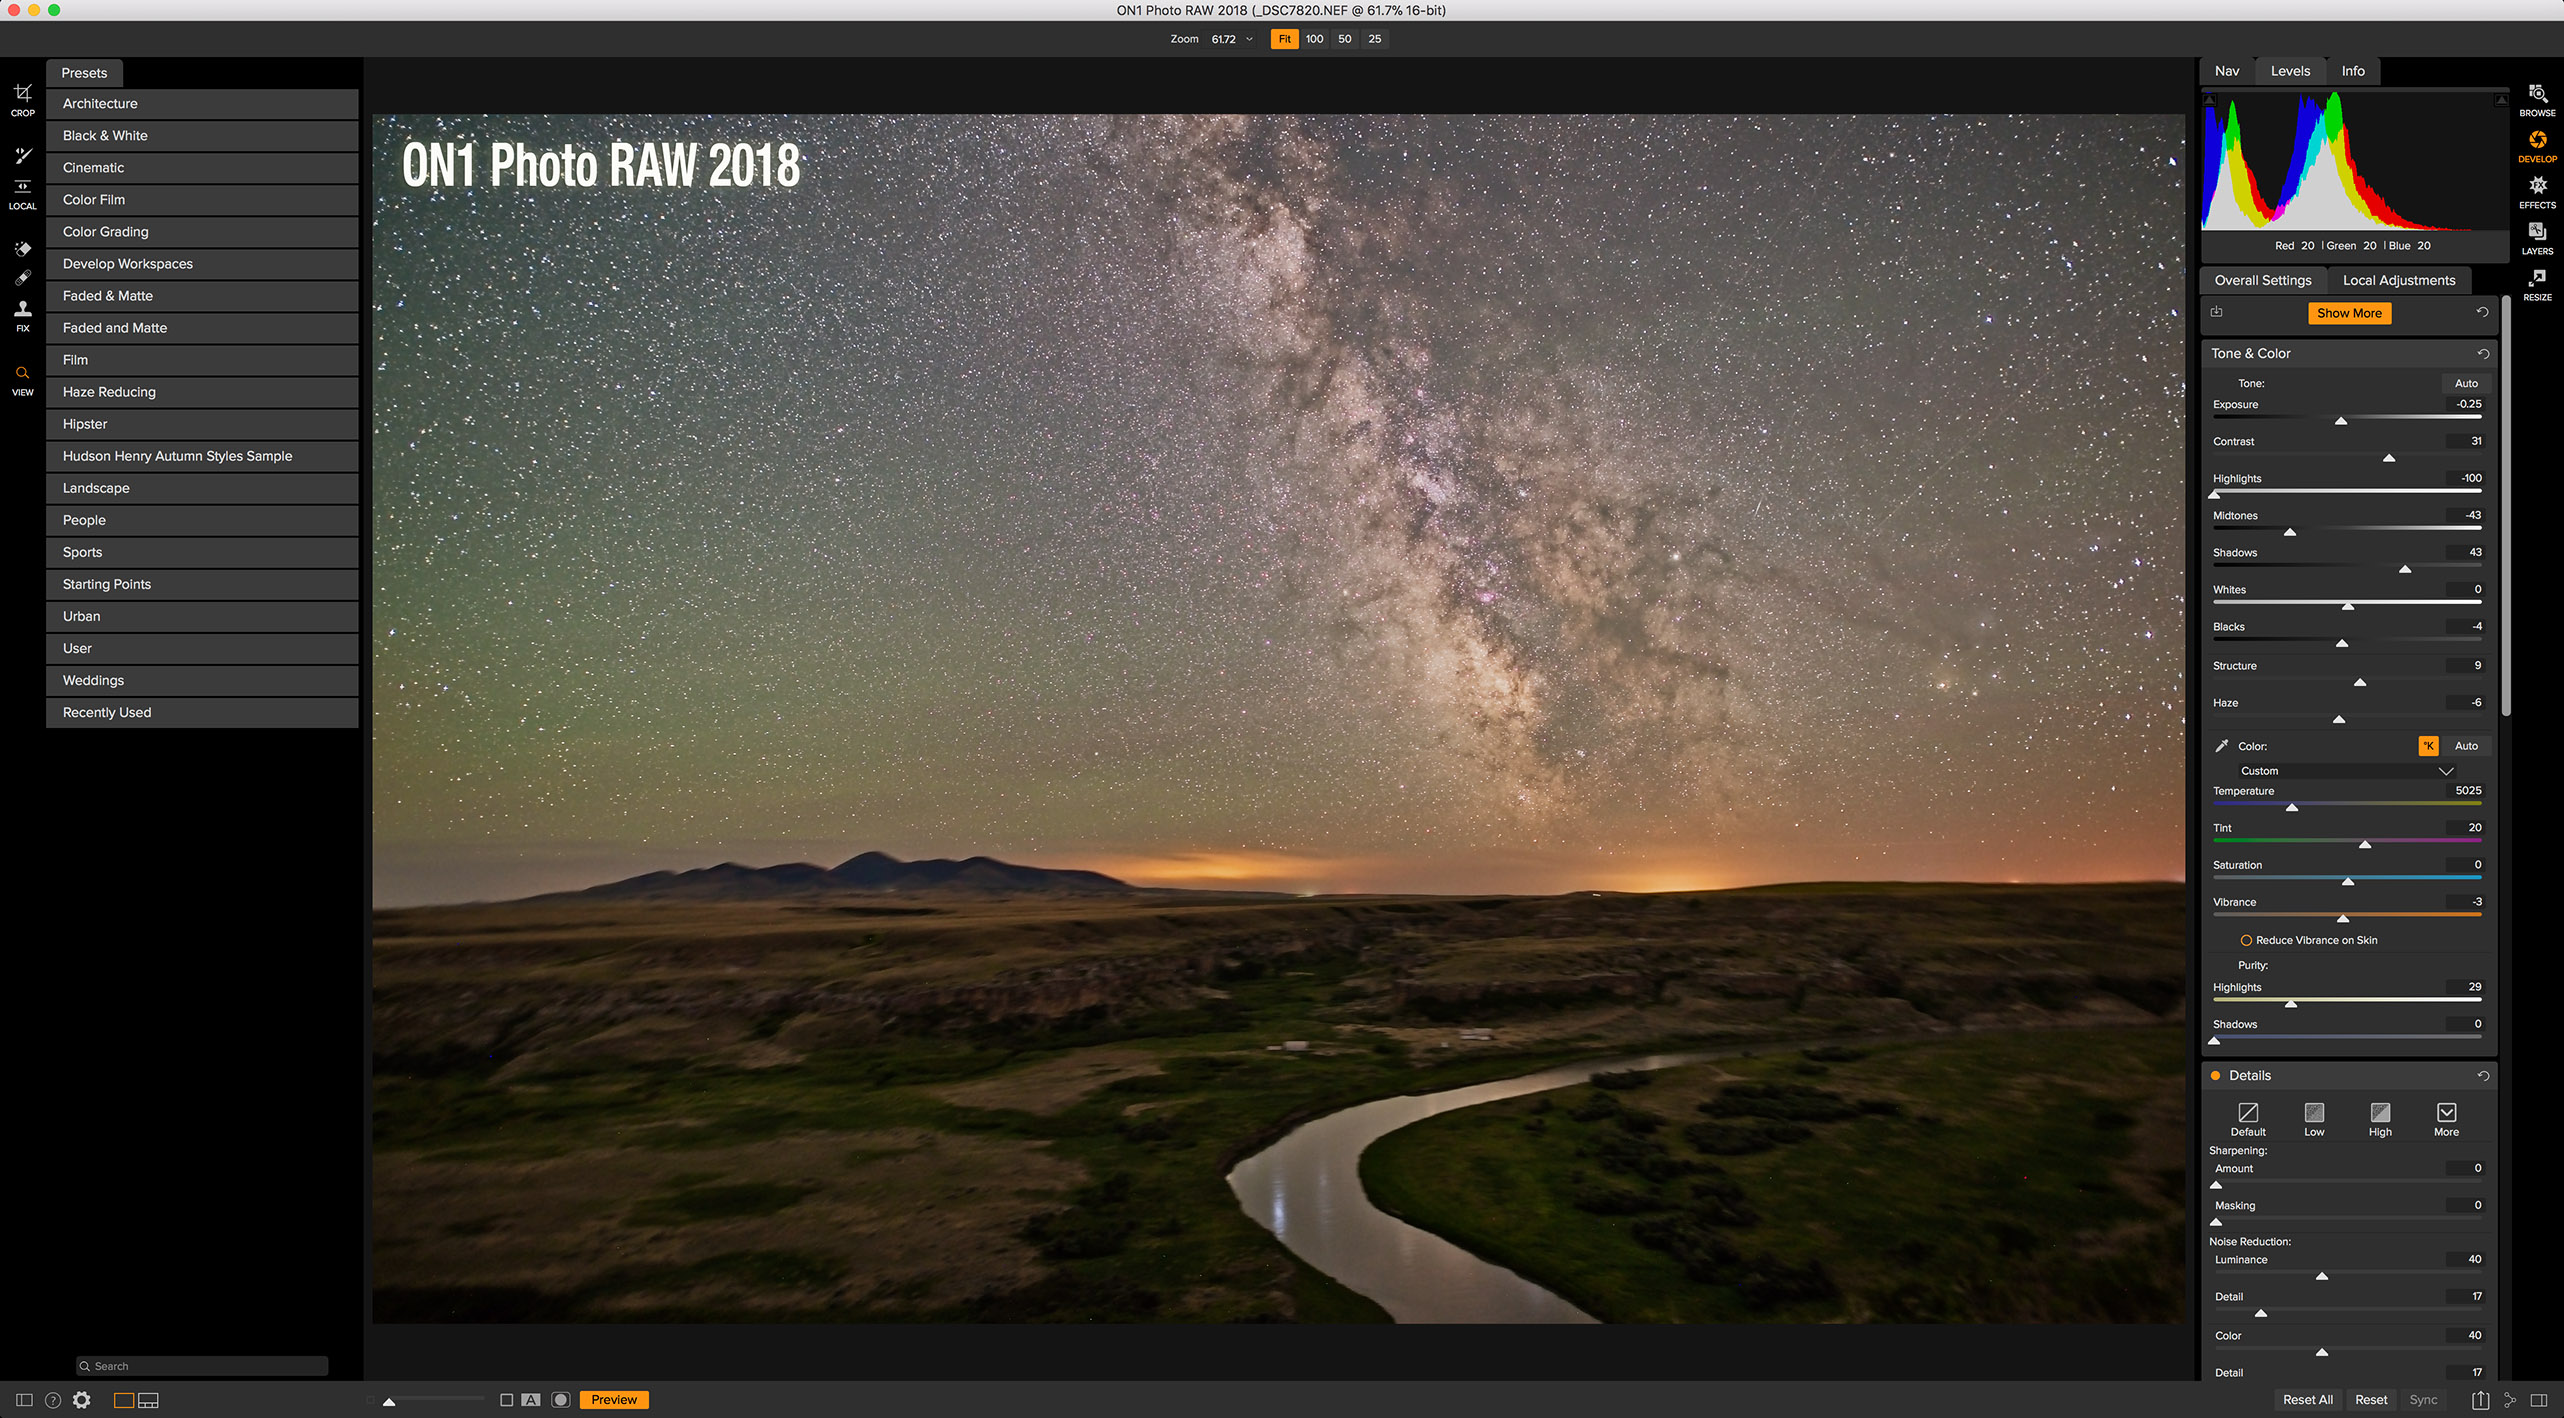
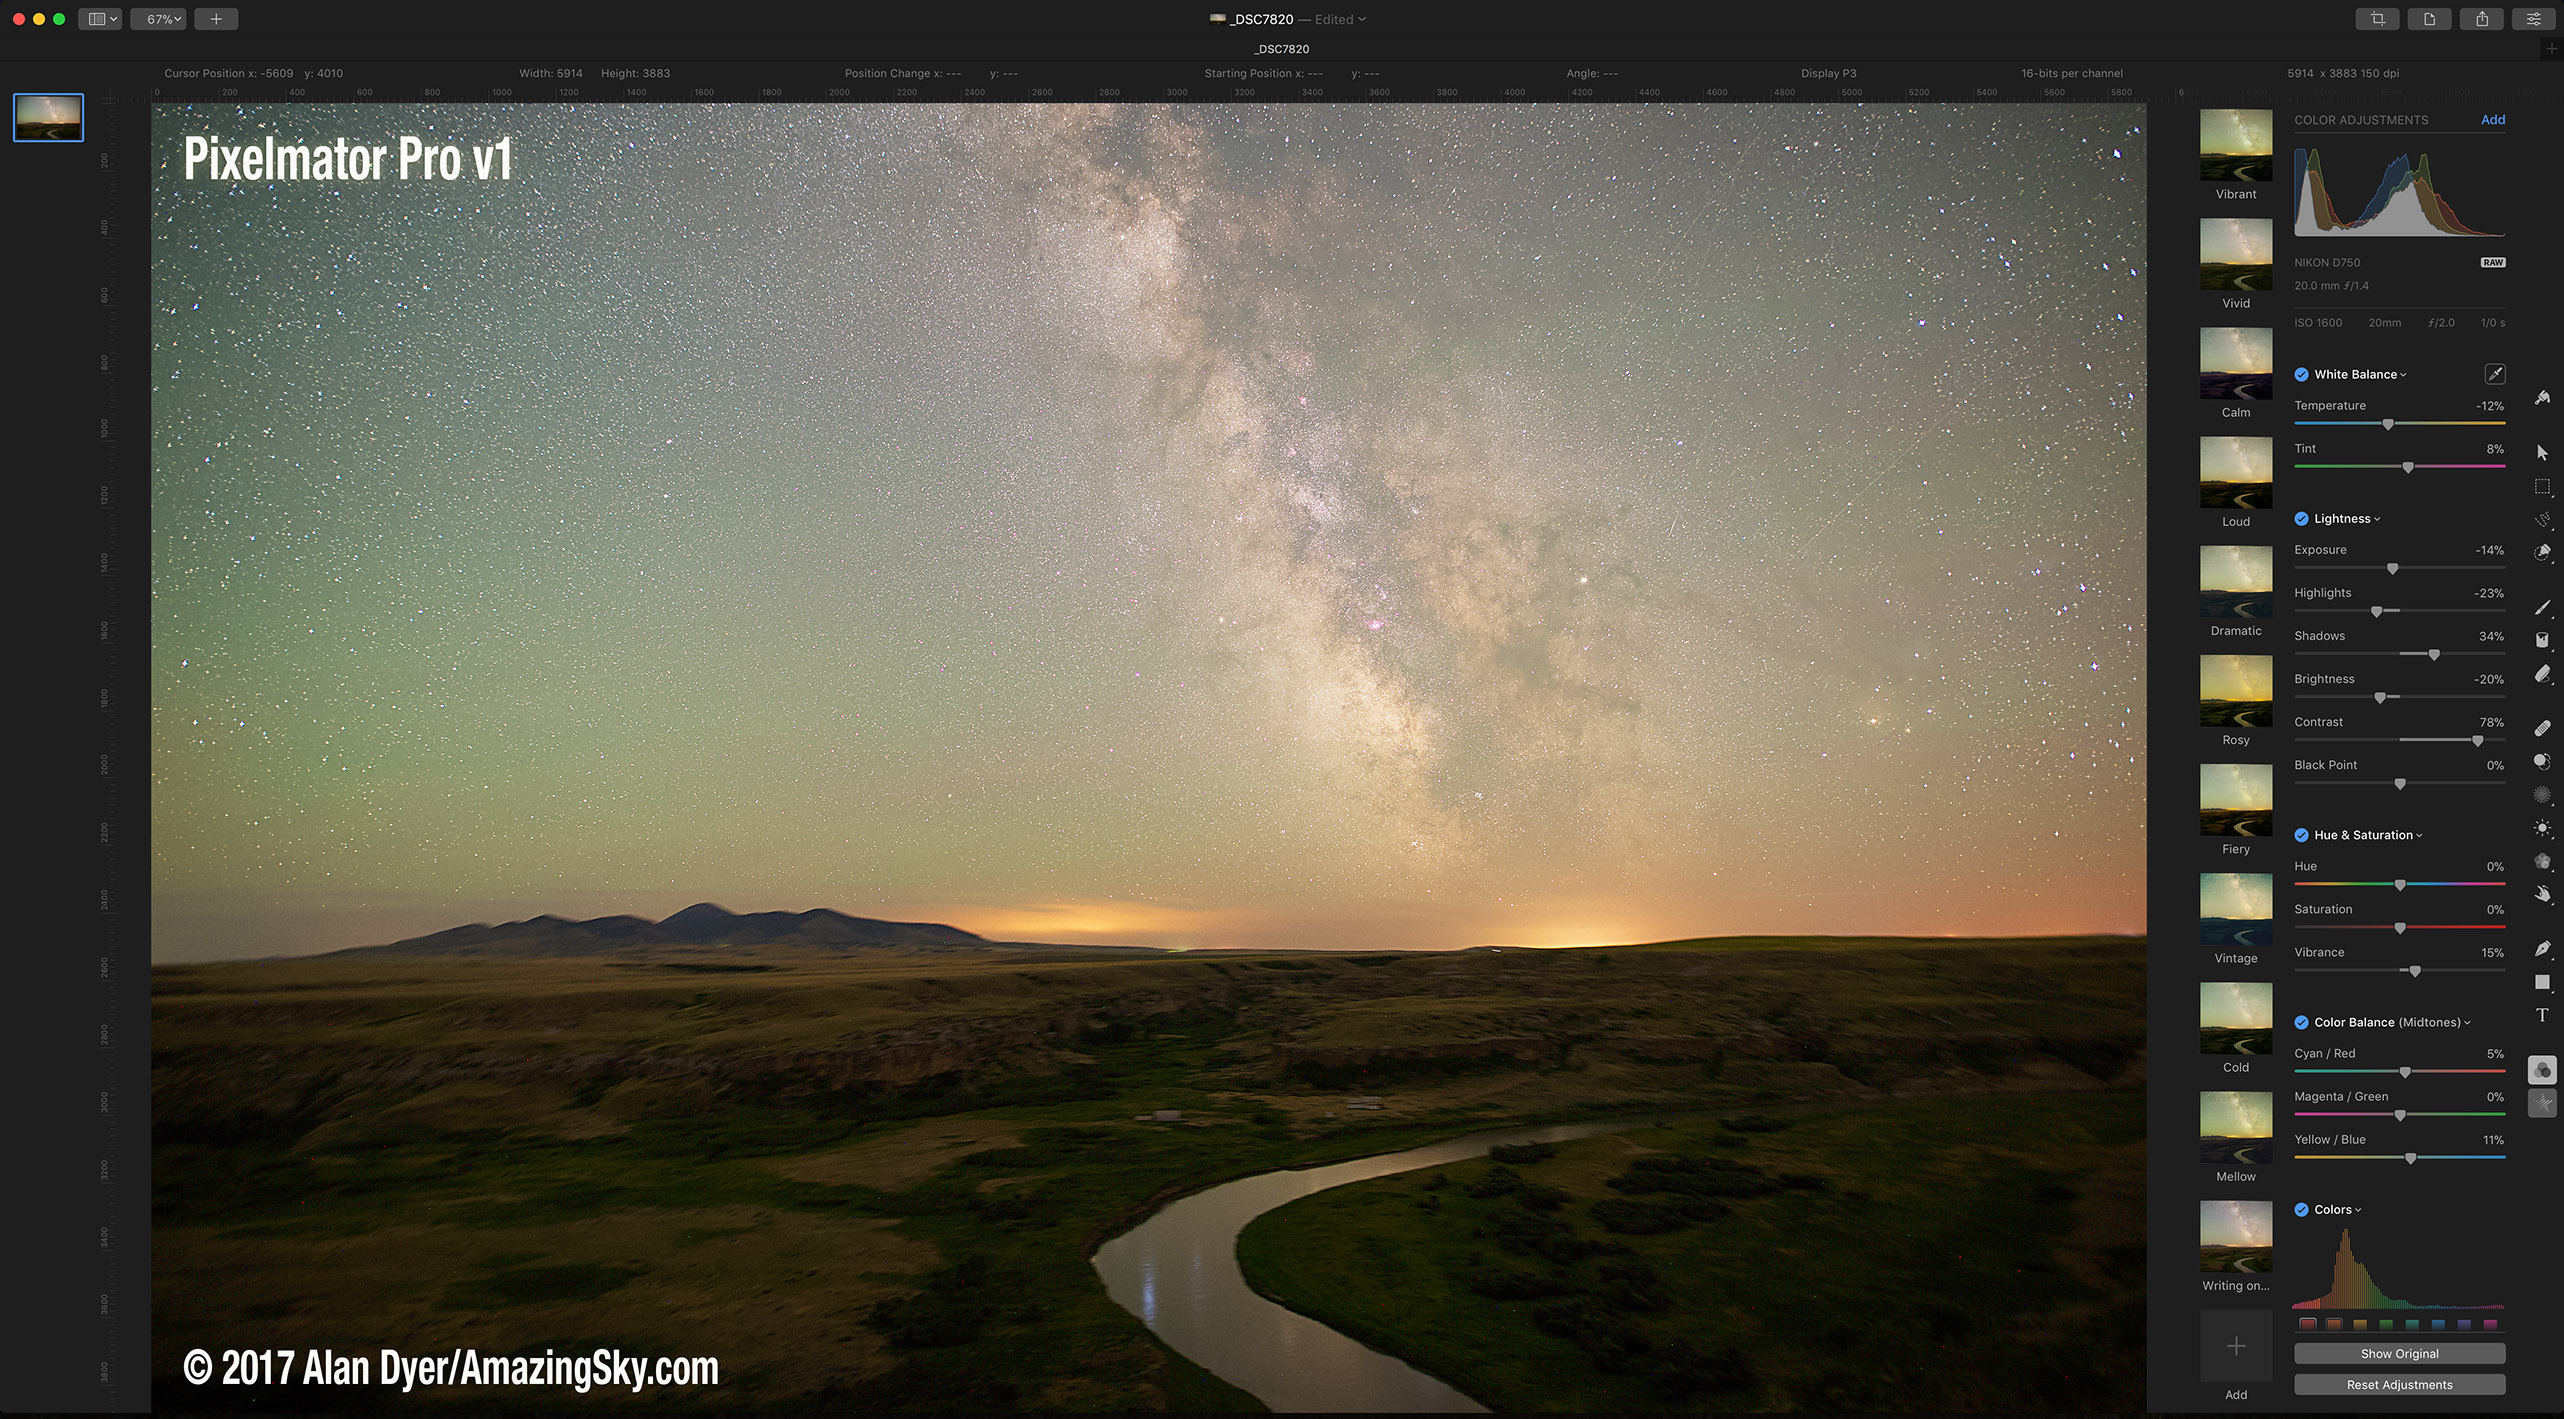
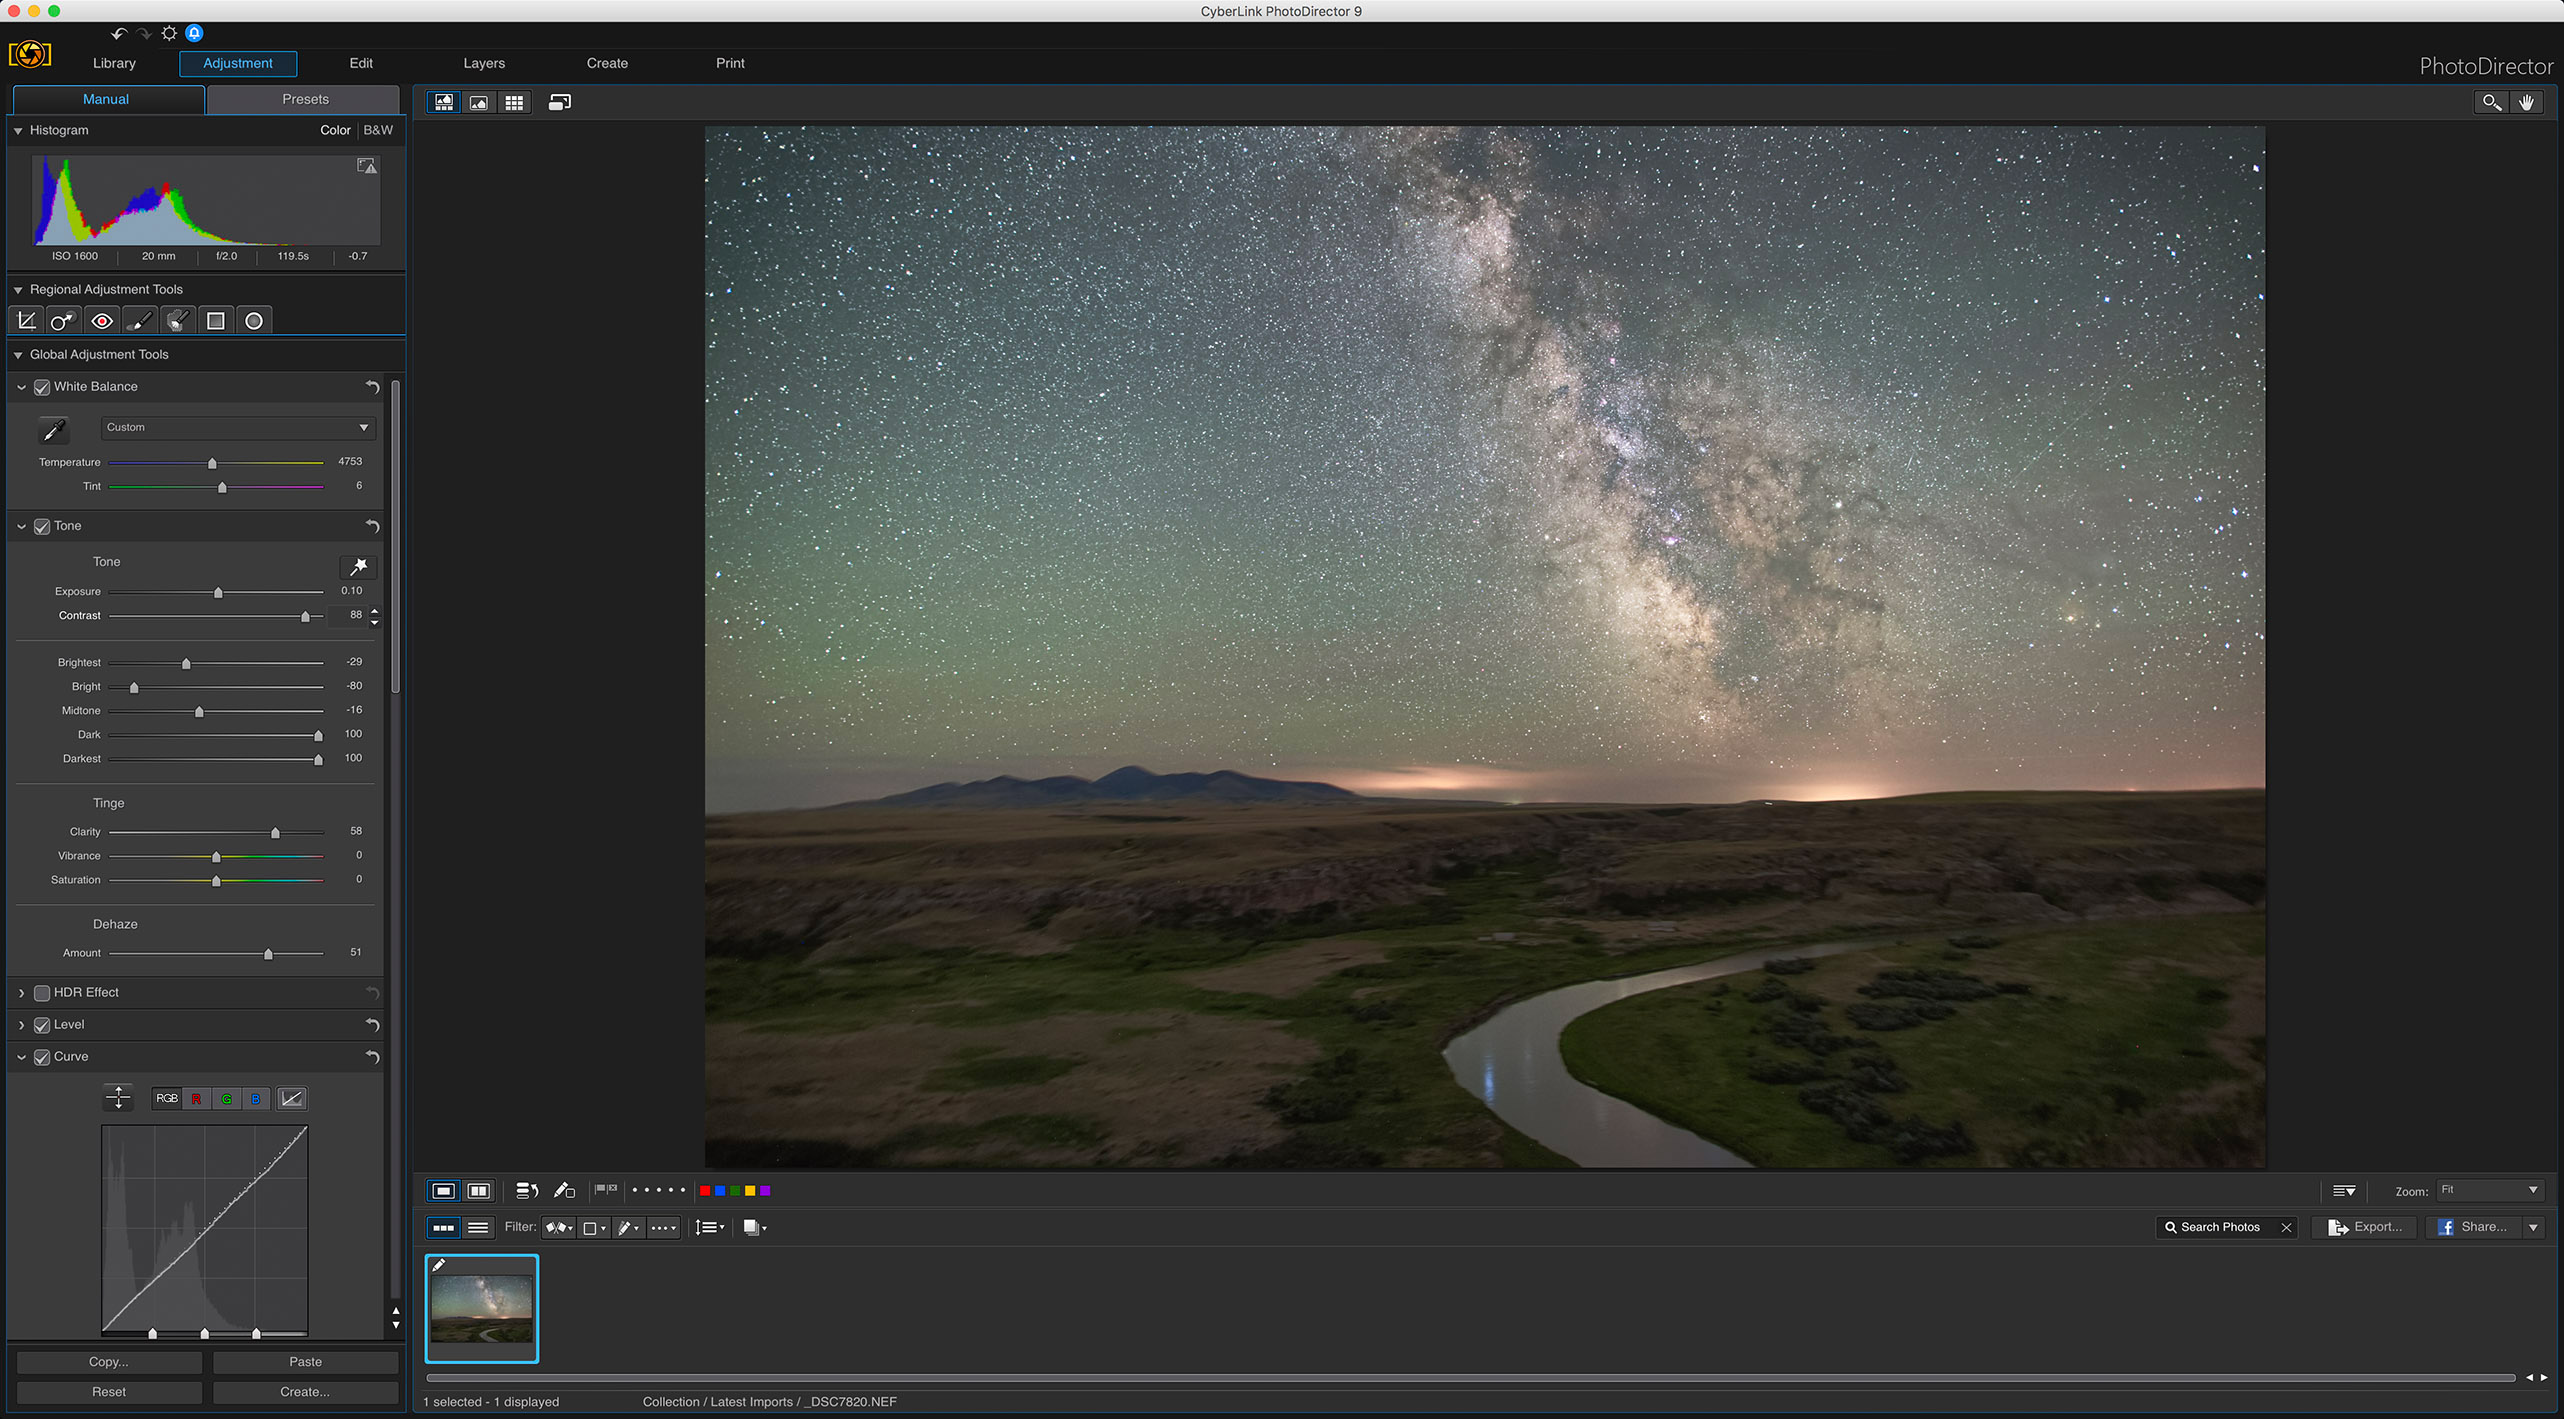
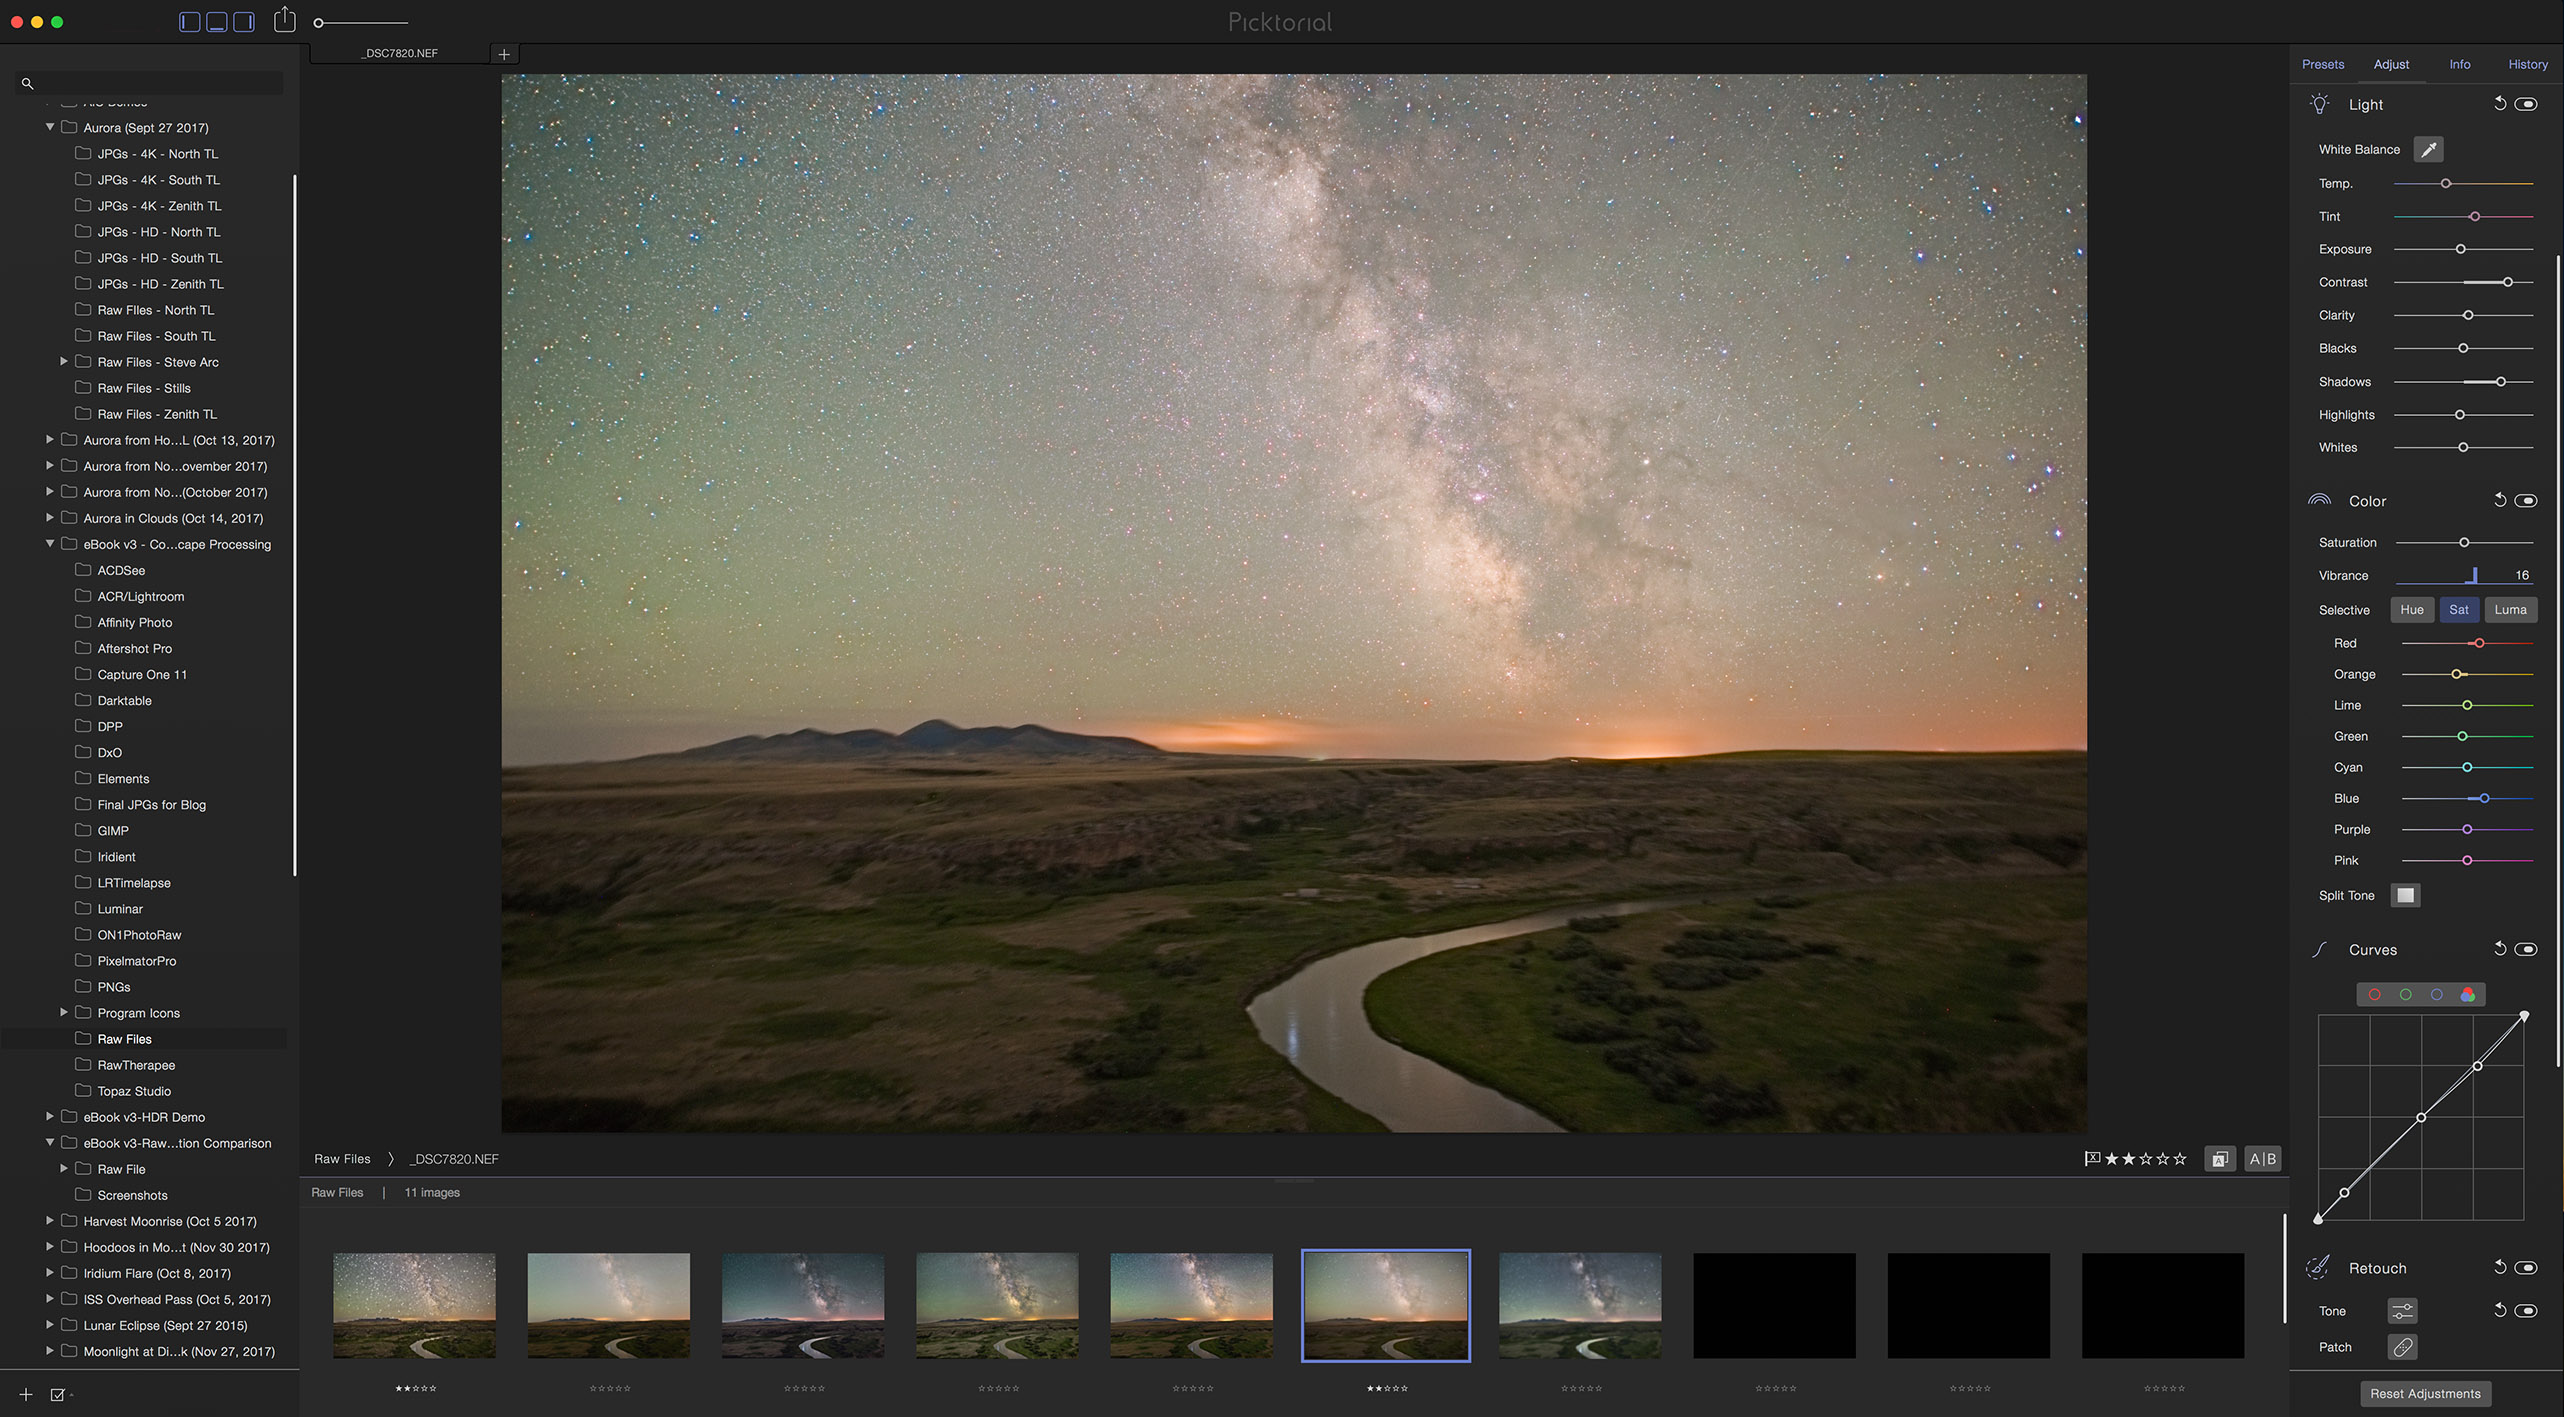
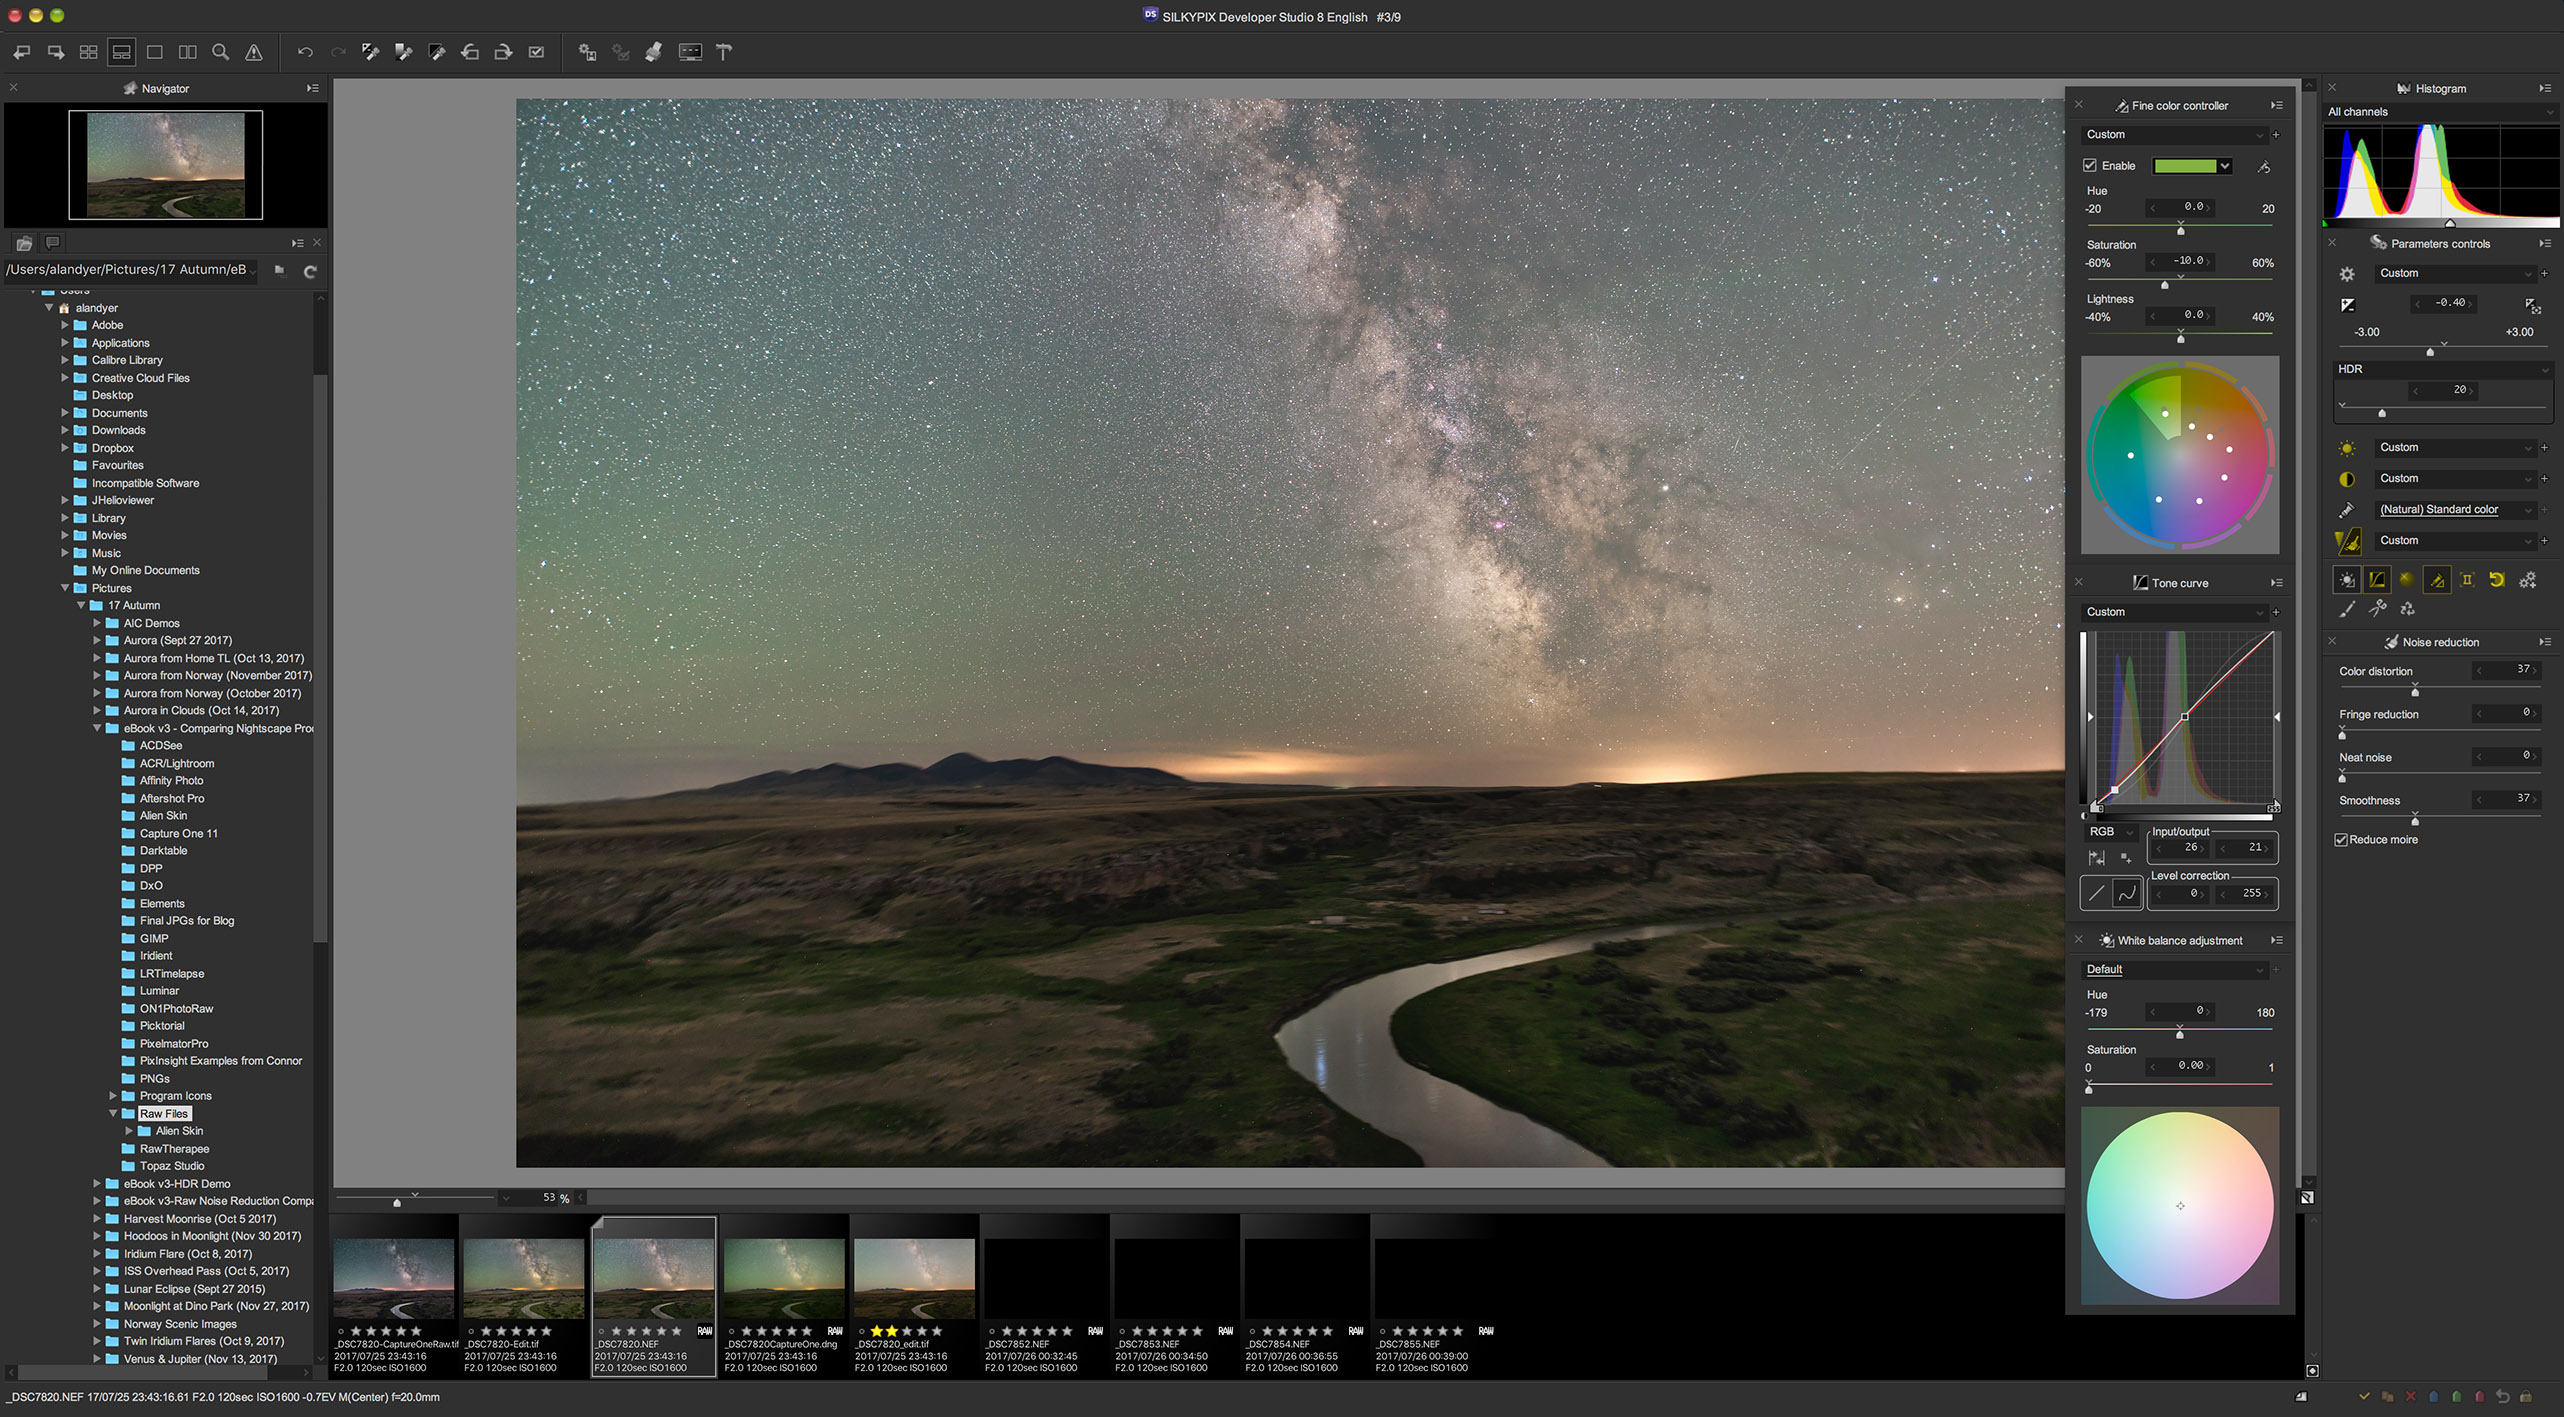
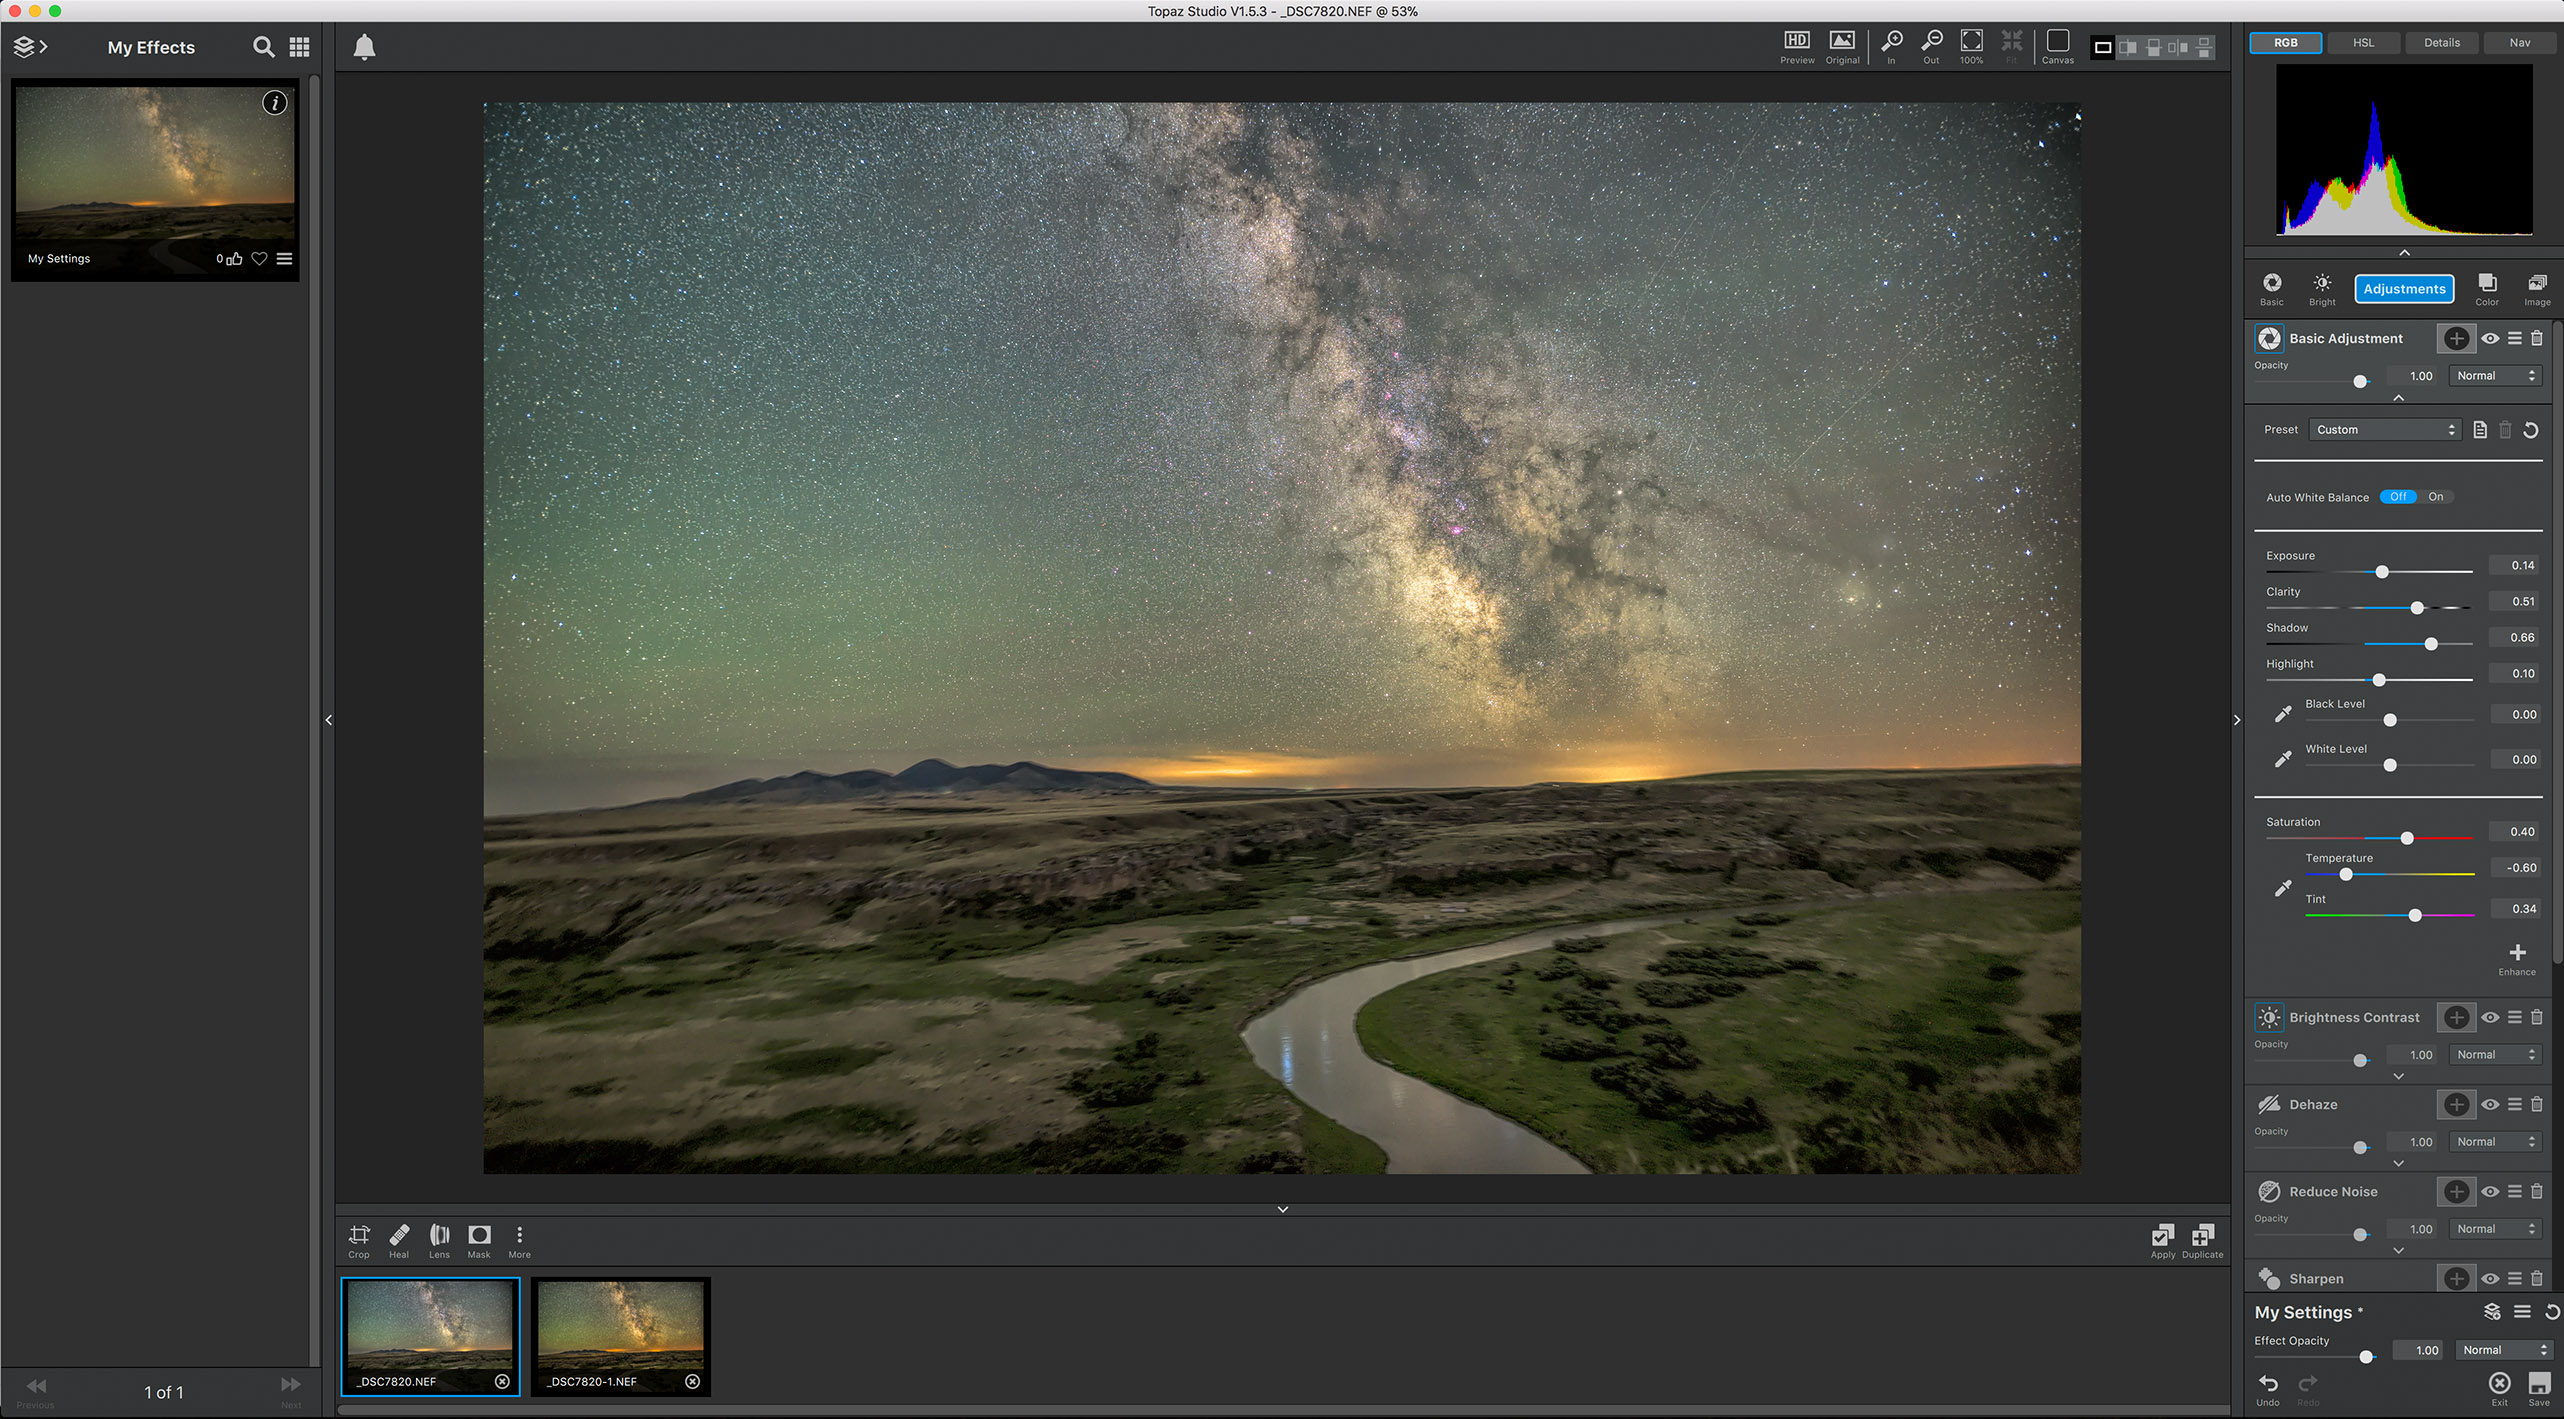
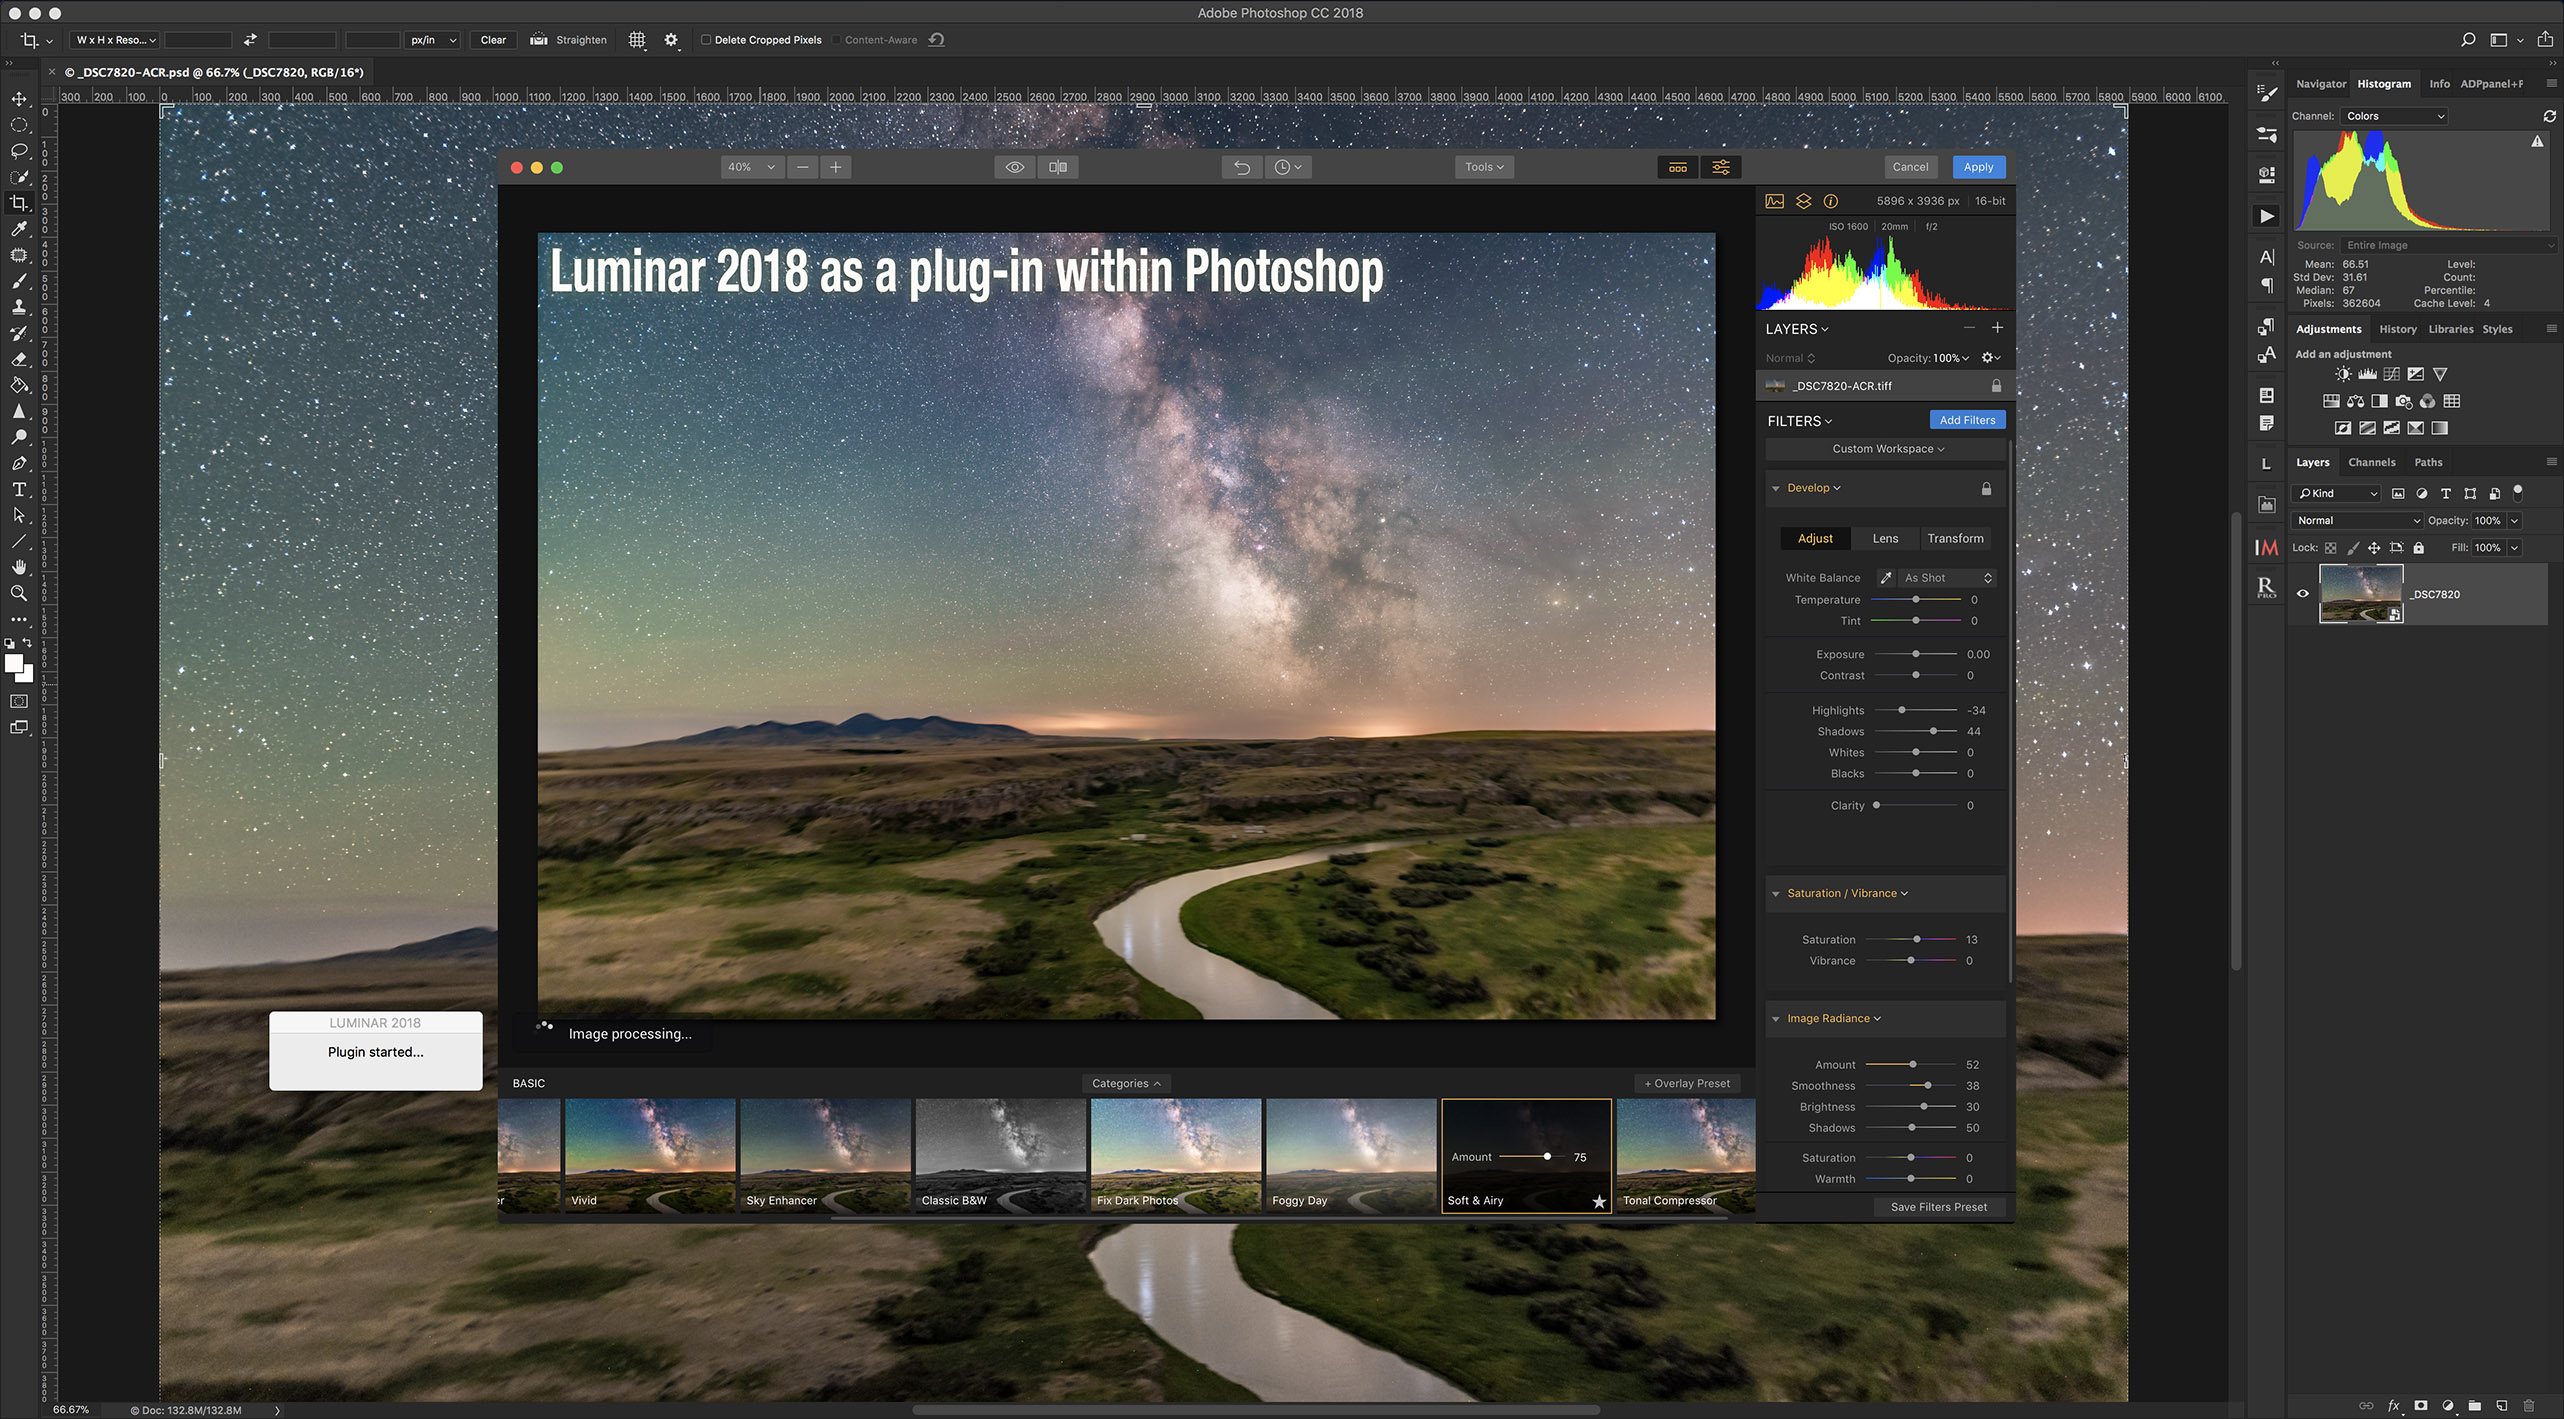
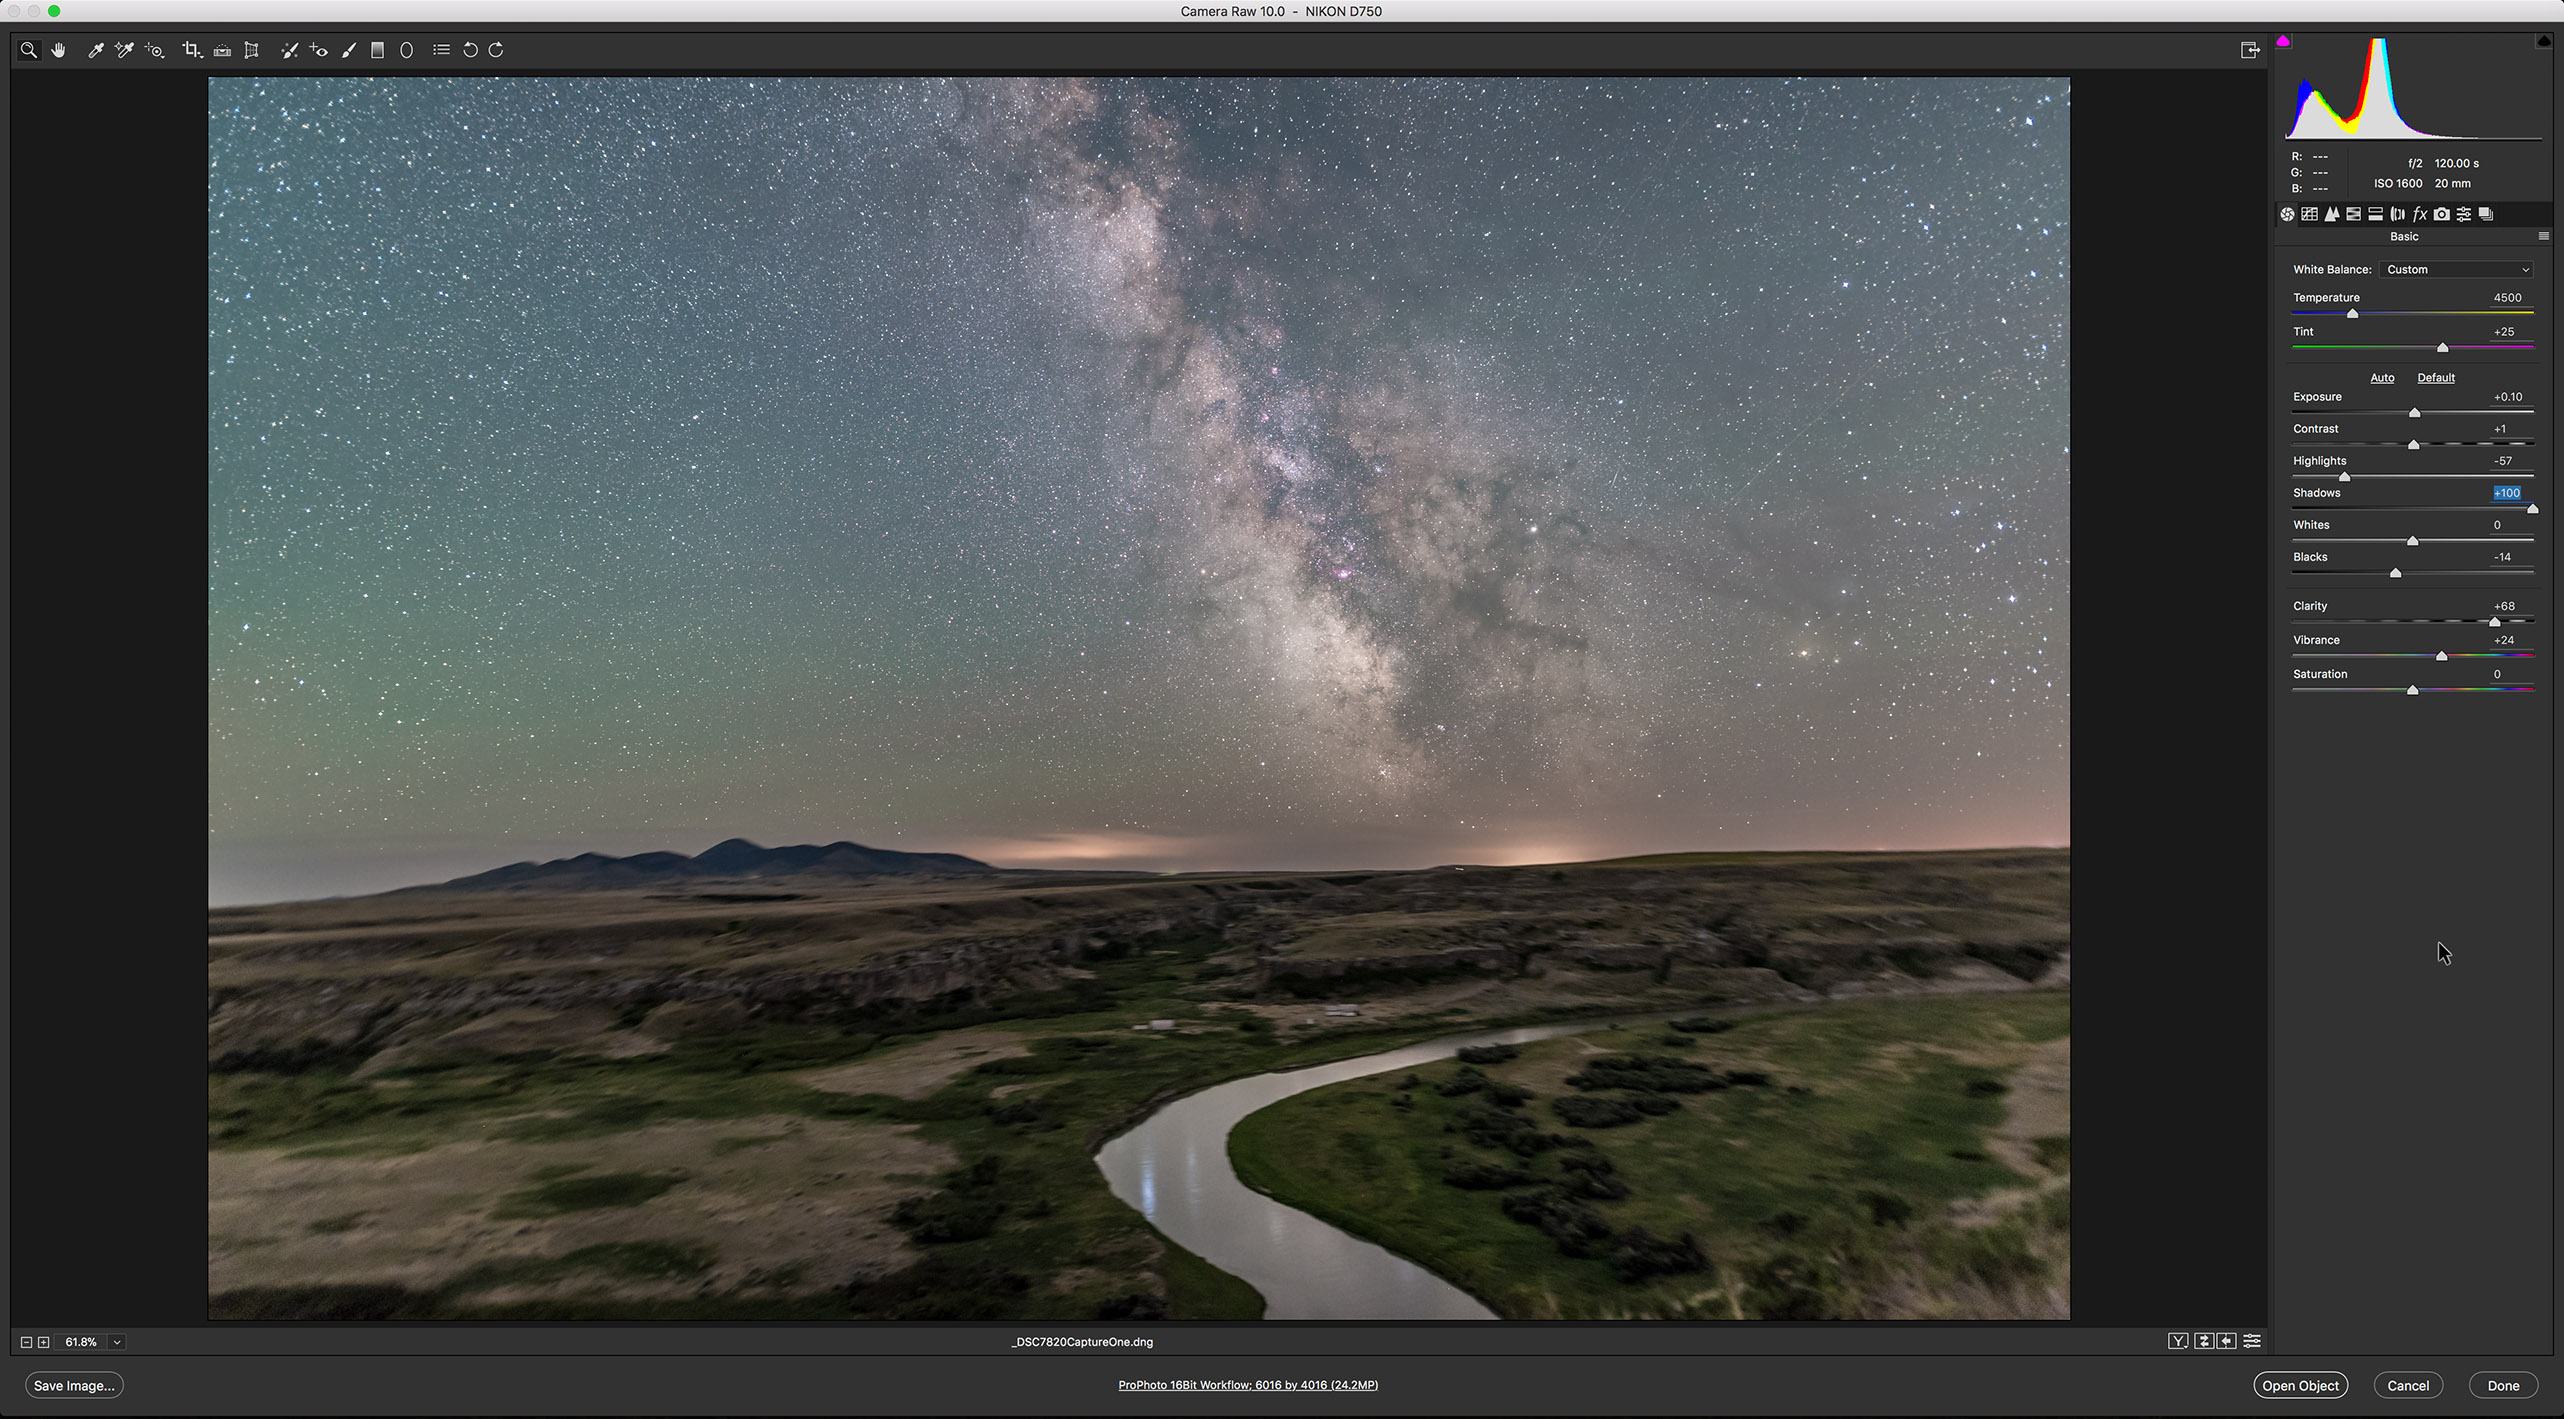
Testing AI Noise Reduction Software for Astrophotography


AI-based noise reduction programs continue to improve, to provide remarkable results on many images. But โ€ฆ how well do they work on star-filled astrophotos? 

In late 2022 I published a comparison of noise reduction programs current at that time. Itโ€™s here on my Amazing Sky blog. 

As we know, software evolves rapidly. So hereโ€™s my latest look at versions of those programs current of as May 2024, plus new entries into the category, all with a focus on how well they perform on a variety of astrophotos. Only two programs tested here, NoiseXTerminator and GraXpert, are specifically designed to be used on astrophotos, primarily telescopic images of deep-sky objects. 

The other programs on test are general purpose, for use on noisy images such as wildlife photos shot at high ISOs to freeze motion, or any photos shot under low light. But the latter includes nightscapes. 

I tested programs in three categories, defined primarily by how they are used in a processing workflow:

  1. General programs usable only on Raw files at the start of a workflow: 
  • Adobe DeNoise AI from within Adobe Camera Raw (v16.3) or Lightroom (v13.3)
  • DxO PureRAW 4 (v4.1), a stand-alone app only
  1. General programs usable as stand-alone apps on Raw files, but also as plug-ins for Photoshop for use later in a workflow (I tested both workflows):
  • Luminar Neo (v1.19.1) and its Noiseless AI filter
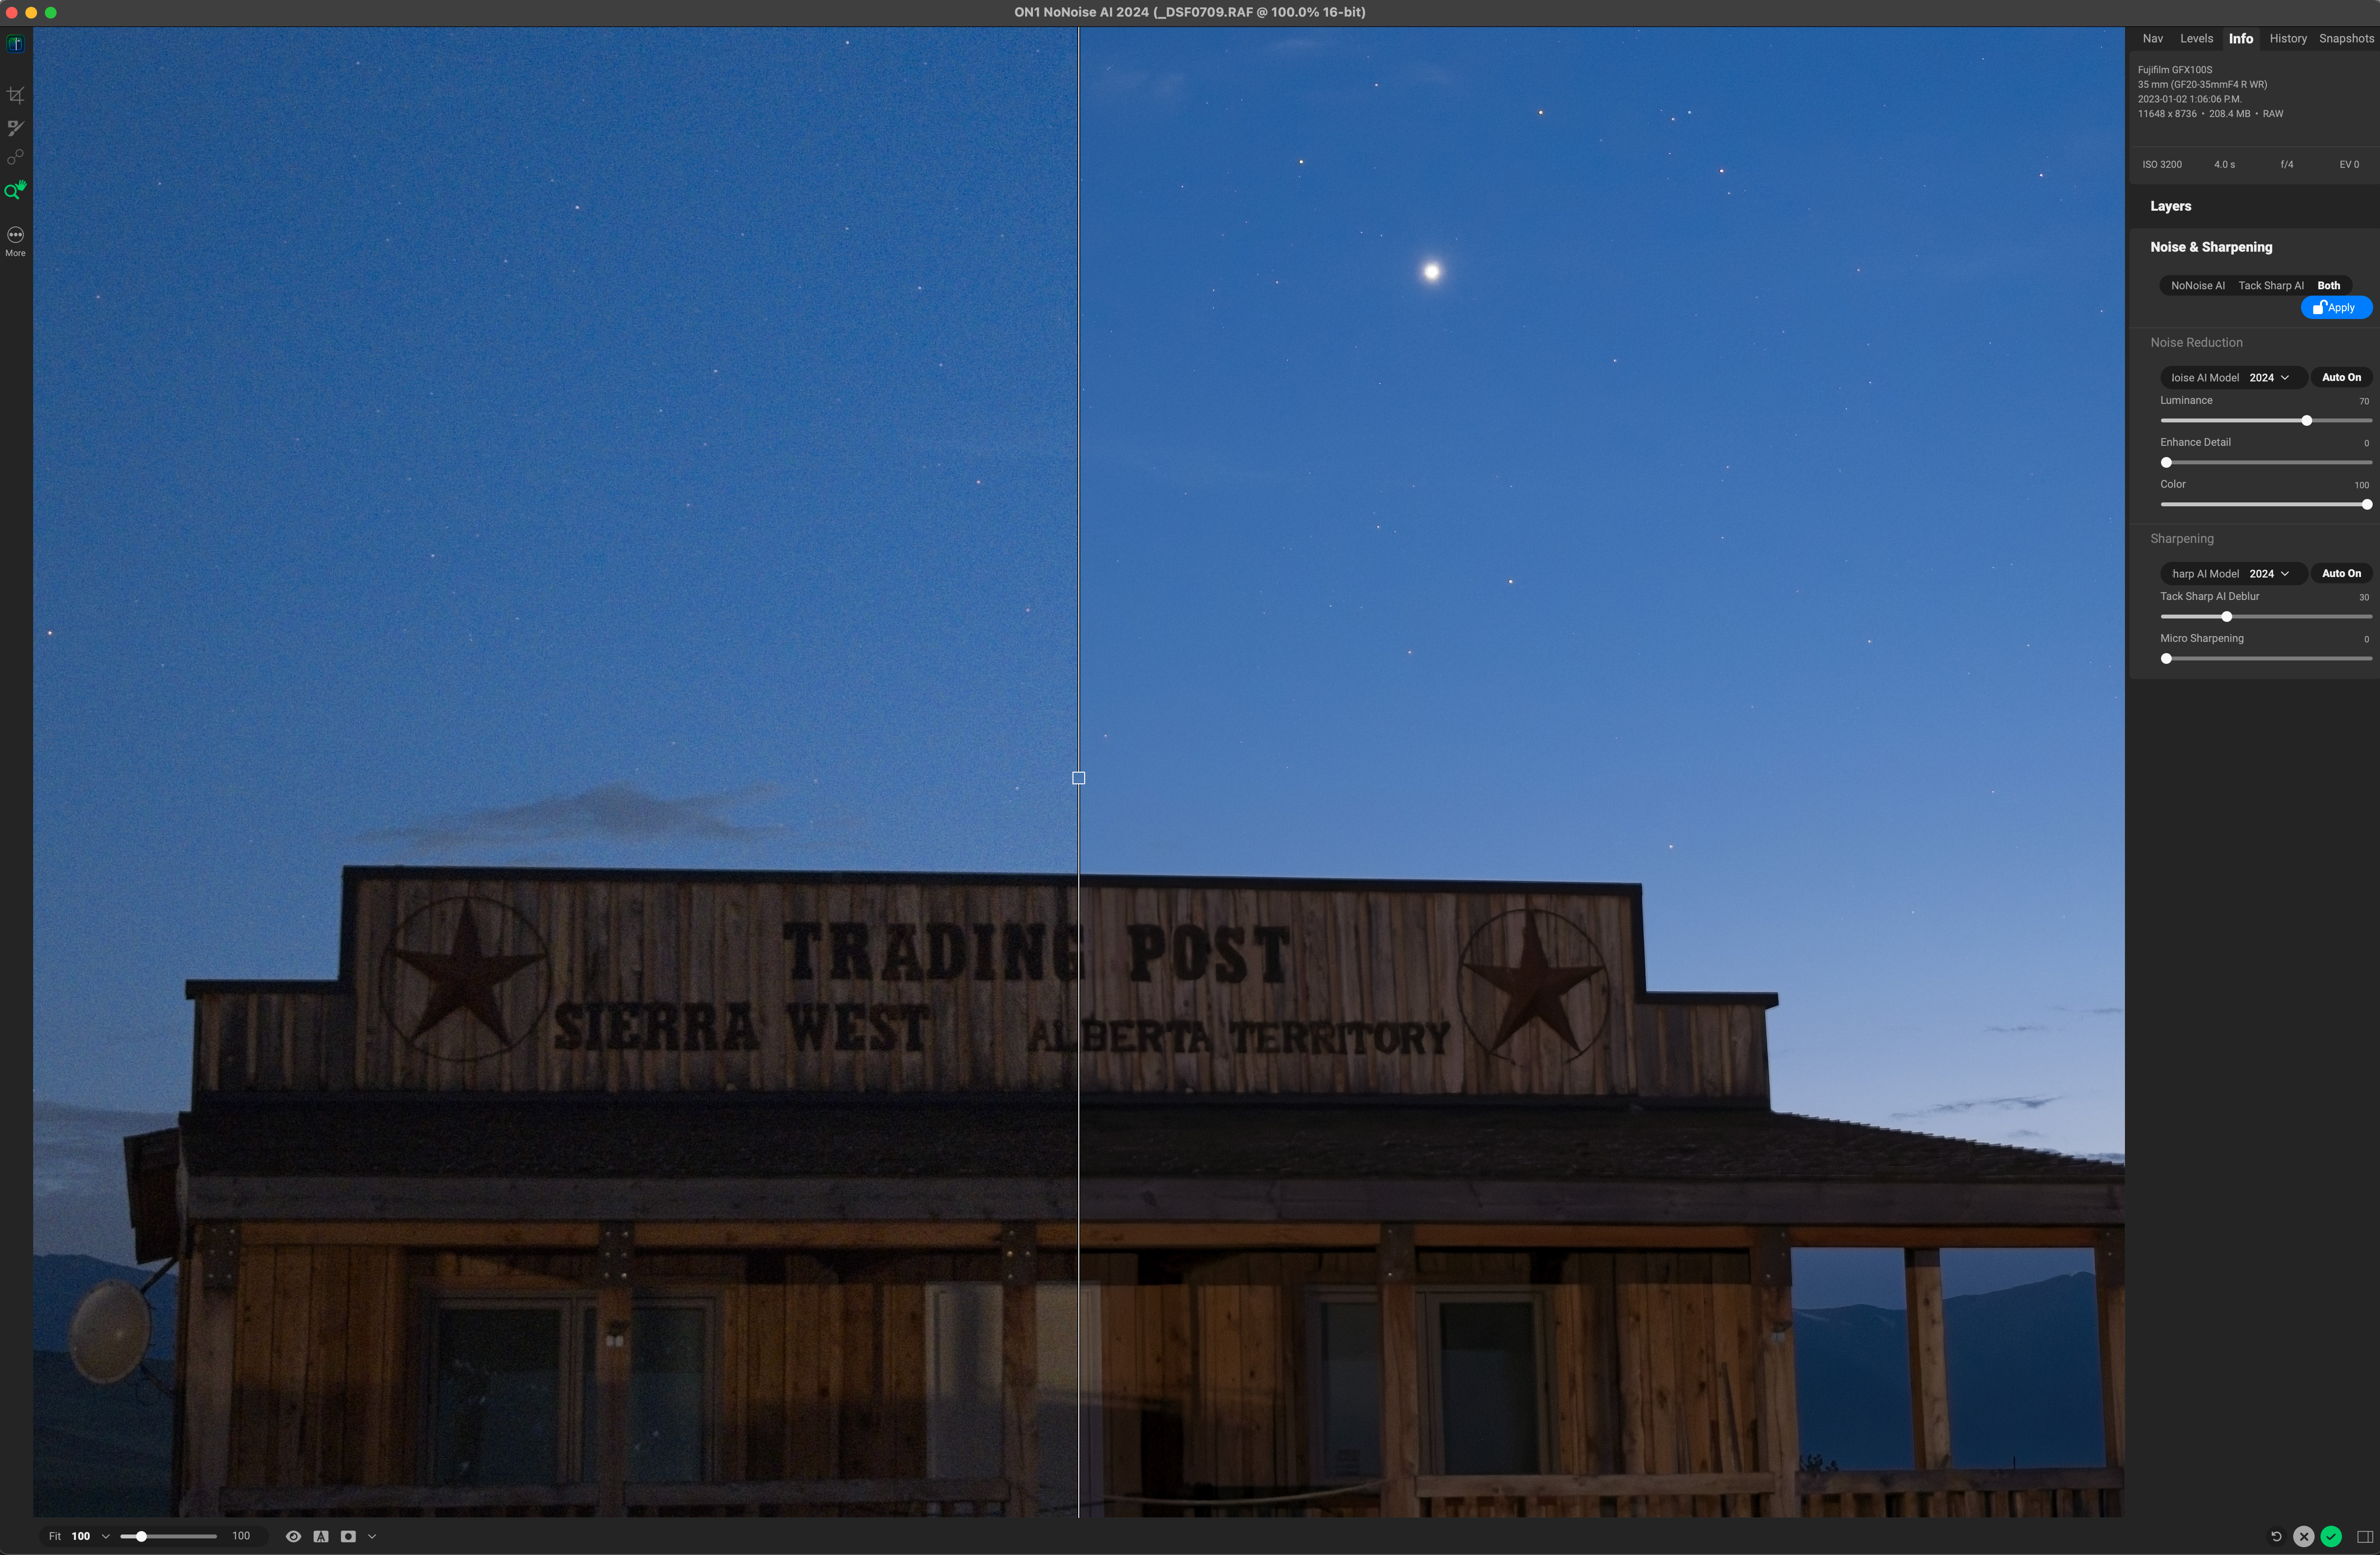
  • ON1 NoNoise AI 2024 (v18.3)
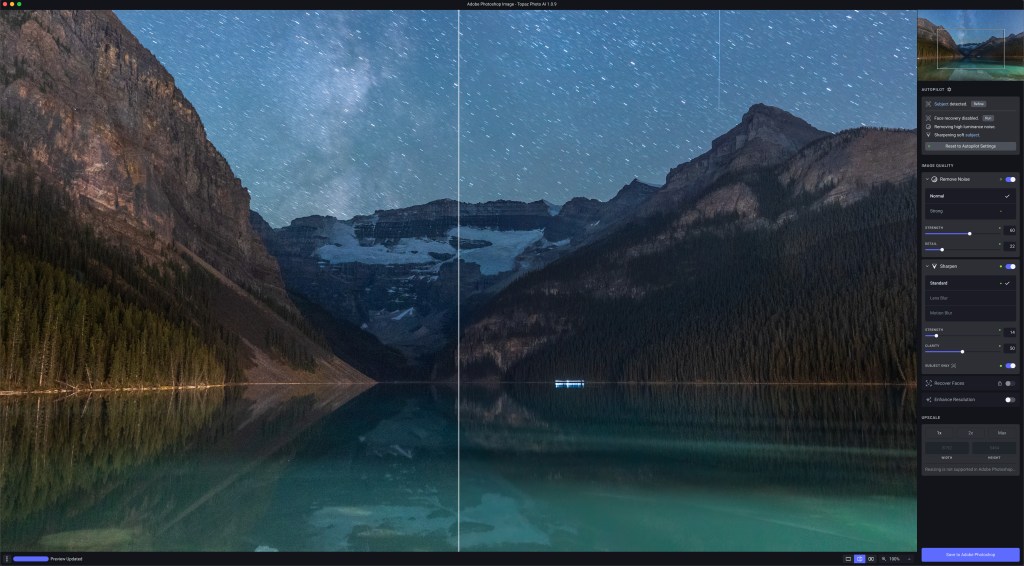
  • Topaz Photo AI (v3.02) 
GraXpert stand-alone app
  1. Programs specialized for astro work:
  • RC-Astro NoiseXTerminator (v1.1.3), usable only as a Photoshop plug-in
  • GraXpert (v3.0.2), usable only as a stand-alone application 

(The latter two can also be installed as โ€œprocessesโ€ accessed from within the specialized astrophoto program PixInsight; I did not test that workflow.) 

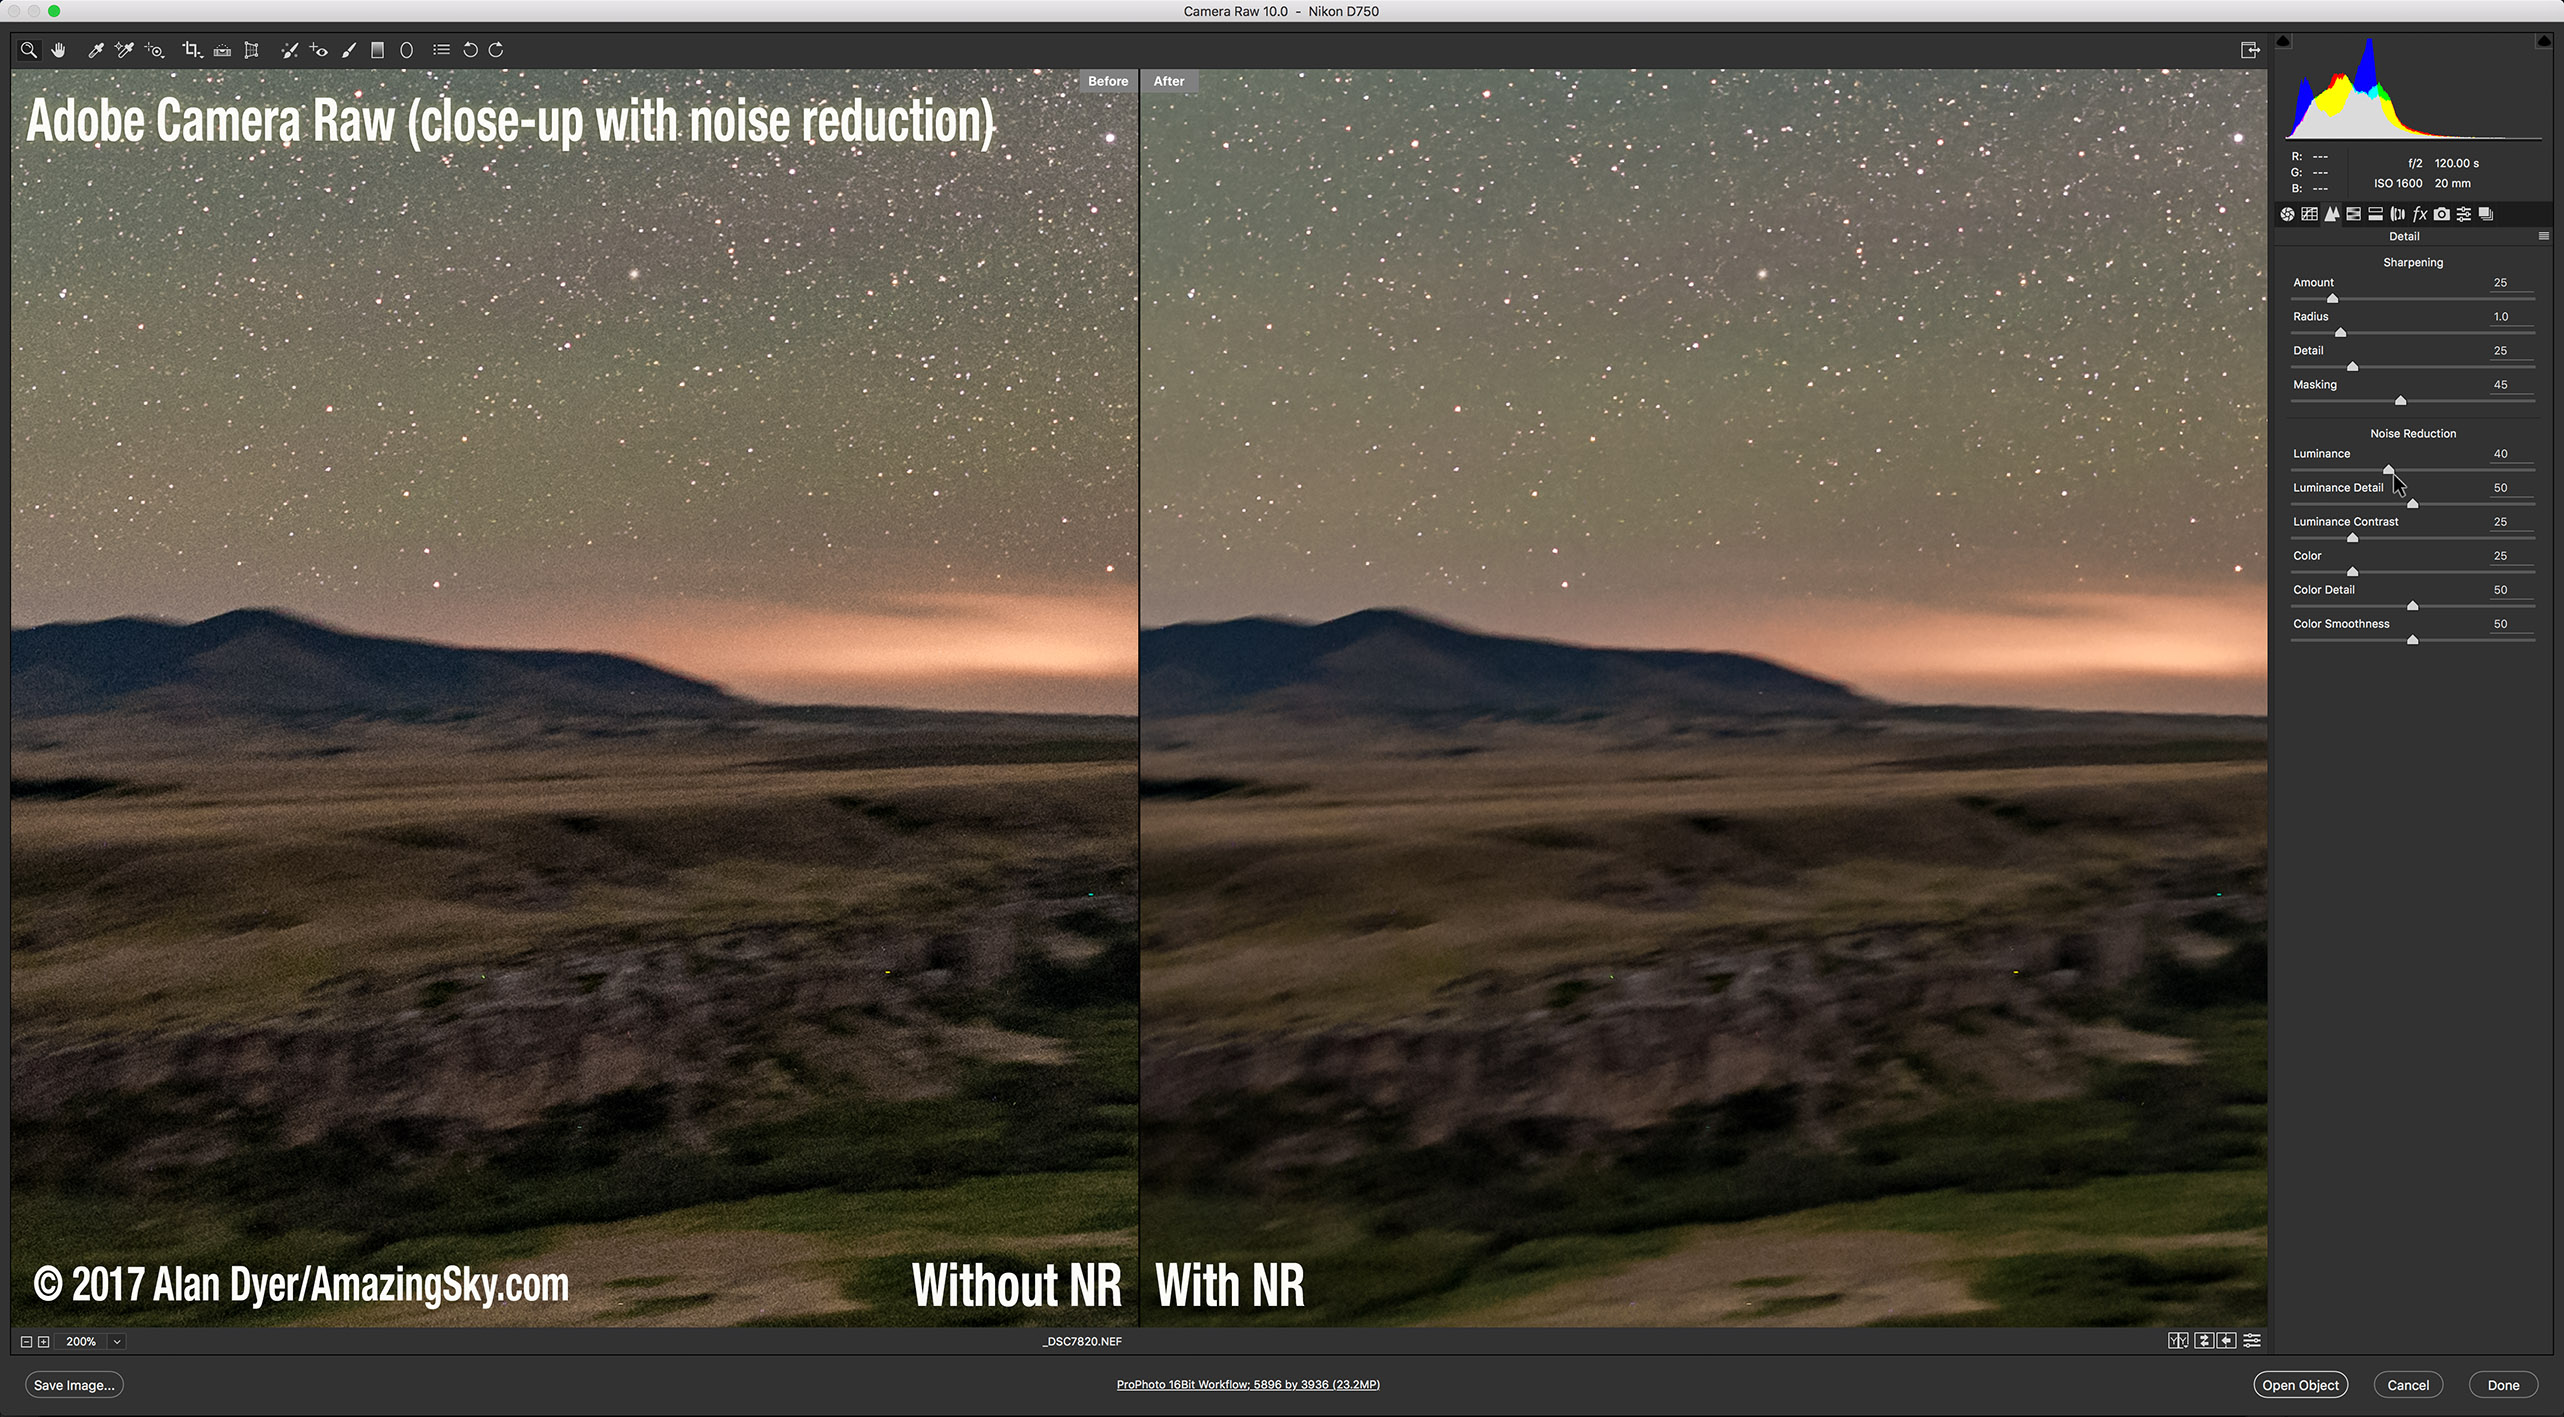
Comparing ACR’s standard noise reduction to 5 AI-based noise reduction programs

MY METHODS (โ€œBUT WHAT ABOUT โ€ฆ?โ€)

I tested the five general-purpose programs on four types of astrophotos:

  • Nightscapes 
  • Aurora images
  • Total solar eclipse images
  • Deep-sky images, both wide-field and telescopic 

I tested the two specialized programs only on sample deep-sky photos, the types of images they are designed and trained for. 

In all cases, the test images are single frames. I did not stack any images for these examples, as I wanted to show what the programs could do with noisy originals.

I tested only on Raw files from mirrorless cameras. I did not test on FITS files from specialized cooled astronomy cameras, as those require a quite different workflow and software. 

Anticipating the โ€œWhat about โ€ฆ?โ€ question โ€” no, I did not test Topaz DeNoise AI. While popular among astrophotographers, both it and its companion program, Sharpen AI, were discontinued in 2023, in favor of Topaz concentrating on their single program, Photo AI, that can de-noise, sharpen, and upscale. 

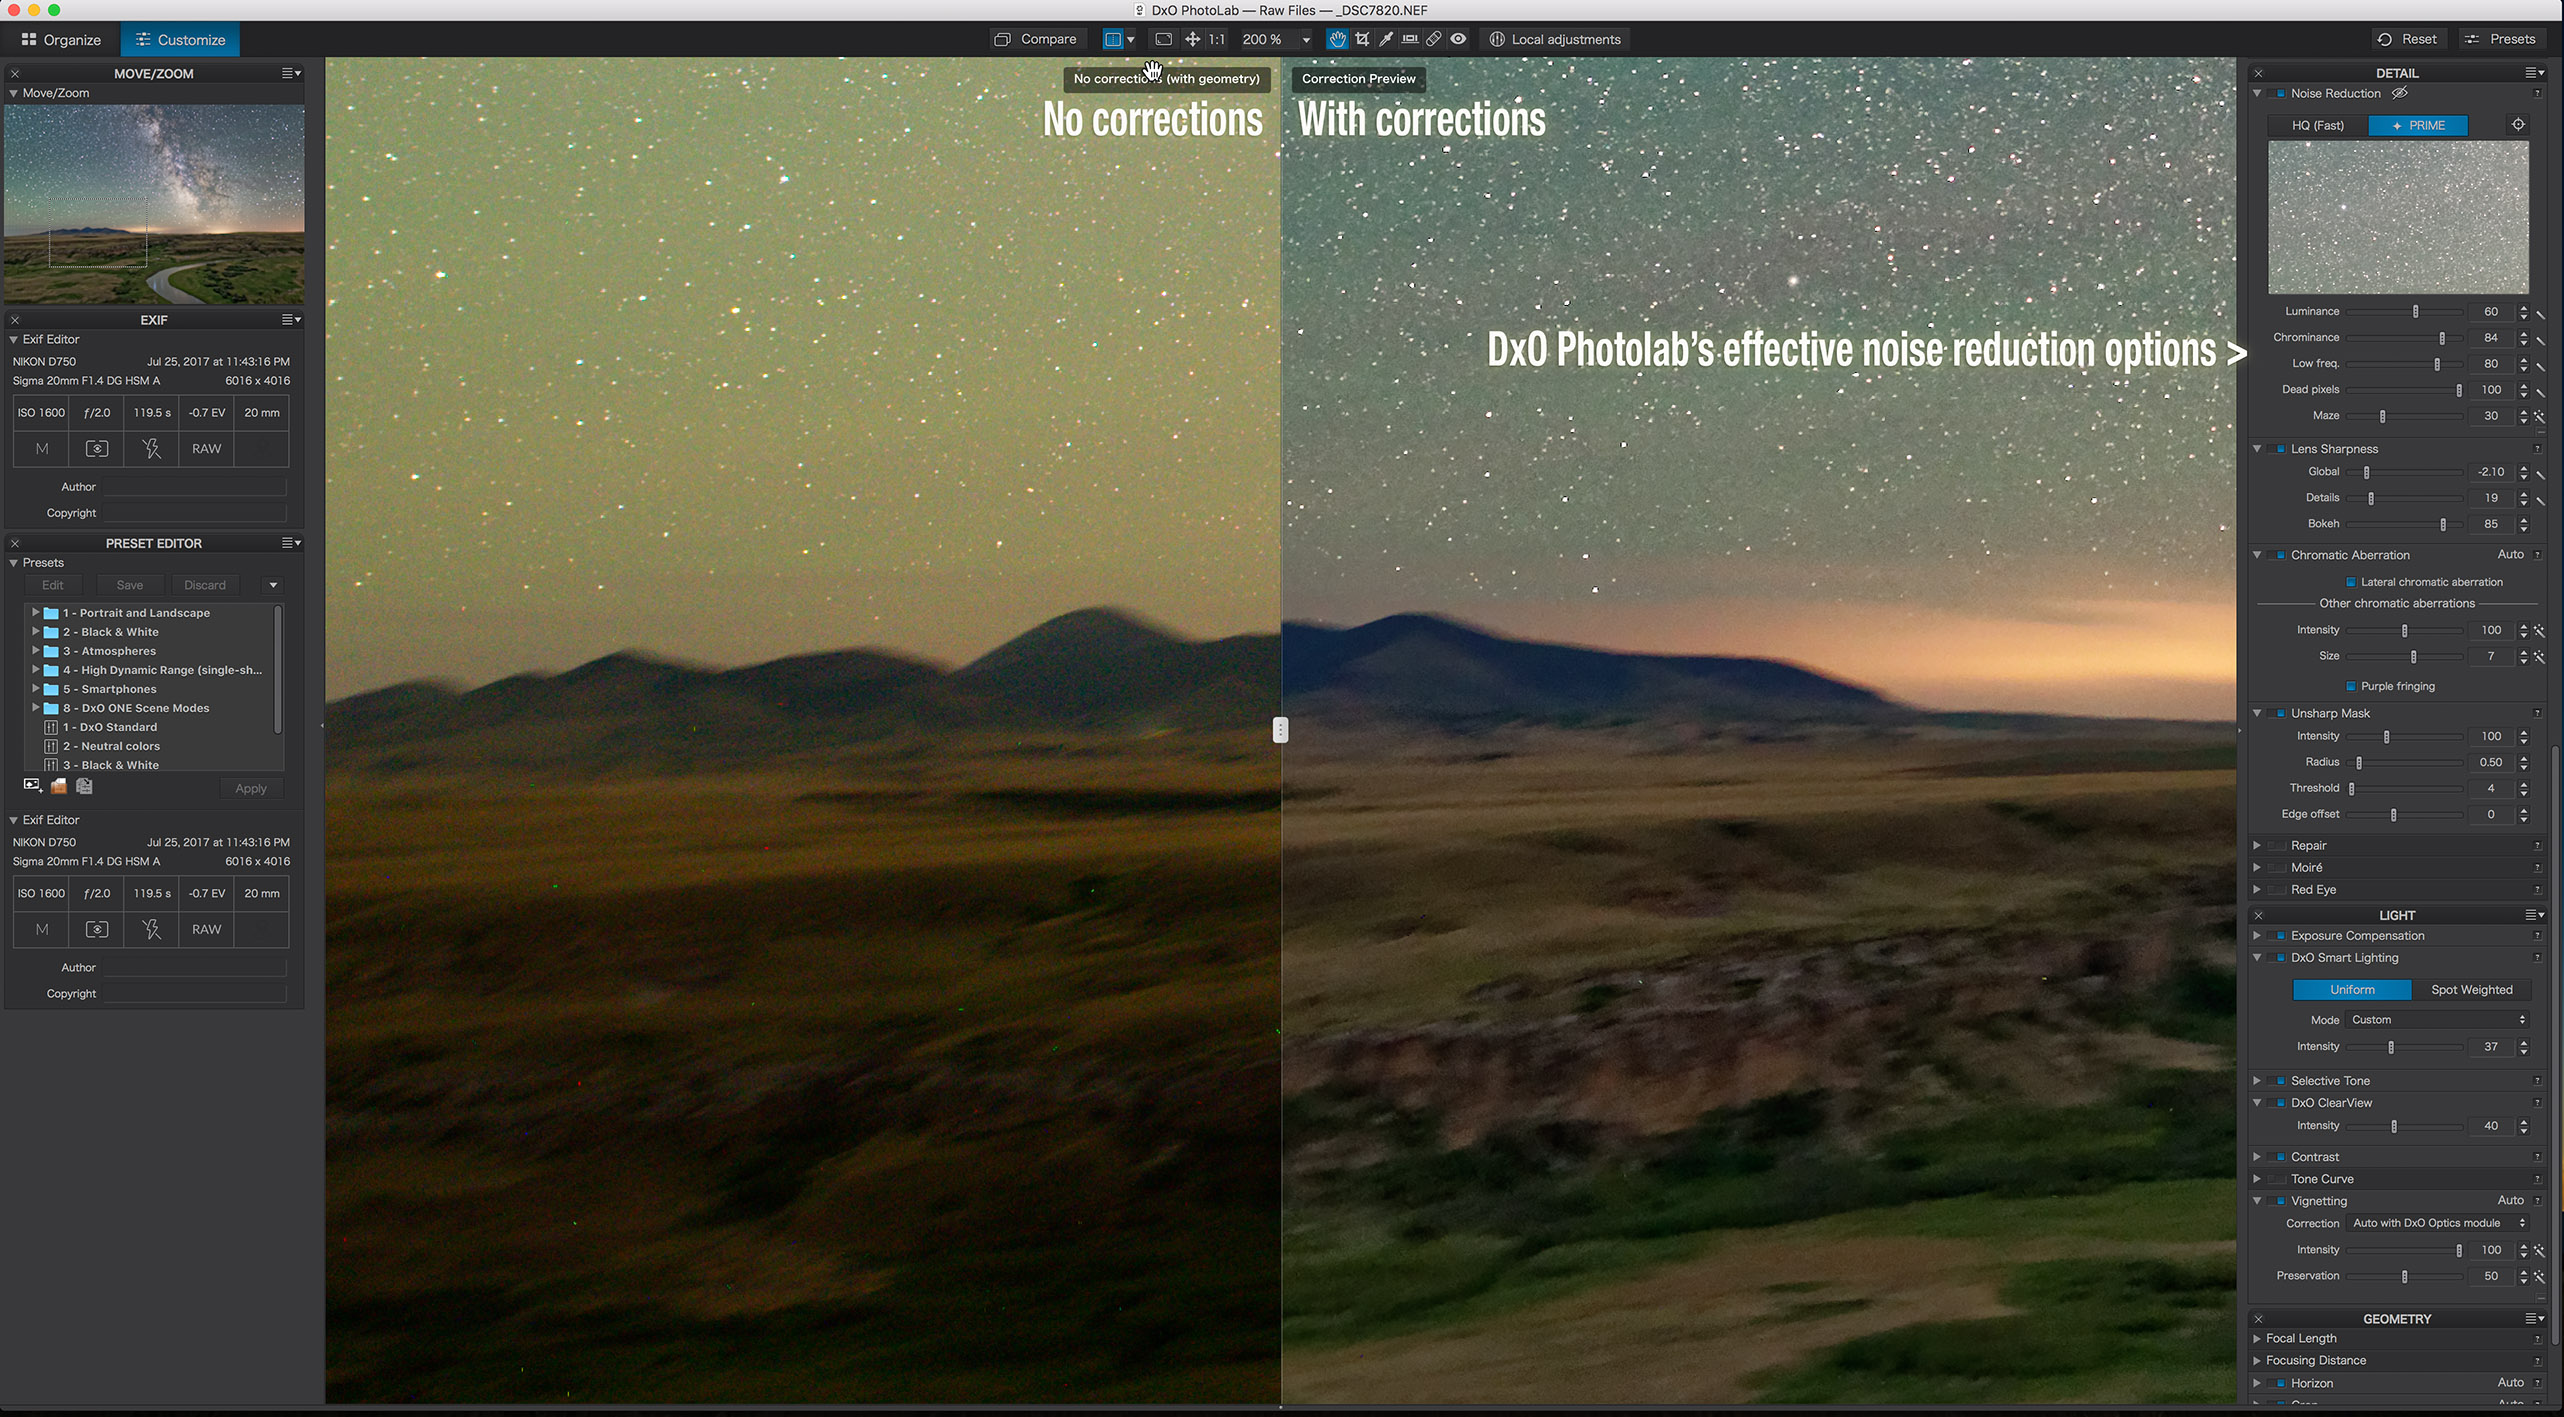
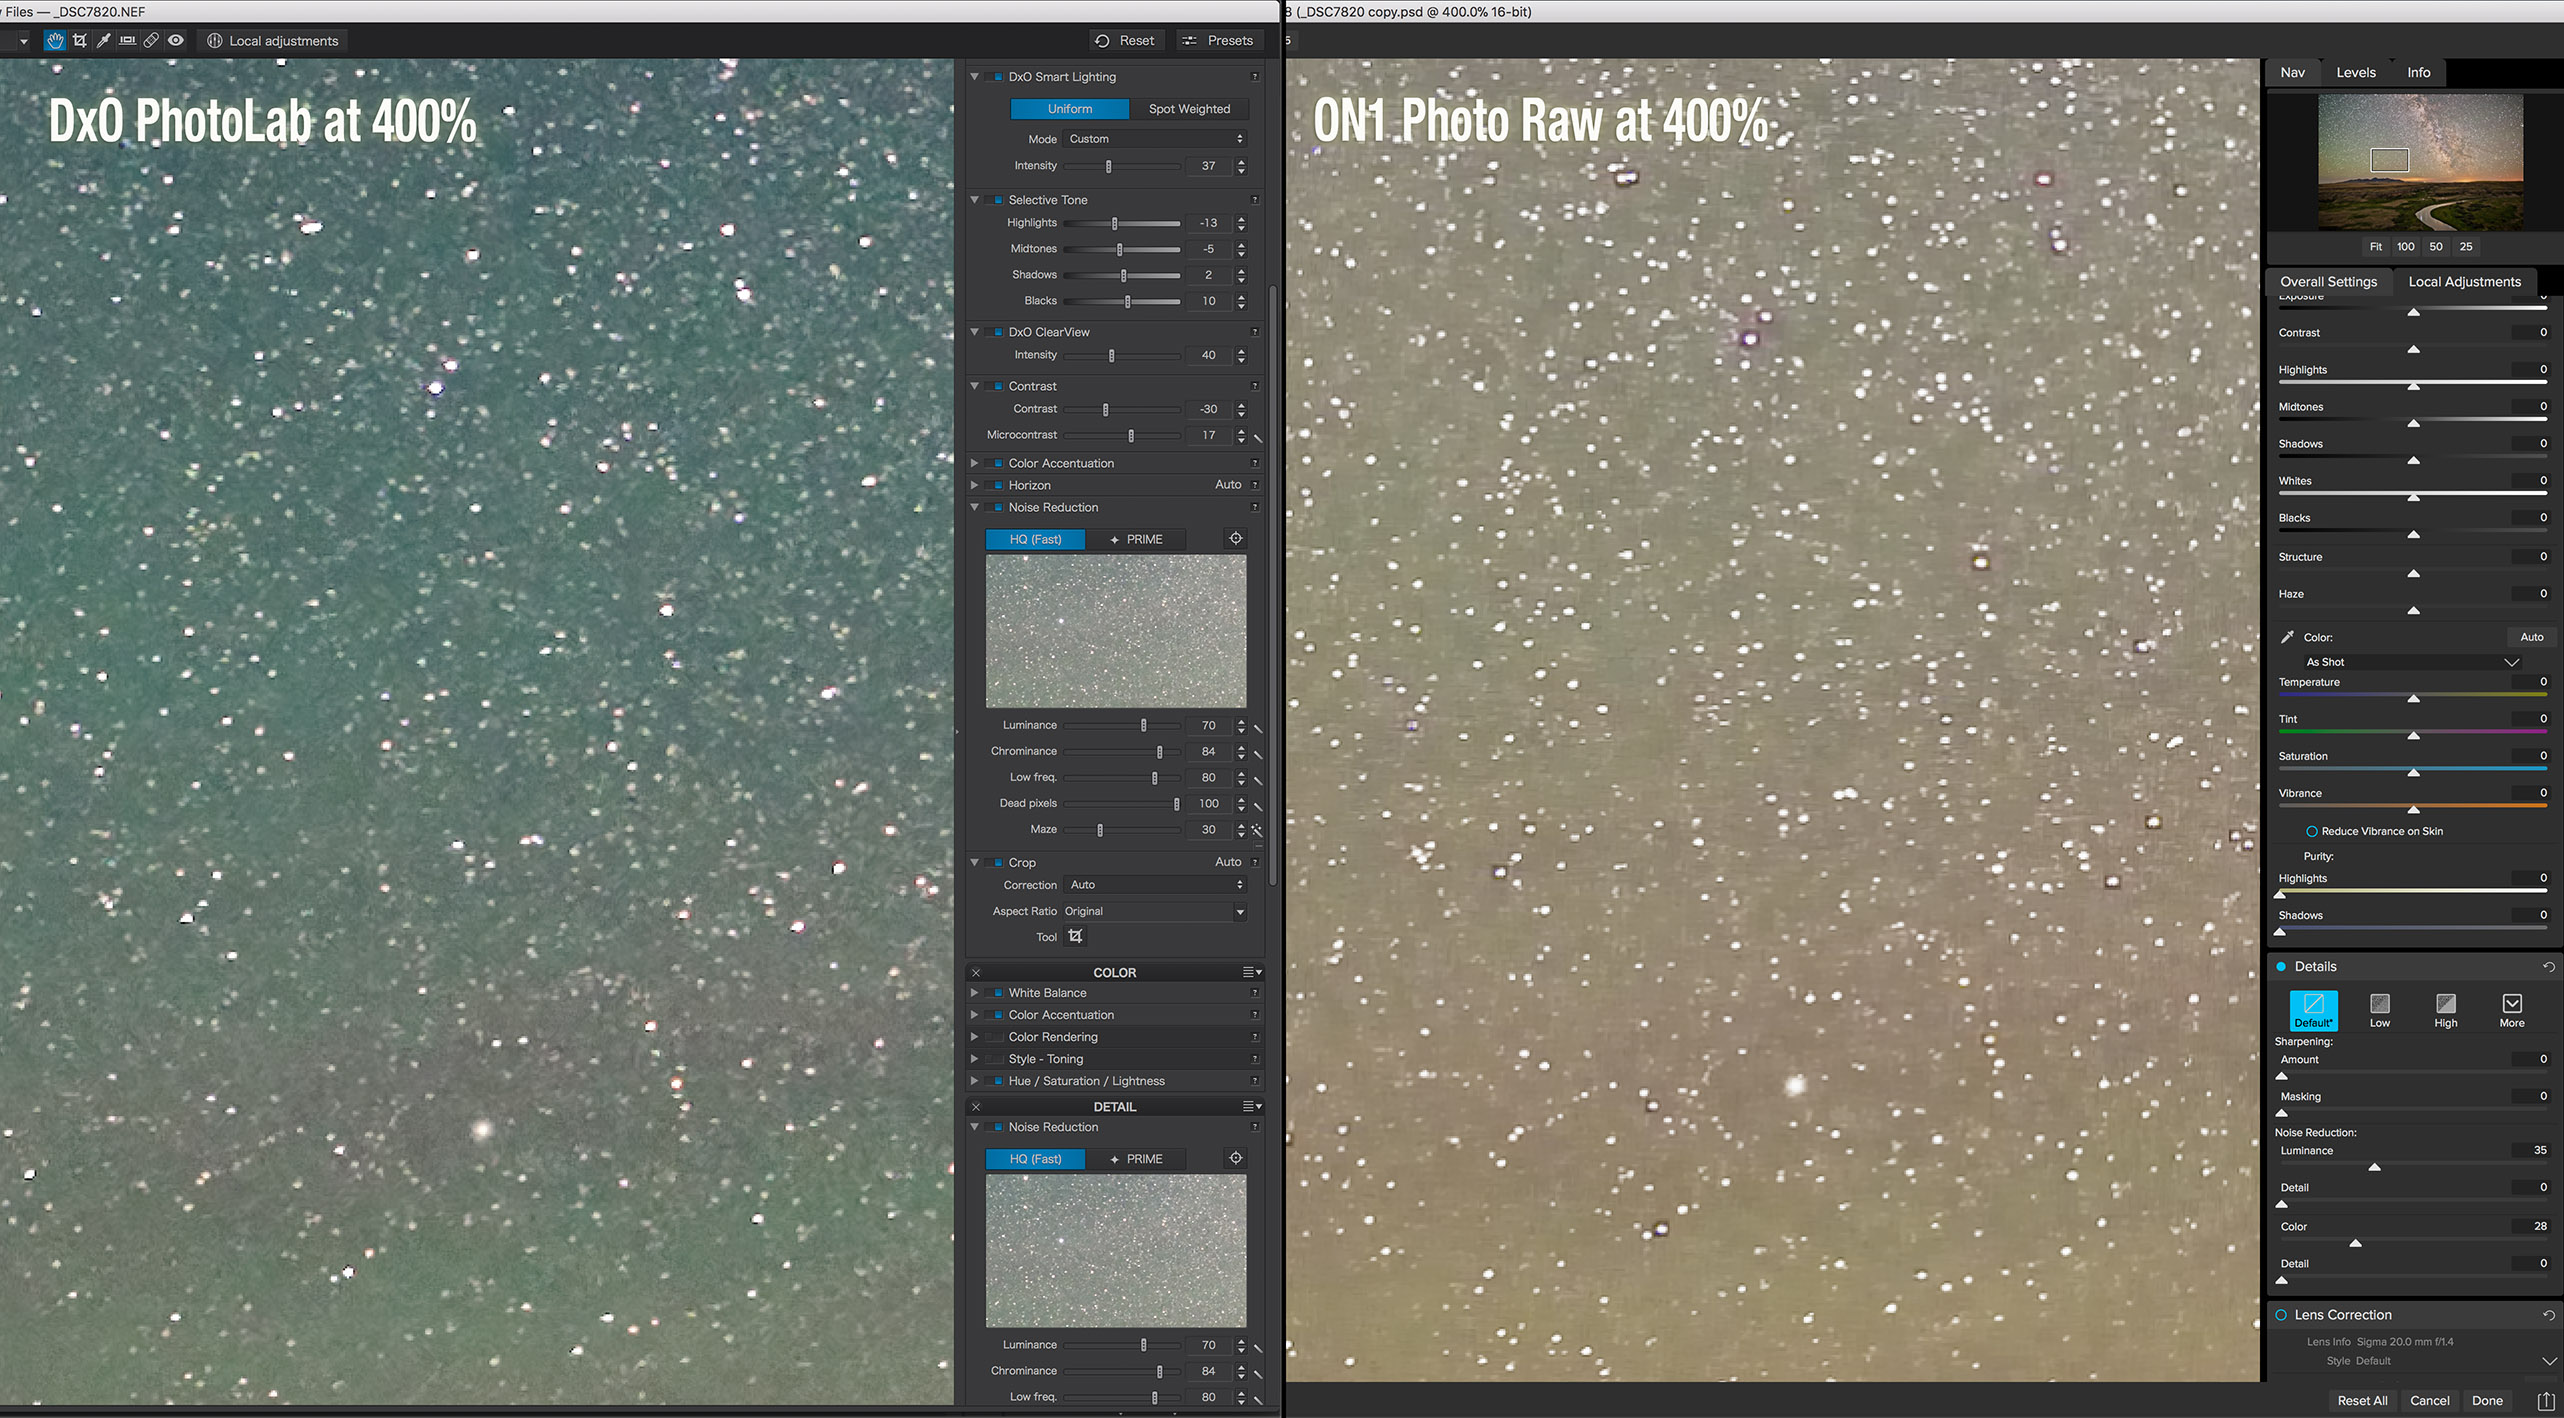
I also did not test other Raw developer programs that contain noise reduction panels. (For example, DxO PhotoLab includes a version of PureRAW, and ON1 PhotoRAW contains a version of NoNoise.) For my most recent comparison of those programs see my test from January 2023

I made an exception for Luminar Neo. While it includes general processing functions, it is used more often (certainly by me!) just as a plug-in for its AI-driven effects and filters, noise reduction being one. 

PLEASE NOTE: 

  • All the test images are full-resolution JPGs (6,000 to 8,000 pixels wide) that you can download (by right-clicking) for detailed inspection. You will often need to do so, to see the pixel-level differences I refer to.
  • But the sizes of the images make the blog page slow to load initially. Patience, please! 
  • All images are ยฉ Alan Dyer, so any publication or posting elsewhere requires my permission, please and thank you! Just link to this blog if you wish to share the review.

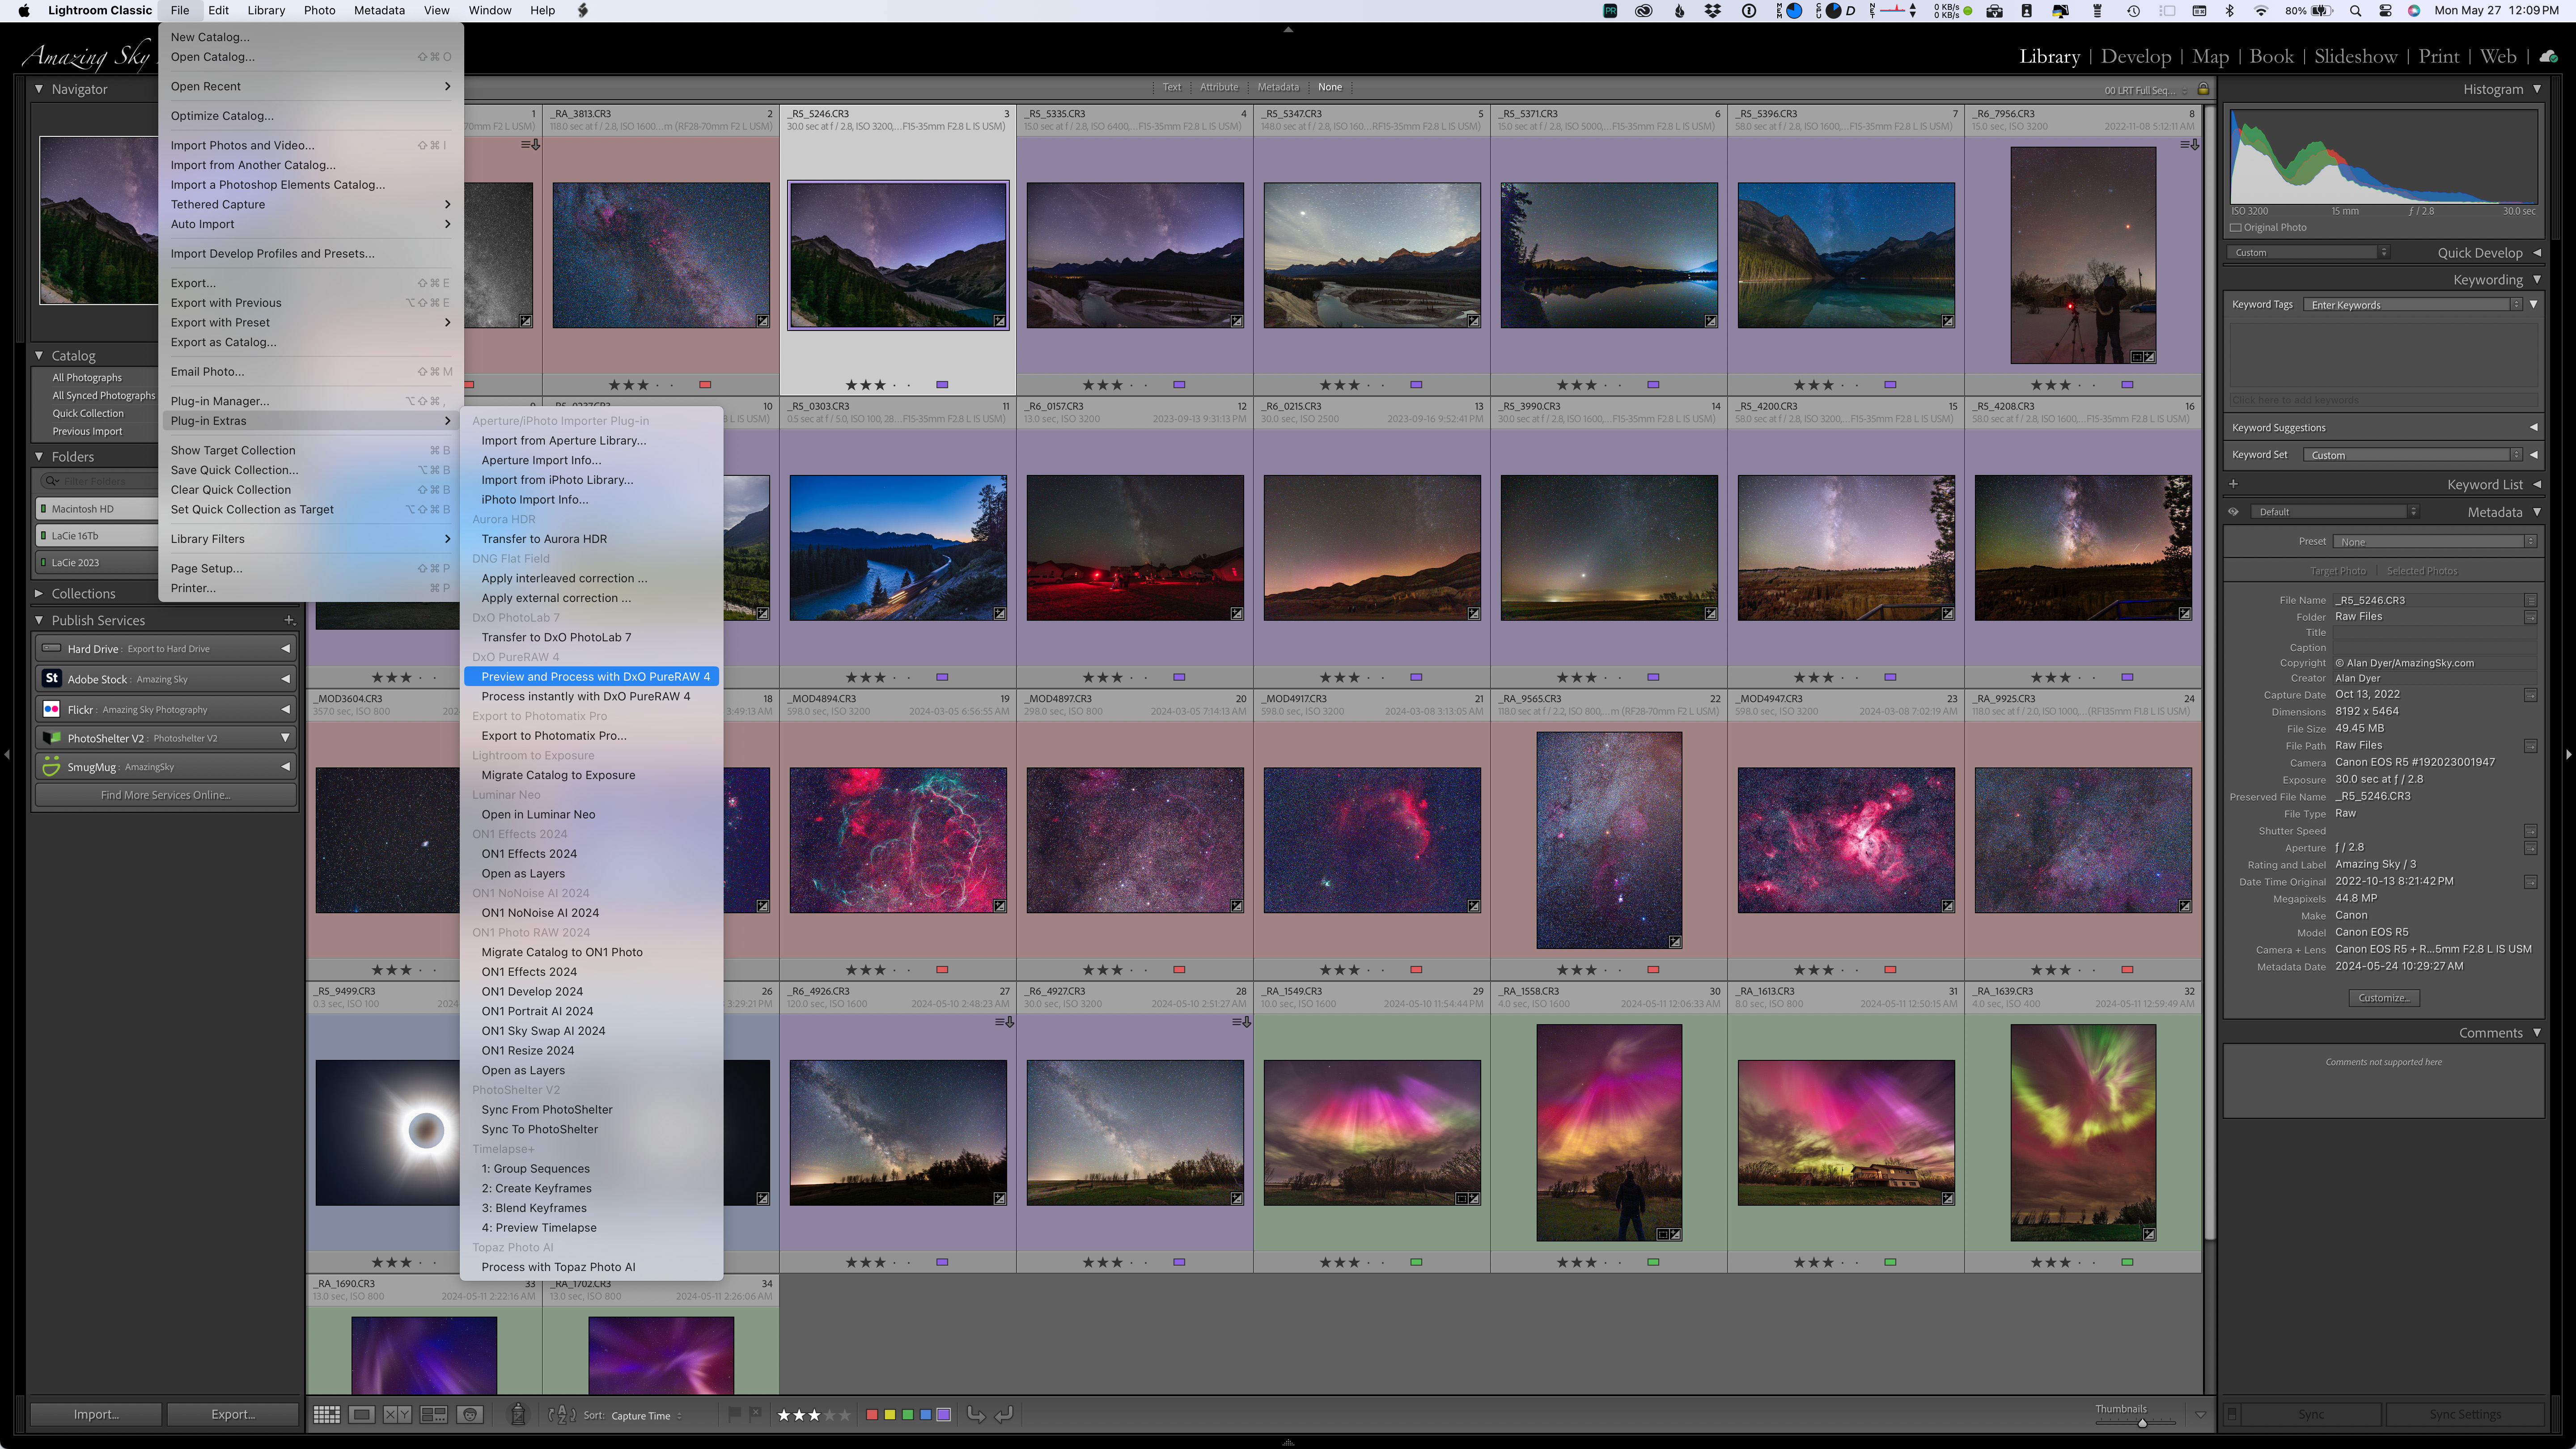
DxO PureRAW can be called up from within Adobe Bridge by going to File>Open With โ€ฆ and choosing DxO PureRAW.
In Lightroom, the route to send images to PureRAW is File>Plug-In Extras>Process and Preview with DxO PureRaw 4. You cannot choose Photo>Edit In โ€ฆ as you might do to send images to other programs. 

TL;DR SUMMARY (with links to the software websites)

  • Of the two Raw-only programs, Adobeโ€™s DeNoise AI and DxOโ€™s PureRAW 4, both worked well, with v4 of PureRAW much improved over its earlier artifact-prone v2 I tested and dismissed in 2022. Similarly, unlike its early version, Adobe DeNoise AI did not invent structures, such as auroral arcs. 
  • Adobeโ€™s DeNoise AI brought out details in the shadows much better than DxOโ€™s PureRAW 4, which blocked up shadows. But PureRAW produced sharper details in illuminated landscapes, yielding less of the plastic appearance that Adobe DeNoise is still prone to. However, both programs turned star trails into wiggly worms. 
  • Each of the three other general-purpose programs failed as stand-alone apps when importing Raw files, then exporting them as either Raw DNG (Digital Negative) files (ON1 NoNoise AI and Topaz Photo AI), or as TIFF files (Luminar Neo). Their exported images were either dark, vignetted, or hugely shifted in color or tonal balance. Results with that Raw-to-DNG/TIFF workflow were often unusable. 
  • However, the same three programs (Luminar Neo, ON1 NoNoise AI and Topaz Photo AI) worked well as plug-ins from within Adobe Photoshop. Images now looked fine, with ON1 NoNoise producing what I thought was the best overall noise reduction with the fewest artifacts and โ€œpatchinessโ€ in most examples. Luminar Neoโ€™s Noiseless AI was consistently the poorest performer in all cases. Itโ€™s the program I can rule out of the running for noise reduction. 
  • The two specialized astro programs, NoiseXTerminator and GraXpert, did a fine  job on deep-sky images, reducing fine-grained noise without eliminating stars, just what they are โ€œtrainedโ€ to do. However, I felt NoiseXTerminator did the better job, with the new (as of May 2024) GraXpert 3.0 softening stars or leaving residual mottled artifacts. Neither worked well on nightscapes โ€” while they didnโ€™t harm detail too much, other programs performed better on what are often detailed but dark and noisy foregrounds.

My main takeaway โ€” No one piece of AI software works best on all astrophotos. A program that provides great results on one image or class of image might perform poorly on another image. That’s the nature of AI-driven processing.

So … my overall conclusion and personal workflow picks? โ€”

  • Adobe DeNoise AI would be my first choice for noisy nightscape images, where it has to be applied early in the workflow. It will be worth trying on deep-sky images.
  • DxO PureRAW might work better on some nightscapes with lots of ground textures.
  • ON1 NoNoise AI works well on many images when applied as a plug-in later in the workflow, but its sliders often need adjusting from the defaults.
  • NoiseXTerminator remains my preferred plug-in for deep-sky images.

PLEASE NOTE: 

  • I have not provided prices and explained buying options, as frankly some can be complex! 
  • For those details, go to the softwareโ€™s website by clicking on the links in the names above. With the exception of Luminar Neo, all are available as free trial copies. 
  • All programs are available for Windows and MacOS. I tested the latter versions, on an M1 Max MacBook Pro. 
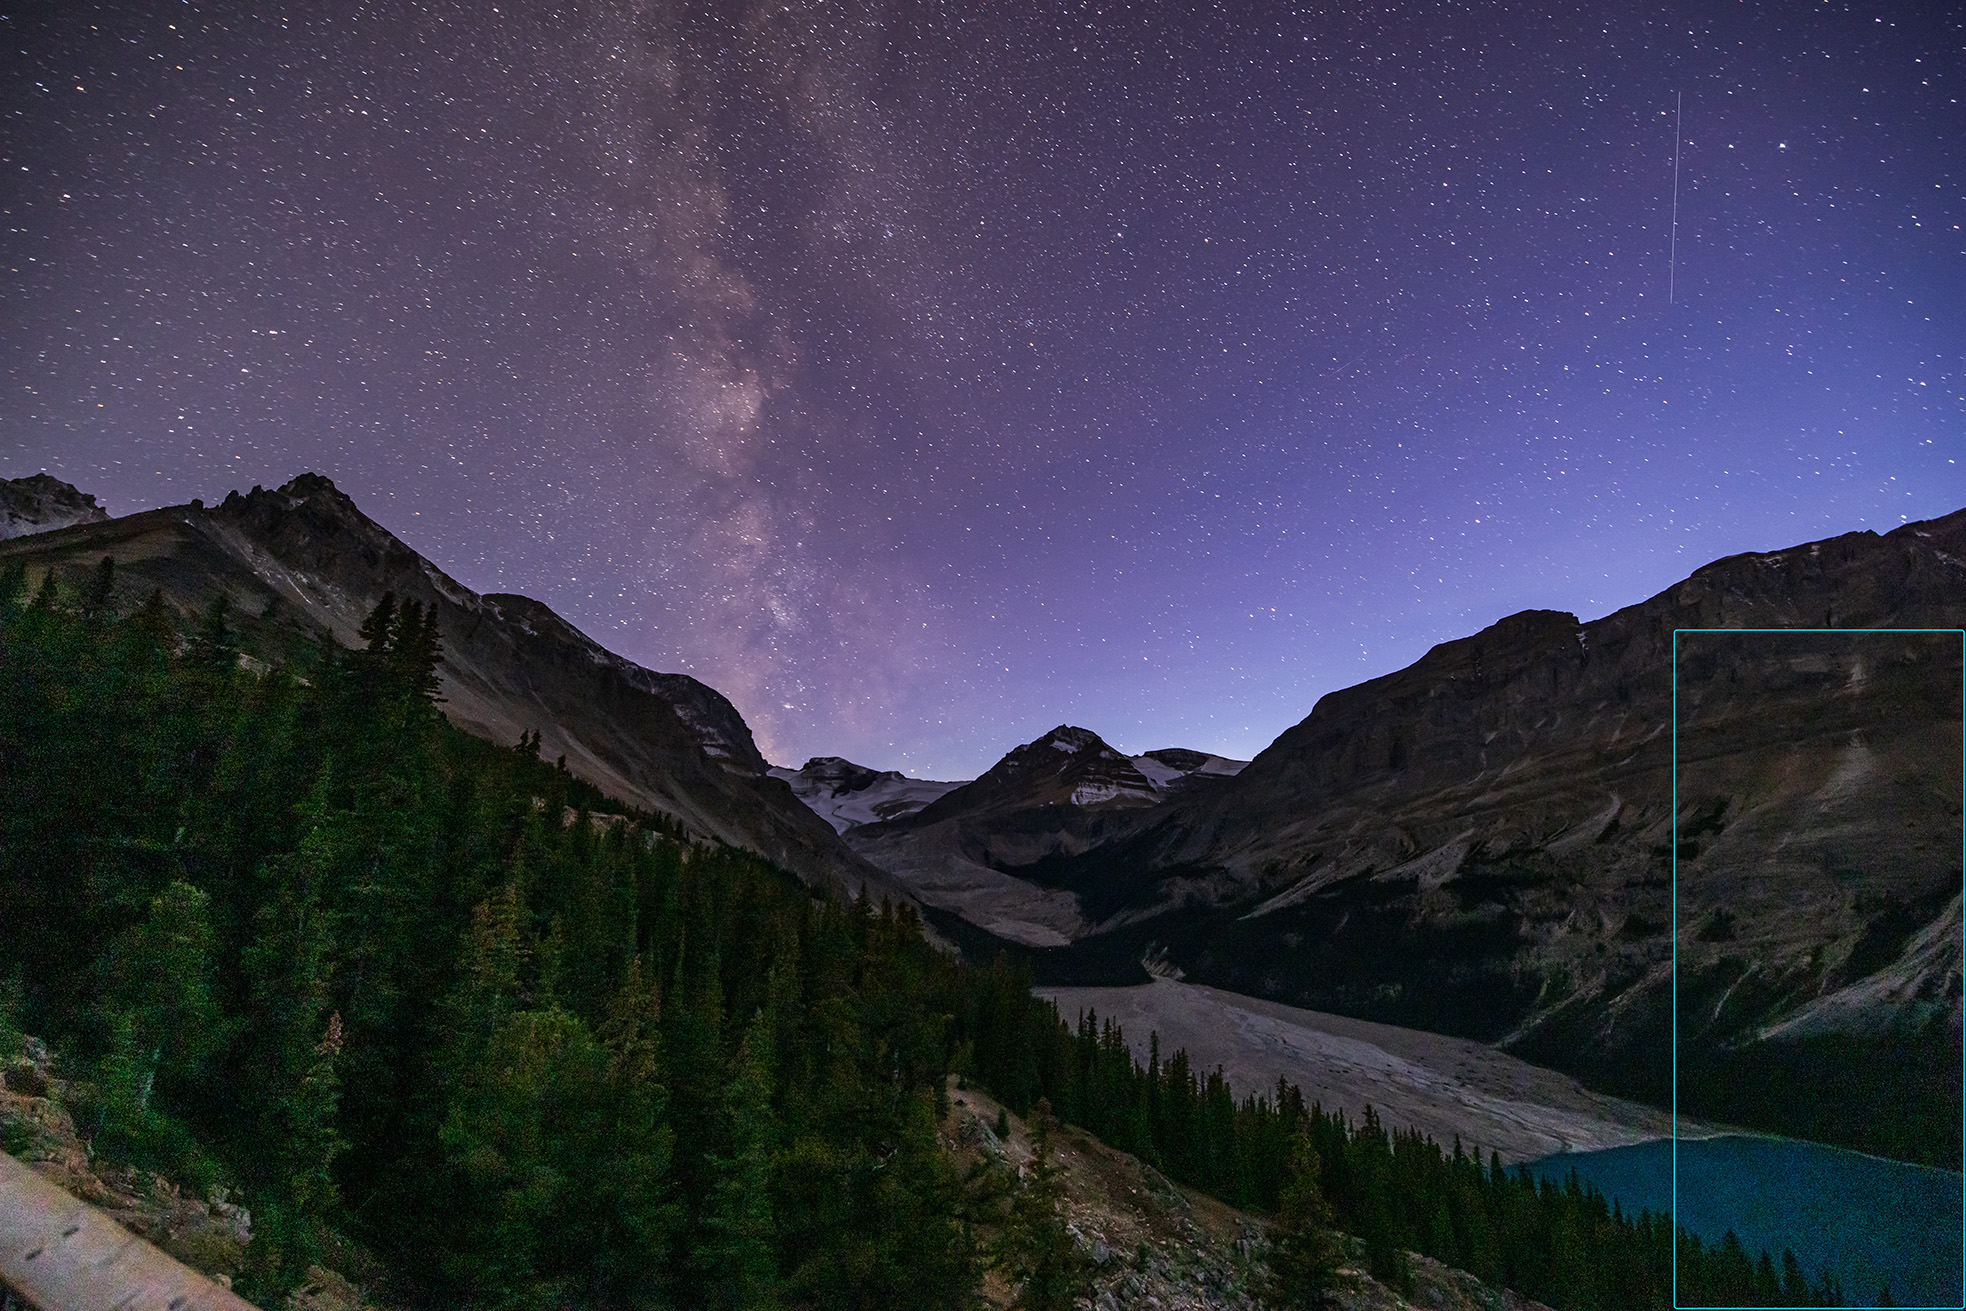
A typical test image, showing the small section that the comparison examples zoom in on. This is the first image shown below in detail.

RAW-ONLY PROGRAMS โ€” NIGHTSCAPES 

To provide evidence for my conclusions, I focus first on the two Raw-only programs, Adobe DeNoise AI and DxO PureRAW 4, as they produced by far the best results of all the programs on demanding nightscapes, often remarkably so. They not only reduce noise, they also recover fine details with AI sharpening you cannot turn off. How well that works is what I demonstrate below.

In each of the following examples, I show the two programs compared to an image processed in Adobe Camera Raw (ACR) using the Detail panelโ€™s old non-AI adjustments for sharpening and noise reduction. 

I developed all the images in ACR, then sent them through Adobeโ€™s DeNoise AI option or into DxO PureRAW. Both options produce new raw DNG files, with all the develop settings intact and accurate, with some exceptions with PureRAW as shown below.

Peyto Lake Nightscape

Peyto Lake corner closeup โ€” with Canon R5 at ISO 3200

In most cases I show only a section of images blown up by 250% to 500%. Here, in the first example of a nightscape shot I zoom in on a corner, as illustrated above, where noise often lurks due to lens vignetting. (I shot this and many of the nightscape examples with the 45-megapixel Canon R5. See my test of it for astrophotography here.)

The standard ACR noise reduction leaves a blizzard of fine noise and large color blotches. The Adobe DeNoise AI version (with it at 60%, the setting I used for all the DeNoise images) shows much less noise and somewhat reduced color blotches. The PureRAW version shows even better noise reduction, but the trees turn very dark with no detail. 

But compare the mountainside. Adobe turns the rock layers into artificial-looking ropey bands; PureRAWโ€™s detail recovery looks much more natural for texture. 

Lake Edith Nightscape 

Lake Edith corner closeup โ€” with Canon R5 at ISO 5000

In this example, I again zoom in on a badly underexposed corner. The standard ACR version looks awful, riddled with color splotches and banding. The Adobe DeNoise version has cleaned up most of the mess. But the PureRAW version is better, eliminating even more noise and artifacts. 

So is PureRAW better? Not so fast! 

Storm Mountain Nightscape

Storm Mountain corner closeup โ€” with Canon R5 at ISO 100

In this close-up of the Storm Mountain twilight image (that I show in full farther down the page), the normal image shot at ISO 100 isnโ€™t marred too much by noise. But it does exhibit the magenta discoloration often seen in underexposed frame corners when the shadows are โ€œliftedโ€ brighter, as I show in the inset of the Basics panel. 

The Adobe DeNoise version automatically corrected the color back to normal (I made no manual adjustments) and brought out the fine details. By comparison, PureRAW turned the trees completely dark, a lazy way to reduce noise! I tried further lifting the shadows with some reverse vignetting (as shown), but the result was a muddy mess. PureRAW crushed the shadows to the point no detail was recoverable. 

So is Adobe better? Not necessarily ….

Lake Louise Nightscape

Lake Louise close-up โ€” with Canon R5 at ISO 1600

Here I zoom in on famous Mount Victoria at the end of Lake Louise in Banff, in a one-minute exposure taken for the ground. As before, I think PureRAW has done a better job at recovering details in the mountain, though maybe to the point of over-sharpening? Adobe DeNoise perhaps looks more natural here. 

But look at the star trails, which we sometimes want in our nightscapes, or have whether we want them or not! Yes, the sky in the AI-processed images looks less noisy, but the star trails now look like wiggly irregular streaks. PureRAW is a little worse, but both programs suffer from the same AI misinterpretation of the content. Both ruined the sky. 

Will this always be the case? 

Sierra Cabins Nightcape

Sierra Cabins close-up โ€” with Fuji GFX100S at ISO 3200

All the other image examples are from Canon mirrorless cameras: the EOS R, Ra or R5. But this is a blow-up of a 100-megapixel photo from a medium-format Fuji GFX100S. The rustic cabin and the sky is less noisy in the AI images, with PureRAW the better performer here by a small margin. Stars look fine, and the AI sharpening of both programs has brought out the faint stars without any artifacts, a welcome improvement I think.ย 


RAW-ONLY PROGRAMS โ€” AURORA 

I include this as a separate example, as an aurora photo provides a sky with a different type of content. In the past Iโ€™ve seen Adobe AI invent aurora rays.

Aurora Curtain

Aurora close-up โ€” with Canon Ra at ISO 1600

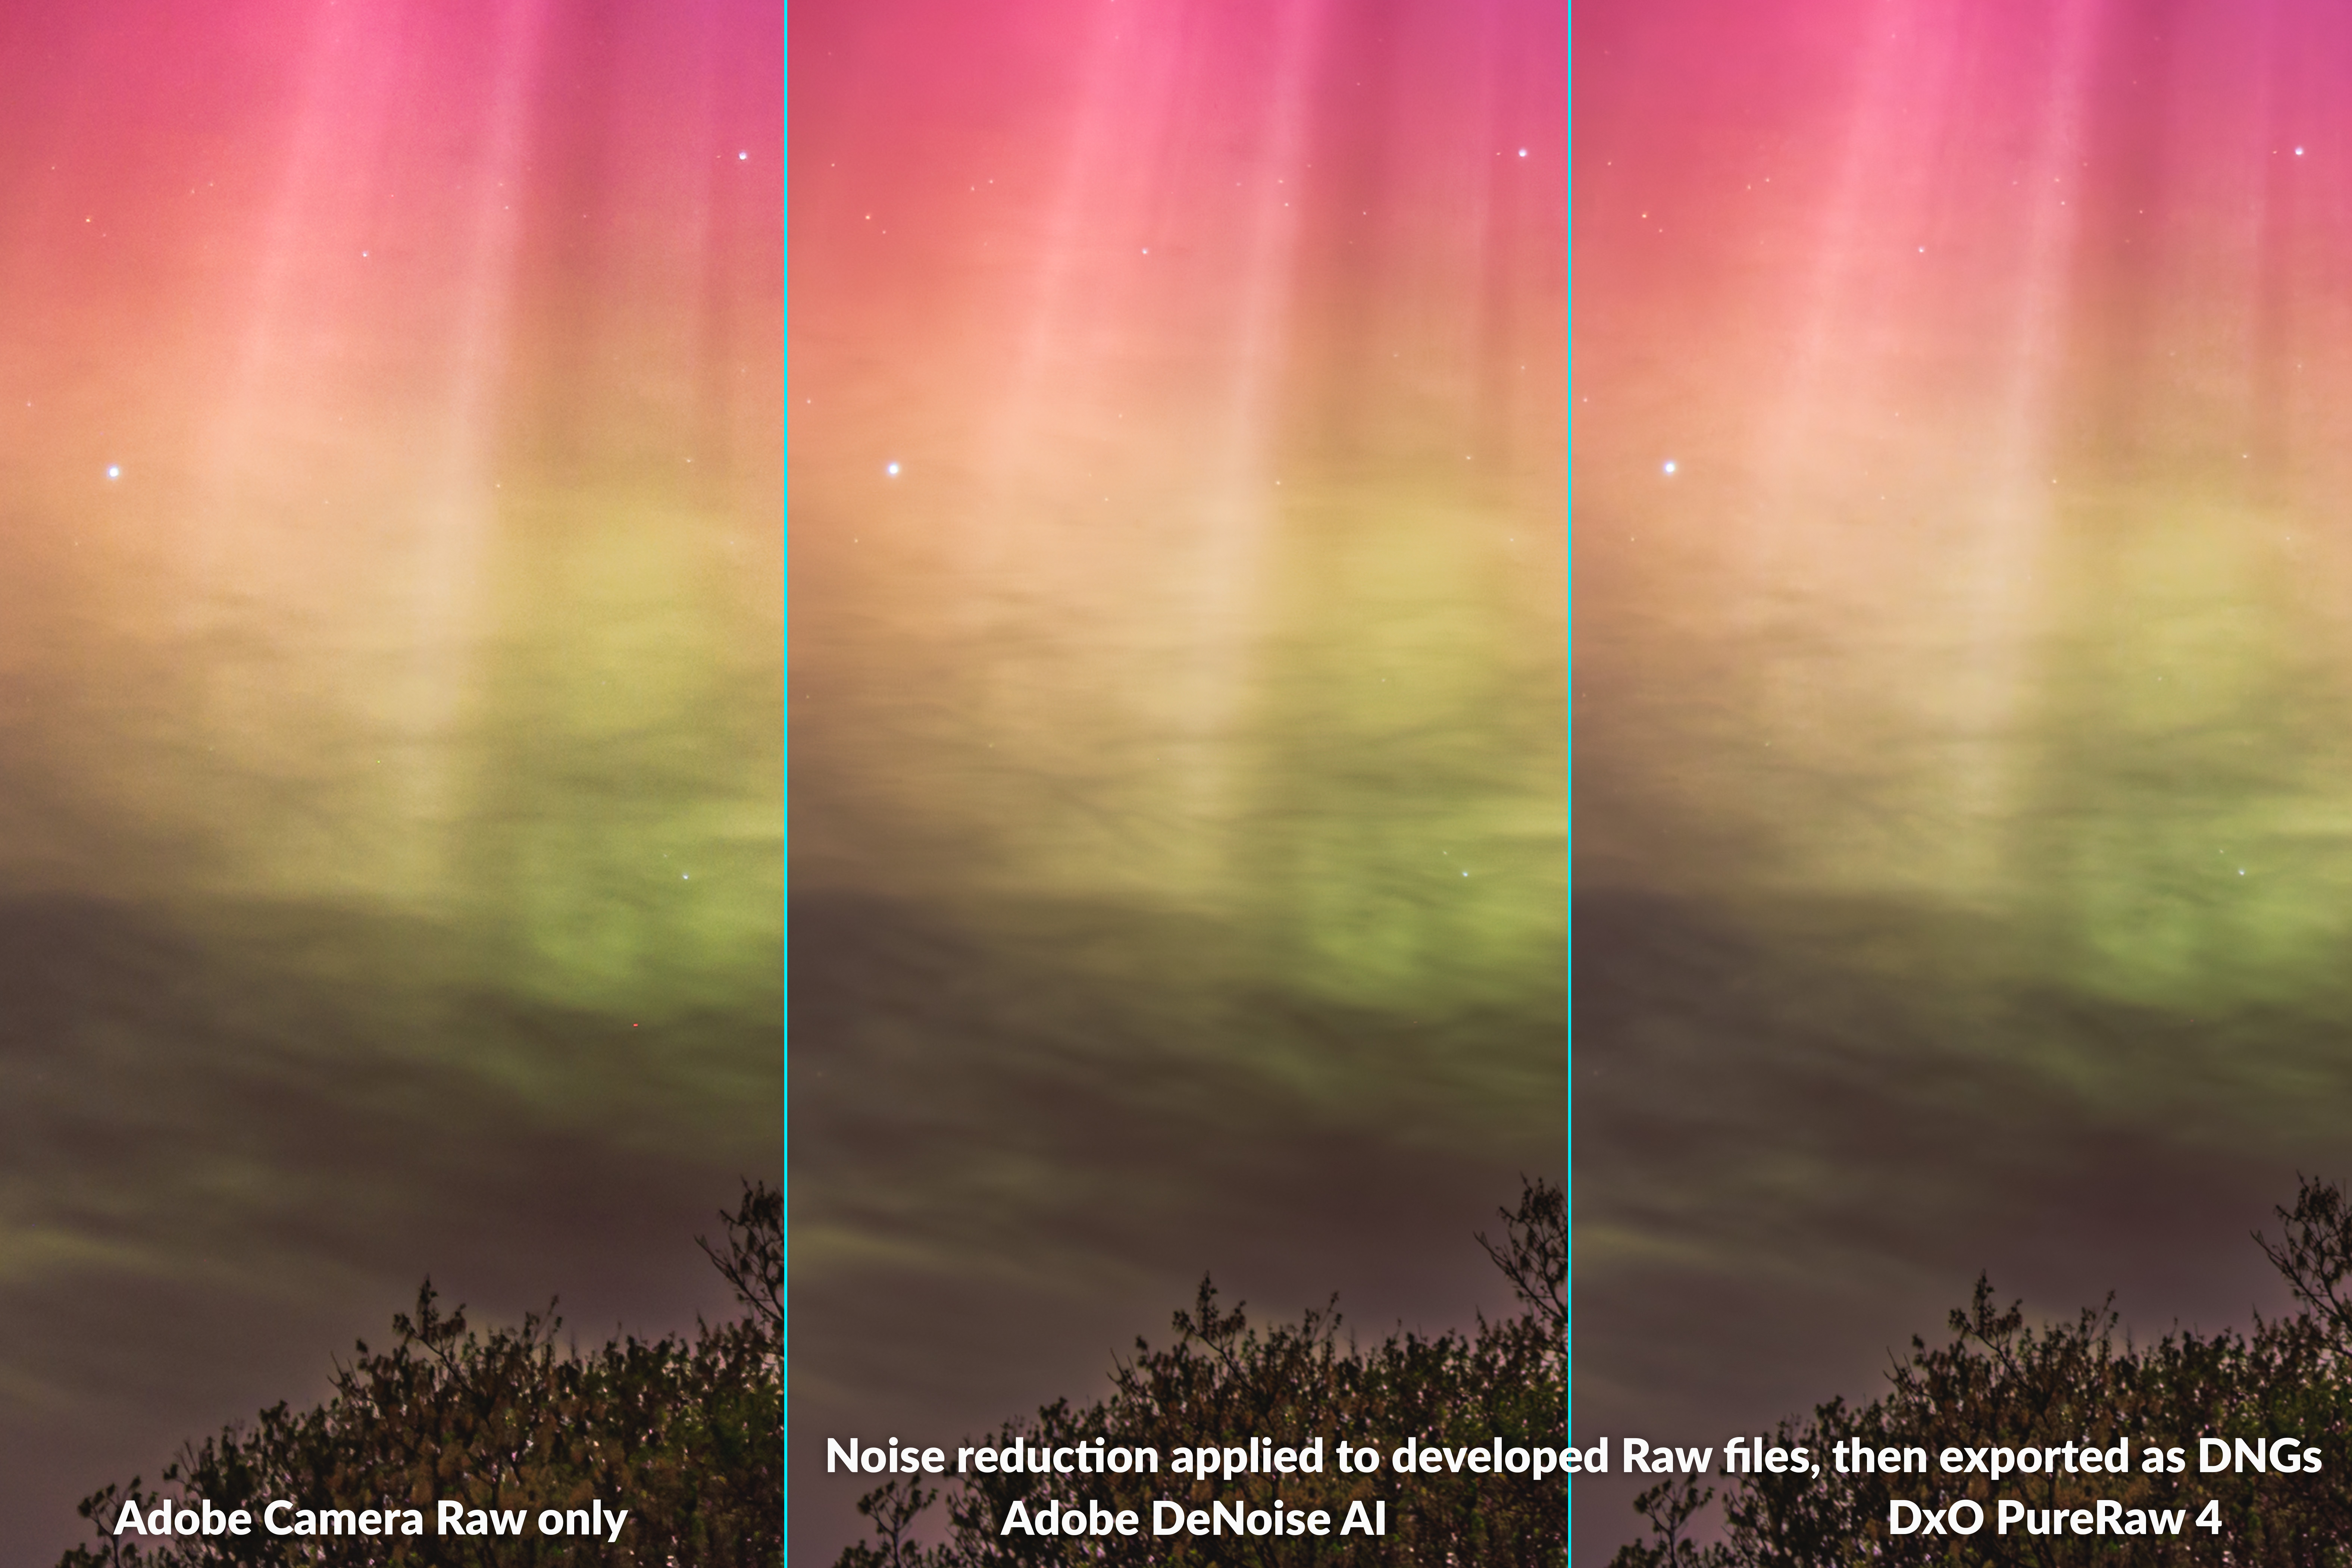
This is an image from the Great Aurora show of May 10, 2024. Thereโ€™s less noise in the AI versions of this example, and both programs also eliminated the errant hot red pixel at lower right in the ACR image. Iโ€™ve found these two AI programs can correctly identify and eliminate some hot pixels, though hot pixel removal can be hit or miss. 

In all, I found the AI routines of Adobe and DxO did a fine job on auroras, reducing noise without introducing artifacts such as banding or posterized color gradations. Neither overly sharpened foreground details, nor added structures into the aurora or clouds that shouldnโ€™t be there or that look unrealistic.


RAW-ONLY PROGRAMS โ€” SOLAR ECLIPSE 

Many of us have close-ups of the April 8, 2024 total eclipse of the Sun. Even though you might have shot them at a low ISO (even when eclipsed, the Sun is bright), you might have been surprised to see how much fine noise remains in the corona and sky. 

Solar Eclipse Corona Close-Up 

Corona close-up โ€” with Canon R5 at ISO 100

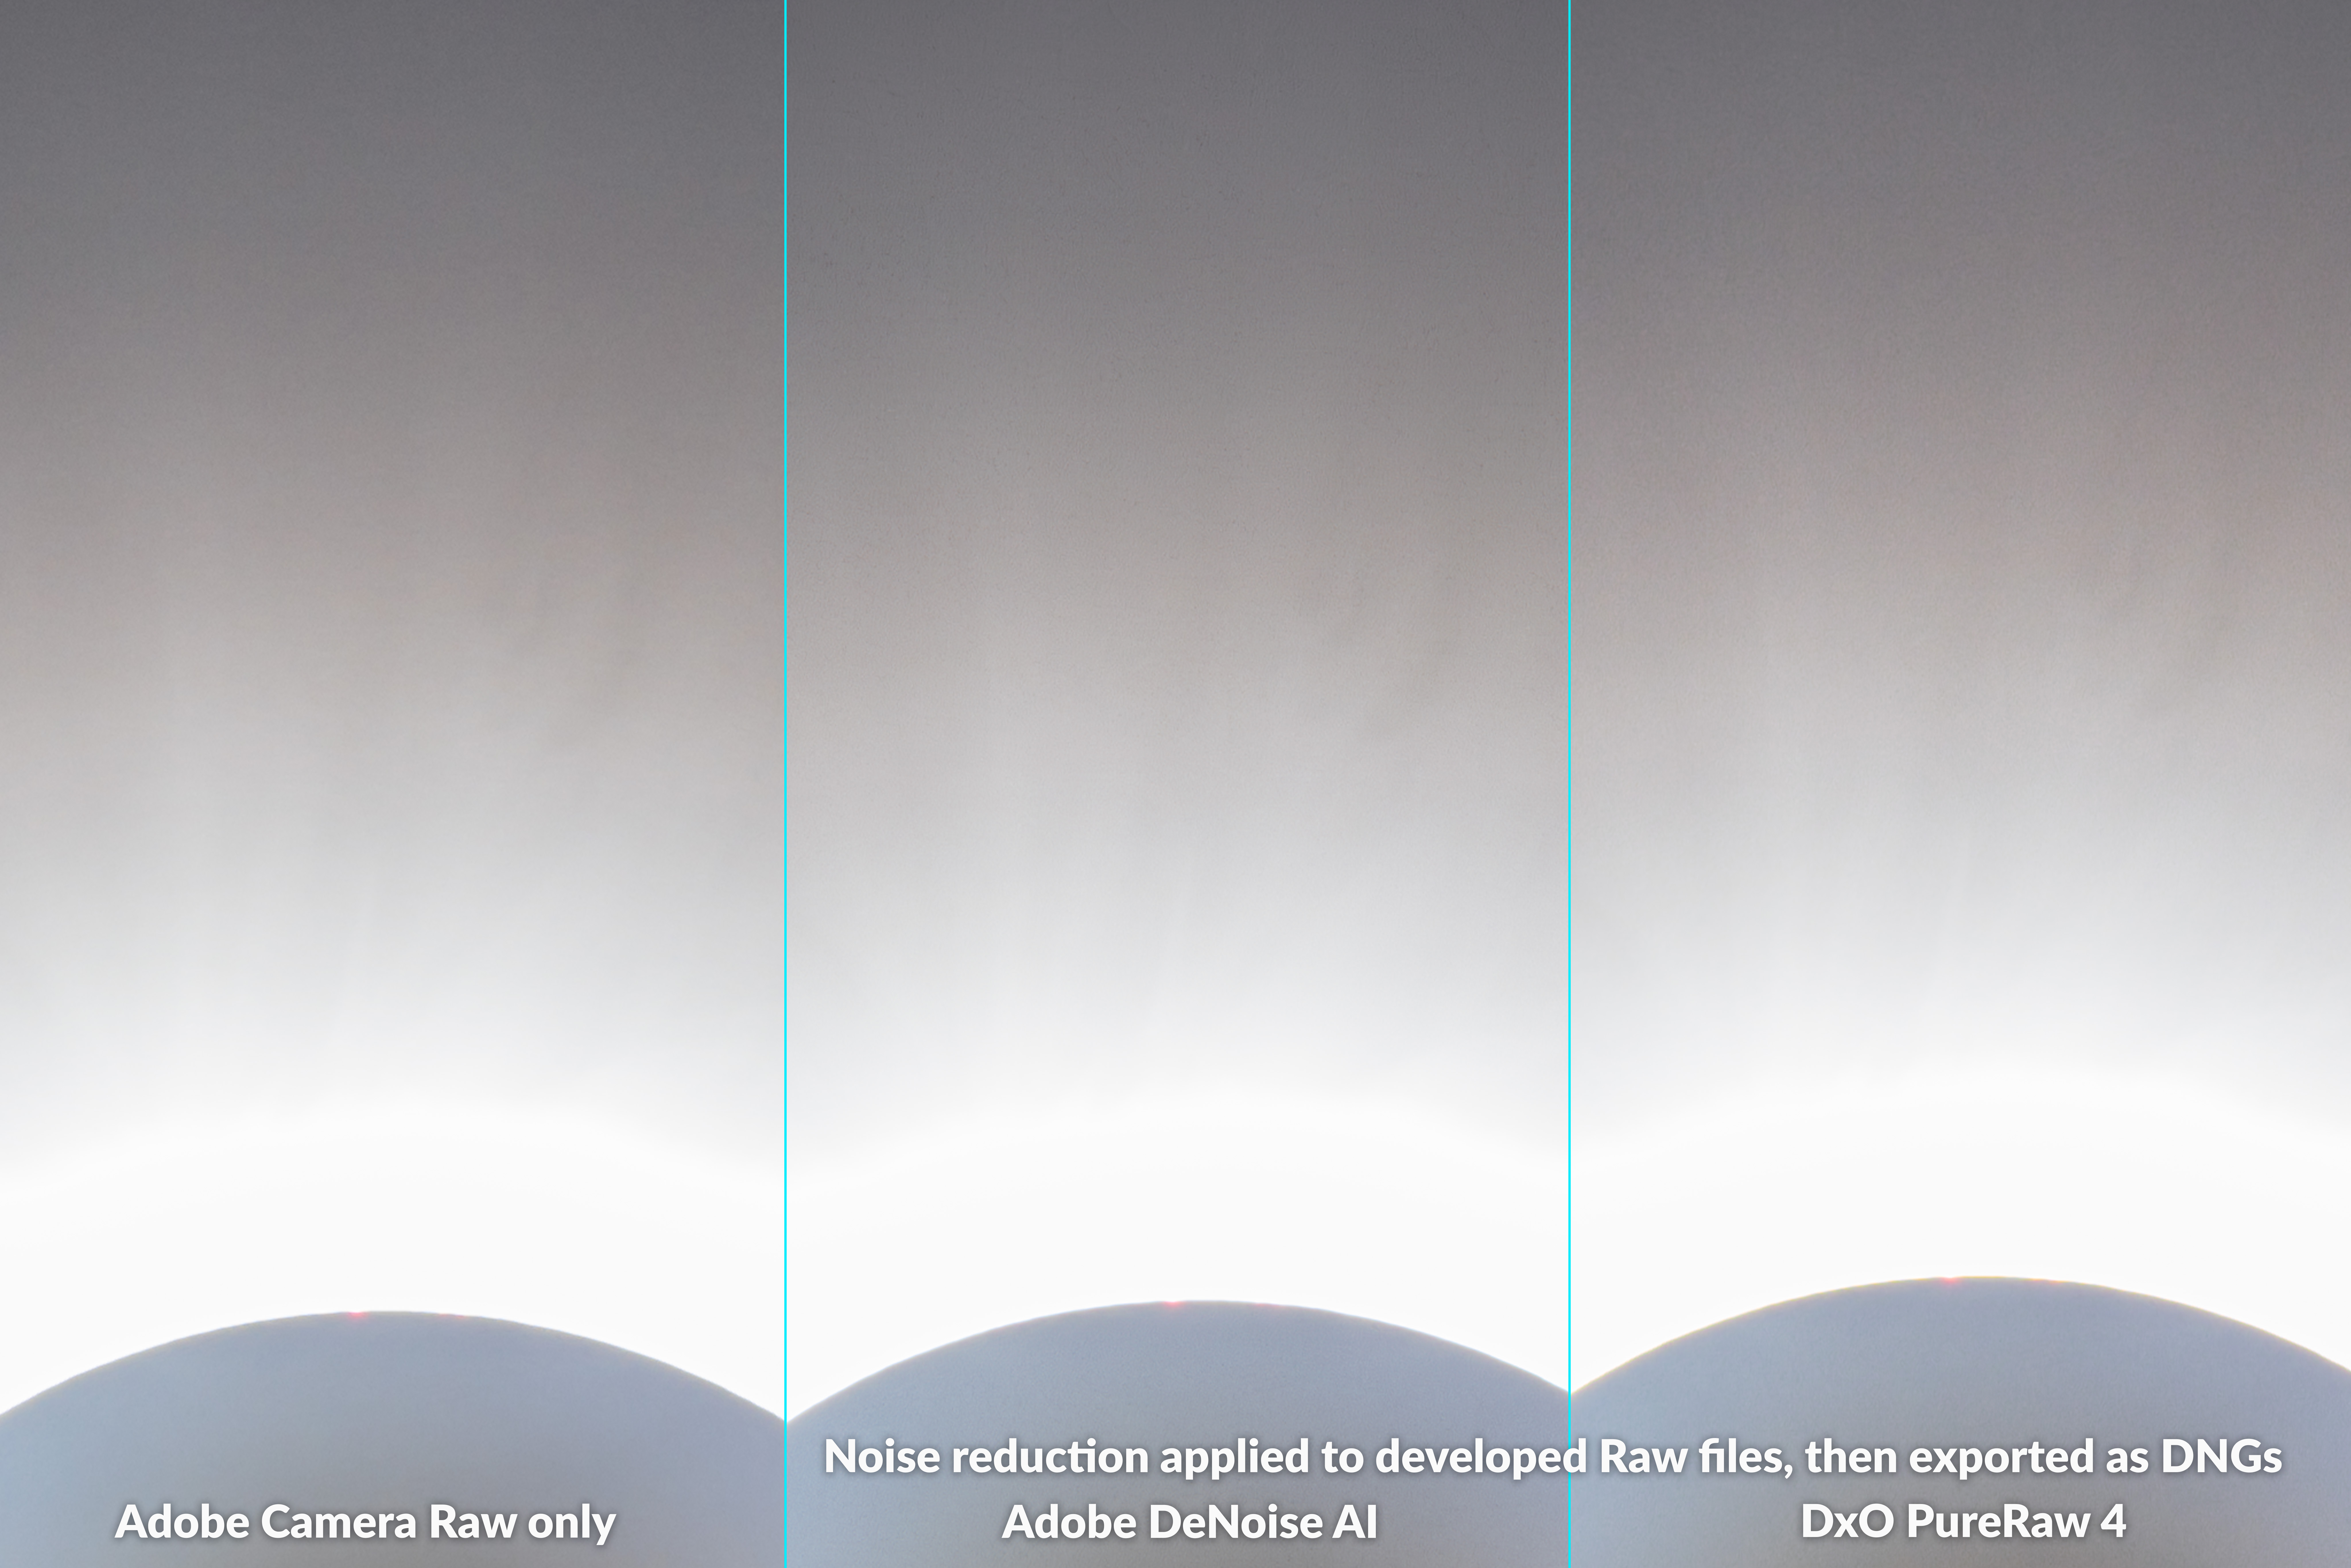
This is a close-up of a frame taken through a 105mm f/6 refractor at a focal length of 630mm. Even at ISO 100, thereโ€™s a pixel-level granulation visible, but in this case I donโ€™t think either Adobe DeNoise or PureRAW provided much of an improvement, likely because this is a low-ISO original.

In fact, I think Adobe DeNoise AI made noise worse, as its inherent sharpening added some dark flecks throughout the corona. But neither program introduced any banding, unlike Topaz was guilty of below. 


RAW-ONLY PROGRAMS โ€” DEEP-SKY

Here I compare the two Raw-only programs on several examples of deep-sky images โ€” photos of the Milky Way and nebulas taken with tracking mounts so the stars remain pinpoints, ideally! These examples are tough tests, as the AI models have likely received little training on what these are supposed to look like! And faint stars can look like noise. 

Orion Portrait 

Orion close-up โ€” with Canon Ra at ISO 800

First is a wide-angle portrait of Orion, blowing up the center of a tracked exposure with a 28-70mm zoom lens set to 46mm. (See my test of Canon RF zoom lenses here.) Shot at ISO 800, low for deep-sky images, this single frame is fairly clean to begin with. The AI programs do smooth the noise, without wiping out stars. Nice! 

But they do accentuate the residual chromatic aberration (the blue haloes) on stars. PureRAW looks a little worse as it seems to have shifted the color to more magenta. All three Raw files have identical settings and profiles applied, yet PureRAW looks slightly different. 

Cygnus H-alpha Monochrome 

Cygnus close-up โ€” with Canon Ra at ISO 3200 with Astronomik 12nm H-a clip-in filter

This is a more demanding example, shot with the same lens but at 70mm, and with the red-sensitive Canon Ra. It is rendered in monochrome as it was shot through a deep-red hydrogen-alpha filter to isolate the red light from the nebulas, here in Cygnus. 

This is a single frame (you would normally stack lots of these!), very noisy due not only to the high ISO used, but also because only the red pixels (one quarter of the total on the sensor) recorded any signal. 

Both Adobe DeNoise AI and DxO PureRaw have cleaned up the noise well. PureRAW has added more sharpening, tightening the stars and enhancing fine structure. Whether this is good or not depends on your goals and tolerance for AI-induced changes. In this case, I donโ€™t think it has invented details.

But then thereโ€™s this example โ€ฆ.

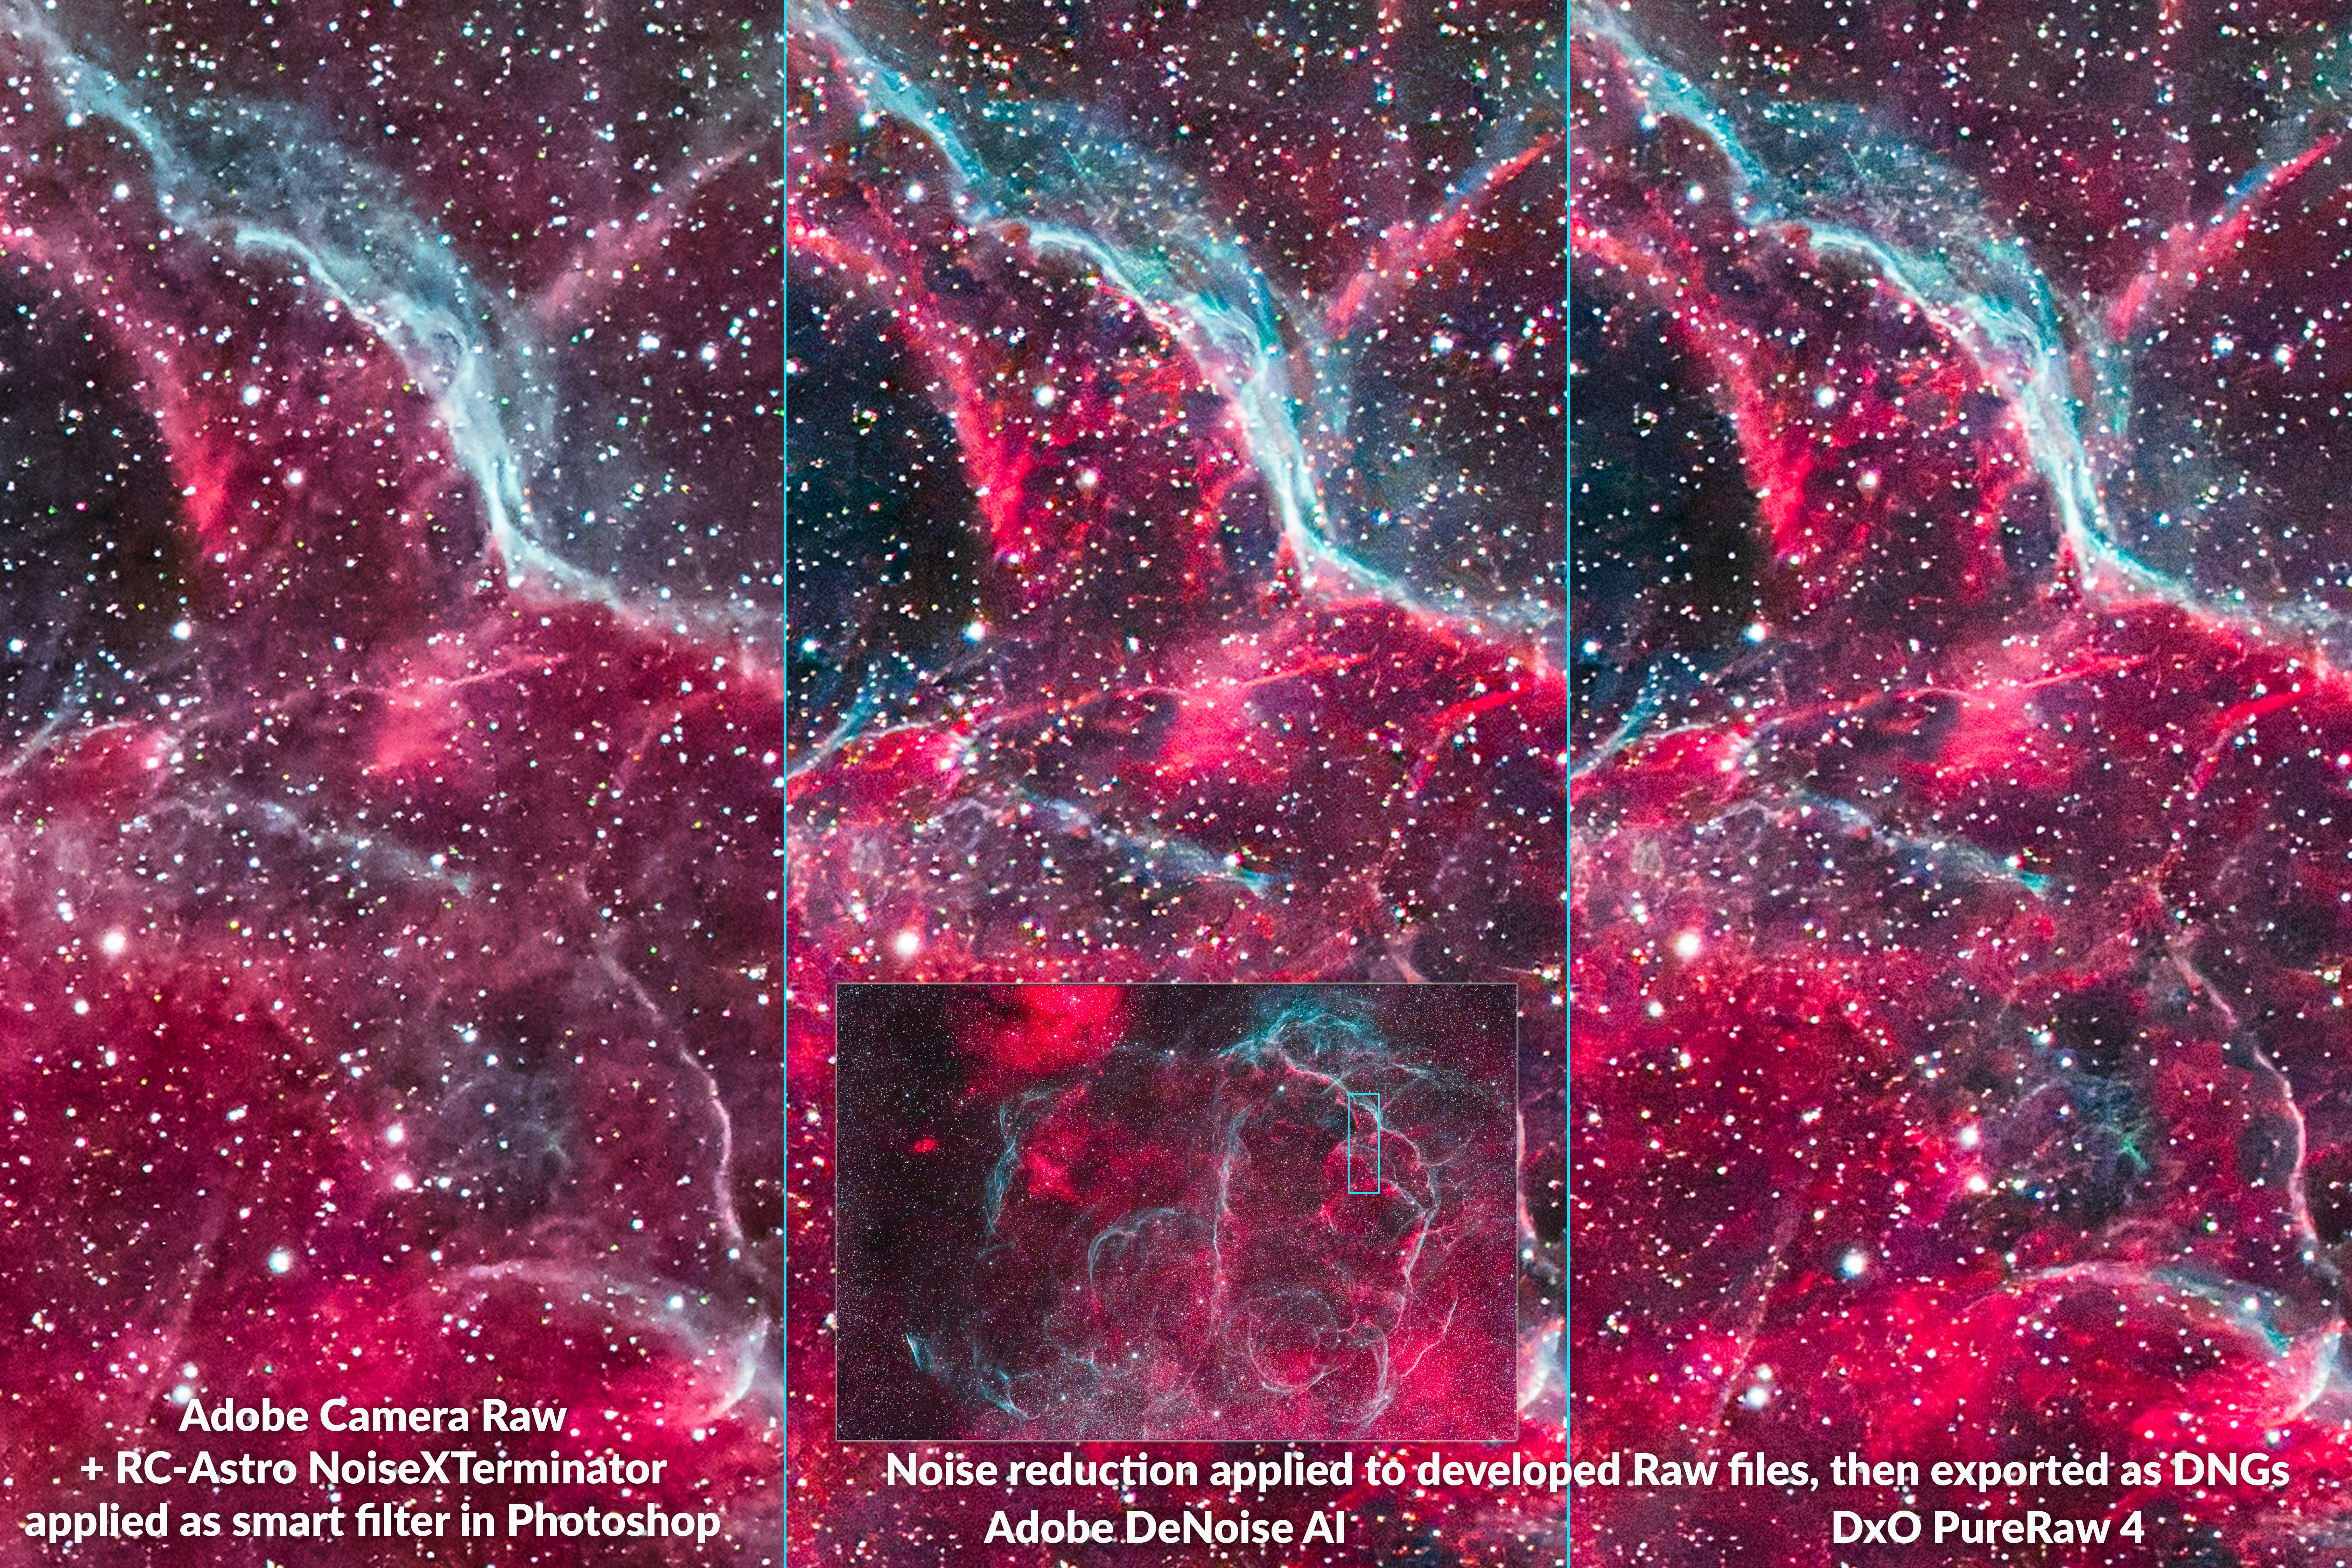
Vela Supernova Remnant 

Vela SNR close-up โ€” with modified Canon R at ISO 3200

This, too, is a filtered single frame, taken through a 61mm-aperture telescope equipped with a โ€œdual narrowbandโ€ filter which isolates the red H-alpha wavelength, but also the cyan Oxygen emission lines prominent in supernova remnants like this one in Vela. The deep filter requires shooting at a high ISO. So thereโ€™s lots of noise. 

In this trio, I also applied NoiseXTerminator to the left image, an AI-based noise reduction program designed for just such images. I show more examples with โ€œNoiseXโ€  at the end. 

I donโ€™t think Adobe DeNoise or PureRAW have done any better job than NoiseX at reducing noise. If anything, each might have added some additional texturing that looks artificial, and accentuated chromatic aberration haloes on the stars. NoiseX wins here, right? 

Well โ€ฆ look at the fine structures of the wisps of nebulas in all three panes. In the two panels at center and right, you can see more structure in the nebulosity, such as the protruding red fingers at top, that are not there in the NoiseX version at left. Is this real? Might other sharpening routines later in the workflow have brought it out anyway? Or are these details the products of AI imagination!? 

Before purists dismiss the Adobe and DxO AI programs for fabricating details, hereโ€™s another example.

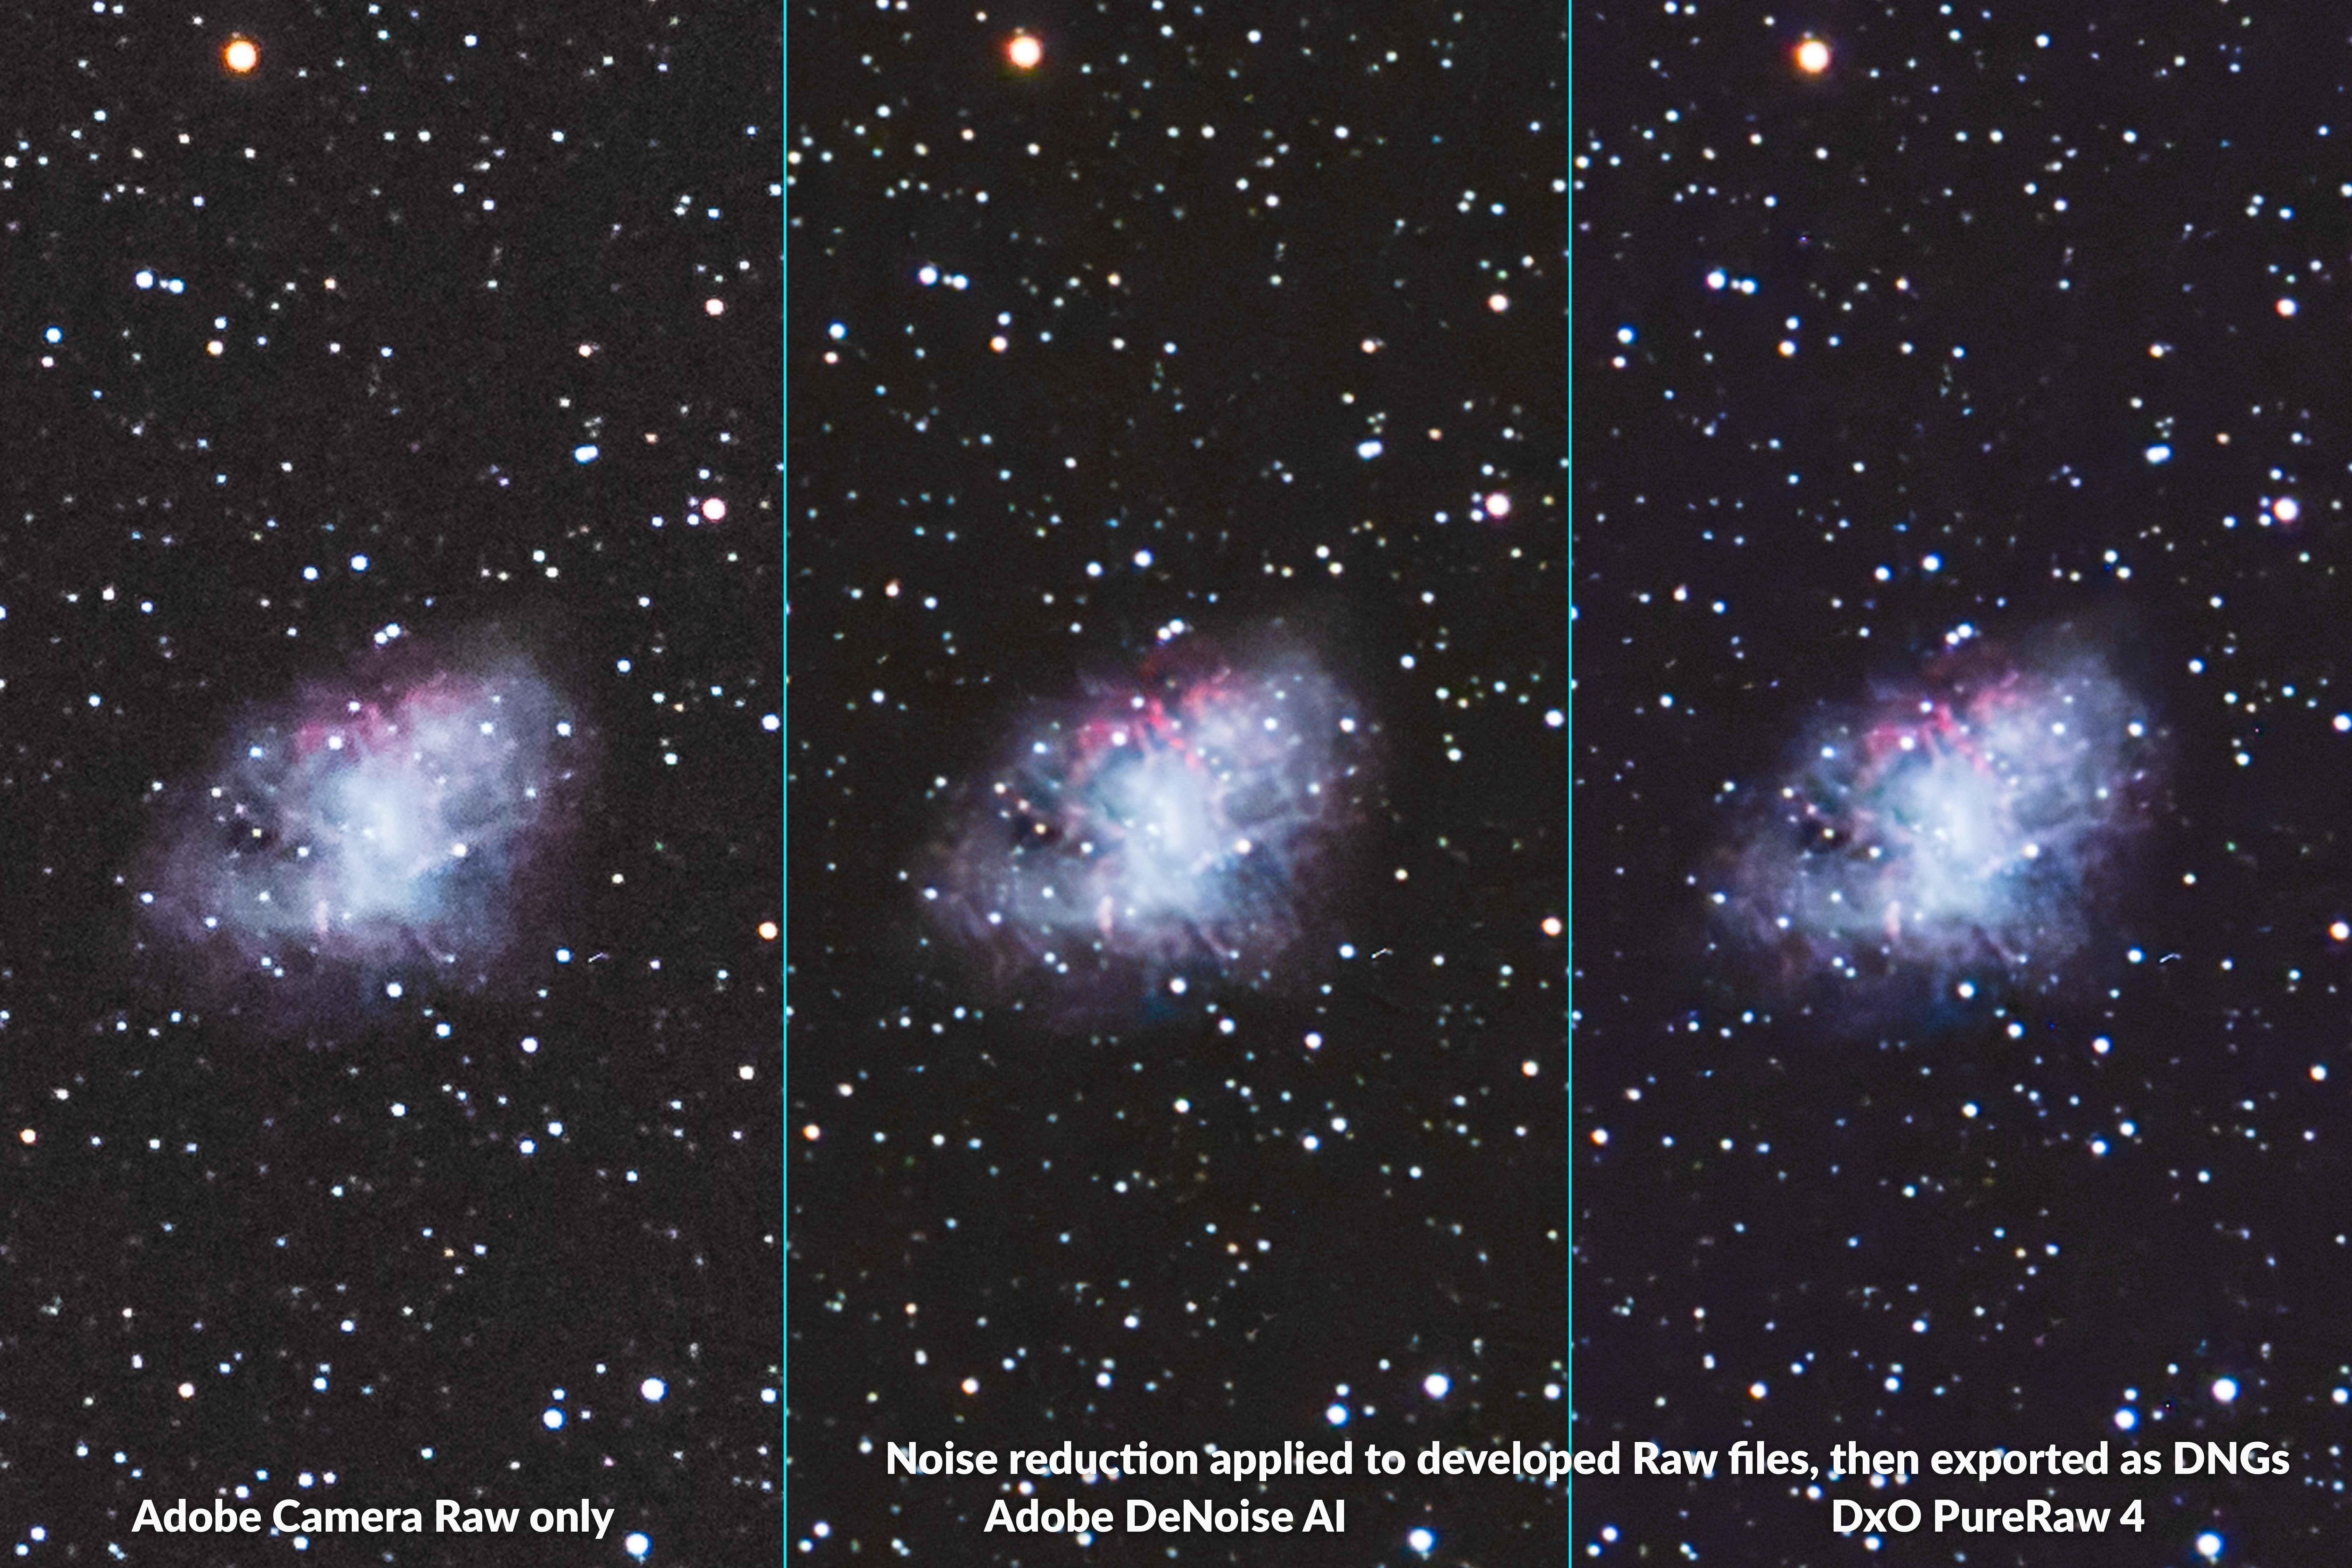
Crab Nebula

Crab Nebula close-up โ€” with modified Canon R at ISO 800

This is another supernova remnant, the famous Crab Nebula in Taurus. It is a 500% blow-up of the center of a single exposure with a modified Canon R on a 120mm f/7 refractor.

In this case, the โ€œnormal” image on the left has had just ACRโ€™s old-style noise reduction applied, nothing else. In the middle and on the right, the Adobe and DxO AI versions are noticeably less noisy. 

But โ€ฆ the small red tendrils are also more obvious with AI enhancement โ€” and they are real (as comparisons to other more detailed astrophotos showed me). So here the AI has helped bring out subtle details while smoothing noise. I think PureRAW has sharpened stars a little too much, and shifted the colors, again to magenta. 


Summary Points:

  • Both Adobe DeNoise AI and DxO PureRAW 4 can work wonders on nightscapesโ€ฆ
  • โ€ฆ Except on star trails! Both programs ruin star trails. 
  • Their improvements to low ISO images is not so great, if minimal.
  • In its conversion of Raw to DNG, PureRAW sometimes introduced minor and unwelcome changes to imagesโ€™ brightness and color. Adobe DeNoise did not. 
  • But PureRAW recovered details in textured landscapes much better than DeNoise, which can suffer from plastic looking artifacts. 
  • Both programs are worth trying on deep-sky images, if your workflow allows working with Raw files.
  • But you have to look carefully at the details โ€“ pixel peep! โ€“ as you might see oddities introduced by either program that you feel are unacceptable. Or you might see welcome sharpening, saving you more work later in processing.

Recommendations: 

  • Adobe DeNoise AI has the advantage that if you are an Adobe Cloud subscriber you already have it. It is included with Lightroom and Camera Raw. So try DeNoise AI; you might like the results. Or not! But as with DxO PureRAW, it can be applied only to Raw files and only at the start of a workflow. 
  • Download the trial copy of DxO PureRAW and test it on your own images. You might prefer it in your workflow. 

OTHER PROGRAMS โ€” WORKING STAND-ALONE ON RAW FILES

Now I test Luminar Neo Noiseless AI, ON1 NoNoise AI, and Topaz Photo AI โ€” three AI noise reduction programs that can work not only on Raw files but on other file formats, allowing them to be applied at various points in a workflow. 

All three programs can read Raw files from a wide range of cameras. Like PureRAW, ON1 and Topaz can also export DNG files, Adobeโ€™s universal version of a Raw file. The best format Luminar can export to is a 16-bit TIFF. 

I sent all the raw images Iโ€™ve shown above, plus a dozen more Iโ€™m not showing, through all three programs working as stand-alone apps, similar to how PureRAW operates. I usually applied their default or auto settings for noise reduction, and also for sharpening, as both Adobe and DxO also sharpen โ€” you canโ€™t have them not sharpen. I wanted to compare like to like. 

Aurora Curtain 

Aurora Curtain with three programs as stand-alone apps

The exported files from all three programs showed noticeable differences in brightness and color on this aurora example from the May 10, 2024 display. Again, all have had the same develop settings applied to them as were applied to the original file in Camera Raw. Topaz shows over-sharpening, but that can be turned down from the usually excessive level chosen by its โ€œAuto Pilotโ€ routine. 

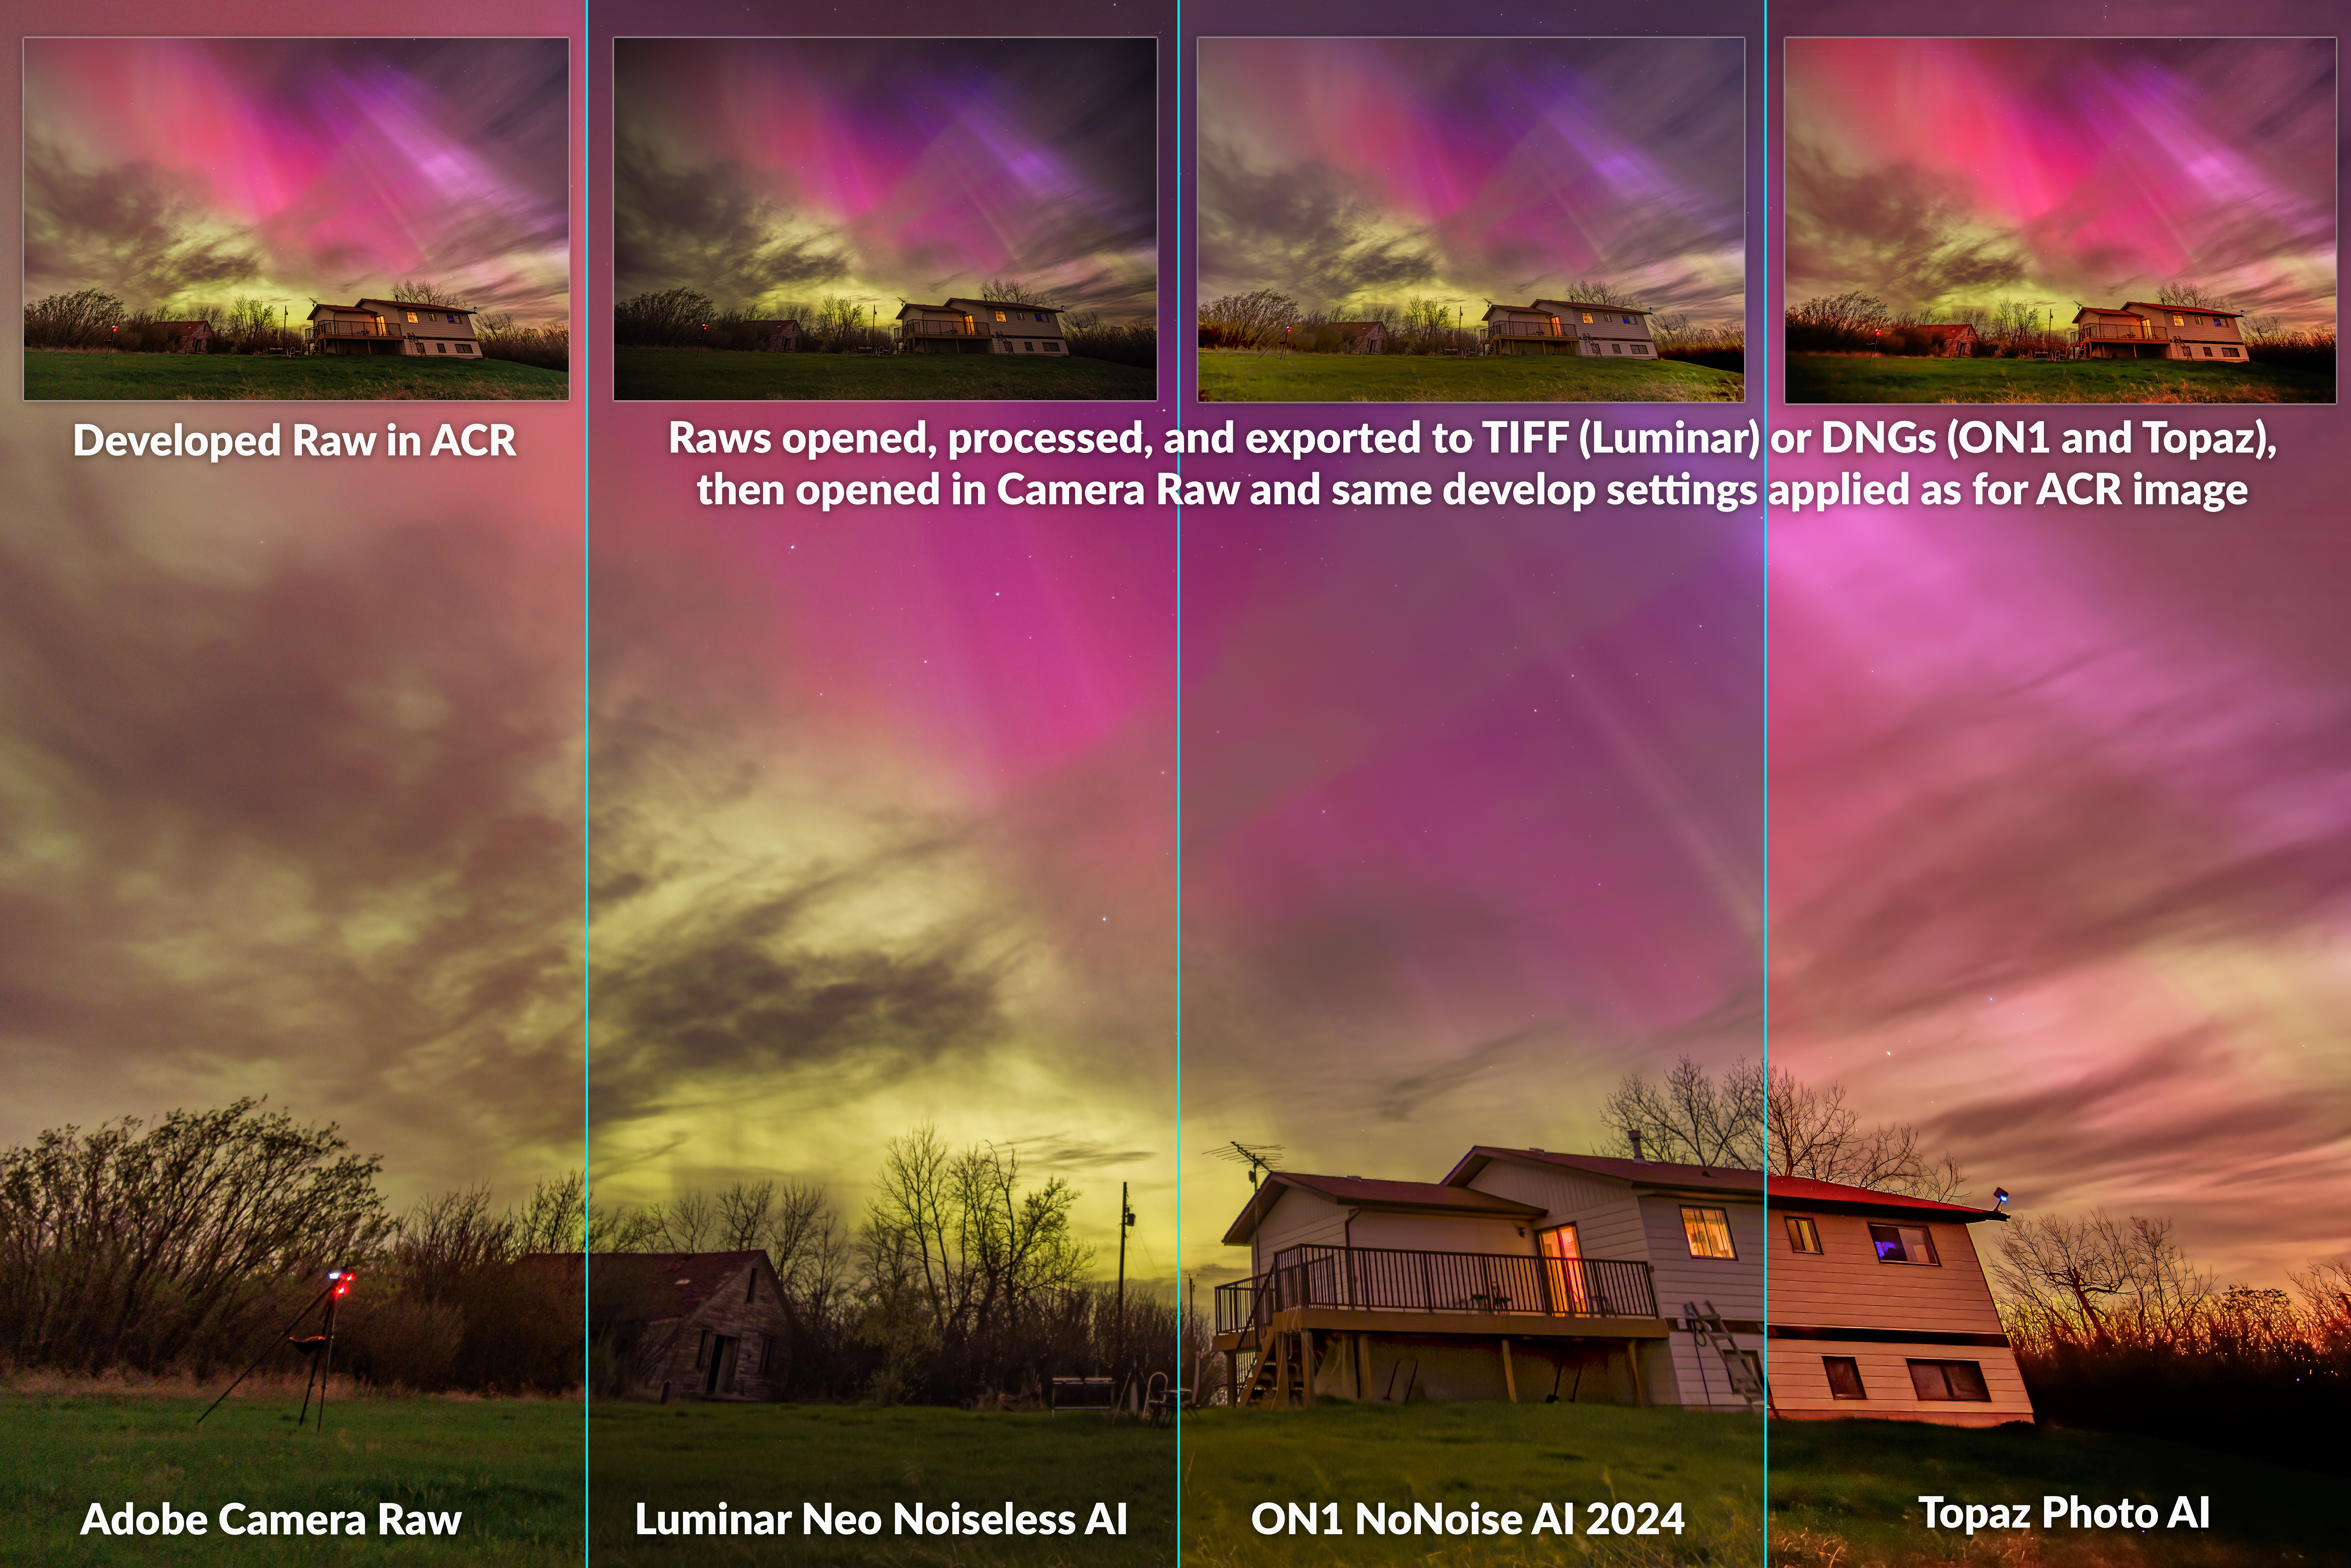
Aurora over House

Aurora over House with three programs as stand-alone apps

Another aurora example also shows significant differences in brightness, color and contrast. Auroras are particularly sensitive to shifts in white balance and to the camera profile chosen. In this case the profile was Camera Neutral. Only Luminar honored that profile; ON1 and Topaz offered only a generic Color profile in their DNGs. Luminar did not apply the lens correction for the Venus Optics 15mm lens used here, as it was not in its database. So its image looks dark and vignetted, requiring manual adjustments. 

Peyto Lake Nightscape

Peyto Lake nightscape with three programs as stand-alone apps

The differences became even more marked on some of my test nightscapes. In this ISO 3200 Canon R5 image from Peyto Lake in Banff only Topazโ€™s exported DNG succeeds in resembling the original developed Raw file from ACR. Luminarโ€™s TIFF is far too dark and ON1โ€™s DNG is way too bright and contrasty. What happened there? 

Storm Mountain Nightscape 

Storm Mountain twilight scene with three programs as stand-alone apps

Another example, shot at ISO 100 with the Canon R5, also shows major disparities between the original Raw files and the exported images, with Luminarโ€™s now looking the closest, ON1 still too bright and contrasty, and Topazโ€™s way too dark. There is no predicting what youโ€™ll get. 

I think the differences might be due to how each program interprets the camera profile used, but the reason is a mystery.


Summary Points: 

  • Unlike DxO PureRAW 4, none of these three programs can be used in practice as stand-alone noise reduction apps, at least not with reliable results. 

Recommendations: 

  • Use Luminar Neo, ON1 NoNoise AI and Topaz Photo AI only as plug-ins, at least for noise reduction. Thatโ€™s what I test next. 

THE SAME TRIO โ€” AS PLUG-INS WITHIN PHOTOSHOP 

Thankfully, when I used the same three programs called up from within Photoshop as filter plug-ins, all worked well, though with varying levels of noise reduction quality. 

All three can also be called up from within Adobe Lightroom.

Sending images to Plug-Ins with Lightroom, using Edit in ….

However, for the latter, do not use the route I advised at the beginning for DxO PureRAW. Do not send images to them via File>Plug-In Extras โ€ฆ. While that will work, youโ€™ll get the same bad results I show in the previous section when using the programs as stand-alone apps.ย 

Instead, as I show immediately above, from Lightroom, use Photo>Edit Inโ€ฆ and choose your plug-in. That will produce the same good results I show below.ย 

An even better method is to choose Photo>Edit In>Open as Smart Object in Photoshop. You can then apply these or any plug-in as a non-destructive โ€œsmart filter,โ€ with settings you can re-adjust at any time, rather than being โ€œbaked intoโ€ the resulting TIFF file. Thatโ€™s what I did for the tests below. 

I can hear the anti-Adobe faction clamouring! For those who do not use Photoshop, all three programs will also install as plug-ins into Affinity Photo 2, a very Photoshop-like layer-based editor available under a perpetual license at low cost. However, I did not test that workflow variation. 

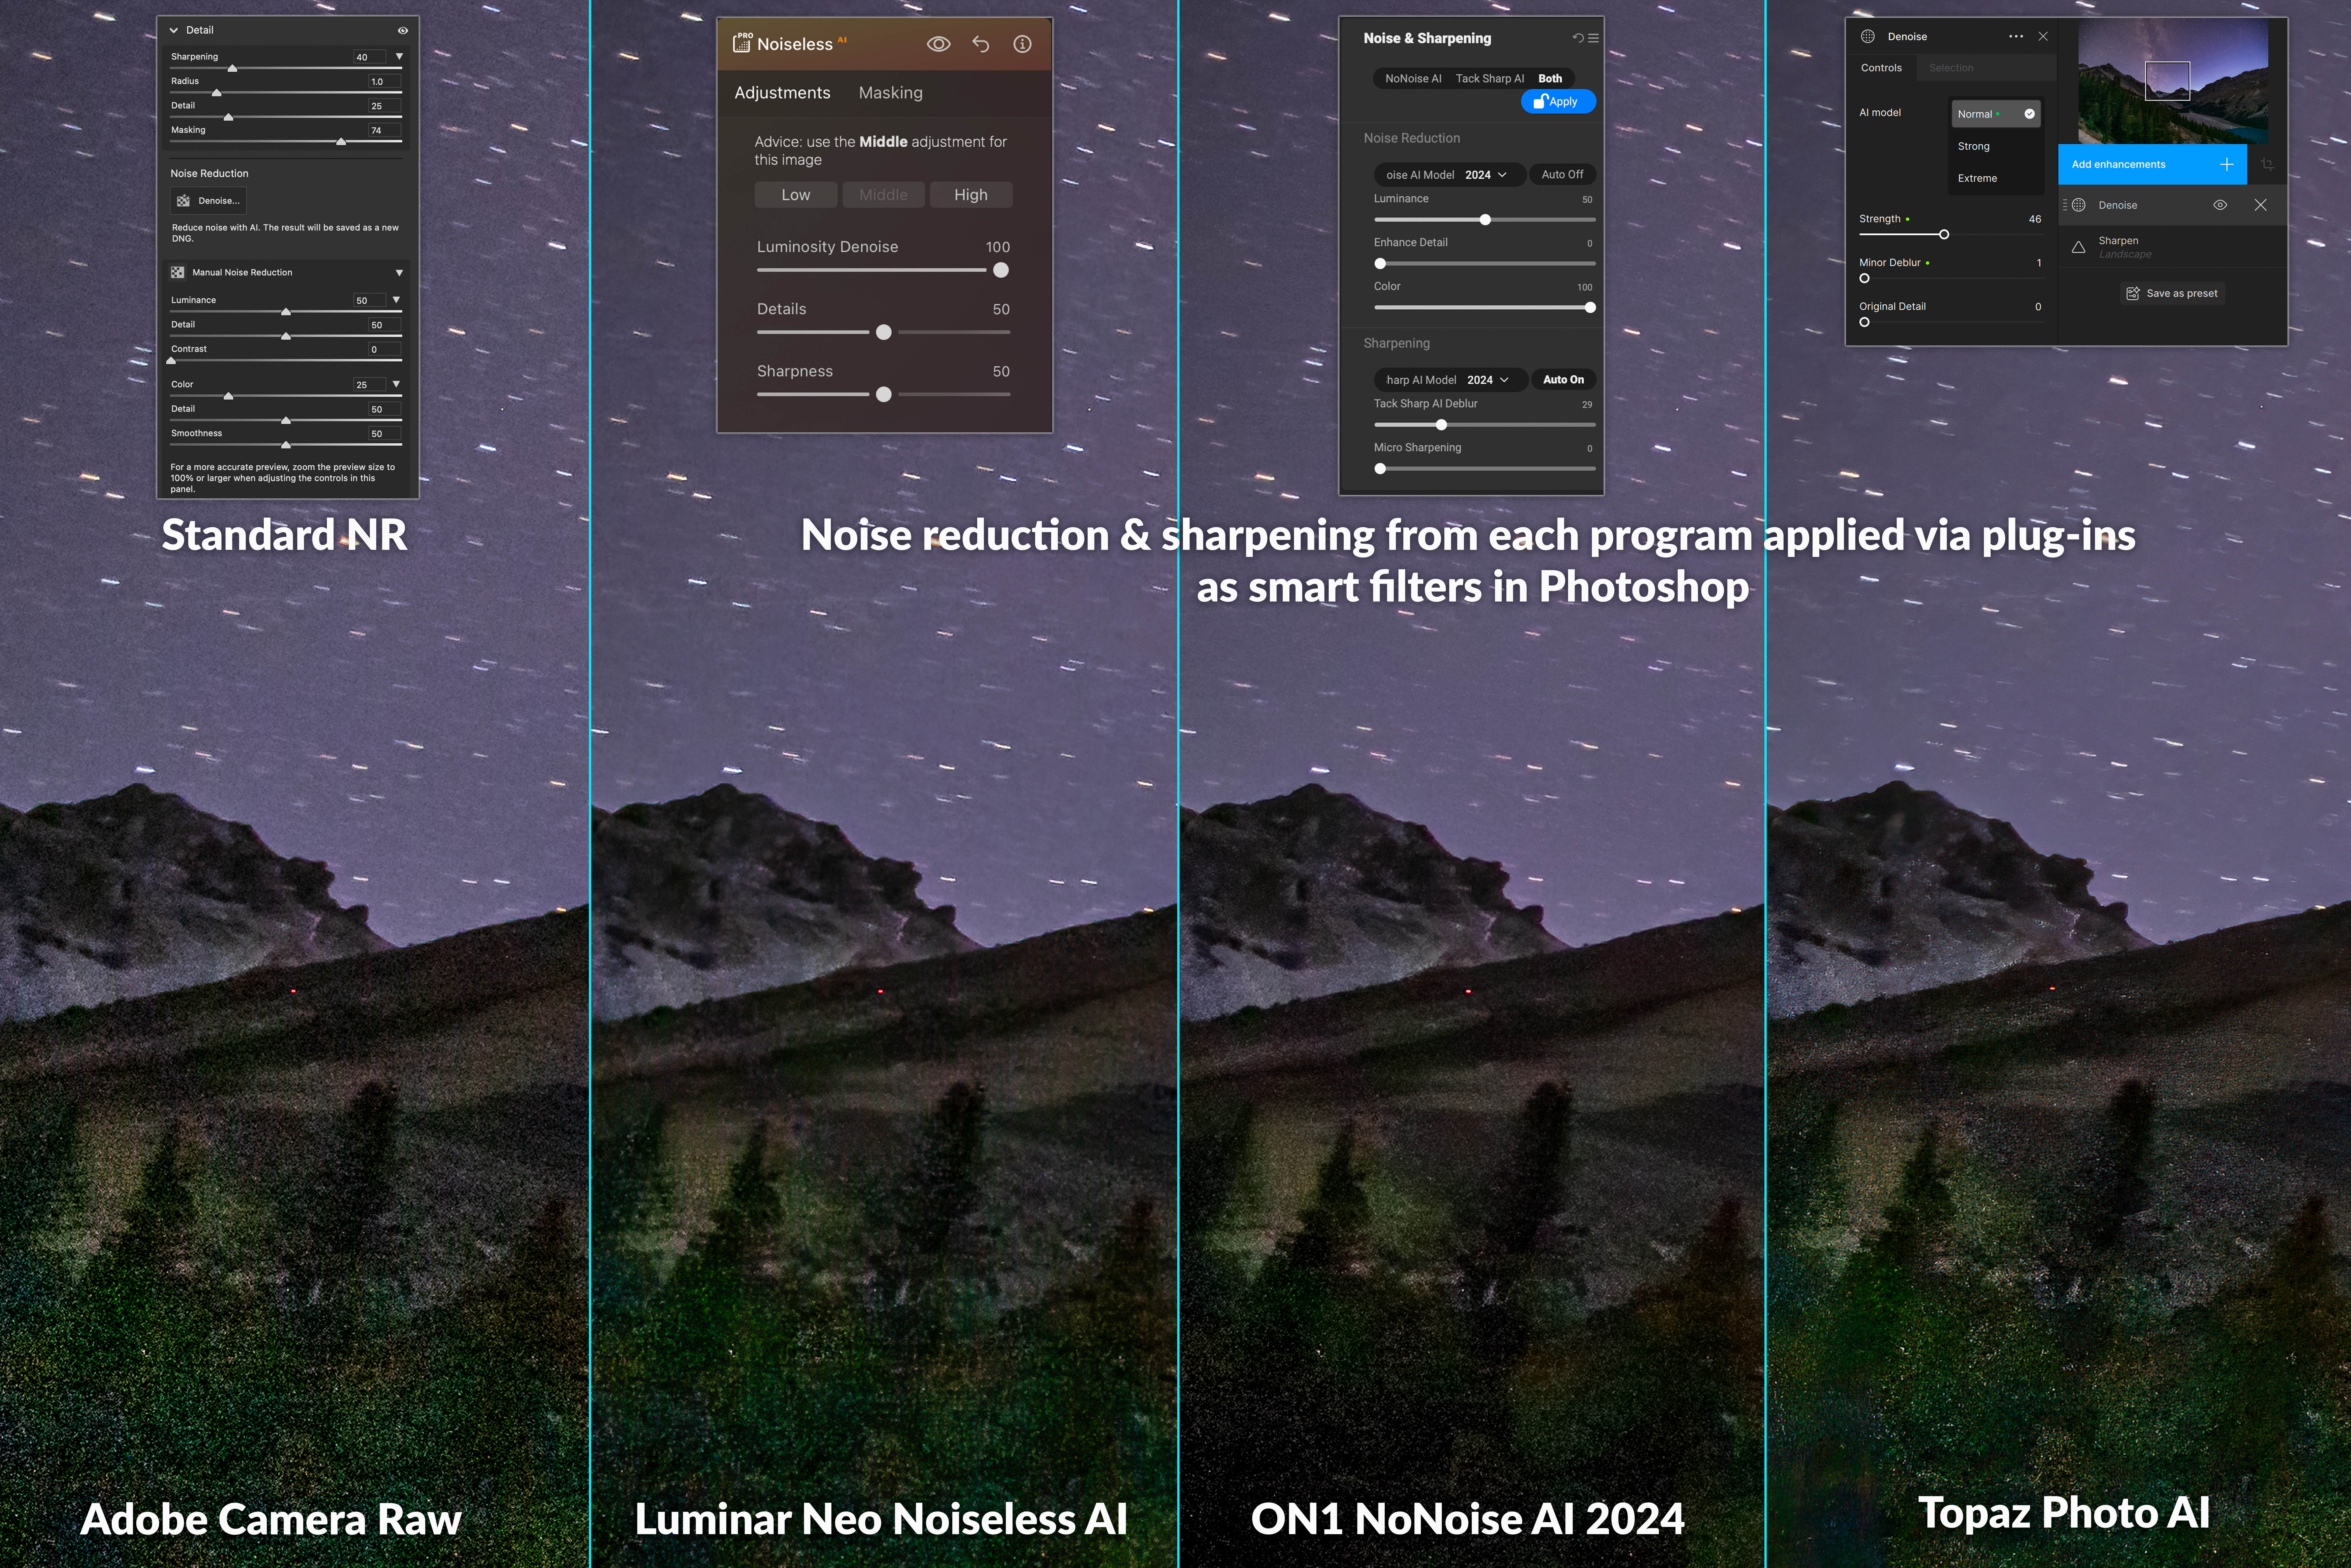
Peyto Lake Nightscape 

Peyto Lake close-up โ€” with Canon R5 at ISO 3200

Here, on blow-ups of a noisy frame corner, I show the settings I used. Most are default, except for ON1 where I backed off its Tack Sharp Deblur from the 100 it had picked. While ON1 NoNoise ostensibly has an Auto function for detecting and applying an amount of noise reduction and sharpening suitable for each photo, it often picks 100%. 

However, ON1 NoNoise AI did the best job. Topaz Photo AI still left noise in the foreground. Luminar Noiseless AI wasnโ€™t bad, but left a noisier sky with some patchy artifacts. 

Aurora Curtain

Aurora Curtain โ€” with Canon Ra at ISO 1600

On the aurora example, I also applied Photoshopโ€™s old Reduce Noise filter to the image brought in from Camera Raw. It can do a good job smoothing fine-scale noise. 

With that conventional filter applied I found there wasnโ€™t a big difference among the four versions. The three AI programs did a good job, with ON1 and Topaz better than Luminar, which still left some noise. Topaz over-sharpened the stars and trees, leaving colorful ringing artifacts on the latter. And that was with its Sharpen filter backed off to 30 from the 50 the Auto Pilot routine suggested using. 

Vela Supernova Remnant Deep-Sky

Vela SNR close-up โ€” with modified Canon R at ISO 3200

Luminar Noiseless AI improved this noisy frame by only a small degree. ON1 and Topaz were much better, providing good noise reduction without adding significant artifacts or odd โ€œinventedโ€ structures. As usual, Topaz sharpened stars by default, and perhaps a little too much. 

Cygnus Starfield Deep-Sky

Cygnus close-up โ€” with Canon Ra at ISO 1600

This star-rich field taken with a 70mm lens tests how well the programs can retain tiny stars while smoothing noise. Luminar left stars intact but didnโ€™t provide much better noise reduction over what Camera Rawโ€™s old manual noise sliders produced. 

ON1 did provide a smoother background sky. But retaining faint stars required backing off Luminance noise reduction and increasing Enhance Detail to bring back the faint stars it wiped out with its default settings. Boosting Deblur and Micro Contrast can add ugly haloes on stars. So, with a deft touch to the sliders the results with ON1 can be very good, with the added benefit that it appears to reduce residual chromatic aberration around stars without affecting star colors. 

With Topaz, sliding up Original Detail helped bring back stars lost to noise smoothing. However, there was an odd general reduction in contrast over the image.

Solar Eclipse Corona Close-Up 

Corona close-up โ€” with Canon R5 at ISO 100

Each program handled this low-ISO file a little differently. Luminar seemed to actually increase noise, adding coarser structures and some banding. ON1 was the smoothest, with noticeably less noise than the original Camera Raw image. Topaz left (or added?) some fine scale color noise. It sharpened the lunar limb very well, though with a slight dark halo. 

But the real revelation was when I zoomed out to look at the darker sky beyond the brightest parts of the corona. 

Solar Corona Banding Artifacts

Corona sky close-up โ€” with Canon R5 at ISO 100, showing Topaz banding artifacts

Topaz Photo AI introduced very noticeable banding in the form of square blocks, an artifact of how AI programs analyze images in โ€œtiles.โ€ I did see this in other photos processed with Photo AI, in areas that should look smooth. The culprit is the noise reduction; turn it off and the banding goes away, but now you have noise! 

In this case, Topazโ€™s noise reduction ruined the image, though its sharpening was useful. Overall, I think ON1 NoNoise AI 2024 was the winning plug-in for noise reduction. But Iโ€™ve used Photo AI to sharpen solar prominences. 


Summary Points: 

  • All three programs worked well as plug-ins, with none of the extreme shifts in color or tone shown in the previous section in the stand-alone app exports. 
  • However, even as a plug-in I felt Luminar Neoโ€™s Noiseless AI filter consistently produced the worst results, or often little benefit at all.
  • Topaz Photo AI can produce good results, but watch for banding artifacts and over-sharpening. I also found that Topaz was prone to crashes and lock-ups, requiring force-quitting. 
  • ON1 NoNoise AI 2024 provided the best overall noise reduction among these three plug-ins. The 2024 version is much improved over the 2023 version which had a High Detail mode that was awful! Even so, watch for loss of stars, or sharpening haloes. Play with the sliders. 

Recommendations: 

  • While Topaz Photo AI is popular among nature photographers, I would suggest ON1โ€™s NoNoise AI 2024 is the better choice for astrophotographers looking for a noise reduction plug-in. 
  • I canโ€™t dismiss Luminar Neo. I like it for some of its other special effect filters, such as Orton glows, Magic Light, Sky Enhancer AI, and Accent AI. I find it a useful plug-in for effects and finishing touches. However, I would not recommend Luminar for noise reduction. 

SPECIALIZED PROGRAMS โ€” NOISE XTERMINATOR and GRAXPERT 

No review of AI programs for astrophotography can leave out RC-Astroโ€™s XTerminator plug-ins. Here I show Russell Cromanโ€™s NoiseXTerminator which uses AI trained on star-filled astrophotos. I tested it as a filter plug-in for Photoshop.

Also becoming popular in the last year is the free stand-alone application GraXpert. Developed first to eliminate nasty gradients of tone and color across deep-sky images due to light pollution, GraXpert now also includes AI-based noise reduction. I tested it as a stand-alone application; it does not install as a plug-in, though like NoiseXTerminator, it can install as a process accessible from within the popular astrophoto program PixInsight. 

As a stand-alone app, GraXpert can only import and work on TIFFs, JPGs, or FITS files, the latter format produced by dedicated astro cameras. 

I show only deep-sky image examples, as thatโ€™s the domain of these two programs. 

Crab Nebula with NoiseXTerminator vs. ON1 and Topaz

Crab Nebula close-up โ€” with modified Canon R at ISO 800

First I show a comparison of the Crab Nebula test image with ACRโ€™s standard non-AI noise reduction applied plus Photoshopโ€™s old Reduce Noise filter. I compare this to the same image but with NoiseXTerminator also applied at 60% strength. Now compare this to versions with ON1 NoNoise and Topaz Photo AI. 

NoiseXTerminator produced the smoothest result with no detrimental affect on the stars or nebulosity. ON1 is a good second place for noise reduction, with slightly sharper stars, which may or may not be desirable. Topaz produced subtle patchy artifacts and added tiny structures that may or may not be real. 

NGC 1763 with NoiseXTerminator vs. ON1 and Topaz

NGC 1763 in LMC โ€” with modified Canon R at ISO 3200

This is a single-frame close-up of the second best nebula in the Large Magellanic Cloud (after the Tarantula), taken at ISO 3200 through a dual-narrowband filter. So it is noisy. 

The left panel is again with ACR and Photoshopโ€™s Reduce Noise. But applying NoiseXTerminator cleaned the image up a lot. ON1 looks almost as good. Topaz sharpened detail to the point of revealing pinprick faint stars that are just blurs in the other images. These may indeed be real! 

Vela Supernova Remnant with Noise XTerminator and GraXpert

Vela SNR close-up โ€” with modified Canon R at ISO 3200

The same Vela SNR image I used earlier shows excellent noise reduction from NoiseXTerminator, with star colors and nebula structures left alone. GraXpert at 50% strength (the developers have suggested backing off the settings) did not produce as smooth a sky. Applying GraXpert at 100% strength did yield noise reduction on par with NoiseX, but produced a slightly softer overall image. 

Crab Nebula with Noise XTerminator and GraXpert

Crab Nebula close-up โ€” with modified Canon R at ISO 800

Processing the Crab Nebula image shows much the same results. Though I think here even at 100% GraXpert isnโ€™t producing as good a level of noise reduction as NoiseX, leaving some patchiness amid the nebula, and a mottled texturing to the background sky. 


Summary Points: 

  • For the best noise reduction on deep-sky images, especially telescopic close-ups, the dedicated programs NoiseXTerminator and GraXpert trained on such images can do a better job than general-purpose AI programs. 
  • I find NoiseXTerminator the better of the two, but GraXpert is new and evolving. 

Recommendations: 

  • GraXpert has the great benefit of being free! But on Macs it runs very slowly, something the developers admit and seem resigned to, as their market is Windows users. My test images each took 2 to 2.5 minutes to process, some 5 to 10 times slower than any of the other programs. And it runs only as a stand-alone app, yet it cannot read Raw files from DSLRs or mirrorless cameras, unlike PureRAW. But if you are a deep-sky imager, try it, as its main purpose โ€“ gradient removal โ€“ might prove indispensable. 
  • As I prefer to accomplish as much of my editing as possible within one program, I prefer NoiseXTerminator as it can be applied from within Photoshop, and as an editable smart filter. I use it on most of my deep-sky images. I highly recommend it and RC-Astroโ€™s other plug-ins. 

YOUR MILEAGE MAY VARY! 

The nature of AI means that results with any program can vary from image to image. Thatโ€™s why no one, me included, can claim that one program is โ€œthe best!โ€ Best for what? And with what workflow? 

As some programs, such as Topaz Photo AI, offer multiple AI models and settings for strength and sharpening, results on the same image can be quite different. In most of my testing I used either the programโ€™s auto defaults or backed off from those defaults where I thought the effect was too strong and detrimental to the image.

This is all by way of saying, your mileage may vary! In fact, it certainly will. 

So donโ€™t take my word for it. Most programs (Luminar Neo is an exception) are available as free trial copies to test out on your astro-images and in your preferred workflow. Test for yourself. 

But do pixel peep. Thatโ€™s where youโ€™ll see the flaws. And the benefits. We are fortunate to have such a great arsenal of tools at our disposal. They will only get better as the AI models improve. 

I hope my review โ€“ as lengthy as it is! โ€“ has helped you make an informed decision on what to buy. 

โ€” Alan, May 29, 2024 / AmazingSky.com  


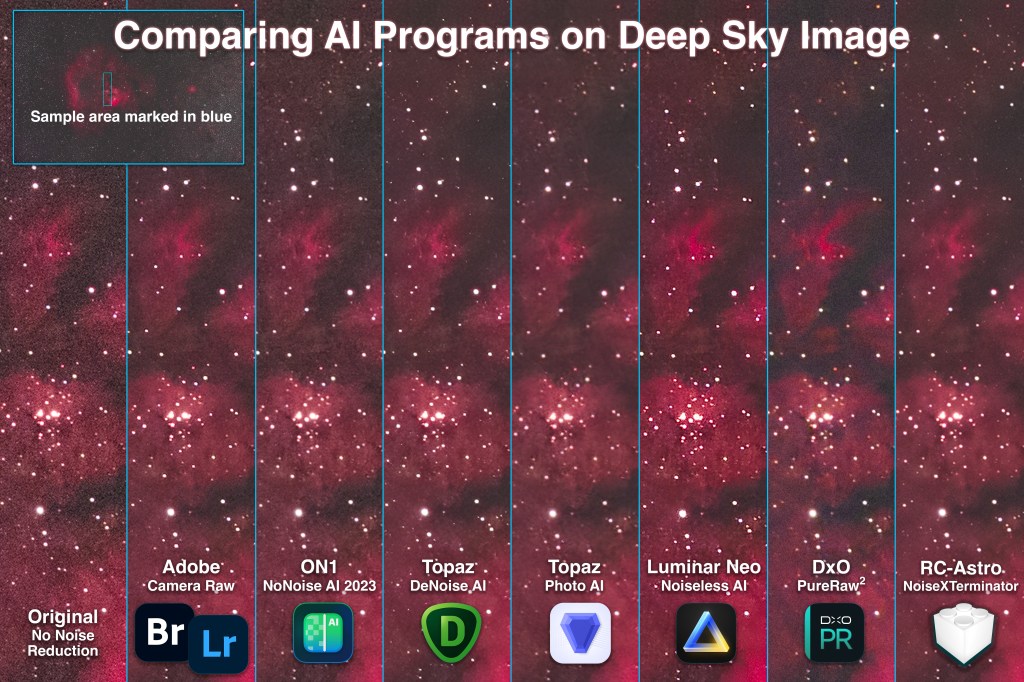
Testing Noise Reduction Programs for Astrophotography


In a detailed technical blog I compare six AI-based noise reduction programs for the demands of astrophotography. Some can work wonders. Others can ruin your image. 

Over the last two years we have seen a spate of specialized programs introduced for removing digital noise from photos. The new generation of programs use artificial intelligence (AI), aka machine learning, trained on thousands of images to better distinguish unwanted noise from desirable image content.

At least thatโ€™s the promise โ€“ and for noisy but normal daytime images they do work very well. 

But in astrophotography our main subjects โ€“ stars โ€“ can look a lot like specks of pixel-level noise. How well can each program reduce noise without eliminating stars or wanted details, or introducing odd artifacts, making images worse. 

To find out, I tested six of the new AI-based programs on real-world โ€“ or rather โ€œreal-skyโ€ โ€“ astrophotos. Does one program stand out from the rest for astrophotography? 

NOTE: All the images are full-resolution JPGs you can tap or click on to download for detailed inspection. But that does make the blog page slow to load initially. Patience! 


TL;DR SUMMARY

The new AI-trained noise reduction programs can indeed eliminate noise better than older non-AI programs, while leaving fine details untouched or even sharpening them. 

  • Of the group tested, the winner for use on just star-filled images is a specialized program for astrophotography, NoiseXTerminator from RC-Astro.
  • For nightscapes and other images, Topaz DeNoise AI performed well, better than it did in earlier versions that left lots of patchy artifacts, something AI programs can be prone to. 
  • While ON1โ€™s new NoNoise AI 2023 performed fine, it proved slightly worse in some cases than its earlier 2022 version. Its new sharpening routine needs work.
  • Other new programs, notably Topaz Photo AI and Luminarโ€™s Noiseless AI, also need improvement before they are ready to be used for the rigours of astrophotography. 
  • For reasons explained below, I would not recommend DxOโ€™s PureRAW2.ย [See below for comments on the newer DxO PureRaw3, which suffers from the same issues.]

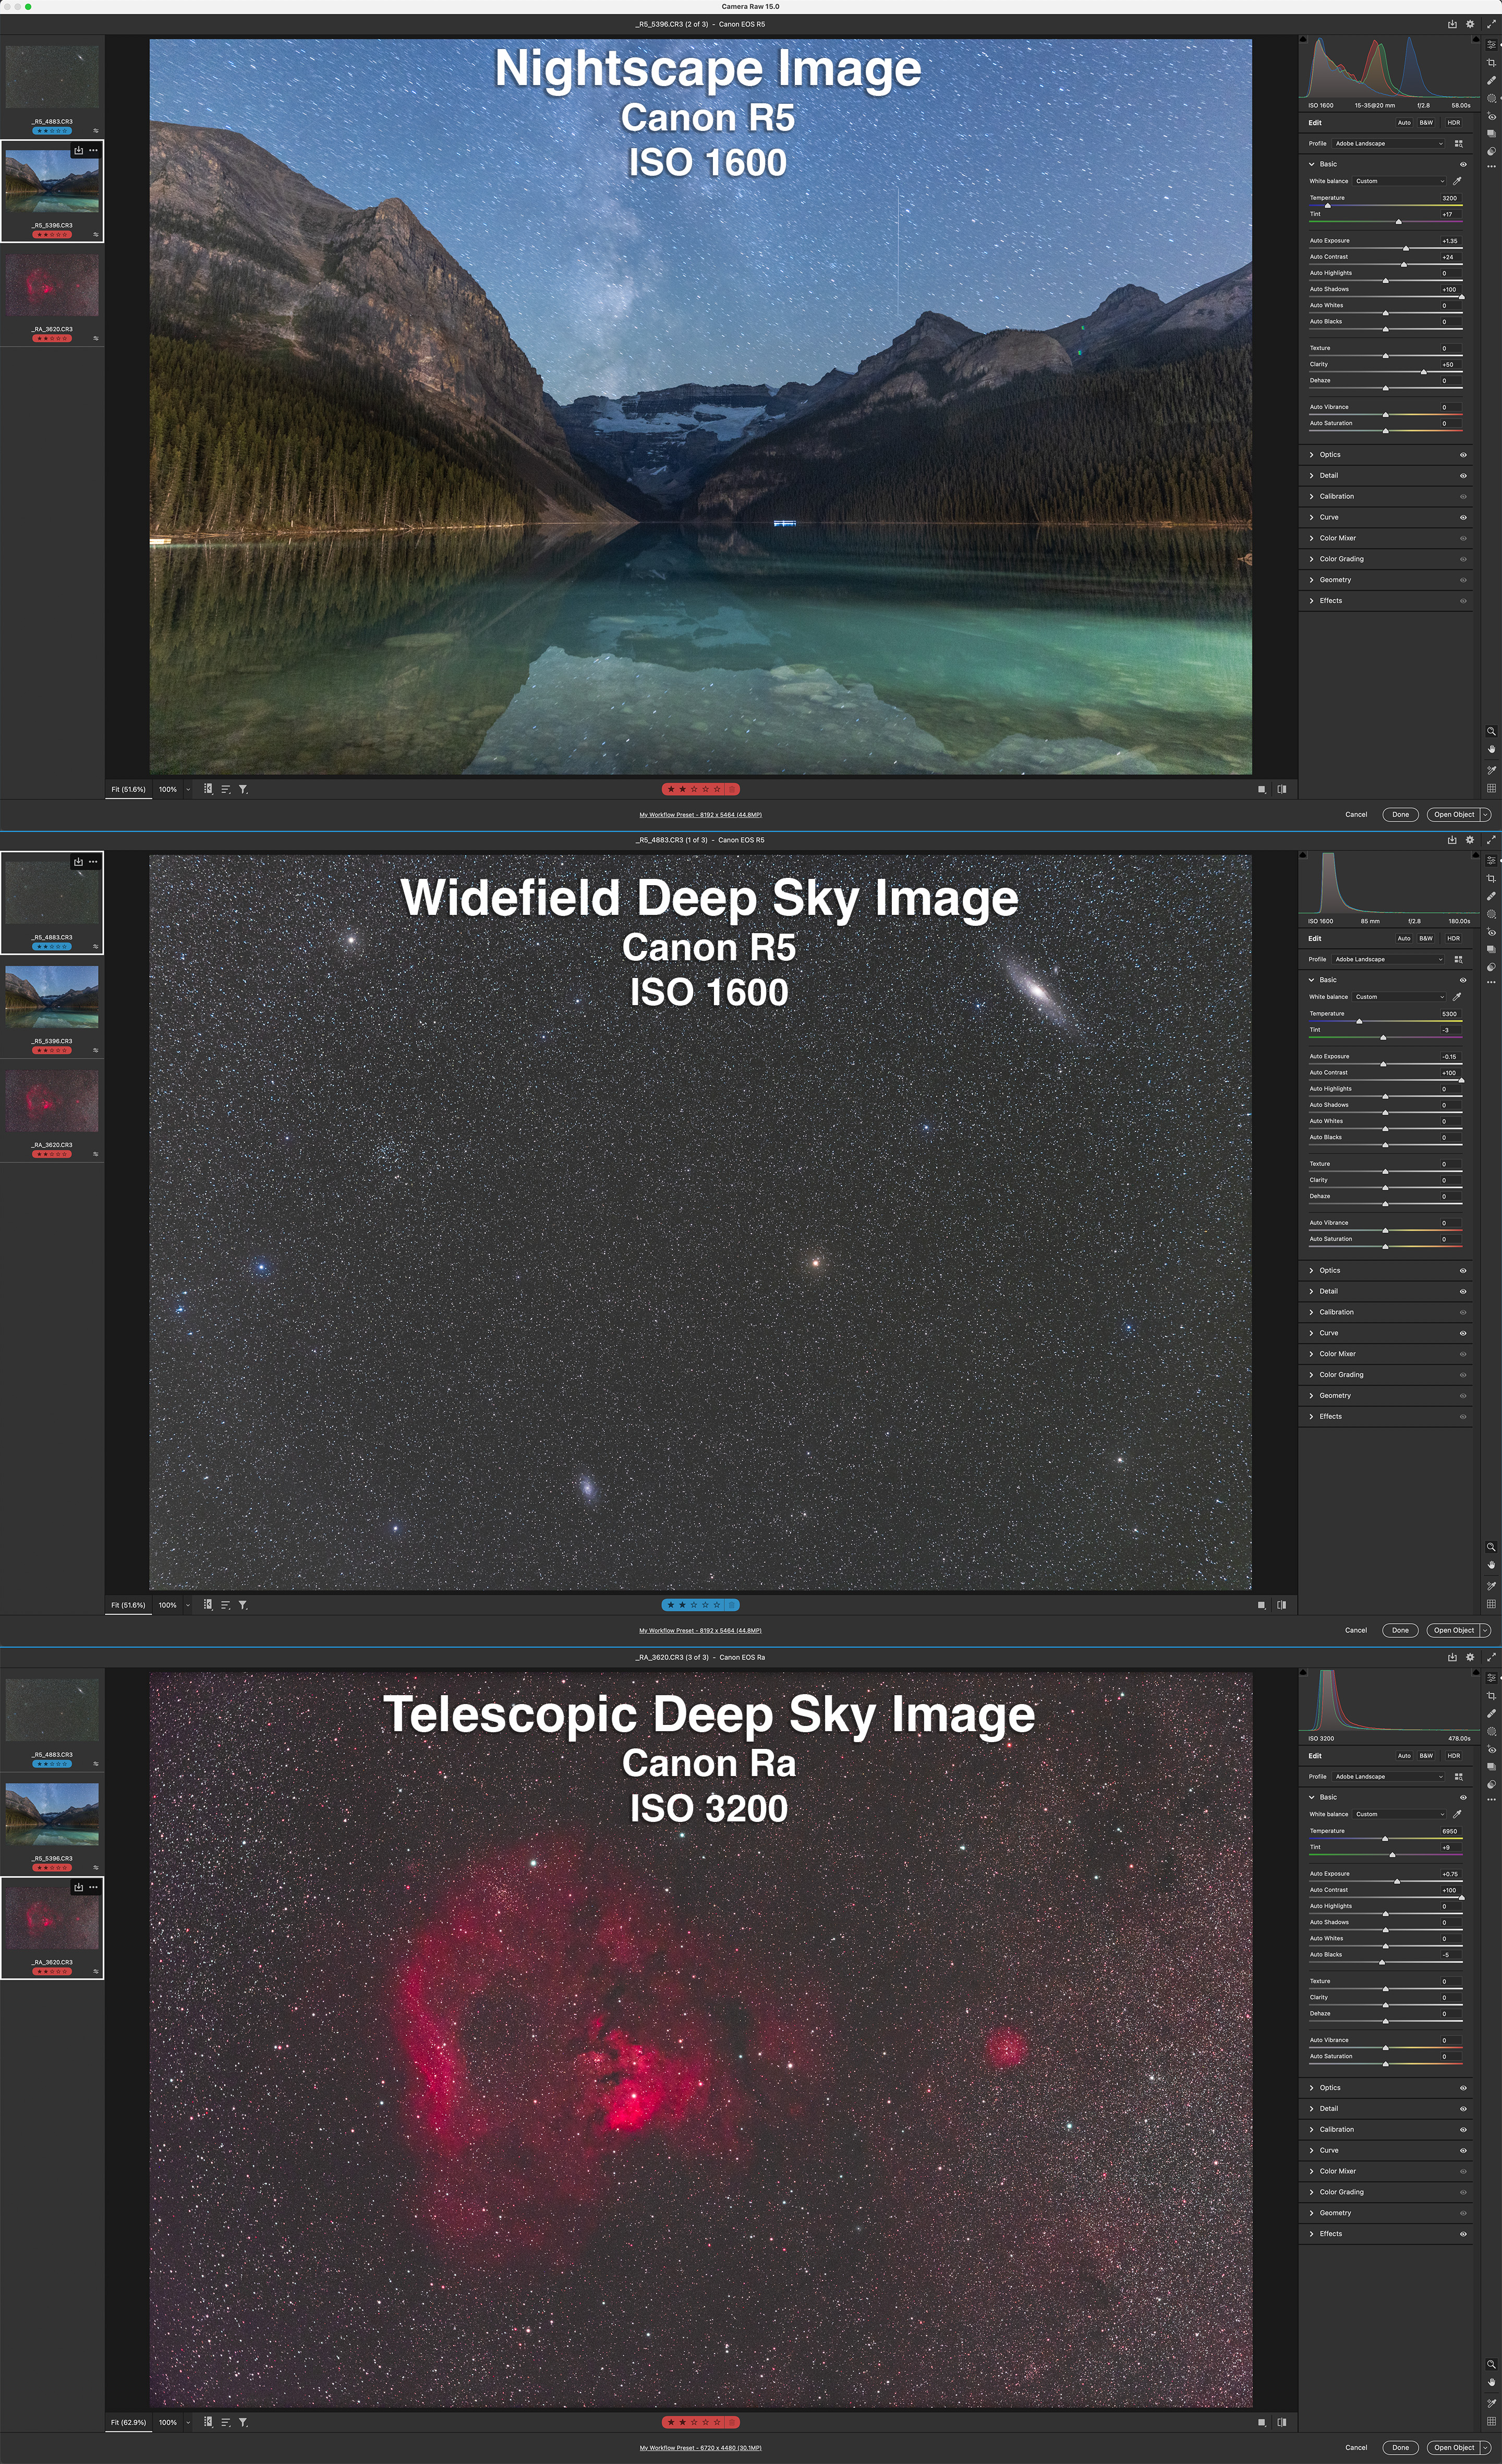
The three test images in Adobe Camera Raw showing the Basic settings applied.

METHODOLOGY

As described below, while some of the programs can be used as stand-alone applications, I tested them all as plug-ins for Photoshop, applying each as a smart filter applied to a developed raw file brought into Photoshop as a Camera Raw smart object. 

Most of these programs state that better results might be obtainable by using the stand-alone app on original raw files. But for my personal workflow I prefer to develop the raw files with Adobe Camera Raw, then open those into Photoshop for stacking and layering, applying any further noise reduction or sharpening as non-destructive smart filters. 

Many astrophotographers also choose to stack unedited original images with specialized stacking software, then apply further noise reduction and editing later in the workflow. So my workflow and test procedures reflect that. 

However, the exception is DxOโ€™s PureRAW2. It can work only on raw files as a stand-alone app, or as a plug-in from Adobe Lightroom. It does not work as a Photoshop plug-in. I tested PureRAW2 by dropping raw Canon .CR3 files onto the app, then exporting the results as raw DNG files, but with the same settings applied as with the other raw files. For the nightscape and wide-field images taken with lenses in DxO’s extensive database, I used PureRAW’s lens corrections, not Adobe’s.

As shown above, I chose three representative images: 

  • A nightscape with star trails and a detailed foreground, at ISO 1600.
  • A wide-field deep-sky image at ISO 1600 with an 85mm lens, with very tiny stars.
  • A close-up deep-sky image taken with a telescope and at a high ISO of 3200, showing thermal noise hot pixels. 

Each is a single image, not a stack of multiple images. 

Before applying the noise reduction, the raw files received just basic color corrections and a contrast boost to emphasize noise all the more. 


THE CONTENDERS

In the test results for the three images, I show the original raw image, plus a version with noise reduction and sharpening applied using Adobe Camera Rawโ€™s own sliders, with luminance noise at 40, color noise at 25, and sharpening at 25. 

I use this as a base comparison, as it has been the noise reduction I have long applied to images. However, ACRโ€™s routine (also found in Adobe Lightroom) has not changed in years. It is good, but it is not AI.

[See below for an April 2023 update with a comparison of Adobe’s new AI Denoise with DxO DeepPrimeXD and Topaz PhotoAI.]

The new smart AI programs should improve upon this. But do they?

PLEASE NOTE: 

  • I have refrained from providing prices and explaining buying options, as frankly some can be complex! 
  • For those details and for trial copies, go to the softwareโ€™s website by clicking on the link in the header product names below. 
  • All programs are available for Windows and MacOS. I tested the latter versions. 
  • I have not provided tutorials on how to use the software; I have just reported on their results. For trouble-shooting their use, please consult the software company in question. 
ON1 NoNoise 2023’s control interface.

ON1 NoNoise AI 2023

ON1โ€™s main product is the Lightroom/Photoshop alternative program called ON1 Photo RAW, which is updated annually to major new versions. It has full cataloging options like Lightroom and image layering like Photoshop. Its Edit module contains the NoNoise AI routine. But NoNoise AI can be purchased as a stand-alone app that also installs as a plug-in for Lightroom and Photoshop. Itโ€™s what I tested here. The latest 2023 version of NoNoise AI added ON1โ€™s new Tack Sharp AI sharpening routine.

Version tested: 17.0.1

Topaz DeNoise AI’s four-pane view to select the best AI model.

Topaz DeNoise AI 

This program has proven very popular and has been adopted by many photographers โ€“ and astrophotographers โ€“ as an essential part of an editing workflow. It performs noise reduction only, offering a choice of five AI models. Auto modes can choose the models and settings for you based on the image content, but you can override those by adjusting the strength, sharpness, and recovery of original detail as desired.

A separate program, Topaz Sharpen AI, is specifically for image sharpening, but I did not test it here. Topaz Gigapixel AI is for image resizing.

Version tested: 3.7.0

Topaz Photo AI’s control interface for its three main functions: noise, sharpening and upscaling.

Topaz Photo AI

In 2022 Topaz introduced this new program which incorporates the trio of noise reduction, sharpening and image resizing in one package. Like DeNoise, Sharpen and Gigapixel, Photo AI works as a stand-alone app or as a plug-in for Lightroom and Photoshop. Photo AIโ€™s Autopilot automatically detects and applies what it thinks the image needs. While it is possible to adjust settings, Photo AI offers much less control than DeNoise AI and Topazโ€™s other single-purpose programs. 

As of this writing in November 2022 Photo AI is enjoying almost weekly updates, and seems to be where Topaz is focusing its development and marketing effort.ย [See below for a test of PhotoAI v1.3.1, current as of April 2023.]

Version tested: 1.0.9

Luminar Neo’s Edit interface with choices of many filters and effects, including Noiseless AI.

Luminar Neo Noiseless AI

Unlike the other noise reduction programs tested here, Luminar Neo from the software company Skylum is a full-featured image editing program, with an emphasis on one-click AI effects. One of those is the new Noiseless AI, available as an extra-cost extension to the main Neo program, either as a one-time purchase or by annual subscription. Noiseless AI cannot be purchased on its own. However, Neo with most of its extensions does work as a plug-in for Lightroom and Photoshop. 

Being new, Luminar Neo is also updated frequently, with more extensions coming in the next few months. 

Version tested: 1.5.0

DxO PureRAW’s simple interface with few choices for Noise Reduction settings.

DxO PureRAW2

Like ON1, DxO makes a full-featured alternative to Adobeโ€™s Lightroom for cataloging and raw developing called DxO PhotoLab, in version 6 as of late 2022. It contains DxOโ€™s Prime and DeepPrime noise reduction routines. However, as with ON1, DxO has spun off just the noise reduction and lens correction parts of PhotoLab into a separate program, PureRAW2, which runs either as a stand-alone app or as a plug-in for Lightroom โ€“ but not Photoshop, as PureRAW works only on original raw files. 

Unlike all the other programs, PureRAW2 offers essentially no options to adjust settings, just the option to apply, or not, lens corrections, and to choose the output format. For this testing I applied DeepPrime and exported out to DNG files.ย [See below for a test of DeepPrimeXD, now offered with PureRaw3.]

Version tested: 2.2

Noise Terminator’s controls allow adjusting strength and detail.

RC-Astro NoiseXTerminator

Unlike the other programs tested, NoiseXTerminator from astrophotographer Russell Croman is designed specifically for deep-sky astrophotography. It installs as a plug-in for Photoshop or Affinity Photo, but not Lightroom. It is also available under the same purchased licence as a โ€œprocessโ€ for PixInsight, an advanced program popular with astrophotographers, as it is designed just for editing deep-sky images. 

I tested the Photoshop plug-in version of Noise XTerminator. It receives occasional updates to both the actual plug-in and separate updates to the AI module.  

Version tested: 1.1.2, AI model 2 


NIGHTSCAPE TEST

As with the other test images, the panels show a highly magnified section of the image, indicated in the inset. I shot the image of Lake Louise in Banff, Alberta with a Canon RF15-35mm lens on a 45-megapixel Canon R5 camera at ISO 1600. 

The test results on a sample nightscape.
  • Adobe Camera Rawโ€™s basic noise reduction did a good job, but like all general routines it does soften the image as a by-product of smoothing out high-ISO noise.
  • ON1 NoNoise 2023 retained landscape detail better than ACR but softened the star trails, despite me adding sharpening. It also produced a somewhat patchy noise smoothing in the sky. This was with Luminosity backed off to 75 from the auto setting (which always cranks up the level to 100 regardless of the image), and with the Tack Sharp routine set to 40 with Micro Contrast at 0. It left a uniform pixel-level mosaic effect in the shadow areas. Despite the new Tack Sharp option, the image was softer than with last yearโ€™s NoNoise 2022 version (not shown here as it is no longer available) which produced better shadow results.
  • Topaz DeNoise AI did a better job than NoNoise retaining the sharp ground detail while smoothing noise, always more obvious in the sky in such images. Even so, it also produced some patchiness, with some areas showing more noise than others. This was with the Standard model set to 40 for Noise and Sharpness, and Recover Details at 75. I show the other model variations below. 
  • Topaz Photo AI did a poor job, producing lots of noisy artifacts in the sky and an over-sharpened foreground riddled with colorful speckling. It added noise. This was with the Normal setting and the default Autopilot settings.
  • Noiseless AI in Luminar Neo did a decent job smoothing noise while retaining, indeed sharpening ground detail without introducing ringing or colorful edge artifacts. The sky was left with some patchiness and uneven noise smoothing. This was with the suggested Middle setting (vs Low and High) and default levels for Noise, Detail and Sharpness. However, I do like Neo (and Skylum’s earlier Luminar AI) for adding other finishing effects to images such as Orton glows.
  • DxO PureRAW2 did smooth noise very well while enhancing sharpness quite a lot, almost too much, though it did not introduce obvious edge artifacts. Keep in mind it offers no chance to adjust settings, other than the mode โ€“ I used DeepPrime vs the normal Prime. Its main drawback is that in making the conversion back to a raw DNG image it altered the appearance of the image, in this case darkening the image slightly. It also made some faint star trails look wiggly!  
  • Noise XTerminator really smoothed out the sky, and did so very uniformly without doing much harm to the star trails. However, it smoothed out ground detail unacceptably, not surprising given its specialized training on stars, not terrestrial content. 

Conclusion: For this image, Iโ€™d say Topaz DeNoise AI did the best, though not perfect, job. 

This was surprising, as tests I did with earlier versions of DeNoise AI showed it leaving many patchy artifacts and colored edges in places. Frankly, I was put off using it. However, Topaz has improved DeNoise AI a lot. 

Why it works so well, when Topazโ€™s newer program Photo AI works so poorly is hard to understand. Surely they use the same AI code? Apparently not. Photo AIโ€™s noise reduction is not the same as DeNoise AI. 

Similarly, ON1โ€™s NoNoise 2023 did a worse job than their older 2022 version. One can assume its performance will improve with updates. The issue seems to be with the new Tack Sharp addition.

NoiseXTerminator might be a good choice for reducing noise in just the sky of nightscape images. It is not suitable for foregrounds, though as of April 2023 its performance on landscapes has improved but is not ideal.ย 


WIDE-FIELD IMAGE TEST

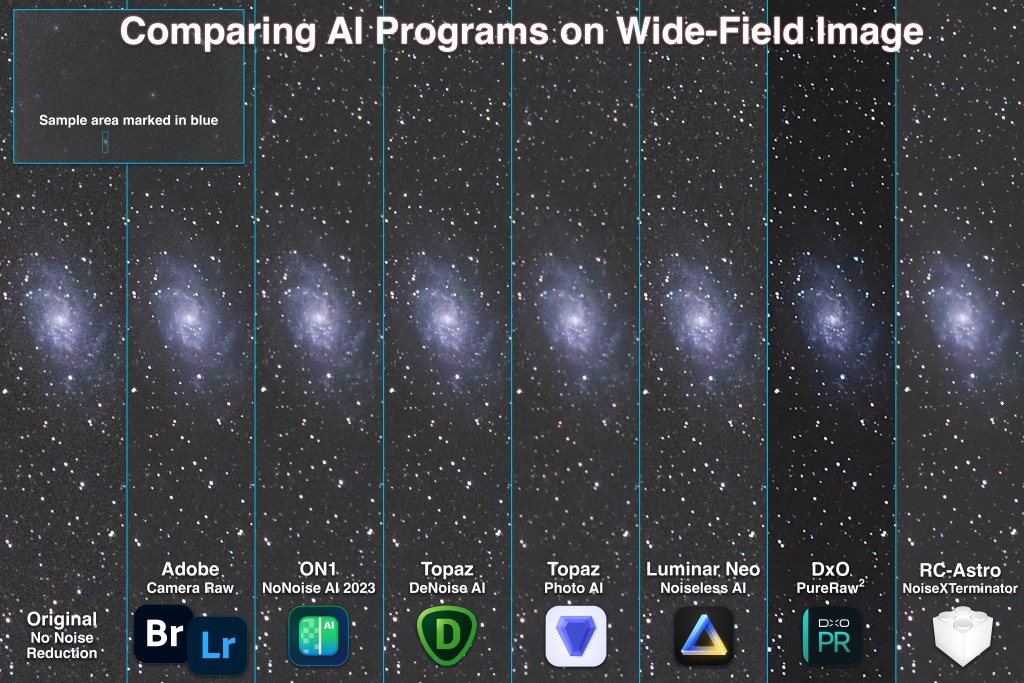
I shot this image of Andromeda and Triangulum with an 85mm Rokinon RF lens on the 45-megapixel Canon R5 on a star tracker. Stars are now points, with small ones easily mistaken for noise. Letโ€™s see how the programs handle such an image, zooming into a tiny section showing the galaxy Messier 33. 

The test results on a sample wide-field deep-sky image.
  • Adobe Camera Rawโ€™s noise and sharpening routines do take care of the worst of the luminance and chrominance noise, but inevitably leave some graininess to the image. This is traditionally dealt with by stacking multiple sub-exposures. 
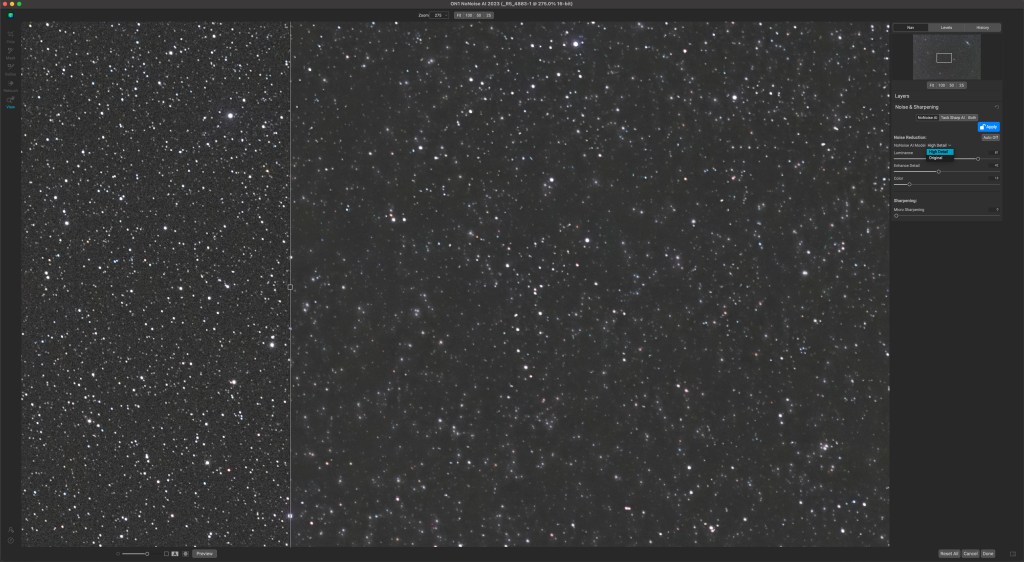
  • ON1 NoNoise 2023 did a better job than ACR, smoothing the worst of the noise and uniformly, without leaving uneven patchiness. However, it did soften star images, almost like it was applying a 1- or 2-pixel gaussian blur, adding a slight hazy look to the image. And yet the faintest stars that appeared as just perceptible blurs in the original image were sharpened to one- or two-pixel points. This was with only NoNoise AI applied, and no Tack Sharp AI. And, as I show below, NoNoise’s default “High Detail” option introduced with the 2022 version and included in the 2023 edition absolutely destroys star fields. Avoid it.
ON1 NoNoise “High Detail” option ruins star fields, as shown at right. Use “Original” instead.
  • Topaz DeNoise AI did a better job than Camera Raw, though it wasnโ€™t miles ahead. This was with the Standard setting. Its Low Light and Severe models were not as good, surprising as you might think one of those choices would be the best for such an image. It pays to inspect Topazโ€™s various modelsโ€™ results. Standard didnโ€™t erase stars; it actually sharpened the fainter ones, almost a little too much, making them look like specks of noise. Playing with Enhance Sharpness and Recover Detail didnโ€™t make much difference to this behavior. 
  • Topaz Photo AI again performed poorly. Its Normal mode left lots of noise and grainy artifacts. While its Strong mode shown here did smooth background noise better, it softened stars, wiping out the faint ones and leaving colored edges on the brighter ones. 
  • Noiseless AI in Luminar Neo did smooth fine noise somewhat, better than Camera Raw, but still left a grainy background, though with the stars mostly untouched in size and color. 
  • DxO PureRAW2 did eliminate noise quite well, while leaving even the faintest stars intact, unlike with the deep-sky image below, which is odd. However, it added some dark halos to bright stars from over-sharpening. And, as with the nightscape example, PureRAWโ€™s output DNG was darker than the raw that went in. I donโ€™t want noise reduction programs altering the basic appearance of an image, even if that can be corrected later in the workflow. 
  • Noise XTerminator performed superbly, as expected โ€“ after all, this is the subject matter it is trained to work on. It smoothed out random noise better than any of the other programs, while leaving even the faintest stars untouched, in fact sharpening them slightly. Details in the little galaxy were also unharmed. 

Conclusion: The clear winner was NoiseXTerminator. 

Topaz DeNoise was a respectable second place, performing better than it had done on such images in earlier versions. Even so, it did alter the appearance of faint stars which might not be desirable. 

ON1 NoNoise 2023 also performed quite well, with its softening of brighter stars yet sharpening of fainter ones perhaps acceptable, even desirable for an effect. 


TELESCOPIC DEEP-SKY TEST

I shot this image of the NGC 7822 complex of nebulosity with a SharpStar 61mm refractor, using the red-sensitive 30-megapixel Canon Ra and with a narrowband filter to isolate the red and green light of the nebulas. 

Again, the test image is a single raw image developed only to re-balance the color and boost the contrast. No dark frames were applied, so the 8-minute exposure at ISO 3200 taken on a warm night shows thermal noise as single โ€œhot pixelโ€ white specks. 

The test results on a sample deep-sky close-up.
  • Adobe Camera Raw did a good job smoothing the worst of the noise, suppressing the hot pixels but only by virtue of it softening all of the image slightly at the pixel level. However, it leaves most stars intact. 
  • ON1 NoNoise 2023 also did a good job smoothing noise while also seeming to boost contrast and structure slightly. But as in the wide-field image, it did smooth out star images a little, though somewhat photogenically, while still emphasizing the faintest stars. This was with no sharpening applied and Luminosity at 60, down from the default 100 NoNoise applies without fail. One wonders if it really is analyzing images to produce optimum settings. With no Tack Sharp sharpening applied, the results on this image with NoNoise 2023 looked identical to NoNoise 2022. 
  • Topaz DeNoise AI did another good job smoothing noise, while leaving most stars unaffected. However, the faintest stars and hot pixels were sharpened to be more visible tiny specks, perhaps too much, even with Sharpening at its lowest level of 1 in Standard mode. Low Light and Severe modes produced worse results, with lots of mottling and unevenness in the background. Unlike NoNoise, at least its Auto settings do vary from image to image, giving you some assurance it really is responding to the image content. 
  • Topaz Photo AI again produced unusable results. Its Normal modes produced lots of mottled texture and haloed stars. Its Strong mode shown here did smooth noise better, but still left lots of uneven artifacts, like DeNoise AI did in its early days. It certainly seems like Photo AI is using old hand-me-down code from DeNoise AI.
  • Noiseless AI in Luminar Neo did smooth noise but unevenly, leaving lots of textured patches. Stars had grainy halos and the program increased contrast and saturation, adjustments usually best left for specific adjustment layers dedicated to the task. 
  • DxO PureRAW2 did smooth noise very well, including wiping out the faintest specks from hot pixels, but it also wiped out the faintest stars, I think unacceptably and more than other programs like DeNoise AI. For this image it did leave basic brightness alone, likely because it could not apply lens corrections to an image taken with unknown optics. However, it added an odd pixel-level mosaic-like effect on the sky background, again unacceptable.
  • Noise XTerminator did a great job smoothing random noise without affecting any stars or the nebulosity. The Detail level of 20 I used actually emphasized the faintest stars, but also the hot pixel specks. NoiseXTerminator canโ€™t be counted on to eliminate thermal noise; that demands the application of dark frames and/or using dithering routines to shift each sub-frame image by a few pixels when autoguiding the telescope mount. Even so, Noise XTerminator is so good users might not need to take and stack as many images. 

Conclusion: Again, the winner was NoiseXTerminator. 

Deep-sky photographers have praised โ€œNoiseXโ€ for its effectiveness, either when applied early on in a PixInsight workflow or, as I do in Photoshop, as a smart filter to the base stacked image underlying other adjustment layers.

Topaz DeNoise is also a good choice as it can work well on many other types of images. But again, play with its various models and settings. Pixel peep!

ON1 NoNoise 2023 did put in a respectable performance here, and it will no doubt improve โ€“ it had been out less than a month when I ran these tests. 

Based on its odd behavior and results in all three test images I would not recommend DxOโ€™s PureRAW2. Yes, it reduces noise quite well, but it can alter tone and color in the process, and add strange pixel-level mosaic artifacts.  


COMPARING DxO and TOPAZ OPTIONS 

DxO and Topaz DeNoise AI offer the most choices of AI models and strength of noise reduction. Here I compare:

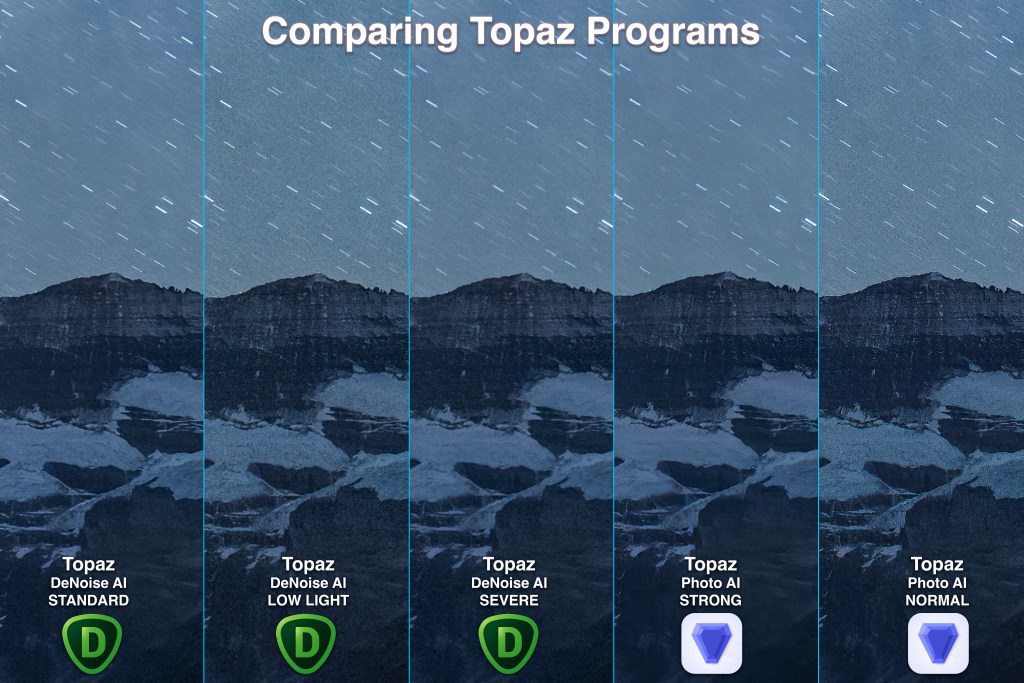
  • Topaz DeNoise AI on the nightscape image using three of its models: Standard (which I used in the comparisons above), plus Low Light and Severe. These show how the other models didnโ€™t do as good a job.
  • The set below also compares DeNoise AI to Topazโ€™s other program, Photo AI, to show how poor a job it is doing in its early form. Its Strong mode does smooth noise but over-sharpens and leaves edge artifacts. Yes, Photo AI is one-click easy to use, but produces bad results โ€“ at least on astrophotos. 
Comparing DeNoise’s and Photo AI’s different model settings.

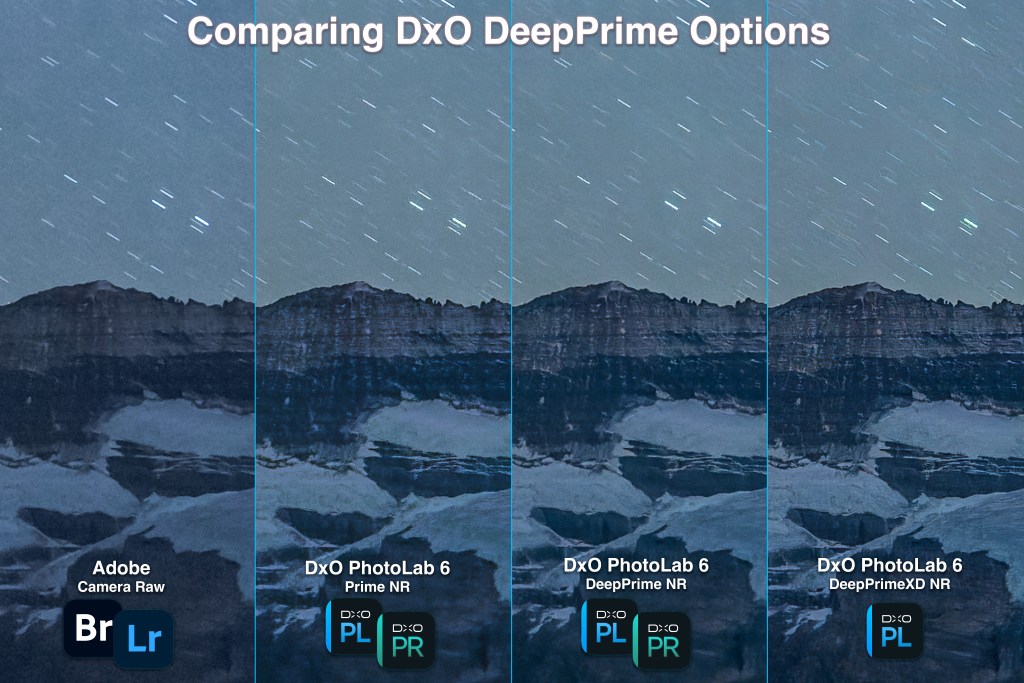
As of this writing DxOโ€™s PureRAW2 offers the Prime and newer DeepPrime AI models โ€“ I used DeepPrime for my tests. 

However, DxOโ€™s more expensive and complete image processing program, PhotoLab 6, also offers the even newer DeepPrimeXD model, which promises to preserve or recover even more โ€œXtra Detailโ€ over the DeepPrime model. As of this writing, the XD mode is not offered in PureRAW2. Perhaps that will wait for PureRAW3, no doubt a paid upgrade. 

[UPDATE MARCH 2023: DxO has indeed brought out PureRaw3 as a paid upgrade that, as expected, offers the DeepPrimeXD. In testing the new version I found that, while it did not seem to alter an image’s exposure as PureRaw2 did, DeepPrime and DeepPrimeXD still unacceptably ruin starry skies, by either adding a fine-scale mosaic effect (DeepPrime) or weird wormy artifacts (DeepPrimeXD). Try it for yourself to see if you find the same.]

Comparing DxO’s various Prime model settings. DeepPrimeXD is only in PhotoLab 6.
  • The set above compares the three noise reduction models of DxOโ€™s PhotoLab 6. DeepPrime does do a better job than Prime. DeepPrimeXD does indeed sharpen detail more, but in this example it is too sharp, showing artifacts, especially in the sky where it is adding structures and textures that are not real. 
  • However, when used from within PhotoLab 6, the DeepPrime noise reduction becomes more usable. PhotoLab is then being used to perform all the raw image processing, so PureRAWโ€™s alteration of color and tone is not a concern. Conversely, it can also output raw DNGs with only noise reduction and lens corrections applied, essentially performing the same tasks as PureRAW. If you have PhotoLab, you don’t need PureRAW.

APRIL 2023 UPDATE โ€” TESTING ADOBE’S NEW AI Denoise

In April 2023 Adobe updated Lightroom Classic to v12.3 and the Camera Raw plug-in for Bridge and Photoshop to 15.3. The major new feature was a long-awaited AI noise reduction from Adobe called Denoise. It works only on raw files and generates a new raw DNG file to which all the raw develop settings, including AI masks, can be applied. But the DNG file is some four times larger than the original raw file from the camera.

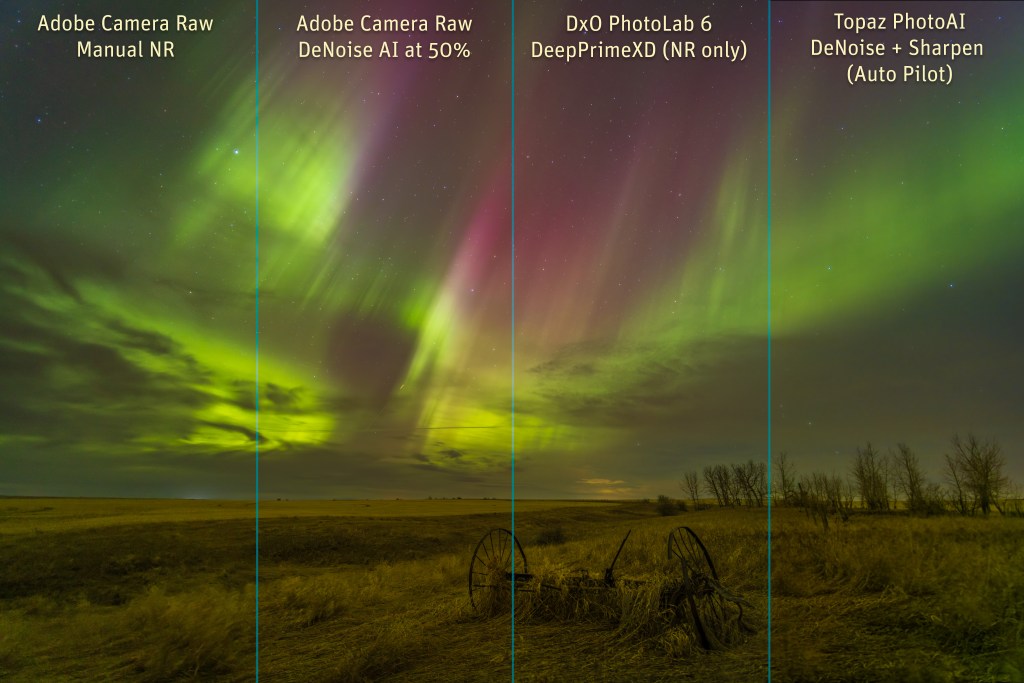
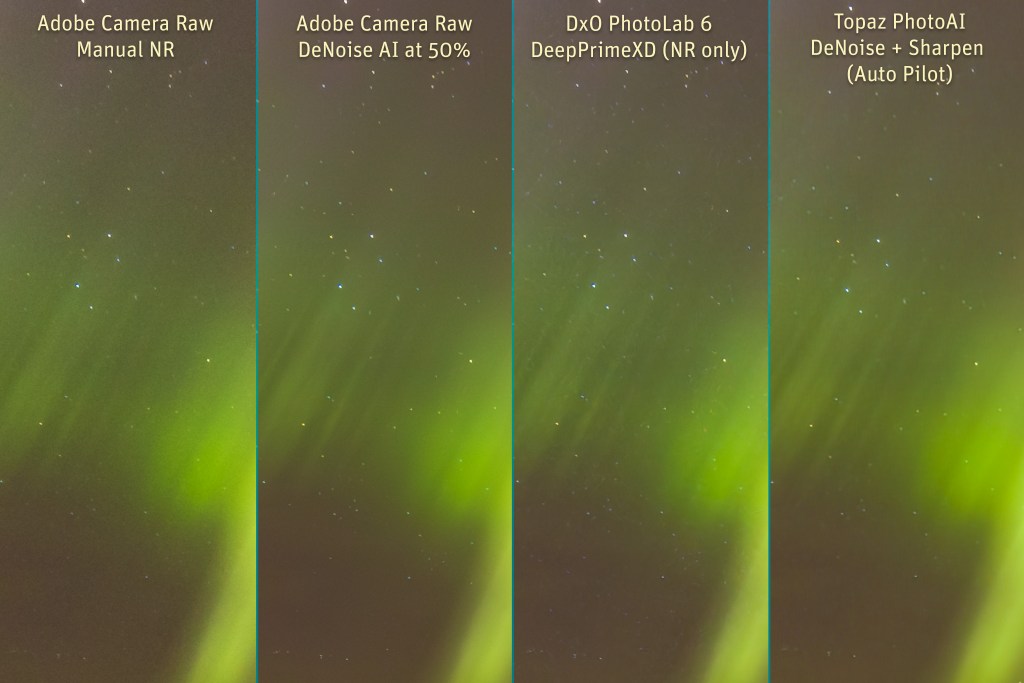
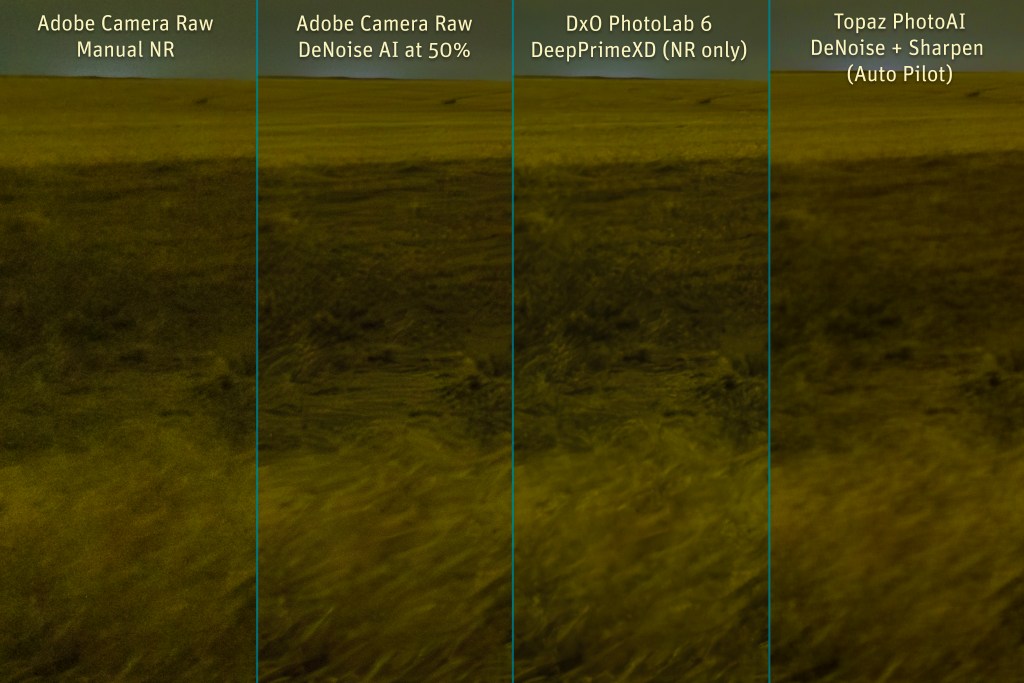
Here’s a comparison of Camera Raw using the old noise reduction and the new AI option, with DxO’s DeepPrimeXD and Topaz’s PhotoAI, on an aurora image from April 23, 2023:

I used Topaz Photo AI as that’s the program Topaz is now putting all their development effort into, neglecting their other plug-ins such as DeNoise AI. I used DxO PhotoLab 6 with its DeepPrimeXD option to export a DNG with only noise reduction applied, for results identical to what is now offered with DxO’s separate PureRaw3 plug-in.

At 100% above, there’s very little obvious difference. They show up when pixel peeping.

400% blow-ups of the sky – Tap or click to download a full-res JPG

Above are 400% blow-ups of a section of the sky.

Compared to using Adobe’s old noise reduction sliders, their new AI Denoise did a far superior job at smoothing noise, and providing sharpening โ€“ย almost too much, making even the smallest stars pop out more, perhaps a good thing. But there’s no control of that sharpening.

DxO’s DeepPrimeXD provides a similar, or perhaps more excessive level of AI sharpening. While it smooths noise, it introduces all manner of wormy AI artifacts. It is unacceptable.

Topaz PhotoAI’s noise reduction and sharpening, here both applied with their AutoPilot settings, smoothed noise, but created a patchy appearance. It also softened the stars, despite having sharpening turned on. It was the worst of the set.

400% blow-ups of a section of the ground y – Tap or click to download a full-res JPG

In a similar set of blow-ups of the ground, the old Adobe noise reduction did just that โ€” it smoothed only some noise. The new AI Denoise not only smooths noise, it also applies AI-based sharpening, to the point of almost inventing detail. Here it looks believable, but in other tests I have seen it add content, such as structures in the aurora, that looked fake and out of place. Or just plain wrong!

DxO’s DeepPrimeXD’s main feature over the older DeepPrime is the “eXtra Detail” it finds. Here it produces a result similar to Adobe Denoise, though in some areas of this and other images, I find it is over-sharpening. As with Adobe, there is no option for backing off the sharpening. Other than using DeepPrime or Prime noise reduction.

Topaz PhotoAI didn’t do much to add sharpening. If anything, it made the image softer. While PhotoAI has improved with its weekly updates, it still falls far short of the competition, at least for astrophotos and nightscapes.

The bottom line โ€” Adobe’s new AI Denoise can do a superb job on astrophotos, and will be particularly useful for high-ISO nightscapes, perhaps better than any of the competition. But watch what it does! It can invent details or create results that look artificial. Being able to adjust the sharpening would be helpful. Perhaps that will come in an update.


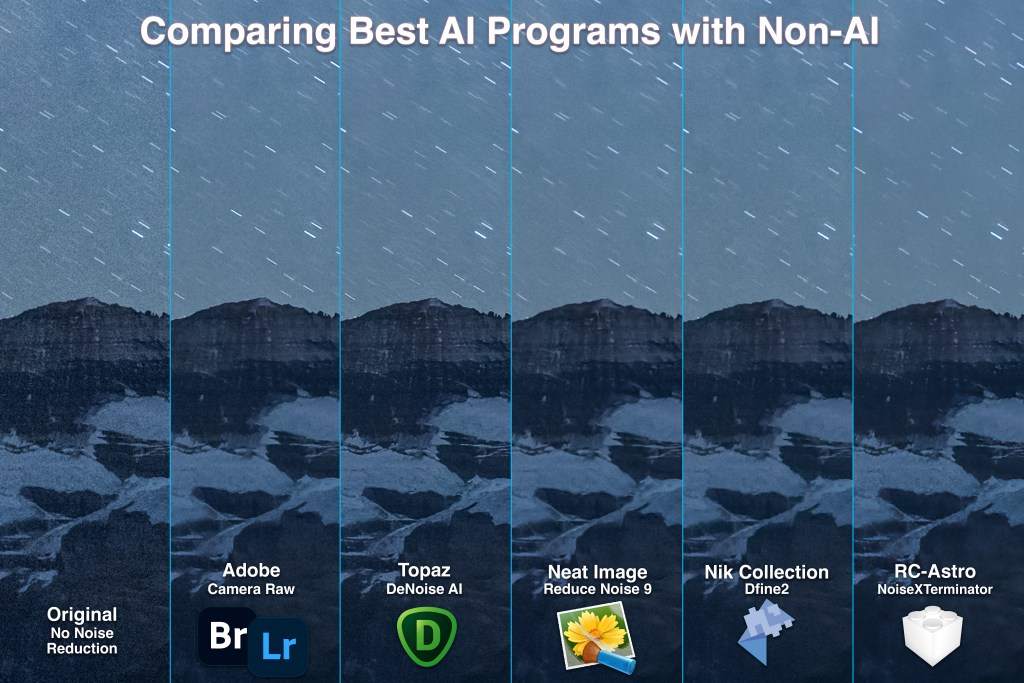
COMPARING AI TO OLDER NON-AI PROGRAMS

The new generation of AI-based programs have garnered all the attention, leaving older stalwart noise reduction programs looking a little forlorn and forgotten. 

Here I compare Camera Raw and two of the best of the AI programs, Topaz DeNoise AI and NoiseXTerminator, with two of the most respected of the โ€œold-schoolโ€ non-AI programs: 

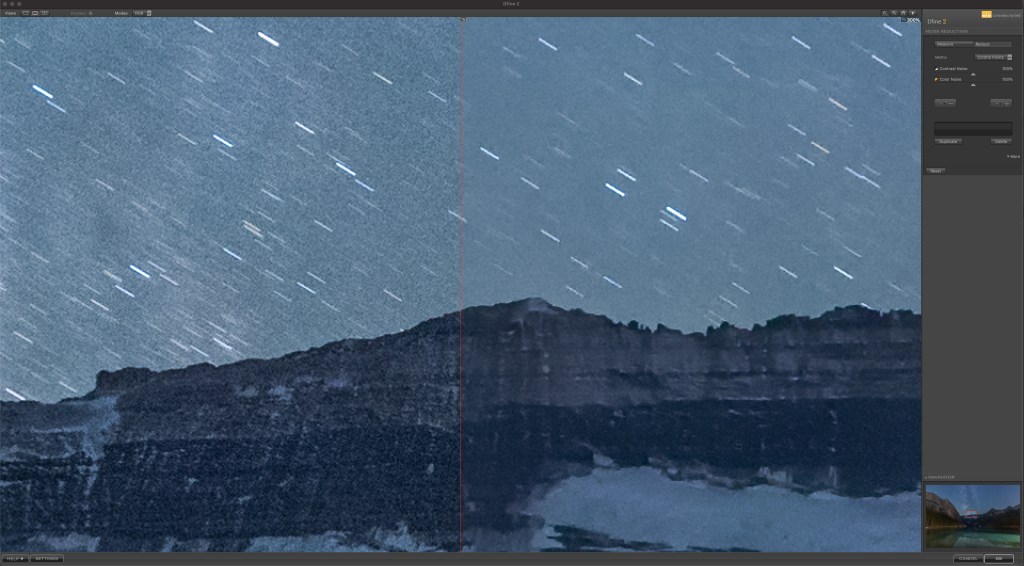
Nik Dfine2’s control interface.
  • Dfine2, included with the Nik Collection of plug-ins sold by DxO (shown above), and
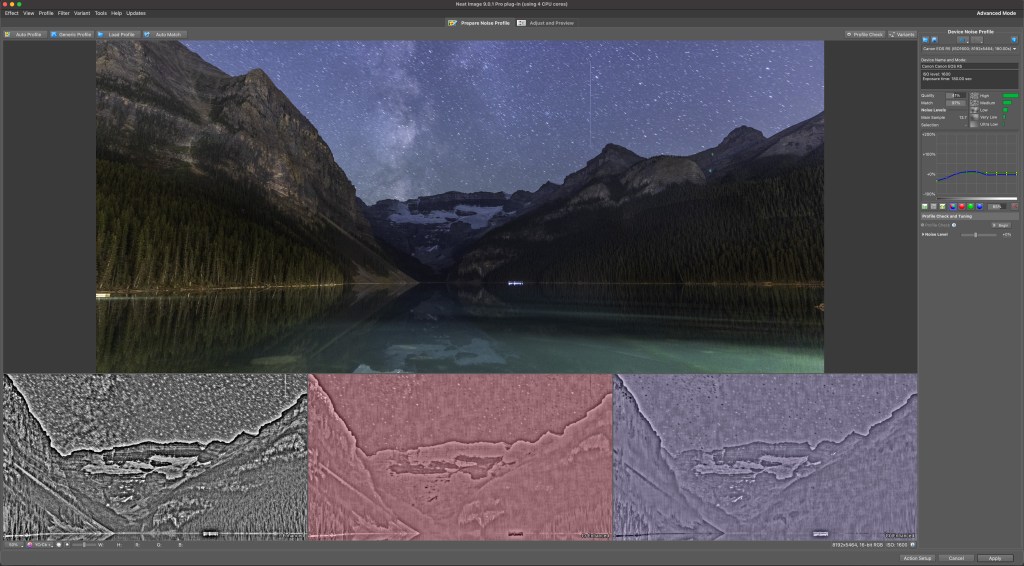
  • Reduce Noise v9 sold by Neat Image (shown below). 
Neat Image’s Reduce Noise control interface – the simple panel.

I tested both by using them in their automatic modes, where they analyze a section or sections of the image and adjust the noise reduction accordingly, but then apply that setting uniformly across the entire image. However, both allow manual adjustments, with Neat Imageโ€™s Reduce Noise offering a bewildering array of technical adjustments. 

How do these older programs stack up to the new AI generation? Here are comparisons using the same three test images. 

Comparing results with Neat Image and Nik Dfine2 on the nightscape test image.

In the nightscape image, Nik Dfine2 and Neat Imageโ€™s Reduce Noise did well, producing uniform noise reduction with no patchiness. But the results werenโ€™t significantly better than with Adobe Camera Rawโ€™s built-in routine. Like ACR, both non-AI programs did smooth detail in the ground, compared to DeNoise AI which sharpened the mountain details. 

Comparing results with Neat Image and Nik Dfine2 on the wide-field test image.

In the tracked wide-field image, the differences were harder to distinguish. None performed up to the standard of Noise XTerminator, with both Nik Dfine2 and Neat Image softening stars a little compared to DeNoise AI. 

Comparing results with Neat Image and Nik Dfine2 on the deep-sky test image.

In the telescopic deep-sky image, all programs did well, though none matched NoiseXTerminator. None eliminated the hot pixels. But Nik Dfine2 and Neat Image did leave wanted details alone, and did not alter or eliminate desired content. However, they also did not eliminate noise as well as did Topaz DeNoise AI or NoiseXTerminator. 

The AI technology does work! 


YOUR RESULTS MAY VARY

I should add that the nature of AI means that the results will certainly vary from image to image. 

In addition, with many of these programs offering multiple models and settings for strength and sharpening, results even from the same program can be quite different. In this testing I used either the programโ€™s auto defaults or backed off those defaults where I thought the effect was too strong and detrimental to the image.

Software is also a constantly moving target. Updates will alter how these programs perform, we hope for the better. For example, two days after I published this test, ON1 updated NoNoise AI to v17.0.2 with minor fixes and improvements.

And do remember Iโ€™m testing on astrophotos, and pixel peeping to the extreme. Rave reviews claiming how well even the poor performers here work on โ€œnormalโ€ images might well be valid. 

This is all by way of saying, your mileage may vary!

So donโ€™t take my word for it. Most programs (Luminar Neo is an exception) are available as free trial copies to test out on your astro-images and in your preferred workflow. Test for yourself. But do pixel peep. Thatโ€™s where youโ€™ll see the flaws. 


WHAT ABOUT ADOBE?

As noted above, with v15.3 of Camera Raw and v12.3 of Lightroom Classic, Adobe finally introduced their contender into the AI noise reduction contest. And it is a very good entry at that.

But it works only on raw files early in the workflow, and it generates a new raw DNG file, one four times the size of the original. The suggestion is that this technology will expand so that the AI noise reduction can be applied later in the workflow to other file formats.

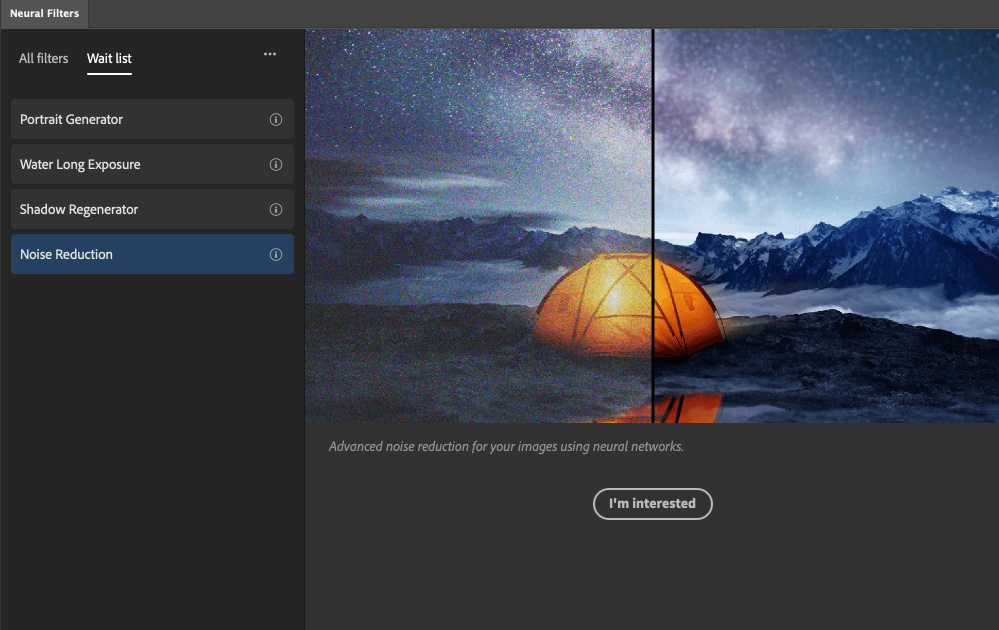
Indeed, in the last couple of years Adobe has introduced several amazing and powerful โ€œNeural Filtersโ€ into Photoshop, which work wonders with one click.

Neural network Noise Reduction is coming to Photoshop. One day!

A neural filter for Noise Reduction is on Adobeโ€™s Wait List for development, so perhaps we will see something in the next few months from Adobe, as a version of the AI noise reduction now offered in Lightroom and Camera Raw.

Until then we have lots of choices for third party programs that all improve with every update. I hope this review has helped you make a choice. 

โ€” Alan, November 15, 2022 / Revised April 27, 2023 / AmazingSky.com ย 

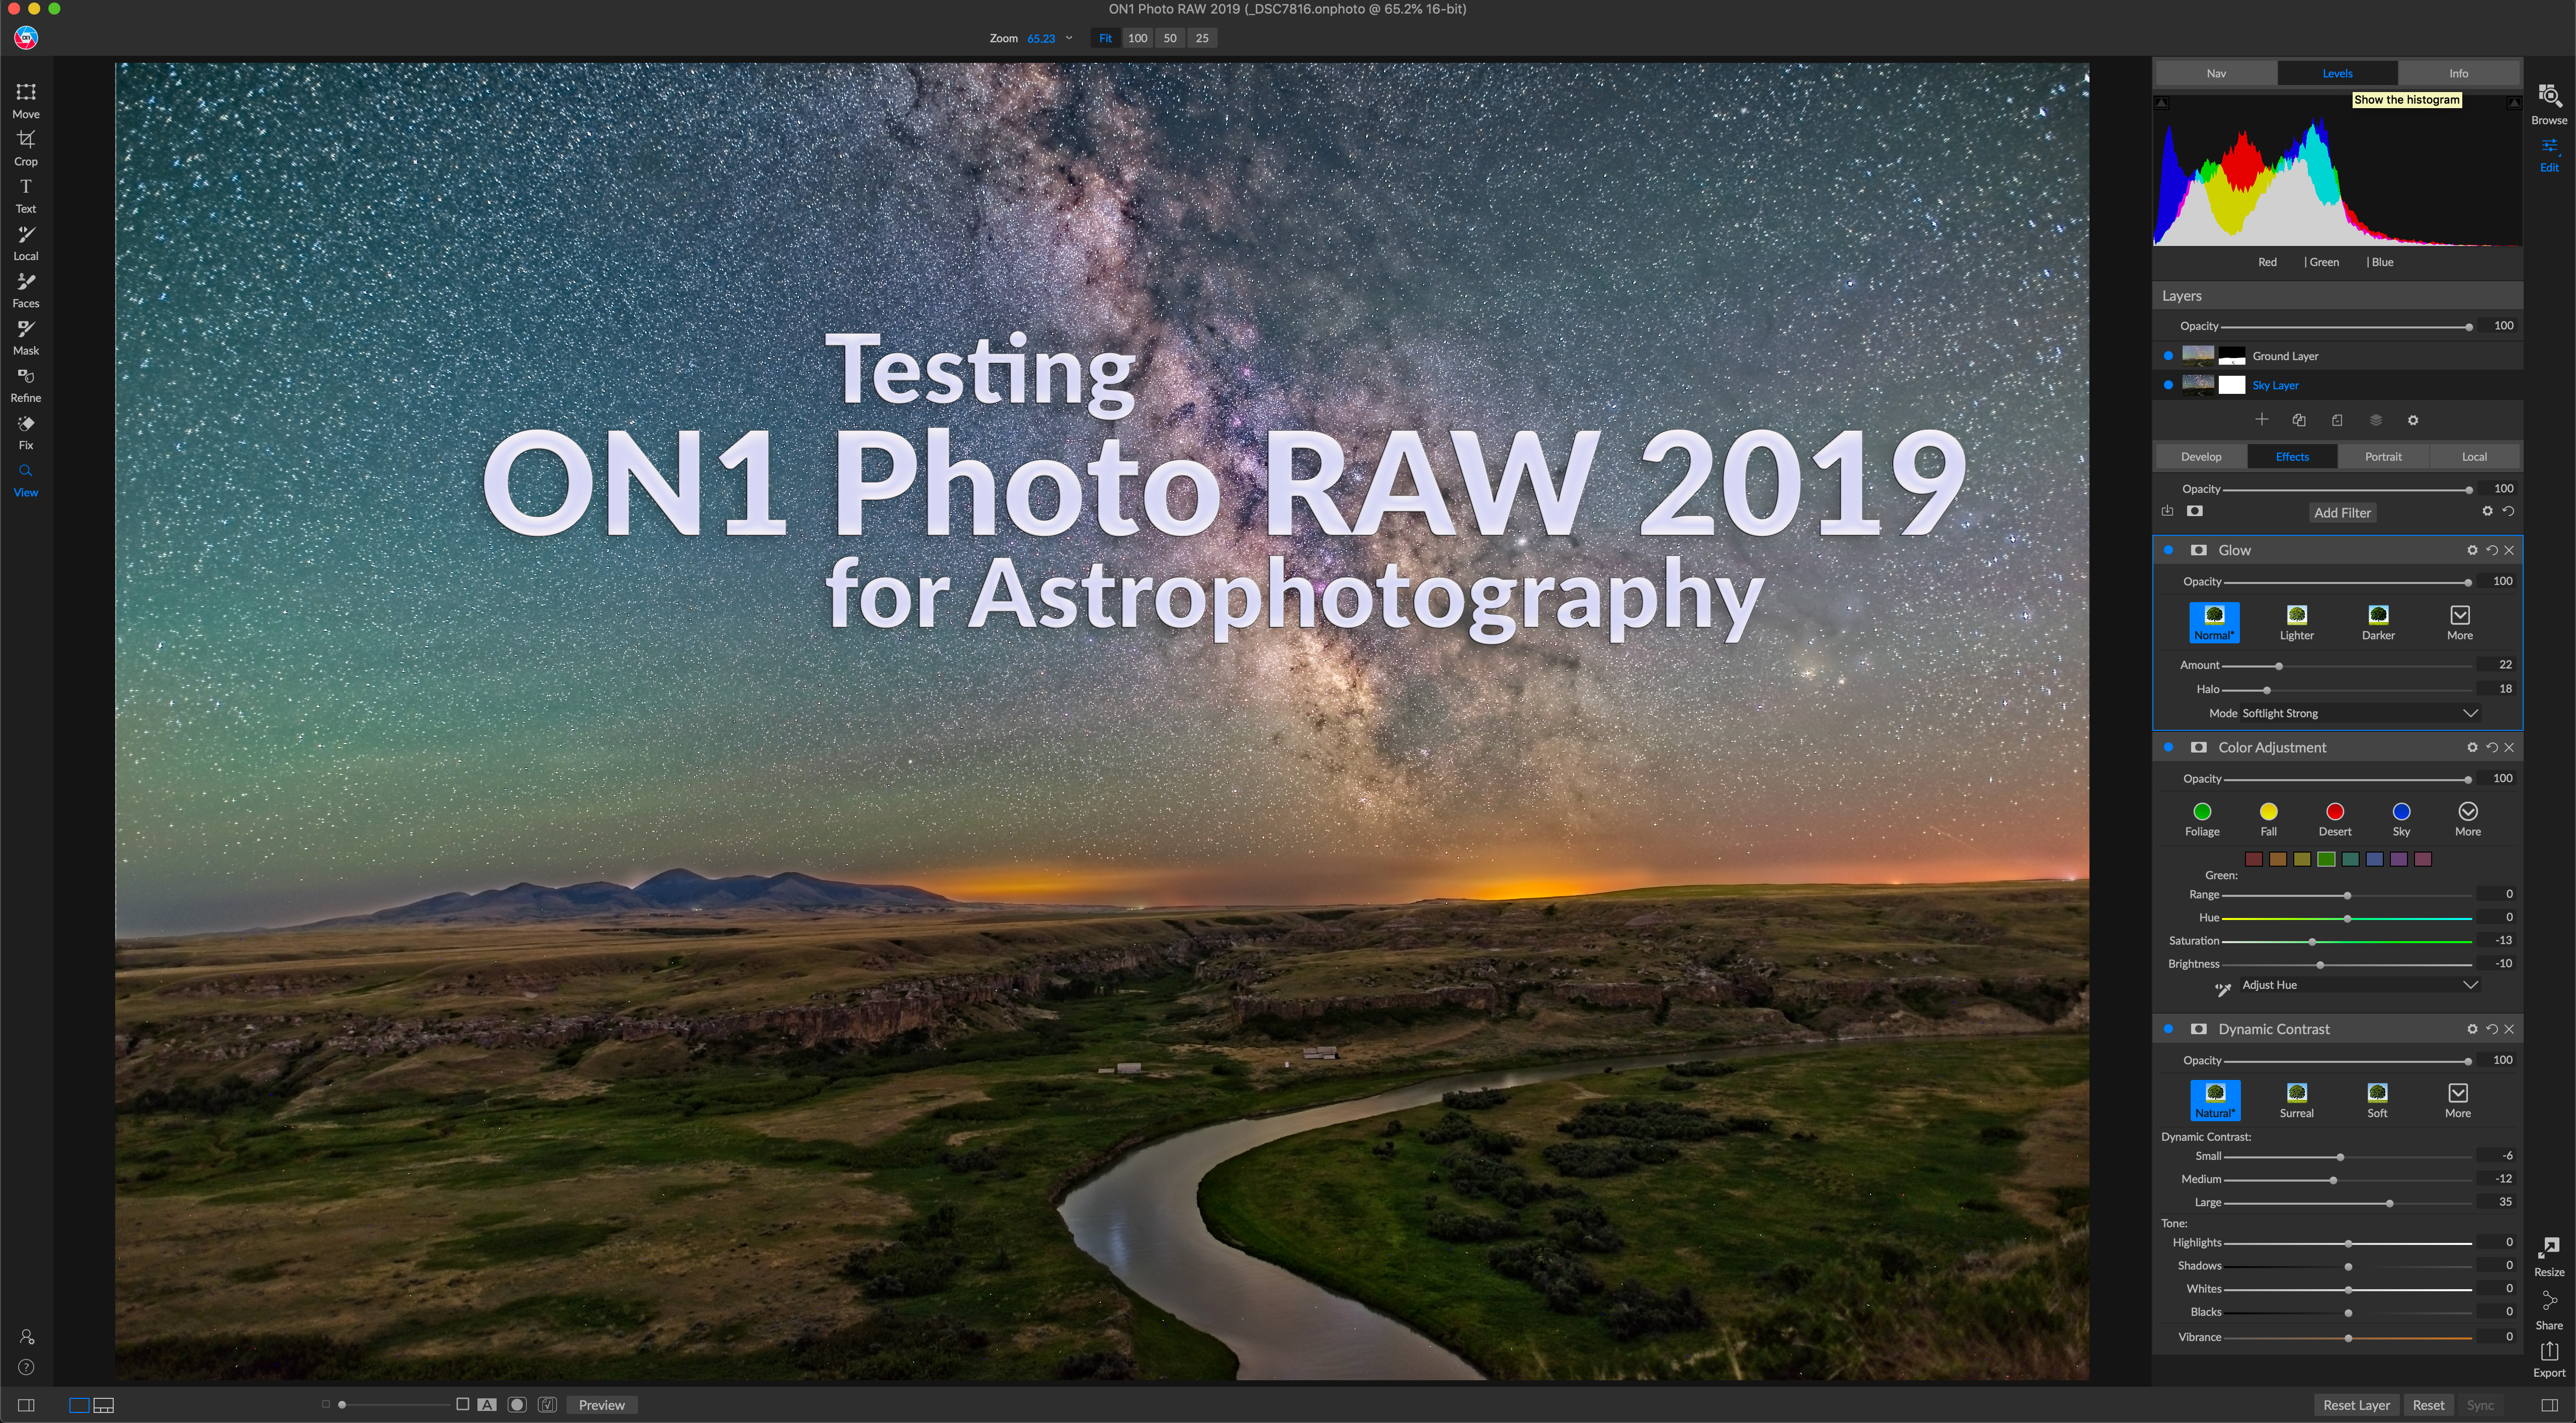
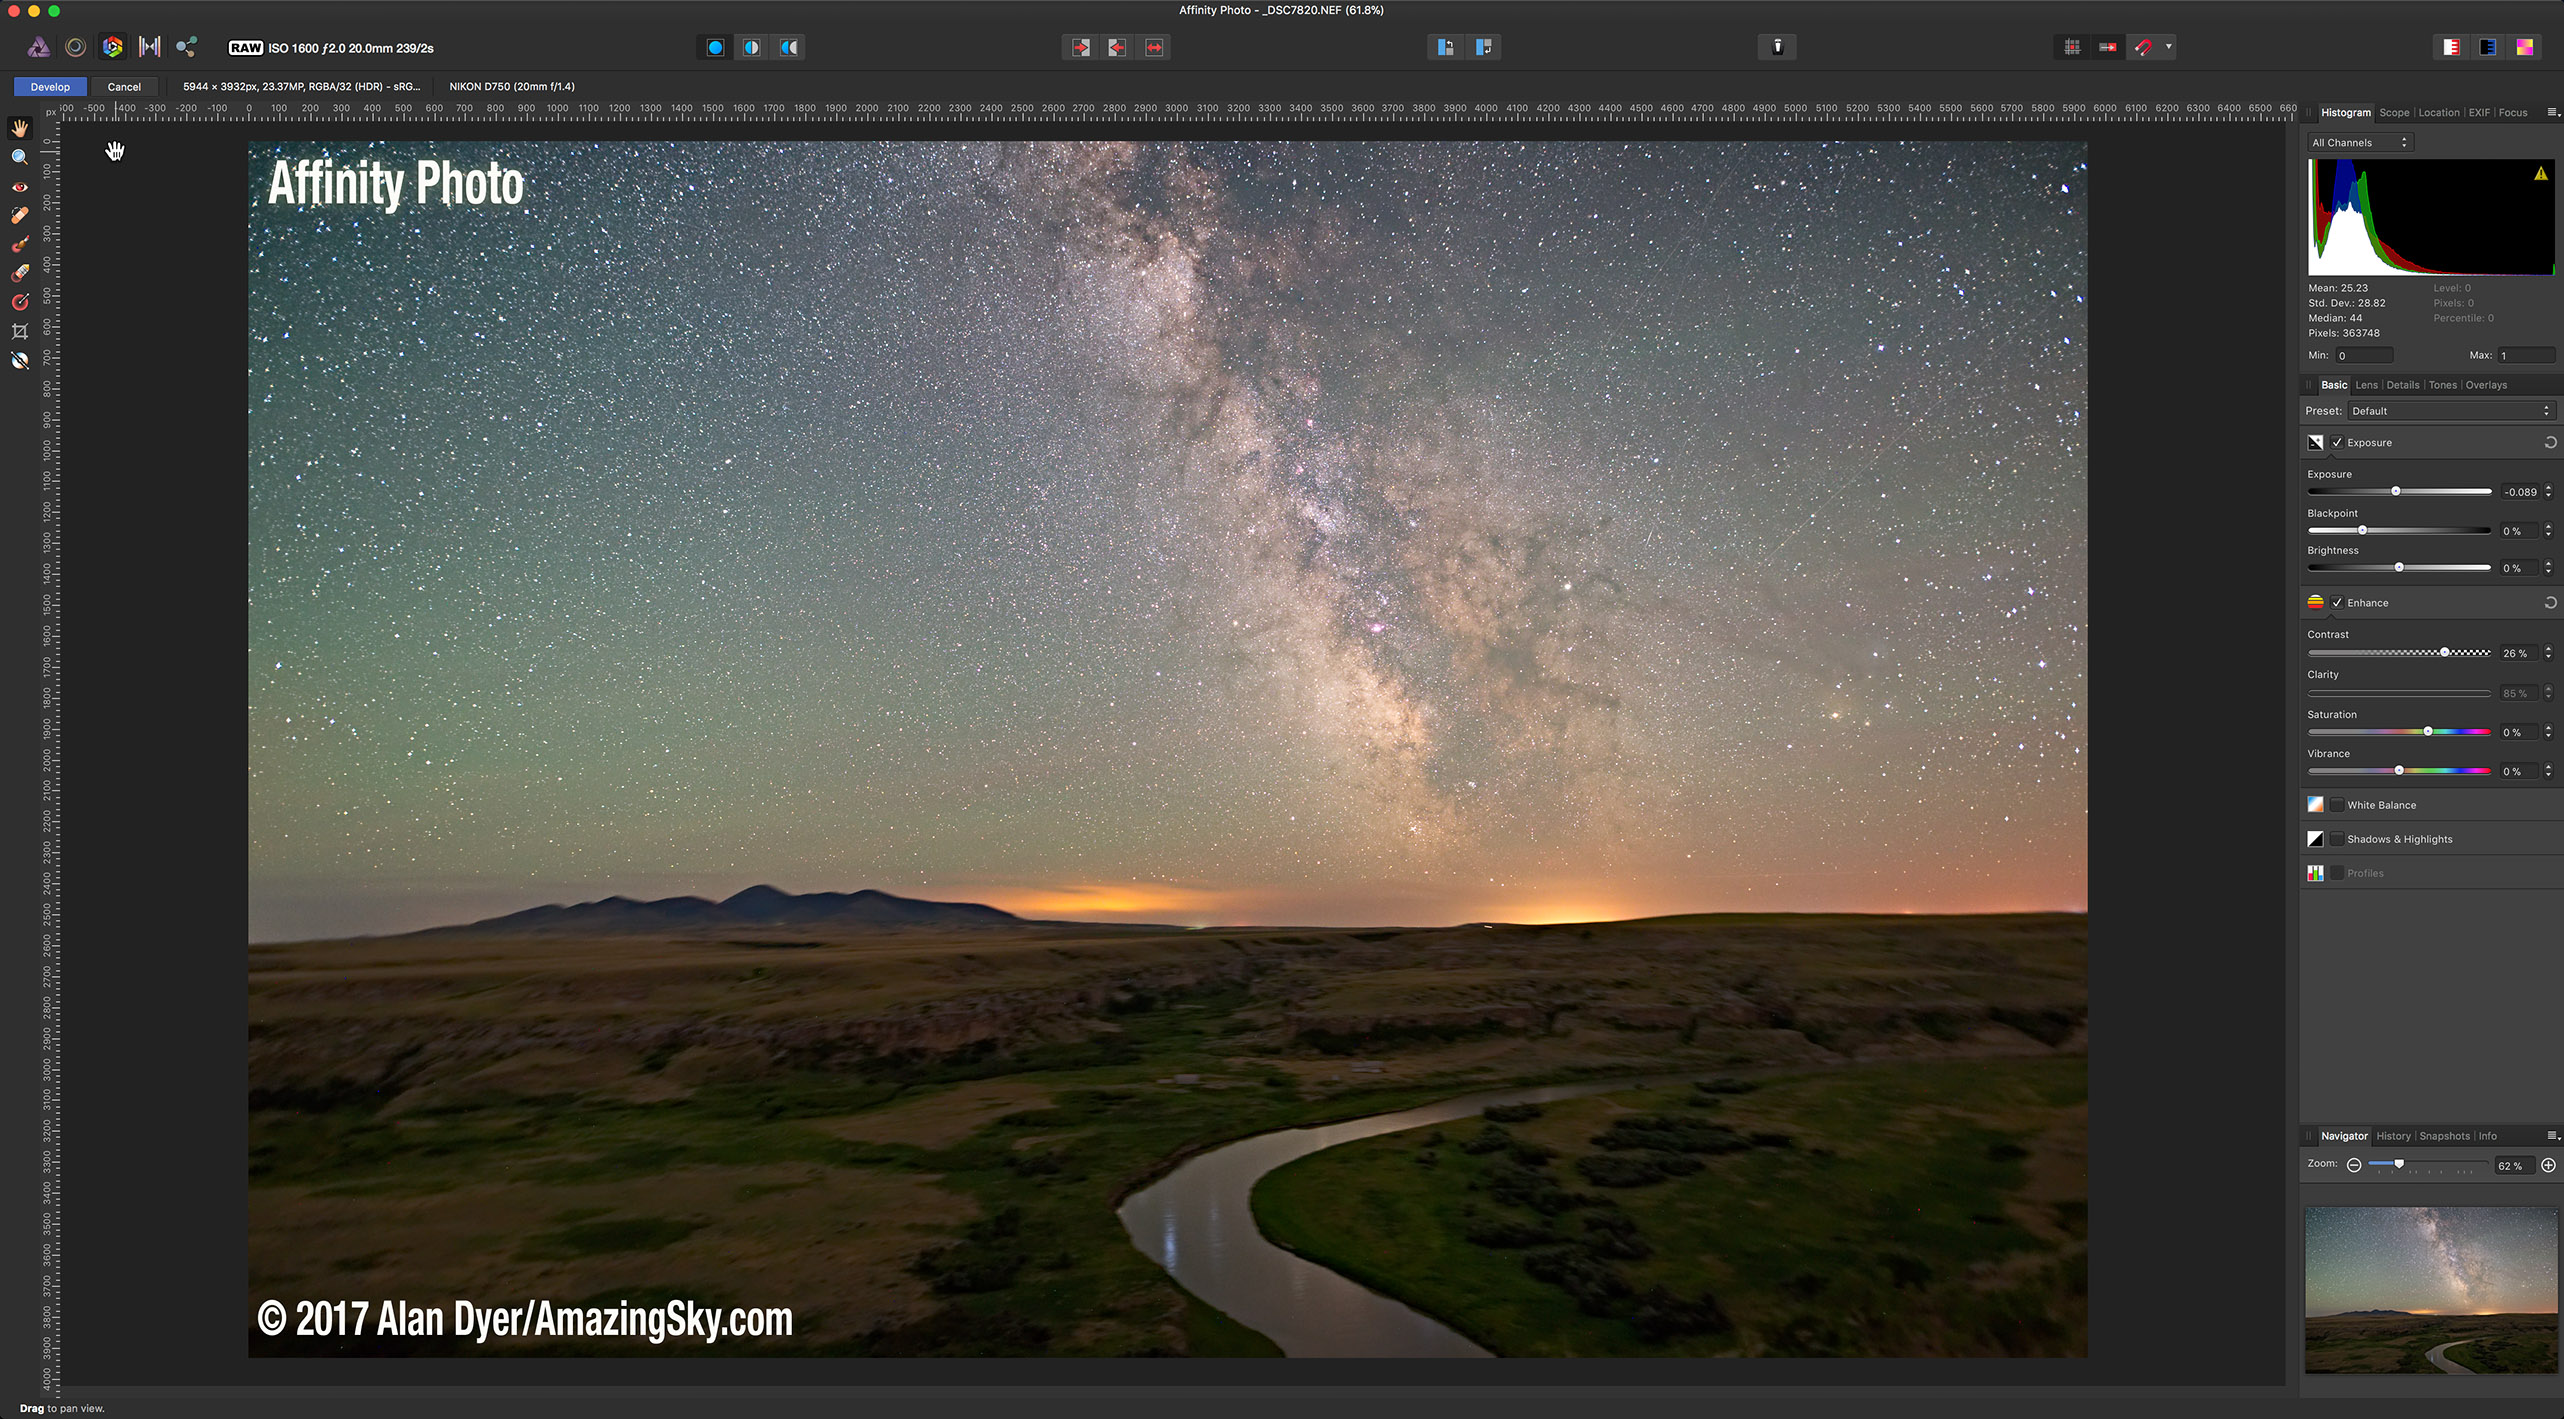
Testing ON1 Photo RAW for Astrophotography


ON1 Testing Title

Can the new version of ON1 Photo RAW match Photoshop for astrophotography?ย 

The short TL;DR answer: No.

But … as always, it depends. So do read on.


Released in mid-November 2018, the latest version of ON1 Photo RAW greatly improves a non-destructive workflow. Combining Browsing, Cataloging, Raw Developing, with newly improved Layers capabilities, ON1 is out to compete with Adobe’s Creative Cloud photo suite โ€“ Lightroom, Camera Raw, Bridge, and Photoshop โ€“ for those looking for a non-subscription alternative.

Many reviewers love the new ON1 โ€“ for “normal” photography.

But can it replace Adobe for night sky photos? I put ON1 Photo RAW 2019 through its paces for the demanding tasks of processing nightscapes, time-lapses, and deep-sky astrophotos.


The Conclusions

In my eBook “How to Photograph and Process Nightscapes and Time-Lapses” (linked to at right) I present dozens of processing tutorials, including several on how to use ON1 Photo RAW, but the 2018 edition. I was critical of many aspects of the old version, primarily of its destructive workflow when going from its Develop and Effects modules to the limited Layers module of the 2018 edition.

I’m glad to see many of the shortfalls have been addressed, with the 2019 edition offering a much better workflow allowing layering of raw images while maintaining access to all the original raw settings and adjustments. You no longer have to flatten and commit to image settings to layer them for composites. When working with Layers you are no longer locked out of key functions such as cropping.

I won’t detail all the changes to ON1 2019 but they are significant and welcome.

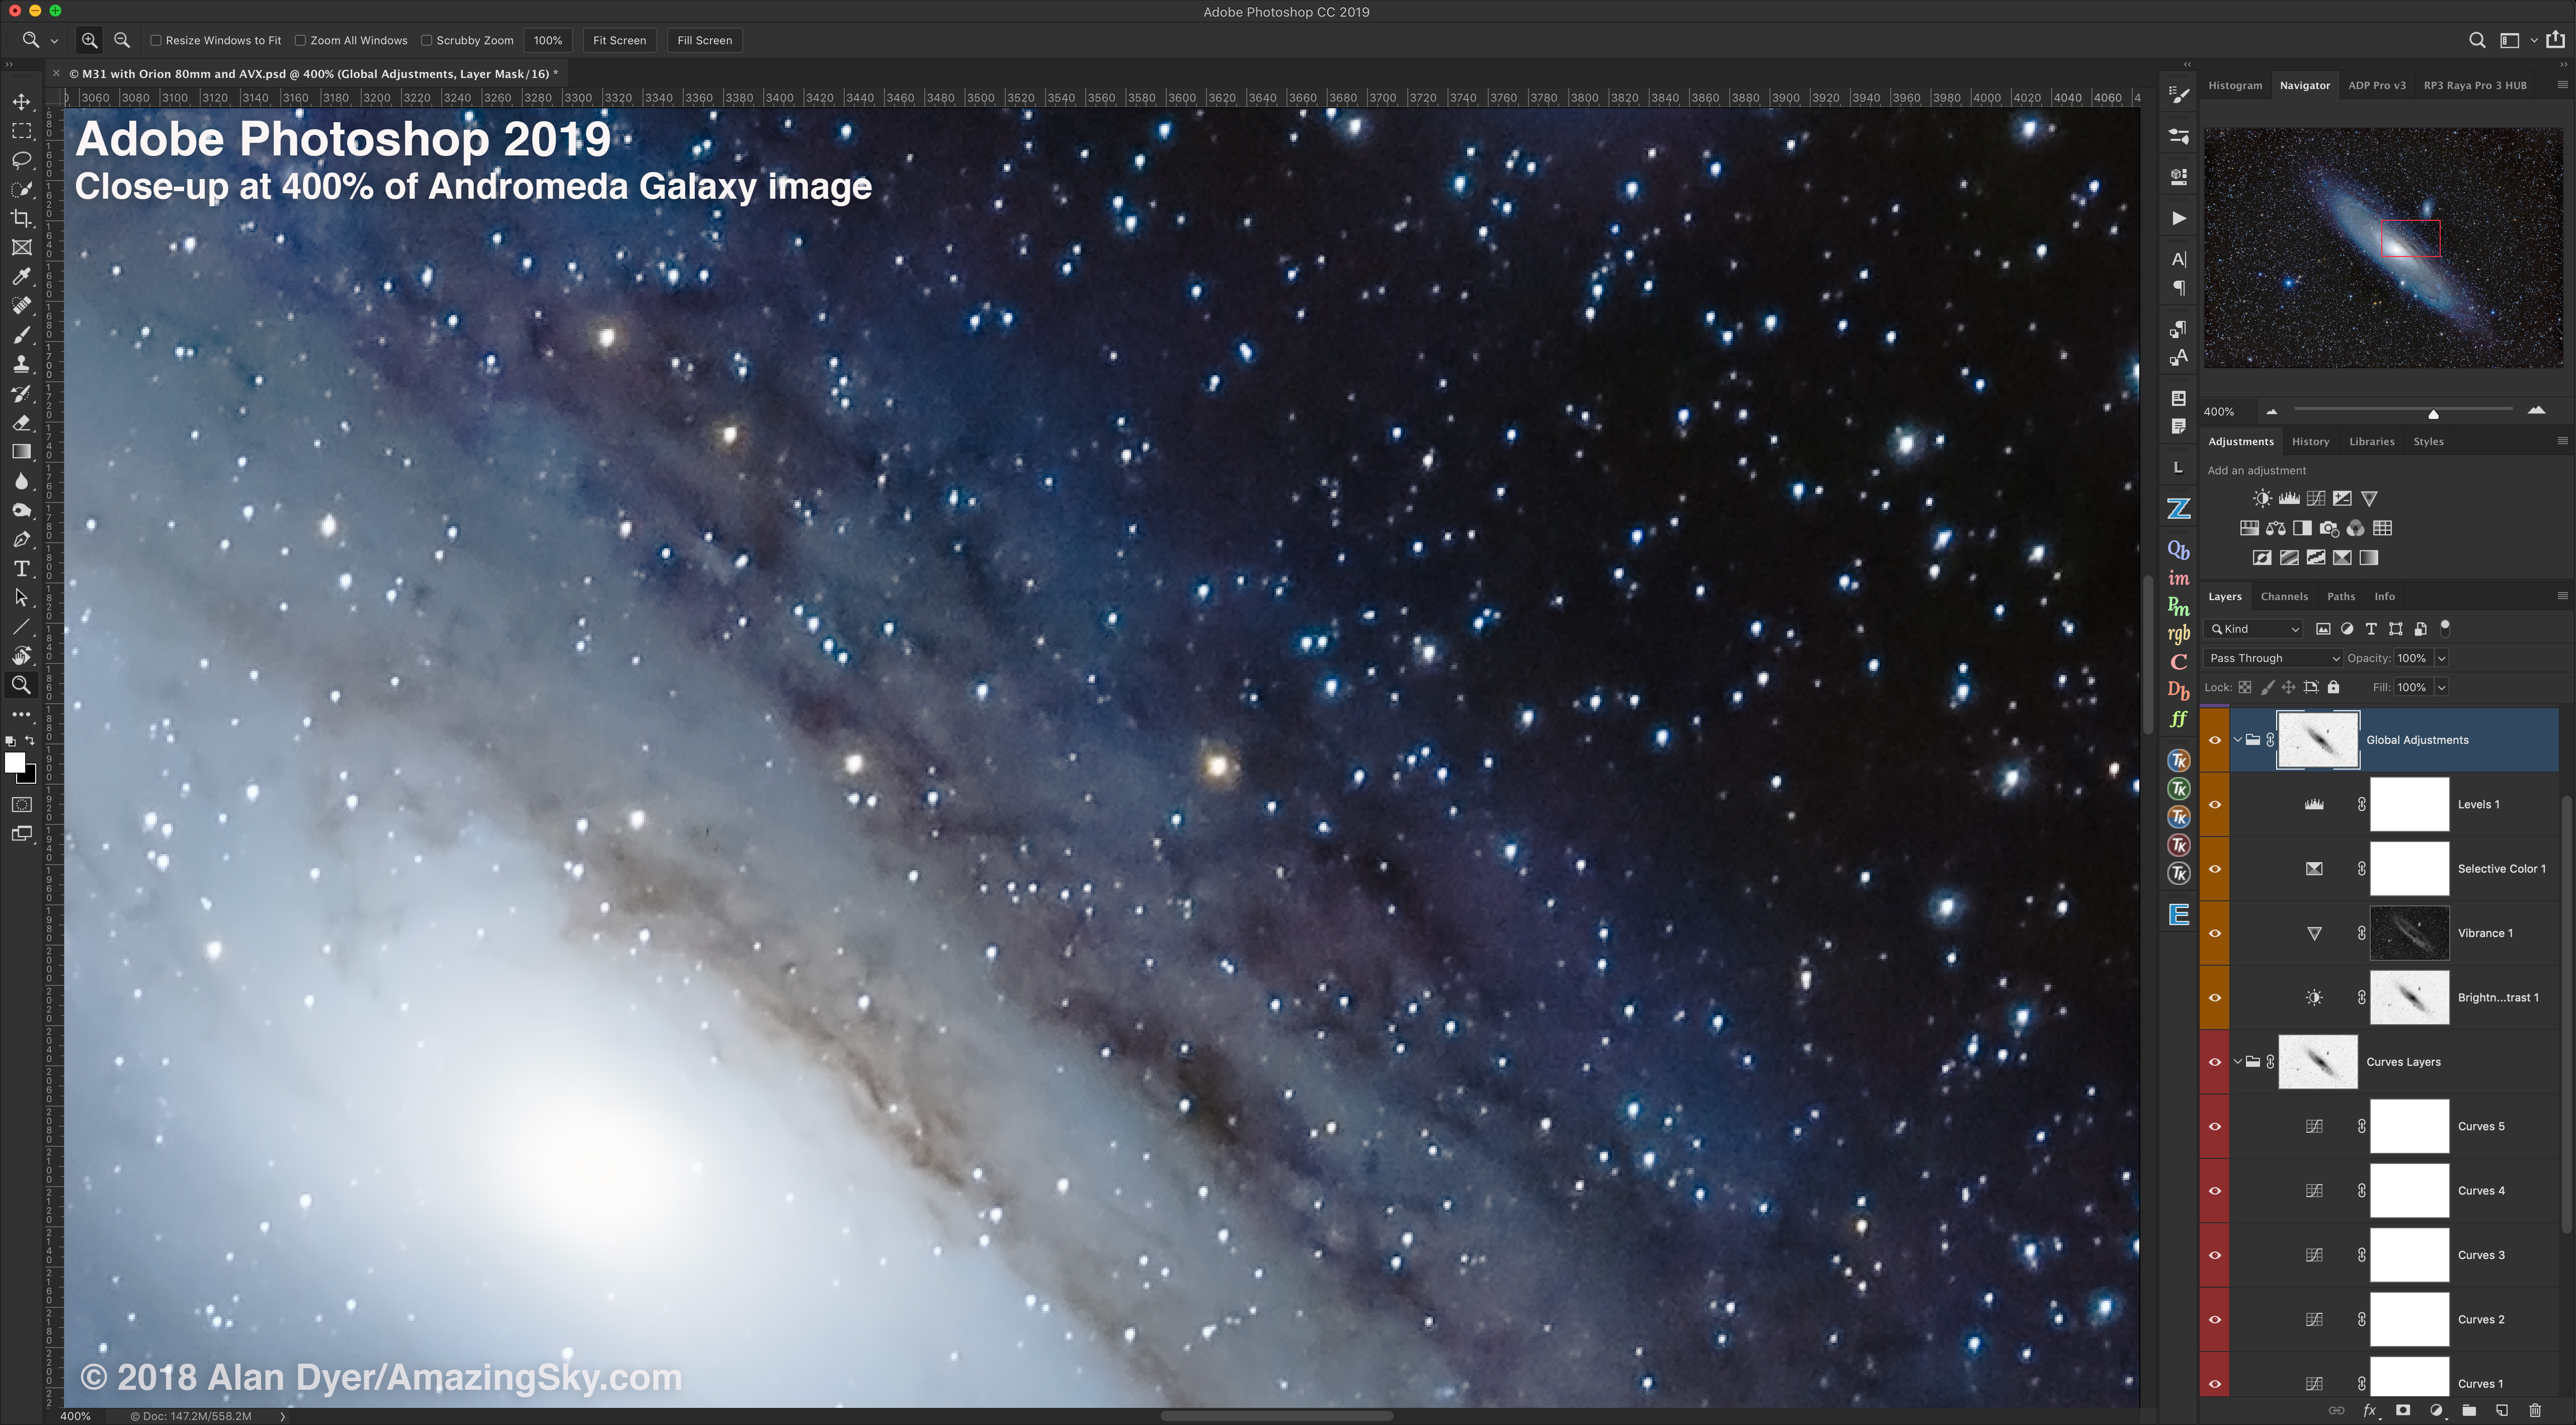
The question I had was: Are they enough for high-quality astrophotos in a non-destructive workflow, Adobe Photoshop’s fortรฉ.

While ON1 Photo RAW 2019 is much better, I concluded it still isn’t a full replacement of Adobe’s Creative Cloud suite, as least not for astrophotography.

NOTE: All images can be downloaded as high-res versions for closer inspection.ย 


ON1 2019 is Better, But for Astrophotography …

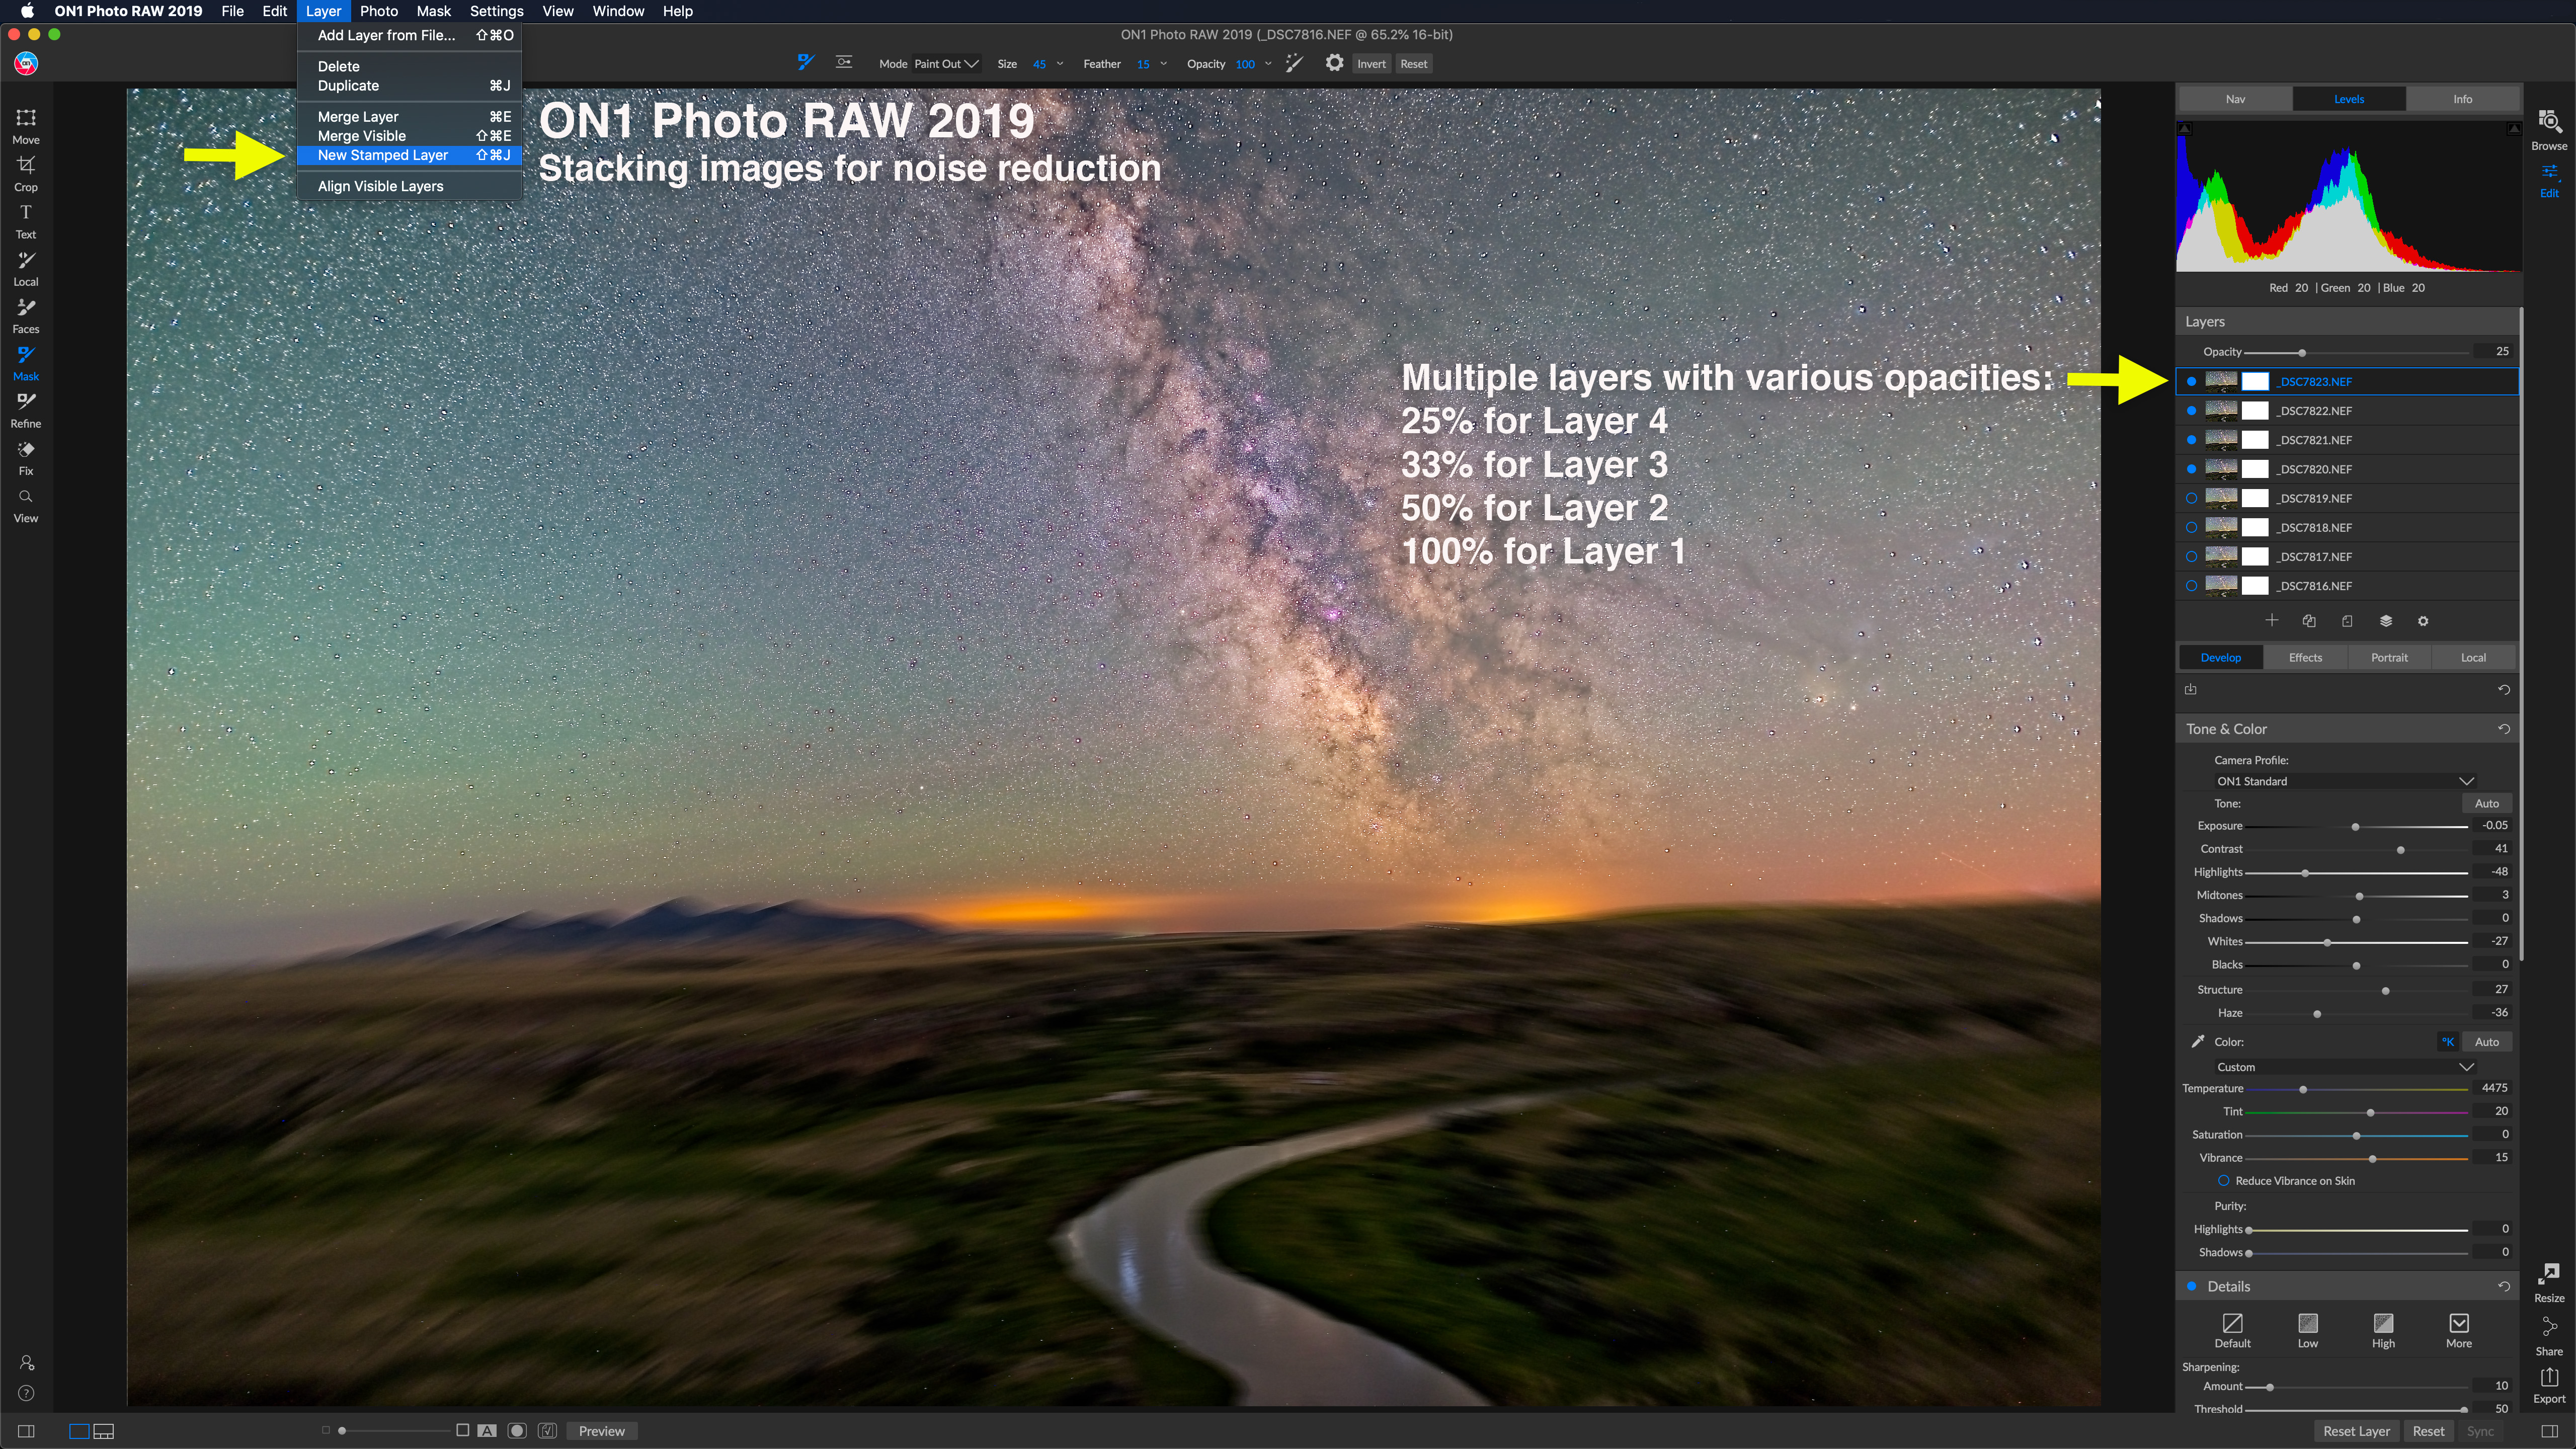
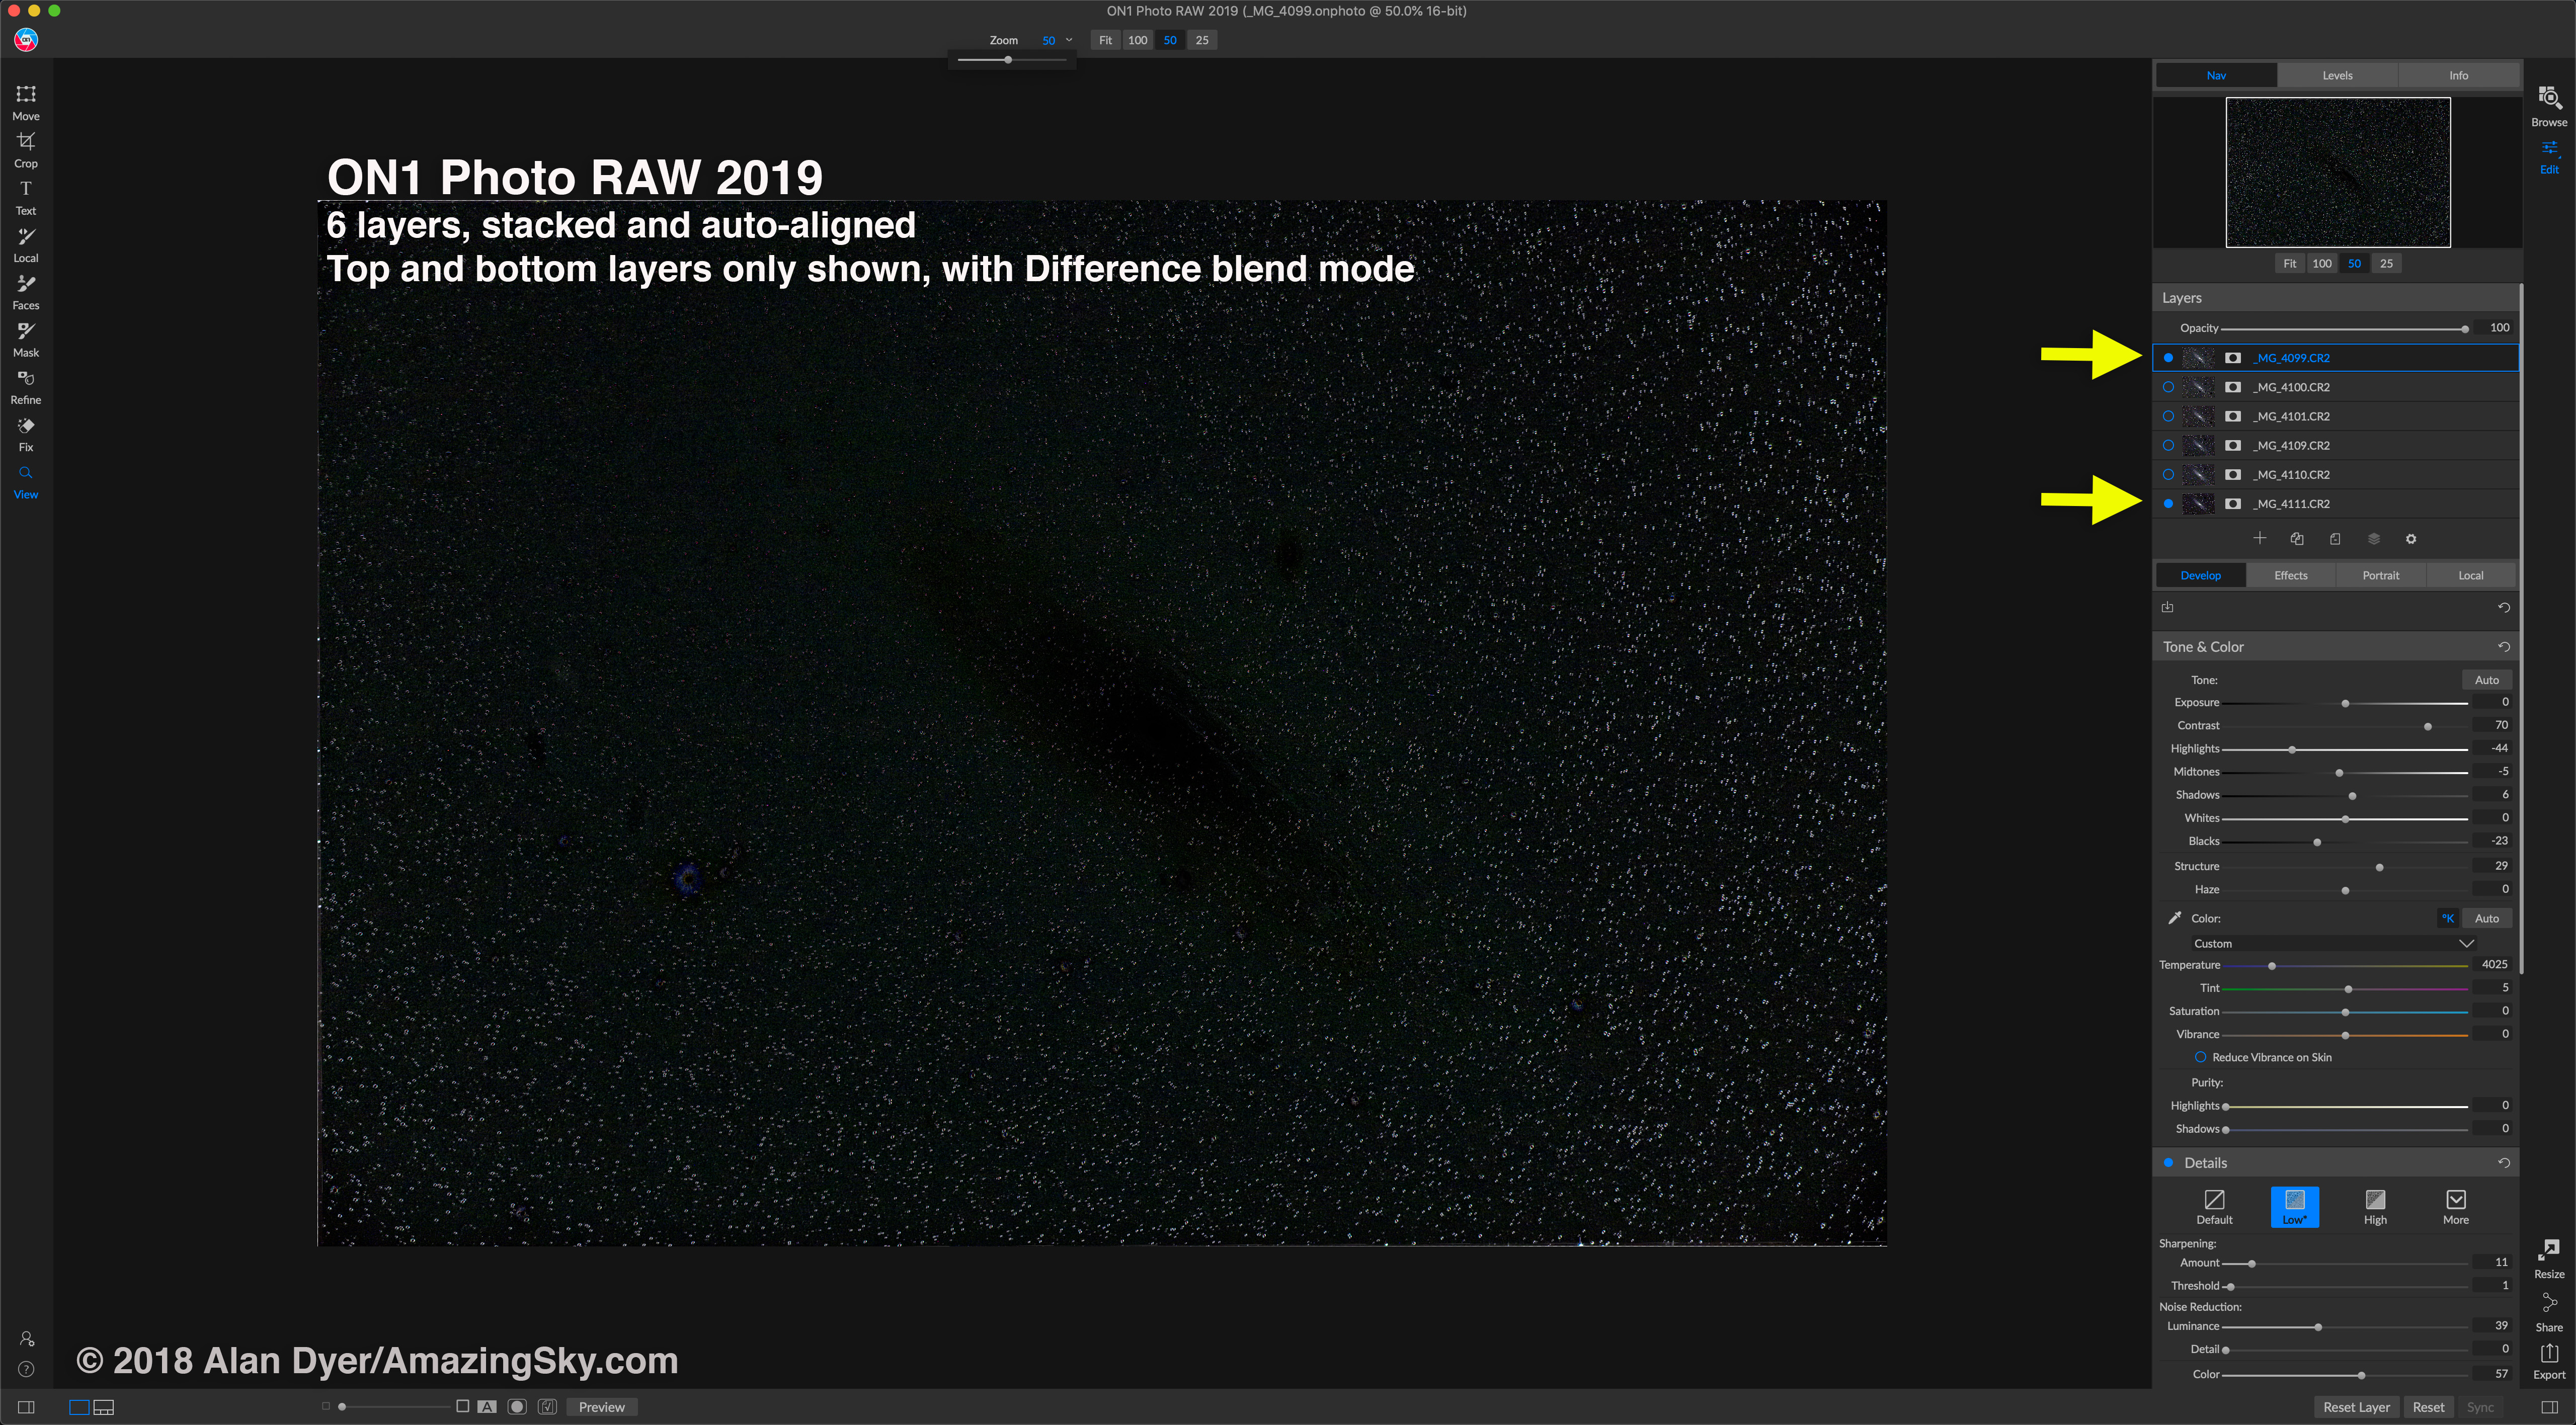
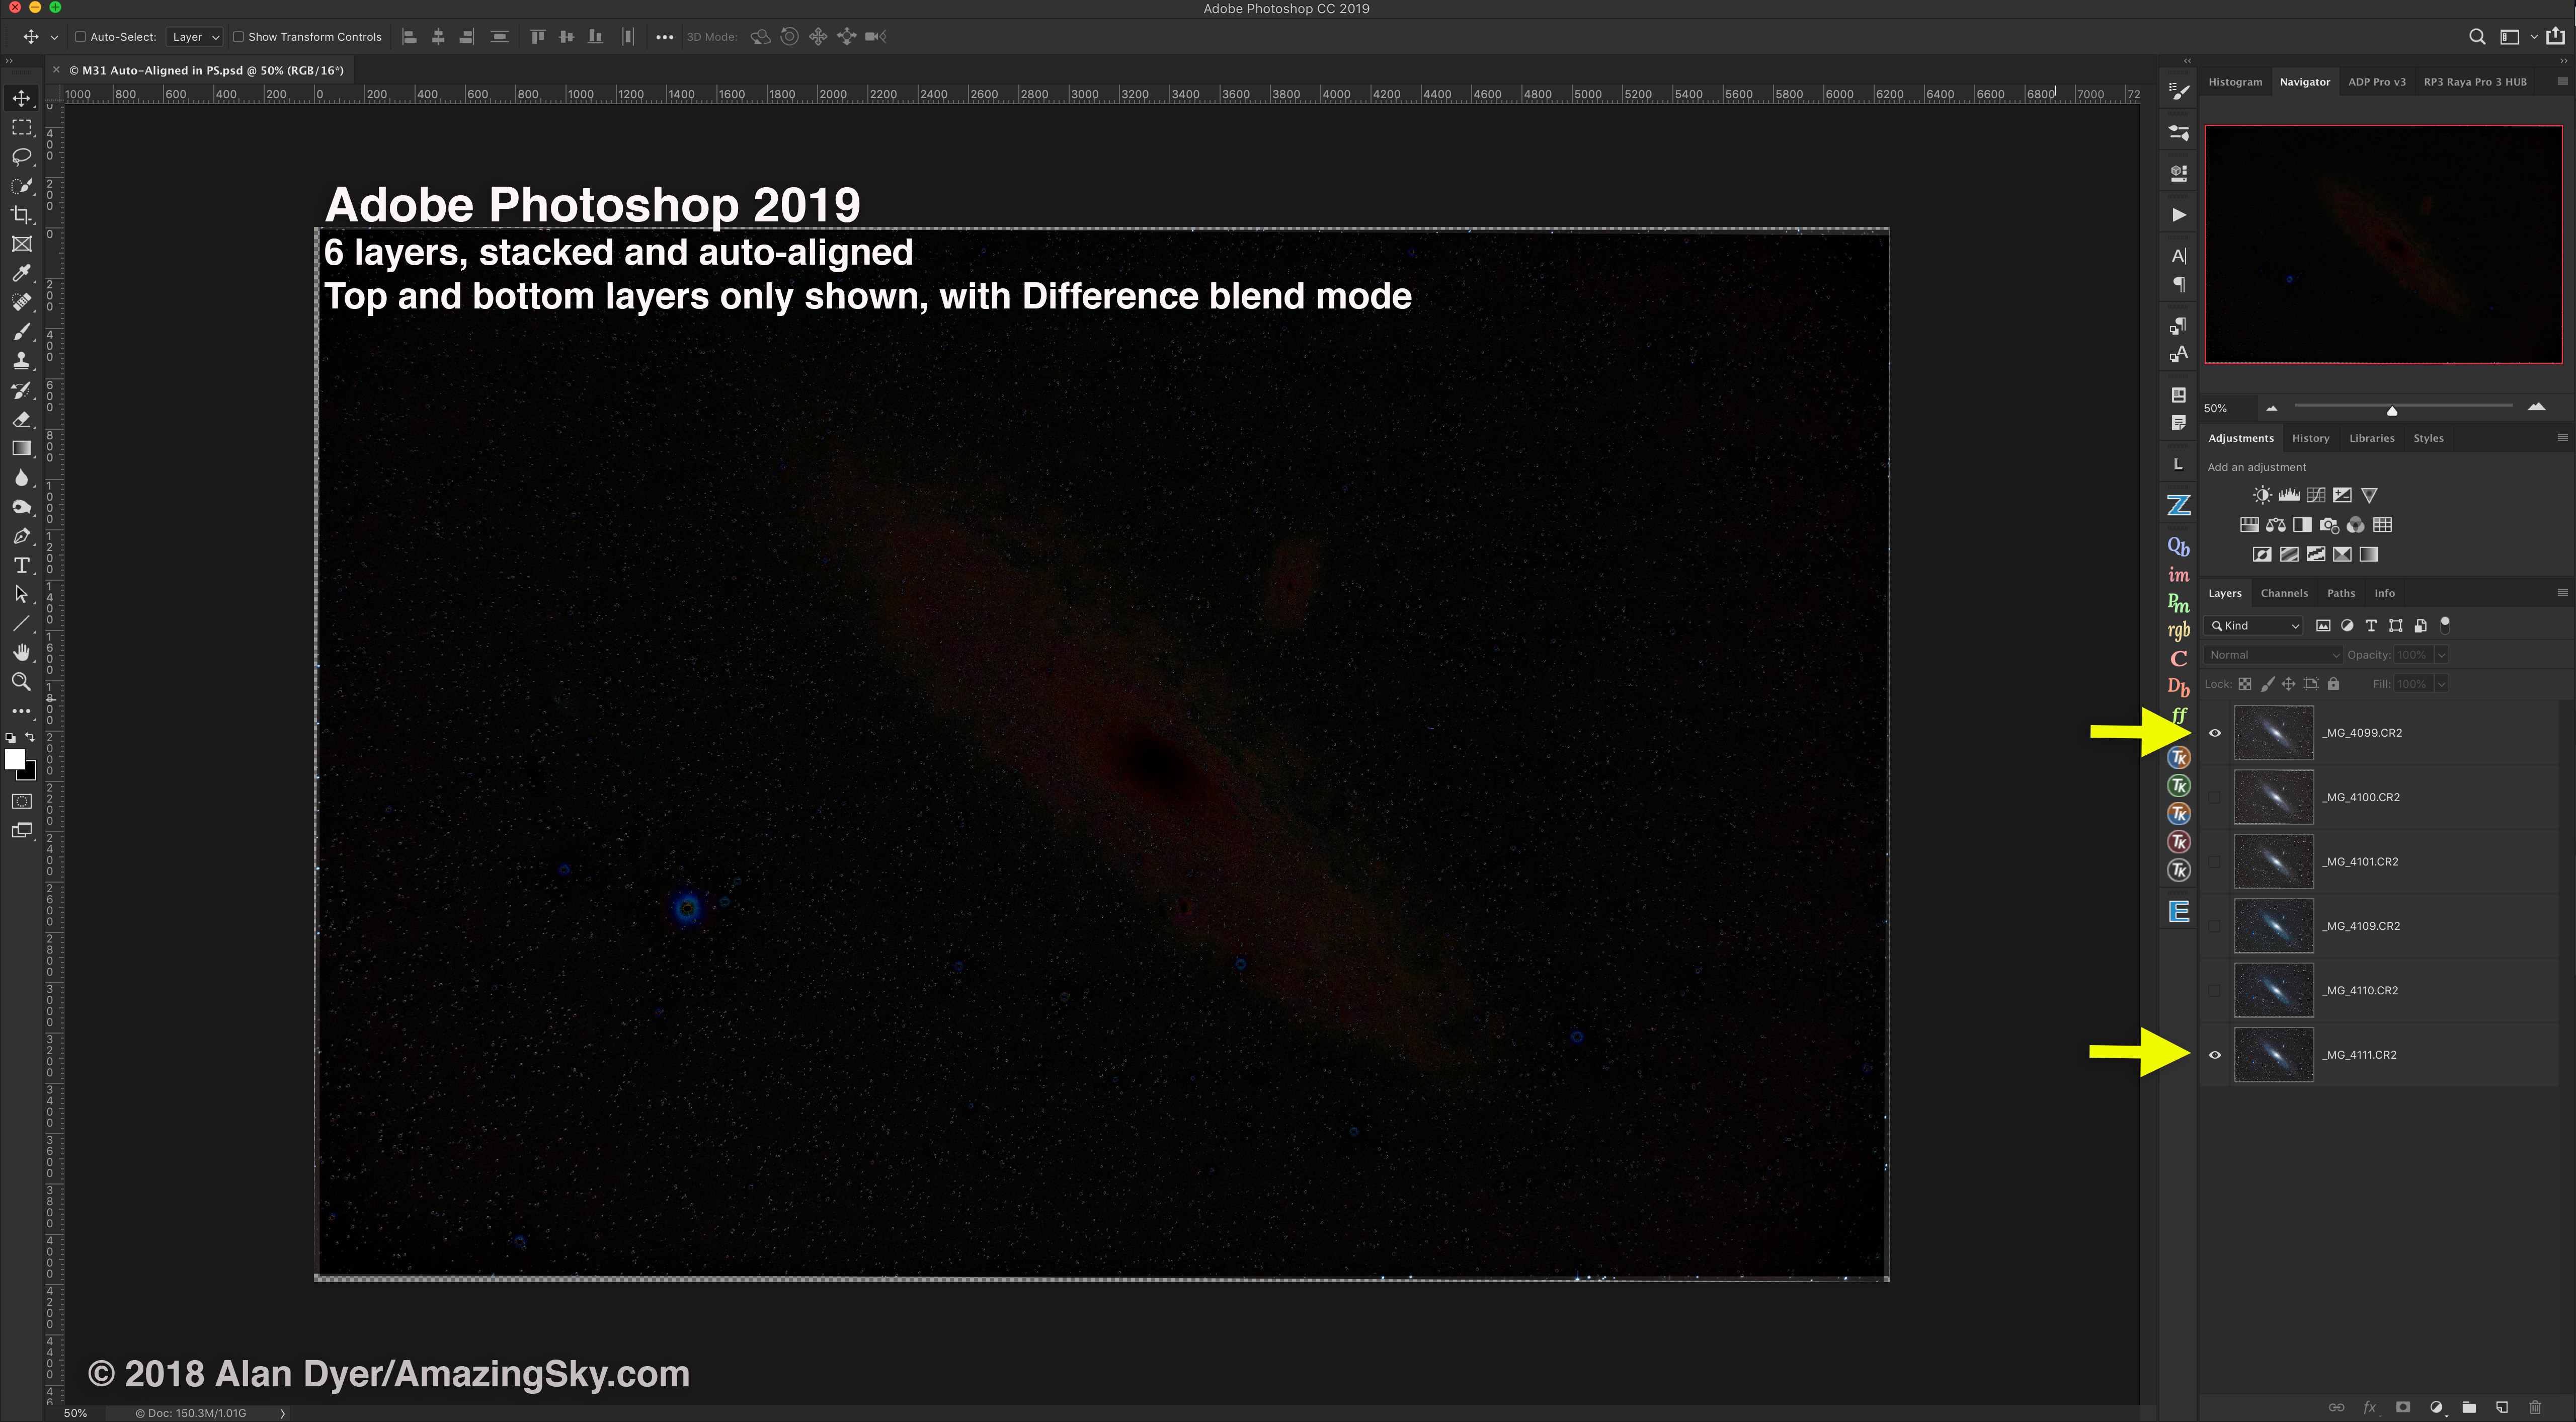
  1. Functions in Layers are still limited. For example, there is no stacking and averaging for noise smoothing. Affinity Photo has those.
  2. Filters, though abundant for artistic special effect “looks,” are limited in basic but essential functions. There is no Median filter, for one.
  3. Despite a proliferation of contrast controls, for deep-sky images (nebulas and galaxies) I was still not able to achieve the quality of images I’ve been used to with Photoshop.
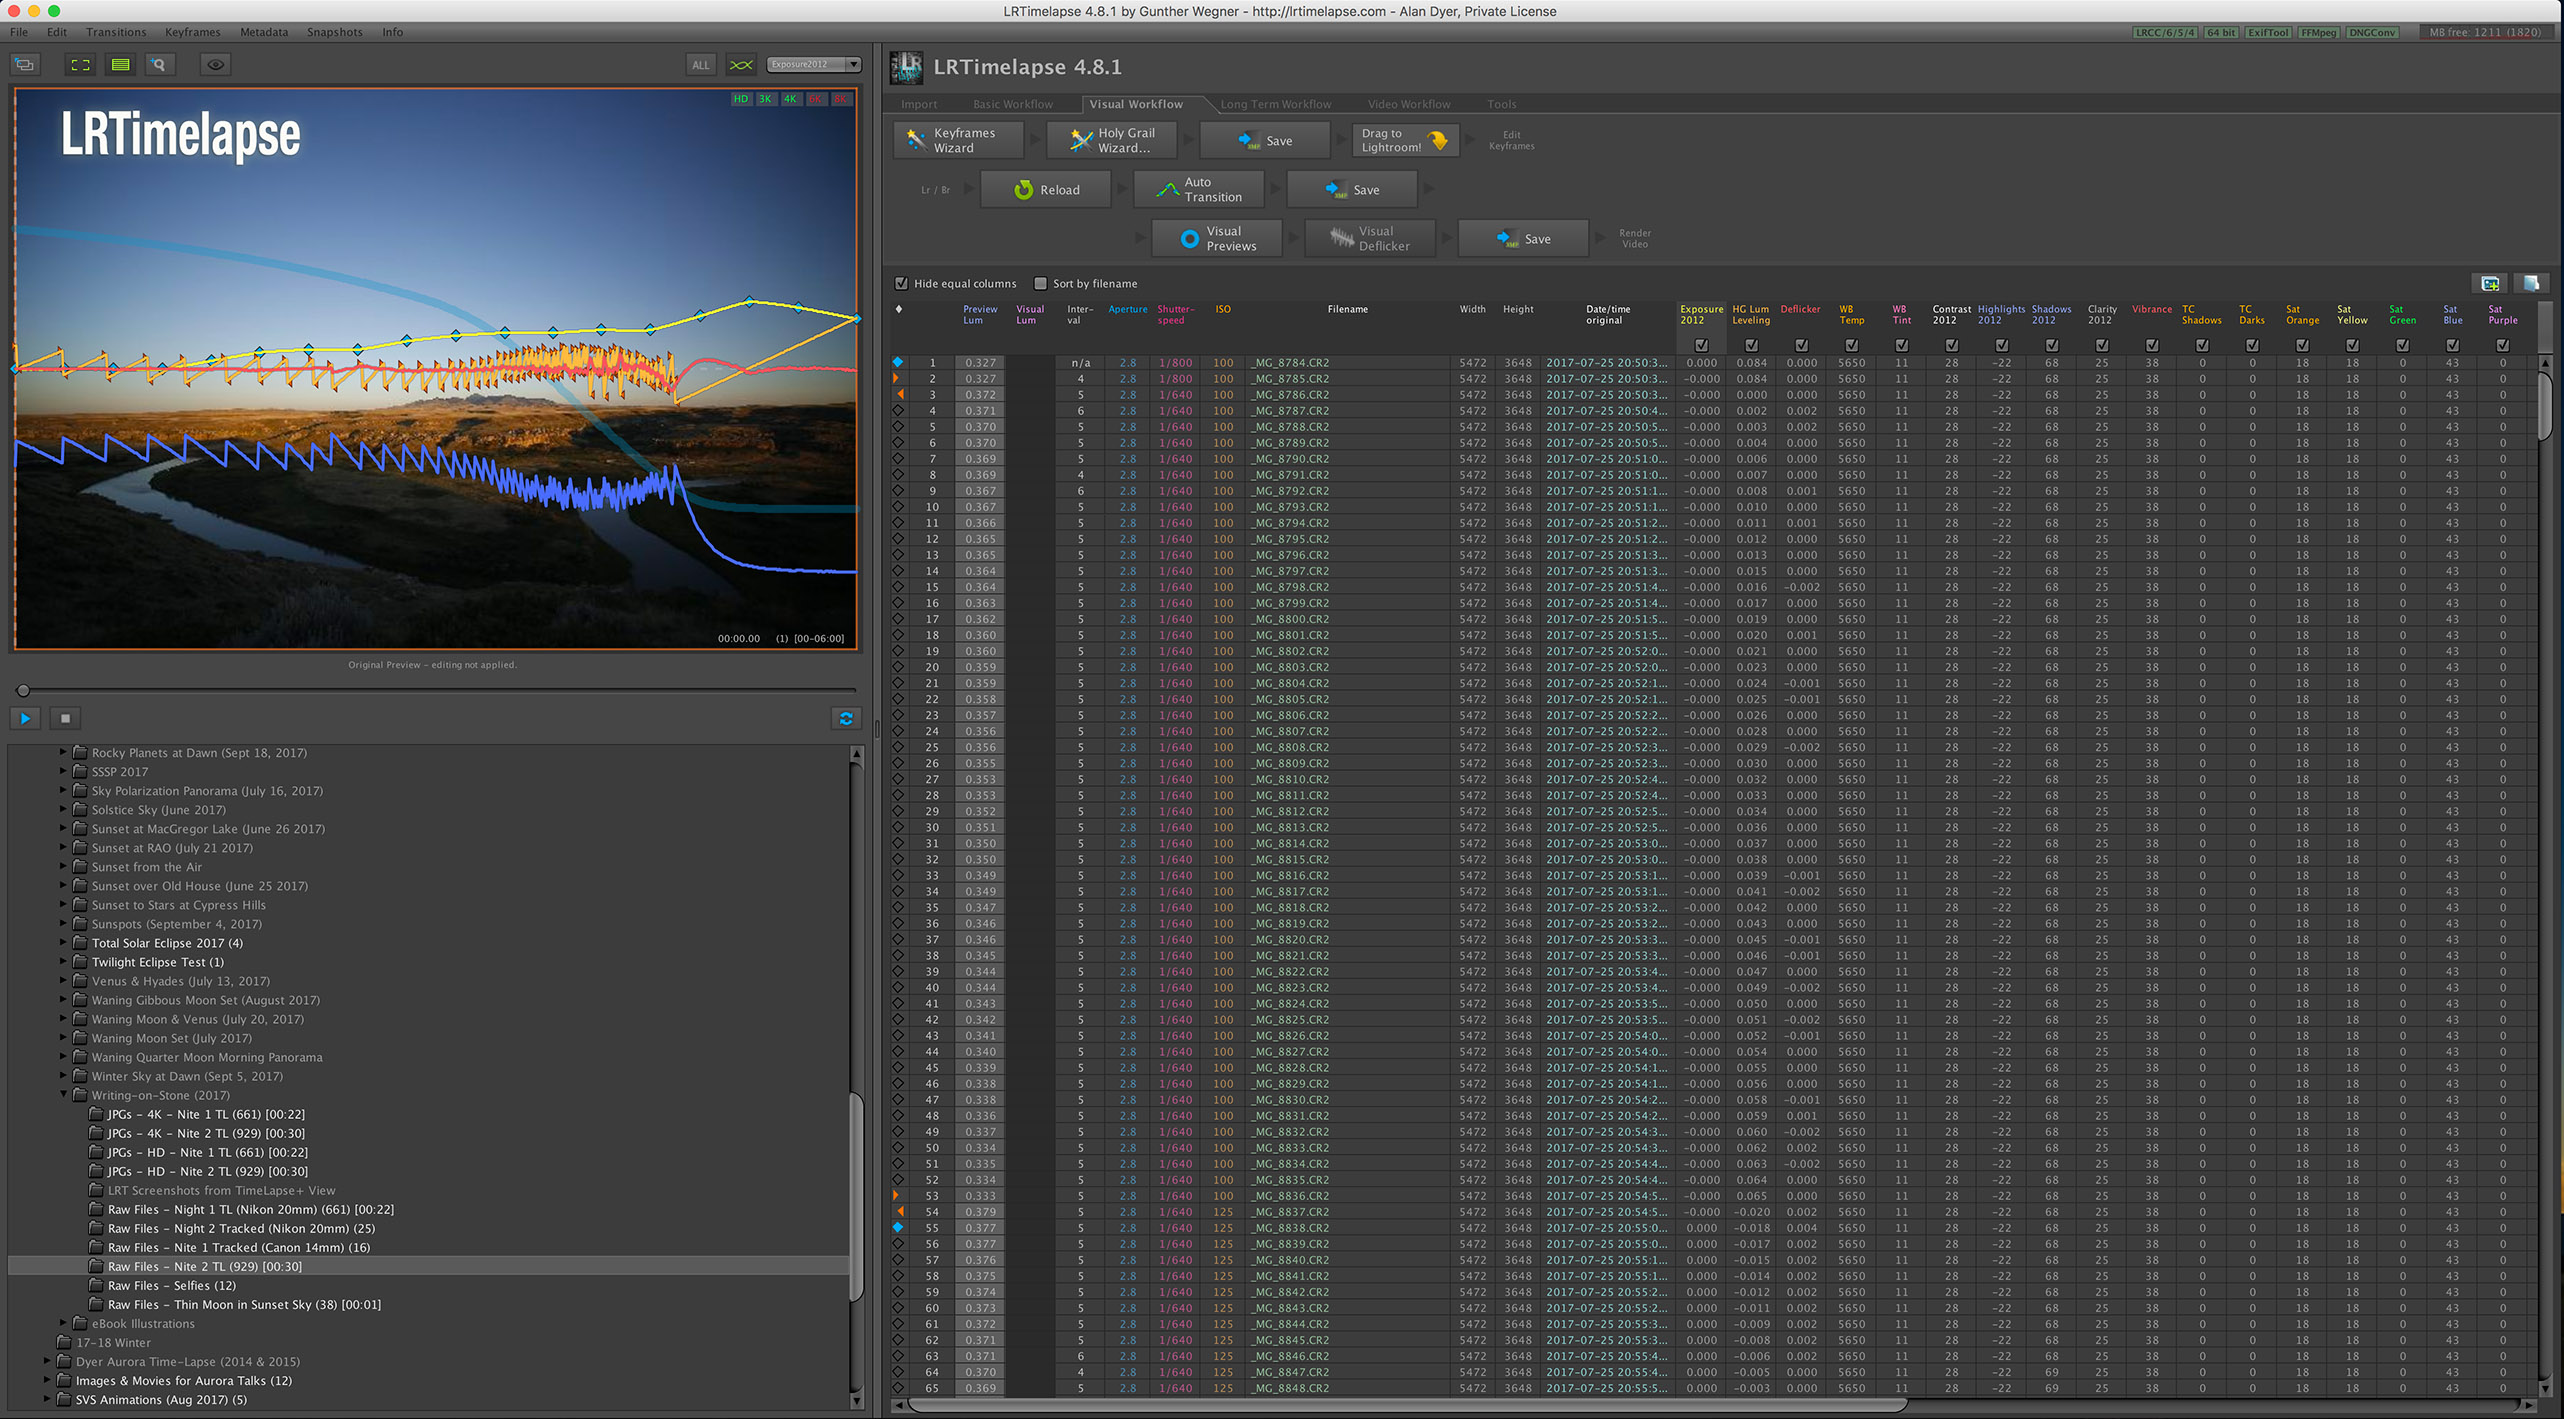
  4. The lack of support for third-party plug-ins means ON1 cannot work with essential time-lapse programs such as Timelapse Workflow or LRTimelapse.

ON1 Final Composite
A finished nightscape composite, with stacked exposures for the ground and stacked and tracked exposures for the sky, layered and blended in ON1.


Recommendations

Nightscapes: ON1 Photo RAW 2019 works acceptably well for nightscape still images:

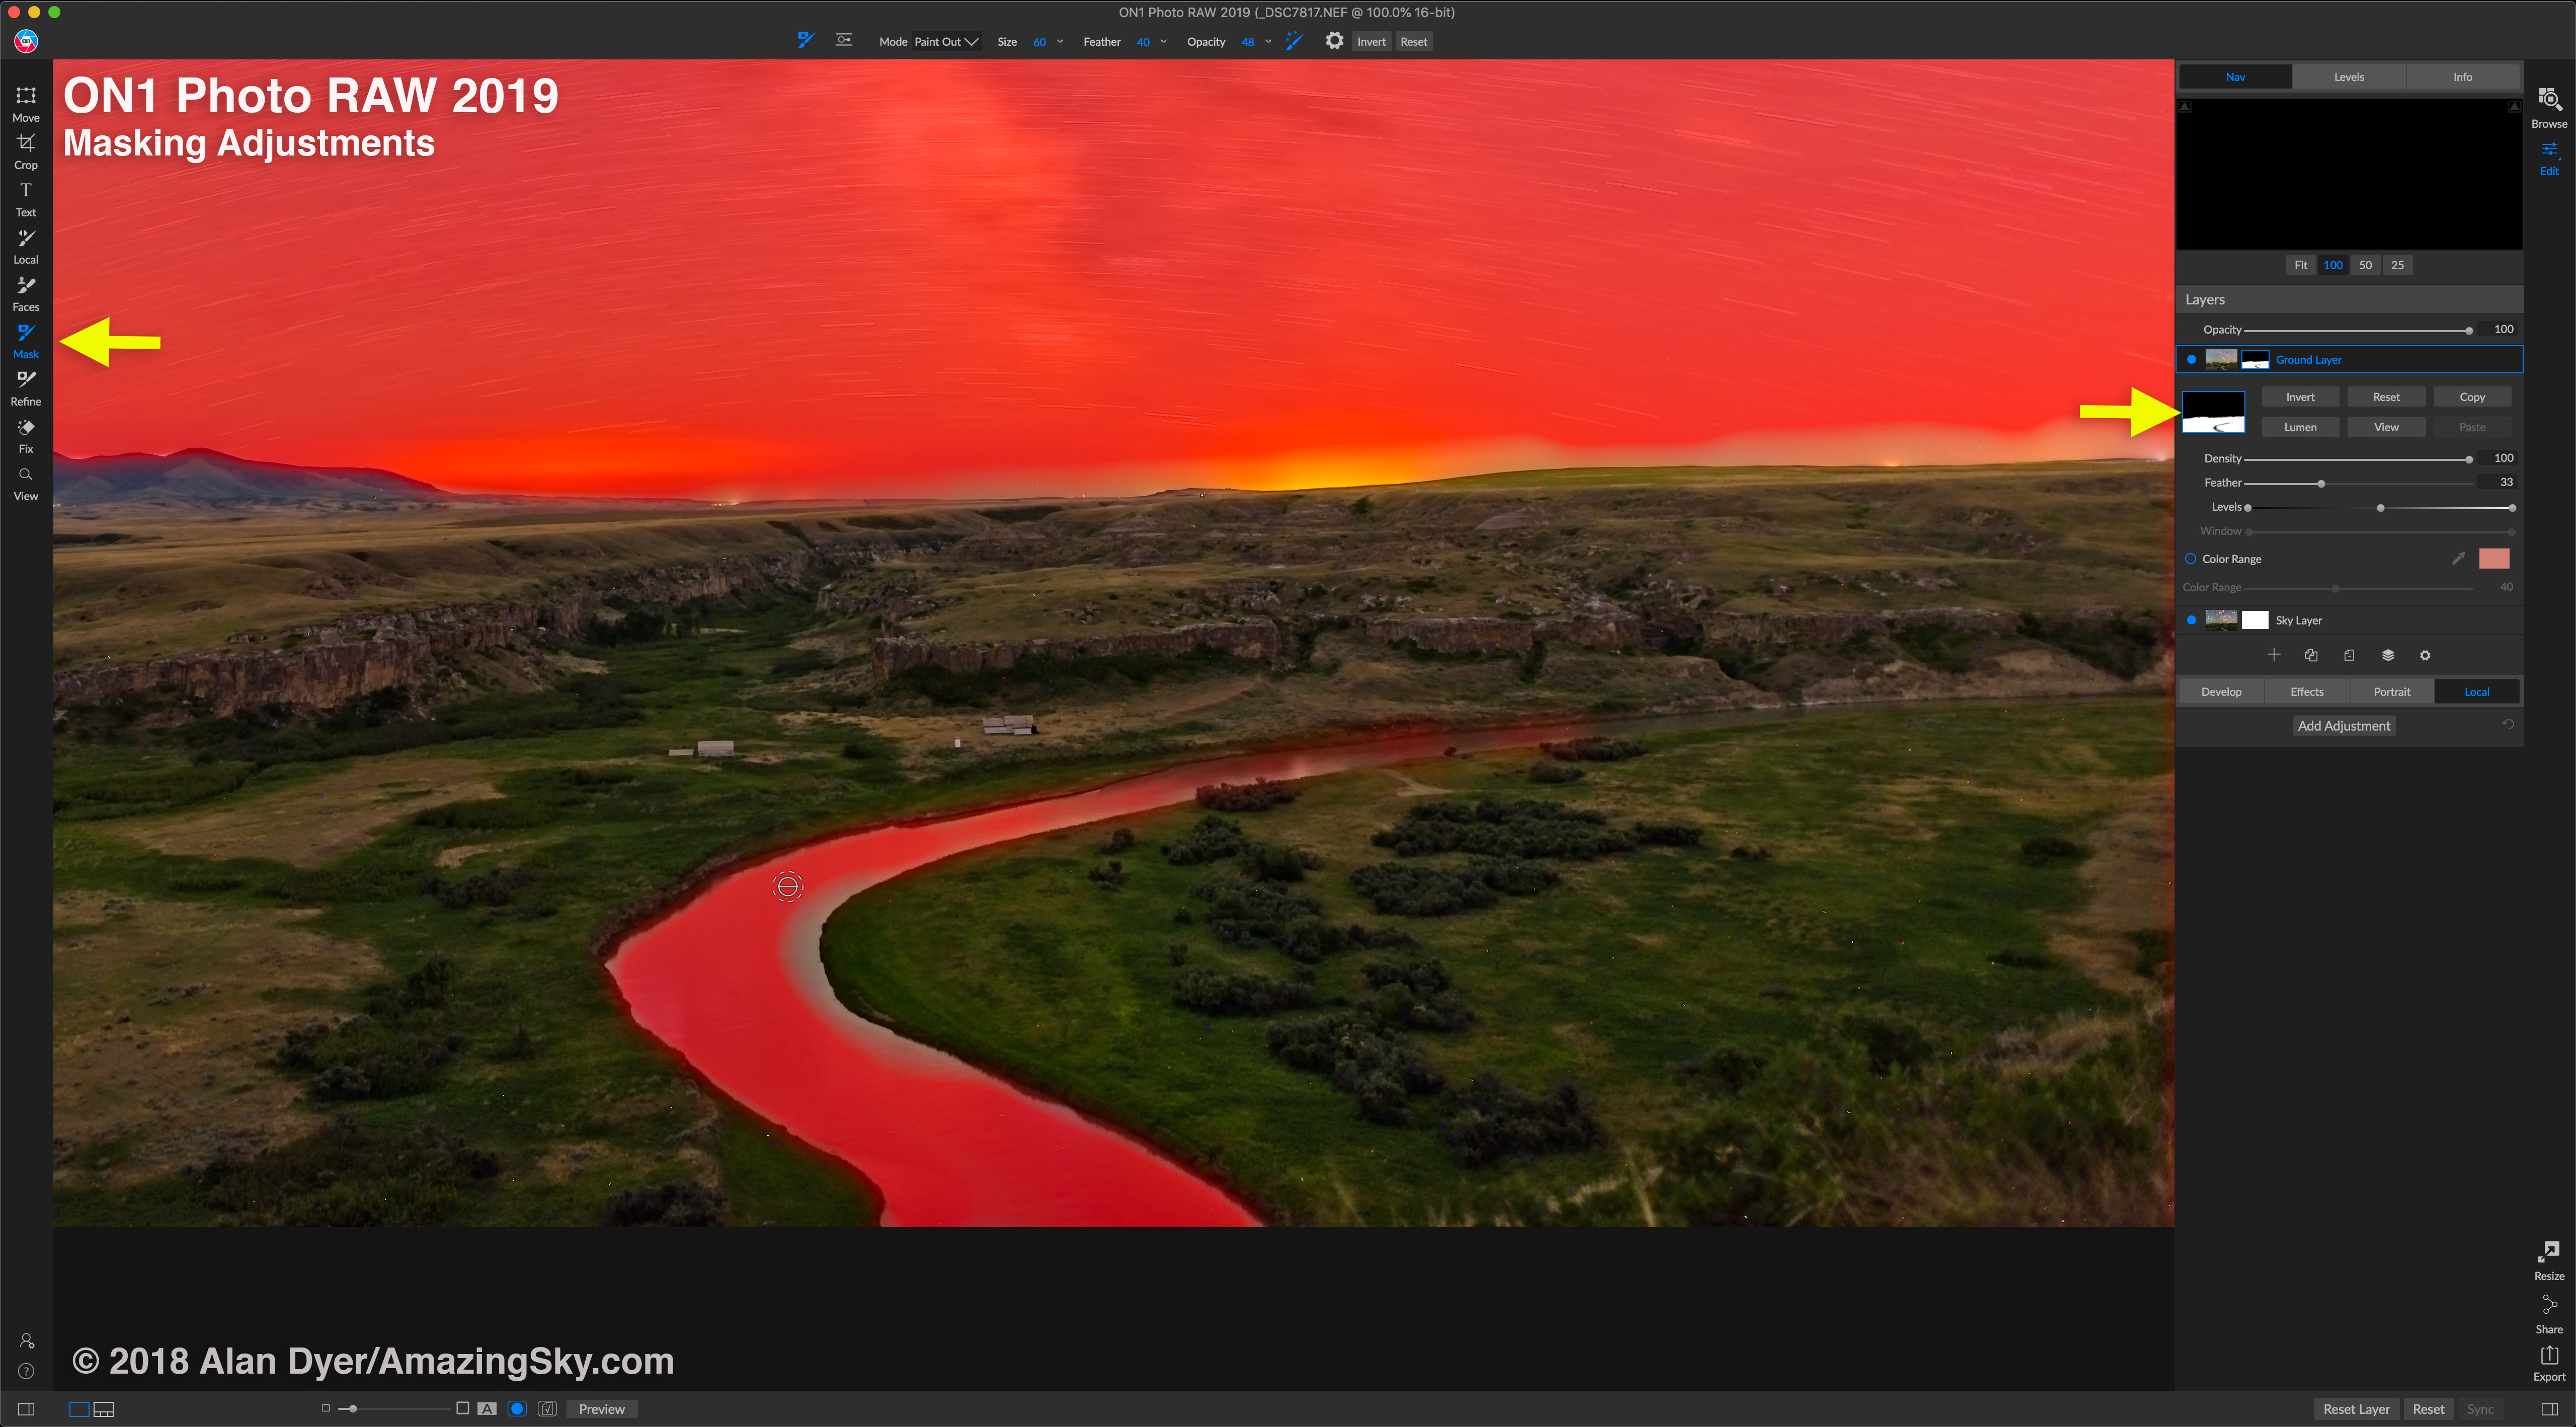
  1. Its improved layering and excellent masking functions are great for blending separate ground and sky images, or for applying masked adjustments to selected areas.

Time-Lapses: ON1 works is just adequate for basic time-lapse processing:

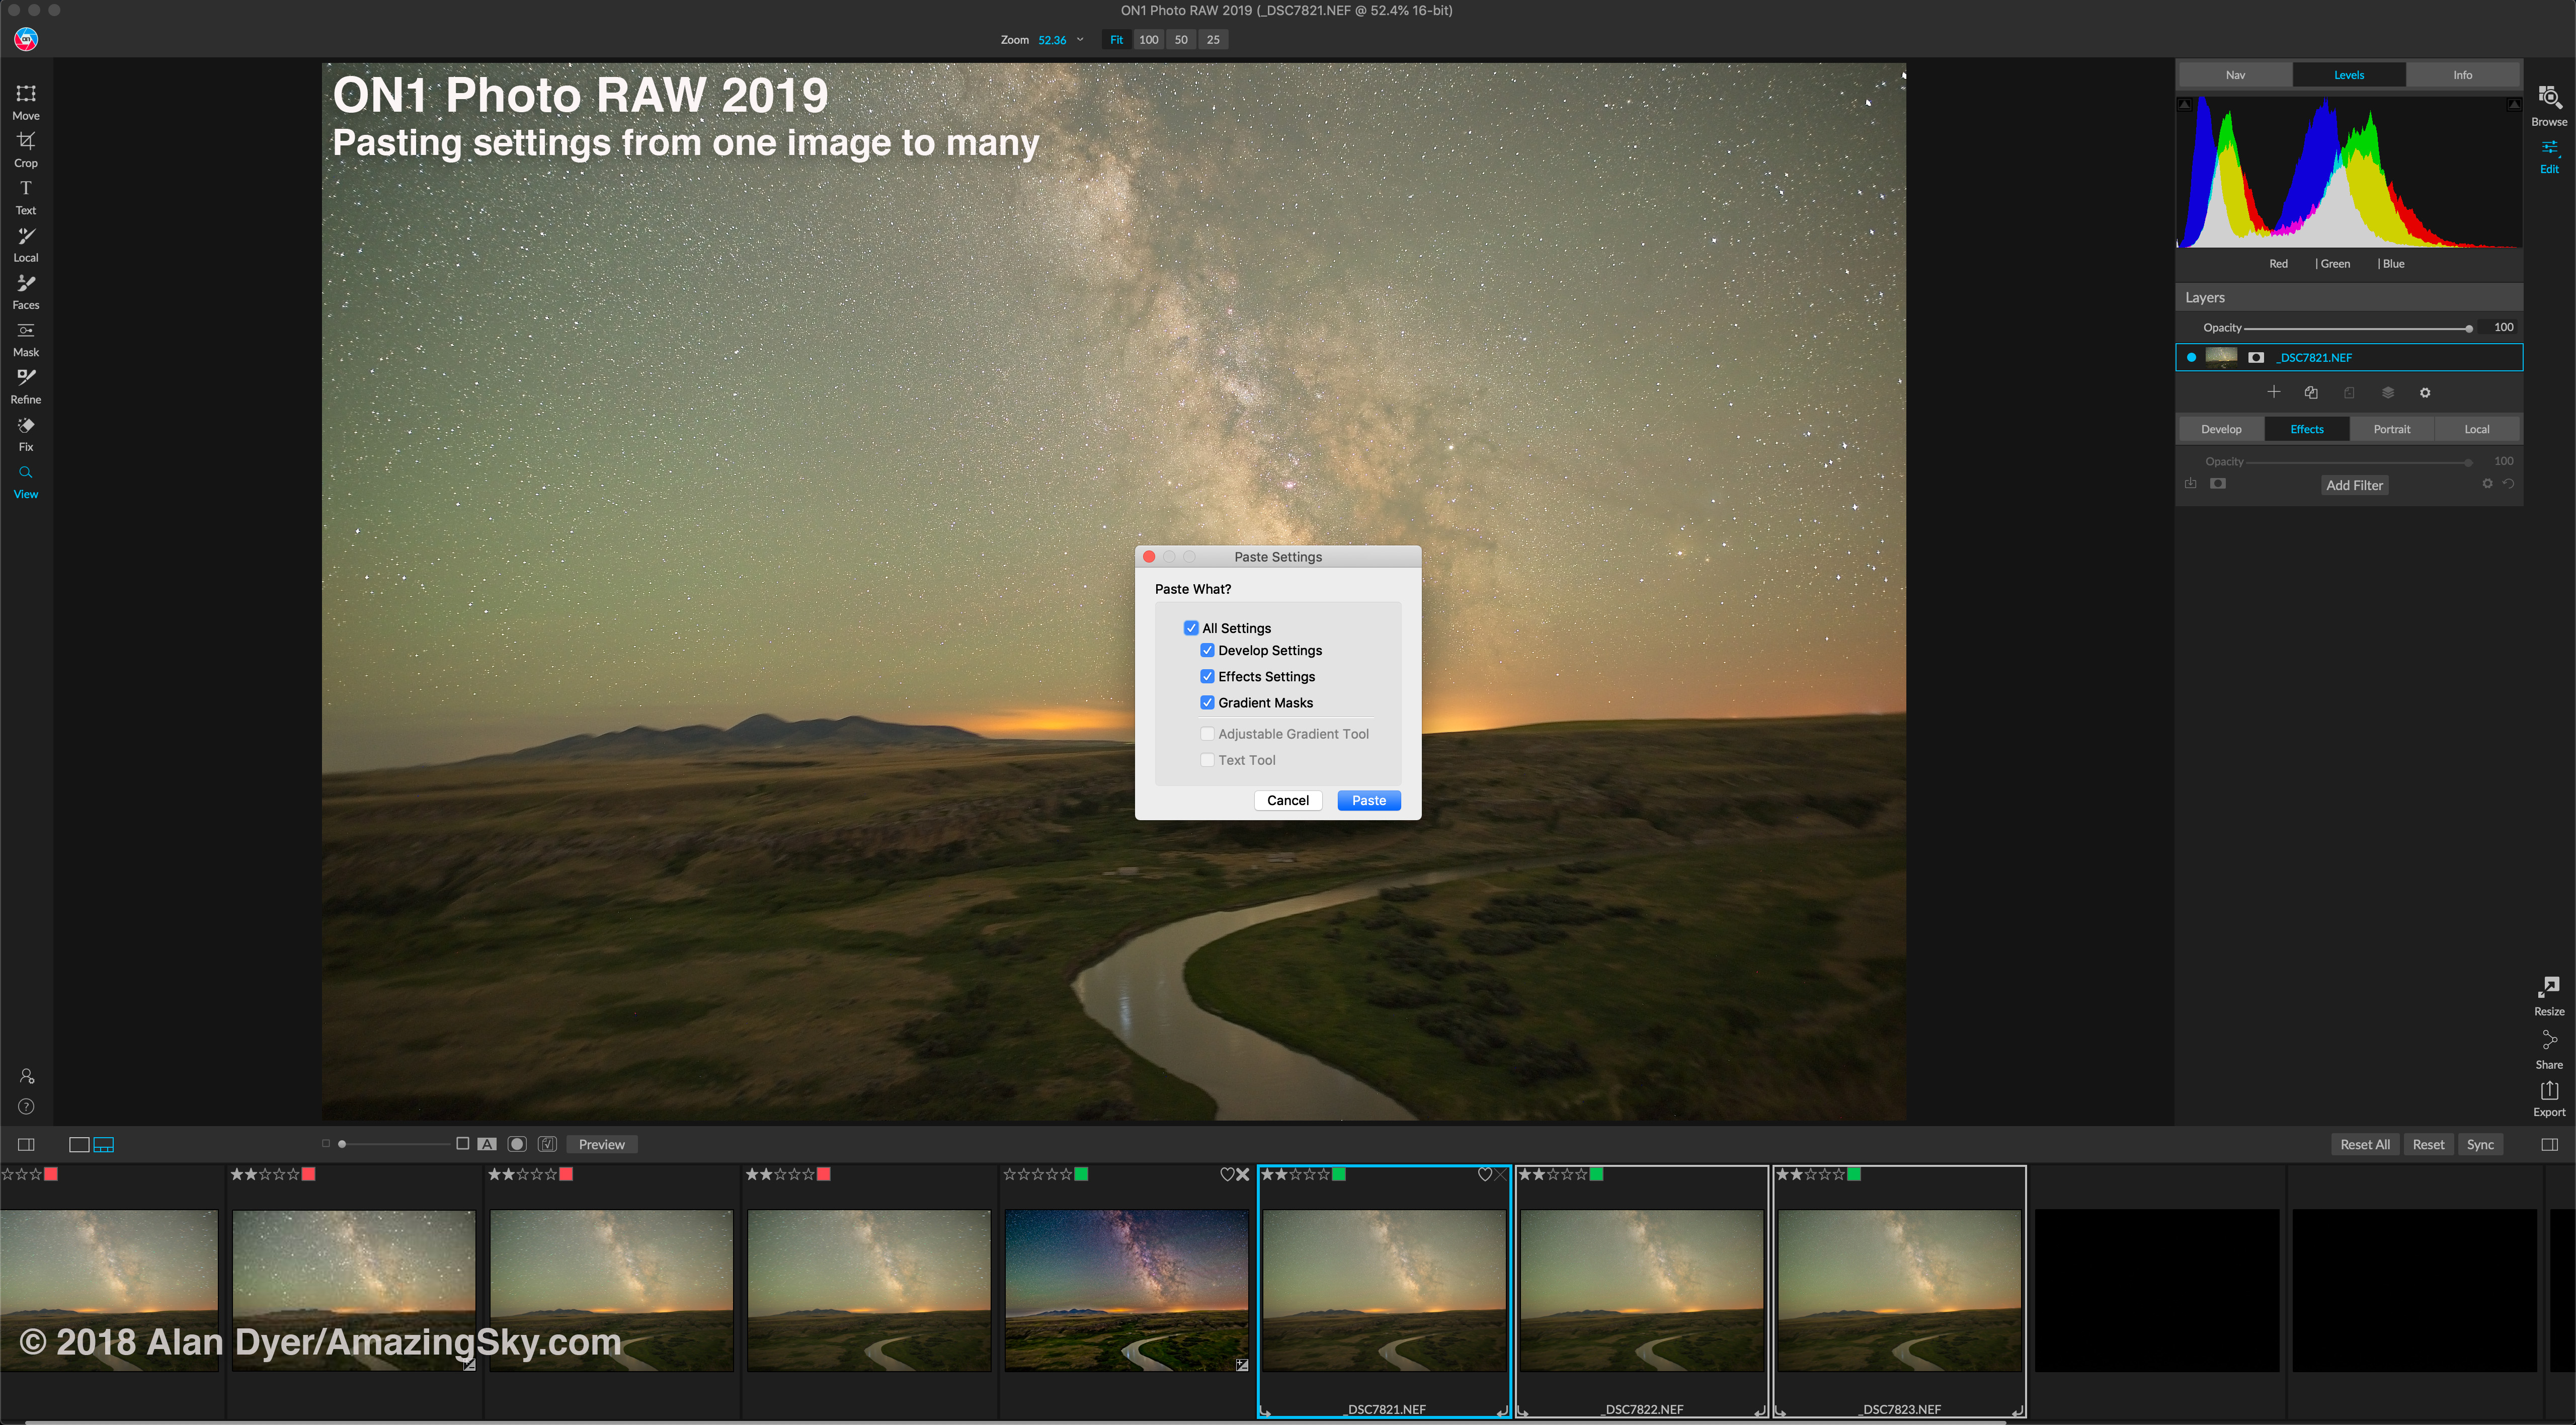
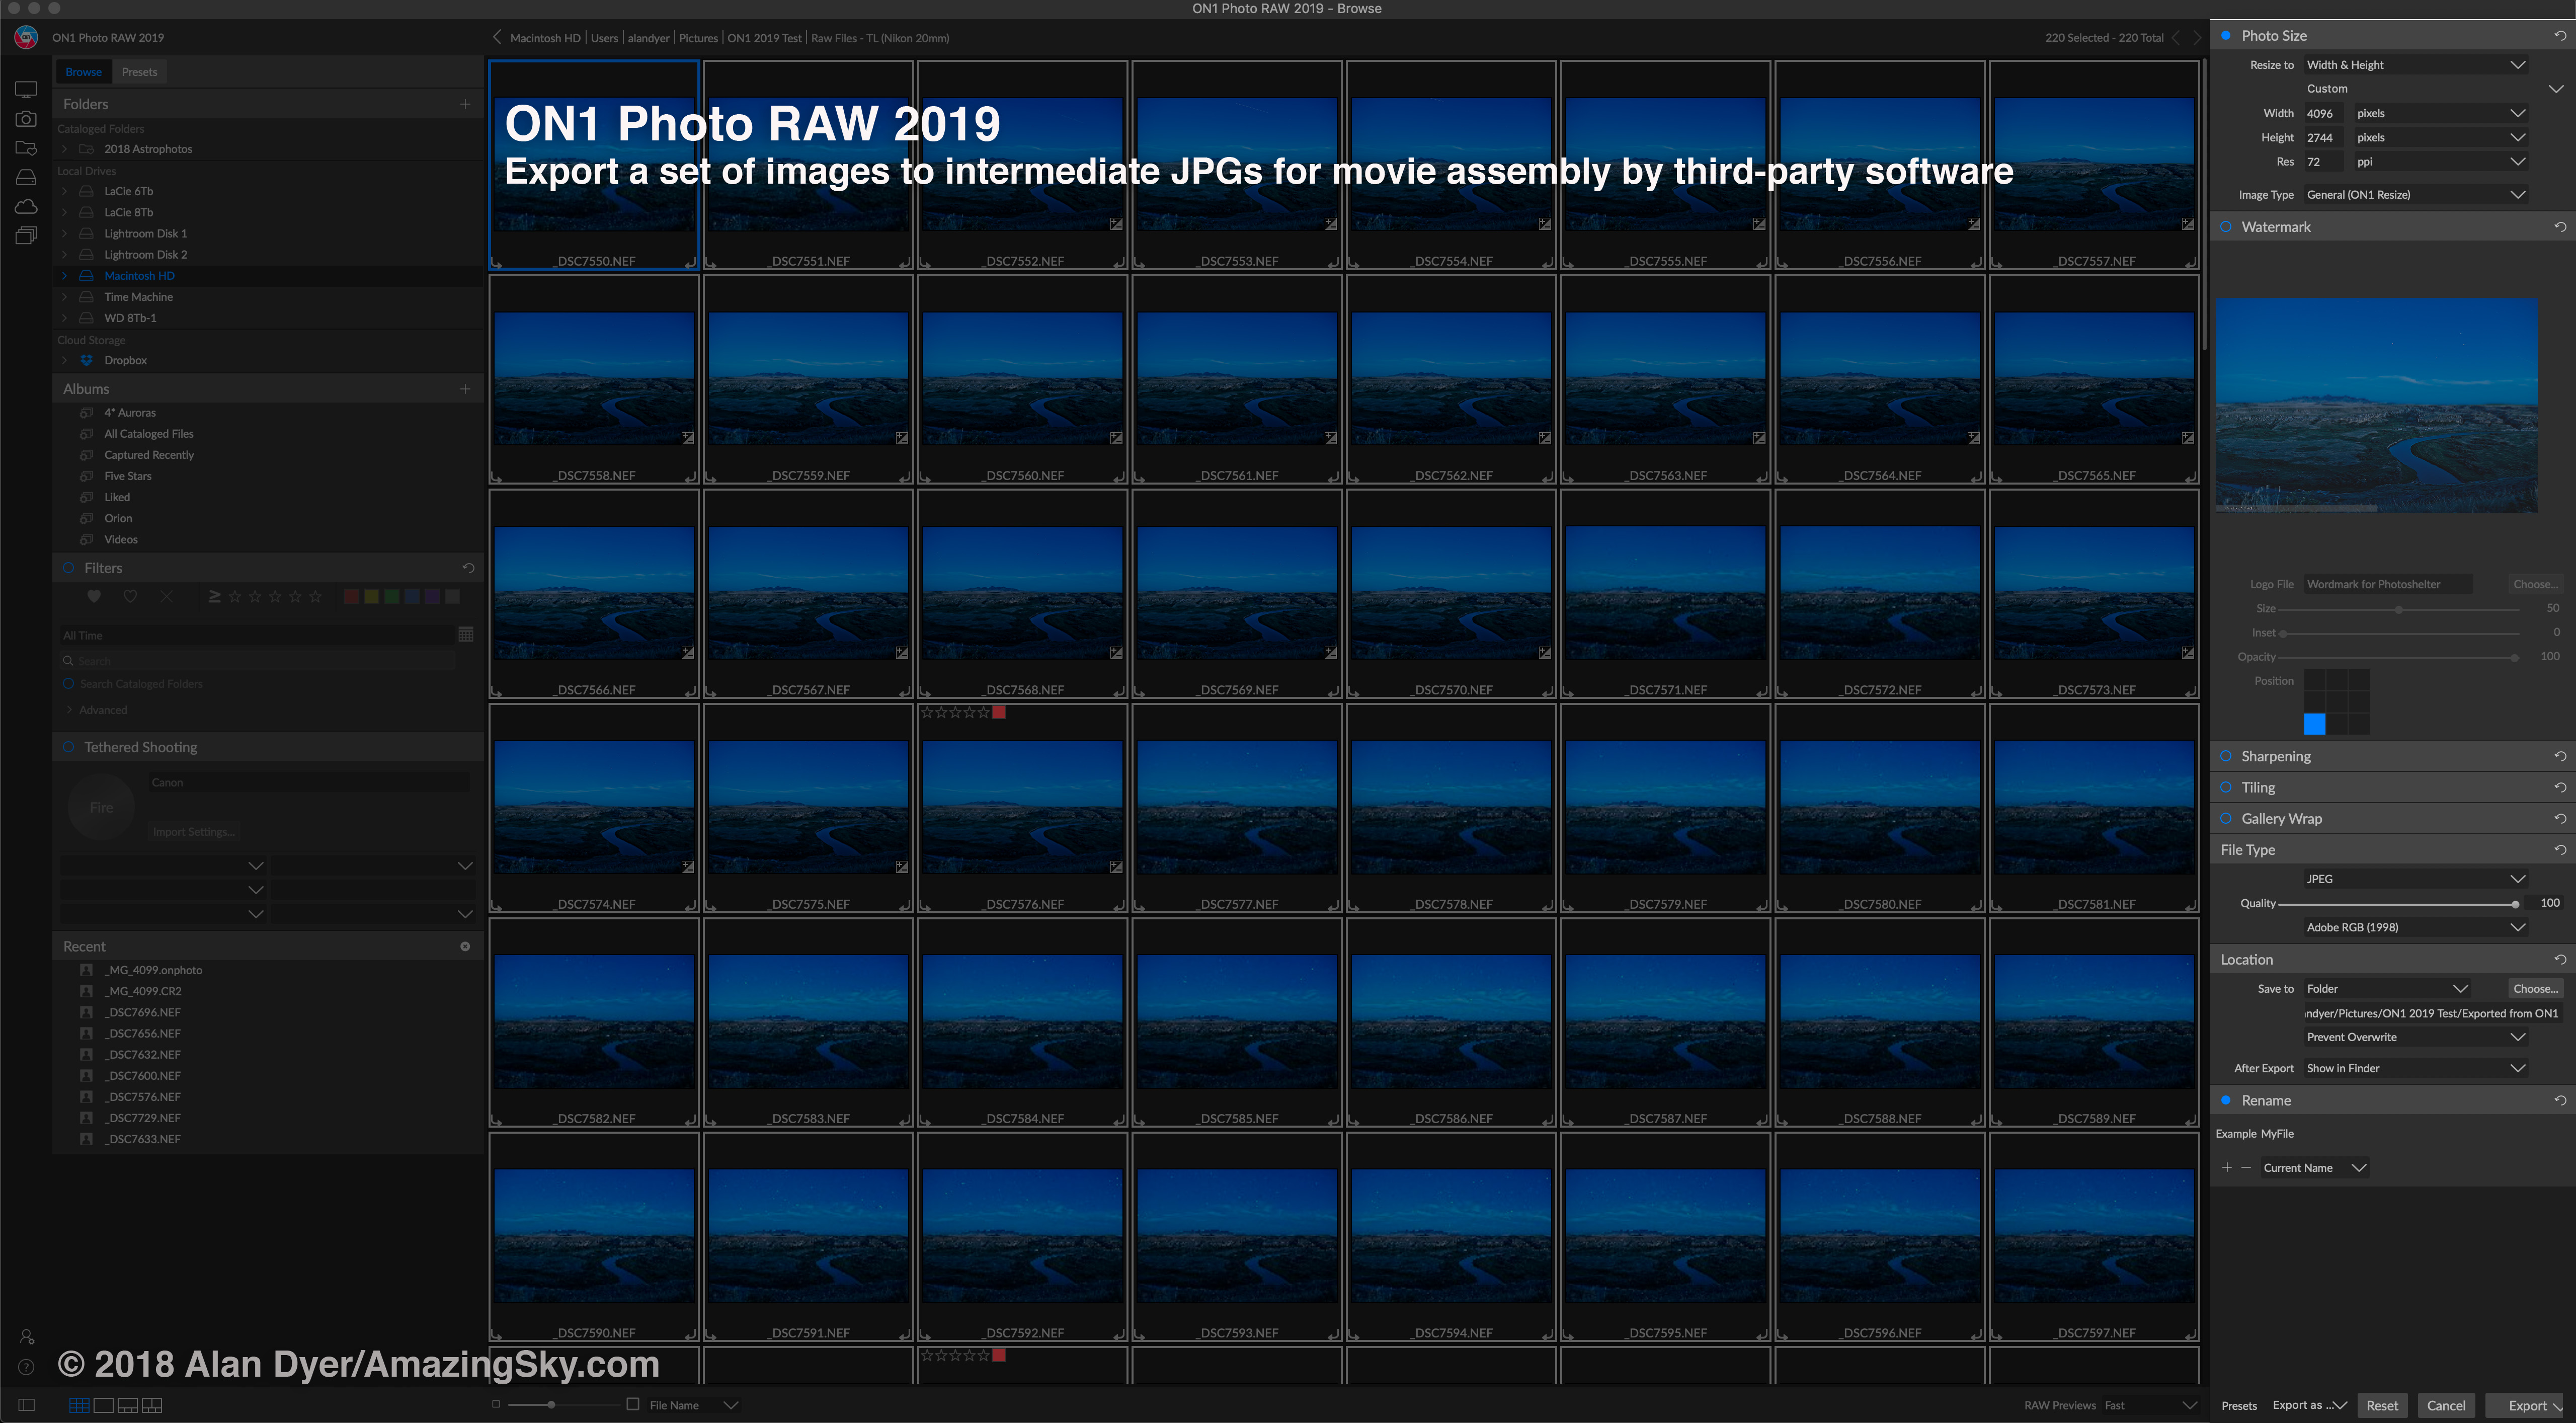
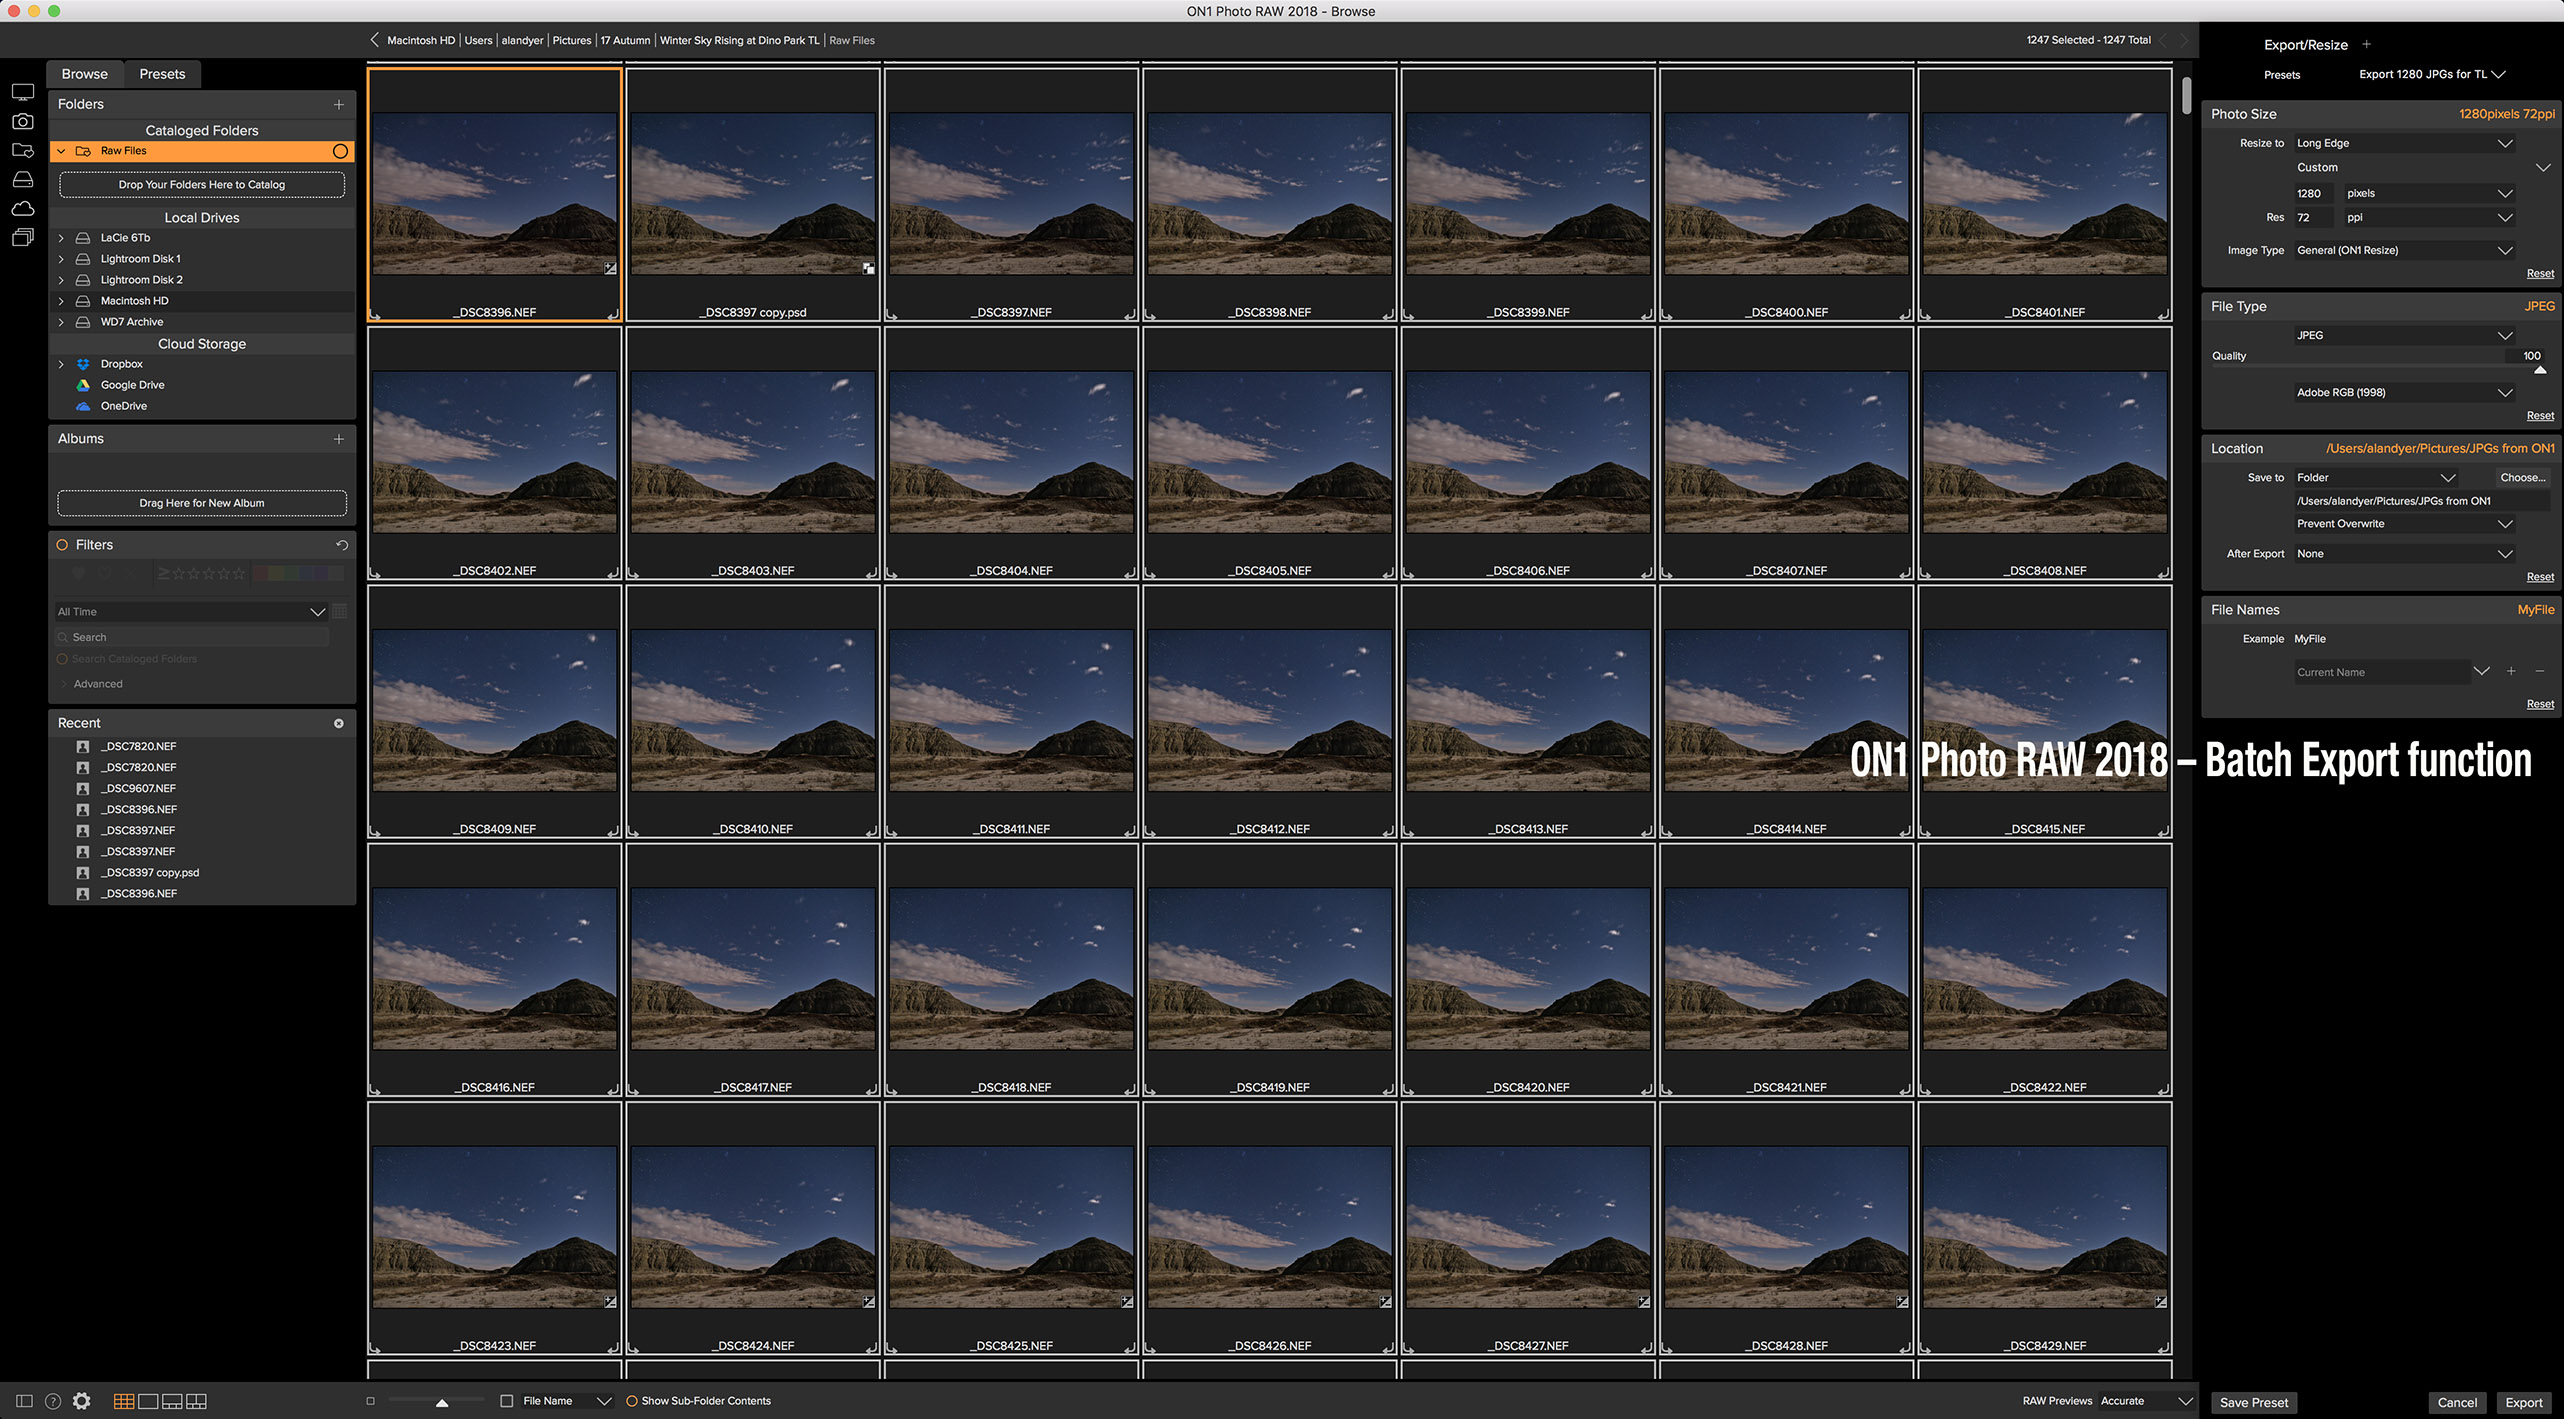
  1. Yes, you can develop one image and apply its settings to hundreds of images in a set, then export them for assembly into a movie. But there is no way to vary those settings over time, as you can by mating Lightroom to LRTimelapse.
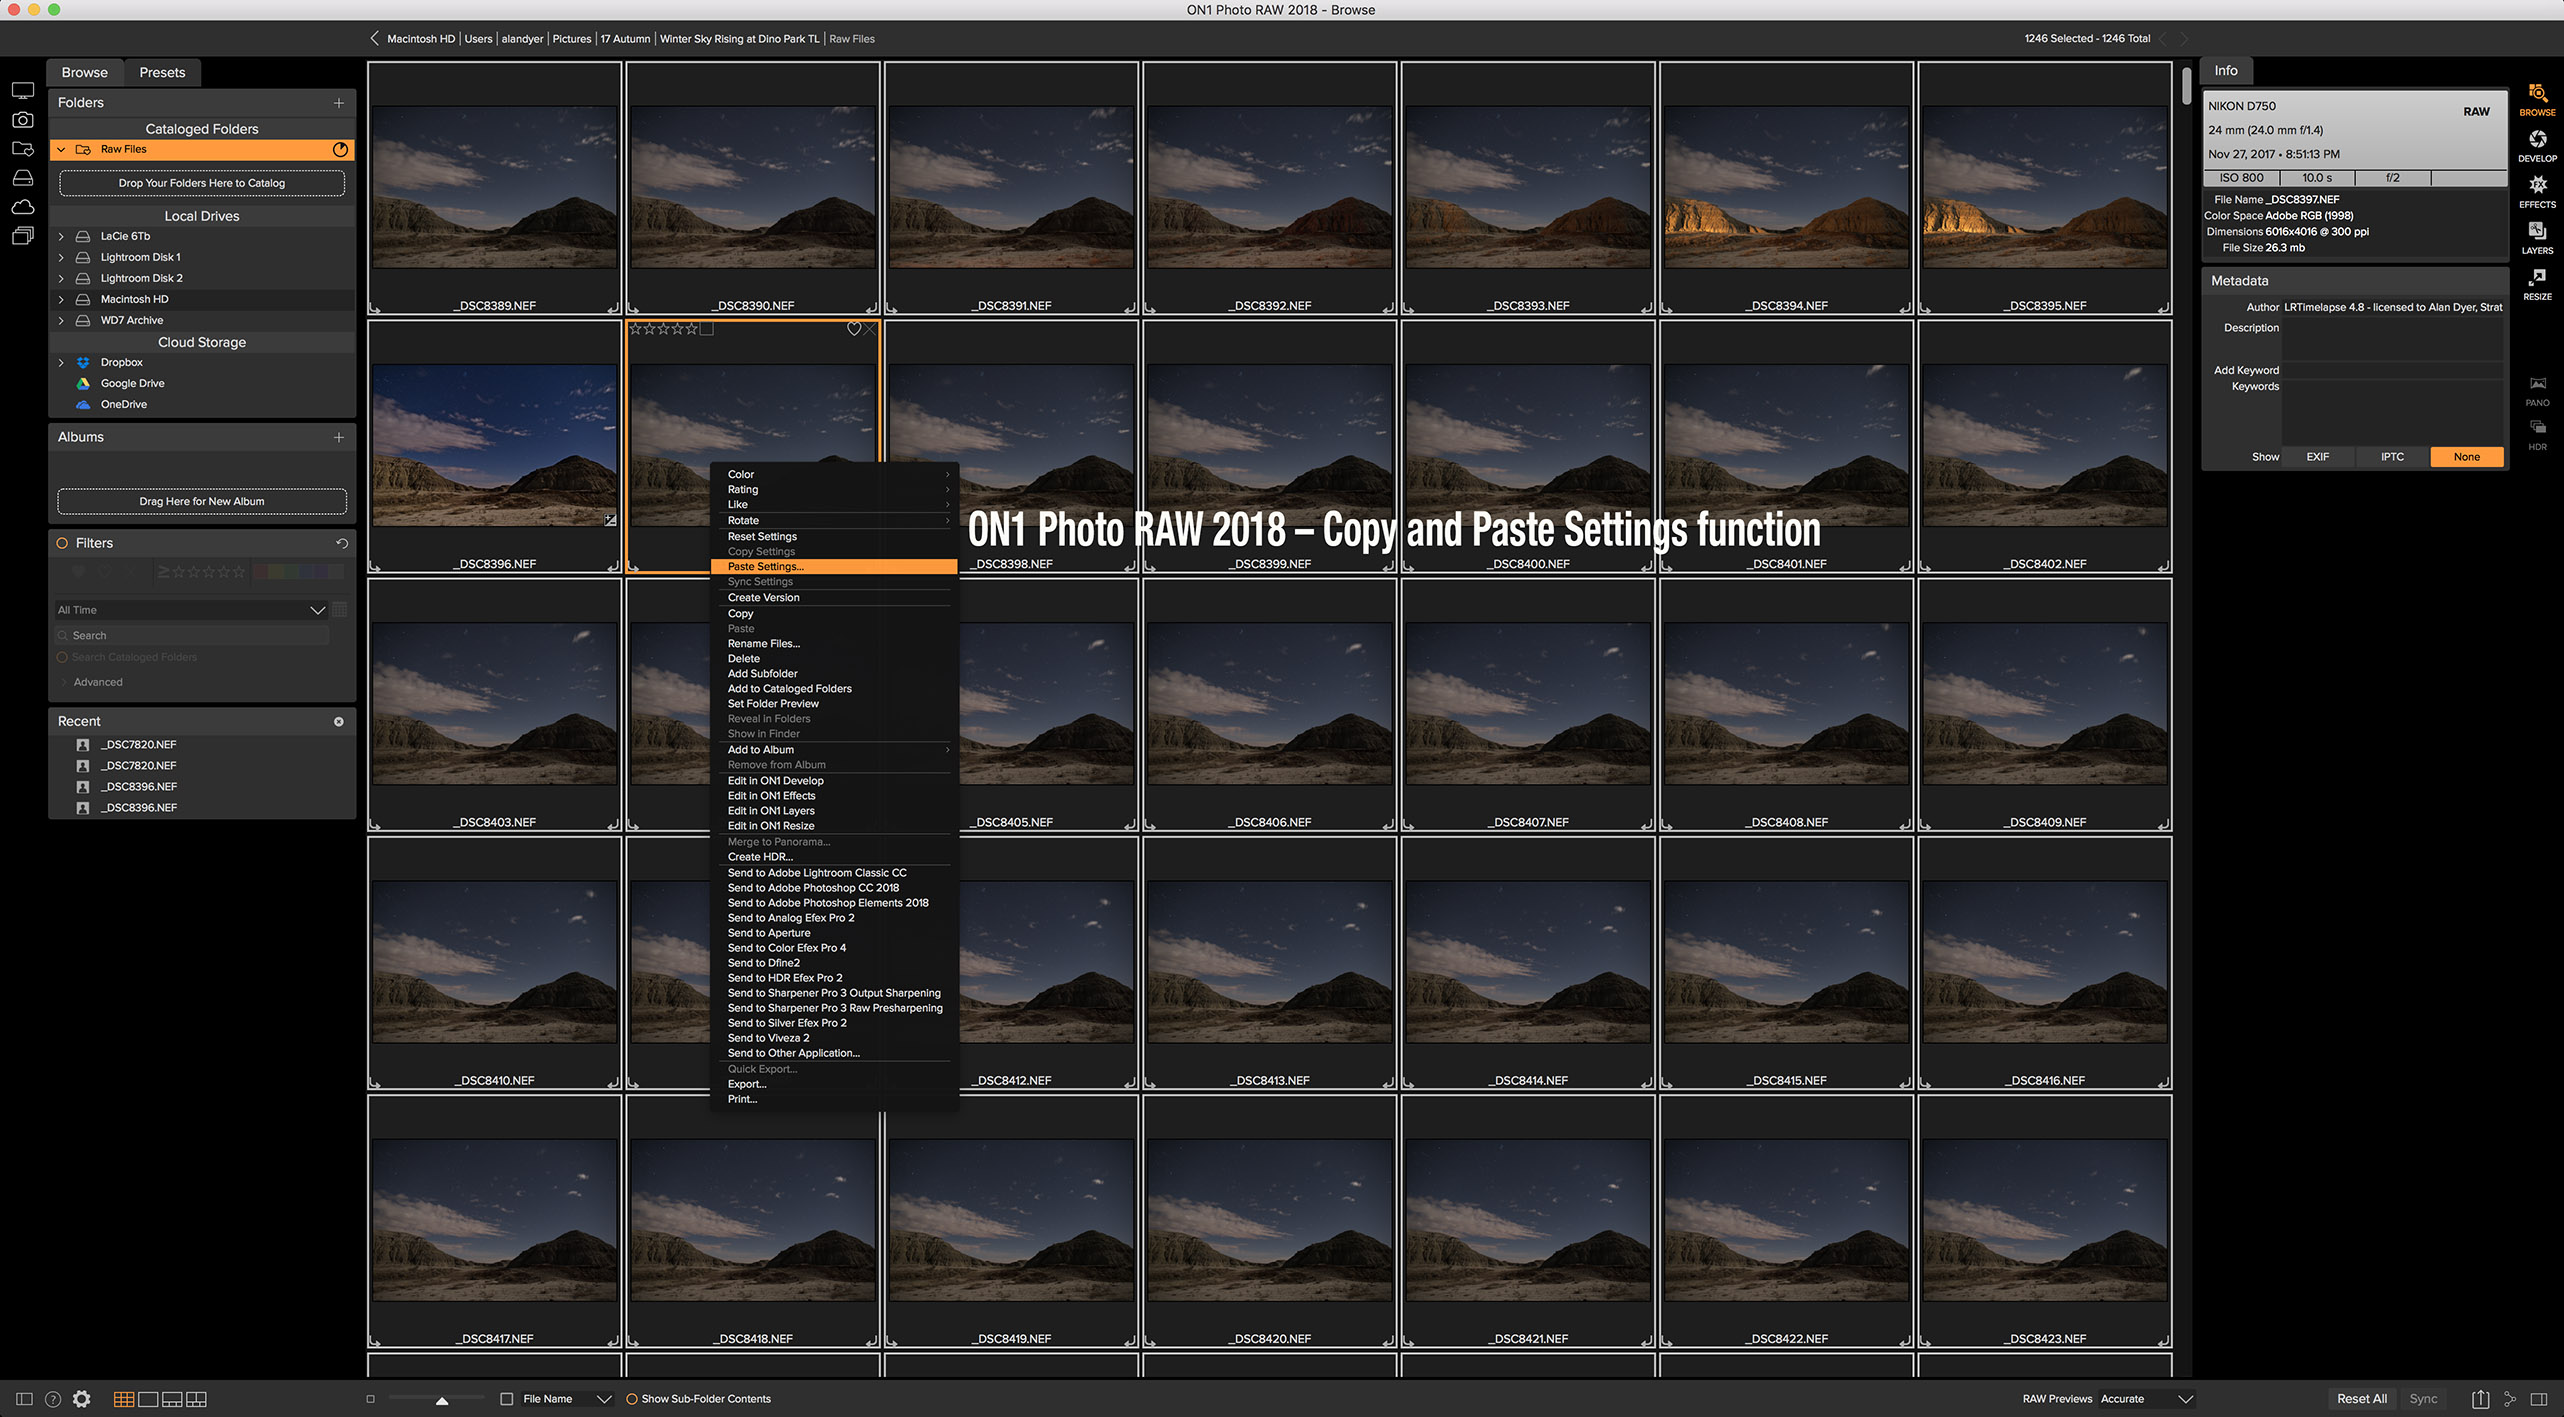
  2. As with the 2018 edition, you still cannot copy and paste masked local adjustments from image to image, limiting their use.
  3. Exporting those images is slow.

Deep-Sky: ON1 is not a program I can recommend for deep-sky image processing:

  1. Stars inevitably end up with unsightly sharpening haloes.
  2. De-Bayering artifacts add blocky textures to the sky background.
  3. And all the contrast controls still don’t provide the “snap” and quality I’m used to with Photoshop when working with low-contrast subjects.

Library / Browse Functions

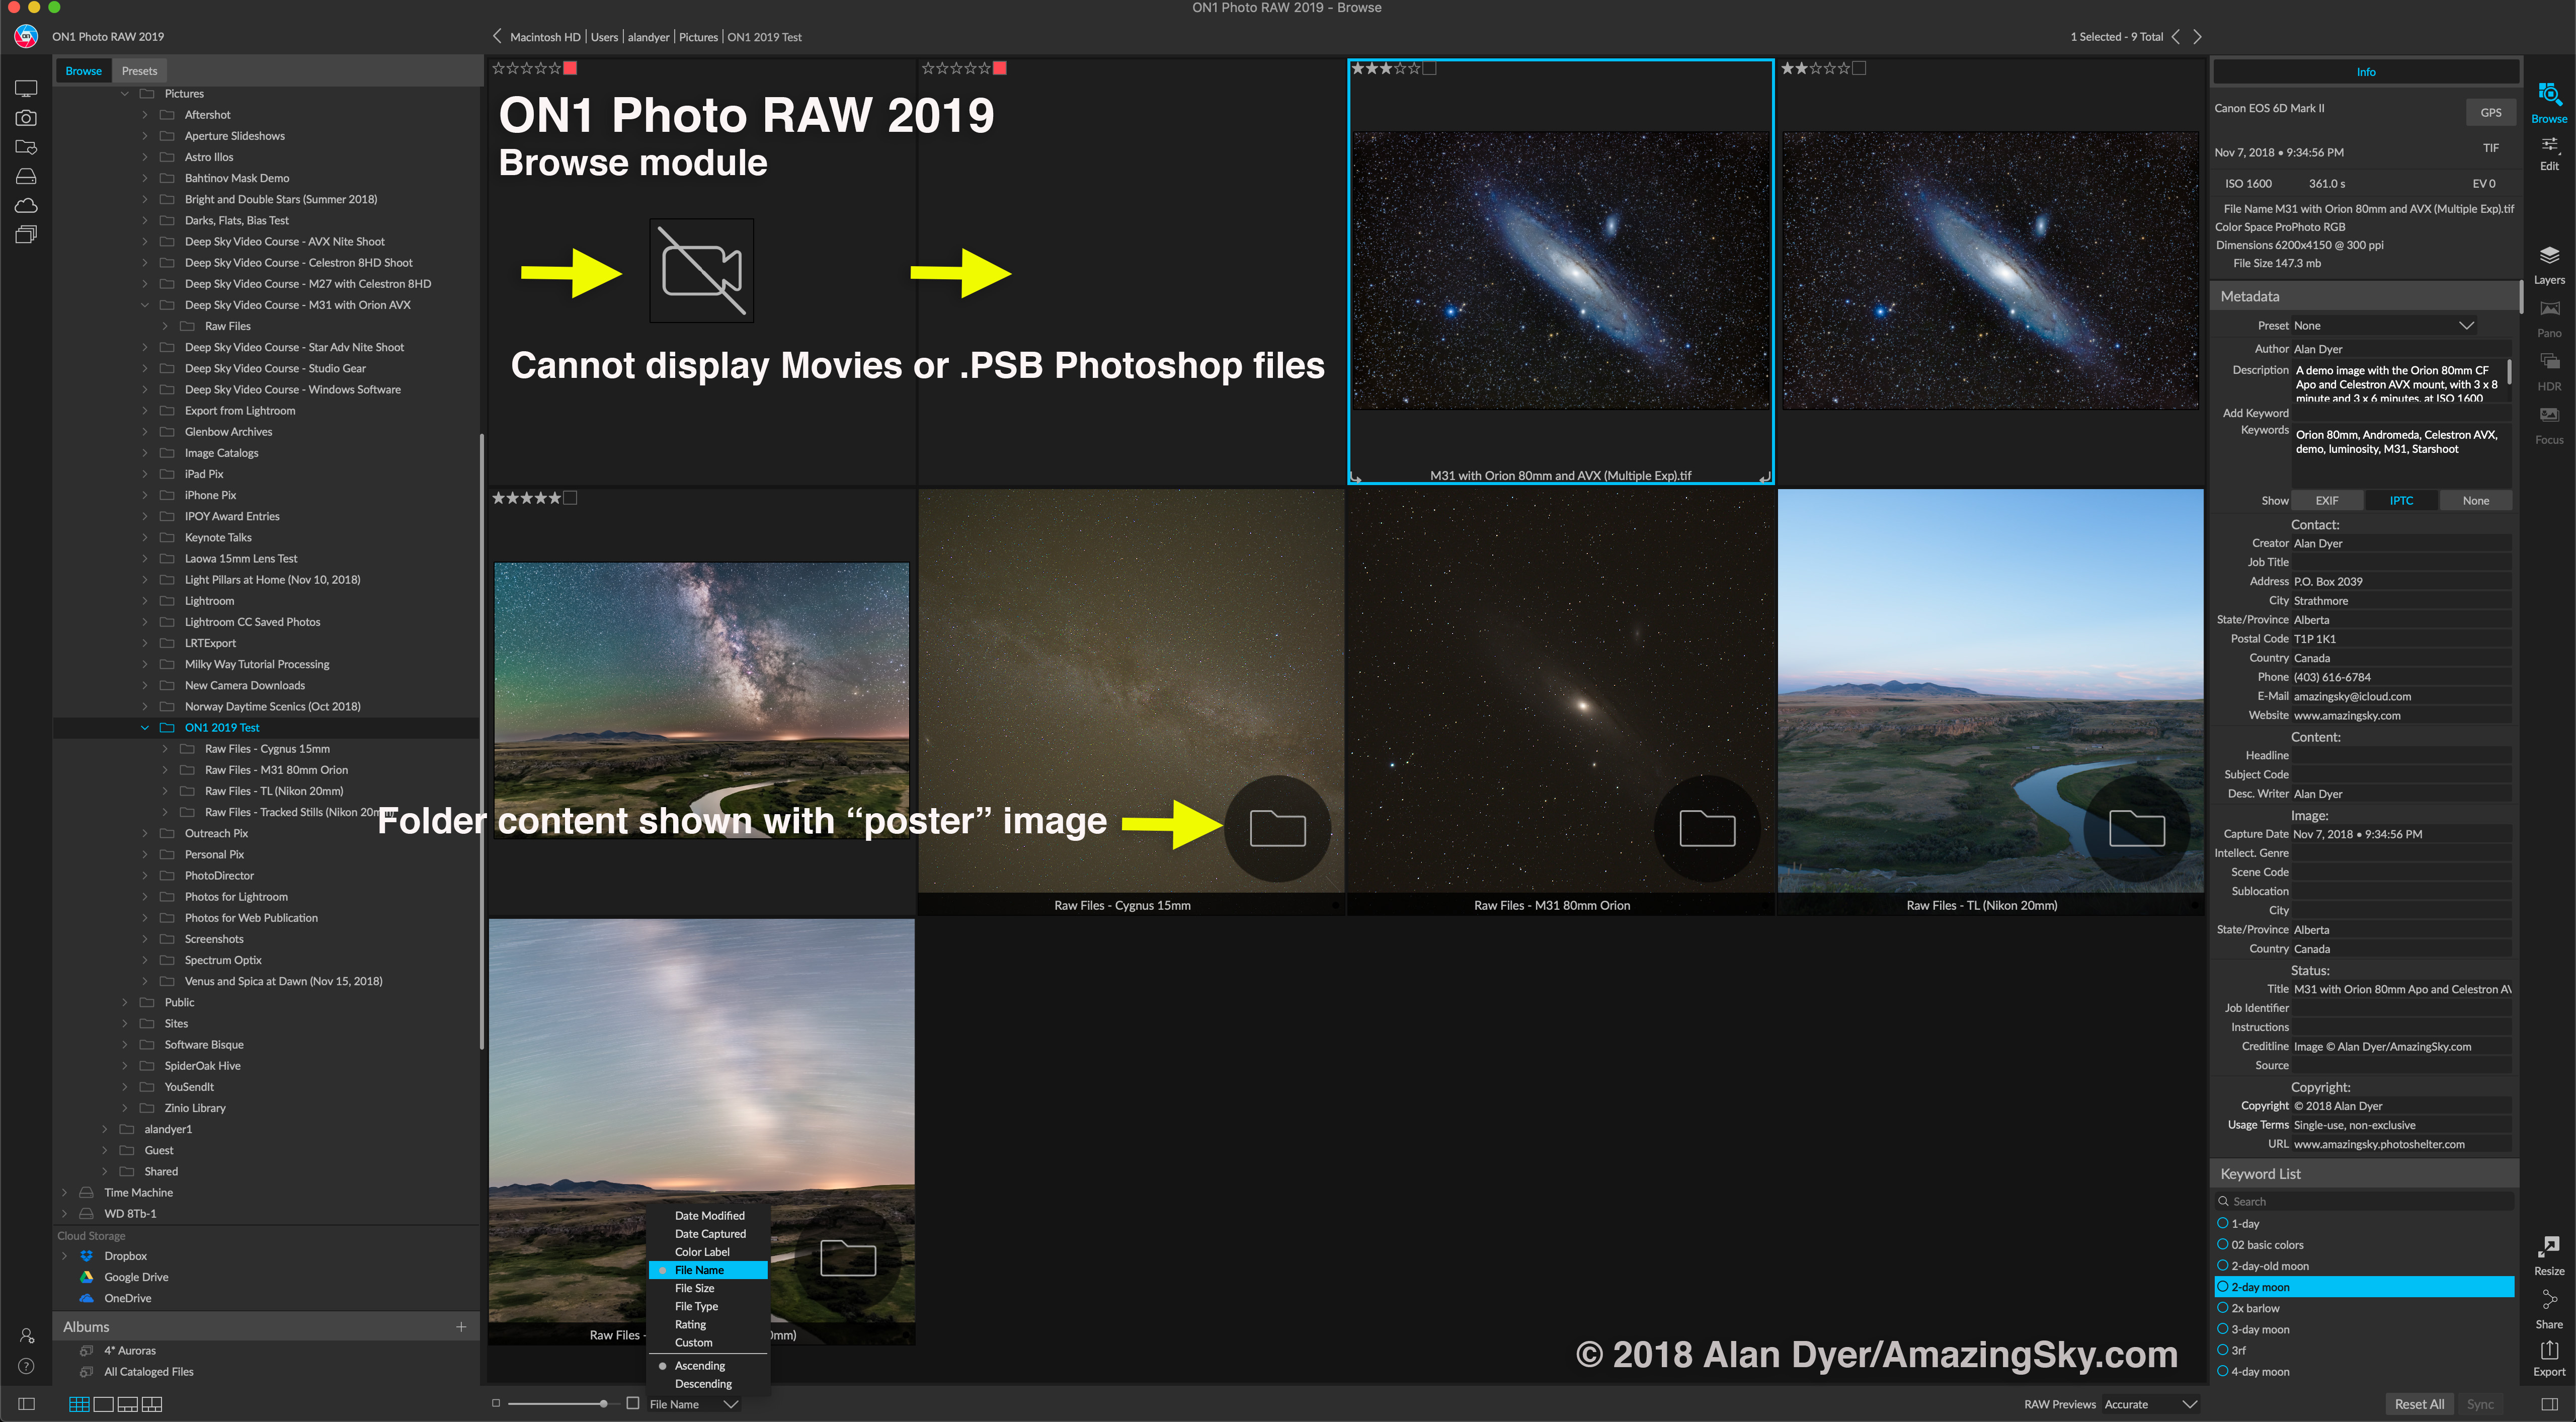
ON1 Browse Module
ON1 cannot catalog or display movie files or Photoshop’s PSB files (but then again with PSBs neither can Lightroom!).

ON1 is sold first and foremost as a replacement for Adobe Lightroom, and to that extent it can work well. Unlike Lightroom, ON1 allows browsing and working on images without having to import them formally into a catalog.

However, you can create a catalog if you wish, one that can be viewed even if the original images are not “on-line.” The mystery seems to be where ON1 puts its catalog file on your hard drive. I was not able to find it, to manually back it up. Other programs, such as Lightroom and Capture One, locate their catalogs out in the open in the Pictures folder.

For those really wanting a divorce from Adobe, ON1 now offers an intelligent AI-based function for importing Lightroom catalogs and transferring all your Lightroom settings you’ve applied to raw files to ON1’s equivalent controls.

However, while ON1 can read Photoshop PSD files, it will flatten them, so you would lose access to all the original image layers.

ON1’s Browse module is good, with many of the same functions as Lightroom, such as “smart collections.” Affinity Photo โ€“ perhaps ON1’s closest competitor as a Photoshop replacement โ€“ still lacks anything like it.

But I found ON1’s Browse module buggy, often taking a long while to allow access into a folder, presumably while it is rendering image previews.

There are no plug-ins or extensions for exporting directly to or synching to social media and photo sharing sites.


Nightscape Processing โ€“ Developing Raw Images

ON1 Before and After Processing
On the left, a raw image as it came out of the camera. On the right, after developing (with Develop and Effects module settings applied) in ON1.

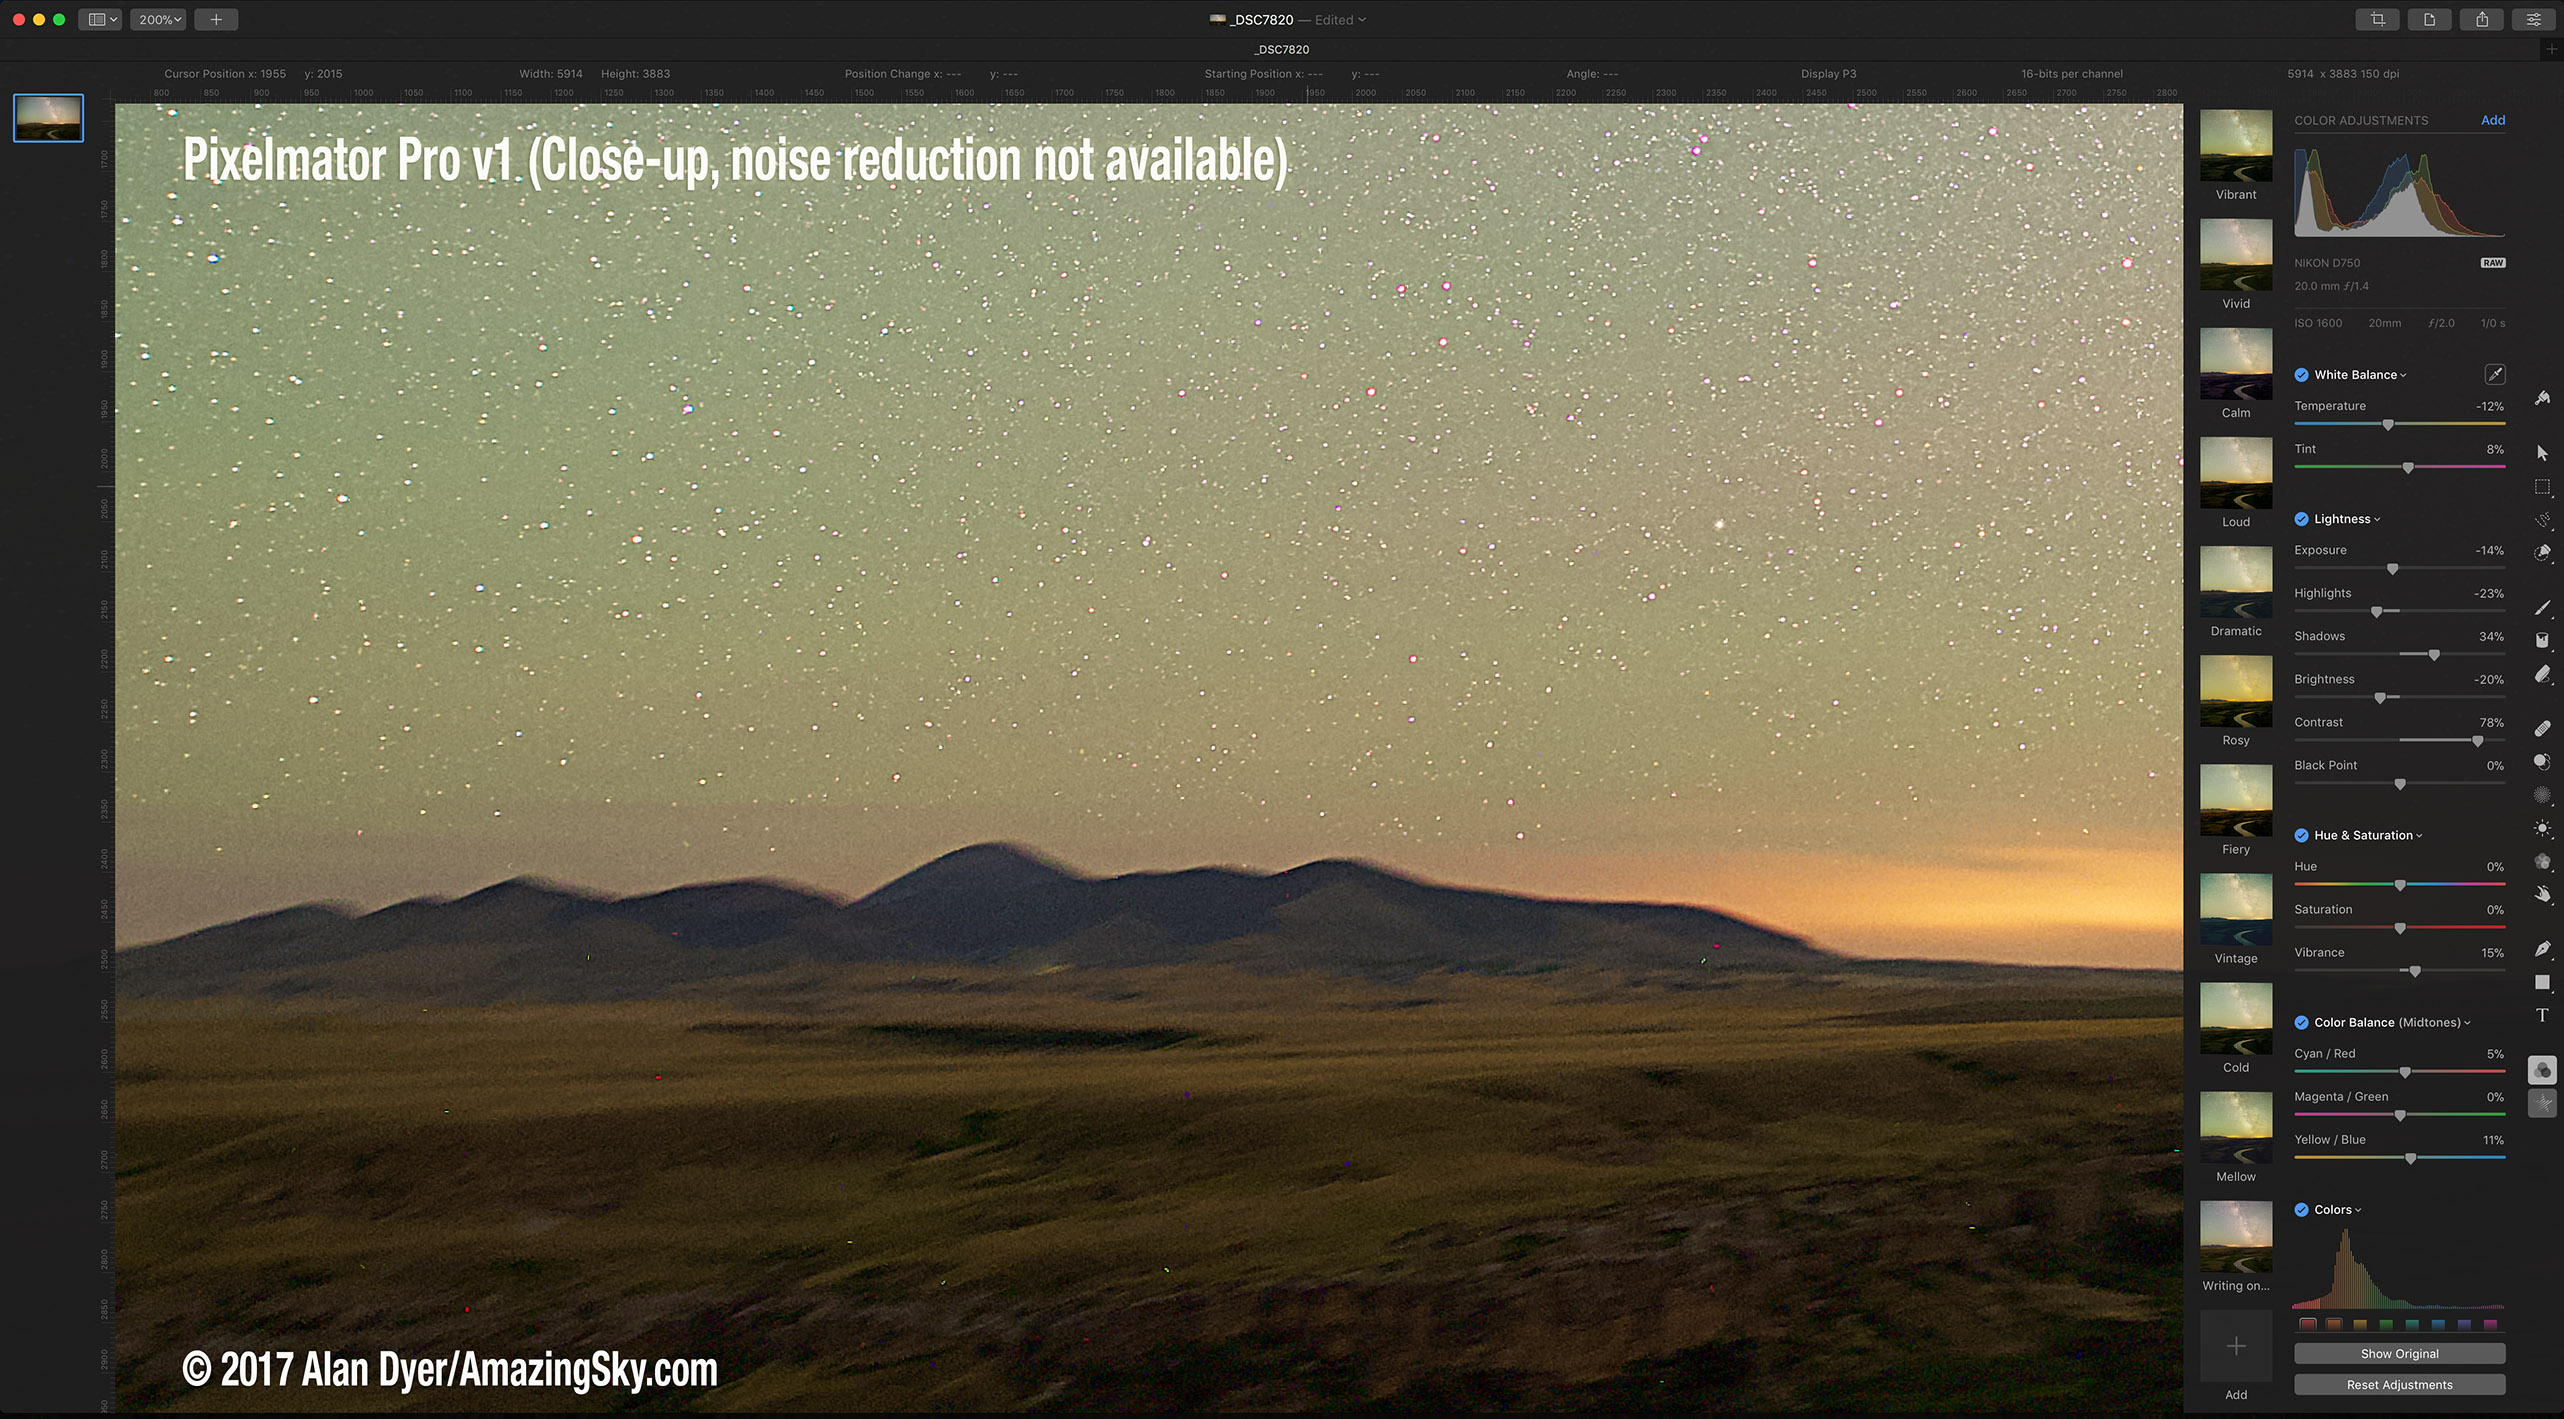
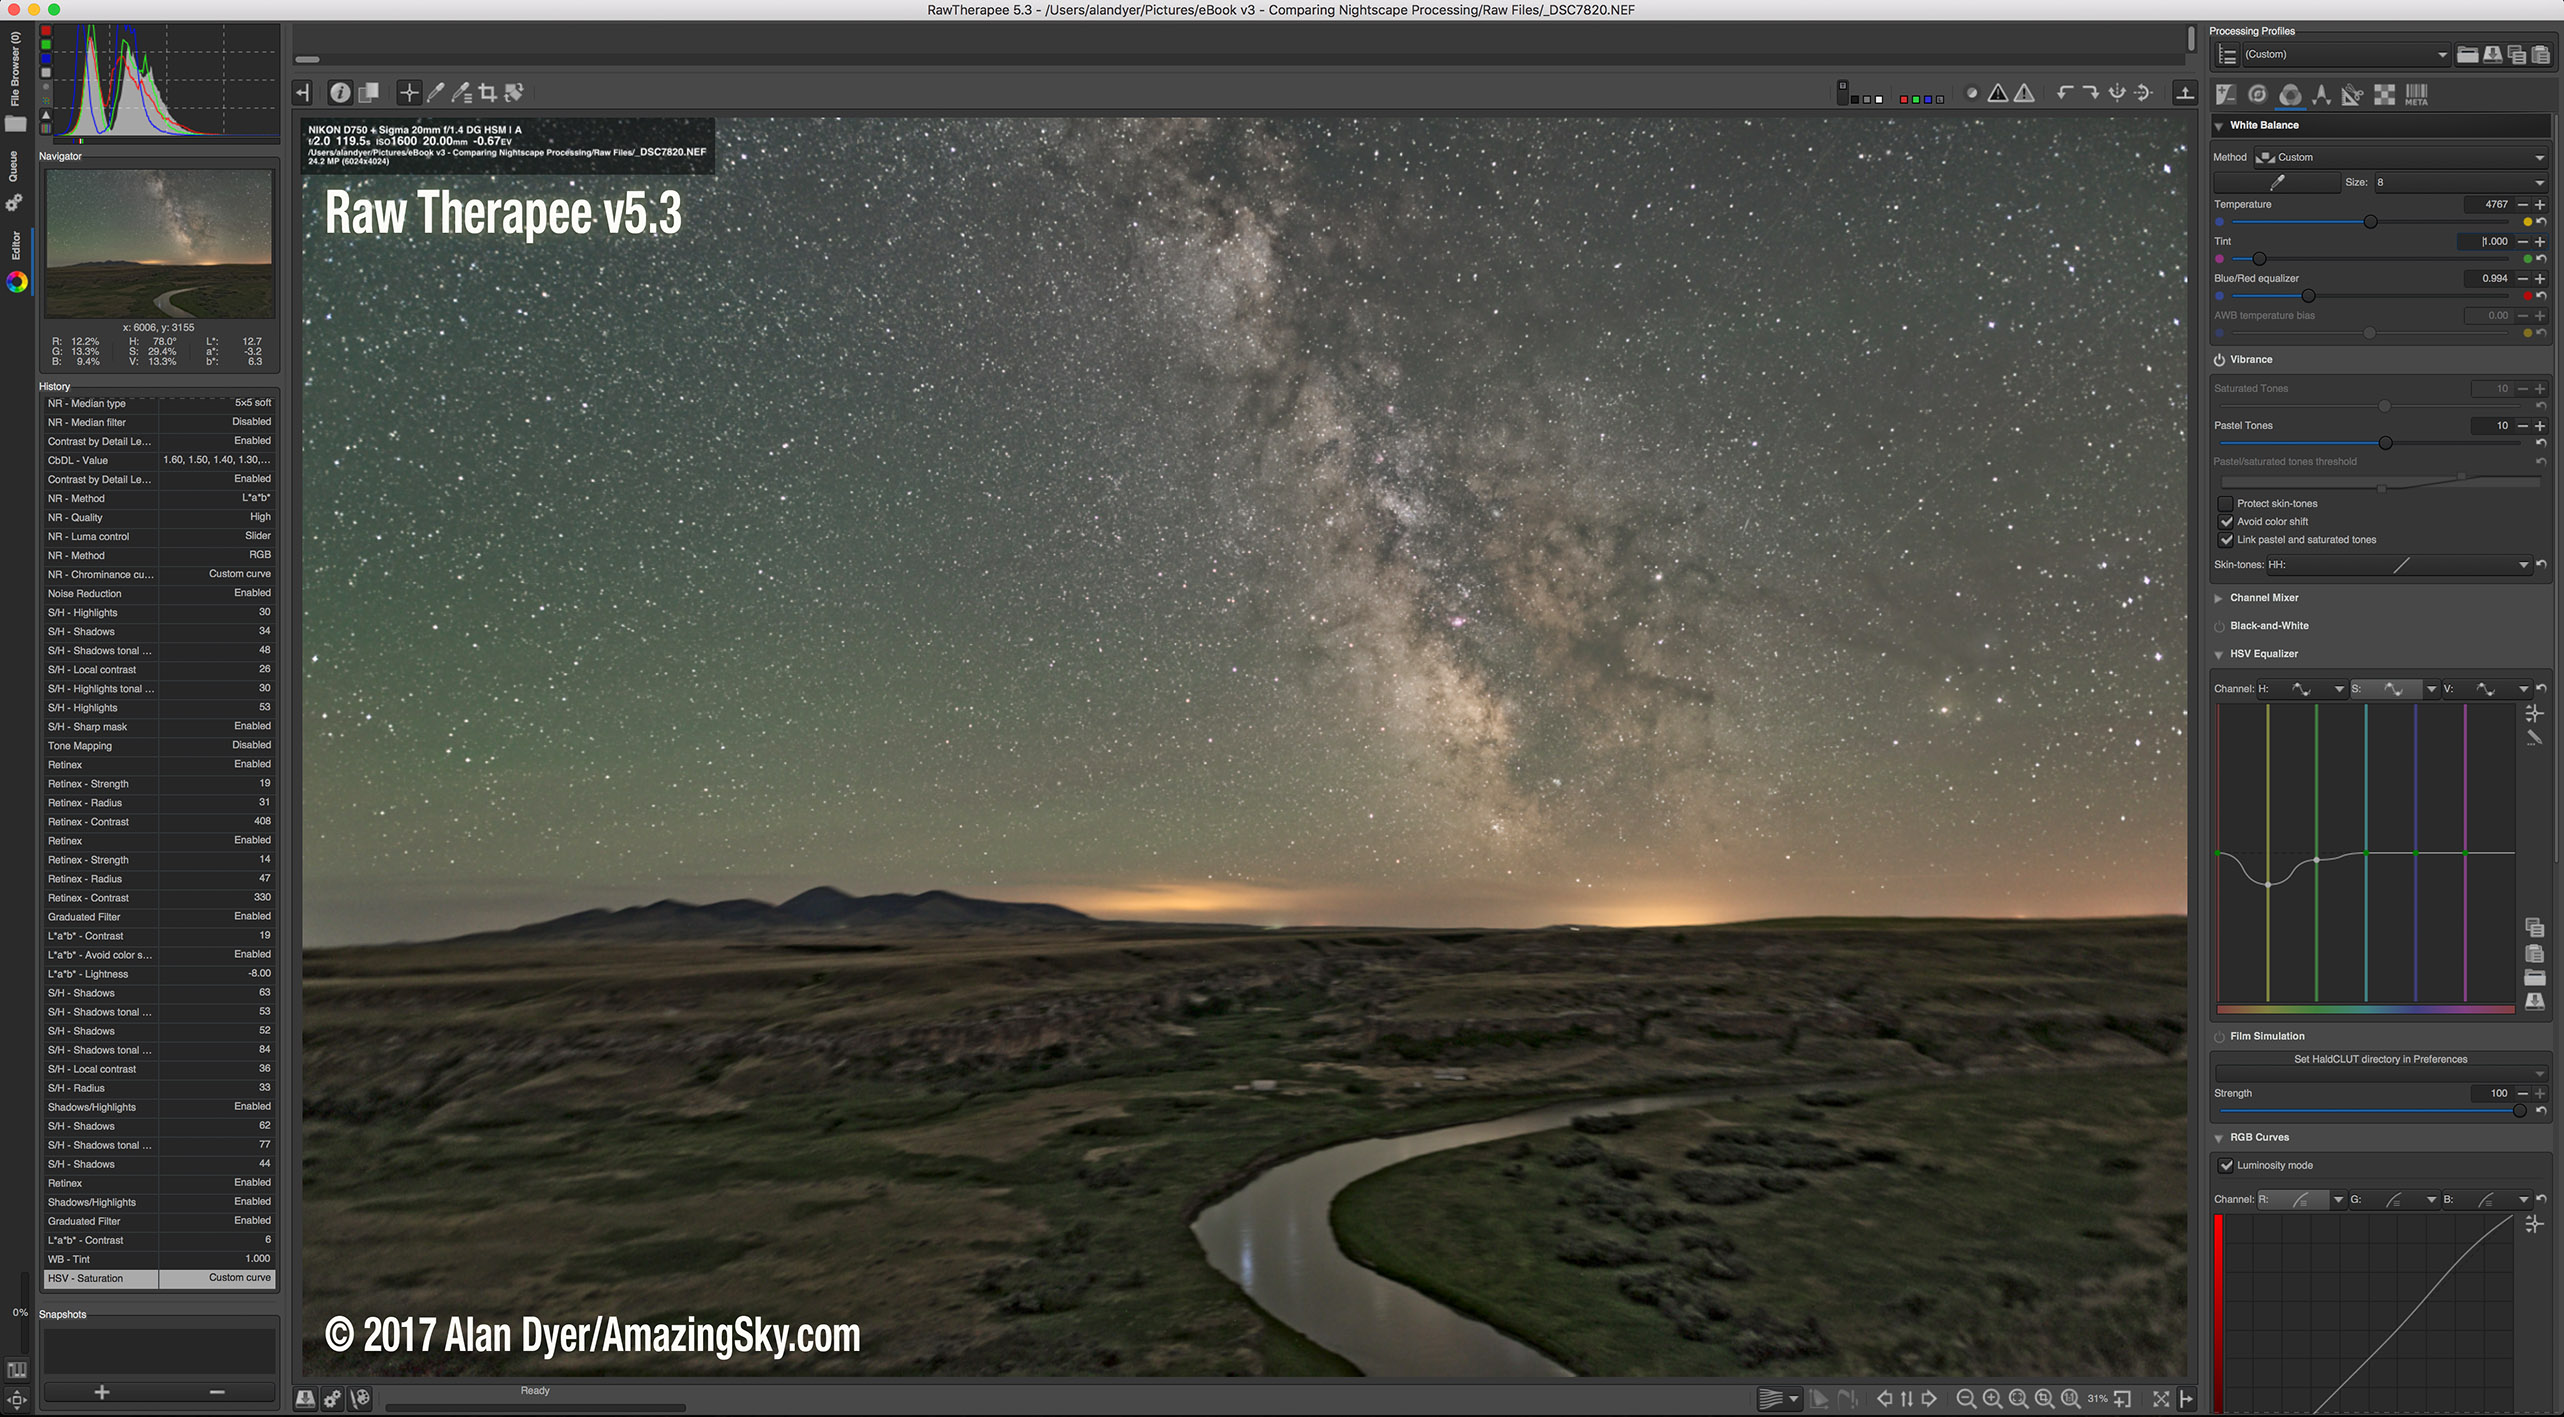
For this test I used the same nightscape image I threw at Adobe competitors a year ago, in a test of a dozen or more raw developers. It is a 2-minute tracked exposure with a Sigma 20mm Art lens at f/2 and Nikon D750 at ISO 1600.

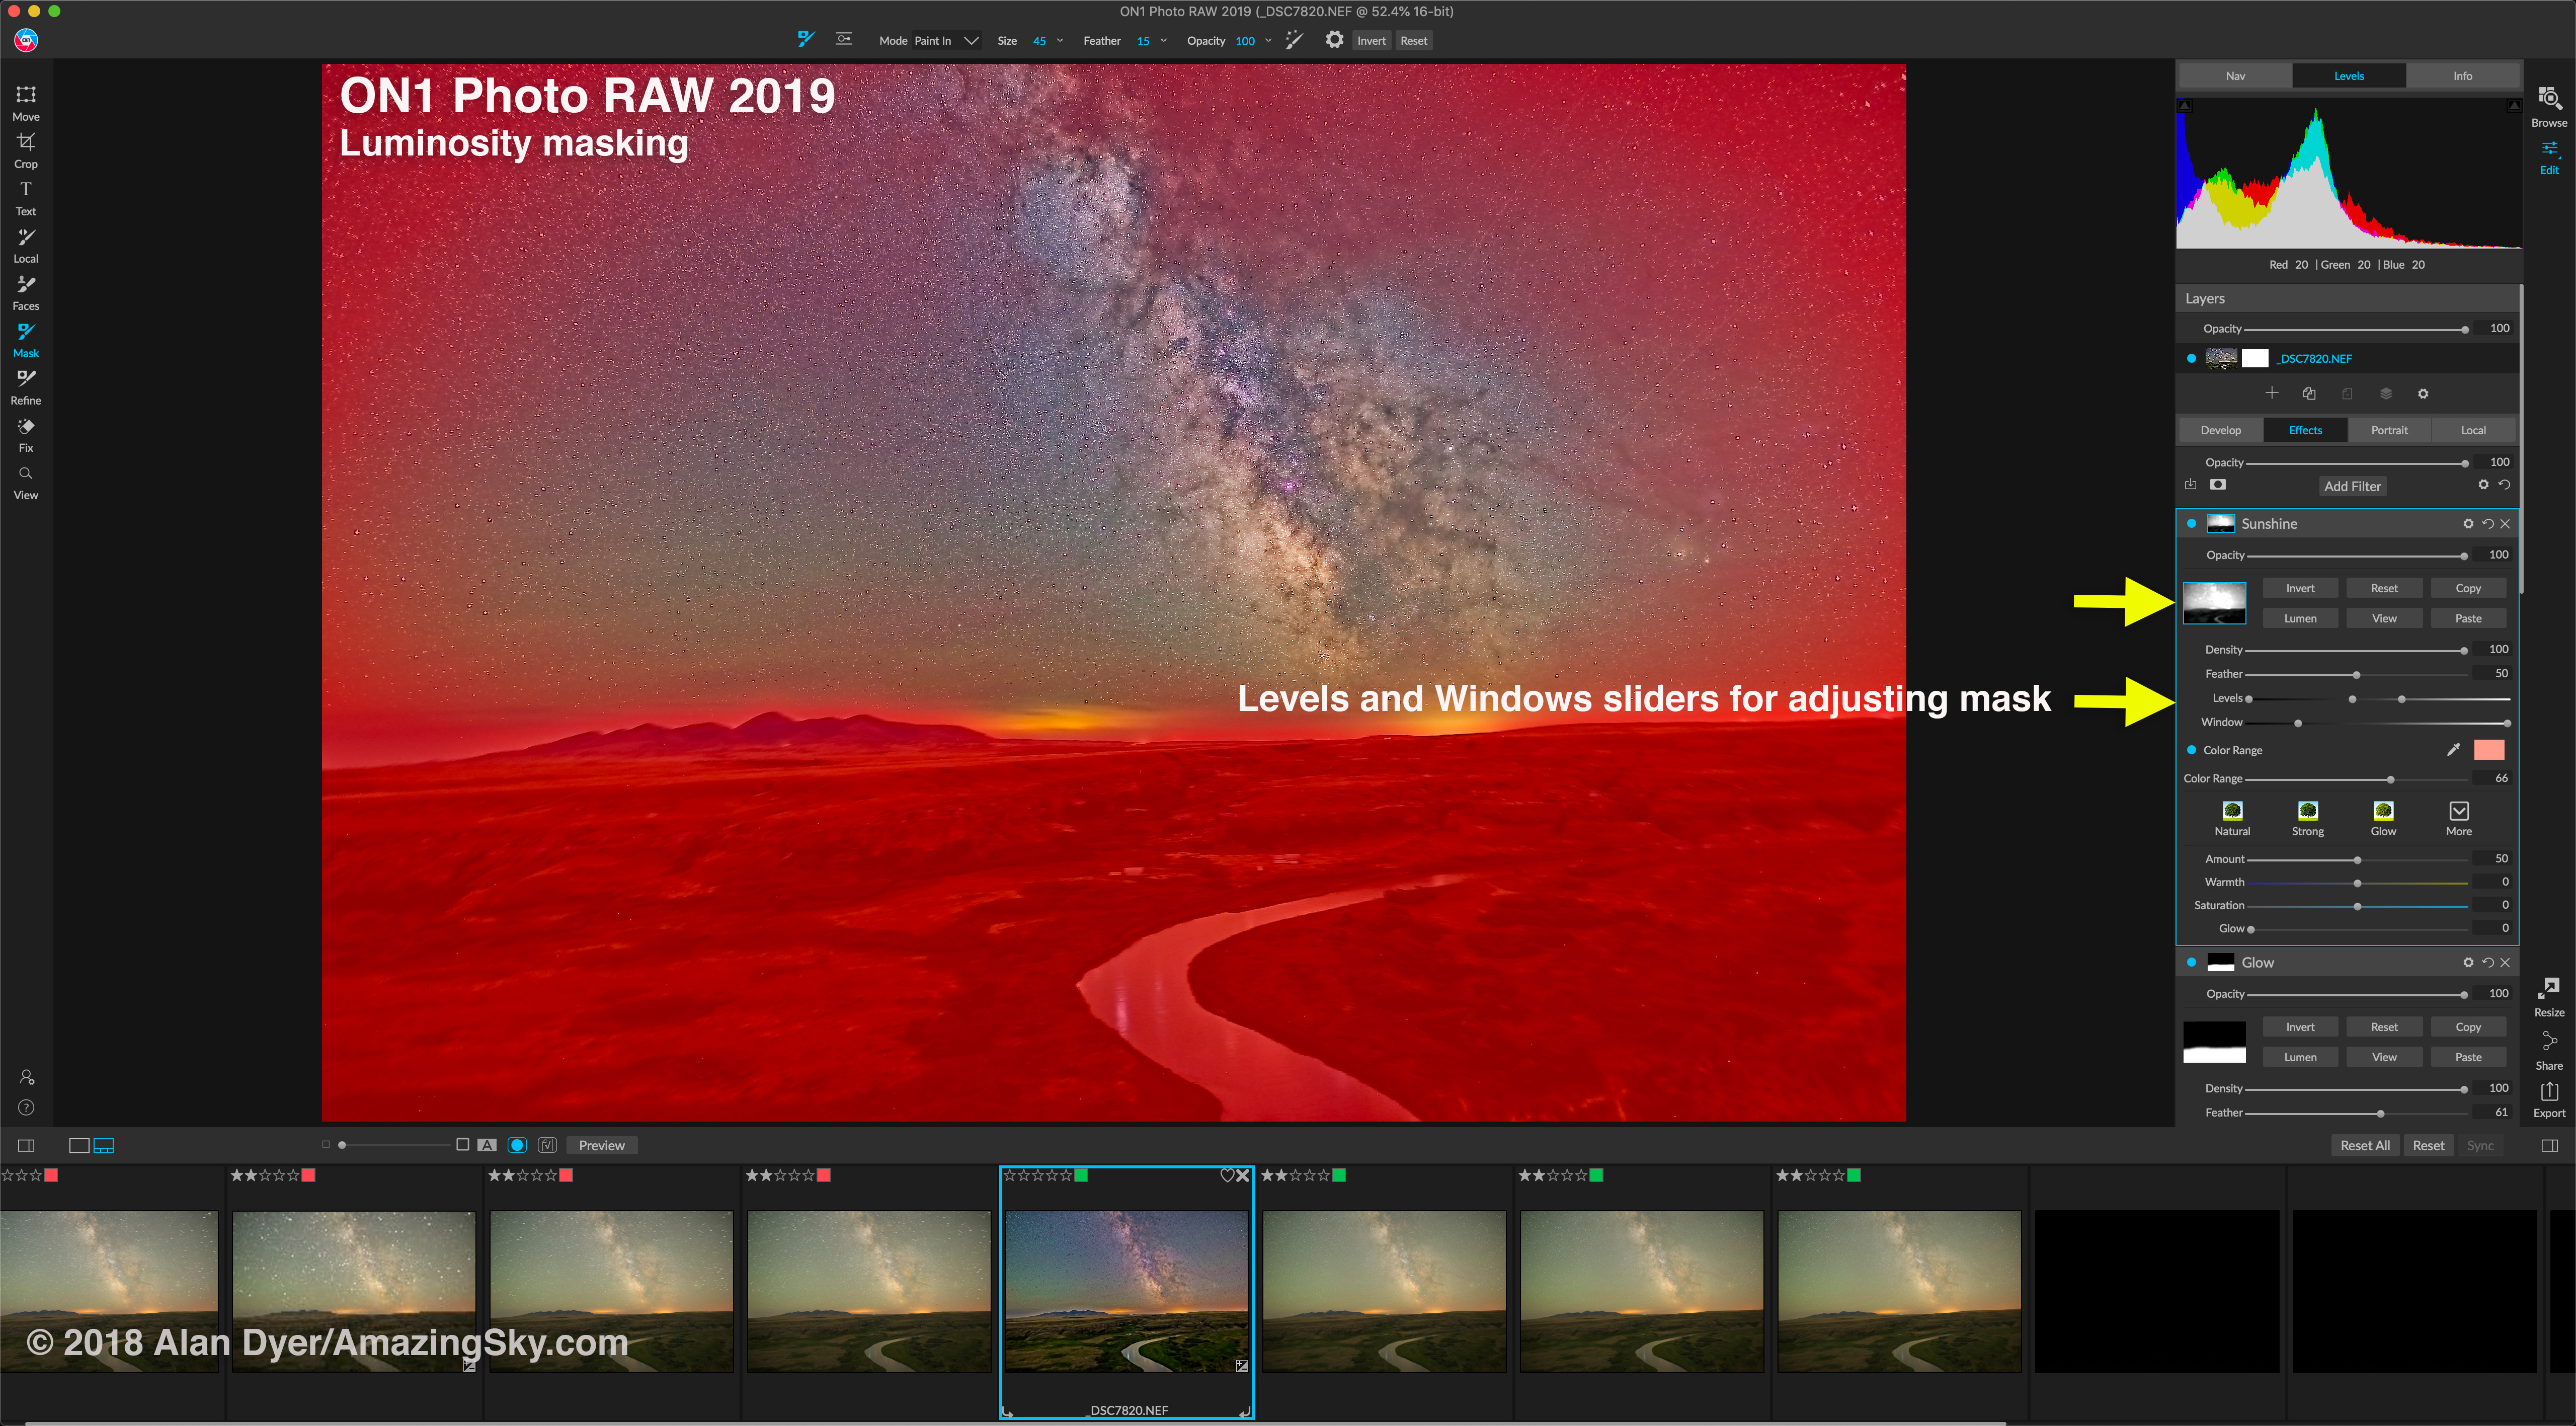
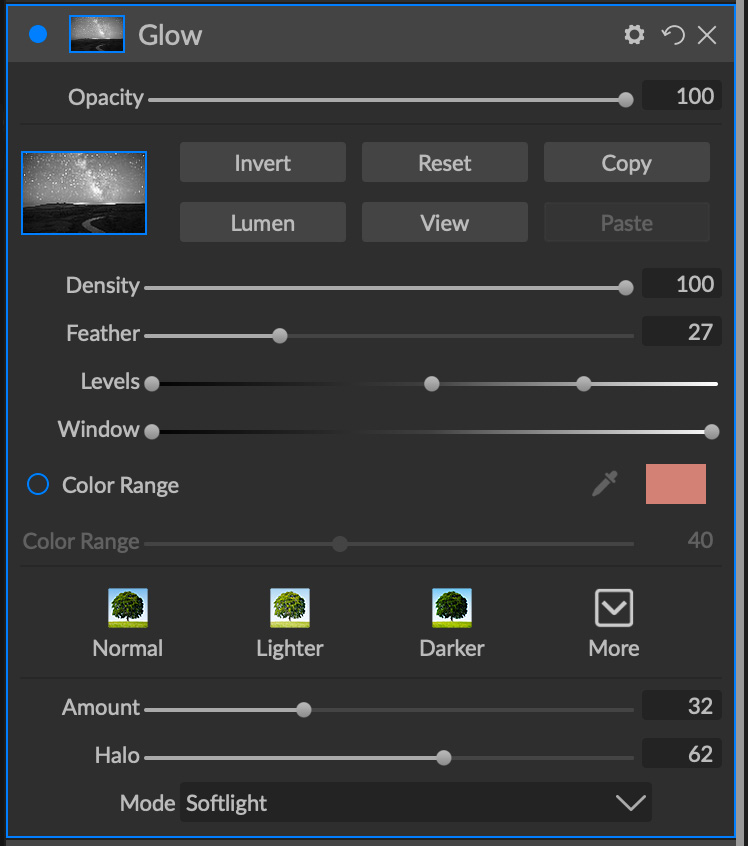
ON1 did a fairly good job. Some of its special effect filters, such a Dynamic Contrast, Glow, and Sunshine, can help bring out the Milky Way, though do add an artistic “look” to an image which you might or might not like.

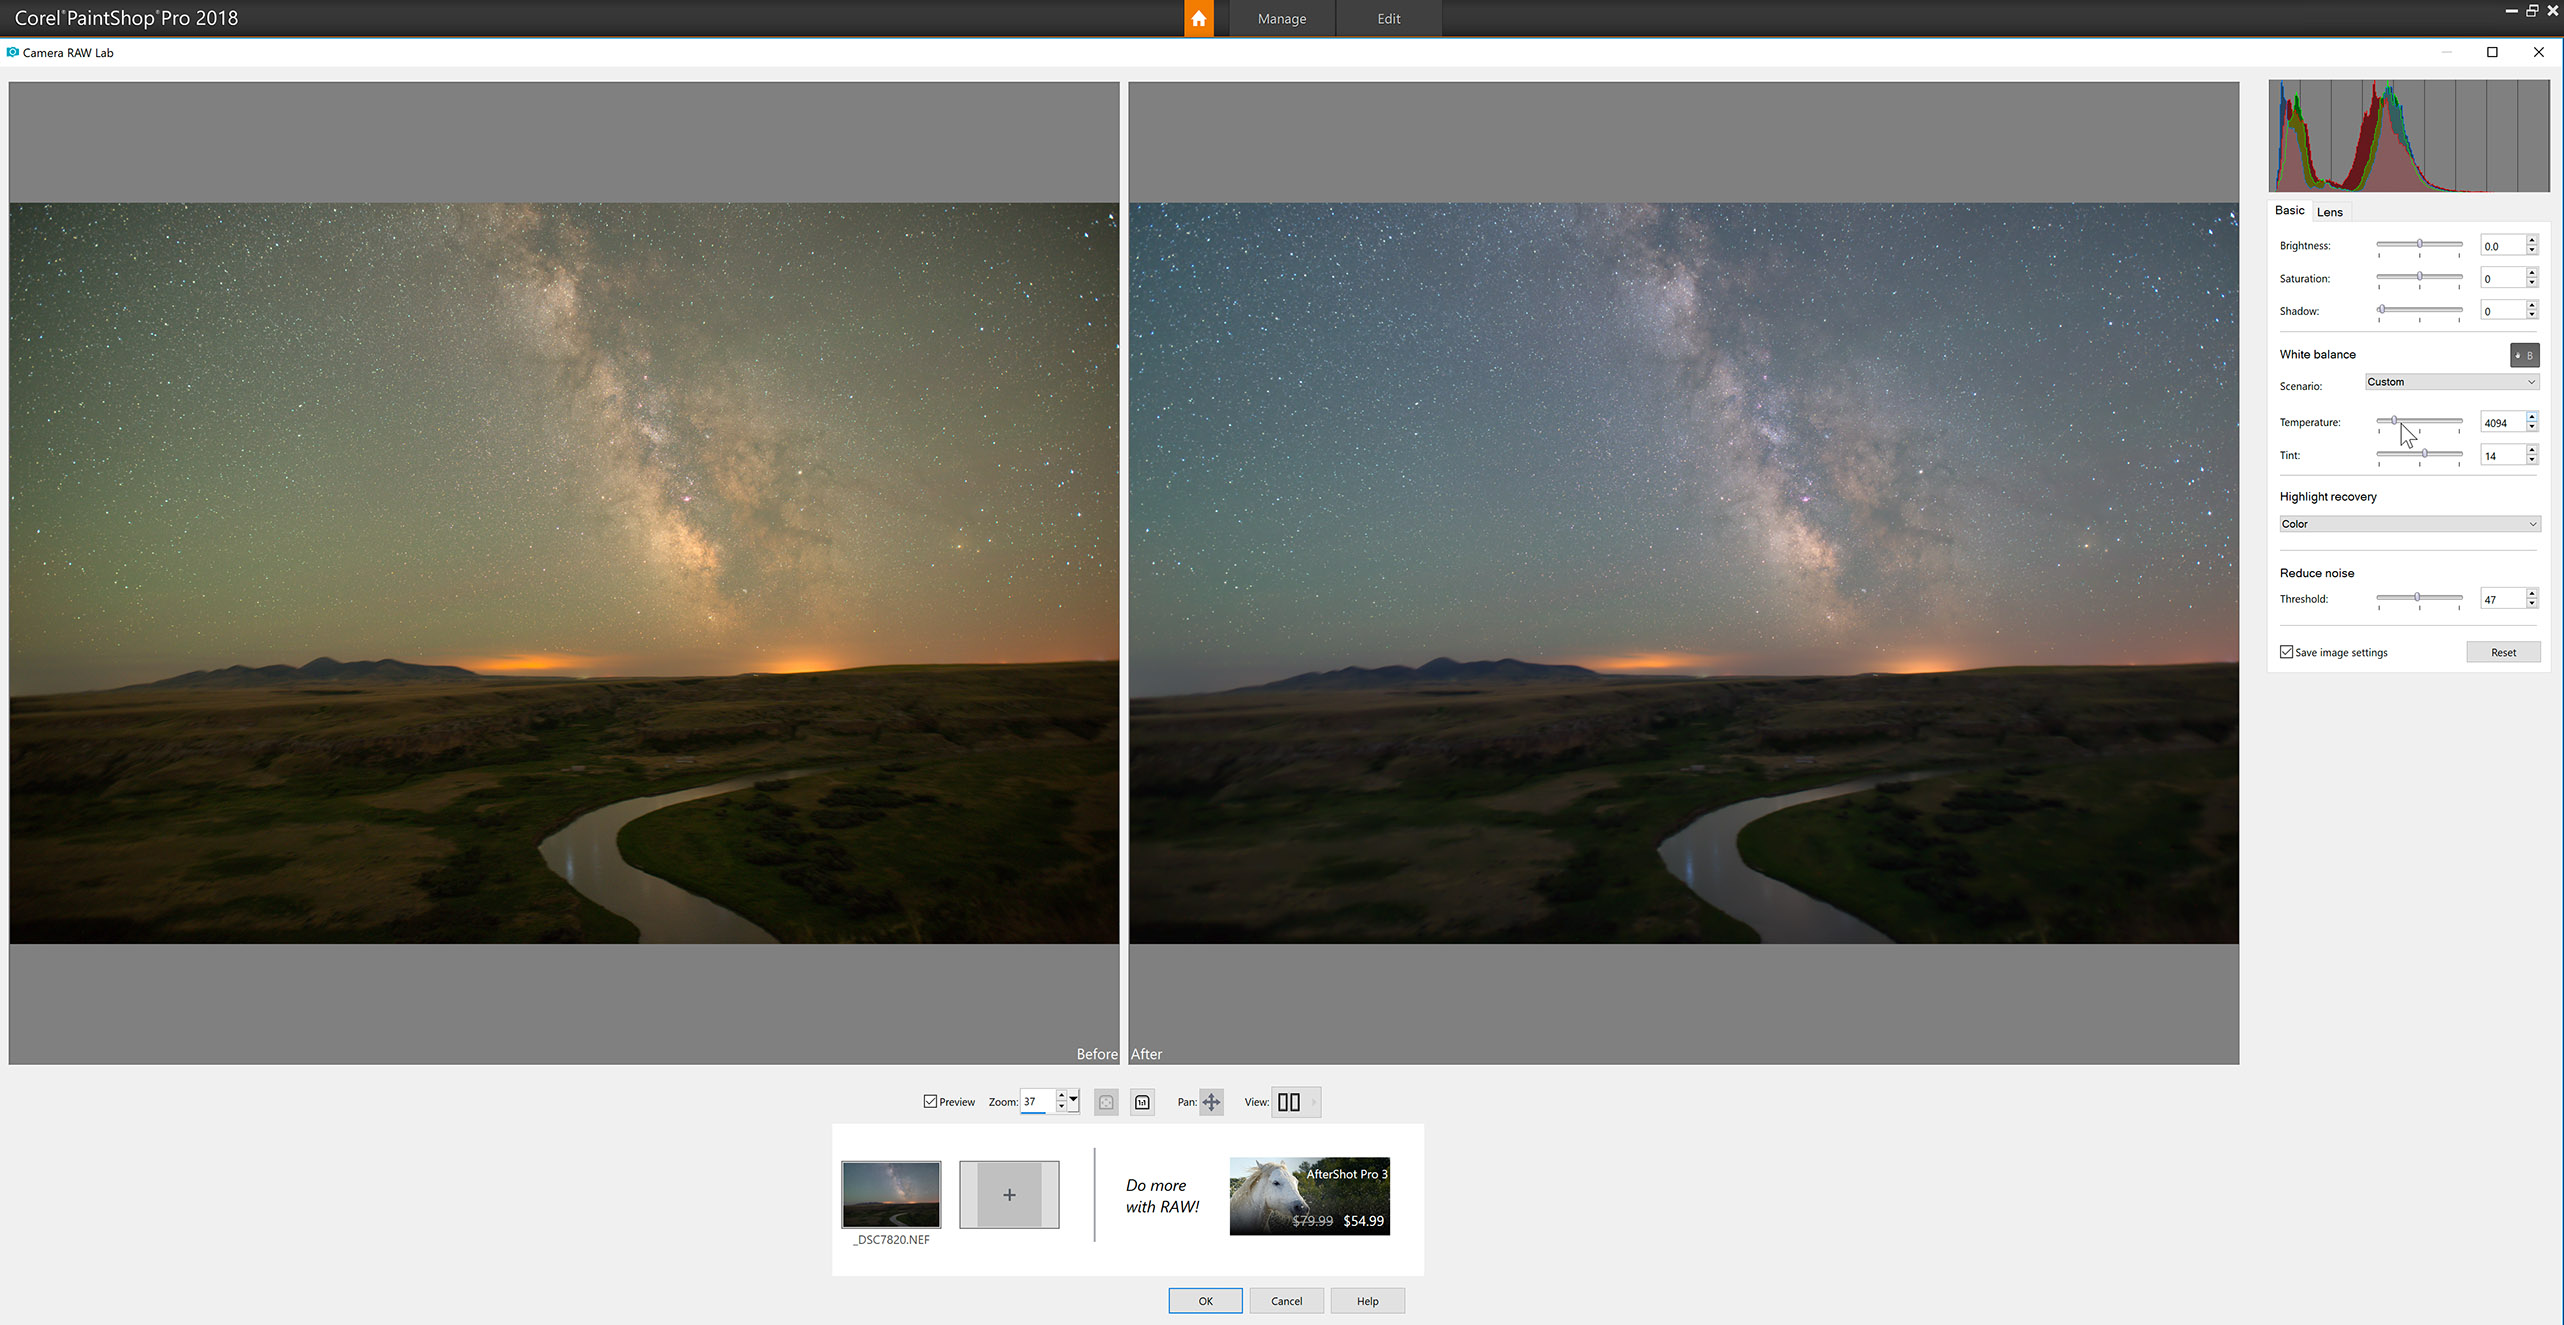
Below, I compare Adobe Camera Raw (ACR) to ON1. It was tough to get ON1’s image looking the same as ACR’s result, but then again, perhaps that’s not the point. Does it just look good? Yes, it does.

ON1 & ACR Raw Image Comparison
On the left, a single raw image developed with Adobe Camera Raw. On the right, the same image with ON1 and its basic Develop and more advanced Effects settings.

Compared to Adobe Camera Raw, which has a good array of basic settings, ON1 has most of those and more, in the form of many special Effects, with many combined as one-click Presets, as shown below.

ON1 Presets
ON1 offers a huge array of Presets that apply combinations of its filters with one click from the Browse module.

Aย few presets and individual filters โ€“ the aforementioned Dynamic Contrast and Glow โ€“ are valuable. However, most of ON1’s filters and presets will not be useful for astrophotography, unless you are after highly artistic and unnatural effects.

Noise Reduction and Lens Correction

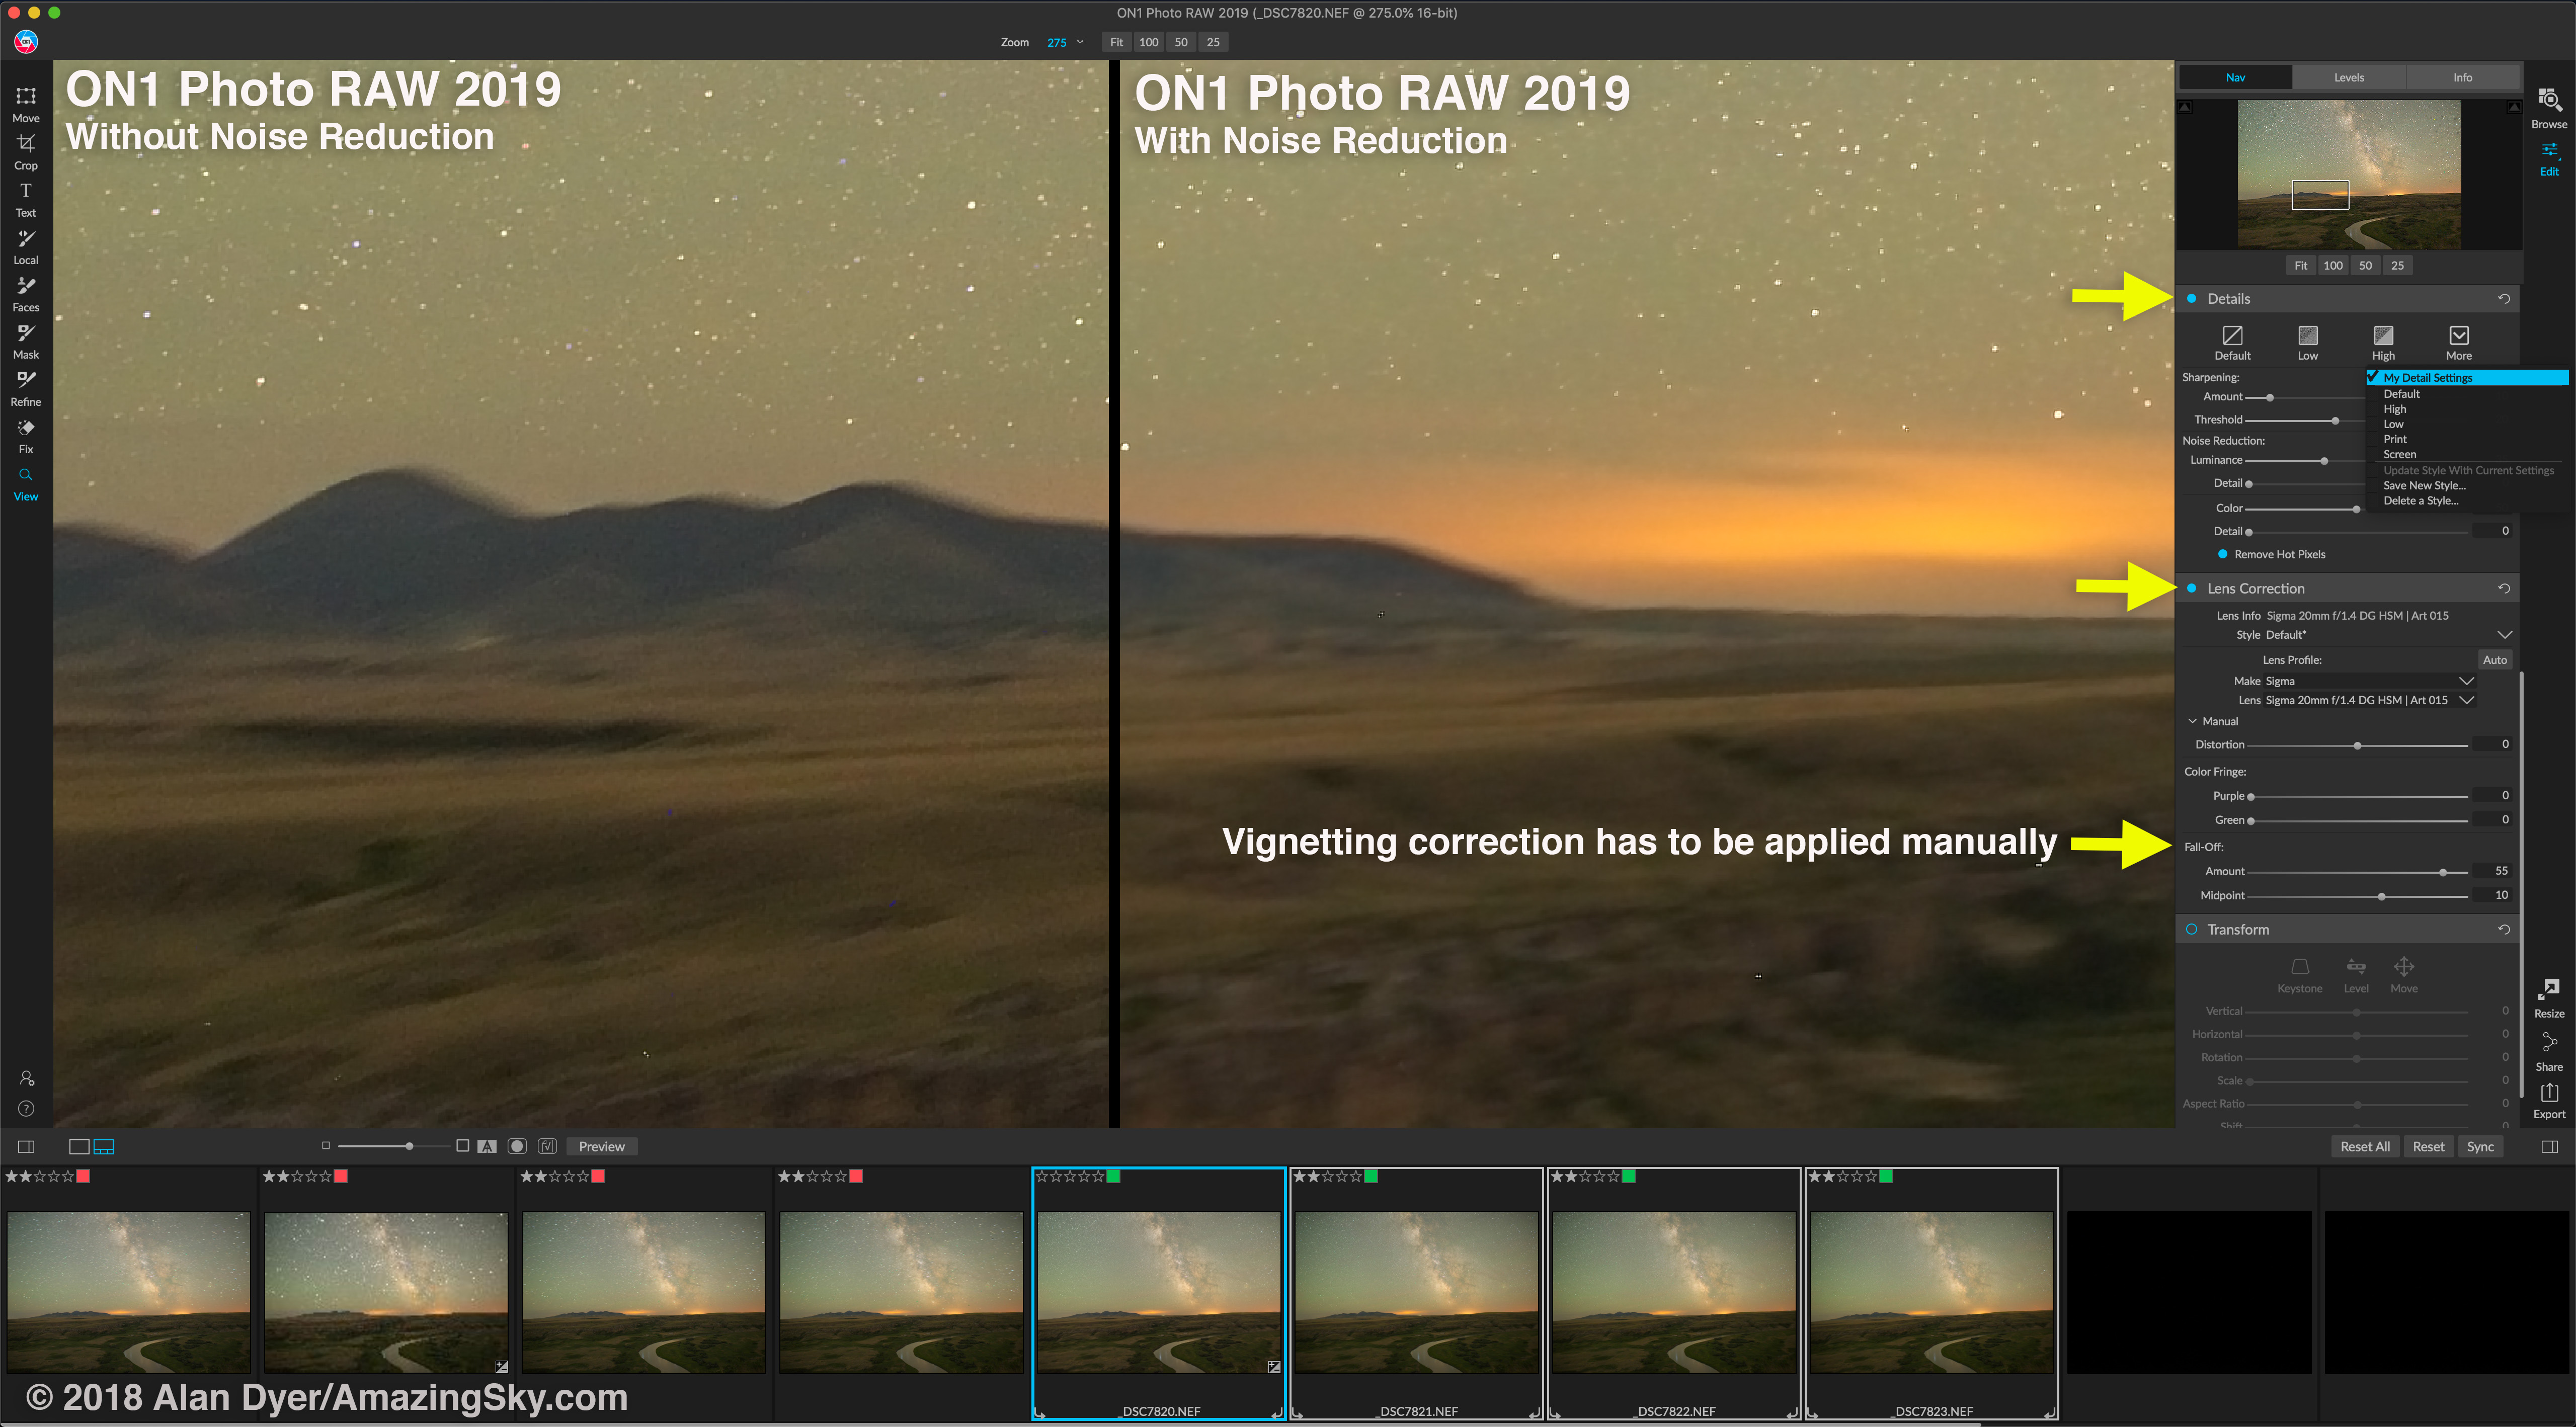
ON1 Noise Reduction
On the left, an image in ON1 without any Noise Reduction. On the right, with noise reduction and sharpening (under Details) applied with the settings shown.

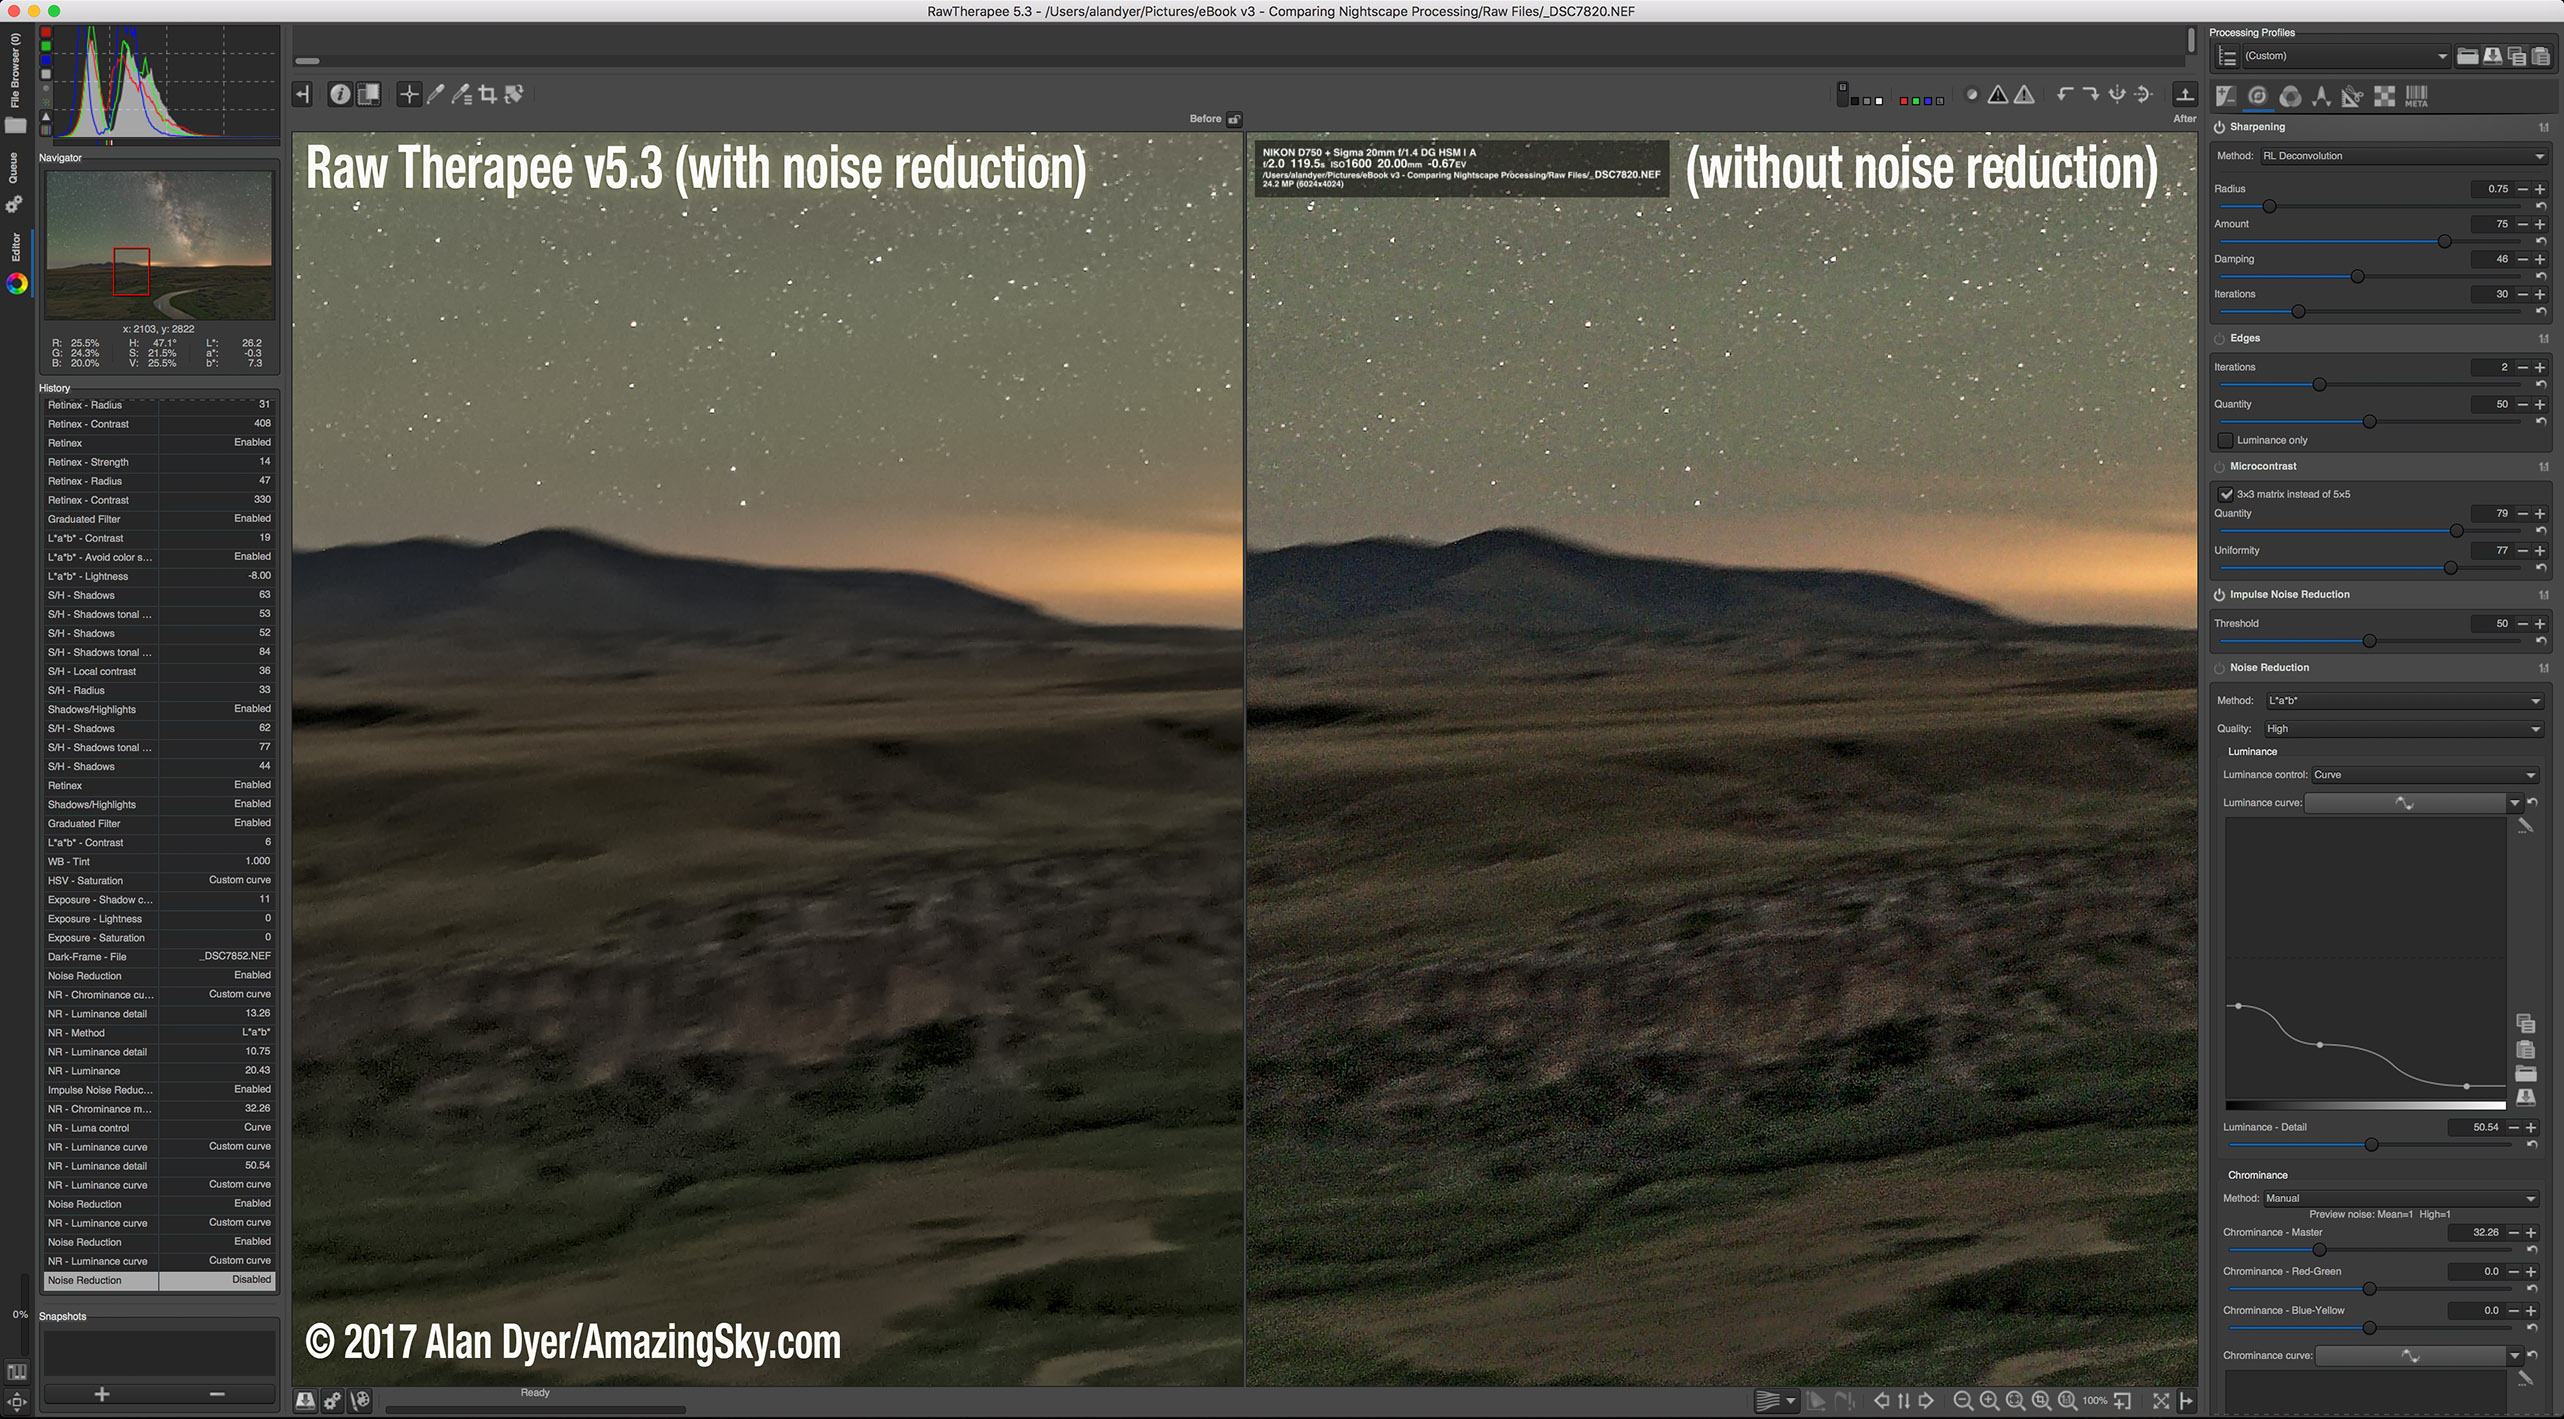
Critical to all astrophotography is excellent noise reduction. ON1 does a fine job here, with good smoothing of noise without harming details.

Lens Correction works OK. It detected the 20mm Sigma art lens and automatically applied distortion correction, but not any vignetting (light “fall-off”) correction, perhaps the most important correction in nightscape work. You have to dial this in manually by eye, a major deficiency.

By comparison, ACR applies both distortion and vignetting correction automatically. It also includes settings for many manual lenses that you can select and apply in a click. For example, ACR (and Lightroom) includes settings for popular Rokinon and Venus Optics manual lenses; ON1 does not.

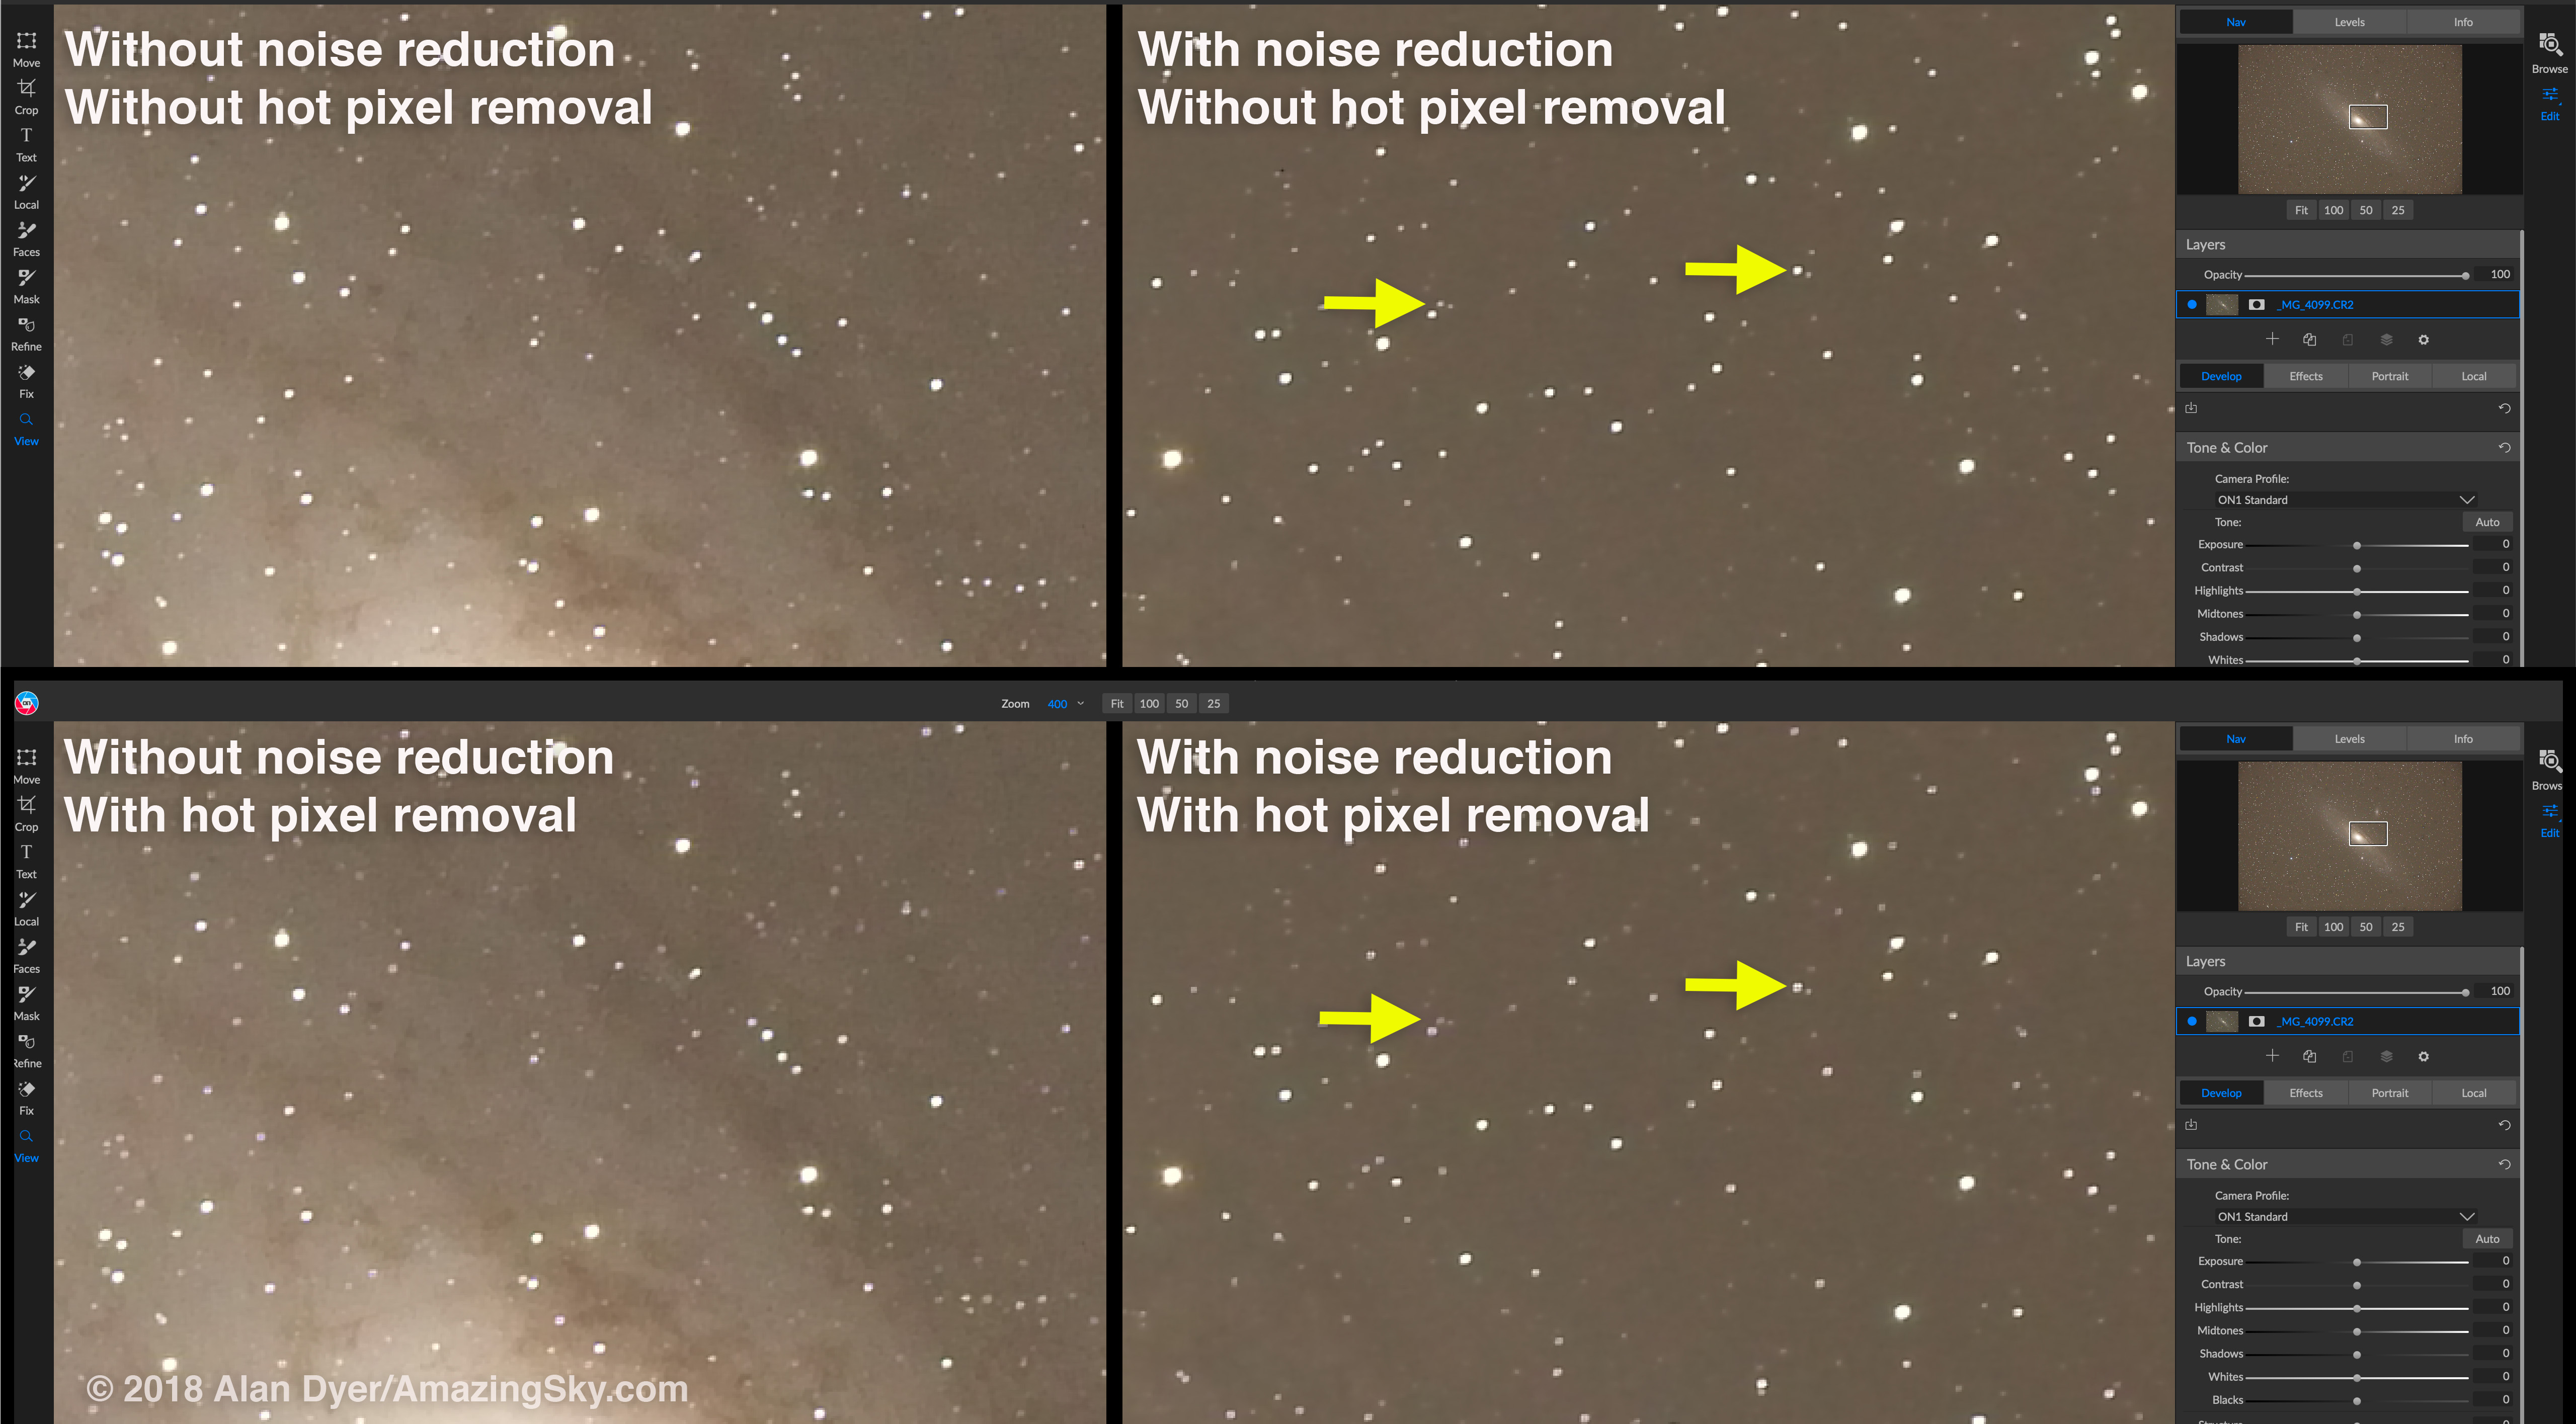
Hot Pixel Removal

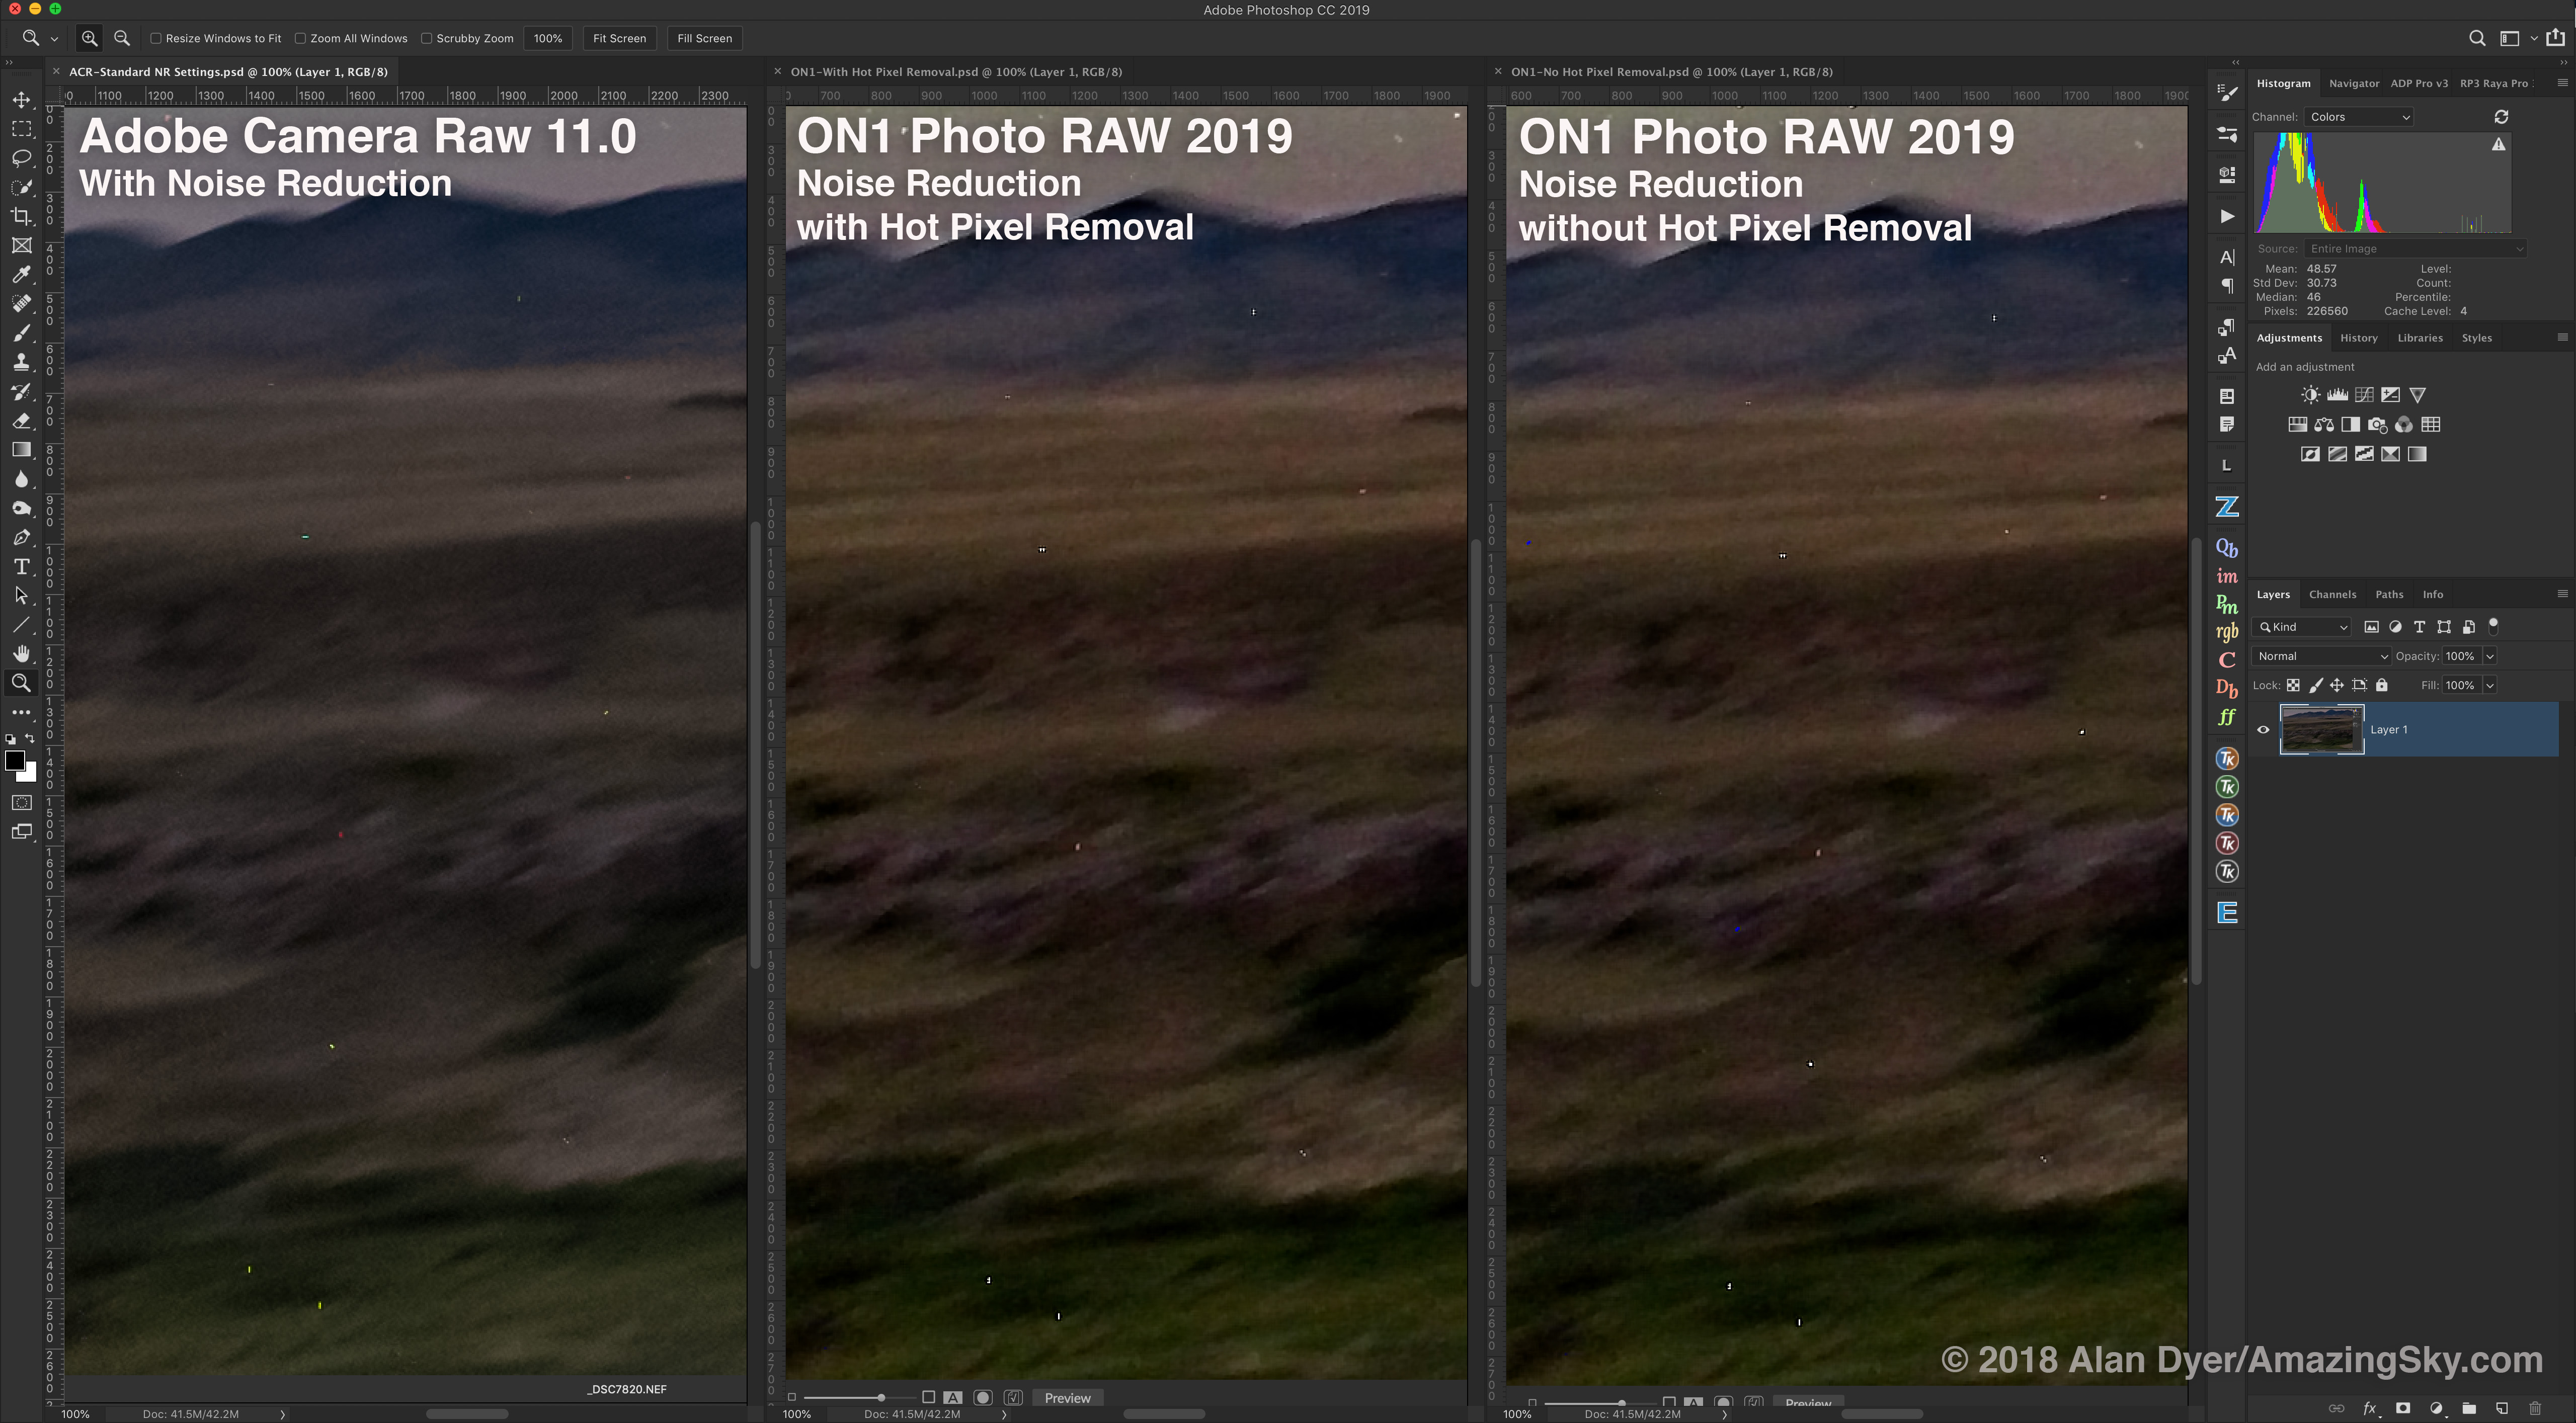
Hot Pixel Removal Comparison
On the left, ACR with noise reduction applied (it offers no user-selectable Hot Pixel Removal tool). In the middle, ON1 with Remove Hot Pixels turned on; on the right, with it turned off โ€“ showing more hot pixels than ACR does.

I shot the example image on a warm summer night and without using in-camera Long Exposure Noise Reduction (to keep the gap between exposures short when shooting sets of tracked and untracked exposures for later compositing).

However, the penalty for not using LENR to expedite the image taking is a ground filled with hot pixels. While Adobe Camera Raw does have some level of hot pixel removal working “under the hood,” many specks remained.

ON1 showed more hot pixels, until you clicked Remove Hot Pixels, found under Details. As shown at centre above, it did a decent job getting rid of the worst offenders.

But as I’ll show later, the penalty is that stars now look distorted and sometimes double, or you get the outright removal of stars. ON1 doesn’t do a good job distinguishing between true sharp-edged hot pixels and the softer images of stars. Indeed, it tends to over sharpen stars.

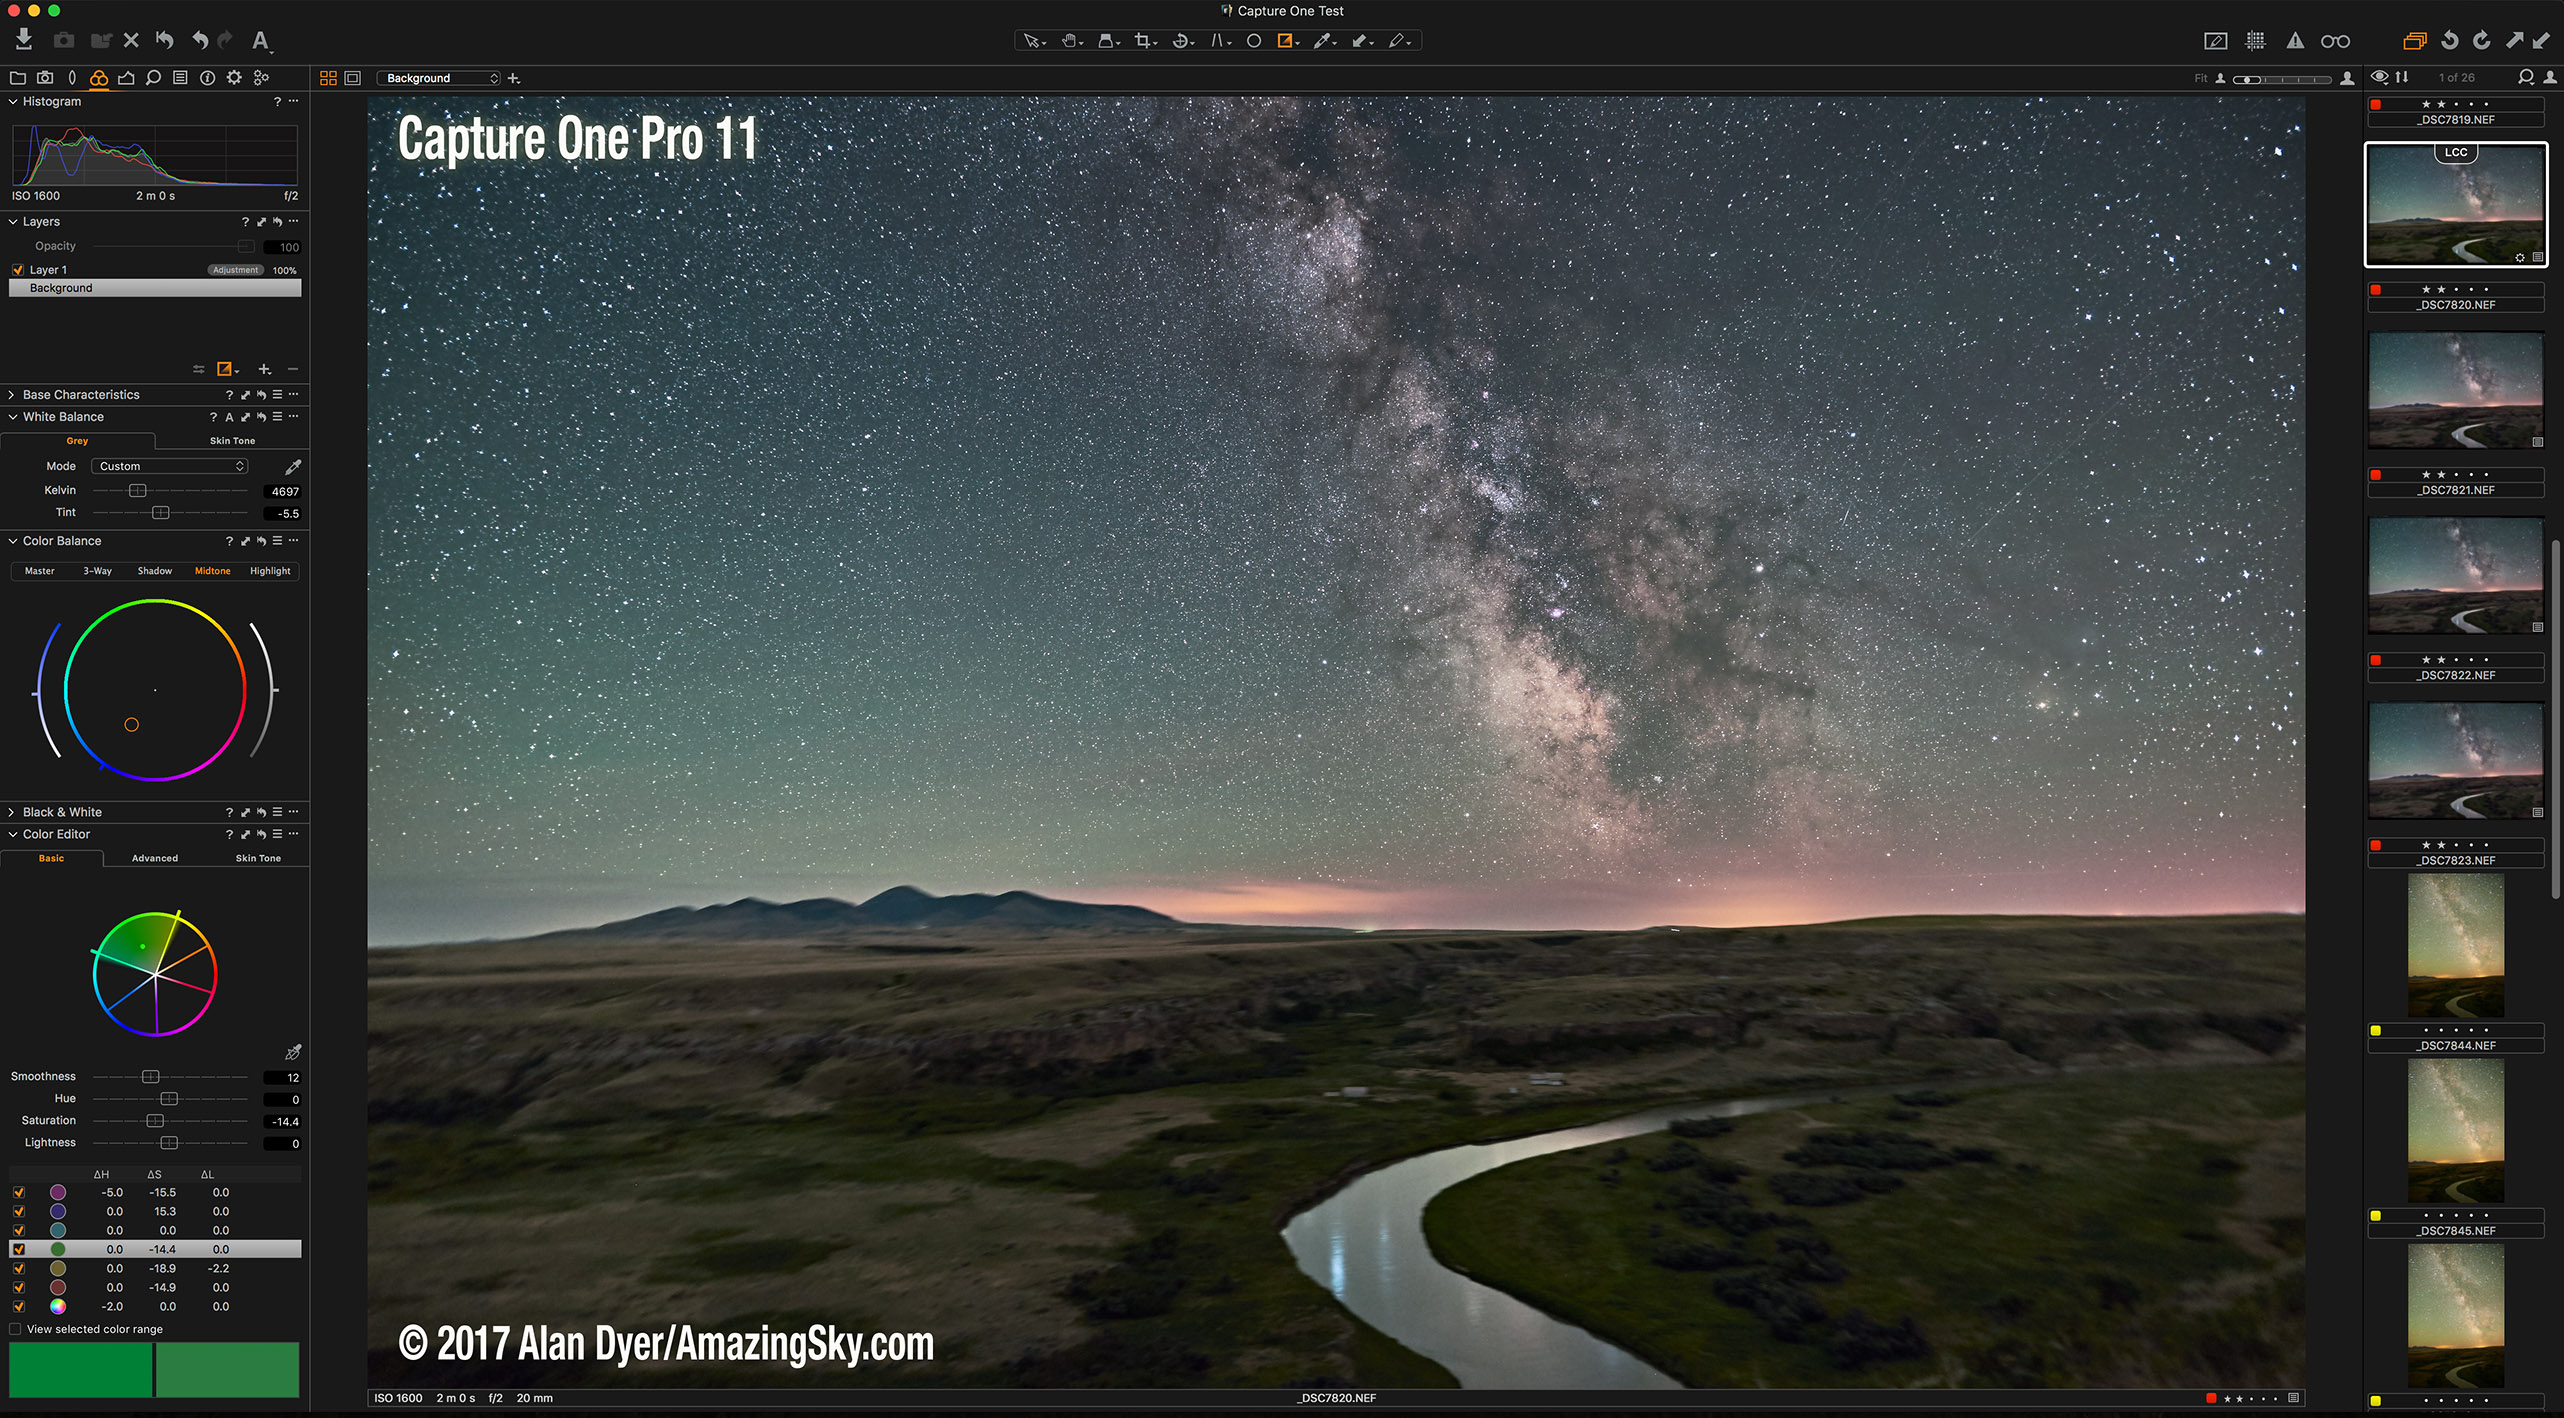
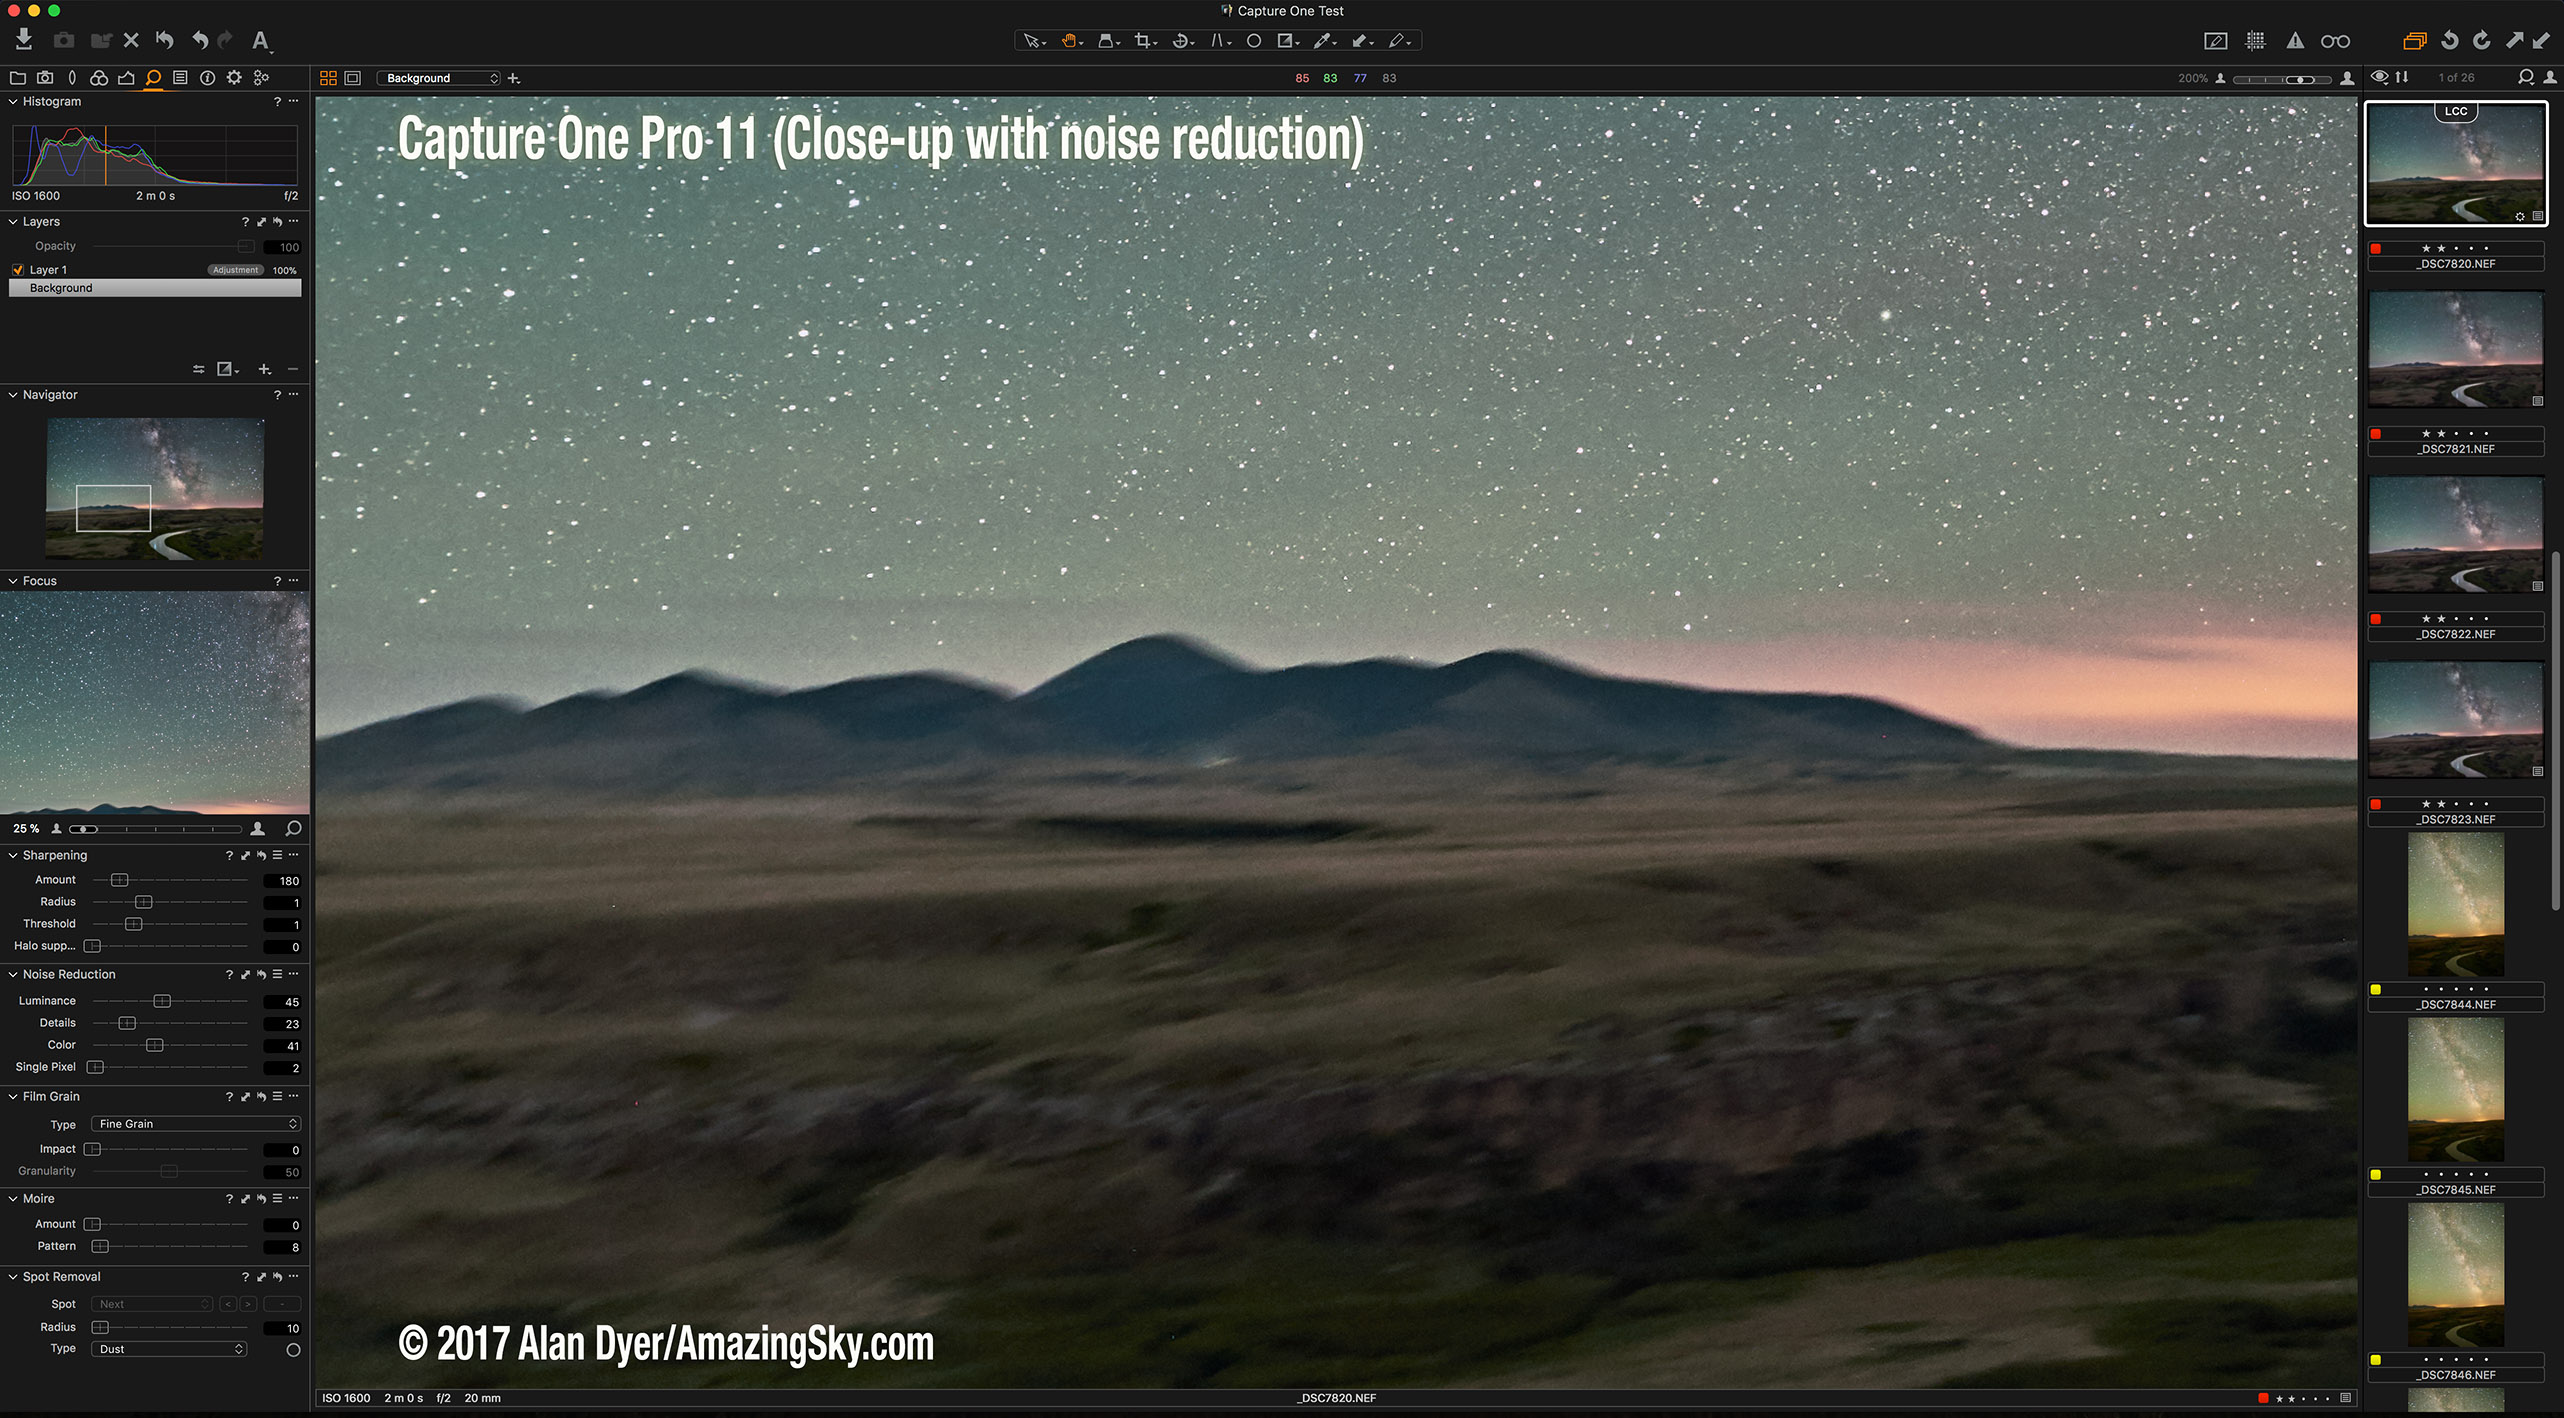
A competitor, Capture One 11, does a better job, with an adjustable Single Pixel removal slider, so you can at least select the level of star loss you are willing to tolerate to get rid of hot pixels.

Star Image Quality

ON1 & ACR Star Image Comparison
On the left, a 700% blow-up of the stars in Adobe Camera Raw. On the right, the same image processed in ON1 and exported out as a PSD.

Yes, we are pixel peeping here, but that’s what we do in astrophotography. A lot!

Stars in ON1 don’t look as good as in Camera Raw. Inevitably, as you add contrast enhancements, stars in ON1 start to exhibit dark and unsightly “sharpening haloes” not present in ACR, despite me applying similar levels of sharpening and contrast boosts to each version of the image.

Camera Raw has been accused of producing images that are not as sharp as with other programs such as Capture One and ON1.

There’s a reason. Other programs over-sharpen, and it shows here.

We can get away with it here in wide-field images, but not later with deep-sky close-ups. I don’t like it. And it is unavoidable. The haloes are there, albeit at a low level, even with no sharpening or contrast enhancements applied, and no matter what image profile is selected (I used ON1 Standard throughout).

De-Bayering Artifacts

ON1-Debayer
ON1, with contrast boosts applied but with no sharpening or noise reduction, shows star haloes, while the sky shows a blocky pattern at the pixel level in high ISO shots.

ACR-Debayer
Adobe Camera Raw, with similar settings but also no sharpening or noise reduction, shows a smooth and uniform sky background.

You might have to download and closely inspect these images to see the effect, but ON1’s de-Bayering routine exhibits a cross-hatched blocky pattern at the pixel-peeping level. ACR does not.

I see this same effect with some other raw developers. For example, the free Raw Therapee shows it with many of its choices for de-Bayering algorithms, but not all. Of the more than a dozen raw developers I tested a year ago, ACR and DxO PhotoLab had (and still have) the most artifact-free de-Bayering and smoothest noise reduction

Again, we can get away with some pixel-level artifacts here, but not later, in deep-sky processing.


Nightscape Processing โ€” Layering and Compositing

ON1 Perfect Brush
ON1’s adjustable “Perfect Brush” option for precise masking around edges and objects isn’t quite as effective as Photoshop’s Quick Selection Tool.

Compositing

The 2018 version of ON1 forced you to destructively flatten images when bringing them into the Layers module.

The 2019 version of ON1 improves that. It is now possible to composite several raw files into one image and still retain all the original Develop and Effects settings for non-destructive work.

You can then use a range of masking tools to mask in or out the sky.

For the example above, I have stacked tracked and untracked exposures, and am starting to mask out the trailed stars from the untracked exposure layer.

To do this with Adobe, you would have to open the developed raw files in Photoshop (ideally using “smart objects” to retain the link back to the raw files). But with ON1 we stay within the same program, to retain access to non-destructive settings. Very nice!

To add masks, ON1 2019 does not have the equivalent of Photoshop’s excellent Quick Selection Tool for selecting the sky or ground. It does have a “Perfect Brush” option which uses the tonal value of the pixels below it, rather than detecting edges, to avoid “painting over the lines.”

While the Perfect Brush does a decent job, it still requires a lot of hand painting to create an accurate mask without holes and defects. There is no non-destructive “Select and Mask” refinement option as in Photoshop.

Yes, ON1’s Refine Brush and Chisel Mask tools can help clean up a mask edge but are destructive to the mask. That’s not acceptable to my non-destructive mindset!

Local Adjustmentsย 

ON1 Masking Adjustments
Local Adjustments can be painted in or out with classic and easy-to-adjust and view masks and layers, rather than adjustment pins used by many raw developers such as ACR.

The masking tools are also applicable to adding “Local Adjustments” to any image layer, to brighten or darken regions of an image for example.

These work well and I find them more intuitive than the “pins” ACR uses on raw files, or DxO PhotoLab’s quirky “U-Point” interface.

ON1’s Local Adjustments work more like Photoshop’s Adjustment Layers and are similarly non-destructive. Excellent.

Luminosity Masks

ON1 Luminosity Masking
ON1 has one-click Luminosity masking, an excellent feature.

A very powerful feature of ON1 is its built-in Luminosity masking.

Yes, Camera Raw now has Range Masks, and Photoshop can be used to create luminosity masks, but making Photoshop’s luminosity masks easily adjustable requires purchasing third-party extension panels.

ON1 can create an adjustable and non-destructive luminosity mask on any image or adjustment layer with a click.

While such masks, based on the brightness of areas, aren’t so useful for low-contrast images like the Milky Way scene above, they can be very powerful for merging high-contrast images (though ON1 also has an HDR function not tested here).

Glow Effect
ON1’s handy Orton-style Glow effect, here with a Luminosity mask applied. The mask can be adjusted with the Levels and Window sliders, and applied to a range of colors as well.

ON1 has the advantage here. Its Luminosity masks are a great feature for compositing exposures or for working on regions of bright and dark in an image.

Final Composite

ON1 Final Composite
A finished nightscape composite, with stacked exposures for the ground and stacked and tracked exposures for the sky, layered and blended in ON1.

Here again is the final result, above.

It is not just one image each for the sky and ground, but is instead a stack of four images for each half of the composite, to smooth noise. This form of stacking is somewhat unique to astrophotography, and is commonly used to reduce noise in nightscapes and in deep-sky images, as shown later.

Stacking

ON1-Layer Opacities
This shows an intermediate step in creating the final composite shown above: Four sky layers are stacked, with opacities as shown, which has the effect of smoothing noise. But to continue working on the image requires making a single “New Stamped Layer” out of the group of four โ€“ in this case, the sky layers. The same can be done for the four ground layers.

Here I show how you have to stack images in ON1.

Unlike Photoshop and Affinity Photo, ON1 does not have the ability to merge images automatically into a stack and apply a mathematical averaging to the stack, usually a Mean or Median stack mode. The averaging of the image content is what reduces the random noise.

Instead, with ON1 you have perform an “old school” method of average stacking โ€“ by changing the opacity of the layers, so that Layer 2 = 50%, Layer 3 = 33%, Layer 4 = 25%, and so on. The result is identical to performing a Mean stack mode in Photoshop or Affinity.

Fine, except there is no way to perform a Median stack, which can be helpful for eliminating odd elements present in only one frame, perhaps an aircraft trail.

Copy and Paste Settings

ON1 Pasting Settings
ON1 allows easy copying and pasting of settings from one raw image to others, with the annoying exception of Local Adjustments and their masks.

Before we even get to the stacking stage, we have to develop and process all the images in a set. Unlike Lightroom or Camera Raw, ON1 can’t develop and synchronize settings to a set of images at once. You can work on only one image at a time.

So, you work on one image (one of the sky images here), then Copy and Paste its settings to the other images in the set. I show the Paste dialog box here.

This works OK, though I did find some bugs โ€“ the masks for some global Effects layers did not copy properly; they copied inverted, as black instead of white masks.

However, Luminosity masks did copy from image to image, which is surprising considering the next point.

The greater limitation is that no Local Adjustments (ones with masks to paint in a correction to a selected area) copy from one image to another … except ones with gradient masks. Why the restriction?

So as wonderful as ON1’s masking tools might be, they aren’t of any use if you want to copy their masked adjustments across several images, or, as shown next, to a large time-lapse set.

While Camera Raw’s and Lightroom’s Local Adjustment pins are more awkward to work with, they do copy across as many images as you like.


Time-Lapse Processing

ON1 Copy & Paste
ON1 does allow developing one image in a set, then copying and pasting its settings to perhaps hundreds of other images in a time-lapse set.

A few Adobe competitors, such as Affinity Photo (as of this writing) simply can’t do this.

By comparison, with the exception of Local Adjustments,ย ON1 does have good functions for Copying and Pasting Settings. These are essential for processing a set of hundreds of time-lapse frames.

ON1 Export
This is ON1’s Export dialog box, set up here to export the developed raw files into another “intermediate” set of 4K-sized JPGs for movie assembly.

Once all the images are processed โ€“ whether it be with ON1 or any other program โ€“ the frames have to exported out to an intermediate set of JPGs for assembly into a movie by third-party software. ON1 itself can’t assemble movies, but then again neither can Lightroom (as least not very well), though Photoshop can, through its video editing functions.

For my test set of 220 frames, each with several masked Effects layers, ON1 took 2 hours and 40 minutes to perform the export to 4K JPGs. Photoshop, through its Image Processor utility, took 1 hour and 30 minutes to export the same set, developed similarly and with several local adjustment pins.

ON1 did the job but was slow.

A greater limitation is that, unlike Lightroom, ON1 does not accept any third party plug-ins (it serves as a plug-in for other programs). That means ON1 is not compatible with what I feel are essential programs for advanced time-lapse processing: either Timelapse Workflow (from https://www.timelapseworkflow.com) or the industry-standard LRTimelapse (from https://lrtimelapse.com).

Both programs work with Lightroom to perform incremental adjustments to settings over a set of images, based on the settings of several keyframes.

Lacking the ability to work with these programs means ON1 is not a program for serious and professional time-lapse processing.


Deep-Sky Processing

ON1-Tracked Milky Way
A tracked 2-minute exposure of the Cygnus Milky Way, with a Sony a7III camera at ISO 800 and Venus Optics Laowa 15mm lens at f/2, developed in ON1.

ACR-Tracked Milky Way
The same Milky Way image developed in Adobe Camera Raw. It looks better!

Wide-Angle Milky Way

Now we come to the most demanding task: processing long exposures of the deep-sky, such as wide-angle Milky Way shots and close-ups of nebulas and galaxies taken through telescopes. All require applying generous levels of contrast enhancement.

As the above example shows, try as I might, I could not get my test image of the Milky Way to look as good with ON1 as it did with Adobe Camera Raw. Despite the many ways to increase contrast in ON1 (Contrast, Midtones, Curves, Structure, Haze, Dynamic Contrast and more!), the result still looked flat and with more prominent sky gradients than with ACR.

And remember, with ACR that’s just the start of a processing workflow. You can then take the developed raw file into Photoshop for even more precise work.

With ON1, its effects and filters all you have to work with. Yes, that simplifies the workflow, but its choices are more limited than with Photoshop, despite ON1’s huge number of Presets.

Deep-Sky Close-Ups

ON1 Processed M31
The Andromeda Galaxy, in a stack of six tracked and auto-guided 8-minute exposures with a stock Canon 6D MkII through an 80mm f/6 refractor.

Photoshop Processed M31
The same set of six exposures, stacked and processed with ACR and Photoshop, with multiple masked adjustment layers as at right. The result looks better.

Similarly, taking a popular deep-sky subject, the Andromeda Galaxy, aka M31, and processing the same original images with ON1 and ACR/Photoshop resulted in what I think is a better-looking result with Photoshop.

Of course, it’s possible to change the look of such highly processed images with the application of various Curves and masked adjustment layers. And I’m more expert with Photoshop than with ON1.

But … as with the Cygnus Milky Way image, I just couldn’t get Andromeda looking as good in ON1. It always looked a little flat.

Dynamic Contrast did help snap up the galaxy’s dark lanes, but at the cost of “crunchy” stars, as I show next. A luminosity “star mask” might help protect the stars, but I think the background sky will inevitably suffer from the de-Bayering artifacts.

Star and Background Sky Image Quality

ON1 Processed M31-Close-Up
A 400% close-up of the final Andromeda Galaxy image. It shows haloed stars and a textured and noisy sky background.

Photoshop Processed M31-Close-Up
The same area blown up 400% of the Photoshop version of the Andromeda Galaxy image. Stars and sky look smoother and more natural.

As I showed with the nightscape image, stars in ON1 end up looking too “crunchy,” with dark halos from over sharpening, and also with the blocky de-Bayering artifacts now showing up in the sky.

I feel it is not possible to avoid dark star haloes, as any application of contrast enhancements, so essential for these types of objects, brings them out, even if you back off sharpening at the raw development stage, or apply star masks.

ON1 Processed M31-With & Without
On the left, the image before any processing applied; on the right, after the level of processing needed for such deep-sky images. What starts out looking OK, turns messy.

ON1 is applying too much sharpening “under the hood.” That might “wow” casual daytime photographers into thinking ON1 is making their photos look better, but it is detrimental to deep-sky images. Star haloes are a sign of poor processing.

Noise and Hot Pixels

ON1 With & Without NR and Hot Pixels
With and without noise reduction and hot pixel removal shows stars becoming lost and misshapen with the Remove Hot Pixel option.

ON1’s noise reduction is quite good, and by itself does little harm to image details.

But turn on the Remove Hot Pixel button and stars start to be eaten. Faint stars fade out and brighter stars get distorted into double shapes or have holes in them.

Hot pixel removal is a nice option to have, but for these types of images it does too much harm to be useful. Use LENR or take dark frames, best practices in any case.

Image Alignment and Registration

ON1 Auto-Alignment
The six Andromeda images stacked then “Auto-Aligned” in ON1, with just the top (first) and bottom (last) images turned on here. with the top image switched to Difference blend mode to show any mis-alignment.

Photoshop Auto-Alignment
The same set stacked and “Auto-Aligned” in Photoshop, with the same first and last images turned on and blended with Difference. PS’s alignment is much better, indicated by the image “blacking out” as the two registered frames cancel out.

Before any processing of deep-sky images is possible, it is first necessary to stack and align them, to make up for slight shifts from image to image, usually due to the mount not being perfectly polar aligned. Such shifts can be both translational (left-right, up-down) and rotational (turning about the guide star).

New to ON1 2019 is an Auto-Align Layers function. It worked OK but not nearly as well as Photoshop’s routine. In my test images of M31, ON1 didn’t perform enough rotation.

Once stacked and aligned, and as I showed above, you then have to manually change the opacities of each layer to blend them for noise smoothing.

By comparison, Photoshop has a wonderful Statistics script (under File>Scripts) that will automatically stack, align, then mean or median average the images, and turn the result into a non-destructive smart object, all in one fell swoop. I use it all the time for deep-sky images. There’s no need for separate programs such as Deep-Sky Stacker.

In ON1, however, all that has to be done manually, step-by-step.ย ON1 does do the job, just not as well.


Wrap-Up

M31 from ON1
The final M31, Andromeda Galaxy image processed with ON1.

ON1 Photo RAW 2019 is a major improvement, primarily in providing a more seamless and less destructive workflow.

Think of it as Lightroom with Layers!ย 

But it isn’t Photoshop.

Dynamic Contrast
ON1’s useful Dynamic Contrast filter. A little goes a long way.

True to ON1’s heritage as a special effect plug-in, it has some fine Effect filters, such as Dynamic Contrast above, ones I sometimes use from within Photoshop as plug-in smart filters.

Under Sharpen, ON1 does offer a High Pass option, a popular method for sharpening deep-sky objects.

Missing Filters and Adjustments

But for astrophoto use, ON1 is missing a lot of basic but essential filters for pixel-level touch-ups. Here’s a short list:

โ€ข Missing are Median, Dust & Scratches, Radial Blur, Shake Reduction, and Smart Sharpen, just to mention a handful of filters I find useful for astrophotography, among the dozens of others Photoshop has, but ON1 does not. But then again, neither does Lightroom, another example of how ON1 is more light Lightroom with layers and not Photoshop.

ON1 Color Adjustment
ON1’s selective Color Adjustment. OK, but where’s the Black and Neutrals?

โ€ข While ON1 has many basic adjustments for color and contrast, its version of Photoshop’s Selective Color lacks Neutral or Black sliders, great for making fine changes to color balance in astrophotos.

โ€ข While there is a Curves panel, it has no equivalent to Photoshop’s “Targeted Adjustment Tool” for clicking on a region of an image to automatically add an inflection point at the right spot on the curve. This is immensely useful for deep-sky images.

โ€ข Also lacking is a basic Levels adjustment. I can live without it, but most astrophotographers would find this a deal-breaker.

โ€ข On the other hand, hard-core deep-sky photographers who do most of their processing in specialized programs such as PixInsight, using Photoshop or Lightroom only to perform final touch-ups, might find ON1 perfectly fine. Try it!

Saving and Exporting

ON1 saves its layered images as proprietary .onphoto files and does so automatically. There is noย Save command, only a final Export command. As such it is possible to make changes you then decide you don’t like … but too late! The image has already been saved, writing over your earlier good version. Nor can you Save As … a file name of your choice. Annoying!

Opening a layered .onphoto file (even with ON1 itself already open) can take a minute or more for it to render and become editable.

Once you are happy with an image, you can Export the final .onphoto version as a layered .PSD file but the masks ON1 exports to the Photoshop layers may not match the ones you had back in ON1 for opacity. So the exported .PSD file doesn’t look like what you were working on. That’s a bug.

Only exporting a flattened TIFF file gets you a result that matches your ON1 file, but it is now flattened.

Bugs and Cost

I encountered a number of other bugs, ones bad enough to lock up ON1 now and then. I’ve even seen ON1’s own gurus encounter bugs with masking during their live tutorials. These will no doubt get fixed in 2019.x upgrades over the next few months.

But by late 2019 we will no doubt be offered ON1 Photo RAW 2020 for another $80 upgrade fee, over the original $100 to $120 purchase price. True, there’s no subscription, but ON1 still costs a modest annual fee, presuming you want the latest features.

Now, I have absolutely no problem with that, and ON1 2019 is a significant improvement.

However, I found that for astrophotography it still isn’t there yet as a complete replacement for Adobe.

But don’t take my word for it. Download the trial copy and test it for yourself.

โ€” Alan, November 22, 2018 / ยฉ 2018 Alan Dyer/AmazingSky.comย 


Testing 10 Photoshop Contenders


1-Comparing Raw Developers (Wide)

To Adobe or not to Adobe. That is the question many photographers are asking with the spate of new image processing programs vying to โ€œkill Photoshop.โ€

I tested more than ten contenders as alternatives to Adobeโ€™s image processing software, evaluating them ONLY for the specialized task of editing demanding nightscape images taken under the Milky Way, both for single still images and for time-lapses of the moving sky. I did not test these programs for other more “normal” types of images.

Also, please keep in mind, I am a Mac user and tested only programs available for MacOS, though many are also available for Windows. I’ve indicated these.

But I did not test any Windows-only programs. So sorry, fans of Paintshop Pro (though see my note at the end), Photoline, Picture Window Pro, or Xara Photo & Graphic Designer. They’re not here. Even so, I think you will find there’s plenty to pick from!

This review expands upon and updates mini-reviews I included in my Nightscapes and Time-Lapses eBook, shown at right.

If you are hoping thereโ€™s a clear winner in the battle against Adobe, one program I can say does it all and for less cost and commitment, I didn’t find one.

Group of 9 (small)

However, a number of contenders offer excellent features and might replace at least one member of Adobeโ€™s image processing suite.


For example, only four of these programs can truly serve as a layer-based editing program replacing Photoshop.

The others are better described as Adobe Lightroom competitors โ€“ย programs that can catalog image libraries and develop raw image files, with some offering adjustment layers for correcting color, contrast, etc. But as with Lightroom, layering of images โ€“ย to stack, composite, and mask them โ€“ is beyond their ability.

For processing time-lapse sequences, however, we donโ€™t need, nor can we use, the ability to layer and mask several images into one composite.

What we need for time-lapses is to:

  • Develop a single key raw file, then โ€ฆ
  • Copy its settings to the hundreds of other raw files in the time-lapse set, then โ€ฆ
  • Export that folder of raw images to โ€œintermediate JPGsโ€ for assembly into a movie.

Even so, not all these contenders are up to the task.

Here are the image processing programs I looked at. Costs are in U.S. dollars. Most have free trial copies available.


Photoshop+Bridge+Lightroom (small)

The Champion from Adobe

Adobe Camera Raw (ACR), Photoshop, Bridge, and Lightroom, the standards to measure others by

Cost: $10 a month by subscription, includes ACR, Photoshop, Bridge, and Lightroom

Website: https://www.adobe.com

OS: Windows and Mac

Adobe Camera Raw (ACR) is the raw development plug-in that comes with Photoshop and Adobe Bridge, Adobeโ€™s image browsing application that accompanies Photoshop. Camera Raw is equivalent to the Develop module in Lightroom, Adobeโ€™s cataloguing and raw processing software. Camera Raw and Lightroom have identical processing functions and can produce identical results.

Photoshop and Lightroom complement each other and are now available together, but only by monthly subscription through Adobeโ€™s Creative Cloud service, at $10/month. Though $120 for a year is not far off the cost of purchasing many of these other programs and perhaps upgrading them annually, many photographers prefer to purchase their software and not subscribe to it.

Thus the popularity of these alternative programs. Most offered major updates in late 2017.

My question is, how well do they work? Are any serious contenders to replace Photoshop or Lightroom?


Group of 5 Raw DevelopersLightroom Contenders: Five Raw Developers

ACDSee Photo Studio (current as of late 2017)

Cost: $60 to $100, depending on version, upgrades $40 to $60.

Website: http://www.acdsystems.com
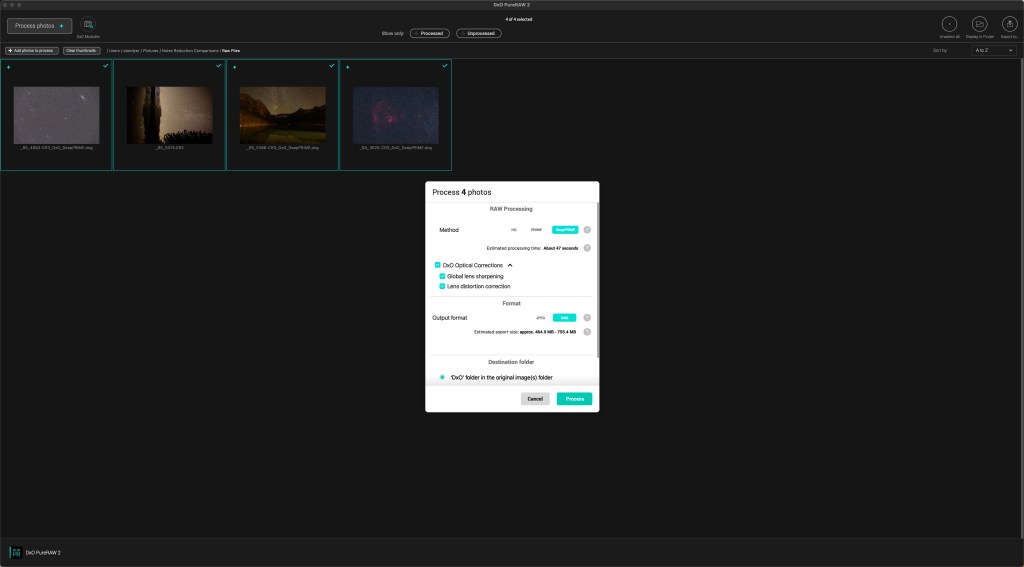
OS: Windows and Mac

I tested the single MacOS version. Windows users have a choice of either a Standard or Professional version. Only the Pro version offers the full suite of raw development features, in addition to cataloging functions. The MacOS version resembles the Windows Pro version.


Capture One v11 (late 2017 release)

Cost: $299, and $120 for major upgrades, or by subscription for $180/year

Website: https://www.phaseone.com
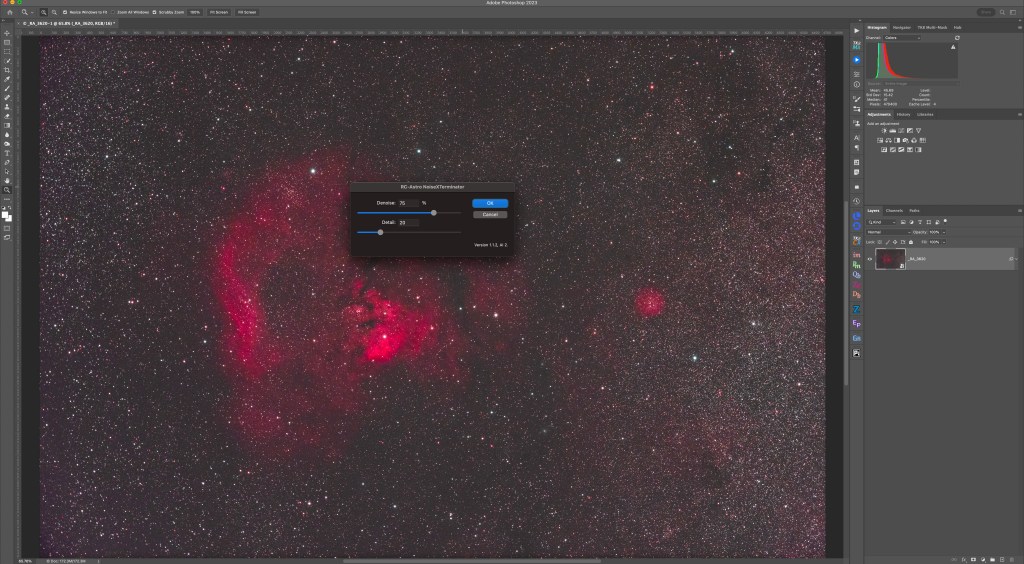
OS: Windows and Mac

As of version 11 this powerful raw developer and cataloguing program offers โ€œLayers.โ€ But these are only for applying local adjustments to masked areas of an image. You cannot layer different images. So Capture One cannot be used like Photoshop, to stack and composite images. It is a Lightroom replacement only, but a very good one indeed.
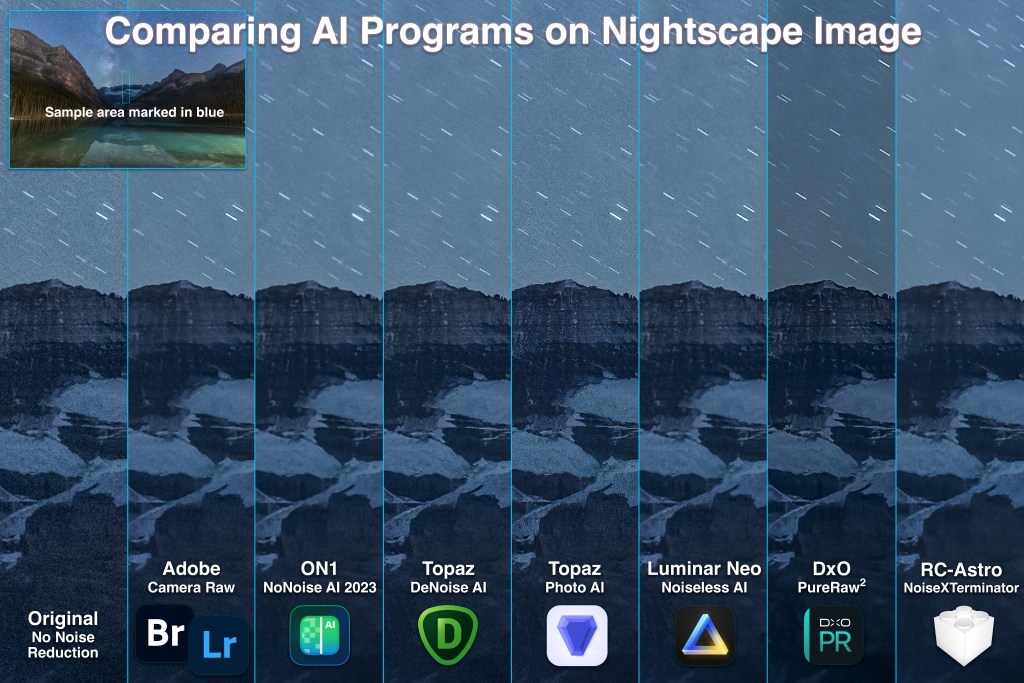

Corel Aftershot Pro v3 (late 2017)

Cost: $80, and $60 for upgrades

Website: http://www.aftershotpro.com/en/

OS: Windows, Mac, and Linux

Hereโ€™s a low cost Lightroom replacement for image management and raw processing abilities. Noise reduction is โ€œPerfectly Clearโ€ from Athentech and works well.


DxO PhotoLab ELITE v1 (late 2017)

Cost: $199

Website: http://www.dxo.com/us/photography/photo-software/dxo-photolab

OS: Windows and Mac

The ELITE version of what DxO now calls โ€œPhotoLabโ€ offers DxO’s superb PRIME noise reduction and excellent ClearView contrast enhancement feature. While it has an image browser, PhotoLab does not create a catalog, so this isnโ€™t a full Lightroom replacement, but it is a superb raw developer. DxO also recently acquired the excellent Nik Collection of image processing plug-ins, so we can expect some interesting additions and features.


Raw Therapee v5.3 (mid-2017 release)

Cost: Free

Website: http://rawtherapee.com

OS: Windows, Mac, and Linux

This free open source program has been created and is supported by a loyal community of programmers. It offers a bewildering blizzard of panels and controls, among them the ability to apply dark frames and flat field images, features unique among any raw developer and aimed specifically at astrophotographers. Yes, itโ€™s free, but the learning curve is precipitous.


Group of 4 Layer-Based EditorsPhotoshop Contenders: Four Raw Developers with Layering/Compositing
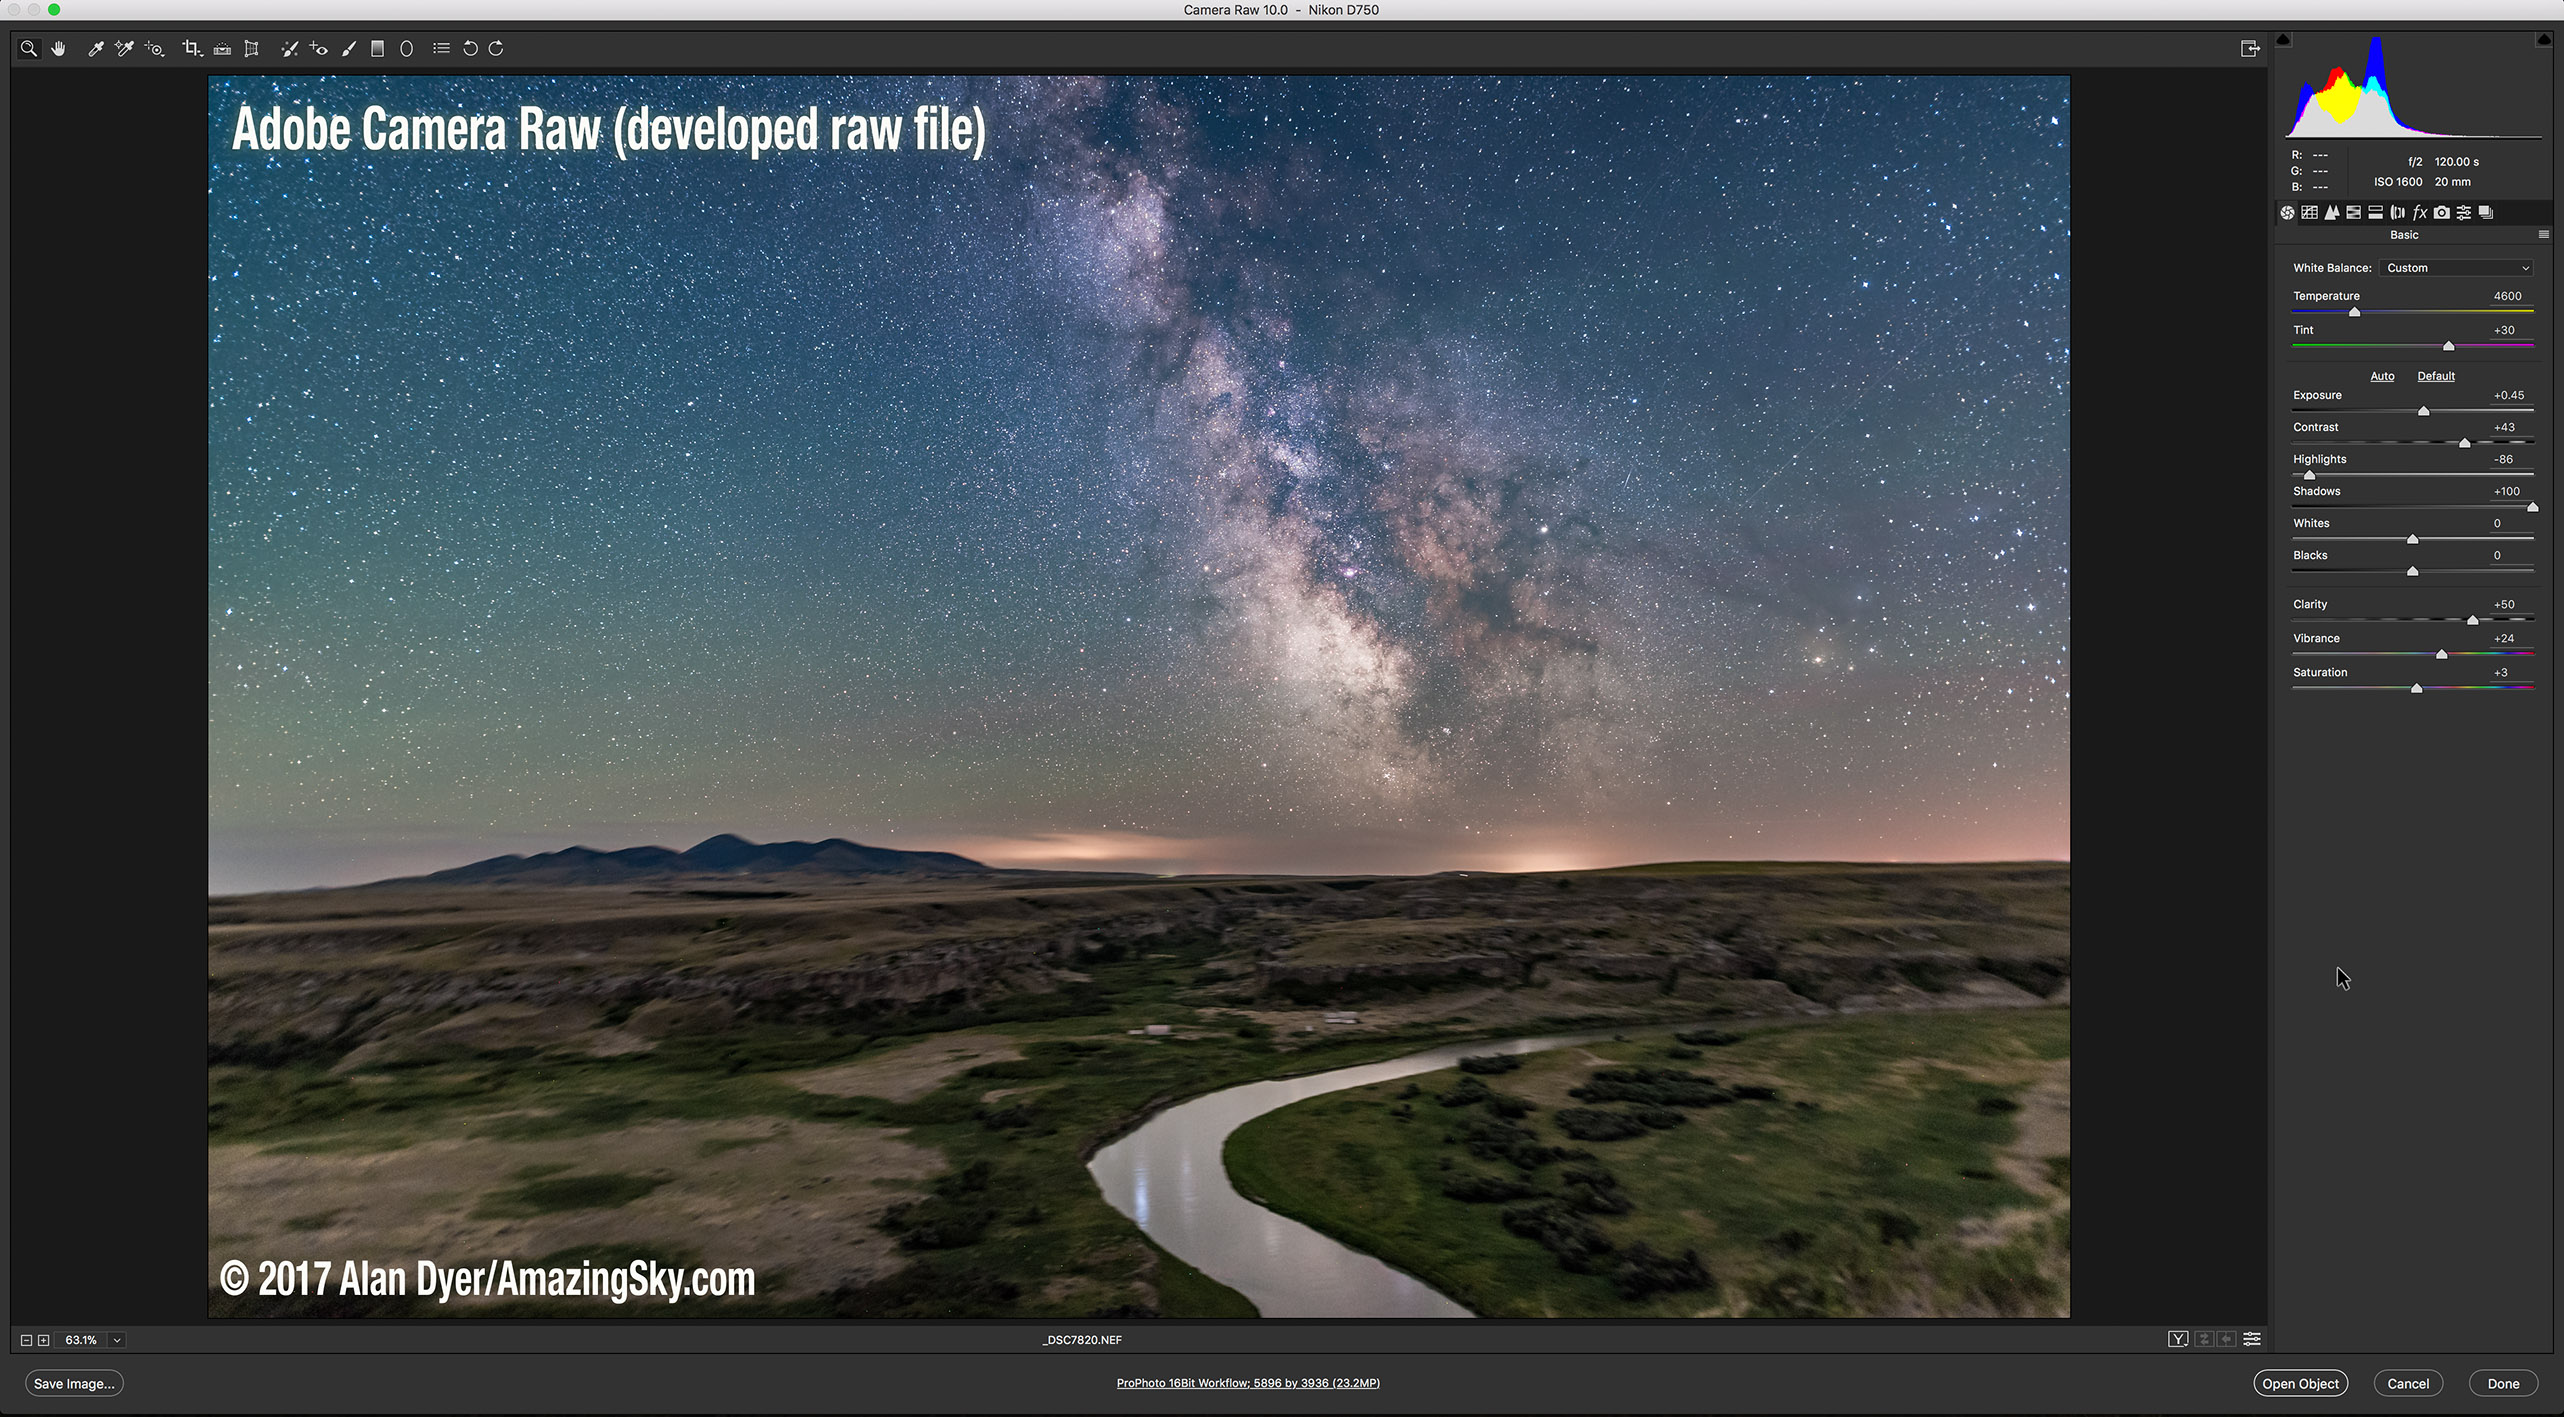
These programs can not only develop at least single raw images, if not many, but also offer some degree of image layering, compositing, and masking like Photoshop.

However, only ON1 Photo RAW can do that and also catalog/browse images as Lightroom can. Neither Affinity, Luminar, or Pixelmator offer a library catalog like Lightroom, nor even a file browsing function such as Adobe Bridge, serious deficiencies I feel.


Affinity Photo v1.6 (late 2017)

Cost: $50

Website: https://affinity.serif.com

OS: Windows and Mac

This is the lowest cost raw developer and layer-based program on offer here, and has some impressive features, such as stacking images, HDR blending, and panorama stitching. However, it lacks any library or cataloguing function, so this is not a Lightroom replacement, but it could replace Photoshop.


Luminar 2018

Cost: $80, and $40 for major upgrades

Website: https://macphun.com

OS: Windows and Mac

Macphun has changed their name to Skylum and now makes their fine Luminar program for both Mac and Windows. While adding special effects is its forte, Luminar does work well both as a raw developer and layer-based editor. But like Affinity, it has no cataloguing feature. It cannot replace Lightroom.


ON1 Photo RAW 2018

Cost: $120, and $100 for major upgrades

Website: https://www.on1.com

OS: Windows and Mac

Of all the contenders tested here, this is the only program that can truly replace both Lightroom and Photoshop, in that ON1 has cataloguing, raw developing, and image layering and masking abilities. In fact, ON1 allows you to migrate your Lightroom catalog into its format. However, ON1โ€™s cost to buy and maintain is similar to Adobeโ€™s Creative Cloud Photo subscription plan. Itโ€™s just that ON1โ€™s license is โ€œperpetual.โ€

NOTE: Windows users might find Corel’s Paintshop Pro 2018 a good “do-it-all” solution โ€“ I tested only Corel’s raw developer program Aftershot Pro, which Paintshop Pro uses.


Pixelmator Pro v1 (late 2017 release)

Cost: $60

Website: http://www.pixelmator.com/pro/

OS: MacOS only

The โ€œProโ€ version of Pixelmator was introduced in November 2017. It has an innovative interface and many fine features, and it allows layering and masking of multiple images. However, it lacks some of the key functions (listed below) needed for nightscape and time-lapse work. Touted as a Photoshop replacement, it isnโ€™t there yet.


The Challenge

This is the image I threw at all the programs, a 2-minute exposure of the Milky Way taken at Writing-on-Stone Provincial Park in southern Alberta in late July 2017.

NOTE: Click/tap on any of the screen shots to bring them up full screen so you can inspect and save them.ย 

2-ACR Original Undeveloped
Original Raw Image Out of the Camera, BEFORE Development

The lens was the Sigma 20mm Art lens at f/2 and the camera the Nikon D750 at ISO 1600.

The camera was on a tracking unit (aย Sky-Watcher Star Adventurer Mini) toย keep stars pinpoints.

Thus the ground is blurred. Keep that in mind, as it will always look fuzzy in the comparison images. But it does show up noise well, including hot pixels. This image of the sky is designed to be composited with one taken without the tracker turning, to keep the ground sharp.

3-ACR Developed (Wide)
Raw Image AFTER Development in Adobe Camera Raw

Above is the image after development in Adobe Camera Raw (ACR), using sliders under its Basic, Tone Curve, Detail, HSL, Lens Corrections, and Effects tabs. Plus I added a โ€œlocal adjustmentโ€ gradient to darken the sky at the top of the frame. I judged programs on how well they could match or beat this result.

4-Adobe Lightroom
Same Image Developed in Adobe Lightroom

Above is the same image developed in Adobe Lightroom, to demonstrate how it can achieve identical results to Camera Raw, because at heart it is Camera Raw.


Feature Focus

I have assumed a workflow that starts with raw image files from the camera, not JPGs, for high-quality results.

And I have assumed the goal of making that raw image look as good as possible at the raw stage, before it goes to Photoshop or some other bit-mapped editor. Thatโ€™s an essential workflow for time-lapse shooting, if not still-image nightscapes.

However, I made no attempt to evaluate all these programs for a wide range of photo applications. That would be a monumental task!

Nor, in the few programs capable of the task, did I test image layering. My focus was on developing a raw image. As such, I did not test the popular free program GIMP, as it does not open raw files. GIMP users must turn to one of the raw developers here as a first stage.

If you are curious how a program might perform for your purposes and on your photos, then why not test drive a trial copy?

Instead, my focus was on these programsโ€™ abilities to produce great looking results when processing one type of image: my typical Milky Way nightscape, below.

TIFF from DxO into Photoshop
TIFF Exported from DxO PhotoLab … then Imported into Photoshop

Such an image is a challenge becauseโ€ฆ

  • The subject is inherently low in contrast, with the sky often much brighter than the ground. The sky needs much more contrast applied, but without blocking up the shadows in the ground.
  • The sky is often plagued by off-color tints from artificial and natural sky glows.
  • The ground is dark, perhaps lit only by starlight. Bringing out landscape details requires excellent shadow recovery.
  • Key to success is superb noise reduction. Images are shot at high ISOs and are rife with noise in the shadows. We need to reduce noise without losing stars or sharpness in the landscape.

I focused on being able to make one image look as good as possible as a raw file, before bringing it into Photoshop or a layer-based editor โ€“ย though thatโ€™s where it will usually end up, for stacking and compositing, as per the final result shown at the end.

I then looked at each programโ€™s ability to transfer that one key imageโ€™s settings over to what could be hundreds of other images taken that night, either for stacking into star trails or for assembling into a time-lapse movie.


Summary Conclusions

1-Comparing Raw Developers (Wide)
Results of 8 Programs compared to ACR (at left)

None of the programs I tested ticked all the boxes in providing all the functions and image quality of the Adobe products.

But hereโ€™s a summary of my recommendations:


For Advanced Time-Lapse

Photoshop+Bridge+Lightroom+LRT

None of the non-Adobe programs will work with the third-party software LRTimelapse (www.lrtimelapse.com). It is an essential tool for advanced time-lapse processing. LRTimelapse works with Lightroom or ACR/Bridge to gradually shift processing settings over a sequence, and smooth annoying image flickering.

If serious and professional time-lapse shooting is your goal, none of the Adobe contenders will work. Period. Subscribe to Creative Cloud. And buy LRTimelapse.


For Basic Time-Lapse

Group of 5 for Time-Lapse

However, for less-demanding time-lapse shooting, when the same settings can be applied to all the images in a sequence, then I feel the best non-Adobe choices are, in alphabetical order:

  • ACDSee
  • Capture One
  • Corel Aftershot Pro
  • DxO PhotoLab
  • ON1 Photo RAW

โ€ฆ With, in my opinion, DxO and Capture One having the edge for image quality and features. But all five have a Library or Browser mode with easy-to-use Copy & Paste and Batch Export functions needed for time-lapse preparation.

Also worth a try is PhotoDirector9 (MacOS and Windows), a good Lightroom replacement. Scroll to the end for more details and a link.


For Still Image Nightscapes

Group of 3 for Still Images

If you are processing just individual still images, perhaps needing only to stack or composite a few exposures, and want to do all the raw development and subsequent layering of images within one non-Adobe program, then look at (again alphabetically):

  • Affinity Photo
  • Luminar 2018
  • ON1 Photo RAW 2018

โ€ฆ With Affinity Photo having the edge in offering a readily-available function off its File menu for stacking images, either for noise smoothing (Mean) or creating star trails (Maximum).

However, I found its raw development module did not produce as good a result as most competitors due to Affinityโ€™s poorer noise reduction and less effective shadow and highlight controls. Using Affinityโ€™s โ€œDevelop Personaโ€ module, I could not make my test image look as good as with other programs.

Luminar 2018 has better noise reduction but it demands more manual work to stack and blend images.

While ON1 Photo Raw has some fine features and good masking tools, it exhibits odd de-Bayering artifacts, giving images a cross-hatched appearance at the pixel-peeping level. Sky backgrounds just arenโ€™t smooth, even after noise reduction.

To go into more detail, these are the key factors I used to compare programs.


Noise Reduction

Absolutely essential is effective noise reduction, of luminance noise and chrominance color speckles and splotches.

Ideally, programs should also have a function for suppressing bright โ€œhotโ€ pixels and dark โ€œdeadโ€ pixels.

Hereโ€™s what I consider to be the โ€œgold standardโ€ for noise reduction, Adobe Camera Rawโ€™s result using the latest processing engine in ACR v10/Photoshop CC 2018.

5A-ACR (Close-Up)
BEFORE and AFTER Noise Reduction with Adobe Camera Raw (ACR)

I judged other programs on their ability to produce results as good as this, if not better, using their noise reduction sliders. Some programs did better than others in providing smooth, noiseless skies and ground, while retaining detail.

5B-DxO Noise Reduction
BEFORE and AFTER Noise Reduction and Other Adjustments with DxO PhotoLab

For example, one of the best was DxO PhotoLab, above. It has excellent options for reducing noise without being overwhelming in its choices, the case with a couple of other programs. For example, DxO has a mostly effective dead/hot pixel removal slider.

ACR does apply such a hot pixel removal โ€œunder the hoodโ€ as a default, but often still leaves many glaring hot specks that must be fixed later in Photoshop.

Comparing Noise Reduction

6-Comparing Raw Developers (CU)
300% Close-Ups to Compare Noise Reduction

Above are 8 of the contender programs compared to Camera Raw for noise reduction.

Missing from this group is the brand new Pixelmator Pro, for MacOS only. It does not yet have any noise reduction in its v1 release, a serious deficiency in imaging software marketed as โ€œPro.โ€ For that reason alone, I cannot recommend it. I describe its other deficiencies below.


Lens Corrections

The wide-angle lenses we typically use in nightscape and time-lapse imaging suffer from vignetting and lens distortions. Having software that can automatically detect the lens used and apply bespoke corrections is wonderful.

8B-Capture One Lens Correction
Lens Corrections in Capture One

Only a few programs, such as Capture One (above), have a library of camera and lens data to draw upon to apply accurate corrections with one click. With others you have to dial in corrections manually by eye, which is crude and inaccurate.


Shadows and Highlights

All programs have exposure and contrast adjustments, but the key to making a Milky Way nightscape look good is being able to boost the shadows (the dark ground) while preventing the sky from becoming overly bright, yet while still applying good contrast to the sky.

7-DxO Shadows and Highlights
Shadows and Highlight and other Enhancements in DxO PhotoLab

Of the contenders, I liked DxO PhotoLab best (shown above), not only for its good shadow and highlight recovery, but also excellent โ€œSmart Lightingโ€ and โ€œClearViewโ€ functions which served as effective clarity and dehaze controls to snap up the otherwise low-contrast sky. With most other programs it was tough to boost the shadows without also flattening the contrast.

On the other hand, Capture Oneโ€™s excellent layering and local adjustments did make it easier to brush in adjustments just to the sky or ground.

However, any local adjustments like those will be feasible only for still images or time-lapses where the camera does not move. In any motion control sequences the horizon will be shifting from frame to frame, making precise masking impractical over a sequence of hundreds of images.

Therefore, I didnโ€™t place too much weight on the presence of good local adjustments. But they are nice to have. Capture One, DxO PhotoLab, and ON1 win here.


Selective Color Adjustments

All programs allow tweaking the white balance and overall tint.

But itโ€™s beneficial to also adjust individual colors selectively, to enhance red nebulas, enhance or suppress green airglow, bring out green grass, or suppress yellow or orange light pollution.

Some programs have an HSL panel (Hue, Saturation, Lightness) or an equalizer-style control for boosting or dialing back specific colors.

8A-Capture One Color Adjustments
Color Adjustments in Capture One

Capture One (above) has the most control over color correction, with an impressive array of color wheels and sliders that can be set to tweak a broad or narrow range of colors.

And yet, despite this, I was still unable to make my test image look quite the way I wanted for color balance. ACR and DxO PhotoLab still won out for the best looking final result.


Copy and Paste Settings

Even when shooting nightscape stills we often take several images to stack later. Itโ€™s desirable to be able to process just one image, then copy and paste its settings to all the others in one fell swoop. And then to be able to inspect those images in thumbnails to be sure they all look good.

Some programs (Affinity Photo, Luminar, Pixelmator Pro) lack any library function for viewing or browsing a folder of thumbnail images. Yes, you can export a bunch of images with your settings applied as a user preset, but thatโ€™s not nearly as good as actually seeing those images displayed in a Browser mode.

9A-ON1 Photo RAW Copy & Paste
Copy and Paste Settings in ON1 Photo RAW

Whatโ€™s ideal is a function such as ON1 Photo RAW displays here, and that some other programs have: the ability to inspect a folder of images, work on one, then copy and paste its settings to all the others in the set.

This is absolutely essential for time-lapse work, and nice to have even when working on a small set to be stacked into a still image.


Batch Export

Once you develop a folder of raw images with โ€œCopy and Paste,โ€ you now have to export them with all those settings โ€œbaked intoโ€ the exported files.

This step is to create an intermediate set of JPGs to assemble into a movie. Or perhaps to stack into a star trail composite using third party software such as StarStaX, or to work on the images in another layer-based program of your choice.

9B-ON1 Photo RAW Batch Export
Batch Export in ON1 Photo RAW

As ON1 Photo RAW shows above, this is best done using a Library or Browser mode to visually select the images, then call up an Export panel or menu to choose the image size, format, quality, and location for the exports.

Click Export and go for coffee โ€“ or a leisurely dinner โ€“ while the program works through your folder. All programs took an hour or more to export hundreds of images.


Design

Those functions were the key features I looked for when evaluating the programs for nightscape and time-lapse work.

Every program had other attractive features, often ones I wished were in Adobe Camera Raw. But if the program lacked any of the above features, I judged it unsuitable.

Yes, the new contenders to the Photoshop crown have the benefit of starting from a blank slate for interface design.

26-Luminar Interface
Luminar 2018’s Clean User Interface

Many, such as Luminar 2018 above, have a clean, attractive design, with less reliance on menus than Photoshop.

Photoshop has grown haphazardly over 25 years, resulting in complex menus. Just finding key functions can take many tutorial courses!

But Adobe dares to โ€œimproveโ€ Photoshop’s design and menu structure at its peril, as Photoshop fans would scream if any menus they know and love were to be reorganized!

The new mobile-oriented Lightroom CC is Adobeโ€™s chance to start afresh with a new interface.


Summary Table of Key Features

Comparison Table
Click or tap to view and save full screen version.

Fair = Feature is present but doesnโ€™t work as easily or produce as good a result

Partial = Program has lens correction but failed to fully apply settings automatically / DxO has a Browse function but not Cataloging

Manual = Program has only a manually-applied lens correction

โ€“ = Program is missing that feature altogether


Program-by-Program Results

Group of 9 (small)

I could end the review here, but I feel itโ€™s important to present the evidence, in the form of screen shots of all the programs, showing both the whole image, and a close-up to show the all-important noise reduction.


ACDSee Photo Studio

10A-ACDSee (Wide)
ACDSee Full Screen

10B-ACDSee (CU)
ACDSee Enlargement

PROS: This capable cataloging program has good selective color and highlight/shadow recovery, and pretty smooth noise reduction. It can copy and paste settings and batch export images, for time-lapses. It is certainly affordable, making it a low-cost Lightroom contender.

CONS: It lacks any gradient or local adjustments, or even spot removal brushes. Lens corrections are just manual. There is no dehaze control, which can be useful for snapping up even clear night skies. You cannot layer images to create composites or image stacks. This is not a Photoshop replacement.


Affinity Photo

11A-Affinity Photo (Wide)
Affinity Photo Full Screen

11B-Affinity Photo (CU)
Affinity Photo Enlargement

PROS: Affinity supports image layers, masking with precise selection tools, non-destructive โ€œliveโ€ filters (like Photoshopโ€™s Smart Filters), and many other Photoshop-like functions. It has a command for image stacking with a choice of stack modes for averaging and adding images.

Itโ€™s a very powerful but low cost alternative to Photoshop, but not Lightroom. It works fine when restricted to working on just a handful of images.

CONS: Affinity has no lens correction database, and I found it hard to snap up contrast in the sky and ground without washing them out, or having them block up. Raw noise reduction was acceptable but not up to the best for smoothness. It produced a blocky appearance. There are no selective color adjustments.

Nor is there any library or browse function. You can batch export images, but only through an unfriendly dialog box that lists images only by file name โ€“ you cannot see them. Nor can you copy and paste settings visually, but only apply a user-defined โ€œmacroโ€ to develop images en masse upon export.

This is not a program for time-lapse work.


Capture One 11

13A-Capture One Pro (Wide)
Capture One 11 Full Screen

13B-Capture One Pro (CU)
Capture One 11 Enlargement

PROS: With version 11 Capture One became one of the most powerful raw developers, using multiple layers to allow brushing in local adjustments, a far better method than Adobe Camera Rawโ€™s local adjustment โ€œpins.โ€ It can create a catalog from imported images, or images can be opened directly for quick editing. Its noise reduction was good, with hot pixel removal lacking in Camera Raw.

Its color correction options were many!

It can batch export images. And it can export files in the raw DNG format, though in tests only Adobe Camera Raw was able to read the DNG file with settings more or less intact.

CONS: Itโ€™s costly to purchase, and more expensive than Creative Cloud to subscribe to. Despite all its options I could never quite get as good looking an image using Capture One, compared to DxO PhotoLab for example.

It is just a Lightroom replacement; it canโ€™t layer images.


Corel Aftershot Pro 3

12A-Aftershot Pro (Wide)
Corel Aftershot Pro Full Screen

12B-Aftershot Pro (CU)
Corel Aftershot Pro Enlargement

PROS: This low-cost option has good noise reduction using Athentechโ€™s Perfectly Clear process, with good hot pixel or โ€œimpulseโ€ noise removal. It has good selective color and offers adjustment layers for brushing in local corrections. And its library mode can be used to copy and paste settings and batch export images.

Again, itโ€™s solely a Lightroom alternative.

CONS: While it has a database of lenses, and identified my lens, it failed to apply any automatic corrections. Its shadow and highlight recovery never produced a satisfactory image with good contrast. Its local adjustment brush is very basic, with no edge detection.


DxO PhotoLab

14A-DxO PhotoLab (Wide)
DxO PhotoLab Full Screen

14B-DxO PhotoLab (CU)
DxO PhotoLab Enlargement

PROS: I found DxO produced the best looking image, better perhaps than Camera Raw, because of its DxO ClearView and Smart Lighting options. It has downloadable camera and lens modules for automatic lens corrections. Its noise reduction was excellent, with its PRIME option producing by far the best results of all the programs, better perhaps than Camera Raw, plus with hot pixel suppression.

DxO has good selective color adjustments, and its copy and paste and batch export work fine.

CONS: There are no adjustment layers as such. Local adjustments and repairing are done through the unique U-Point interface which works something like ACRโ€™s โ€œpins,โ€ but isnโ€™t as visually intuitive as masks and layers. Plus, DxO is just a raw developer; there is no image layering or compositing. Nor does it create a catalog as such.

So it is not a full replacement for either Lightroom or Photoshop. But it does produce great looking raw files for export (even as raw DNGs) to other programs.


Luminar 2018

15A-Luminar 2018 (Wide)
Luminar 2018 Full Screen

15B-Luminar 2018 (CU)
Luminar 2018 Enlargement

PROS: Luminar has good selective color adjustments, a dehaze control, and good contrast adjustments for highlights, mid-tones, and shadows. Adjustments can be added in layers, making them easier to edit. Noise reduction was smooth and artifact-free, but adjustments were basic. Many filters can be painted on locally with a brush, or with a radial or gradient mask.

CONS: It has no lens correction database; all adjustments are manual. The preview was slow to refresh and display results when adjusting filters. The interface is clean but always requires adding filters to the filter panel to use them when creating new layers. Its batch export is crude, with only a dialog box and no visual browser to inspect or select images.

Settings are applied as a user preset on export, not through a visual copy-and-paste function. I donโ€™t consider that method practical for time-lapses.


ON1 Photo RAW 2018

16A-ON1 Photo Raw (Wide)
ON1 Photo RAW Full Screen

16B-ON1 Photo Raw (CU)
ON1 Photo RAW Enlargement

PROS: ON1 is the only program of the bunch that can: catalog images, develop raw files, and then layer and stack images, performing all that Lightroom and Photoshop can do. It is fast to render previews in its โ€œFastโ€ mode, but in its โ€œAccurateโ€ mode ON1 is no faster than Lightroom. It has good layering and masking functions, both in its Develop mode and in its Photoshop-like Layers mode.

Selective color and contrast adjustments were good, as was noise reduction. Developing, then exporting a time-lapse set worked very well, but still took as long as with Lightroom or Photoshop.

CONS: Despite promising automatic lens detection and correction, ON1 failed to apply any vignetting correction for my 20mm Sigma lens. Stars exhibited dark haloes, even with no sharpening, dehaze, or noise reduction applied. Its de-Bayering algorithm produced a cross-hatched pattern at the pixel level, an effect not seen on other programs.

Noise reduction did not smooth this. Thus, image quality simply wasnโ€™t as good.


Pixelmator Pro

17A-Pixelmator Pro (Wide)
Pixelmator Pro Full Screen

17B-Pixelmator Pro (CU)
Pixelmator Pro Enlargement

PROS: It is low cost. And it has an attractive interface.

CONS: As of version 1 released in November 2017 Pixelmator Pro lacks: any noise reduction (itโ€™s on their list to add!), any library mode or copy and paste function, nor even the ability to open several images at once displayed together.

It is simply not a contender for โ€œPhotoshop killerโ€ for any photo application, despite what click-bait โ€œreviewsโ€ promise, ones that only re-write press releases and donโ€™t actually test the product.


Raw Therapee v5.3

18A-Raw Therapee (Wide)
Raw Therapee Full Screen

18B-Raw Therapee (CU)
Raw Therapee Enlargement โ€“ With and Without Noise Reduction

PROS: Itโ€™s free! It offers an immense number of controls and sliders. You can even change the debayering method. It detects and applies lens corrections (though in my case only distortion, not vignetting). It has good selective color with equalizer-style sliders. It has acceptable (sort of!) noise reduction and sharpening with a choice of methods, and with hot and dead pixel removal.

It can load and apply dark frames and flat fields, the only raw developer software that can. This is immensely useful for deep-sky photography.

CONS: It offers an immense number of controls and sliders! Too many! It is open source software by committee, with no one in charge of design or user friendliness. Yes, there is documentation, but it, too, is a lot to wade through to understand, especially with its broken English translations. This is software for digital signal processing geeks.

But worst of all, as shown above, its noise reduction left lots of noisy patches in shadows, no matter what combination of settings I applied. Despite all its hundreds of sliders, results just didnโ€™t look as good.


What About โ€ฆ? (updated December 28)

What About Group of 8

No matter how many programs I found to test, someone always asks, “What about …?” In some cases such comments pointed me to programs I wasn’t even aware of, but subsequently tried out. So here are even more to pick from…


Acorn (https://flyingmeat.com/acorn/)

Acorn
Acorn’s very basic raw adjustment module.

Billed as having โ€œeverything you need in an image editor,โ€ this low-cost ($30) MacOS-only program is anything but. Its raw developer module is crude and lacks any of the sophisticated range of adjustments offered by all the other programs on offer here. It might be useful as a layer-based editor of images developed by another program.


Alien Skin Exposure x3 (https://www.alienskin.com)

Alien Skin (Wide)
Alien Skin Exposure x3 at work on the the image

Available for Mac and Windows for $150, this Lightroom competitor offers a good browser function, with the ability to โ€œcopy-from-one and paste-to-manyโ€ images (unlike some of the programs below), and a good batch export function for time-lapse work. It has good selective color controls and very good noise reduction providing a smooth background without artifacts like blockiness or haloes. Local adjustments, either through brushed-on adjustments or through gradients, are applied via handy and easy to understand (I think!) layers.

While it has auto lens corrections, its database seemed limited โ€” it did not have my Sigma 20mm lens despite it being on the market for 18 months. Manual vignetting correction produced a poor result with just a washed out look.

The main issue was that its shadow, highlight, and clarity adjustments just did not produce the snap and contrast I was looking for, but that other programs could add to raw files. Still, it looks promising, and is worth a try with the trial copy. You might find you like it. I did not. For similar cost, other programs did a better job, notably DxO PhotoLab.


darktable (http://www.darktable.org)

In the same ilk as Raw Therapee, I also tested out another free, open-source raw developer, one simply called โ€œdarktable,โ€ with v2.2.5 shown below. While it has some nice functions and produced a decent result, it took a lot of time and work to use.

19A-Darktable
darktable RAW Developer

The MacOS version I tried (on a brand new 5K iMac) ran so sluggishly, taking so long to re-render screen previews, that I judged it impractical to use. Sliders were slow to move and when I made any adjustments often many seconds would pass before I would see the result. Pretty frustrating, even for free.


Iridient Developerย (http://www.iridientdigital.com)

19B-Iridient Developer
Iridient Developer

A similar crowd-developed raw processing program, Iridient Developer (above), sells for $99 US. I tested a trial copy of v3.2. While it worked OK, I was never able to produce a great looking image with it. It had no redeeming features over the competition that made its price worthwhile.


Paintshop Pro (https://www.paintshoppro.com/en/)

PaintShop Raw Developer
Paintshop Pro’s included but very basic Raw developer.

Using Parallels running Windows 10 on my Mac, I did try out this popular Windows-only program from Corel. By itself, Paintshop Proโ€™s raw developer module (shown above) is basic, crude and hardly up to the tax of processing demanding raw files. You are prompted to purchase Corelโ€™s Aftershot Pro for more capable raw development, and I would agree โ€“ Aftershot would be an essential addition. However …

As I showed above, I did test the MacOS version of Aftershot Pro on my raw sample image, and found it did the poorest job of making my raw test image look good. Keep in mind that it is the ability of all these programs to develop this typical raw nightscape image that I am primarily testing.

That said, given a well-developed raw file, Paintshop Pro can do much more with it, such as further layering of images and applying non-destructive and masked adjustment layers, as per Photoshop. Indeed, it is sold as a low-cost (~ $60) Photoshop replacement. As such, many Windows users find Paintshopโ€™s features very attractive. However, Paintshop lacks the non-destructive โ€œsmartโ€ filters, and the more advanced selection and masking options offered by Photoshop, Affinity Photo, and ON1 Photo Raw. If you have never used these, you likely donโ€™t realize what you are missing.

If itโ€™s an Adobe alternative you are after, I would suggest Windows users would be better served by other options. Why not test drive Affinity and ON1?


PhotoDirector 9 (https://www.cyberlink.com/products/photodirector-ultra/features_en_US.html)ย 

Photo Director Wide
PhotoDirector’s very Lightroom-like interface and controls.

This was a surprising find. Little known, certainly to me, this Windows and MacOS program from the Taiwanese company Cyberlink, is best described as a Lightroom substitute, but itโ€™s a good one. Its regular list price is $170. I bought it on sale for $60.

Like Lightroom, working on any images with PhotoDirector requires importing them into a catalog. You cannot just browse to the images. Fine. But one thing some people complain about with Lightroom is the need to always import images.

I was impressed with how good a job PhotoDirector did on my raw test image. PhotoDirector has excellent controls for shadow and highlight recovery, HSL selective color, copying-and-pasting settings, and batch exporting. So it will work well for basic time-lapse processing.

Noise reduction was very good and artifact-free. While it does have automatic lens corrections, its database did not include the 2-year old Sigma 20mm Art lens I used. So it appears its lens data is not updated frequently.

PhotoDirector has good local adjustments and gradients using โ€œpinsโ€ rather than layers, similar to Camera Raw and Lightroom.

After performing raw image โ€œAdjustments,โ€ you can take an image into an Edit module (for adding special effects), then into a Layers module for further work. However, doing so destructively โ€œflattensโ€ the image to apply the raw adjustments you made. You cannot go back and tweak the raw settings in the Adjustment module, as you can when opening a raw file as a โ€œsmart objectโ€ in Adobe Photoshop.

While PhotoDirector does allow you to layer in other images to make basic composites (such as adding type or logos), there is no masking function nor any non-destructive adjustment layers. So this is most assuredlyย not a Photoshop substitute, despite what the advertising might suggest. But if itโ€™s a Lightroom replacement you are after, do check it out in a trial copy.


Picktorial v3 (https://www.picktorial.com)

Picktorial
MacOS-only Picktorial v3, with its clean interface

This little-known MacOS-only program (only $40 on sale) for developing raw images looks very attractive, with good selective color, lots of local adjustments, and good masking tools, the features promoted on the website. It does have a browse function and can batch export a set of developed files.

However โ€ฆ its noise reduction was poor, introducing glowing haloes around stars when turned up to any useful level. Its shadows, highlights, and contrast adjustments were also poor โ€“ย it was tough to make the test image look good without flattening contrast or blocking up shadows. Boosting clarity even a little added awful dark haloes to stars, making this a useless function. It has no lens correction, either automatic or manual. Like Topaz Studio, below, it cannot copy and paste settings to a batch of images, only to one image at a time, so it isn’t useful for time-lapse processing.

I cannot recommend this program, no matter how affordable it might be.


Silky Pix Developer Studio 8 (http://www.silkypix.us)ย 

Silky Pix Wide

Popular among some camera manufacturers as their included raw developer, Silky Pix can be purchased separately ($80 list price for the standard version, $250 list price for the Pro version) with support for many camerasโ€™ image files. It is available for MacOS and Windows. I tried the lower-cost โ€œnon-Proโ€ version 8. It did produce a good-looking end result, with good shadow and highlight recovery, and excellent color controls. Also on the plus side, Silky Pix has very good copy-and-paste functions for development settings, and good batch export functions, so it can be used to work on a folder of time-lapse frames.

On the down side, noise reduction, while acceptable, left an odd mottled pattern, hardly โ€œsilky.โ€ The added โ€œNeatโ€ noise reduction option only smoothed out detail and was of little value except perhaps for very noisy images. Noise reduction did nothing to remove hot pixels, leaving lots of colored specks across the image. The program uses unorthodox controls whose purposes are not obvious. Instead ofย  Highlights and Shadows you get Exposure Bias and HDR. Instead of Luminance and Color noise reduction, you get sliders labeled Smoothness and Color Distortion. You really need to read the extensive documentation to learn how to use this program.

I found sliders could be sticky and not easy to adjust precisely. The MacOS version was slow, often presenting long bouts of spinning beachballs while it performed some function. This is a program worth a try, and you might find you like it. But considering what the competition offers, I would not recommend it.


Topaz Studio (http://www.topazlabs.com)

Topaz Studio (Wide)
Topaz Studio at work on the test image

While Topaz Labs previously offered only plug-ins for Photoshop and other programs (their Topaz DeNoise 6 is very good), their Topaz Studio stand-alone program now offers full raw processing abilities.

It is for Mac and Windows. While it did a decent job developing my test Milky Way image (above), with good color and contrast adjustments, it cannot copy and paste settings from one image to a folder of images, only to one other image. Nor can it batch export a folder of images. Both deficiencies make it useless for time-lapse work.

In addition, while the base program is free, adding the โ€œPro Adjustmentsโ€ modules I needed to process my test image (Noise Reduction, Dehaze, Precision Contrast, etc.) would cost $160 โ€“ each Adjustment is bought separately. Some users might like it, but I wouldnโ€™t recommend it.


And … Adobe Photoshop Elements v18 (late 2017 release)

What about Adobeโ€™s own Photoshop โ€œLite?โ€ Elements is available for $99 as a boxed or downloadable one-time purchase, but with annual updates costing about $50. While it offers image and adjustment layers, it cannot do much with 16-bit images, and has very limited functions for developing raw files.

And its Lightroom-like Organizer module doesย not have any copy-and-paste settings or batch export functions, making it unsuitable for time-lapse production.

19C-Photoshop Elements
Photoshop Elements v18 โ€“ Showing its Version of Camera Raw Lite

Elements is for processing photos for the snapshot family album. Like Appleโ€™s Photos and other free photo apps, I donโ€™t consider Elements to be a serious option for nightscape and time-lapse work. But it can be pressed into service for raw editing and layering single images, especially by beginners.

However, a Creative Cloud Photo subscription doesnโ€™t cost much more than buying, then upgrading Elements outright, yet gets you far, far more in professional-level software.


And Yet Moreโ€ฆ!

In addition, for just developing raw files, you likely already have software to do the job โ€“ the program that came with your camera.

20-Canon DPP
Canon Digital Photo Professional v4

For Canon itโ€™s Digital Photo Professional (shown above); for Nikon itโ€™s Capture NX; for Pentax itโ€™s Digital Camera Utility, etc.

These are all capable raw developers, but have no layering capabilities. And they read only the files from their camera brand. If theirs is the only software you have, try it. They are great for learning on.

But youโ€™ll find that the programs from other companies offer more features and better image quality.


What Would I Buy?

Except for Capture One, which I tested as a trial copy, I did buy all the software in question, for testing for my Nightscapes eBook.

However, as Iโ€™ve described, none of the programs tick all the boxes. Each has strengths, but also weaknesses, if not outright deficiencies. I donโ€™t feel any can fully replace Adobe products for features and image quality.

DxO to Affinity

A possible non-Adobe combination for the best image quality might be DxO PhotoLab for raw developing and basic time-lapse processing, and Affinity Photo for stacking and compositing still images, from finished TIFF files exported out of DxO and opened and layered with Affinity.
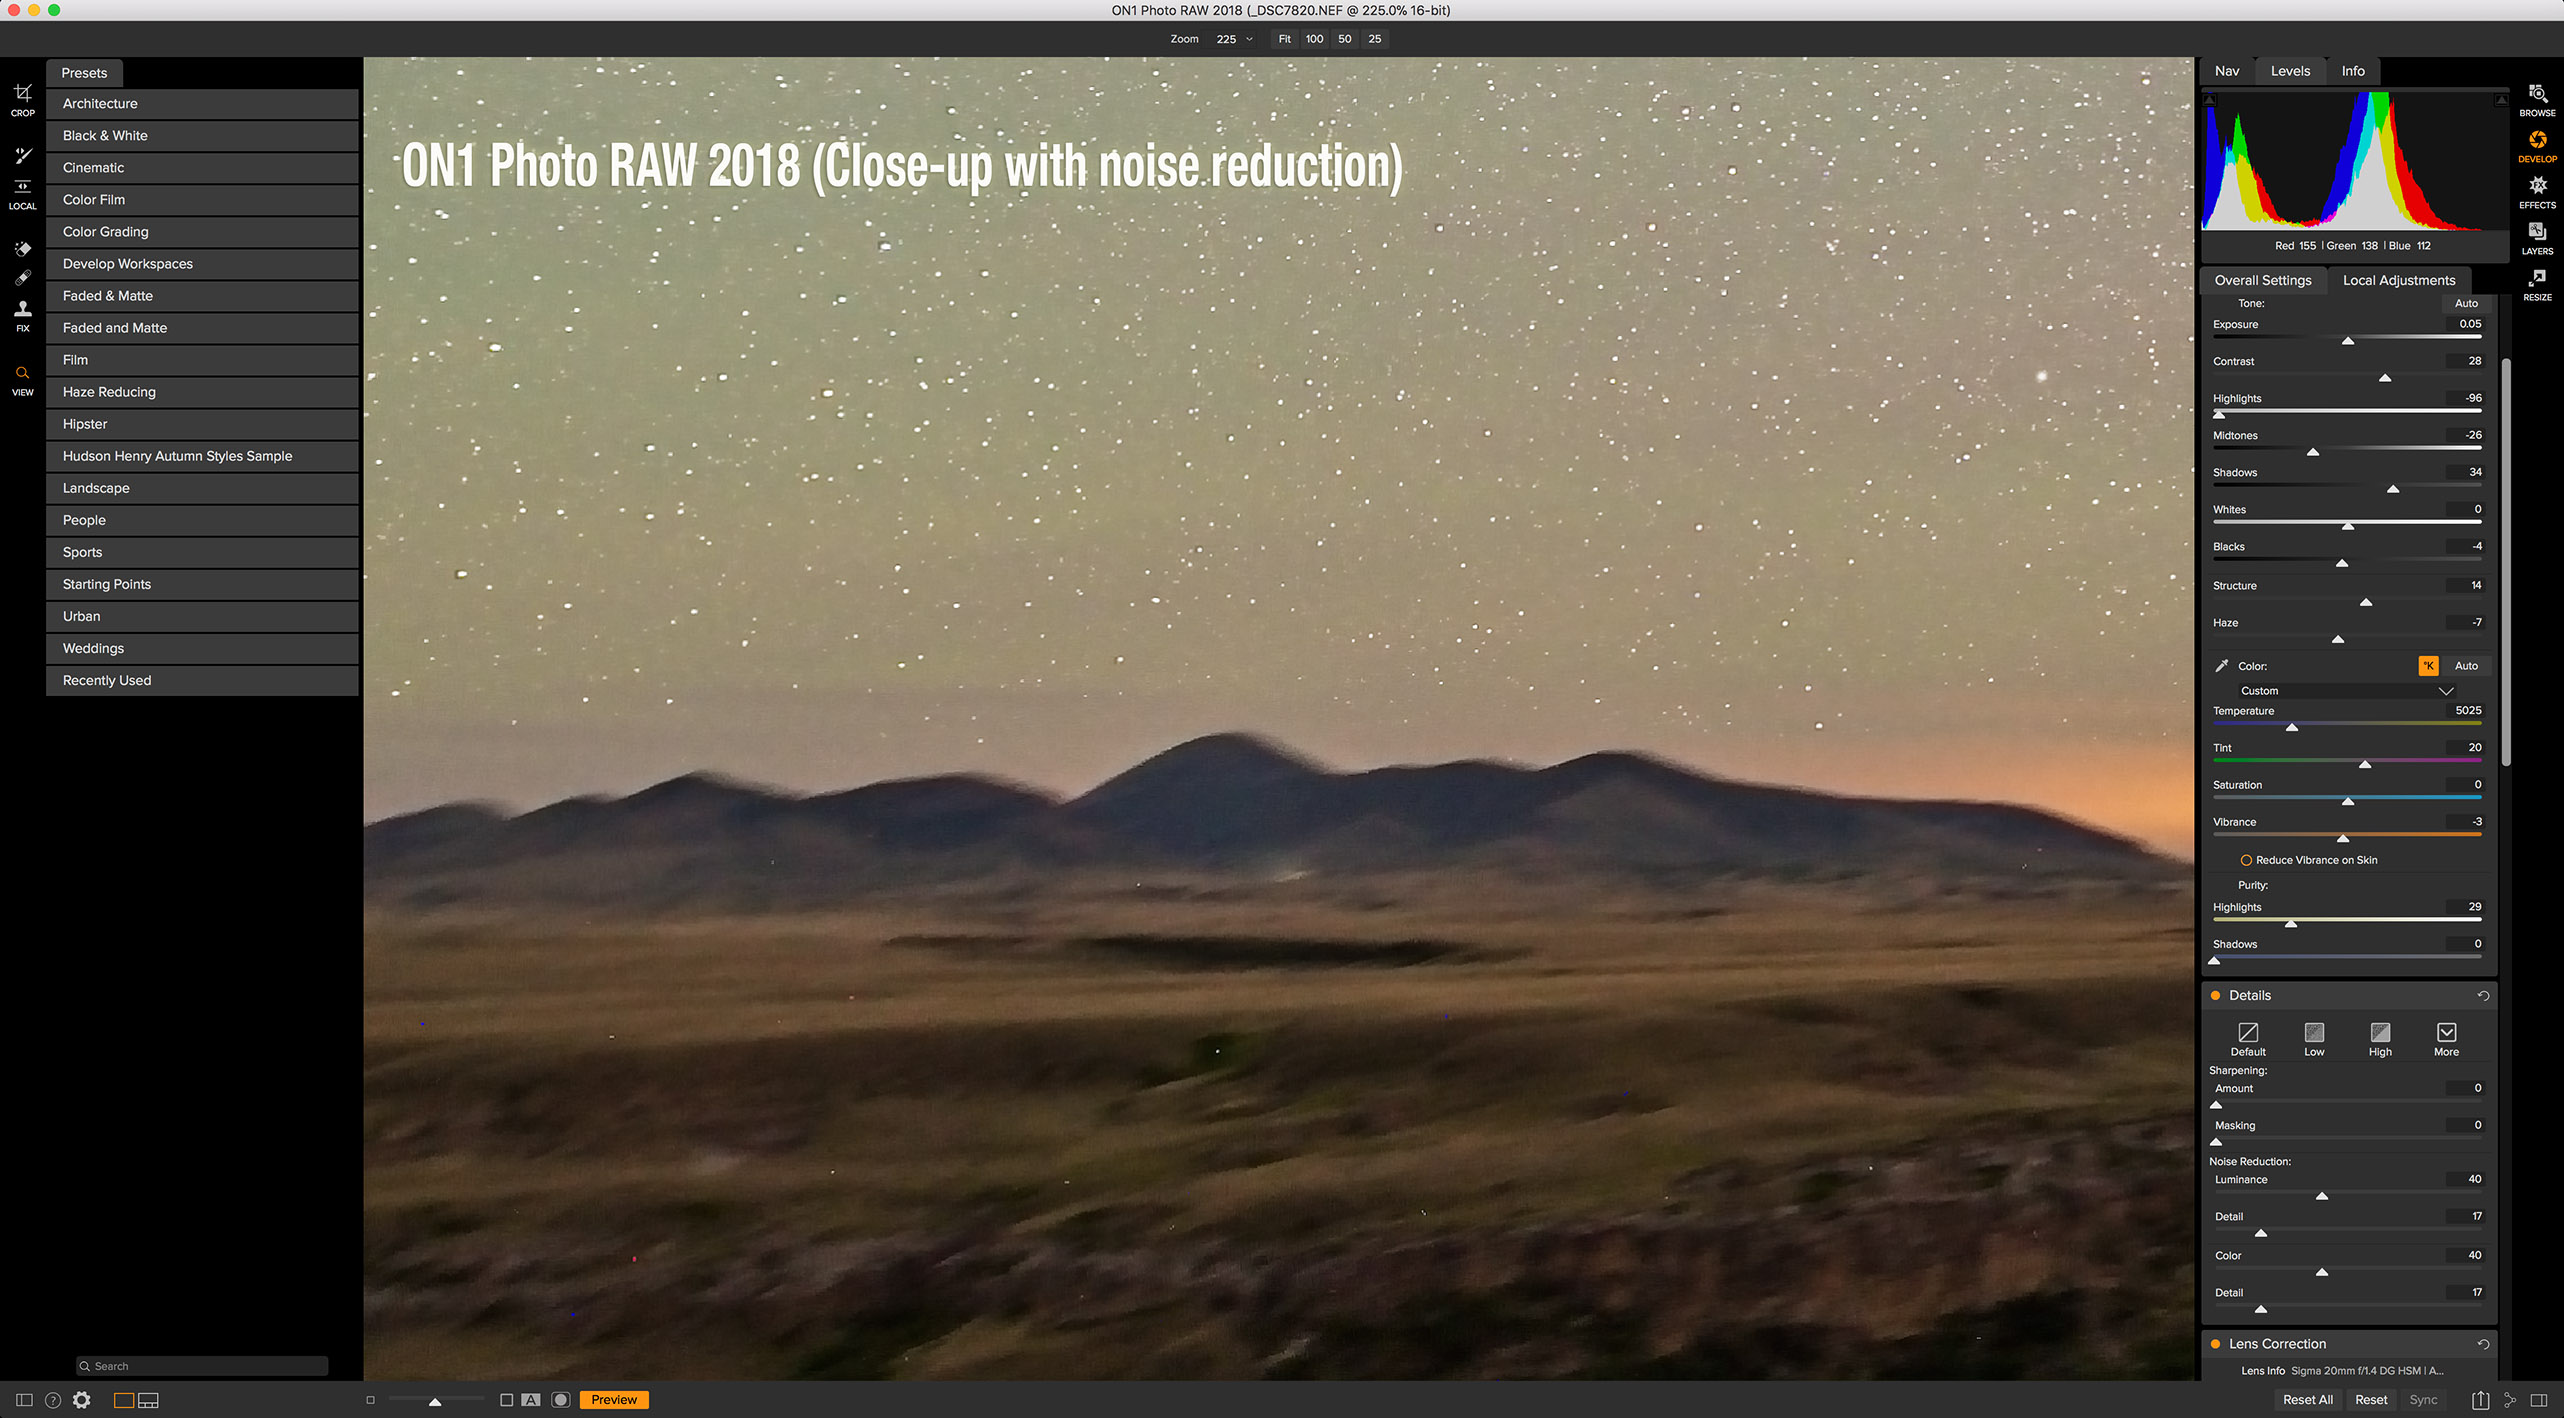
But that combo lacks any cataloging option. For that youโ€™d have to add ACDSee or Aftershot for a budget option. Itโ€™s hardly a convenient workflow Iโ€™d want to use.

DxO vs ON1 Noise
ON1 De-Bayer Artifacts (Right) Compared to DxO PhotoLab (Left), at 400%

Iโ€™d love to recommend ON1 Photo RAW more highly as a single solution, if only it had better raw processing results, and didnโ€™t suffer from de-Bayering artifacts (shown in a 400% close-up above, compared to DxO PhotoLab). These add the star haloes and a subtle blocky pattern to the sky, most obvious at right.


To Adobe or Not to Adobe

Iโ€™m just not anxious, as others are, to โ€œavoid Adobe.โ€

Iโ€™ve been a satisfied Creative Cloud subscriber for several years, and view the monthly fee as the cost of doing business. Itโ€™s much cheaper than the annual updates that boxed Photoshop versions used to cost. Nor am I worried about Adobe suddenly jacking up the fees or holding us hostage with demands.

21-LRTimelapse
LRTimelapse at Work on a Time-Lapse Sequence

For me, the need to use LRTimelapse (shown above) for about 80 percent of all the time-lapse sequences I shoot means the question is settled. LRTimelapse works only with Adobe software, and the combination works great. Sold.

I feel Camera Raw/Lightroom produces results that others can only just match, if that.

Only DxO PhotoLab beat Adobe for its excellent contrast enhancements and PRIME noise reduction.

Yes, other programs certainly have some fine features I wish Camera Raw or Lightroom had, such as:

  • Hot and dead pixel removal
  • Dark frame subtraction and flat field division
  • Better options for contrast enhancement
  • And adding local adjustments to raw files via layers, with more precise masking tools
  • Among others!

But those arenโ€™t โ€œmust haves.โ€

Using ACR or Lightroom makes it easy to export raw files for time-lapse assembly, or to open them into Photoshop for layering and compositing, usually as โ€œsmart objectsโ€ for non-destructive editing, as shown below.

21-Photoshop Final Image
Final Layered Photoshop Image

Above is the final layered image, consisting of:

  • A stack of 4 tracked exposures for the sky (the test image is one of those exposures)
  • And 4 untracked exposures for the ground.

The mean stacking smooths noise even more. The masking reveals just the sky on the tracked set. Every adjustment layer, mask, and “smart filter” is non-destructive and can be adjusted later.

Iโ€™ll work on recreating this same image with the three non-Adobe programs capable of doing so โ€“ย  Affinity, Luminar, and ON1 Photo RAW โ€“ย to see how well they do. But thatโ€™s the topic of a future blog.


Making the Switch?

The issue with switching from Adobe to any new program is compatibility.

While making a switch will be fine when working on all new images, reading the terabytes of old images I have processed with Adobe software (and being able to re-adjust their raw settings and layered adjustments) will always require that Adobe software.

If you let your Creative Cloud subscription lapse, as I understand it the only thing that will continue to work is Lightroomโ€™s Library module, allowing you to review images only. You canโ€™t do anything to them.

None of the contender programs will read Adobeโ€™s XMP metadata files to display raw images with Adobeโ€™s settings intact.

Conversely, nor can Adobe read the proprietary files and metadata other programs create.

ON1 Warning Dialog

With final layered Photoshop files, while some programs can read .PSD files, they usually open them just as flattened images, as ON1 warns it will do above. It flattened all of the non-destructive editing elements created in Photoshop. Luminar did the same.

23-Affinity Opening PSB File
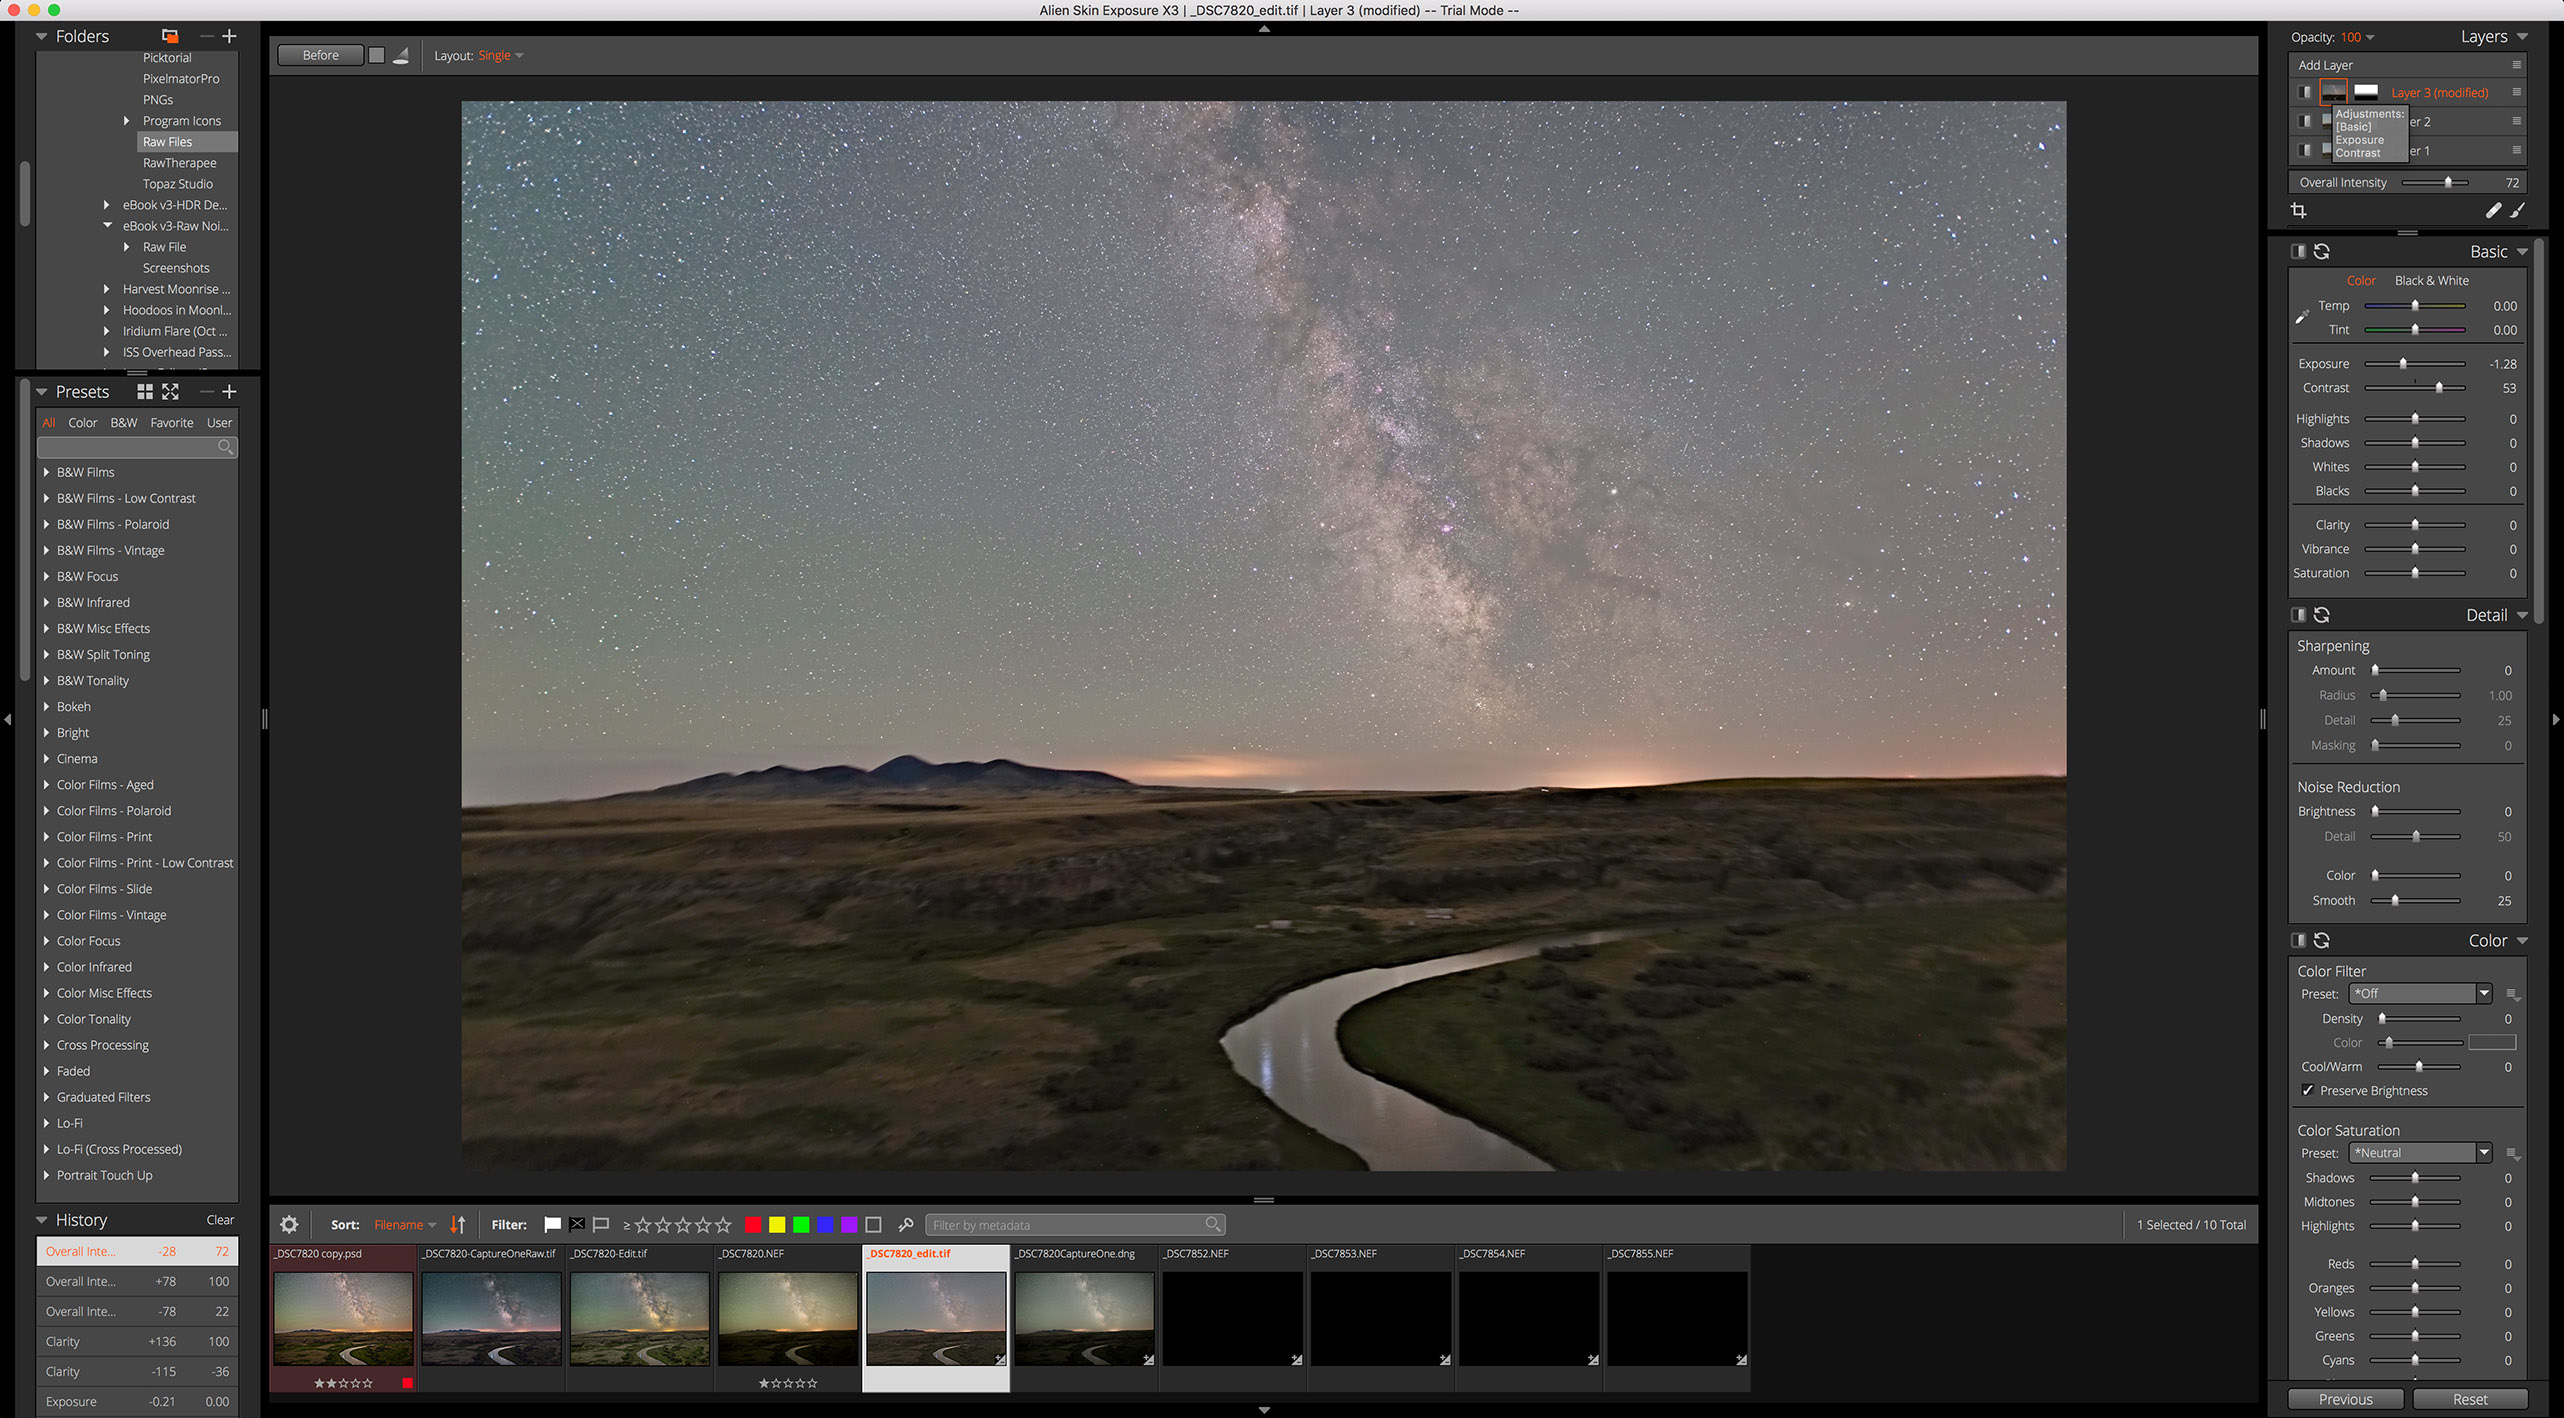
A Layered Photoshop PSB File Opened in Affinity Photo

Only Affinity Photo (above) successfully read a complex and very large Photoshop .PSB file correctly, honouring at least its adjustment and image layers. So, if backwards compatibility with your legacy Photoshop images is important, choose Affinity Photo.
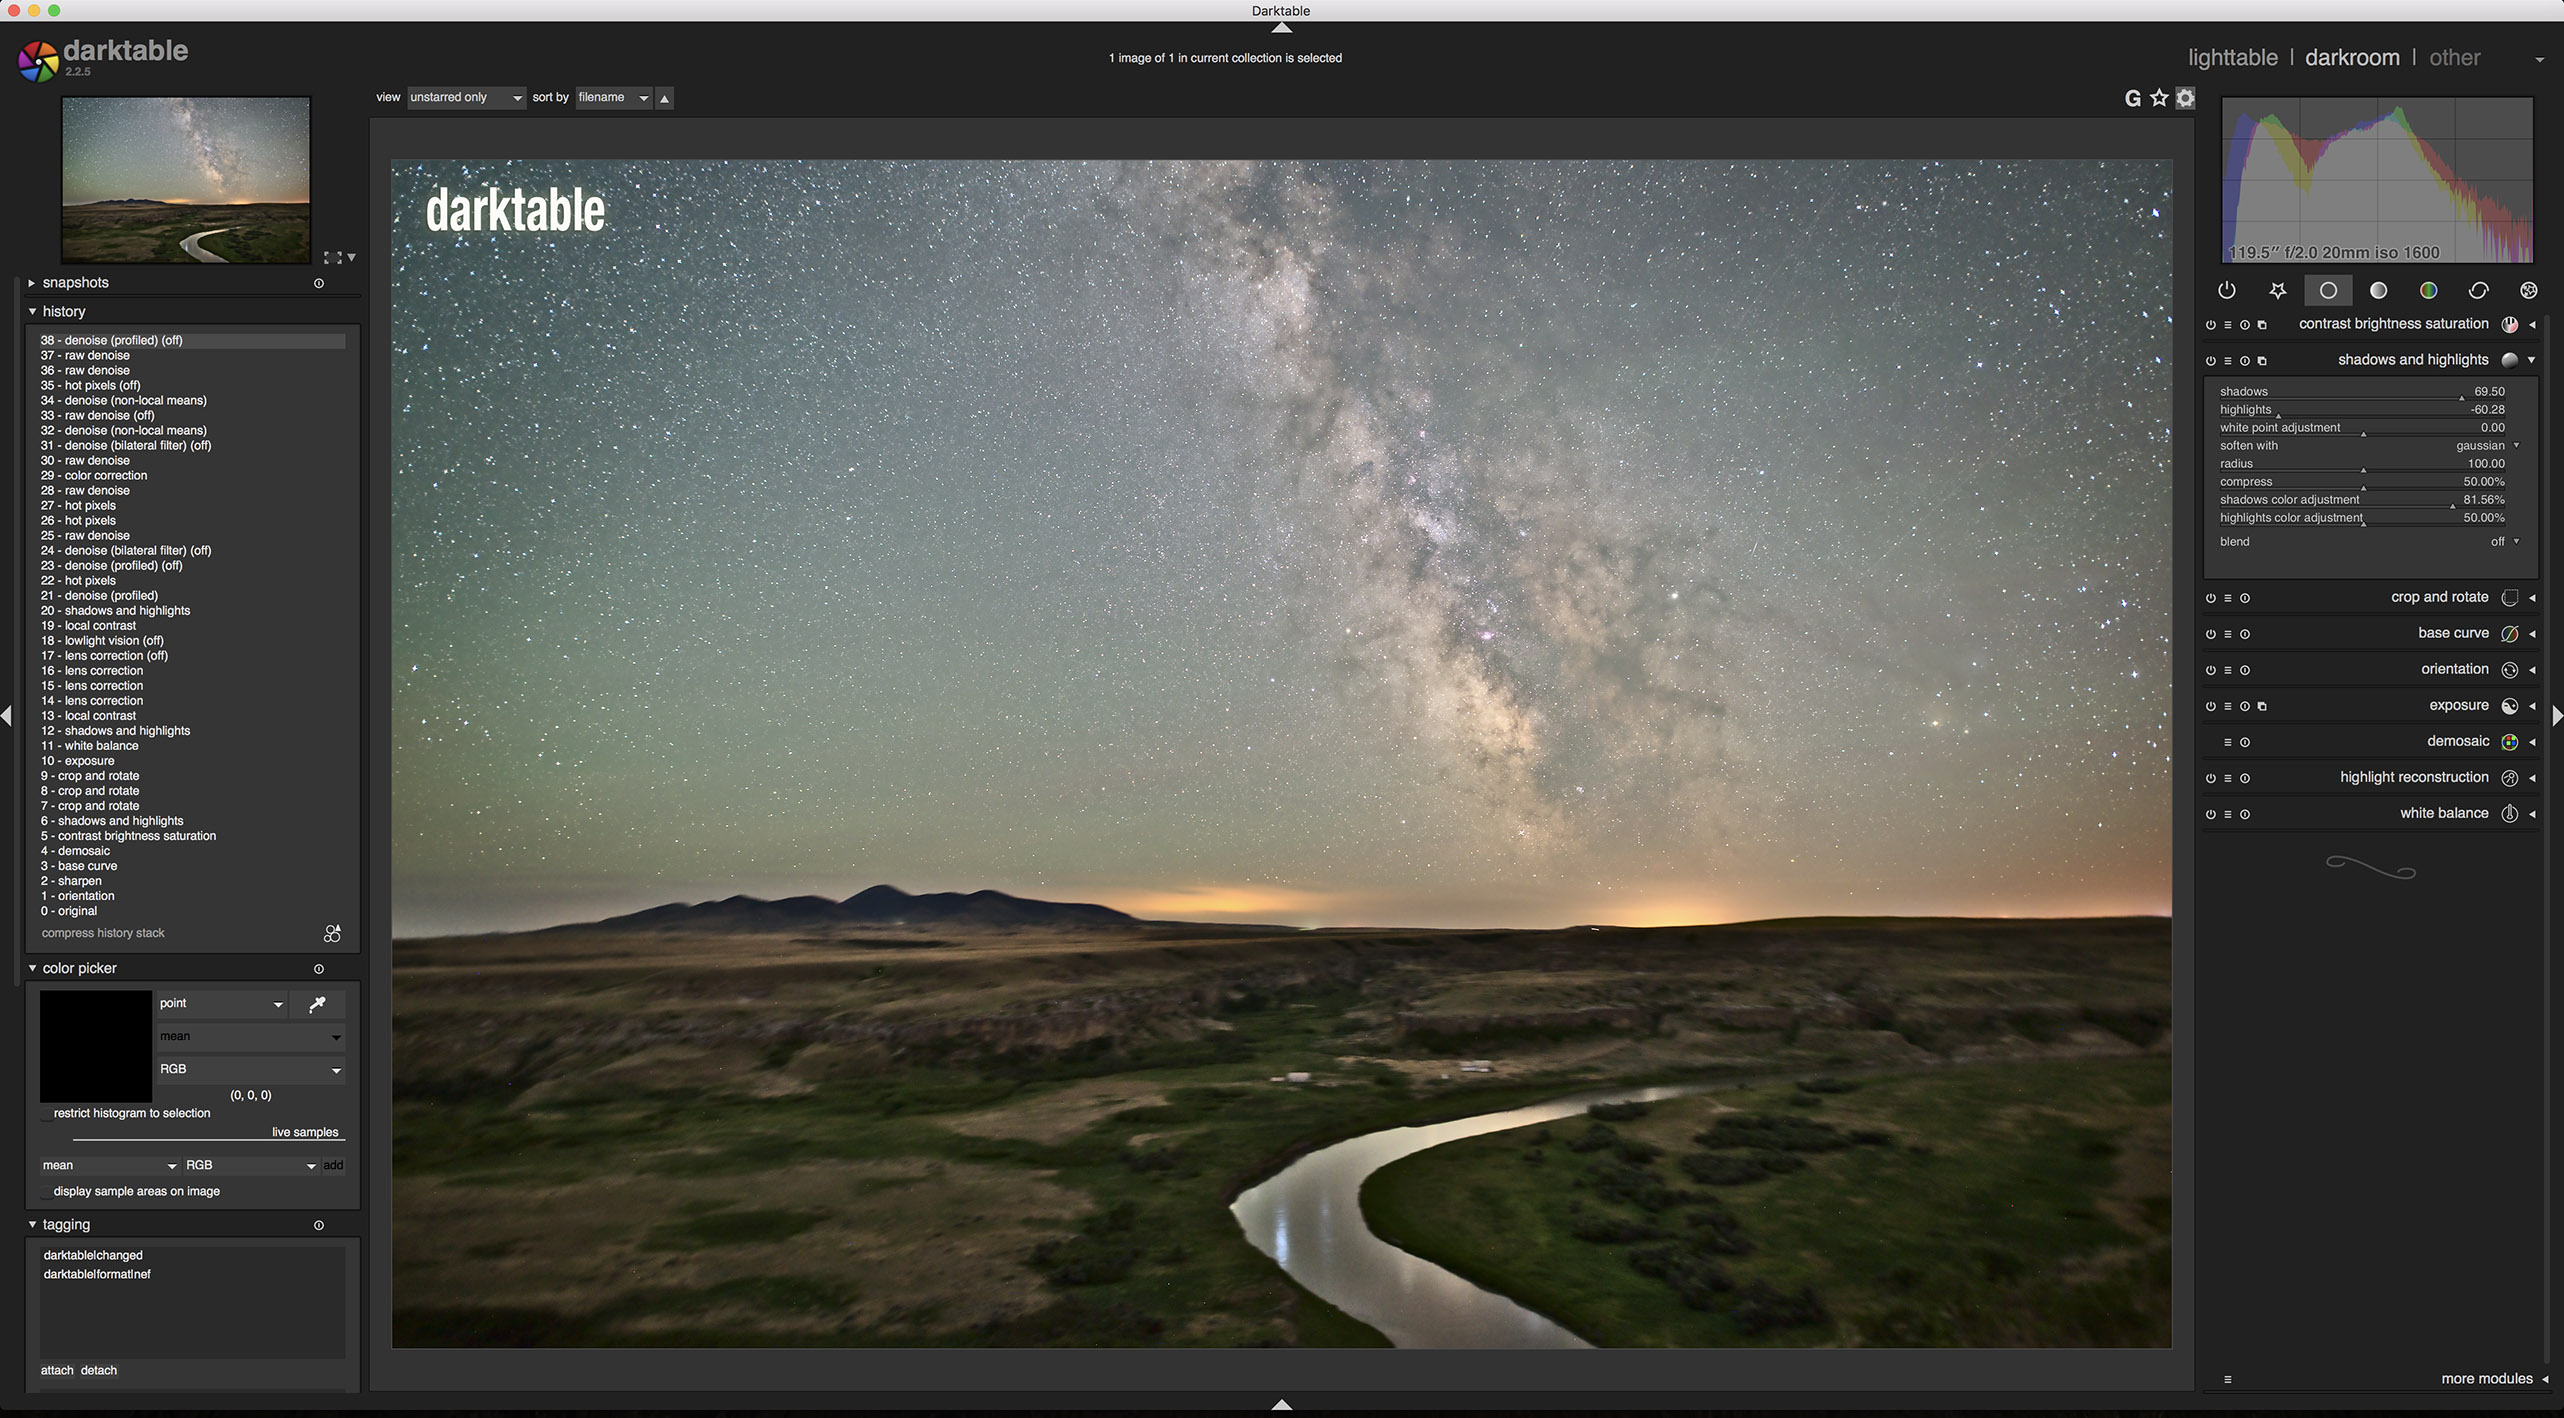
However, Affinity flattened Photoshopโ€™s smart object image layers and their smart filters. Even Adobe’s own Photoshop Elements doesnโ€™t honor smart objects.

Lest you think thatโ€™s a โ€œwalled gardenโ€ created by “evil Adobe,” keep in mind that the same will be true of the image formats and catalogs that all the contender programs produce.

To read the adjustments, layers, and โ€œlive filtersโ€ you create using any another program, you will need to use that program.
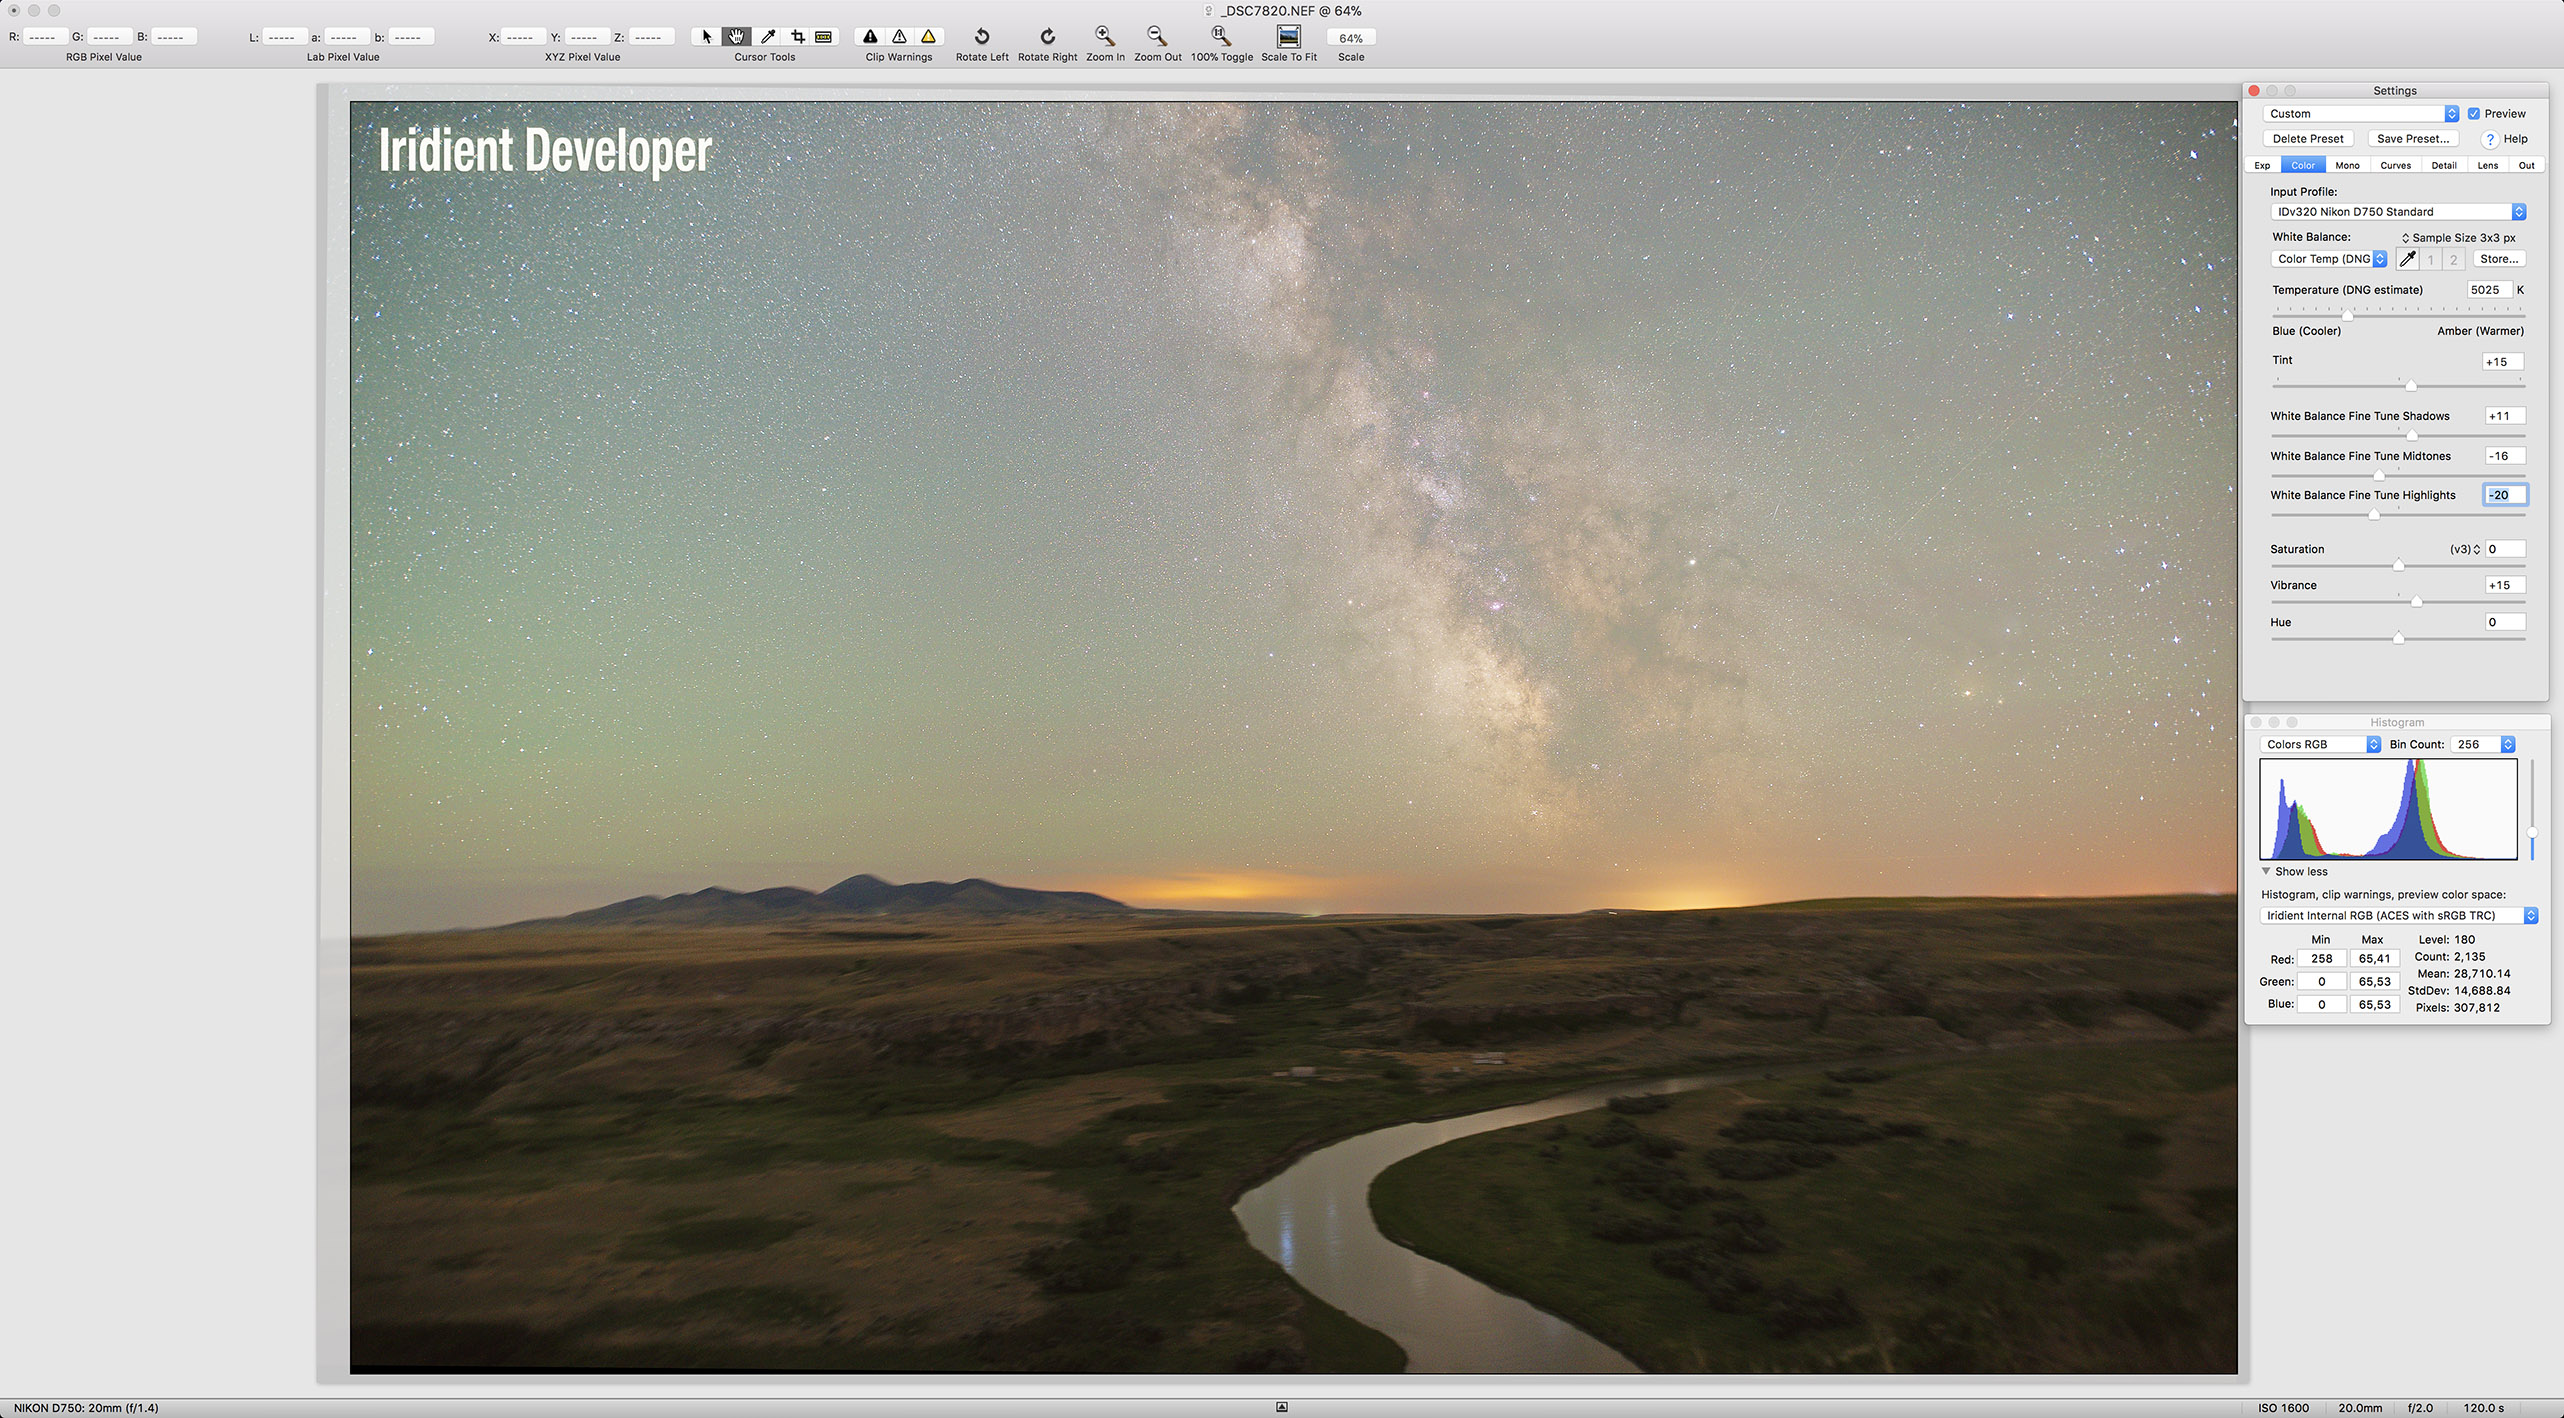
Will Affinity, DxO, Luminar, ON1, etc. be around in ten years?

Yes, you can save out flattened TIFFs that any program can read in the future, but that rules out using those other programs to re-work any of the imageโ€™s original settings.


In Conclusion!

24-DxO UPoint Local
U-Point Local Adjustments in DxO PhotoLab

I can see using DxO PhotoLab (above) or Raw Therapee for some specific images that benefit from their unique features.

Or using ACDSee as a handy image browser.

28-Luminar as Plug-In
Luminar 2018 as a Plug-In Within Photoshop

And ON1 and Luminar have some lovely effects that can be applied by calling them up as plug-ins from within Photoshop, and applied as smart filters. Above, I show Luminar working as a plug-in, applying its “Soft & Airy” filter.

In the case of Capture One and DxO PhotoLab, their ability to save images back as raw DNG files (the only contender programs of the bunch that can), means that any raw processing program in the future should be able to read the raw image.

27-CaptureOne DNG Opened in ACR
DNG Raw File Created by Capture One Opened in ACR

However, only Capture Oneโ€™s Export to DNG option produced a raw file readable and editable by Adobe Camera Raw with its settings from Capture One (mostly) intact (as shown above).

Even so, I wonโ€™t be switching away from Adobe any time soon.

But I hope my survey has given you useful information to judge whether you should make the switch. And if so, to what program.

Thanks!ย 

โ€” Alan, December 6, 2017 / ยฉ 2017 Alan Dyer / AmazingSky.com