In a detailed technical blog I compare six AI-based noise reduction programs for the demands of astrophotography. Some can work wonders. Others can ruin your image.
Over the last two years we have seen a spate of specialized programs introduced for removing digital noise from photos. The new generation of programs use artificial intelligence (AI), aka machine learning, trained on thousands of images to better distinguish unwanted noise from desirable image content.
At least that’s the promise – and for noisy but normal daytime images they do work very well.
But in astrophotography our main subjects – stars – can look a lot like specks of pixel-level noise. How well can each program reduce noise without eliminating stars or wanted details, or introducing odd artifacts, making images worse.
To find out, I tested six of the new AI-based programs on real-world – or rather “real-sky” – astrophotos. Does one program stand out from the rest for astrophotography?
NOTE: All the images are full-resolution JPGs you can tap or click on to download for detailed inspection. But that does make the blog page slow to load initially. Patience!
TL;DR SUMMARY
The new AI-trained noise reduction programs can indeed eliminate noise better than older non-AI programs, while leaving fine details untouched or even sharpening them.
- Of the group tested, the winner for use on just star-filled images is a specialized program for astrophotography, NoiseXTerminator from RC-Astro.
- For nightscapes and other images, Topaz DeNoise AI performed well, better than it did in earlier versions that left lots of patchy artifacts, something AI programs can be prone to.
- While ON1’s new NoNoise AI 2023 performed fine, it proved slightly worse in some cases than its earlier 2022 version. Its new sharpening routine needs work.
- Other new programs, notably Topaz Photo AI and Luminar’s Noiseless AI, also need improvement before they are ready to be used for the rigours of astrophotography.
- For reasons explained below, I would not recommend DxO’s PureRAW2. [See below for comments on the newer DxO PureRaw3, which suffers from the same issues.]
METHODOLOGY
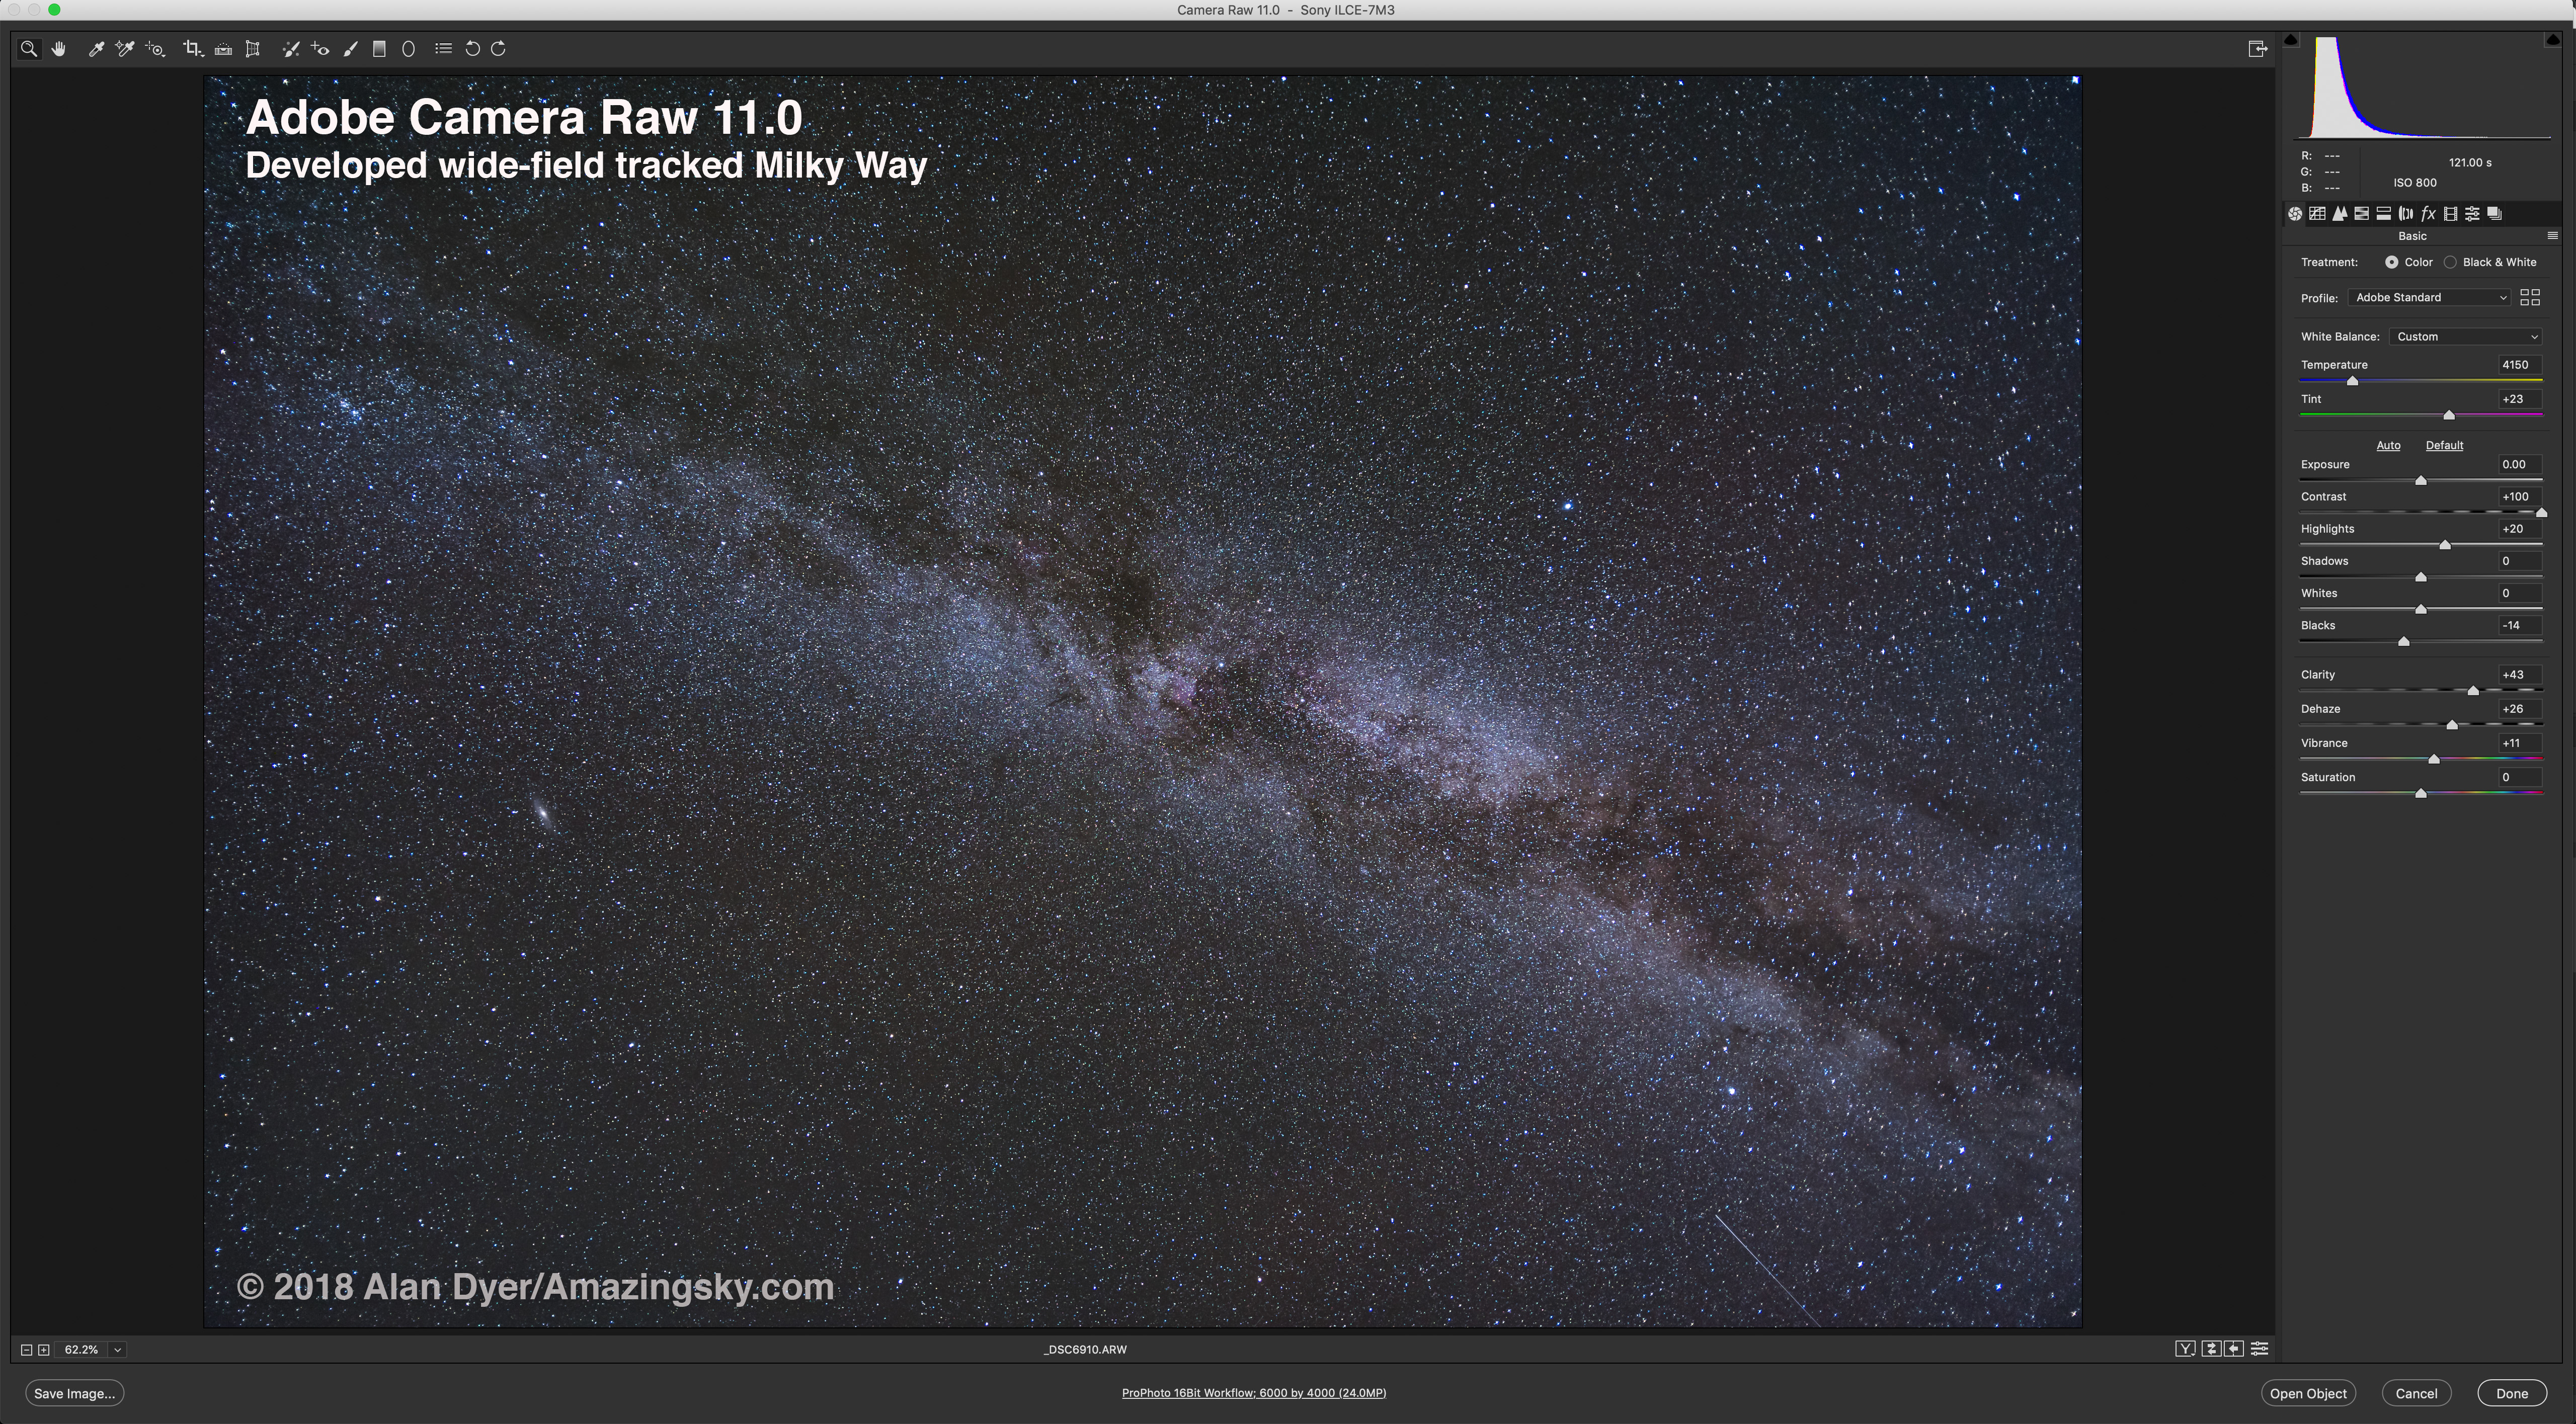
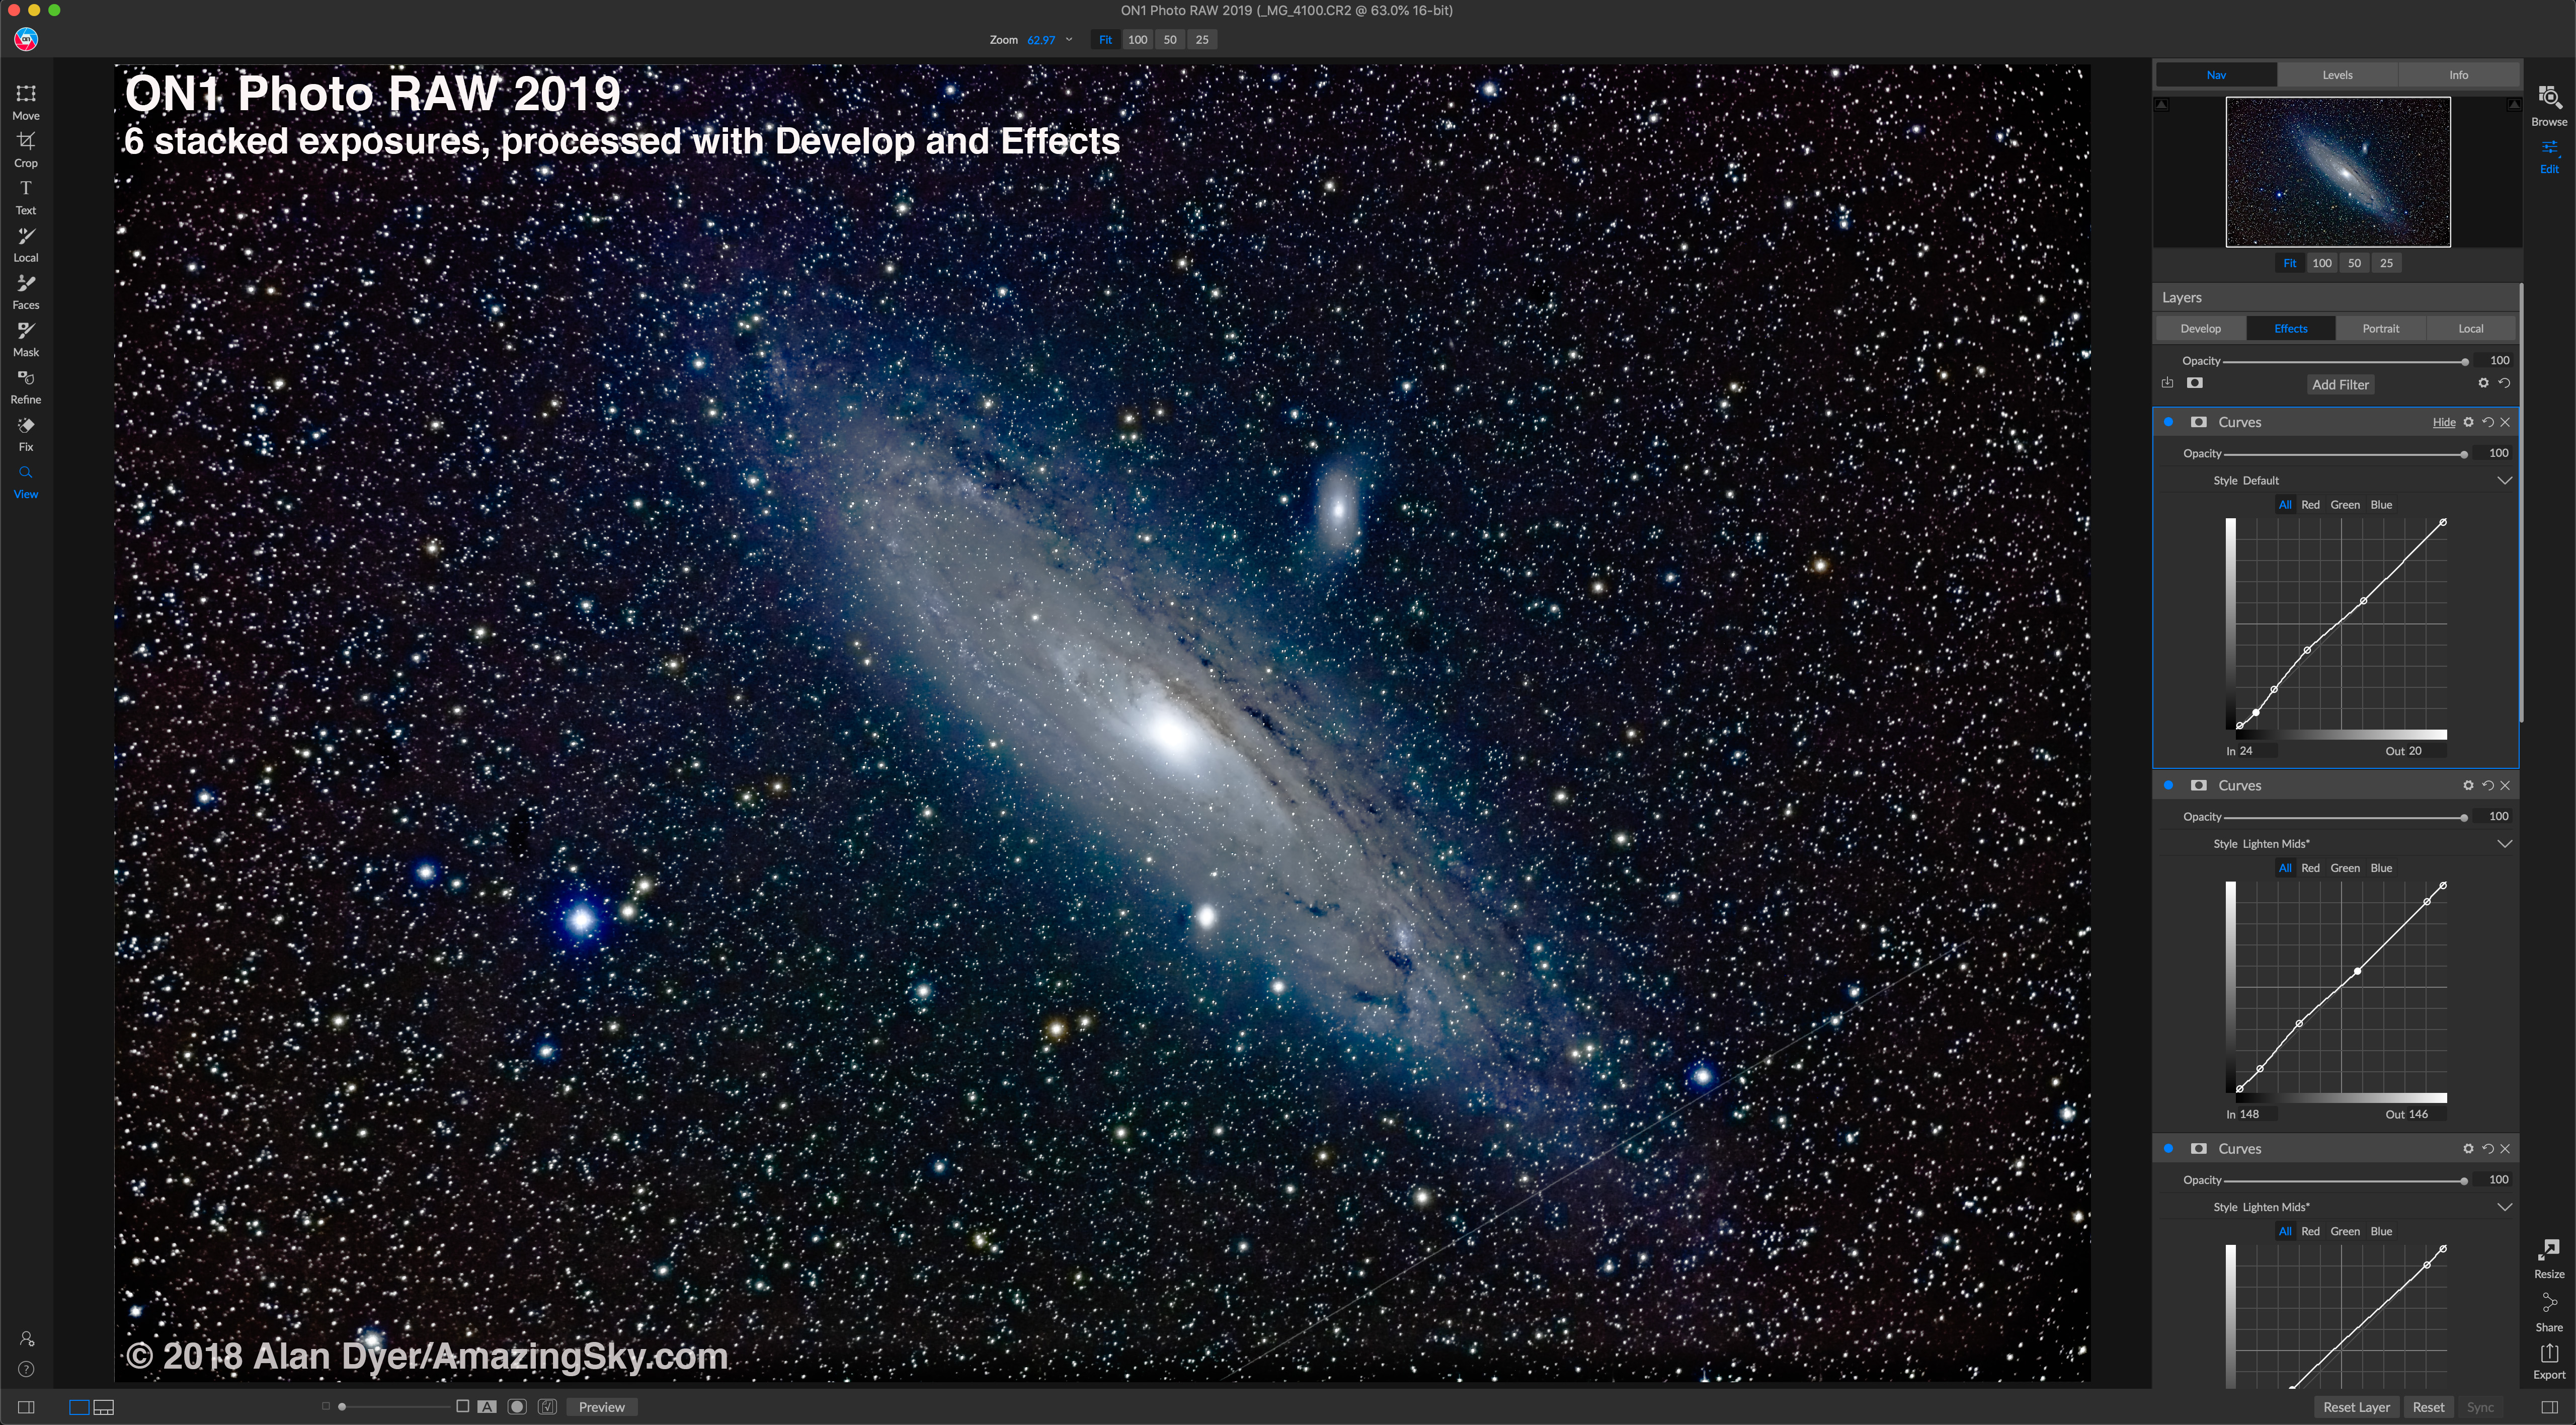
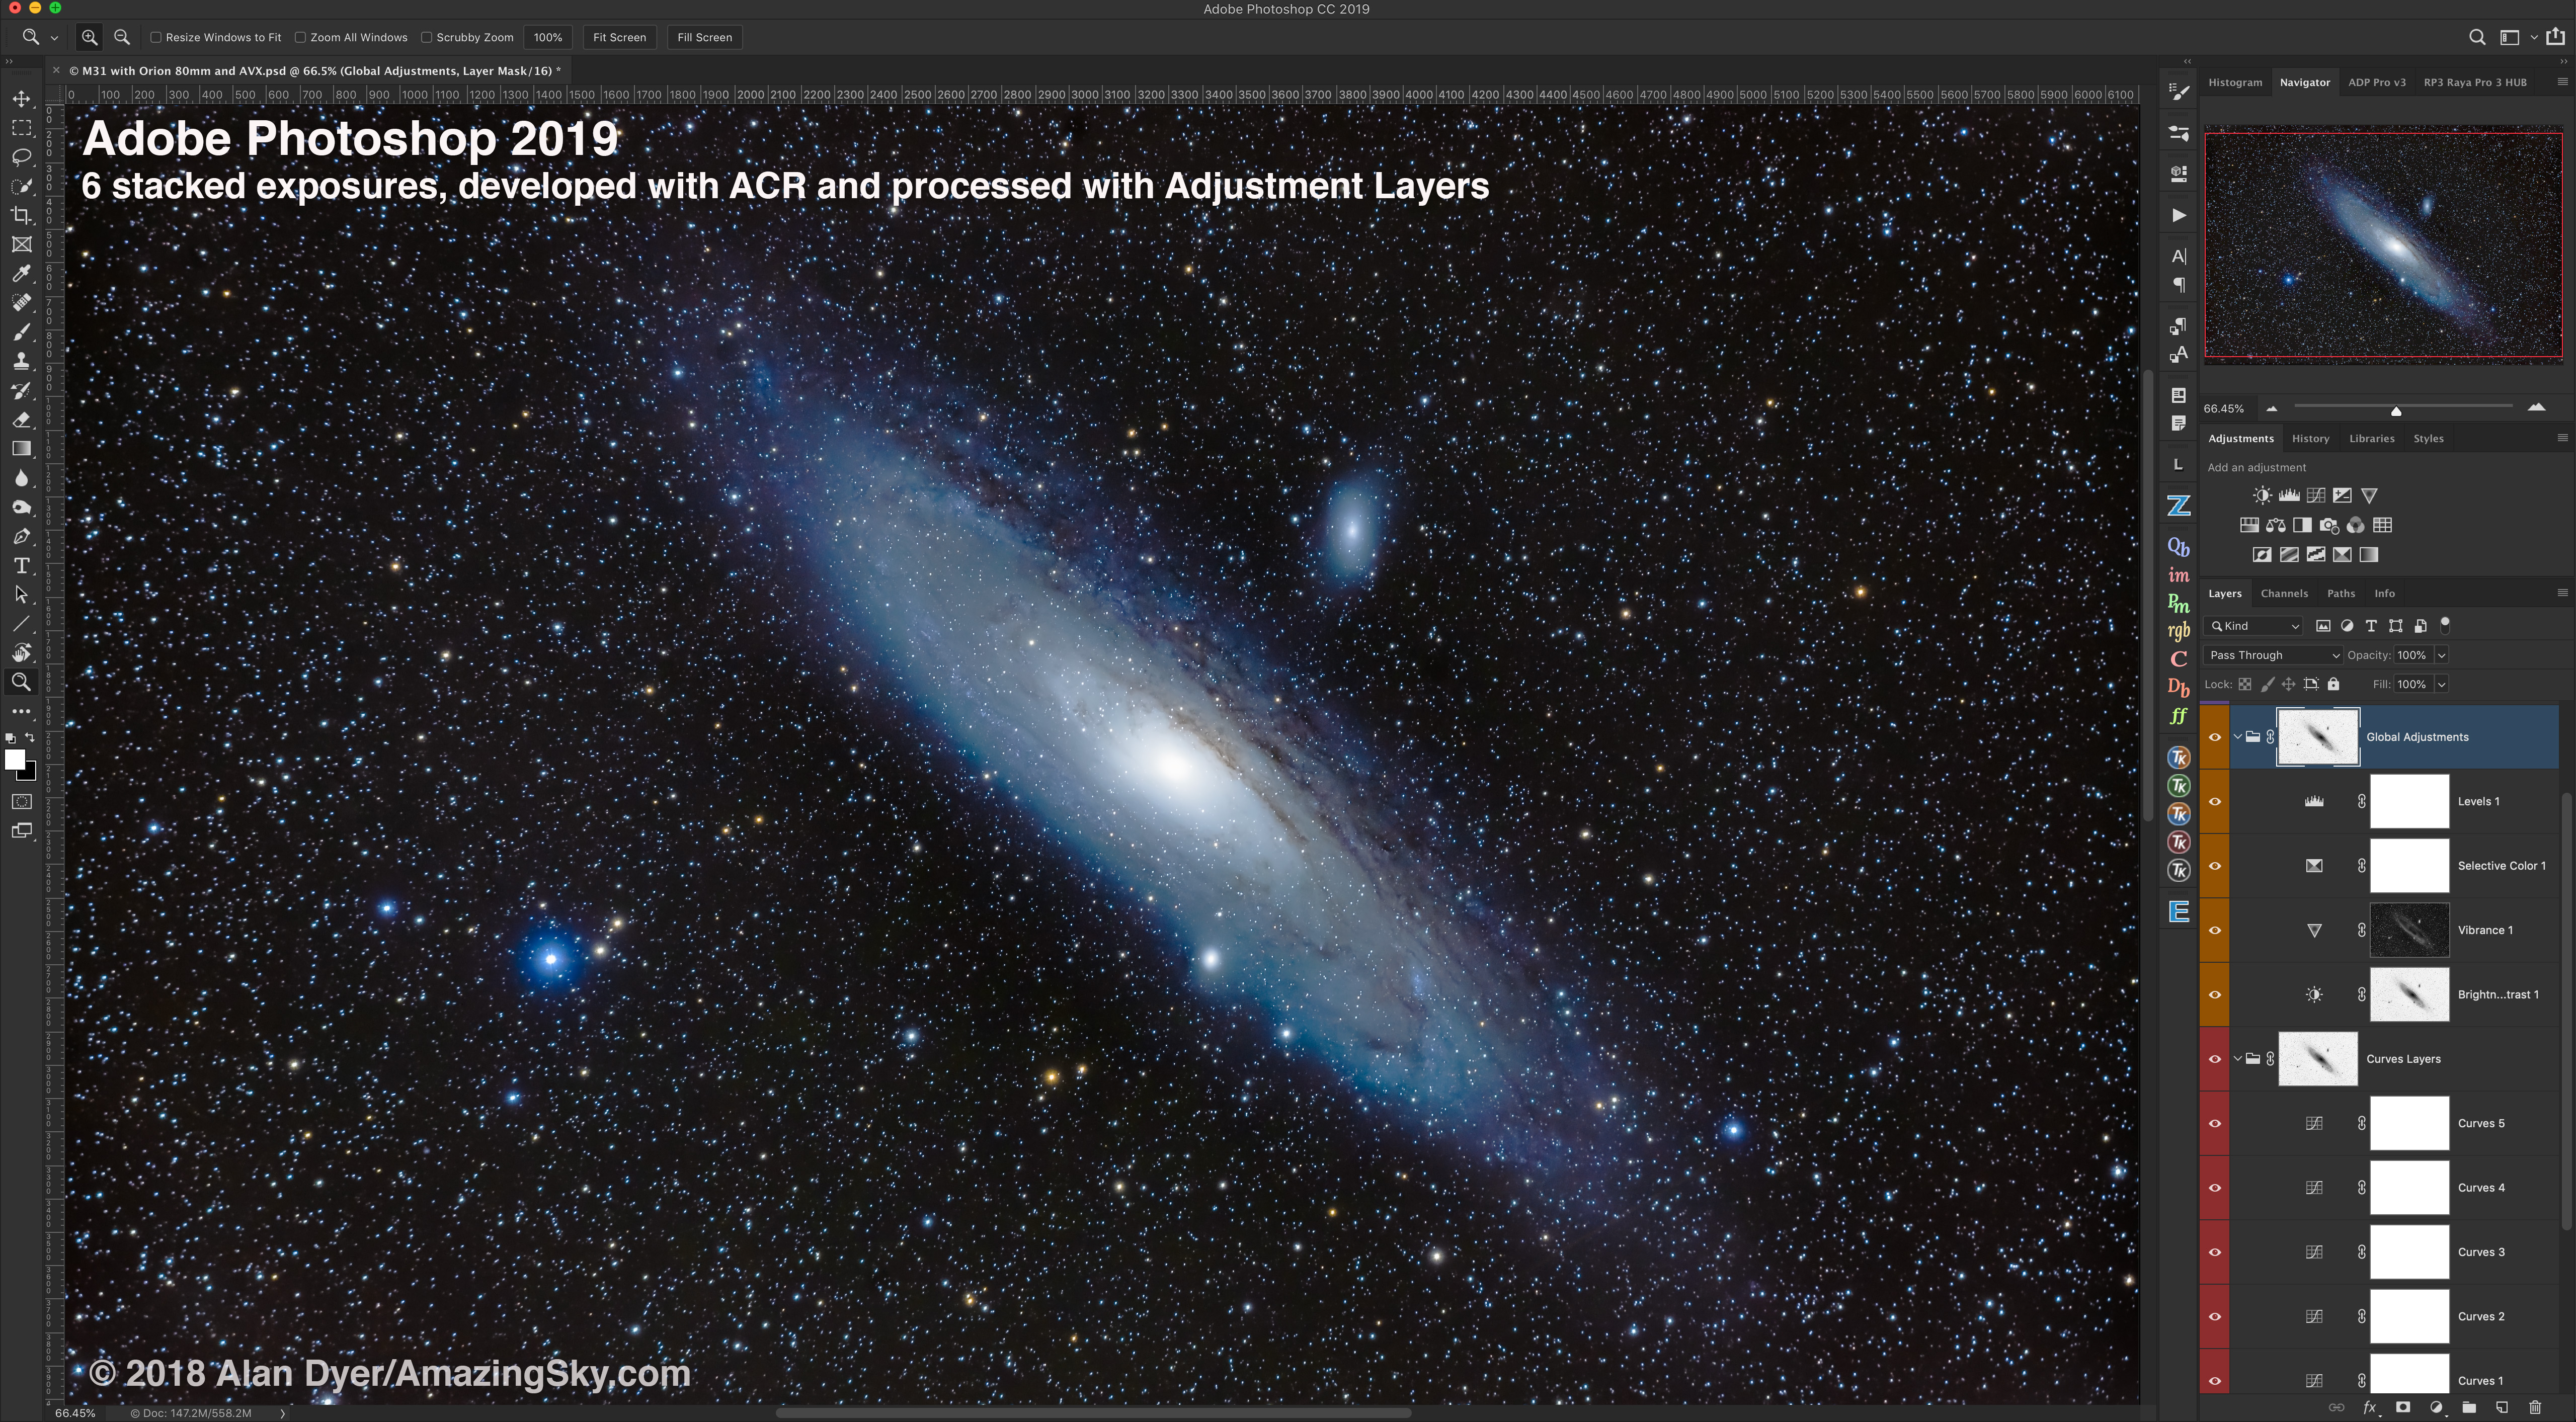
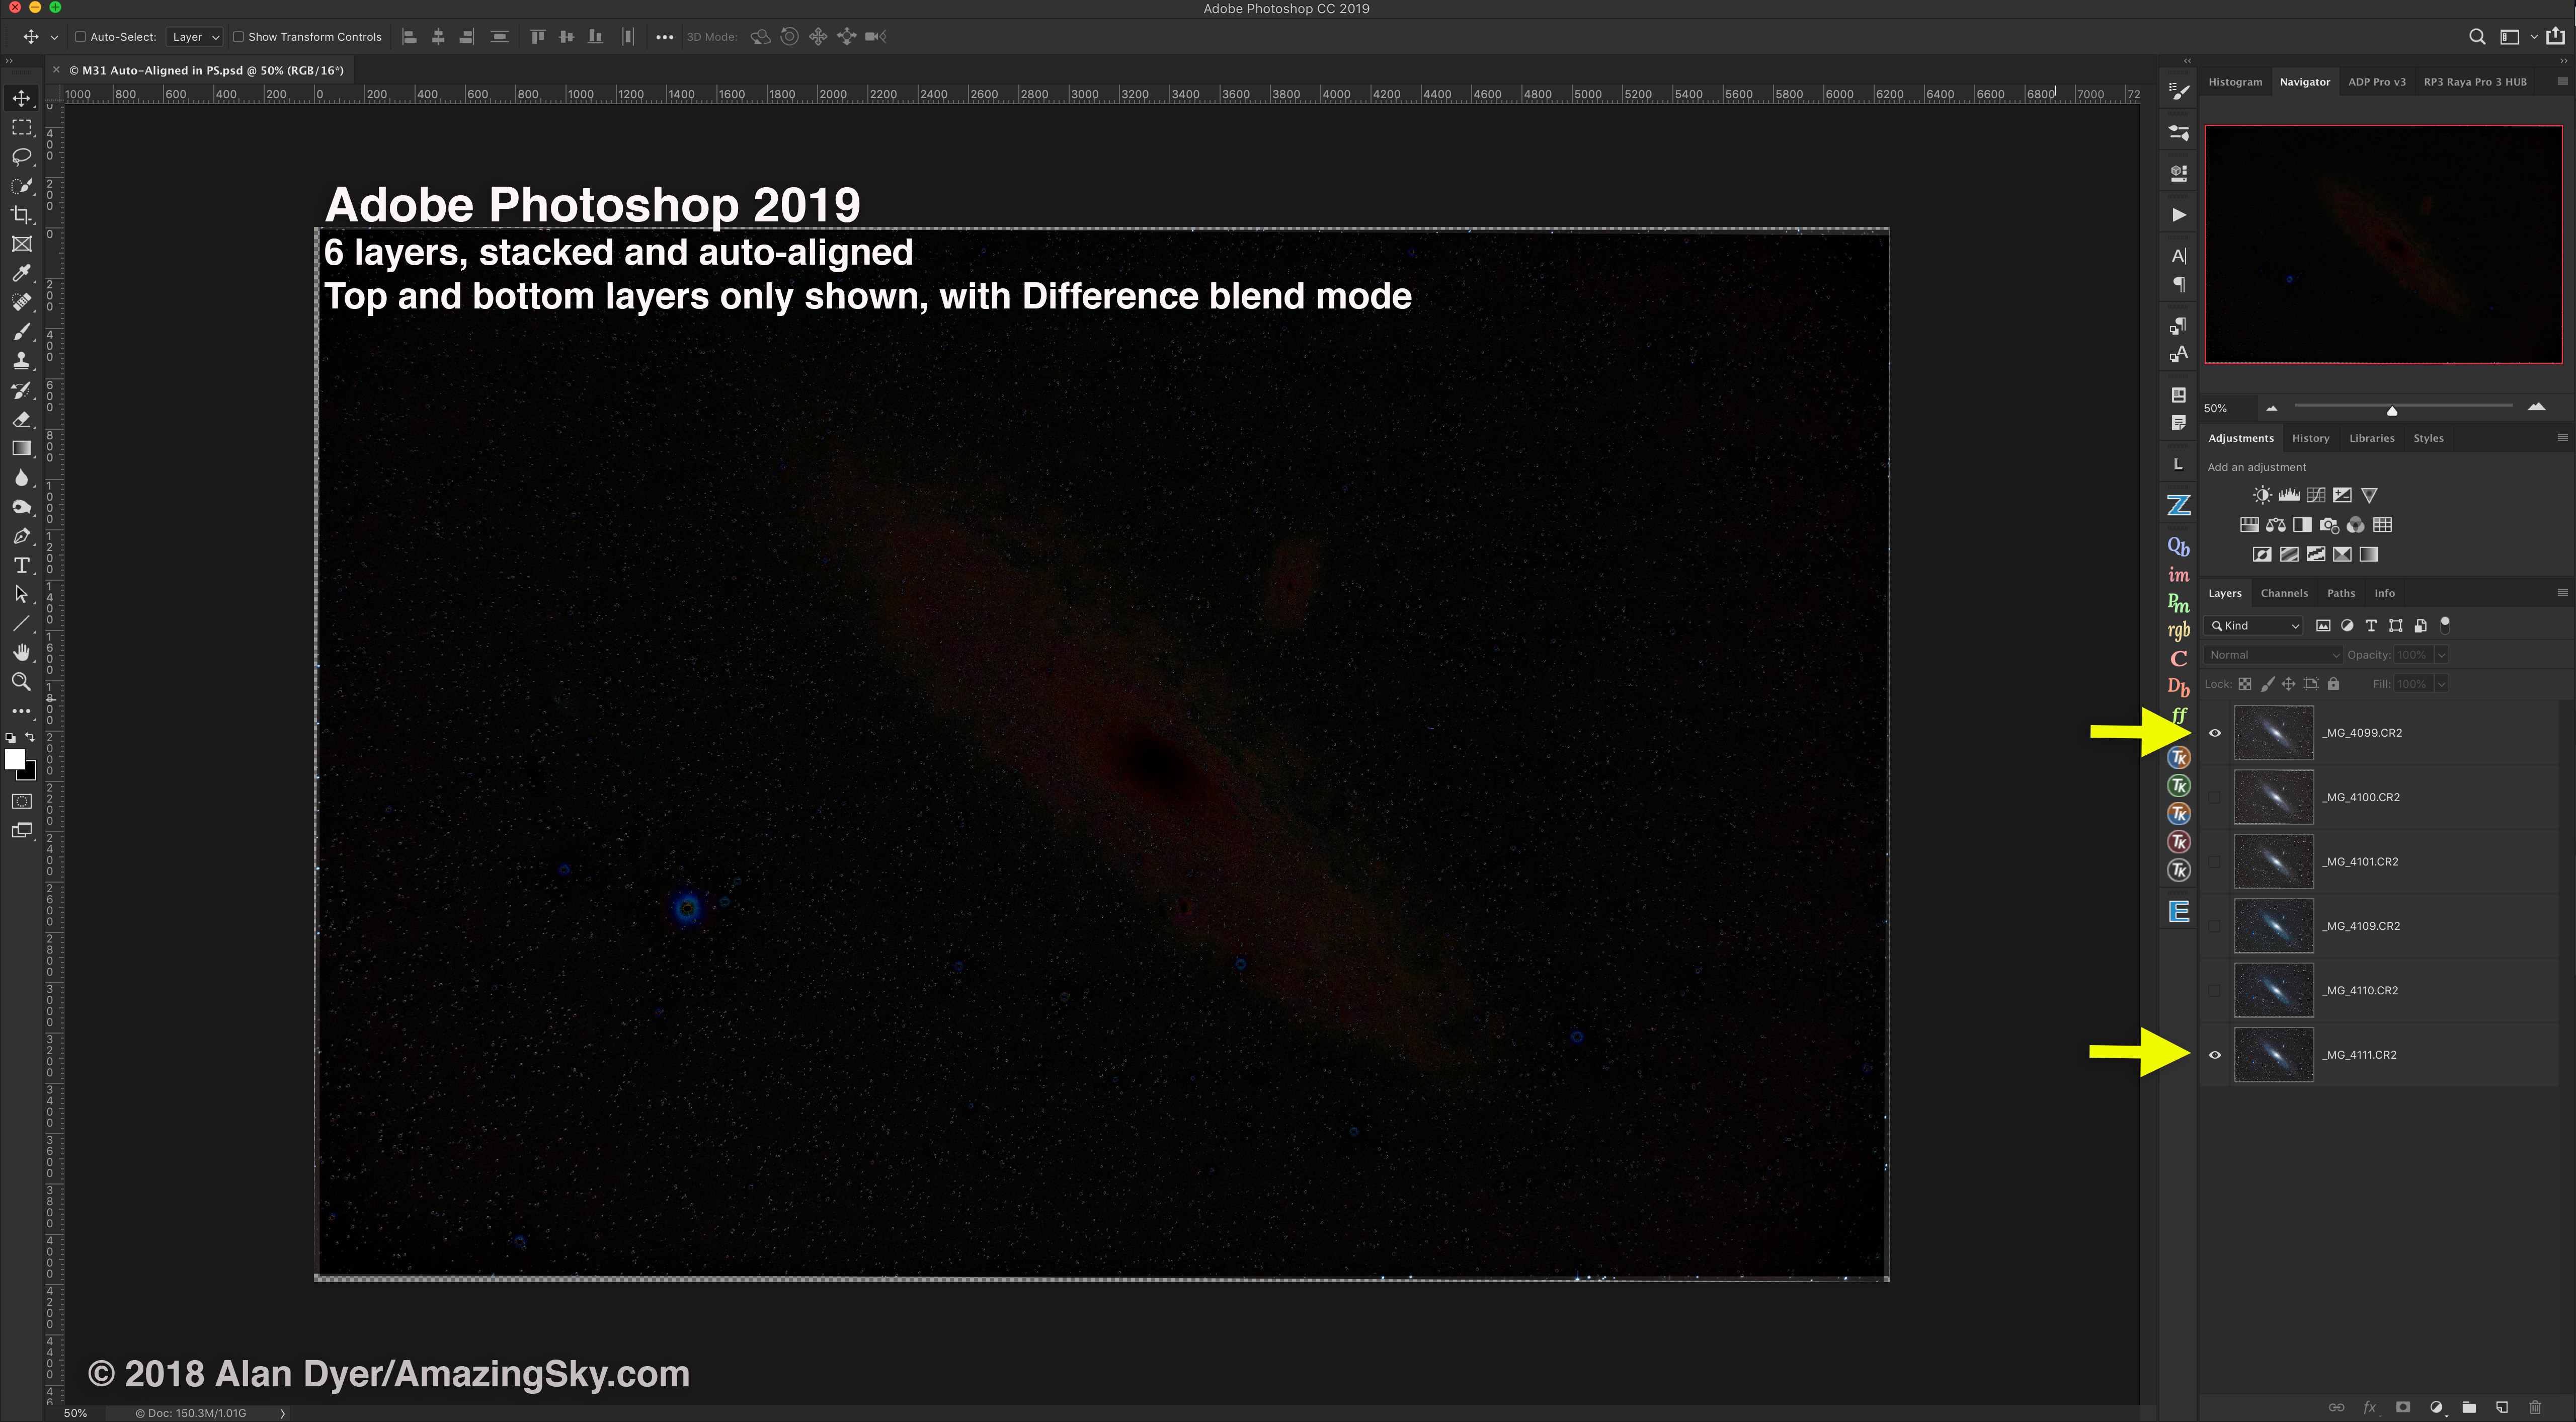
As described below, while some of the programs can be used as stand-alone applications, I tested them all as plug-ins for Photoshop, applying each as a smart filter applied to a developed raw file brought into Photoshop as a Camera Raw smart object.
Most of these programs state that better results might be obtainable by using the stand-alone app on original raw files. But for my personal workflow I prefer to develop the raw files with Adobe Camera Raw, then open those into Photoshop for stacking and layering, applying any further noise reduction or sharpening as non-destructive smart filters.
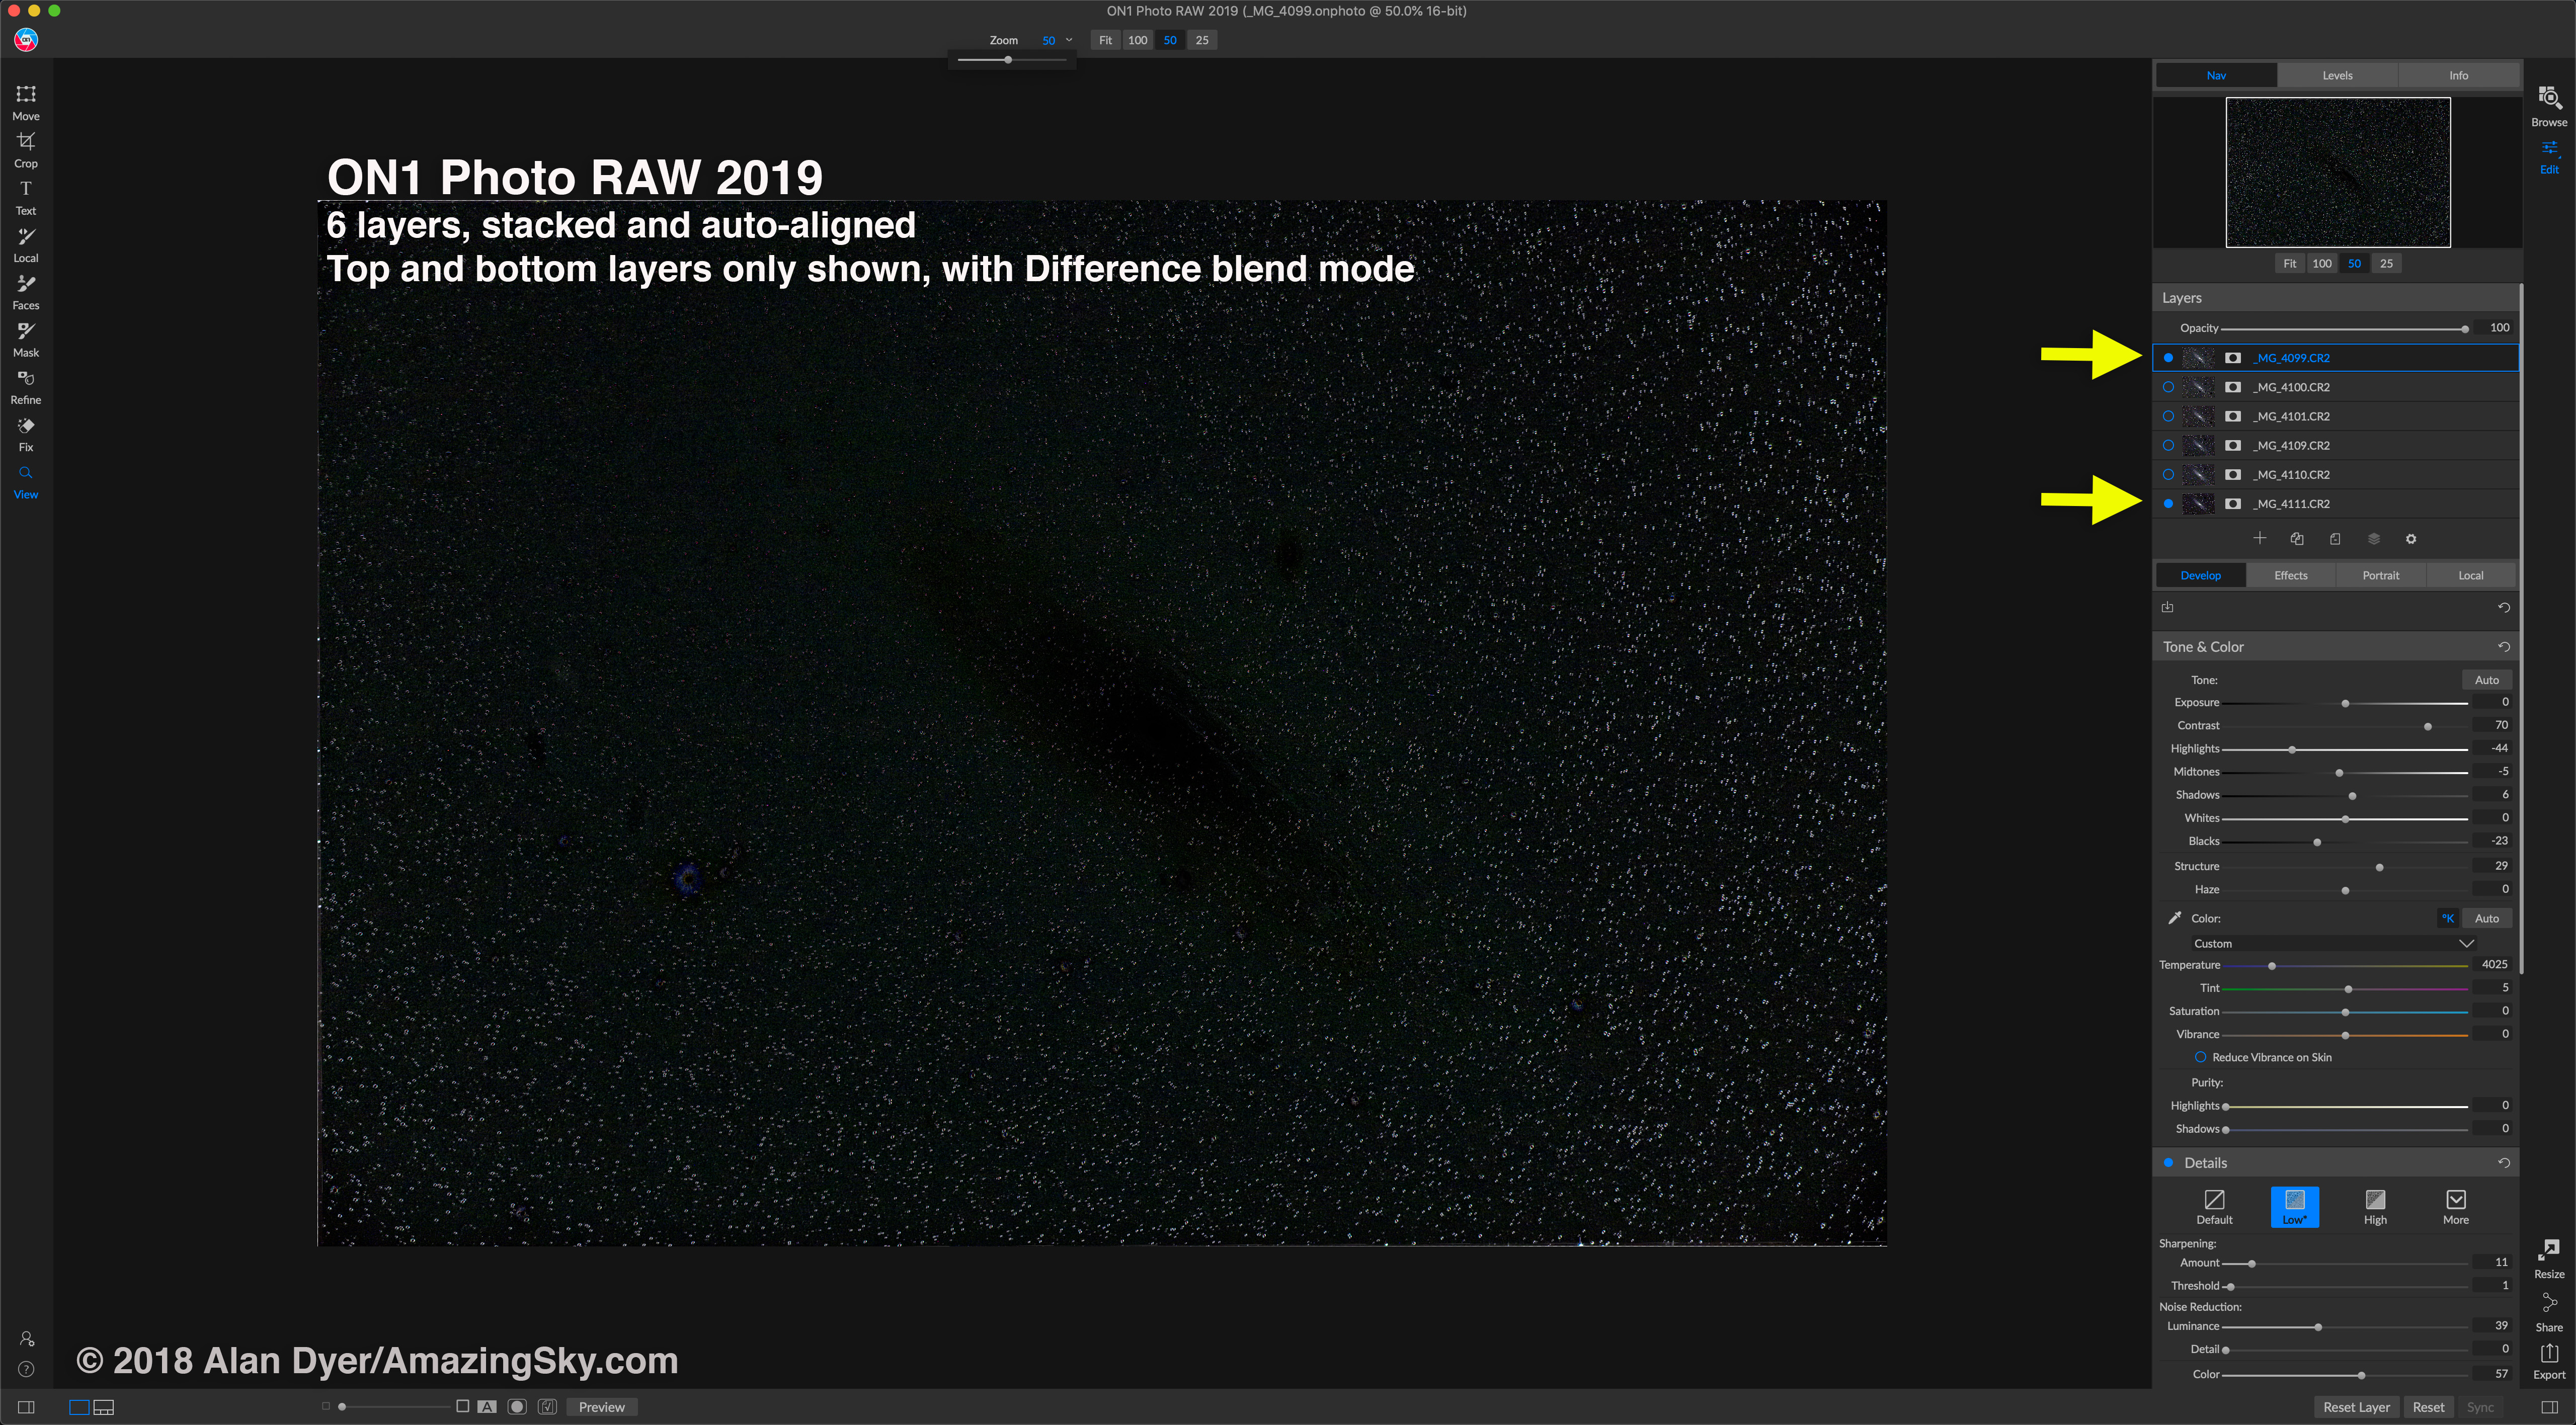
Many astrophotographers also choose to stack unedited original images with specialized stacking software, then apply further noise reduction and editing later in the workflow. So my workflow and test procedures reflect that.
However, the exception is DxO’s PureRAW2. It can work only on raw files as a stand-alone app, or as a plug-in from Adobe Lightroom. It does not work as a Photoshop plug-in. I tested PureRAW2 by dropping raw Canon .CR3 files onto the app, then exporting the results as raw DNG files, but with the same settings applied as with the other raw files. For the nightscape and wide-field images taken with lenses in DxO’s extensive database, I used PureRAW’s lens corrections, not Adobe’s.
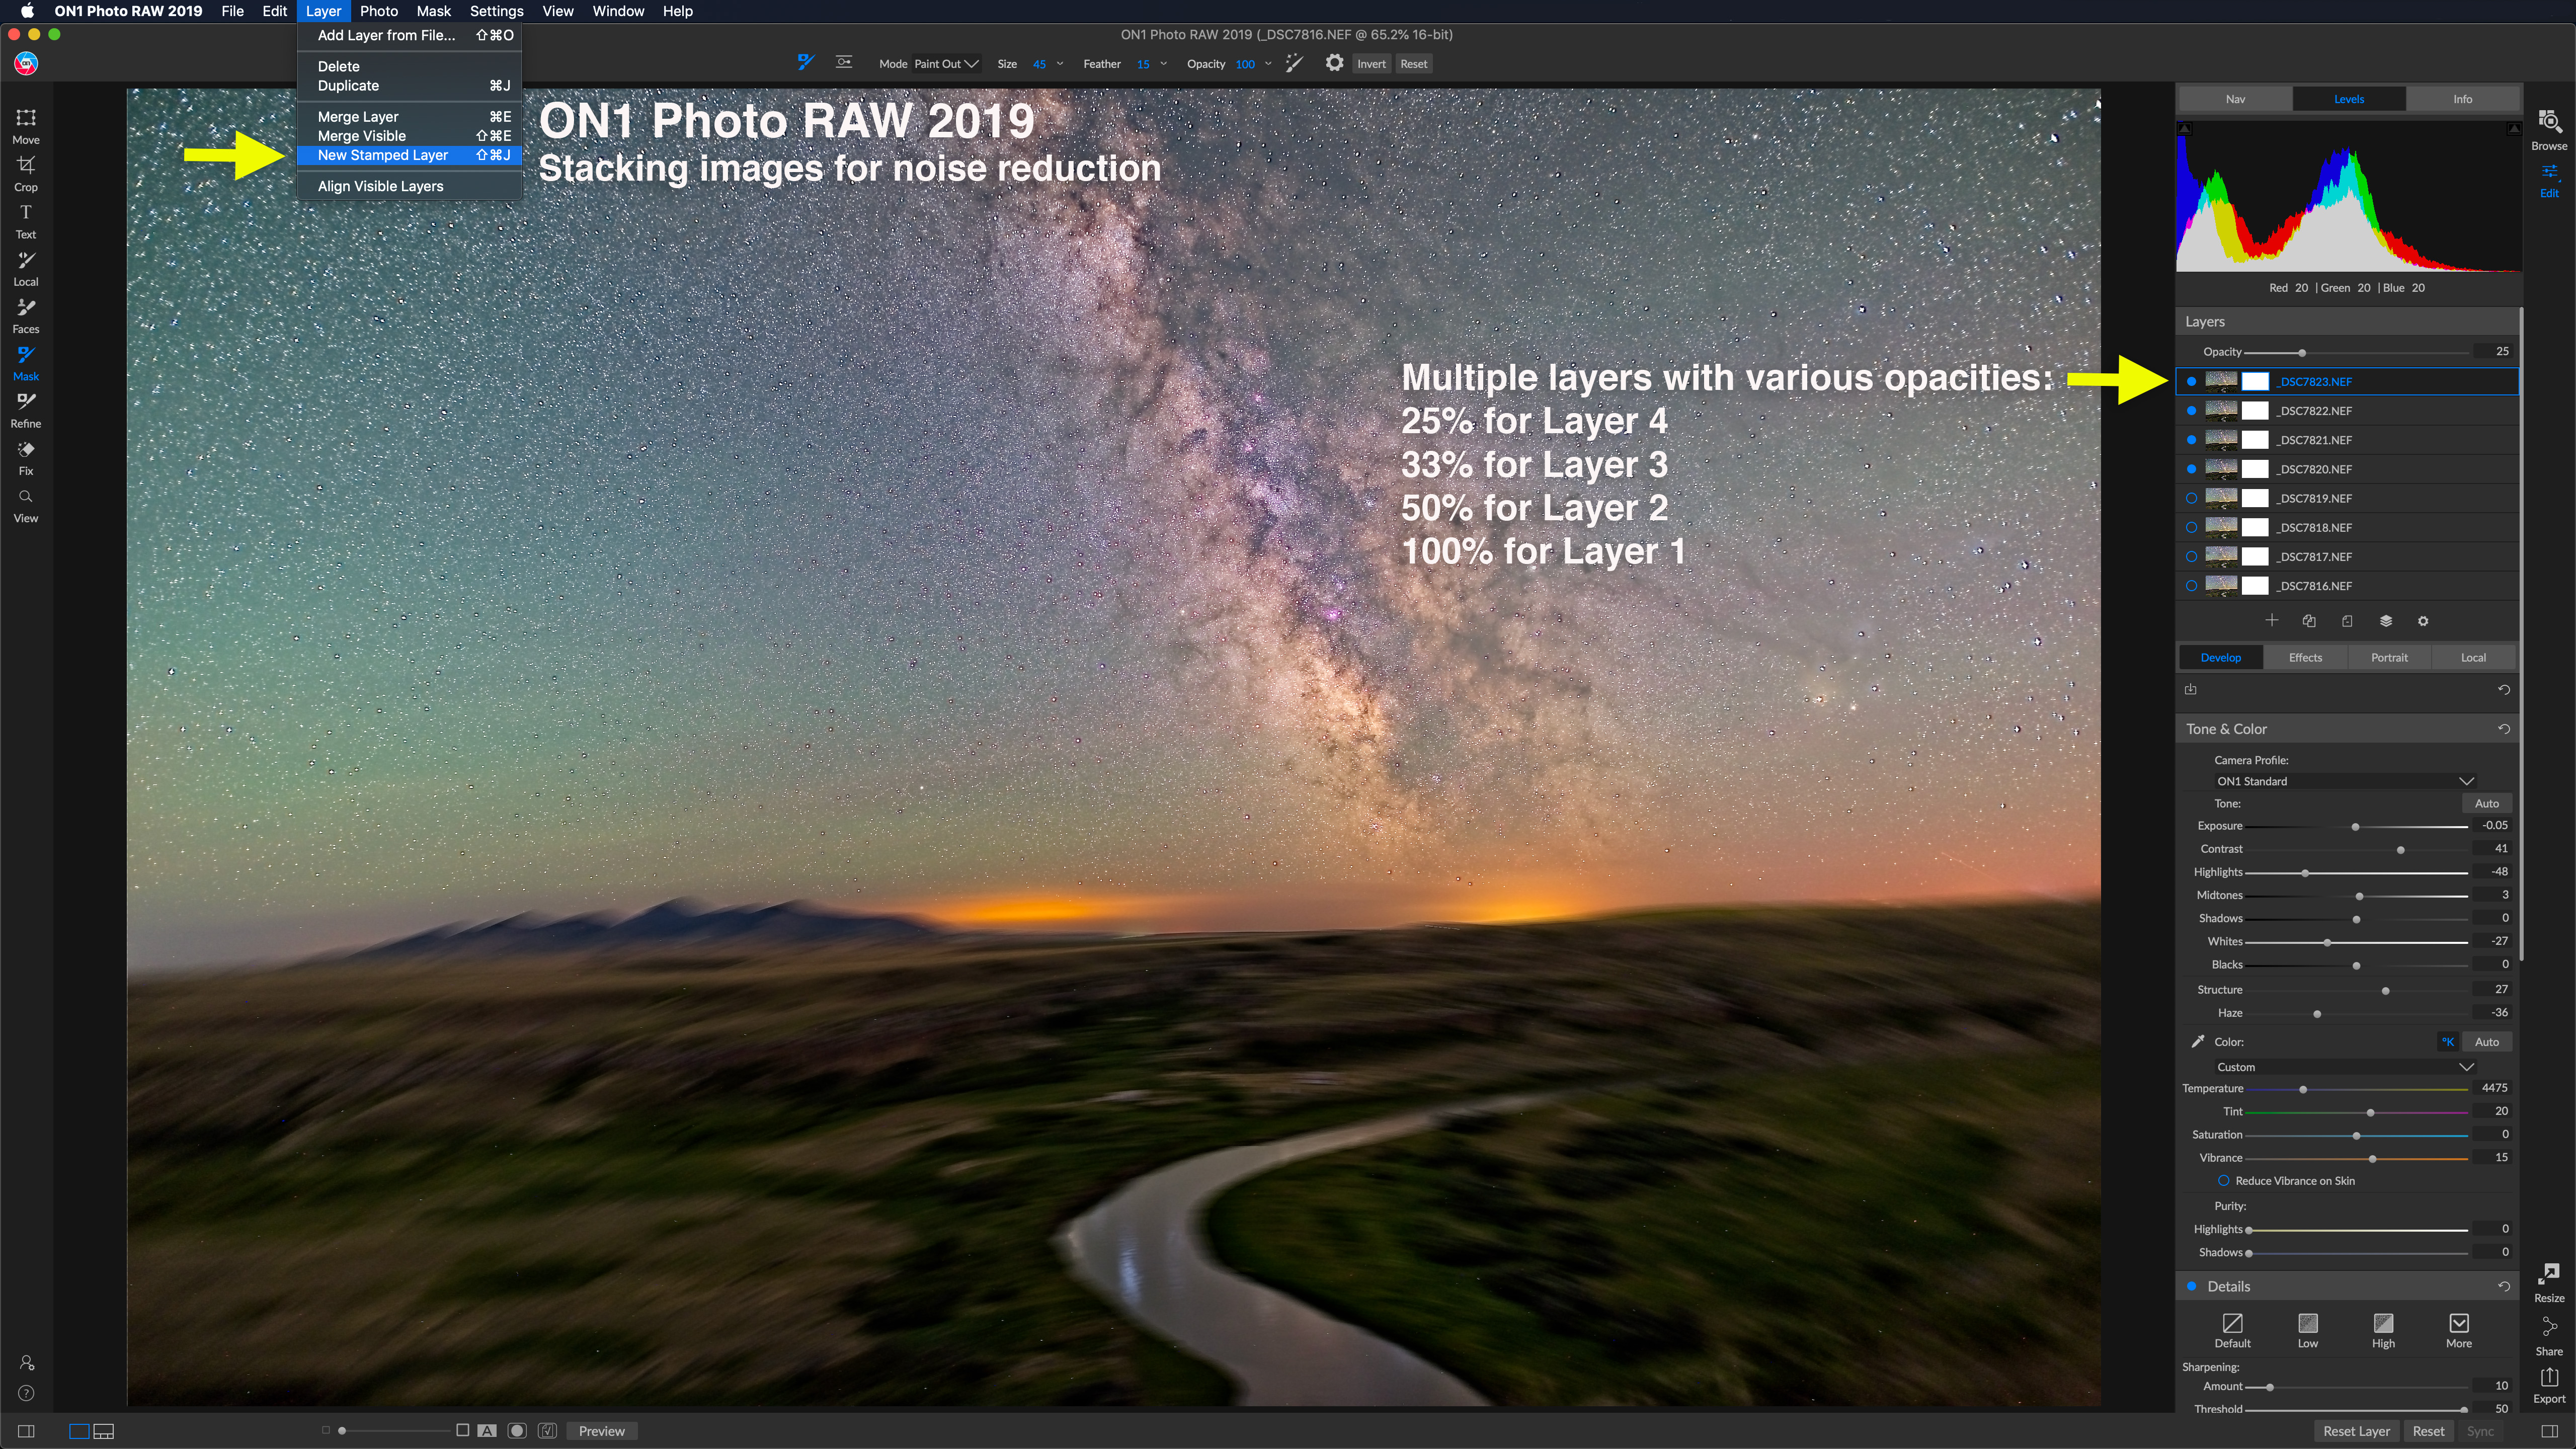
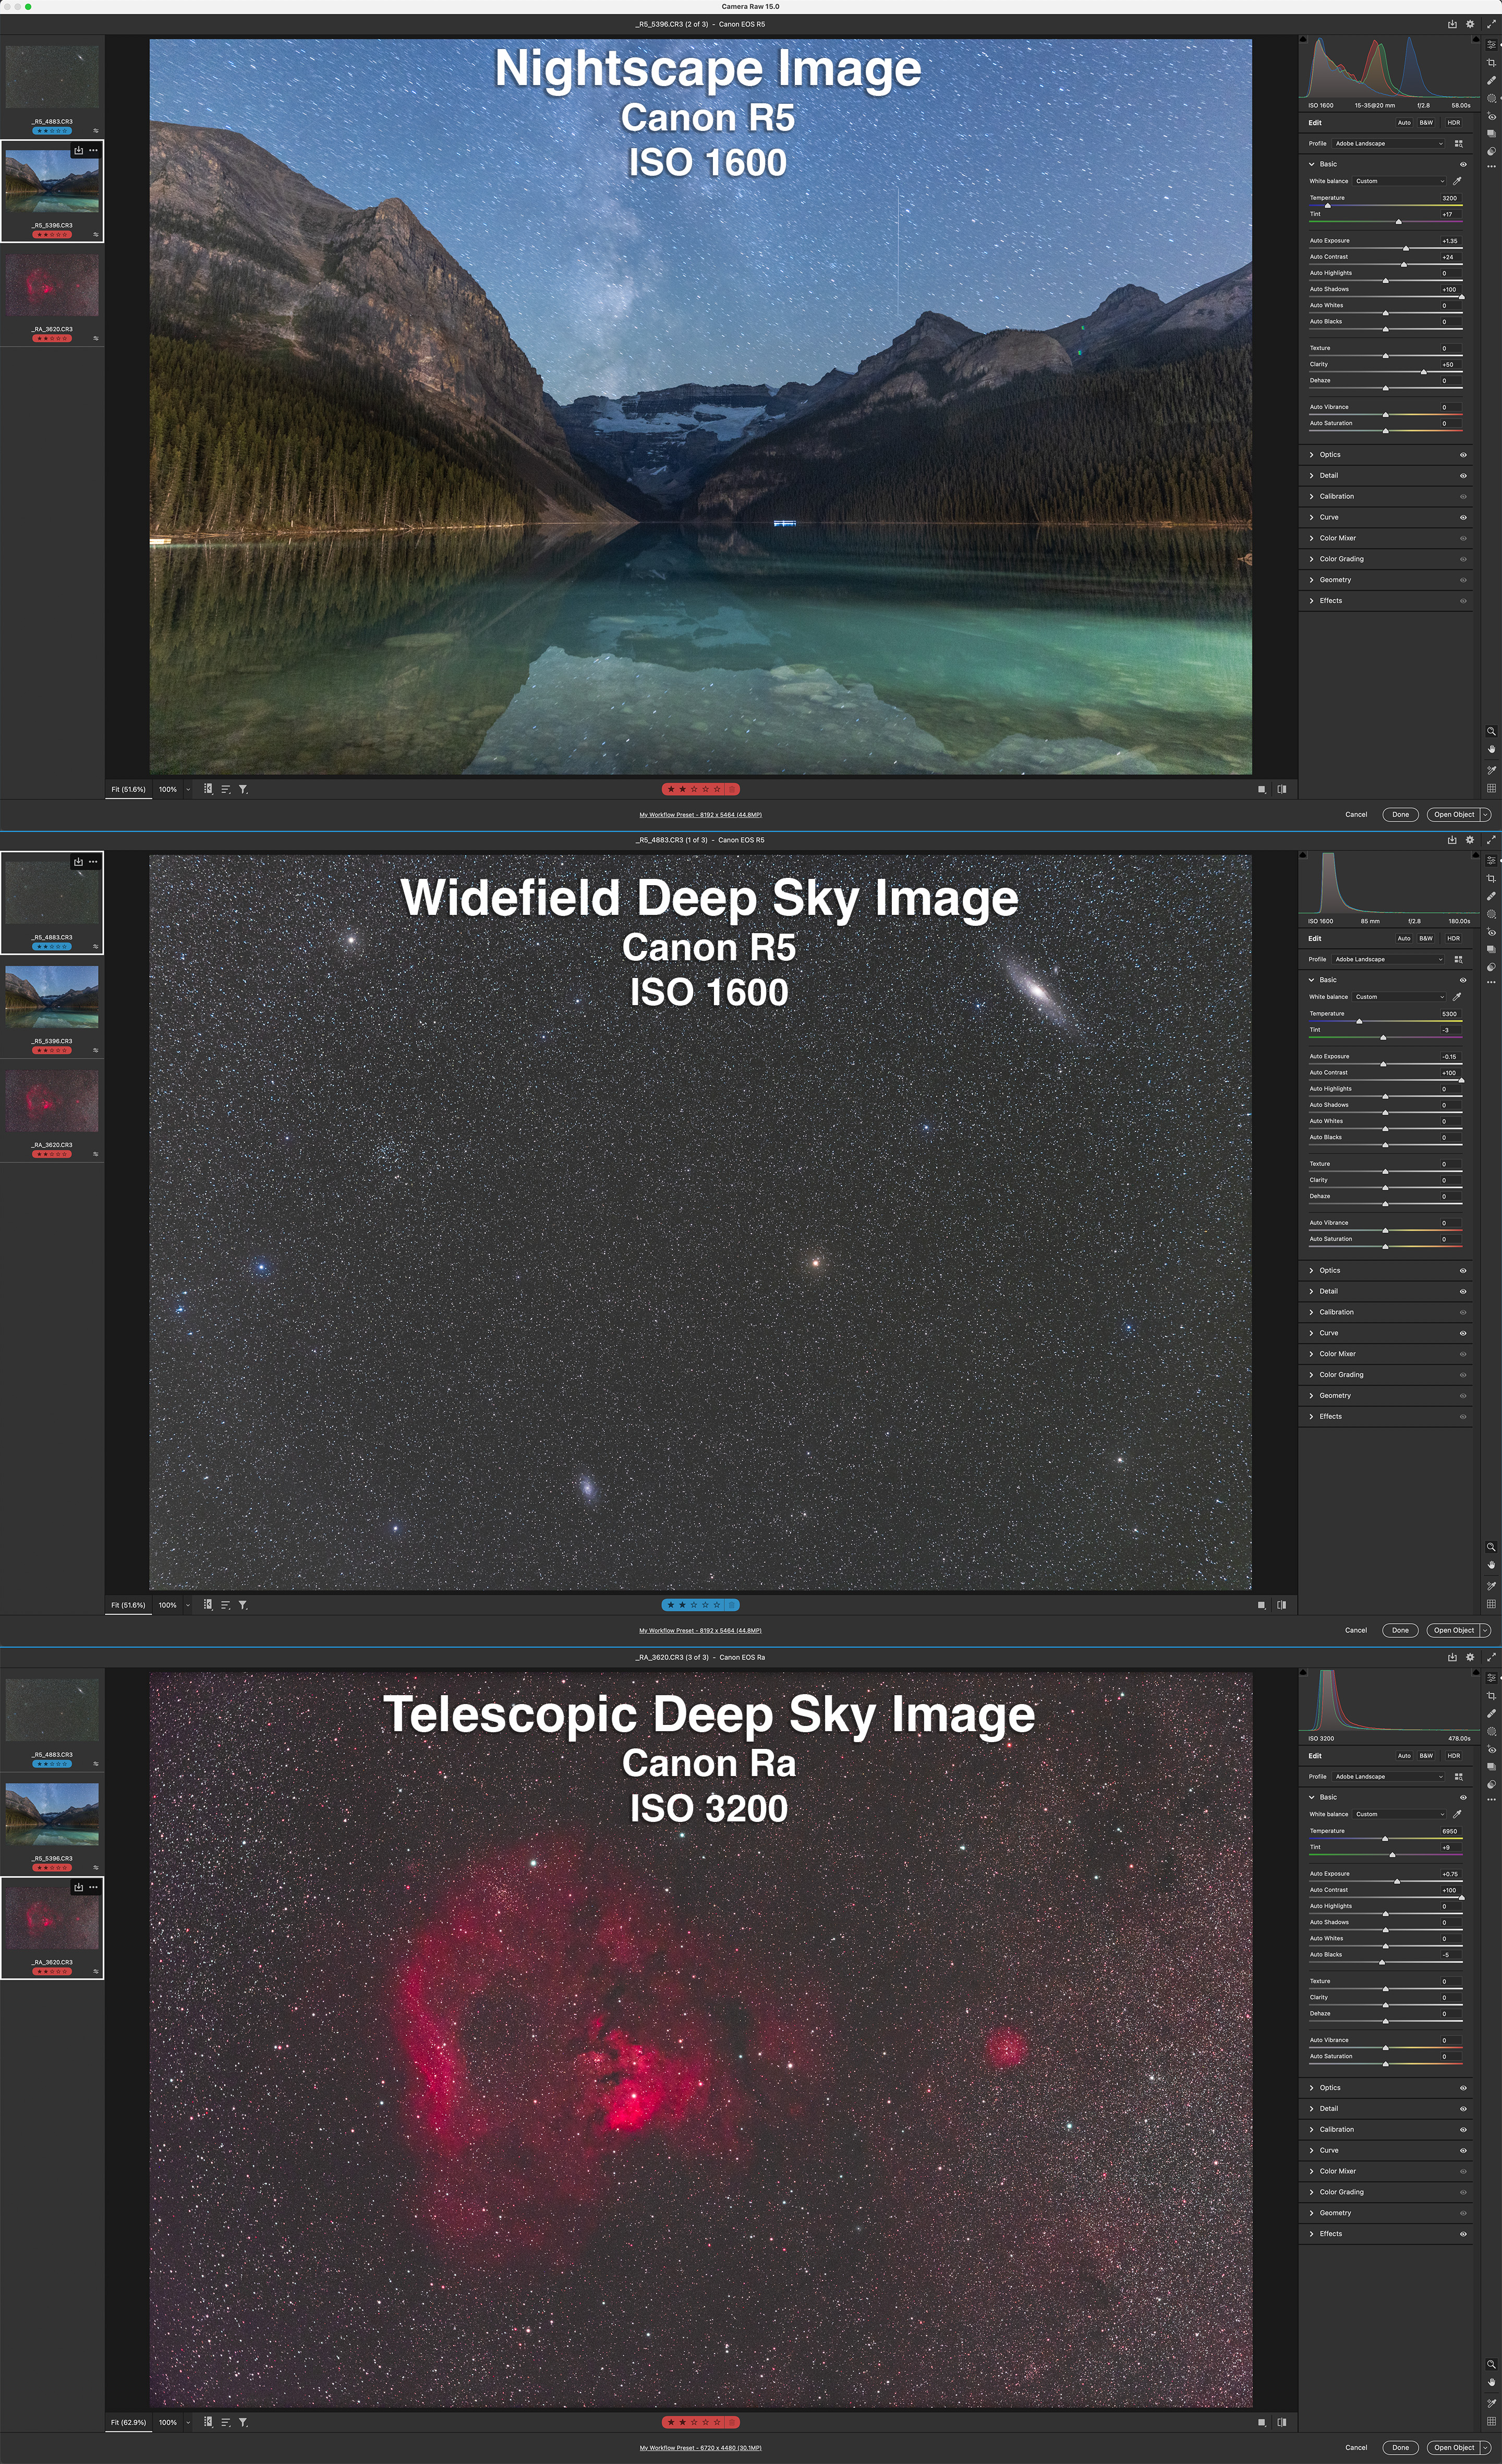
As shown above, I chose three representative images:
- A nightscape with star trails and a detailed foreground, at ISO 1600.
- A wide-field deep-sky image at ISO 1600 with an 85mm lens, with very tiny stars.
- A close-up deep-sky image taken with a telescope and at a high ISO of 3200, showing thermal noise hot pixels.
Each is a single image, not a stack of multiple images.
Before applying the noise reduction, the raw files received just basic color corrections and a contrast boost to emphasize noise all the more.
THE CONTENDERS
In the test results for the three images, I show the original raw image, plus a version with noise reduction and sharpening applied using Adobe Camera Raw’s own sliders, with luminance noise at 40, color noise at 25, and sharpening at 25.
I use this as a base comparison, as it has been the noise reduction I have long applied to images. However, ACR’s routine (also found in Adobe Lightroom) has not changed in years. It is good, but it is not AI.
[See below for an April 2023 update with a comparison of Adobe’s new AI Denoise with DxO DeepPrimeXD and Topaz PhotoAI.]
The new smart AI programs should improve upon this. But do they?
PLEASE NOTE:
- I have refrained from providing prices and explaining buying options, as frankly some can be complex!
- For those details and for trial copies, go to the software’s website by clicking on the link in the header product names below.
- All programs are available for Windows and MacOS. I tested the latter versions.
- I have not provided tutorials on how to use the software; I have just reported on their results. For trouble-shooting their use, please consult the software company in question.

ON1’s main product is the Lightroom/Photoshop alternative program called ON1 Photo RAW, which is updated annually to major new versions. It has full cataloging options like Lightroom and image layering like Photoshop. Its Edit module contains the NoNoise AI routine. But NoNoise AI can be purchased as a stand-alone app that also installs as a plug-in for Lightroom and Photoshop. It’s what I tested here. The latest 2023 version of NoNoise AI added ON1’s new Tack Sharp AI sharpening routine.
Version tested: 17.0.1
This program has proven very popular and has been adopted by many photographers – and astrophotographers – as an essential part of an editing workflow. It performs noise reduction only, offering a choice of five AI models. Auto modes can choose the models and settings for you based on the image content, but you can override those by adjusting the strength, sharpness, and recovery of original detail as desired.
A separate program, Topaz Sharpen AI, is specifically for image sharpening, but I did not test it here. Topaz Gigapixel AI is for image resizing.
Version tested: 3.7.0
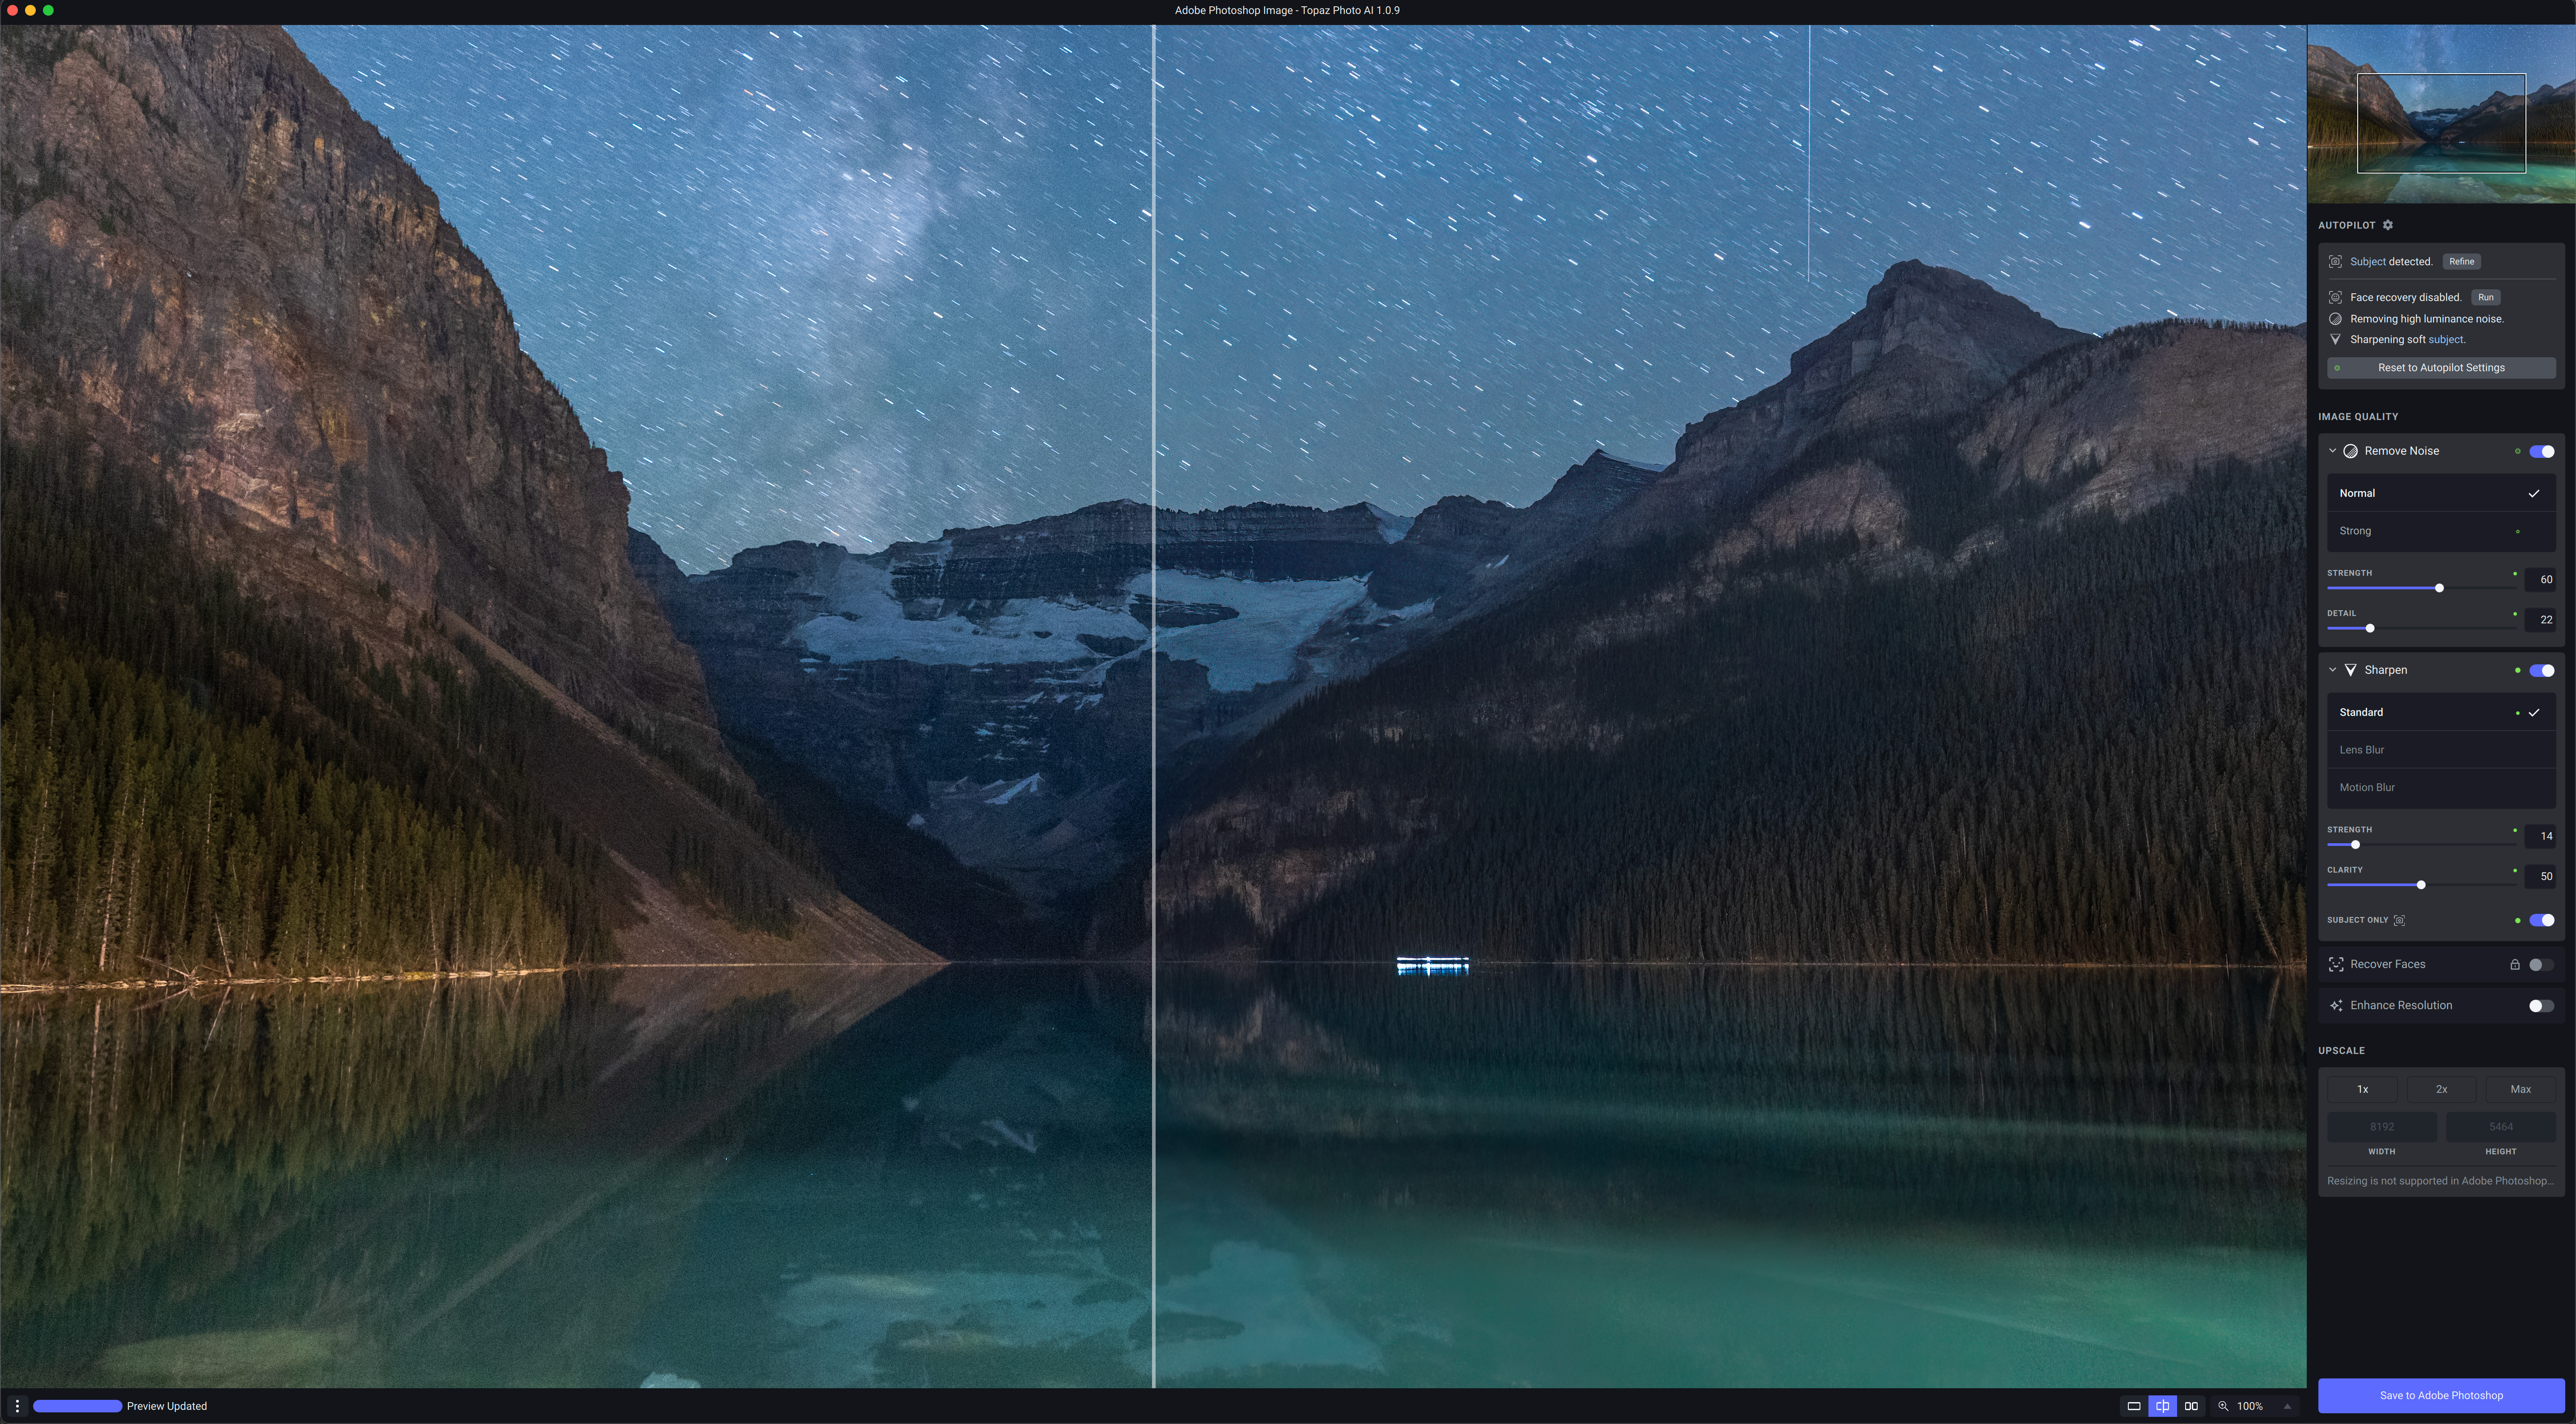
In 2022 Topaz introduced this new program which incorporates the trio of noise reduction, sharpening and image resizing in one package. Like DeNoise, Sharpen and Gigapixel, Photo AI works as a stand-alone app or as a plug-in for Lightroom and Photoshop. Photo AI’s Autopilot automatically detects and applies what it thinks the image needs. While it is possible to adjust settings, Photo AI offers much less control than DeNoise AI and Topaz’s other single-purpose programs.
As of this writing in November 2022 Photo AI is enjoying almost weekly updates, and seems to be where Topaz is focusing its development and marketing effort. [See below for a test of PhotoAI v1.3.1, current as of April 2023.]
Version tested: 1.0.9
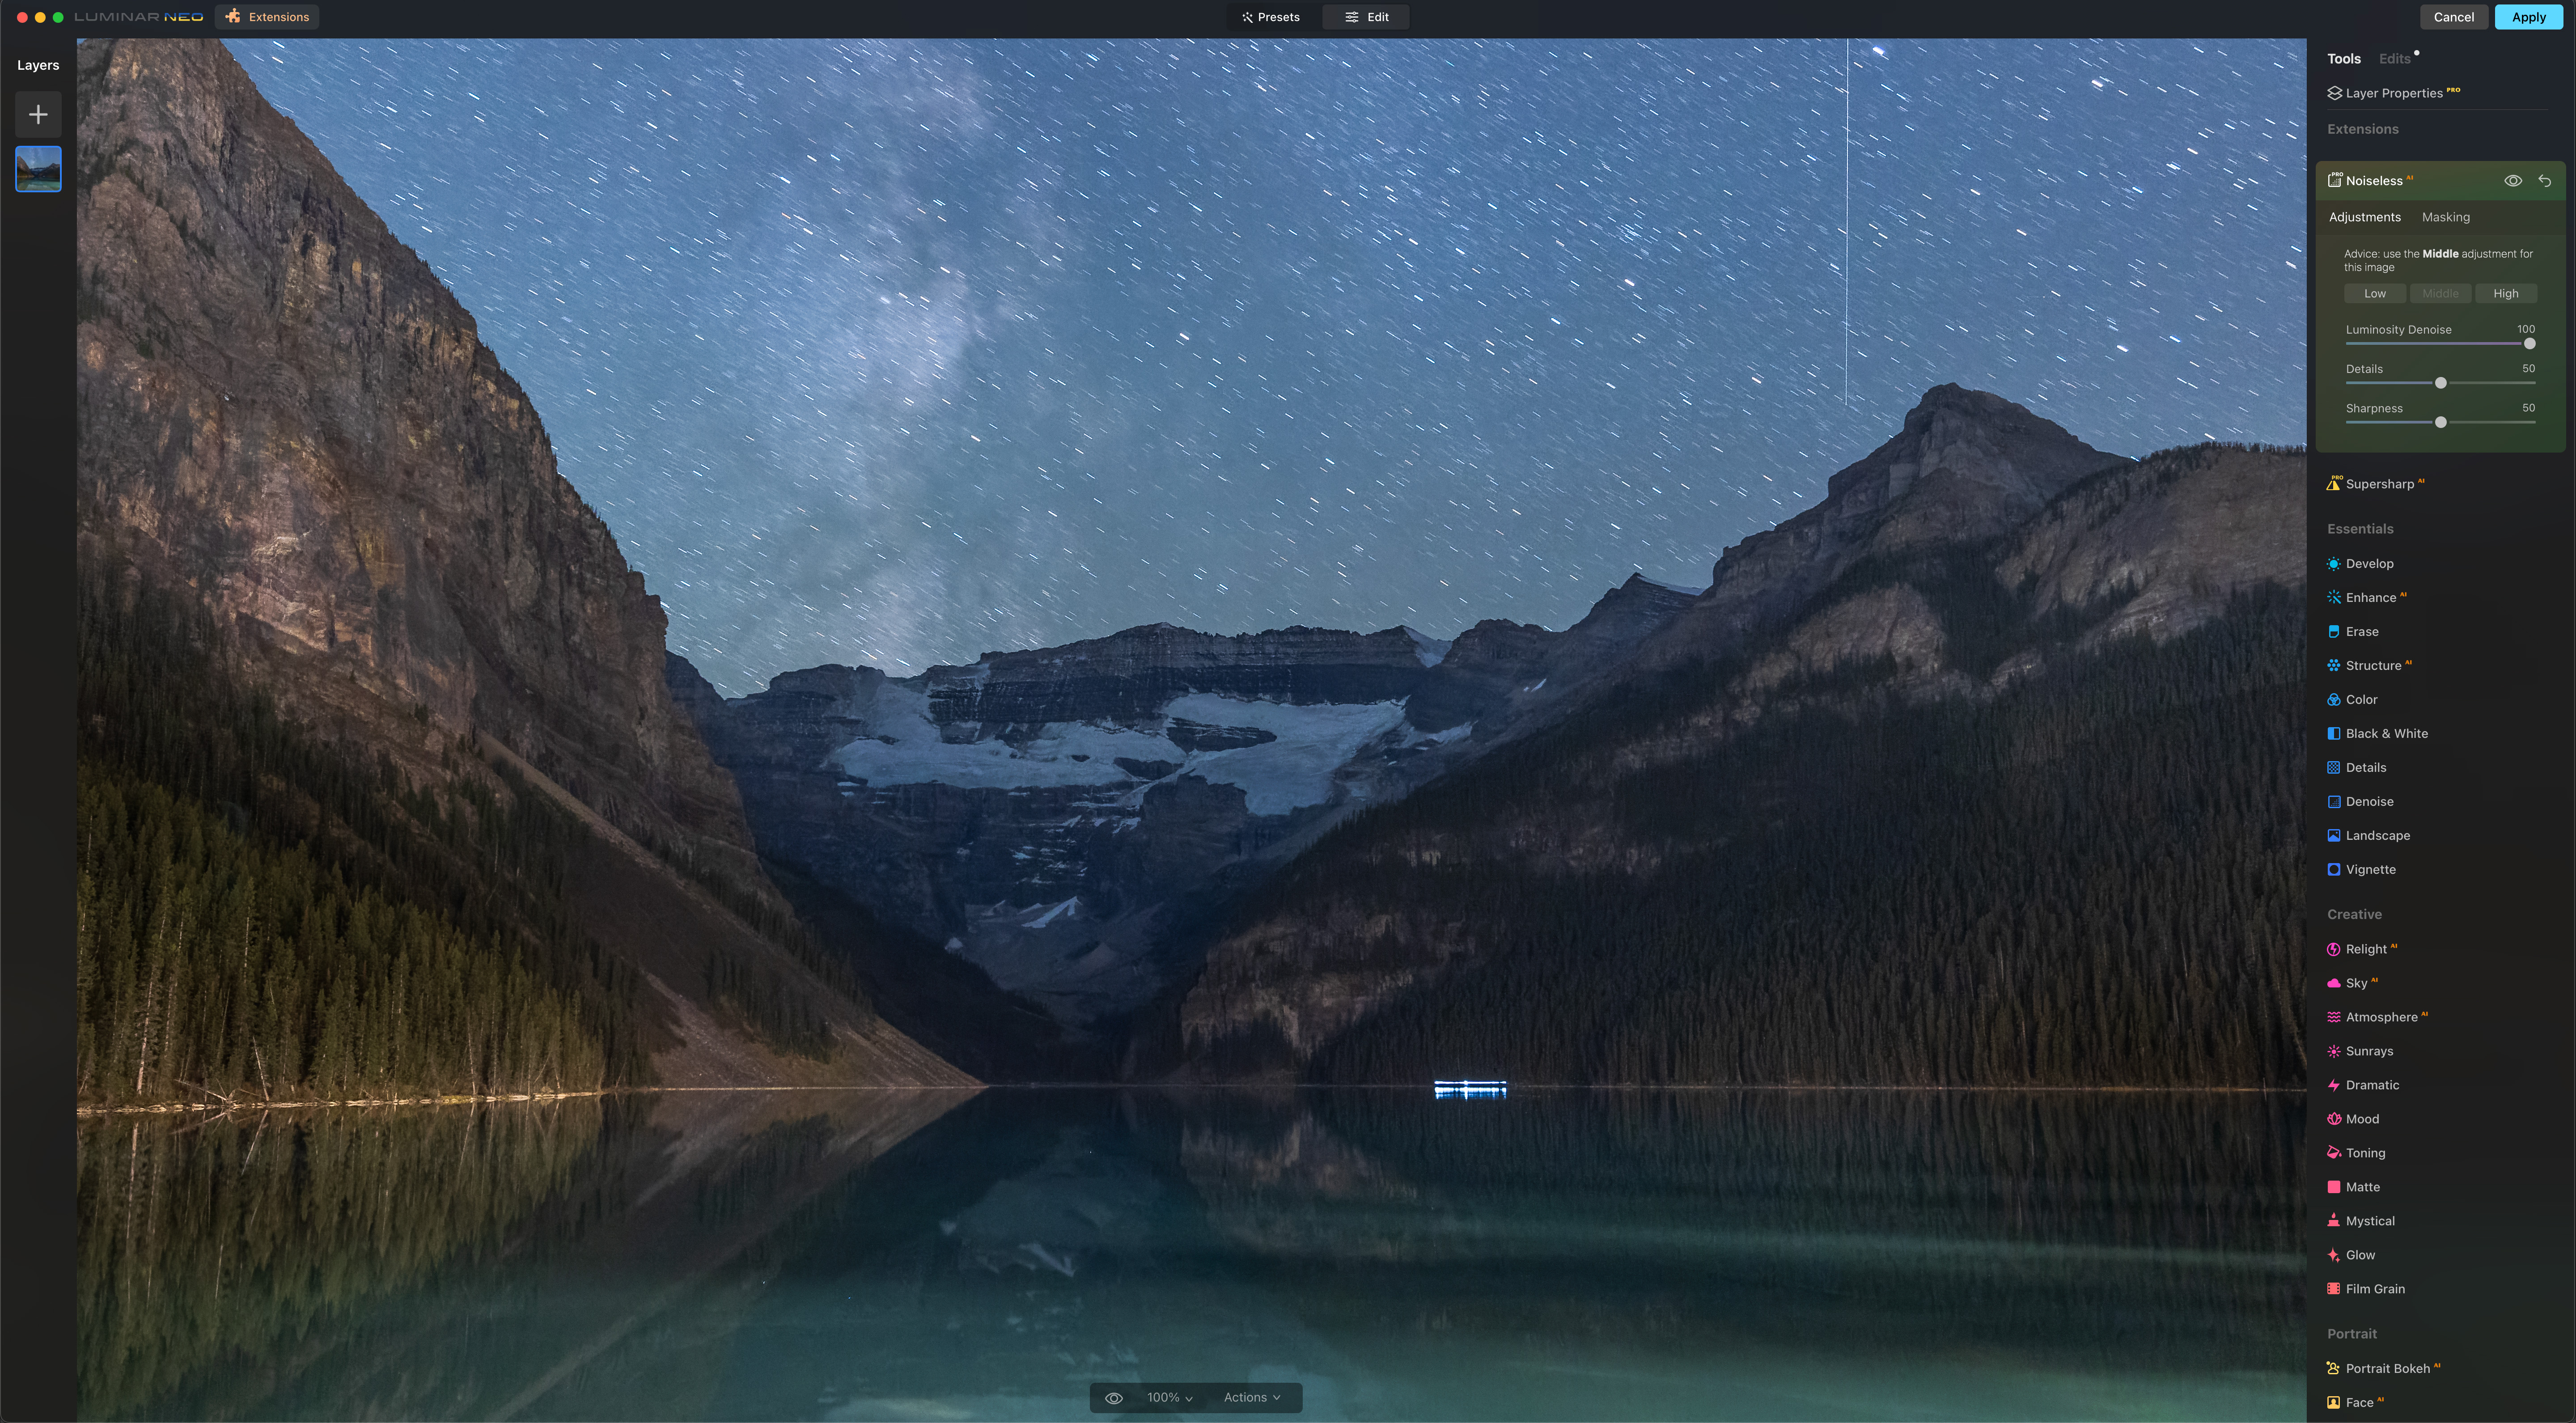
Unlike the other noise reduction programs tested here, Luminar Neo from the software company Skylum is a full-featured image editing program, with an emphasis on one-click AI effects. One of those is the new Noiseless AI, available as an extra-cost extension to the main Neo program, either as a one-time purchase or by annual subscription. Noiseless AI cannot be purchased on its own. However, Neo with most of its extensions does work as a plug-in for Lightroom and Photoshop.
Being new, Luminar Neo is also updated frequently, with more extensions coming in the next few months.
Version tested: 1.5.0
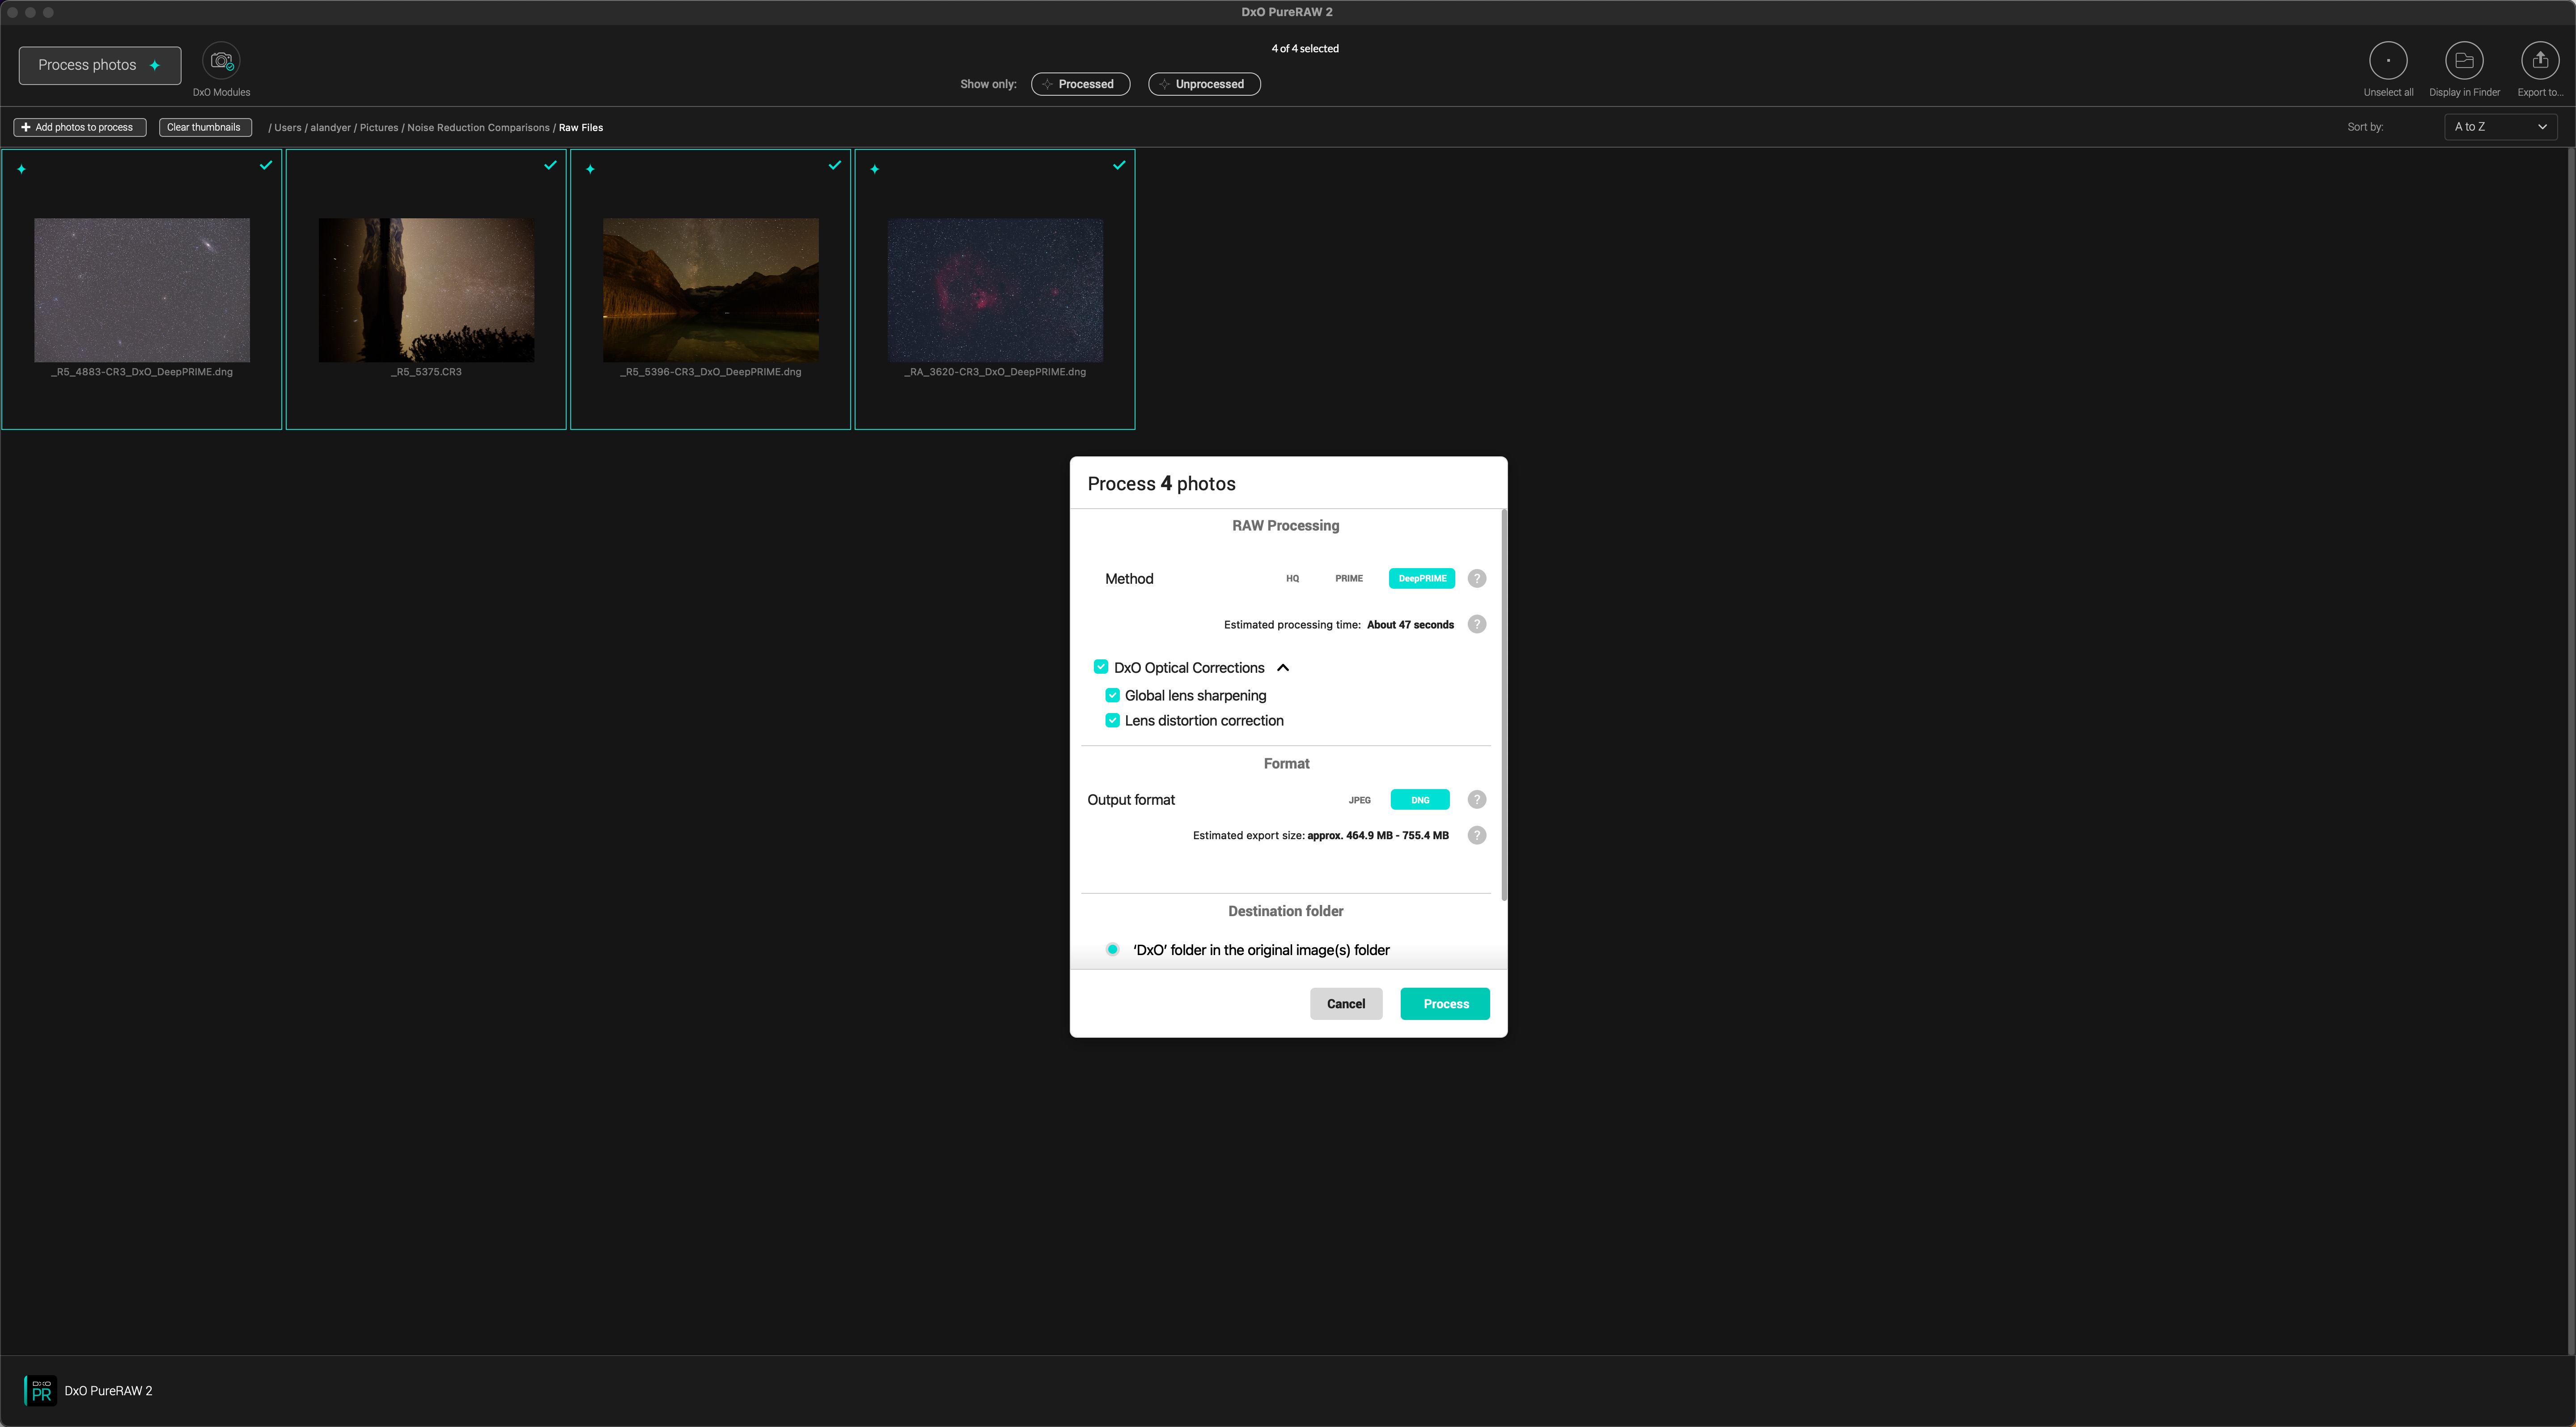
Like ON1, DxO makes a full-featured alternative to Adobe’s Lightroom for cataloging and raw developing called DxO PhotoLab, in version 6 as of late 2022. It contains DxO’s Prime and DeepPrime noise reduction routines. However, as with ON1, DxO has spun off just the noise reduction and lens correction parts of PhotoLab into a separate program, PureRAW2, which runs either as a stand-alone app or as a plug-in for Lightroom – but not Photoshop, as PureRAW works only on original raw files.
Unlike all the other programs, PureRAW2 offers essentially no options to adjust settings, just the option to apply, or not, lens corrections, and to choose the output format. For this testing I applied DeepPrime and exported out to DNG files. [See below for a test of DeepPrimeXD, now offered with PureRaw3.]
Version tested: 2.2
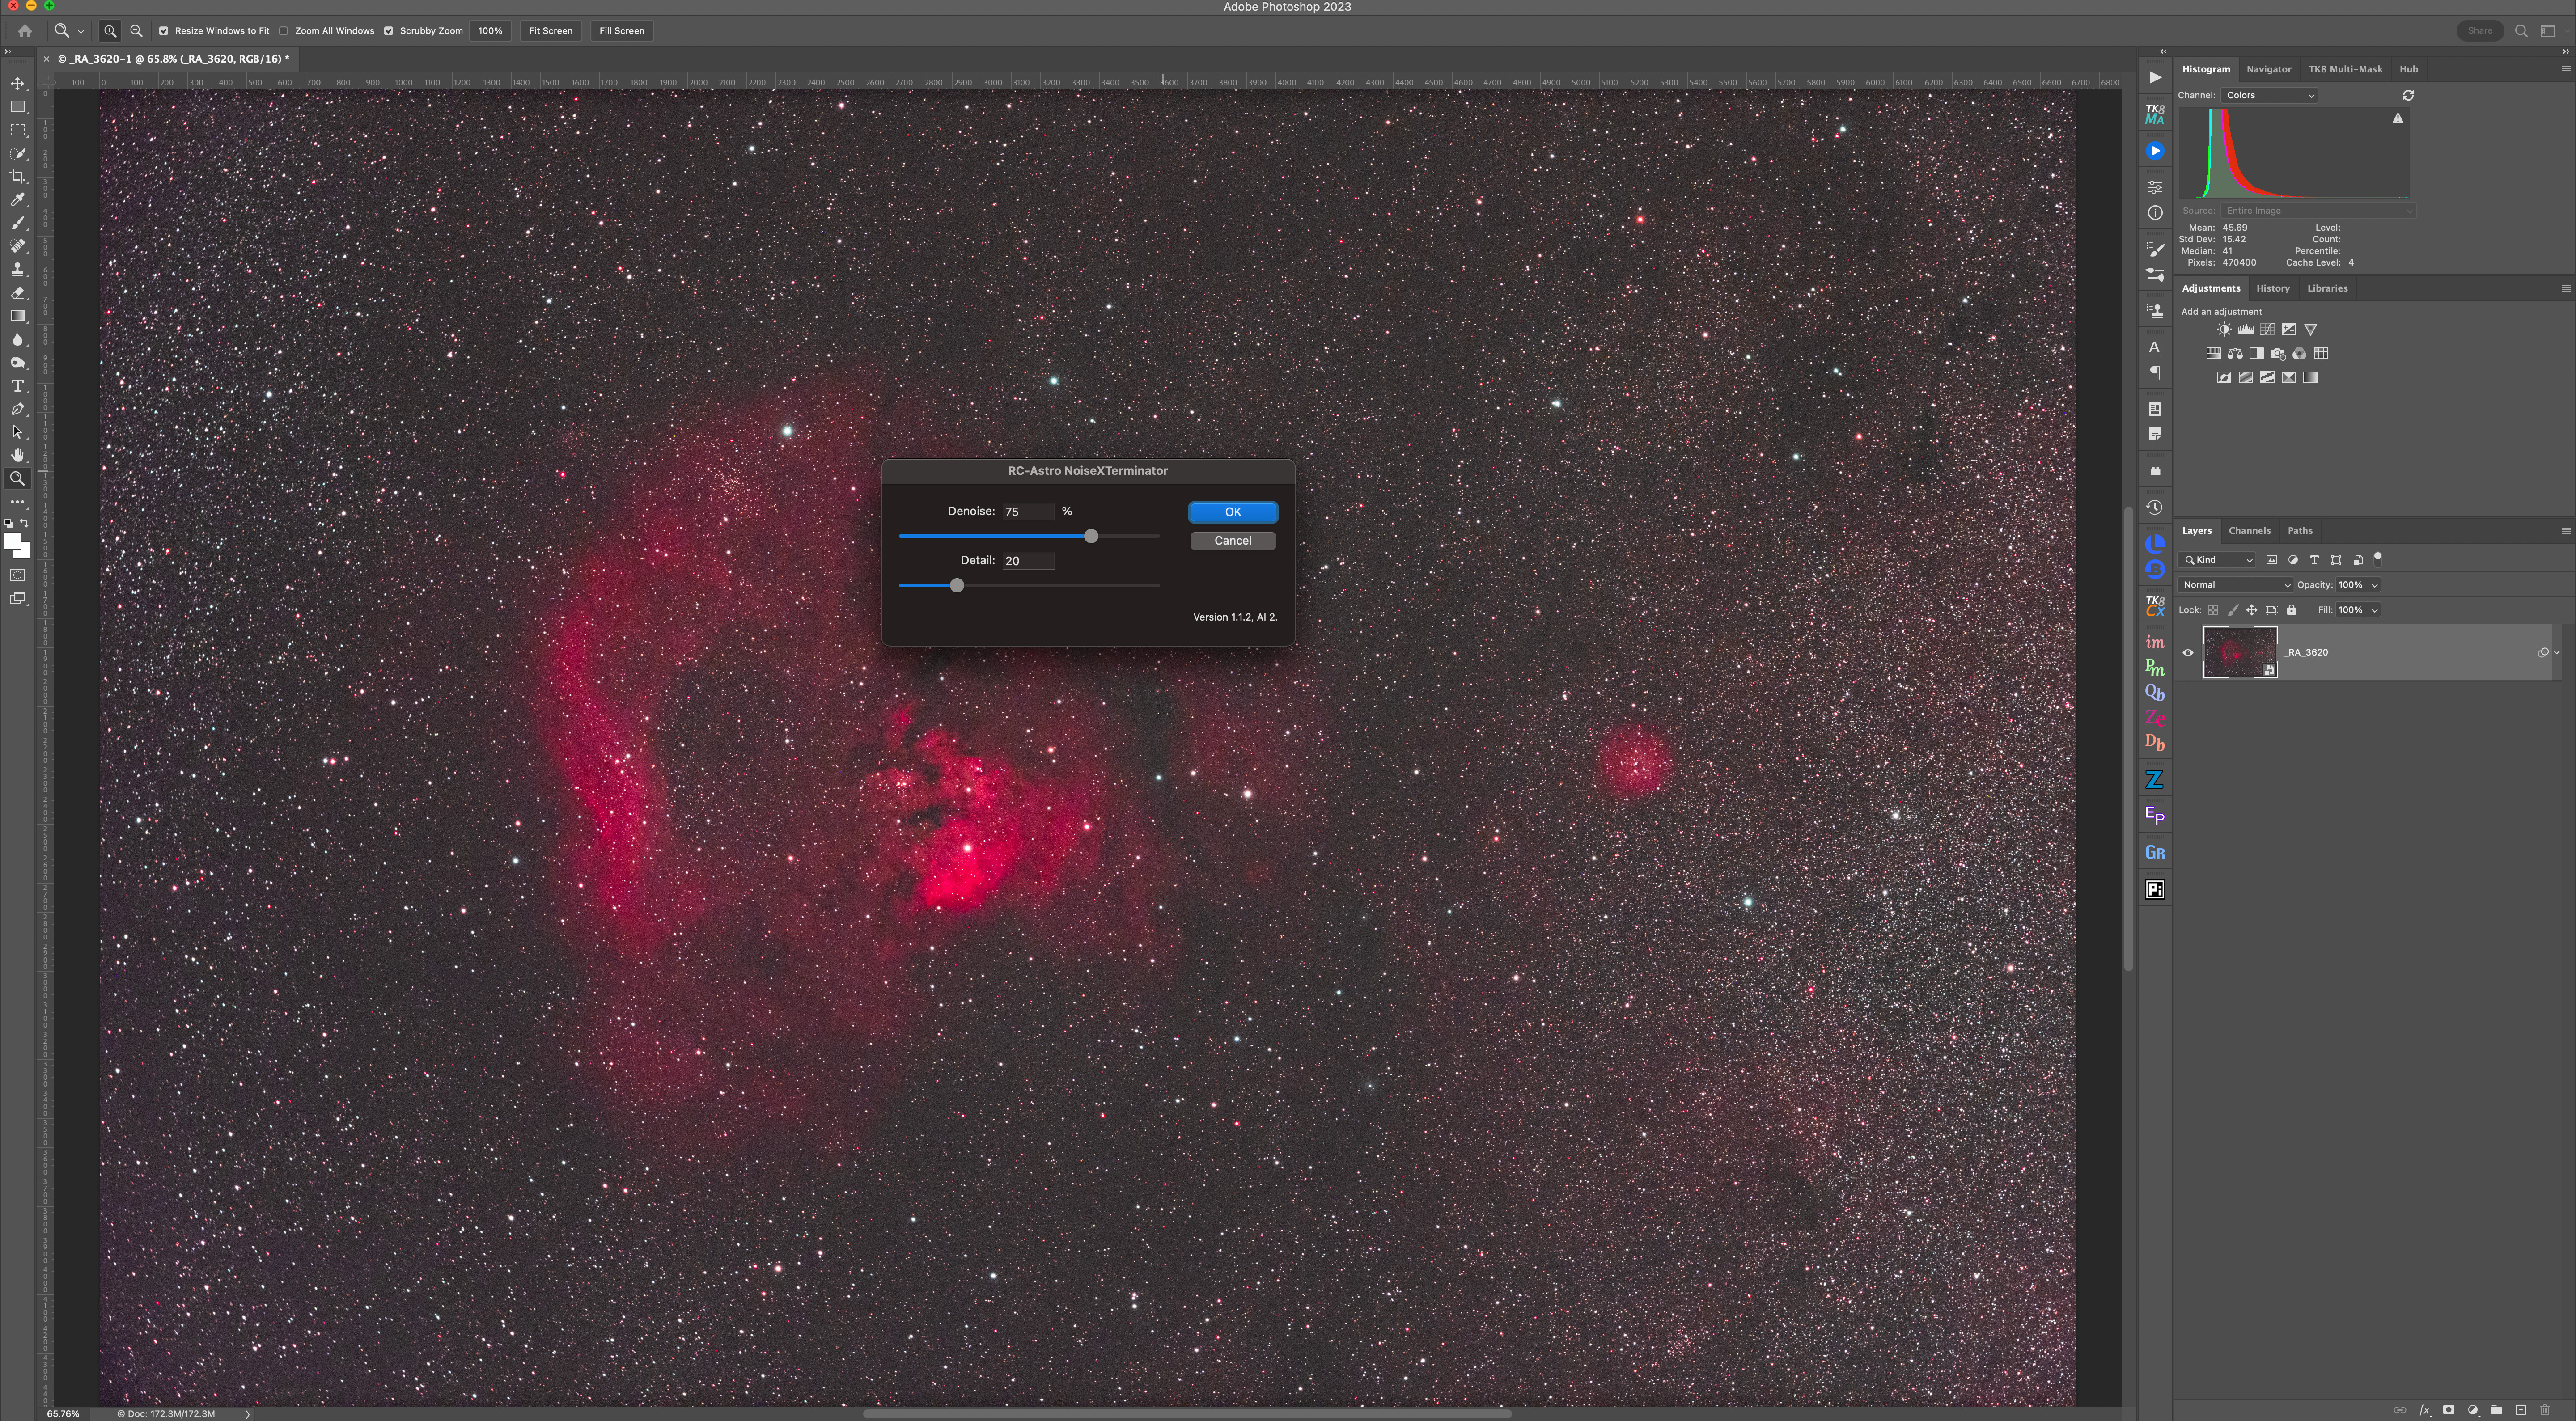
Unlike the other programs tested, NoiseXTerminator from astrophotographer Russell Croman is designed specifically for deep-sky astrophotography. It installs as a plug-in for Photoshop or Affinity Photo, but not Lightroom. It is also available under the same purchased licence as a “process” for PixInsight, an advanced program popular with astrophotographers, as it is designed just for editing deep-sky images.
I tested the Photoshop plug-in version of Noise XTerminator. It receives occasional updates to both the actual plug-in and separate updates to the AI module.
Version tested: 1.1.2, AI model 2
NIGHTSCAPE TEST
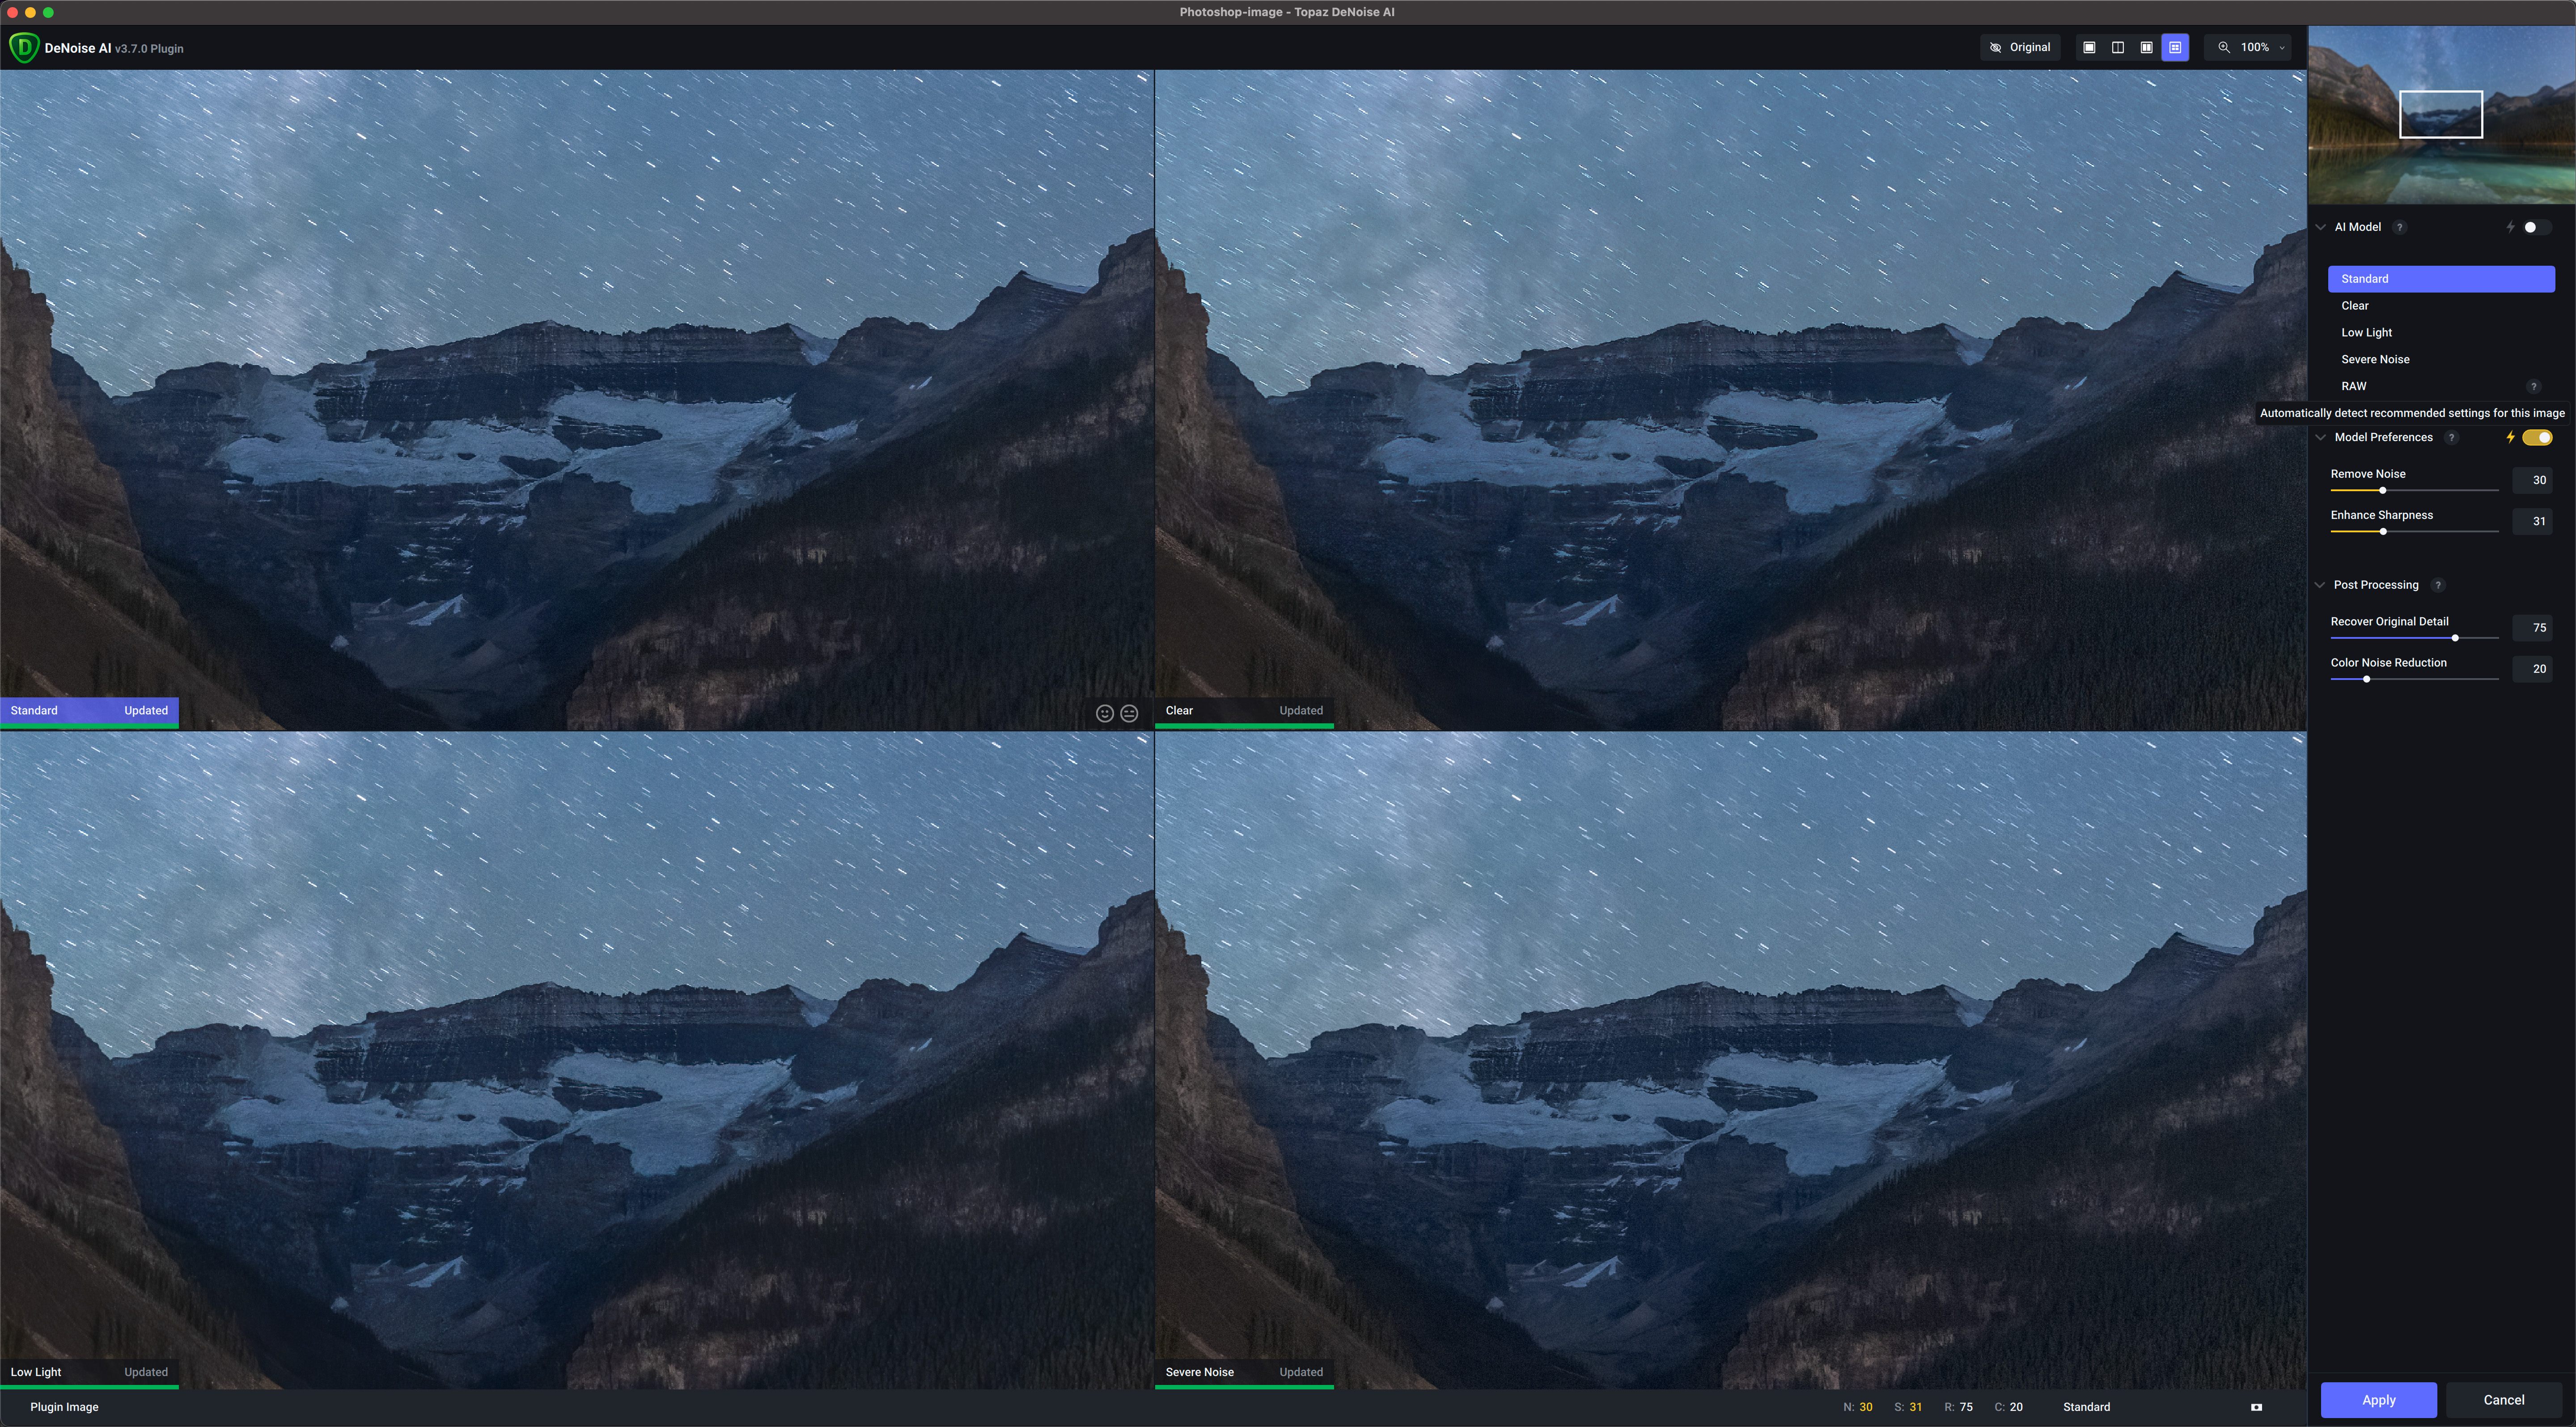
As with the other test images, the panels show a highly magnified section of the image, indicated in the inset. I shot the image of Lake Louise in Banff, Alberta with a Canon RF15-35mm lens on a 45-megapixel Canon R5 camera at ISO 1600.

- Adobe Camera Raw’s basic noise reduction did a good job, but like all general routines it does soften the image as a by-product of smoothing out high-ISO noise.
- ON1 NoNoise 2023 retained landscape detail better than ACR but softened the star trails, despite me adding sharpening. It also produced a somewhat patchy noise smoothing in the sky. This was with Luminosity backed off to 75 from the auto setting (which always cranks up the level to 100 regardless of the image), and with the Tack Sharp routine set to 40 with Micro Contrast at 0. It left a uniform pixel-level mosaic effect in the shadow areas. Despite the new Tack Sharp option, the image was softer than with last year’s NoNoise 2022 version (not shown here as it is no longer available) which produced better shadow results.
- Topaz DeNoise AI did a better job than NoNoise retaining the sharp ground detail while smoothing noise, always more obvious in the sky in such images. Even so, it also produced some patchiness, with some areas showing more noise than others. This was with the Standard model set to 40 for Noise and Sharpness, and Recover Details at 75. I show the other model variations below.
- Topaz Photo AI did a poor job, producing lots of noisy artifacts in the sky and an over-sharpened foreground riddled with colorful speckling. It added noise. This was with the Normal setting and the default Autopilot settings.
- Noiseless AI in Luminar Neo did a decent job smoothing noise while retaining, indeed sharpening ground detail without introducing ringing or colorful edge artifacts. The sky was left with some patchiness and uneven noise smoothing. This was with the suggested Middle setting (vs Low and High) and default levels for Noise, Detail and Sharpness. However, I do like Neo (and Skylum’s earlier Luminar AI) for adding other finishing effects to images such as Orton glows.
- DxO PureRAW2 did smooth noise very well while enhancing sharpness quite a lot, almost too much, though it did not introduce obvious edge artifacts. Keep in mind it offers no chance to adjust settings, other than the mode – I used DeepPrime vs the normal Prime. Its main drawback is that in making the conversion back to a raw DNG image it altered the appearance of the image, in this case darkening the image slightly. It also made some faint star trails look wiggly!
- Noise XTerminator really smoothed out the sky, and did so very uniformly without doing much harm to the star trails. However, it smoothed out ground detail unacceptably, not surprising given its specialized training on stars, not terrestrial content.
Conclusion: For this image, I’d say Topaz DeNoise AI did the best, though not perfect, job.
This was surprising, as tests I did with earlier versions of DeNoise AI showed it leaving many patchy artifacts and colored edges in places. Frankly, I was put off using it. However, Topaz has improved DeNoise AI a lot.
Why it works so well, when Topaz’s newer program Photo AI works so poorly is hard to understand. Surely they use the same AI code? Apparently not. Photo AI’s noise reduction is not the same as DeNoise AI.
Similarly, ON1’s NoNoise 2023 did a worse job than their older 2022 version. One can assume its performance will improve with updates. The issue seems to be with the new Tack Sharp addition.
NoiseXTerminator might be a good choice for reducing noise in just the sky of nightscape images. It is not suitable for foregrounds, though as of April 2023 its performance on landscapes has improved but is not ideal.
WIDE-FIELD IMAGE TEST
I shot this image of Andromeda and Triangulum with an 85mm Rokinon RF lens on the 45-megapixel Canon R5 on a star tracker. Stars are now points, with small ones easily mistaken for noise. Let’s see how the programs handle such an image, zooming into a tiny section showing the galaxy Messier 33.
- Adobe Camera Raw’s noise and sharpening routines do take care of the worst of the luminance and chrominance noise, but inevitably leave some graininess to the image. This is traditionally dealt with by stacking multiple sub-exposures.
- ON1 NoNoise 2023 did a better job than ACR, smoothing the worst of the noise and uniformly, without leaving uneven patchiness. However, it did soften star images, almost like it was applying a 1- or 2-pixel gaussian blur, adding a slight hazy look to the image. And yet the faintest stars that appeared as just perceptible blurs in the original image were sharpened to one- or two-pixel points. This was with only NoNoise AI applied, and no Tack Sharp AI. And, as I show below, NoNoise’s default “High Detail” option introduced with the 2022 version and included in the 2023 edition absolutely destroys star fields. Avoid it.
- Topaz DeNoise AI did a better job than Camera Raw, though it wasn’t miles ahead. This was with the Standard setting. Its Low Light and Severe models were not as good, surprising as you might think one of those choices would be the best for such an image. It pays to inspect Topaz’s various models’ results. Standard didn’t erase stars; it actually sharpened the fainter ones, almost a little too much, making them look like specks of noise. Playing with Enhance Sharpness and Recover Detail didn’t make much difference to this behavior.
- Topaz Photo AI again performed poorly. Its Normal mode left lots of noise and grainy artifacts. While its Strong mode shown here did smooth background noise better, it softened stars, wiping out the faint ones and leaving colored edges on the brighter ones.
- Noiseless AI in Luminar Neo did smooth fine noise somewhat, better than Camera Raw, but still left a grainy background, though with the stars mostly untouched in size and color.
- DxO PureRAW2 did eliminate noise quite well, while leaving even the faintest stars intact, unlike with the deep-sky image below, which is odd. However, it added some dark halos to bright stars from over-sharpening. And, as with the nightscape example, PureRAW’s output DNG was darker than the raw that went in. I don’t want noise reduction programs altering the basic appearance of an image, even if that can be corrected later in the workflow.
- Noise XTerminator performed superbly, as expected – after all, this is the subject matter it is trained to work on. It smoothed out random noise better than any of the other programs, while leaving even the faintest stars untouched, in fact sharpening them slightly. Details in the little galaxy were also unharmed.
Conclusion: The clear winner was NoiseXTerminator.
Topaz DeNoise was a respectable second place, performing better than it had done on such images in earlier versions. Even so, it did alter the appearance of faint stars which might not be desirable.
ON1 NoNoise 2023 also performed quite well, with its softening of brighter stars yet sharpening of fainter ones perhaps acceptable, even desirable for an effect.
TELESCOPIC DEEP-SKY TEST
I shot this image of the NGC 7822 complex of nebulosity with a SharpStar 61mm refractor, using the red-sensitive 30-megapixel Canon Ra and with a narrowband filter to isolate the red and green light of the nebulas.
Again, the test image is a single raw image developed only to re-balance the color and boost the contrast. No dark frames were applied, so the 8-minute exposure at ISO 3200 taken on a warm night shows thermal noise as single “hot pixel” white specks.

- Adobe Camera Raw did a good job smoothing the worst of the noise, suppressing the hot pixels but only by virtue of it softening all of the image slightly at the pixel level. However, it leaves most stars intact.
- ON1 NoNoise 2023 also did a good job smoothing noise while also seeming to boost contrast and structure slightly. But as in the wide-field image, it did smooth out star images a little, though somewhat photogenically, while still emphasizing the faintest stars. This was with no sharpening applied and Luminosity at 60, down from the default 100 NoNoise applies without fail. One wonders if it really is analyzing images to produce optimum settings. With no Tack Sharp sharpening applied, the results on this image with NoNoise 2023 looked identical to NoNoise 2022.
- Topaz DeNoise AI did another good job smoothing noise, while leaving most stars unaffected. However, the faintest stars and hot pixels were sharpened to be more visible tiny specks, perhaps too much, even with Sharpening at its lowest level of 1 in Standard mode. Low Light and Severe modes produced worse results, with lots of mottling and unevenness in the background. Unlike NoNoise, at least its Auto settings do vary from image to image, giving you some assurance it really is responding to the image content.
- Topaz Photo AI again produced unusable results. Its Normal modes produced lots of mottled texture and haloed stars. Its Strong mode shown here did smooth noise better, but still left lots of uneven artifacts, like DeNoise AI did in its early days. It certainly seems like Photo AI is using old hand-me-down code from DeNoise AI.
- Noiseless AI in Luminar Neo did smooth noise but unevenly, leaving lots of textured patches. Stars had grainy halos and the program increased contrast and saturation, adjustments usually best left for specific adjustment layers dedicated to the task.
- DxO PureRAW2 did smooth noise very well, including wiping out the faintest specks from hot pixels, but it also wiped out the faintest stars, I think unacceptably and more than other programs like DeNoise AI. For this image it did leave basic brightness alone, likely because it could not apply lens corrections to an image taken with unknown optics. However, it added an odd pixel-level mosaic-like effect on the sky background, again unacceptable.
- Noise XTerminator did a great job smoothing random noise without affecting any stars or the nebulosity. The Detail level of 20 I used actually emphasized the faintest stars, but also the hot pixel specks. NoiseXTerminator can’t be counted on to eliminate thermal noise; that demands the application of dark frames and/or using dithering routines to shift each sub-frame image by a few pixels when autoguiding the telescope mount. Even so, Noise XTerminator is so good users might not need to take and stack as many images.
Conclusion: Again, the winner was NoiseXTerminator.
Deep-sky photographers have praised “NoiseX” for its effectiveness, either when applied early on in a PixInsight workflow or, as I do in Photoshop, as a smart filter to the base stacked image underlying other adjustment layers.
Topaz DeNoise is also a good choice as it can work well on many other types of images. But again, play with its various models and settings. Pixel peep!
ON1 NoNoise 2023 did put in a respectable performance here, and it will no doubt improve – it had been out less than a month when I ran these tests.
Based on its odd behavior and results in all three test images I would not recommend DxO’s PureRAW2. Yes, it reduces noise quite well, but it can alter tone and color in the process, and add strange pixel-level mosaic artifacts.
COMPARING DxO and TOPAZ OPTIONS
DxO and Topaz DeNoise AI offer the most choices of AI models and strength of noise reduction. Here I compare:
- Topaz DeNoise AI on the nightscape image using three of its models: Standard (which I used in the comparisons above), plus Low Light and Severe. These show how the other models didn’t do as good a job.
- The set below also compares DeNoise AI to Topaz’s other program, Photo AI, to show how poor a job it is doing in its early form. Its Strong mode does smooth noise but over-sharpens and leaves edge artifacts. Yes, Photo AI is one-click easy to use, but produces bad results – at least on astrophotos.

As of this writing DxO’s PureRAW2 offers the Prime and newer DeepPrime AI models – I used DeepPrime for my tests.
However, DxO’s more expensive and complete image processing program, PhotoLab 6, also offers the even newer DeepPrimeXD model, which promises to preserve or recover even more “Xtra Detail” over the DeepPrime model. As of this writing, the XD mode is not offered in PureRAW2. Perhaps that will wait for PureRAW3, no doubt a paid upgrade.
[UPDATE MARCH 2023: DxO has indeed brought out PureRaw3 as a paid upgrade that, as expected, offers the DeepPrimeXD. In testing the new version I found that, while it did not seem to alter an image’s exposure as PureRaw2 did, DeepPrime and DeepPrimeXD still unacceptably ruin starry skies, by either adding a fine-scale mosaic effect (DeepPrime) or weird wormy artifacts (DeepPrimeXD). Try it for yourself to see if you find the same.]
- The set above compares the three noise reduction models of DxO’s PhotoLab 6. DeepPrime does do a better job than Prime. DeepPrimeXD does indeed sharpen detail more, but in this example it is too sharp, showing artifacts, especially in the sky where it is adding structures and textures that are not real.
- However, when used from within PhotoLab 6, the DeepPrime noise reduction becomes more usable. PhotoLab is then being used to perform all the raw image processing, so PureRAW’s alteration of color and tone is not a concern. Conversely, it can also output raw DNGs with only noise reduction and lens corrections applied, essentially performing the same tasks as PureRAW. If you have PhotoLab, you don’t need PureRAW.
APRIL 2023 UPDATE — TESTING ADOBE’S NEW AI Denoise
In April 2023 Adobe updated Lightroom Classic to v12.3 and the Camera Raw plug-in for Bridge and Photoshop to 15.3. The major new feature was a long-awaited AI noise reduction from Adobe called Denoise. It works only on raw files and generates a new raw DNG file to which all the raw develop settings, including AI masks, can be applied. But the DNG file is some four times larger than the original raw file from the camera.
Here’s a comparison of Camera Raw using the old noise reduction and the new AI option, with DxO’s DeepPrimeXD and Topaz’s PhotoAI, on an aurora image from April 23, 2023:
I used Topaz Photo AI as that’s the program Topaz is now putting all their development effort into, neglecting their other plug-ins such as DeNoise AI. I used DxO PhotoLab 6 with its DeepPrimeXD option to export a DNG with only noise reduction applied, for results identical to what is now offered with DxO’s separate PureRaw3 plug-in.
At 100% above, there’s very little obvious difference. They show up when pixel peeping.
Above are 400% blow-ups of a section of the sky.
Compared to using Adobe’s old noise reduction sliders, their new AI Denoise did a far superior job at smoothing noise, and providing sharpening – almost too much, making even the smallest stars pop out more, perhaps a good thing. But there’s no control of that sharpening.
DxO’s DeepPrimeXD provides a similar, or perhaps more excessive level of AI sharpening. While it smooths noise, it introduces all manner of wormy AI artifacts. It is unacceptable.
Topaz PhotoAI’s noise reduction and sharpening, here both applied with their AutoPilot settings, smoothed noise, but created a patchy appearance. It also softened the stars, despite having sharpening turned on. It was the worst of the set.

In a similar set of blow-ups of the ground, the old Adobe noise reduction did just that — it smoothed only some noise. The new AI Denoise not only smooths noise, it also applies AI-based sharpening, to the point of almost inventing detail. Here it looks believable, but in other tests I have seen it add content, such as structures in the aurora, that looked fake and out of place. Or just plain wrong!
DxO’s DeepPrimeXD’s main feature over the older DeepPrime is the “eXtra Detail” it finds. Here it produces a result similar to Adobe Denoise, though in some areas of this and other images, I find it is over-sharpening. As with Adobe, there is no option for backing off the sharpening. Other than using DeepPrime or Prime noise reduction.
Topaz PhotoAI didn’t do much to add sharpening. If anything, it made the image softer. While PhotoAI has improved with its weekly updates, it still falls far short of the competition, at least for astrophotos and nightscapes.
The bottom line — Adobe’s new AI Denoise can do a superb job on astrophotos, and will be particularly useful for high-ISO nightscapes, perhaps better than any of the competition. But watch what it does! It can invent details or create results that look artificial. Being able to adjust the sharpening would be helpful. Perhaps that will come in an update.
COMPARING AI TO OLDER NON-AI PROGRAMS
The new generation of AI-based programs have garnered all the attention, leaving older stalwart noise reduction programs looking a little forlorn and forgotten.
Here I compare Camera Raw and two of the best of the AI programs, Topaz DeNoise AI and NoiseXTerminator, with two of the most respected of the “old-school” non-AI programs:
- Dfine2, included with the Nik Collection of plug-ins sold by DxO (shown above), and
- Reduce Noise v9 sold by Neat Image (shown below).
I tested both by using them in their automatic modes, where they analyze a section or sections of the image and adjust the noise reduction accordingly, but then apply that setting uniformly across the entire image. However, both allow manual adjustments, with Neat Image’s Reduce Noise offering a bewildering array of technical adjustments.
How do these older programs stack up to the new AI generation? Here are comparisons using the same three test images.

In the nightscape image, Nik Dfine2 and Neat Image’s Reduce Noise did well, producing uniform noise reduction with no patchiness. But the results weren’t significantly better than with Adobe Camera Raw’s built-in routine. Like ACR, both non-AI programs did smooth detail in the ground, compared to DeNoise AI which sharpened the mountain details.
In the tracked wide-field image, the differences were harder to distinguish. None performed up to the standard of Noise XTerminator, with both Nik Dfine2 and Neat Image softening stars a little compared to DeNoise AI.
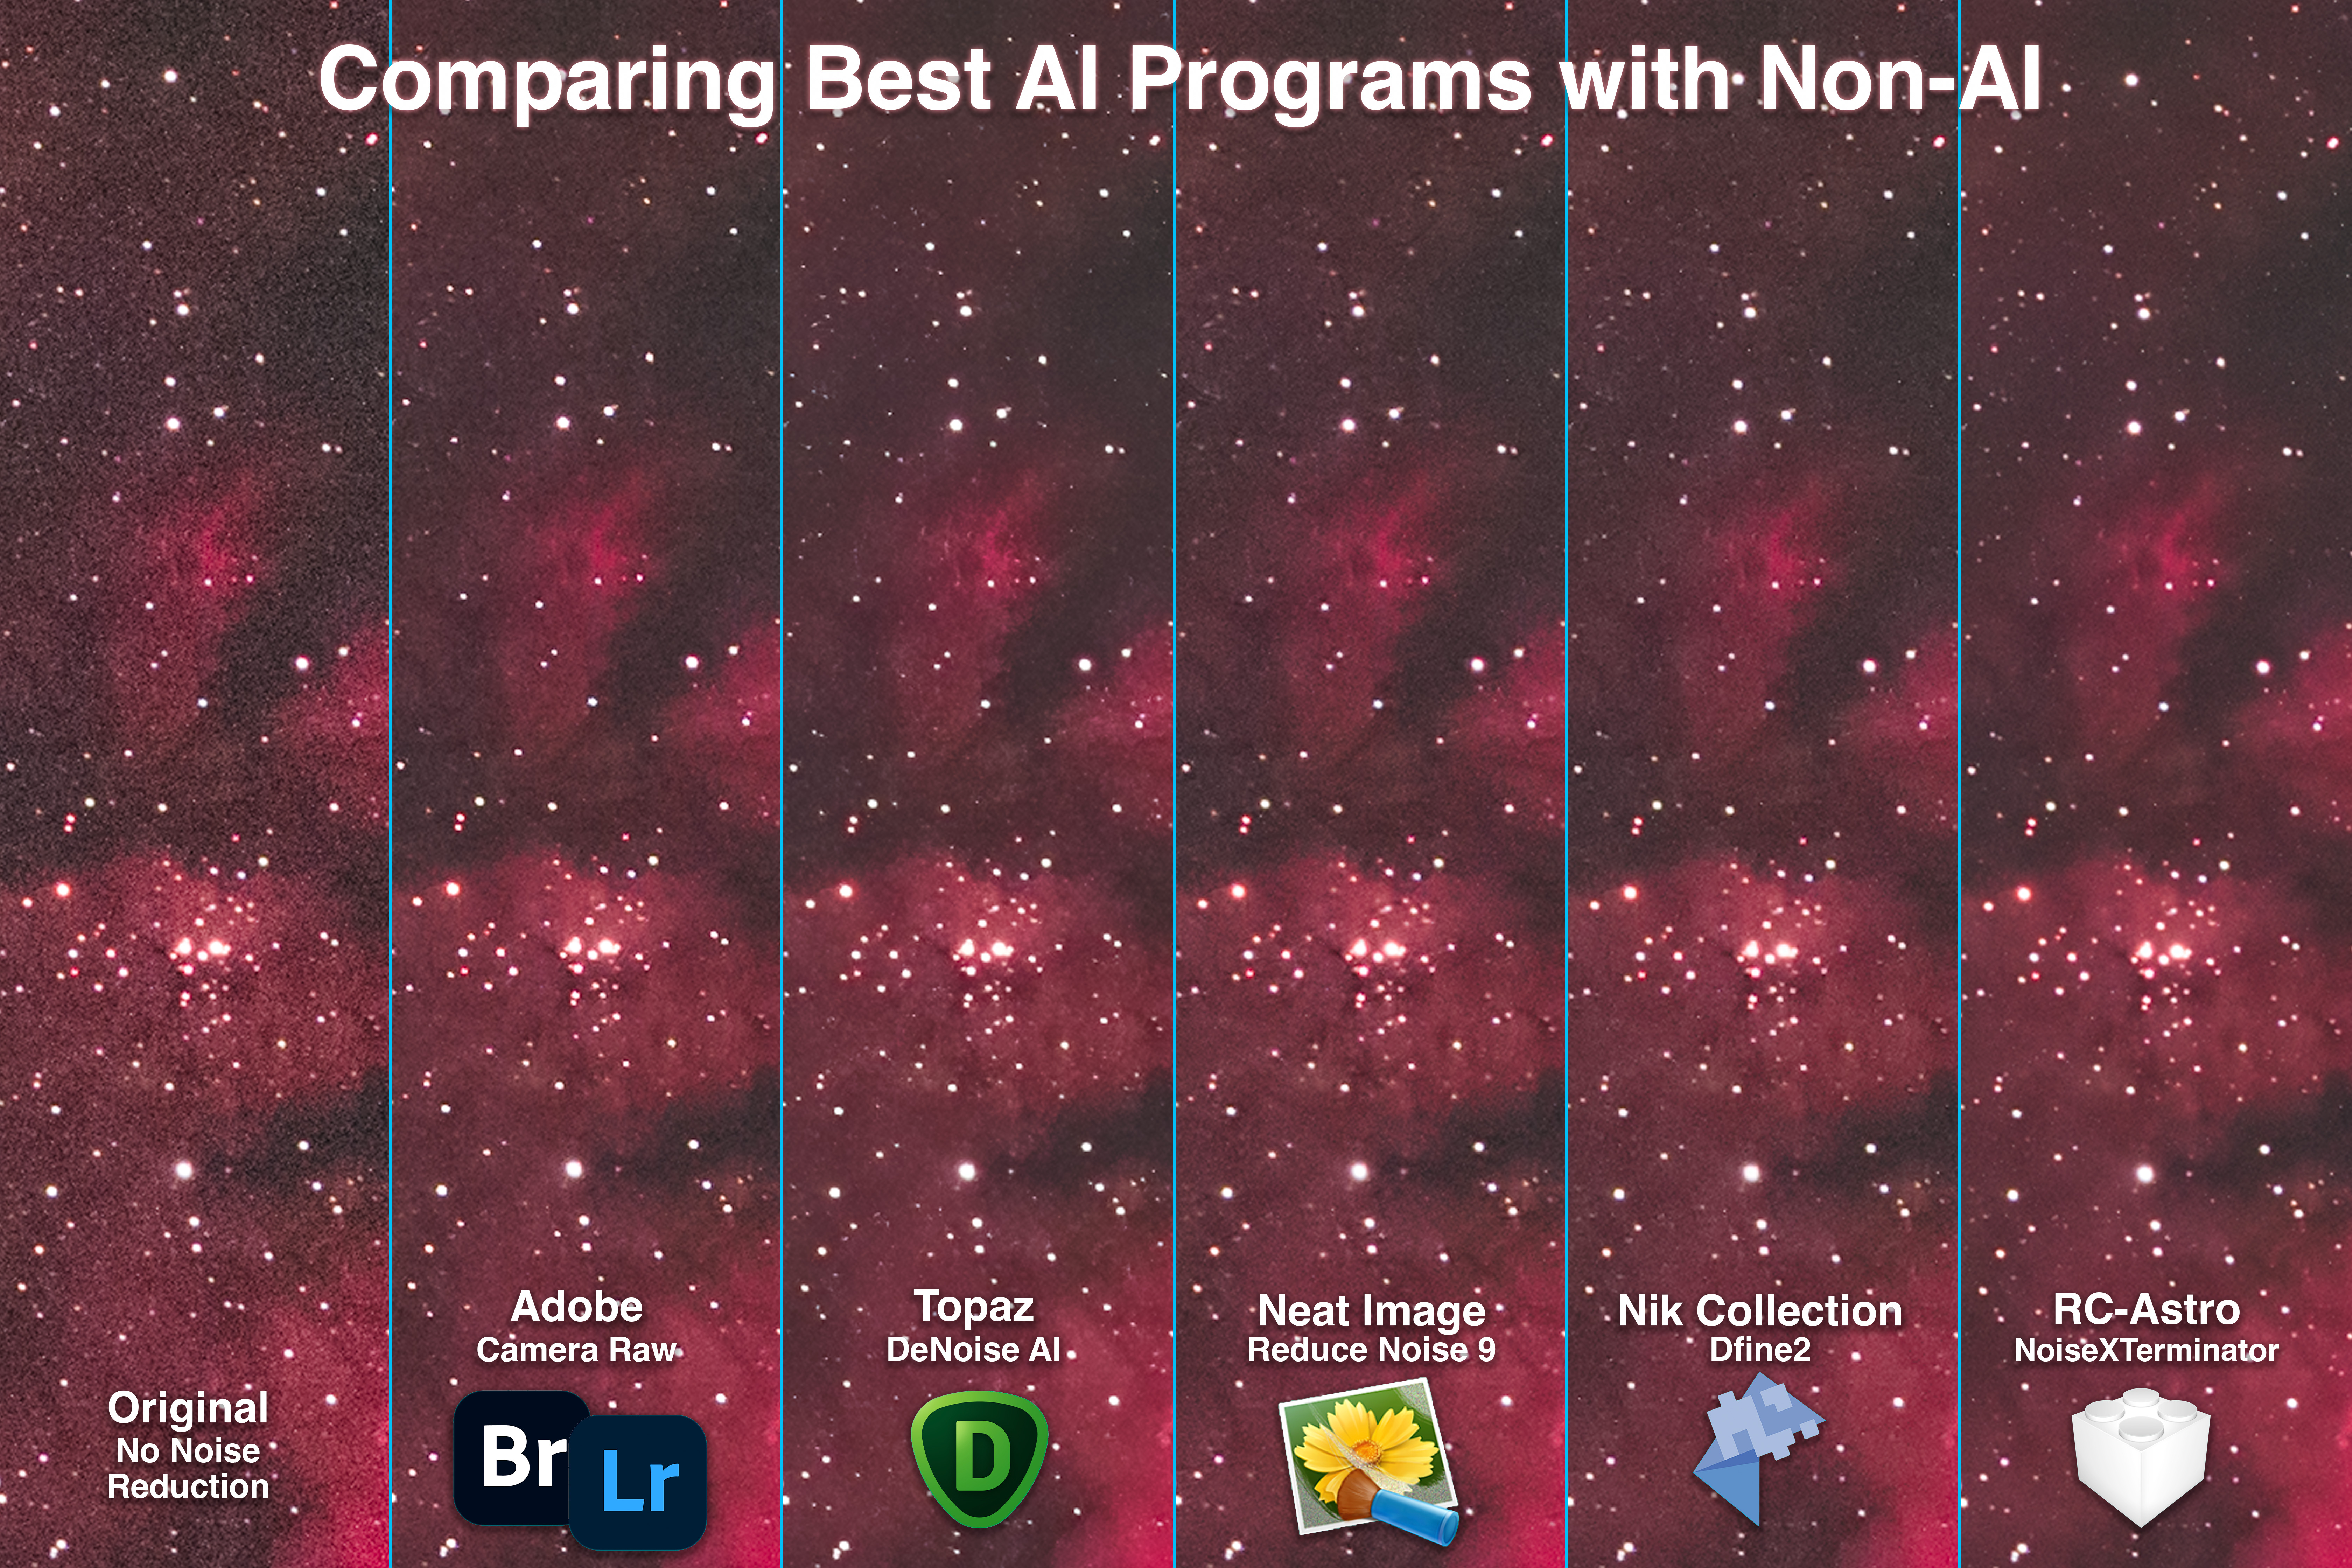
In the telescopic deep-sky image, all programs did well, though none matched NoiseXTerminator. None eliminated the hot pixels. But Nik Dfine2 and Neat Image did leave wanted details alone, and did not alter or eliminate desired content. However, they also did not eliminate noise as well as did Topaz DeNoise AI or NoiseXTerminator.
The AI technology does work!
YOUR RESULTS MAY VARY
I should add that the nature of AI means that the results will certainly vary from image to image.
In addition, with many of these programs offering multiple models and settings for strength and sharpening, results even from the same program can be quite different. In this testing I used either the program’s auto defaults or backed off those defaults where I thought the effect was too strong and detrimental to the image.
Software is also a constantly moving target. Updates will alter how these programs perform, we hope for the better. For example, two days after I published this test, ON1 updated NoNoise AI to v17.0.2 with minor fixes and improvements.
And do remember I’m testing on astrophotos, and pixel peeping to the extreme. Rave reviews claiming how well even the poor performers here work on “normal” images might well be valid.
This is all by way of saying, your mileage may vary!

So don’t take my word for it. Most programs (Luminar Neo is an exception) are available as free trial copies to test out on your astro-images and in your preferred workflow. Test for yourself. But do pixel peep. That’s where you’ll see the flaws.
WHAT ABOUT ADOBE?
As noted above, with v15.3 of Camera Raw and v12.3 of Lightroom Classic, Adobe finally introduced their contender into the AI noise reduction contest. And it is a very good entry at that.
But it works only on raw files early in the workflow, and it generates a new raw DNG file, one four times the size of the original. The suggestion is that this technology will expand so that the AI noise reduction can be applied later in the workflow to other file formats.
Indeed, in the last couple of years Adobe has introduced several amazing and powerful “Neural Filters” into Photoshop, which work wonders with one click.
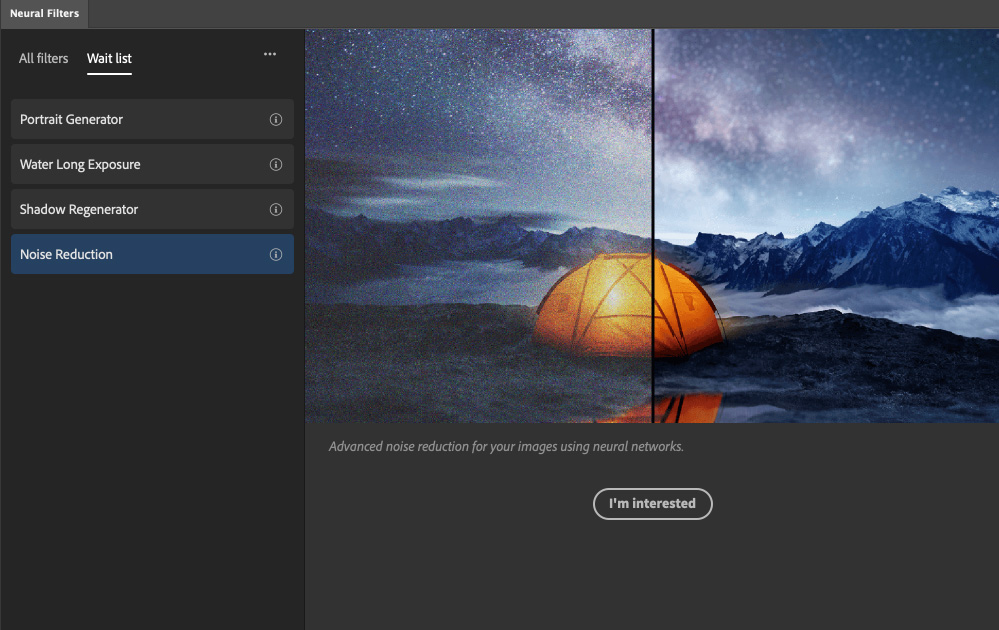
A neural filter for Noise Reduction is on Adobe’s Wait List for development, so perhaps we will see something in the next few months from Adobe, as a version of the AI noise reduction now offered in Lightroom and Camera Raw.
Until then we have lots of choices for third party programs that all improve with every update. I hope this review has helped you make a choice.
— Alan, November 15, 2022 / Revised April 27, 2023 / AmazingSky.com