Tracks of the Geosats


This short video, below, captures time-lapses of the trails of geostationary satellites through southern Orion. It demonstrates the “crowded sky” we now have above us. 

If you have tried photographing the Orion Nebula and Sword of Orion area with long tracked exposures you have no doubt seen these trails in your photos. Here I shot to purposely capture them in a time-lapse, for demonstration purposes. 

Please note, these are not Starlink satellites. So do not blame Elon Musk for these! 

These are the much more established geostationary or “geosynchronous” satellites that orbit 35,785 kilometres above Earth and so take 24 hours to orbit the planet. As such they remain apparently motionless over the same spot on Earth, allowing fixed dish antennas to aim at them.

(For more about geosats see the Wikipedia page.)

So why are they moving here?

The camera is on a mount that is tracking the sky as it turns from east to west, so the stars are staying still. What would normally be satellites fixed in one spot in the sky (after all, they are called “geostationary” for a reason) instead trail into short streaks traveling from west to east (right to left) in the frame. But in reality, it is the stars that are in motion behind the satellites. 

The region of sky in Orion below the Orion Nebula (the object at top) lies south of the line that bisects the sky into northern and southern halves called the “celestial equator.” Most geostationary satellites also orbit in Earth’s equatorial plane and so appear along a belt near the celestial equator in the sky. 

This chart from SkySafari shows the belt of geosats through southern Orion with the satellites identified. The green box is the field of view of the telescope (shown below) that I used to take the time-lapses.

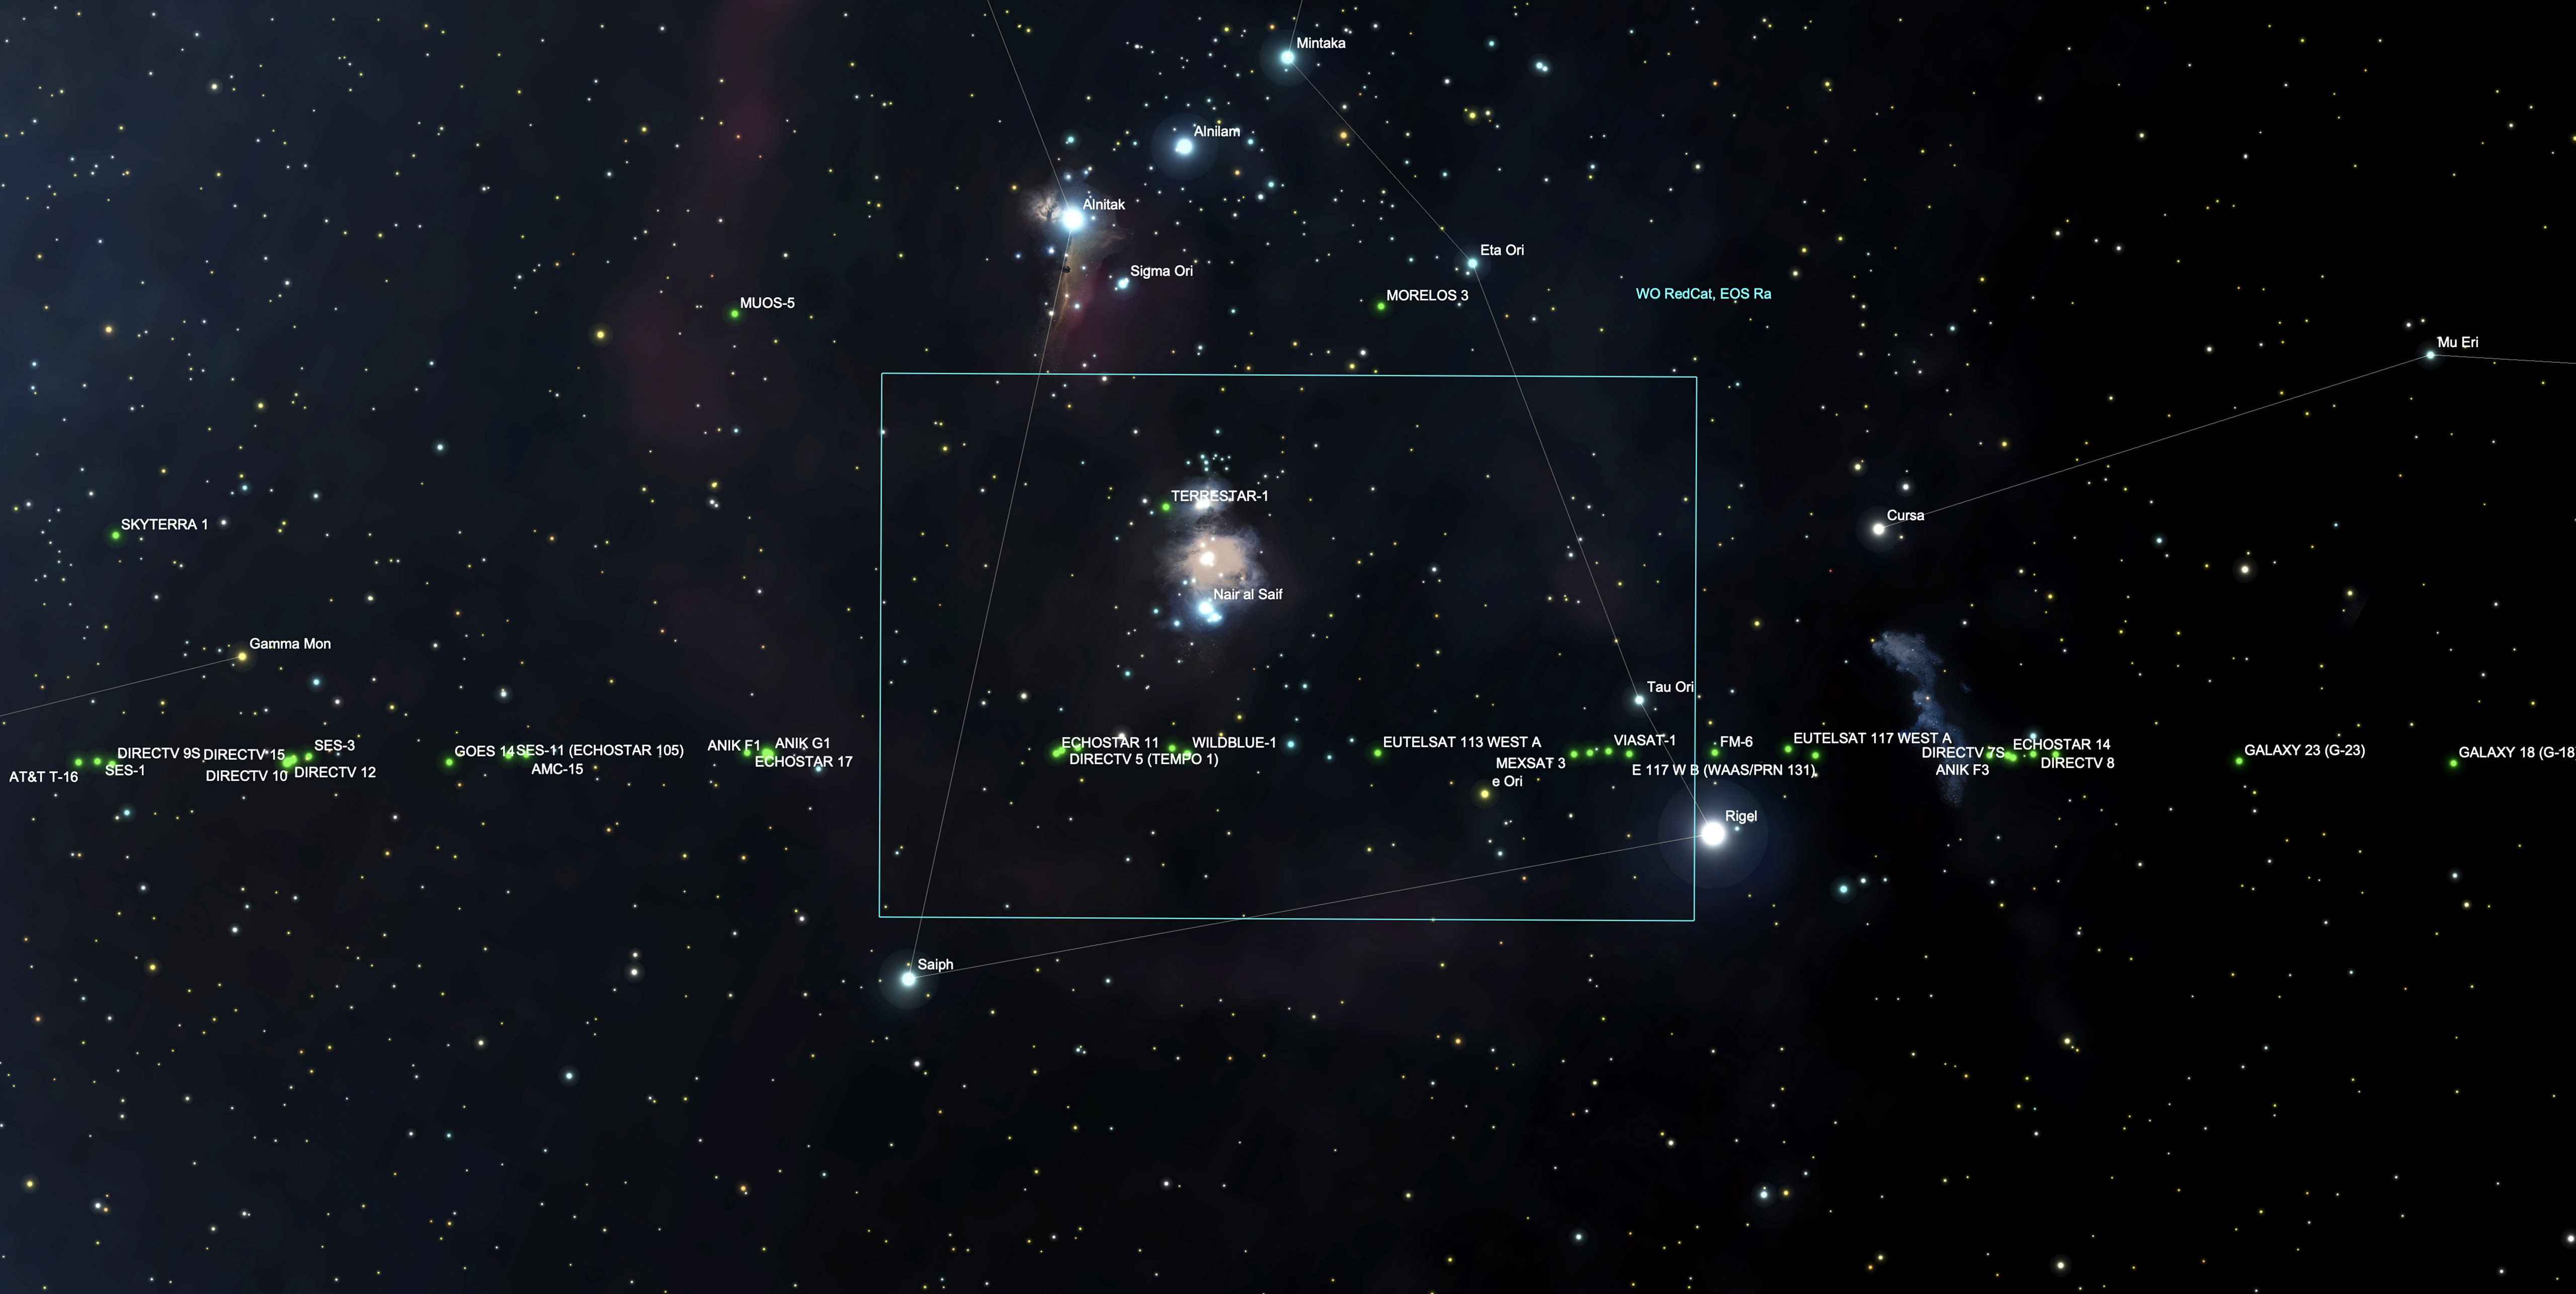
In this video, however, they appear about 5° to 7° south of the celestial equator (which runs through the famous Belt of Orion off frame at top). That’s because I live north of the equator of the Earth, at a latitude of 51° north. So parallax makes the geosat belt appears south of the celestial equator in my sky. From a site in the southern hemisphere the geosat belt would appear north of the celestial equator.

You’ll notice some satellites travelling diagonally — they are not geosats. You’ll also see some flashing or pulsing satellites — they are likely tumbling objects, perhaps spent rocket boosters.

The satellites are visible because they are high enough to reflect sunlight even in the middle of the night, as the sequences each end about 11:30 to midnight local time.

But in this video the satellites are not flaring — this is their normal brightness. During flare season around the two equinoxes geosats can become bright enough to be seen with the unaided eye. For a video of that phenomenon see my video shot in October 2020, below. 


TECH DETAILS FOR “TRACKS OF THE GEOSATS” VIDEO:

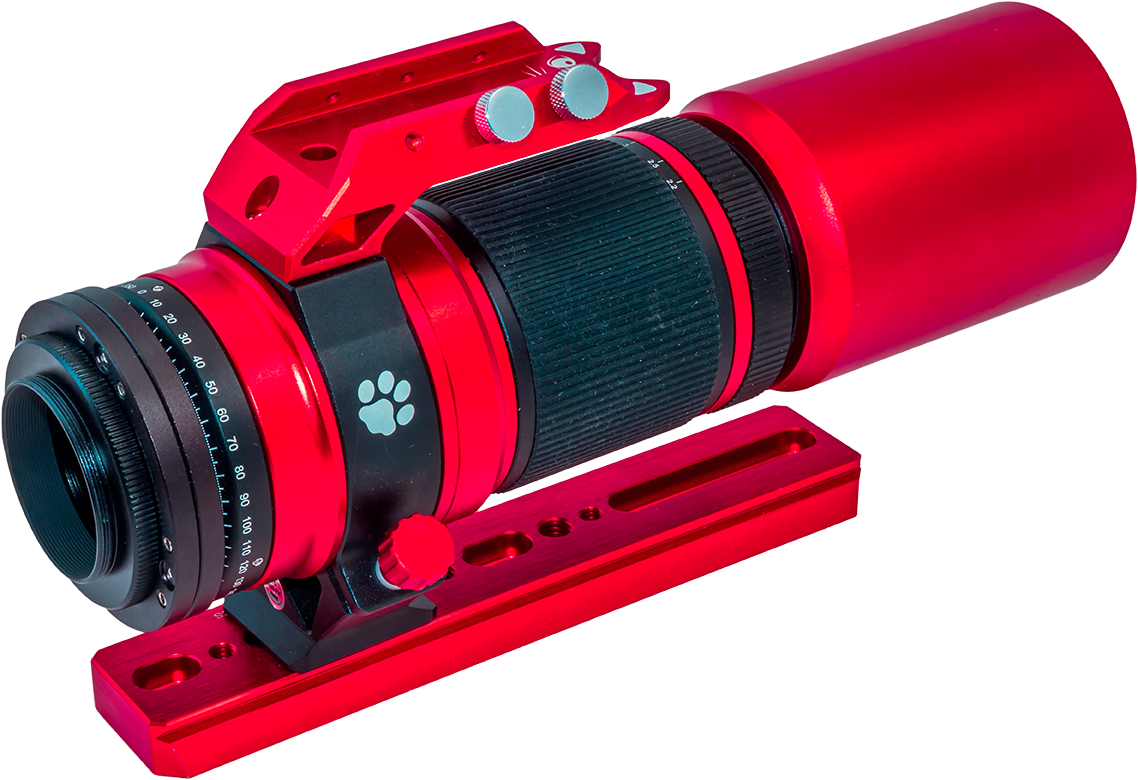
The video at top contains time-lapses shot on two nights: January 18 and 20, 2021. Both are made from hundreds of frames taken through a William Optics RedCat astrograph at f/5 with a 250mm focal length. The field of view is 8° by 5.5°. 

The William Optics RedCat 51mm f/5 astrographic refactor.

Each exposure is 30 seconds long, taken at a one second interval. The camera was a Canon 6D MkII at ISO 3200 on January 18 and ISO 1600 on January 20 in the brighter moonlight that night. 

In the first sequence from January 18 the equatorial mount, an Astro-Physics Mach1, is left to track on its own and is unguided. So the stars wobble back and forth slightly due to periodic error in the mount. The field also drifts north due to slight misalignment on the pole. Clouds pass through the field during the shoot. 

In the second clip from January 20, taken with a quarter Moon lighting the sky, the mount was autoguided, using an MGEN3 auto-guider. So the stars remained better fixed over the 5.5 hours of shooting. A slight glitch appears near the end where I swapped camera batteries, and the camera turned ever so slightly causing the stars to enlarge a bit for a moment. 

LRTimelapse at work processing the second sequence, deflickering some of the oddly exposed frames.

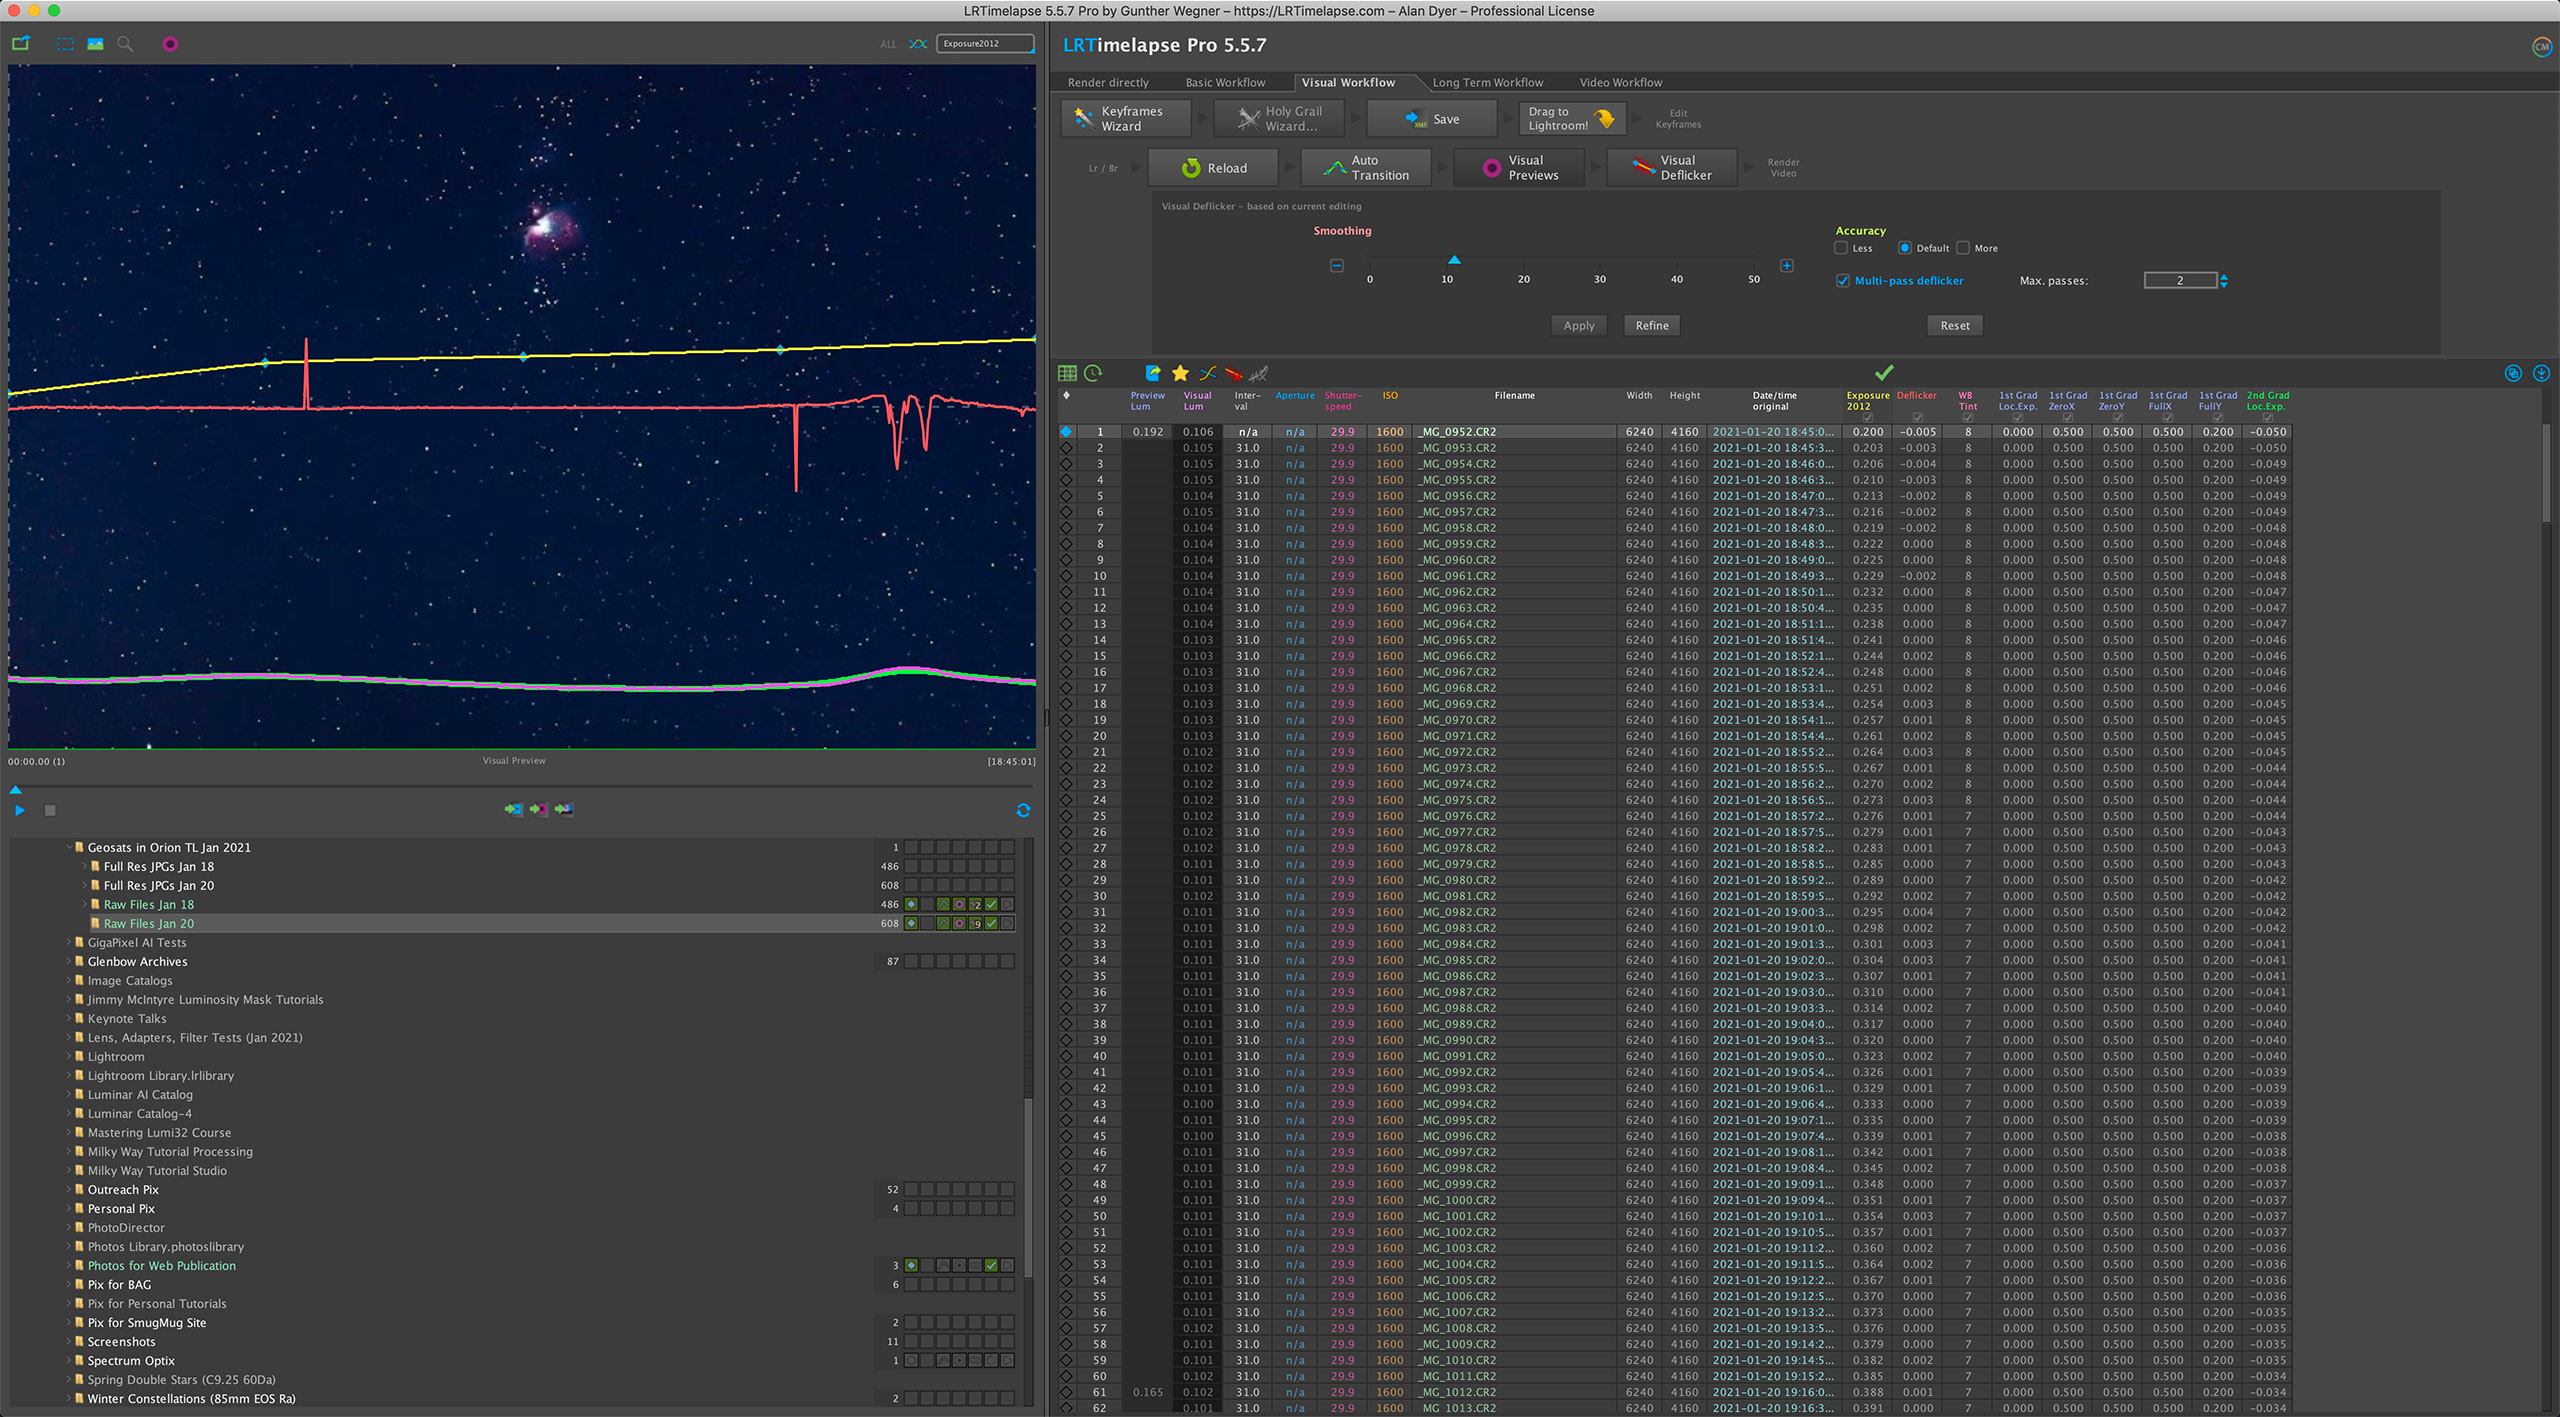
The frames were processed in Adobe Camera Raw and LRTimelapse

TimeLapse DeFlicker at work assembling the video, showing its All Frames + Lighten blend mode for the Accumulating version of clip #2.

I then assembled exported JPGs with TimeLapseDeFlicker, using a 3-frame Lighten blend mode to lengthen the trails. The final version was assembled with TLDF’s All Frames mode (shown above) where every frame gets stacked for an accumulated total, to show the busy sky traffic! 

Thanks! 

— Alan, © 2021 / AmazingSky.com 

The Perseids Perform


Radiant of the Perseid Meteor Shower (2016)

It was a great night for shooting meteors as the annual Perseids put on a show.

For the Perseid meteor shower I went to one of the darkest sites in Canada, Grasslands National Park in southern Saskatchewan, a dark sky preserve and home to several rare species requiring dark nights to flourish – similar to astronomers!

This year a boost in activity was predicted and the predictions seemed to hold true. The lead image records 33 meteors in a series of stacked 30-second exposures taken over an hour.

It shows only one area of sky, looking east toward the radiant point in the constellation Perseus – thus the name of the shower.

Extrapolating the count to the whole sky, I think it’s safe to say there would have been 100 or more meteors an hour zipping about, not bad for my latitude of 49° North.

Lone Perseid in the Moonlight
A lone Perseid meteor streaking down below the radiant point in Perseus, with the sky and landscape lit by the waxing gibbous Moon, August 11, 2016. Perseus is rising in the northeast, Andromeda is at right, with the Andromeda Galaxy right of centre. Cassiopeia is at top. Taken from the 70 Mile Butte trailhead in Grasslands National Park, Saskatchewan.

The early part of the evening was lit by moonlight, which lent itself to some nice nightscapes scenes but fewer meteors.

Perseid Meteor Shower Looking North (2016)
The 2016 Perseid meteor shower, in a view looking north to the Big Dipper and with the radiant point in Perseus at upper right, the point where the meteors appear to be streaking from. This is a stack of 10 frames, shot over one hour from 1:38 a.m. to 2:37 a.m. CST. The camera was on the Star Adventurer tracker so all the sky frames aligned. The ground is from a stack of four frames, mean combined to smooth noise, and taken with the tracker motor off to minimize ground blurring, and taken at the start of the sequence. All exposures 40 seconds at f/3.2 with the 16-35mm lens and Canon 6D at ISO 6400.

But once the Moon set and the sky darkened the show really began. Competing with the meteors was some dim aurora, but also the brightest display of airglow I have even seen.

It was bright enough to be visible to the eye as grey bands, unusual. Airglow is normally sub-visual.

But the camera revealed the airglow bands as green, red, and yellow, from fluorescing oxygen and sodium atoms. The bands slowly rippled across the sky from south to north.

Airglow is something you can see only from dark sites. It is one of the wonders of the night sky, that can make a dark sky not dark!

TECHNICAL:

Meteor Composite Screen ShotThe lead image is stack of 31 frames containing meteors (two frames had 2 meteors), shot from 1:13 am to 2:08 a.m. CST, so over 55 minutes. The camera was not tracking the sky but was on a fixed tripod. I choose one frame with the best visibility of the airglow as the base layer. For every other meteor layer, I used Free Transform to rotate each frame around a point far off frame at upper left, close to where the celestial pole would be and then nudged each frame to bring the stars into close alignment with the base layer, especially near the meteor being layered in.

This placed each meteor in its correct position in the sky in relation to the stars, essential for showing the effect of the radiant point accurately.

Each layer above the base sky layer is masked to show just the meteor and is blended with Lighten mode. If I had not manually aligned the sky for each frame, the meteors would have ended up positioned where they appeared in relation to the ground but the radiant point would have been smeared — the meteors would have been in the wrong place.

Unfortunately, it’s what I see in a lot of composited meteor shower shots.

It would have been much easier if I had had this camera on a tracker so all frames would have been aligned coming out of the camera. But the other camera was on the tracker! It took the other composite image, the one looking north.

The ground is a mean combined stack of 4 frames to smooth noise in the ground. Each frame is 30 seconds at f/2 with the wonderful Sigma 20mm Art lens and Nikon D750 at ISO 5000. The waxing Moon had set by the time this sequence started, leaving the sky dark and the airglow much more visible.

— Alan, August 13, 2016 / © 2016 Alan Dyer / AmazingSky.com 


Astrophotography Video Tutorials – Free!


Video Tutorial FB PR ImageLearn the basics of shooting nightscape and time-lapse images with my three new video tutorials.

In these comprehensive and free tutorials I take you from “field to final,” to illustrate tips and techniques for shooting the sky at night.

At sites in southern Alberta I first explain how to shoot the images. Then back at the computer I step you through how to process non-destructively, using images I shot that night in the field.


Tutorial #1 – The Northern Lights

This 24-minute tutorial takes you from a shoot at a lakeside site in southern Alberta on a night with a fine aurora display, through to the steps to processing a still image and assembling a time-lapse movie.


Tutorial #2 – Moonlit Nightscapes

This 28-minute tutorial takes you from a shoot at Waterton Lakes National Park on a bright moonlit night, to the steps for processing nightscapes using Camera Raw and Photoshop, with smart filters, adjustment layers and masks.


Tutorial #3 – Star Trails

This 35-minute tutorial takes you from a shoot at summer solstice at Dinosaur Provincial Park, then through the steps for stacking star trail stills and assembling star trail time-lapse movies, using specialized programs such as StarStaX and the Advanced Stacker Plus actions for Photoshop.


As always, enlarge to full screen for the HD versions. These are also viewable at my Vimeo channel.  

Or they can be viewed on my YouTube channel

Thanks for watching!

And for much more information about shooting and processing nightscapes and time-lapse movies, check out my 400-page multimedia eBook, linked below.

— Alan, November 21, 2015 / © 2015 Alan Dyer / www.amazingsky.com/tutorials.html