In a detailed review, I test a “holy trinity” of premium Canon RF zoom lenses, with astrophotography the primary purpose.
In years past, zoom lenses were judged inferior to fixed-focal length “prime” lenses for the demands of astrophotography. Stars are the severest test of a lens, revealing optical aberrations that would go unnoticed in normal images, or even in photos of test charts. Many older zooms just didn’t cut it for discerning astrophotographers, myself included.
The new generation of premium zooms for mirrorless cameras, from Canon, Nikon and Sony, are dispelling the old wisdom that primes are better than zooms. The new zooms’ optical performance is proving to be as good, if not better than the older generation of prime lenses for DSLR cameras, models often designed decades ago.
The shorter lens-to-sensor “flange distance” offered by mirrorless cameras, along with new types of glass, provide lens designers more freedom to correct aberrations, particularly in wide-angle lenses.
While usually slower than top-of-the-line primes, the advantage of zoom lenses is their versatility for framing and composing subjects, great for nightscapes and constellation shots. It’s nice to have the flexibility of a zoom without sacrificing the optical quality and speed so important for astrophotography. Can we have it all? The new zooms come close to delivering.

A good thing, because with Canon we have little choice! For top-quality glass in wide-angle focal lengths at least, zooms are the only choice for their mirrorless R cameras. As of this writing in late 2022, Canon has yet to release any premium primes for their RF mount shorter than 50mm. Rumours are a 12mm, 24mm, 28mm, and 35mm are coming! But when?
The three zooms I tested are all “L” lenses, designating them as premium-performance models. I have not tested any of Canon’s “economy” line of RF lenses, such as their 24mm and 35mm Macro STM primes. Tests I’ve seen suggest they don’t offer the sharpness I desire for most astrophotography.
Contributing to the lack of choice, top-quality third-party lenses from the likes of Sigma (such as their new 20mm and 24mm Art lenses made for mirrorless cameras) have yet to appear in Canon RF mount versions. Will they ever? In moves that evoked much disdain, Samyang and Viltrox were both ordered by Canon to cease production of their RF auto-focus lenses.
For their mirrorless R cameras, Canon has not authorized any third-party lens makers, forcing you to buy costly Canon L glass, or settle for their lower-grade STM lenses, or opt for reverse-engineered manual-focus lenses from makers such as TTArtisan and Laowa/Venus Optics. While they are good, they are not up to the optical standards of Canon’s L-series glass.
I know, as I own several RF-mount TTArtisan wide-angle lenses and the Laowa 15mm f/2 lens. You can find my tests of those lenses at AstroGearToday.com. Look under Reviews: Astrophotography Gear.

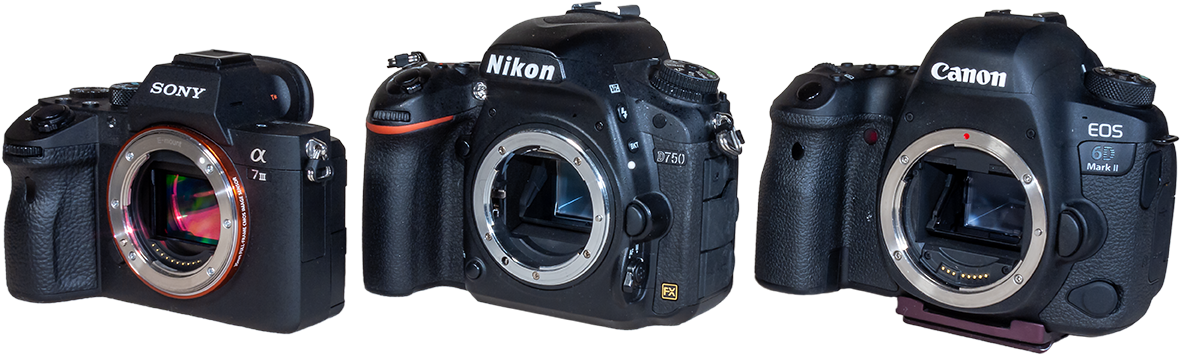
The trio of RF lenses tested here work on all Canon EOS R-series cameras, including their R7 and R10 cropped-frame cameras. However, they will not work on any Canon DSLRs.
Two of the lenses, the RF15-35mm F/2.8 and RF70-200mm F/4, are designs updated from older Canon DSLR lenses with similar specs. The RF28-70mm F/2 does not have an equivalent focal length range and speed in Canon’s DSLR lens line-up. Indeed, nobody else makes a lens this fast covering the “normal” zoom range.
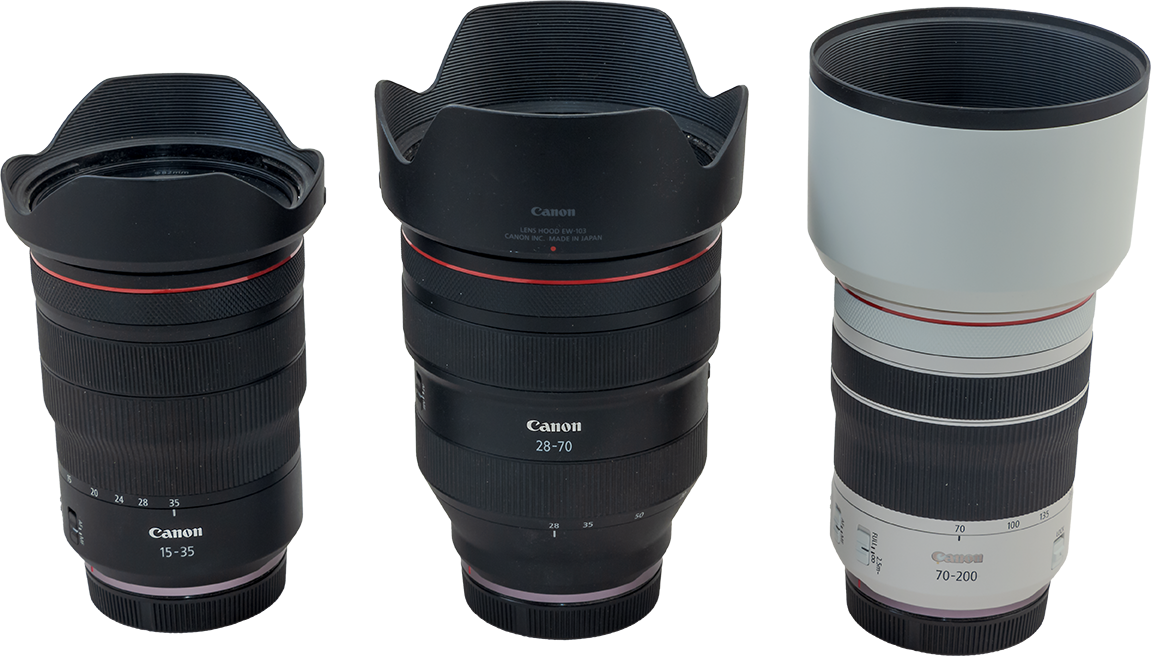
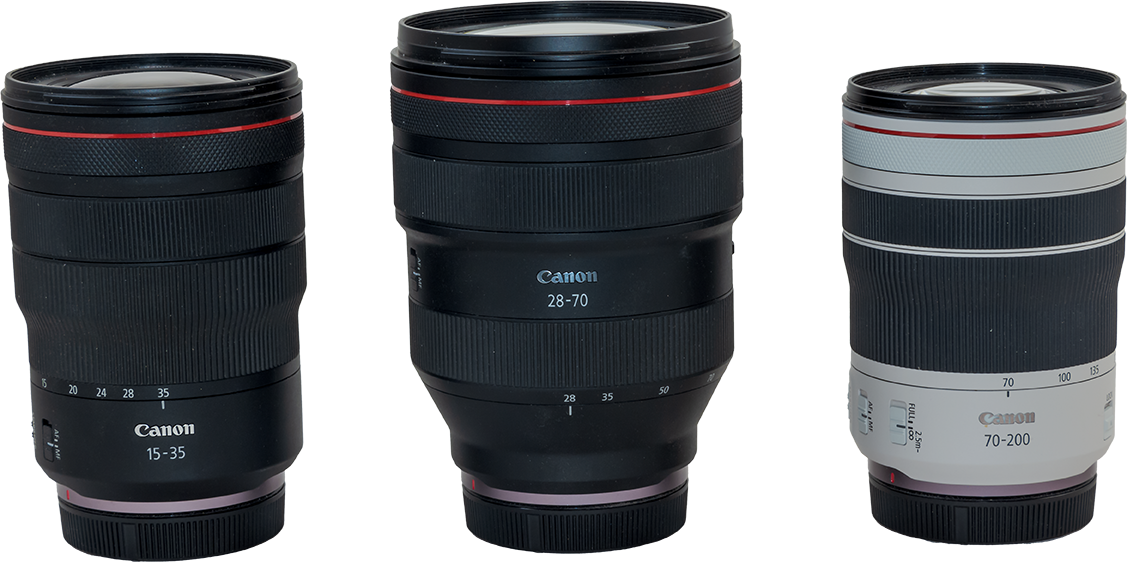
Together, the three lenses cover focal lengths from 15mm to 200mm, with some overlap. A trio of zooms like this — a wide-angle, normal, and telephoto — is often called a “holy trinity” set, a popular combination all camera manufacturers offer to cover the majority of applications.
However, my interest was strictly for astrophotography, with stars the test subjects.
NOTE: CLICK or TAP on a test image to download a full-resolution image for closer inspection. The images, while low-compression JPGs, are large and numerous, and so will take time to fully load and display. Patience!
All images are © 2022 by Alan Dyer/AmazingSky.com. Use without permission is prohibited.
METHODOLOGY
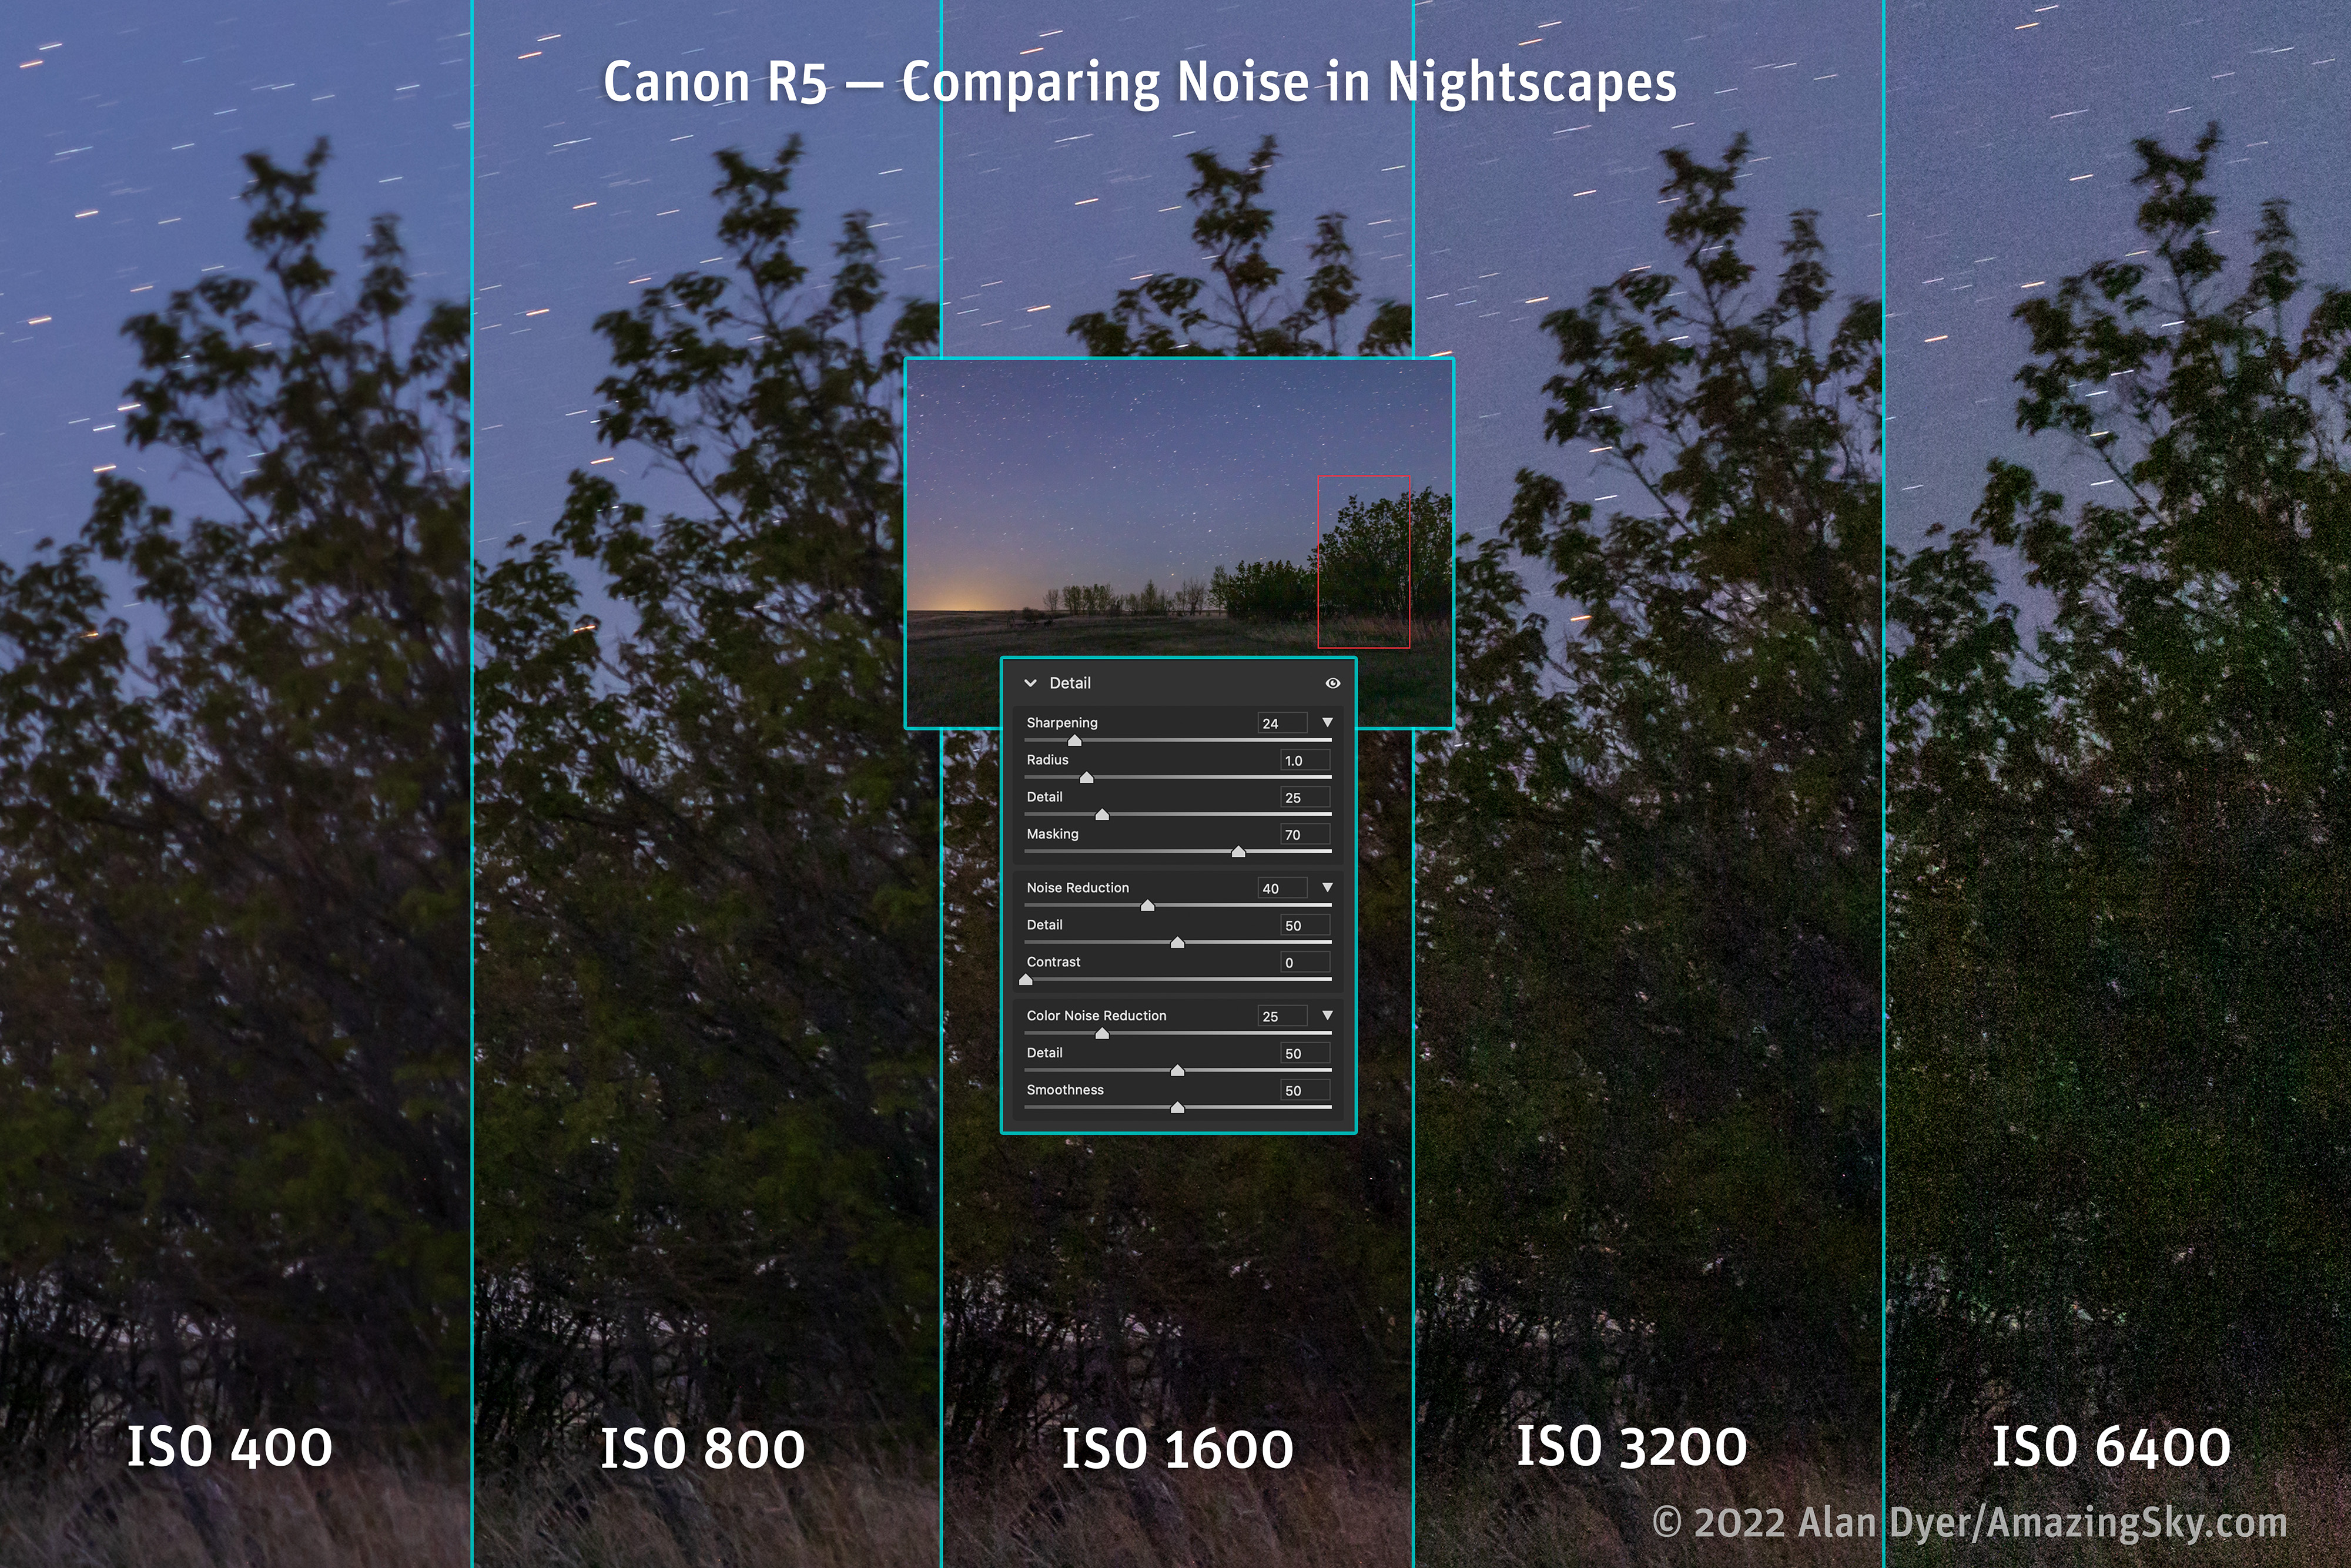
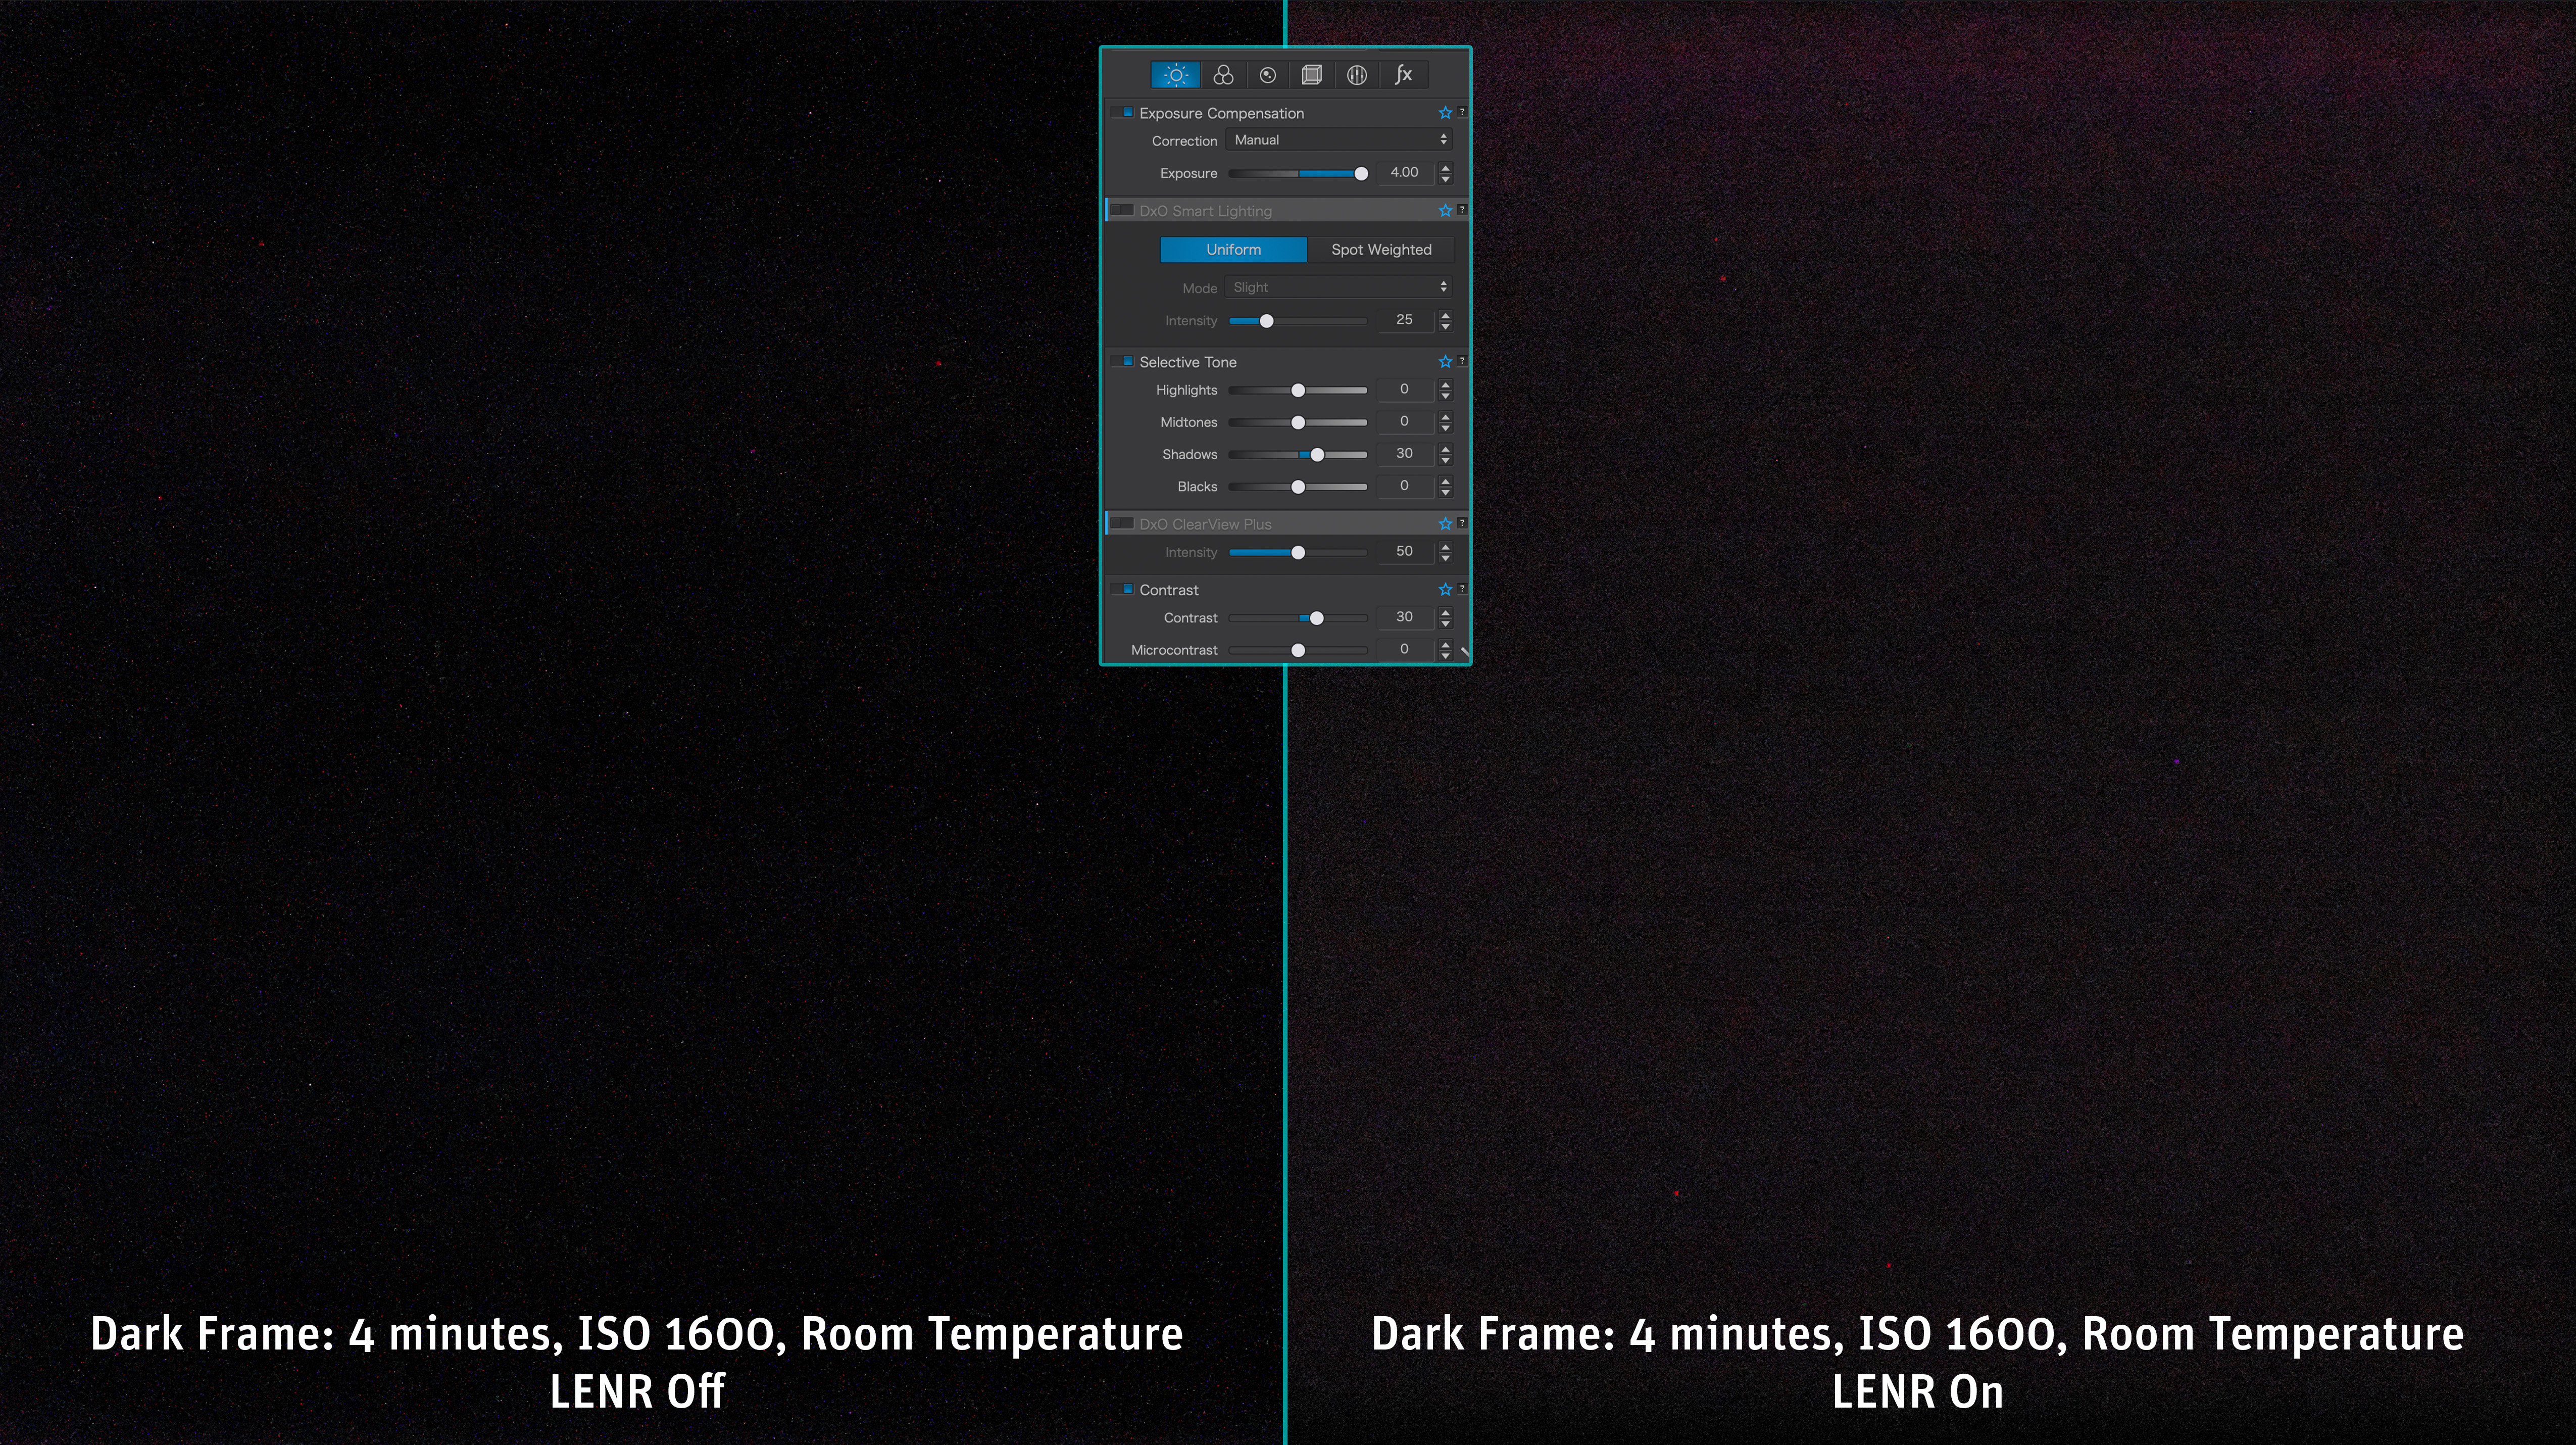
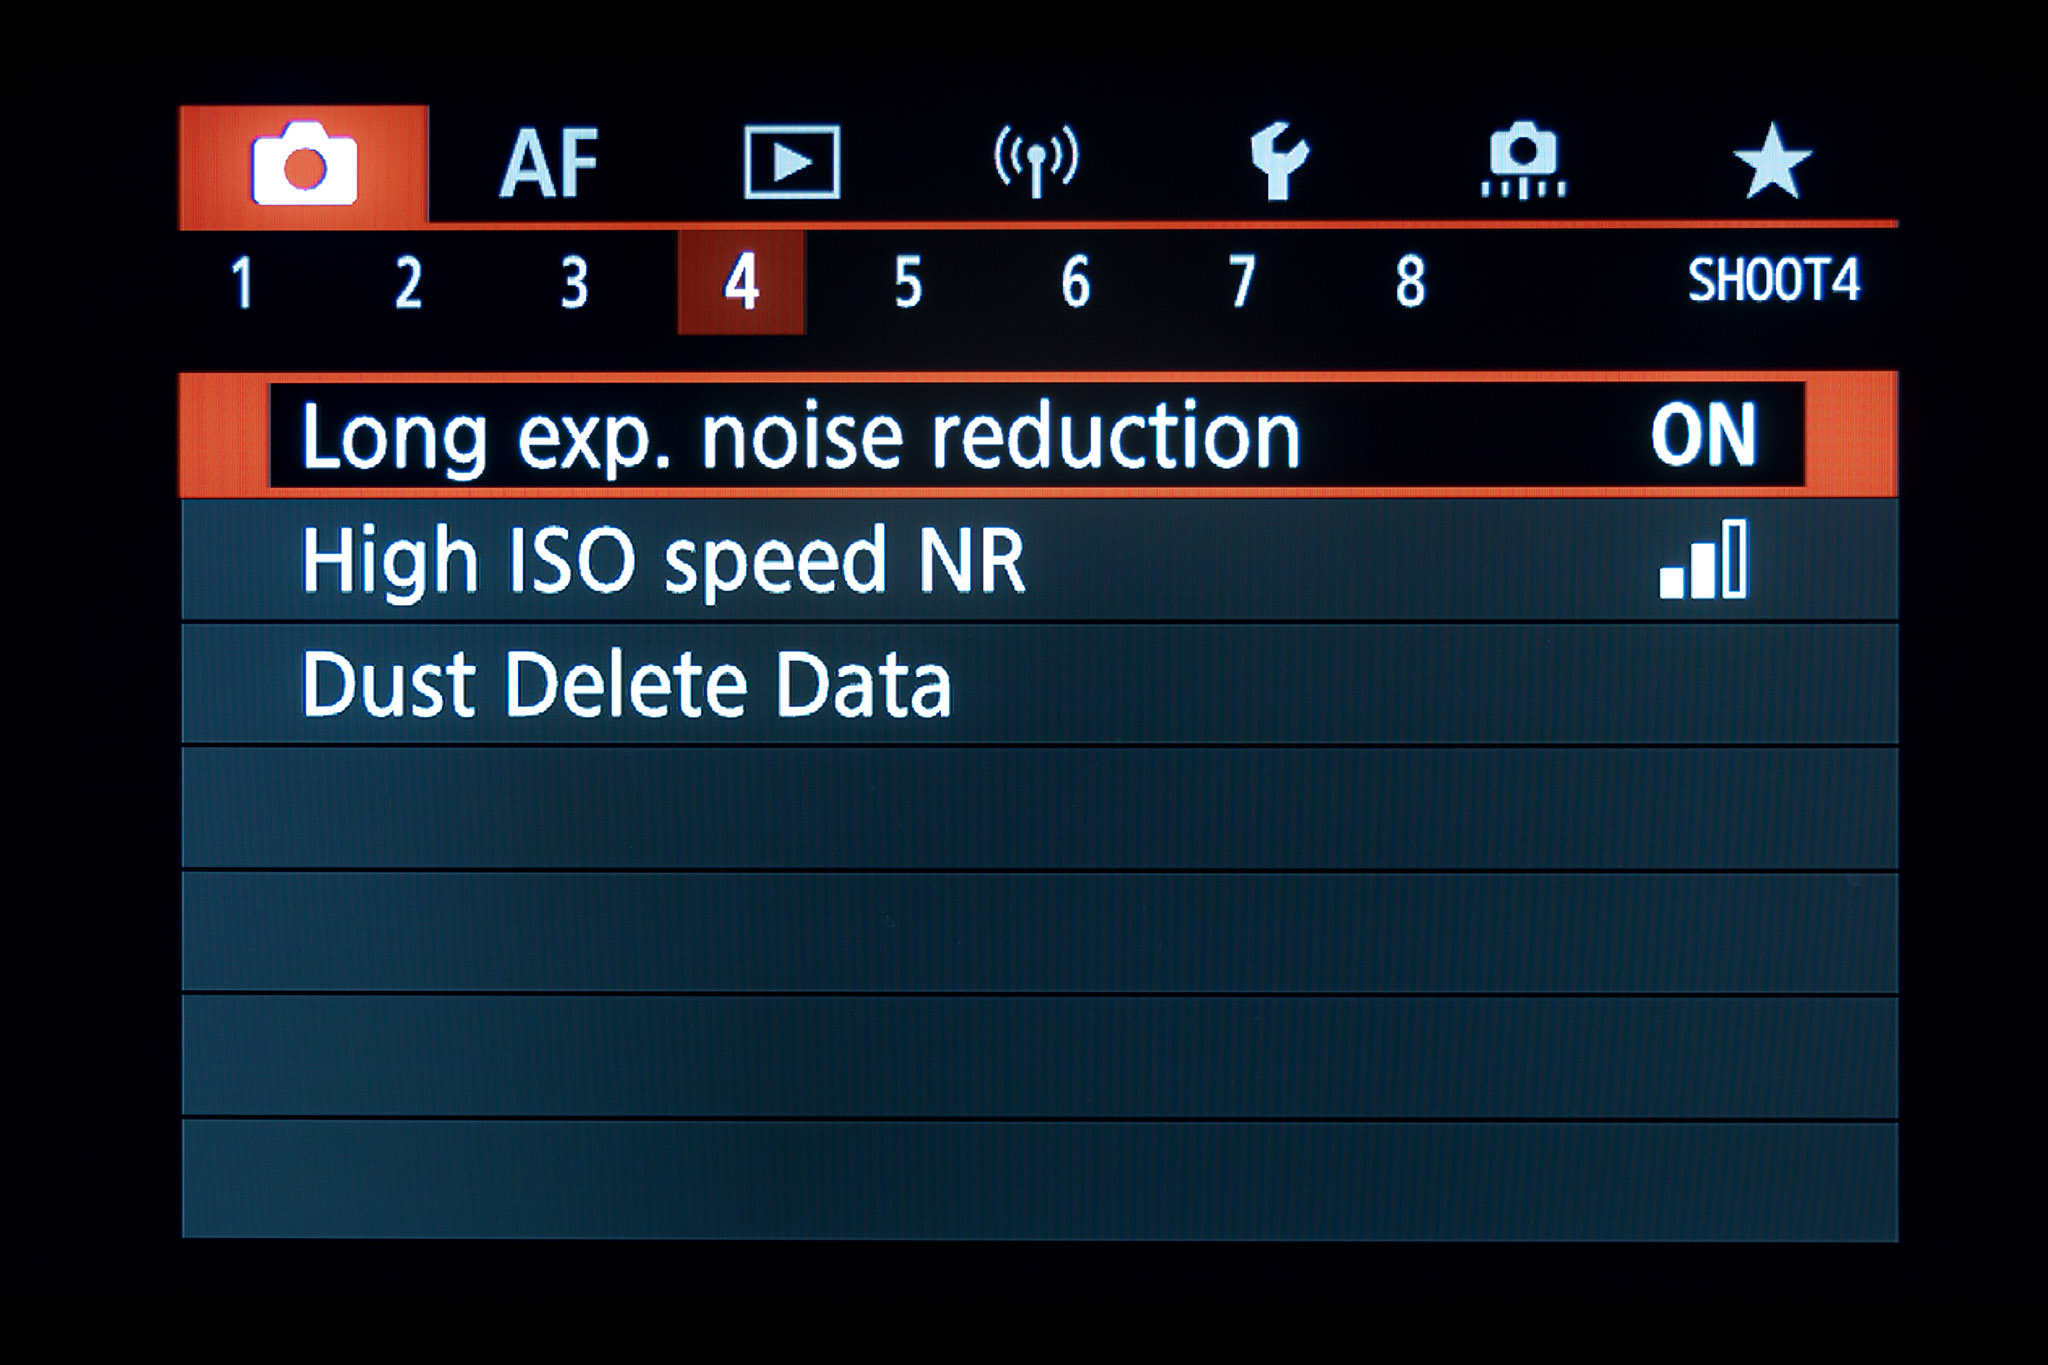
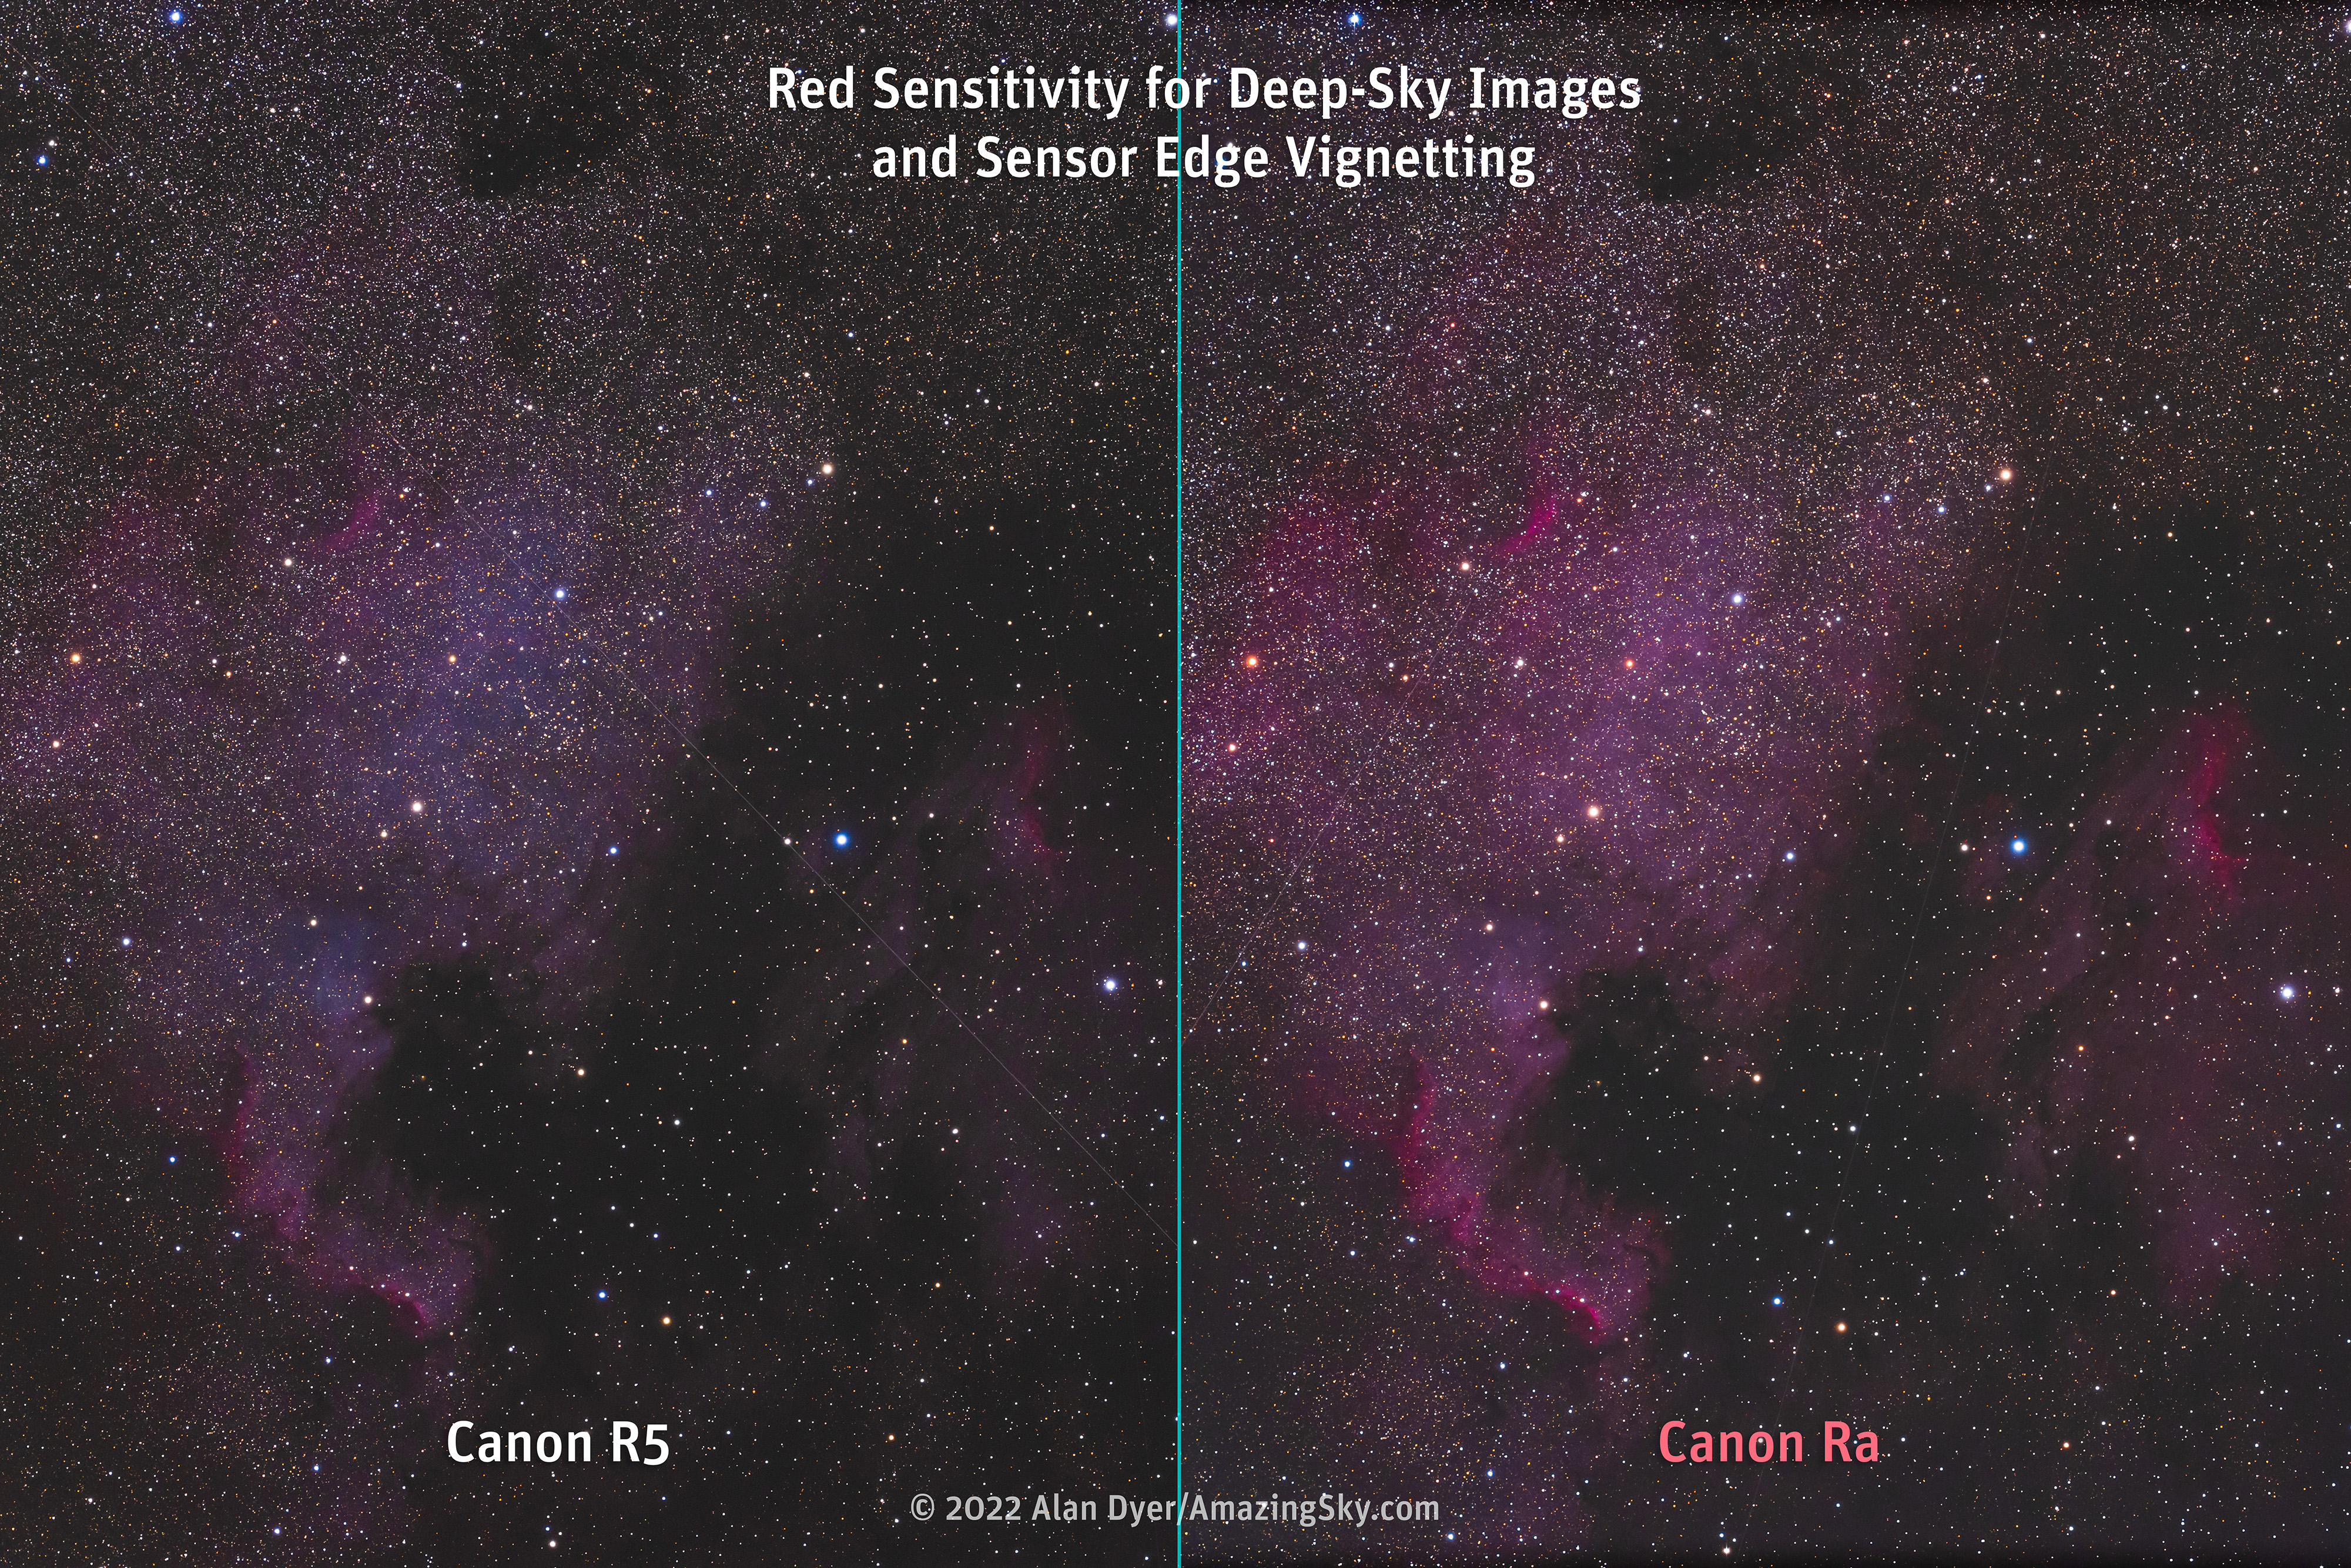
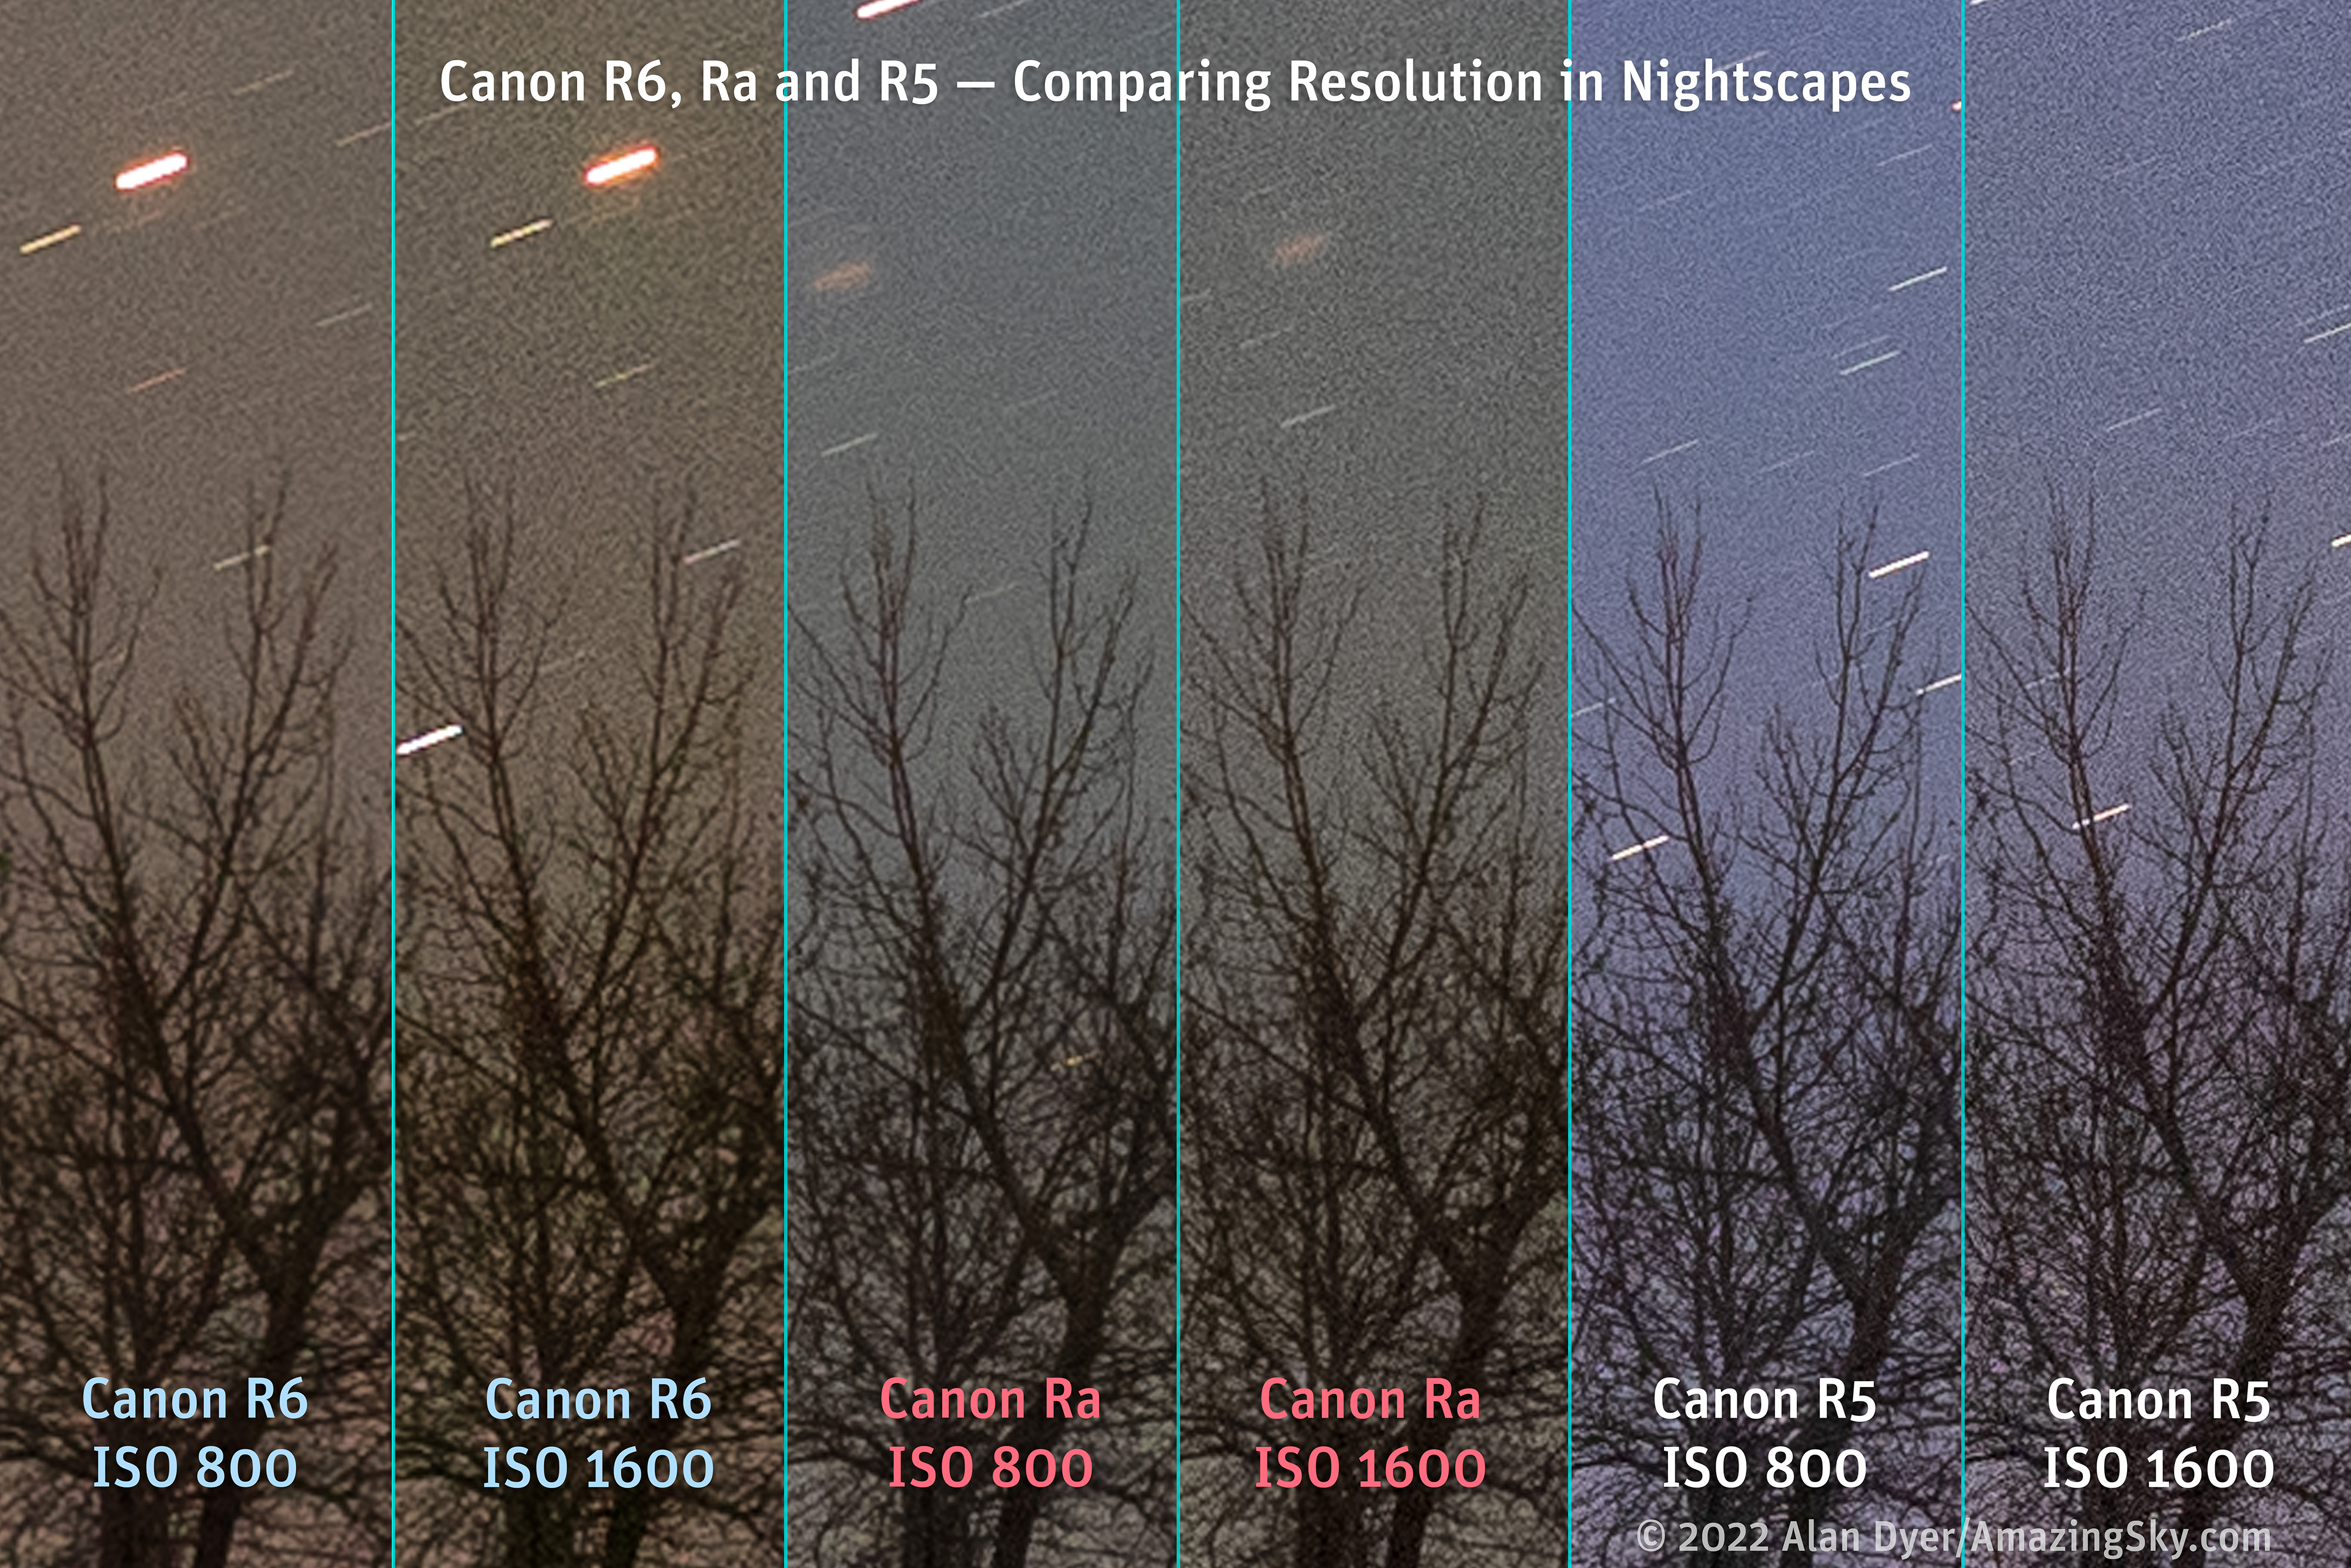
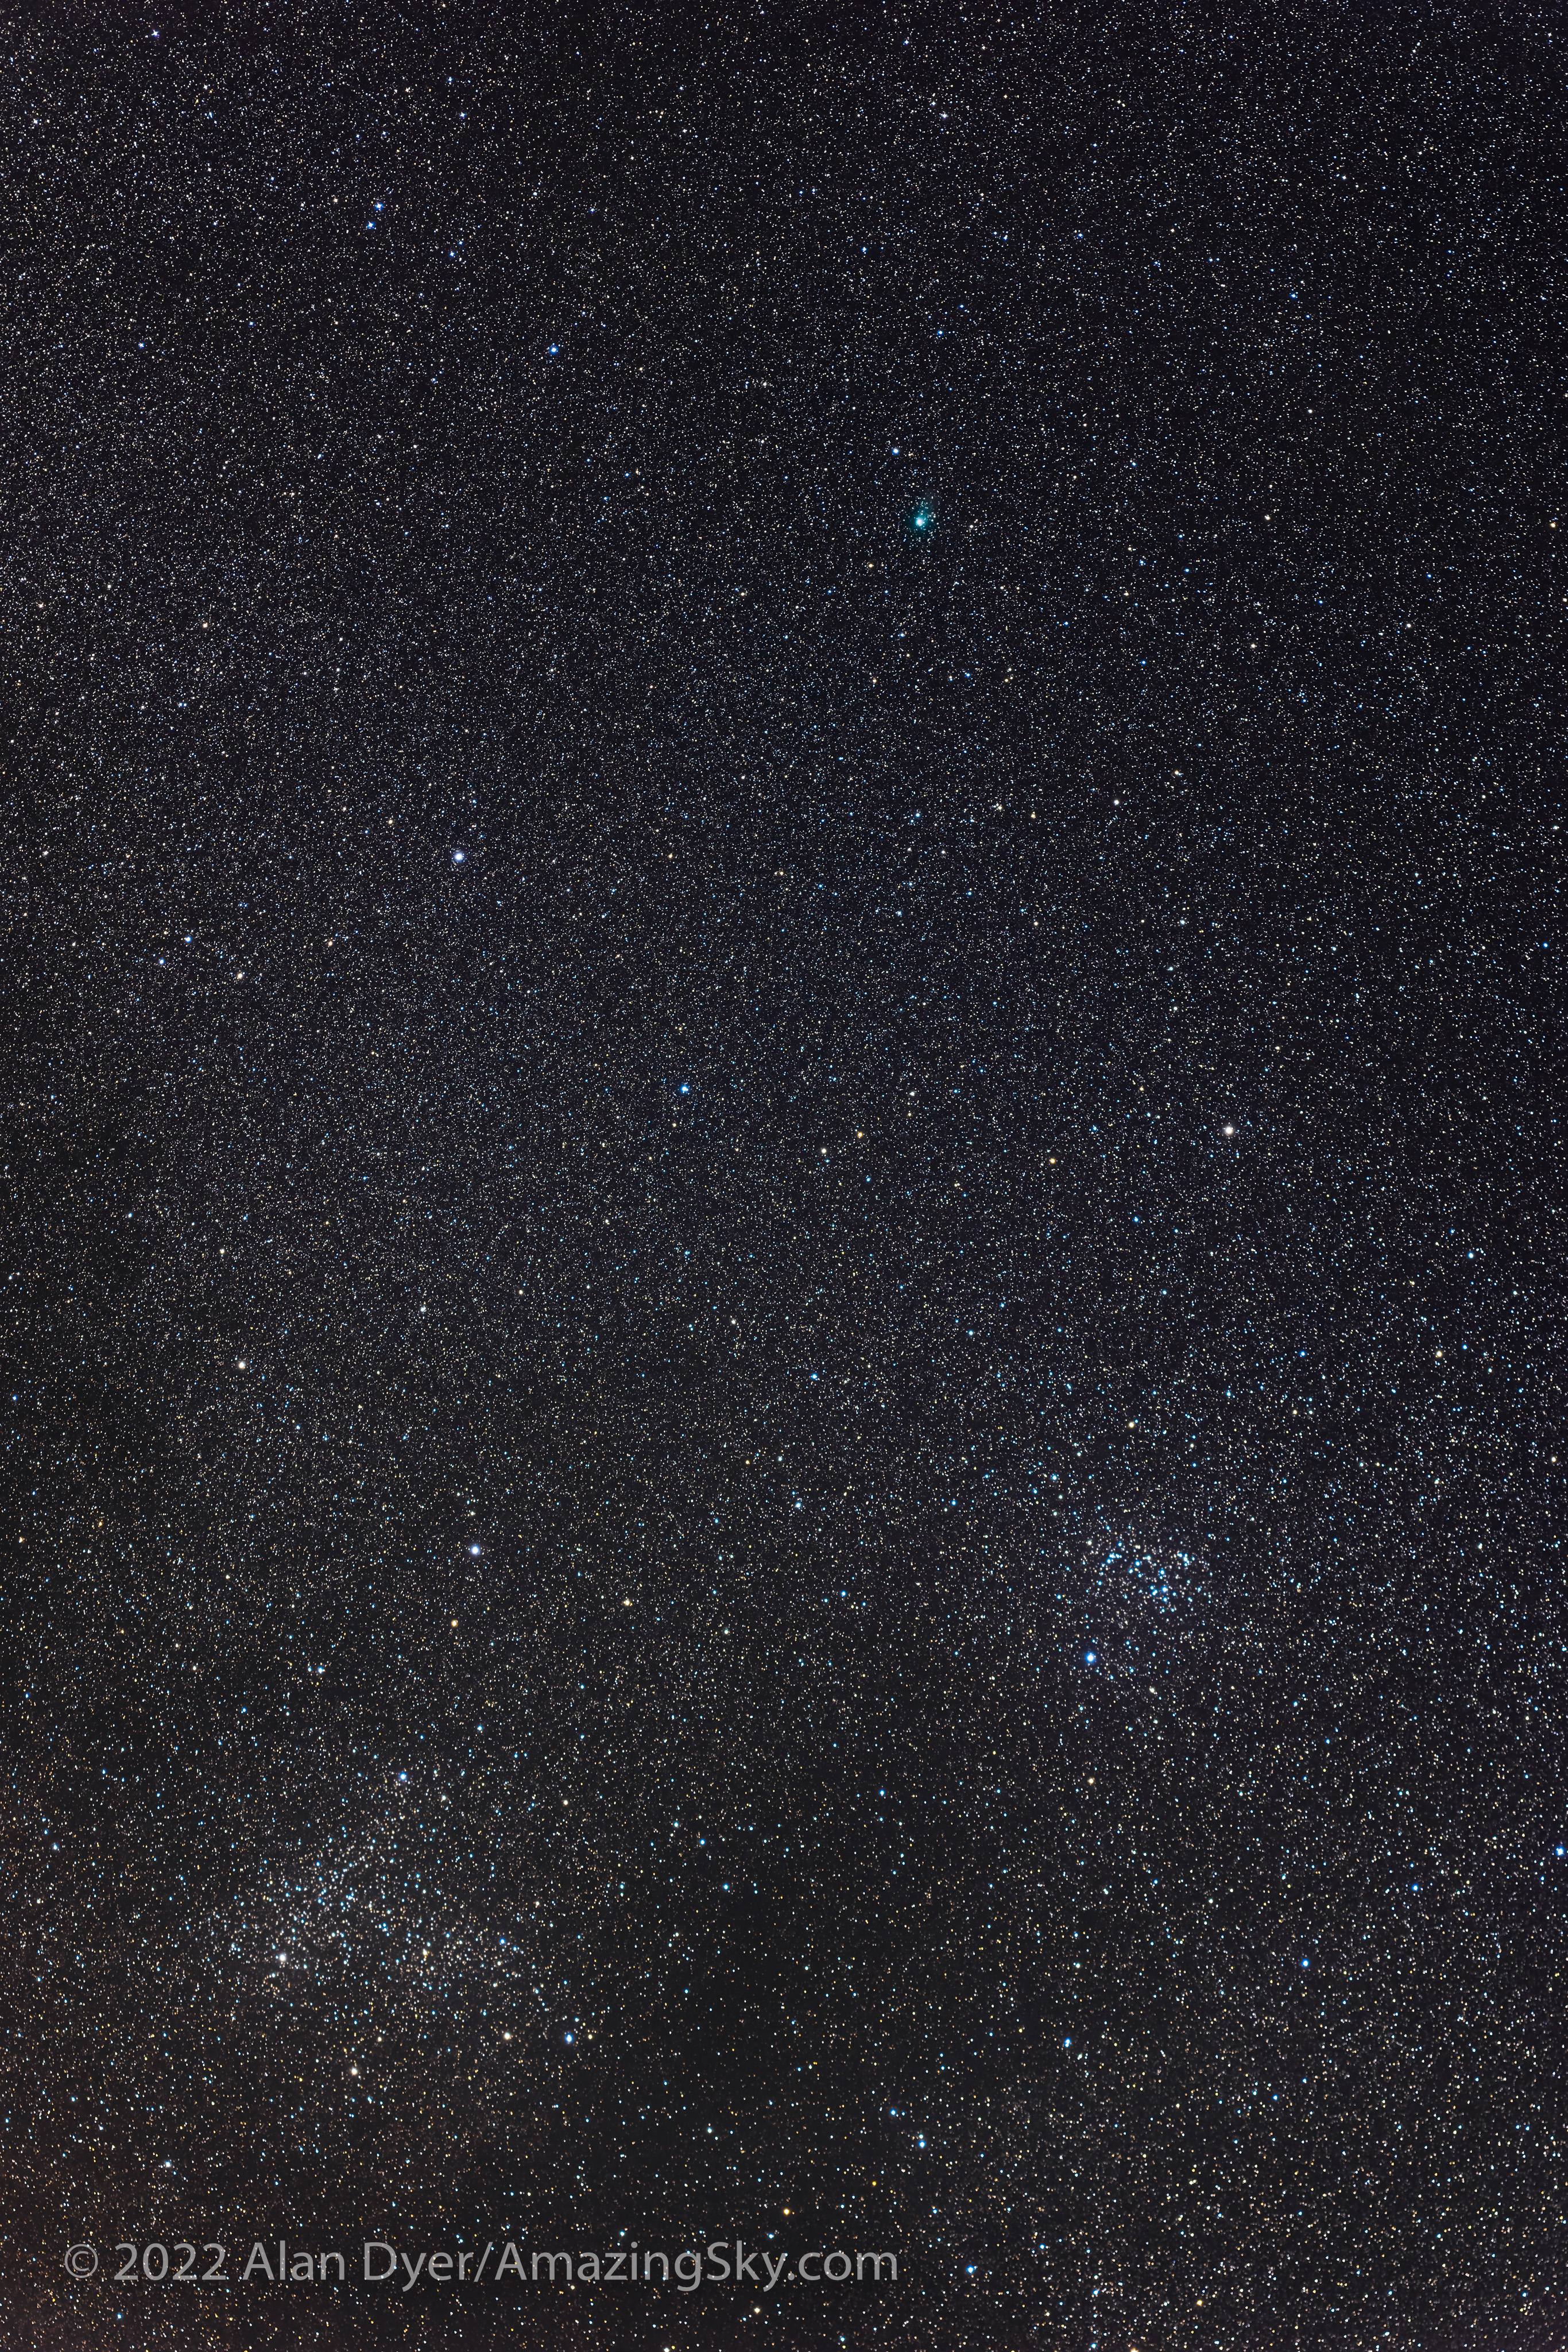
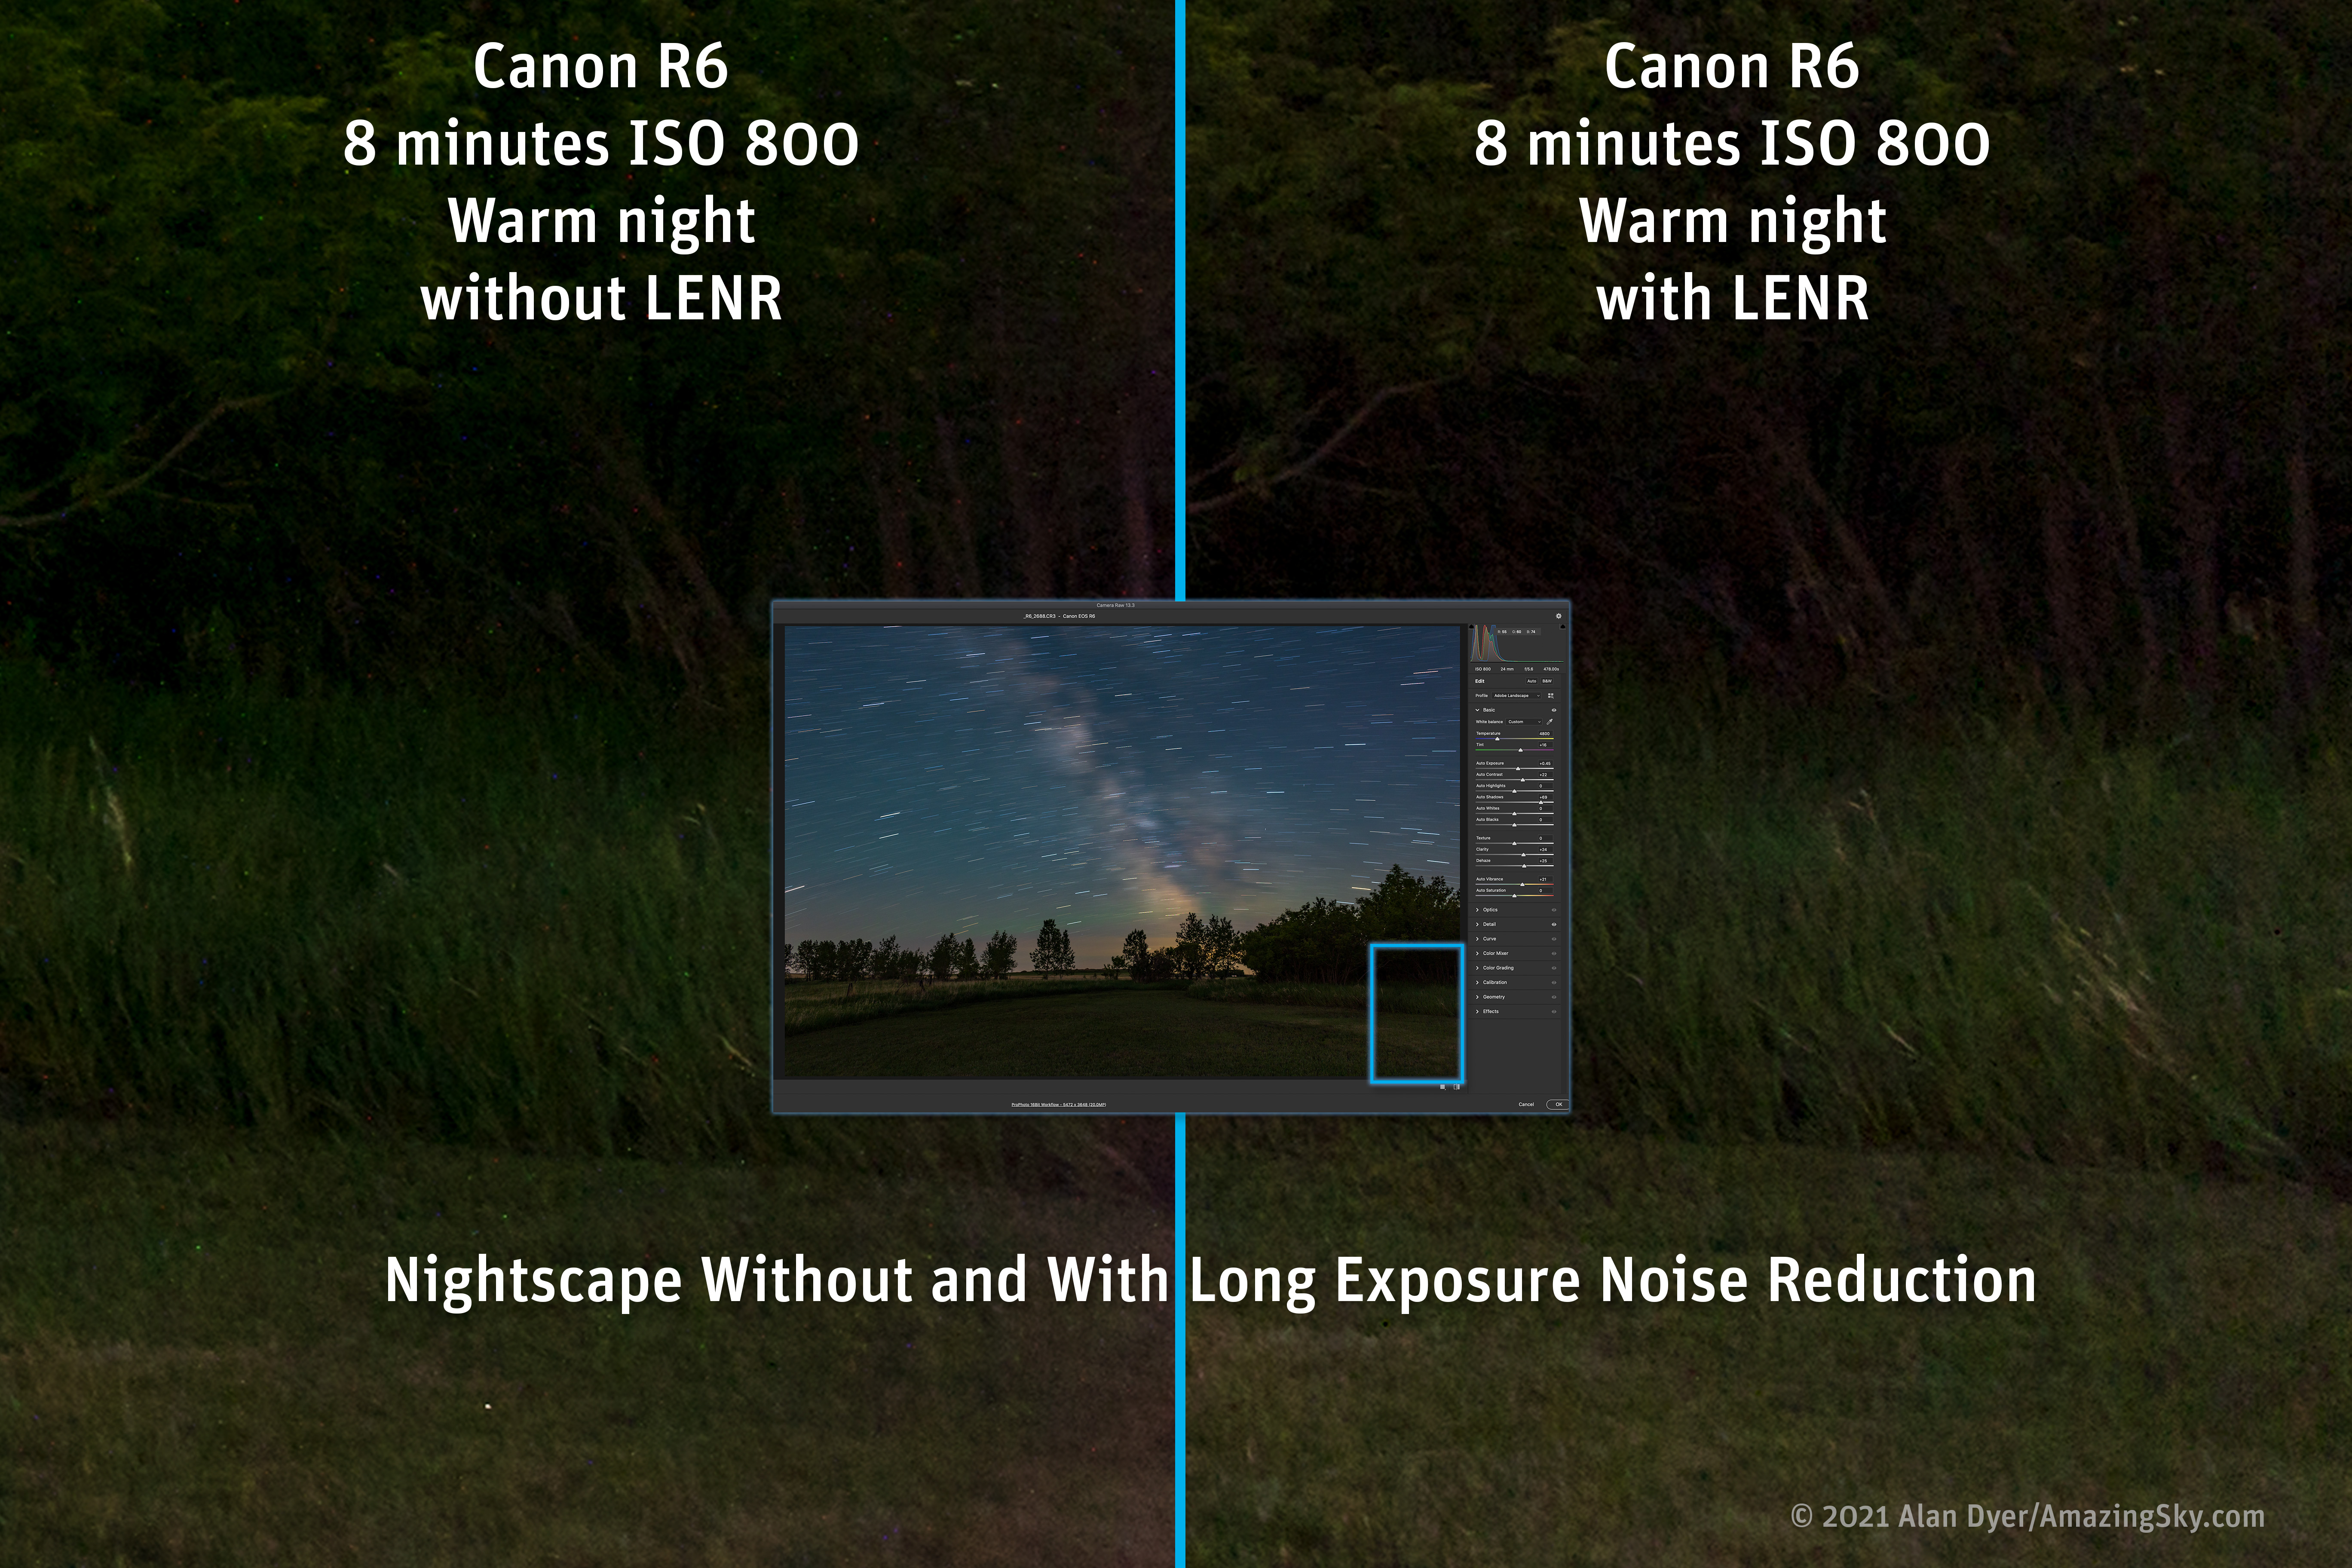
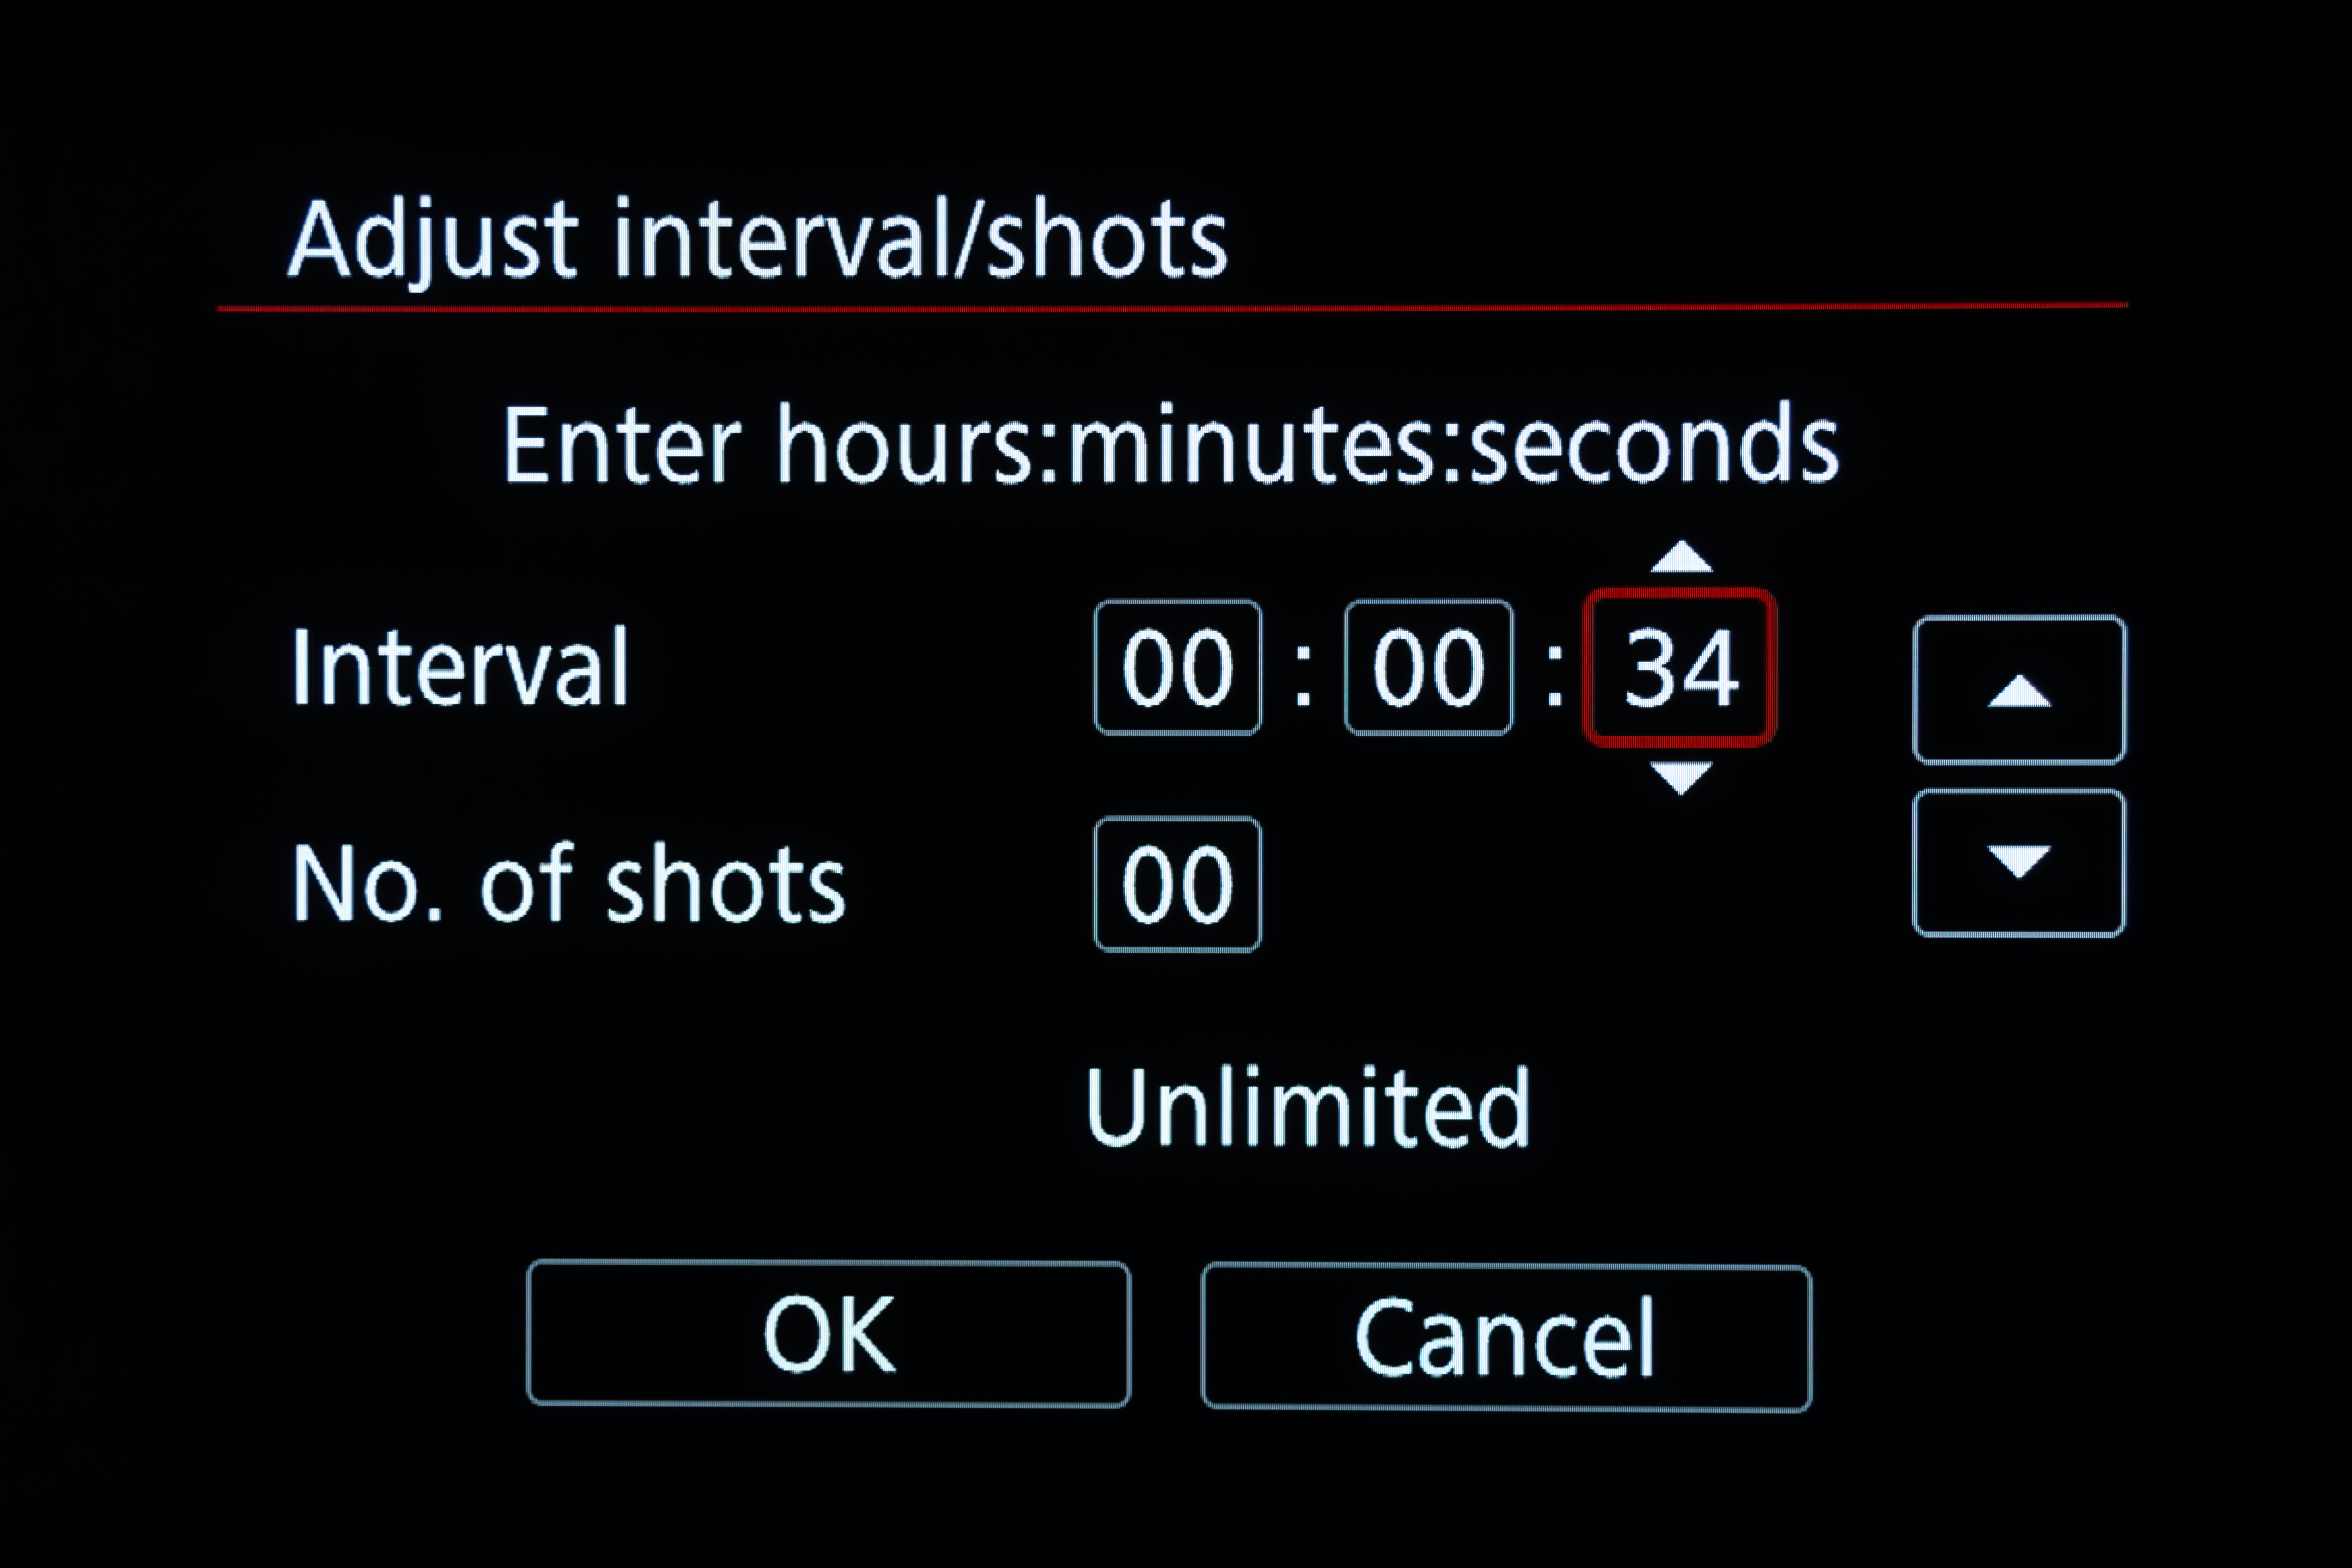
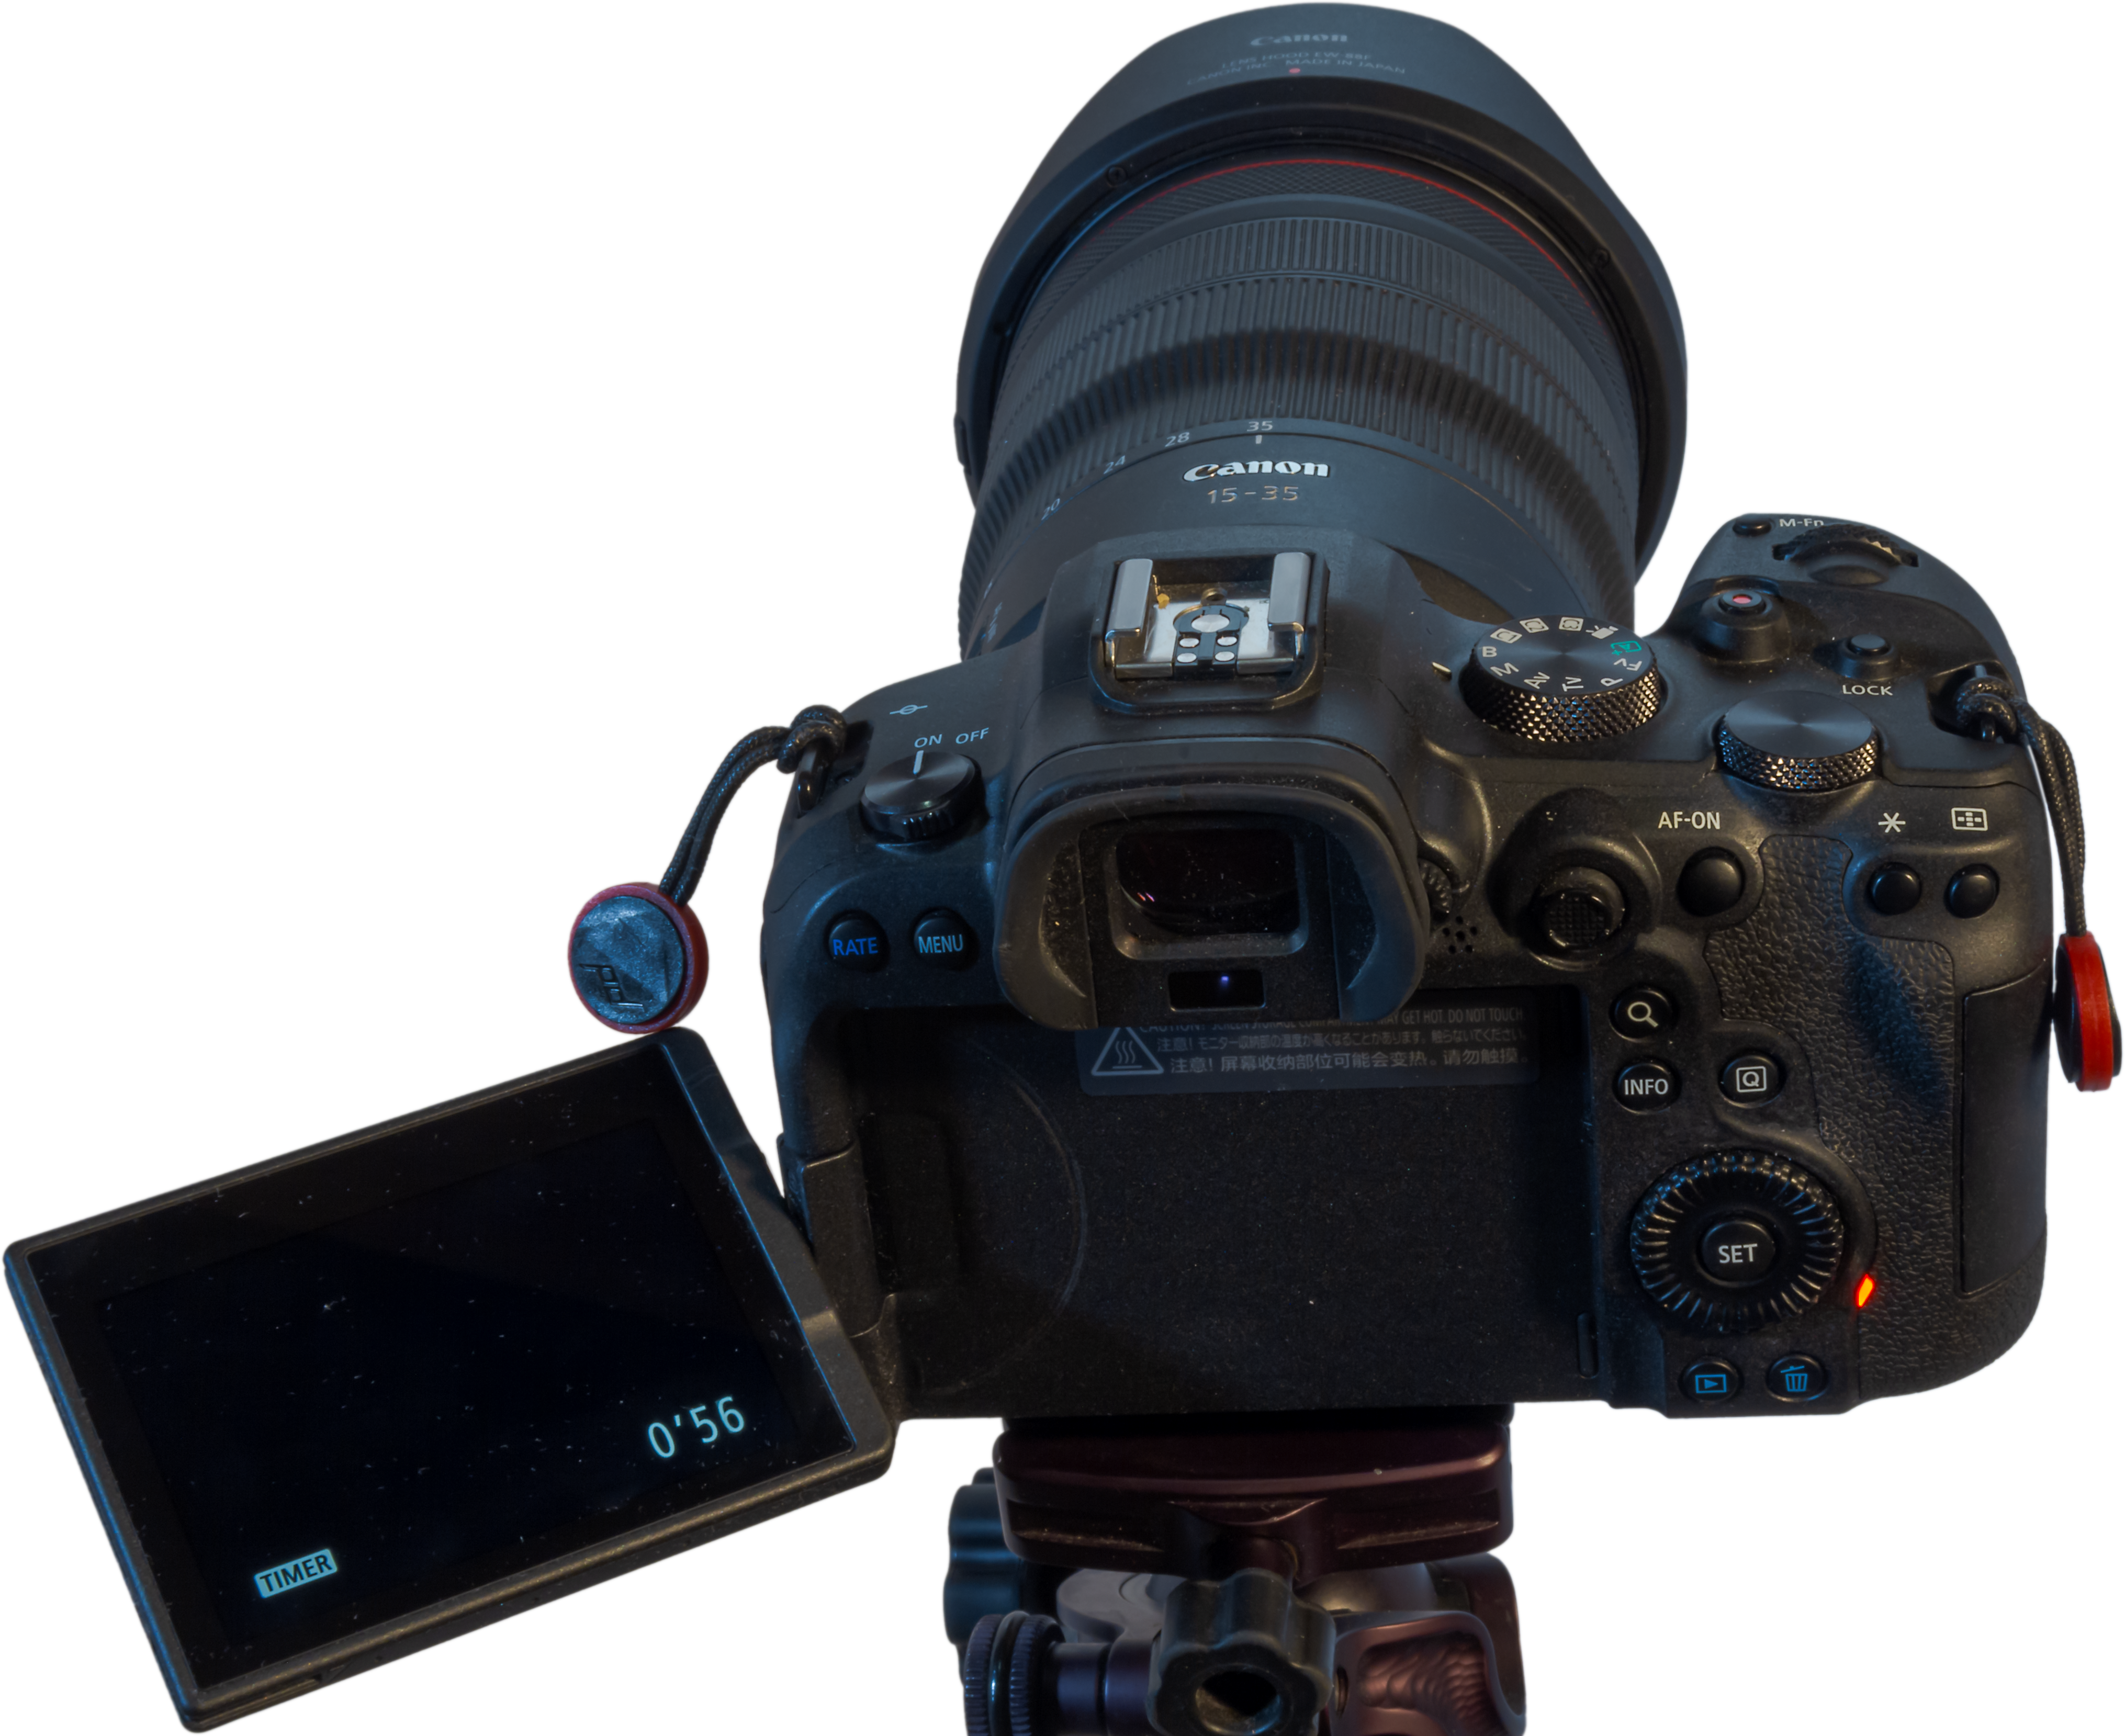
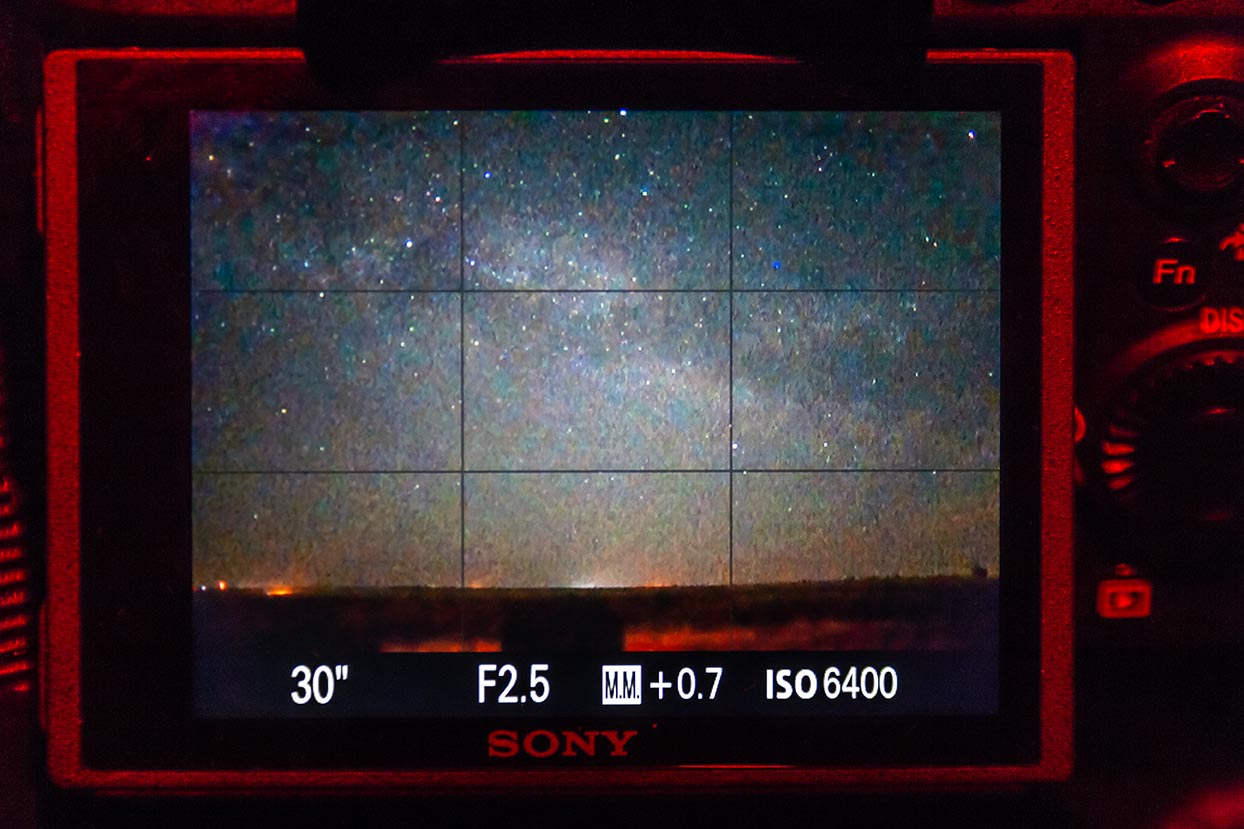
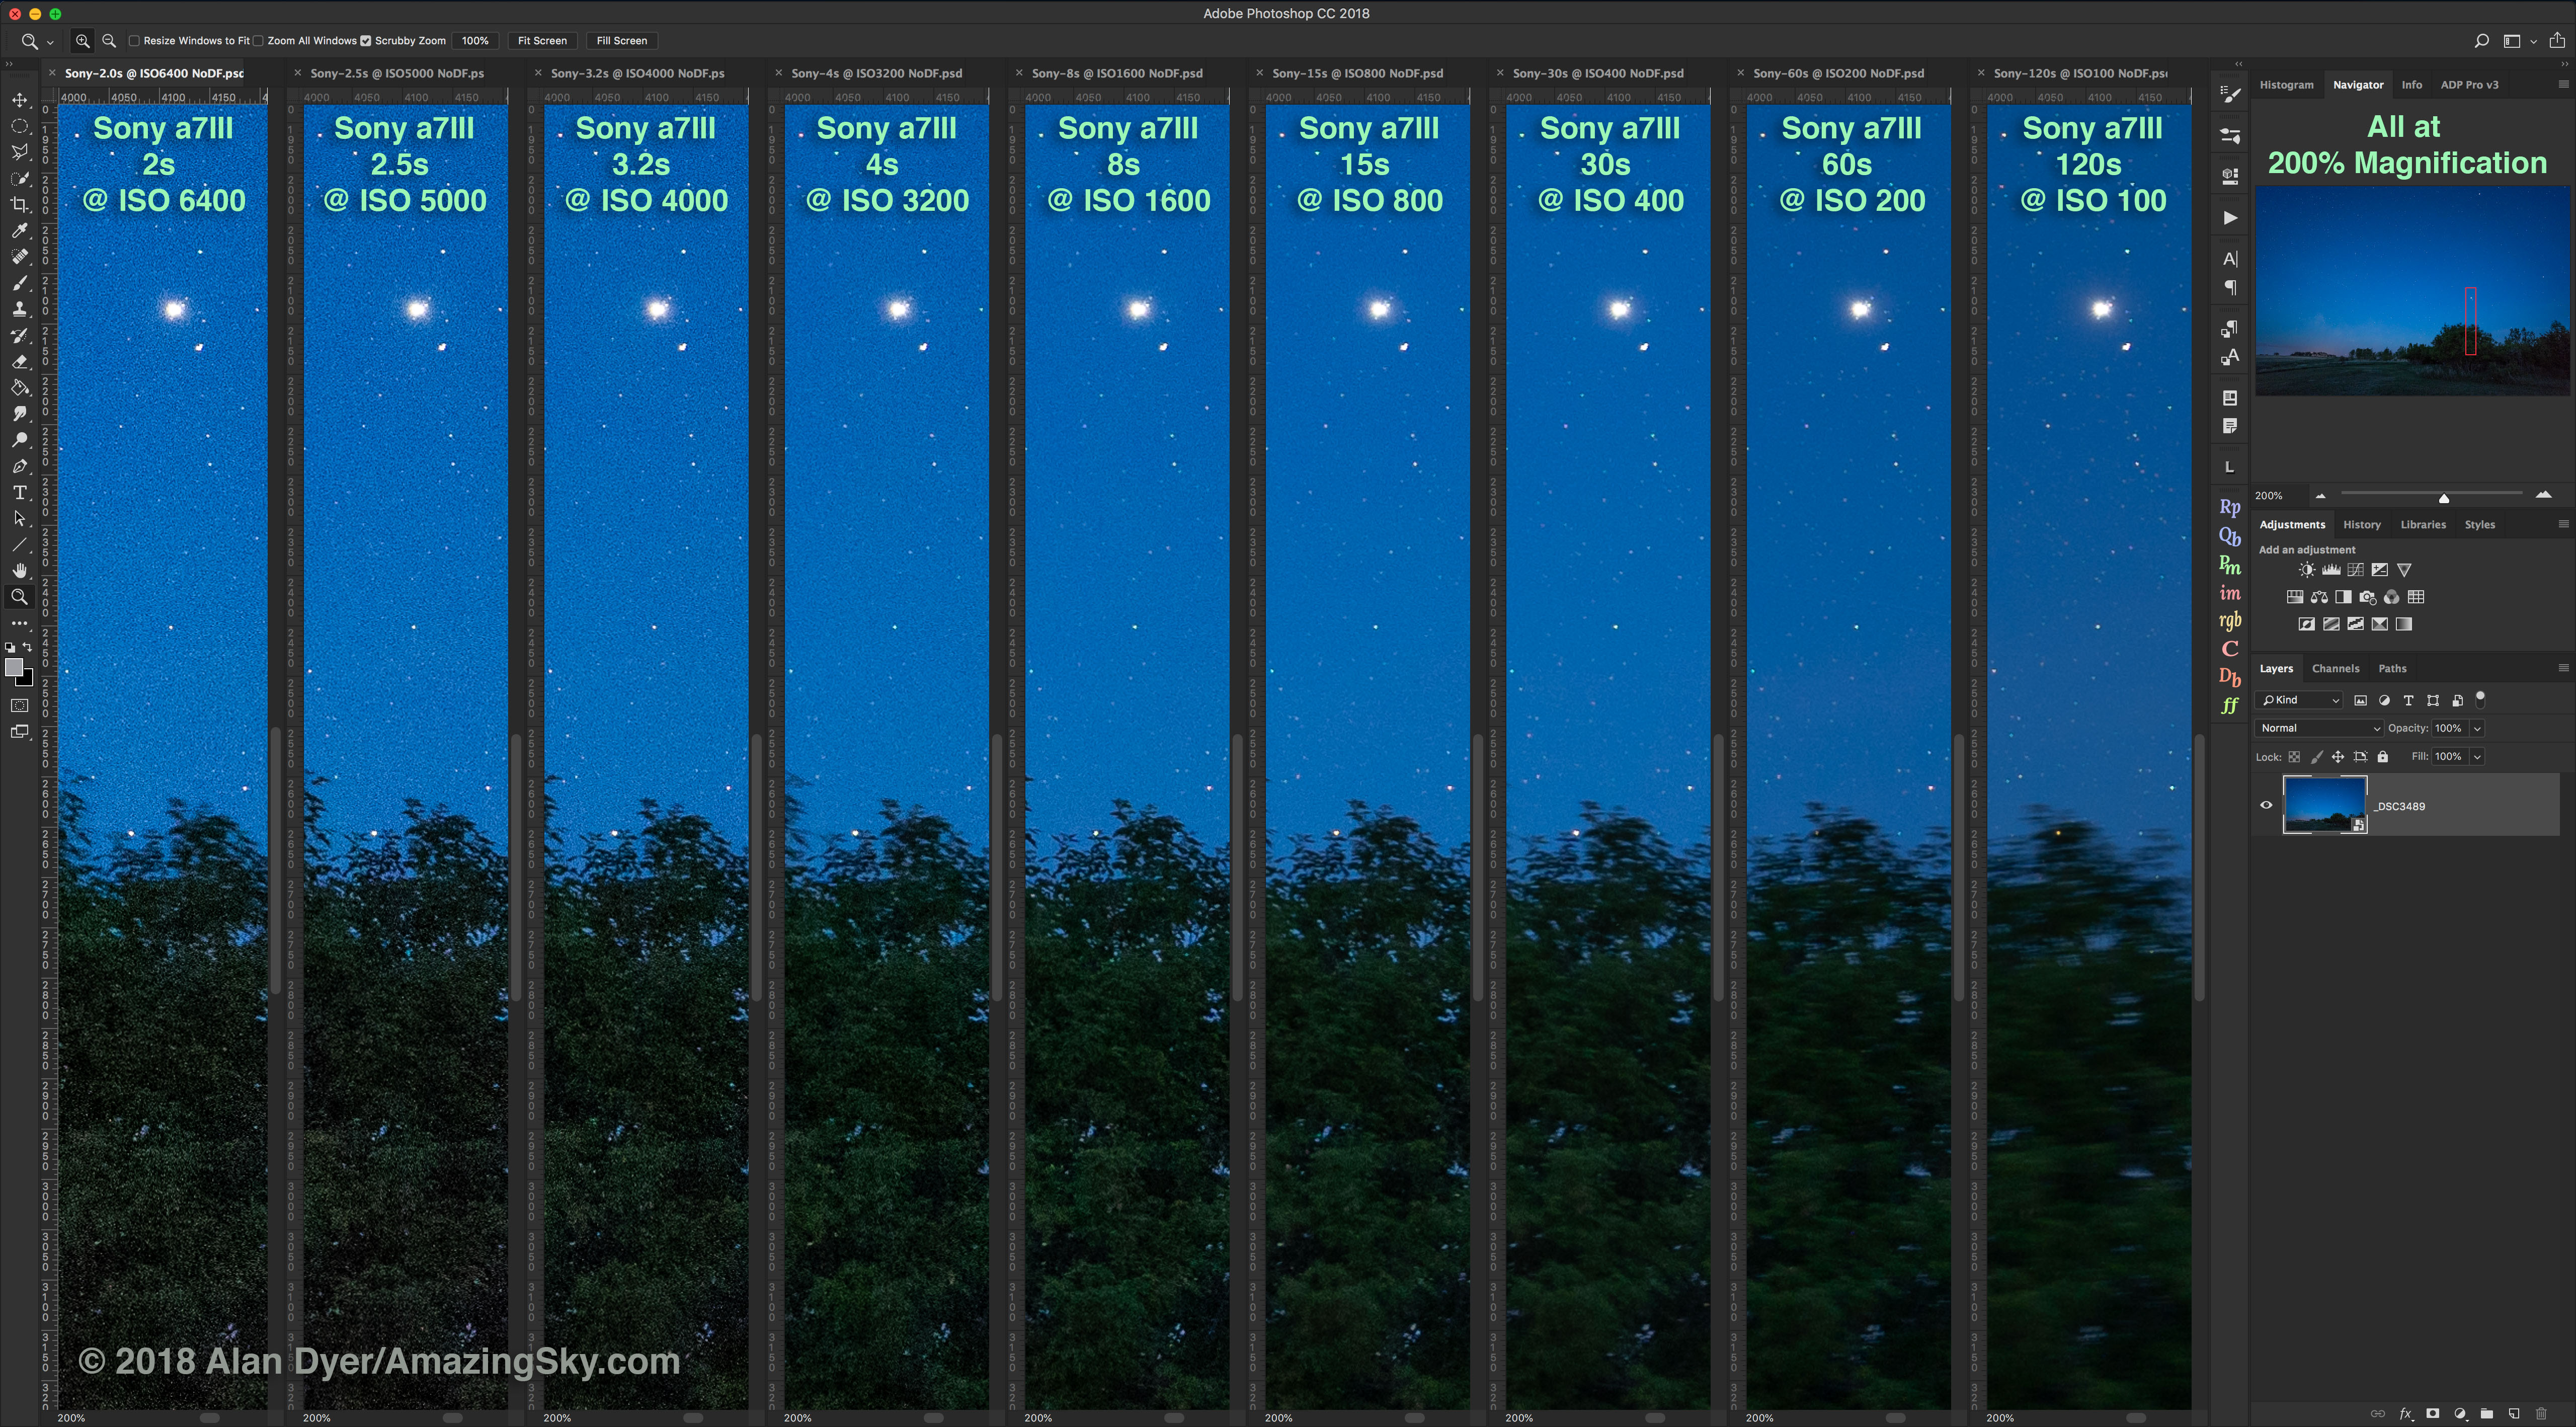
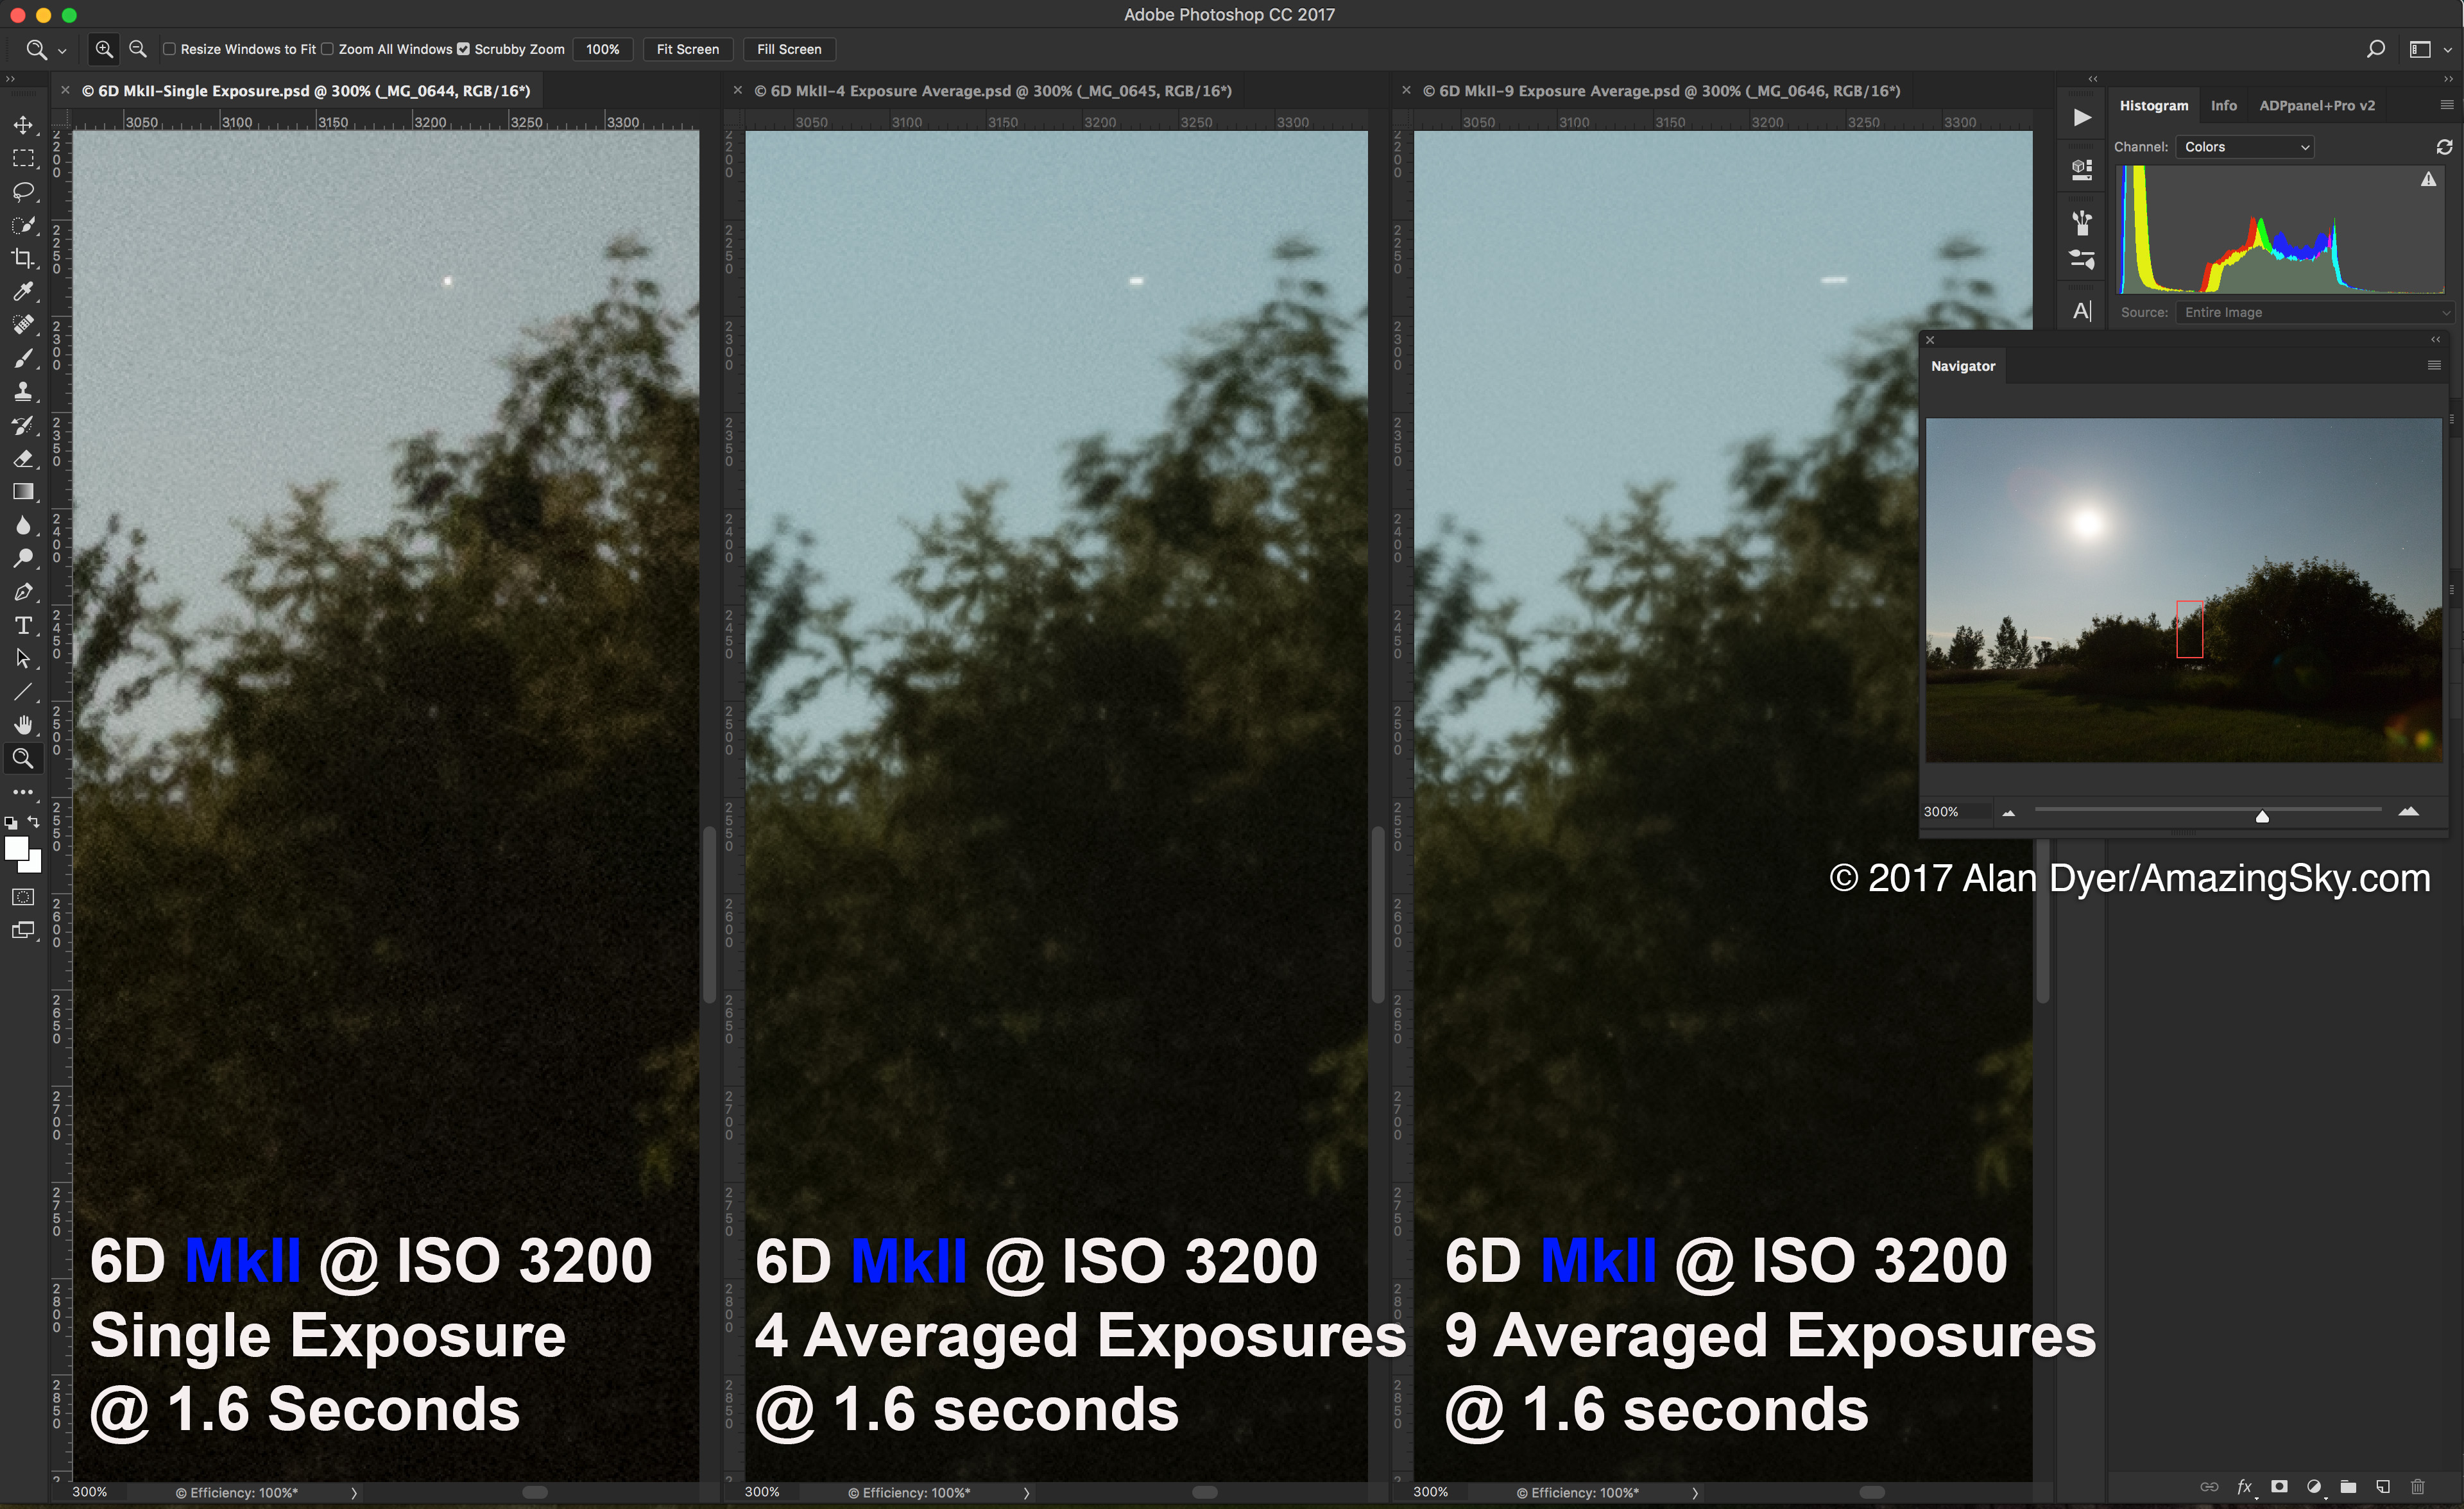
I tested the trio of lenses on same-night exposures of a starry but moonlit sky, using the 45-megapixel Canon R5 camera mounted on a motorized star tracker to follow the rotating sky. With one exception noted, any distortion of stars from perfect pinpoints is due to lens aberrations, not star trailing. The brighter moonlit sky helped reveal non-uniform illumination from lens vignetting.
I shot each lens wide-open at its maximum aperture, as well as one stop down from maximum, to see how aberrations and vignetting improved.
I did not test auto-focus performance, nor image stabilization (only the RF28-70mm lacks internal IS), nor other lens traits unimportant for astro work such as bokeh or close focus image quality.
I also compared the RF15-35mm on same-night dark-sky tests against a trio of prime lenses long in my stable: the Rokinon 14mm SP, and Canon’s older L-series 24mm and 35mm primes, all made for DSLRs.
TL;DR SUMMARY
- Each of the Canon “holy trinity” of zoom performs superbly, though not without some residual lens aberrations such as corner astigmatism and, in the RF28-70mm, slight chromatic aberration at f/2.
- However, what flaws they show are well below the level of many older prime lenses made for DSLR cameras.
- The RF lenses’ major optical flaw is vignetting, which can be quite severe at some focal lengths, such as in the RF70-200mm at 200mm. But this flaw can be corrected in processing.
- These are lenses that can replace fixed-focal length primes, though at considerable cost, in part justifiable in that they negate the need for a suite of many prime lenses.
- The performance of these and other new lenses made for mirrorless cameras from all brands is one good reason to switch from DSLR to mirrorless cameras.
Lens Specs and Applications
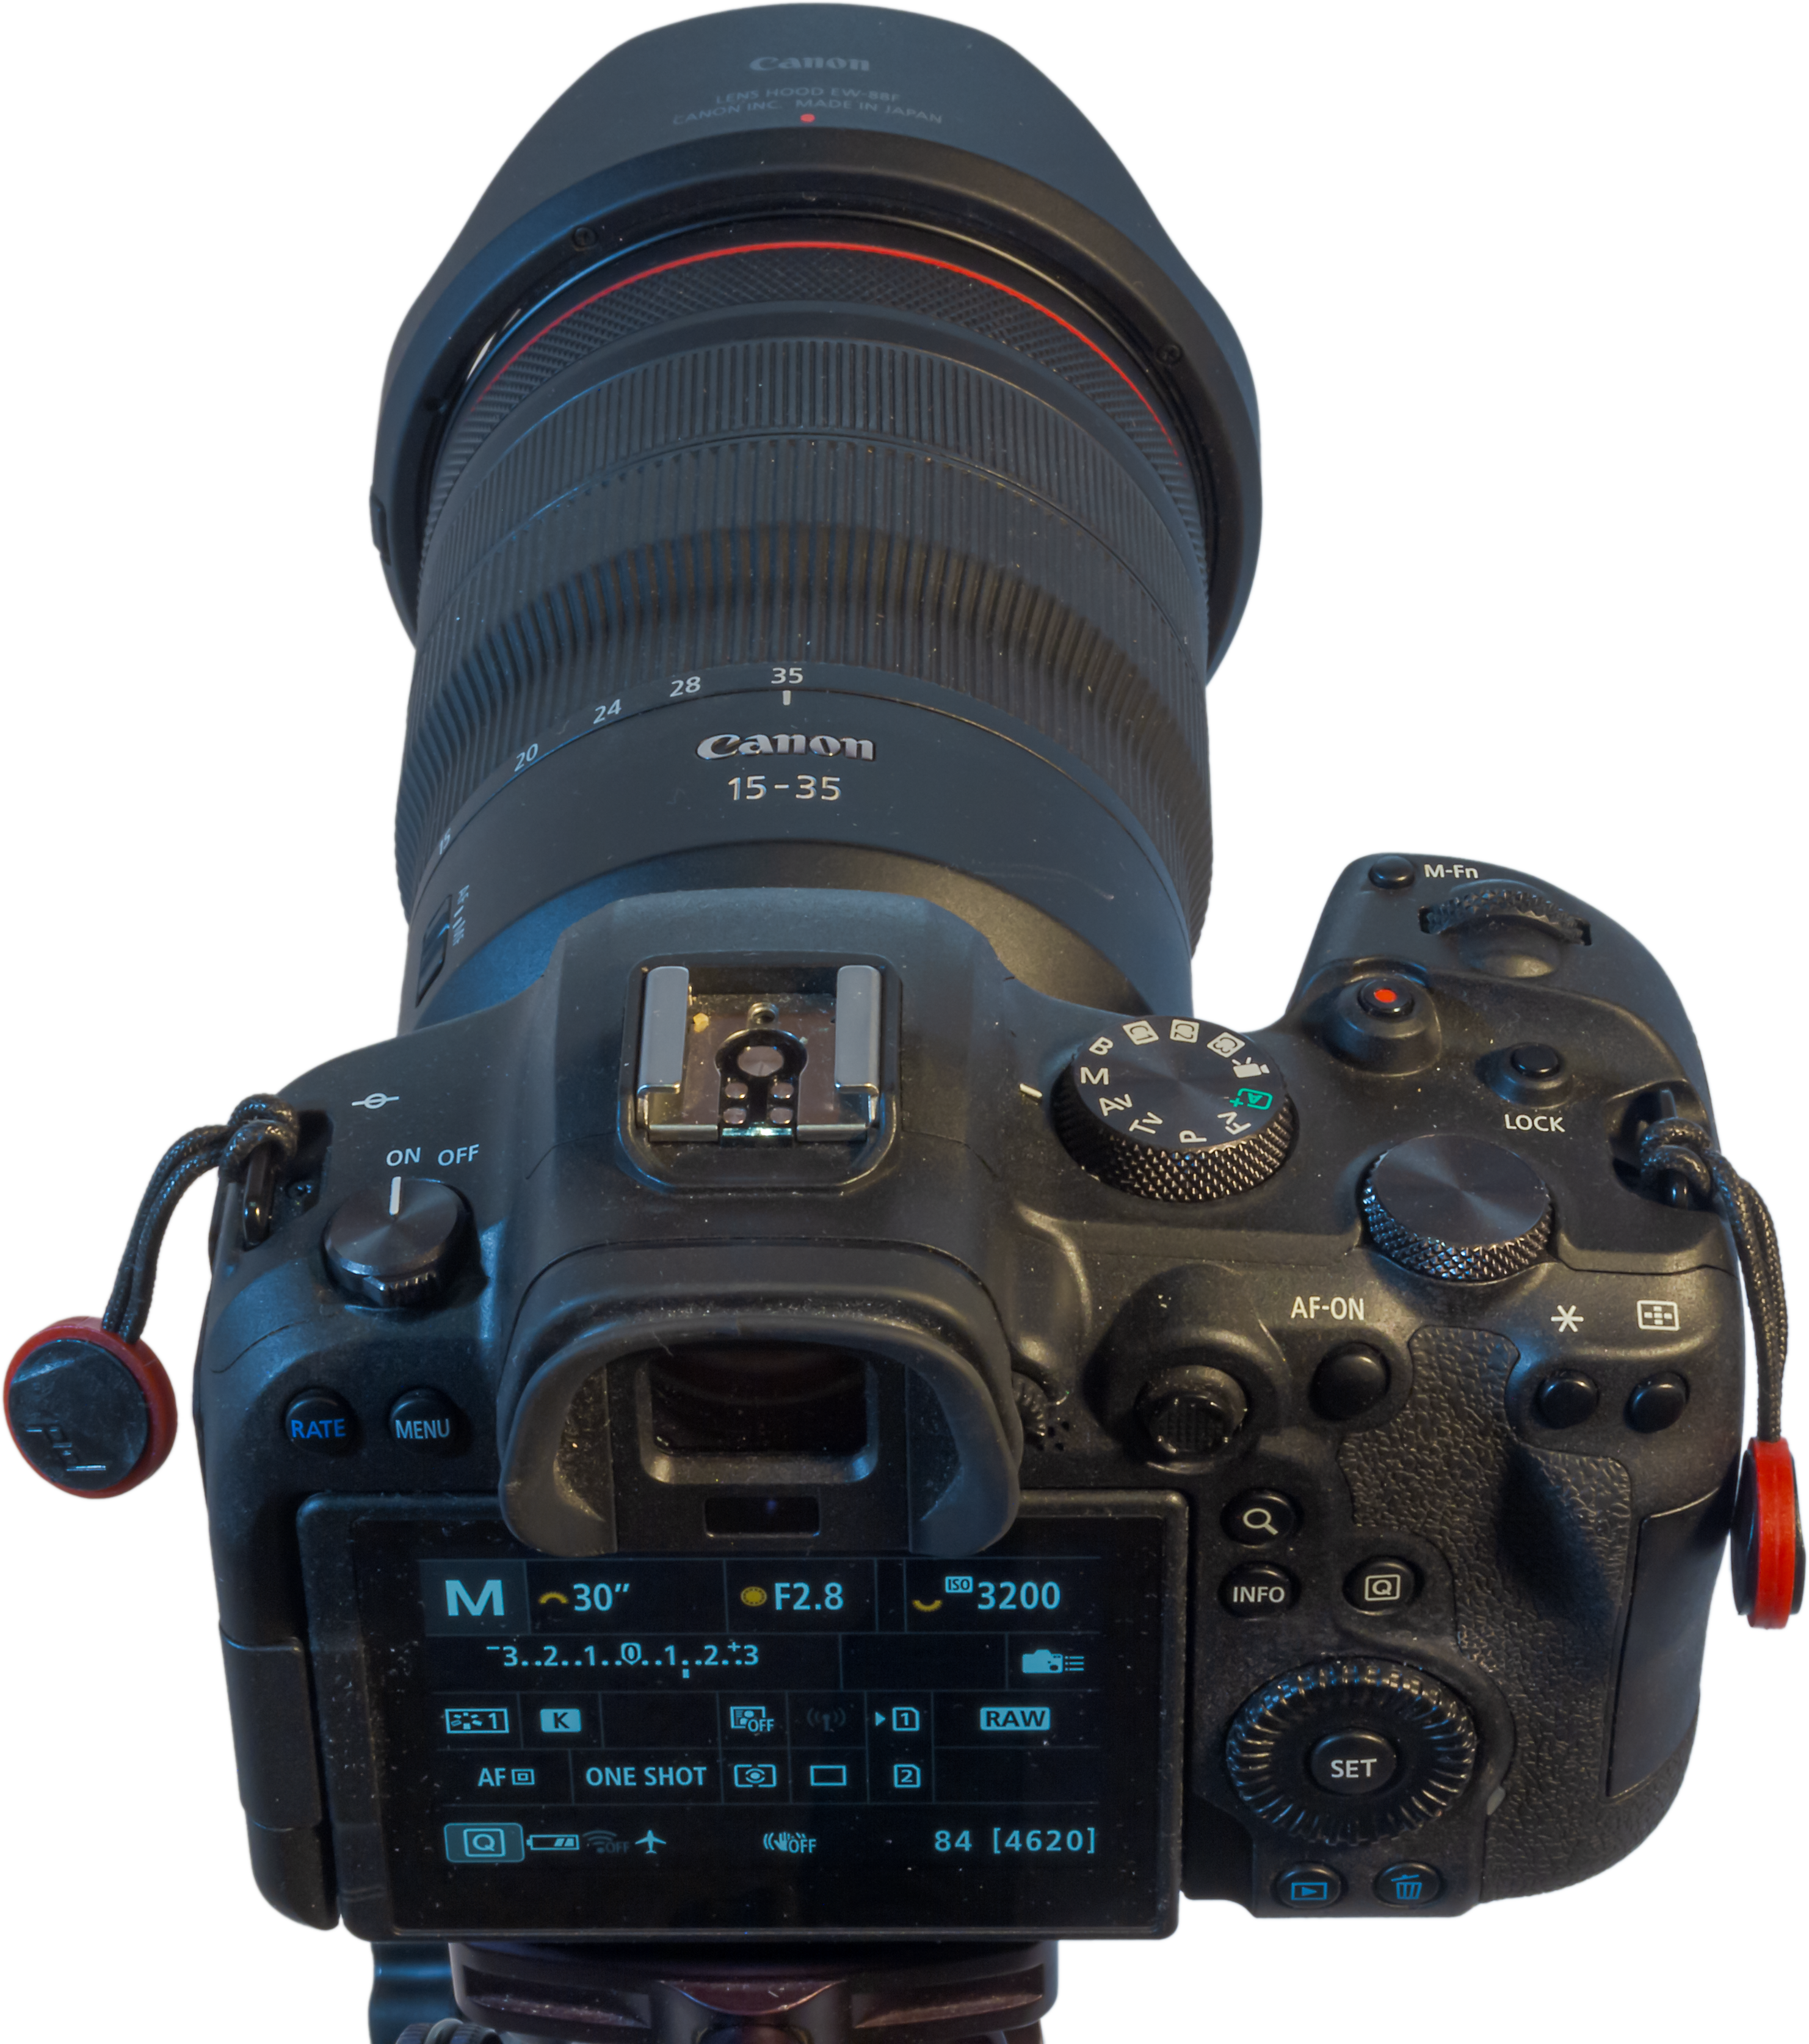
Canon RF15-35mm F/2.8 L IS USM
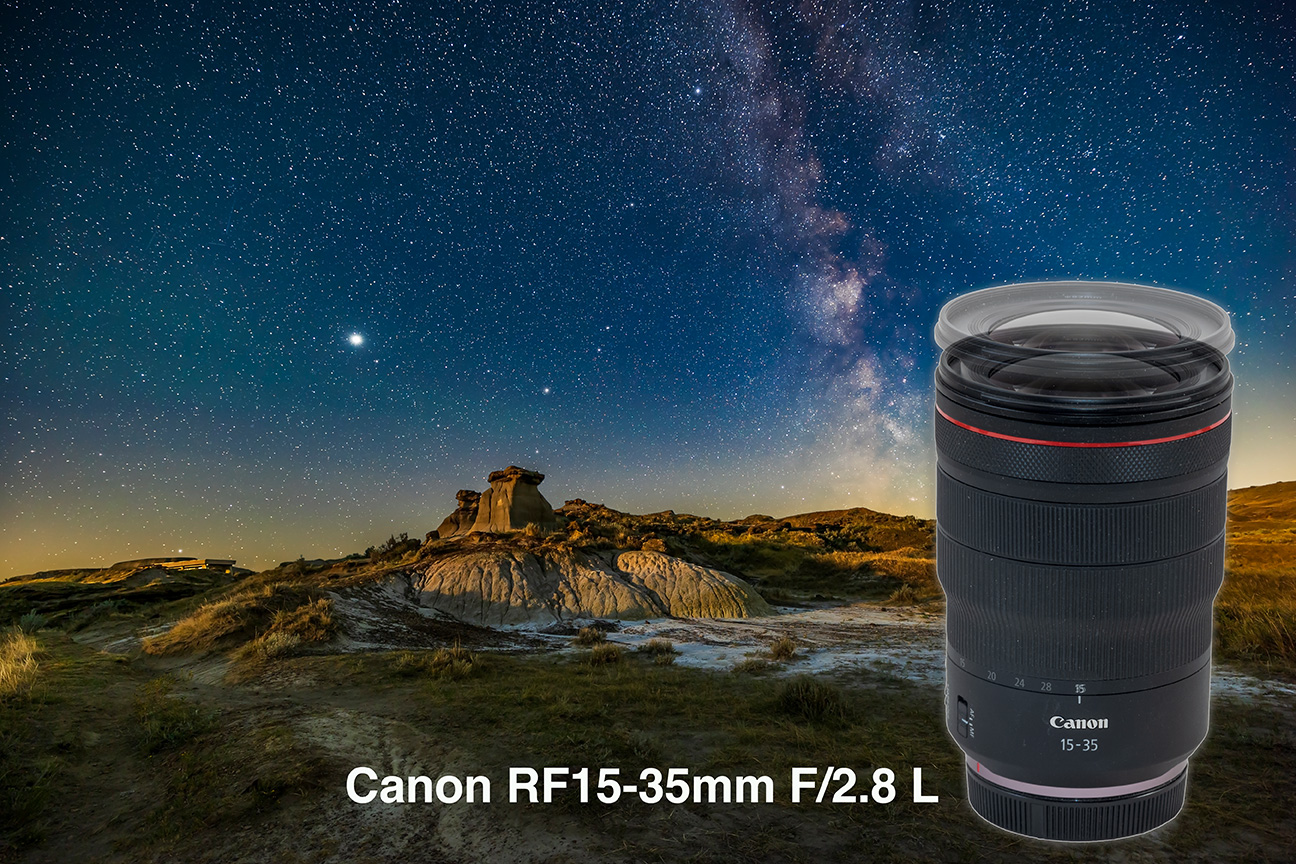
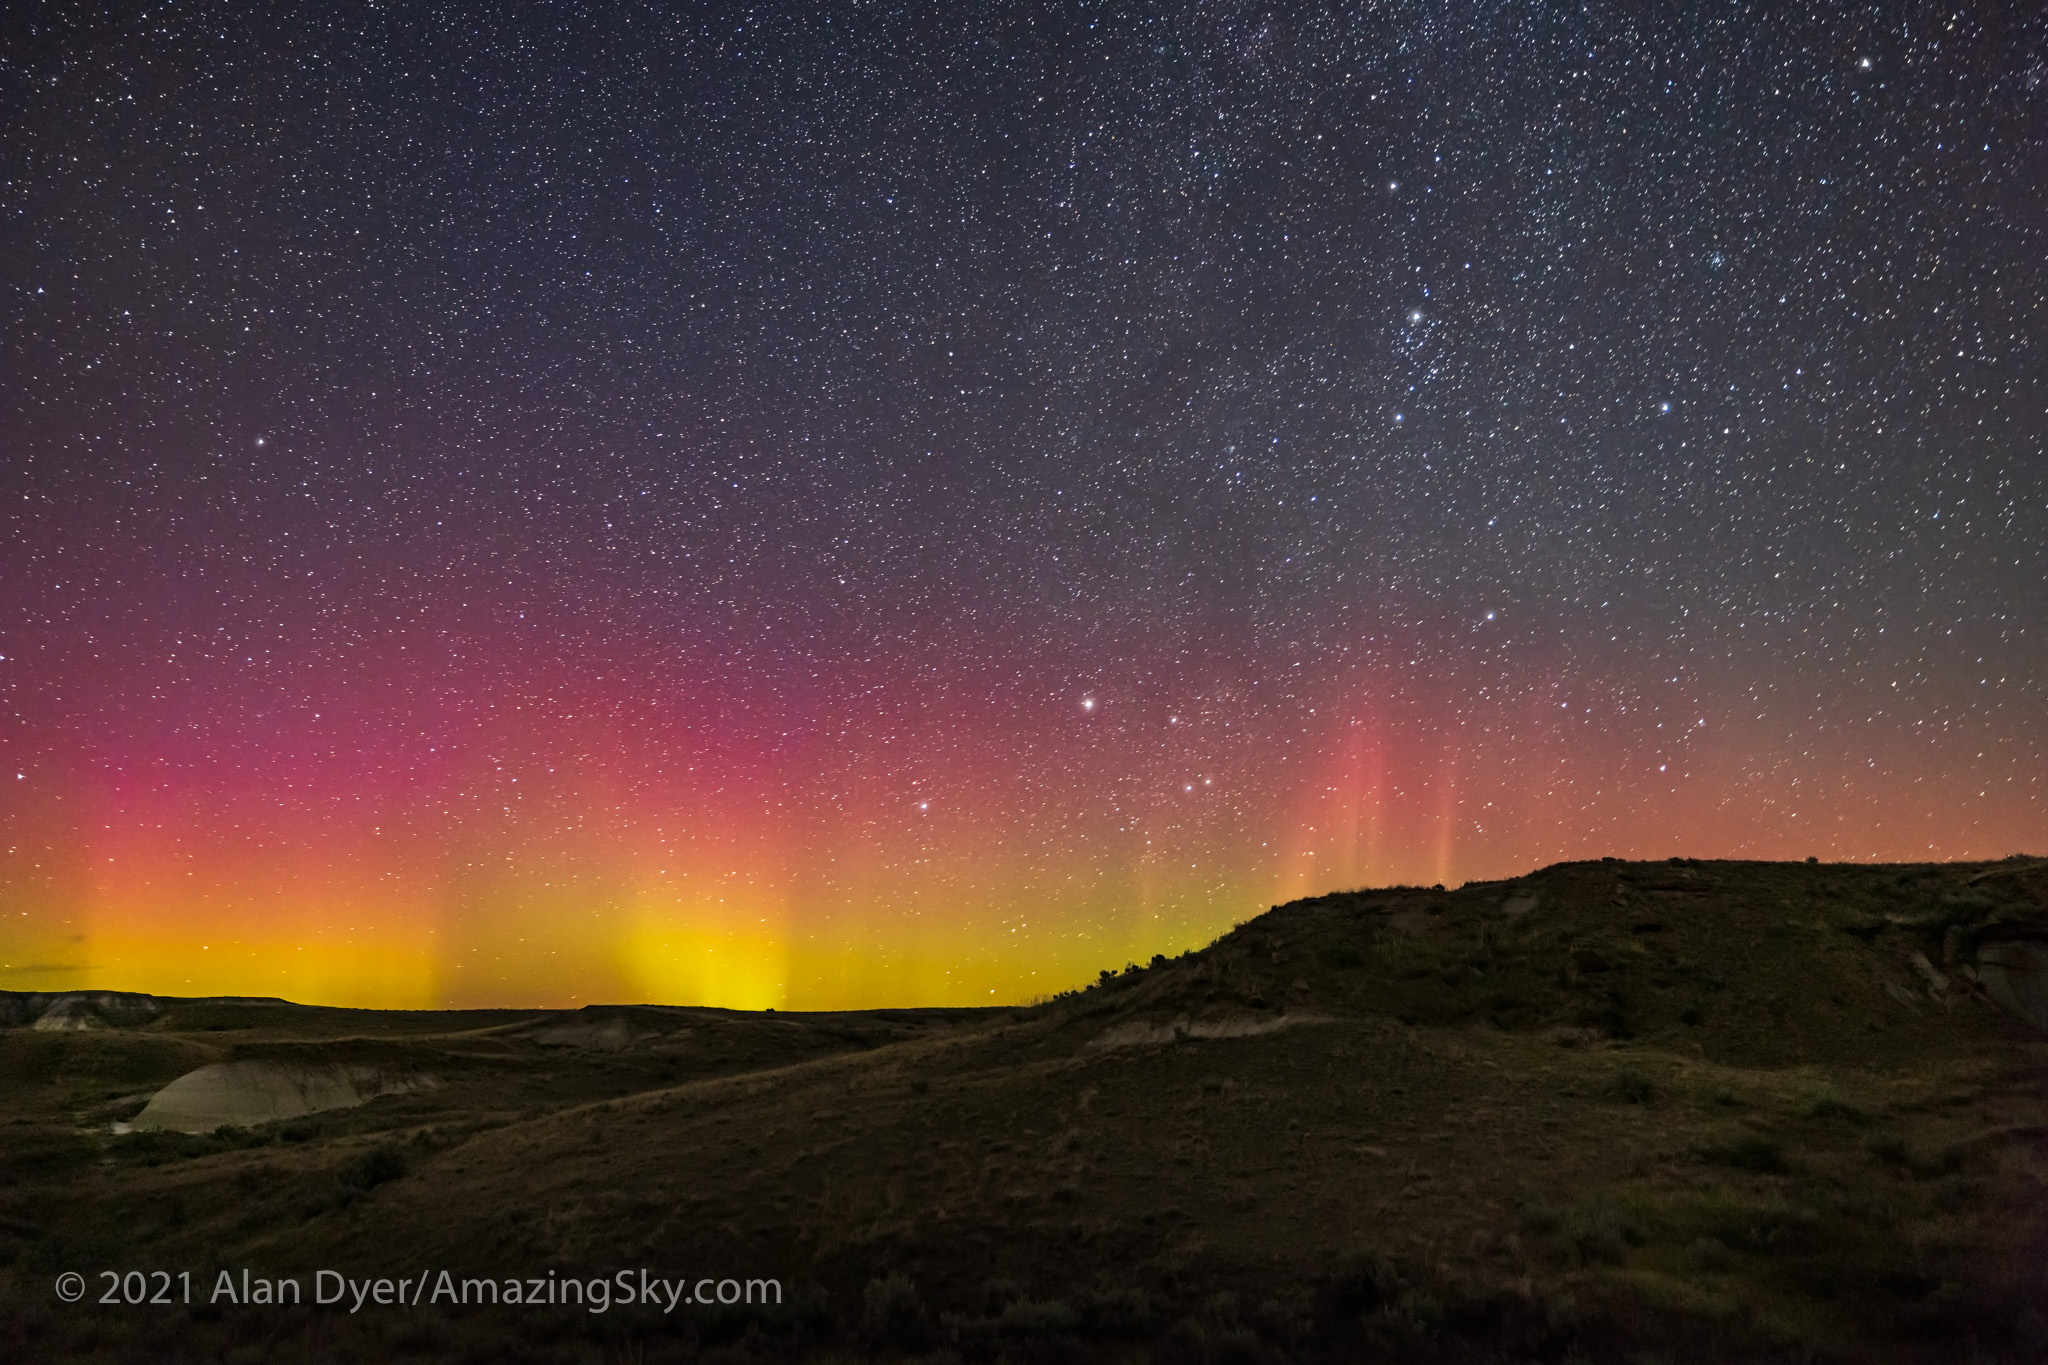
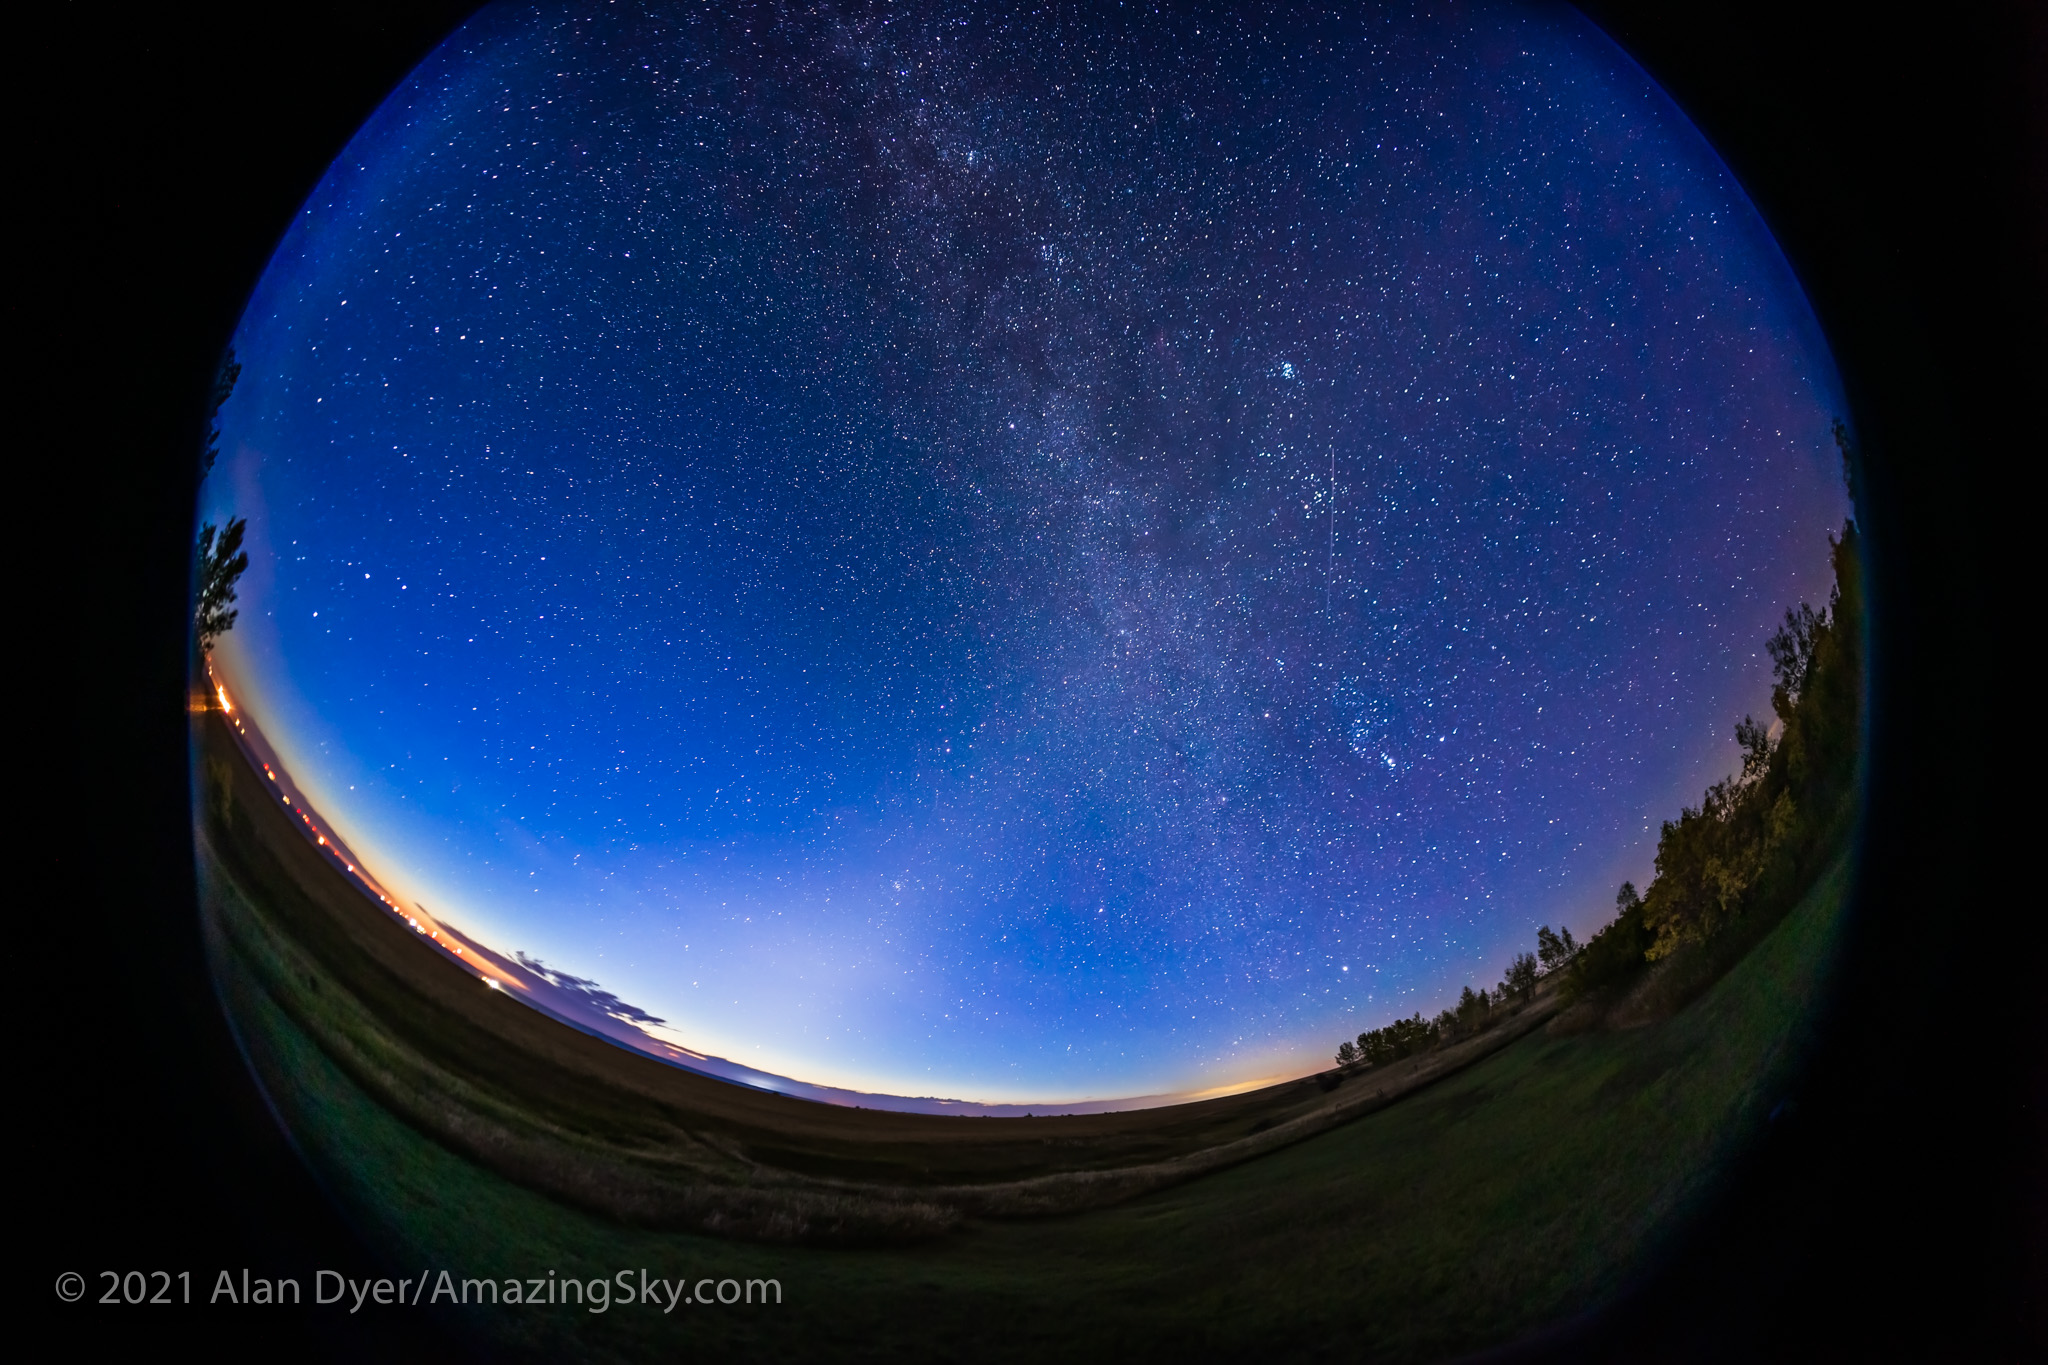
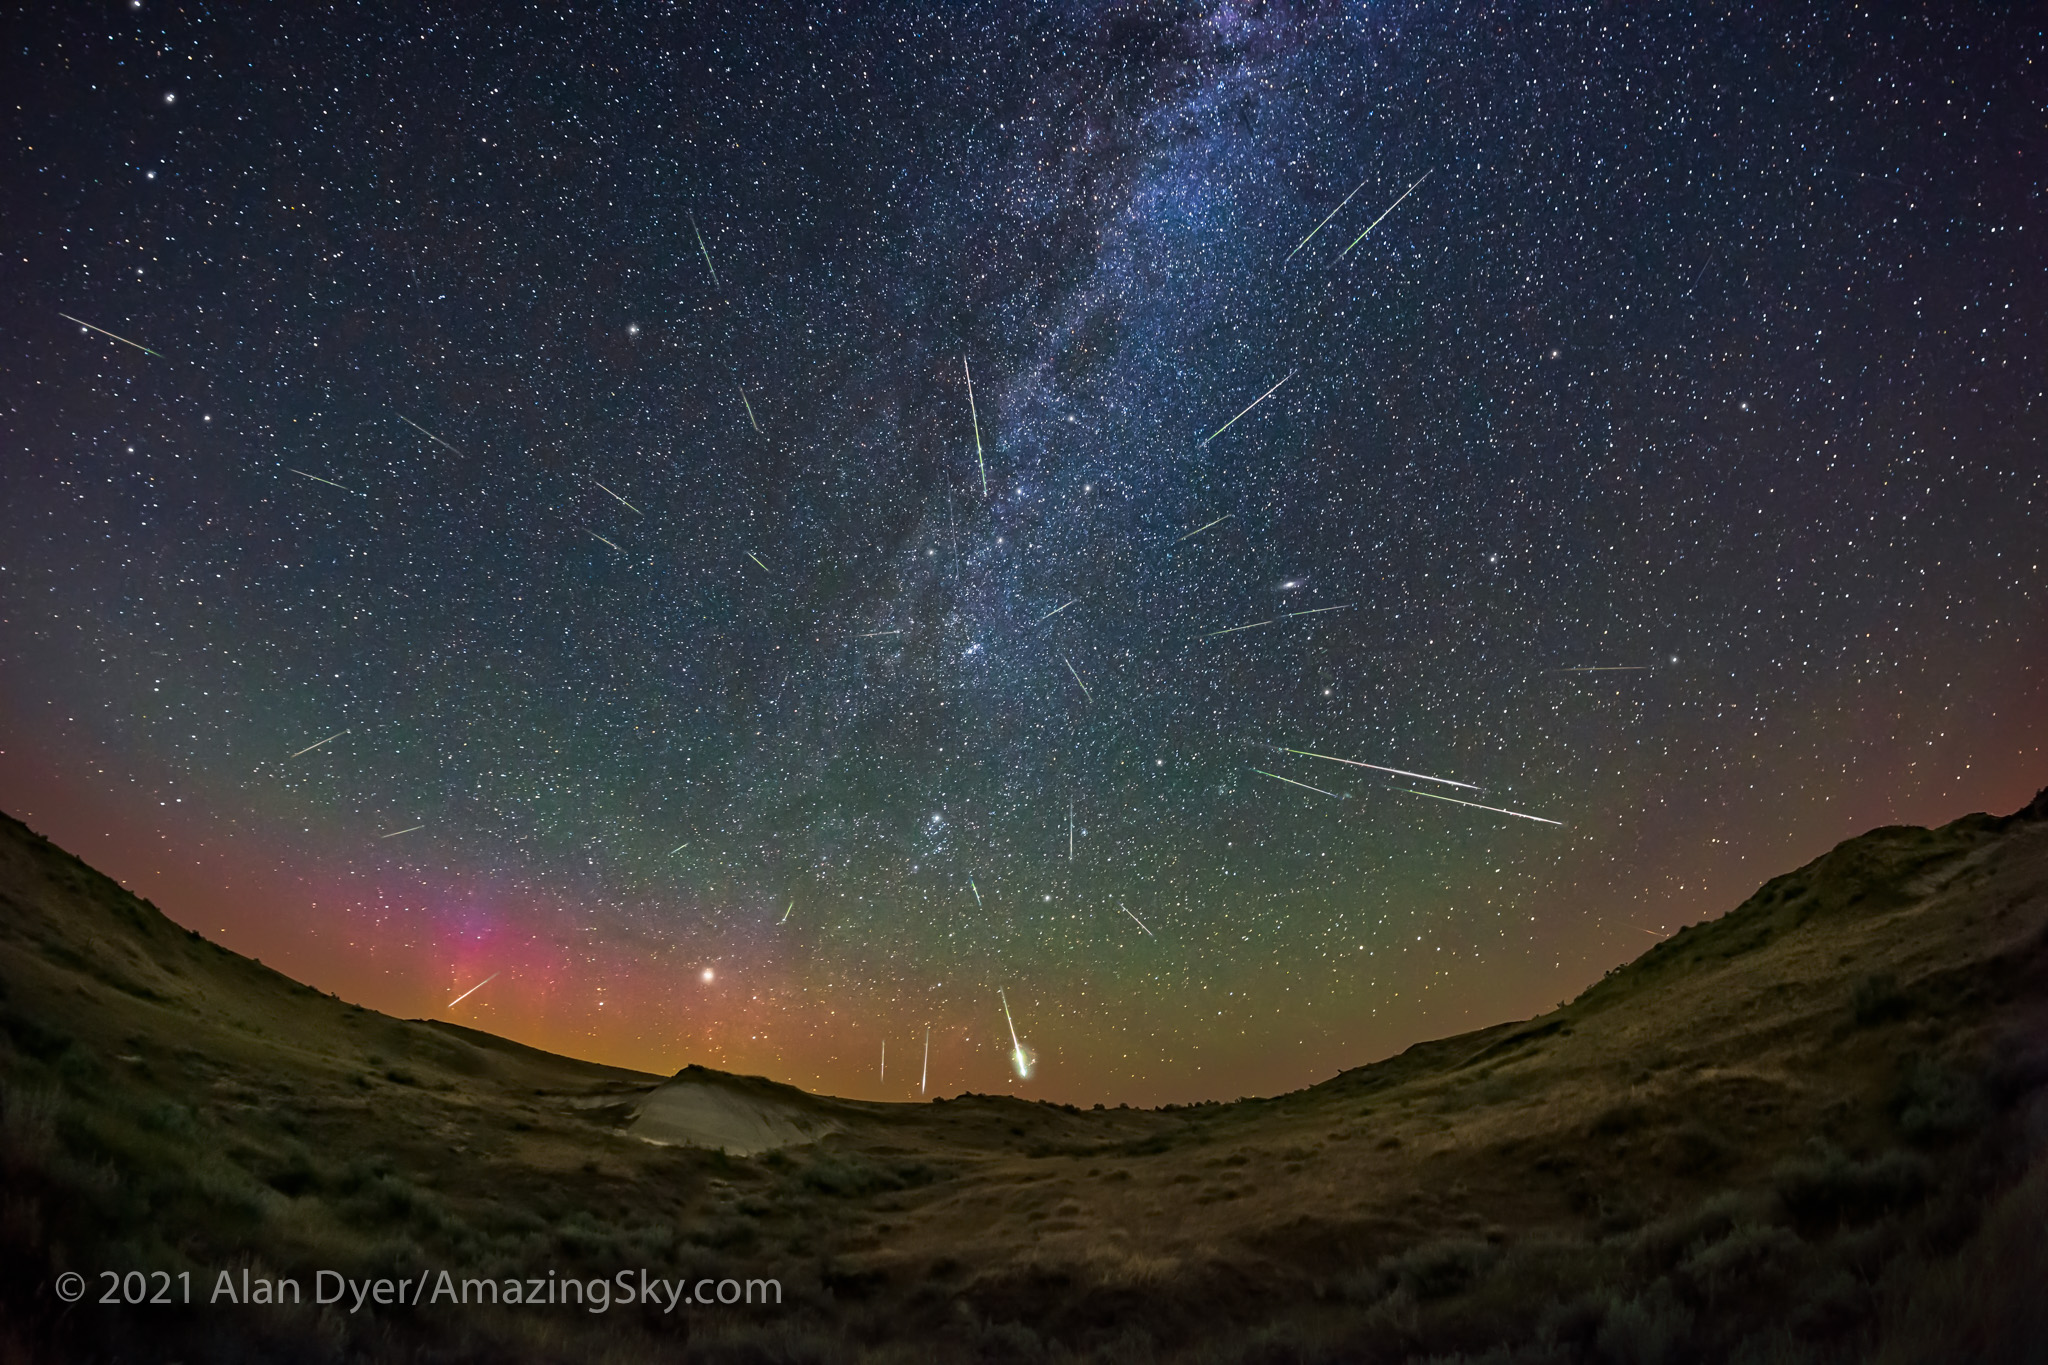
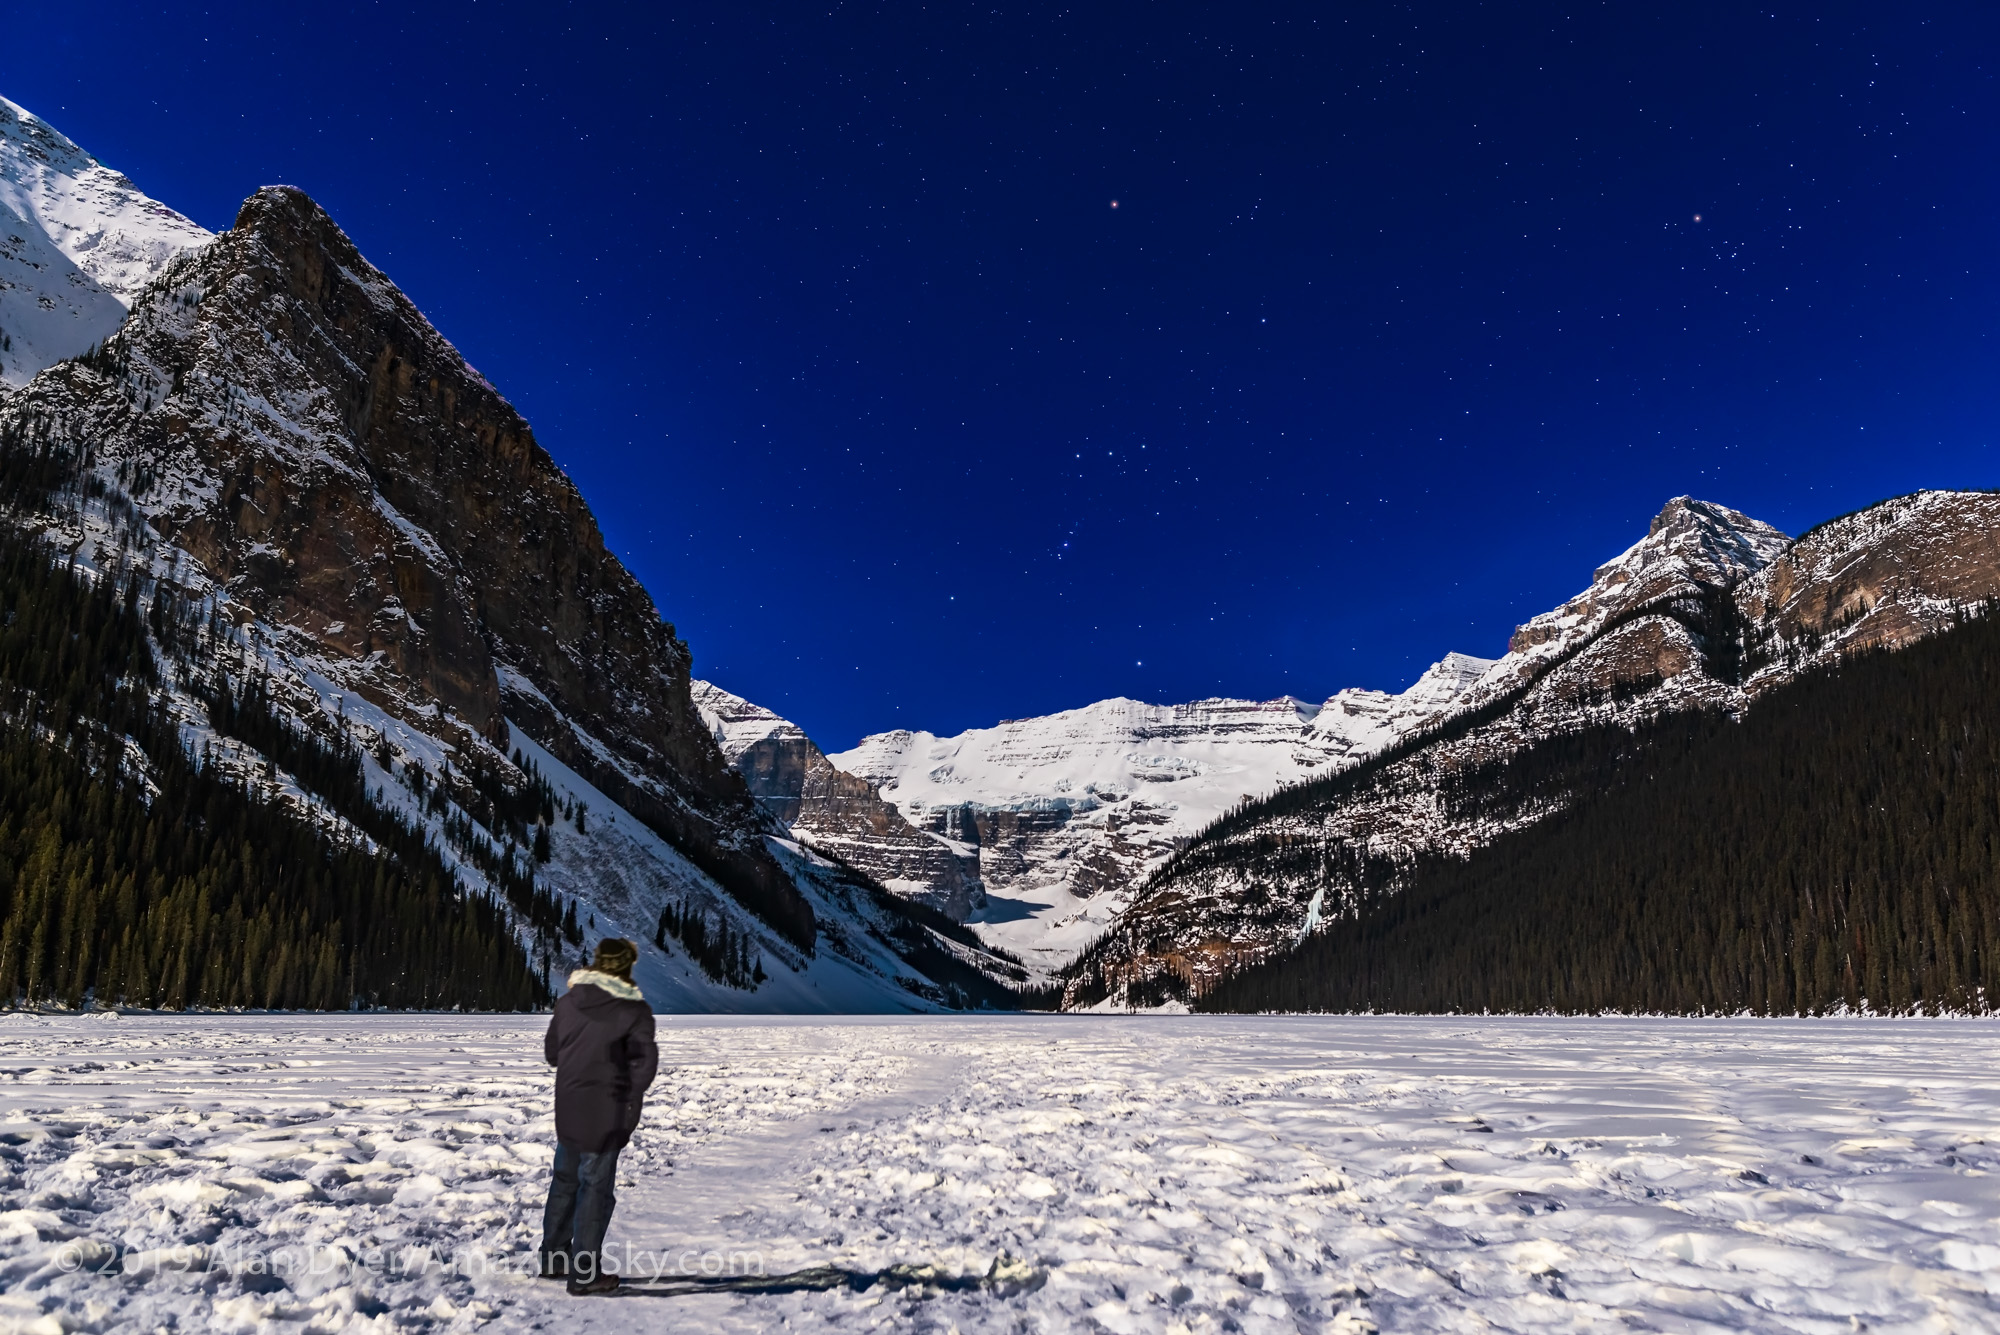
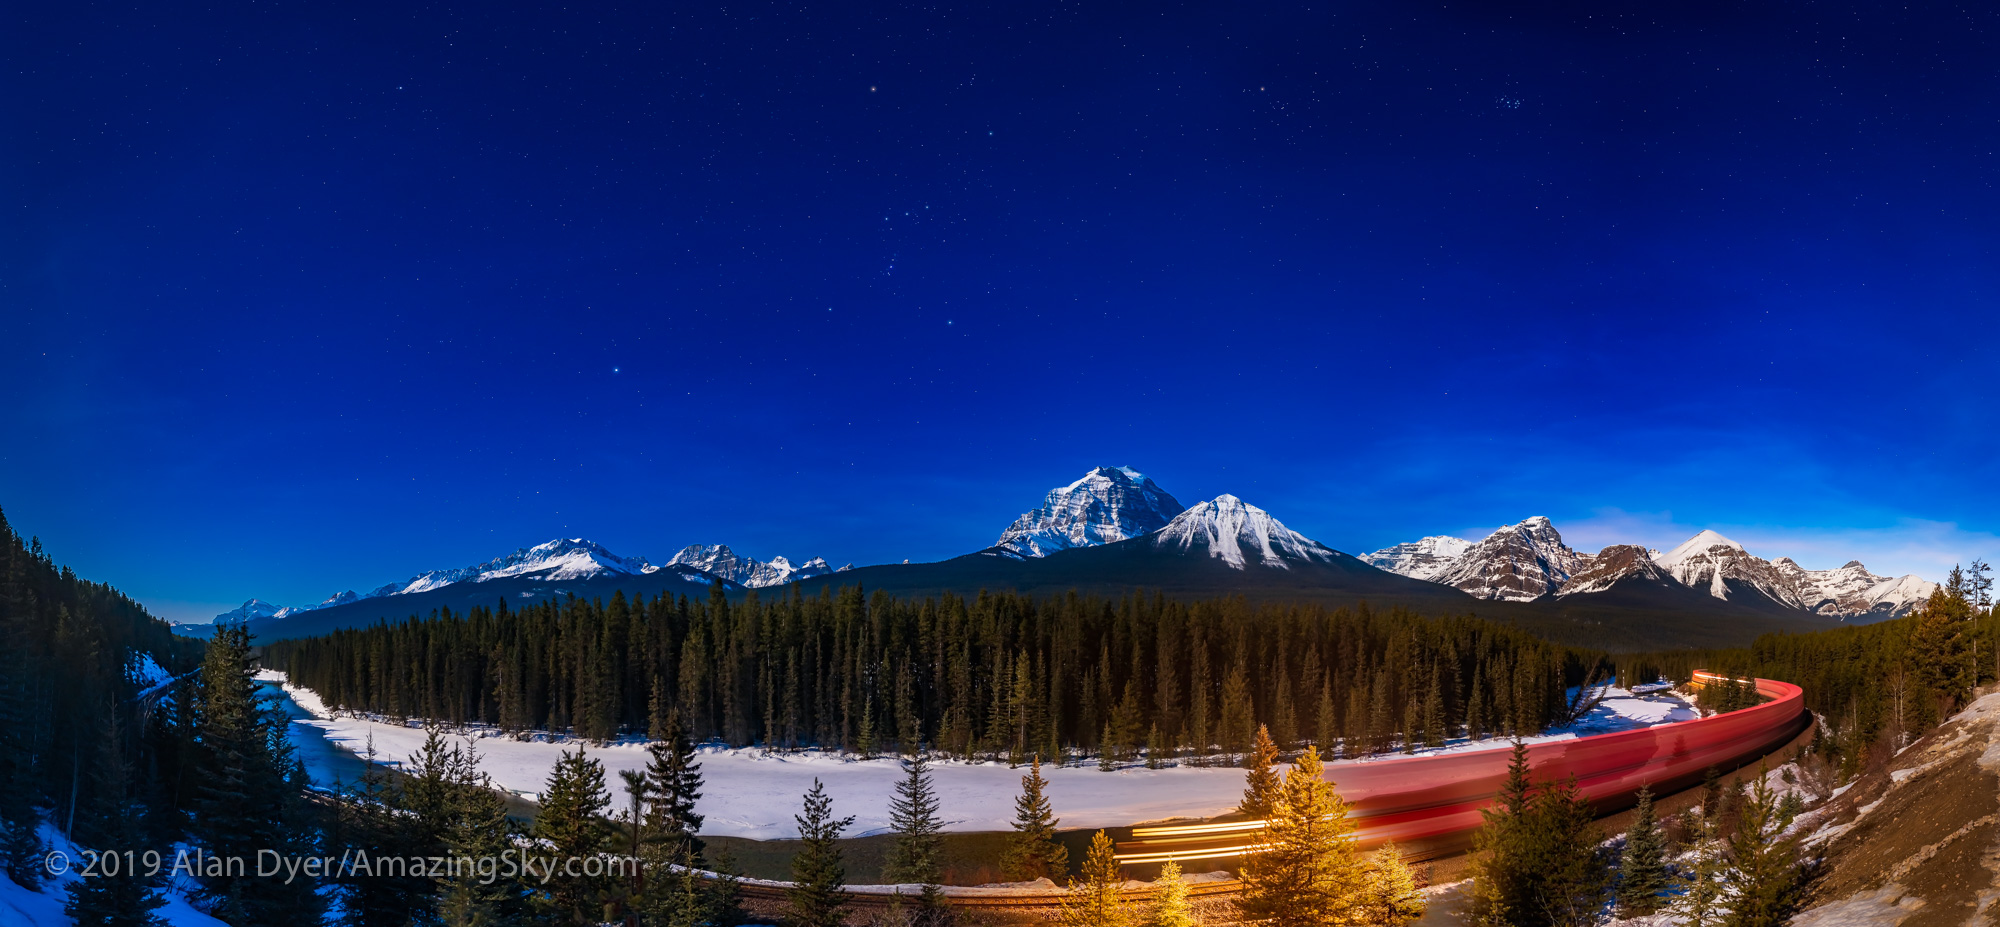
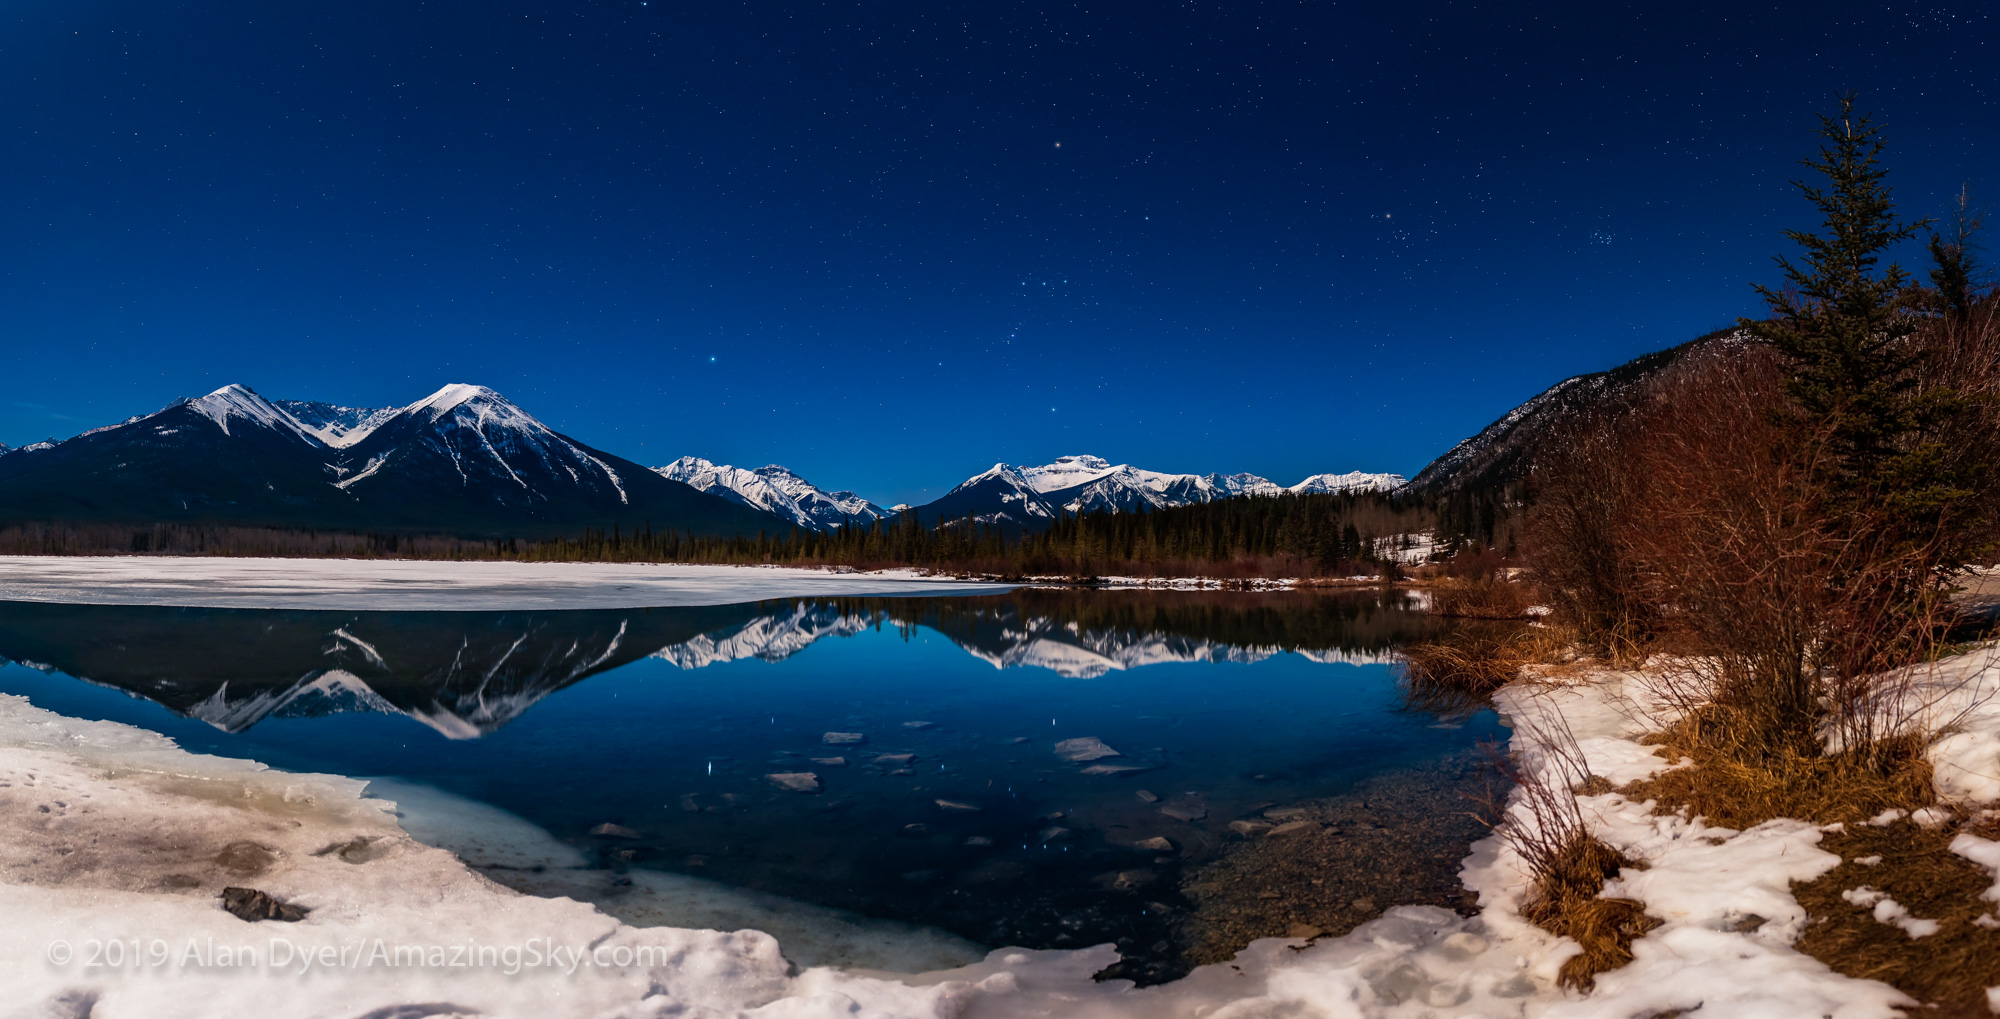
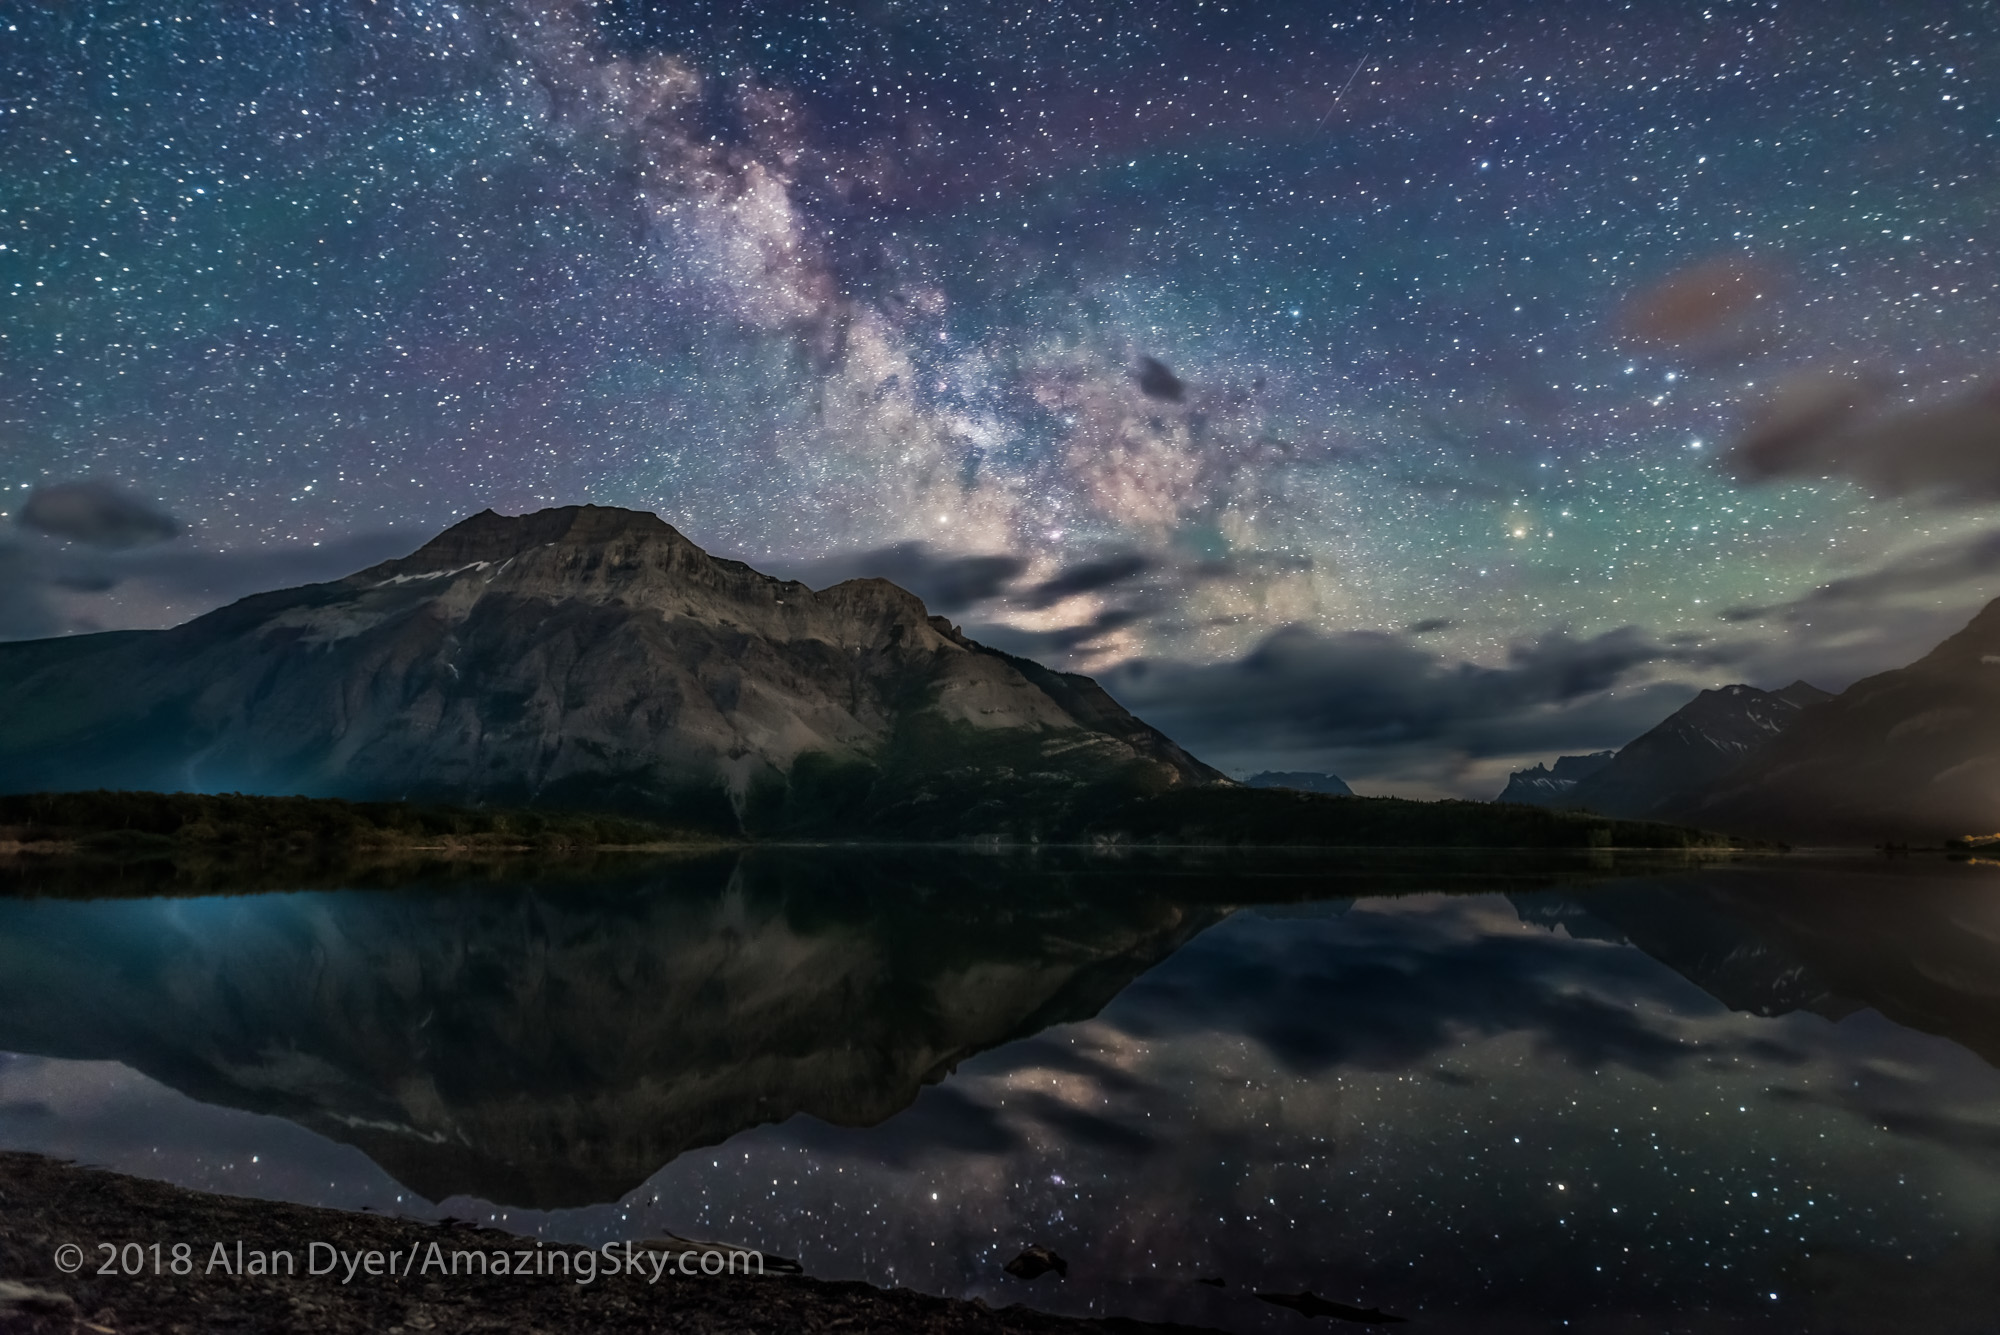
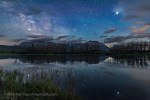
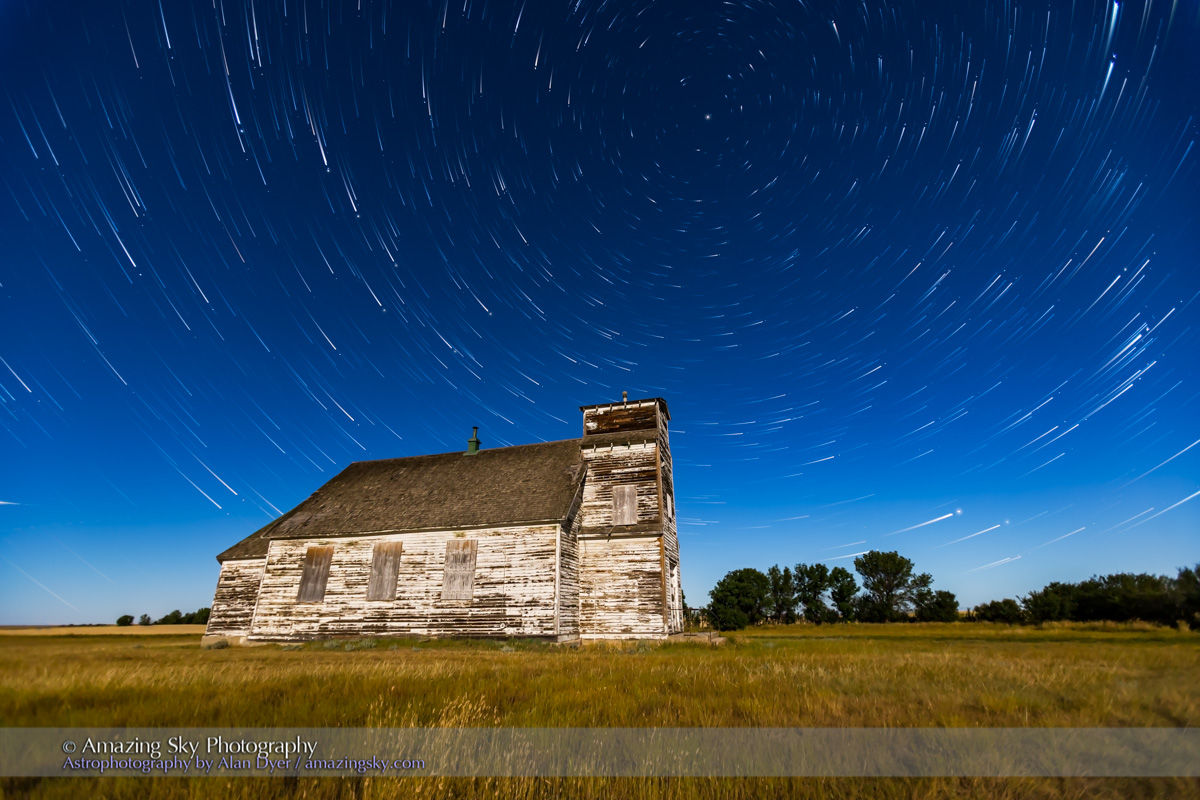
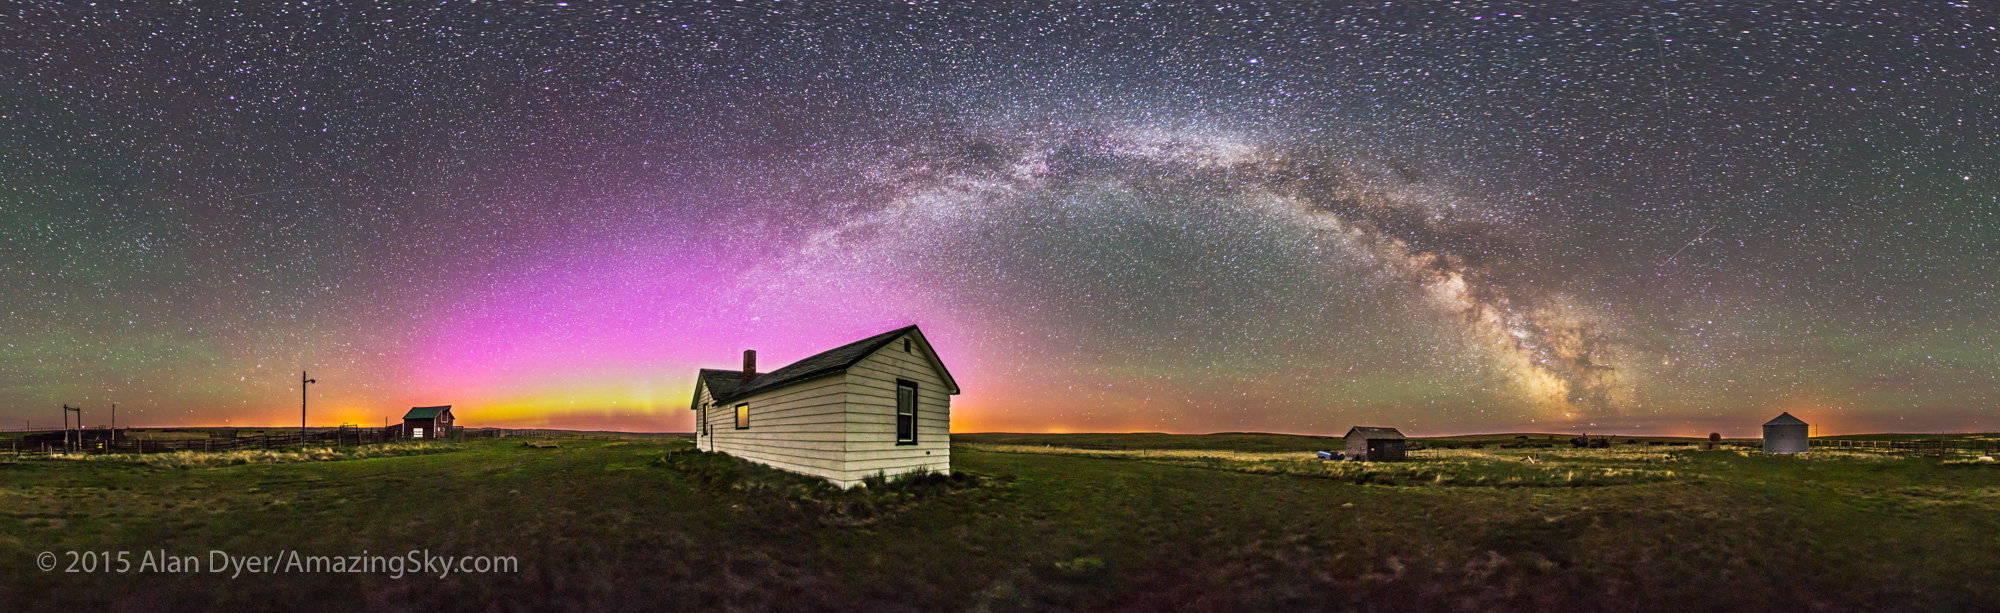
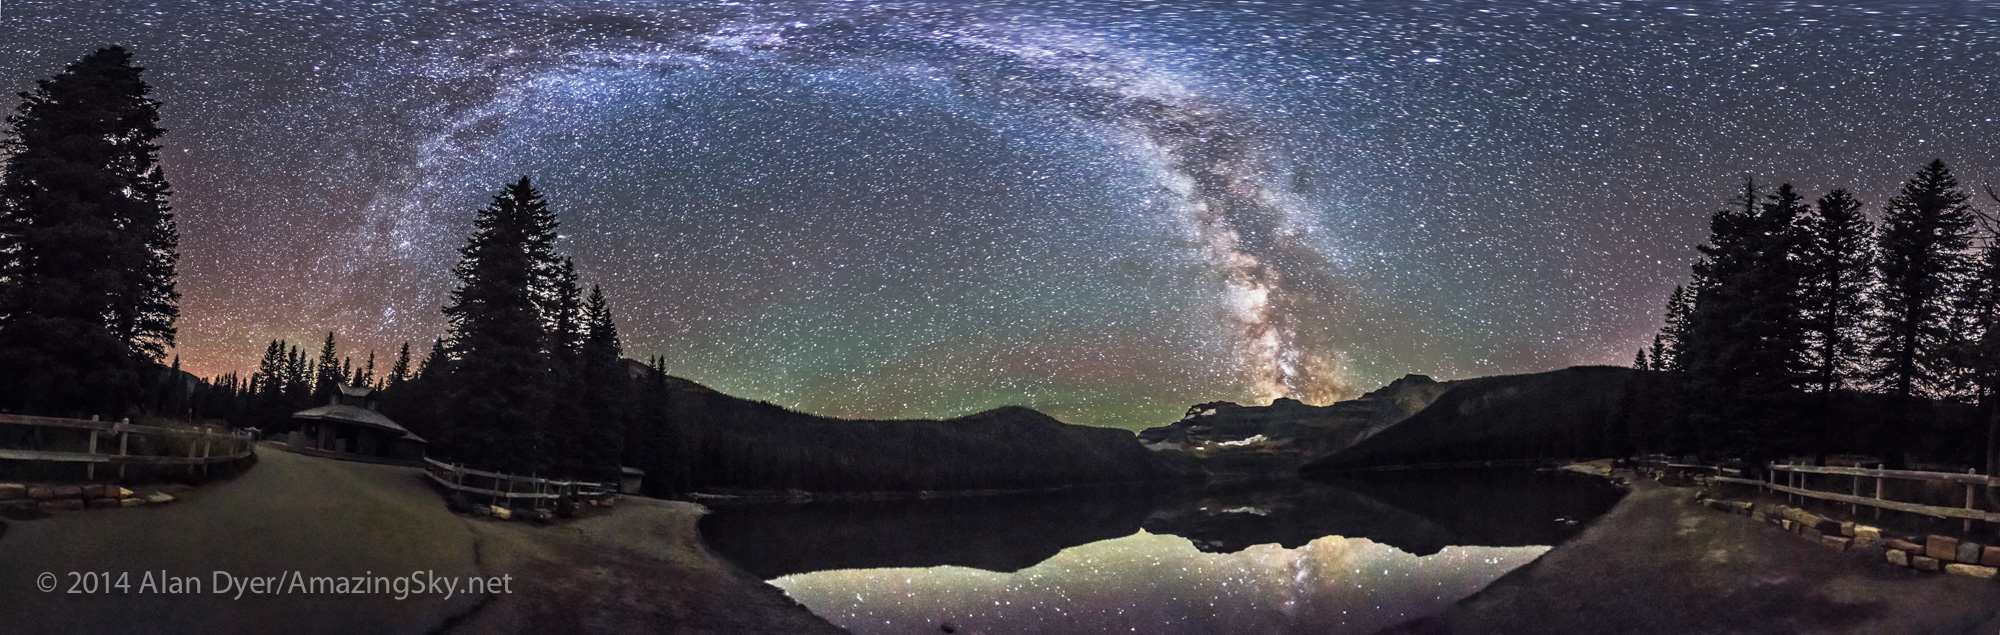
The Canon RF15-35mm F/2.8 L is made primarily for urban photography and landscapes by day. My main application is using it to take landscapes by night, and auroras, where its relatively fast f/2.8 speed helps keeps exposure times short and ISO speeds reasonably low. However, the RF15-35mm can certainly be used for tracked wide-angle Milky Way and constellation portraits.
The lens weighs a moderate 885 grams (31 ounces or 1.9 pounds) with lens hood and end caps, and accepts 82mm filters, larger than the 72mm or 77mm filter threads of most astrophoto-friendly lenses. Square 100mm filters will work well on the lens, even at the 15mm focal length. There are choices, such as from KASE, for light pollution reduction and star diffusion filters in this size and format. I have reviews of these filters at AstroGearToday.com, both here for light pollution filters and here for starglow filters.
Canon offers a lower-cost alternative in this range, their RF14-35mm. But it is f/4, a little slow for nightscape, aurora, and Milky Way photography. I have not tested one.
Canon RF28-70mm F/2 L USM
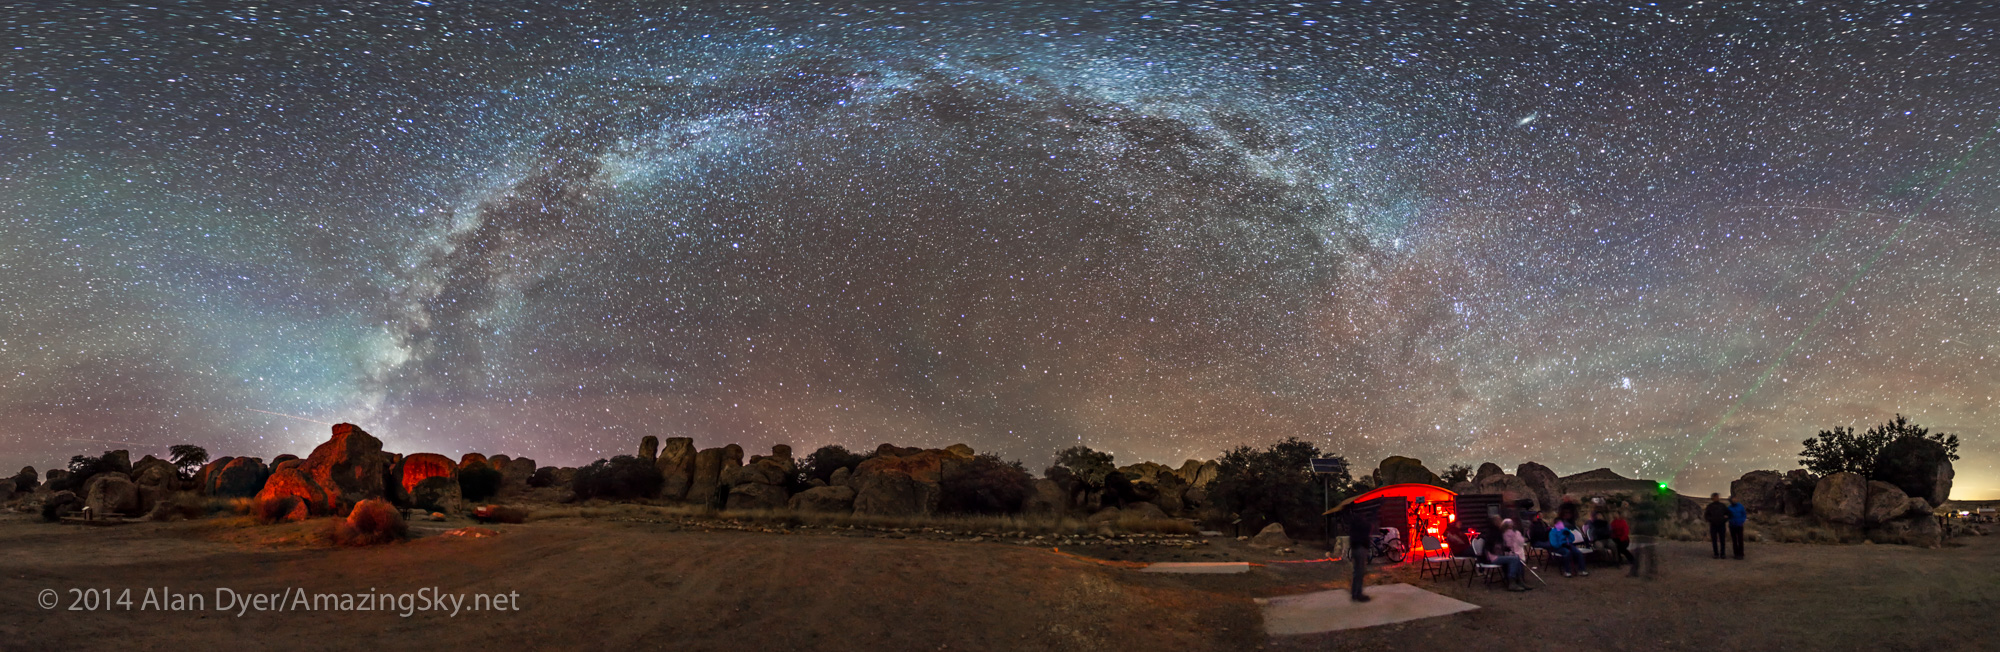
The big Canon RF28-70mm F/2 is aimed at wedding and portrait photographers, though the lens is suitable for landscape work. While I do use it for nightscapes, my primary use is for tracked Milky Way and constellation images, where its range of fields of view nicely frames most constellations, from big to small.
I justified its high cost by deciding it replaces (more or less!) prime lenses in the common 24mm, 35mm, 50mm, and 85mm focal lengths. Its f/2 speed does bring it into fast prime lens territory. It’s handy to have just one lens to cover the range.
Canon offers a lower-cost alternative here, too, their RF24-70mm. But it is f/2.8. While this is certainly excellent speed, I like having the option of shooting at f/2. An example is when using narrowband nebula filters such as red hydrogen-alpha filters, where shooting at f/2 keeps exposures shorter and/or ISOs lower when using such dense filters. I use this lens with an Astronomik 12-nanometre H-α clip-in filter. An example is in one of the galleries below.
While a clip-in filter shifts the infinity focus point inward (to as close as the 2-metre mark with the RF28-70mm at 28mm, and to 6 metres at 70mm), I did not find that shift adversely affected the lens’s optical performance. That’s not true of all lenses.
Make no mistake, the RF28-70mm is one hefty lens, weighing 1530 grams (54 ounces or 3.4 pounds). Its front-heavy mass demands a solid tripod head. Its large front lens accepts big 95mm filters, a rare size with few options available. I found one broadband light pollution filter in this size, from URTH. Otherwise, you need to use in-body clip-in filters. Astronomik makes a selection for Canon EOS R cameras.
Canon RF70-200mm F/4 L IS USM
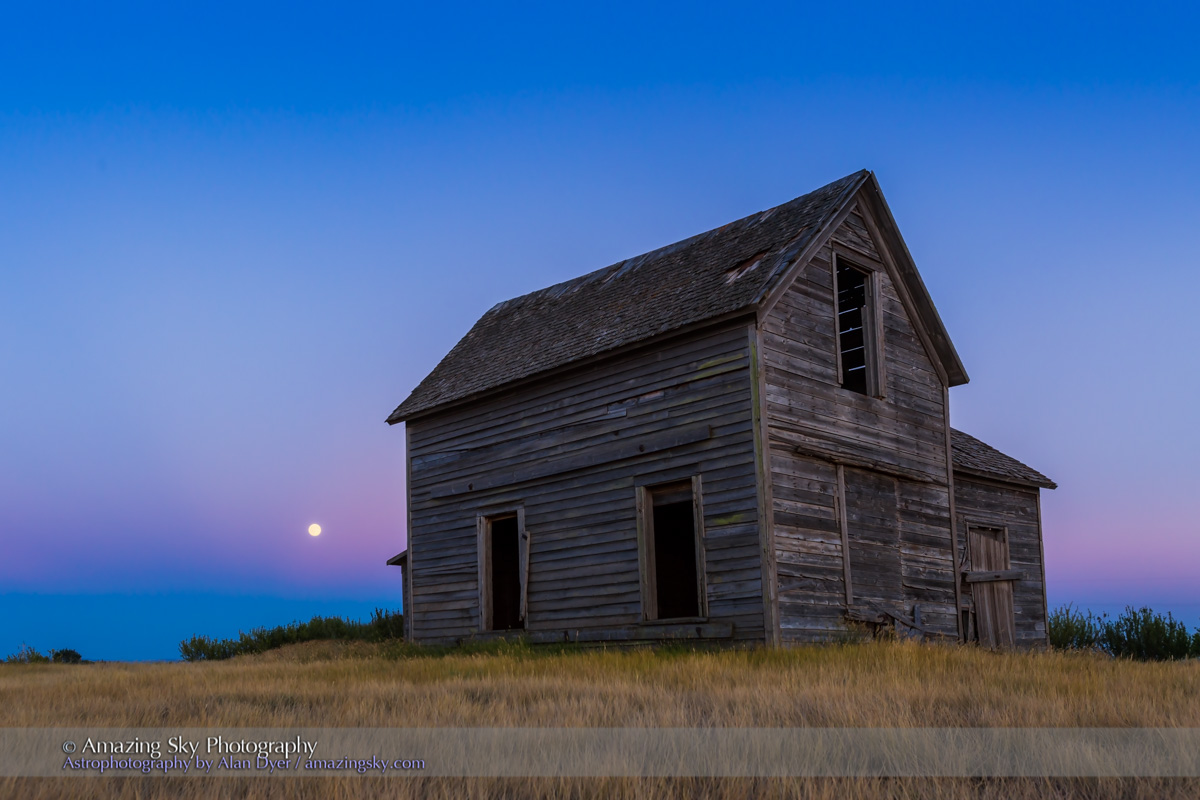
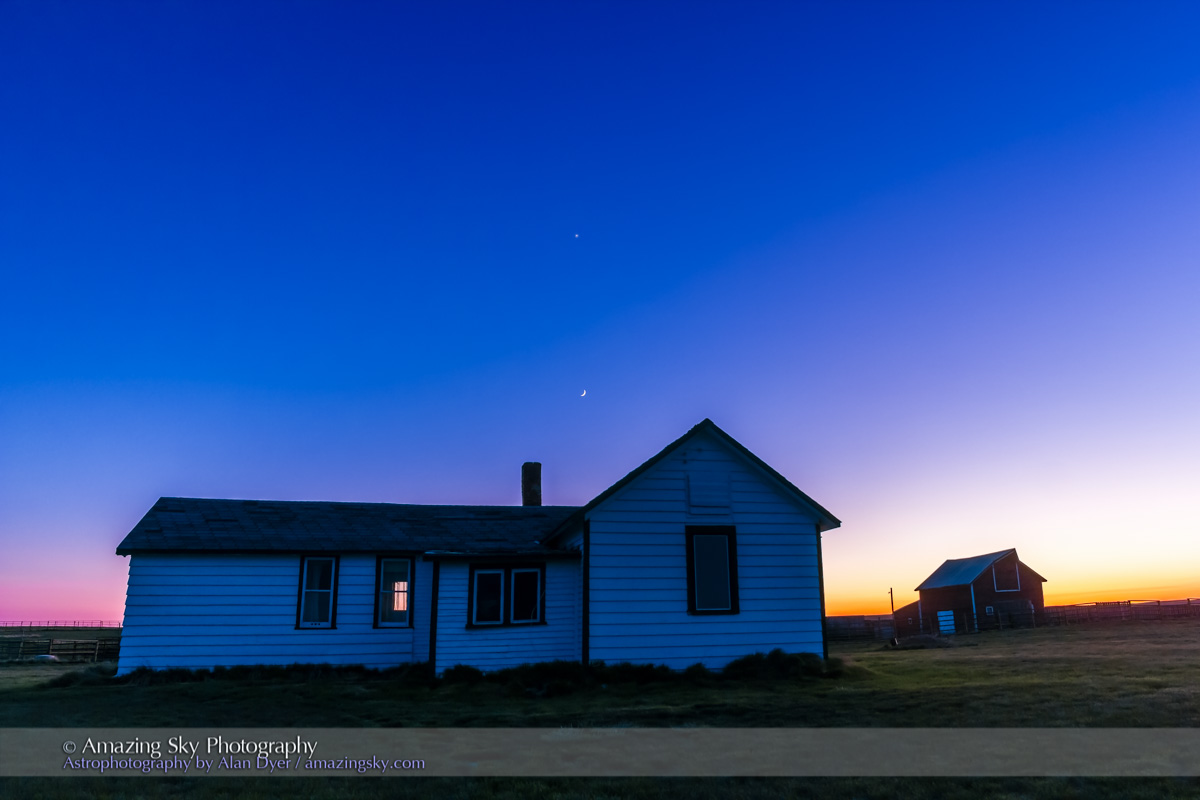
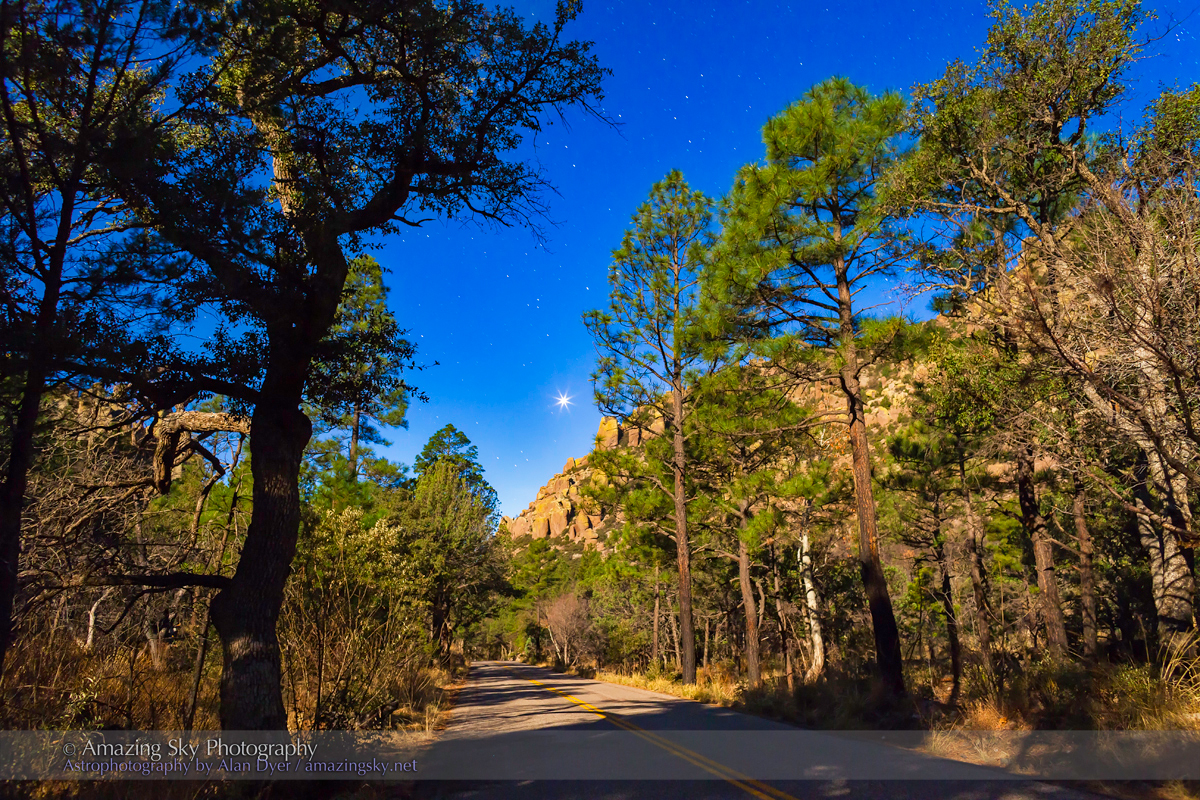
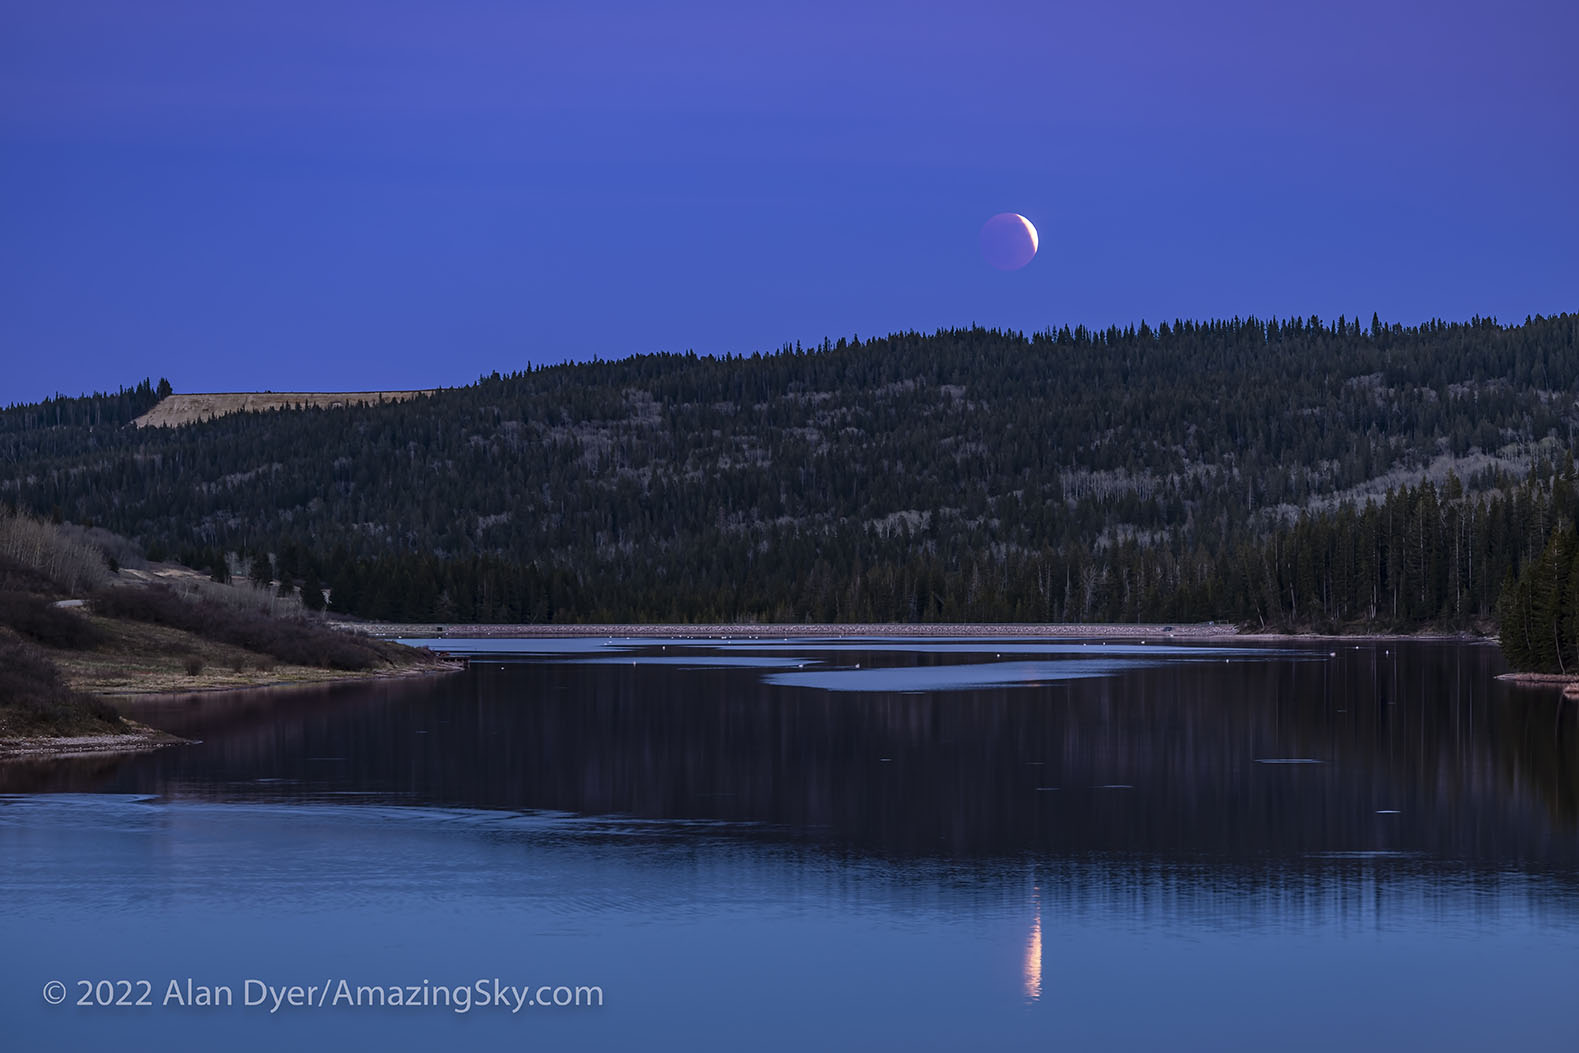
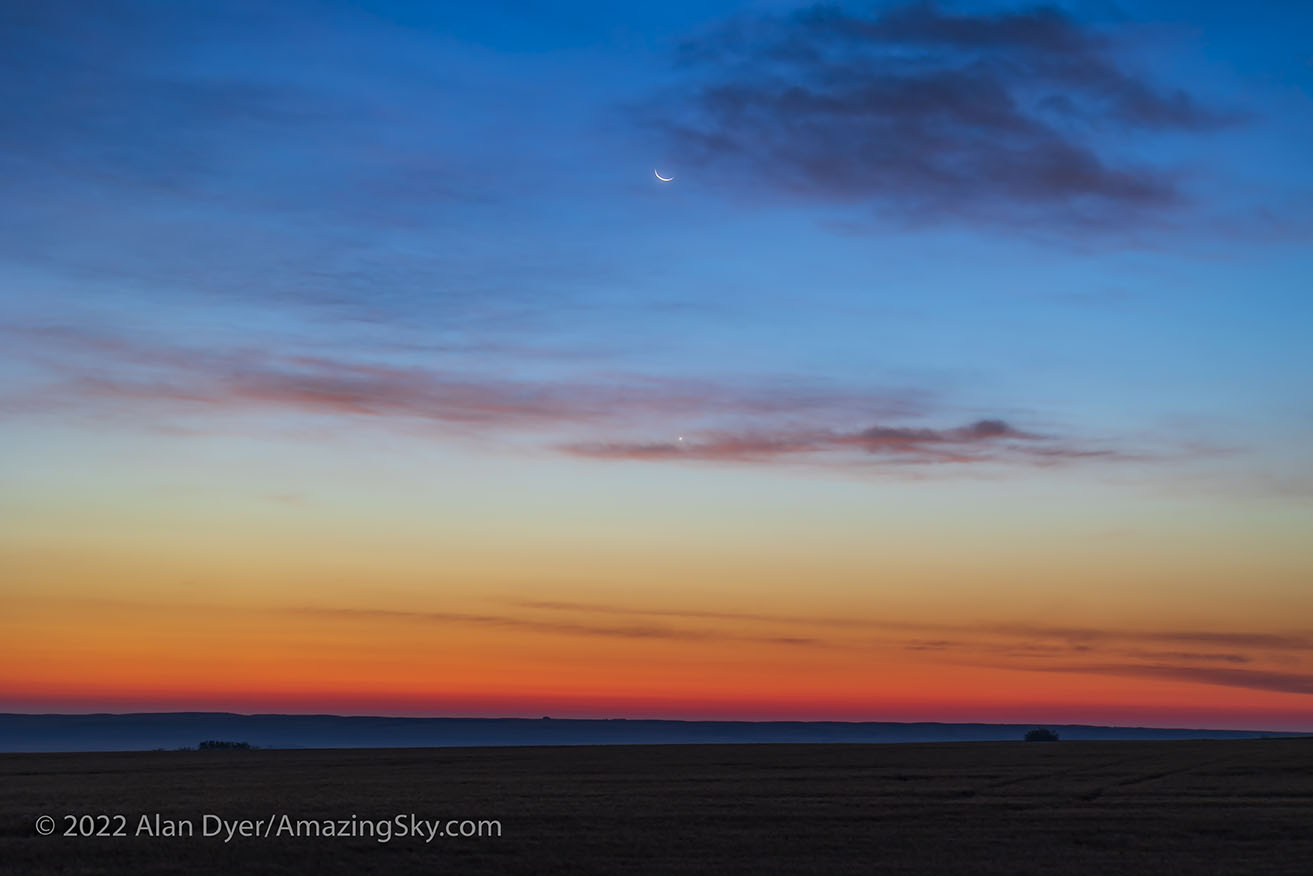
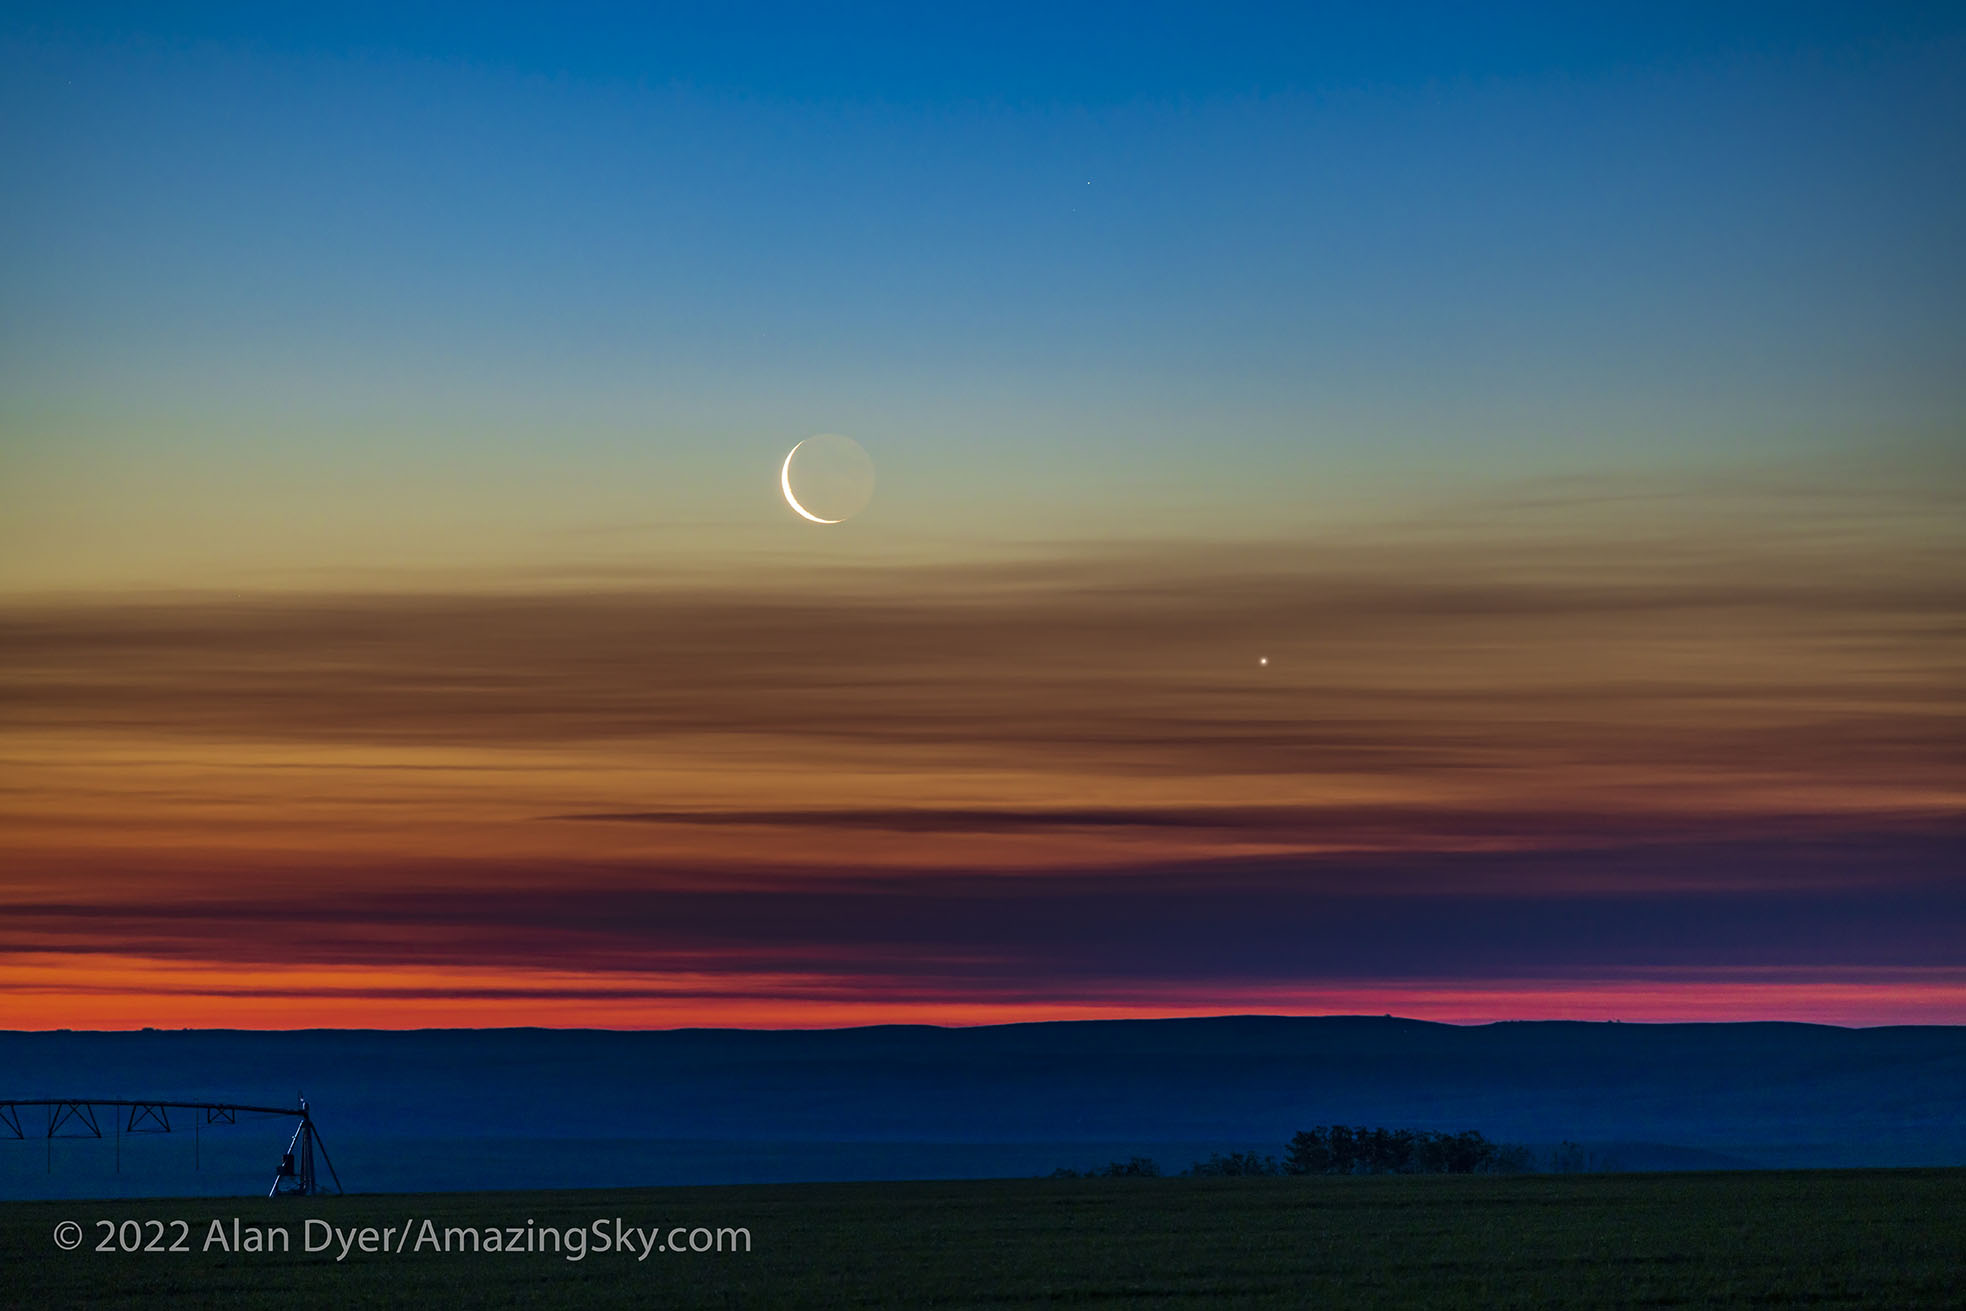
The Canon RF70-200mm F/4 is another portrait or landscape lens. I use it primarily for bright twilight planet conjunctions and moonrise scenes, where its slower f/4 speed is not a detriment. However, as my tests show, it can be used for tracked deep-sky images, where it is still faster than most short focal length telescopes.
The RF70-200mm lens weighs 810 grams (28 ounces, or 1.75 pounds) with lens hood and caps, so is light for a 70-to-200mm zoom. It is also compact. At just 140mm long when set to 70mm, it is actually the shortest lens of the trio. However, the barrel extends to 195mm long when zoomed out to 200mm focal length.
Canon offers the more costly and, at 1200 grams, heavier RF70-200mm F/2.8 lens which might be a better choice for deep-sky imaging where the extra stop of speed can be useful. But in this case, I chose the slower, more affordable – though still not cheap – f/4 version. It accepts common 77mm filters, as does the f/2.8 version.
Centre Sharpness
Canon RF15-35mm F/2.8 L IS USM
Like the other two zoom lenses tested, the RF15-35mm is very sharp on axis. Even wide open, there’s no evidence of softness and star bloat from spherical aberration, the bane of cheaper lenses.
Coloured haloes from longitudinal chromatic aberration are absent, except at 28mm and 35mm (shown here) when wide open at f/2.8, where bright stars show a little bit of blue haloing. At f/4, this minor level of aberration disappears.
Canon RF28-70mm F/2 L USM

The big RF28-70mm is also very sharp on-axis but is prone to more chromatic aberration at f/2, showing slight magenta haloes on bright stars at the shorter focal lengths and pale cyan haloes at 70mm in my test shots. Such false colour haloes can be very sensitive to precise focus, though with refractive optics the point of least colour is often not the point of sharpest focus.
At f/2, stars are a little softer at 70mm than at 28mm. Stopping down to f/2.8 eliminates this slight softness and most of the longitudinal chromatic aberration.
Canon RF70-200mm F/4 L IS USM

Unlike prime telephotos I’ve used, the RF70-200mm shows negligible chromatic aberration on-axis at all focal lengths, even at f/4. Stars are a little softer at the longest focal length at f/4, perhaps from slight spherical aberration, though my 200mm test shots are also affected by a little mistracking, trailing the stars slightly.
Stopping down to f/5.6 sharpens stars just that much more at 200mm.
Corner Aberrations
The corners are where we typically separate great lenses from the merely good. And it is where zoom lenses have traditionally performed badly. For example, my original Canon EF16-35mm f/2.8 lens was so bad off-axis I found it mostly unusable for astro work. Not so the new RF15-35mm, which is the RF replacement for Canon’s older EF16-35mm.
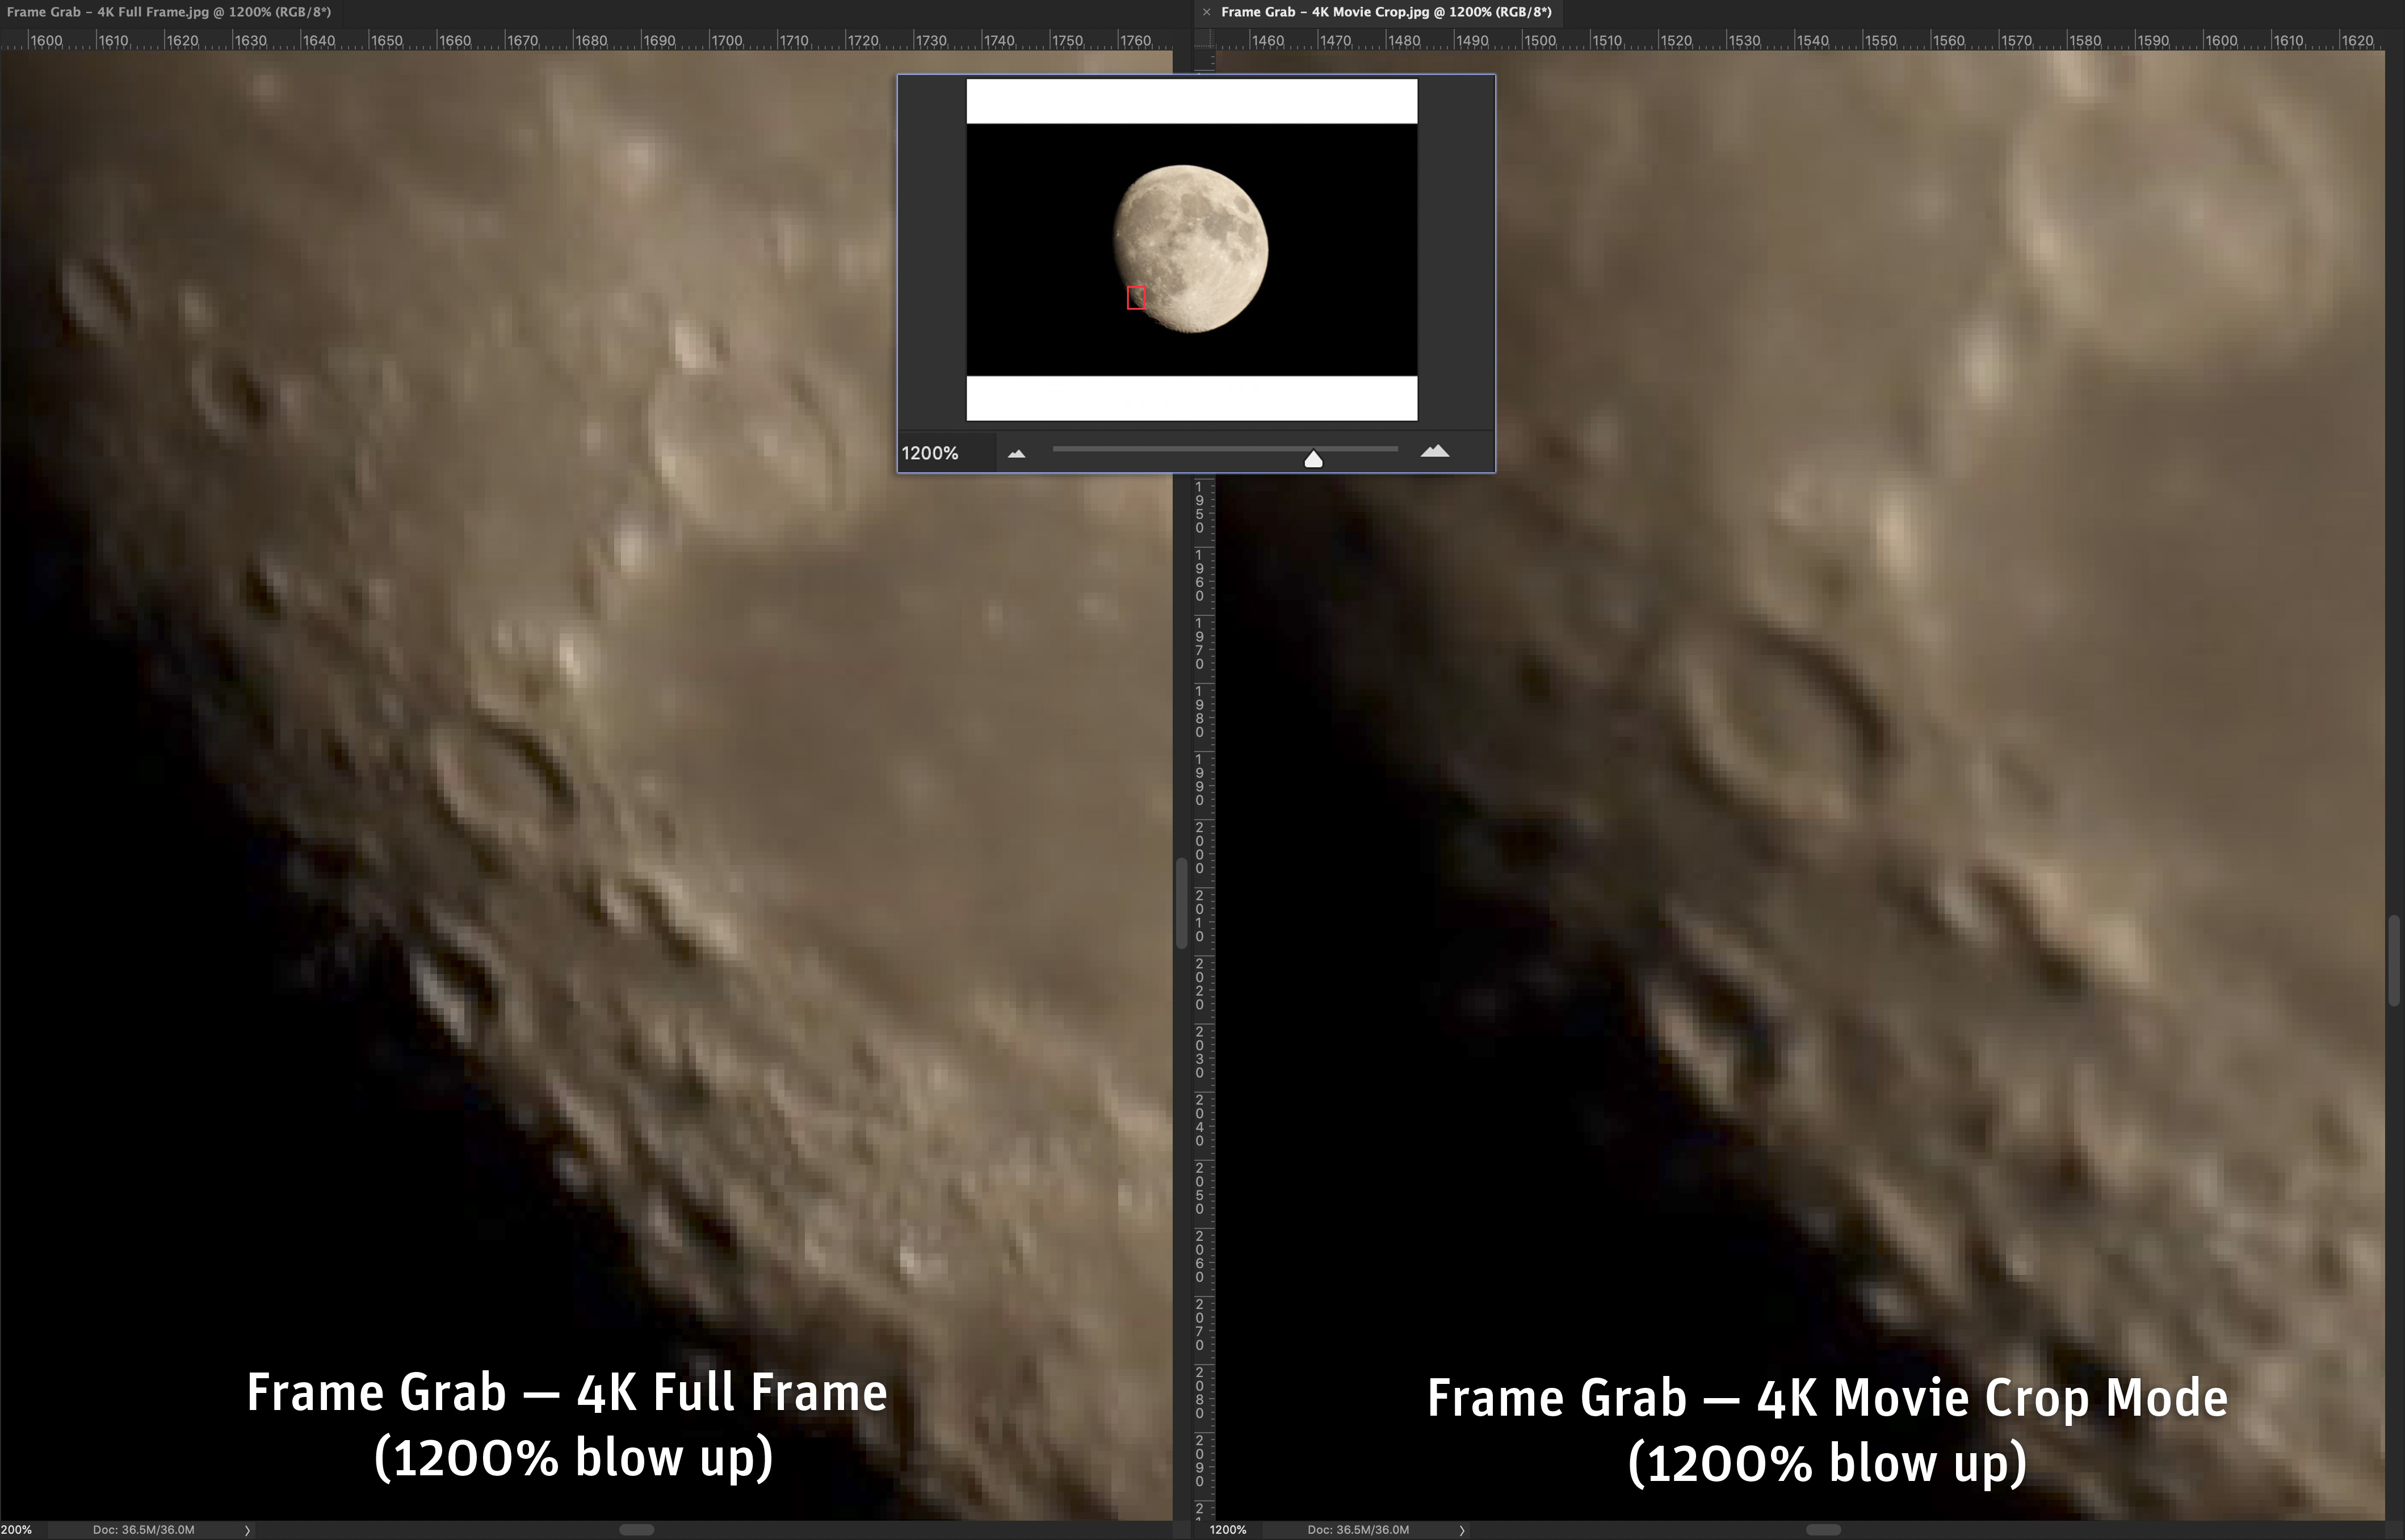
To be clear – in these test shots you might think the level of aberrations are surprising for premium lenses. But keep in mind, to show them at all I am having to pixel-peep by enlarging all the test images by 400 percent, cropping down to just the extreme corners.
Check the examples in the Compared to DSLR Lenses section and in the Finished Images Galleries for another look at lens performance in broader context.
Canon RF15-35mm F/2.8 L IS USM
Surprisingly, this RF’s best performance off-axis is actually at its shortest focal length. At 15mm it exhibits only some slight tangential astigmatism, elongating stars away from the frame centre. At 24mm aberrations appear slightly worse than at the other focal lengths, showing some flaring from sagittal astigmatism and perhaps coma as well, aberrations seen to a lesser degree at 28mm and 35mm, making stars look like little three-pointed triangles.
The aberrations reduce when stopped down to f/4, but are still present, especially at 24mm, this lens’s weakest focal length, though only just.
While the RF15-35mm isn’t perfect, it outperforms other prime lenses I have, and that I suspect most users will own or have used in the past with DSLRs. Only new wide-angle premium primes for the RF mount, if and when we see them, will provide better performance.
Canon RF28-70mm F/2 L USM

The RF28-70mm’s fast f/2 speed, unusual for any zoom lens, was surely a challenge to design for. Off-axis when wide open at f/2 it does show astigmatism at the extreme corners at all focal lengths, but the least at 50mm, and the worst at 28mm where a little lateral chromatic aberration is also visible, adding slight colour fringing.

Sharpness off-axis improves markedly when stopped down one stop to f/2.8, where at 50mm stars are now nearly perfect to the corners. Indeed, performance is so good at 50mm, I think there would be little need to buy the Canon RF50mm prime, unless its f/1.2 speed is deemed essential.
With the RF28-70mm at f/2.8, stars still show some residual astigmatism at 28mm and 35mm, but only at the extreme corners.
Canon RF70-200mm F/4 L IS USM
The RF70-200mm telephoto zoom shows some astigmatism and coma at the corners when wide open at f/4, with it worse at the shorter focal lengths. While lens corrections have been applied here, the 200mm image still shows a darker corner from the vignetting described below.
Stopping down to f/5.6 eliminates most of the off-axis aberrations at 135mm and 200mm focal lengths but some remain at 70mm and to a lesser degree at 100mm.
This is a lens that can be used at f/4 even for the demands of deep-sky imaging, though perfectionists will want to stop it down. At f/5.6 it is similar in speed to many astrographic refractors, though most of those start at about 250mm focal length.
Frame Vignetting
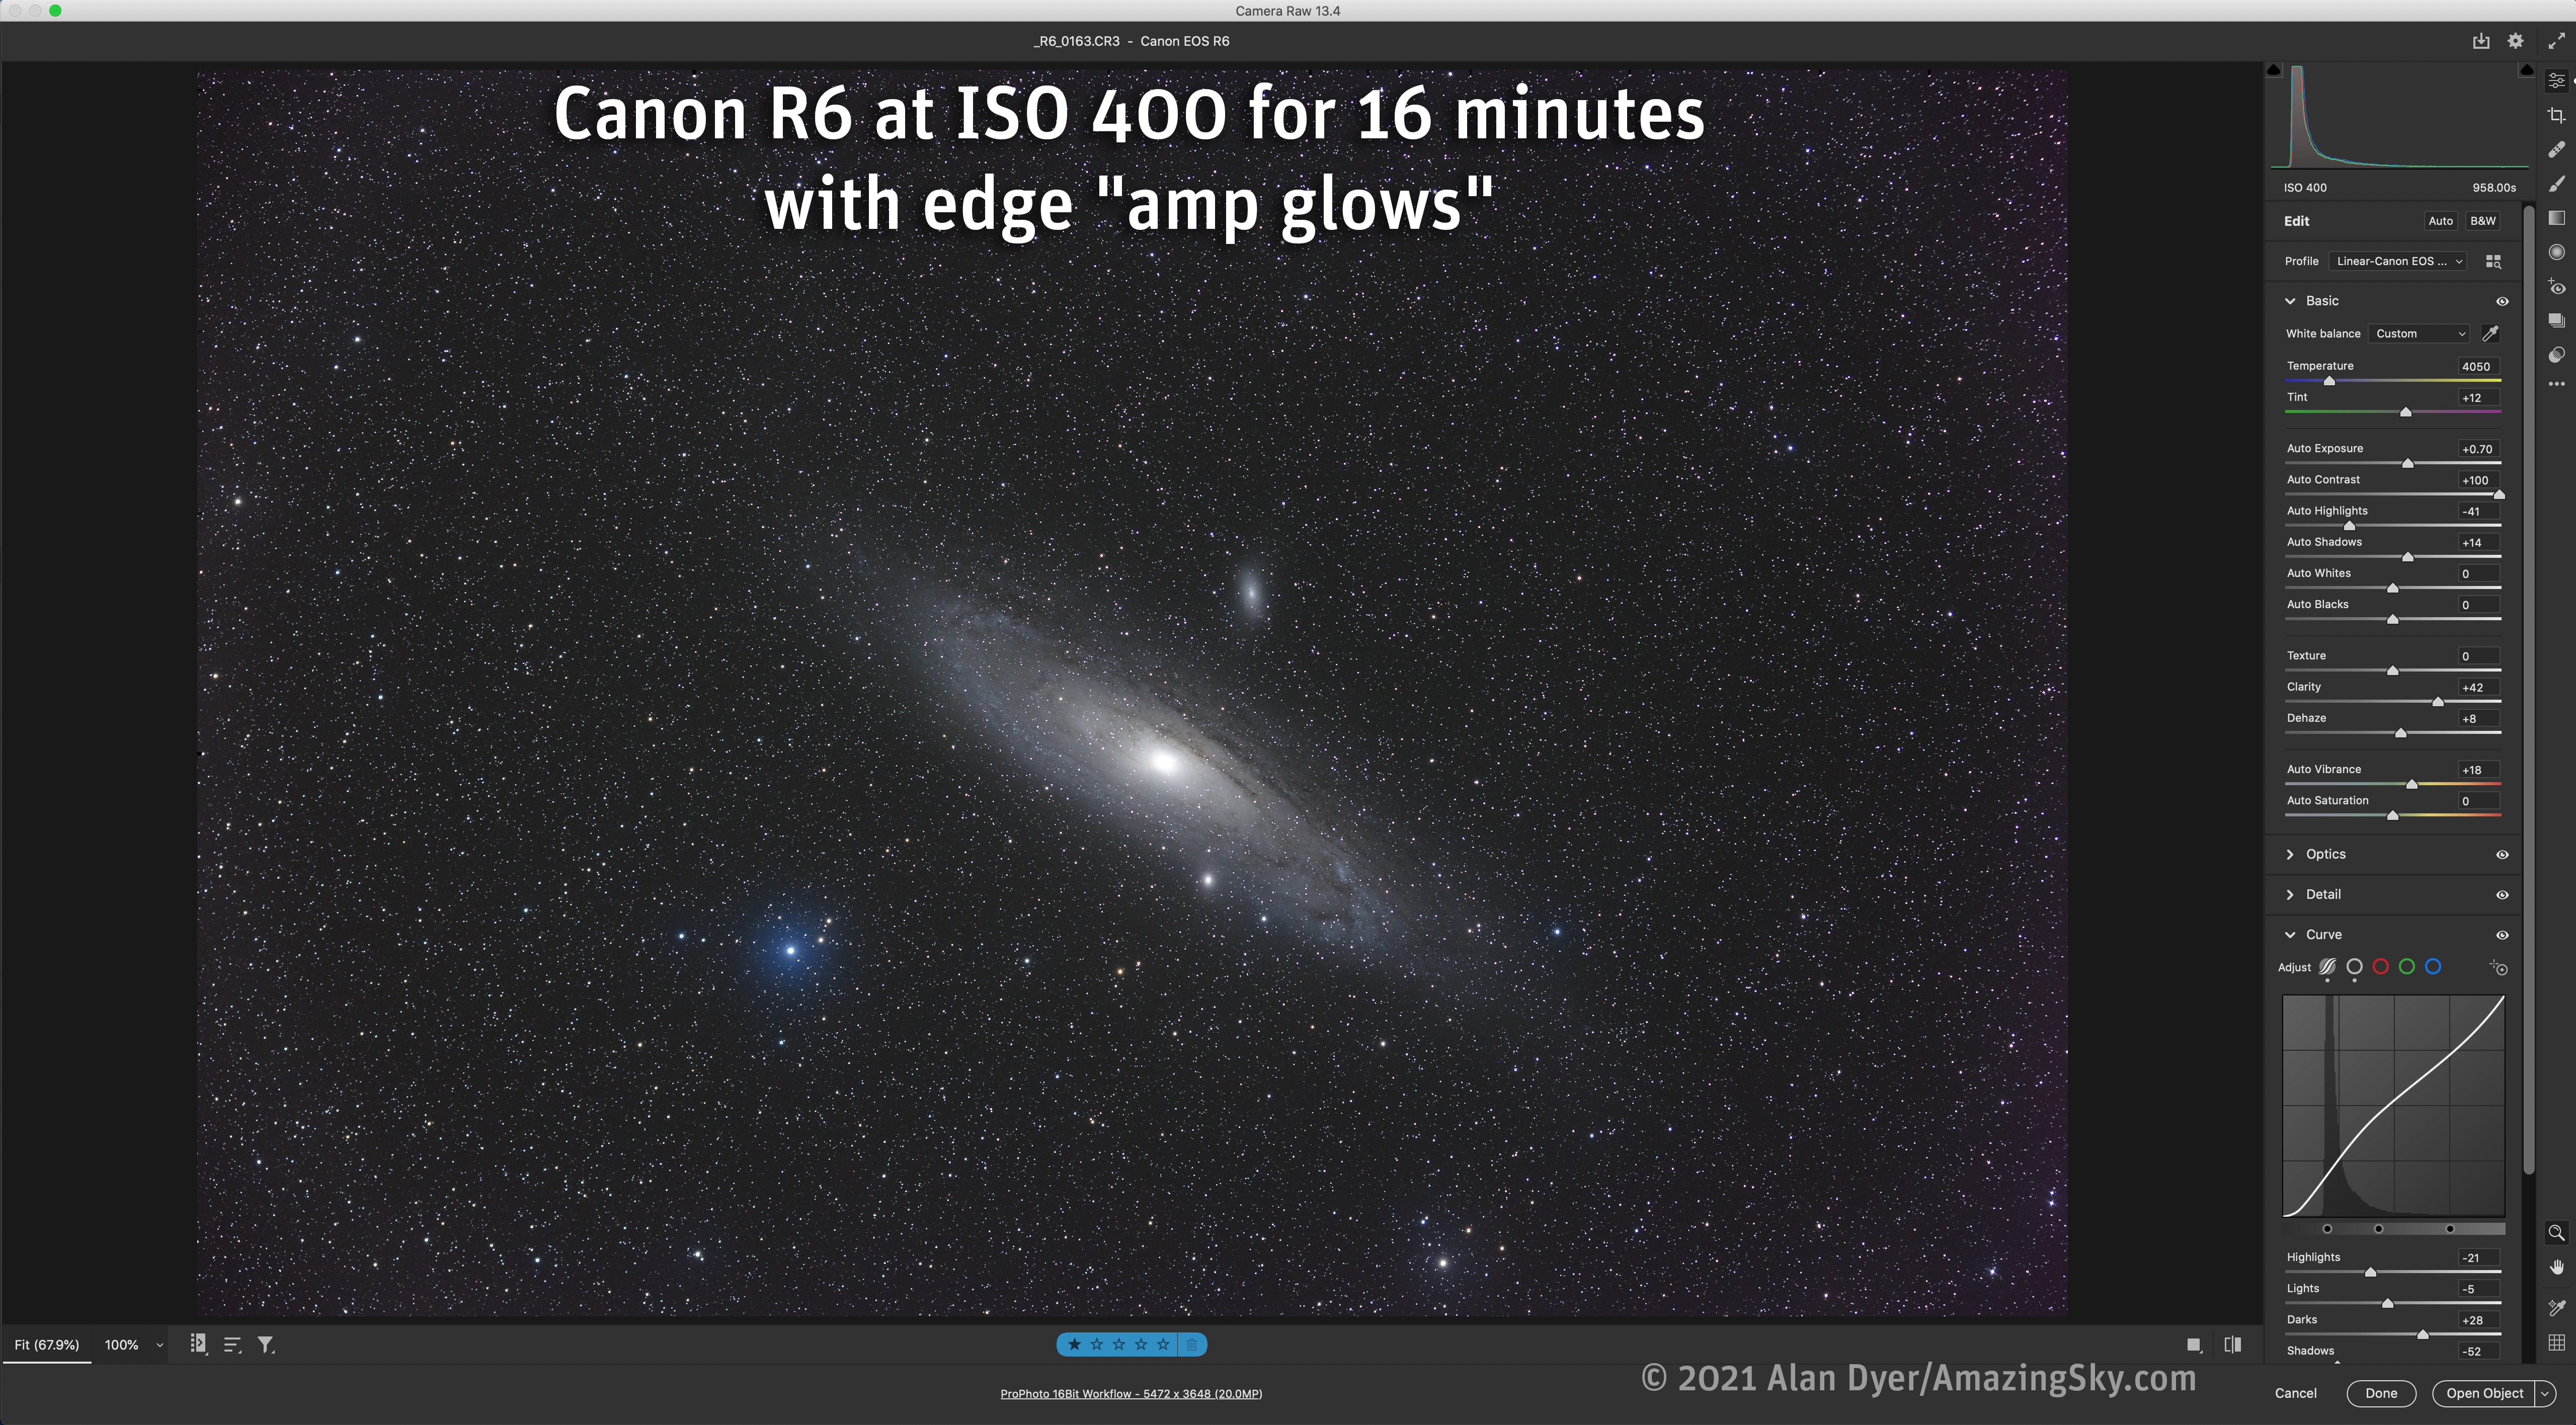
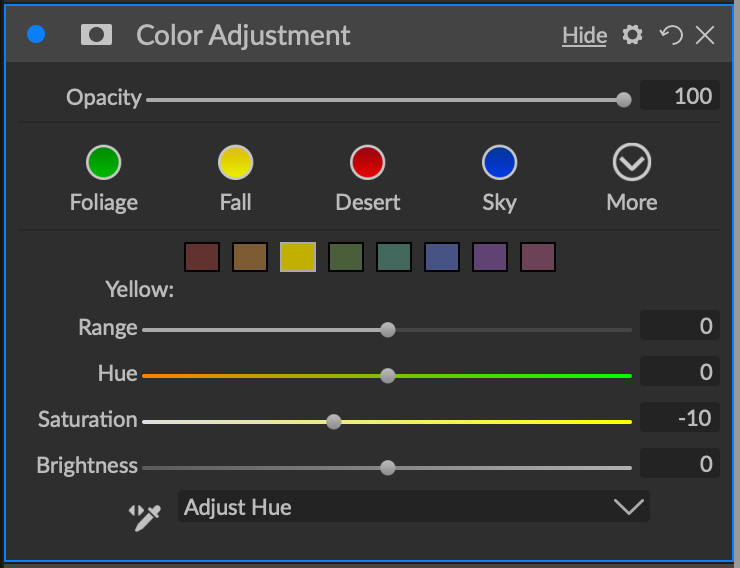
In the previous test images, I applied lens corrections (but no other adjustments) to each of the raw files in Adobe Camera Raw, using the settings ACR automatically selects from its lens database. These corrections brightened the corners.
In this next set I show the lenses’ weakest point, their high level of vignetting. This light falloff darkens the corners by a surprising amount. In the new generation of lenses for mirrorless cameras, it seems lens designers are choosing to sacrifice uniform frame illumination in order to maximize aberration corrections. The latter can’t be corrected entirely, if at all, by software.
However, corrections applied either in-camera or at the computer can brighten corners, “flattening” the field. I show that improvement in the section that follows this one.
Canon RF15-35mm F/2.8 L IS USM

In the wide-angle zoom, vignetting darkens just the corners at 15mm, but widens to affect progressively more of the frame at the longer focal lengths. The examples show the entire right side of the frame. I show the effect just at f/2.8.
Though I don’t show examples with the two wider zooms, with all lenses vignetting decreases dramatically when each lens is stopped down by even one stop. The fields become much more evenly illuminated, though some darkening at the very corners remains one stop down.
Canon RF28-70mm F/2 L USM

In this “normal” zoom, vignetting performance is similar at all focal lengths, though it affects a bit more of the field at 70mm than at 28mm. Again, while I’m not presenting an example, vignetting decreases a lot when this lens is stopped down to f/2.8. While the extra stop of speed is certainly nice to have at times, I usually shoot the RF28-70mm at f/2.8.
Canon RF70-200mm F/4 L IS USM
In this telephoto zoom, vignetting is fairly mild at the shorter focal lengths but becomes severe at 200mm, affecting much of the field. It is far worse than I see with my older Canon EF200mm f/2.8 prime, a lens that is not as sharp at f/4 as the RF zoom.
The faster RF70-200mm f/2.8 lens, which I had the chance to test one night last year, showed as much, if not more, vignetting than the f/4 version. See my test here at AstroGearToday.com. I thought the f/4 version would be better for vignetting, but it is not.
In this case, as the vignetting is so prominent at 200mm, I show above how much it improves when stopped down to f/5.6, in a comparison with the lens at f/4, both with no lens corrections applied in processing. The major improvement comes from the smaller aperture alone. For twilight scenes, I’d suggest stopping this lens down to better ensure a uniform sky background.
LENS Corrections
In this next set I show how well applying lens corrections improves the vignetting at the focal lengths where each of the lenses is at its worse, and with each at its widest aperture.
I show this with Adobe Camera Raw but Lightroom would provide identical results. I did not test lens corrections with other programs such as CaptureOne, DxO PhotoLab, or ON1 Photo Raw, which all have automatic lens corrections as well.
Canon RF15-35mm F/2.8 L IS USM

Applying lens corrections in Adobe Camera Raw certainly brightened the corners and edges, though still left some darkening at the very corners that can be corrected by hand in the Manual tab.
Canon RF28-70mm F/2 L USM
ACR’s lens corrections helped but did not completely eliminate the vignetting here. Corner darkening remained. Manually increasing the vignetting slider can provide that extra level of correction needed.
Canon RF70-200mm F/4 L IS USM

The high level of vignetting with this lens at 200mm largely disappeared with lens corrections, though not entirely. For deep-sky imaging, users might prefer to shoot and apply flat-field frames. I prefer to apply automatic and manual corrections to the raw files, to stay within a raw workflow as much as possible.
Same Focal Length Comparisons
With the trio of lenses offering some of the same focal lengths, here I show how they compare at three of those shared focal lengths. I zoom into the upper right corners here, as with the Corner Aberrations comparisons above.
RF15-35mm vs. RF28-70mm at 28mm
With both lenses at 28mm and at the same f/2.8 aperture (though the RF28-70mm is now stopped down one stop), it’s a toss up. Both show corner aberrations, though of a different mix, distorting stars a little differently. The RF28-70mm shows some lateral chromatic aberration, but the RF15-35mm shows a bit more flaring from astigmatism.
RF15-35mm vs. RF28-70mm at 35mm

The story is similar with each lens at 35mm. Stars seem a bit sharper in the RF15-35mm though are elongated more by astigmatism at the very corners. Lens corrections have been applied here and with the other two-lens comparison pairs.
RF28-70mm vs. RF70-200mm at 70mm
Here I show the RF28-70mm at f/2.8 and the RF70-200mm wide open at f/4, with both set to 70mm focal length. The telephoto lens shows a little more softening and star bloating from corner aberrations, though both perform well.
Compared to DSLR Lenses
Here I try to demonstrate just how much better at least one of the zooms on test here is compared to older prime lenses made for DSLRs. The Canon lenses are labeled EF, for Canon’s EF lens mount used for decades on their DSLRs and EOS film cameras. Both are premium L lenses.
I shot this set on a different night than the previous examples, with some light cloud present which added various amounts of glows around stars. But the test shots still show corner sharpness and aberrations well, in this case of the upper left corners of all frames.
Canon RF15-35mm at 35mm vs. Canon EF35mm L
The Canon EF35mm is the original Mark I version, which Canon replaced a few years ago with an improved Mark II model. So I’m sure if you were to buy an EF35mm lens now (or if that’s the model you own) it will perform better than what I show here.
Both lenses are at f/2.8, wide open for the RF lens, but stopped down two stops for the f/1.4 EF lens.
The zoom lens is much sharper to the corners, with far less astigmatism and none of the lateral chromatic aberration and field curvature (softening stars at the very corner) of the old EF35mm prime. I thought the EF35mm was a superb lens, and used it a lot over the last 15 years for Milky Way panoramas. I would not use it now!
Canon RF15-35mm at 24mm vs. Canon EF24mm L
Bought in the early years of DSLRs, the EF24mm tested here is also an original Mark I model, since replaced by an improved Mark II 24mm. The old 24mm is good, but shows more astigmatism than the RF lens, and some field curvature and purple chromatic aberration not present at all in the RF lens.
And this is comparing it to the RF lens at its weakest focal length, 24mm. It still handily outperforms the old EF24mm prime.
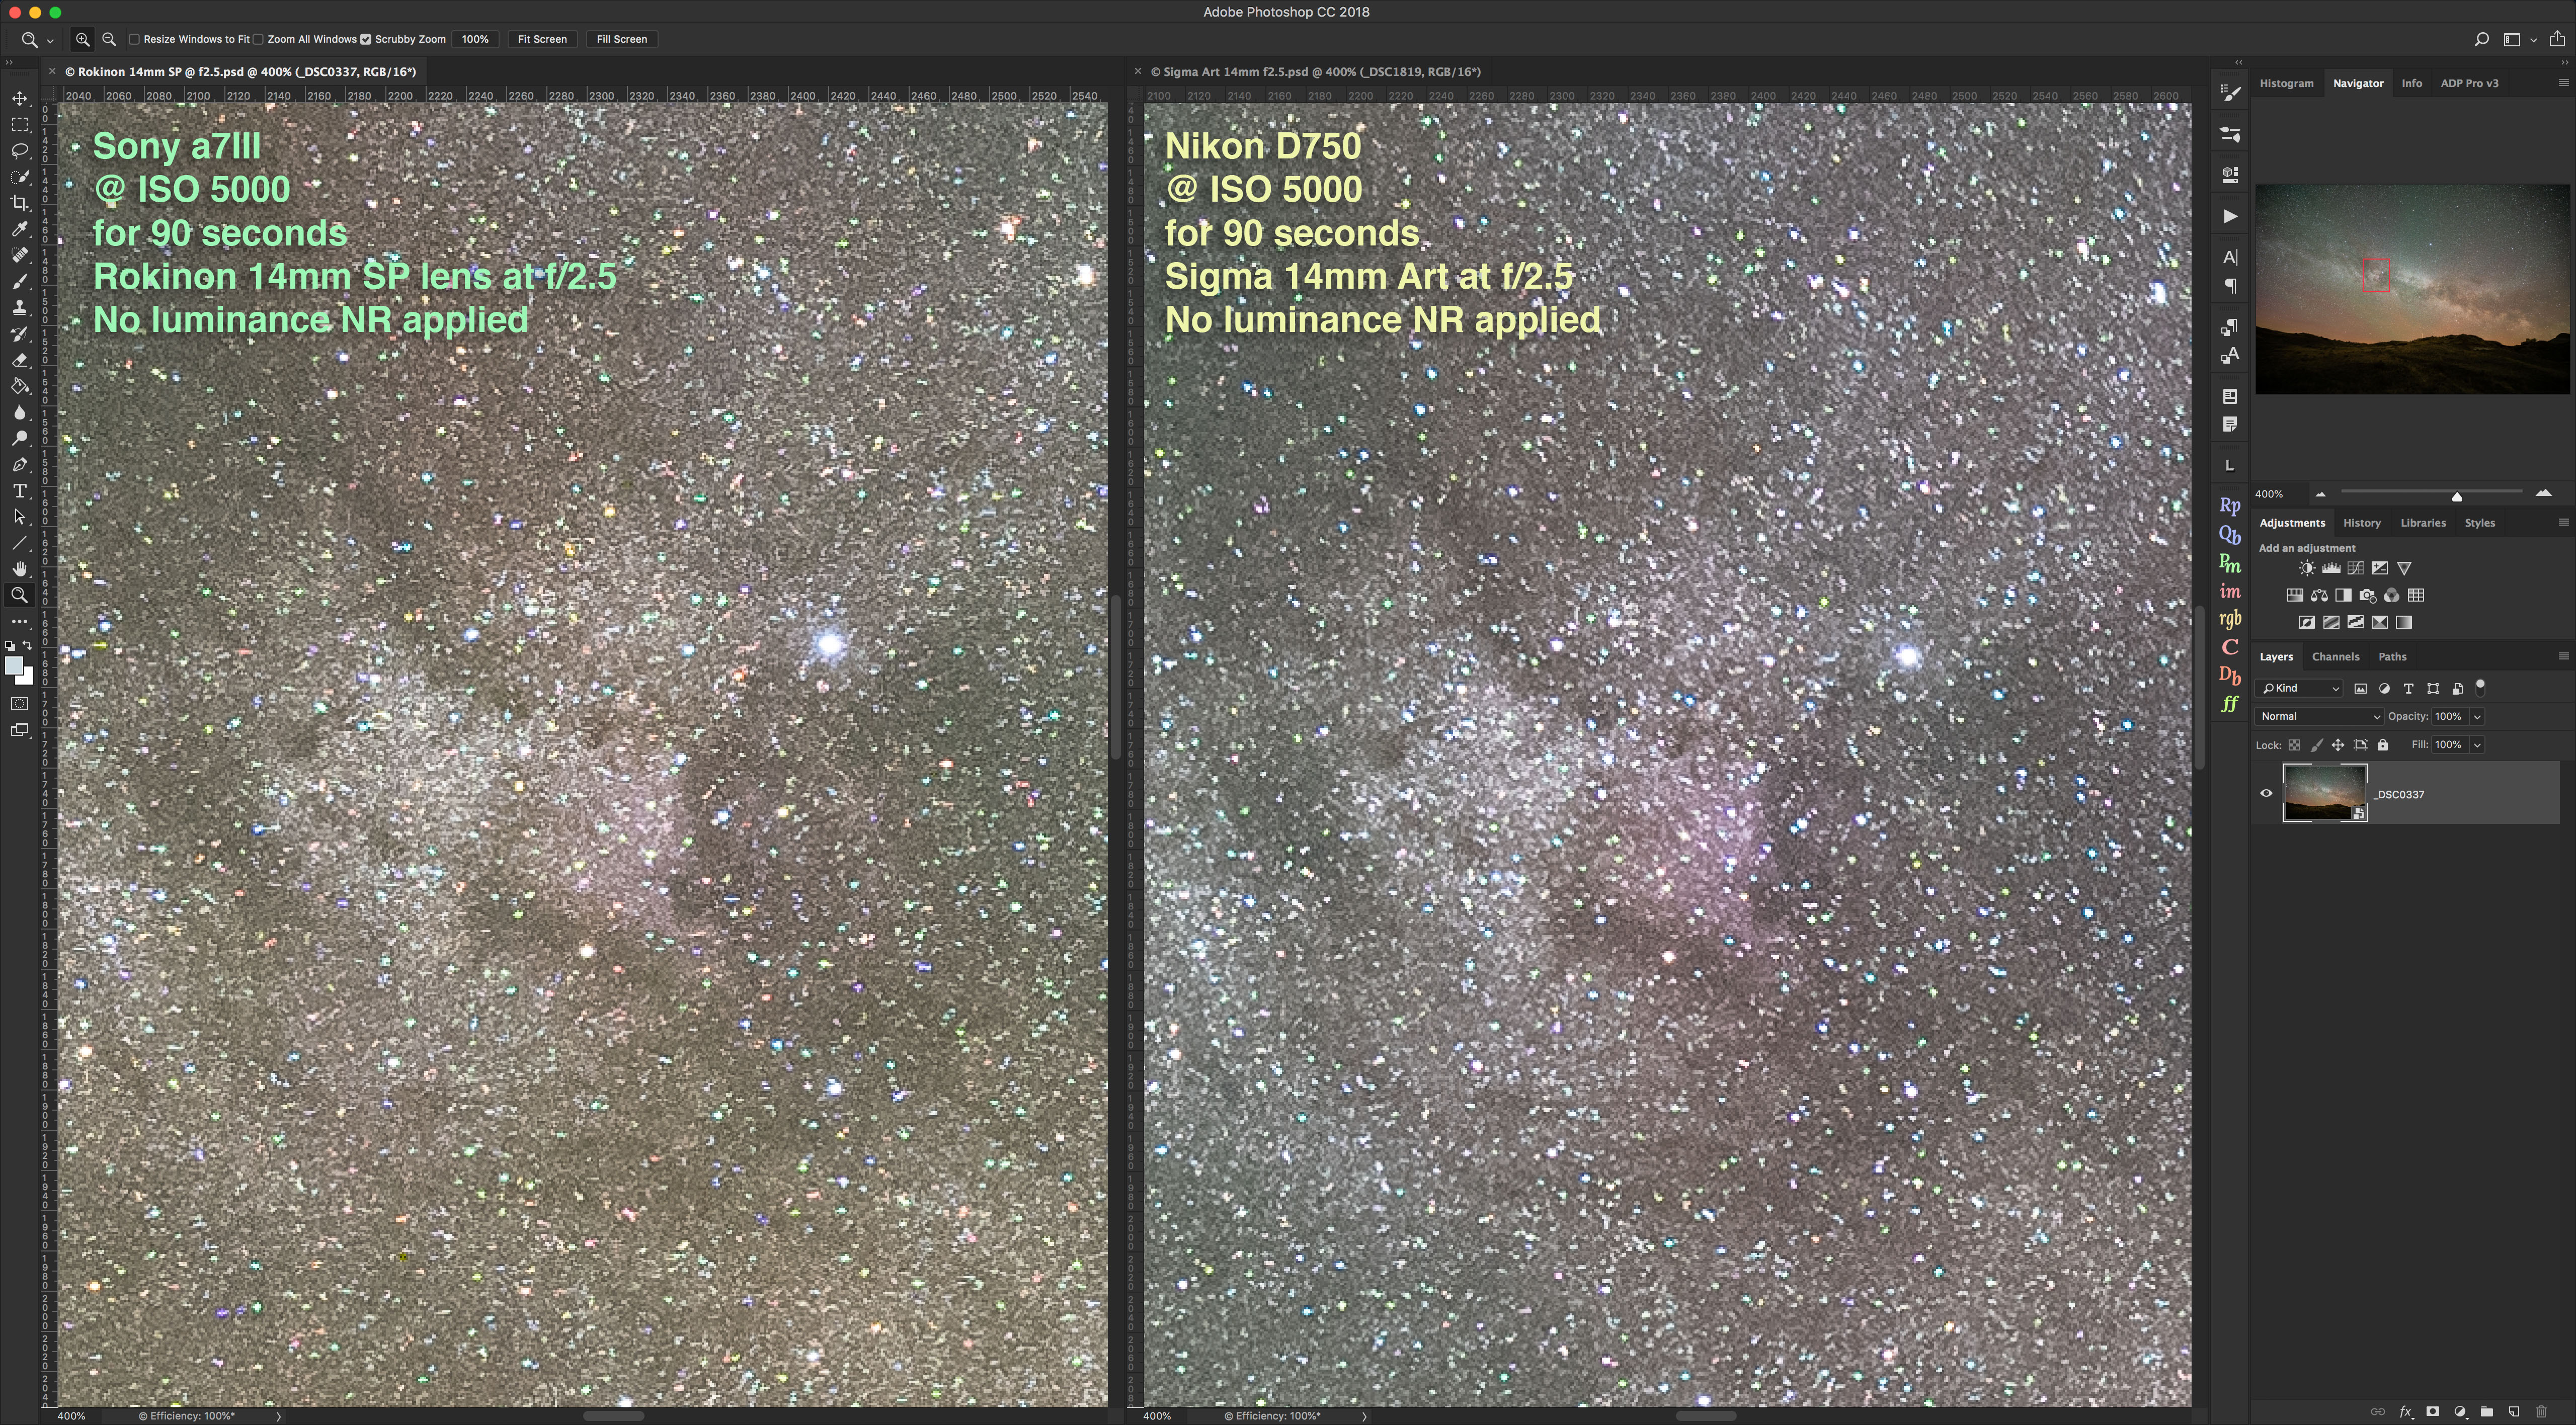
Canon RF15-35mm at 15mm vs. Rokinon 14mm SP
Canon once made an EF14mm f/2.8 L prime, but I’ve never used it. For a lens in this focal length, one popular with nightscape photographers, I’ve used the ubiquitous Rokinon/Samyang 14mm f/2.8 manual lens. While a bargain at about $300, I always found it soft and aberrated at the corners. See my test of 14mm ultra-wides here.
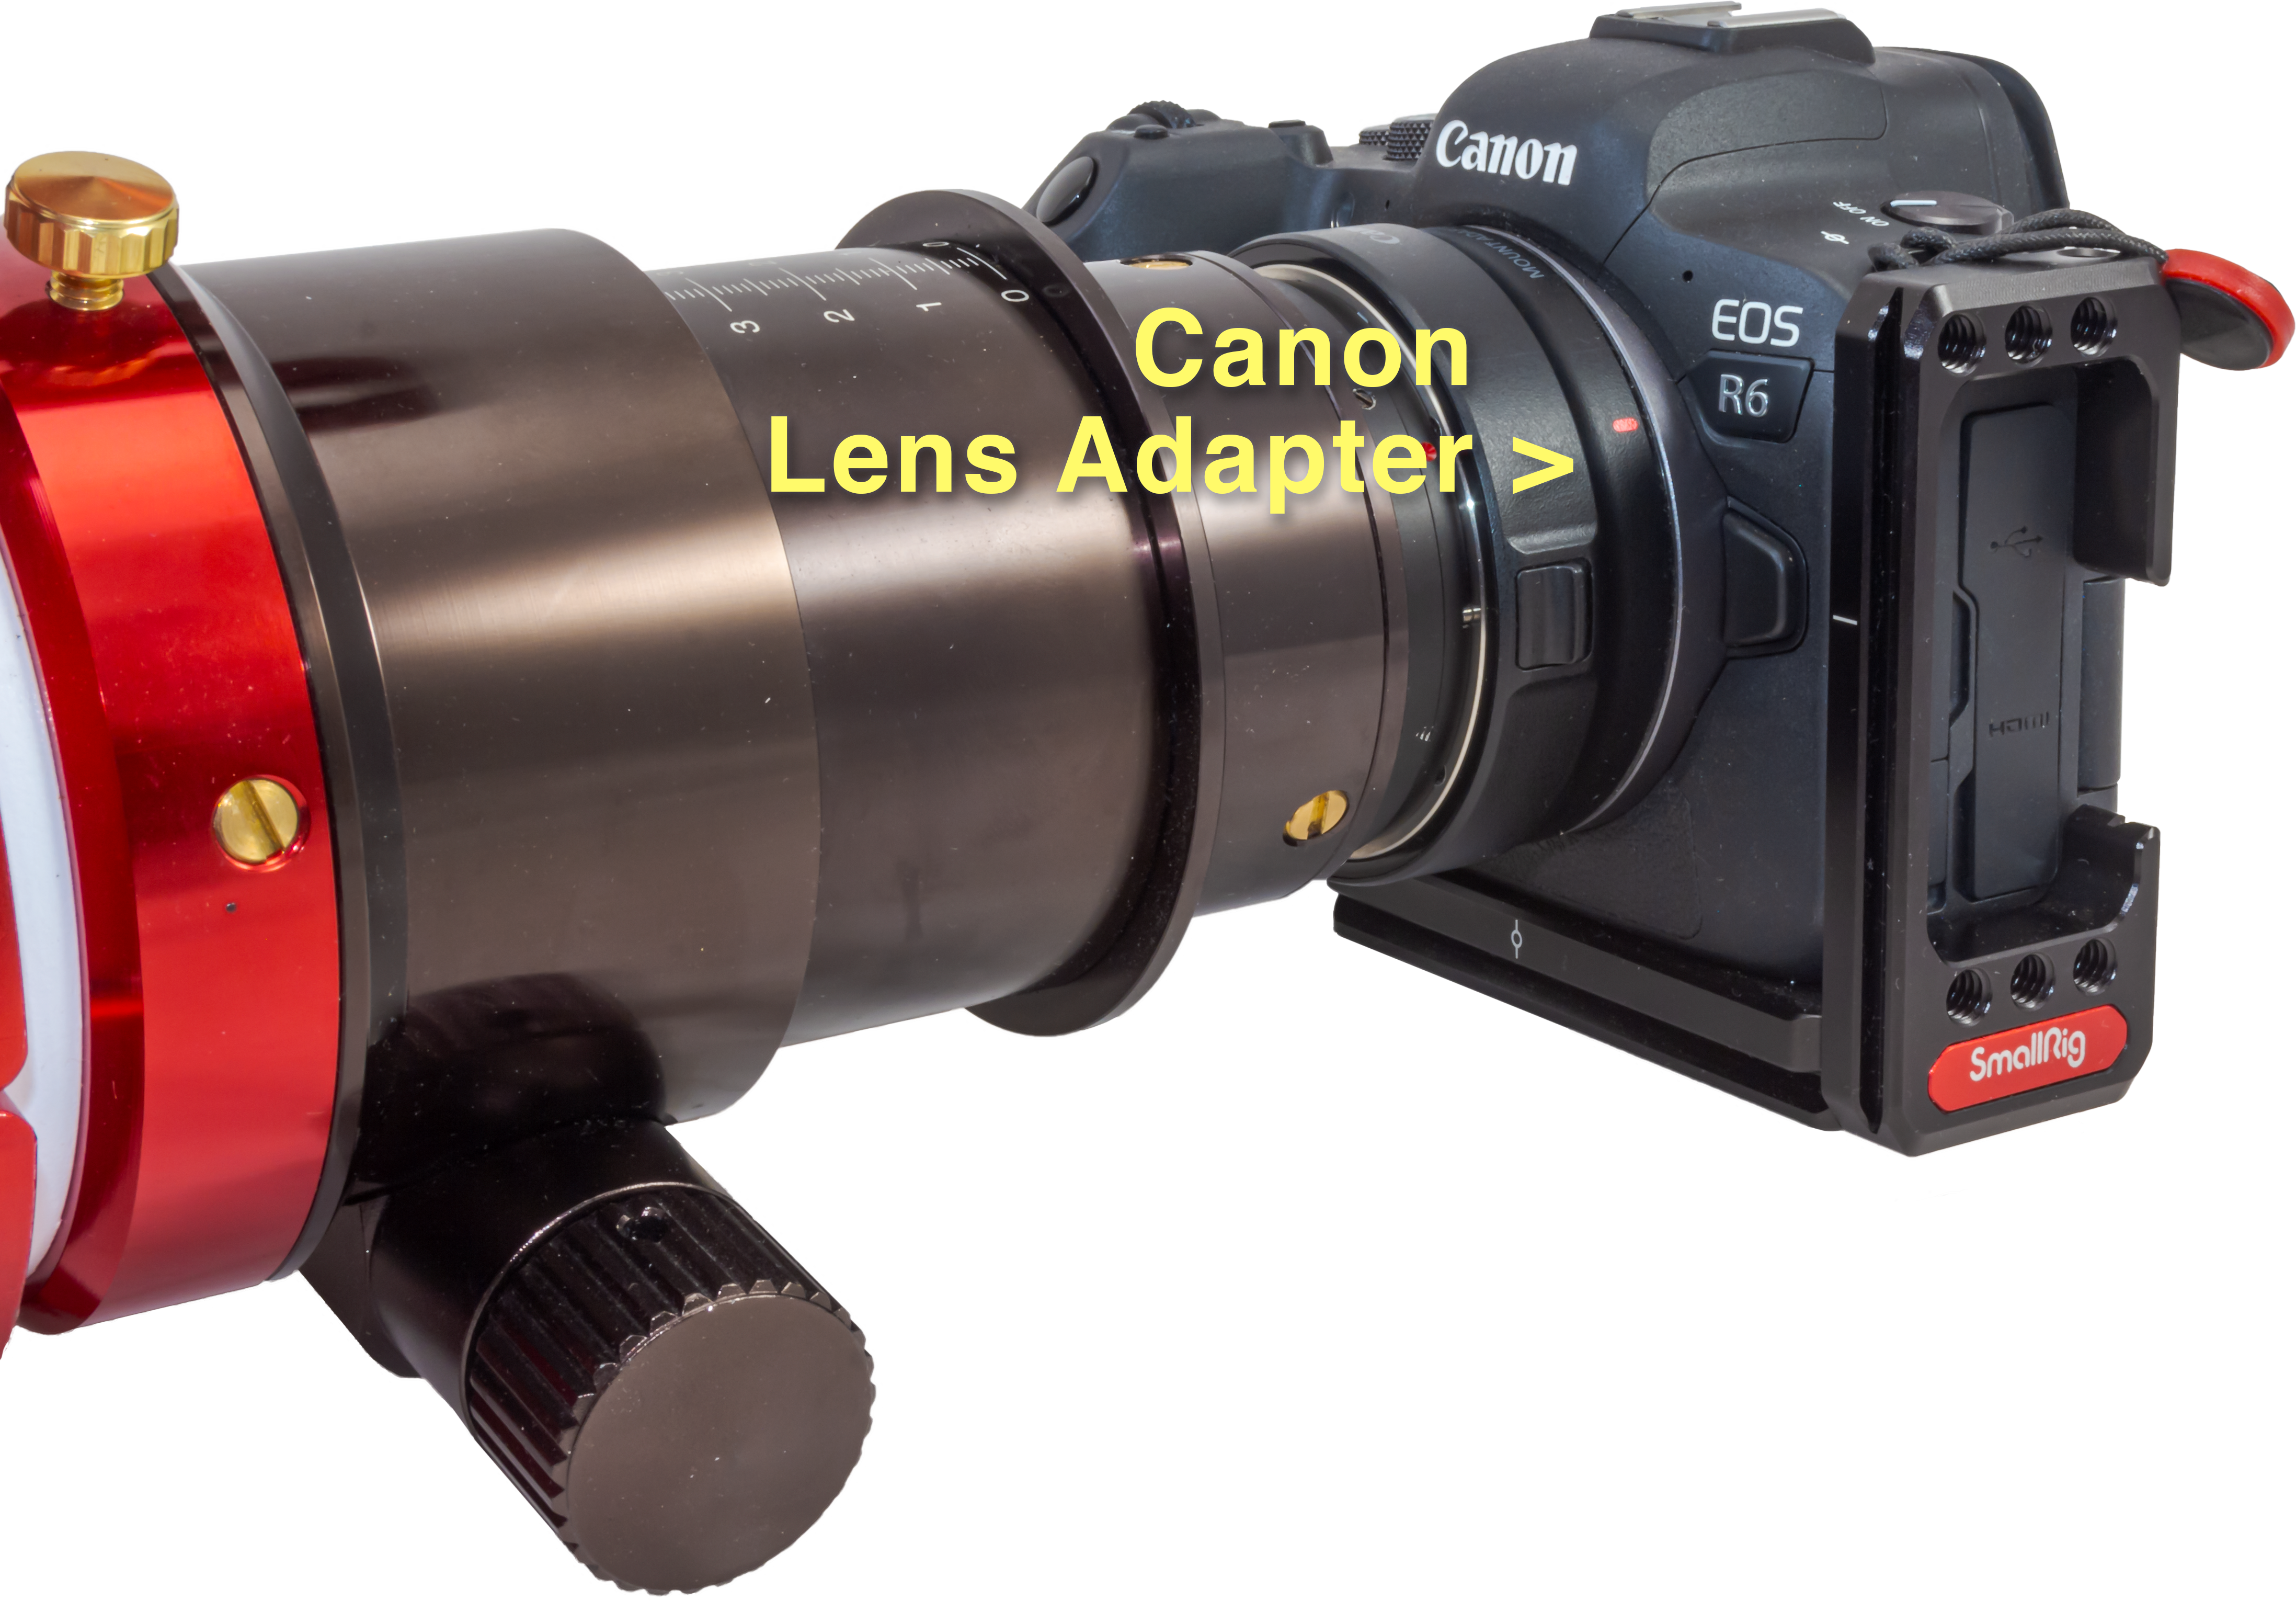
A few years ago I upgraded to the Rokinon 14mm f/2.4 lens in their premium SP series (about $800 for the EF-mount version). While a manual lens, it does have electrical contacts to communicate lens metadata to the camera. Like all EF-mount lenses from any brand, it can be adapted to Canon R cameras using Canon’s $100 EF-EOS R lens adapter.

The Rokinon SP is the only prime I found that beat the RF zoom. It provided sharper images to the corners than the RF15-35mm at 15mm. The Rokinon also offers the slightly faster maximum aperture of f/2.4 (which Canon cameras register as f/2.5). Vignetting is severe, but like the RF lenses can be corrected – Camera Raw has this lens in its database. What is not so easy to correct is some slight colour shift at the corners.
Another disadvantage, as with many other 14mm lenses, is that the SP lens cannot accept front-mounted filters. The RF15-35mm can.
Nevertheless, until Canon comes out with a 12mm to 14mm RF prime, or allows Sigma to, an adapted Rokinon 14mm SP is a good affordable alternative to the RF15-35mm.

Mechanical Points
- All the RF lens bodies are built of weight-saving engineered plastic incorporating thorough weather sealing. There is nothing cheap about their fit, finish or handling. Each lens has textured grip rings for the zoom, focus and a control ring that can be programmed to adjust either aperture, ISO, exposure compensation or other settings of your choosing.
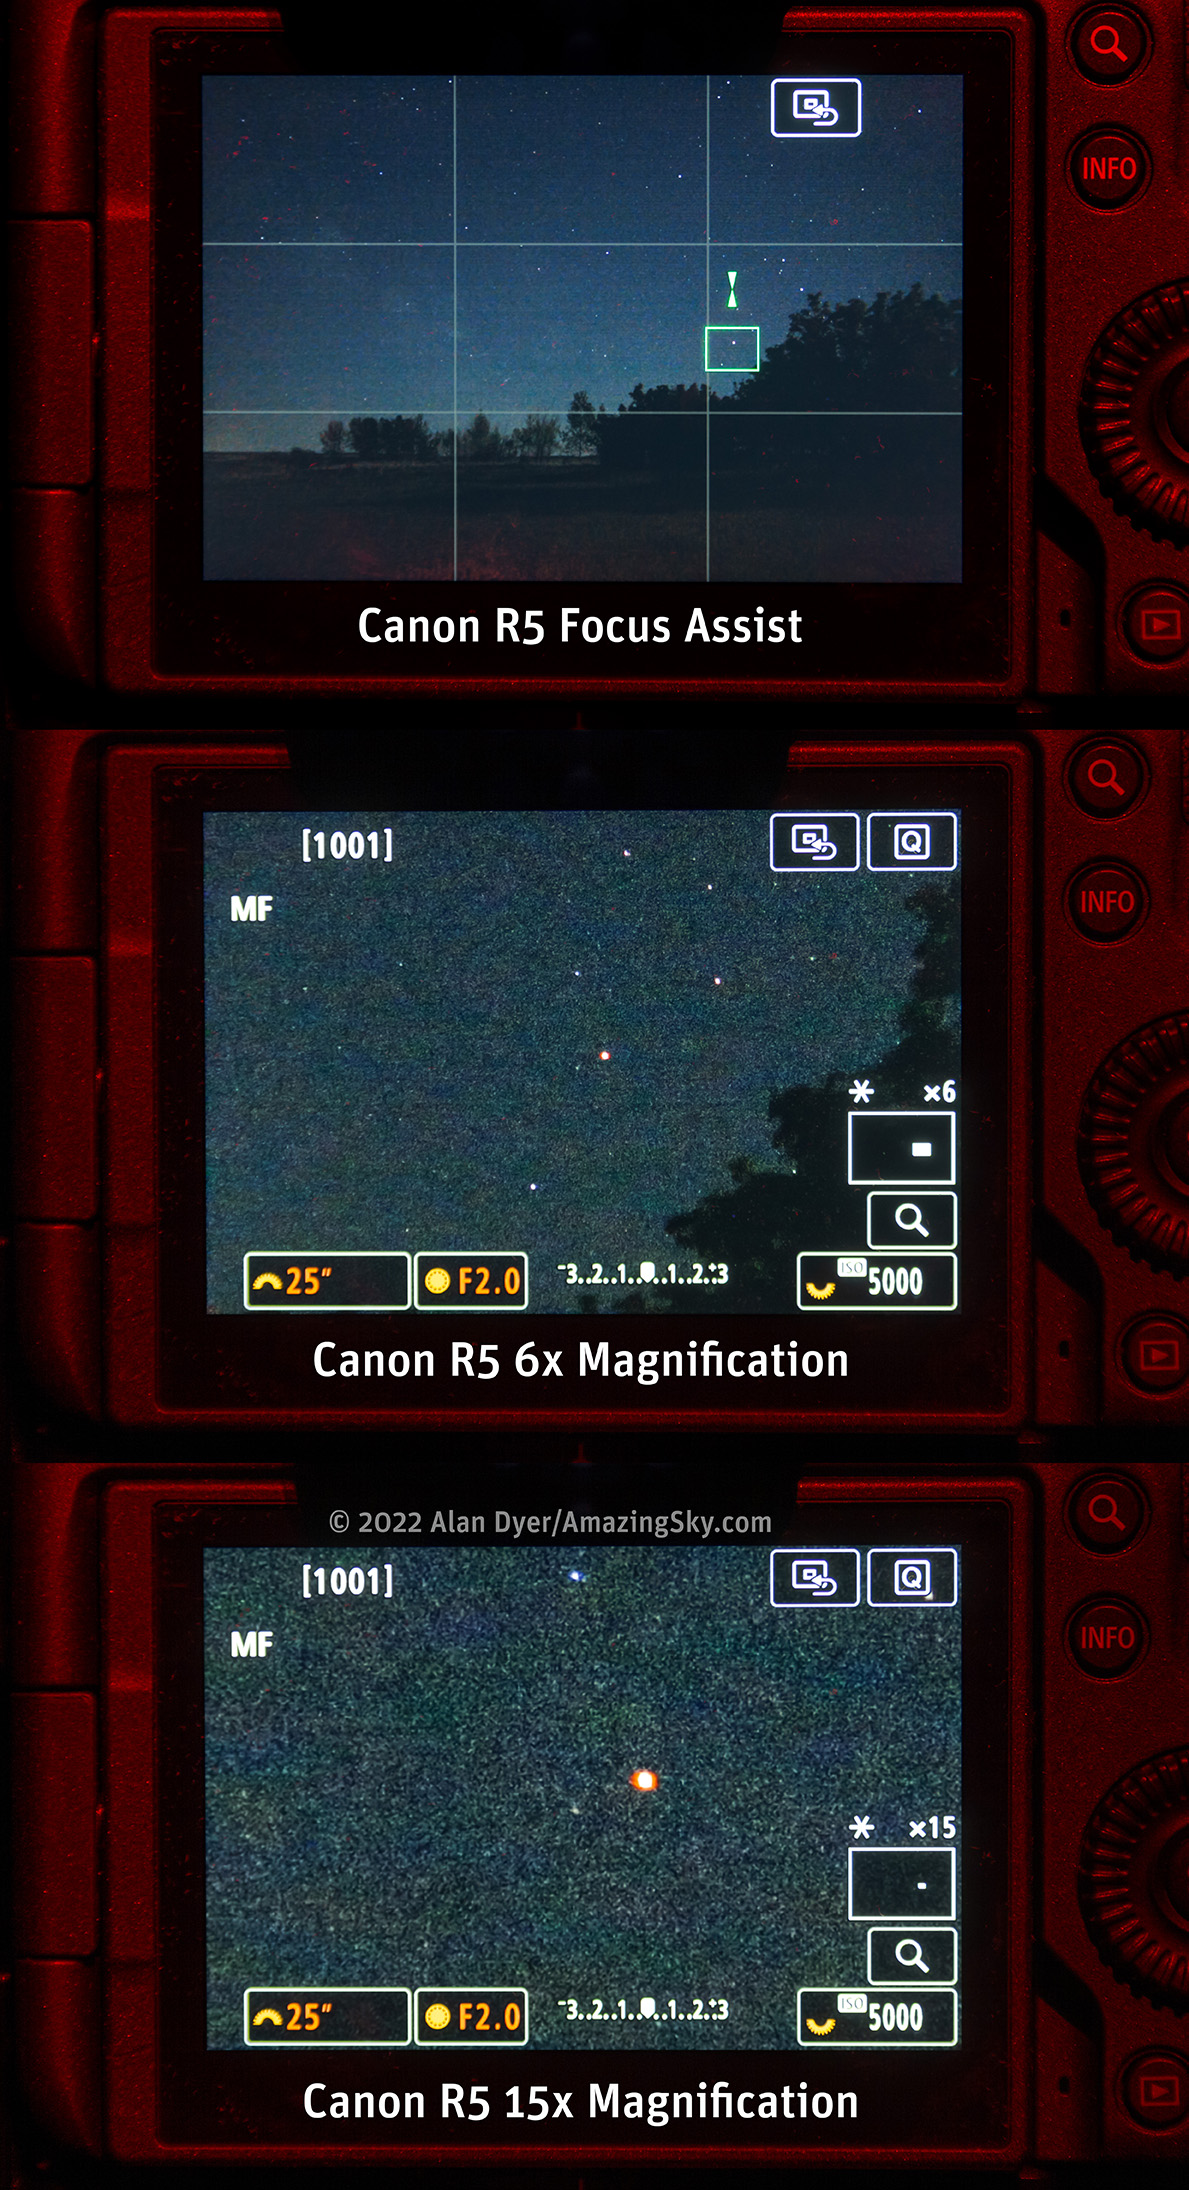
- As with all modern auto-focus lenses, the manual focus ring on each lens does not mechanically move glass. It controls a motor that in turn focuses the lens, so-called “focus-by-wire.” However, I found that focus could be dialled in accurately. But if the camera is turned off, then on again, the lens will not return to its previous focus position. You have to refocus to infinity each time the camera is powered up, a nuisance.
- Unlike some Nikon, Sony, Samyang, and Sigma lenses, none of the Canon lenses have a focus lock button, or any way of presetting an infinity focus point, or simply having the lens remember where it was last set. I would hope Canon could address that deficiency in a firmware update.
- With all the zooms, I did not find any issue with “zoom creep.” The telescoping barrels remained in place during long exposures and did not slowly retract when aimed up. While the RF28-70mm and RF70-200mm each have a zoom lock switch, it locks the lens only at its shortest focal length.
- Each lens is parfocal within its zoom range. Focus at one zoom position, and it will be in focus for all the focal lengths. I usually focus at the longest focal length where it is easiest to judge focus by eye, then zoom out to frame the scene.
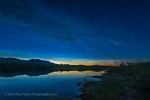
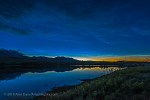
FINISHED IMAGES GALLERIES
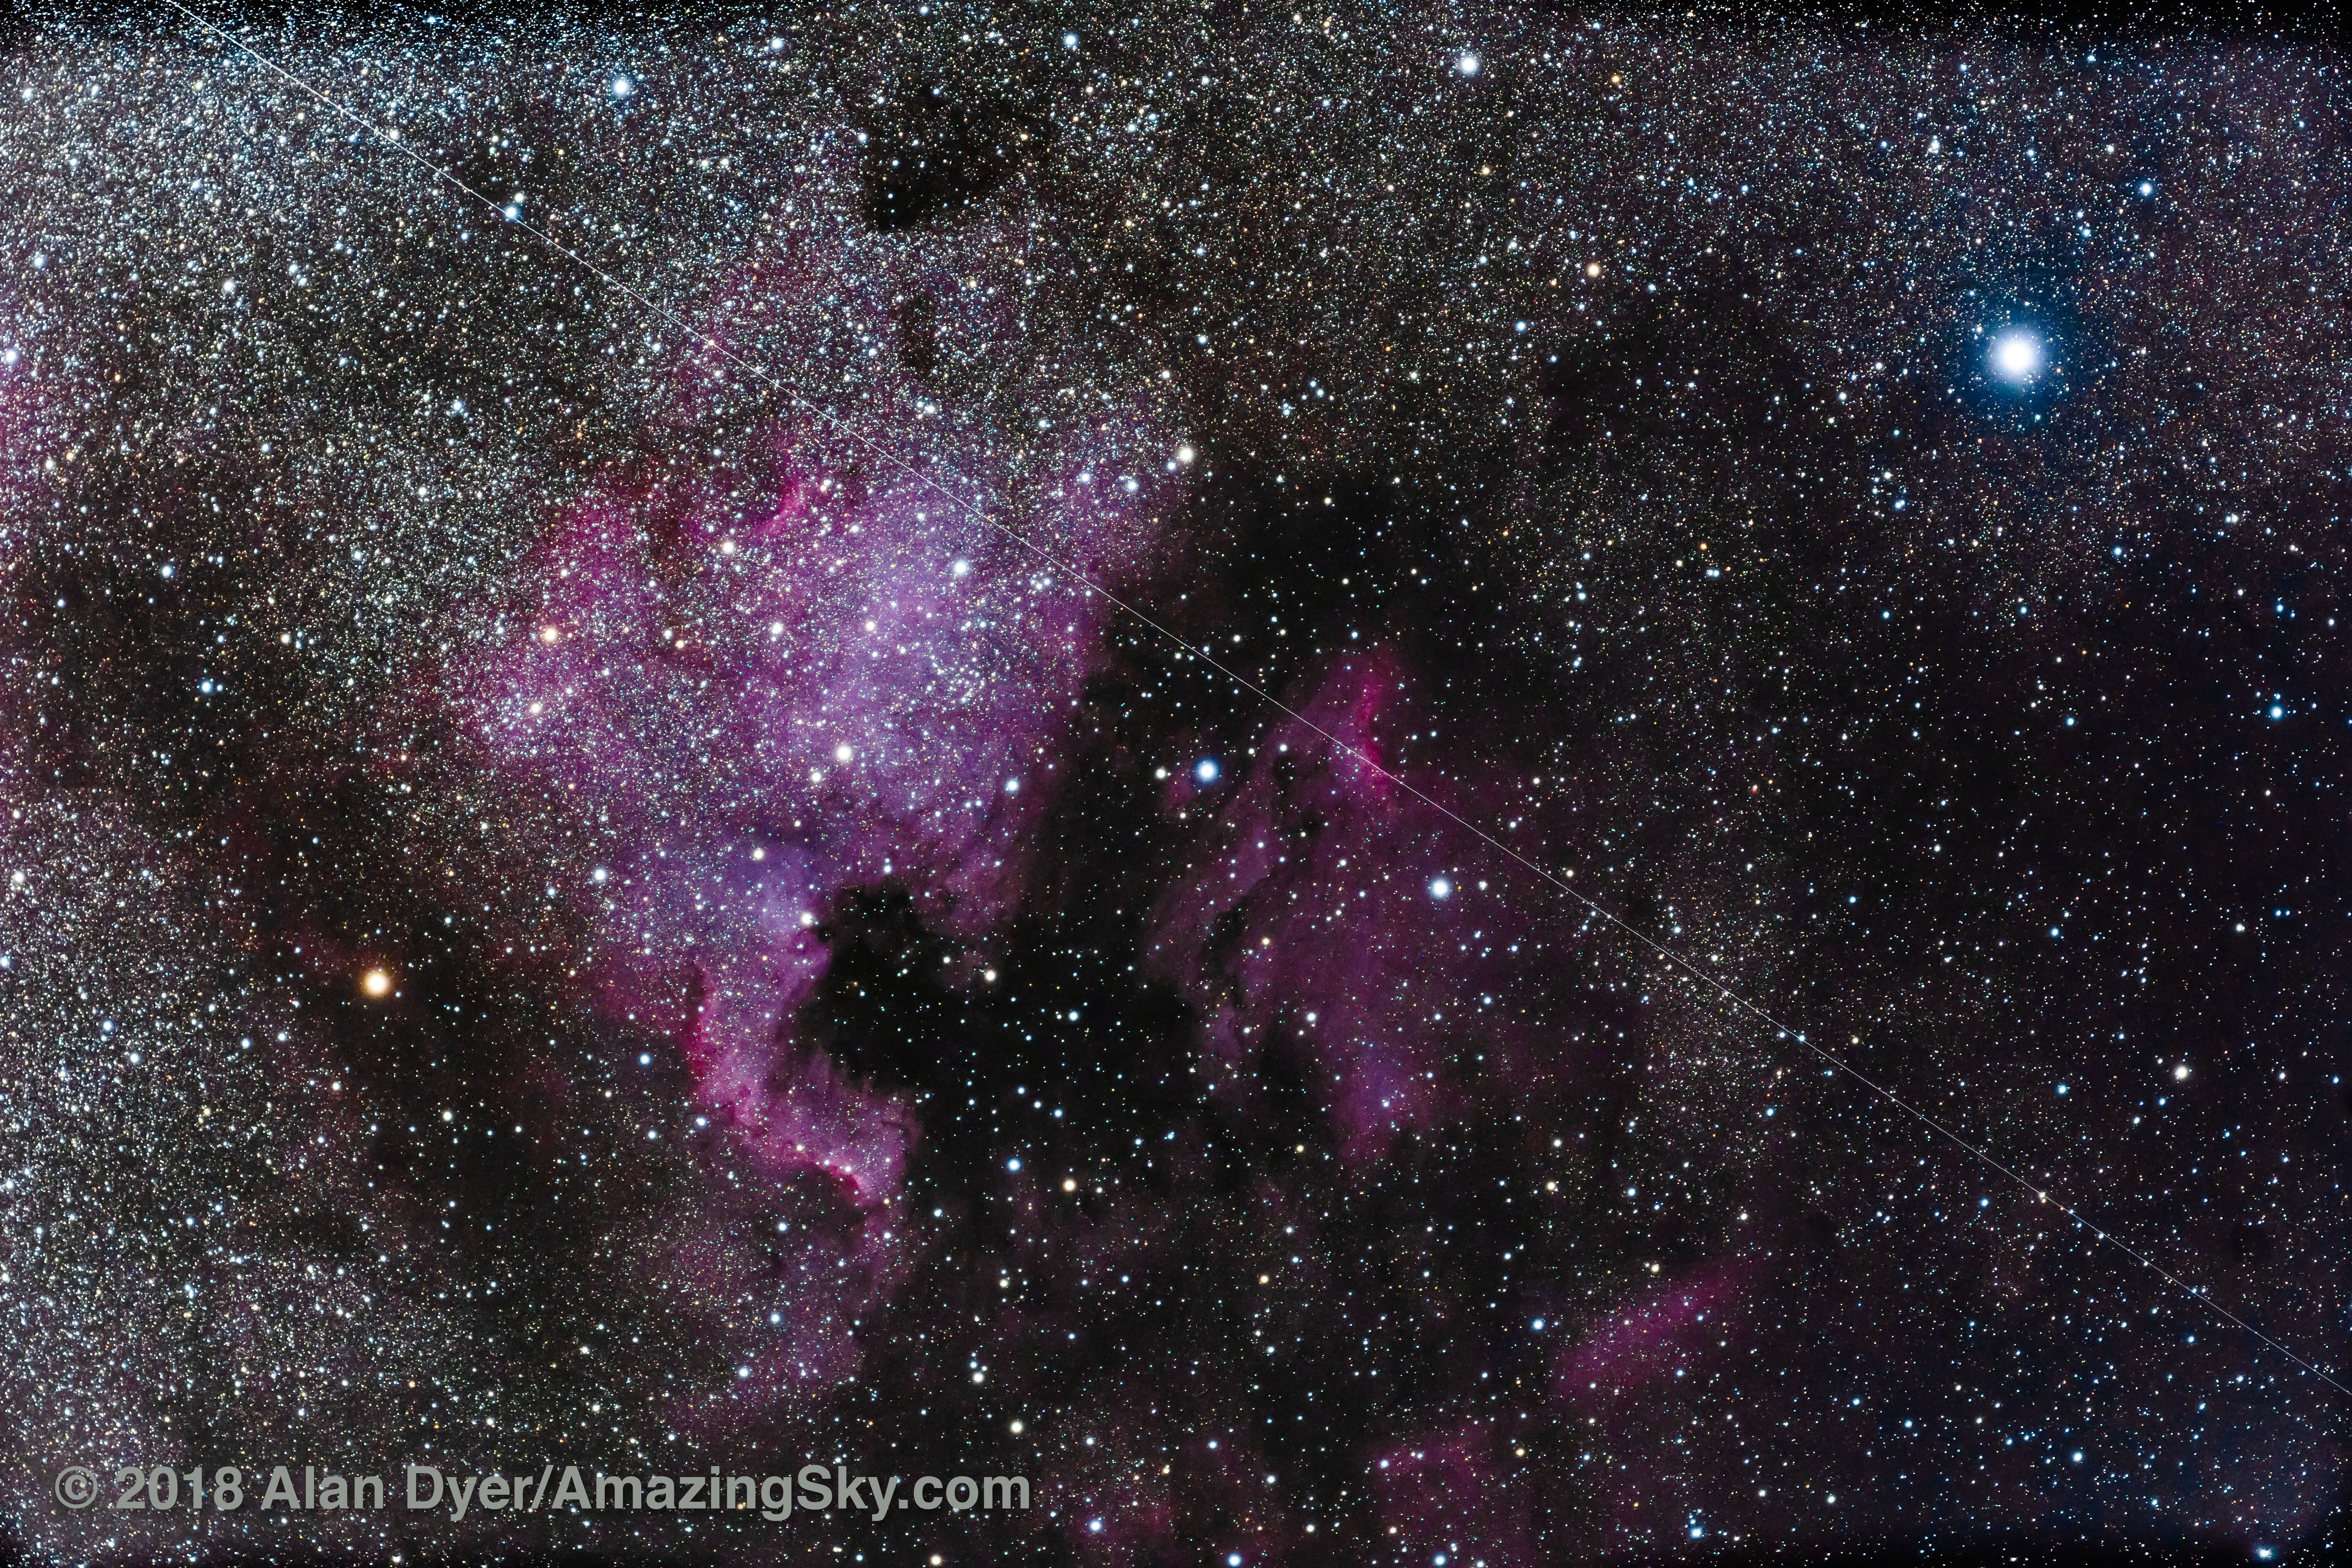
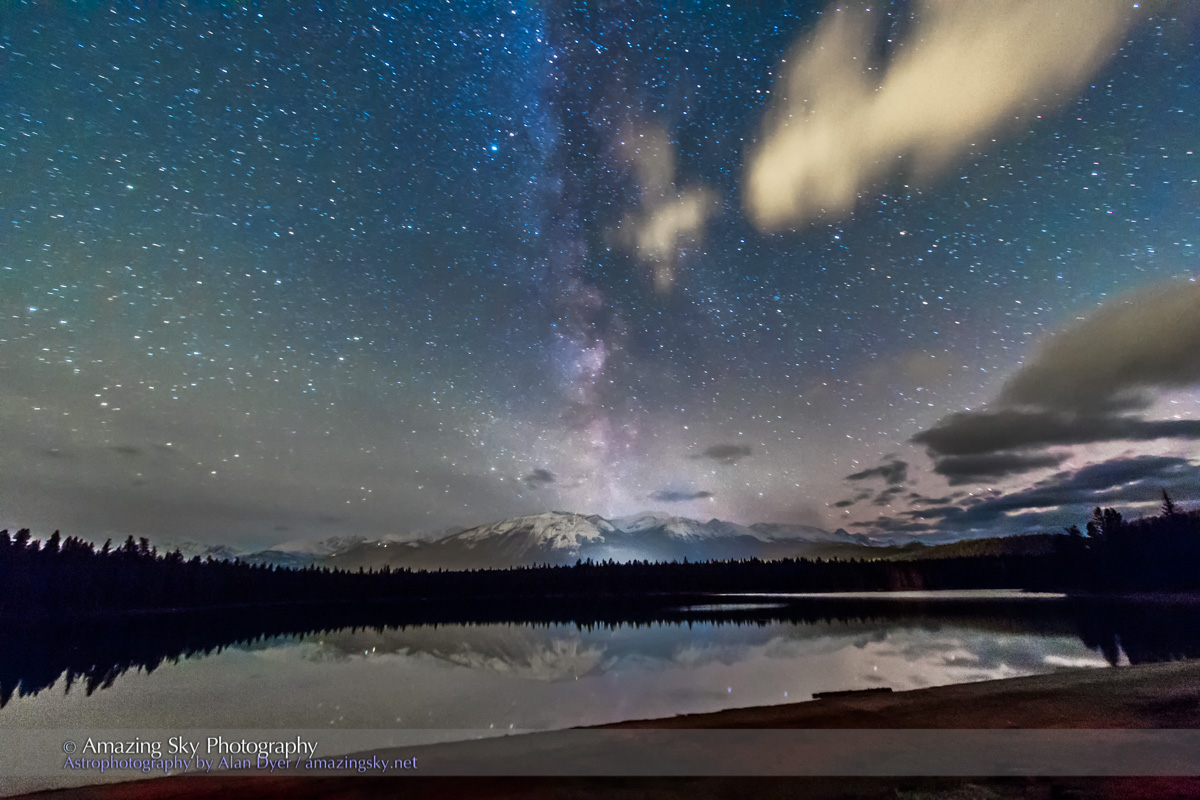
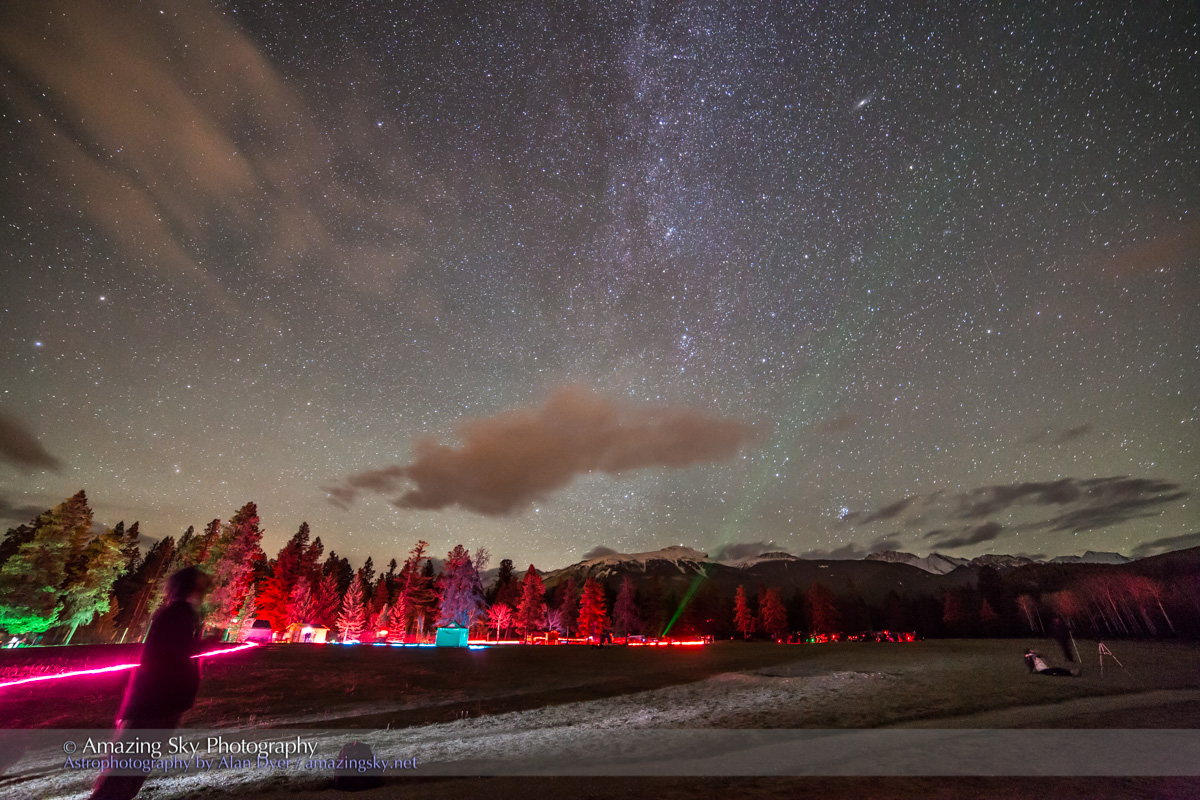
Here I present a selection of final, processed images (four for each lens), so you can better see how each performs on real-world celestial subjects. To speed download, the images are downsized to 2048 pixels wide.
As per my comments at top, the RF15-35mm is my primary nightscape lens, the RF28-70mm my lens for wide-field constellation and Milky Way shots, while the RF70-200mm is for conjunctions and Moon scenes. It would also be good for eclipses.
Image Gallery with Canon RF15-35mm F/2.8 L IS USM
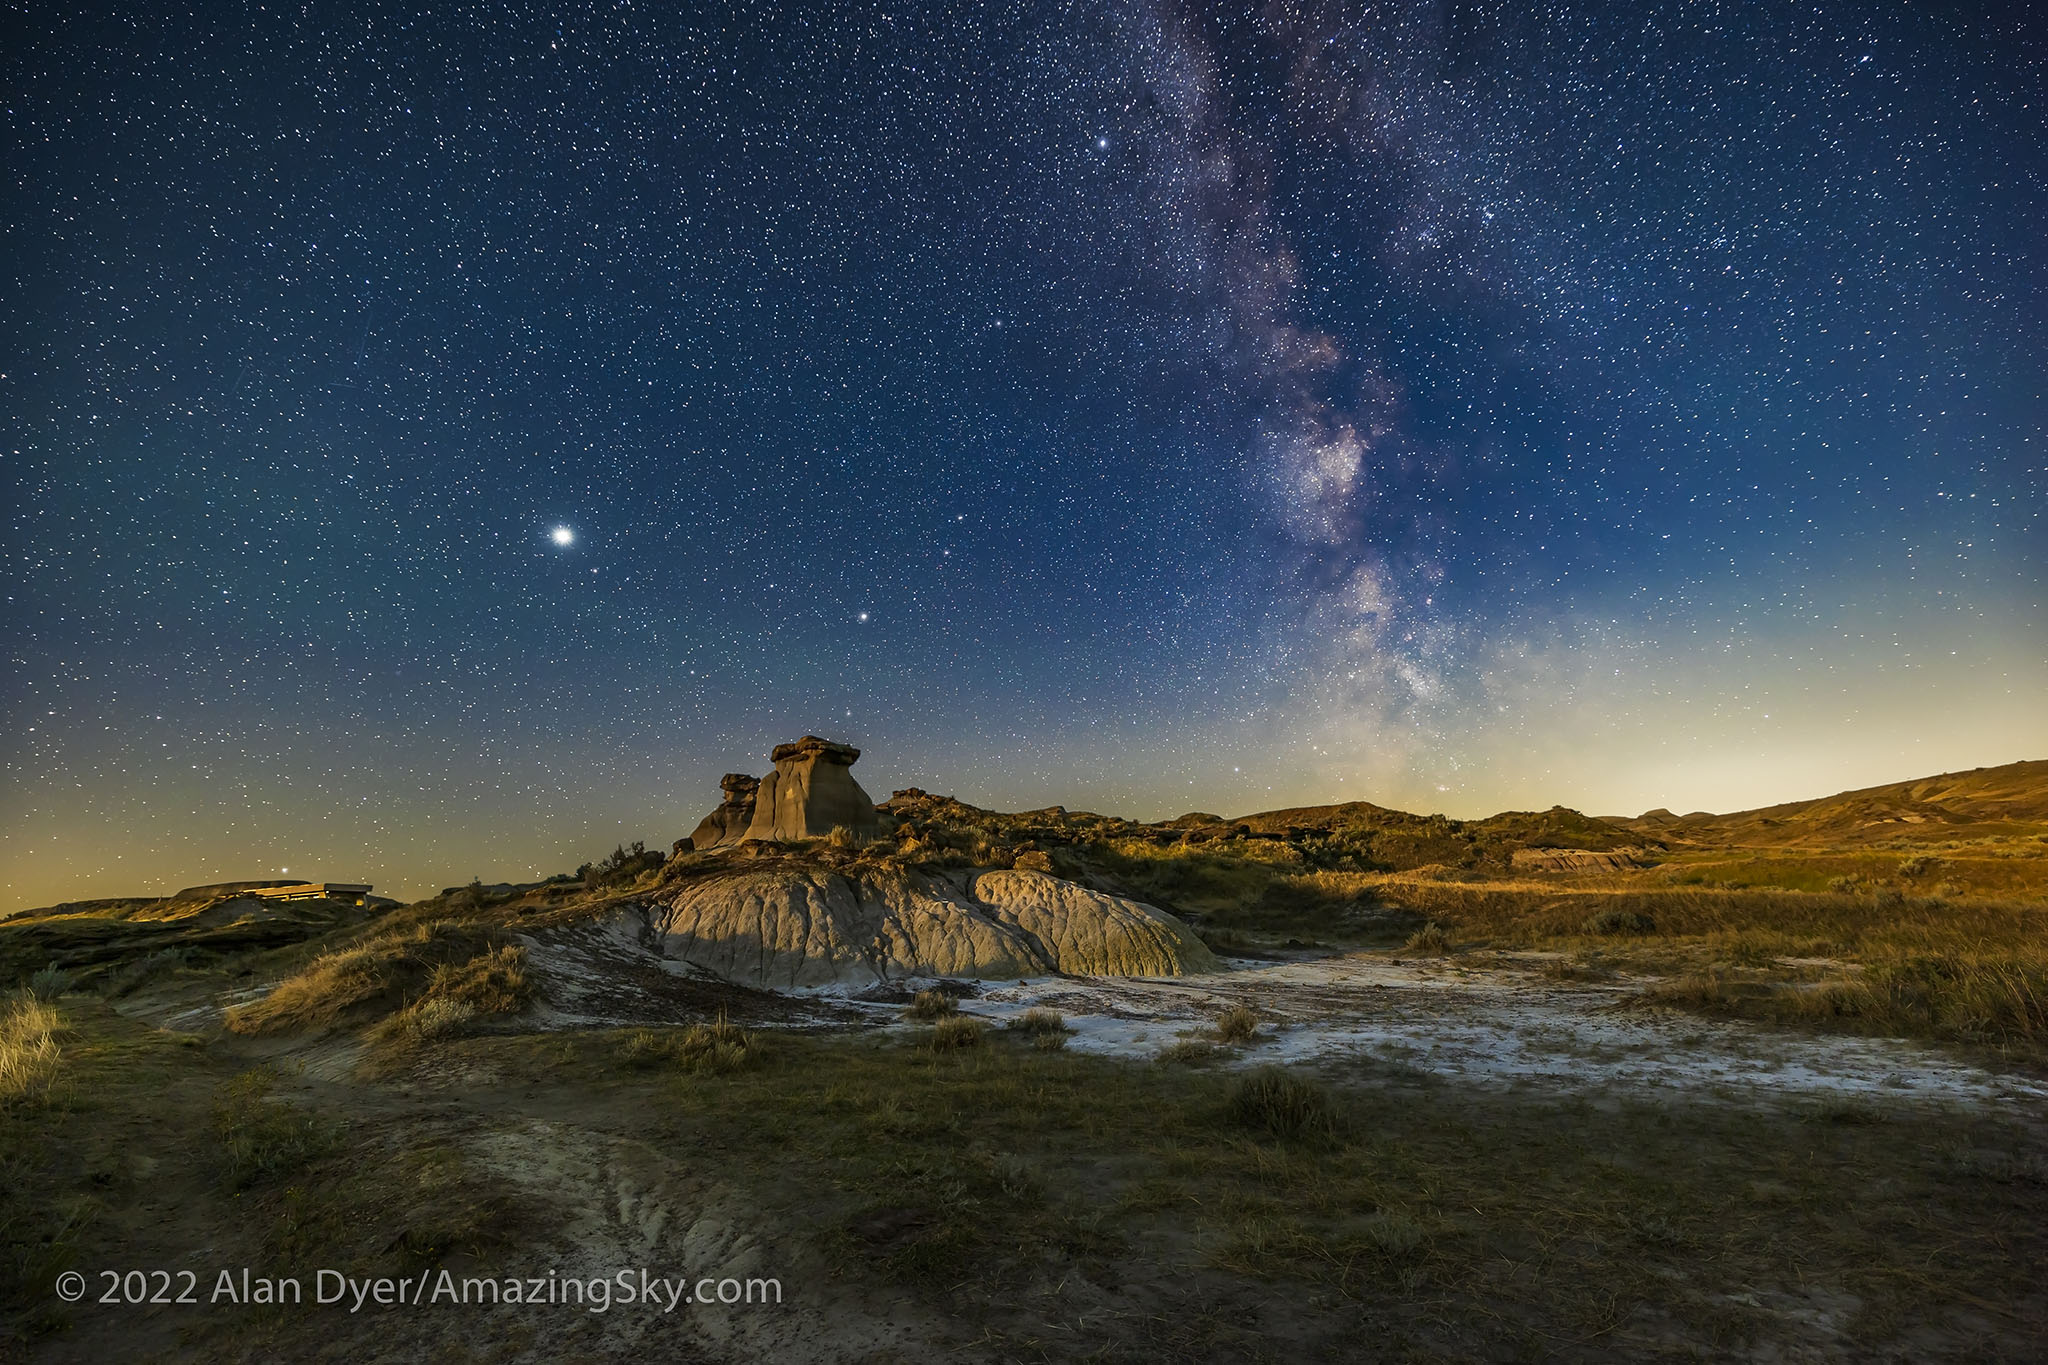
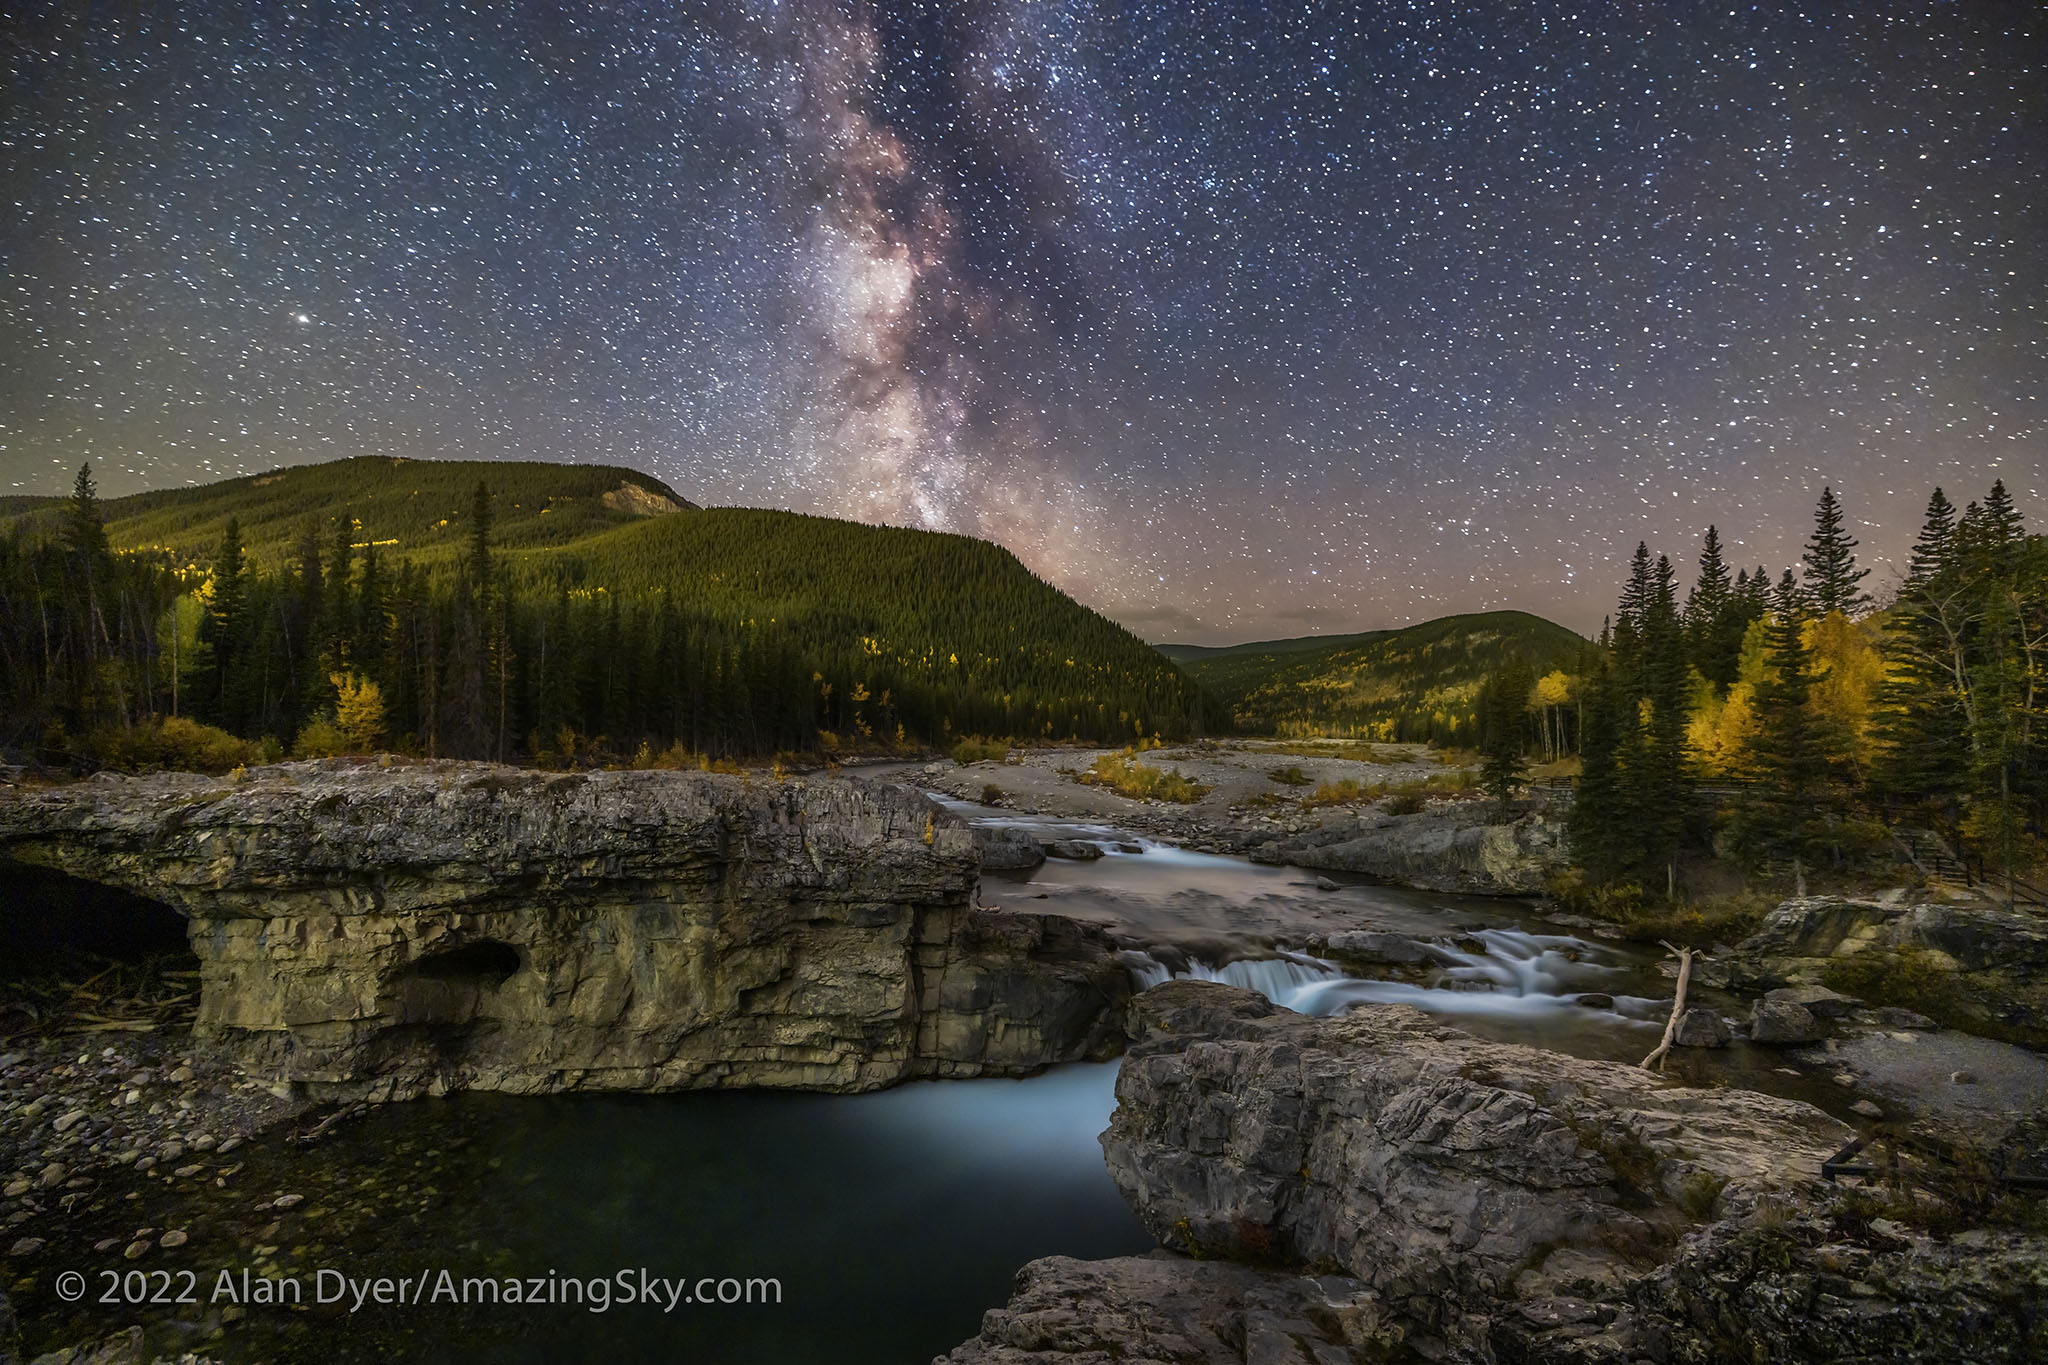
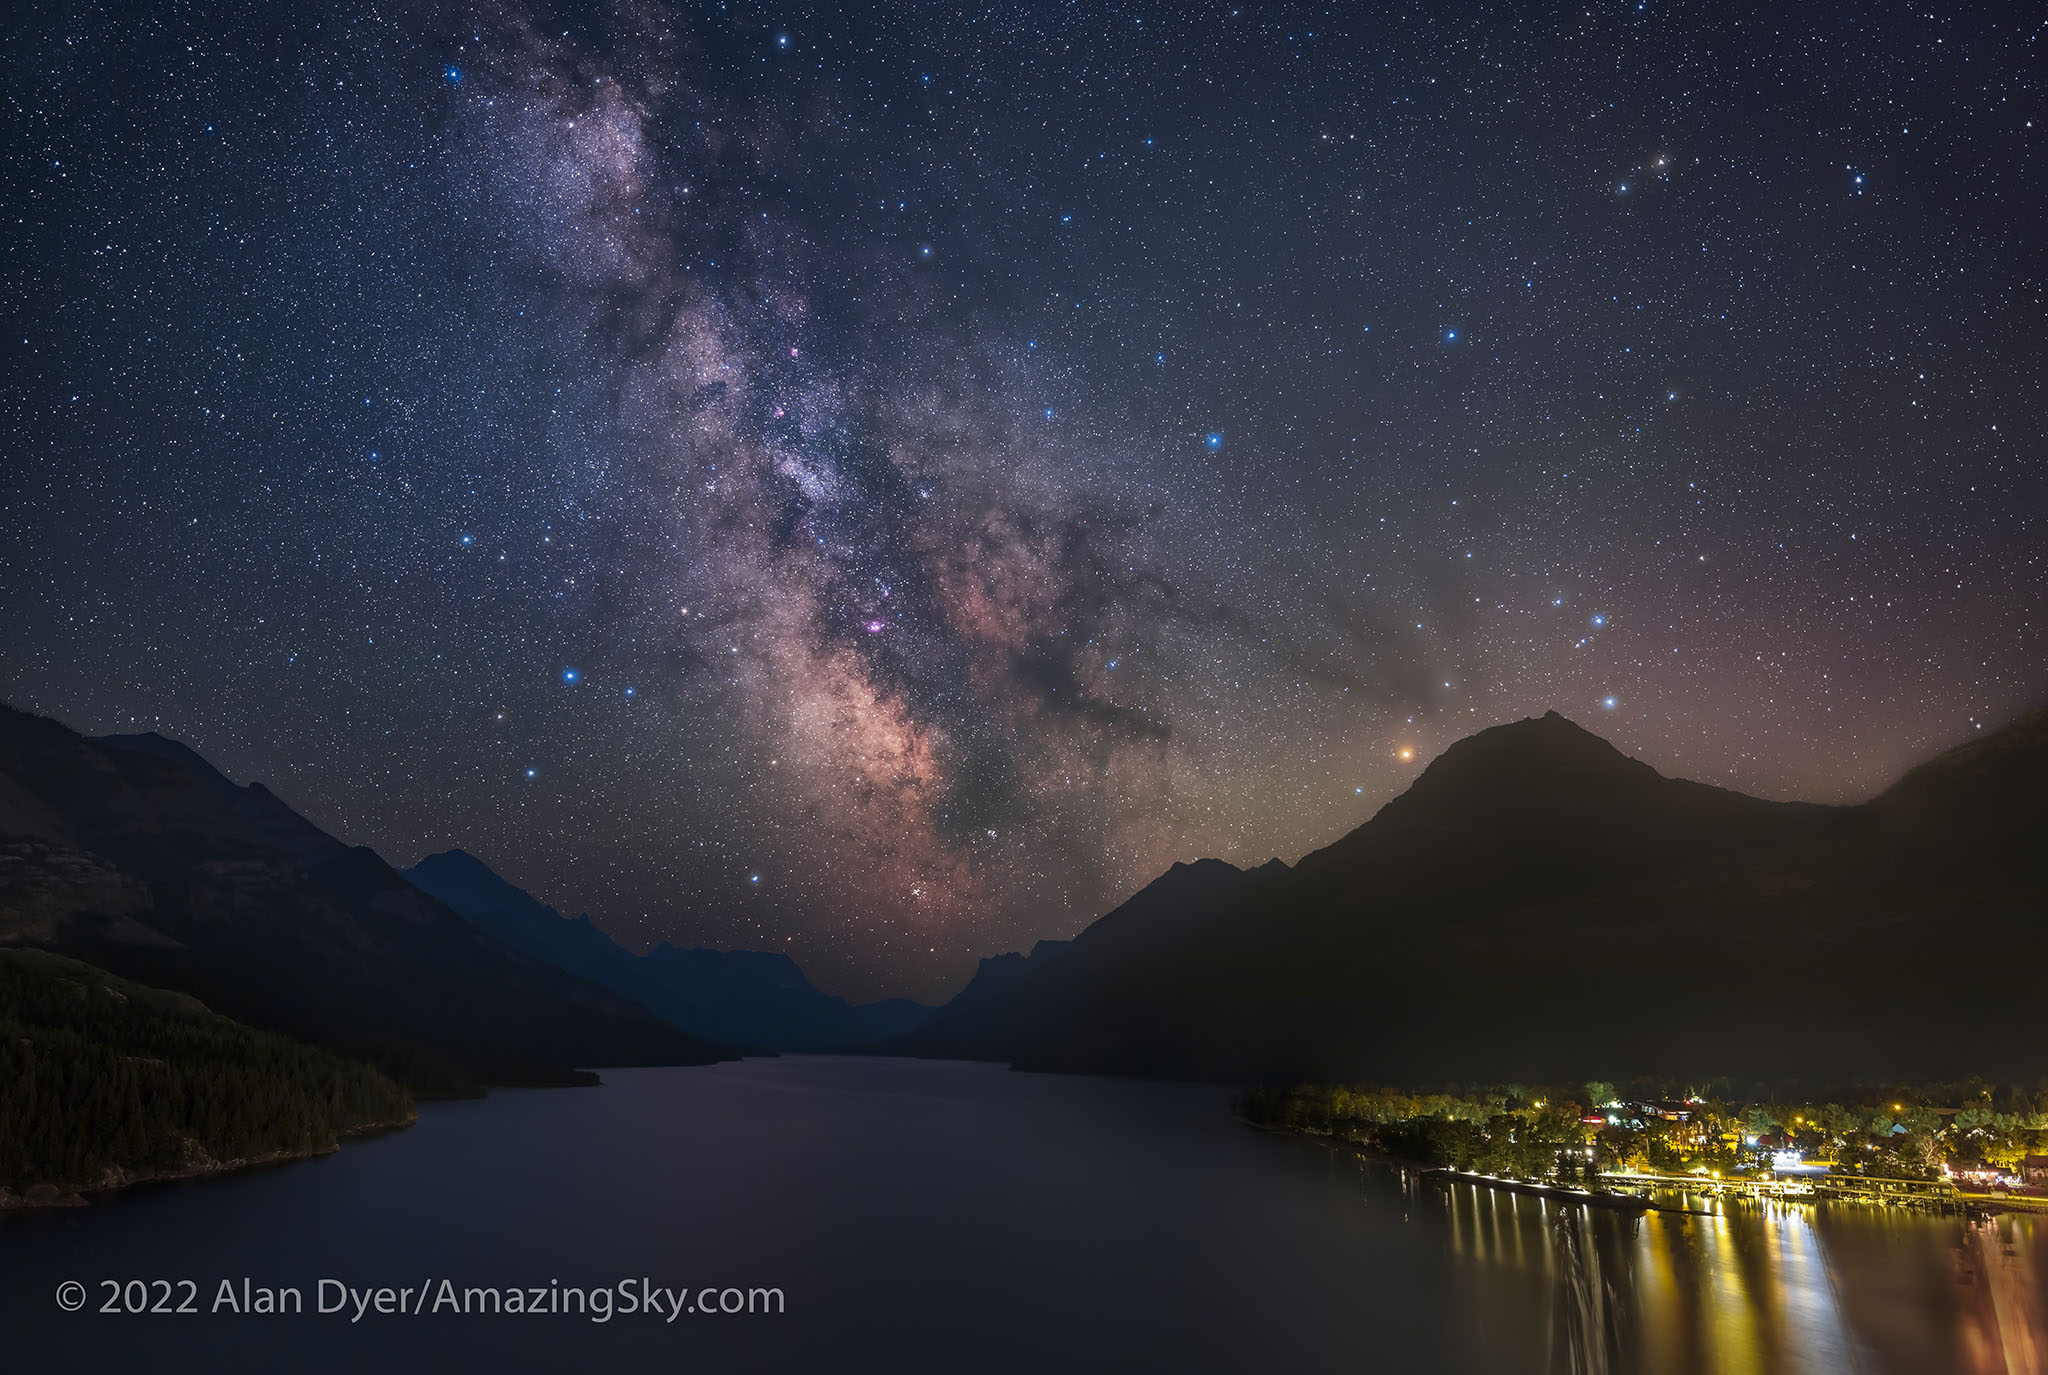
Image Gallery with Canon RF28-70mm F/2 L USM
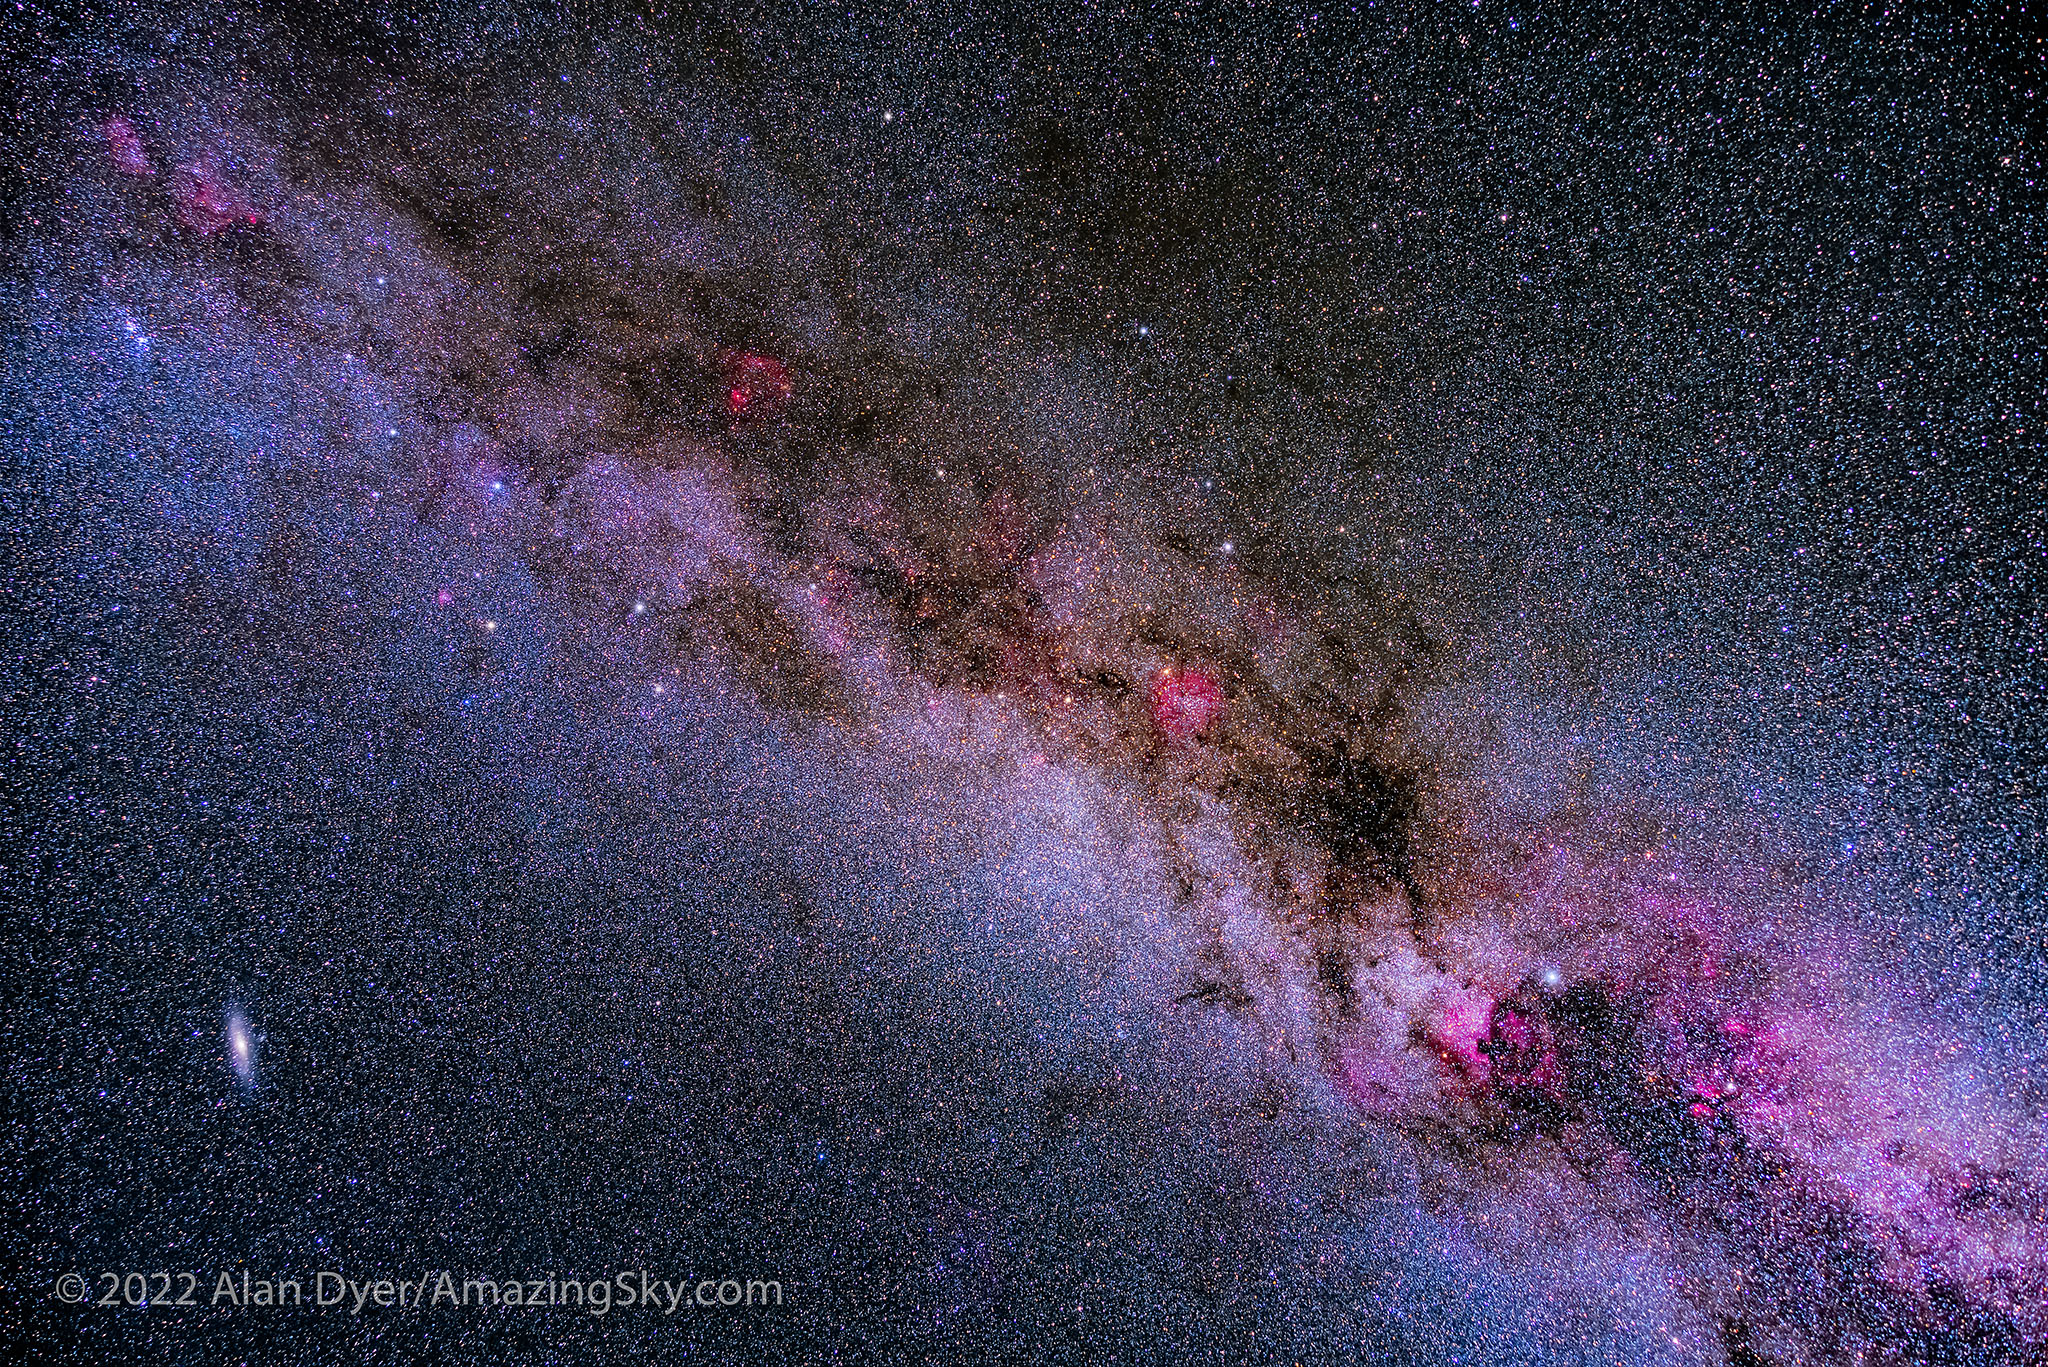

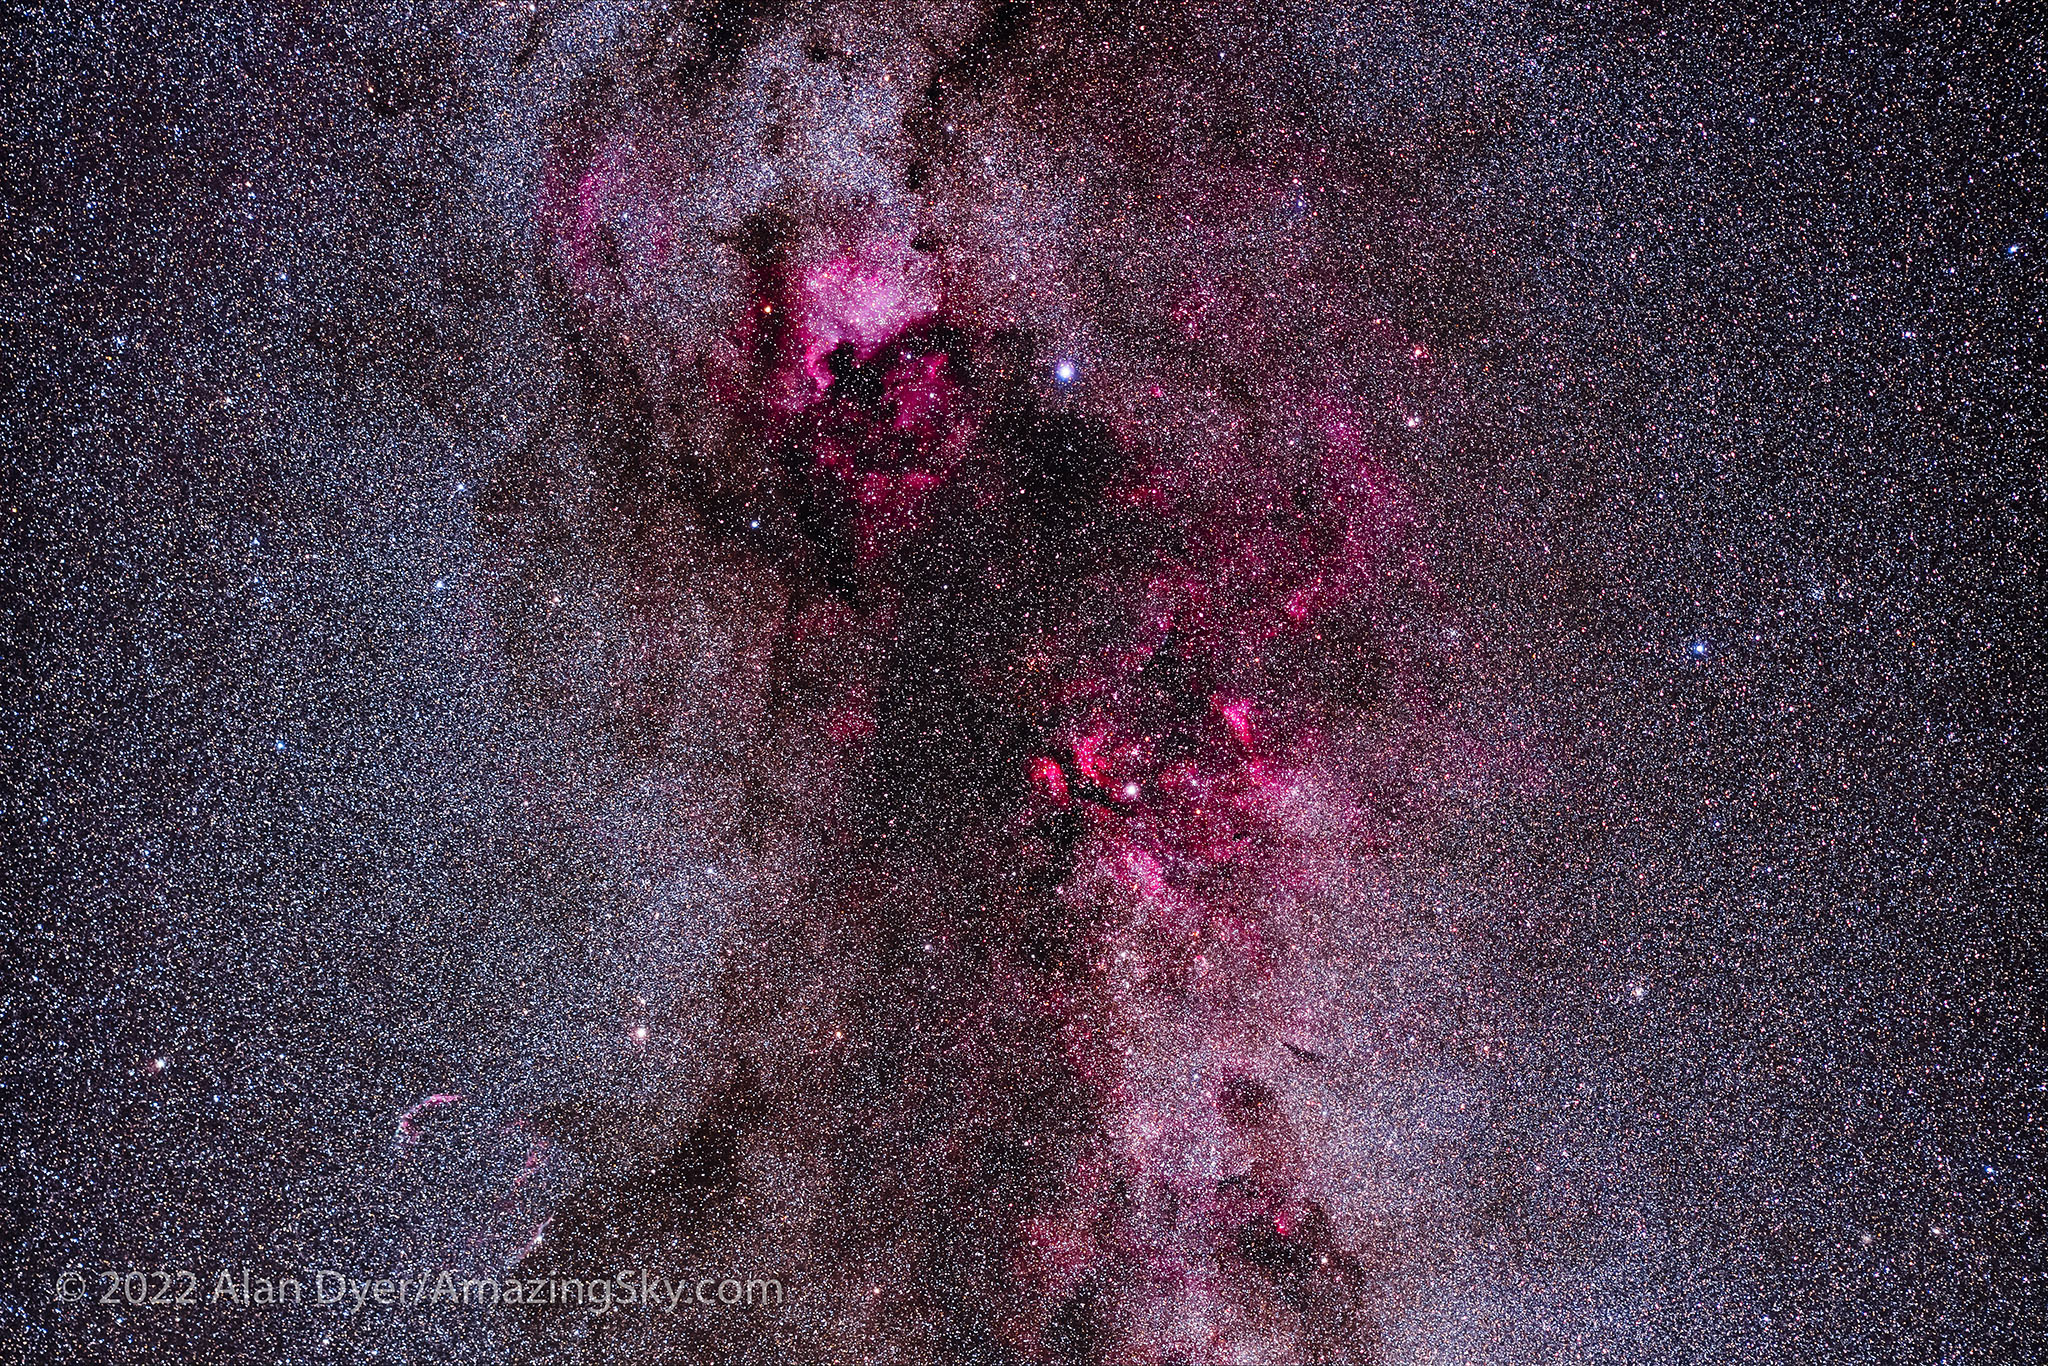
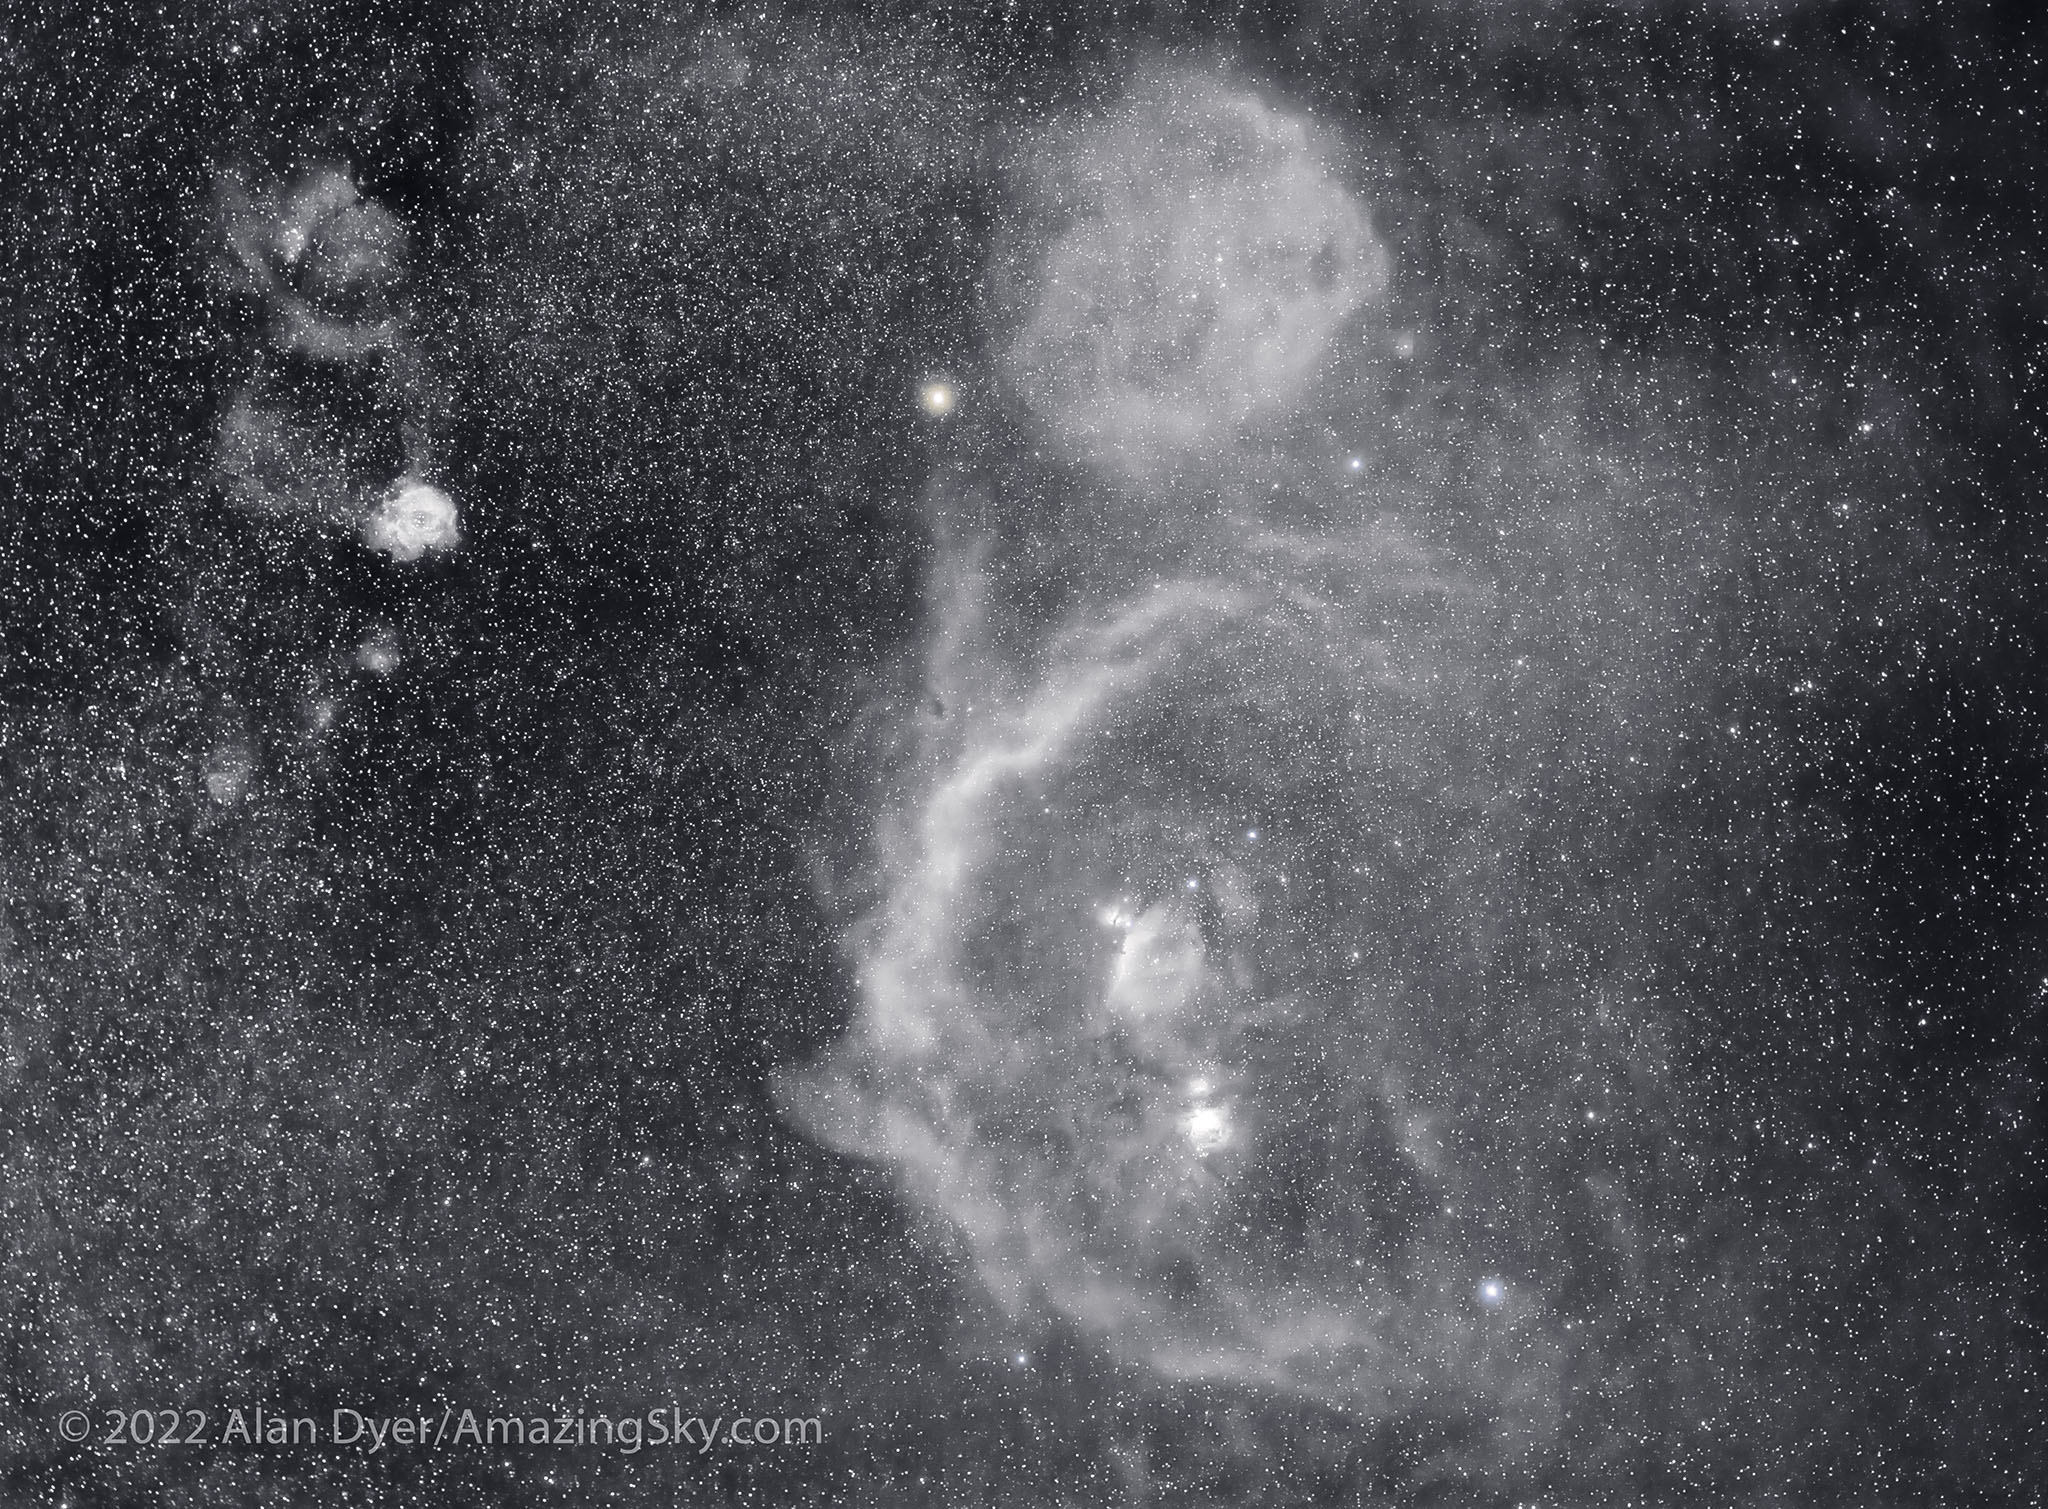
Image Gallery with Canon RF70-200mm F/4 L IS USM

CONCLUSIONs and recommendations
If you are a Canon user switching from your aging but faithful DSLR to one of their mirrorless R cameras, each of these lenses will perform superbly for astrophotography. At a price! Each is costly. But the cost of older EF lenses has also increased in recent months.
The other native RF L-series lenses in this focal length range, Canon’s RF50mm and RF85mm f/1.2 primes, are stunning … but also expensive. As I’m sure any coming RF wide-angle L primes will be, if and when they ever appear!
The cheaper alternative – not the least because you might already own them! – is using adapted EF-mount lenses made for DSLRs, either from Canon or other brands. But in many cases, as I’ve shown, the new RF glass is sharper, especially when on a high-resolution camera such as the Canon R5 I used for all the testing.
And there’s the harsh reality that Canon is discontinuing many EF lenses. You can now buy some only used. For example, the EF135mm f/2 L and EF200mm f/2.8 L are both gone.
Until Canon licenses other companies to issue approved lenses for their RF mount – if that happens at all – our choices for native RF lenses are limited. However, the quality of Canon’s L lenses is superb. I now use these zooms almost exclusively, and financed most of their considerable cost by selling off a ream of older cameras and lenses.
If there’s one lens to buy for most astrophotography, it might be the big RF28-70mm F/2, a zoom lens that comes close to offering it all: flexibility, optical quality and speed. The RF24-70mm F/2.8 is a more affordable choice, though I have not tested one.
If nightscapes are the priority, the RF15-35mm F/2.8 would see a lot of use, as perhaps the only lens you’d need.
Of the trio, the RF70-200mm was the lowest priority on my wish list. But it has proven to be very useful for framing horizon scenes.
The superb optics of these and other new lenses made for mirrorless cameras is one good reason to upgrade from a DSLR to a mirrorless camera, in whatever brand you prefer.
— Alan, September 21, 2022 / © 2022 Alan Dyer / AmazingSky.com
All images are © 2022 by Alan Dyer/AmazingSky.com. Use without permission is prohibited.