


With the October 14, 2023 annular eclipse of the Sun only weeks or days away, it’s time to test your equipment, to ensure success on eclipse day.
On October 14 everyone in North America, Central America, and much of South America can see an eclipse of the Sun, as shown in the map below, courtesy GreatAmericanEclipse.com. The closer you are to the “path of annularity” drawn in yellow here, the more of the Sun you see covered by the Moon.

However, for the best experience, plan to be in the central path of the Moon’s shadow. In North America, as shown in the map below, that path crosses the western states, passing over the scenic landscapes of the American southwest.

Those in the main path will see an annular eclipse – the Moon will travel across the center of the Sun’s disk, but won’t be large enough to completely cover the Sun. The result, as shown below, is that the Sun will be reduced to a thin ring or “annulus” of light at mid-eclipse, but only for a few minutes.
For details of when the eclipse occurs and how long the eclipse lasts at your site, see the interactive map at Fred Espenak’s site at https://www.eclipsewise.com/solar/SEgmapx/2001-2100/SE2023Oct14Agmapx.html
GEAR AND FILTERS

To view or photograph the annular eclipse well, you need to use a long telephoto lens or a telescope. A focal length of 400mm or longer is required to make the Sun’s and Moon’s disks large enough to show detail well.
As I show above, the lens or telescope can be on a solid tripod, or on an untracked alt-azimuth telescope mount, or on a mount that can track the sky, such as the equatorial mount on the right above. All will work fine, as exposures will always be short, just a fraction of a second.
I go into the many options for photographing the eclipse in my ebook, linked to at right. It contains thorough tutorials on how to shoot the eclipses in 2023 and 2024. In this blog I’m focusing on extolling the need to practice now, with whatever gear you own and intend to use for the eclipse.
No matter what optics you plan to use, they must be equipped with a safe solar filter mounted over the front of the optics. For the October 14 eclipse, even from sites in the path of annularity, a filter must be used at all times. It will never be safe to look at or shoot the Sun without a filter.
And it must be a filter dense enough and designed for the purpose of aiming at the Sun. Do not use stacked neutral density filters or other jury-rigged arrangements, as other filters can transmit ultraviolet or infrared light that can still damage eyes and cameras.
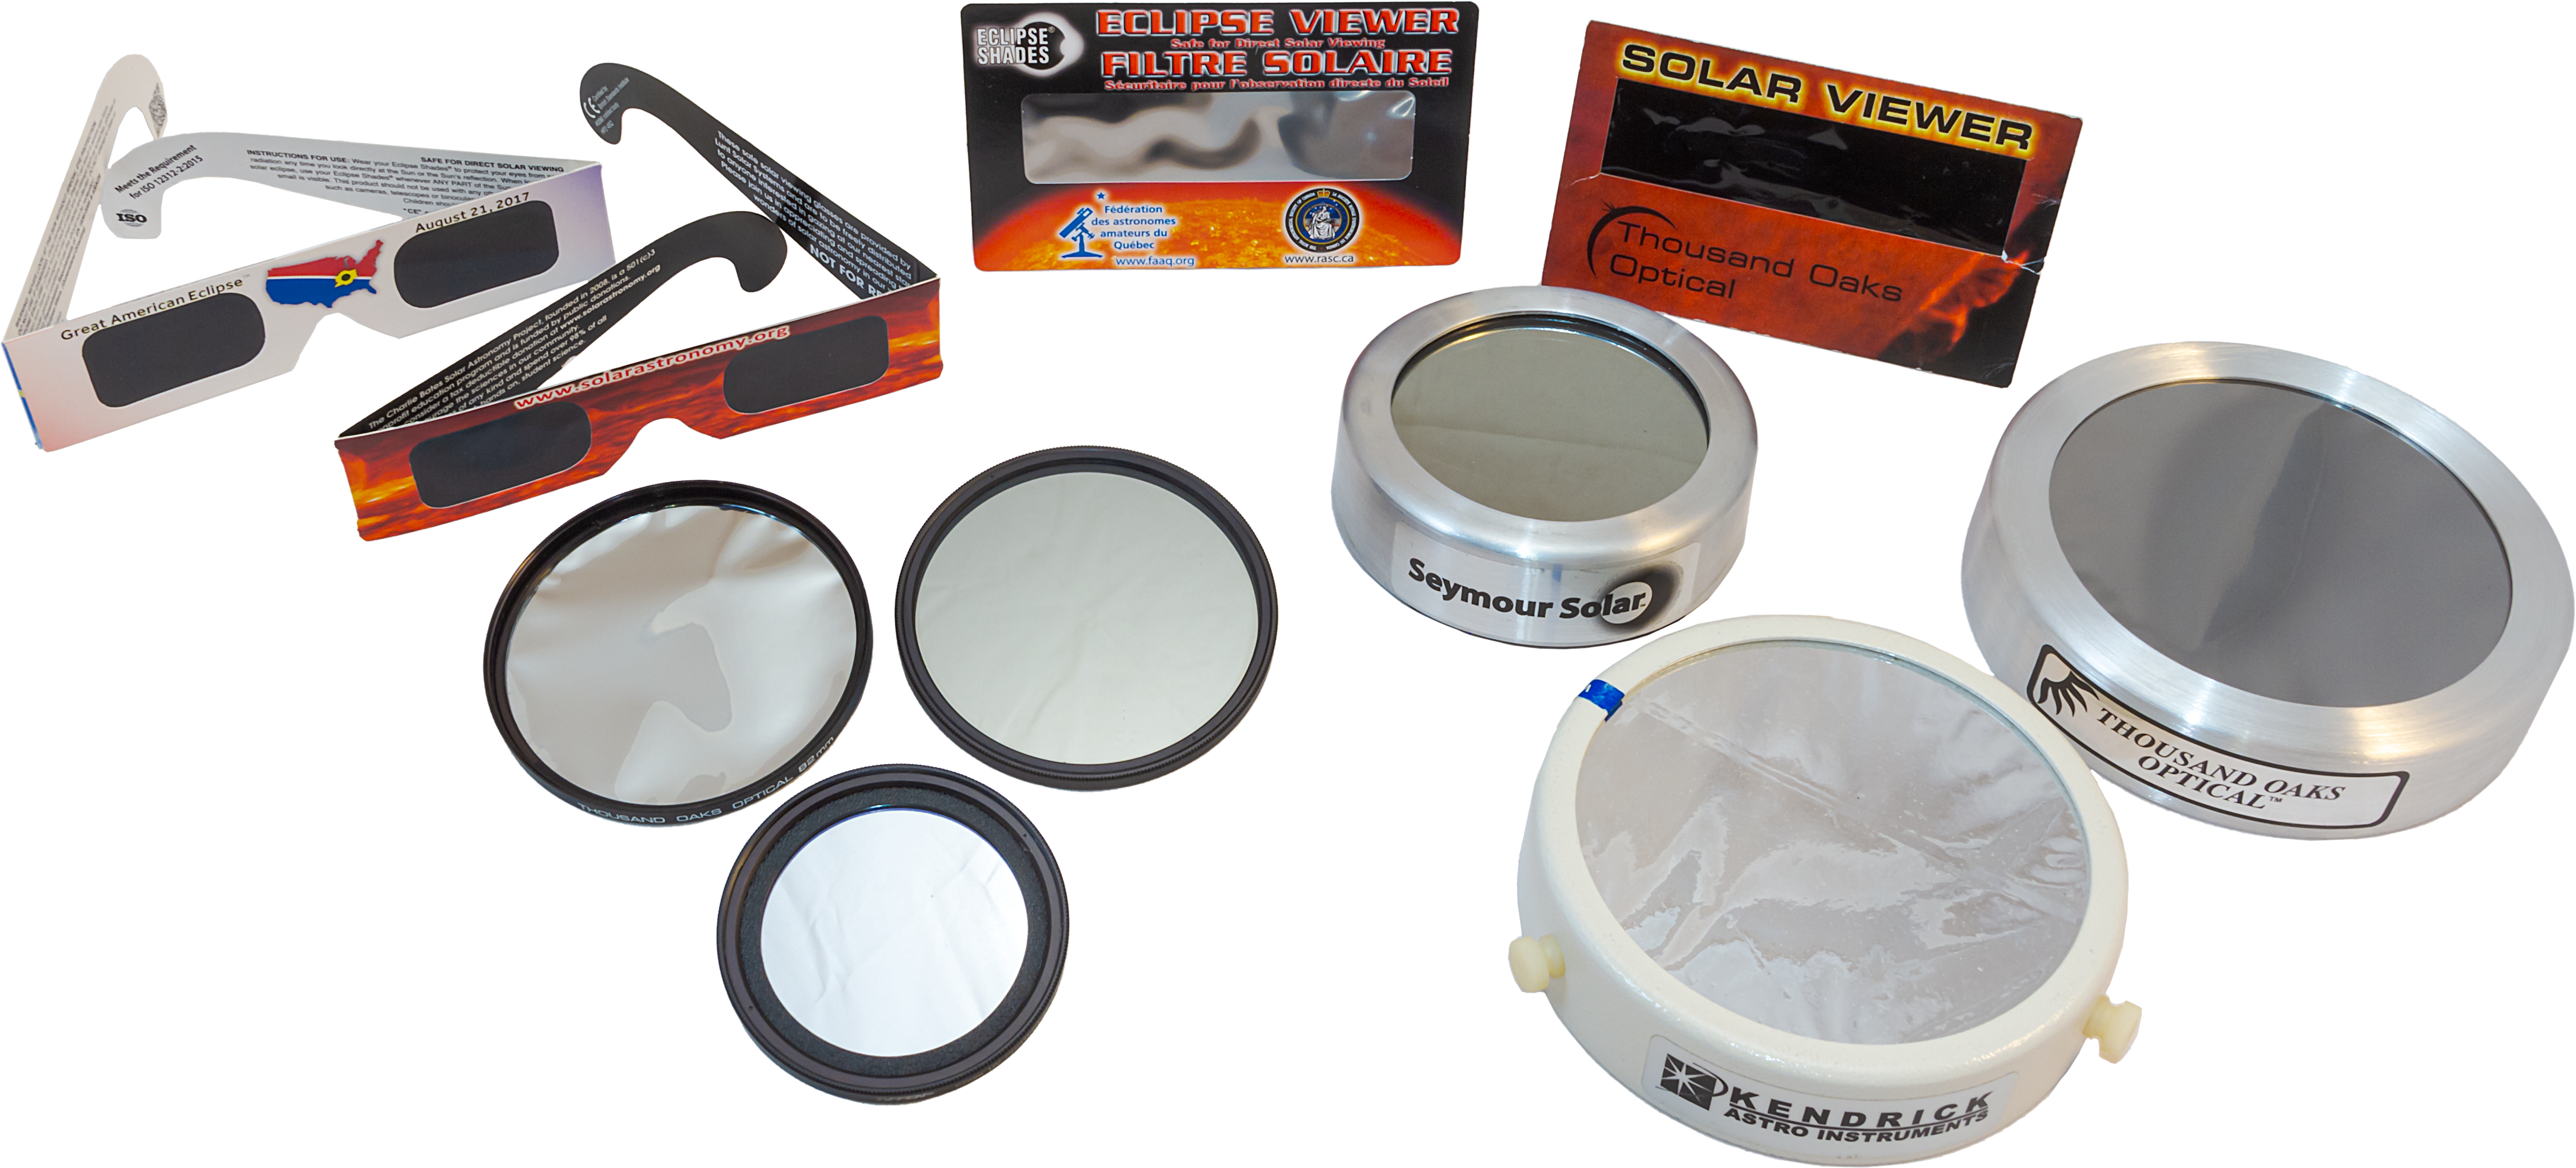
If you do not have a proper filter for your lens or telescope, get one now. Order from reputable suppliers such as AstroZap, Baader Planetarium, Kendrick Astro Instruments, Seymour Solar, Thousand Oaks Optical, or from the makers of telescopes and their dealers.
The eyeglass or handheld style of solar filters are good for unaided eye views, and most are made by American Paper Optics or Rainbow Symphony. A list of recommended filter suppliers is available at the American Astronomical Society’s eclipse website at https://eclipse.aas.org/eye-safety. In addition, many astronomy clubs, planetariums and science centers will offer safe eyeglass-style filters they purchased in bulk from one of the suppliers above.
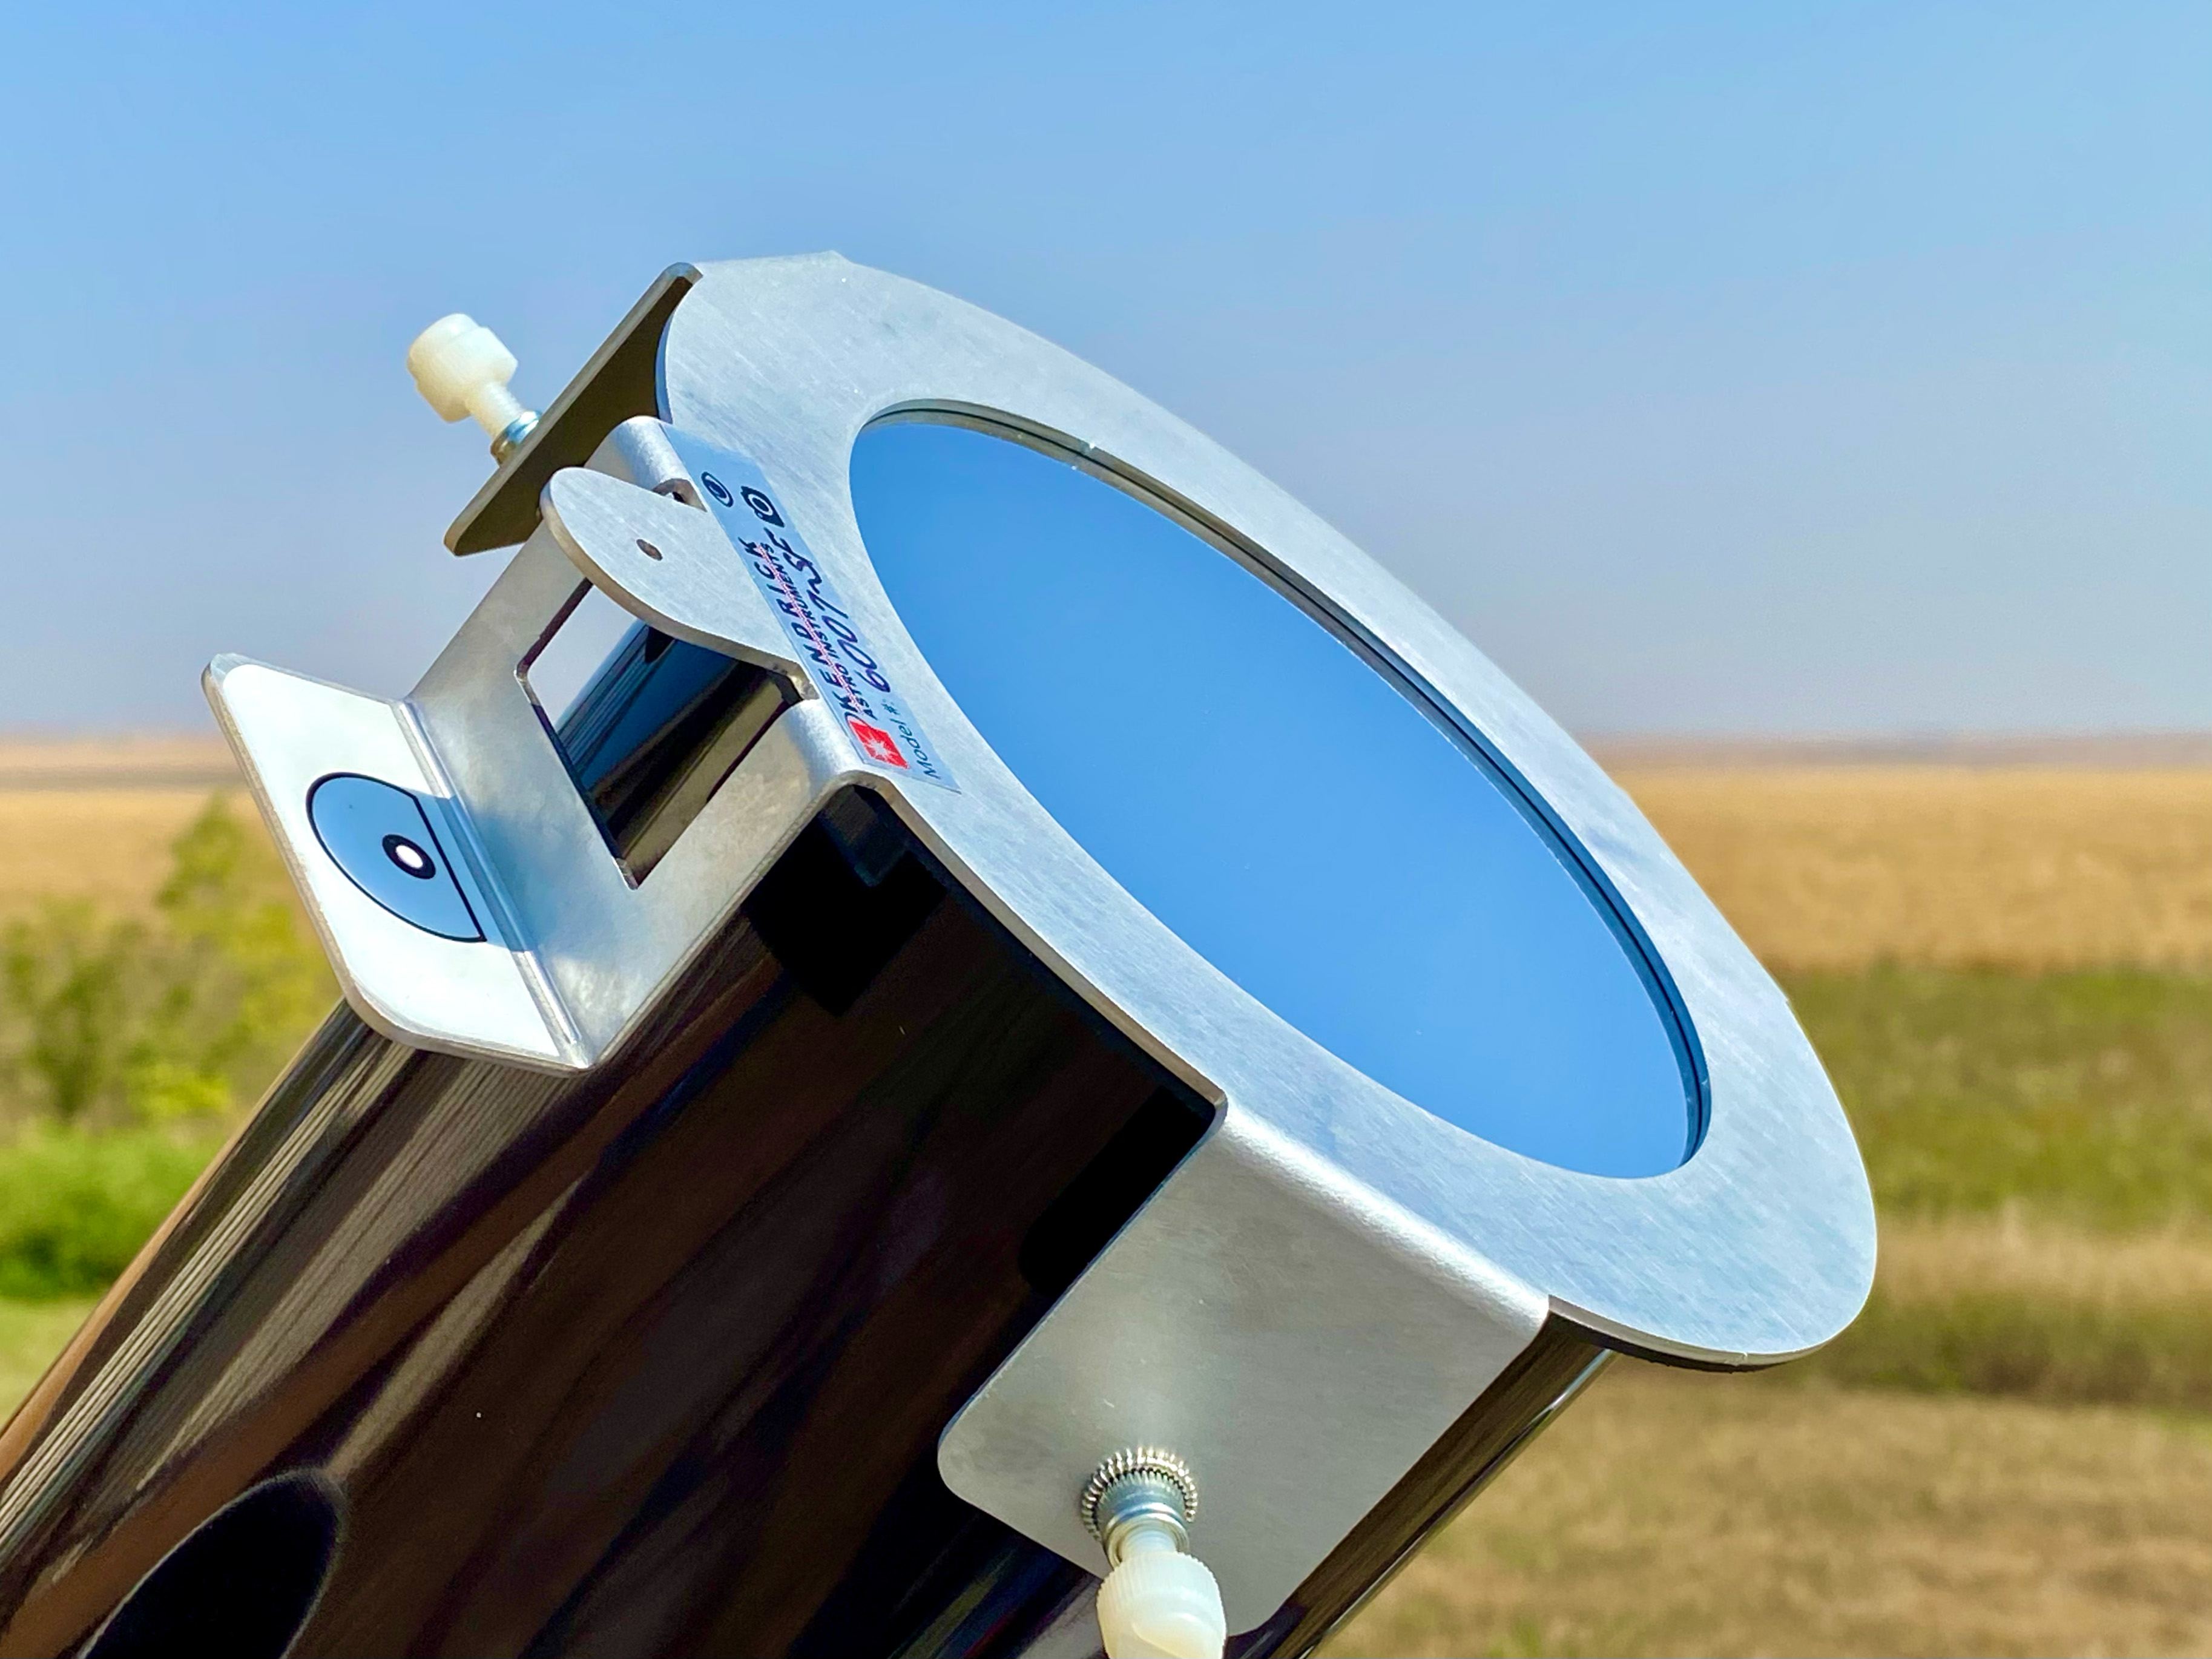
However, for photography through a lens or telescope you need a filter that either screws onto the lens or clamps over the telescope, as I show below.

In my testing, I’ve found that the aluminized Mylar® (or polyethylene) type of filter – one that looks like a silvery sheet – provides the best sharpness and contrast, despite the wrinkles. The most popular type is made by Baader Planetarium, and sold by them or by other dealers and resellers.
While metal-coated glass filters also work very well, in recent years they have become hard to find, with past suppliers of glass filters switching to black polymer plastic material. While safe and good for naked-eye views, I’ve found the image through black polymer filters can be soft and surrounded by lots of light scatter when used for photography at long focal lengths.
TESTING, TESTING!
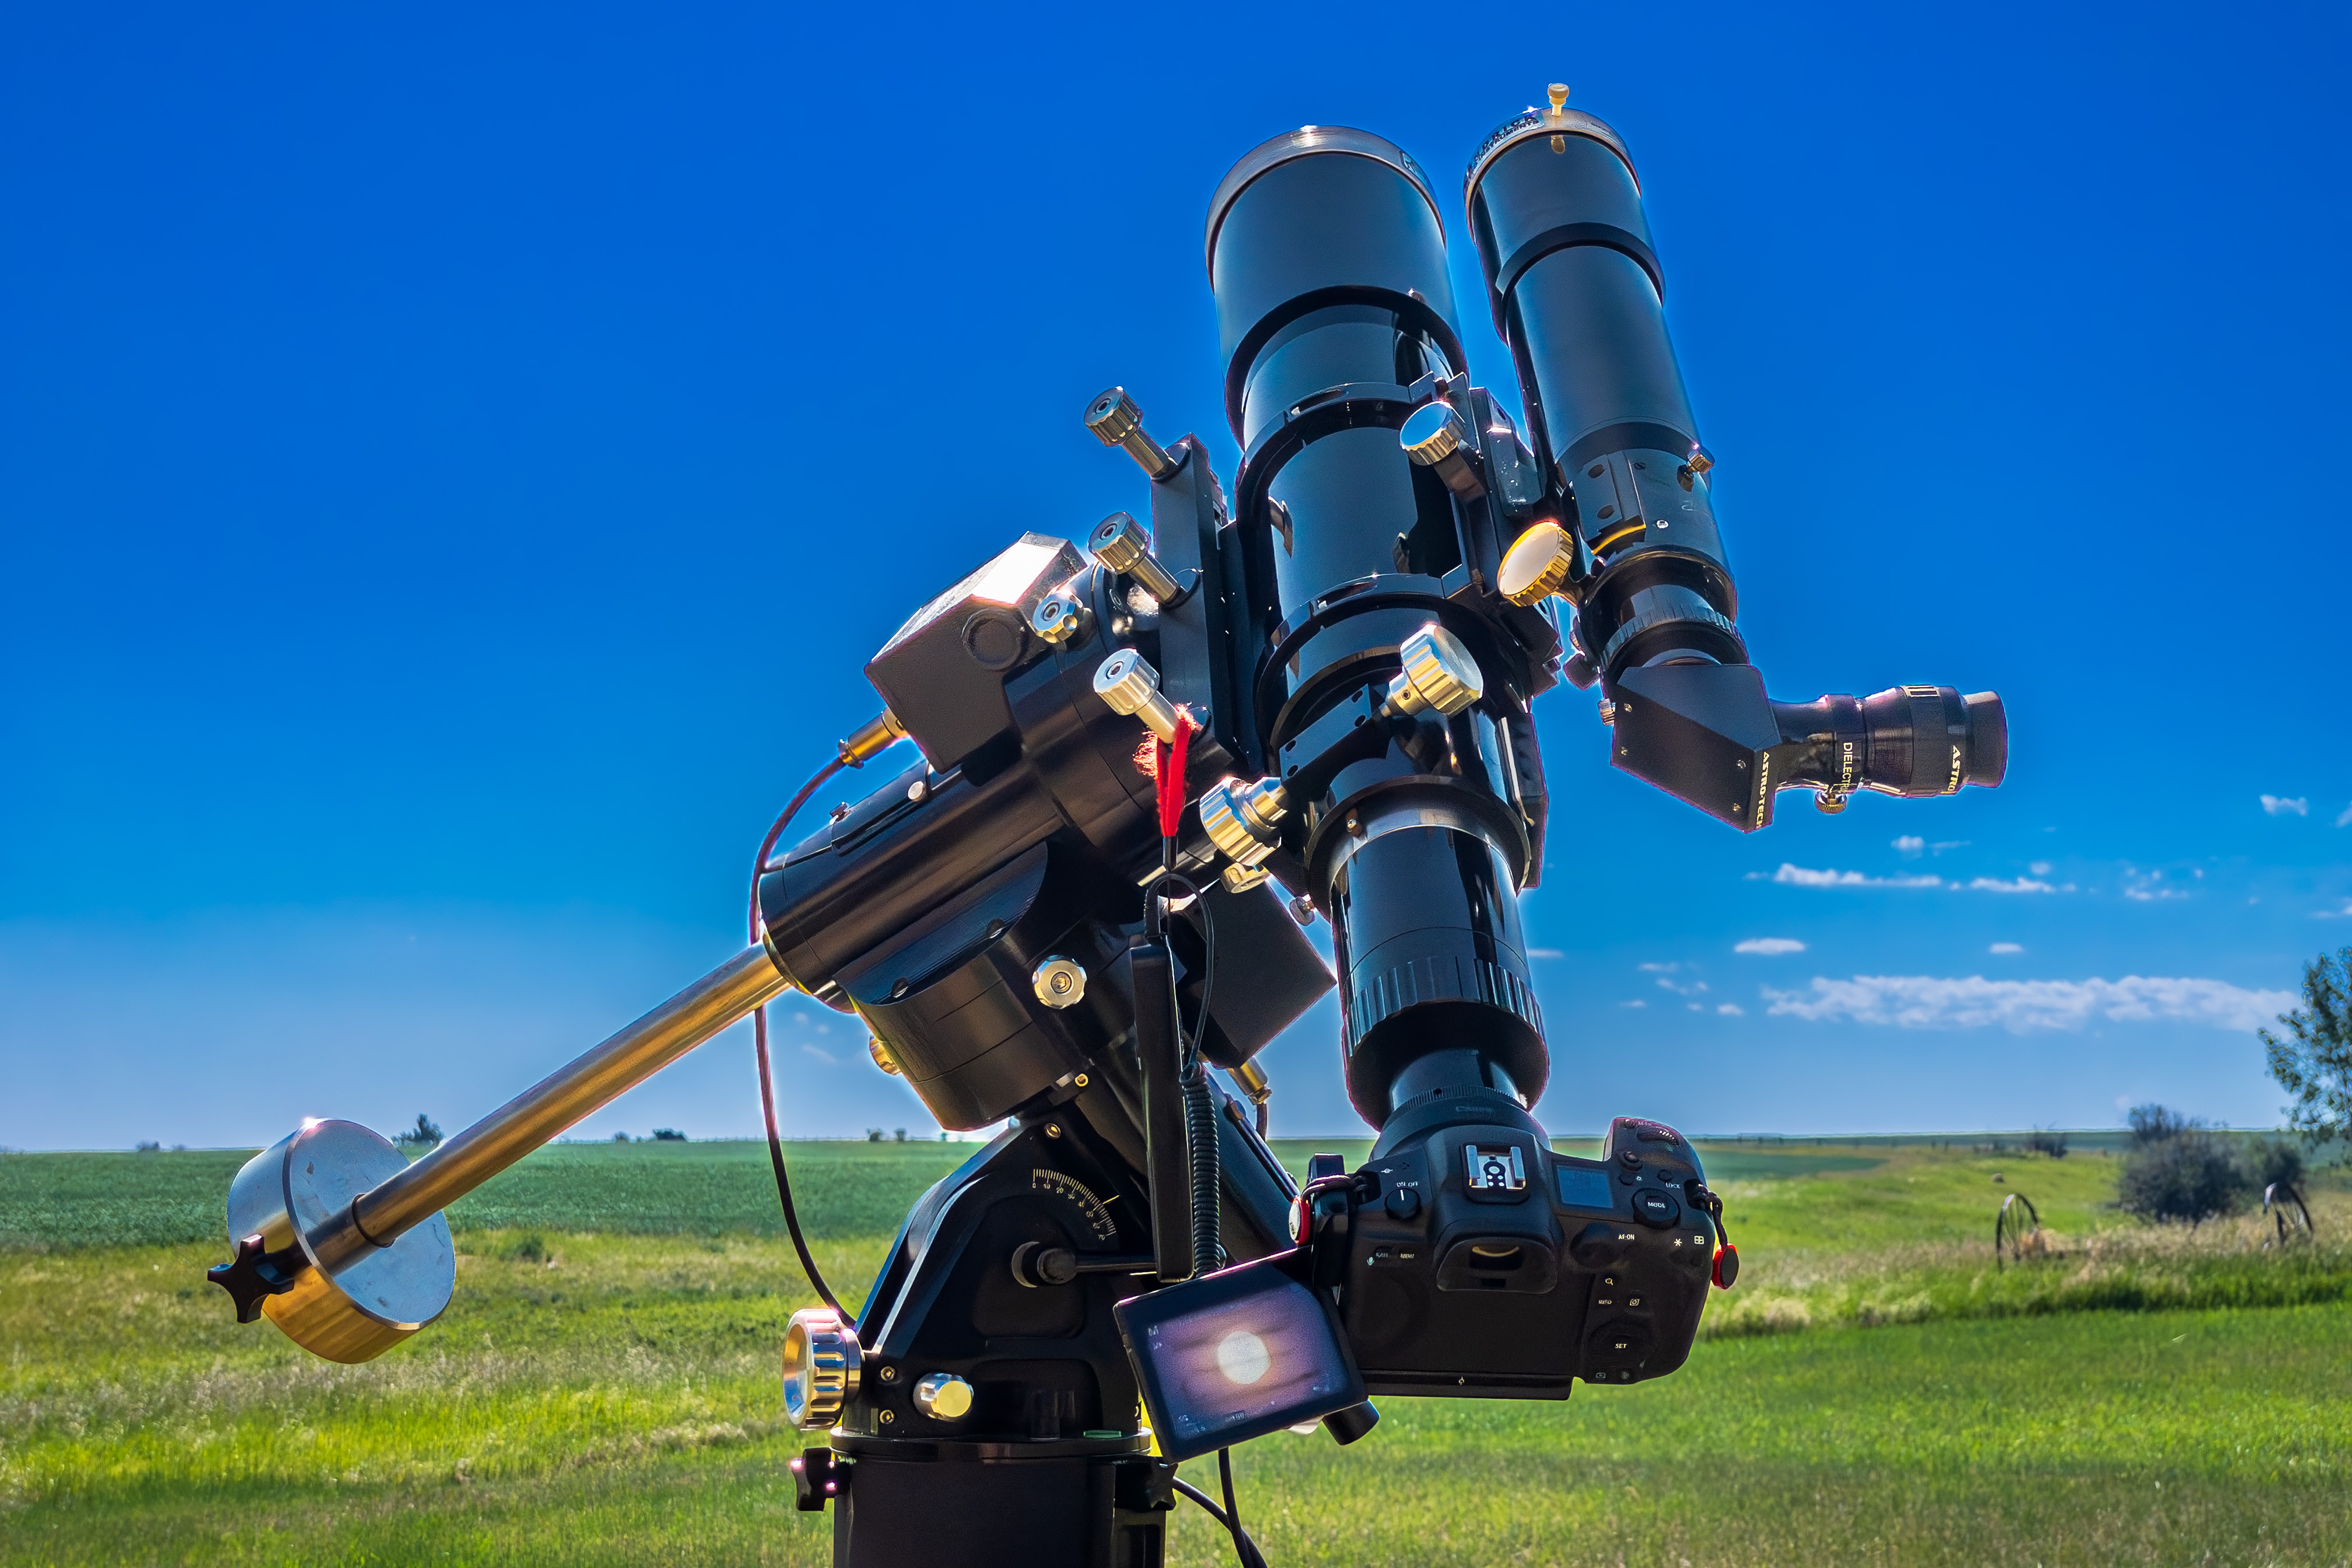
Once properly equipped, test your setup as soon as possible on the Sun. In the rig above I have piggybacked a smaller telescope onto the larger telescope, both with filters, the latter to shoot through while I look through the smaller scope, good for watching the few minutes of annularity.
The key things to test for are:
- Finding the Sun (not as easy as you might think!)
- Focusing on the Sun (also critical and can be tough – focus on the edge or on sunspots)
- Checking for any focus shift over a couple of hours time
- Determining the correct exposures with your filter
- Checking for any vibration that can blur the image
- Operating your camera to change settings, without vibration
- Checking to see how long batteries will last
- Seeing how much the Sun moves across the frame during a few minutes time
- Following the Sun or keeping it centered
- Making a checklist of the gear you need on eclipse day, plus any backups such as a spare battery, and tools for last-minute fixes or adjustments.
You want to test how solid your setup is when aimed up. Your super-telephoto lens and tripod that work great for birds and wildlife might not be as well-suited as you thought when aimed high at the Sun. Best to find out now about any shortcomings in your gear.

Run through a set of exposures to see what produces the best result with your optics and filter. Even with the October 14 eclipse underway, the Sun will be a similar brightness as it is on any normal day.
At best, on eclipse day you might wish to shoot a bracketed set of exposures throughout the eclipse, perhaps a frame taken at your pre-determined “best” exposure, and two others: at one stop and two stops overexposed, to account for the slightly dimmer solar disk when it is mostly covered by the Moon in a deep partial or annular phase.
Alter exposures by changing shutter speeds, not aperture or ISO. Keep the ISO speed low, and the aperture either wide open or at some middle setting such as f/5.6 for the sharpest images.
But also check what exposures might be needed when shooting the Sun through thin clouds. Any cloud or haze will require longer exposures. And you might need to change shutter speeds quickly if the Sun goes into and out of clouds. Practice that – without introducing vibration from handling the camera.
Leave the rig for a couple of hours to test how the focus might shift, as it is certain to do, as the temperature changes through the morning or afternoon. Practice touching up the focus. People fuss over the “best” exposure, when it is poor focus that is the common spoiler of eclipse photos.
You can find more tips for practicing for eclipse close-ups at a blog I wrote for AstronomyByNight.ca.
WIDE-FIELD OPTIONS

An alternative way to shoot the eclipse is with a wide-angle lens, but also equipped with a solar filter, as shown above. Frame the scene to include the expected path of the Sun, determined by using planetarium software such as SkySafari or Stellarium (my ebook also has charts). Take images every minute or so, then layer those onto an unfiltered image of the sky and foreground taken either before the Sun enters the frame or after it leaves it.

Practice that method now, to shoot images for a test composition as I show above. It layers filtered images taken at 5-minute intervals onto an unfiltered background sky image taken after the Sun left the frame.
However, composite images can be complex to plan and execute.

A simpler method for grabbing a souvenir eclipse photo is to simply hold a handheld solar filter in front of the lens to dim the Sun but leave the rest of the scene visible.
Again, you can practice that now to see what exposure might be best. For this type of shot I find black polymer filters best as they are less reflective than the Mylar type.
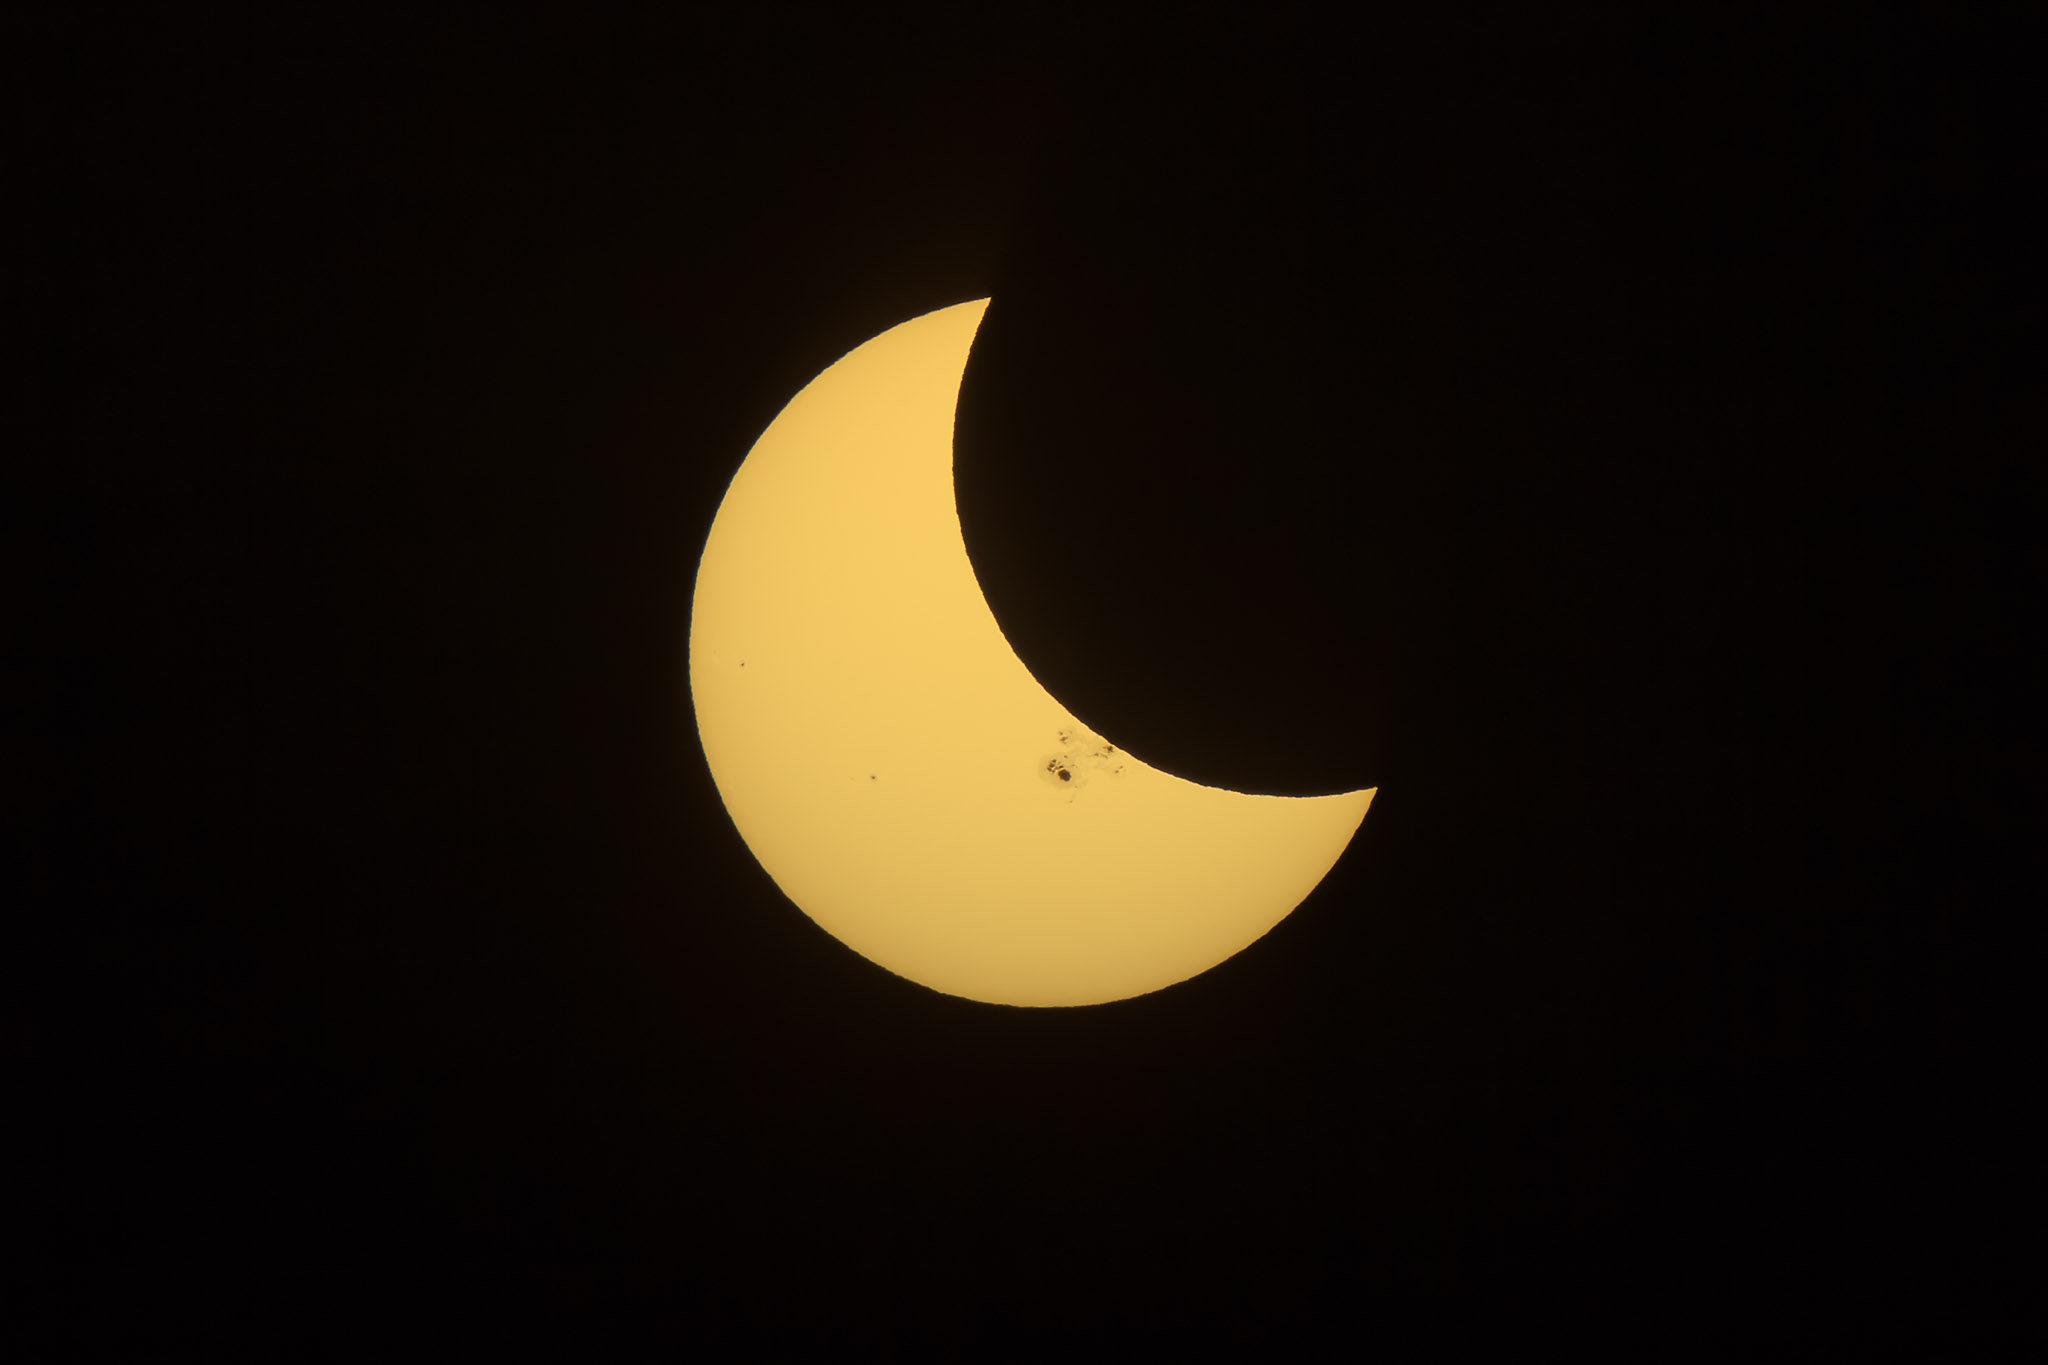
That method, or using a long lens or telescope will work well on eclipse day no matter where you are, either in the path or elsewhere enjoying the partial eclipse, as in the example image below, also from October 23, 2014, shot with my small scope at lower left in the image above.
No matter the method and gear you use, success on eclipse day will require practicing beforehand to learn what can go wrong, and what works best for the setup you plan to use. Never assume something will work!
Clear skies on October 14! The annular eclipse that day will serve as a great dress rehearsal for the big eclipse to come – the total eclipse of the Sun on April 8, 2024. That’s the event you really want to get right!
– Alan, September 5, 2023
(© 2023 Alan Dyer/AmazingSky.com)

HI. I have purchased the book and have a question. I will be near Albuquerque, New Mexico. I am looking at page 87 about framing the eclipse in Albuquerque and your chart shows a 35mm lens on a full frame camera will capture the eclipse. However, when I look up the field of view of a 35mm lens on a full frame camera, it comes out to about 37.85 degrees by 54.43 degrees. Although the height is adequate to capture the latter phases of the eclipse, the Sun covers a greater horizontal distance than this lens covers while your chart shows it captures the entire sequence…am I missing something? Been trying to figure this out for a while and can’t make the numbers work they way you do.
Thanks for any further insight you can provide.
Yes, that is correct and the eclipse images show Suns from 84 minutes before 2nd contact until 84 minutes after 3rd contact, so not quite the entire partial phase. So a 35mm lens is a bit too narrow. I have amended the text and captions. Thanks!
Thank you Alan for the primer and safety tips. I’ve purchased your eclipse photography ebook and found it to be very helpful.