Time-Lapse – Alberta Skies 2013


It was a good year for time-lapse photography at home. Here’s my compilation of Alberta time-lapses in a 3-minute music video.

For a year-end look back at 2013 I assembled these highlights of my year of shooting time-lapse movies of the Alberta sky, by day and night. 

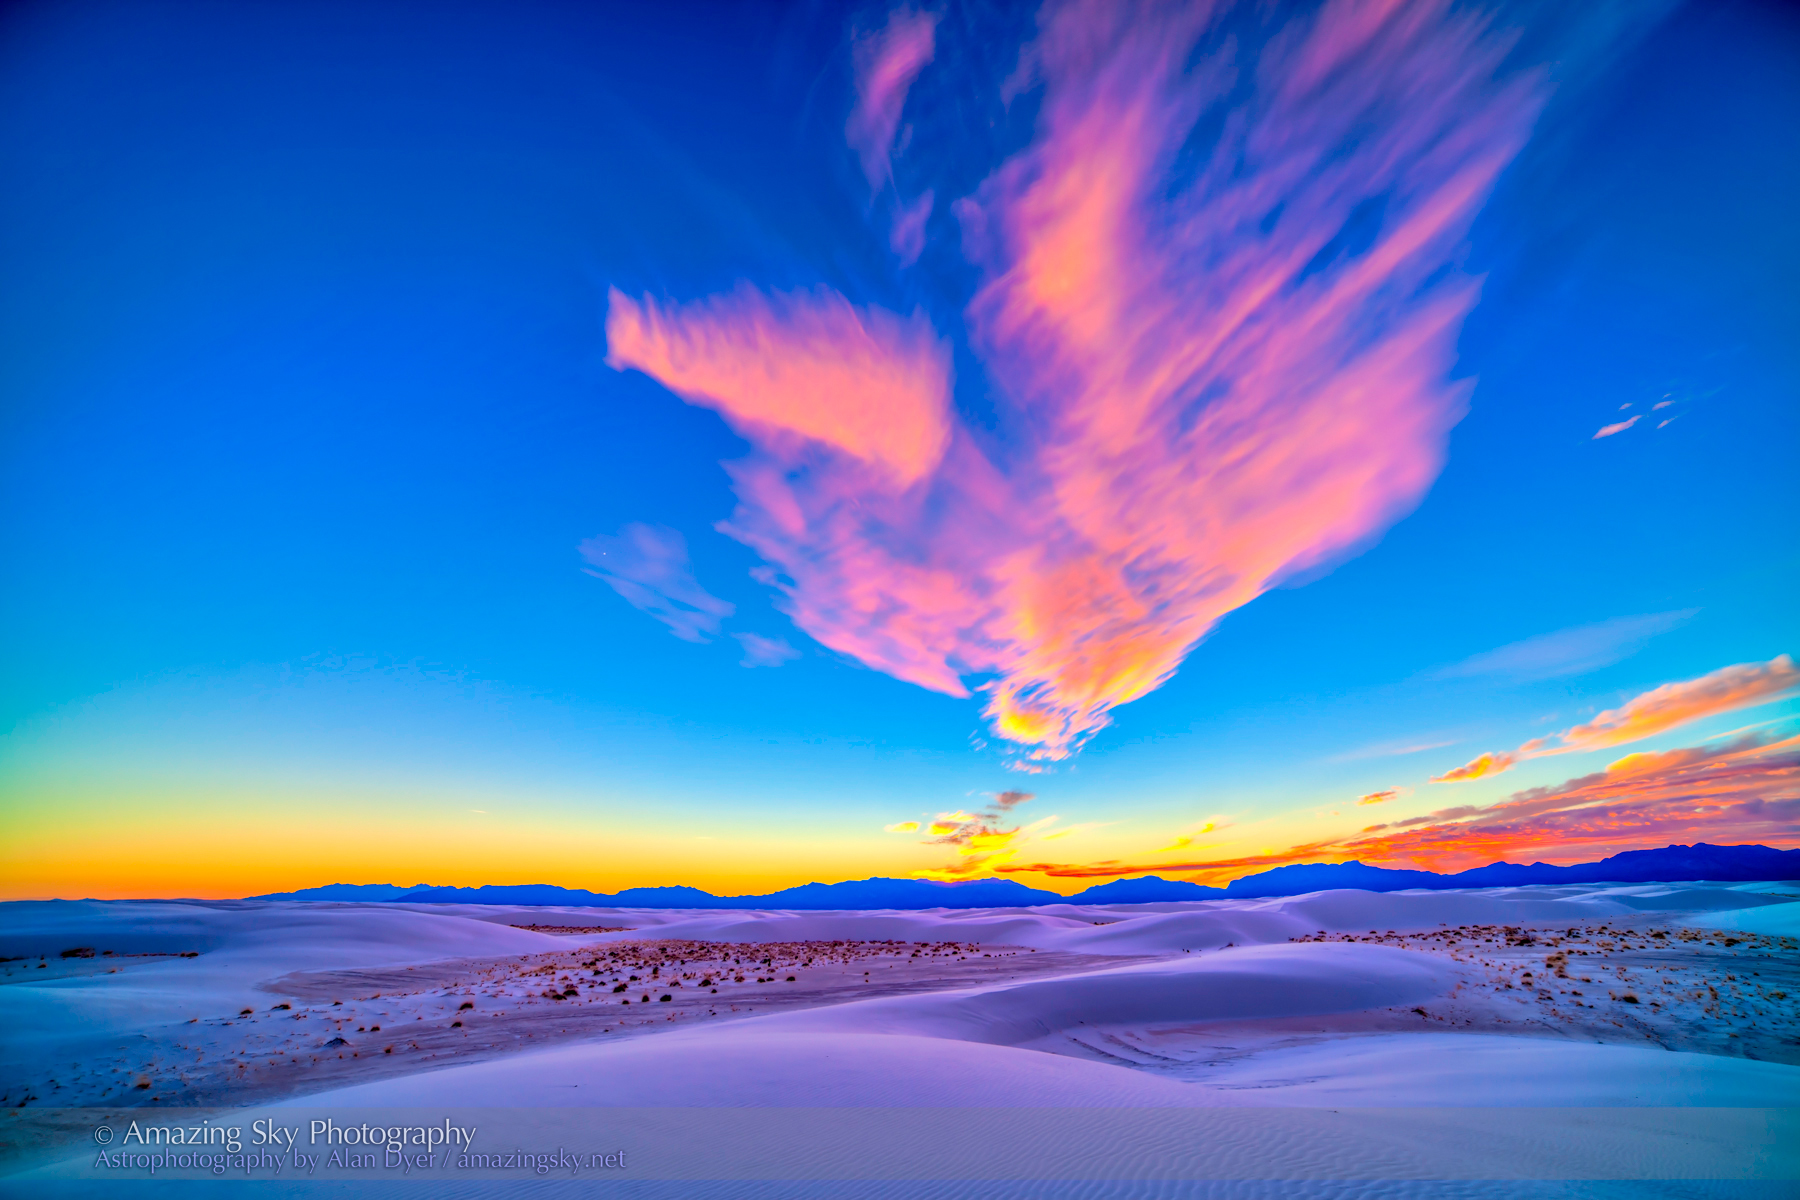
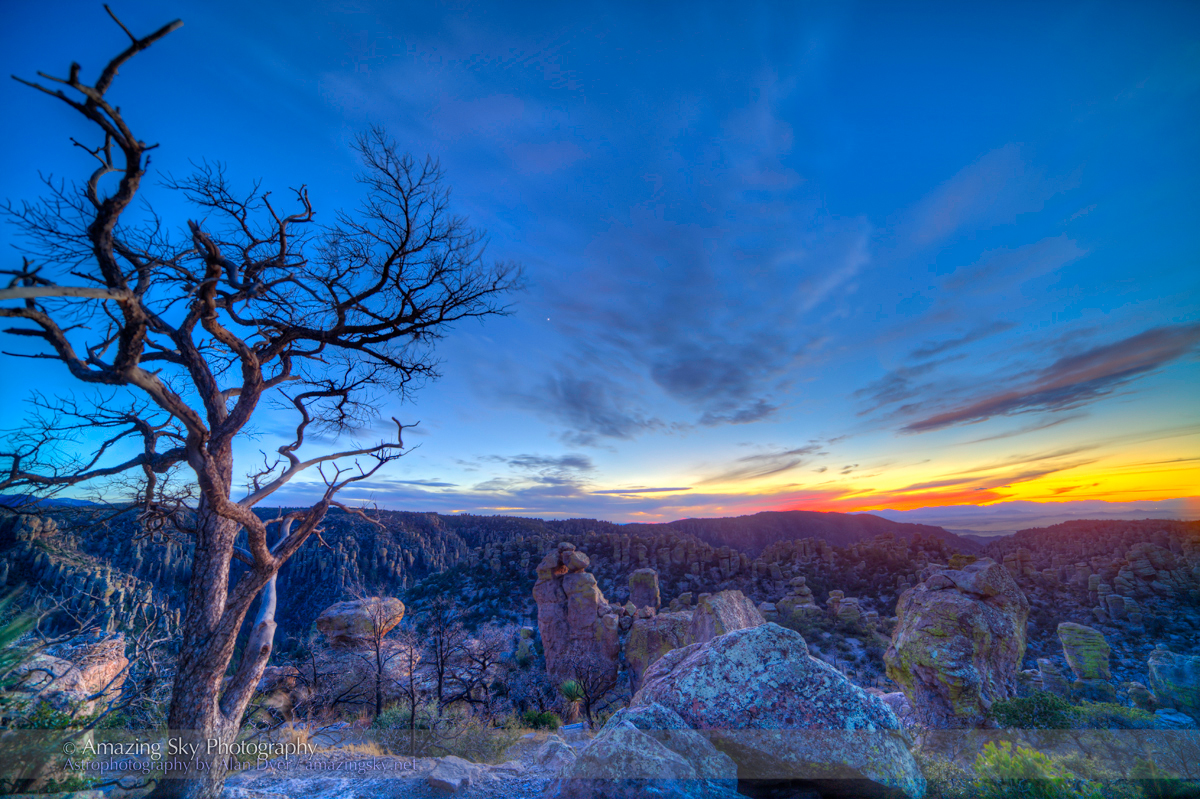
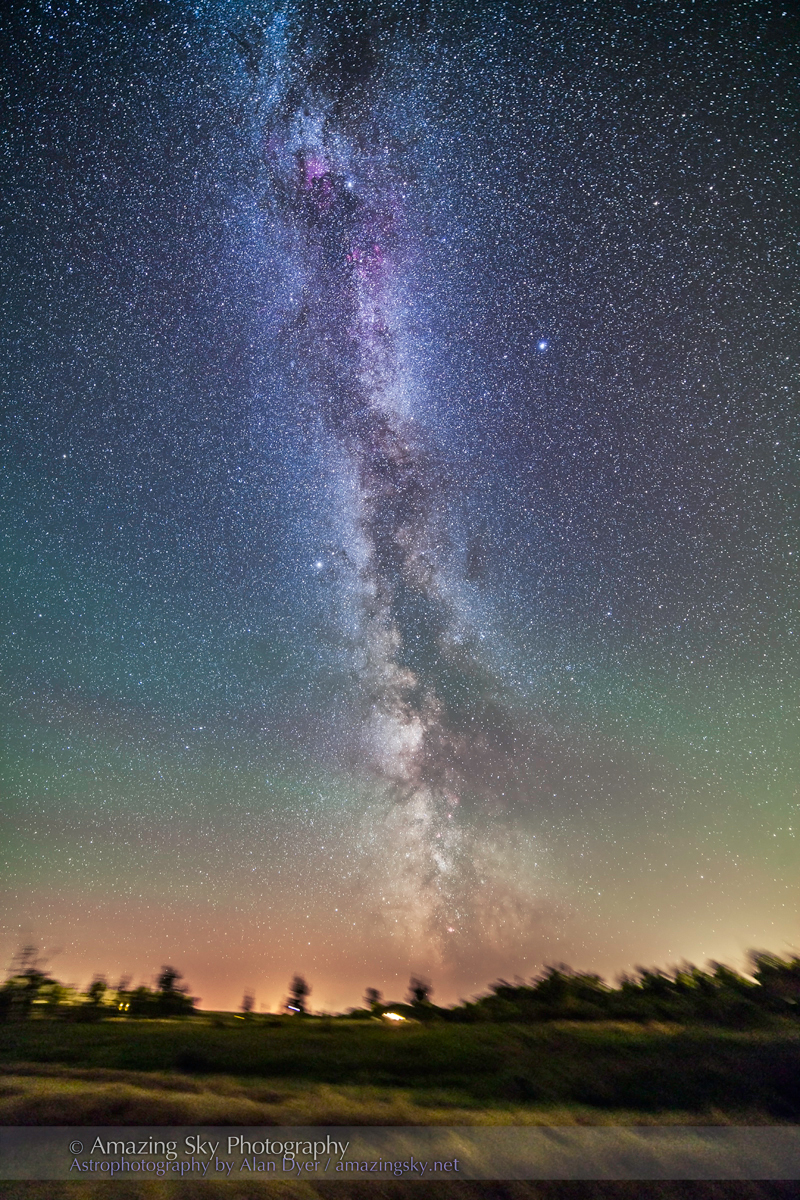
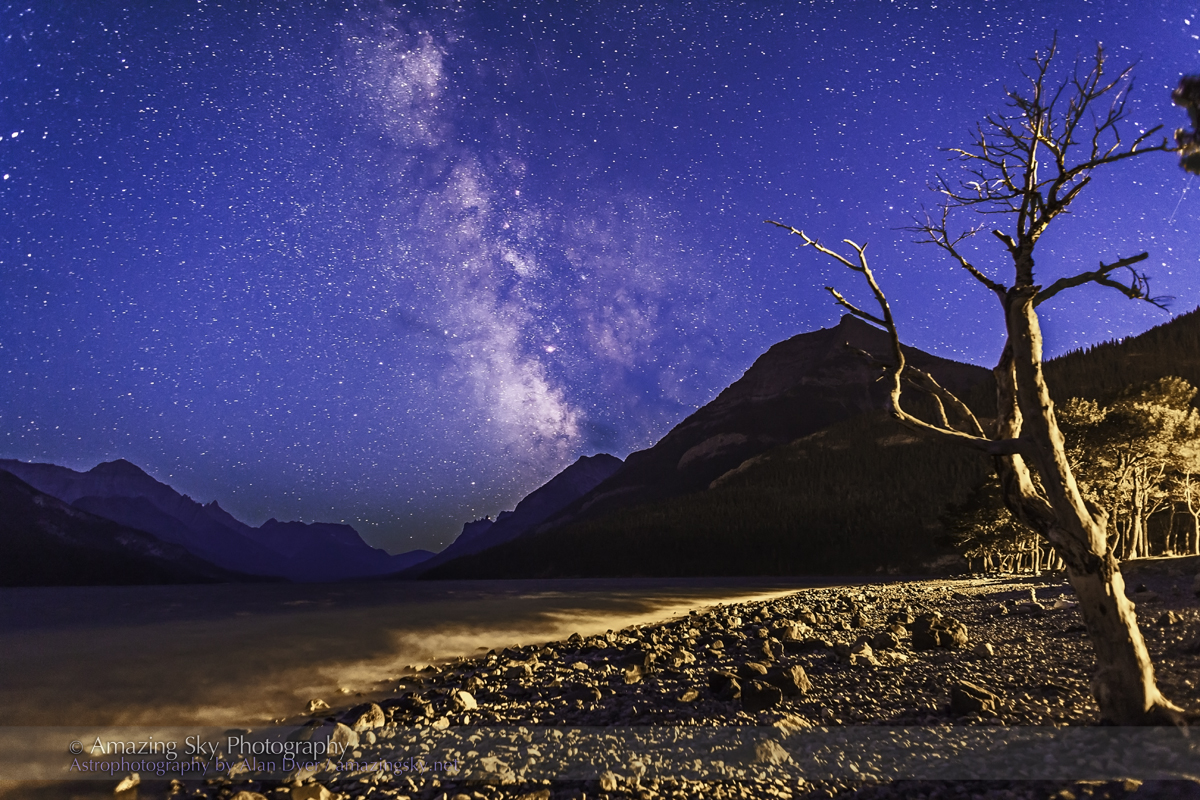
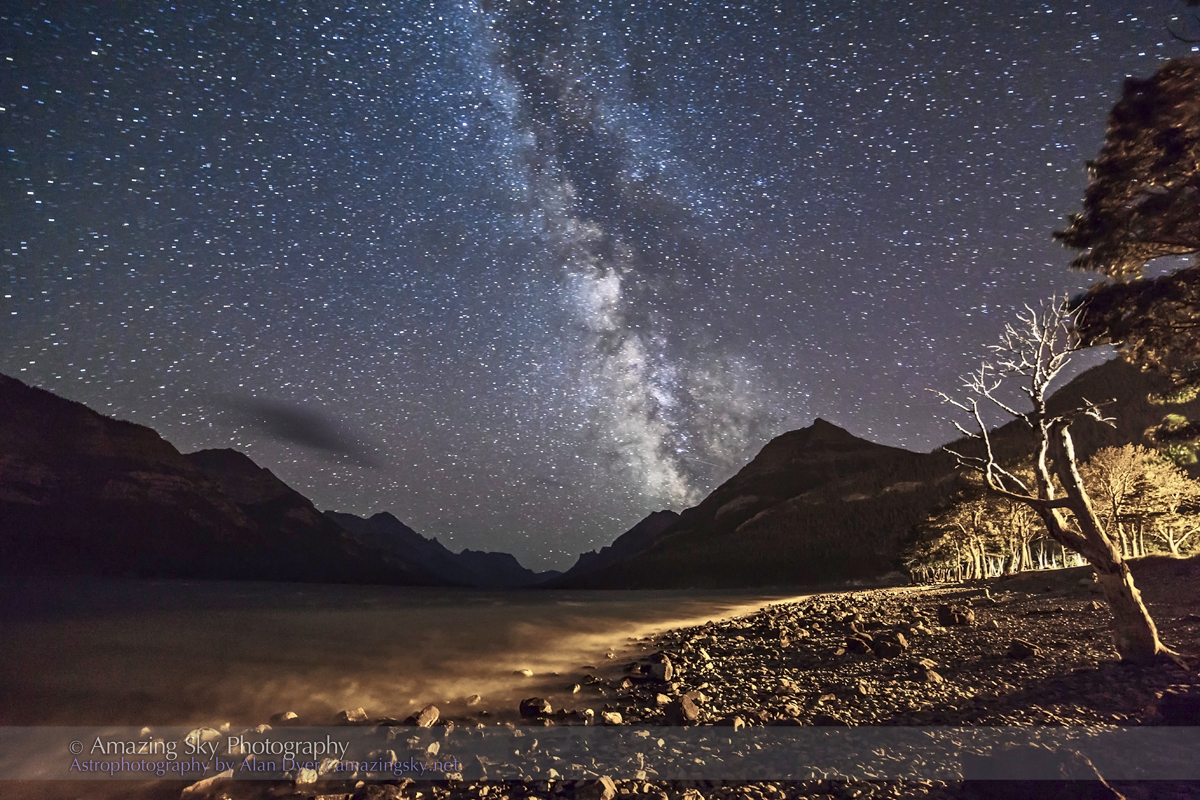
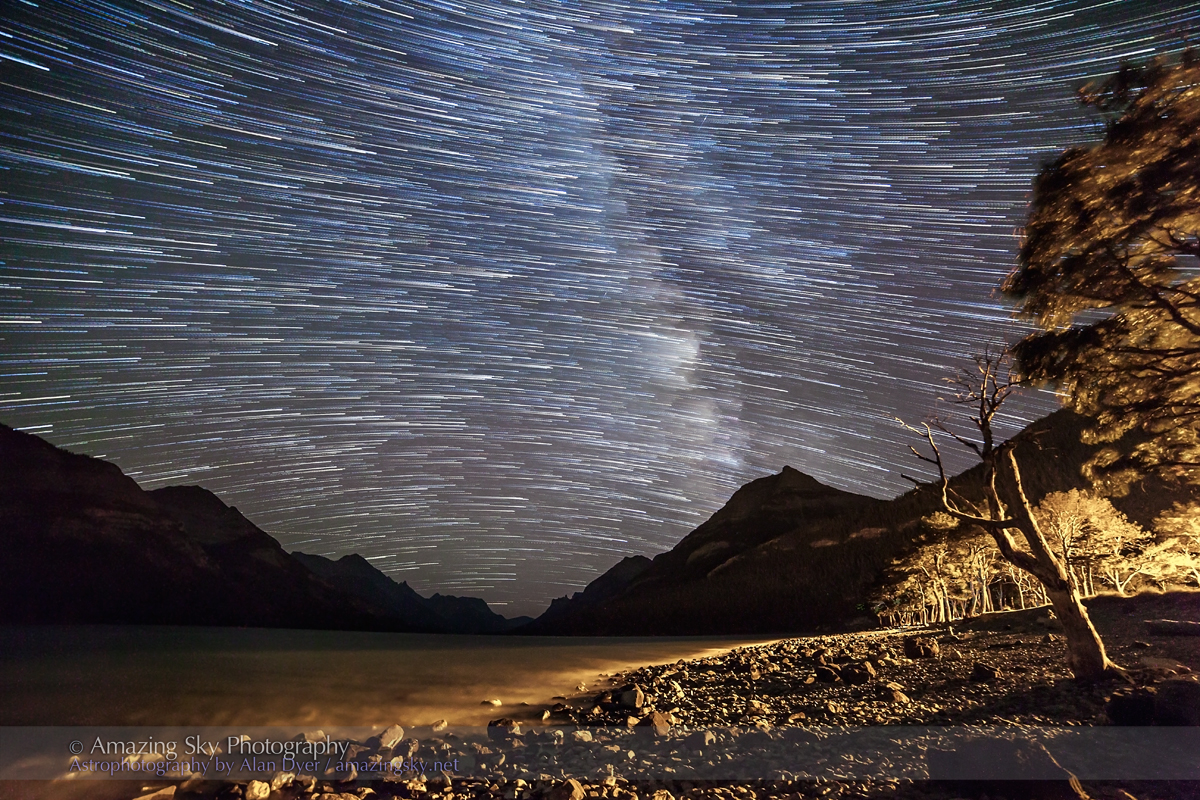
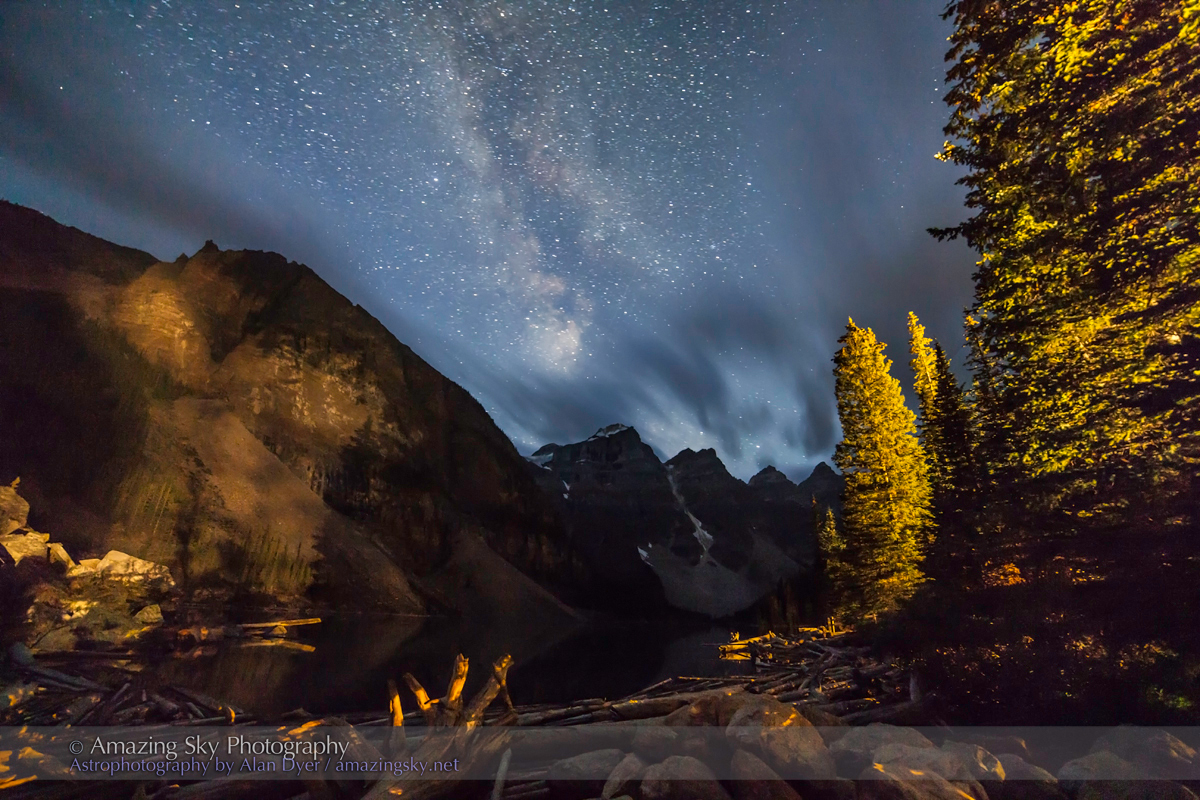
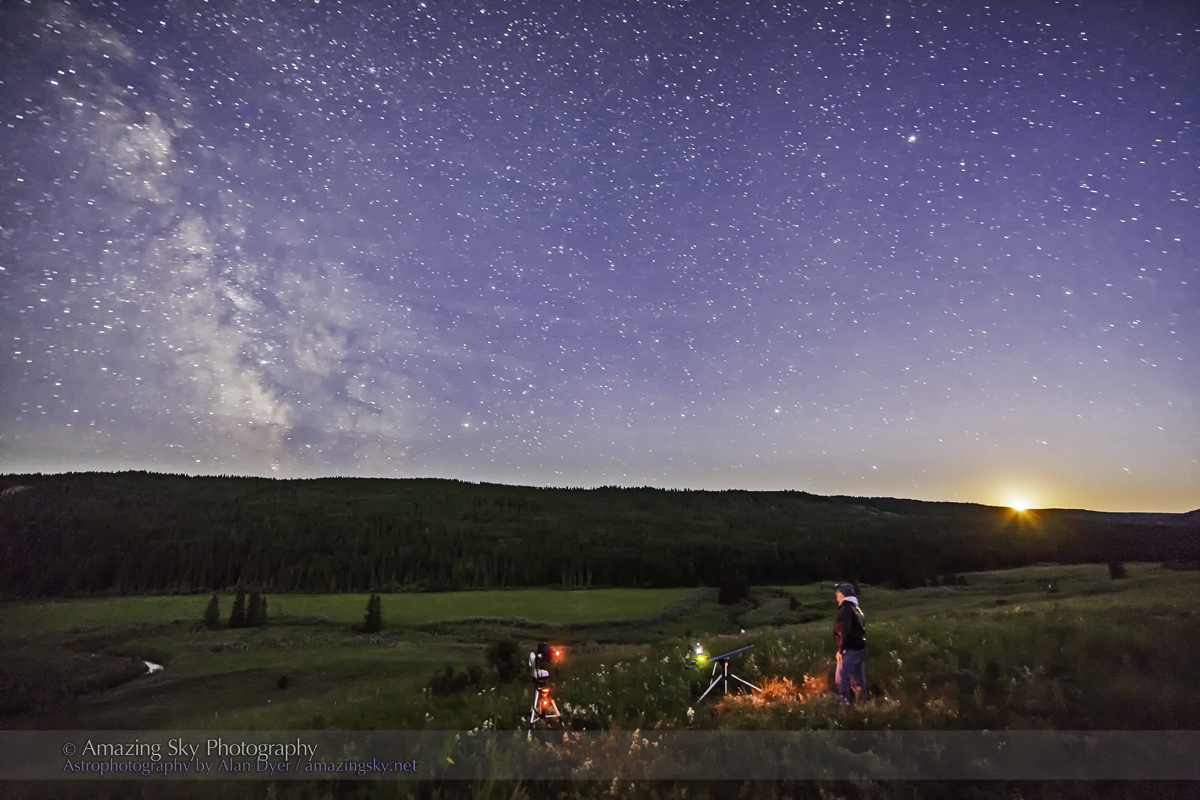
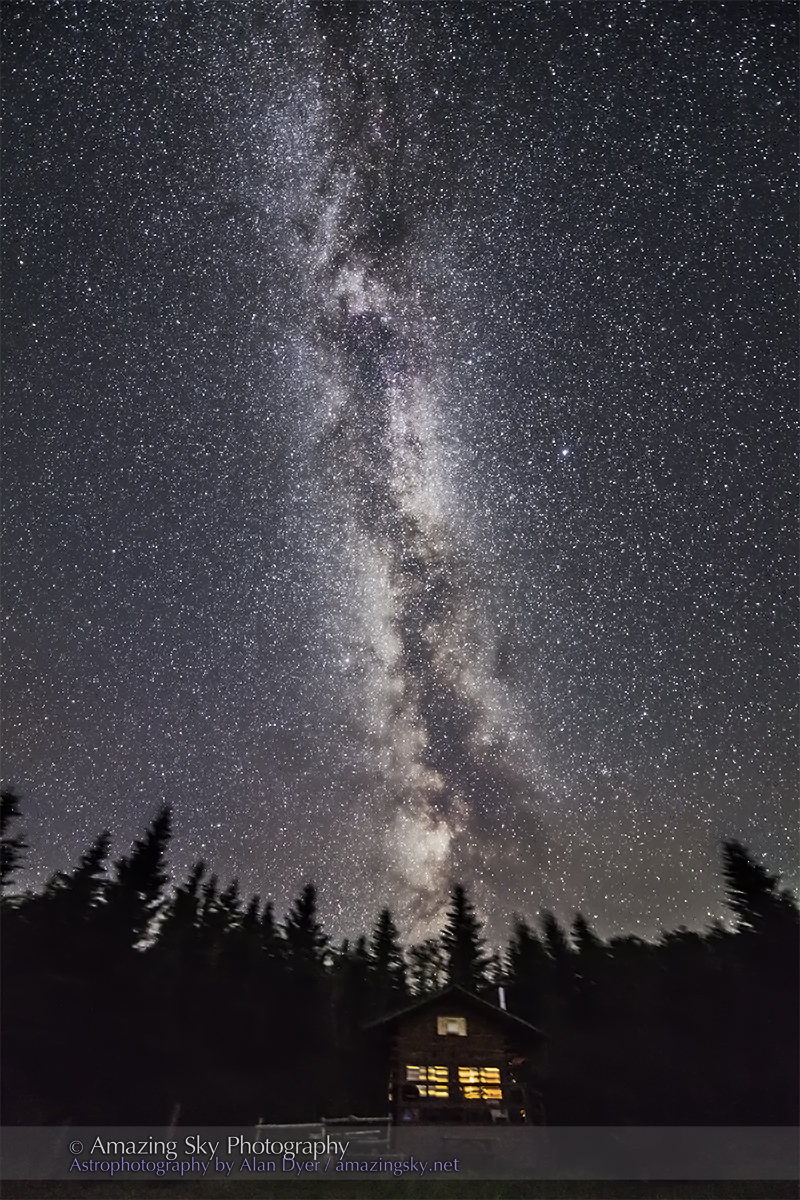
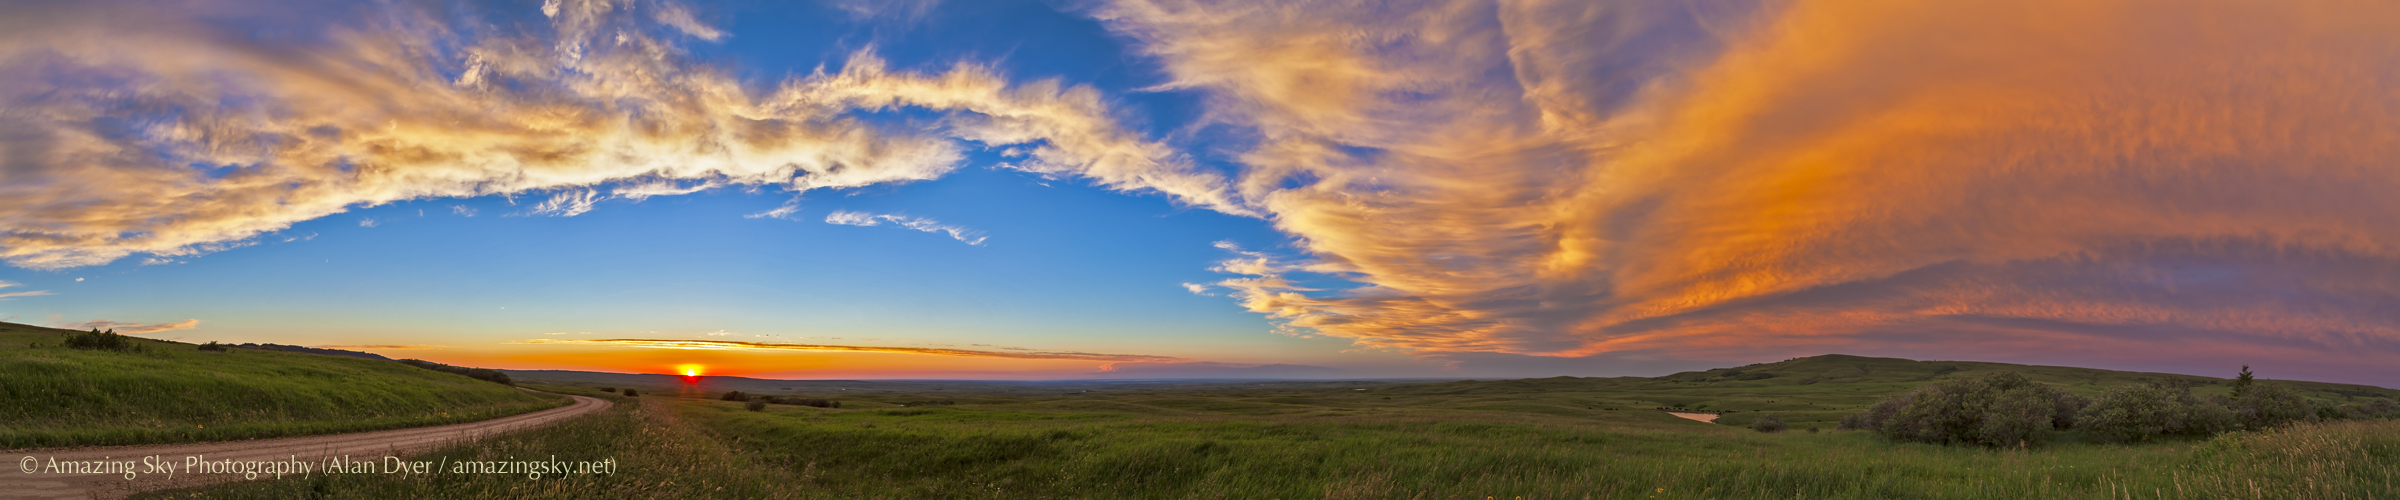
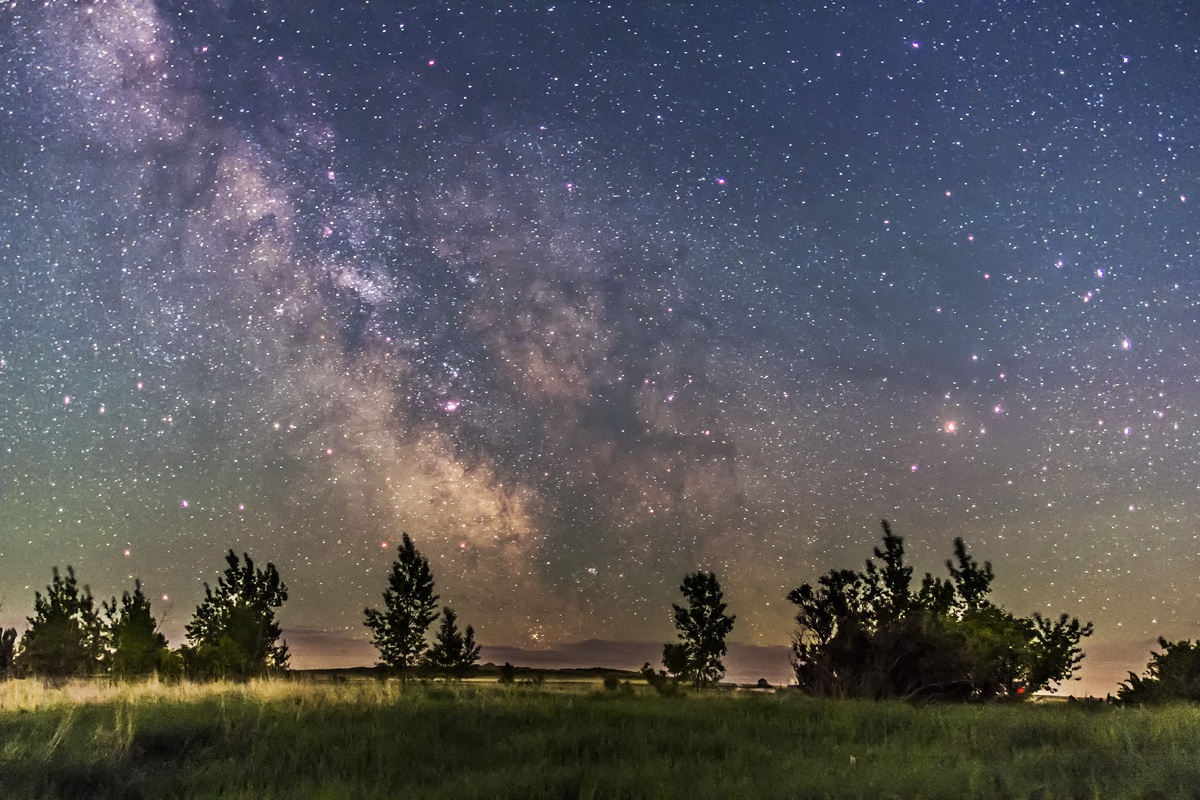
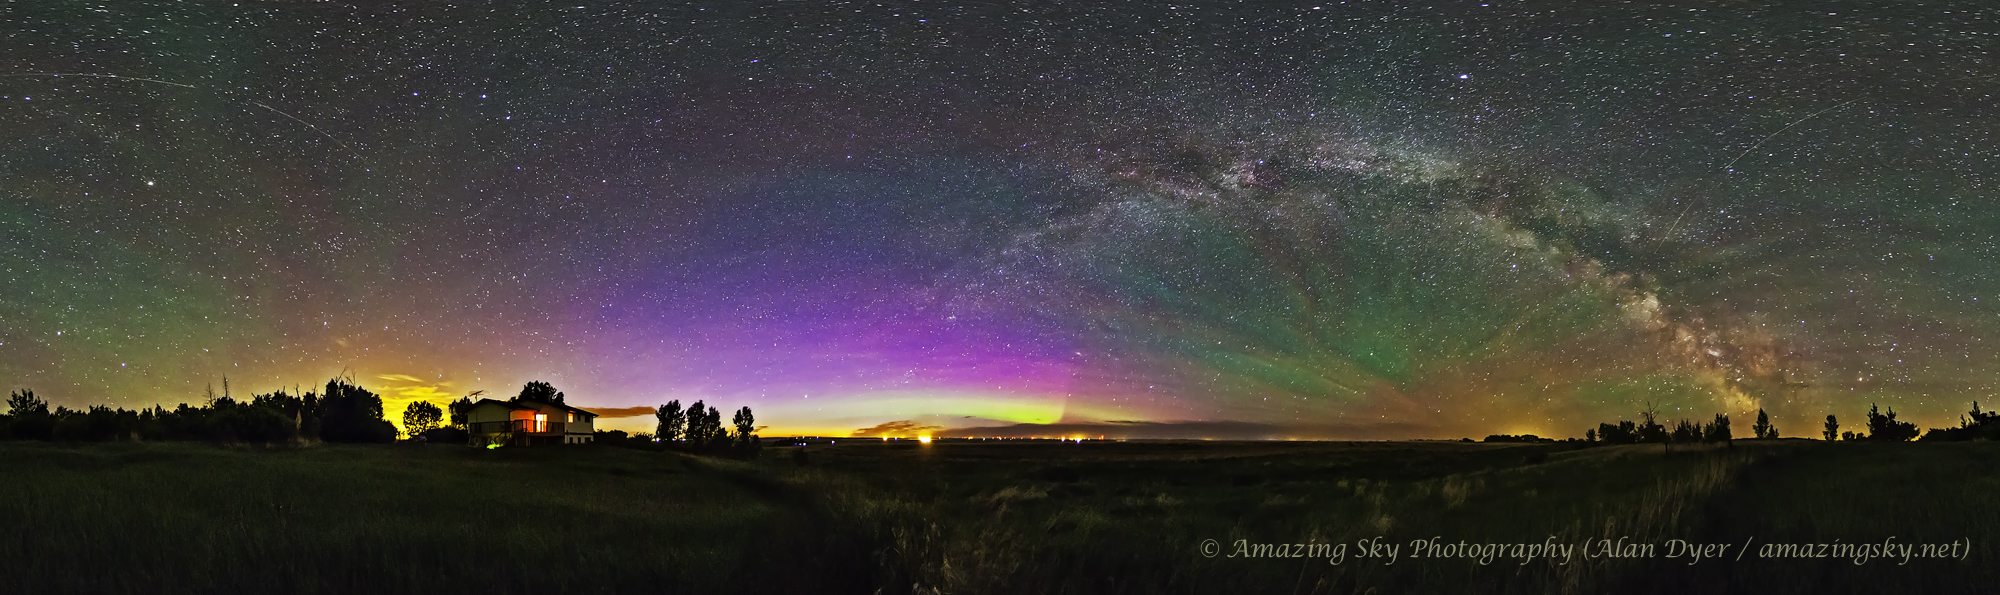
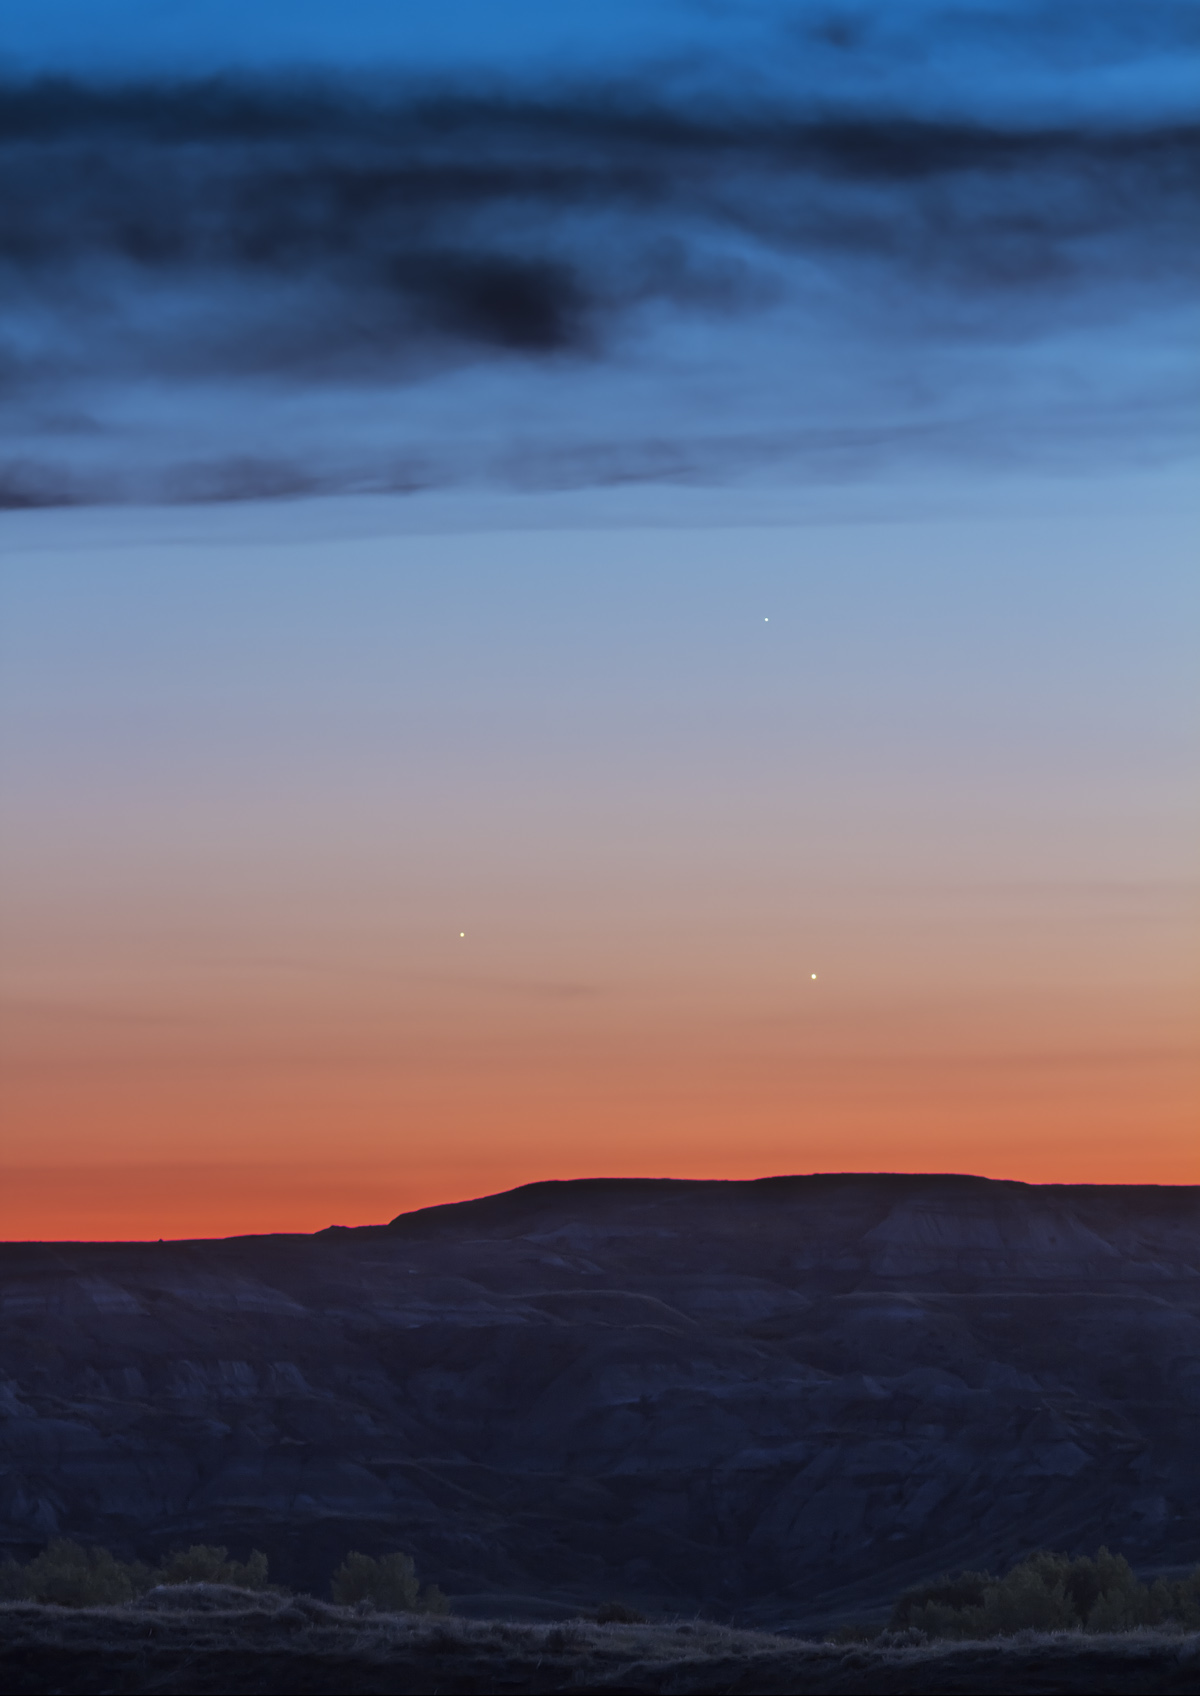
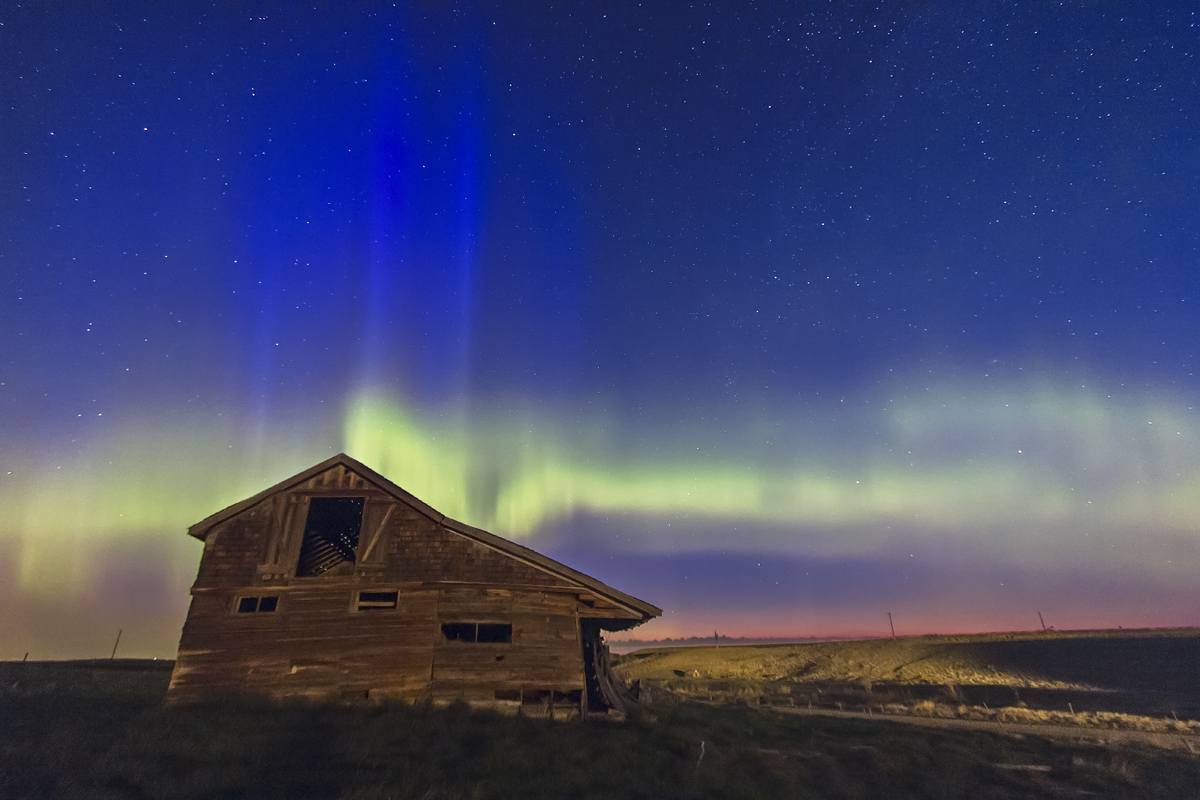
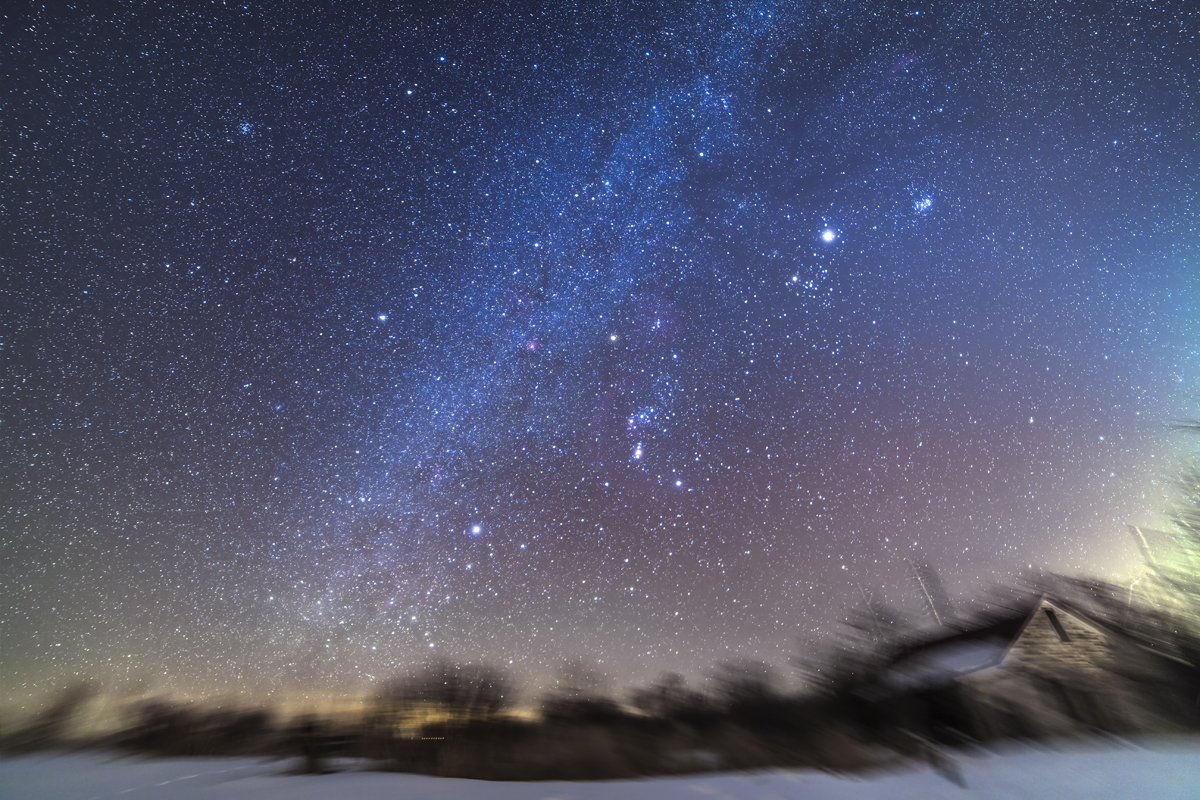
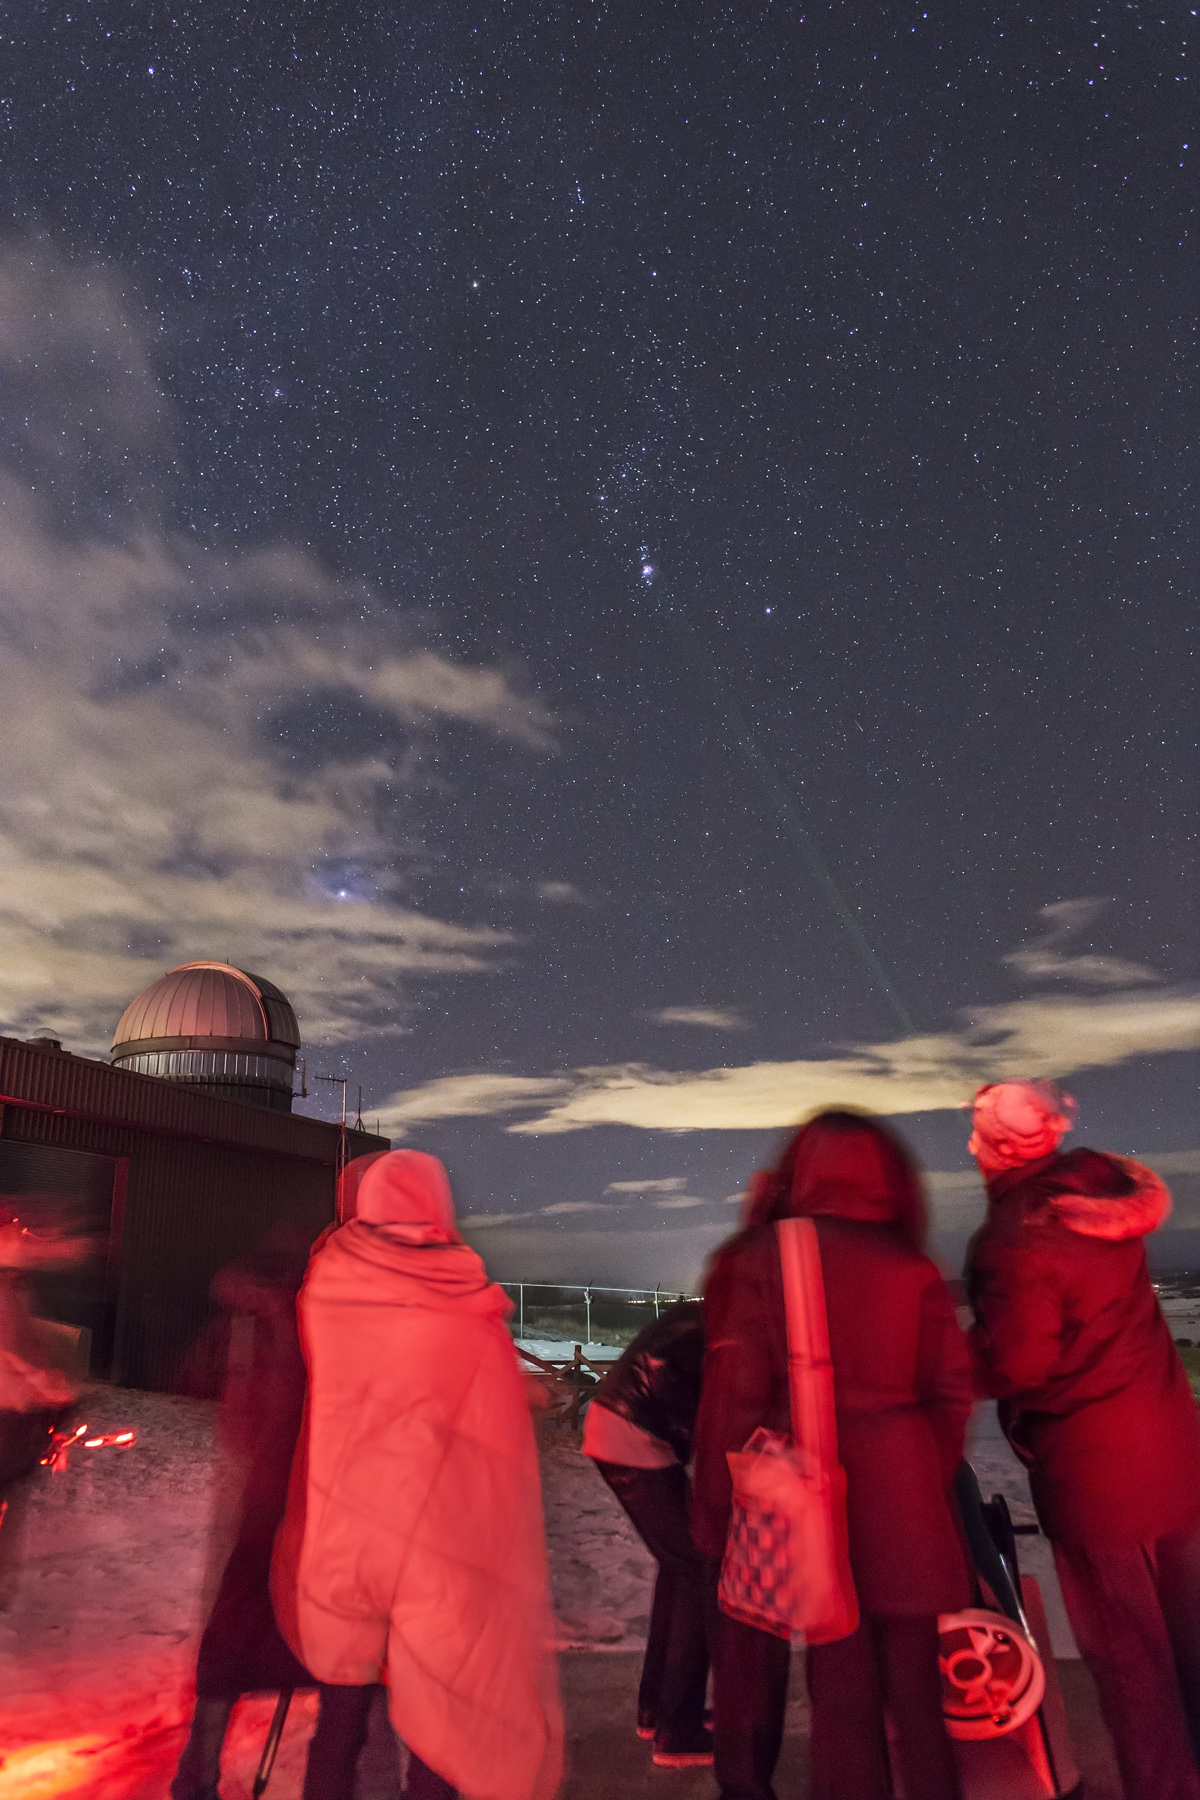
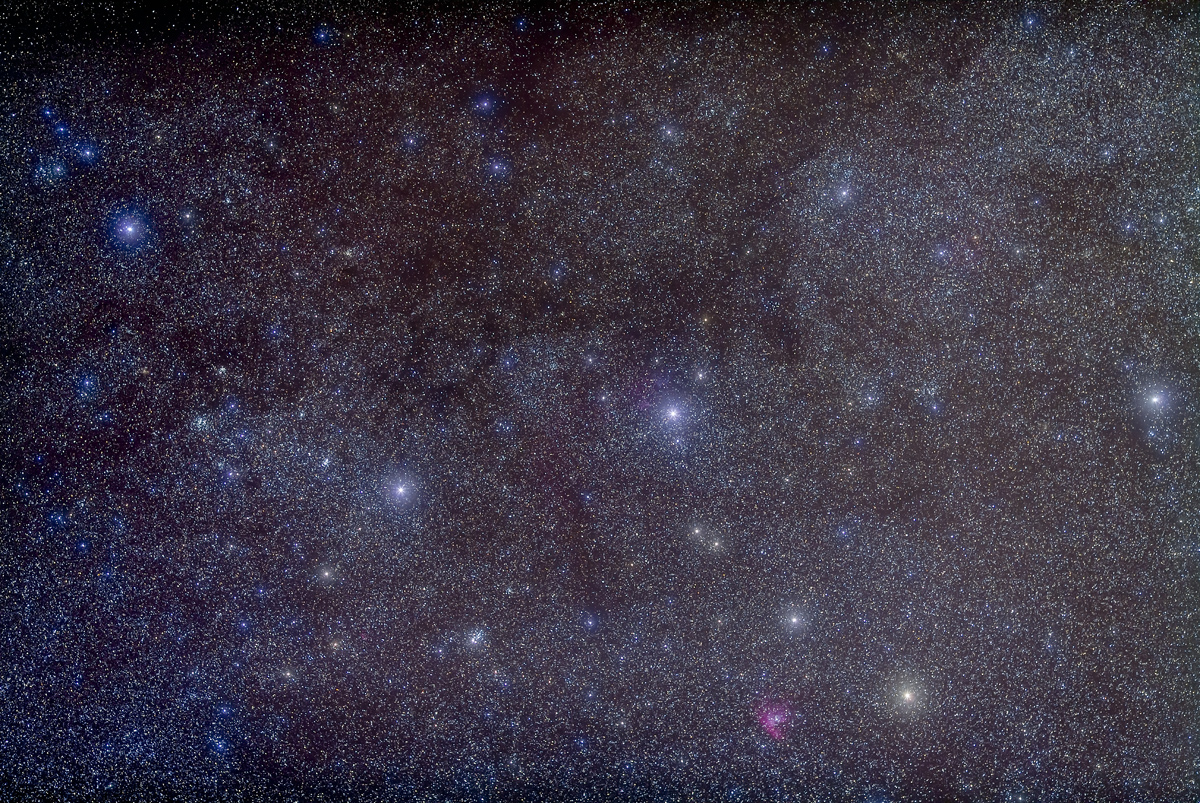
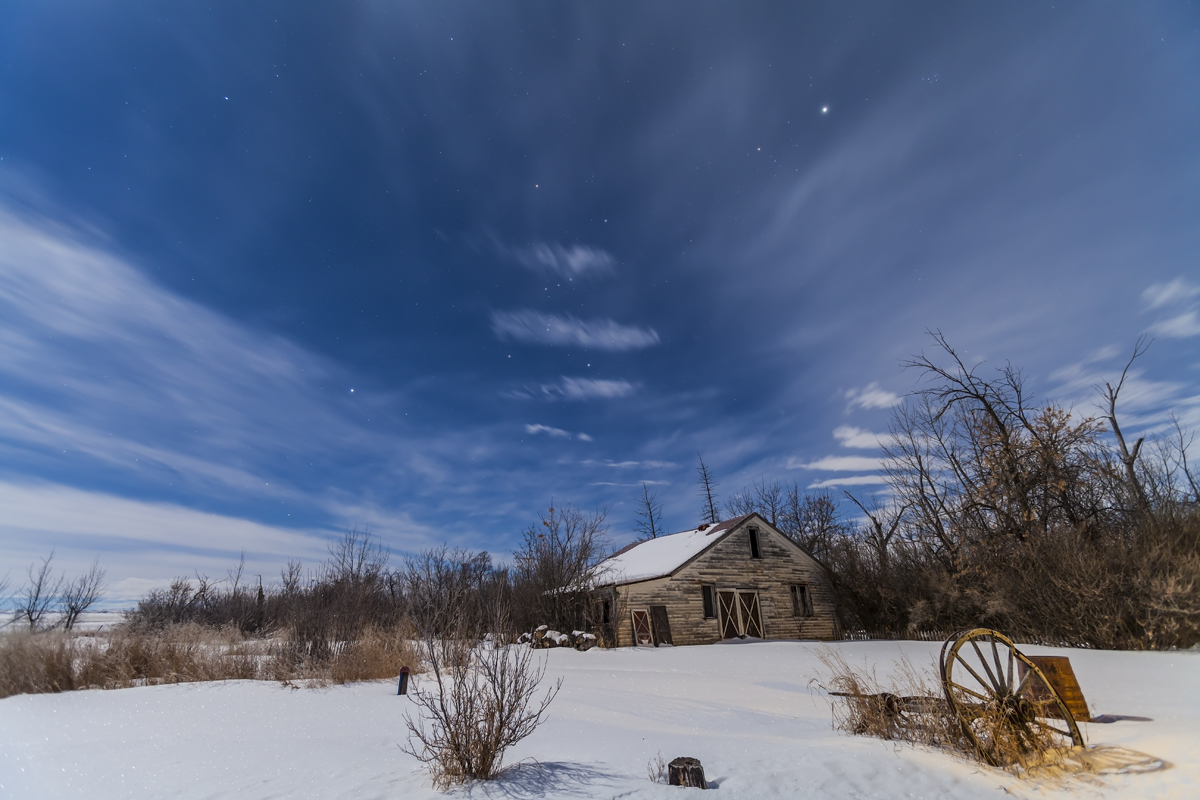
I’ve included clips shot around home in rural southern Alberta, and further afield at popular photo spots around the province such as Waterton Lakes National Park, Banff, Writing-on-Stone Provincial Park, and Cypress Hills Provincial Park. 

I hope you enjoy it! Be sure to maximize the video screen and select HD.  Or for a better grade version check out my Vimeo channel.

________________________________________________

Some technical background:

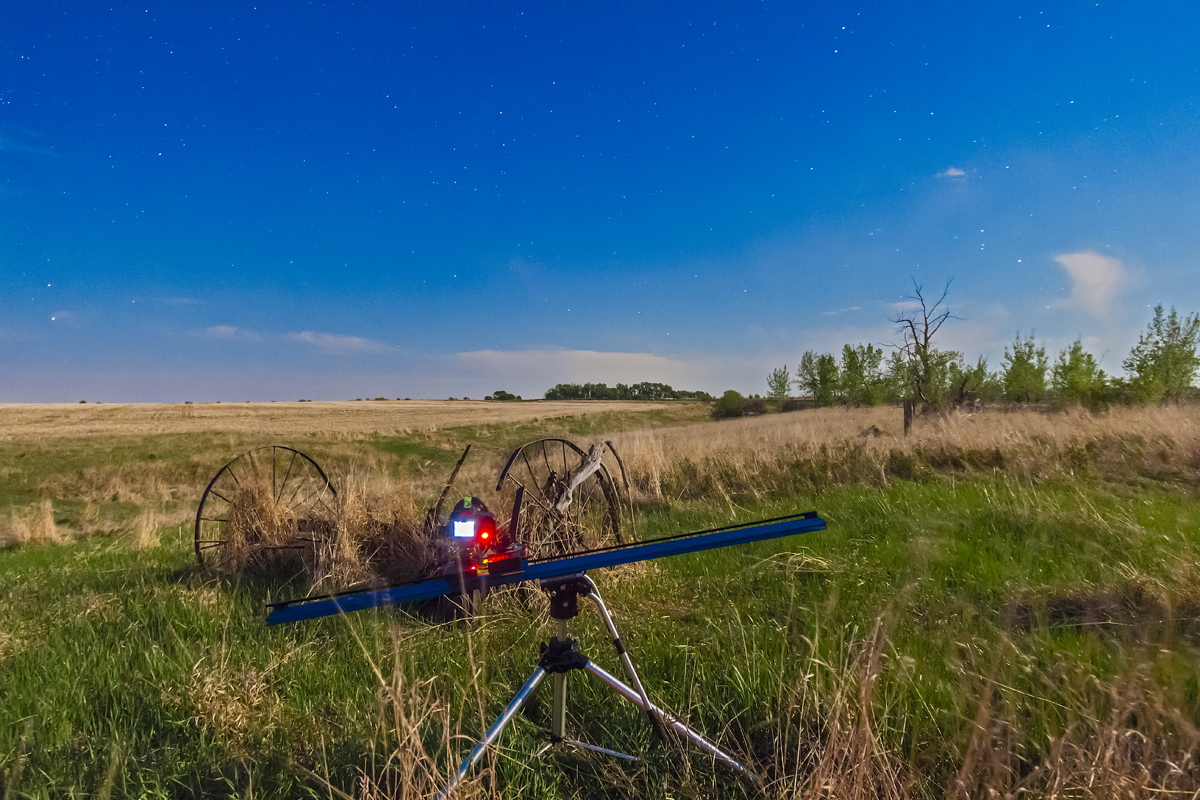
I shot all the frames for the movies (150 to 300 frames for each clip) with either a Canon 5D MkII or a Canon 60Da camera, equipped with various lenses from 8mm to 200mm. For many of the clips the cameras were on motion control devices: the Radian azimuth panning unit, an Orion TeleTrack mount, or a Dynamic Perception Stage Zero dolly unit. You see the latter in action behind the credits. 

For image processing and movie assembly I used Adobe Camera Raw, Photoshop, LRTimeLapse, Sequence, Panolapse/RawBlend utility, and for some of the star trails either StarStax or Star Circle Academy’s Advanced Stacker Actions.

I demonstrate all these in my Nightscapes workshops. The next one is in Edmonton, January 25!

To edit the movie I used the new OS10 Mavericks iMovie. 

– Alan, December 29, 2013 / © 2013 Alan Dyer

Sunset at White Sands


Sunset at White Sands, New Mexico (Dec 10, 2013)

The setting Sun sets the sky on fire above the gypsum dunes of White Sands National Monument.

A week ago I was at Chiricahua National Monument in Arizona for the sunset. This was the scene tonight, at White Sands National Monument in New Mexico.

I was on top of a sand dune at the Yucca picnic area on the Loop Road, watching an amazing sunset over the dunes. The clouds lit up on cue and Venus began to appear, visible here left of centre. The horizon was rimmed with a rainbow of twilight tints.

It was a cool evening, and driving on the unpaved Loop Road graded out of the white sand made me feel I was back home driving on a snow-covered back road. But the white stuff wasn’t snow but pure white gypsum.

This image is a High Dynamic Range (HDR) stack of seven exposures taken at 2/3rd stop increments and composited with Photomatix Pro. The technique brings out details in the shadowy landscape while preserving the bright sky. I used the 14mm Rokinon lens on the Canon 5D MkII. Final processing was in Photoshop CC.

– Alan, December 10, 2013 / © 2013 Alan Dyer


Orion and His Hunting Dogs in the Milky Way


Orion and Canis Major Panorama

Orion parades across the northern winter sky followed by his two odedient hunting dogs, Canis Major and Minor.

I shot the images for this panorama of the winter sky last night, December 6/7, on a frosty and cool night at our retreat in New Mexico.

The scene takes in Orion at upper right, with his signature stars, red Betelgeuse and blue Rigel, plus the dog stars Procyon at upper left (the brightest star in Canis Minor), and Sirius at lower centre (the brightest star in Canis Major). Canis Major itself appears in full at the bottom of the frame. Canis Major and Minor are depicted in mythology as Orion’s two Hunting Dogs .

The northern winter Milky Way runs from top to bottom of the frame, punctuated by patches of red nebulosity such as the circular Rosette Nebula above centre. Orion is wreathed in the sweeping arc of Barnard’s Loop, while his Belt and Sword contain the Horsehead Nebula and Orion Nebula.

While we are looking to the outer edge of our Galaxy in this view, this region of the Milky Way is one of the richest areas of star formation in the sky. It’s a wonderful field and lovely to shoot under civilized conditions in southern New Mexico, at the idyllic Painted Pony Resort.

For this mosaic, I shot 4 to 5 frames for each of the two mosaic segments, plus two images for each segment shot through a diffusion filter to add in the accentuated star glows. I stacked and stitched all of them using Photoshop CC.

So a total of 13 exposures went into the mosaic, each 4 minutes long, shot with the 35mm lens and filter-modified Canon 5D MkII, which helps bring out the red nebulosity.

As a footnote — this is Blog post #400 from me.

— Alan, December 7, 2013 / © 2013 Alan Dyer

Adobe Moon and Venus


Crescent Moon & Venus Over Adobe House (Dec 5, 2013)

The waxing crescent Moon shines above Venus and our adobe house in New Mexico.

Tonight, December 5, the clouds cleared in time for us to catch a glimpse of the crescent Moon above Venus, now at its most brilliant for the year.

They shine above the main house at the Painted Pony Resort where I am this week for a stint of astrophotography with a dozen other Canadians escaping winter up north. But it’s cold here, too – it might go down to freezing tonight. Horrors!

For this shot I made liberal use of shadow and highlight recovery at the Adobe Camera Raw stage and in Photoshop to recover as much detail as I could in the overexposed Moon at top. However, the long exposure nicely brings out the stars in the moonlit sky. I also like the contrast of pastel colours.

– Alan, December 5, 2013 / © 2013 Alan Dyer

Twilight in the Chiricahuas


Evening Twilight in the Chiricahuas, Arizona (Dec 3, 2013)

The colours of twilight illuminate the eroded rock formations of Chiricahua National Monument in southeast Arizona.

This was the scene tonight, Tuesday, December 3, as night fell over the Chiricahua Mountains in Arizona. The landscape below is a maze of eroded towers of ancient volcanic ash. The sky above is one of the finest on the continent for stargazing.

I spent a week or so here back in May 1995, stargazing with friends from the parking lot at Massai Point at the summit of the Chiricahuas. Tonight was my first visit back to that parking lot in 18 years. The evening was just as windy as I remember it in 1995. And as it was back then, Venus was in the western sky tonight.

Sunset in the Chiricahuas, Arizona (Dec 3, 2013)

This was sunset a few minutes earlier when the clouds were lit red by the setting Sun. I used a 24mm lens for this shot but a 14mm lens for the main image above.

Both shots are 7- to 8-frame “high dynamic range” composites that stack images taken in quick succession over a range of exposures from 2 stops under to 2 stops overexposed. The stack of images, when merged with HDR software, captures what one exposure cannot, due to the huge contrast between the bright sky and the dark foreground at twilight. I used Photomatix Pro software to do the merging and tonal balancing. Such amazing digital tools were unheard of and undreamed of in 1995!

— Alan, December 3, 2013 / © 2013 Alan Dyer

Zodiacal Light – Dawn’s Early Light


Zodiacal Light in Dawn Sky (Oct 2013)

The ghostly glow of comet dust brightens an October dawn.

This is the zodiacal light, as it appeared two mornings ago in the pre-dawn sky from my backyard in southern Alberta. This tapering glow angled up from the horizon is best spotted in the eastern sky on clear and moonless autumn mornings, like this one.

What you are seeing is sunlight reflected off dust left by passing comets in the inner solar system. So while this glow looks like it might originate in our atmosphere it really comes from dust out in interplanetary space.

This subtle glow, often called the “false dawn,” appears in the hour or so before the true dawn begins to brighten the sky too much (its purple light is just starting to light the horizon here).

Also visible here: Sirius at far right, Jupiter above centre, the Beehive star cluster below Jupiter, and Leo rising embedded in the zodiacal light, with Mars just above Regulus, Leo’s brightest star. The planets lie along the zodiacal light because the dust that causes it also lies in the same plane as the orbits of the planets, the ecliptic plane.

I shot this with a 14mm lens for a stack of four 2-minute tracked exposures, but with the horizon coming from just one of the exposures to minimize blurring from the moving camera slowly following the sky.

– Alan, October 10, 2013 / © 2013 Alan Dyer


The Veil Nebula in Cygnus


NGC 6960 & 6992-5 Veil Nebula (92mm 5DII)

This is what’s left of a star that exploded thousands of years ago.

I shoot this object every year or two, so this is my 2013 take on the Veil Nebula. For last year’s see Star Death Site, a post from September 2012.

The Veil Nebula is a supernova remnant. The lacework arcs are what’s left of a massive star that blew itself to bits in historic times. This object, one of the showpieces of the summer sky for telescope users, is now high overhead at nightfall, off the east wing of Cygnus the swan.

I shot this a couple of nights ago using a 92mm-aperture refractor that provides a wide field of view to easily frame the 3-degree-wide extent of the nebula. The image is a stack of five 15-minute exposures with a filter-modified (i.e. red sensitive) Canon 5D MkII camera at ISO 800. Stacking the images helps reduce noise.

The colours in this object make it particularly photogenic, with a contrast of magenta and cyan. At right, a sharp-edged area of obscuring interstellar dust tints the sky brown and dims the stars.

– Alan, October 9, 2013 / © 2013 Alan Dyer

The Cocoon Nebula in Cygnus


Cocoon Nebula IC 5146 (92mm 5DII)

A cocoon of glowing gas sits at the tip of a dark cloud of interstellar dust.

It’s been months since I’ve shot more “traditional” astrophotos, meaning images of deep-sky objects through telescopes. But the last couple of nights have been excellent, and well-timed to the dark of the Moon.

This is the Cocoon Nebula in Cygnus, aka IC 5146. It is a cloud of gas about 4,000 light years away where new stars are forming. They are lighting up the gas to glow with incandescent pink colours.

The Cocoon sits at the end of snake-like dark nebula known as Barnard 168 which, in the eyepiece of a telescope, is usually more obvious than the subtle bright nebula. Photos like mine here, with long exposures and boosted contrast and colours, make nebulas look much brighter and more colourful than they can ever appear to the eye.

For the technically curious, I shot this with a 92mm diameter apochromatic refractor, the TMB 92, and a Borg 0.85x flattener/reducer, a combination that gives a fast f-ratio of f/4.8 with a very flat wide field. I also used my now-vintage filter-modified Canon 5D MkII at ISO 800. This is a stack of five 12-minute exposures, registered and median-combined in Photoshop to smooth out noise. All processing was with Adobe Camera Raw and Photoshop CC. The telescope was on an Astro-Physics Mach 1 mount, flawlessly autoguided with an SBIG SG-4 autoguider.

– Alan, October 6, 2013 / © 2013 Alan Dyer


The Princess Stars


Andromeda (50mm 5DII)

The stars of Andromeda the Princess highlight the autumn sky.

Here’s an image from last night, October 4, that frames all of the constellation of Andromeda, now high in the northern autumn sky. A trio of coloured stars arcs across the centre of the image, forming the main pattern in Andromeda. In Greek legend she was the daughter of Queen Cassiopeia and was rescued by Perseus from the devouring jaws of Cetus the Sea Monster.

Above the centre star lies the constellation’s most famous feature, the Andromeda Galaxy, shining at us from 2.5 million light years away. It is the most distant object easily visible to the unaided eye.

An equal distance below the centre star of Andromeda you can see another smaller fuzzy spot. That’s the Pinwheel or Triangulum Galaxy, a dwarf spiral 2.8 million light years away, but also a member of the Local Group of galaxies that contains our Milky Way and Andromeda as its two main members.

At left, just below centre, is a large open cluster of stars, NGC 752, easily visible to the naked eye.

For this shot, as I do for most constellation portraits, I used Photoshop to layer in a shot taken through a diffusion filter (the Kenko Softon A) on top of a stack of shots taken without the filter. This allows me to add the enhanced glows around stars to bring out their colours, and to do so in a controlled fashion by varying the opacity of the filtered view. Shooting on a night with high haze or cirrus clouds has the same end effect but that’s hardly a reliable way to take constellation images. Combining filtered and unfiltered views works great, and gives the “look” made popular years ago by Japanese astrophotographer Akira Fuji.

– Alan, October 5, 2013 / © 2013 Alan Dyer


The Summer Triangle Stars


Summer Triangle in the Milky Way

The trio of Summer Triangle stars flank the Milky Way in the dying days of summer.

I shot the featured image above two nights ago on a perfect late summer night from home. Skies were dark and transparent, with no aurora and little airglow to taint the sky.

The image takes in the Summer Triangle stars of Vega (top), Deneb (left) and Altair (bottom). Vega and Altair straddle the summer Milky Way, but Deneb lies right in the thick of it, way down the Local Arm that we live in. Vega and Altair are nearby normal stars, only 25 and 16 light years away. But Deneb is a blue supergiant, shining from 1400 light years away, and one of the most luminous stars in the catalog.

The Milky Way through this area of sky is riven by twisting lanes of interstellar dust. A particularly dark patch sits above Deneb at top left. Then below Deneb the Milky Way gets split by the Great Rift that continues down into Aquila and Ophiuchus at lower right.

All along this part of the Milky Way, particularly around Deneb, the camera picks up a string of glowing red nebulas where stars are forming. The red comes from hydrogen atoms emitting deep red light, as hydrogen is wont to do.

Summer Milky Way from Backyard (Sept 9, 2013)

This image is from a couple of nights earlier. I used a wider angle lens to take in the full sweep of the summer Milky Way, from Sagittarius skimming the horizon, to Cassiopeia past the zenith at the top. You can see the Summer Triangle in the top half of the image, the part of the sky now overhead on early September nights from the northern hemisphere.

I took both shots with a filter-modified Canon 5D MkII placed on a little iOptron SkyTracker for tracked long exposures (4 to 5 minutes). The main image was with a 24mm Canon lens, the bottom image with a 14mm Rokinon lens.

– Alan, September 12, 2013 / © 2013 Alan Dyer


The Great Arc of the Milky Way


Milky Way Panorama (Sept 4, 2013)

The Milky Way sweeps in a great arch of light across the sky.

It’s been a wonderful week for shooting the Milky Way. I had a very clear night on Tuesday but ventured no further than a few hundred feet from home to the harvested canola field next door.

The Milky Way was beautifully placed, as it always is at this time of year, right across the sky from northeast to southwest, with the starclouds of Cygnus passing directly overhead.

The top photo is a panorama of 8 shots, with a camera on a tripod, and each exposure being just 60 seconds with a 14mm lens in portrait orientation. I stitched the segments with PTGui software, rendering the scene with its spherical projection mode which wraps the dome of the sky onto a flat surface in a way that retains the zenith detail as your eye saw it, but greatly distorts the extremities of the scene at either end.

My house is at lower right.

Milky Way over Harvest Field (Sept 4, 2013)

For this image, I used the same lens to take a single view from horizon to well past the zenith. Here the camera was tracking the stars for a set of stacked 5-minute exposures to grab even more detail in the Milky Way.

What stands out as much as the Milky Way are the green fingers of airglow stretching across the sky. These were invisible to the eye but the camera sure picks them up.

Airglow is caused by oxygen atoms, in this case, fluorescing at night as they release some of the energy they absorbed by day. It’s not aurora and generally covers more of the sky, sometimes with a diffuse glow or, as here, with more structured bands that slowly shift over minutes. It varies from night to night and can occur at any latitudes. But usually only cameras pick it up. To the eye, airglow just makes the sky look inexplicably a little less dark than you think it should be on such a clear night.

– Alan, September 7, 2013 / © 2013 Alan Dyer


The Milky Way at Waterton Lakes


Waterton Lakes Milky Way #3 (Aug 29, 2013)

The Milky Way glows bright in the twilight of a summer evening at Waterton Lakes National Park.

It’s been a marvellous weekend so far at Waterton Lakes, with another fine night ahead it appears, on a warm weekend to end the summer. Two nights ago I set up cameras on the shore of the main lake, shooting south to the Milky Way. The main photo above shows the Milky Way while the sky was still deep blue with evening twilight.

Light from the campground streetlights illuminates the old tree and foreground. It is light pollution to be sure, but sometimes added lighting can help, especially on a dark moonless night.

Waterton Lakes Milky Way #1 (Aug 29, 2013)

This shot comes from later in the evening with a wider angle lens and shows the Milky Way under dark sky conditions at the end of the long Upper Waterton Lake that extends south into Montana and Glacier National Park.

Waterton-Lakes-Star-Trails-(Aug-29,-2013)

By stacking about 35 images taken in quick succession, each 1-minute exposures, I created this star trail effect. I used the new version of StarStaX, a free program that does a great job stacking star trails. Its latest version offers this neat “comet trails” effect as an easy-to-apply stacking option.

– Alan, August 31, 2013 / © 2013 Alan Dyer (all photos)

Milky Way Over Moraine Lake


Milky Way over Moraine Lake (Aug 25, 2013)

The summer Milky Way shines from behind clouds coming over the Continental Divide at Moraine Lake, Banff.

Earlier in the day, thousands of people stood here, admiring the famous view of Moraine Lake set in the Valley of Ten Peaks. This was the view by night, before the waning Moon rose to light the scene. I was the only one there.

A couple of hours after I took this image, the peaks were well lit by moonlight, but clouds had moved in to obscure the stars. This shot from the start of the night shows the sky at its clearest and darkest.

The last time I visited Moraine Lake at night was back in the 1990s shooting with 6×7 film. I’ve wanted to get back with digital cameras for some years. Last Sunday, August 25 was my chance.

Despite the encroaching clouds, I managed to shoot time-lapses with three cameras: a dolly shot with the Dynamic Perception Stage Zero, a pan in azimuth with the new Radian controller, and a tilt-pan with the Sky-Watcher AllView mount. All worked well, but had the night been perfectly clear the movie clips and stills would have been all the nicer. But you go with what the mountains deliver.

This is one of the best of the frames from the night’s shoot, taken with a 14mm Rokinon lens for 60 seconds at f/2.8 and Canon 5D MkII at ISO 4000.

It shows one of the issues with shooting near lodges and resorts – yes, it’s convenient and safe (I’m reluctant to hike far in the dark alone, with Grizzly in Area and Travel in Groups signs about!) but even the most eco-friendly of resorts fail to realize the effects of their lights spilling out over the natural landscape. In this case, they do help light the dark scene, but they are pollution. When, oh when, will parks and resort operators begin to realize that the night is an environment to be protected as well, and not a jurisdiction to be ruled by lawyers and planners who dictate that the worst and usually cheapest types of lighting be installed.

P.S.: This was blog post #350 for me! 

– Alan, August 27, 2013 / © 2013 Alan Dyer

Wheatfield Moon


Wheatfield Moon (Aug 14, 2013)

The waxing Moon shines above a ripening field of wheat on a prairie August evening.

A track winds off through the wheat field toward the western twilight sky, while a waxing Moon shines in the south.

This was the scene tonight just down the county road where I live, on a warm August night on the Canadian Prairies.

For this shot, I assembled a high dynamic range set from eight exposures taken over a range of 8 f-stops, to compress the wide range of brightness into the one photo. Even so, the Moon remains overexposed. But I like shooting these scenes in deep twilight for more saturated colours and for some stars in the sky.

– Alan, August 14, 2013 / © 2013 Alan Dyer


Star Rain


Star Rain - Big Dipper Star Trails

The sky seems to swirl in a rainstorm of stars.

I’ve combined several exposures of the stars in the northern sky to create a “comet trail” effect, showing them turning about the celestial pole. The top photo looks northwest to the stars around the Big Dipper and picks up the purple light of a faint aurora.

For the photo below, taken on a different night, I used a fish-eye lens to capture the entire sky, but looking north. You can see how the sky turns counterclockwise about the Pole Star. The Milky Way also appears as a blurred band of light.

Circumpolar Comet Star Trails (July 16, 2013)

I shot these last week from the cabin at Reesor Ranch in Saskatchewan during a wonderful week of nightscape photography in the Cypress Hills.

To create these images I used the Advanced Stacking Actions from Star Circle Academy.

– Alan, July 25, 2013 / © 2013 Alan Dyer


Road to the Northern Lights


Northern Lights Down the Road (July 14, 2013)

A country road winds off into the dancing Northern Lights.

The sky put on another fine show last night, the fourth in a row with some level of aurora activity. This was the scene Sunday night as a display blossomed for a while, dancing at the end of the back road through the Cypress Hills on the Alberta-Saskatchewan border.

I had one camera shooting north and devoted to the Northern Lights, while, as you can see below, I had two other cameras on rigs to shoot time-lapse movies looking south.

Self Portrait at Battle Creek, Cypress Hills (July 14, 2013)

This was the scene at the overlook to the Battle Creek valley, with the Moon setting and me getting the time-lapse gear going, to shoot the Milky Way moving over the hills. One camera was on a mount to pan across the landscape following the stars. The other camera was on a motion control dolly to travel down a track over the 3 hours of the shoot. I spent a lot of time in the car listening to BBC Desert Island Discs and The Life Scientific podcasts last night — the thrill of time-lapse shooting!

Milky Way over Battle Creek (July 14 2013)

This is one frame from one of the movies. Streaks of green and red airglow tint the sky around the Milky Way. Amazingly, the scene is lit only by starlight and by the aurora. You could never have done this with film. It’s the sensitivity of digital cameras that makes such scenes possible, though it takes some clever processing (such as Shadow Detail recovery in Raw, Shadows and Highlights, & masked Adjustment Layers) to balance Earth and sky in the final image.

– Alan, July 15, 2013 / © 2013 Alan Dyer


Log Cabin in the Milky Way


Milky Way over Log Cabin (July 11, 2013)

The summer Milky Way shines over a log cabin in the woods of the Cypress Hills.

This was the view this morning, at 2 a.m., as the Milky Way of northern summer shone over my vacation log cabin on the Reesor Ranch in Saskatchewan. After the clouds cleared the sky was beautifully dark for a while before the early dawn twilight came on.

The view here takes in the Milky Way from the Scutum star cloud above the trees to the dark dust clouds of northern Cygnus overhead. The trio of Summer Triangle stars, Deneb, Vega and Altair, flank the Milky Way.

This is a composite of five tracked and stacked images for the sky and one image for the foreground shot with the iOptron Skytracker running at half speed to minimize the blurring from the tracking motion. The lens was the 14mm Samyang at f/2.8.

– Alan, July 12, 2013 / © 2013 Alan Dyer


Sunset Panorama at Reesor Ranch


Sunset at Reesor Ranch Panorama #1 (July 11, 2013)

The setting Sun lights up a classic Canadian prairie skyscape. 

This was sunset last night, July 11, from the historic Reesor Ranch in southwest Saskatchewan, on the north edge of the Cypress Hills. The clouds opened up across the sky in a Chinook arch, with clearing to the west where the waxing Moon and Venus were also setting into the twilight.

It was a stunning scene looking out over the plains from the highlands of the hills.

I’m in the area for a week of shooting, weather permitting.

This shot is a 7-section panorama, stitched with Photoshop’s Photomerge command.

– Alan, July 12, 2013 / © 2013 Alan Dyer


The Milky Way at Solstice


Centre of Galaxy on Horizon (June 9, 2013)

The centre of the Galaxy culminates over a starlit landscape on a night near the summer solstice.

This was last weekend, on the same night I took the images of the aurora and noctilucent clouds featured in the previous two blog posts. But toward the end of the shoot, I turned south to capture this scene, of the Milky Way over a grassy prairie field.

The landscape is lit only by starlight and by the glow of twilight and aurora to the north.

In the sky, the constellations of Scorpius and Sagittarius are peaking as high as they get for me in southern Alberta. The red giant star Antares is to the right while the bright star clouds toward the centre of our Galaxy are just left of centre. The sky is not dark because of the glow of perpetual twilight at this time of year near solstice.

Deep sky fans will note that the star cluster M7, the southernmost Messier object, is just clearing the horizon.

Remarkably, this is a mere 15 second exposure, at ISO 1600 but with the 24mm lens wide open at f/1.4. Normally I wouldn’t shoot at that wide an aperture as the images look too distorted at the corners of the frame. But for this shot I used the Canon 60Da camera – its cropped-frame sensor records only the central area of what the lens projects so it crops out the nasty stuff at the corners of the frame that would certainly have been detracting had I used the full-frame camera.

But shooting at f/1.4 allowed even this quickie 15-second shot to grab lots of detail in the Milky Way.

– Alan, June 14, 2013 / © 2013 Alan Dyer


The Colour of Dark


Colors of the Dark Sky Panorama

What colour is the dark night sky? Depending on conditions, it can be any colour you want.

I shot this 360° panorama last night from my backyard under what looked like a clear and fairly dark, moonless sky. Looks can certainly be deceiving. The camera picked up all kinds of colours the eye couldn’t see.

Let’s review what’s causing the colours:

• To the north just left of  centre the horizon is rimmed with a bright yellow glow from all-night perpetual twilight present around summer solstice at my mid-northern latitude.

• Above that shines a green and magenta band from a low-level aurora just visible to the naked eye.

• Much of the sky is tinted with bands of green from ever-present airglow, caused by oxygen atoms at the top of the atmosphere giving off at night some of the energy they absorbed by day. I had thought the sky would look blue from the perpetual twilight but the airglow seems to overwhelm that.

• Yellow glows around the horizon at left (west) and right (southeast) are from urban light pollution from towns 50 km away.

• Some strands of remaining cloud from a departing thunderstorm add streams of brown as they reflect lights from below.

• Finally, the Milky Way shows up in shades of yellow and pale blue, punctuated here and there by red patches of glowing hydrogen hundreds of light years away.

The only thing missing this night was a display of electric blue noctilucent clouds.

The sources of most of these colours are an anathema to observers of faint deep-sky objects. Aurora, airglow and certainly light pollution just get in the way and hide the light from the distant deep sky.

A word on technique:
I shot this panorama using an 8mm fish-lens to shoot 8 segments at 45° spacings. I used the excellent software PTGui to stitch the segments together, which it did seamlessly and flawlessly. Each segment was an untracked 1 minute exposure at ISO 3200 and f/3.5. The panorama covers 360° horizontally and nearly 180° vertically, from the ground below to the zenith above. It takes in everything except the tripod and me!

– Alan, June 8, 2013 / © Alan Dyer

Time-Lapse Techniques — Creating Star Trails


Dinosaur Park Star Trails (May 26, 2013)

The stars wheel above the Cretaceous-age sediments of Dinosaur Provincial Park.

One of the most powerful techniques in the nightscape photographer’s arsenal is to stack lots of short-exposure images together to create the equivalent of one long exposure showing the motion of the stars. A creative tool to do this in Photoshop is the “Advanced Stacking Actions” from Steven Christenson who maintains a blog and eStore called Star Circle Academy.

I used one of his Actions to create the feature image above. Unlike more run-of-the-mill stacking procedures, Christenson’s nifty Actions can create star trails that look like comets or streaks fading off into the sky at their tail end. It’s a clever bit of Photoshop work achieved by stacking each successive image at slightly lower opacity.

You can use his Actions to create a single composite still image, as above, or to create a set of “intermediate” frames that can be turned into a time-lapse movie with stars turning across the sky and drawing trails behind them. My movie shows several variations. Click the Expand button on the movie to have it fill the screen and reveal the sub-titles.

In Clip #1 I stacked the original set of 360 images without any trailing, using the original frames that came from the camera, albeit with each frame processed to enhance contrast and colour.

In Clip #2 I stacked the images using the “Comet Trails” Action, one that produces very short comet-like streaks.

In Clip #3 I used the “Long Streak” Action to produce longer star trails, but the process also creates unusual cloud streaks as well. Rather neat.

In Clip #4 I used the more conventional “Lighten Mode” to create trails that accumulate over the entire sequence and never fade out. The result on this night was pretty wild and excessive, with the twilight and moonlight adding other-worldly colours.

I certainly recommend the Star Circle Academy Photoshop Actions. While there is a basic Test Set available for free, the full Advanced set is well worth the $30.

– Alan, June 1, 2013 / © 2013 Alan Dyer

Moonlight on the Hoodoos


Dinosaur Park Nightscape (May 26, 2013) (16mm 5DII)

The stars shine in a bright moonlit sky over the Alberta Badlands.

My feature image above is one of several still frames I took at the end of 4-hour photo shoot last Sunday at Dinosaur Provincial Park. The nearly Full Moon provides the illumination on an eroded landscape originally cut by water from retreating ice age glaciers.

But the volcanic ash layers hold treasures much older, from 70 million years ago. This area contains the world’s richest collection of late Cretaceous fossils of dinosaurs and other flora and fauna from near the end of the dinosaurs’ reign.

The movie below is a 300-frame time lapse of the stars turning behind the hoodoos. It’s a dolly shot, using the Dynamic Perception Stage Zero rail and controller.

The system works very well, but such shots demand a site with a suitable immediate foreground, as well as a good view to the distant sky. It is the parallax motion between foreground and background that makes a dolly move interesting.

I planned this shot to begin at twilight and continue as the sky was darkening, then into the rest of the night with the Moon rising and lighting up the landscape. The moving clouds were perfectly timed and placed!

– Alan, May 29, 2013 / © 2013 Alan Dyer

Planet Triangle in the Twilight


Three-Planet Conjunction (May 26, 2013)

Three planets, Mercury, Venus and Jupiter form a triangle briefly in the evening twilight.

This was the triple-planet conjunction last night, Sunday, May 26, as seen from the badlands of Dinosaur Provincial Park, Alberta. I headed  there, a 90-minute drive east from home, to conduct a night of time-lapse shooting, and to catch the planets low in the western twilight far away from thick clouds that tend to hug the horizon over the mountains.

Skies were nearly perfect and the night ideal for photography. Even with just unaided eyes the planets were obvious, Venus especially so at bottom right. Mercury (at top) and Jupiter (left) were also easy to spot in the twilight glow.

However, binoculars gave a view similar to this telephoto lens shot. I used a short 1/2 second exposure for the sky and a longer 3-second exposure for the ground, to bring out some detail in the badland landscape below the beautiful twilight sky.

– Alan, May 27, 2013 / © 2013 Alan Dyer


Time-Lapse Techniques — A Dolly Shot


Shooting Rusty Farm Wheels & Stars (May 20, 2013)

Time-lapse shooting has become immensely popular of late, but there’s nothing like a dolly shot to add interest to a scene .

Among the more advanced techniques for shooting time-lapse movies is to place the camera on a motorized track for a cinematic “dolly” shot.

These are easy to do in the daytime as the camera simply needs to slide down a rail at a constant rate. But at night, time-lapse dolly shots become more complex. Exposures are often 15 to 60 seconds even in bright moonlight, as here. During each exposure the camera shouldn’t move. The slide down the track should happen only in the brief time between exposures, typically 2 to 5 seconds.

Accomplishing this “shoot-move-shoot” routine requires a specialized bit of kit. In my case, I use the Stage Zero dolly and MX2 controller from Dynamic Perception.

It works great, and sends the camera down the 6-foot rail at a speed you determine. The controller also operates the camera shutter, ensuring sync between the exposures and dolly motion. You can see the setup in operation below, in a 2-part movie. The first scene shows the dolly and camera in operation over the 2-hour shoot, while the second clip shows the time-lapse sequence the dolly-mounted camera took.


This was one of the easiest time-lapse sequences I’ve shot, as I had to travel no more than 100 feet from my house to do it.

I was after a couple of sequences just to use for demo purposes, and didn’t want to tackle a long shoot far from home on a weeknight.

The bright moonlight on May 20 also meant exposures could be short, so that collecting the 300 frames I typically shoot for a time-lapse could be accomplished in well under 2 hours. Getting to bed before 1 am is a rare treat on a time-lapse night!

— Alan, May 22, 2013 / © 2013 Alan Dyer


Night of the Northern Lights – #3


Aurora with Blue Curtains #2 (May 17-18, 2013)

The memorable night of Northern Lights ended with a final outburst sending blue curtains into the dawn twilight.

This is a frame from May 17-18, taken near the end of my time-lapse sequence, when the aurora kicked up again in intensity and shot towering blue curtains into the northern sky. The pink glow of dawn tinges the northeastern sky, bookending the sequence of 1200 frames and 27 gigabytes of images. Good thing I had a large capacity memory card!

Each shot was 11 seconds at ISO 1600 to try to freeze the moving curtains while still maintaining a good level of exposure.

Here, lights from a passing car at 3 a.m. illuminated the old barn.


As a postscript, I also note that this was my 300th blog post since beginning The Amazing Sky in February 2011. I hope you’ve enjoyed the views of the sky I’ve been able to publish over the last two years.

– Alan, May 18, 2013 / © 2013 Alan Dyer

The Milky Way of Spring on the Prairies


Summer Milky Way over Field (May 2013)

Late on a clear spring night on the Canadian Prairies the Milky Way rises over a fallow field.

Despite taking this not 200 feet from my home, this isn’t a view I see or photograph very often. In spring on the Canadian Prairies, it seems we go from dark winter nights to the bright skies of mid-summer with little in between to mark spring. Miss a dark-of-the-Moon period in late April or early May and you miss the opportunity to see and shoot this sight – the summer Milky Way rising late on a dark spring night, with Scorpius due south. In another month this same sky will be washed out by the glow of perpetual twilight around solstice.

By July or August when dark skies return, the Milky Way will be already well up at nightfall, and Scorpius on the way down past his prime for the year.

But in this shot, taken at 3 am this morning, during a welcome run of clear moonless nights, I framed Scorpius at lower right skimming the southern horizon as high as he gets from western Canada. The yellow star at lower right is Antares, the heart of the Scorpion. To the left of Scorpius, the spectacular starclouds of the summer Milky Way span the sky from Sagittarius in the southeast to Cygnus high in the east at upper left.

Around me now, farmers are beginning their work of tilling and seeding the fields. But this one will likely lay fallow this year, the furrows seeming to extend off into the distant Milky Way.

This is a stack of five 2.5-minute tracked exposures, but with the ground included from just one of the exposures, to minimize the blurring introduced by the moving camera. The lens was the wonderful 14mm Samyang, a manual lens that doesn’t register in the camera’s metadata, thus the reading at left that this was taken with a 50mm lens, the default setting when the camera doesn’t know what optics it is connected to.

– Alan, May 6, 2013 / © 2013 Alan Dyer

Piercing the Night


Bright Meteor over Old Farmstead (April 25, 2013)

All things must pass. A bit of billion-year-old comet dust disintegrates above a decaying pioneer farm.

This was a lucky shot to be sure. Last night I returned to my favourite farmstead site to shoot a time-lapse sequence of the stars turning over the moonlit rustic buildings. I started shooting some test frames to get the settings right — the camera was on a motorized dolly to move it along a track for the next three hours, so you want to make sure you have all the settings right. I opened the shutter to start a test series, and whoosh! A bright meteor appeared. Right on time and in frame. That doesn’t happen very often!

However, shooting hundreds of shots for a time-lapse sequence, now a common practice among astrophotographers, does boost your chances of picking up a bright meteor on one of the frames. But having it appear nicely framed is often too much to ask. I was lucky. But … I was out with a camera aimed at the sky, and for getting good shots that’s the first requirement!

– Alan, April 26, 2013 / © 2013 Alan Dyer


The Moon Meets Jupiter and the Hyades


Moon near Jupiter & Hyades (March 17, 2013)

On Sunday night, March 17, the waxing Moon came very close to Jupiter and the Hyades star cluster for one of the best conjunctions of the year.

This was certainly a night to remember. Minutes after I took the images for this shot, I took the frames for the Comet over the VLA image in the previous post. Here, I caught the Moon shining just below Jupiter (you can see a couple of its moons as well) and just above the Hyades star cluster and the bright yellow star Aldebaran at the bottom of the frame. All are set in the deep blue of twilight.

This is a high dynamic range (HDR) stack of seven exposures ranging from 6 seconds to 1/13 second, to capture the huge range in brightness from the sunlit Moon to the faint stars. Even so, the daylit side of the Moon remains overexposed. But the “dark side of the Moon” lit by Earthshine shows up well. A 135mm telephoto frames the field much as binoculars would show it.

This night recalled a similar evening on April 10, 1997, when Comet Hale-Bopp appeared low in the northwest, much as PANSTARRS is now, and the Moon actually passed in front of Aldebaran. An aurora display also broke loose that night, but not so last night – they are unlikely from New Mexico, though some northern lights were seen the night before from as far south as Colorado.

– Alan, March 18, 2013 / © 2013 Alan Dyer


Orion and the Winter Triangle


Winter Triangle & Orion (35mm 5DII)

The Milky Way runs through the middle of the Winter Triangle, three of the bright stars of the northern winter sky.

At right is the familiar pattern of Orion the Hunter. But if you take his shoulder star, the orange-looking Betelgeuse, you can form an equilateral triangle with Sirius below centre and Procyon at upper left. The trio are sometimes called the Winter Triangle. The pattern seems obvious here but with so many other bright stars in the winter sky, I’ve never found the pattern too obvious. But in this image I’ve chosen to nicely centre and frame the Triangle.

I’ve also increased the contrast and saturation to emphasize the wealth of nebulosity that fills this area of the Milky Way. Streamers seem to reach out from Orion and connect to the reddish Seagull Nebula above Sirius, and also to the round Rosette Nebula above centre. The background sky west of the Milky Way under Orion is filled with a faint red glow, in contrast to the neutral black sky east (left) of the Milky Way.

I shot this last night, from New Mexico, on our last good clear night on a week-long observathon. This is a stack of 5 exposures, each 8 minutes long, plus two other exposures shot through a diffusion filter to add the glows around stars. I used a 35mm lens and a filter-modified Canon 5D MkII camera, riding on an iOptron Skytracker tracking platform.

– Alan, March 15, 2013 / © 2013 Alan Dyer


The Arch of the Milky Way


New Mexico Milky Way Panorama

On March evenings the Milky Way arches overhead in a magnificent river of starlight.

This is the panoramic view we are getting every night this week at our astronomy retreat in New Mexico, as we gaze upwards to the northern winter Milky Way running across the sky from northwest to southeast, from Cassiopeia at right to Vela at left.

In the middle you can see the stars of Orion and his familiar Belt.

On March nights we are gazing outward, to objects farther out than we are from the centre of our Galaxy. This part of the Milky Way is dominated by stars and nebulas around the Orion complex several hundred light years away.

Above the main house a pillar of light rises from the western horizon and tapers out as it reaches the Milky Way high in the west. That’s the Zodiacal Light caused by sunlight reflecting off comet dust in the inner solar system. You need to be at a fairly dark site to see it, with no prominent urban sky glows to the west. But springtime is the best season for seeing the Zodiacal Light in the evening sky. From the latitude of New Mexico the Zodiacal Light rises almost straight up, perpendicular to the horizon. Here, Jupiter sits at the apex of the Zodiacal Light.

So this panorama includes the Earth, objects in our solar system (Jupiter and comet dust), and the distant stars and nebulas of the Milky Way Galaxy we live in.

For this scene I shot a panorama of 4 segments, each consisting of 2 images stacked for noise smoothing, and the segments stitched with Photoshop. Each frame was a 3-minute exposure with the Samyang 14mm lens at f/2.8. The camera was on a tracking platform, so it followed the sky during the 25 minutes or so it took for me to shoot the entire panorama. I reframed the camera between each segment to try to get the horizon and landscape horizontal and lined up as best I could from segment to segment.

The ground is from one frame out of each segment and is blurred slightly because the camera was tracking the sky. Despite shooting a moving target, Photoshop was still able to automatically assemble the frames into a seamless panorama that, in this case, covers about 250°. This was the first time I attempted such a tracked panorama. I was impressed that it worked!

– Alan, March 14, 2013 / © 2013 Alan Dyer


Skies of Enchantment – Summer Milky Way Rising


Summer Milky Rising over Adobe House (14mm 5DII)

If you lived here you’d be in astronomy paradise.

This is the summer Milky Way and galactic centre in Sagittarius and Scorpius rising before dawn early this morning. The setting is the Painted Pony Resort in New Mexico, and its adobe lodges.

There’s no more spectacular sight than this in the night sky, other than perhaps an all-sky aurora display. And they don’t get too many of those down here at 31° North in southern New Mexico.

This image is a stack of ten 3-minute exposures for the sky (to smooth out noise) but the ground is from just 2 of those exposures and is blurred because the camera was tracking the sky. Light from walkway lights, plus starlight itself, added just enough illumination to provide details in the foreground.

So to be clear – this is a real scene. The Milky Way has not been pasted onto a separate image of the foreground. However, colour and contrast have been boosted to bring out details your eye would not have seen had you been standing here early this morning in the frosty New Mexico night.

Again, as with my previous image taken earlier in the night, I used the new Samyang 14mm ultra-wide angle lens, at f/2.8. It works very well!

– Alan, March 11, 2013 / © 2013 Alan Dyer

The Wide-Angle Winter Sky


Wide-Angle Winter Sky (March 1, 2013)

Orion and his friends are beginning their descent into the evening sky, signalling the welcome end of winter and the coming of spring. 

I shot this last night from home, in a scene similar to some earlier posts, such as Winter Stars Rising. But the difference here is that I’m using a new lens, testing it for the first time. I wasn’t really after a “keeper” shot, but I think this one turned out pretty well!

The lens is the Samyang (aka Rokinon) 14mm f/2.8, an ultra-wide angle lens that sells for a bargain price, a fraction of the cost of name brand 14mm lenses. The reason is that this lens dispenses with all the automatic features and electronic communication and is a classic manual lens, just like we used to recommend people buy for astrophotography in the old film days. For shooting stars you don’t need autofocus or having the aperture stay wide-open until you take the photo. So we’re not missing much employing a no-frills manual lens like the Korean-made Samyang series – they make well-respected 24mm and 35mm lenses as well.

Star images are quite sharp across the very wide field, with very good control over coma at the corners. Stopping the lens down to f/4 does sharpen them up but the lens is perfectly usable at f/2.8, as it is here. The big issue is the extreme amount of vignetting — darkening of the corners of the frame. In star shots, we often have to boost the contrast a lot to make the shot presentable, and that increases the visibility of any vignetting, making the photo look like it was taken through a porthole. For this shot I “flattened” the image by applying very generous levels (almost maximum) anti-vignetting both in Adobe Camera Raw (at the start of processing) and again in Photoshop (at the end of processing) with its Lens Correction routine. The final result looks very good and natural I think.

Another drawback to the Samyang manual lenses is that they feed no information to the camera about what lens is attached. The “EXIF” data that the camera records lacks any info on aperture and focal length. So in the photo info at left (which is picked off the image automatically by WordPress), you’ll see the lens listed as a 50mm and with no aperture specified.

So the verdict? The Samyang/Rokinon 14mm is a very nice lens for wide-angle piggyback shooting (like this stack of five 5-minute tracked exposures), and for nightscapes and time-lapse work. A bargain at ~ $360. Recommended!

– Alan, March 2, 2013 / © 2013 Alan Dyer


A Luminous Starfield


M38 & IC 405-410-417 Complex (92mm 6D)

The Starfish and the Flaming Star combine to create a rich star field in the Charioteer.

I shot this last week, using a favourite small refractor that takes in a generous field of view for a telescope. In this case, it frames the star cluster at left called the Starfish Cluster, or better known as Messier 38. At right the large number 7-shaped patch of nebulosity is the Flaming Star Nebula, known by its catalog number as IC 405. At bottom, the nameless companion nebulas are IC 417 at left and IC 410 at bottom centre.

Of note is the colourful grouping of six stars at right called the Little Fish. It’s not a proper star cluster but an asterism, a chance alignment of stars that happens to look like something imaginative. David Ratledge presents a nice list and photo gallery of similar whimsical asterisms at his Deep-Sky.co.uk website.

The entire field is a rich hunting ground for the eyepiece or camera. You can find it these nights, in winter from the northern hemisphere, straight overhead in the evening, in the middle of Auriga the Charioteer.

For this portrait I shot and stacked eight 7-minute exposures at ISO 800 using a filter-modified Canon 6D on my TMB 92mm apo refractor at f/4.8.

Happy Valentine’s Day!

– Alan, February 14, 2013 / © 2013 Alan Dyer


See, That’s the Orion Nebula!


RAO Open House (February 9, 2013)

What a hardy bunch we are in Canada, braving winter weather to see Orion and company. 

A well-bundled group of sky fans partakes in an impromptu tour of Orion and his famous nebula.

I shot this scene last night, February 9, at the first of a series of monthly stargazing nights at the local university research observatory, the Rothney Astrophysical Observatory. About 120 people and volunteers gathered to take in the sights of the winter sky, as best they could as transient clouds permitted. Inside, speakers presented talks themed to the Chinese New Year, which is governed by the timing of the New Moon each year. As this was a New Moon night, people were able to stargaze under reasonably dark skies to see deep-sky sights such as the Orion Nebula.

Want to know where it is? An astronomy club member points it out rather handily with one of the best tools astronomers have for public outreach, a bright green laser pointer. Controversial and dangerous in the wrong hands, when used responsibly these laser pointers are wonderful for conducting sky tours.

As a side note, this is a 3-second exposure with a new Canon 6D camera at ISO 8000, yet the photo shows very little noise. In just 3 seconds, the Milky Way is beginning to show up! I could have gone to previously unthinkable speeds of ISO 12000+ and still had a presentable shot. This will be a superb camera for nightscapes and available light shots.

– Alan, February 10, 2013 / © 2013 Alan Dyer


The Beautiful Belt of Orion


Belt of Orion & B33 Horsehead Nebula (92mm 6D)

Everyone knows the Belt of Orion, but only the camera reveals the wealth of colours that surround it.

I shot this Friday night, February 8, under very clear sky conditions.

While I used a telescope, it had a short enough focal length, about 480mm, that the field took in all three stars in the Belt: from left to right, Alnitak, Alnilam, and Mintaka. All are hot blue stars embedded in colourful clouds. The most famous is the Horsehead Nebula, running down from Alnitak at left. Above the star is the salmon-coloured Flame Nebula. All manner of bits of blue and cyan nebulas dot the field, their colour coming from the blue starlight the dust reflects.

Dimmer dust clouds more removed from nearby stars glow with browns and yellows. At left, a large swath of sky is obscured by gas and dust simmering in dull red. The entire field is peppered with young blue stars.

It is certainly one of the most vibrant regions of sky, though only long exposures and image processing bring out the colours.

This is another test shot with a new Canon 6D that has had its sensor filter modified to transmit more of the deep red light of these types of nebulas. The camera works very well indeed!

– Alan, February 8, 2013 / © 2013 Alan Dyer

Snapshots of Starlife


IC 443 Jellyfish Nebula & M35 (92mm 6D)

This one image frames examples of both the beginning and end points of a star’s life.

I shot this last night, February 6, 2013, capturing a field in the constellation of Gemini the twins. At upper right is the showpiece star cluster known as Messier 35. It’s a collection of fairly young stars still hanging around together after forming from a cloud of interstellar gas tens of millions of years ago. M35 lies about 2,800 light years from Earth, on the other side of the spiral arm we live in. Just below M35 you can see another smaller and denser cluster. That’s NGC 2158, about five times farther away from us, thus its smaller apparent size. Both are objects that represent the early stages of a star’s life.

At lower left is an object known as the Jellyfish Nebula, for obvious reasons. The official name is IC 443. It’s the expanding remains of a star that blew up as a supernova anywhere from 3,000 to 30,000 years ago. What’s left of the star’s core can still be detected as a spinning neutron star. You need a radio telescope to see that object, but the blasted remains of the star’s outer layers can be seen through a large backyard telescope as a shell of gas. It is expanding into the space between stars – the interstellar medium – ploughing into other gas clouds. The shockwave from its collision with other nebulas may trigger those clouds to collapse and form clusters of new stars. And so it goes in the Galaxy.

For this portrait of stellar lifestyles, I used a 92mm apochromatic refractor and a new Canon 6D camera, one that has had its sensor filter modified to accept a greater range of deep red light emitted by hydrogen nebulas. The image is actually a stack of 12 exposures with an accumulated exposure time of 80 minutes.

– Alan, February 7, 2013 / © 2013 Alan Dyer

Constellation of the Queen


Cassiopeia (135mm 5DII)

After the 7 stars of the Big Dipper and the 3 stars of Orion’s Belt, these 5 stars are likely the most well-known in the northern sky.

These are the 5 bright stars of Cassiopeia the queen, better known simply as “the W” in the sky. Her five stars come in a range of colours, from blue giant Segin at upper left to yellow giant Shedar at lower right.

Scattered around Cassiopeia you can also spot at least one bright red nebula, the “Pacman Nebula,” plus a faint patch of purple nebulosity just above central Navi, the middle star of the W also known as Gamma Cassiopeiae. A few wisps of fainter reddish nebulosity and lanes of dark dust wind around the queen’s celestial throne. The left side of the W – the back of the throne –  is also home to several clumps of stars, nice open clusters suitable for binoculars or any telescope.

I shot this portrait of the Queen on Wednesday night, February 6, on a cool and frosty winter night in my backyard. For the set of 8 images that went into this stack I used a new tracking device, the iOptron SkyTracker. It’s a nifty little battery-powered tracker, compact but very solid. And it tracks very well. For this portrait I used a 135mm telephoto lens, and most, though not all, shots were very well tracked with pinpoint stars. A few frames showed a bit of trailing, not unusual for small portable tracking mounts. At $400 the little iOptron SkyTracker is a great accessory for anyone wanting to shoot constellations and the Milky Way with wide-angle to telephoto lenses.

– Alan, February 7, 2013 / © 2013 Alan Dyer

Winter Sky in Moonlight


Orion & Winter Stars over Old House

Earlier this week I shot a similar scene with the Moon in the photo, when it was near Jupiter. This is the same sky but 5 days later, on January 26, with the Moon now out of the picture, but serving to light up the landscape.

This is the old house on my property that serves as an occasional foreground for test nightscapes. In this case, I was testing my veteran Canon 5D MkII camera against a new Canon 6D. This shot with the 5D MkII had the best arrangement of clouds and stars and works as a decent enough shot on its own.

You can see Orion dodging the clouds, with Sirius at left, and Aldebaran, Jupiter and the Pleiades at upper right.

So what of the tests? Initial impressions are that as far as noise is concerned (always the bane of astrophotographers) the new full-frame Canon 6D improves upon the 5-year old Canon 5D MkII by a factor of two. Noise looks to be about one f-stop better in the 6D, no doubt due to its new Digic V on-board processor.

What this means is:

• Images taken with the 6D at ISO 6400 have a similar level of noise as do images taken at ISO 3200 with the 5D MkII. ISO 3200 images with the 6D look like ISO 1600 images with the 5D MkII, and so on.

• So, if you were happy with shooting at ISO 1600 with the 5D MkII before, you could now shoot at ISO 3200 with the new 6D and get similar results, but with the added benefit of being able to cut your exposure times in half, always a nice thing to do.

• Or conversely, you could continue to shoot with the Canon 6D at ISO 1600 for the same exposure times as before but get shots with much less noise in them. Always a good thing, too!

It’s great to see camera state-of-the-art advancing.

– Alan, January 27, 2013 / © 2013 Alan Dyer

An Orion Portrait from Alberta


Orion in Porttrait Format

He’s certainly the sky’s most photogenic mythological figure. Here’s my full-length portrait of Orion the hunter, captured from Alberta.

I’ve shot him many times before but this was a new combination of gear: the Canon 60Da camera and the Sigma 50mm lens, nicely framing the hunter in portrait format. This version of Orion isn’t as deep as the one I took last month from Australia. But skies were darker there, and I used my filter-modified Canon 5D MkII for his Oz portrait, a camera which picks up more faint red nebulosity than does the 60Da, Canon’s own specialized DSLR camera for astronomy. The 60Da does do a very good job though, much better than would a normal DSLR.

For this shot, as I do for many constellation images, I layered in exposures taken through a soft-focus filter, the Kenko Softon, to enlarge and “fuzzify” the stars! It really helps bring out their colours, contrasting cool, orange Betelgeuse with the hot blue-white stars in the rest of Orion.

I shot this January 4 on a fine clear winter night, the classic hunting ground for Orion.

– Alan, January 11, 2013 / © 2013 Alan Dyer

Winter Stars Rising


The Winter Sky, Northern Hemisphere

Yes, it’s cold out there, but a clear evening away from city lights this week – or this winter – will reward you with the sight of a rising star-filled sky.

This is the winter sky of the northern hemisphere, rising above a snowy prairie landscape, in a shot I took Sunday night, January 6, 2013. The sky is populated by a ream of bright stars and constellations, anchored by Orion, just below centre. You can see his three Belt stars pointing down to Sirius, just peering above the horizon in the glow of a distant town. Orion’s Belt points up to Aldebaran, the V-shaped Hyades star cluster, and bright Jupiter (the brightest object in the scene, above centre), all in Taurus. Above Jupiter is the Pleiades star cluster.

The Milky Way runs down the sky from Auriga to Canis Major. This week, January 6 to 13, is a good week to see the winter Milky Way, as it’s New Moon and the sky is dark.

In this scene the camera was looking southeast about 9 p.m. Sirius has just risen. By midnight the Dog Star shines due south. I used a 15mm wide-angle lens to take in the entire sweep of the winter sky from horizon to zenith. This is a stack of four 4-minute exposures, though the landscape is from just one of the frames, to minimize the blurring caused by the camera tracking the sky. Some clouds moving in add the streaks on either side of the frame. It was a wonderful sky, while it lasted!

And I’m pleased to note that this is my 250th blog post since beginning AmazingSky.net two years ago in early 2011. I hope you have enjoyed the sky tours.

– Alan, January 6, 2013 / © 2013 Alan Dyer

Jupiter Amid the Clusters of Taurus


Jupiter in Taurus (January 4, 2013)

Look up on a clear night this season (winter for us in the northern hemisphere) and you’ll see a bright object shining in Taurus the bull. That’s Jupiter.

This year Jupiter sits in a photogenic region of the sky, directly above the stars of the Hyades star cluster and yellow Aldebaran, the brightest star in Taurus. Above and to the west (right) of Jupiter is the blue Pleiades star cluster.

Over the course of January 2013 you’ll be able to see Jupiter move a little further west each night (to the right in this photo) away from Aldebaran and toward the Pleiades. Jupiter will stop its retrograde motion on January 30. After that it treks eastward to again pass above the Hyades and Aldebaran (returning to where it is now) in early March.

Jupiter’s proximity to Aldebaran and the Hyades makes it easy to follow its retrograde loop over the next few weeks. It’s an easy phenomenon to watch, but explaining it took society hundreds of years and the ultimate in paradigm shifts in thinking, from the self-important arrogance that Earth – and we – were the centre of the universe, to the Sun-centered view of space, with Earth demoted to being just one planet orbiting our star.

I took this image Friday night, January 4, from home as my first astrophoto upon returning to Canada from Australia. It’s a combination of two sets of images: one taken “straight & unfiltered” and one taken through a soft-focus filter to add the glows around the stars and central, brilliant Jupiter. I then blended the filtered images onto the normal images in Photoshop with the Lighten blend mode.

– Alan, January 5, 2013 / © 2013 Alan Dyer

The Down Under Waxing Moon


Earthshine on Australian Waning Crescent Moon (HDR)

To northern eyes this looks like an old Moon in the morning sky, but this is really a young Moon in the evening sky – seen from Australia.

This was the waxing crescent Moon a few nights ago in the early evening sky. Because I took this from a latitude of 30° south, the Moon is turned over almost 90° from the way northern hemisphere viewers would see it from Canada or the northern U.S.

For this image, I shot ten exposures from 1/30s to 15 seconds and merged them into one “high dynamic range” composite using Photomatix Pro software. The result is an image with detail in both the bright sunlit crescent and in the dark side of the Moon visible here lit by Earthshine, sunlight reflected off the Earth. The resulting “HDR image” compressed the wide range of brightness into one image, to show the Moon the way your eye would see it but that photo technology is still not capable of recording in one exposure.

– Alan, December 20, 2012 / © 2012 Alan Dyer


The Amazing Orion Nebula


Orion Nebula Complex, M42, M43, NGC 1973-5-7

My Australian nights are proving to be frequently and thankfully clear enough that I’ve got the luxury of shooting some familiar “home sky” objects. This is the famous Orion Nebula in the Sword of Orion, about 1500 light years away.

I’ve shot this nebula many times from the northern hemisphere but my Australian skies are darker than at home, and the nights a lot warmer than when this object is up in our winter sky.

The Orion Nebula is a complex consisting of Messier 42, the main nebula, M43, a small nebula attached to the north (above) and the bluish Running Man Nebula (can you see his dark figure?) at top that is officially catalogued as NGC 1973-5-7. Together, these make up the largest region of star formation in our corner of the Milky Way. It’s easy to see with the unaided eye on a dark night.

To shoot this, I blended three different exposures, short (4 x 1 minute), medium (4 x 5 minutes) and long (4 x 15 minutes), to preserve all the details from the intensely bright core our to the faint tendrils extending into deep space. I stacked the 4 frames taken at each of the exposure times, then blended those stacks using masks in Photoshop CS6 (and its wonderful and editable Refine Mask function) to mask out the overexposed area of the longer exposure and let the shorter exposure content shine through. The result is that the core still shows the little cluster of stars, the Trapezium, and the characteristic green tint of the core. But I applied lots of Curves to bring out the fainter bits and swirls in the periphery.

I shot this through my Astro-Physics Traveler 105mm refractor at f/5.8 using the filter-modified Canon 5D MkII camera, at ISO 400. This turned out to be certainly my best shot of Orion yet in my library.

– Alan, December 13, 2012 / © 2012 Alan Dyer

Regal Colours of Cassiopeia


Sitting on the border of Queen Cassiopeia and King Cepheus is this royal cloak of pinks and reds.

Too faint to see even in a small telescope, the main cloud of nebulosity is called NGC 7822, with a companion cloud below known as Cederblad 214. Rather cold names for a stunning region of space.

I love the colours in this field. The camera I use is modified to bring out the reds of glowing hydrogen but also nicely picks up blues and purples, which mix to provide subtle shades of pink and magenta. There are even yellows and greens from dust clouds.

Yes, I’ve certainly punched up the colour and contrast quite a bit from what came out of the camera, but I tried to retain a “natural” colour balance, not skewing the palette too far to the deeply saturated monotone red I see in some images of nebulas.

I shot this Saturday night, October 6, from my backyard on a fine autumn night for stargazing and star shooting. It’s a stack of eight 12-minute exposures, “median” combined to eliminate the satellite trails that crossed several frames.

– Alan, October 6, 2012 / © 2012 Alan Dyer

Big Dipper Over the Badlands


The Big Dipper swings low over the Badlands of Dinosaur Provincial Park, with an aurora added for good measure.

This another shot from my very productive night last Sunday out at Dinosaur Park, 100 km east of me. Here the curtains of aurora that made the news that evening shimmer below the iconic seven stars of the Big Dipper, now low in the northern sky on autumn evenings.

Light from the Full Moon provides the illumination. People wonder how we astrophotographers can take pictures of the stars in the daytime. We don’t. We take them at night, letting the Moon light the scene. Its light is just reflected sunlight, so a long enough exposure (and in this case it was only 8 seconds) records the landscape looking as if it were daytime, complete with blue sky, but with stars – and this night an aurora – in the sky.

– Alan, October 2, 2012 / © 2012 Alan Dyer


Sunset on the City


The Sun sets in a ball of fire behind the skyline of Calgary.

For this shot on September 27 I found a spot on an overpass on the Ring Road east of Calgary to look west. Using an app for the iPad, LightTrac, I was able to locate the exact spot where the Sun would set behind the skyline, including the new 50-storey Bow Tower.

Getting the Sun big compared to the buildings means shooting from a distance with a telephoto lens. I used a 200mm and 1.4x extender here.

It would have been nice to have shot from a higher altitude but such places are hard to find east of Calgary where the land flattens out onto the prairie. However, this was a good test of the technique for lining up a rising or setting Sun or Moon with a photogenic foreground. That’ll come in handy this weekend for the Harvest Moon.

– Alan, September 27, 2012 / © 2012 Alan Dyer


Star Trail Reflections


The stars of the southern sky arc over the peaks of the Lake Louise Range in this half-hour’s worth of exposures.

For this shot I took 35 frames from a 200-frame time-lapse movie and stacked them to create star trails moving over about 25 minutes time when the sky was dark and moonless. I also layered in the moonlit landscape from a frame taken at the very end of the time-lapse sequence when the Moon has risen and was lighting the mountains and trees. So this scene is a bit of a Photoshop fake, but only so far as to merge exposures taken a couple of hours apart from the same fixed camera to combine the sky and stars from when the Moon was not in the sky with the ground from when it was, so the ground isn’t too dark and featureless.

What most people find surprising about star trail shots is the range of colours displayed. Some of the magenta trails come from a little chromatic aberration in the lens. But nevertheless, stars do exhibit lots of colours, but usually only in time exposures like this. As a bonus one frame captures either a meteor or an Iridium satellite flare at right above Mount Victoria.

I took the images for this scene on Friday, September 7, on a shoot at Herbert Lake in Banff.

– Alan, September 14, 2012 / © 2012 Alan Dyer


Milky Way Amid the Trees


This is the classic summer campsite shot, looking up through the trees to the Milky Way.

I shot this Saturday night from a favourite viewpoint in Banff at Saskatchewan River Crossing. The night proved to be less than the perfectly clear I had hoped for, so I settled for Plan B and shots looking up to a nearby nightscape scene, rather than out across a landscape and into horizon clouds. Some drifting clouds in this shot blur the stars.

This is an example of the type of simple nightscape anyone can do with a camera on a tripod. There’s no tracking going on here, just a short 70-second exposure, enough to pick up the Milky Way. The little trailing of the stars that results isn’t objectionable. I could have shortened the exposure and decreased the trailing but only by going to a higher ISO speed like ISO 3200 which, with the Canon 7D camera, is pushing it too much for noise in a shot like this.

Better still would have been to place the camera on a tracking platform. expose longer at an even slower, less noisy ISO speed, and then let the trees blur from the camera’s motion as it followed the stars. It would have simply looked like a windy night.

Or, it’s possible to combine tracked and untracked exposures, one for the sky and one for the ground, using Photoshop magic.

But I did neither here. This is an unadulterated image of the summer sky shining through trees.

– Alan, September 11, 2012 / © 2012 Alan Dyer


Horizon to Horizon Milky Way


The view doesn’t get any wider than this. This fish-eye image takes in the entire night sky and summer Milky Way.

I shot this last weekend at the Saskatchewan Summer Star Party in Cypress Hills. Red lights of observers streak along the horizon around the perimeter of the circular image. At centre is the zenith, the point in the sky straight overhead.

The sky was very dark, but the sky close to the horizon is tinted with the faint glows of aurora and airglow.

The Milky Way is the main feature of the summer sky, here stretching from Sagittarius in the south at bottom to Perseus at top in the north. Wide shots like this really put the giant lanes of dust into proper context; you can see their full structure and faint tendrils extending well off the Milky Way band.

For these fish-eye shots (suitable for projection in a planetarium) I used a Sigma 8mm fish-eye lens and a full-frame Canon 5D MkII camera. This is a stack of five 5-minute exposures, all tracked. The landscape is from just one of the images, to minimize blurring of the ground.

— Alan, August 23, 2012 / © 2012 Alan Dyer

Lost in the Milky Way


Just lie back and lose yourself in the Milky Way.

That’s what one person is doing here, under the starry skies of Cypress Hills, Saskatchewan. In summertime the Milky Way is the main attraction at night. Here, it rises from the south, a region containing the centre of our Galaxy in Sagittarius, to climb up overhead through the star clouds of Scutum and Aquila, then into Cygnus in our local spiral arm, and on into Cassiopeia at the top of the frame in the north.

As in most deep sky photos, I’ve boosted the contrast and colour to make a dramatic image. To the eye the Milky Way appears in subtle shades of grey painted with the dark brushstrokes of dust lanes winding through the bright clouds of stars. But your eye does see much of this structure.

I like these types of ultra-wide images. They capture the mind’s eye impression of what the Milky Way looks like across the vault of heaven.

This is a stack of four 5-minute exposures, all tracked on a small equatorial mount, the Kenko SkyMemo, and all taken with the Canon 5D MkII at ISO 800 and Canon’s ultra-wide 15mm lens at f/4, as you can see from the photo data at left. I retained the ground from just one image, to minimize the blurring from the slowly moving camera tracking the stars. I masked out the ground in the other 3 images. They help smooth out noise in the sky.

— Alan, August 21, 2012 / © 2012 Alan Dyer

Star Party Panorama


This image depicts a 360° panorama of the field and sky at the Saskatchewan Summer Star Party.

This was my first time shooting a nighttime panorama but it was easy. Just 12 exposures taken at 30° intervals panning around on a levelled tripod, in classic planetarium panorama style. Each exposure was 30 seconds at f/2 and ISO 3200 with the Canon 5D MkII and 24mm lens. It helps to have a high-quality fast lens.

North is at centre, south on either end.

The sky contains some interesting and subtle features that show up well in a wide-angle panorama like this:

– The bright summer Milky Way is setting at left in the southwest while the fainter winter half of the Milky Way is rising opposite, at right in the northeast.

– Jupiter and the Pleiades rise at right just off the Milky Way

– A meteor streaks over the trees at centre

– At centre, to the north, glows a faint yellow and magenta aurora

– The larger green glow left of centre is, I suspect, airglow rather than aurora. It has a striated structure, particularly at right of centre above the trees where it appears as subtle green and red bands arching across the northeast.

The sky this night was dark but did have a brighter than usual background, likely due to the presence of this faint airglow that the camera picks up better than the eye.

Even so, I can see another faint glow:

– A whitish band coming up from the northeast passing through Jupiter and below the Pleaides. That’s the Zodiacal Band, an extension of the brighter Zodiacal Light and caused by sunlight reflecting off cometary dust in the ecliptic plane.

The location of the panorama and star party was the Cypress Hills Interprovincial Park in southwest Saskatchewan, one of the darkest places in southern Canada.

— Alan, August 20, 2012 / © 2012 Alan Dyer

Circling Star Trails in the Rockies


Let the camera shoot for a few hours and this is what you get: stars circling the sky, turning into concentric paths around the North Star.

For this image I stacked 230 short exposures, each 50 seconds long, taken over about 4 hours time on July 7/8. My previous blog entry is one of those individual frames. But in this composite, the stars become trails rotating about the pole of the sky, near Polaris, the North Star, here over Num-Ti-Jah Lodge at Bow Lake in Banff. Moonlight provides the illumination and turns the sky blue, just as in daytime, only much dimmer. But the long exposures bring out the colours and make the scene look like daylight, because the light of the Moon is daylight, just reflected first off the Moon’s neutral grey face.

The same frames used to make this still frame composite can also be used to make a time-lapse movie of the circumpolar stars turning.

— Alan, July 14, 2012 / © 2012 Alan Dyer

Venus Meets the Seven Sisters


The goddess of love meets the daughters of Atlas — it isn’t often we get to see such a sight!

This is brilliant Venus shining amid the stars of the Pleiades, on the evening of Tuesday, April 3, 2012, with Venus as close to the Seven Sisters star cluster as I can ever remember seeing.

Venus last passed near the Pleiades in April 2004 (though not as closely as it did tonight), and will again in April 2020, reflecting the 8-year periodicity of Venus’s return to the same place in the sky. Thus the 8-year interval between the June 2004 transit of Venus and the one this June in 2012.

I took this through a 92mm aperture refractor, but added the classic spikes of light (which you would normally get only when shooting through a Newtonian reflector telescope) by taping some wire in front of the lens. It’s a technique that’s strictly for show. Some high cloud moving in, supposedly in advance of a big spring snowstorm, added the glow around Venus.

This was one of many superlative Venus events this year. Enjoy the sight of Venus now that it is as high as it ever gets in our northern hemisphere evening sky. We won’t see it quite as good as this again until 2020.

— Alan, April 3, 2012 / © 2012 Alan Dyer

Orion the Hunter, A Full-Length Portrait


Orion is quickly disappearing from the dark night sky now, as spring begins and the winter constellations depart the sky. This is a shot from February, one I only just now processed.

The Belt of Orion really stands out as do the nebulas that wind all through and around Orion. This is a rich region of the sky for star formation.

I took this portrait of Orion using the 50mm Sigma lens, taking four 5-minute exposures and stacking them. In this case each exposure had varying amounts of haze in the sky as light clouds moved in. So the fuzzy glows around stars are from natural causes here, and are not produced by filters (as in the blog from last year called Fuzzy Constellations) or by post-processing. The glows bring out the star colours, particularly orangish Betelgeuse at upper left and blue Rigel at lower right.

This is the first image I’ve processed using the new Beta version of Photoshop CS6 and Adobe Camera Raw 7 software, just released this past week. Very nice indeed! You can download it for free from Adobe Labs. I like the new interface and functions. I’m not sure the final image quality is any better but some of the new features will be very nice for astrophotography and day to day use. Increased speed is promised but I haven’t seen much evidence for that. But this is a Beta version.

— Alan, March 24, 2012 / © 2012 Alan Dyer

Bridging Earth and Sky (Off to Venus and Jupiter)


This was the scene Sunday night, March 11, as Venus edged up to Jupiter in the evening twilight.

To capture the nightscape I hunted around for a spot along the Bow River near home and settled for a site on the banks of the river at the point called Blackfoot Crossing, the traditional heart of the Siksika First Nation land. Here, the Bow River runs north-south for a stretch and the highway crosses the river heading west into the evening twilight, as if off into the sky to meet Venus and Jupiter in conjunction.

I waited until a passing car added the streak of tail lights, heading off into the sunset and starry sky. Nightscapes like this are often best taken when the sky is fairly dark but a longer exposure still brings out the remaining colours of twilight, as well as fainter stars, to make an image enhanced from what the eye might have seen.

— Alan, March 11, 2012 / © 2012 Alan Dyer


Trails of Orion Over Fairview


I love the lighting in this shot from Saturday night. I took this by standing out on Lake Louise, from a spot you couldn’t be in summer without getting wet!

Moonlight grazes the east and north slopes of Mount Fairview, while spill from a skating rink flood lamp lights the trees. The sky is deep blue from moonlight making this look like a day scene.

But this is actually a 4-minute exposure, purposely long to allow the stars of Orion and the bright star Sirius at left to trail across the heavens over Fairview.

Unlike most nightscape shots, of necessity taken at high ISO speeds to grab lots of light in a short exposure, I took this shot at ISO 100. Even with the blog’s low resolution images, I think you can see the difference here – this slow-speed shot looks richer and smoother, lacking the fine noise that is inevitable in high ISO shots. It’s just like using slow speed film – in the old days I’d always carry two types of film for trips like this: slow Velvia 50 for long star trail shots, and fast Fuji or Ektachrome 400 for the untrailed nightscapes. I always loved the Velvia shots – they were indeed like smooth velvet.

Now with digital cameras you can switch settings as you like. And see the results instantly. How did we ever manage to get any results with film?

— Alan, February 6, 2012 / © 2012 Alan Dyer

Calgary Lights Up


I’m getting the hang of shooting demanding day-to-night time-lapse movies!

For this clip I shot over 2.5 hours, using a fish-eye lens, to create a sequence suitable for projection in a digital planetarium dome.

But the trick with these day-to-night sequences is getting a smooth transition in exposures, which can range over 12 to 16 f-stops, from short snapshot exposures with the lens stopped all the way down at the start before sunset, to long 8-second exposures with the lens wide open at night, plus the camera’s ISO speed increasing from a slow ISO 100 to a faster ISO 400 or more at select points through the sequence as well.

The secret to doing this is a control box called the Little Bramper, an intervalometer that fires the shutter automatically at set intervals but also gradually ramps the exposure time a tad longer with each successive exposure. This was my third time out with the Bramper, and I more or less got it right this time!

While the Bramper does a great job running the camera, it still takes a lot of manual oversight to control its ramping rate so the exposures don’t get too long and overexpose the scene, or fail to get long enough to track the darkening sky.

At several points in the sequence it is also necessary to quickly (in one exposure cycle) half the exposure time, while at the same time opening up the lens a stop, or doubling the ISO, so that the ever-lengthening exposure doesn’t get too long and collide with the interval between exposures. In this case, shots were taken about 12 seconds apart, so the maximum exposure for each frame couldn’t be much more than 8 to 10 seconds.

The end result of the work is a time-lapse movie that shows the setting Sun, then the lights of Calgary coming on as the sky darkens. Clouds lit by the yellow glow of streetlights move in, then blow away again to reveal a few stars in the urban sky.

— Alan, October 16, 2011 / Movie © 2011 Alan Dyer

Milky Way Mosaic


Centre of the Milky Way Panorama (2011)

It’s taken me a few months to get around to the task, but at last! — my mosaic of the Milky Way I shot in Chile back in May.

The panorama is made up of 6 frames, stitched and blended together, extending from Crux, the Southern Cross (at right) to Aquila the eagle (at left) — a sweep of the Milky Way from Acrux to Altair! The mosaic is centred on the core of the Galaxy in Sagittarius and Scorpius.

Panoramas like this allow you to step back a distance and take in the big picture:

— You can see the large-scale structure of the dust clouds and the odd diagonal sweep of many of the clouds cutting across the plane of the Galaxy. I’ve never heard an explanation of why the dust lanes seem to have that structure and direction. I also see a 3D effect, with the nearby dust clouds hanging in front of and obscuring the bright starclouds of the distant inner spirals arms of our Galaxy.

— Also apparent are the extensive dust clouds at left extending from Ophiuchus (at top) down into Aquila, well below the plane of the Galaxy. Most wide-angle shots of the Milky Way I see tend to process out the subtle brown clouds that extend far off the Galactic plane. And they are brown, not black.

— And what really stands out is the band of bright blue stars from Scorpius (at top centre) to the right above the Milky Way through Lupus, Centaurus then down into Crux. This is a section of Gould’s Belt, a ring of hot blue stars around the sky that runs at an angle of about 20° to the Milky Way. This ring of hot, nearby stars surrounds us in our spiral arm and is thought to be only about 65 million years old, likely caused by some disturbance in our spiral arm which set off a wave of star formation close to us.

— And … as my Australian friends will point out, you can see the entire Dark Emu, made of the dust lanes from the Coal Sack in Crux at right (his head and beak), through the curving lanes in Centaurus (his neck), then sweeping up and over the centre of the Galaxy (his body) then down into Scutum and Aquila (his two feet and his tail).

I took this panorama from the Atacama Lodge in north central Chile, using the Canon 5D MkII and Canon 35mm lens. Each of the 6 segments that went into this pan was itself a stack of 4 x 6 minute exposures, plus a fifth exposure through a soft-focus filter, all at f/4 and ISO 800. The camera was on a Kenko SkyMemo tracking platform. I assembled the pan with Photoshop CS5’s Photomerge command. This is actually only half of the full panorama mosaic, which extends for another 5 segments to the right along the Milky Way to Orion, taking in the entire southern portion of the Milky Way. But this is the best bit!

— Alan, Oct 2, 2011 / Image © 2011 Alan Dyer

Time-Lapse Test: Adding Motion Control


Here’s the movie I show being taken in my previous blog. This is my first attempt at a motion-control time-lapse.

In this movie the camera shifted position during the 3 hours of shooting by sliding along a rail, with the movement controlled by a little computer box that opened and closed the shutter (in this case for 15 seconds for each frame), then between each exposure it pulsed the motor to shift the camera a centimetre or so down the dolly’s rail. 

Pretty nifty! And until this unit, the Stage Zero Dolly, came along this capability would have cost much more money, from some Hollywood cinema supplier.

This was only a test, and I did mess up at one point (where I appear in the frame in the previous blog’s movie) as I tried to adjust the speed in mid-track, resulting in some dead motion for a few frames. So the motion comes to a halt briefly. It will take some learning to know how to set the speed right for the number of frames and exposure times I typically shoot.

But the ramping up in speed at the beginning of this movie is intentional, and is one of the motion control variables you can program in. 

The Stage Zero Dolly unit is from Dynamic Perception LLC. Lots of time-lapse shooters are employing it now, for their cinema-like pans and moves. I’ve been inspired by the work of Randy Halverson at http://dakotalapse.com/ . Amazing stuff — representing a whole new level of time-lapse techniques. 

So now I know what I’ll be doing now on moonlit evenings! 

— Alan, September 12, 2011 / Movie © 2011 Alan Dyer

Time-Lapse of a Time-Lapse


I’ve been taking lots of time-lapse movies of late. But this one is a time-lapse movie of my other camera taking a time-lapse movie.

Here you see my Canon 7D camera riding aboard my latest tool (or toy!), a motion-control dolly. The camera takes its series of still images (that will be later stitched together into a movie) while it tracks down a rail, riding on a motorized cart.

The unit is called the Stage Zero Dolly, from Dynamic Perception LLC. It is a nifty device that fires the camera shutter for the exposure time and interval you desire. In between each exposure it also moves the camera a small amount down the track. The result can be seen in the next blog, a time-lapse movie with a changing perspective, giving a cinema-style dolly shot. Except, I took this one over 3 hours.

While this scene might look like I took it during the day, it is the middle of the night (witness the moving stars). The blue sky is due to moonlight, from an almost Full Moon on September 10.

The Stage Zero Dolly takes some work to set up and program right, but the results open up a whole new dimension (literally!) in time-lapse shooting.

— Alan, September 12, 2011 / Movie © 2011 Alan Dyer

Twilight at Waterfowl Lakes


About half an hour after I took the previous blog entry image, I was here on Sunday evening, farther down the Icefields Parkway, at the shore of Lower Waterfowl Lake. The peak is Mt. Cephren.

The Sun had set and the sky was now filled with the purple glow of twilight marking the beginning of an exceptionally clear night.

Capturing this scene as the eye saw it took a stack of 7 different exposures, combined in what is known as a High Dynamic Range image, that blends the shadows details in the foreground without losing the subtle tints of the bright sky.

— Alan, September 5, 2011 / Image © 2011 Alan Dyer

Lake Louise by Moonlight — The Movie


Here is the time-lapse movie I took last Saturday night at Lake Louise, Alberta, under the light of the Full Moon. My previous blog featured a still frame from the beginning of this sequence.

The night starts clear, but as often happens, clouds move in, blowing off the cold icefields of the continental divide. It does make for a nice effect in time-lapse, one of few instances in astronomy where some clouds can be useful!

Also notice how the reflection disappears as the lake breaks up into waves briefly, as wind blows in now and then through the night. The Full Moon is rising behind the camera, causing the lake to light up as moonlight illuminates more of the lake’s surface. Shadows move across the mountainsides. Arcturus is the bright star setting at right. The red object at left is a moored canoe, moving about on the lake.

I took this movie over 4 hours from 10:30 pm to 2:30 am, taking 477 frames with the Canon 7D and 10mm lens. For time-lapse movies like this, I process the full-size RAW files in Adobe Camera Raw and Bridge, then use Photoshop’s Image Processor to export them all to smaller size JPGs. From that set, I use Photoshop CS5 Extended’s “Motion” feature to assemble the folder of JPGs into a movie, in this case at 24 frames per second, a little fast perhaps for this sequence, but it’s easy to change if needed. Photoshop then renders that image file out as a Quicktime movie. What you see here is a tiny version of the final HD-sized video.

— Alan, August 16, 2011 / Movie © 2011 Alan Dyer

Lake Louise by Moonlight


This has to be one of the most photogenic and photographed places in the world. Here it is in a different light, moonlight.

This is Lake Louise, in Banff National Park, Alberta. A few hours before I took this photo on Saturday, August 13, where I stood would have been swarming with thousands of people. But at midnight there was no one about. I had the view to myself.

This looks like a daytime shot, except the stars give it away. Instead, it is the Full Moon, behind the camera, providing the illumination. Contrary to Hollywood lighting clichés, moonlight is not blue. It is the same colour as sunlight, because it is sunlight, just much fainter, reflected off the Moon’s neutral grey surface.

In this view we are looking southwest, toward the stars of the summer sky setting behind the peaks of the continental divide. Arcturus is the bright star at right.

A calm night provided the glassy lake to reflect Mount Victoria and Victoria Glacier.

This is one frame of 477 30-second exposures I took over 4 hours, of the stars turning and eventually clouds blowing in across the sky from the icefields over the divide. It’s rare to get such a perfectly clear night in the Rockies. It was a wonderful to be there, and apparently to be the only one there, to experience it.

— Alan, August 14, 2011 / Image © 2011 Alan Dyer


Sunset in the City — This is Only a Test!


This is one for the time-lapse geeks!

One of the trickiest subjects for a time-lapse sequence is a smooth and seamless day-to-night transition. Exposure times vary from fractions of a second before sunset to several seconds at night fall.

How to do it? Manually shifting exposures is too much work and prone to error. Putting the camera on Automatic can work but inevitably results in an effect known in the time-lapse world as “flickering.” The camera’s automatically-judged exposures aren’t consistent from frame to frame so the final movie shows minor bright/dark flickering, making it look jerky.

For this test sequence of sunset over the Calgary skyline, I tried a new toy for the first time, as a solution.

The device is called the Little Bramper (for Bulb Ramping). It is a custom-made intervalometer that fires the camera shutter every few seconds (at whatever interval you desire). Nothing new there. But what’s unique is that it can be set to slowly increment the exposure time by as little as 1/1000th of a second from frame to frame, gradually increasing the exposure (“ramping” it) to accommodate the darkening scene. The result is a smooth transition from day to night with no flickering.

This was my first use of the Bramper and it wasn’t without its glitches. The shortest exposure the Bramper can provide (it always controls the camera thru its Bulb setting) is about 1/10th of a second (I had no idea camera shutters can fire as quickly as that even on Bulb).

But at the beginning of a sequence like this, with a bright sky, achieving that exposure (still quite long) means using a small f-stop, a slow ISO speed, or a neutral density filter, or all of the above. But as the sky darkens and exposures lengthen, exposures would become too long to fit within the desired interval between frames (typically no more than 5 to 10 seconds for a smooth sequence). So, to shorten the exposures you then have to open up the lens, switch to a faster ISO, or remove the ND filter, while also commanding the Bramper to quickly reduce its exposure time, all in one exposure cycle (i.e. 5 to 10 seconds) so as not to lose or ruin frames. Takes some coordination and practice (hit the Bramper’s button, adjust the camera, all within 5 seconds), and I didn’t get it right the first couple of times.

But overall, for a first test, the sequence turned out very well. The $80 Little Bramper does the job, though it does take careful monitoring through the sequence, not just to perform the exposure swaps, but to also watch that the ramping rate (adjustable on the fly) matches what the scene is doing and you aren’t under- or over-exposing. It’ll take a little more practice, but the results certainly are worth it.

It’s another neat tool in the time-lapse arsenal.

— Alan, August 10, 2011 / Movie © 2011 Alan Dyer

Moon in the Mountains


I’ve been chasing the Moon this week. I caught up with it last Thursday night, August 4, in Banff, with the waxing crescent Moon low in the southwest at dusk.

The location is the upper Vermilion Lake just outside the Banff townsite. The golden reflection of the low Moon on the water, the slope of the mountainside and its reflection, the dock and steps, and the tail lights from a vehicle on Highway 1 just up the hill (I decided to leave them in!) make for what I think is an interesting composition of converging lines.

I got set up and in position just in time to catch the scene at the magic hour of twilight, when the sky is dark enough the show deep colours and the Moon’s entire disk shows up, but before the sky gets too dark and the Moon too bright to make an interesting scene.

Even so, the contrast in such a scene is still very high. So to capture it more as your eye would have seen it I used a stack of five exposures, taken in rapid succession, each 2/3rds of an f-stop apart. I then merged the frames with Photoshop’s High Dynamic Range routine to create a scene that brings out detail in the foreground without overexposing the Moon and sky.

A technical method to capture a simple scene of serenity in the mountains.

— Alan, August 7, 2011 / Image © 2011 Alan Dyer

The Eagle and the Swan


Though they are truly “nebulous,” these clouds of interstellar gas carry fanciful names — our human attempt to make sense of the vast chaotic forms that pervade deep space.

Above is the Eagle Nebula, a.k.a. Messier 16. Below lies the Swan Nebula, a.k.a. Messier 17. Through a telescope to the eye these nebulas do take on the imagined shape of interstellar birds flying along the Milky Way. But long exposure images like this bring out far more than the eye can see. The entire field, here about the width of what high-power binoculars take in, is filled with swirls of hydrogen gas, glowing in its characteristic red colour.

The Eagle Nebula lies in the constellation of Serpens the serpent, while the Swan Nebula lies just over the border in Sagittarius the archer.

I took this shot Saturday night, July 30, 2011, on one the few perfect nights of observing we get here in Canada — the night was warm, dry, with little wind and no mosquitoes. I could venture out with just a sweater on for a bit of warmth. A far cry from the parkas and down-filled boots normally needed.

This field is a first for me from Canada. I’ve shot it from Australia and Chile, where these objects lie overhead, never from home in Alberta at a latitude of 51° North. But the night was so transparent, the field was worth going after, despite it being low on the southern horizon and at its best for no more than an hour after it got dark.

To shoot the field, I used the wonderful little Borg 77mm f/4 astrographic refractor, effectively a 300mm telephoto lens but far sharper and flatter than most telephotos made for sports and wildlife. The camera was the Canon 5D MkII, a filter-modified version that has a special filter for passing more of the deep red colour of hydrogen. But the real difference here was the use of a filter at the focus of the telescope that further isolated the red wavelengths and blocked other colours that might have otherwise fogged the image, especially from a field so low on the horizon. It worked great, though does tend to render the whole field on the red side.

— Alan, July 31, 2011 / Image © 2011 Alan Dyer


Sacred Site: The Movie


Here’s my time-lapse sequence of the hoodoos at Writing-on-Stone Park lighting up as the Moon rises and the Milky Way sets.

The sky starts off dark but lights up as the waning Moon, off frame behind the camera, rises and lights up the foreground and sky. The sequence ends as the sky brightens with the onset of dawn.

Waning moons are great nights for this type of shooting as the changing lighting produces dramatic effects as the landscape lights up at moonrise. The problem is, the Moon doesn’t rise till very late, making for a long night of shooting.

I assembled this sequence from 290 frames, each a 60-second exposure, taken at 1-second intervals over about 4 hours. The camera was the Canon 7D and the lens the 10-22mm Canon EF-S zoom at 10mm. I also shot a matching sequence simultaneously with the 8mm fish-eye and Canon 5D MkII camera, for an all-sky sequence for planetarium use.

— Alan, July 30, 2011 / Movie © 2011 Alan Dyer

Sunset on the Sweetgrass Hills


My previous blog featured a still frame from a time-lapse movie I took of sunset on the Sweetgrass Hills and Writing-on-Stone Provincial Park. Here’s the full movie, taken at sunset on July 22, 2011.

I assembled the movie in Photoshop Extended CS5 from 678 frames taken over nearly an hour, at 5-second intervals, beginning before sunset and continuing until well after sunset. The camera was the Canon 7D and lens the 10-22mm lens at 10mm.

Putting the camera into automatic Aperture-priority mode keeps the exposure uniform as the lighting level drops but does induce some slight flickering from minor shot-to-shot variations in exposure. That can be fixed in “post!” But it’ll be a while before I get around to that!

— Alan, July 26, 2011 / Image © 2011 Alan Dyer

Circling the Sky II


My encounter with the old farmstead near home continued the next night (after the shot featured in the previous blog), under another stunningly clear moonlit sky. Here I let the camera fire away for three and half hours, producing a rather neat juxtaposition of surreal starfield above an abandoned old farmhouse.

For this shot I stacked 660 17-second exposures that were taken in rapid succession at one second intervals. I used the Canon 5D MkII at ISO 800 and Sigma 8mm lens  at f/4.5.

My workflow for an image like this is to…:

1. Use Adobe’s Photo Downloader to download all the images from the camera card into a folder on a local hard drive, then open Adobe Bridge to inspect them. Toss out any junk shots at the beginning and end of the set.

2. Open a representative image in the sequence using Adobe Camera Raw and process it for Colour Correction, Contrast, Noise Reduction, Vibrance, Fill Light (to bring out shadow detail) and Recovery (to recover details in highlights).

3. Then in Bridge, go under Edit: Develop Settings: Copy Camera Raw Settings.

4. Select all the images (Select All) and then Paste Camera Raw Settings. This applies that custom setting to all the images in the sequence in one fell swoop. 600+ images processed in seconds! Sometimes it can take a few iterations to get a good setting that works well through the whole set.

5. Then Select All again in Bridge and go under Tools: Photoshop: Image Processor. This open Photoshop itself and brings up a dialog box that allows you to convert those processed RAW files into other formats (JPGs, TIFFs, etc. in whatever size you want). For this type of single image I convert the RAWs into full resolution TIFFs. While I am at it, I’ll also convert each image into a smaller-sized (1080 pixels high) JPG. The folder of JPGs are for creating an HD-format time-lapse movie from the same set of images. Image Processor can create two sets of images simultaneously from the same RAW master. Very nice.

6. This will take a while as Image Processor dutifully opens up each image one by one and creates a TIFF (and a JPG, too, if you like) from each RAW file in another folder. Go for a very leisurely coffee!

7. Once a folder of finished TIFFs is there, I can use Chris Schur’s Photoshop Action to take each of those images and stack them one by one into a single image. That process can take hours with full-res TIFFs. Start it before you go to bed! Slow, yes, but it’s better than doing it all by hand.

8. The final image can still use touch-ups, to sharpen, alter the brightness and contrast of the sky (frames taken when the sky was still bright with twilight can make the scene look too bright).

It can take a day’s worth of computer crunching to get a final image. But the result is certainly unique.

— Alan, July 20, 2011 / Image © 2011 Alan Dyer

Circling the Sky


It has been an incredible week for imaging. Clear skies and a bright Moon are the tickets to nightscape photography. And in the last week we’ve had clear moonlit nights in abundance.

I’ve taken advantage of the run of great weather to shoot an old farmstead down the road from my house, on several nights. This is a shot from the first night out, on Thursday, July 14. It is a fish-eye lens shot taking in most of the sky, and looking north at the bottom of the frame. The star trails, taken over 2 hours, circle around the North Star (or close to it).

So why is the sky blue? The Full Moon, just out of the frame at top, is illuminating the landscape and sky — and light from the Full Moon is the same colour as light from the Sun (because that’s what moonlight is! — reflected sunlight). It’s just that moonlight is much dimmer. Expose long enough and you get a scene that looks like daylight but has the stars in it.

To create this image I took 400 18-second exposures, taken 1 second apart, using the Canon 5D MkII camera at ISO 800 and the Sigma 8mm lens at f/5. I stacked the images using an automated “action” for Photoshop developed  by astrophotographer Chris Schur. The original frames can also be strung together in sequence to create a time-lapse movie of the sky turning, suitable, in this case, for projection in a full-dome digital planetarium. I’ll post some of those shortly.

But after several nights of shooting till 3 and 4 a.m., and accumulating 100 gigabytes or more of RAW files, it’s time to take a night off and turn in early! At 1 a.m.!

— Alan, July 19, 2011 / Image © 2011 Alan Dyer

Moon Over Banff Springs Hotel


A weekend in Banff National Park — but three cloudy nights foiled the array of starry time-lapse shots I had hoped to take. But on Sunday night, July 10, I did get a nice evening shot of the Moon over the most famous Banff landmark.

This is the Banff Springs Hotel, in the deepening twilight as the gibbous Moon shone over Sulphur Mountain behind the hotel. I shot this from the overlook across the Bow River on Tunnel Mountain Drive, a popular spot by day for tourists to disembark by the busload and get their requisite shot. But at this time of night, about 11 p.m., I was the only one there. That’s the beauty of nightscape photography — you have the scene to yourself! And the bears.

Banff Springs is the epitome of a grand hotel. Opened in 1888 but since reconstructed and added to several times, the hotel was built by the Canadian Pacific Railway as the focal point for the tourists it planned to bring into the new Rocky Mountain Park, to take “the waters” in the Park’s sulphur hot springs and enjoy mountain wilderness in genteel splendour. I had the pleasure of staying there one night, in an upper room, courtesy of the Hotel as part of an astronomy outreach program we did there for Earth Hour in 2010. It was truly splendid!

For this shot, I combined three different exposures (1/2 second, 1.3 seconds and 3.4 seconds) in a High Dynamic Range stack, to bring out dark foreground detail but retain the still bright sky, and prevent the Moon from becoming too overexposed. So some Photoshop trickery was involved. But unlike many picture postcard scenes of the Moon sitting above a landmark, this one is real and has not had the Moon pasted into place, usually in a spot and orientation that is astronomically impossible! We astronomers hate that!

— Alan, July 11, 2011 / Image © 2011 Alan Dyer

Time-Lapse Tips from Adobe


I’ve learned of a new technique for creating time-lapse movies that I wanted to pass along.

Time-lapse imaging is an entirely new area of astrophotography previously accessible only to those who had access to expensive custom-made movie cameras, at least in the film days. Now anyone with a Digital SLR camera can take time-lapse movies of the night sky and landscapes with lots of Wow! factor. Here, as examples, are a couple of recent sequences I’ve done.

Moonrise over Vermilion Lakes, Banff

Trains in Twilight at Morant’s Curve, Banff

(You can see more of my time-lapse movies at my Amazing Sky channel on YouTube.)


One of the other wonderful, if not breathless, aspects of the digital technology is how tools and techniques are always improving. Thanks to a new tutorial at Adobe, I realize there is a better way to assemble the hundreds of frames that make up a typical time-lapse movie, using a tool I already had, Adobe Photoshop. For years I had been using Apple’s Quicktime Pro software to string together movie frames — each frame being a time-exposure still image. Quicktime works very well but any processing of the frames had to be done while they were still images, before stringing them together into a movie.

Adobe’s tutorial, linked to below and here from Adobe TV, demonstrates how to use the special “Extended” version of Adobe Photoshop — that’s the extra-cost scientific edition of Photoshop — to do the same thing: pick a folder of images and then automatically string them into a movie at a frame rate you pick. The secret is selecting the “Motion” workspace to reveal the motion picture timeline.

The beautiful thing about this technique is that the entire movie can then be processed using Adjustment Layers and other usual Photoshop processing methods. By turning the movie layer into a Smart Object you can even apply filters like Sharpening and Noise Reduction to the entire movie, but do it non-destructively. Anyone who has taken my DSLR Astrophotography workshops will know my penchant for non-destructive editing using the superb tools that Photoshop provides. Non-destructive editing is my mantra.

Being able to stay within Photoshop for working on movies, as well as the original still images, is a tremendous advantage. Again, I am a big proponent of simplifying the workflow by staying within the one software package as much as possible.

Yes, Adobe Photoshop is costly, and the Extended Edition more costly still, but it is worth it for what it can do for us demanding astrophotographers. For example, the Extended Edition also has superb but little-known tools for stacking, registering and combining images in one fell swoop, essential for deep-sky photography. Now I know it handles time-lapse movies as well, all the more reason to get it. You learn something new every day!

LINK TO ADOBE TV EPISODE

— Alan, March 27, 2011