Milky Way Mosaic


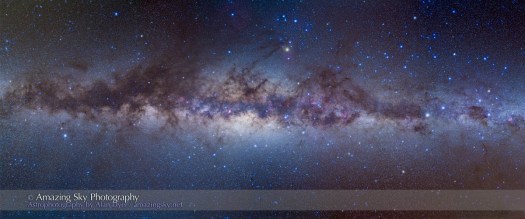
Centre of the Milky Way Panorama (2011)

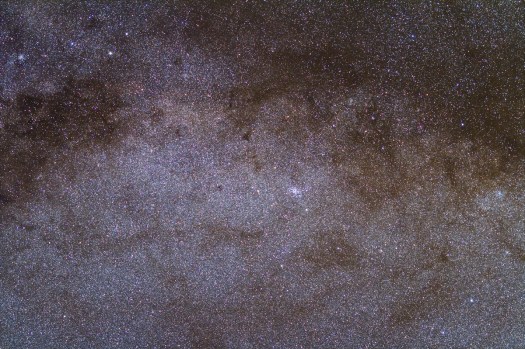
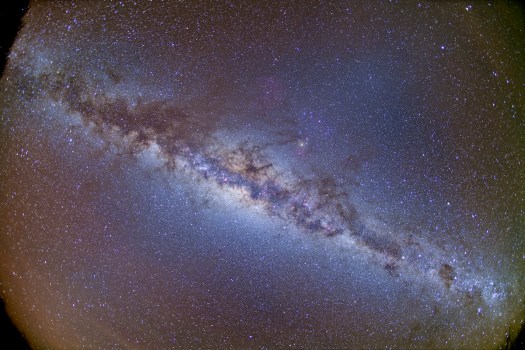
It’s taken me a few months to get around to the task, but at last! — my mosaic of the Milky Way I shot in Chile back in May.

The panorama is made up of 6 frames, stitched and blended together, extending from Crux, the Southern Cross (at right) to Aquila the eagle (at left) — a sweep of the Milky Way from Acrux to Altair! The mosaic is centred on the core of the Galaxy in Sagittarius and Scorpius.

Panoramas like this allow you to step back a distance and take in the big picture:

— You can see the large-scale structure of the dust clouds and the odd diagonal sweep of many of the clouds cutting across the plane of the Galaxy. I’ve never heard an explanation of why the dust lanes seem to have that structure and direction. I also see a 3D effect, with the nearby dust clouds hanging in front of and obscuring the bright starclouds of the distant inner spirals arms of our Galaxy.

— Also apparent are the extensive dust clouds at left extending from Ophiuchus (at top) down into Aquila, well below the plane of the Galaxy. Most wide-angle shots of the Milky Way I see tend to process out the subtle brown clouds that extend far off the Galactic plane. And they are brown, not black.

— And what really stands out is the band of bright blue stars from Scorpius (at top centre) to the right above the Milky Way through Lupus, Centaurus then down into Crux. This is a section of Gould’s Belt, a ring of hot blue stars around the sky that runs at an angle of about 20° to the Milky Way. This ring of hot, nearby stars surrounds us in our spiral arm and is thought to be only about 65 million years old, likely caused by some disturbance in our spiral arm which set off a wave of star formation close to us.

— And … as my Australian friends will point out, you can see the entire Dark Emu, made of the dust lanes from the Coal Sack in Crux at right (his head and beak), through the curving lanes in Centaurus (his neck), then sweeping up and over the centre of the Galaxy (his body) then down into Scutum and Aquila (his two feet and his tail).

I took this panorama from the Atacama Lodge in north central Chile, using the Canon 5D MkII and Canon 35mm lens. Each of the 6 segments that went into this pan was itself a stack of 4 x 6 minute exposures, plus a fifth exposure through a soft-focus filter, all at f/4 and ISO 800. The camera was on a Kenko SkyMemo tracking platform. I assembled the pan with Photoshop CS5’s Photomerge command. This is actually only half of the full panorama mosaic, which extends for another 5 segments to the right along the Milky Way to Orion, taking in the entire southern portion of the Milky Way. But this is the best bit!

— Alan, Oct 2, 2011 / Image © 2011 Alan Dyer
Legends of the Fall


These stars are as much a part of autumn in the northern hemisphere as are the changing colours of leaves and the flying south of geese.

These are the stars of legend, outlining the mythical constellations of Queen Cassiopeia (at top left), her daughter Andromeda (arcing across the bottom half of the image), and the hero Perseus (the stars at lower left) who rescued Andromeda from the ravages of Cetus the sea monster.

These stars are now high in the east in the evening sky, heralding the start of autumn and the return of frosty nights.

There are lots to see with binoculars or a telescope in these constellations. Look around this image and you can pick out several clumps, or clusters, of stars in Perseus and Andromeda. But the most obvious object is the oval-shaped Andromeda Galaxy, visible to the unaided eye from dark rural skies. This is the nearest sizeable galaxy to our Milky Way, and yet its light still takes 2.5 million years to reach us.

I took this shot earlier this week during a run of clear and warm autumn nights, perhaps the last before the chill nights of fall come on. It’s a wide-angle shot with a 35mm lens and Canon 5D MkII camera, tracked for a stack of four 6-minute exposures plus a fifth taken with a soft-focus filter.

— Alan, October 1, 2011 / Image © 2011 Alan Dyer


The Stellar Triangle of Summer


When the Summer Triangle sinks into the west, we know summer has come to an end. While the stars of the Summer Triangle are now high overhead from northern latitudes as the sky gets dark, by late evening the Summer Triangle is setting into the west.

These three bright stars are an example of stellar variety:

– At bottom is Altair in Aquila the eagle. It’s a white main-sequence star 17 light years away, fairly nearby by stellar standards. Leslie Nielson and his crew went to Altair in the 1950s movie Forbidden Planet.

– At top right is Vega, in Lyra the harp, a hotter and more luminous blue-white star than Altair, making it appear brighter than Altair, despite Vega being farther away, at 25 light years distant. Jodi Foster went to Vega in the movie Contact.

– But the third member of the Triangle, Deneb, at top left, is an extreme star. It appears a little fainter than Vega, but looks can be deceiving. Deneb is actually a luminous supergiant star, putting out 54,000 times the energy of our Sun. Deneb is about 1,400 light years away and yet, due to its fierce output of light, appears almost as bright as Vega. Light from Deneb left that star in the 6th century. I don’t know of any movie heroes who went to Deneb. The name means “tail of the Swan,” hardly a romantic destination for space-faring adventurers.

Look toward the Summer Triangle and you are looking down the spiral arm of the Milky Way that we live in. The stars of that arm appear as a packed stellar cloud running through Cygnus the swan, the constellation that contains Deneb.

I took this shot Saturday night, from home, on what turned out to be a very clear night, once some clouds got out of the way in the early evening. This is a 4-image stack of 8-minute exposures, at f/4 with the 35mm Canon lens, a favourite of mine, on the Canon 5D MkII at ISO 800. I added in exposures taken through a soft-focus filter to give the added glows around the stars to help make the bright stars and their colours more visible.

— Alan, September 25, 2011 / Image © 2011 Alan Dyer

Happy Equinox!


This is a shot I’ve been after for several years, usually from this same location, looking west toward the setting Sun.

This is sunset at the autumnal equinox, with the Sun going down due west, something it does only at the two equinoxes. September’s usually the one with clear skies, as it was this night, Sept 23, 2011. Except for some annoying clouds at the horizon over the Rockies to the west. I was hoping for a clear shot of the Sun right at sunset at the end of Highway 1, the Trans-Canada Highway. But it’s close. Better luck next year!

After today, the Sun will be setting south of west, and the days will become shorter than the nights.

This is a 6-image HDR stack to capture both the bright and dark parts of the scene. It worked, but Photoshop refused to properly remove the “ghosts” — images from cars moving from shot to shot. But if I hadn’t told you about it, you might not have noticed!

— Alan, September 23, 2011 / Image © 2011 Alan Dyer


September Milky Way


This was the scene from my rural backyard on Tuesday night, September 20, with the Milky Way at its best across the sky.

September usually brings the best nights of the year for dark-sky observing and shooting the Milky Way. Nights are clear, dry, and transparent. The Milky Way stretches across the sky from southwest to northeast in the early evening.

Under clear skies on Tuesday the dark lanes and structure of the Milky Way really stood out, both to the eye and to the camera. Image processing for contrast does bring out the dust lanes, including the subtle patches off the main Milky Way band.

The centre of the image contains the three bright stars of the Summer Triangle. They frame the bright Cygnus starclouds and glowing red nebulas that mark the spiral arm that we live in. Above, at top left in the image, is a bluer section of the Milky Way formed by the more distant Perseus spiral arm, the one further out from us in the Galaxy.

I took this shot with the Canon 5D MkII and Canon 15mm lens, for a stack of five 6-minute exposures at f/4 and ISO 800.

— Alan, September 21, 2011 / Image © 2011 Alan Dyer


Saturday Night Stargazing


It was a marvellous night for the Milky Way … and some Saturday Night Stargazing.

This was the scene at the University of Calgary’s Rothney Astrophysical Observatory on Saturday night (Sept 17, 2011) as a crowd of about 250 people took in the wonders of the night sky at one of the Observatory’s monthly Open Houses. Skies were excellent and a late moonrise left dark skies early on for views of the Milky Way, a seldom seen part of nature for city-dwellers. A dozen volunteers from the local chapter of the Royal Astronomical Society of Canada provided telescopes and expertise to tour people around night sky wonders, from comets to star clusters. Many people are delighted just to have the constellations pointed out, so they can identify the patterns whose names they have heard of but have never seen.

What always impresses me about such events is how much interest the public shows, and how much the kids in attendance know about astronomy and space. One young man, age 10 or so, in seeing some of the images, like this one, that I was taking pop up on my camera screen, asked if I do piggyback photography! At his age I’m not sure I knew about piggyback photography!

We see all ages at our public stargazing events, all expressing the same “Wow! That’s cool!” reaction. Hearing the comments gives us astronomers a charge — we get as much back from the guests as we hope we provide them.

— Alan, Sept. 18, 2011 / Image © 2011 Alan Dyer


Time-Lapse Test: Adding Motion Control


Here’s the movie I show being taken in my previous blog. This is my first attempt at a motion-control time-lapse.

In this movie the camera shifted position during the 3 hours of shooting by sliding along a rail, with the movement controlled by a little computer box that opened and closed the shutter (in this case for 15 seconds for each frame), then between each exposure it pulsed the motor to shift the camera a centimetre or so down the dolly’s rail. 

Pretty nifty! And until this unit, the Stage Zero Dolly, came along this capability would have cost much more money, from some Hollywood cinema supplier.

This was only a test, and I did mess up at one point (where I appear in the frame in the previous blog’s movie) as I tried to adjust the speed in mid-track, resulting in some dead motion for a few frames. So the motion comes to a halt briefly. It will take some learning to know how to set the speed right for the number of frames and exposure times I typically shoot.

But the ramping up in speed at the beginning of this movie is intentional, and is one of the motion control variables you can program in. 

The Stage Zero Dolly unit is from Dynamic Perception LLC. Lots of time-lapse shooters are employing it now, for their cinema-like pans and moves. I’ve been inspired by the work of Randy Halverson at http://dakotalapse.com/ . Amazing stuff — representing a whole new level of time-lapse techniques. 

So now I know what I’ll be doing now on moonlit evenings! 

— Alan, September 12, 2011 / Movie © 2011 Alan Dyer

Time-Lapse of a Time-Lapse


I’ve been taking lots of time-lapse movies of late. But this one is a time-lapse movie of my other camera taking a time-lapse movie.

Here you see my Canon 7D camera riding aboard my latest tool (or toy!), a motion-control dolly. The camera takes its series of still images (that will be later stitched together into a movie) while it tracks down a rail, riding on a motorized cart.

The unit is called the Stage Zero Dolly, from Dynamic Perception LLC. It is a nifty device that fires the camera shutter for the exposure time and interval you desire. In between each exposure it also moves the camera a small amount down the track. The result can be seen in the next blog, a time-lapse movie with a changing perspective, giving a cinema-style dolly shot. Except, I took this one over 3 hours.

While this scene might look like I took it during the day, it is the middle of the night (witness the moving stars). The blue sky is due to moonlight, from an almost Full Moon on September 10.

The Stage Zero Dolly takes some work to set up and program right, but the results open up a whole new dimension (literally!) in time-lapse shooting.

— Alan, September 12, 2011 / Movie © 2011 Alan Dyer

A Super Star Party Sky


This is the kind of sky that makes astronomers smile. Clear and painted with twilight colours.

This was the scene two weekends ago, on August 26, at the annual Starfest star party in southern Ontario. Starfest is Canada’s biggest annual astronomy gathering and this year attracted about 700 people, filling the campground with tents, trailers and telescopes.

I was fortunate enough to be able attend this year, as one of the guest speakers in a pretty full program of afternoon and evening talks. I presented two talks, on the “Great Southern Sky” and on “Ten Tips for Better Pix,” plus presented a laser tour of “my sky” after dark on the Friday.

Starfest, as with other star parties I’ve been to lately, hasn’t fared well for weather in the last few years, but this year the clouds (mostly!) stayed away and people enjoyed a fabulous weekend under the Milky Way and summer stars.

This is a roughly 180° panorama taken at twilight, showing the rising dark blue arc of Earth’s shadow at left, with a strangely bright glow in the atmosphere above it. At right is the glow of sunset and some crepuscular rays (shadows from distant clouds) visible as bright and dark bands across the sky.

Starfest is a great star party. Anyone in eastern Canada interested in astronomy should make a point of attending. Next year’s event is August 16-19, 2012.

— Alan, Sept 11, 2011 / Image © 2011 Alan Dyer

Milky Way over Peyto Lake


What a night this was! This was the view Sunday night, September 4, from the Peyto Lake viewpoint, of the Milky Way arching overhead, on a clear night at 7,000 feet altitude near the timberline of Bow Summit.

This is one frame of 275 of a time-lapse movie I took of the stars turning over Peyto Lake. This frame catches the Moon just as it sets over Peyto Glacier at left. At this altitude the Milky Way was obvious even with the Moon still in the sky.

It was a scene of a starry night that Bill Peyto would have enjoyed. As he wrote of nearby Bow Lake (see my shot here) … “Around the fire tonight Jim [Jimmy Simpson] said that for his money this campsite was the closest one could get to Heaven on Earth and I reckon he’s not far wrong.”

— Alan, September 5, 2011 / Image © 2011 Alan Dyer

Big Dipper over Peyto Lake


After taking the twilight shots at Waterfowl Lakes on Sunday night (click back to the previous blog), I continued up the Icefields Parkway, ascending to Bow Summit and the viewpoint that overlooks one of the most famous scenes in the Canadian Rockies, Peyto Lake.

Named for legendary mountain man and guide Bill Peyto, the lake was a favourite place for him, to give him solitude away from the madding crowds of Banff.

As with so many of these places, by day this very spot swarms with tourists by the bus load. Peyto would have cringed. But at nightfall, I am the only one there, enjoying the stars coming out in the solitude of the darkening sky.

Here, we look north, to the Big Dipper and Arcturus over the lake in the valley below.

This is a single exposure of 30 seconds at ISO 800 with the Canon 7D and 10-22mm lens.

— Alan, September 5, 2011 / Image © 2011 Alan Dyer

Twilight at Waterfowl Lakes


About half an hour after I took the previous blog entry image, I was here on Sunday evening, farther down the Icefields Parkway, at the shore of Lower Waterfowl Lake. The peak is Mt. Cephren.

The Sun had set and the sky was now filled with the purple glow of twilight marking the beginning of an exceptionally clear night.

Capturing this scene as the eye saw it took a stack of 7 different exposures, combined in what is known as a High Dynamic Range image, that blends the shadows details in the foreground without losing the subtle tints of the bright sky.

— Alan, September 5, 2011 / Image © 2011 Alan Dyer

Moon over Saskatchewan River Crossing


This is how the night started, on Sunday evening, September 4 — as clear a night as you could ask for in the mountains. A quarter Moon hangs over the peaks of the Continental Divide, with alpen glow, the last rays of the Sun, illuminating the mountains around Saskatchewan River Crossing, in Banff.

The North Saskatchewan River flows east out of the mountains here, after being joined by the Mistaya and Howse rivers. It was here, in the early 1800s, that David Thompson and his party of fur traders from the North West Company entered the Rockies and heading up over Howse Pass off frame to the right, to trade with the Kootenays in the interior of what is now British Columbia.

This is David Thompson country, named for one of the world’s greatest geographers and mapmakers. He mapped most of western Canada and down into the Oregon Territory. All using compasses, sextants, a Dolland refractor telescope (to observe the moons of Jupiter for telling time), and his skills as an astronomer. The Kootenays called him Koo-Koo-Sint — the man who watches the stars.

It was also here, on these open river plains, that James Hector, mapping southern Alberta with the Palliser Expedition, observed Comet Donati in September 1858.

This is a place in the Rockies with many ties to history and to astronomy.

— Alan, September 5, 2011 / Image © 2011 Alan Dyer

Bow Lake by Moonlight (The Movie)


Here is the time-lapse movie I took last Saturday night, August 20, on a perfect night at Bow Lake in Banff, Alberta.

The sequence starts in bright twilight then darkens to full night with the Milky Way over the  mountain silhouettes. The peaks then light up as they catch the light of the rising last quarter Moon coming up about 11:30 pm in the east. The moonlight creeps down the mountains to light up the entire valley and the lake. The sky brightens to deep blue again. The sequence ends about 3:30 am.

There was hardly a cloud in the sky all night, unusual for locations near the large icefields that straddle the continental divide.

I assembled the movie from 454 frames, each 40 seconds in exposure time, and taken 1 second apart.

— Alan, August 24, 2011 / Movie © 2011 Alan Dyer

Bow Lake By Moonlight


This was a truly magical scene — the Milky Way over Bow Glacier, and mountains lit by moonlight and reflected in the waters of Bow Lake.

Last Saturday night, August 20, 2011, brought some of the clearest skies I’ve seen in the Rockies. To take advantage of them, I headed to Bow Lake, in Banff, a favourite and very photogenic location for day and nighttime shooting. I hadn’t been there at night since the film days, pre-2004.

This shot is one of 450 frames taken as part of a time-lapse sequence, showing the Milky Way moving over Bow Lake. Here, at about 2 a.m. the light from the rising last quarter Moon is illuminating the peaks, and the Milky Way is perfectly placed over the end of Bow Lake and Bow Glacier, source of the waters of the Bow River and what Calgarians drink!

The sky is blue from moonlight. Last quarter moons are wonderful for nightscapes — providing enough light to illuminate the landscape but not so much as to wash out the sky and Milky Way. But making use of that phase of the Moon means very late nights of shooting. I packed it in this night at 4 a.m.

— Alan, August 22, 2011 / Image © 2011 Alan Dyer


Space Station Over the Rockies


This was the view Friday night, August 19, 2011, as the International Space Station flew over Banff, Alberta and the Canadian Rockies.

I took this shot (actually this is a composite of three successive exposures) from the viewpoint on Mt. Norquay overlooking the Banff townsite and the Trans-Canada Highway interchange, unfortunately all too well lit. This might well be a case study in light pollution as well.

But the lights in the valley don’t diminish the Milky Way above, and the sky-wide streak created by the passage from west to east of the Space Station. What looks like a brilliant star to the eye turns into a streak here due to the three 45-second time exposures I used to capture this scene. The lens is the 8mm fish-eye, and these frames are from a 400-frame time-lapse movie for the planetarium dome.

— Alan, August 20, 2011 / Image © 2011 Alan Dyer


Lake Louise by Moonlight — The Movie


Here is the time-lapse movie I took last Saturday night at Lake Louise, Alberta, under the light of the Full Moon. My previous blog featured a still frame from the beginning of this sequence.

The night starts clear, but as often happens, clouds move in, blowing off the cold icefields of the continental divide. It does make for a nice effect in time-lapse, one of few instances in astronomy where some clouds can be useful!

Also notice how the reflection disappears as the lake breaks up into waves briefly, as wind blows in now and then through the night. The Full Moon is rising behind the camera, causing the lake to light up as moonlight illuminates more of the lake’s surface. Shadows move across the mountainsides. Arcturus is the bright star setting at right. The red object at left is a moored canoe, moving about on the lake.

I took this movie over 4 hours from 10:30 pm to 2:30 am, taking 477 frames with the Canon 7D and 10mm lens. For time-lapse movies like this, I process the full-size RAW files in Adobe Camera Raw and Bridge, then use Photoshop’s Image Processor to export them all to smaller size JPGs. From that set, I use Photoshop CS5 Extended’s “Motion” feature to assemble the folder of JPGs into a movie, in this case at 24 frames per second, a little fast perhaps for this sequence, but it’s easy to change if needed. Photoshop then renders that image file out as a Quicktime movie. What you see here is a tiny version of the final HD-sized video.

— Alan, August 16, 2011 / Movie © 2011 Alan Dyer

Lake Louise by Moonlight


This has to be one of the most photogenic and photographed places in the world. Here it is in a different light, moonlight.

This is Lake Louise, in Banff National Park, Alberta. A few hours before I took this photo on Saturday, August 13, where I stood would have been swarming with thousands of people. But at midnight there was no one about. I had the view to myself.

This looks like a daytime shot, except the stars give it away. Instead, it is the Full Moon, behind the camera, providing the illumination. Contrary to Hollywood lighting clichés, moonlight is not blue. It is the same colour as sunlight, because it is sunlight, just much fainter, reflected off the Moon’s neutral grey surface.

In this view we are looking southwest, toward the stars of the summer sky setting behind the peaks of the continental divide. Arcturus is the bright star at right.

A calm night provided the glassy lake to reflect Mount Victoria and Victoria Glacier.

This is one frame of 477 30-second exposures I took over 4 hours, of the stars turning and eventually clouds blowing in across the sky from the icefields over the divide. It’s rare to get such a perfectly clear night in the Rockies. It was a wonderful to be there, and apparently to be the only one there, to experience it.

— Alan, August 14, 2011 / Image © 2011 Alan Dyer


Sunset in the City — This is Only a Test!


This is one for the time-lapse geeks!

One of the trickiest subjects for a time-lapse sequence is a smooth and seamless day-to-night transition. Exposure times vary from fractions of a second before sunset to several seconds at night fall.

How to do it? Manually shifting exposures is too much work and prone to error. Putting the camera on Automatic can work but inevitably results in an effect known in the time-lapse world as “flickering.” The camera’s automatically-judged exposures aren’t consistent from frame to frame so the final movie shows minor bright/dark flickering, making it look jerky.

For this test sequence of sunset over the Calgary skyline, I tried a new toy for the first time, as a solution.

The device is called the Little Bramper (for Bulb Ramping). It is a custom-made intervalometer that fires the camera shutter every few seconds (at whatever interval you desire). Nothing new there. But what’s unique is that it can be set to slowly increment the exposure time by as little as 1/1000th of a second from frame to frame, gradually increasing the exposure (“ramping” it) to accommodate the darkening scene. The result is a smooth transition from day to night with no flickering.

This was my first use of the Bramper and it wasn’t without its glitches. The shortest exposure the Bramper can provide (it always controls the camera thru its Bulb setting) is about 1/10th of a second (I had no idea camera shutters can fire as quickly as that even on Bulb).

But at the beginning of a sequence like this, with a bright sky, achieving that exposure (still quite long) means using a small f-stop, a slow ISO speed, or a neutral density filter, or all of the above. But as the sky darkens and exposures lengthen, exposures would become too long to fit within the desired interval between frames (typically no more than 5 to 10 seconds for a smooth sequence). So, to shorten the exposures you then have to open up the lens, switch to a faster ISO, or remove the ND filter, while also commanding the Bramper to quickly reduce its exposure time, all in one exposure cycle (i.e. 5 to 10 seconds) so as not to lose or ruin frames. Takes some coordination and practice (hit the Bramper’s button, adjust the camera, all within 5 seconds), and I didn’t get it right the first couple of times.

But overall, for a first test, the sequence turned out very well. The $80 Little Bramper does the job, though it does take careful monitoring through the sequence, not just to perform the exposure swaps, but to also watch that the ramping rate (adjustable on the fly) matches what the scene is doing and you aren’t under- or over-exposing. It’ll take a little more practice, but the results certainly are worth it.

It’s another neat tool in the time-lapse arsenal.

— Alan, August 10, 2011 / Movie © 2011 Alan Dyer

Milky Way in the Mountains


It’s rare to get such a clear night in the mountains but I used the opportunity last Thursday night to shoot the Milky Way in a twilight scene in Banff National Park.

I took this a little later on the same night as the previous blog’s image of the setting Moon. The location is the Vermilion Lakes, a familiar scenic spot for classic views of Banff and Mount Rundle reflected in the water, at far left. It is one of the few places in the mountains where you can look south over a low mountain skyline (to see the southern Milky Way) and over still water (to get reflections).

For this shot I used a fish-eye lens to record most of the sky and the summer Milky Way arching over the water. The sky was dark enough to show the Milky Way but still had a lingering blue tint from the last glow of deep twilight. The yellow glow at left to the east is from the urban lights of Banff.

The still image is one frame of 220 shot over 4 hours for a time-lapse video, for projection in a full-dome video-equipped planetarium. Just so happens we’re building one in Calgary to open in early 2012.

— Alan, August 9, 2011 / Image © 2011 Alan Dyer


Moon in the Mountains


I’ve been chasing the Moon this week. I caught up with it last Thursday night, August 4, in Banff, with the waxing crescent Moon low in the southwest at dusk.

The location is the upper Vermilion Lake just outside the Banff townsite. The golden reflection of the low Moon on the water, the slope of the mountainside and its reflection, the dock and steps, and the tail lights from a vehicle on Highway 1 just up the hill (I decided to leave them in!) make for what I think is an interesting composition of converging lines.

I got set up and in position just in time to catch the scene at the magic hour of twilight, when the sky is dark enough the show deep colours and the Moon’s entire disk shows up, but before the sky gets too dark and the Moon too bright to make an interesting scene.

Even so, the contrast in such a scene is still very high. So to capture it more as your eye would have seen it I used a stack of five exposures, taken in rapid succession, each 2/3rds of an f-stop apart. I then merged the frames with Photoshop’s High Dynamic Range routine to create a scene that brings out detail in the foreground without overexposing the Moon and sky.

A technical method to capture a simple scene of serenity in the mountains.

— Alan, August 7, 2011 / Image © 2011 Alan Dyer

Moonscape


As all the other sunset photographers were packing up for the night, I was just getting started. This is the scene last night, with the waxing Moon hanging over the moonscape of Dinosaur Provincial Park in southern Alberta.

I took this in deep twilight, when the sky is tinted with subtle colours complementing the earth tones of the landscape below.

Dinosaur Park is the world’s best repository of late Cretaceous fossils, being unearthed as the terrain made of ancient volcanic ash erodes away with every rainstorm. Though the formations date from the Cretaceous some 70 million years ago when this area of Alberta was a bayou-like swamp, the badlands landscape we see today was created at the end of the last ice age when glacial floods poured over the landscape, carving the channels occupied by rivers today, like the Red Deer River that flows through Dinosaur Park.

It’s a favourite spot of mine, just an hour east of where I live, to shoot sunsets and moonrises, and twilight landscapes like this one.

— Alan, August 7, 2011 / Image © 2011 Alan Dyer


Auroral All-Sky Dance


Here is nearly two hours of auroral dancing compressed into 25 seconds.

This was the “all-sky” aurora of August 5/6, 2011, widely seen over North America but perhaps (from early reports) best from the western half, especially Canada, favoured for Northern Lights due to our latitude.

I shot this with the 8mm fish-eye lens and the Canon 5D MkII. The movie consists of 255 frames, each 24 to 30 seconds in exposure duration, taken one second apart. ISO speed was 1600 and aperture f/3.5. The playback frame rate is 10 fps.

This display was quite chaotic, without the graceful rippling curtains present in many displays, but rather huge patches of sky turning off and on. This is typical of an aurora in the declining part of the storm — it had already been raging for several hours by the time it got dark here in Alberta.

Nor was the display very bright, so the longer exposures needed to record it well further blur any fine motion. Nevertheless, you get a good idea of the intense activity this aurora displayed. The magnetosphere was jumping last night!

— Alan, August 6, 2011 / Movie © 2011 Alan Dyer

Auroras At Last!


It’s been quite a while since I’ve seen a display of Northern Lights as good as this one. But with the Sun picking up in activity from a record lull in the last few years, great all-sky displays like this might become more frequent.

The last time I saw aurora cover most of the sky like it did last night (August 5) was back in the days of shooting film. So this was the first chance I had to shoot an all-sky aurora with digital cameras. This is with the Canon 7D and the ultra-wide 10-22mm zoom. I also shot with the fish-eye 8mm, and an “all-sky” movie of those frames will be in the next posting.

This display was widely seen and predicted, as solar monitoring satellites had observed major flares on the Sun earlier in the week and tracked the resulting “coronal mass ejections” across the solar system. We knew they were aimed at Earth and would hit August 5. In this case, the resulting geomagnetic storm raged for long enough that people across a wide swath of longitudes from Europe to North America were able to see the display during their local night, August 5/6. Even people in the northern U.S. had a good look.

While the display was certainly active and extensive it never did get really bright. So this one still falls short of the “10 out 10” scale for spectacle. Nevertheless, as digital cameras can do so well, the images picked up the greens from glowing oxygen with remarkable intensity. More interesting are the purples, seen toward the beginning of the night but then they faded away. The purple tints come from the tops of the towering curtains of aurora which often glow red from nitrogen molecules at very high altitudes being charged up and excited. But the tops of the curtains can also be lit by sunlight. The blue from the sunlight and the red from the aurora itself mix to produce a purple tint. Only the camera picked this up.

— Alan, August 6, 2011 / Image © 2011 Alan Dyer


The Comet and the Cluster


This was the scene Monday night and into Tuesday morning, August 1/2, as a relatively new comet to our skies passed a bright globular cluster known as M15 in Pegasus. The comet is Comet Garradd, or more formally C/2009 P1. Here it glows with the characteristic cyan tint of many comets and sports a stubby fan-shaped tail.

As comets move across the sky they often appear near prominent deep-sky objects for a night or two before moving on. Comet Garradd has a number of such encounters coming up: with the globular cluster M71 on August 26, and then near the neat Coathanger cluster September 1 through 3.

Comet Garradd can be spotted now from a dark site in big astronomy binoculars and is a fine sight in a telescope. However, it is well below the threshold of naked-eye brightness and is expected to remain so as it moves high across the summer sky from east to west and then into the western evening sky in late autumn. It is certainly well-placed for viewing, but only comet aficionados are likely to pay much attention to it. Plus astrophotographers taking advantage of photo ops like this one.

— Alan, August 2, 2011 / Image © 2011 Alan Dyer


The Glowing Heart of Cygnus


Look straight up on a summer night in the northern hemisphere and you are looking into this region of sky. This is the centre — the heart — of Cygnus the swan, marked here by the bright star called Sadr, or Gamma Cygni.

While the star is easily visible to the unaided eye, the glowing clouds of gas surrounding it are not. Only long exposure images reveal the amazing swirls of nebulosity in the middle of Cygnus.

The main cloud at left, split by a dark lane of dust, is catalogued as IC 1318. The little crescent-shaped nebula at right is NGC 6888, or more appropriately, the Crescent Nebula. It formed when a hot giant star blew off its outer layers, to add to the general melee of hydrogen and other elements. But note the little blue reflection nebulas at top left. Oddly out of place!

New stars are forming in this region, located about 1500 light years away down the Cygnus arm that we live in, in the Milky Way Galaxy.

This field can be framed nicely by binoculars or a low-power telescope, but only the brightest bits of this nebulosity will show up in the eyepiece as grey ghosts, and then only with the aid of a specialized nebula filter.

I took this shot on Saturday night, July 30, 2011 with the Borg 77mm f/4 astrograph lens and Canon 5D MkII camera. Other stats are similar to the previous blog post. It’s certainly my best shot of this area of sky.

— Alan, August 1, 2011 / Image © 2011 Alan Dyer


The Eagle and the Swan


Though they are truly “nebulous,” these clouds of interstellar gas carry fanciful names — our human attempt to make sense of the vast chaotic forms that pervade deep space.

Above is the Eagle Nebula, a.k.a. Messier 16. Below lies the Swan Nebula, a.k.a. Messier 17. Through a telescope to the eye these nebulas do take on the imagined shape of interstellar birds flying along the Milky Way. But long exposure images like this bring out far more than the eye can see. The entire field, here about the width of what high-power binoculars take in, is filled with swirls of hydrogen gas, glowing in its characteristic red colour.

The Eagle Nebula lies in the constellation of Serpens the serpent, while the Swan Nebula lies just over the border in Sagittarius the archer.

I took this shot Saturday night, July 30, 2011, on one the few perfect nights of observing we get here in Canada — the night was warm, dry, with little wind and no mosquitoes. I could venture out with just a sweater on for a bit of warmth. A far cry from the parkas and down-filled boots normally needed.

This field is a first for me from Canada. I’ve shot it from Australia and Chile, where these objects lie overhead, never from home in Alberta at a latitude of 51° North. But the night was so transparent, the field was worth going after, despite it being low on the southern horizon and at its best for no more than an hour after it got dark.

To shoot the field, I used the wonderful little Borg 77mm f/4 astrographic refractor, effectively a 300mm telephoto lens but far sharper and flatter than most telephotos made for sports and wildlife. The camera was the Canon 5D MkII, a filter-modified version that has a special filter for passing more of the deep red colour of hydrogen. But the real difference here was the use of a filter at the focus of the telescope that further isolated the red wavelengths and blocked other colours that might have otherwise fogged the image, especially from a field so low on the horizon. It worked great, though does tend to render the whole field on the red side.

— Alan, July 31, 2011 / Image © 2011 Alan Dyer


Sacred Site: The Movie


Here’s my time-lapse sequence of the hoodoos at Writing-on-Stone Park lighting up as the Moon rises and the Milky Way sets.

The sky starts off dark but lights up as the waning Moon, off frame behind the camera, rises and lights up the foreground and sky. The sequence ends as the sky brightens with the onset of dawn.

Waning moons are great nights for this type of shooting as the changing lighting produces dramatic effects as the landscape lights up at moonrise. The problem is, the Moon doesn’t rise till very late, making for a long night of shooting.

I assembled this sequence from 290 frames, each a 60-second exposure, taken at 1-second intervals over about 4 hours. The camera was the Canon 7D and the lens the 10-22mm Canon EF-S zoom at 10mm. I also shot a matching sequence simultaneously with the 8mm fish-eye and Canon 5D MkII camera, for an all-sky sequence for planetarium use.

— Alan, July 30, 2011 / Movie © 2011 Alan Dyer

Sacred Site


Standing among these “hoodoo” rock formations at night with moonlight and starlight for illumination was a magical moment. This is a scene at Writing-on-Stone Provincial Park in southern Alberta, that I took last Saturday night, July 23, 2001 at 3 a.m.

It shows the summer Milky Way arching over the sandstone formations, with the rocks lit by the light of the rising waning Moon in the east.

Writing-on-Stone is a sacred site for First Nations people, a place to connect to the spirit world through dreamquests. No one lived here — it was a place haunted by the spirits — people only visited at special times. The rocks were also used to record visions and historic events, in the form of carved petroglyphs that are among the best preserved and most extensive of any archaeological sites in North America. By day or by night, Writing-on-Stone is an inspiring location, carved in the rocks on the banks of the Milk River (see the previous blogs for some panoramic sunset views of the area).

This is one frame of about 300 taken as part of a time-lapse movie, and is a 60-second exposure with the Canon 7D and 10-22mm lens.

— Alan, July 30, 2011 / Image © 2011 Alan Dyer

Sunset on the Sweetgrass Hills


My previous blog featured a still frame from a time-lapse movie I took of sunset on the Sweetgrass Hills and Writing-on-Stone Provincial Park. Here’s the full movie, taken at sunset on July 22, 2011.

I assembled the movie in Photoshop Extended CS5 from 678 frames taken over nearly an hour, at 5-second intervals, beginning before sunset and continuing until well after sunset. The camera was the Canon 7D and lens the 10-22mm lens at 10mm.

Putting the camera into automatic Aperture-priority mode keeps the exposure uniform as the lighting level drops but does induce some slight flickering from minor shot-to-shot variations in exposure. That can be fixed in “post!” But it’ll be a while before I get around to that!

— Alan, July 26, 2011 / Image © 2011 Alan Dyer

The Great Lone Land


This is one of the great places for evoking the wide open spaces of the high plains. Here we are looking south over the Milk River and the rock formations of Writing-on-Stone Provincial Park in Alberta to the peaks of the Sweetgrass Hills in Montana. The buildings at right are the modern reconstructions of the late 1800’s North West Mounted Police outpost that guarded Canada from the illegals from the U.S. (!) coming up Police Coulee smuggling whiskey from Montana into Canada.

The time is just after sunset, as the last light of the Sun still illuminates the clouds. This is the magic hour for photography, and for taking in the solitude of the “Great Lone Land” as author William Francis Butler described it in his book of that title in 1872.

As Butler wrote, “No ocean of water in the world can vie with its gorgeous sunsets; no solitude can equal the loneliness of a night-shadowed prairie…”

— Alan, July 27, 2011 / Image © 2011 Alan Dyer


Dawn Sky Serenity


Some sky scenes are worth getting up early for. This was the dawn sky this morning, July 25, at about 4:20 a.m., looking east to the rising crescent Moon, which this morning appeared near the Pleiades star cluster. You can see it just above the overexposed Moon.

The waning Moon also sits between two planets now in the pre-dawn sky: Jupiter, the bright object at upper right, and Mars, about the same distance away from the Moon but to the lower left. Mars, the Moon and Jupiter form a diagonal line across the dawn sky that defines the dawn ecliptic. Also in the scene is the V-shaped Hyades star cluster, and the bright star Aldebaran, just below the Moon.

This was a 5-second exposure with the Canon 24mm lens at f/3.5 and Canon 5D MkII camera at ISO 800.

— Alan, July 25, 2011 / Image © 2011 Alan Dyer


Stars Over Waterton Lakes II


When I’m doing time-lapse sequences I often run two cameras, one with a wide-angle lens for a frame-filling rectangular view for “normal” HD movies (that’s what’s in the previous blog post), and another camera with a fish-eye lens for a circular format “all-sky” view. These scenes are for projection in full-dome digital planetariums.

This still image is one frame of 470 that I took over four hours on the night of July 20/21, showing the stars and clouds moving in the sky over Waterton Lakes National Park and the stately Prince of Wales Hotel on the bluff across the bay. North is at the bottom of the frame in this shot.

I took this image about 11:30 pm when the sky still had some twilight glow in it and just before the waning Moon was about to rise at right. So the eastern sky has a glow from the impending moonrise. However, the sky is dark enough that the Milky Way shows up running across the sky and down toward the hotel.

You can also see the Big Dipper at left and Cassiopeia at right. The Summer Triangle stars are at top right, in the south. Polaris, the North Star, is dead centre.

— Alan, July 22, 2011 / Image © 2011 Alan Dyer


Stars over Waterton Lakes


One of my favourite places is Waterton Lakes National Park. Even now, in 2011, the little town seems like Banff was back in the 1960s, before huge developments, resort hotels and endless shopping malls. Even at peak season the town is quiet and laid back.

It’s been a while since I had visited Waterton but was determined to this summer. A couple of days here yielded one clear night and a couple of 4-hour time-lapse sequences of stars turning over Waterton’s landmark, the Prince of Wales Hotel.

The hotel is a wood chalet-like structure built in 1927 by the Great Northern Railway as one in a chain of grand railway hotels. It sits on a bluff overlooking Waterton Lakes and remains the elegant place to stay or dine while in Waterton.

For this shot I set up at the end of the marina dock, looking north toward Polaris, the Big Dipper and Cassiopeia. This is a single 30-second exposure taken in deep twilight at the beginning of the night with the 10-22mm lens and Canon 7D camera. It’s one of 400+ frames taken for a time-lapse sequence. While lights from the hotel interior are somewhat picturesque and inviting it’s a pity that national parks still employ unshielded sodium vapour lights on roads. The streetlights are so bright and glaring they actually illuminate the mountainsides.

— Alan, July 22, 2011 / Image © 2011 Alan Dyer


Circling the Sky II


My encounter with the old farmstead near home continued the next night (after the shot featured in the previous blog), under another stunningly clear moonlit sky. Here I let the camera fire away for three and half hours, producing a rather neat juxtaposition of surreal starfield above an abandoned old farmhouse.

For this shot I stacked 660 17-second exposures that were taken in rapid succession at one second intervals. I used the Canon 5D MkII at ISO 800 and Sigma 8mm lens  at f/4.5.

My workflow for an image like this is to…:

1. Use Adobe’s Photo Downloader to download all the images from the camera card into a folder on a local hard drive, then open Adobe Bridge to inspect them. Toss out any junk shots at the beginning and end of the set.

2. Open a representative image in the sequence using Adobe Camera Raw and process it for Colour Correction, Contrast, Noise Reduction, Vibrance, Fill Light (to bring out shadow detail) and Recovery (to recover details in highlights).

3. Then in Bridge, go under Edit: Develop Settings: Copy Camera Raw Settings.

4. Select all the images (Select All) and then Paste Camera Raw Settings. This applies that custom setting to all the images in the sequence in one fell swoop. 600+ images processed in seconds! Sometimes it can take a few iterations to get a good setting that works well through the whole set.

5. Then Select All again in Bridge and go under Tools: Photoshop: Image Processor. This open Photoshop itself and brings up a dialog box that allows you to convert those processed RAW files into other formats (JPGs, TIFFs, etc. in whatever size you want). For this type of single image I convert the RAWs into full resolution TIFFs. While I am at it, I’ll also convert each image into a smaller-sized (1080 pixels high) JPG. The folder of JPGs are for creating an HD-format time-lapse movie from the same set of images. Image Processor can create two sets of images simultaneously from the same RAW master. Very nice.

6. This will take a while as Image Processor dutifully opens up each image one by one and creates a TIFF (and a JPG, too, if you like) from each RAW file in another folder. Go for a very leisurely coffee!

7. Once a folder of finished TIFFs is there, I can use Chris Schur’s Photoshop Action to take each of those images and stack them one by one into a single image. That process can take hours with full-res TIFFs. Start it before you go to bed! Slow, yes, but it’s better than doing it all by hand.

8. The final image can still use touch-ups, to sharpen, alter the brightness and contrast of the sky (frames taken when the sky was still bright with twilight can make the scene look too bright).

It can take a day’s worth of computer crunching to get a final image. But the result is certainly unique.

— Alan, July 20, 2011 / Image © 2011 Alan Dyer

Circling the Sky


It has been an incredible week for imaging. Clear skies and a bright Moon are the tickets to nightscape photography. And in the last week we’ve had clear moonlit nights in abundance.

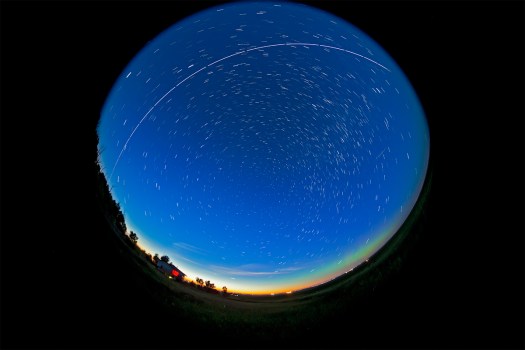
I’ve taken advantage of the run of great weather to shoot an old farmstead down the road from my house, on several nights. This is a shot from the first night out, on Thursday, July 14. It is a fish-eye lens shot taking in most of the sky, and looking north at the bottom of the frame. The star trails, taken over 2 hours, circle around the North Star (or close to it).

So why is the sky blue? The Full Moon, just out of the frame at top, is illuminating the landscape and sky — and light from the Full Moon is the same colour as light from the Sun (because that’s what moonlight is! — reflected sunlight). It’s just that moonlight is much dimmer. Expose long enough and you get a scene that looks like daylight but has the stars in it.

To create this image I took 400 18-second exposures, taken 1 second apart, using the Canon 5D MkII camera at ISO 800 and the Sigma 8mm lens at f/5. I stacked the images using an automated “action” for Photoshop developed  by astrophotographer Chris Schur. The original frames can also be strung together in sequence to create a time-lapse movie of the sky turning, suitable, in this case, for projection in a full-dome digital planetarium. I’ll post some of those shortly.

But after several nights of shooting till 3 and 4 a.m., and accumulating 100 gigabytes or more of RAW files, it’s time to take a night off and turn in early! At 1 a.m.!

— Alan, July 19, 2011 / Image © 2011 Alan Dyer

Moon Over Banff Springs Hotel


A weekend in Banff National Park — but three cloudy nights foiled the array of starry time-lapse shots I had hoped to take. But on Sunday night, July 10, I did get a nice evening shot of the Moon over the most famous Banff landmark.

This is the Banff Springs Hotel, in the deepening twilight as the gibbous Moon shone over Sulphur Mountain behind the hotel. I shot this from the overlook across the Bow River on Tunnel Mountain Drive, a popular spot by day for tourists to disembark by the busload and get their requisite shot. But at this time of night, about 11 p.m., I was the only one there. That’s the beauty of nightscape photography — you have the scene to yourself! And the bears.

Banff Springs is the epitome of a grand hotel. Opened in 1888 but since reconstructed and added to several times, the hotel was built by the Canadian Pacific Railway as the focal point for the tourists it planned to bring into the new Rocky Mountain Park, to take “the waters” in the Park’s sulphur hot springs and enjoy mountain wilderness in genteel splendour. I had the pleasure of staying there one night, in an upper room, courtesy of the Hotel as part of an astronomy outreach program we did there for Earth Hour in 2010. It was truly splendid!

For this shot, I combined three different exposures (1/2 second, 1.3 seconds and 3.4 seconds) in a High Dynamic Range stack, to bring out dark foreground detail but retain the still bright sky, and prevent the Moon from becoming too overexposed. So some Photoshop trickery was involved. But unlike many picture postcard scenes of the Moon sitting above a landmark, this one is real and has not had the Moon pasted into place, usually in a spot and orientation that is astronomically impossible! We astronomers hate that!

— Alan, July 11, 2011 / Image © 2011 Alan Dyer

The Clouds Keep Coming!


Clouds aren’t usually the astronomer’s friend, but at this time of year they become the objects of our attention. For the past few nights, my Alberta prairie skies have been beautifully clear and filled with the clouds of solstice.

Last night, July 6, began at twilight with the best display of noctilucent clouds so far this season — and we’re now at peak season for this northern sky phenomenon. This was the scene at about 11:30 pm local time, with the wispy high-altitude clouds at their most extensive and fully lit by sunlight. Over the next hour or so, as the Sun set further below the horizon, the display disappeared as darkness came to the high atmosphere and the Sun no longer illuminated these clouds suspended over the Arctic. Here’s a diagram of the geometry of how they get lit up. If you are curious to learn more, check this NASA page.

I took a time-lapse movie of the fall of darkness on the clouds, which you can view here at my SmugMug gallery at AmazingSky.ca. The video shows how the clouds begin the night fully illuminated by the Sun but over the hour duration of the video they disappear from top to bottom. You can see a curtain of darkness moving down the clouds, caused by the Sun dropping farther below the horizon. As it does so its illumination seems to drop toward the horizon as night falls, leaving only clouds closest to the horizon (and farthest north) still illuminated. The video also shows that the edge of the illumination appears reddish — that’s because clouds on the edge of the descending dark shadow are being lit only by a low red Sun setting below the limb of the Earth. Pretty neat, and something I’ve not seen before in any image or movie. (The movie is HD quality and will take a while to load, sorry!)

However, tonight normal, everyday weather clouds moves in, curtailing any late night NLC watch. Tomorrow, I head to the Rockies to do some time-lapse nightscape shooting in the mountains. Yes, I know I’ll miss seeing Duke and Duchess Will and Kate start off the Calgary Stampede Parade. Royalty will just have to get on without me.

— Alan, July 7, 2011 / Image © 2011 Alan Dyer

Arctic Ice-Blue Clouds at Dawn


We were treated to a good display of noctilucent clouds last night. Or should I say early this morning! At this time of year, many a night is spent keeping a watchful vigil for noctilucent clouds. They often appear at their best before dawn.

That was the case July 5/6. The night started with a decent display of these northern sky clouds in the northwest after sunset and just before midnight. But then as the Sun dropped lower below the horizon, the lighting angles changed and the clouds disappeared. A low aurora display took their place through most of the night.

Then, at 3 am or so, as the lighting from the rising Sun hit the right angle coming over the Pole, the Arctic ice clouds reappeared, now in the northeast. Sequences of shots showed a rapid east to west motion of the clouds, driven by winds at the edge of space, at the clouds’ extreme altitude of 80 km or so.

This shot is with a 16-35mm zoom, set to 24mm and takes in the bright star Capella at upper right, a useful “survey marker” for measuring angles and cloud altitudes. I took this at about 3:30 am. MDT.

— Alan, July 6, 2011 / Image © 2011 Alan Dyer

The Glowing Clouds of Solstice Appear


The glowing clouds of solstice have appeared. This was my first sighting of “noctilucent clouds” for the season.

Every northern summer in late June and early July we are often treated to bright pearly clouds glowing along the northern horizon long after sunset. Their origin remains somewhat of a mystery. These clouds form almost at the edge of space, so high there shouldn’t be much for clouds to form around. But their height is what makes them visible, as they catch sunlight streaming over the pole even in the middle of the night.

I took this shot Tuesday, June 28 just before midnight. The noctilucent clouds are the blue-white wavy bands just above the orange twilight. In front of them lie dark normal clouds low in our troposphere. But the NLCs shine from an altitude of some 80 km, well into the mesosphere. They are located over the Northwest Territories but, like aurora, their height allows us to see them even from more southerly latitudes.

The bright star Capella, circumpolar from my latitude of 51° North, shines through the clouds at right.

— Alan, June 28, 2011 / Image © 2011 Alan Dyer

Centaurus, Creator of Constellations


In George Lucas mythology, Luke Skywalker went to Yoda to learn the wisdom and ways of heroes. In Greek mythology, heroes the likes of  Achilles, Jason and Hercules sought out Chiron, the wise and kindly Centaur, who taught them science, astronomy, medicine, music, arts, hunting and archery.

Centaurs, the romping half man/half horse creatures, were a riotous and drunken lot, but not immortal Chiron. He was the offspring of Kronos and the ocean nymph Philyra and served as tutors to many legendary heroes. One reference in my library suggests Chiron actually invented the constellations, to make it easier for mankind to keep track of the stars and the season. To reward his work, Zeus placed Chiron in the stars, becoming by some accounts, this southern sky constellation, Centaurus.

However, most writings suggest Chiron is actually the Zodiac constellation of Sagittarius, while the constellation we call Centaurus is one of the wilder bunch, depicted in the sky as carrying the slain Lupus the wolf, drawn here in the fainter blue stars at top centre.

The bright stars at right are the main stars of Centaurus, including Alpha and Beta Centauri at lower right. Beta Centauri is the blue star, a giant some 390 light years away. But just to the left of Beta is yellow-white Alpha Centauri, a Sun-like star (or actually a pair of them orbiting each other) just 4.3 light years away.

Alpha and Beta Centauri sit at the start of a long dark rift in the Milky Way that splits into fingers of nebulosity reaching into Norma, Ara and Scorpius, here at the left edge of the frame.

I took this shot of Centaurus and Lupus in Chile last month, using a 50mm lens and a Canon 5D MkII. It’s a stack of four 6-minute exposures at f/4 and ISO 800, layered in with two exposures shot through a Kenko Softon-A filter to produce the photogenic star glows.

— Alan, June 26, 2011 / Image © 2011 Alan Dyer


Summer Solstice Space Station, Part 2


Here’s a capture of the Space Station, coming over in a darker, clearer sky than last night’s shot (in the previous blog). This was June 22, 2011, a fine solstice night on the Canadian Prairies.

The time was just before midnight, with no Moon. Yet the sky is blue and the northern horizon tinged with the orange glow of twilight. It never gets truly dark now, as summer begins. To the right, on the northeast horizon, a low green aurora kicks up.

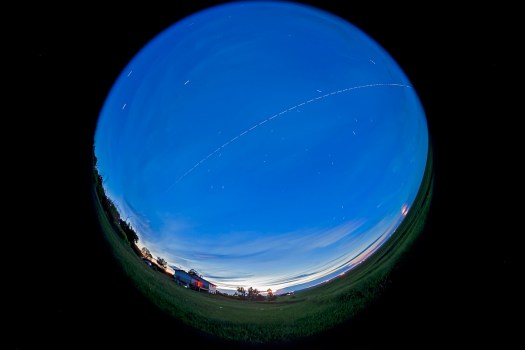
The Space Station, the dashed arc at top, tonight passed from west to southeast, across the southern sky at the top of this fisheye 360° frame.

This is a stack of 28 18-second exposures at f/4 and ISO 1600 with the Canon 5D MkII and Sigma 8mm lens.

— Alan, June 22, 2011 / Image © 2011 Alan Dyer


Summer Solstice Space Station


We’re currently enjoying a series of nightly (and often twice or thrice nightly) passes of the International Space Station, coinciding with the bright nights of summer solstice.
I took this shot on the night of solstice, June 21, 2011, as the Space Station came directly overhead, flying out of the west then heading off into the east. So we’re looking a little west of north here, toward the bright northern horizon. Pity some light cloud hazed up the sky. The pass began at 11:12 pm so the sky was still quite bright, though even an hour or two later at this time of year the northern horizon is tinged with perpetual twilight glow, at least at my latitude of 51° N.
To create the image I took a series of 100 3-second exposures (as long as the bright sky would allow) taken 1 second apart in rapid-fire fashion with the camera firing automatically with a remote timer. The 1 second gap between exposures creates the gaps in the Space Station trail.
I processed the images in Adobe Camera Raw, and exported them all as TIFFs to their own folder. I then used Chris Schur’s excellent “Star Trails” Photoshop Action to stack all those images into one composite image showing the complete flight of the Space Station across the sky. A little application of Shadows and Highlights helped bring out the foreground and bright sky detail.
I used the Sigma 8mm fisheye lens and Canon 5D Mk II to capture the whole sky, for a still and time-lapse sequence suitable for projection in a full-dome video planetarium … because the neat thing about this method is that the same set of images can be strung together sequentially (using Photoshop Extended’s Movie function) into a time-lapse movie of the pass, showing cloud and star motion as well as the ISS passage. The same techniques work for star trails, as indeed you can see here with the stars of the northern sky (Big Dipper at left and Cassiopeia at right) trailing around the North Star.
— Alan, June 22, 2011 / Image © 2011 Alan Dyer

The Moon in June


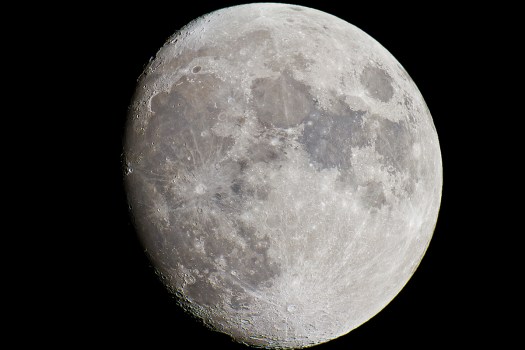
On one of the few clear nights of late I took the opportunity to shoot the Moon. It’s a familiar subject to be sure, but one I don’t shoot very often. Pity really, as it is rich in detail and makes for dramatic photos.

I took this shot June 12, about 4 days before the Full Moon of June, so this is a waxing gibbous Moon. Lots of terrain (lunain?) shows up at left along the terminator, including the wonderful semi-circular bay at about 10 o’clock called Sinus Iridum. At the bottom is the bright Tycho crater, with its distinctive splash of rays spreading out across most of globe. Imagine the devastating impact that caused that feature! It isn’t that old either — estimates suggest Tycho is just 100 million years old, putting its formation smack dab in the middle of the Cretaceous Period when dinosaurs ruled the Earth. They would have seen that impact, little knowing another similar-sized impact 35 million years hence, but aimed at Earth, would do them in.

For this shot I used the Astro-Physics 130mm apo refractor with a 2x Barlow lens to increase the effective focal length to 1600mm, a combo that exactly fills the frame of the Canon 7D with no room to spare. I processed this image for high contrast, to bring out the subtle tonal and colour variations in the dark lunar seas, an effect due to different mineral content of the lava that oozed out forming the lunar plains. Judicious use of Highlight Recovery (in Camera Raw) and Shadows and Highlights (in Photoshop) brings out the detail across a subject with a huge dynamic range in brightness. A liberal application of Smart Sharpening also helps snap up detail.

— Alan, June 18, 2011 / Image © Alan Dyer 2011


Into the Heart of the Scorpion


Here we peer into the heart of Scorpius, to a place where the sky is painted with pastel hues unlike anywhere else in the heavens.

The yellow star at bottom is Antares, the cool supergiant star that marks the heart of the Scorpion. To the right is Messier 4, a globular cluster of thousands of stars. Wrapping the entire field are shrouds of dust, reflecting the yellow light of Antares and the blue light of hotter stars above, such as Rho Ophiuchi at top right. Glowing hydrogen gas clouds add the magenta hues.

The remarkable feature of this field are the dark fingers, clouds of dark interstellar stardust glowing with a dim yellowy-brown hue. In places the clouds become more opaque and intense, blocking any light from background stars. Those clouds must be close by in our galactic spiral arm because few stars lie between us and their dark masses. Estimates put them about 400 light years away.

The entire region is a busy factory of star making, one of the closest to our Sun. Chances are our solar system formed in a similar star factory 5 billion years ago, one that has long since dissolved away and dispersed around the Galaxy.

Like the previous shot, this is a Canon 7D/135mm telephoto image in a stack of six 2-minute exposures, taken from Chile in early May. I find it remarkable that with digital cameras just 2-minute exposures not only bring out the dark nebulas, but actually show them with colour and tonality. In the old days, film shots 20 minutes long only ever showed them as a mass of underexposed and featureless black.

— Alan, June 16, 2011 / Image © 2011 Alan Dyer

Off the Stinger Stars of Scorpius


Off the tail of Scorpius lies one of the great starry regions of the Milky Way. From southern Canada the Scorpion’s Tail barely clears our horizon at this time of year, on June nights. But from farther south, Scorpius crawls high into the sky — and the sky actually gets dark at solstice, so stargazers can see the starclouds of Scorpius in all their glory.

At right, the blue stars mark the “stinger” at the end of the Scorpion’s tail. The brightest one, called Shaula, or Lambda Scorpii, is a hot blue giant star some 10,000 times more luminous than our own modest Sun. It is also a triple star, with another luminous blue star orbiting it, plus a third odd mystery star thought to be either a neutron star or perhaps a young proto-object still in the process of forming a proper “main-sequence” normal star.

To the left lie two prominent clusters of stars: at top the Butterfly Cluster (a.k.a. Messier 6), a bright group of stars sitting amid a dark bay of dust. Below it, almost lost in the stars, is Ptolemy’s Cluster (a.k.a. Messier 7), that is an obvious sight to the unaided eye – so obvious the Greek astronomer Ptolemy catalogued it in 130 AD. Several other star clusters pepper the field.

This telephoto lens shot frames the field as binoculars would show it. I took this from Chile in early May, using the Canon 7D and 135mm lens, for a stack of six 2-minute exposures at f/2.8 and ISO 1250.

— Alan, June 16, 2011 / Image © 2011 Alan Dyer


A Window in the Stars


In this part of the sky the Milky Way takes on a surprising palette of hues. And it’s all due to dust.

The centrepiece of this shot is a bright star cloud in Sagittarius called, well, the Sagittarius Star Cloud! But not the Large one. This is the Small Sagittarius Star Cloud, a.k.a. Messier 24, a mass of stars with a single black eye. The dark spot, called Barnard 92, is a dense and opaque cloud of dust. Stardust — clouds of carbon soot blown out by aging stars — weaves all through this scene, creating the dark canyons winding through the stars. Obscuring dust also dims much of the background stars and discolours most of this part of the Milky Way a yellowish brown. It’s the same effect that dims the setting Sun a deep orange or red, as its light shines through haze and dust in the sky.

But here, the Star Cloud looks bluish and “cleaner.” That part of the Milky Way has less dust in front of it. And yet it is much farther away than the yellow dusty starfields around it. When we look toward the Small Sagittarius Star Cloud we are looking through a dust-free window, allowing us to see unencumbered right past our Galaxy’s nearby Sagittarius-Carina spiral arm to glimpse a dense part of the more distant Norma Arm, an inner spiral arm of our Milky Way Galaxy about 12,000 to 16,000 light years away.

To the lower right of M24 is M23, a rich cluster of stars 2,000 light years away, nearby by galactic standards, and so sits suspended in front of the fainter star background. The pinkish nebula at top is Messier 17, the Swan Nebula.

I took this shot May 2 from Chile, using the Canon 7D and 135 lens, for a stack of six 2-minute exposures.

— Alan, June 7, 2011 / Image © 2011 Alan Dyer


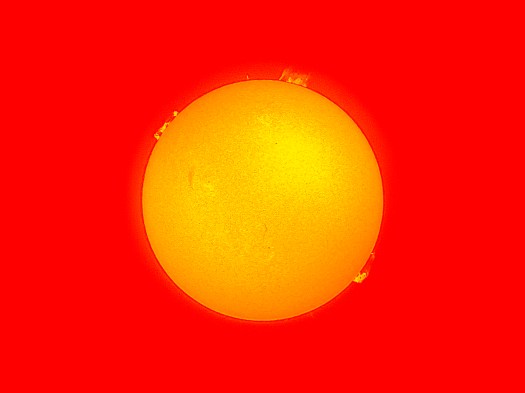
Here Comes the Sun!


I can count on one hand how many shots of the Sun I’ve taken in the last decade that weren’t at an eclipse, or a sunrise/sunset. I just don’t do much solar shooting. But today I had to resurrect some old gear to get this shot. The Sun was putting on a fabulous show this afternoon (Sunday, June 5, 2011) with an army of huge prominences rimming the edge of the Sun. Very impressive. And looking very HOT!

After 2 to 3 years of record low activity, the Sun is picking up, returning to its normal self, with sunspots and prominences a daily occurrence. But these were especially dramatic. Each of these prominence “flames: towers tens of thousands of kilometre above the surface of the Sun. The Earth would be a dot next to one of them.

To get this shot, I created a masked composite in Photoshop of two exposures, a short 1/13s second shot to record the disk detail, and a long 1/2 second shot to record the fainter limb prominences. For a telescope I used my little Coronado PST H-alpha scope, a special scope just for solar viewing that filters out all but a narrow wavelength of red light, allowing the prominences to be seen.

Trouble is, my DSLR cameras won’t reach focus on the Coronado scope. So I dusted off the little 2003 vintage Sony DSC-V1 point and shoot camera and a Scopetronix 40mm eyepiece and “afocal” adapter, so the camera was screwed onto and looking into the eyepiece which was then inserted into the scope. I hadn’t used an afocal setup like that since the Venus transit in 2004.

It was tough to focus the stack, so focus was a bit of a guess — it was helped here with a liberal application of Photoshop’s Smart Sharpen filter! In all, it is a crude system but in a pinch it does work. Maybe I’ll have to get better gear just to take solar shots. With the Sun becoming more active, there certainly will be lots more to shoot.

— Alan, June 5, 2011 / Image © 2011 Alan Dyer


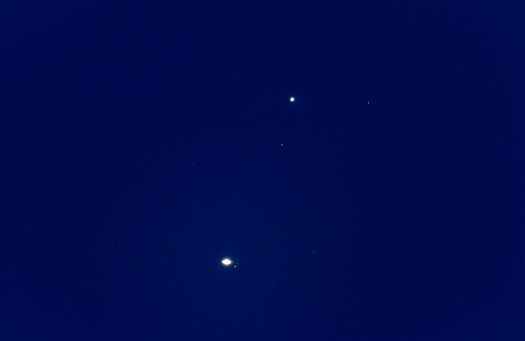
Saturn Sidles Up to a Star


If you look up this week, to the southwest, you’ll see a bright star in the evening twilight that, upon close inspection, is really a tight double star. The fainter companion becomes obvious as it gets dark. The bright member of the pair is actually Saturn, and its fainter companion is the star Porrima, a.k.a. Gamma Virginis. And they are unusually close!

This week Saturn (at bottom here) sidles up to Porrima (at top), getting so close both are contained in a high-power telescope field, which is what this shot depicts. I took it Saturday night, June 4, when Saturn was about 1/4° (16 arc minutes) from Porrima. But by June 10 their separation will be a tad less, at 15 arc minutes apart. This week Saturn stops its annual retrograde motion just shy of Porrima.

The pairing made a wonderful sight in the telescope tonight, especially because of the “good seeing” — so Saturn looked very sharp. And Porrima, itself a very tight double star, was easy to split at 200x, appearing like a pair of headlights at high power. (The photo doesn’t split Porrima.)

But the nicest view is just naked eye — Saturn and Porrima are forming a rare and temporary double star easy to split with no optical aid but looking much more striking than any other naked eye double. The pairing won’t last long — Saturn turns around near Porrima this week, then begins to head east again away from its stellar partner.

The shot also picks up four of Saturn’s moons: Dione very close to Saturn, then Tethys, and Rhea in a row from left to right, and bright Titan below the trio.

This a stack of five 5-second exposures at ISO 1600 with a Canon 7D attached to my 130mm Astro-Physics refractor with a 2x Barlow, giving an effective focal length of about 1600mm and f/12. I took this in twilight to add the blue sky.

— Alan, June 5, 2011 / Image © 2011 Alan Dyer


The Seven Sisters of the South


Down in the south sit many austral equivalents to namesake northern sky objects: the Southern Cross, the Southern Beehive, the Southern Pinwheel. This is the “Southern Pleiades,” a match to the famous Pleiades star cluster prominent in our northern hemisphere sky. Since our Pleiades also carries the moniker the “Seven Sisters,” I suppose that makes this object the “Seven Sisters of the South.”

The field here again duplicates what binoculars would show, and this is a lovely object for binos. Its resemblance to the northern Pleiades comes from this star cluster’s bright but scattered appearance, and the blue colour of its sorority of stars. Like its northern counterpart, the Southern Pleiades is a cluster of hot young stars which shine furiously blue in their energetic youth. This group is perhaps no more than 50 million years old, and like the northern Sisters, shines quite close by, just 480 light years away, putting it a stone’s throw away down our own galactic spiral arm.

Officially catalogued as IC 2602, and also dubbed the Theta Carinae Cluster, this clutch of blue stars shines just below the Carina Nebula (you can see both together in my earlier blog The Best Nebula in the Sky). A couple of other fainter star clusters also populate the field.

I took this shot with the Canon 7D and 135mm telephoto lens and stacked five 2-minute exposures. Stacking helps smooth out background noise, though in a wide field shot like this, the sheer number of stars tends to overwhelm any camera noise.

— Alan, June 4, 2011 / Image © 2011 Alan Dyer


An Island in a Sea of Stars


This image looks toward the inner spiral arm of our Milky Way called the Norma Arm, where stars bunch together to form the rich Norma Starcloud, a prominent patch in the southern Milky Way. What you see here is all stars, lots and lots of stars.

Seemingly embedded in the sea of stars is an island of brighter stars called the Norma star cluster, or more prosaically NGC 6067. It’s about 6800 light years away, much closer to us than the more distant stars behind it. It is literally floating in front of the background sea of stars.

As with the previous image, this is a wide field shot, taken with the 135mm telephoto, to frame the field much as it would appear in binoculars. This shot is a stack of six 2-minute unguided exposures at ISO 1250 with the Canon 7D riding on the little Kenko tracking platform. It’s one of a couple of dozen fields I shot the first night of shooting on Chile in May.

— Alan, June 4, 2011 / Image © 2011 Alan Dyer


Rose of the Southern Sky


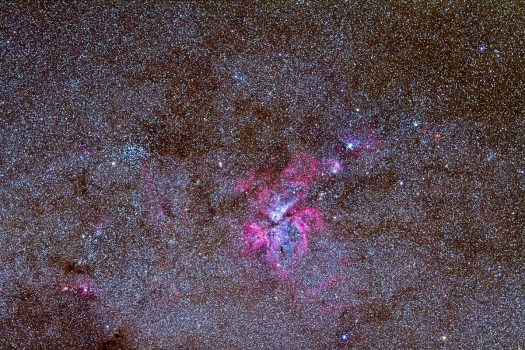
It’s been a month since my last post, a month with no new astrophotos from home. But I’ve got a backlog of RAW files to work through from the Chile trip a month ago. Here’s a new image from that shooting expedition. It’s of an area of the southern sky that lends itself to every focal length and framing variation — you can’t go wrong with the Carina Nebula!

This wonderful nebula in the deep-south Milky Way rewards any astrophotographer. For this shot I used a 135mm telephoto (Canon’s wonderful f/2 L-series lens) and the Canon 7D camera. The 7D is what I call a “stock” camera, used just as it comes off the dealer shelf. The 7D does a superb job capturing the red nebulosity and its faint outlying bits and pieces. It tends to record these clouds of glowing hydrogen as magenta in tone. By comparison, my other Canon camera is a “filter-modified” 5D MkII. You can see a shot of this same area of sky taken with the 5D MkII a few blogs back under The Best Nebula in the Sky, posted May 6. The 5D MkII’s modification (which replaces the filter in front of the sensor with a new astro-friendly one) allows it to record deep-red wavelengths and picks up more faint nebulosity, registering it more as red in tone. But both images look good and presentable.

This field is rich in objects — not only the main sprawling nebula but nearby star clusters and patches of dark dust clouds. It is one of the finest fields in the sky for binoculars, and this shot approximates the field of view of typical binos. I like to shoot a lot of objects with telephoto lenses — while the main subject is not frame-filling and in your face, it does match (at least in field of view) what you can see in binos, useful for illustrations and observing articles. Of course, the camera picks up  more stuff and colours even your bino-aided eyes can’t see.

This shot is a stack of five 2-minute exposures at f/2.8 with the 135mm telephoto, on the Canon 7D at ISO 1250. I used the little Kenko Sky Memo tracking platform for this, letting it track without any added guiding. It’s tracking was spot on, with nary any star trailing as it followed the target for 20 minutes or so.

— Alan, June 3, 2011 / Image © 2011 Alan Dyer

Under the Southern Cross


I’m back home in Canada now, after 24 hours of travel from Chile. Despite having to check my carry-on bag filled with cameras and the Mac laptop for the Calama to Santiago domestic flight, all the gear arrived home intact. Now to process the 40+ gigs of images I shot. And properly reprocess some of the images worked on at the dining room table at the lodge, under the bright Chilean sun.

Here’s a shot taken the last night of shooting, of the icon of the southern sky, the Southern Cross, more formally called the constellation of Crux. Next to it, at left, are the dark clouds of the Coal Sack. To the eye, these clouds looks like a uniform dark spot in the sky. But photos, and even binoculars, reveal it as a complex mess of shapes and densities.

What stands out are the colours of the Cross stars. Most are hot blue Type B stars – energetic blue giants. But Gacrux at top is very red – it’s a cool red giant star.

Scattered amid the Cross are Coal Sack are several clumps of stars – open star clusters, such as the Jewel Box Cluster to the left and just below Becrux, the left star of the Cross. On our final night at the Atacama Lodge, we helped out at the lodge in a public stargazing session to a group of tourists from all over the world. I ran a telescope aimed at the Jewel Box and heard lots of ooohs and aaahs at the sight of its multicoloured stars.

This shot is a Mean-combine stack of five 3-minute exposures at f/2.8 with the wonderful Canon L-series 135mm telephoto, and the Canon 5D MkII camera, filter-modified, at ISO 800. The camera was on a Kenko SkyMemo tracking platform, which followed the stars during the 15 minutes worth of exposures.

– Alan, May 9, 2011 / Image © 2011 Alan Dyer

The Galactic Cathedral


We’re on our last full day in Chile, packing up and sorting out. I’ll finish off my Chile blog series with this parting shot — the entire southern Milky Way from horizon to horizon.

In this view, we’re looking straight up, with the horizon at the edges of the frame of the 15mm fish-eye lens. The glowing starclouds of Sagittarius and Scorpius, seen in close up in the previous blog post, are in the centre of the frame. The Southern Cross is at far right, the Northern Cross at far left.

This scene is a superb way to end a night of southern sky stargazing – just lying back and looking up at the entire panorama of the Galaxy. You really do get the sense that we are indeed living at the edge of the Galaxy, looking off into its bright core, and with its spiral arms wrapping around us.

It’s a galactic cathedral of stars.

– Alan, May 7, 2011 / Image  © 2011 Alan Dyer

The Starfields of Sagittarius and Scorpius


I can’t get enough of this region of sky. I can and do shoot this with every lens I have and with all kinds of framing (horizontally, vertically, or at a rakish angle, like here) and it always looks great.

These are the rich and stunning starfields toward the centre of the Milky Way in Sagittarius (bottom) and Scorpius (at top). Look for the pinkish nebulas dotted along the Milky Way, the bright starclouds, and the dark lanes of interstellar dust. It’s all part of the galactic recycling program that our Milky Way participates in, as stars explode, cast off dust and gas, which then clump into glowing nebulas and form new generations of stars.

I took this shot about 5 a.m. a couple of mornings ago, with this area directly overhead. It’s a stack of six 3-minute exposures with the 35mm lens and Canon 5D MkII camera. I took some shots through a soft focus filter to add the star glows.

– Alan, May 7, 2011 / Image © 2011 Alan Dyer

The Best Nebula in the Sky


What a great field this is to explore with binoculars. The image here takes in about the same area of sky as most binoculars and look what it contains! Arguably, the best nebula in the sky: the Carina Nebula, and the best open star cluster: the Football Cluster (aka NGC 3532) to the left of the main nebula. And then there’s the Southern Pleiades star cluster, IC 2602, below the nebula, and lots more besides.

This one field is reason enough to travel to the southern hemisphere for stargazing.

I shot this last night, May 6, 2011, using a 135mm telephoto lens at the modified Canon 5D MkII camera. The filter modification allows the camera to pick up a lot more of the faint wispy bits of glowing nebulosity. This is a stack of four 3-minute exposures, with two of the exposures shot through some thin cloud (the first we saw all week!), adding the subtle but photogenic glows around the stars.

– Alan, May 7, 2011 / Image © 2011 Alan Dyer

Belt of Venus and Volcanoes


This was the scene we were treated to each evening at the Atacama Lodge in Chile. Quite an amazing skyline, with 5,900-metre-high Licancabur Volcano, here at sunset.

The sky colour comes from a phenomenon known as the Belt of Venus, a magenta/pinkish glow from sunlight lighting up the upper atmosphere after the Sun has set for us on the ground. The dark blue rimming the horizon is the rising shadow of the Earth.

I have punched up the colour saturation here to bring out the colours, but not so much as to be faked — the colours are real!

This is a shot with the 50mm lens and Canon 7D camera, taken on one of the nights we had dinner back at the lodge, in this case with a group of Québec amateur astronomers also here this week who were great observing friends on the field.

– Alan, May 7, 2011 / Image © 2011 Alan Dyer

Dawn Planets, Part Two


I began my night sky shooting stint earlier this week in Chile with a shot of the dawn gathering of planets. I’ve ended it with another, taken this morning at 7 a.m., on May 7, 2011.

This scene shows four planets partaking in a rare close mutual conjunction in the morning sky. From top to bottom they are: Venus (brightest) with Mercury just to the right of Venus (both inner worlds appear close together for the next week or so), then below that pair, Jupiter, then at the bottom and faintest, Mars.

Notice how Venus, Jupiter and Mars are almost equally spaced, forming a straight line that defines the ecliptic path of the planets, here seen coming up vertically from the horizon. This is the view from 23° south latitude; from Canada these planets would be arrayed more horizontally low across the eastern horizon.

The conical peak at left is 5,900-metre-high Licancabur Volcano. The lights are tail lights of pre-dawn traffic going over the high pass over the Andes into Bolivia.

– Alan, May 7, 2011 / Image © 2011 Alan Dyer

Dawn’s Early Light


This shot took getting up early (rather than staying up all night) to shoot the sky at 5 a.m. The main subject here is a subtle tower of light rising up vertically from the eastern horizon. That’s the Zodiacal Light, best seen from low latitudes.

The glow is from sunlight reflected off dust particles deposited in the inner solar system by passing comets. While it looks like dawn twilight coming on, the light actually comes from out in space and heralds the brightening of the sky by true twilight.

After a week of gazing in the evening sky, a number of us observers took the opportunity this morning to snooze through part of the night and get up prior to dawn to see a new set of objects. At that time of night, and at this time of year, the centre of the Milky Way sits straight overhead, and shows up here in an ultrawide shot from horizon to zenith.

I shot this with the 15mm lens at f/2.8 and the Canon 5D MkII at ISO 800. It’s a stack of two 3-minute exposures.

– Alan, May 6, 2011 / Image © 2011 Alan Dyer

The Southern Crosses


The emblem of the southern hemisphere sky is here on the left: the Southern Cross, or Crux. But how many other crosses can you find in this field?

At the right is a larger version of Crux, made of two stars from Carina and two stars from Vela. So it’s not a proper constellation but an asterism well known in the southern hemisphere sky, called the False Cross.

You might also be able to pick out a third cross at lower centre, looking upside down but also made of four stars in an elongated diamond shape.

The prominent centre-stage object here is the massive Eta Carinae Nebula, sometimes just called the Carina Nebula (I’ve never determined what the proper and official name of it is). Surrounding it is an array of star clusters that make this area an absolute delight to explore with binoculars. But this week, at our stay at the Atacama Lodge, our small observing party has had fabulous views of the nebula in a big 18-inch telescope that reveals intricate structure in the swirls and eddies of its glowing clouds.

This is a stack of 6 exposures, each 3 minutes at f/4 with a 50mm Sigma lens and the Canon 5D MkII camera.

– Alan, May 6, 2011 / Image © 2011 Alan Dyer

Southern Spectacular


Everyone from the north who sees this area of sky for the first time quickly realizes just how much better the sky is down south. This is the most spectacular region of the deep-south Milky Way, as it passes through the constellations of Carina, Crux and Centaurus.

Dead centre here is the symbol of the southern sky, the Southern Cross. To the right of it glow the reddish nebulas of Carina and Centaurus; to the left of the Cross lie the dark clouds of the Coal Sack and the pair of brilliant stars, Alpha (on the left) and Beta Centauri. Alpha is the closest bright star to our solar system.

This one field contains much of what makes the southern sky so memorable and a mecca for any backyard astronomer. You haven’t lived an astronomical life until you’ve seen this part of the Milky Way, accessible only from southern latitudes.

I took this shot last night, May 4, 2011, using a Sigma 50mm lens and a modified Canon 5D MkII camera. The image is a stack of four 6-minute exposures at f/4 and ISO 800, plus a stack of two more 6-minute exposures taken through a soft-focus filter, with those images layered into the final Photoshop image to add the star glows and make the constellation outlines, like the Southern Cross, pop out.

– Alan, May 5, 2011 / Image © 2011 Alan Dyer

Exploring the Large Magellanic Cloud


A prime attraction of the southern hemisphere sky is an object called the Large Magellanic Cloud, a satellite galaxy to our own Milky Way, and only visible from southern latitudes. You can spend many nights just working your way through its confusing array of star  clusters and nebulas.

Here, Gary Finlay (seated) and Philip Downey (standing, checking his digital iPad star atlas) are doing just that – trying to identify the many objects you can see in one eyepiece field at a time. And the LMC is so large it covers dozens of eyepiece fields. They’re using an 18-inch reflector, which is providing us with outstanding views of not only the LMC and its many nebulas, but hundreds of other targets along the Milky Way.

I took this with a 30-second exposure at f/2.8 and ISO 3200 with the Canon 7D. The location is the small observing field adjacent to our rooms at the Atacama Lodge in Chile.

– Alan, May 4, 2011 / Image © Alan Dyer 2011

Toward the Centre of the Galaxy


This is without a doubt the most spectacular area of sky. Here we’re looking toward the centre of our Galaxy, toward the starfields of Scorpius (at right) and Sagittarius (bottom centre). The field is a riot of stars, dark lanes of dust, and patches of glowing red nebulas.

It is wonderful experience – wonder-filled! – just to lie back and scan these constellations with binoculars or a wide-field telescope. One outstanding feature are the parallel bands of dark dust that seem to form the shape of a dark prancing horse in the Milky Way.

The brightest area of the Milky Way here is the Sagittarius Starcloud, and marks the direction of the centre of our Galaxy. From here in Chile where I took this shot, this region of sky passes directly overhead, making it more prominent than at northern latitudes where the galactic core is often lost in horizon haze.

This image is a stack of four 6-minute exposures at f/4 with the 35mm lens and Canon 5D MkII camera. For one of the exposures I shot through a special soft-focus filter to add the fuzzy star glows that make it easier to see the outline of the constellations. The filter also emphasizes the colours of the stars.

The image is a segment of a 12-section panorama I shot all along the Milky Way from dusk to dawn.

– Alan, May 3, 2011 / Image © 2011 Alan Dyer

Entangled in Dark Dust


This is a star cluster in Scorpius called NGC 6124 – it doesn’t have a name, to the best of my knowledge. But a good one might be the “Dark River Cluster.”

I’ve shot lots of stuff along the Milky Way on my various trips to the southern hemisphere, but this field was a pleasant new surprise. While I had photographed this star cluster before, previous portraits had been extreme closeups. I had not shot it with a wide field like this.

The field here takes in about the same area of sky as binoculars. One of my projects on this current trip to Chile has been to shoot binocular fields like this. And it’s a good one. The cluster is a little off the beaten track in Scorpius and tends to be ignored. But its position entangled with lanes of dark nebulosity makes it a wonderful contrast of stars and darkness.

The dark lanes are obscuring dust in the foreground, hiding the light of distant stars in the Milky Way. The cluster itself is about 18,000 light years away, quite a distance for a star cluster, and putting it a good portion of the way toward the centre of the Galaxy.

For this shot I used the Canon 7D camera and 135mm telephoto, for a stack of six 2-minute exposures at ISO 800 and f/2.8.

– Alan, May 3, 2011 / Image © 2011 Alan Dyer

Galaxyrise


In the southern hemisphere sky we are treated to the stunning sight of the centre of the Galaxy rising each night, as the starfields of Scorpius and Sagittarius come up over the eastern horizon. In this shot, taken last night (May 2/3), we see the Milky Way’s heart rising behind some of the robotic, remotely-controlled domes and telescopes at the Atacama Lodge in Chile. Only the centre dome is operating, taking images or data under the command of someone half a world away.

Amazing technology to be sure, but … that robotic observer misses the experience of standing under the Milky Way, watching its heart rise over the Andes and swing overhead through the night. The Milky Way is so bright it lights the ground, as you can see here.

Last night our little group of 7 Canadian observers had a fantastic time exploring the southern sky with several telescopes, including an 18-inch reflector set up for us by lodge owner Alain Maury. With the help of a couple of wide-angle eyepieces we saw wonderful views of the Vela Supernova Remnant, dark nebulas in the Milky Way, and showpiece targets like Omega Centauri and the Tarantula Nebula – the list goes on! And will again tonight, as we compile another “hit-list” of targets to find tonight.

For this shot, I used the Canon 7D camera, a 15mm lens, and ISO 2500 for a 40 second exposure at f/2.8. This is one of about 500 frames taken for a time-lapse movie of “Galaxyrise.”

– Alan, May 3, 2011 / Image © 2011 Alan Dyer

The Milky Way from Chile


This was the Milky Way as it appeared toward the end of a long night of non-stop shooting from Chile. The centre of the Galaxy lies directly overhead and the Milky Way stretches from horizon to horizon. This is one of the sky’s greatest sights, and this is an ideal time of year to see it. But only if you are in the magic latitude zone of 20° to 30° south.

In this shot, another skyglow stretches up from the eastern horizon at left – that’s the Zodiacal Light, so obvious from this latitude. It’s sunlight reflected off comet dust in the inner solar system, and heralds the coming dawn twilight.

My tracking platform – the device that allows a camera to follow the sky for a time exposure – is at lower right, with a second camera taking telephoto lens shots of star clusters in the Milky Way.

I took this shot with the Sigma 8mm fish-eye lens and the Canon 5D MkII camera that was on a fixed tripod – it was not tracking the sky. But the 45-second exposure at ISO 3200 was enough to bring out the Milky Way in all its glory. This frame is one of 660 or so that make up (or will once I assemble it) a time-lapse movie of the Milky Way turning about the pole and rising through the night. The fish-eye format makes it suitable for projection in a planetarium dome.

– Alan, May 2, 2011 / Image © 2011 Alan Dyer

A Dawn Gathering of Planets


The joys of stargazing at southern latitudes! Here’s a shot from this morning, May 2, 2011, of the gathering of four planets now coming together in the pre-dawn sky. From Canada, you won’t see this well at all. The planets will be hugging the horizon and lost in the twilight. But from here in Chile, at a latitude of 23° south, the planets are arranged vertically straight up from the horizon. Over the next couple of weeks the planets will converge as Venus and Mercury drop down to meet Jupiter and Mars – they’ll be tightest, within 6° of each other on the mornings of May 11 and 12, when Venus and Jupiter, the two brightest objects here, will be closest together.

It was very neat watching them rise this morning over the Andes, first brilliant Venus popping over the ridge, then fainter Mercury, the Jupiter, and finally, at the bottom here, Mars. Venus and Mercury pair at top, and Jupiter and Mars are together at bottom.

The conical peak at left is 5,900-metre (19,400-foot) Licancabur, an extinct volcano, one of many along the line of the Andes. I shot this from just outside our dining room at the Atacama Lodge near San Pedro de Atacama. It was the finale of an all-night session shooting the Milky Way in stills and time-lapse. All the gear worked great and the raw images look fabulous. More to come!

– Alan, May 2, 2011 / Image © 2011 Alan Dyer

Under Chilean Skies


Welcome to paradise for astronomers! Yesterday I arrived at the Atacama Lodge near the little resort town of San Pedro de Atacama in central Chile. As you can see, we’re at the base of the Andes and some very impressive volcanoes. The next week promises outstanding skies and night after night of non-stop shooting and sightseeing of southern sky splendours. And yes, the sky really is that blue!

I’m with a small group of three other fellow Canadian stargazers and we’ve met up with three other fellows from Québec who’ve been here a few nights already. So we’re told we’re the largest gathering of Canadians in this part of Chile! My group arrived yesterday evening after 24 hours of travel, the worst of which was the hour shopping for groceries at the superstore in Calama. It was the day before a national holiday, and the crowds were worse than Xmas eve back home.

But we’re settled in now, and all the equipment arrived unscathed and is ready to go. The scopes I’m posing with are ones that live on site for the public tours conducted by Alain and Ale Maury, owners of the Lodge. We had a great evening last night of binocular viewing but tonight we’ll be ready to go with our own gear all set up, plus an 18-inch we’ll be using for the week.

There is no finer place on the planet for astronomy. Watch for more photos coming soon!

– Alan, May 1, 2011 / photo by Bob Cassgrain.

Springtime Cluster #3: Diamond Tresses in the Sky


Unlike most deep-sky objects, this one is obvious to the unaided eye. The Coma Star Cluster is so big it barely squeezes into the frame of the wide field telescope I used to take this image. To see it for yourself just look up and due south on northern spring evenings. To the left of Leo, off his back end, shines this loose and scattered grouping of stars obvious to the unaided eye on a dark night. Indeed, I think in olden times this bunch of stars was drawn as the tuft of hair at the end of Leo’s tail.

But now we picture this cluster of stars as the tresses of hair of the late dynasty Egyptian Queen Berenice II, placed in the sky to honour her loyalty to her husband, the Pharaoh Ptolemy. The story has it that the group did not become officially recognized as a constellation until the 16th century.

The constellation of Coma Berenices (hair of Berenices) extends over a larger area of sky than just this grouping, but the Coma star cluster is certainly the most obvious feature of the constellation. Binoculars frame it well (taking in a bit more sky than this image) and are the best way to view it. With their narrow field, telescopes look right through this object.

The cluster is spread over nearly five degrees of sky and contains about 40 stars, so a rather sparse gathering to be sure. Many open clusters, like M67 pictured a couple of blogs back, contain hundreds of stars. Coma is so big in our sky because it is one of the closest star clusters to us, only 288 light years away, and above us toward the north pole of our Galaxy.

Its size and scattered appearance actually meant it hid in plain sight for centuries – yes, it was given a name and people saw it, but astronomers didn’t give it status as an official star cluster until 1938. In 1915 astronomer P.J. Melotte had listed it as object number 111 in his catalogue of star groupings. And so today, we usually refer to this cluster as Mel 111, the most famous entry in “Mel’s” catalog!

I took this shot with the same gear used for the M67 and Beehive M44 shots earlier, so it’s easy to see just how much bigger the Coma Cluster is than just about every other star cluster in the sky. This is a stack of four 6-minute exposures at ISO 1600 with the Canon 7D camera and the 92mm TMB apo refractor.

– Alan, April 2011 / Image © 2011 Alan Dyer

Easter Sunday Space Station


What a picture perfect pass this was, on Easter Sunday evening, April 24, 2011. The International Space Station (ISS) rose out of the west right on time, passed almost directly overhead, the flew off to the east, fading out just as it approached the horizon. The sky was a deep blue in the late twilight, with the spring stars beginning to appear. As it usually does, the Space Station outshone them all, including Arcturus, the brightest streak at right. The Station also passed just north of the handle of the Big Dipper at the top of the frame.

I took this with the 15mm lens that takes in a field of view from the horizon to almost straight up.

Because the sky was still bright, one long exposure wouldn’t work with this shot. The Station took nearly 3 minutes to traverse the frame. The only way to avoid overexposing the sky would have been to stop the lens way down or use a very slow ISO speed, either of which would have meant the Station and stars might not have recorded very well, especially the fast-moving Station.

So instead, I used what turned out to be thirteen short 15-second exposures at f/4 and ISO 400, taken 1 second apart. Each one is exposed correctly, and the aperture and ISO speed are fast enough to pick up stars and the moving satellite. The trick is to then stack the images in Photoshop. To do this I import the images first from the memory card using Adobe Bridge, then process them in Adobe Camera Raw. ACR provides most of the processing necessary for shots like these – sharpening, noise reduction, some contrast boost, and the usual Vibrance and Clarity. Once processed, I use Bridge’s “Import into Photoshop Layers” command to automatically create a single image with all the processed frames stacked on top of each other in layers. Then it’s a matter of turning the Blend mode of each layer from Normal to Lighten, and voila! – the frames turn transparent and appear merged together, all properly exposed. The result is a single exposure effectively 3 minutes long, long enough that the stars also trail.

In this shot, the 1-second interval between exposures creates the gaps in the ISS trail. I could do a little Photoshop trickery to eliminate those but I think they give a sense of the speed of the ISS as it flies overhead quite quickly when it is closest, then slows down in apparent motion as it flies away into the distance.

A great help in planning a shot like this is Starry Night software – it loads in the latest satellite orbit data and shows the exact path of the satellite across your local sky. So I was ready and waiting with the camera all framed up, knowing just where it would appear, then started the camera firing as the ISS came overhead and into the field of the camera. It was a fine sight on an Easter Sunday.

– Alan, April 2011 / Image © 2011 Alan Dyer

Springtime Cluster #2: Ancient M67


Poor old M67. Does anyone ever look at this cluster? I tend to ignore it, in favour of its brighter and bigger brother, the Beehive Cluster just to the north. Yet, this smaller cluster ranks with the best of the sky’s open star clusters for richness and brilliance. Only a few showpiece star clusters, like the Beehive and the Pleiades, beat M67.

Located in Cancer, M67 really deserves more respect – even a name! – as it stands out as one of the few prominent deep-sky objects in the otherwise sparse spring sky, at least sparse for bright targets for binoculars or a small telescope. Yes, if you love galaxies, the spring sky is heaven! There are thousands of galaxies to hunt down in spring, but most need a decent-sized telescope to do them justice. By contrast, M67 looks just fine in a small telescope. With a few hundred stars packed into an area the apparent size of the Full Moon this is one rich cluster.

M67 is called that because it is #67 in Charles Messier’s catalog of “things not to be confused as comets.” Messier came across this object in April 1780. Messier ‘s object #67 is one of the few open star clusters not embedded in the Milky Way. Like the Beehive, M67 sits well above the disk of our Galaxy’s spiral arms. We look up out of the plane of the Galaxy to view M67, sitting some 2600 light years away, over four times farther away than its neighbour in Cancer, the Beehive. Thus, M67 looks smaller than the Beehive because it is more distant.

M67 holds the distinction of being one of the oldest star clusters known. It’s been around for over 4 billion years. Its position well above the frenzied traffic jam of our Galaxy’s spiral arms helps M67 stay intact and together, an isolated island of stars in our spring sky.

This image was taken right after the M44 Beehive Cluster shot featured in my previous blog post, using the same gear. So the image scale is the same. You can see how much smaller M67 appears than M44. Because M67 was beginning to sink into the west when I took this, I bumped the camera up to ISO 1600 and used shorter 3 minute exposures and stacked five of them to smooth out noise. The telescope was the little 92mm TMB apo riding on the Astro-Physics 600E mount and flawlessly autoguided with the Santa Barbara Instruments SG-4 autoguider. I really love the SG-4 — just press one button and it’s guiding. True “Push Here Dummy” guiding!

— Alan Dyer, April 2011 / Image © 2011 Alan Dyer

Springtime Cluster #1: The Beehive (M44)


At last! A clear night in what so far has been an awful spring. The long-awaited arrival of mild spring nights brings a sky sprinkled with a few naked-eye star clusters. This is the most famous, and appears as a fuzzy glow in the constellation of Cancer the Crab. Indeed, to the unaided eye, there’s not much else to see in Cancer. But this cluster is a dandy in binoculars. Called the Beehive, this is one of the few deep-sky objects known since antiquity. Apparently, the Greek poet Aratos mentioned it in 260 B.C., describing it as a “little mist.” A hundred years later Hipparchus included it in his star catalog, calling it a “cloudy star.”

It wasn’t until 1609 that Galileo, using his pioneering telescope, resolved the cloud into a mass of stars. Any binoculars will do the same today. This close-up view more closely matches the view through a modern telescope, showing its subtly coloured blue and yellow stars.

In 1769 Charles Messier included it as object #44 (the Pleiades was #45) in his first catalog of what we now call deep-sky wonders. To him, however, these fuzzy spots in the sky were just distractions to his goal of hunting the fuzzy things that really mattered – comets.

The stars of M44 really do belong together in a gravitationally-bound cluster of up to 1000 stars, traveling together through space since the time about 600 million years ago when they formed out of what must have been a massive gas cloud. That’s a pretty good age for a star cluster; most break apart and scatter around the Galaxy after just a few tens of millions of years. However, the Beehive sits about 600 light years away, above the main disk of the Milky Way and its spiral arms. Its location makes it partly immune to the disruptive tidal forces of the Galaxy. Because it lies above the galactic plane we see it far off the band of the Milky Way, shining in our spring sky sparsely populated with bright stars and lacking the rich assortment of clusters and nebulas scattered along the winter and summer Milky Way.

For this exposure I used a favourite scope, the TMB 92mm apo refractor, a compact and fast little telescope perfect for imaging big binocular-class objects like this. This is a stack of four 4-minute exposures at ISO 800 with the Canon 7D camera. A Photoshop routine added the diffraction spikes, purely for photogenic value.

– Alan Dyer, April 2011 / Image © 2011 Alan Dyer

End of an Era


The final night was inevitable – the last night we could operate the public Observing Deck at the science centre where I work. You see, we’re building a new science centre in Calgary and the old one will be closing at the end of June. But long before then, with the Sun setting later and later, it will become too light to see anything during the evening hours the science centre is open to offer any programming on the telescope deck. So, as the person in charge of the program, I looked at sunset times and moon phases and decreed that April 14 would be the last night for public viewing at the Deck.

And so it was. We went out in fine style. A facility that has served the public well since 1967 ended its public life with the best one-night attendance of the year, thankfully clear skies (after a day of snow), and a great turnout from present and past volunteers to the Deck. Staff from the science centre – the TELUS World of Science-Calgary – were on hand to present a certificate of appreciation to the members of the Royal Astronomical Society of Canada who have made the Deck program possible. It was their volunteer help that, over 44 years, allowed hundreds of thousands of people to view through telescopes and be amazed at the craters of the Moon, the rings of Saturn, and the moons of Jupiter.

Among the highlights: record line-ups for the comet crash on Jupiter in 1994, and even bigger line-ups in August 2003 for the close approach of Mars. That year we had to turn people away from 2 hour line-ups to look through the telescopes. The Deck was also one of the centrepiece venues for our 2009 Year of Astronomy programming.

Now, what has this got to do with astrophotography? Not much I suppose. But very few astrophotographers, and indeed amateur astronomers, aren’t also rabid enthusiasts for promoting astronomy to the public. Almost everyone in the hobby and profession now can look back to a moment at just such a facility or at telescopes staffed by people like these, moments when they first saw the rings of Saturn, or some other amazing sky sight. That view, and the enthusiasm of the telescope operator, got them hooked. And off they went to pursue a lifetime interest in the sky, perhaps even wanting to photograph it. I know that’s certainly the case with me. As such, so many people in the hobby feel it their obligation to give back to the community and allow others the same chance for a life-changing view through a telescope – a “Galileo moment” as we so aptly described it during the Year of Astronomy’s 400th anniversary of the telescope.

The Observing Deck at the TELUS World of Science is now closed. May its spirit of enthusiastic volunteers promoting moments of personal discovery live on.

Photo by John Mancenido


Time-Lapse Tips from Adobe


I’ve learned of a new technique for creating time-lapse movies that I wanted to pass along.

Time-lapse imaging is an entirely new area of astrophotography previously accessible only to those who had access to expensive custom-made movie cameras, at least in the film days. Now anyone with a Digital SLR camera can take time-lapse movies of the night sky and landscapes with lots of Wow! factor. Here, as examples, are a couple of recent sequences I’ve done.

Moonrise over Vermilion Lakes, Banff

Trains in Twilight at Morant’s Curve, Banff

(You can see more of my time-lapse movies at my Amazing Sky channel on YouTube.)


One of the other wonderful, if not breathless, aspects of the digital technology is how tools and techniques are always improving. Thanks to a new tutorial at Adobe, I realize there is a better way to assemble the hundreds of frames that make up a typical time-lapse movie, using a tool I already had, Adobe Photoshop. For years I had been using Apple’s Quicktime Pro software to string together movie frames — each frame being a time-exposure still image. Quicktime works very well but any processing of the frames had to be done while they were still images, before stringing them together into a movie.

Adobe’s tutorial, linked to below and here from Adobe TV, demonstrates how to use the special “Extended” version of Adobe Photoshop — that’s the extra-cost scientific edition of Photoshop — to do the same thing: pick a folder of images and then automatically string them into a movie at a frame rate you pick. The secret is selecting the “Motion” workspace to reveal the motion picture timeline.

The beautiful thing about this technique is that the entire movie can then be processed using Adjustment Layers and other usual Photoshop processing methods. By turning the movie layer into a Smart Object you can even apply filters like Sharpening and Noise Reduction to the entire movie, but do it non-destructively. Anyone who has taken my DSLR Astrophotography workshops will know my penchant for non-destructive editing using the superb tools that Photoshop provides. Non-destructive editing is my mantra.

Being able to stay within Photoshop for working on movies, as well as the original still images, is a tremendous advantage. Again, I am a big proponent of simplifying the workflow by staying within the one software package as much as possible.

Yes, Adobe Photoshop is costly, and the Extended Edition more costly still, but it is worth it for what it can do for us demanding astrophotographers. For example, the Extended Edition also has superb but little-known tools for stacking, registering and combining images in one fell swoop, essential for deep-sky photography. Now I know it handles time-lapse movies as well, all the more reason to get it. You learn something new every day!

LINK TO ADOBE TV EPISODE

— Alan, March 27, 2011

A Magical Moment in the Planetarium


This isn’t really an astrophoto as such, but it certainly captures a special moment under the stars, in this case the artificial sky of the Discovery Dome planetarium theatre where I work. At the TELUS World of Science we currently have a wonderful exhibit featuring artifacts recovered from the wreck of the Titanic. To complement the exhibition, I’ve been organizing a series of evening special events, such as lectures and concerts. Here, performers from the Cantos Music Foundation in Calgary are performing some of the music the Titanic Band played on the ship’s fateful maiden voyage 99 years ago.

The special point of the concert for me came when Kasia, on a vintage Steinway piano, and Bob, on tin whistle, played the hymn “Nearer My God to Thee,” reputedly the last song the band played before the ship went down. All aboard Titanic that night described the sky as a clear and star-filled (a thin waning Moon did not rise till just before dawn). As one passenger described it —

There was no Moon, and I have never seen the stars shine brighter. They appeared to stand out of the sky, sparkling like diamonds. It was the kind of night that made one feel glad to be alive.” — Jack Thayer, First Class Passenger.

We set up the Digistar II to project the sky as it appeared on the night of  April 14/15, 1912, and let it roll through the night from sunset to stop the stars as they were at about 2:30 am local time, when the ship disappeared, leaving only the lifeboats with about 700 survivors on the Atlantic under the cold night sky.

It was a powerful moment, one of the best of my long career as a planetarium producer.

Jupiter and Mercury Amid the Clouds


One of the rules of astrophotography is that clouds always position themselves right over the objects you are trying to shoot. When the subject in question is a pair of planets, then a cloud will always cover one or the other planet, making it impossible to capture both at once and therefore record the conjunction.

Tonight, March 15, I chased out west of Calgary to get the conjunction of Mercury and Jupiter over the scenic skyline of the Rockies. Of course, clouds drifted slo-0-0-0-w-ly across the sky. But with a little patience (and I do have very little to spare in situations like this!) I was able to catch a few moments when both Jupiter (at left here) and Mercury (upper right) shone in view amid the clouds.

The highway (Highway 66 to Bragg Creek) adds a nice touch, with cars seeming to come and go from the distant planets.

Again, as with the previous night’s shot, this is a “high dynamic range” stack of three shots taken in quick succession but with EV values 1 1/3rd f-stops apart, to retain both ground and sky detail in an inherently contrasty situation. Photoshop CS5’s HDR Pro feature does a great job. This is with the Canon 7D and 135mm lens.

– Alan, March 15, 2011 / Image © 2011 Alan Dyer

Mercurial Encounter


Mercury is the elusive planet. Yet, when conditions are right, it is surprisingly easy to see. And you wonder what everyone is complaining about!

That was certainly the case tonight, March 14, 2011. I just walked out, looked west and there it was, shining bright and obvious to the right of Jupiter. No binoculars needed! Having brighter Jupiter nearby helps to be sure. But Mercury is certainly not dim. It’s wonderful that this week is the best time of the year for us northerners to spot Mercury, just as NASA’s Messenger probe enters orbit around the inner planet, becoming the first to orbit, not just fly past, Mercury. It is always nice to look up and see the planet that you can point to and say, “We have a probe exploring that world.” Later this year, one will be on its way to Jupiter as well — the Juno orbiter.

This shot shows the scene with Mercury (at right) approaching its March 15 close conjunction with Jupiter in the evening twilight. This image captures the view much as the eye saw it. But to do that I took a “High Dynamic Range” composite of three exposures about 1 stop apart, taken in rapid succession with a Canon 7D camera and Sigma 50mm lens.

– Alan, March 14, 2011 / Image © 2011 Alan Dyer

Reliving Apollo


When I first walked into this exhibit hall at the Kennedy Space Centre, I was floored. This image only shows part of the vast Saturn V rocket lying on its side, surrounded by artifacts and memorabilia from the glory days of the Apollo moon landing program, including an actual lunar module (at upper right), though one that never flew — if it had, it wouldn’t be here to be on display. The immensity of the Saturn V rocket is overwhelming. I regret never having seen one go up.

The actual Command Module from Apollo 14 is here, as well as the Saturn launch control room faithfully recreated from the original consoles, and brought to life in a multi-media show.

It is a stunning exhibit, and a space enthusiast’s dream, located at the site of the VIP launch viewing area. Across the water are the launch pads and Vertical Assembly Building still used, though not for long, by the Space Shuttle.

On the day we were there, March 5, by good fortune we did manage to see a launch, of an Atlas V rocket carrying the secret X37B spaceplane into orbit. That was pretty neat, though seeing a Shuttle go up would be even better. Only two more chances for that!

And then, I hope, those amazing Shuttles will find retirement homes in exhibit complexes as fine as this one at KSC. The last 30 years of Shuttle missions have provided some of the most memorable moments in space exploration, both highs and lows, and they deserve to be commemorated in suitable fashion in impressive exhibits. It would be a pity if, after spending billions and billions on the Shuttle program, no one can come up with ~ $100 million to house and display at least one of the retired orbiters properly.

– Alan, March 13, 2011 / Image © 2011 Alan Dyer

Looking Up at Arecibo


Visiting one of the world’s great observatories is always a highlight for any astronomy enthusiast. Most of us “collect” observatories, and try to get to as many as possible in our lifetime of travels and explorations. This last week provided me an opportunity to visit a place of legendary status in astronomy, the Arecibo Radio Observatory in Puerto Rico. This is the world’s largest single-dish radio telescope, and consists of a 1000-foot metal dish suspended in a natural bowl in the island landscape.

In this shot, our tour group, part of the “Cosmic Trails” Caribbean cruise I was on that week, is standing underneath the metal mesh dish, looking up toward the antennas suspended high above the dish. This is a rare and privileged place to stand — driving down into and under the dish isn’t on the usual tourist tour. Had they been beaming powerful radar signals out to some solar system target that afternoon we would not have been able to stand here. As it was, they were listing to signals from pulsars. We also got into the main control room to talk to the observers and technicians at work that afternoon.

I won’t provide all the background about this remarkable observatory (you can read about it yourself at Wikipedia or visit the telescope’s webpage). However, movie fans will know this location from its appearance in the movie Contact and in the James Bond film Goldeneye. And it is well-known for its role in broadcasting signals to potential aliens and for listing to signals from extraterrestrials. However, one of its main roles these days is bouncing radar signals off passing near-Earth asteroids, and producing radar “images” of those asteroids. Arecibo also discovered, back in the 1960s, the true rotation rate of Mercury, now visible at its best in the evening sky.

– Alan, March 13, 2011 / Image © 2011 Alan Dyer

Sailin’ Toward the Moon


For the past week I was on a cruise ship in the Caribbean, on a “cruise and learn” voyage, serving as one of the guest speakers to a group of astronomy enthusiasts who wanted an immersive vacation learning about the latest in astronomy research and, in my presentations, about the hobby side: choosing a telescope and doing astrophotography. The cruise was organized by Insight Cruises and by Sky and Telescope magazine.

The trip went great, with fabulous weather all along, and a welcome break to an awful winter in the north. However, a cruise ship is not the best place to actually do astrophotography!

This is a shot taken on Friday, March 11, from the upper deck and bow of the ship, the Holland America Line’s “Nieuw Amsterdam,” as we sailed on a northwest course back to Fort Lauderdale from our most southerly port of call in St. Maartens in the eastern Caribbean. The Moon is overexposed at right, and is directly ahead of us, making it look like we were sailing toward the Moon. At left is Orion and Canis Major, tipped over on their sides compared to our northerly view. This was from a latitude of about 20° North.

To keep the stars looking like stars (and not seagulls) and freeze the rolling of the ship, I had to bump the camera up to ISO 6400 and use a 5 second exposure at f/2.8 (wide open) with the 16-35mm lens. Not the best combination of settings, but it’s what it took to capture the “seascape” night scene.

— Alan, March 13, 2011 / Image © 2011 Alan Dyer

Goodbye Discovery!


What an awesome spacecraft it has been — launching the Hubble Space Telescope, Ulysses and John Glenn! It returned NASA to manned spaceflight following both the Challenger and Columbia accidents. And now this week, we say goodbye to Space Shuttle Discovery. On Sunday night, Feb. 27, I took a look at it (perhaps my last), and the ISS, as they flew over together in an ideal pass across our sky. Even in binoculars you could see the shape of the ISS — or at least that it had a shape and was not just a star, as all other satellites appear. A great sight was watching the craft fly into Earth’s shadow and go deep red then fade out. That’s why the bright streak the ISS/Shuttle left on the frame during the time exposure fades out at left, as they fly to the east and experience sunset.

To the west (right) note the Zodiacal Light glow reaching up from the western horizon. Orion and Canis Major are at bottom in the south. To the northwest is my house. I purposely left the porch light on around the other side of the house to light up the yard and the photogenic old house on the property. It features in many of my backyard shots.

This shot is a two-image stack of 4-minute exposures, with the Canon 5D MkII at ISO 800 tracking the sky on an equatorial mount. The lens is one of my favourites, the Sigma 8mm full-circle fish-eye lens. Some haze in the sky knocked back the contrast, so the Milky Way doesn’t pop out as well as it should. Still, this was the first clear night in a while when it wasn’t -25°C!

– Alan, February 27, 2011 / Image © 2011 Alan Dyer

Awesome Auriga


My previous post was a profile of Perseus. Right next door in the current evening sky is Auriga the Charioteer, embedded right in the middle of the Milky Way. This is a 50mm “normal” lens shot of all of Auriga showing its distinctive pentagon shape with the bright yellow star, Capella, at top. It’s the bright star shining high overhead on winter nights, at least if you live in the northern hemisphere at latitudes like the US and Canada. What is not obvious (because it can’t be resolved through a telescope) is that Capella is a close double star, made of twin suns orbiting each other at about the same distance apart as are the Sun and Venus. A planet orbiting the pair would definitely see a Tatooine-style double-Sun sunset. Not to say Luke Skywalker was from the Capella system — remember Luke’s tale took place in a Galaxy far, far away! Capella is just 42 light years from Earth.

What shows up here just below centre is some of the wisps of red nebulosity in the middle of Auriga (tough to see visually but easy for the camera to see), as well as the trio of star clusters first catalogued by Charles Messier in the 18th century and that are great objects for any telescope. Notice how the Milky Way brightens through Auriga, partly by way of contrast to the lanes of dark nebulosity to the right that weave through Taurus and Perseus. The streak of nebulosity at right is the California Nebula in Perseus. Flip back to the previous blog to see more of Perseus, in a shot taken the same night.

I took this shot on January 23, 2011 (just about the last decent night we’ve had!) with the Canon 5D MkII set at ISO 800 and the 50mm Sigma lens set at f/2.8. It’s stack of  five 4-minute exposures, plus three 4-minute exposures with the Kenko soft filter to add the star glows. The blog “Fuzzy Constellations” a few posts back gives some more details about my technique.

– Alan, February 2011 / Image © 2011 Alan Dyer

Pursuing Perseus


One of the tenets of my astrophotography “philosophy,” if there can be such a thing (my university degree is in Philosophy after all), is to not spend an enormous amount of time and money chasing after the same images others do, knowing they will likely get far better results than I might achieve, given my location and choice number of clear skies. I don’t live in Arizona, New Mexico or Chile.

Yes, there are certain showpiece objects one is obliged to shoot, to add to the portfolio. But rather than go after many of the usual galaxies and nebulas, I often prefer to shoot wider-field targets that others often bypass.

Simple shots of constellations are often more in demand by publishers than closeups of deep-sky objects, and yet are usually in short supply, as many astrophotographers dismiss them as being “just for beginners.” But good constellation shots still take the right gear, techniques and skies to stand out. Only now am I getting the results I’ve long sought.

With new techniques now in hand, one of my goals is to accumulate a complete portfolio of constellation portraits, though not all of these star patterns stand out as being photogenic. But this one does.

This shot is a recent favourite of mine, of the constellation of Perseus, a rich area of sky. Modern digital cameras show it as the old film cameras never could, laced with reddish dark nebulas of different densities. The Milky Way through this region takes on such a variety of subtle hues achieving correct colour balance is tough.

At top is the loose collection of hot blue stars known as the Perseus Association. At bottom is the most famous tightly bound cluster of stars, the Pleiades. Between is the finger of glowing hydrogen gas called the California Nebula. This photo is an example of how “simple constellation” shots can take on a beauty of their own.

– Alan, February 2011 / Image © 2011 Alan Dyer

Testing New Gear


Now and then I have the opportunity to test new equipment for astrophotography. That can be both a blessing and a curse — I get to try out new gear before I buy it to see if it really works first, which is nice. But if the equipment doesn’t work well, I might have wasted some valuable nights with little to show for it but some poor photos and lots of frustration. Not so with the gear pictured here. The Celestron CGEM mount, tested for SkyNews magazine, worked great, tracking very well and serving as the platform I used in late 2010 for a lot of astrophotos over two dark of the Moon periods. At about $1500 this is a superb entry-level mount for anyone serious about astrophotography.

I also can praise the Celestron NexGuide autoguider (with the glowing screen at right), shown here on a William Optics 66mm guidescope. It, and its near twin, the Synta SynGuider, worked very well — these are autoguiders to provide exact tracking of the mount over long exposures, a necessity even in the digital age. Unlike many autoguiders, these units are “stand-alone,” requiring no additional computer and able to run for many nights off a typical 12-volt power pack. They are great for use in the field. What’s more, the new autoguiders are quite low cost (~$300) compared to the $1000+ cost of previous models with similar capabilities. I reviewed these units for Sky and Telescope and for SkyNews.

The scope shown here is a favourite of mine, the A&M (now Officina Stellare) 105mm f/6 apo refractor, a beautiful Italian-made “designer scope” with first-class optics. It is a terrific visual and imaging telescope, though a little large for its aperture.

For more details about recommended autoguiders, see the website I developed to support The Backyard Astronomer’s Guide and follow the links to the Chapter 13 entries on astrophoto gear.

– Alan, February 2011 / Image © 2011 Alan Dyer

The Wonderful Winter Sky


While I took this image a year ago in early 2010, I thought I’d post this up now, with the new blog now underway. This is a mosaic of what surely ranks as one of the most amazing areas of sky — the vast panorama of the night sky visible in the northern hemisphere each winter. Here we see more bright stars than at any other season of the year, in the constellations (in clockwise order) of Orion, Canis Minor, Gemini, Auriga, and Taurus. Canis Major and its luminary, Sirius, are just off the bottom of the frame.

This is a 4-panel mosaic, each panel consisting of four 4-minute exposures plus two 4-minute exposures with a soft diffuser filter to add the star glows. Each was taken at ISO 800 with the Canon 5D MkII and a 35mm lens at f/4. Slight haze, changing sky fog, and changing elevation of the fields make it tough to get consistent colours across the sky during the couple of hours of exposure time needed to grab the images for such a mosaic, especially from my home latitude. But this attempt worked pretty well and records the wealth of bright red and dark nebulosity throughout this area of sky, a region of the Milky Way in our spiral arm but a little farther out from the centre of the Galaxy than where we live.

– Alan, January 2011 / Image © 2010 Alan Dyer

The Neglected Small Magellanic Cloud


It sits not far away in the deep southern sky from its larger counterpart, but it must feel rather inferior and sadly neglected. Pity as this object does have lots to offer.

This is the Small Magellanic Cloud, a satellite galaxy to the Milky Way and a companion to the Large Magellanic Cloud — each is named for Ferdinand Magellan who noted them on his pioneering circumnavigation voyage of the world in the 16th century. The Small Cloud doesn’t contain the number and complexity of nebulas and clusters as does its larger brother, but it does have some lovely offerings, like the complex of cyan-coloured nebulas and related clusters at top.

However, the notable sights in this area of sky aren’t actually part of the SMC. The two globular clusters in the field lie much closer to us. NGC 362 is a nice globular at top, but it pales in comparison (every such object does) next to the amazing object known as 47 Tucanae, or NGC 104, the huge globular cluster at right. It is a wonderful sight in any telescope.

This is a stack of five 7-minute exposures with the Borg 77mm f/4 astrograph and Canon 5D MkII at ISO 800. I took this on my astrophoto trip to Australia in December 2010, a season when this object is ideally placed for viewing. Most times of the year, the SMC is dragging close to the horizon and lost in the murk, as least for shooting. That’s another reason the poor old SMC gets no respect!

— Alan, December 2010 / Image © 2010 Alan Dyer

The Wonder-filled Large Magellanic Cloud


It occupies only a binocular field or two in the sky but … Wow! What a field it is! This is one of the objects that makes a trip to the southern hemisphere for astronomy worth the trek alone. This satellite galaxy of our Milky Way is visible only from south of the equator. It contains so many clusters and nebulas, many in the same telescope field, that just sorting out what you are looking at takes a good star atlas (most don’t plot this region well). This is one of my best shots of the “LMC,” taken on my December Oz trip. It is with the Borg 77mm f/4 astrographic lens/telescope and the filter-modified Canon 5D MkII, that picks up much more red nebulosity (that emits deep red wavelengths) that stock cameras don’t record well.

Even so, I’m always amazed at how so many nebulas in the LMC, and in its smaller counterpart, the nearby Small Magellanic Cloud, record as magenta or cyan, rather than deep red. The most prominent object is the Tarantula Nebula at left of centre. It is an amazing sight in any telescope, especially with a nebula filter.

This is a stack of five 7-minute exposures at ISO 800, with the scope on the AP 400 mount and guided with the SG-4 autoguider. This is a single image, framed to take in all the best stuff of the LMC. But to really get it all in with any detail requires a multi-panel mosaic. I’ve done those on previous trips and was hoping to re-do one on this last trip, with the better, sharper camera, the 5D MkII, and with the LMC higher in the sky than on earlier trips. But the lack of clear nights curtailed my plans.

But I’m happy with this one. Nice and sharp and with oodles of nebulosity. But one can never exhaust what this object has to offer, both for imaging and for just looking with the eyepiece. So there’s always next time!

– Alan, December 2010 / Image © 2010 Alan Dyer

Imaging Down Under in Oz


I like shooting in Australia as I have the good fortune of having family there who kindly allow me to store equipment down under. On each trip over the last decade or so, I’ve brought down various bits of gear, not to mention clothing and other necessities, to be left on site for the next shooting expedition. Now, when I go, I just have to take camera gear, a computer & gadgets, and a couple of days clothing. All else is already there: an Astro-Physics 400 mount, an AP Traveler 105mm apo refractor, a 10-inch compact Dobsonian reflector, and all kinds of accessories, eyepieces, power supplies, adapters, etc. etc. The gear fills several watertight and dust proof storage bins as well as a large golf case brought down originally in 2002.

Each trip usually means taking a new autoguider system as well, since the technology changes so much from trip to trip. In December 2010 I brought two systems, the Santa Barbara Instruments SG-4, shown here, with its e-finder lens, and the Orion Starshoot with a small Borg 50mm guidescope, as a back up just in case the stand-alone SG-4 did not work in the southern hemisphere on a mount it had not been calibrated on and had never “seen” before. I needn’t of worried – the SG-4 worked beautifully — perfectly guided shots with a push of a button. Stunning!

But it is an item I have to take back and forth — like the cameras, it’s all a little too costly to have multiple copies in both the northern and southern hemispheres, at least vs. the size and weight involved in packing and carrying them. With mounts and scopes there is no question — yes, they are costly but there is no way I’m hauling all that gear back and forth for every trip. So at home, I have other mounts and scopes to take the role of the wonderful AP gear that has emigrated to Oz.

– Alan, December 2010 / Images © 2010 Alan Dyer

The Dark Clouds of Taurus


An area of sky often neglected but ideal for digital imaging is the region of Milky Way in Taurus and Auriga. Threaded through this area of sky are large lanes of dark interstellar dust, forming cold molecular clouds out of which stars form. This complex is close, only 400 light years away, in our spiral arm of the Galaxy, and so is spread out over a wide area of sky. Only piggybacked cameras with normal and wide-angle lenses capture it. But today’s digital cameras are able to record these kinds of dark nebulae as more than just dark holes in the sky — they have colour, usually shades of reddish-brown.

This is a shot from January 2011 from my home backyard, and takes in all of Taurus, most of Auriga and southern Perseus, with the Pleiades at right and the Hyades below.

— Alan, January 2011 / Image © 2011 Alan Dyer

Hazy Hyades


Here’s a photogenic rendering of a classic northern winter sky object, the Hyades star cluster in Taurus. The Kenko Softon filter added the star glows and punched out the subtle colour variations in the stars. Note how the Hyades stars come in shades of blue and white. The yellow star is Aldebaran, the eye of Taurus the Bull and an interloper here — Aldebaran is actually halfway between us and the Hyades, which lie about 150 light years away, and are true cluster of stars moving together through space. Note the much more distant and smaller star cluster, NGC 1647, at left.

— Alan, January 2011 / Image © 2011 Alan Dyer

Fuzzy Constellations


I’ve tried for years to create the effect of fuzzy haloes around stars to pop out the brighter stars and make the constellation pattern more obvious. It’s the “Akira Fuji” effect, named for the ace Japanese astrophotographer who has long perfected the technique with beautiful and widely-published results. I’ve tried various soft focus and diffusion filters, scratched UV filters, vaseline-smeared filters, breathing on filters, etc., etc. None have worked well. Till now.

The Kenko “Softon” filter offered by Hutech Scientific works fabulously well! It’s a tough filter to find in local camera stores here — but Hutech sells it. And it really changes the way I do constellation shooting, making any previous shots obsolete. I take several shots without the filter then one or more of the same exposure with the filter in place. I stack the two types of exposures  in Photoshop, with the fuzz-filter layer blended with a Lighten mode to a varying opacity to “dial in” the level of fuzziness that looks good. Too much and it looks overdone and fake.

The technique also pops out the star colours, like here on red Betelgeuse amid the blue-white stars of  Orion. This was from January 2011 from my backyard and is a stack of four 5-minute exposures w/o filter and one with. All with the Canon 5D MkII and 50mm Sigma lens, a terrific combination for constellation portraits.

— Alan, January 2011 / Image © 2011 Alan Dyer

Canis Major Hopping


On one of the few clear nights so far this winter I was able to make Canis Major obey for a while and pose for a shot of the canine constellation hopping along my horizon in the south. From my latitude of 51° N he never appears high in the sky, though the placement on the horizon does make for a photogenic winter scene. Here, you can see the Messier star cluster M41 just below Sirius, the Dog Star, the brightest star in the night sky and the bright jewel in the collar of Canis Major (according to some depictions of the constellation). This is a stack of five 4-minute exposures  with the Canon 5D MkII at ISO 800 and a 50mm Sigma lens at f/2.8, plus a single 4-minute exposure with the Kenko soft filter to add the enhanced hazy star glows.

– Alan, January 2011 / Image © 2011 Alan Dyer

After the Blizzard


We’ve certainly had our share (more than our share!) of snowstorms and blizzards so far this winter, though nothing like people down east have experienced. The one saving grace is that after the storm the sky often clears beautifully. In this case, on January 30, 2011 we had very clear blue skies, but filled with ice crystals of just the right shape (hexagonal) and orientation to produce a classic solar halo, with prominent sundogs on the 22° halo and a hint of an upper tangent arc, or is it an upper Parry arc? A trace of a circumhorizontal arc is also visible parallel to the horizon. Solar haloes are fascinating and often unique — each one can display a slightly different set of halo phenomena.

The website Atmospheric Optics gives great information and reference works.

– Alan, January 2011 / Image © 2011 Alan Dyer

An Accurate Lunar Eclipse, At Last!


For years we astrophotographers have been thwarted by our recording media’s inability to capture a wide range of brightness in one exposure. A classic example is a lunar eclipse. The range in brightness between the non-eclipsed Full Moon and the part of the lunar disk in the Earth’s shadow is so great no one exposure can grab it all. You are left with either an over-exposed crescent or a dark under-exposed eclipsed Moon — nothing that looks anything like the eye can see.

At last, modern image processing comes to the rescue! This is a stack of 9 exposures, from 1/125th to 2 seconds, all at f/6 with a 130mm apo refractor and Canon 7D camera. The images were stacked and merged into one “high dynamic range” image using Photoshop CS5, whose new HDR mode is wonderful! A little tweaking of settings in the Tone Mapping dialog box, and voilá! An image of the partially eclipsed Moon that really looks like what the eye saw. I’m impressed.

— Alan, December 2010 / Image © 2010 Alan Dyer

Eclipse in the Winter Milky Way


The December 20, 2010 total lunar eclipse promised to be a photogenic one. With the Moon smack dab in the middle of the winter Milky Way, it was going to be a great sight, as the Milky Way appeared during totality. The event did not disappoint. Though some haze intervened, I wasn’t complaining, as the weather has been so poor of late, we were lucky to get a clear night at all, despite having to endure -20° C temperatures to take in the event. This shot captures the scene from my backyard during totality, with the over-exposed eclipsed Moon sitting in the Milky Way above Orion. The naked and binocular view was truly stunning.

I got back from Australia in time to see this event from home, squeezed in between Oz and a Xmas trip to the rainy west Coast. The plan worked! I managed to catch the eclipse, against the odds, which defeated many across Canada. Alberta was one of the few clear places for this event. I had considered a hasty trip to Arizona for it, but decided against it — a good thing, as I think they had cloud. The winter of 2010/11 is proving to be an awful one for many.

— Alan, December 2010 / Image © 2010 Alan Dyer

Shooting in Australia, Despite the Floods


I have not managed to get back to Australia since 2008, and had long planned for a trip in the November-December period, to get the Magellanic Clouds and “winter” Milky Way area of Orion, Canis Major, Puppis and friends, regions of the sky not well-placed in the usual months of my Oz trips in March and April. I planned a trip for late 2010, a month under southern skies, with 2 weeks at my favourite dark site, Coonabarabran, NSW, which bills itself as the Astronomy Capital of Australia — the Siding Spring Observatory, Oz’s major optical observatory complex is down the Timor Road. I rented a cottage for the period, which worked out great. The site could not have been better. The weather could not have been worse!

I go to Oz prepared to lose about 50% of nights to cloud, but this time, out of 15 nights in Coona, only 2 were clear and usable. Torrential rains deluged the area of the Central West of NSW, causing severe flooding all around me. On one trip back from Parkes, I had to detour 200 or 300 km around through the Hunter Valley just to avoid washed out roads and get back home. Indeed, at one point I had to plough through one town whose main streets were being inundated with a torrent of water. When it did clear, it was humid! But I got two nights of great shooting in. The skies were transparent. The one thing about Oz — when skies are clear they are dark and clean. The best I’ve ever seen.

This is a single, tripod-mounted shot of the southern Milky Way and Magellanic Clouds, over the cottage that was my retreat and home for two weeks. Would I go back? You bet! It is still astronomy paradise for me. Even if skies are cloudy it is a chance to enjoy a writing retreat and a time to quietly work on projects long put off.

– Alan, December 2010 / Image © 2010 Alan Dyer

Orion’s Sword Defeated!


Every astrophotographer has an object or field that seems to defy capture. For me, shooting the Sword of Orion has always been beset by haze, tints from light pollution and low altitude — something has always gone wrong. At last I managed to get a good shot of the region. It was a priority for me on my Australia trip of December 2010. Even though I ended up with only 2 clear nights to do any  serious shooting, out of 15 I was there, I really wanted to grab this area, while Orion was high in the north, and higher in altitude than I can get it from home, so less hindered by sky gradient tints.
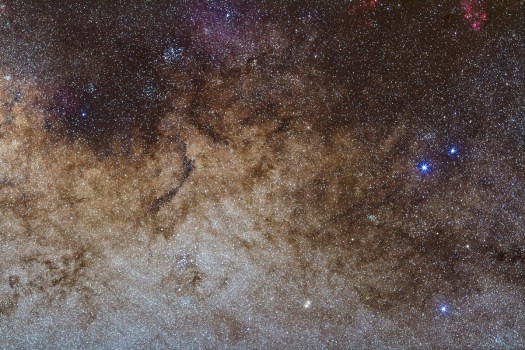
This is a shot with the wonderful Borg 77mm f/4 astrograph (which is tack sharp across the field) and the modified full-frame Canon 5D MkII camera — both items purchased from Hutech Scientific, a great source of astrophoto gear. This is a stack of five 7-minute exposures at ISO 800, processed in Photoshop CS5.

– Alan, December 2010 / Image © 2010 Alan Dyer